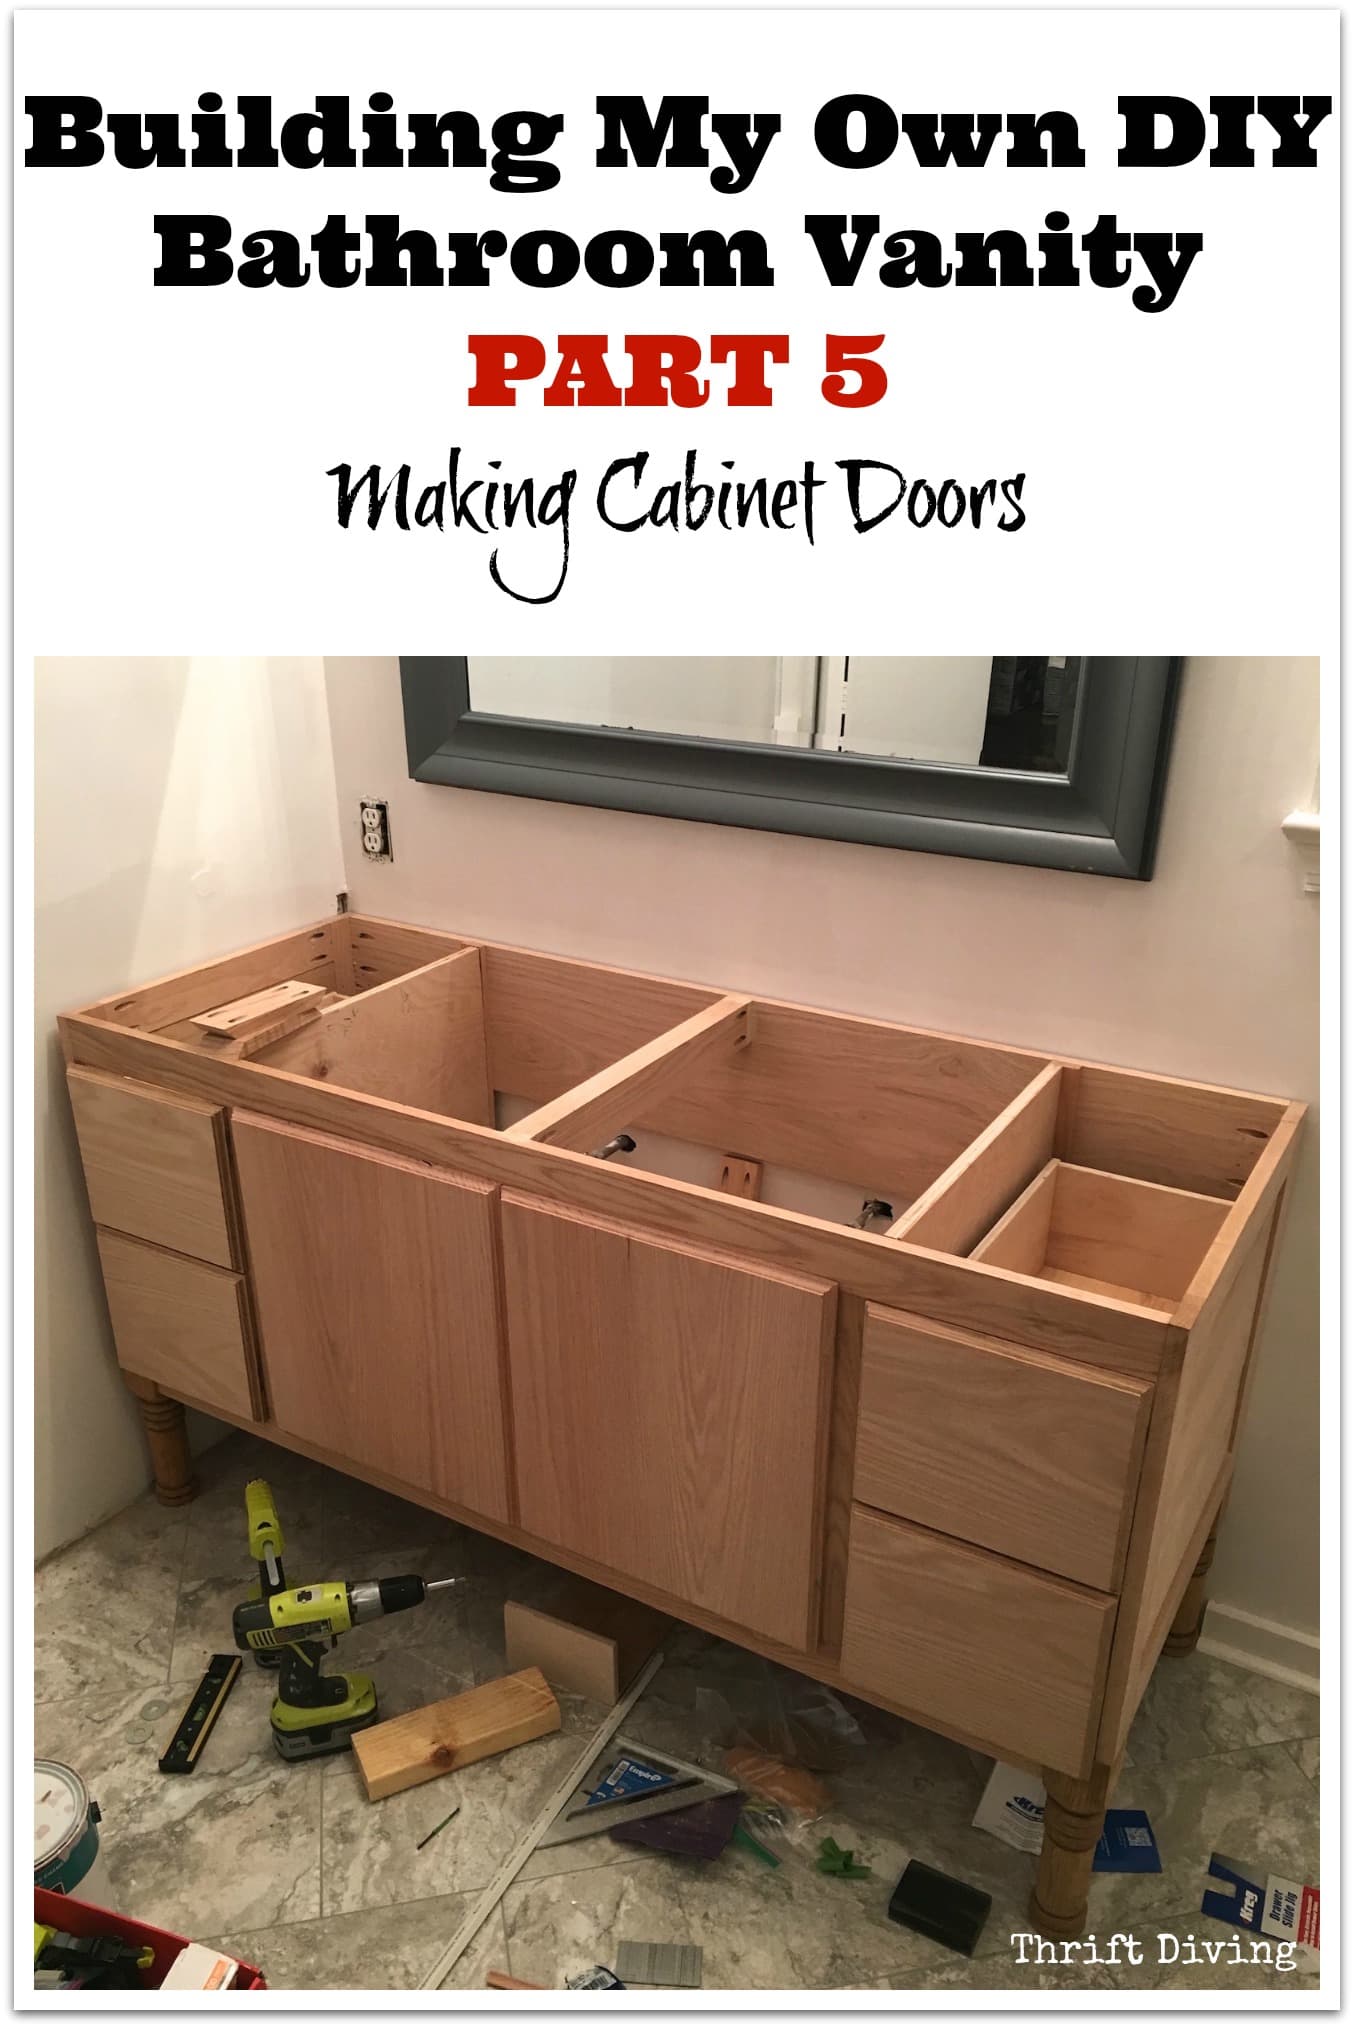
Build a DIY Bathroom Vanity – Part 5 – Making Cabinet Doors
This post is Part 5: Making Cabinet Doors in the series where I thought of this crazy idea to build my own 60″ DIY bathroom vanity from scratch. Be sure to check out the other parts in this tutorial series:
- Part 1: Attaching Legs and a Base
- Part 2: Attaching the Sides
- Part 3: Creating the Partitions
- Part 4: Making Drawers
- Part 5: Making Cabinet Doors
- Part 6: Fitting the Granite Vanity Top
- Part 7: Finishing the Oak Vanity
- BEFORE & AFTER: The Final Master Bathroom Makeover Reveal!
SKIP AROUND THIS POST
No time to read the entire post? No problem! Click to skip around each section! 🙂
Introduction
Materials Used
STEP 1: Taking Measurements
STEP 2: Cutting and Joining the Wood for Cabinet Doors
STEP 3: Routing the Edges
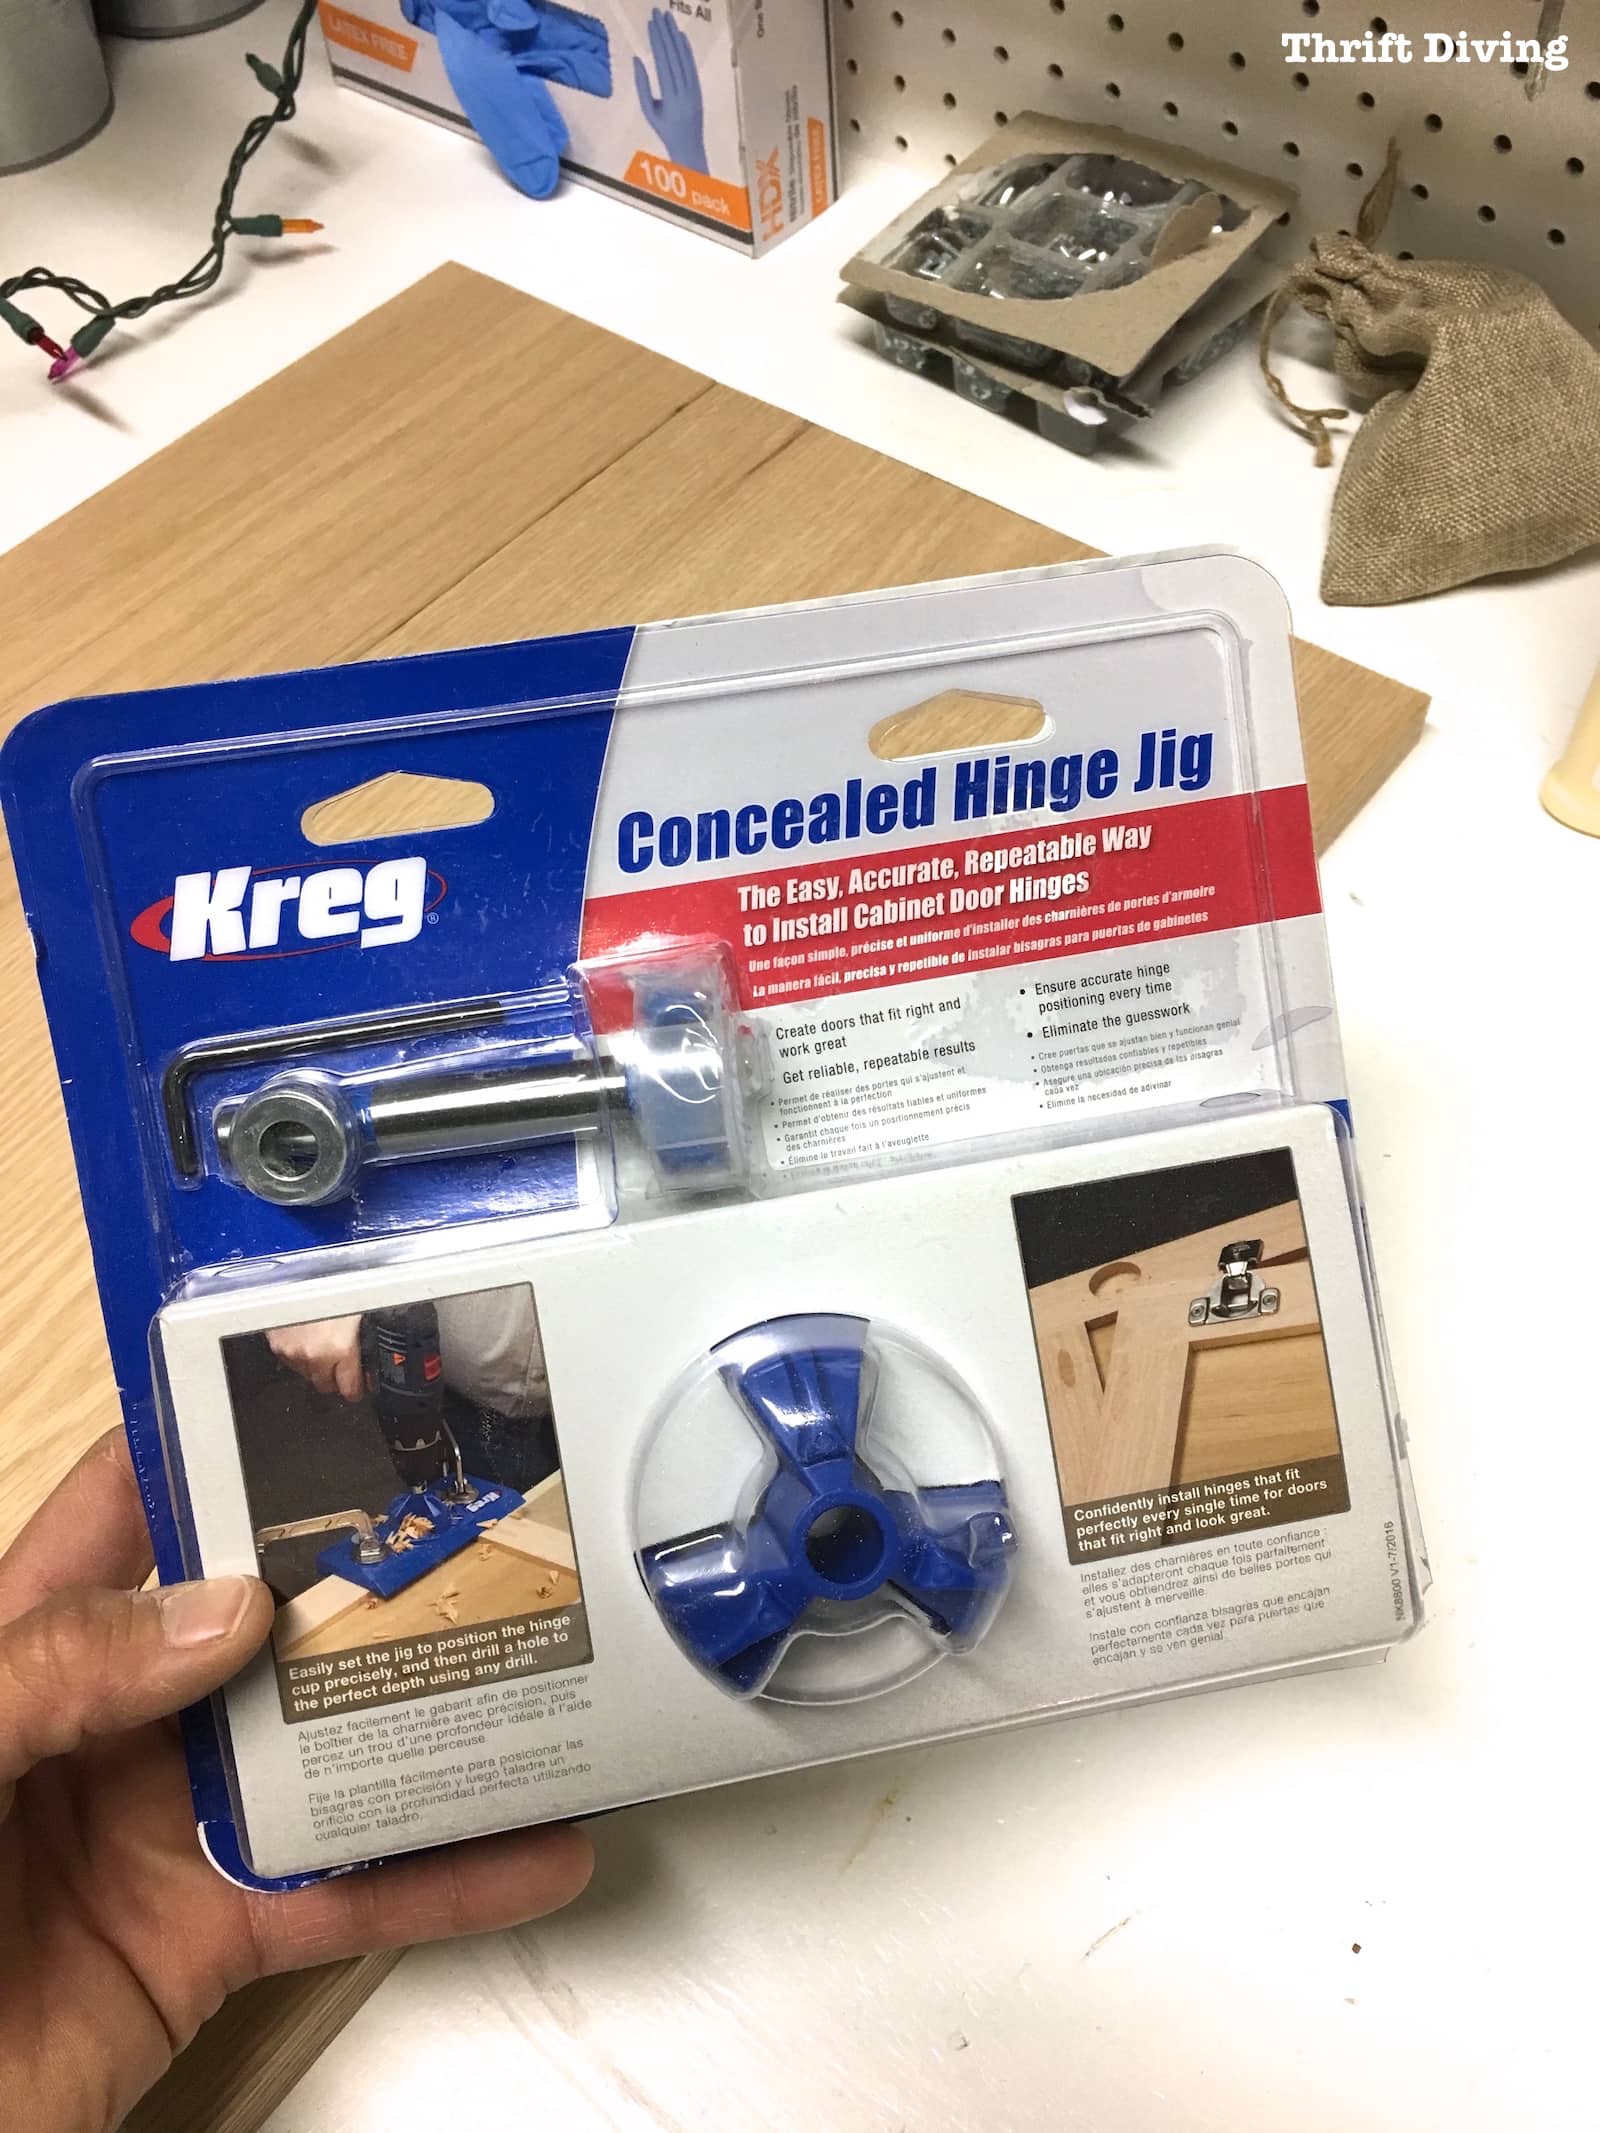
STEP 4: Installing the Cabinet Hinges
Uh-Oh, We Have a Problem!
Lessons Learned
This was another tricky part in this DIY bathroom vanity “experiment.”
As I mentioned in other posts in this series: when one part of the vanity isn’t square or plumb (i.e. straight, vertical), it can throw off the steps that follow.
The vanity cabinet doors are an example.
If you recall, the stiles weren’t flush to the top frame. See the red arrow and how they’re back about 1/4″?
The reason why is because the top front support was lined up with the side edge (A) and the bottom support was set back on the leg about 1/4″ (B). This means the two boards were parallel, but not in line with one another. The stile would have been tilted forward if I had tried to attach it flush to the top and bottom supports.
(I know…I’ve totally lost you….)
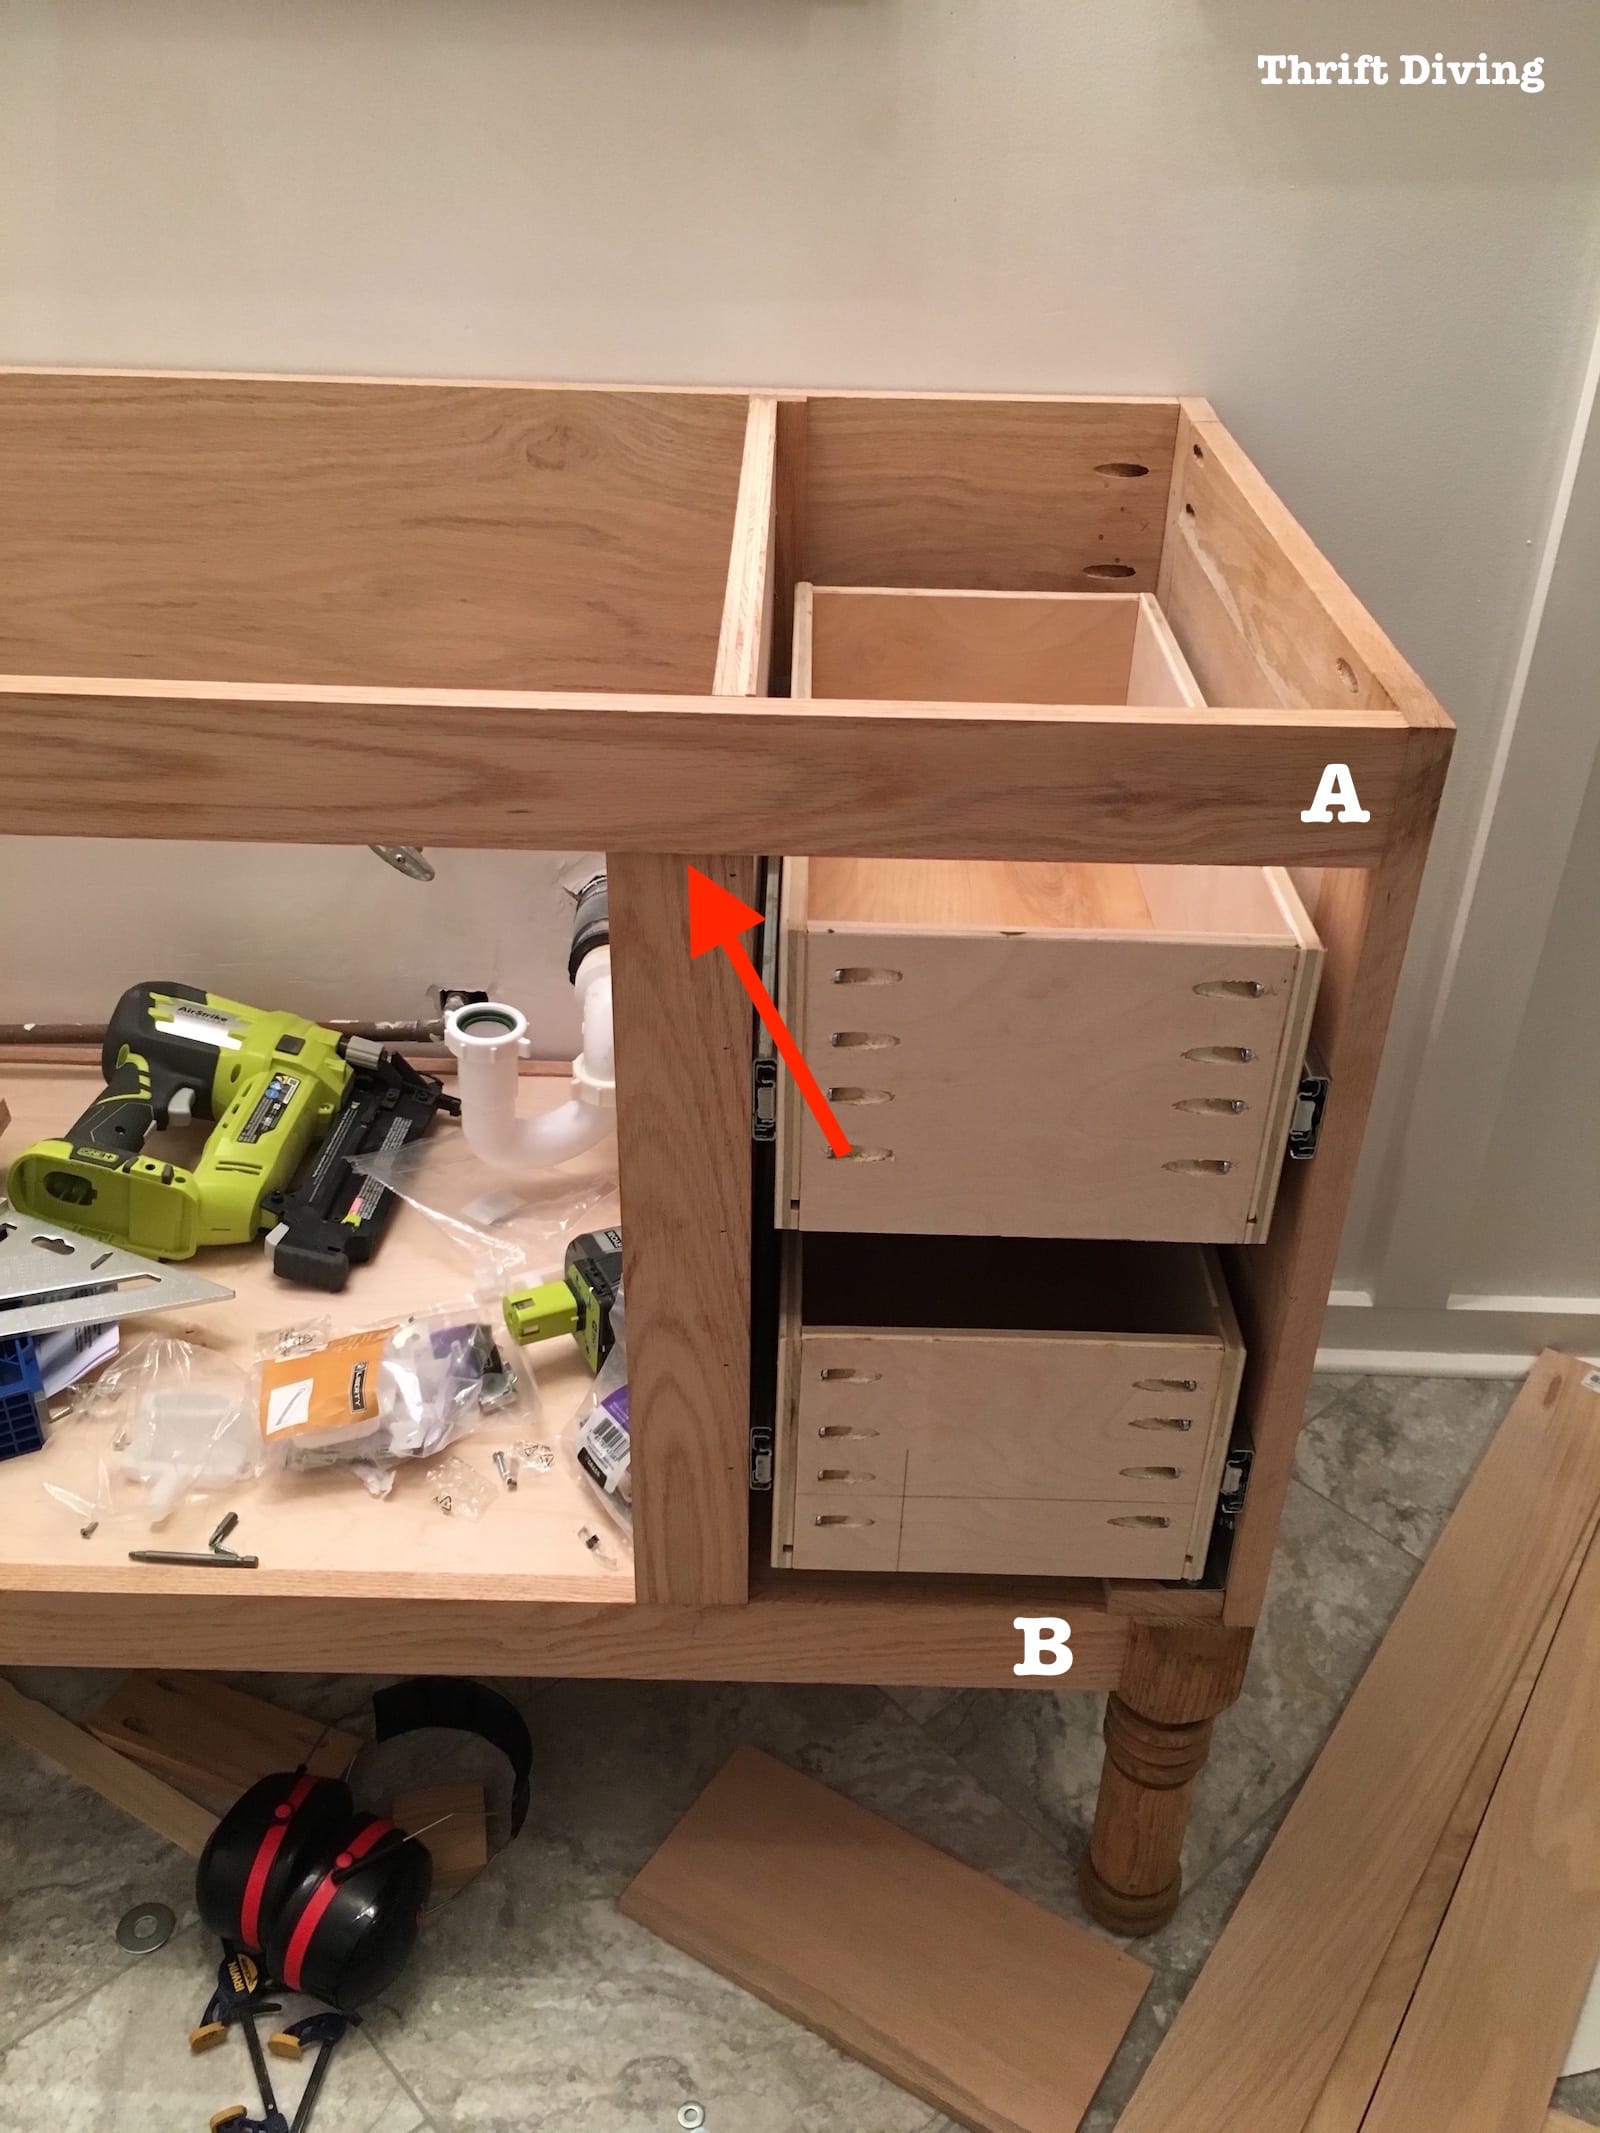
The reason why this matters is because when I tried to make cabinet doors for this DIY vanity, having flush or not flush stiles made a difference in how the cabinet door was placed.
Anyhow….let’s worry about that later.
Let me show you how I made the cabinet doors.
Materials Used
-
-
- 1″ x 12″ Red Oak boards
- Router
- Router bit
- Router table
- Homemade wood filler (sawdust and wood glue)
- 4 overlay soft-close cabinet hinges (from The Home Depot)
-
STEP 1: Taking Measurements
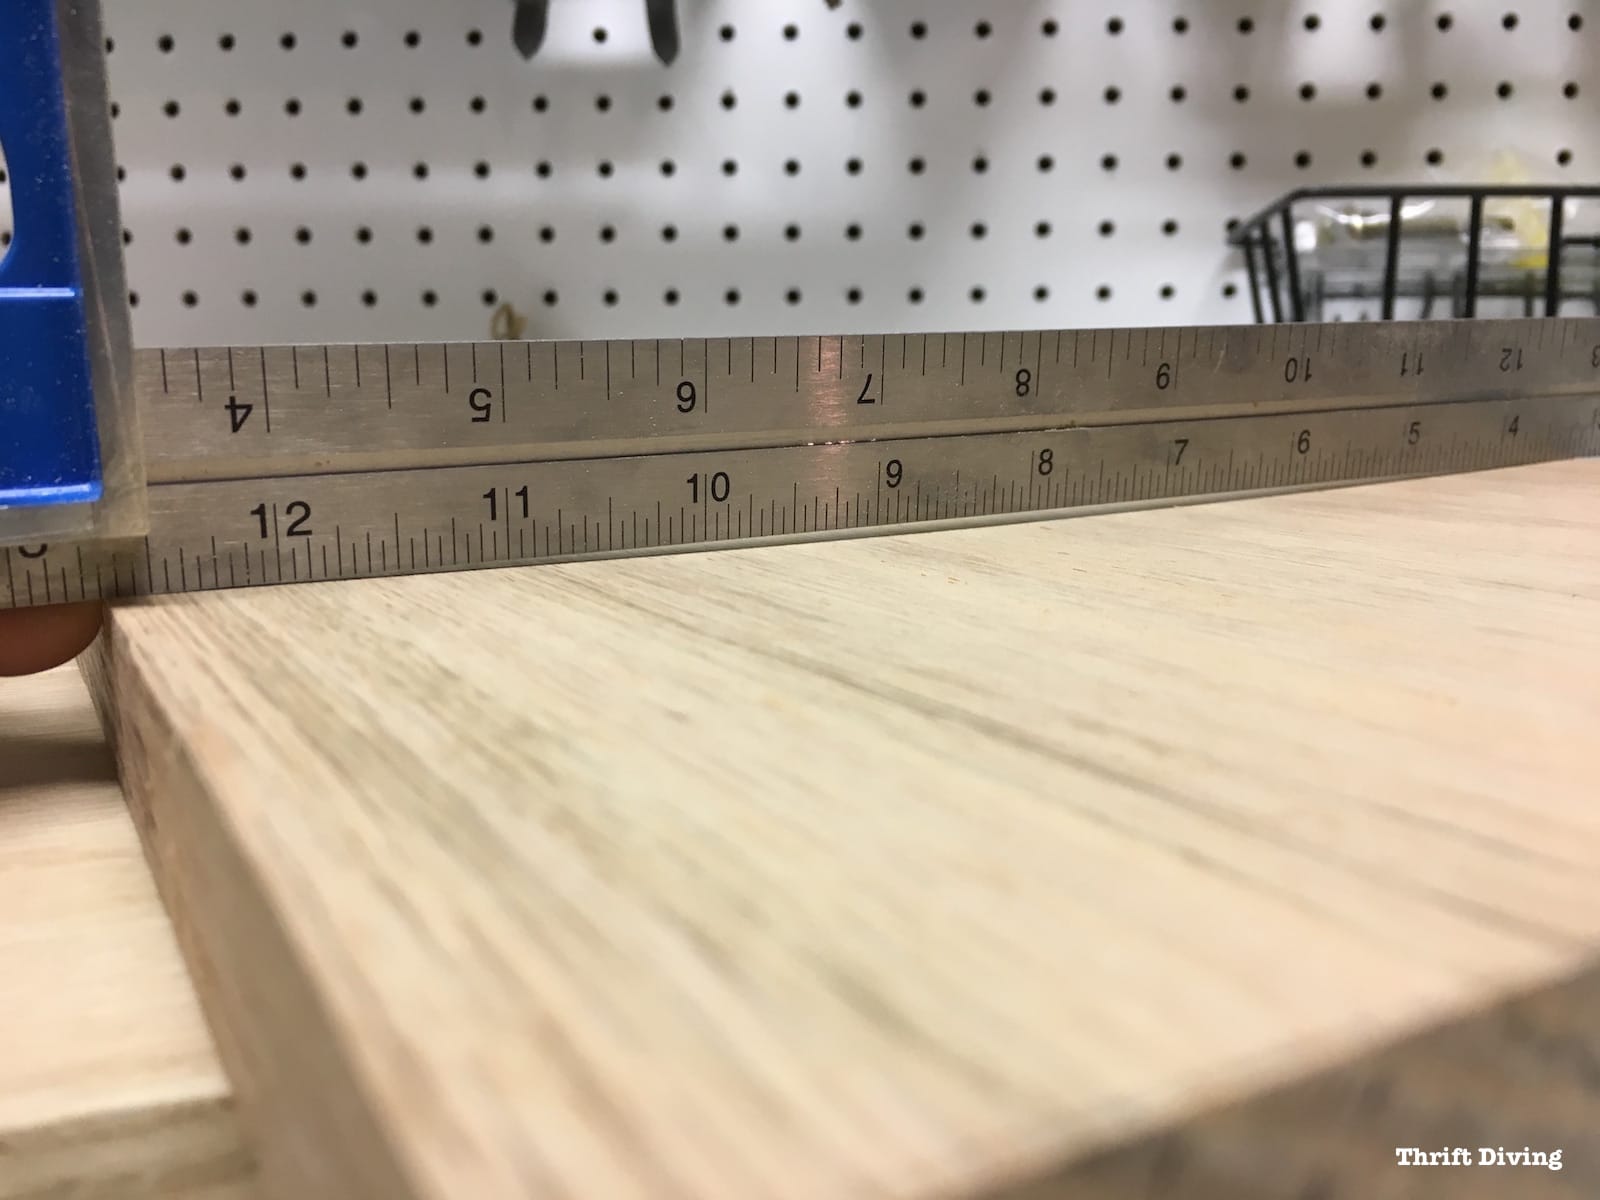
The first thing I had to do was to take measurements.
I measured how WIDE the cabinet opening was and how TALL it was.
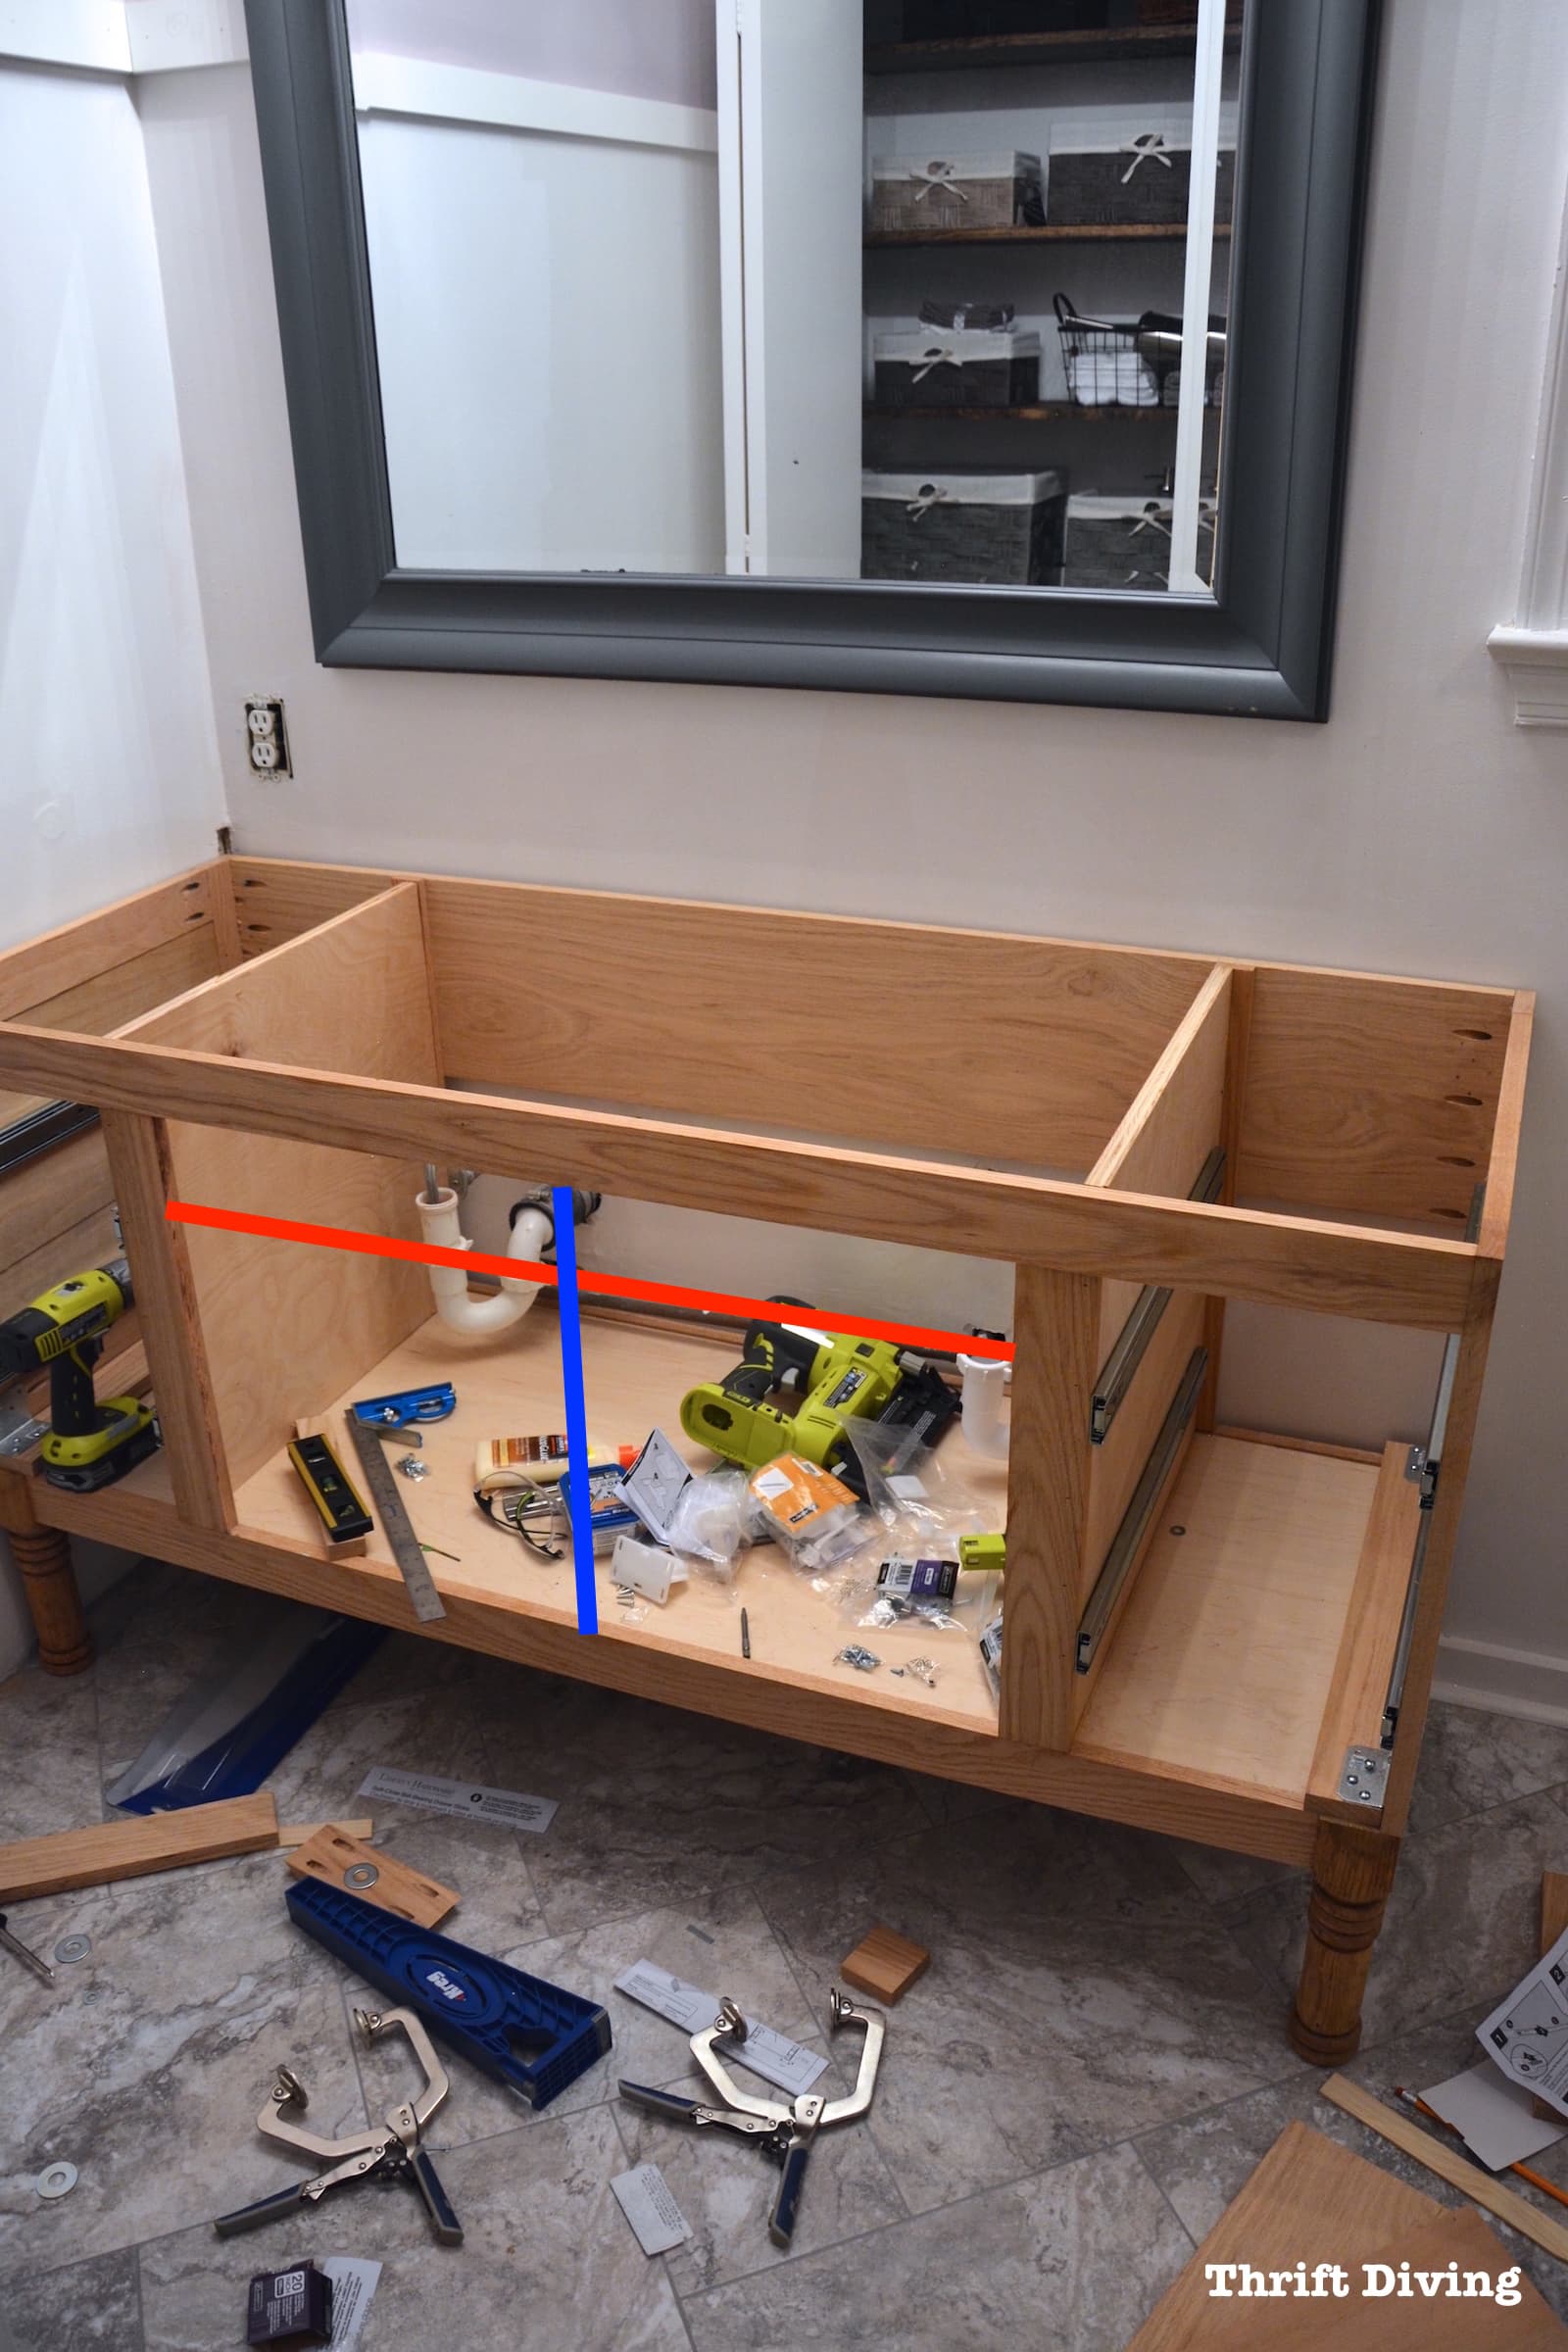
Since I had planned for two cabinet doors, I simply divided the width in half.
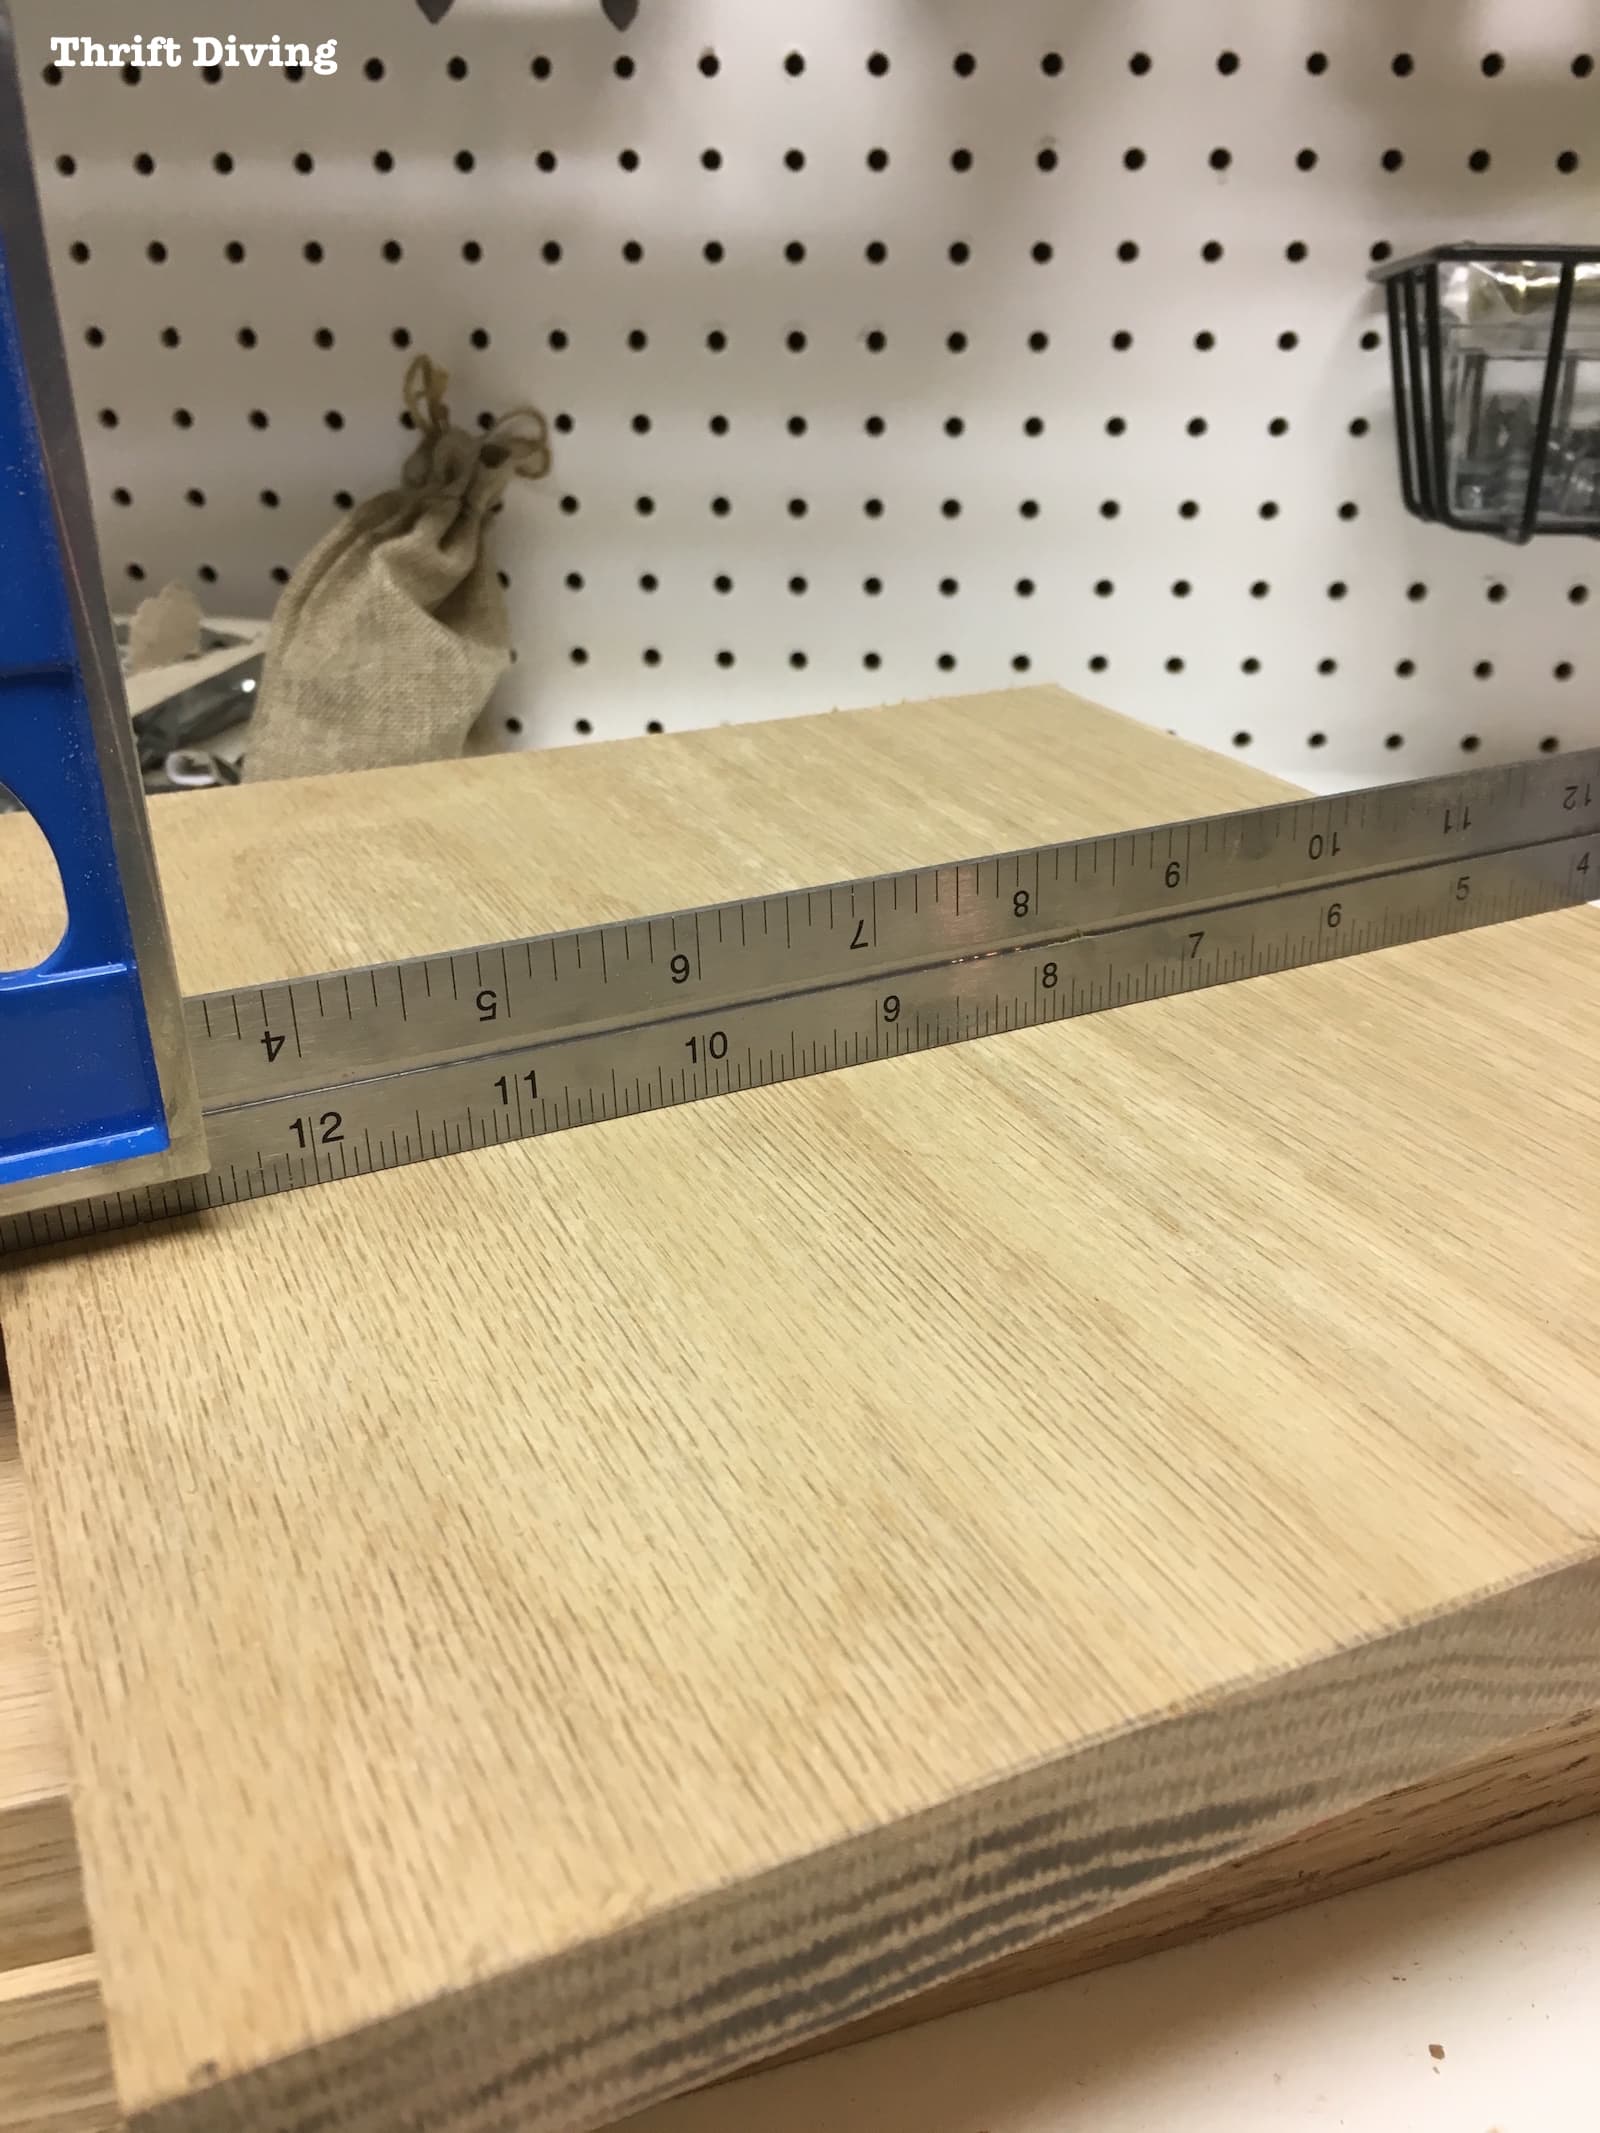
Then, I took into account a 1/8″ gap between the doors where they’d meet down the middle.
I had decided that I would do overlay cabinets, which means that part of the cabinet would hang over the rails and stiles.
So I then added 1/2″ to the measurements on top, on one side, and on the bottom of each cabinet panel measurement.
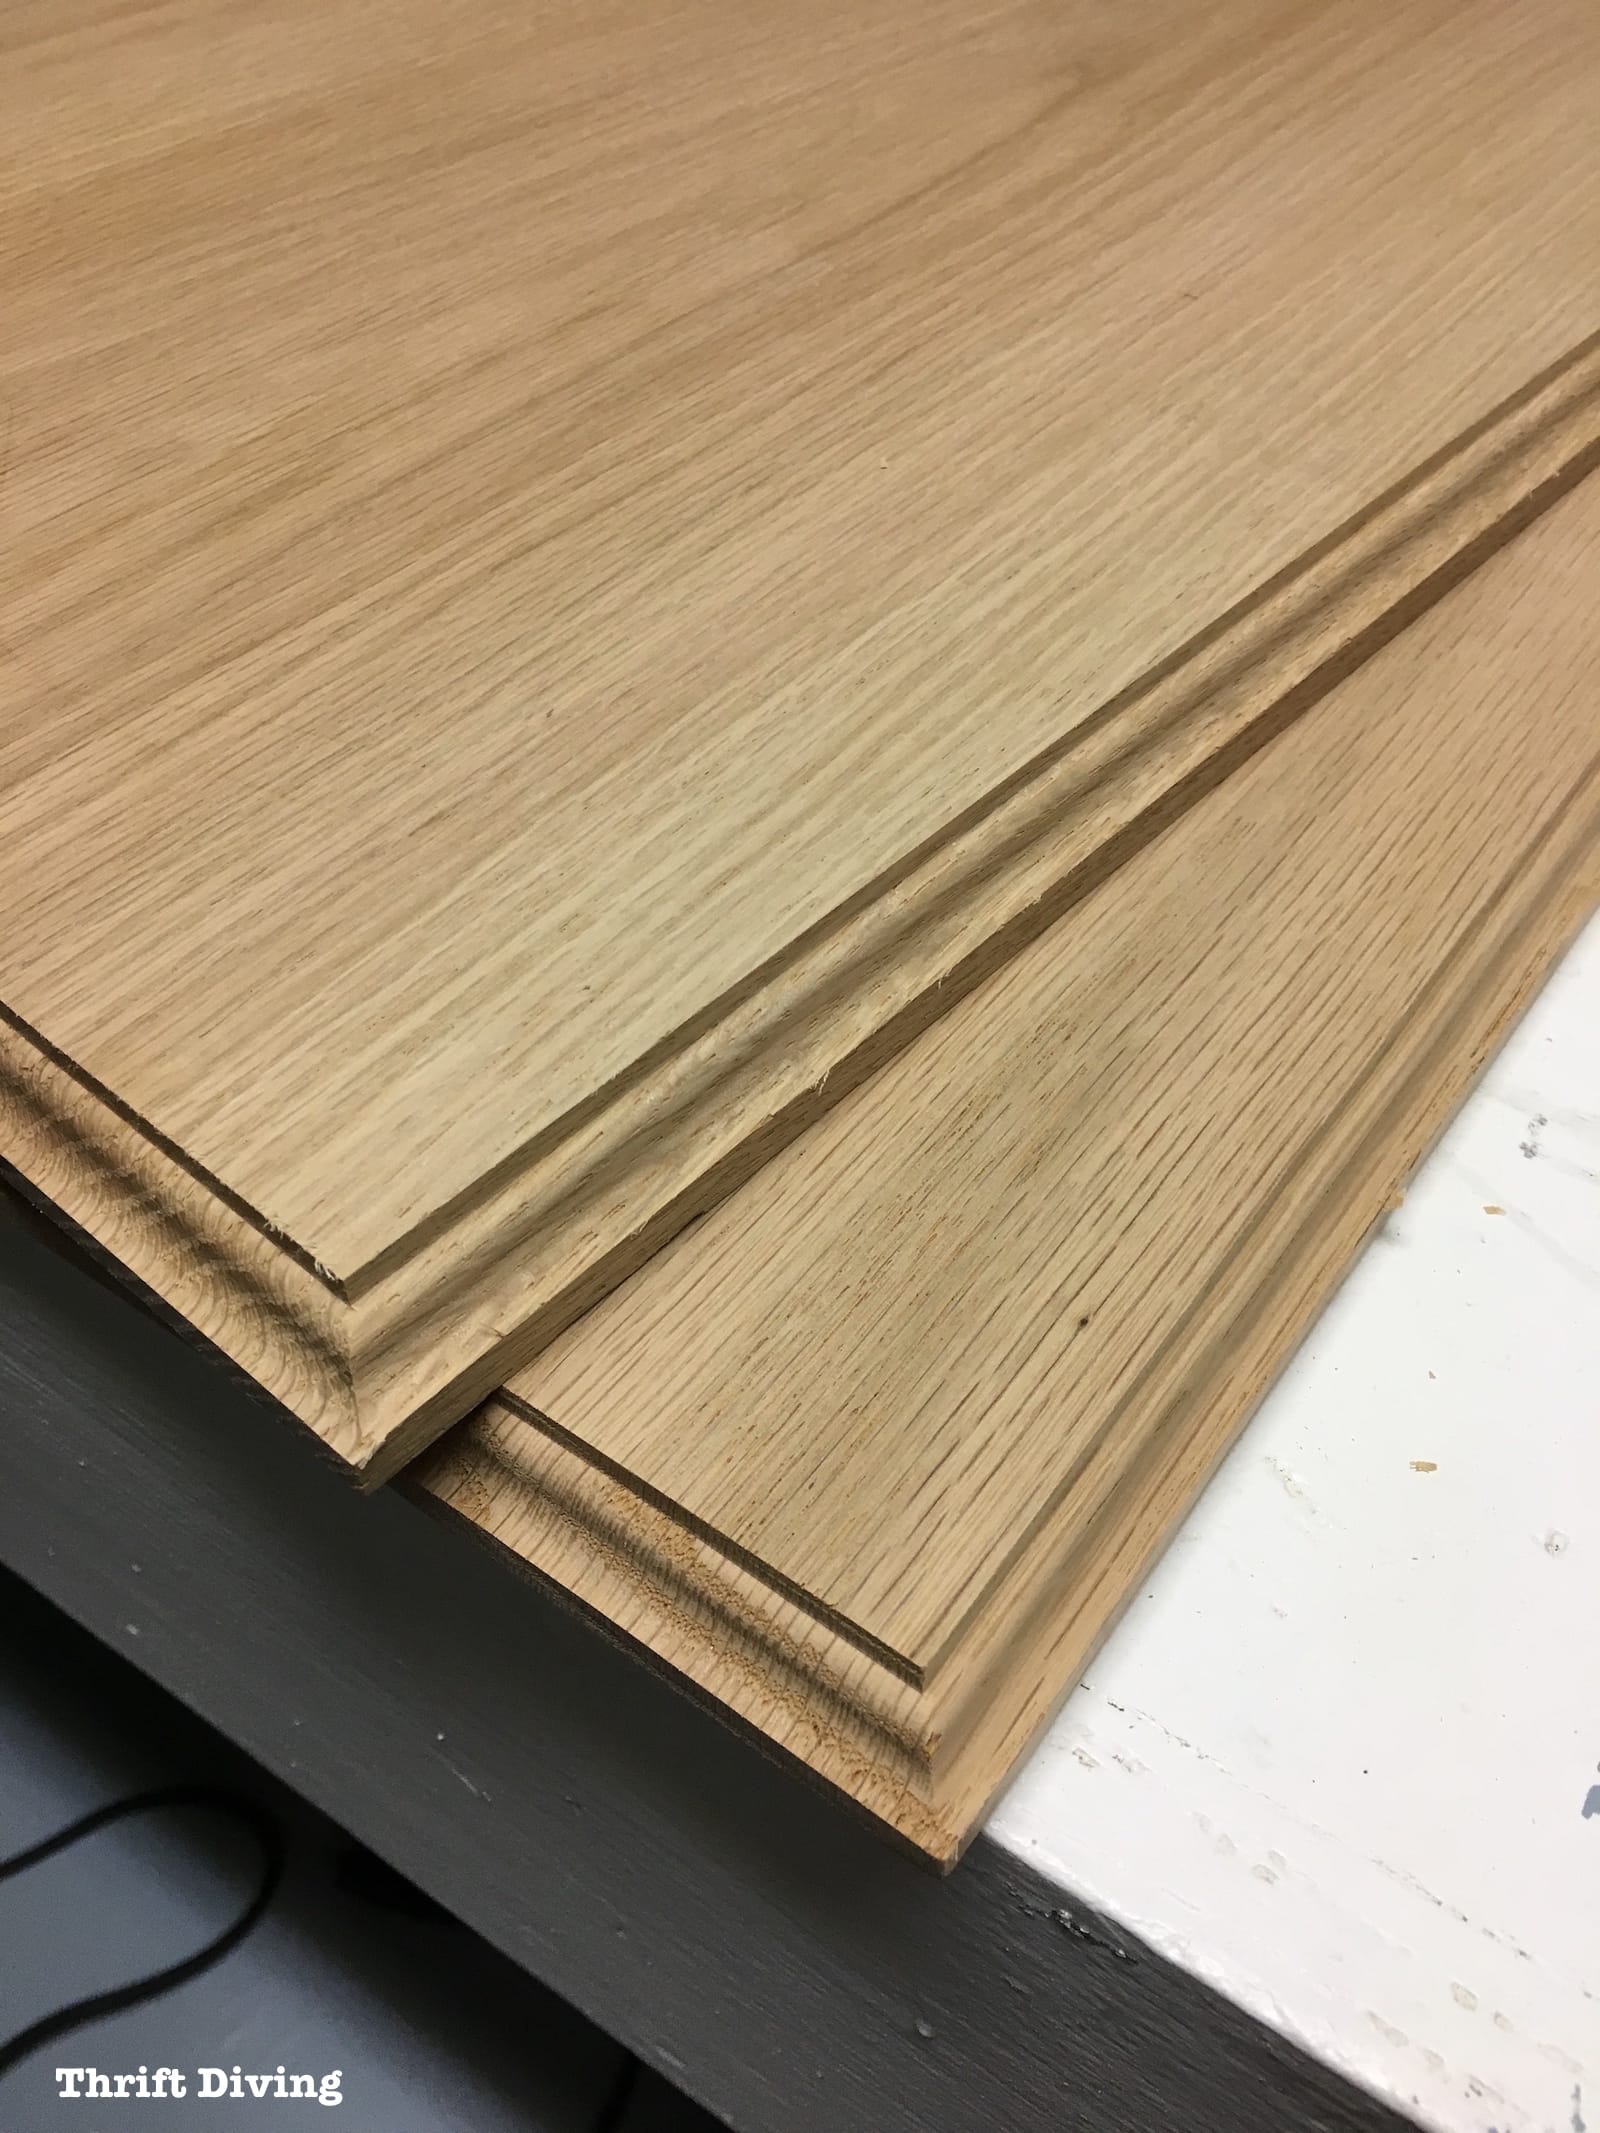
STEP 2: Cutting and Joining the Wood for Cabinet Doors
Did you know that the widest Red Oak board you can buy at The Home Depot is a 1″ x 12″ board?
The actual measurement is only 3/4″ x 11.25″.
Well, I can tell you that I needed about 16″ for each cabinet door!
So I was going to have to get crafty and creative.
First, I took the 1″ x 12″ board and cut two cabinets doors to height using my circular saw.
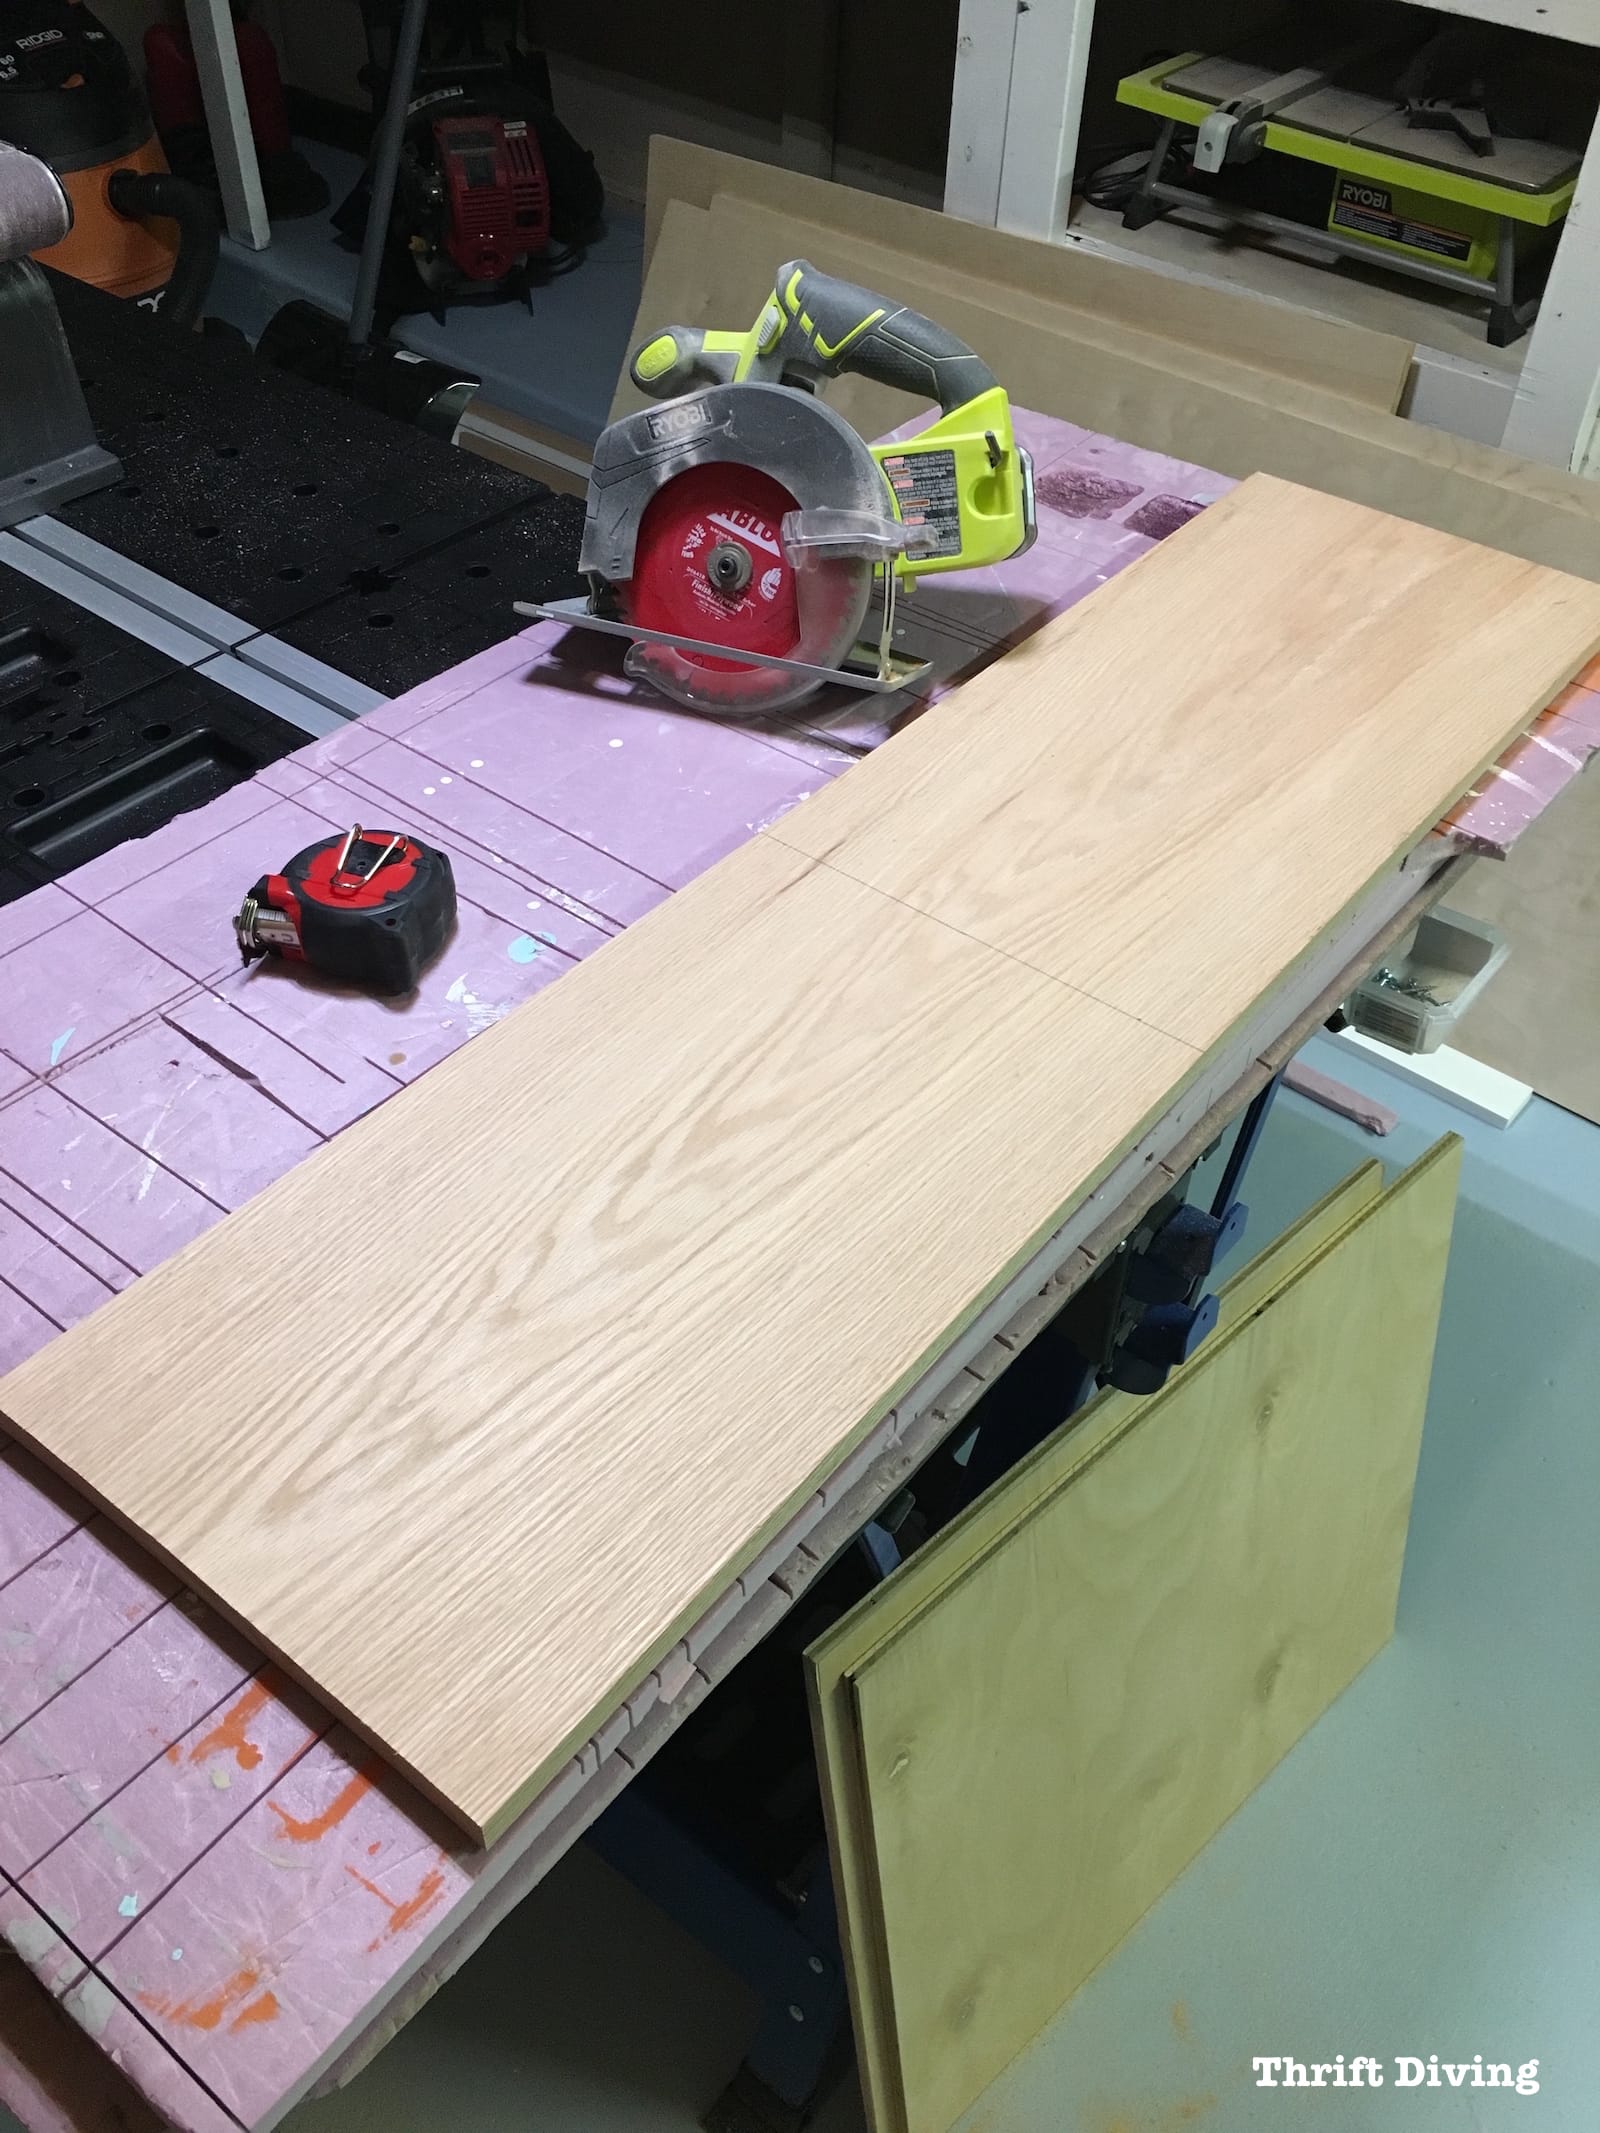
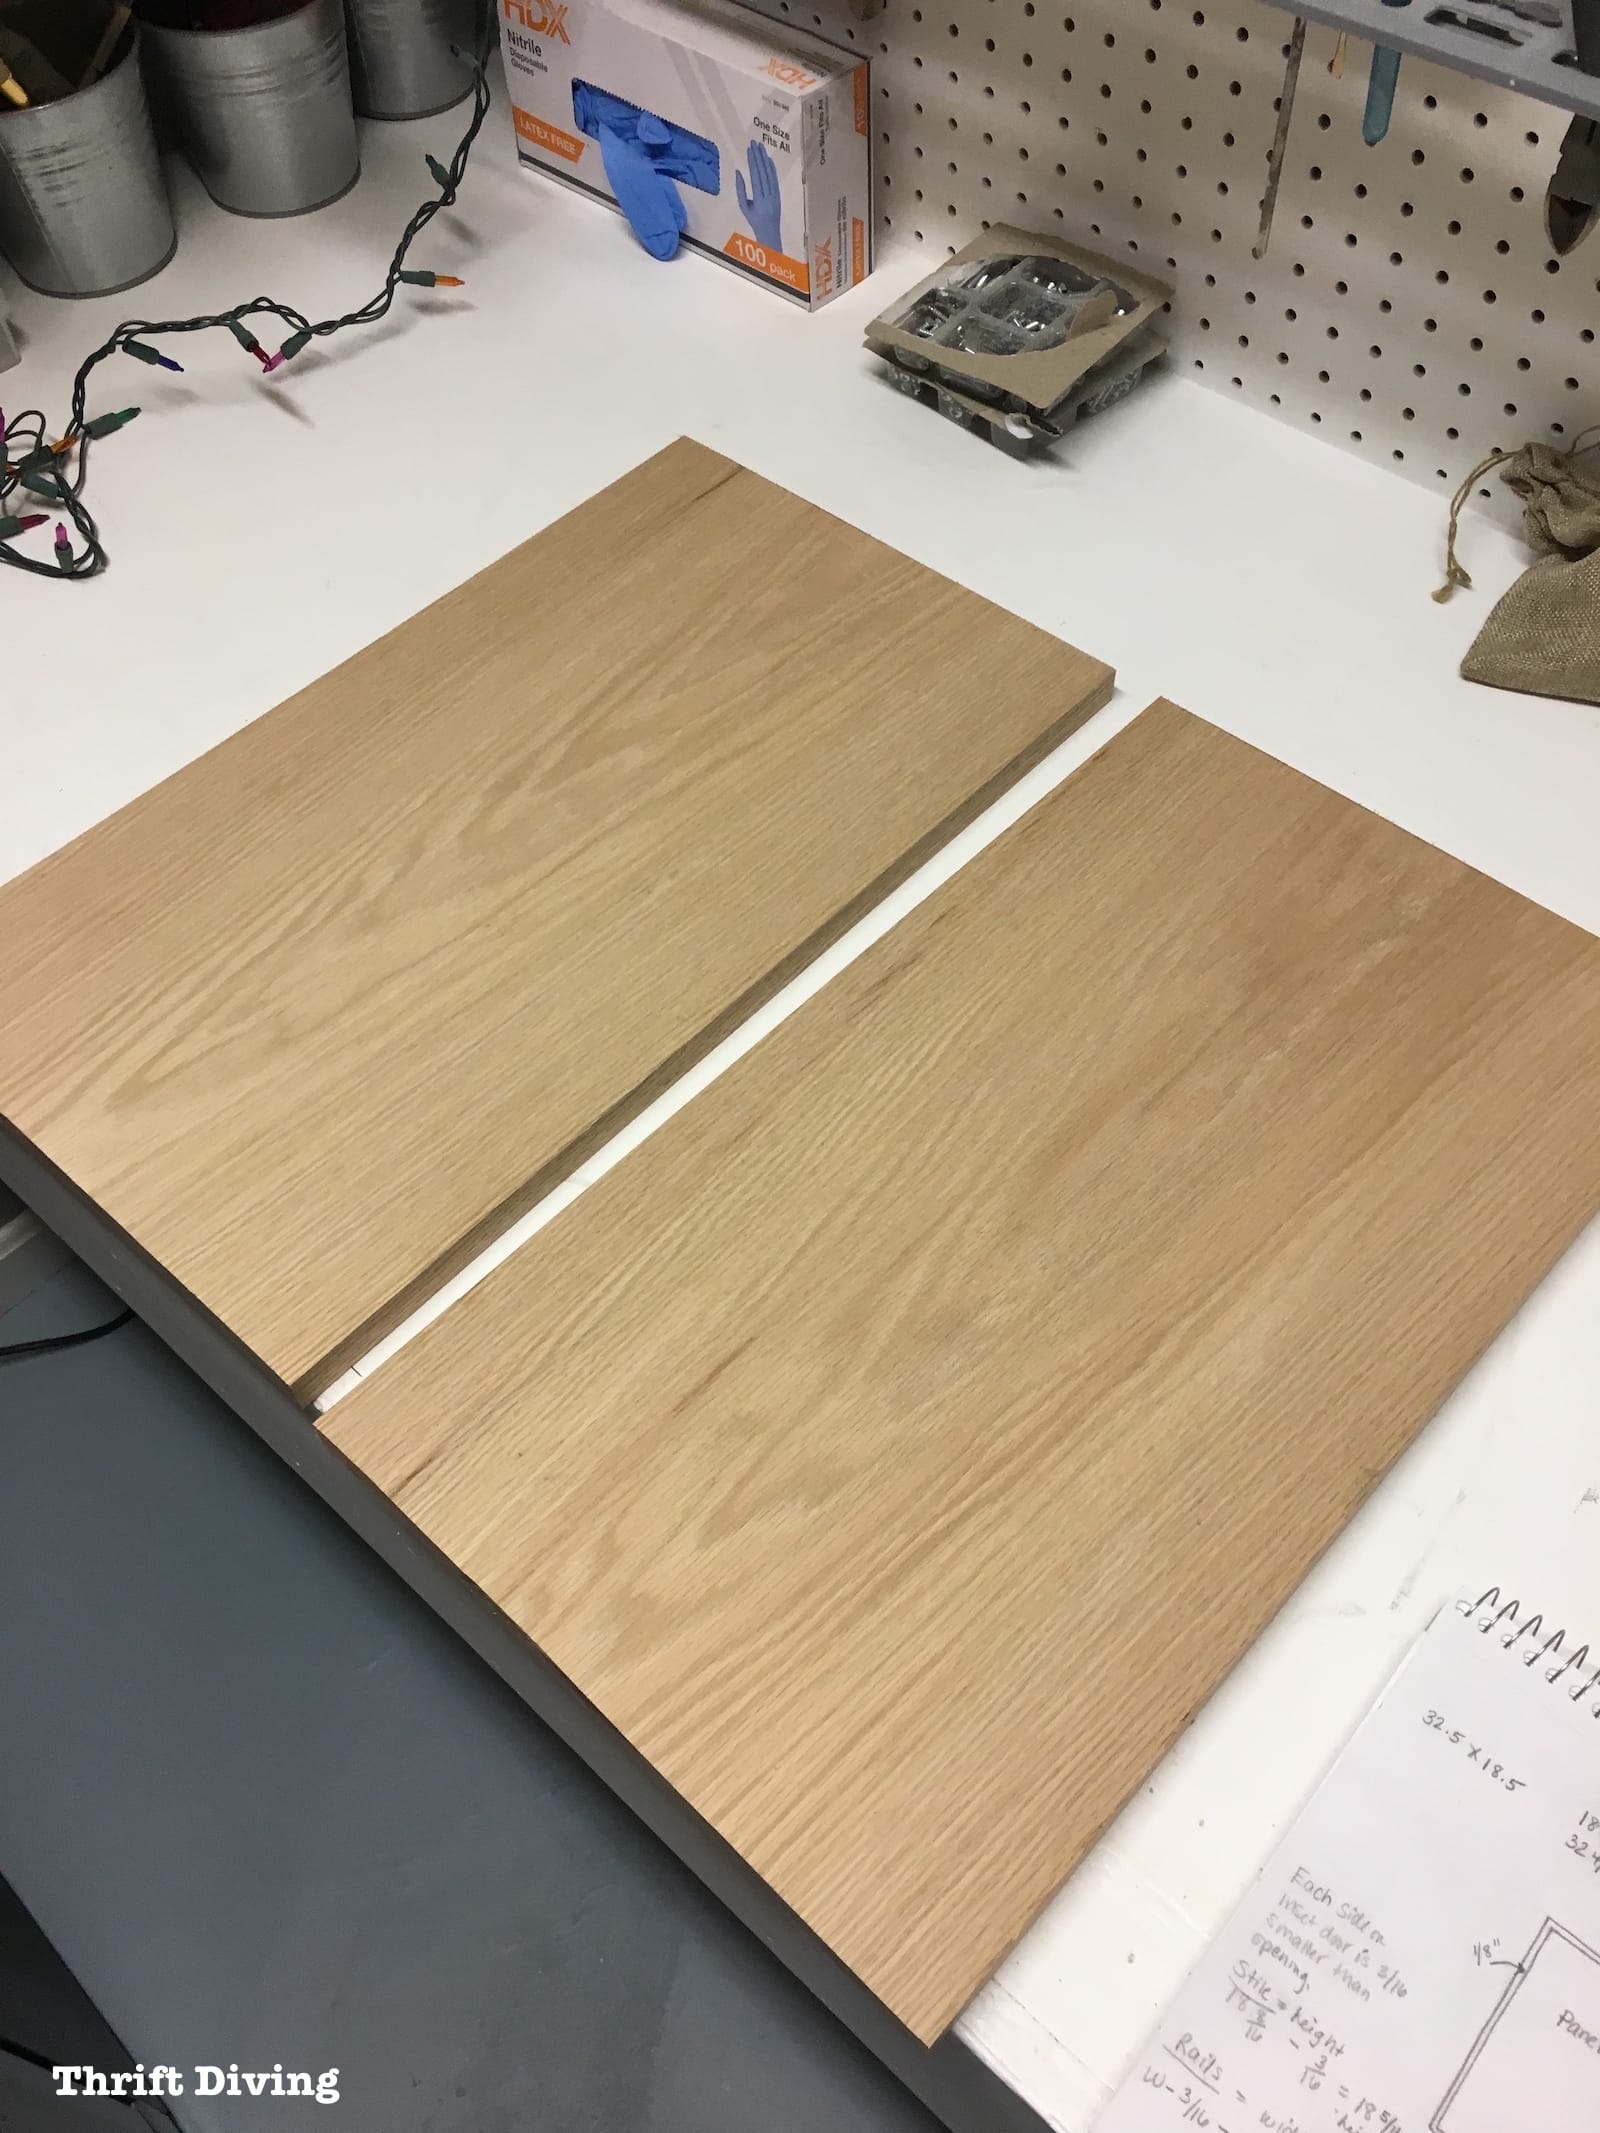
Then I cut another two pieces the same height, only these pieces were about 5″ in width.
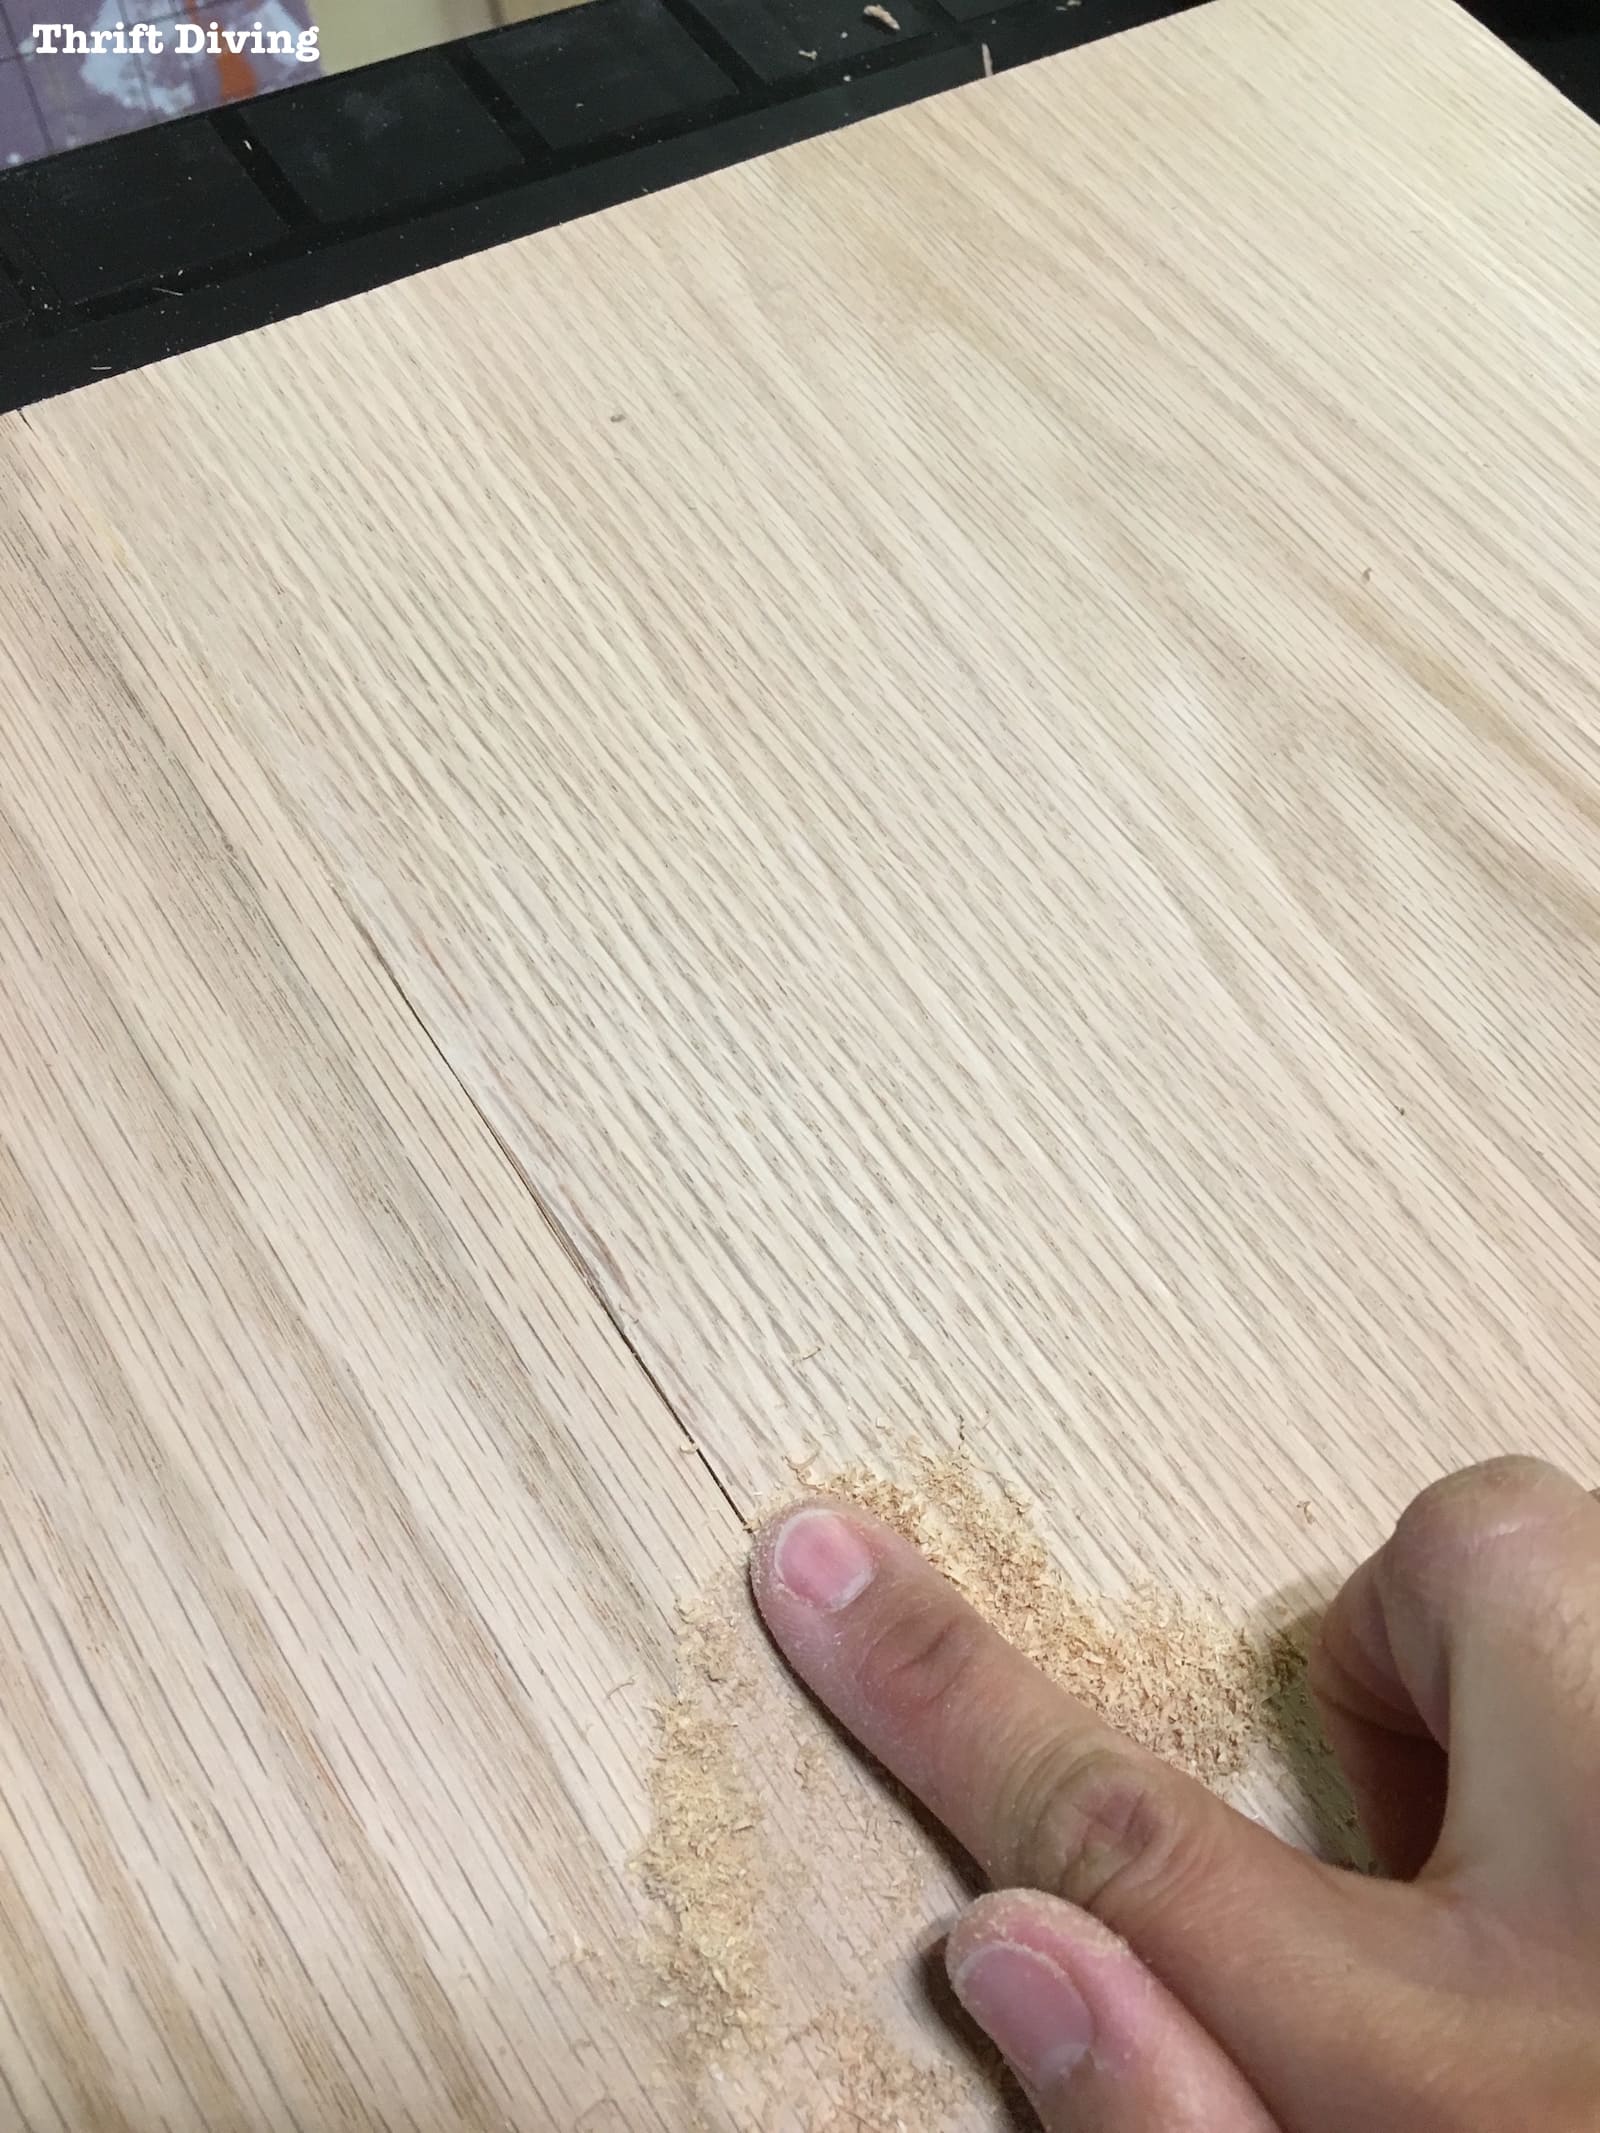
I simply used wood glue to join them together, to create one larger cabinet door panel.
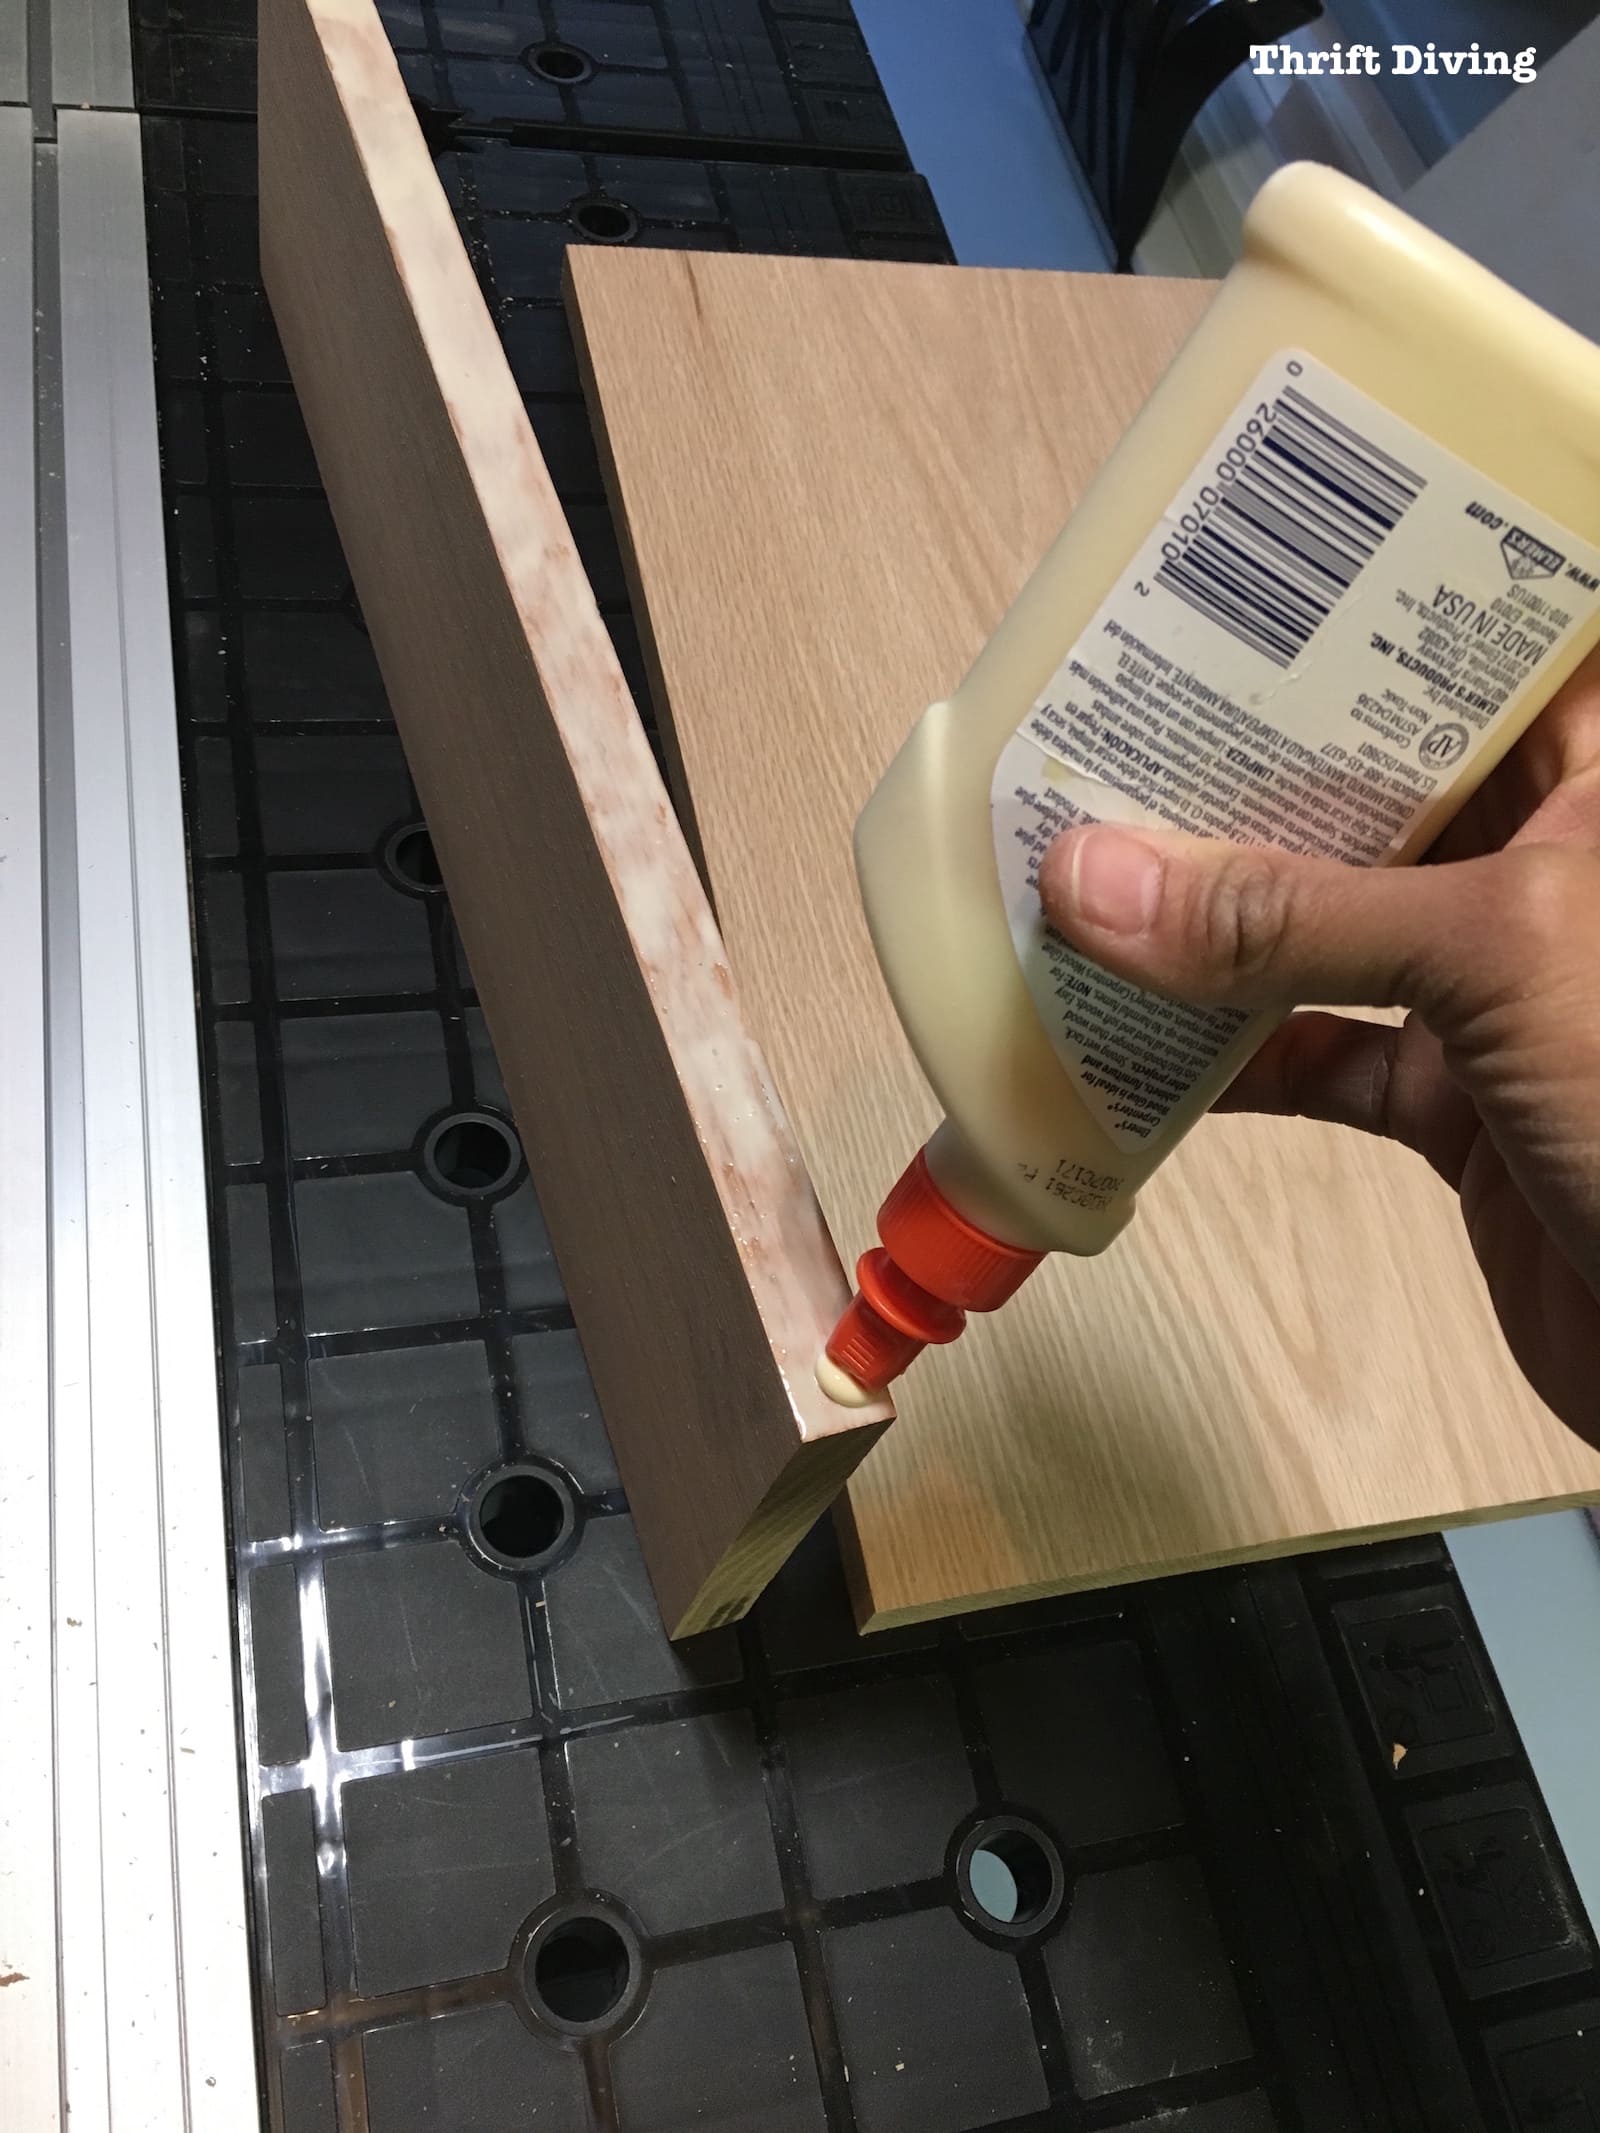
Then I clamped them together. I tried to be careful that they didn’t “bow” from the pressure of the clamp.
I had heard a neat trick about making your own DIY wood filler by using sawdust from your project mixed with wood glue. Doing this makes a closer match to the type of wood you’re using (but be warned: it may not take stain well, so just be mindful of that).
Well, I had saved a good fit of fine Red Oak sawdust!
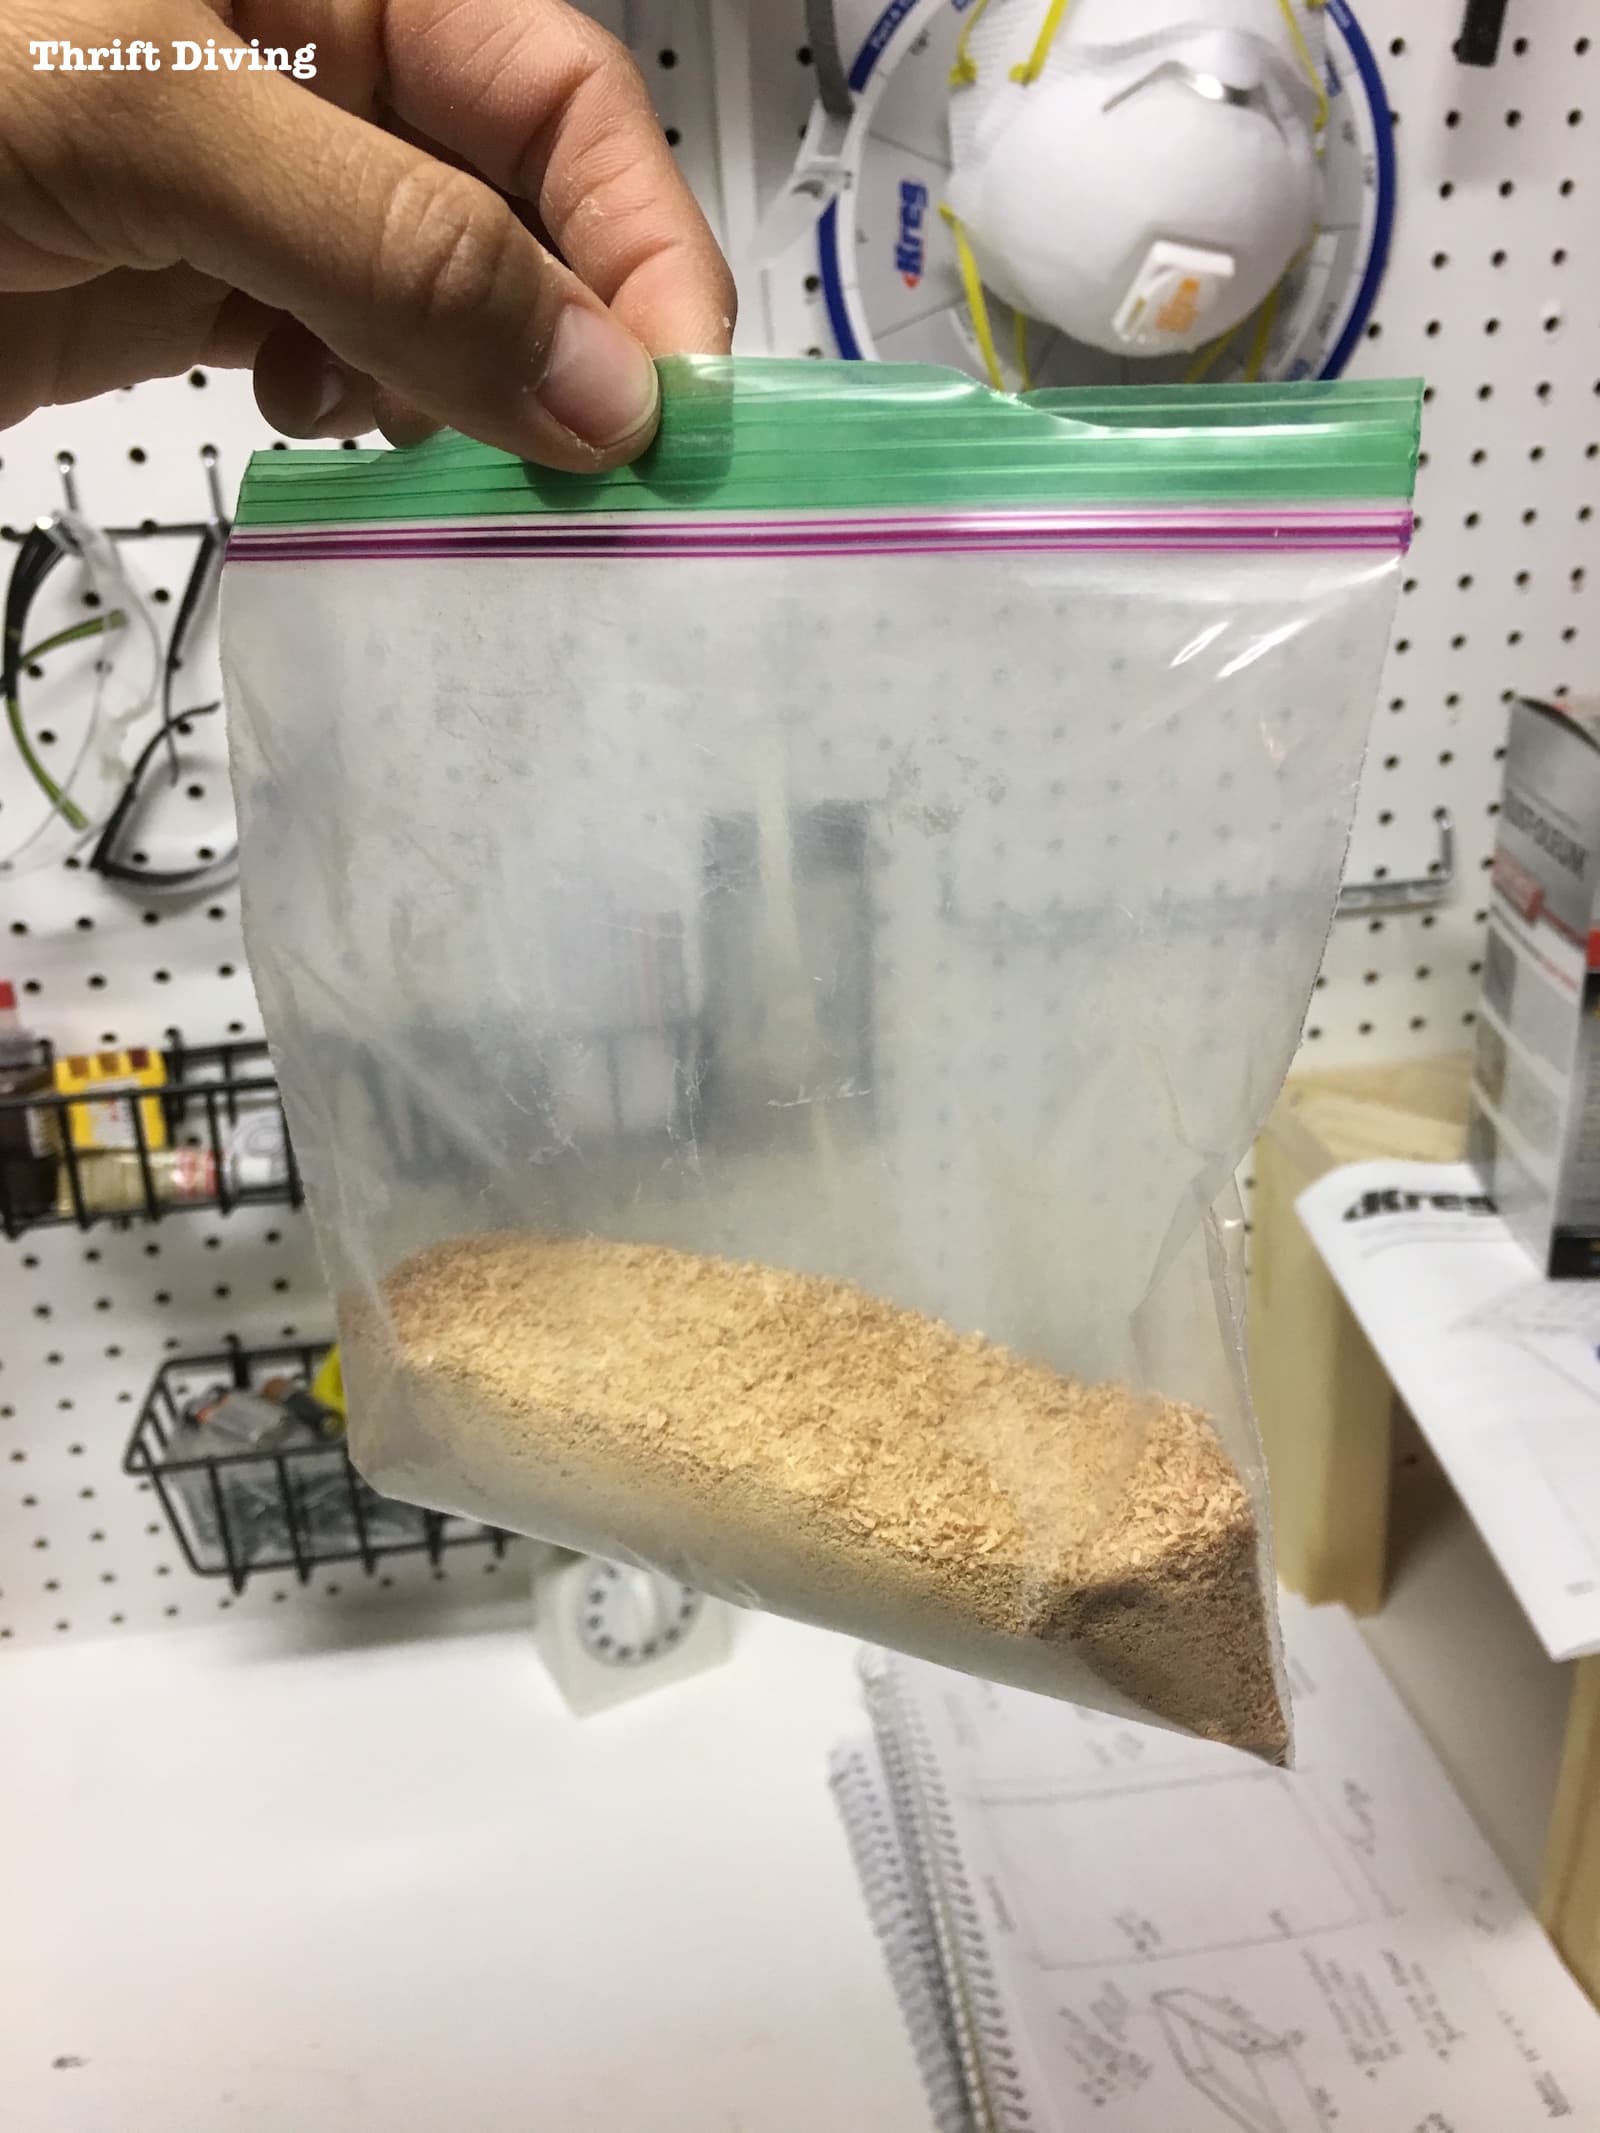
I mixed some sawdust and wood glue on a piece of scrap wood and then used my finger to push the DIY wood filler into the little cracks after the two joined boards were dry.
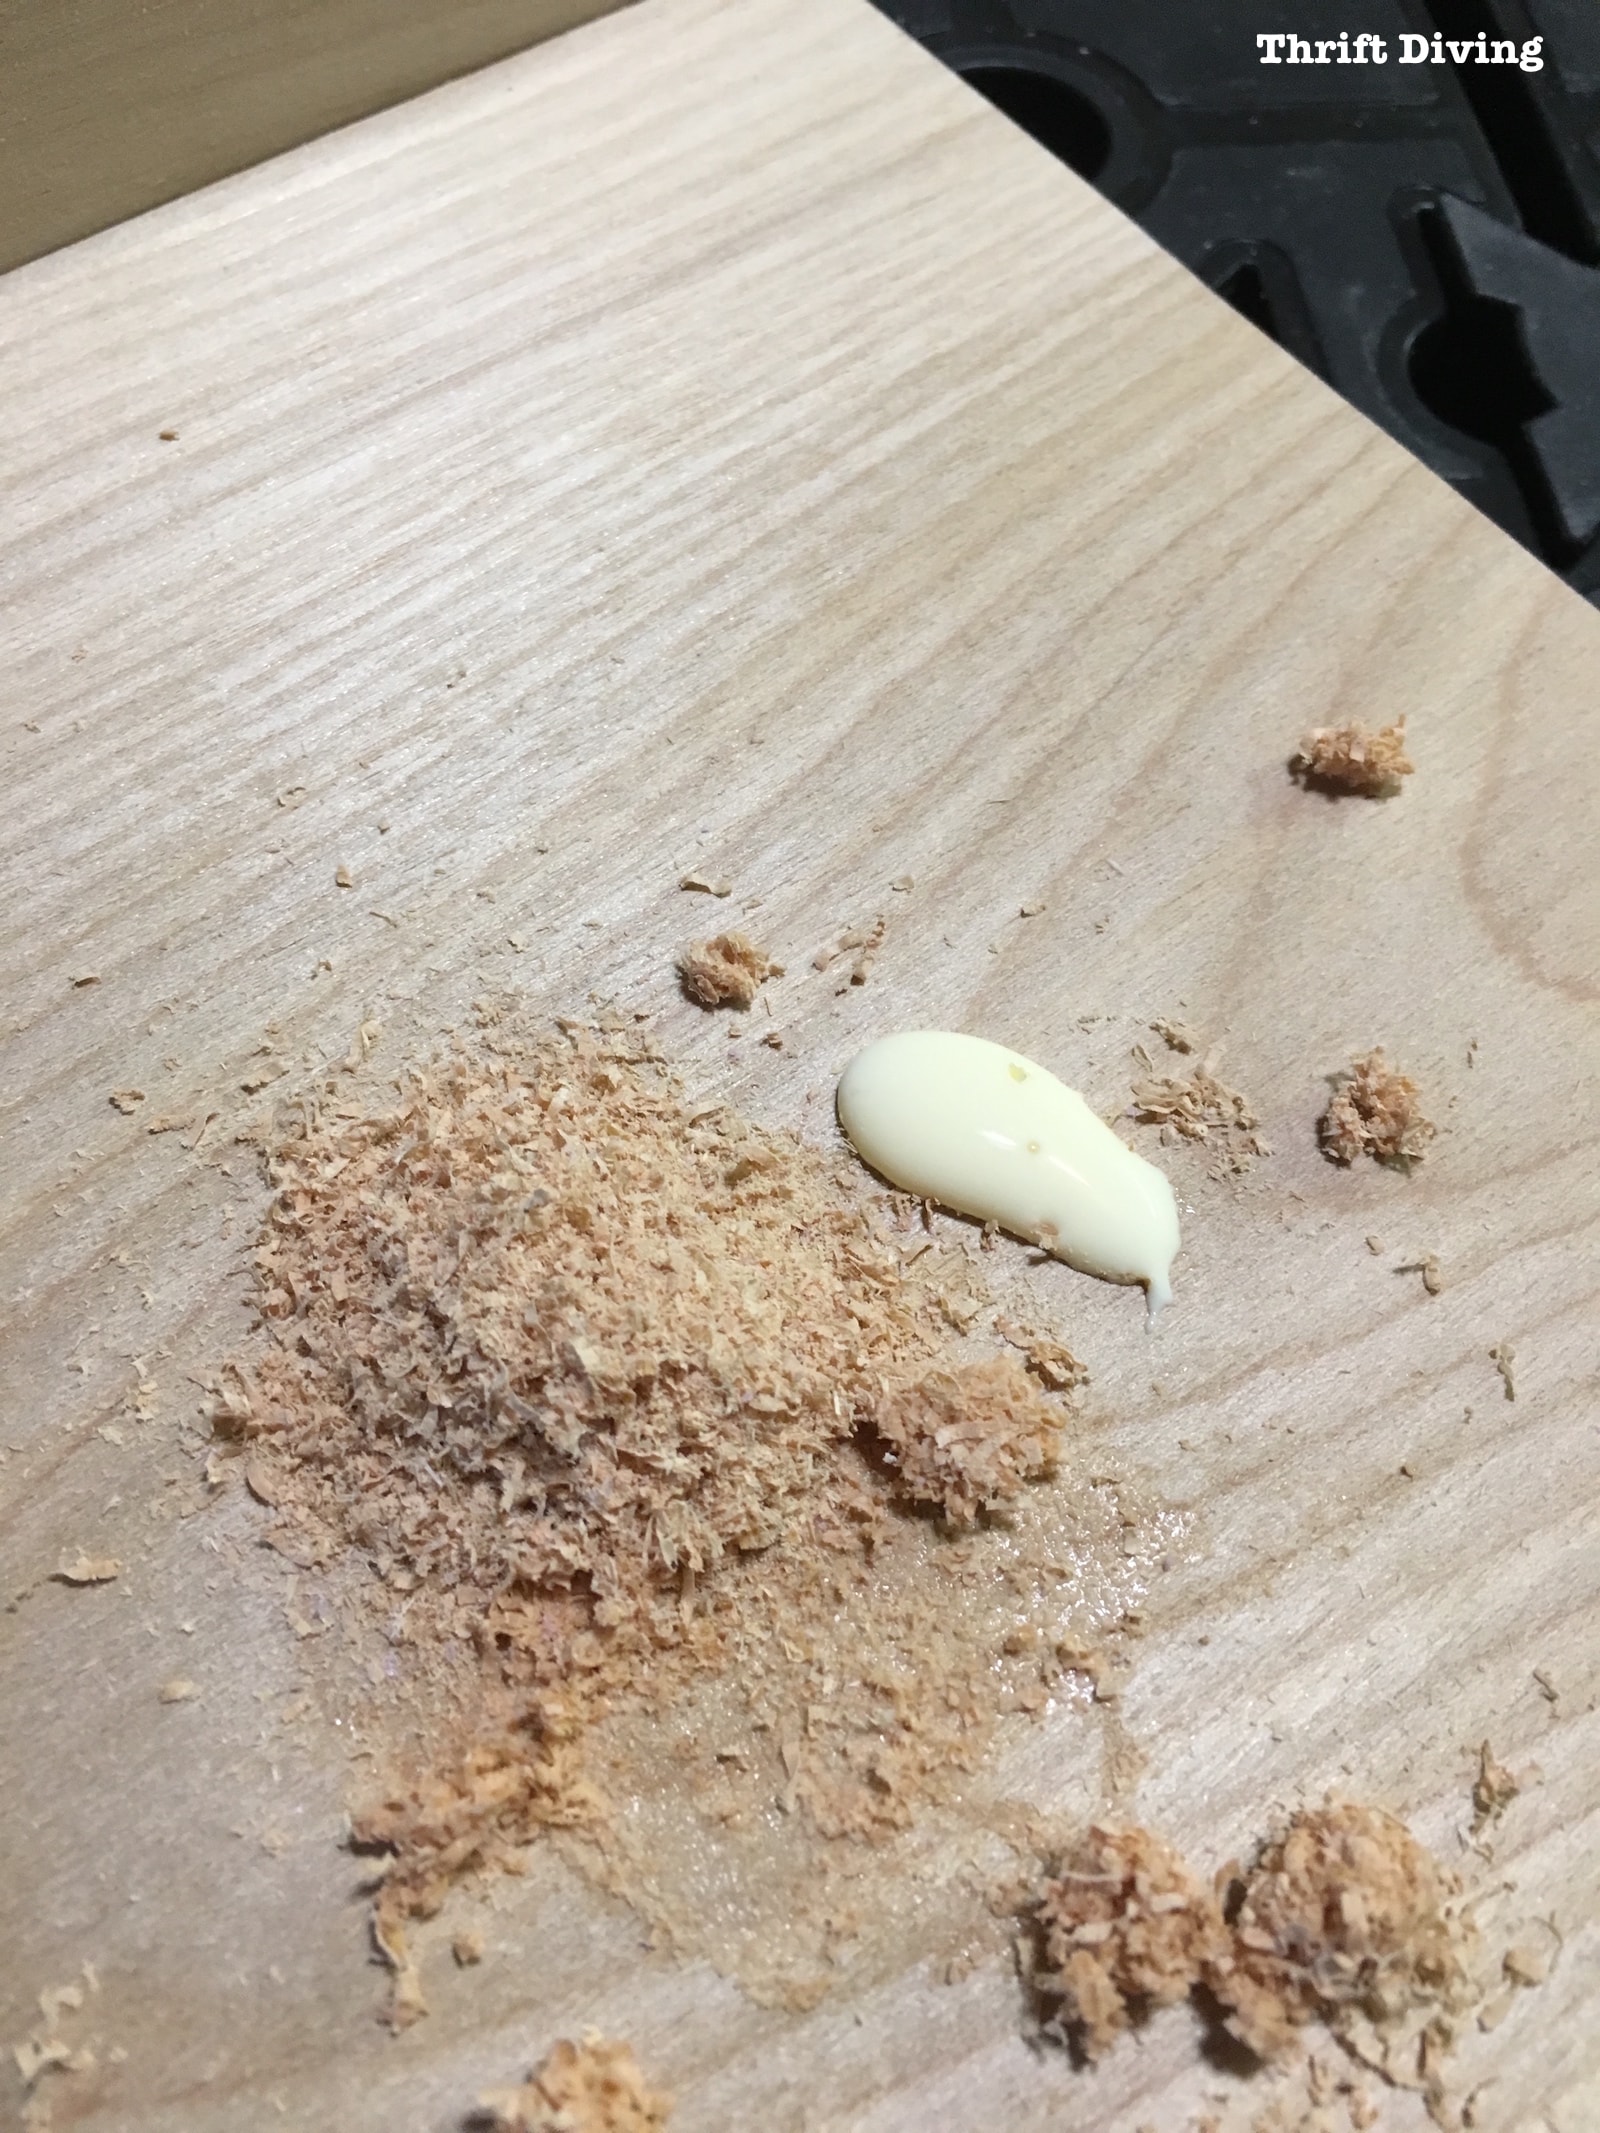
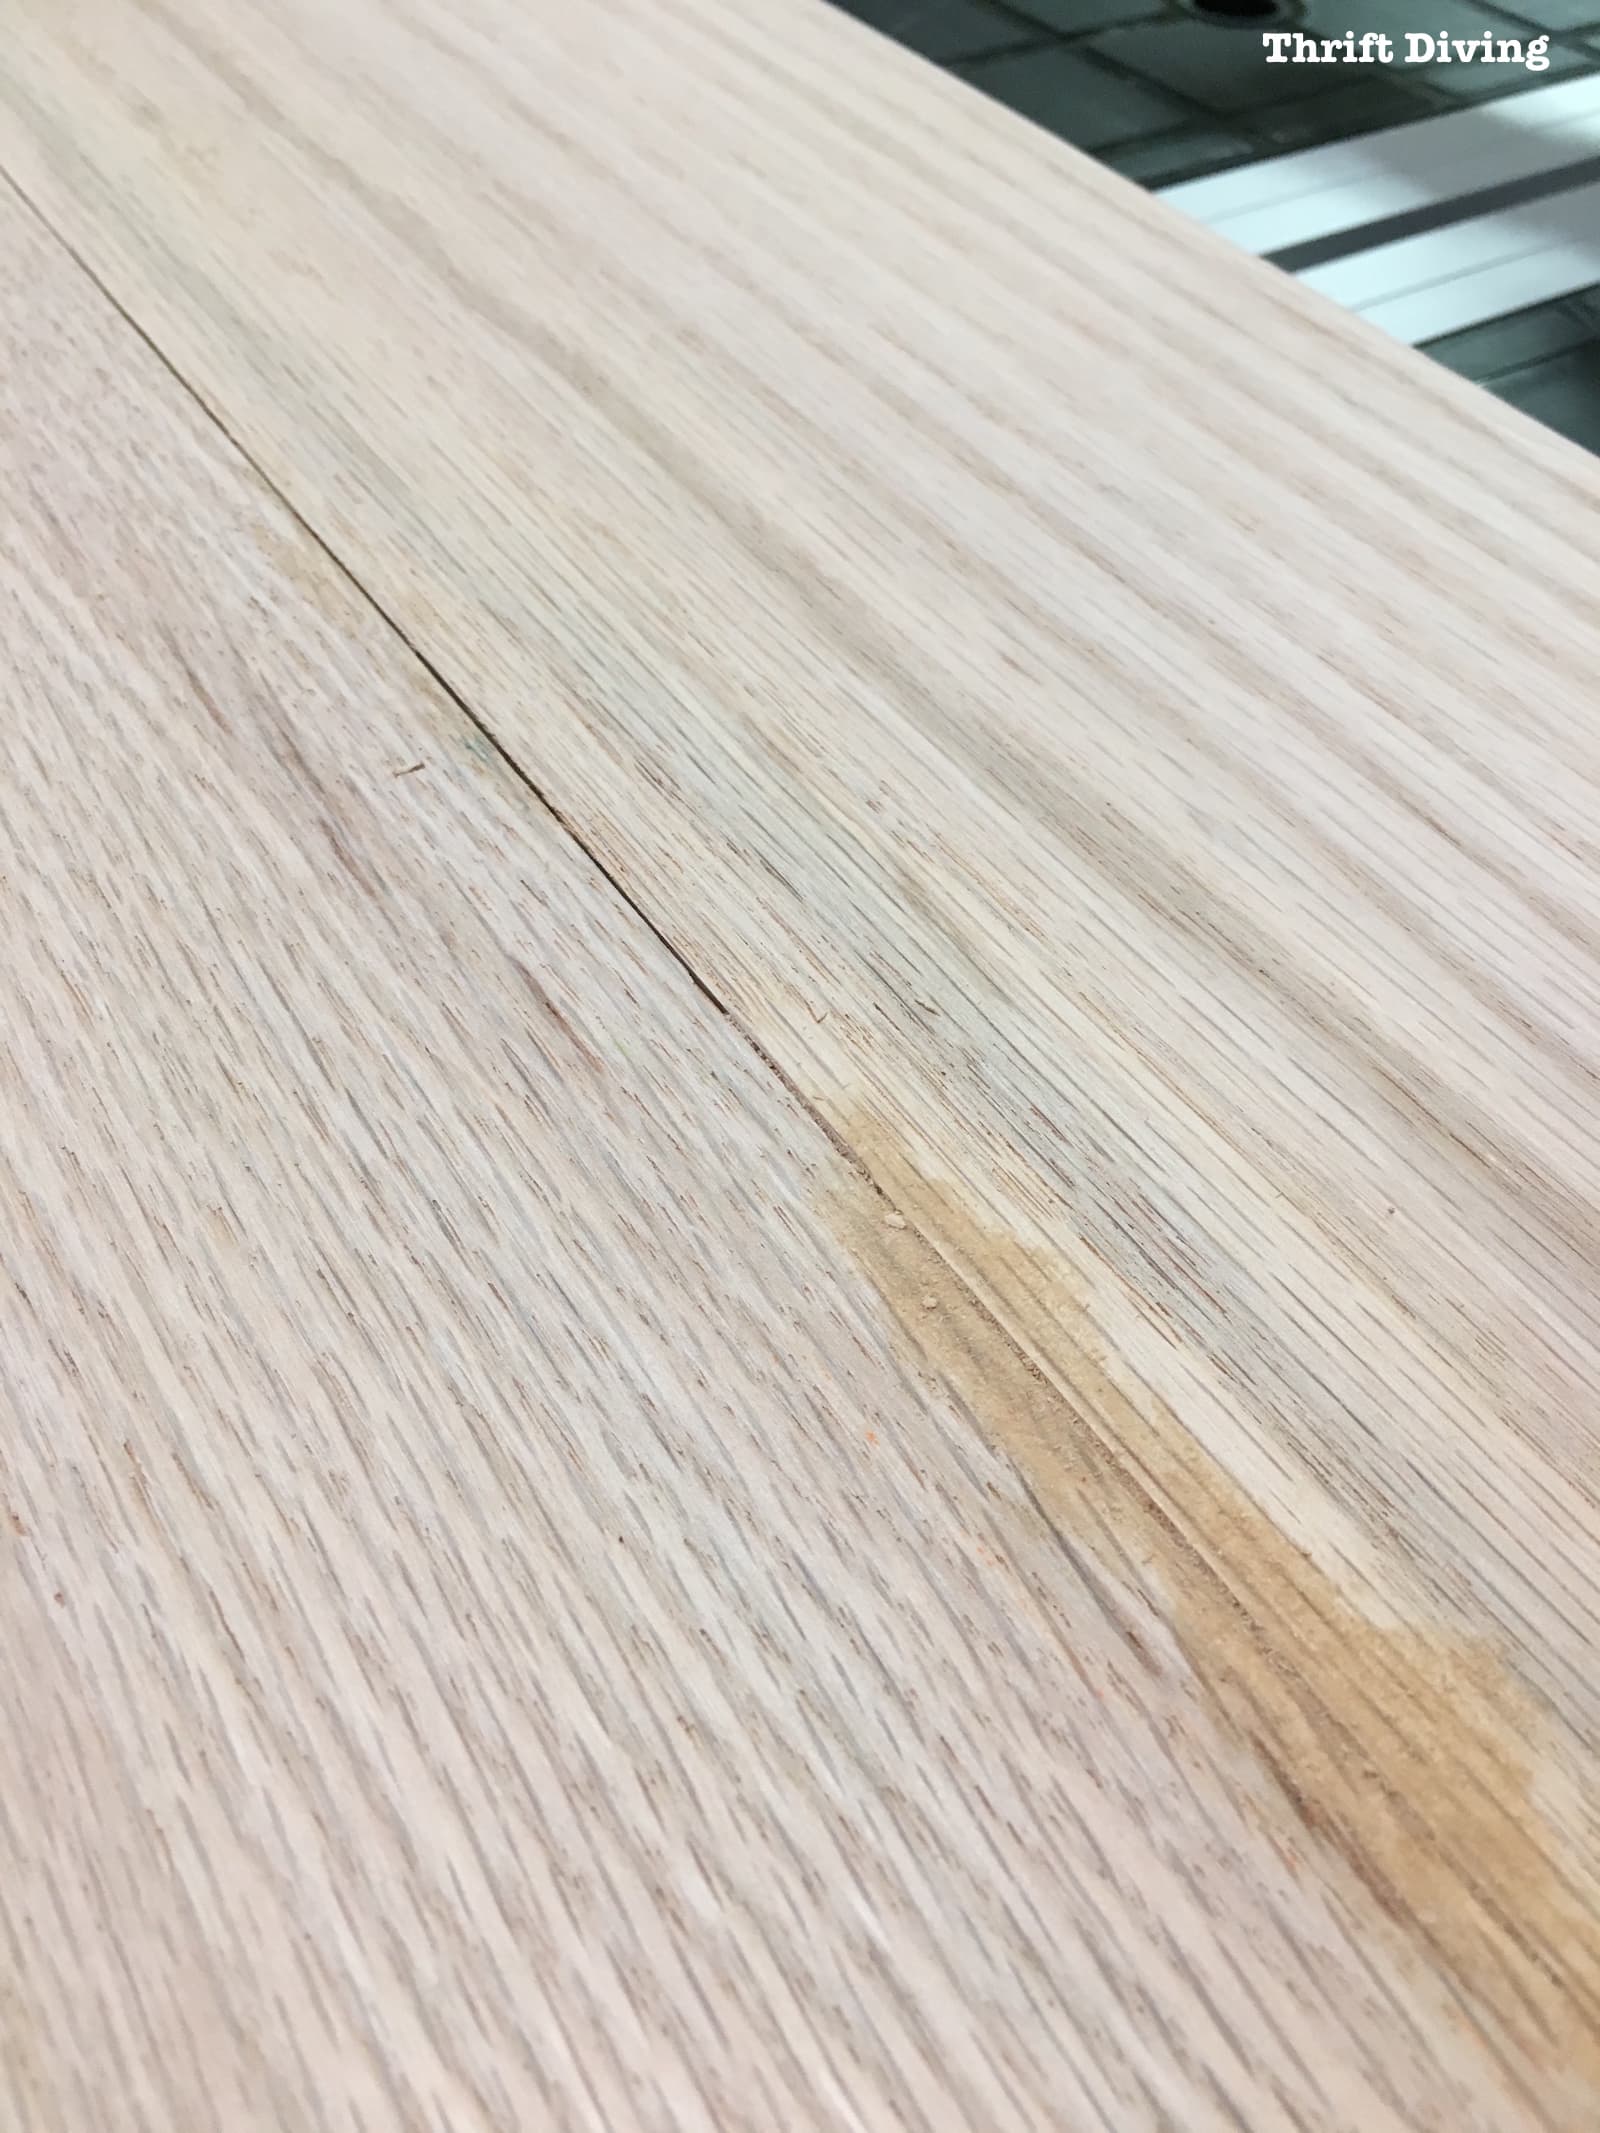
Once it was dry, I sanded it down as smoothly as I could with 220 grit sand paper on my RYOBI orbital sander.
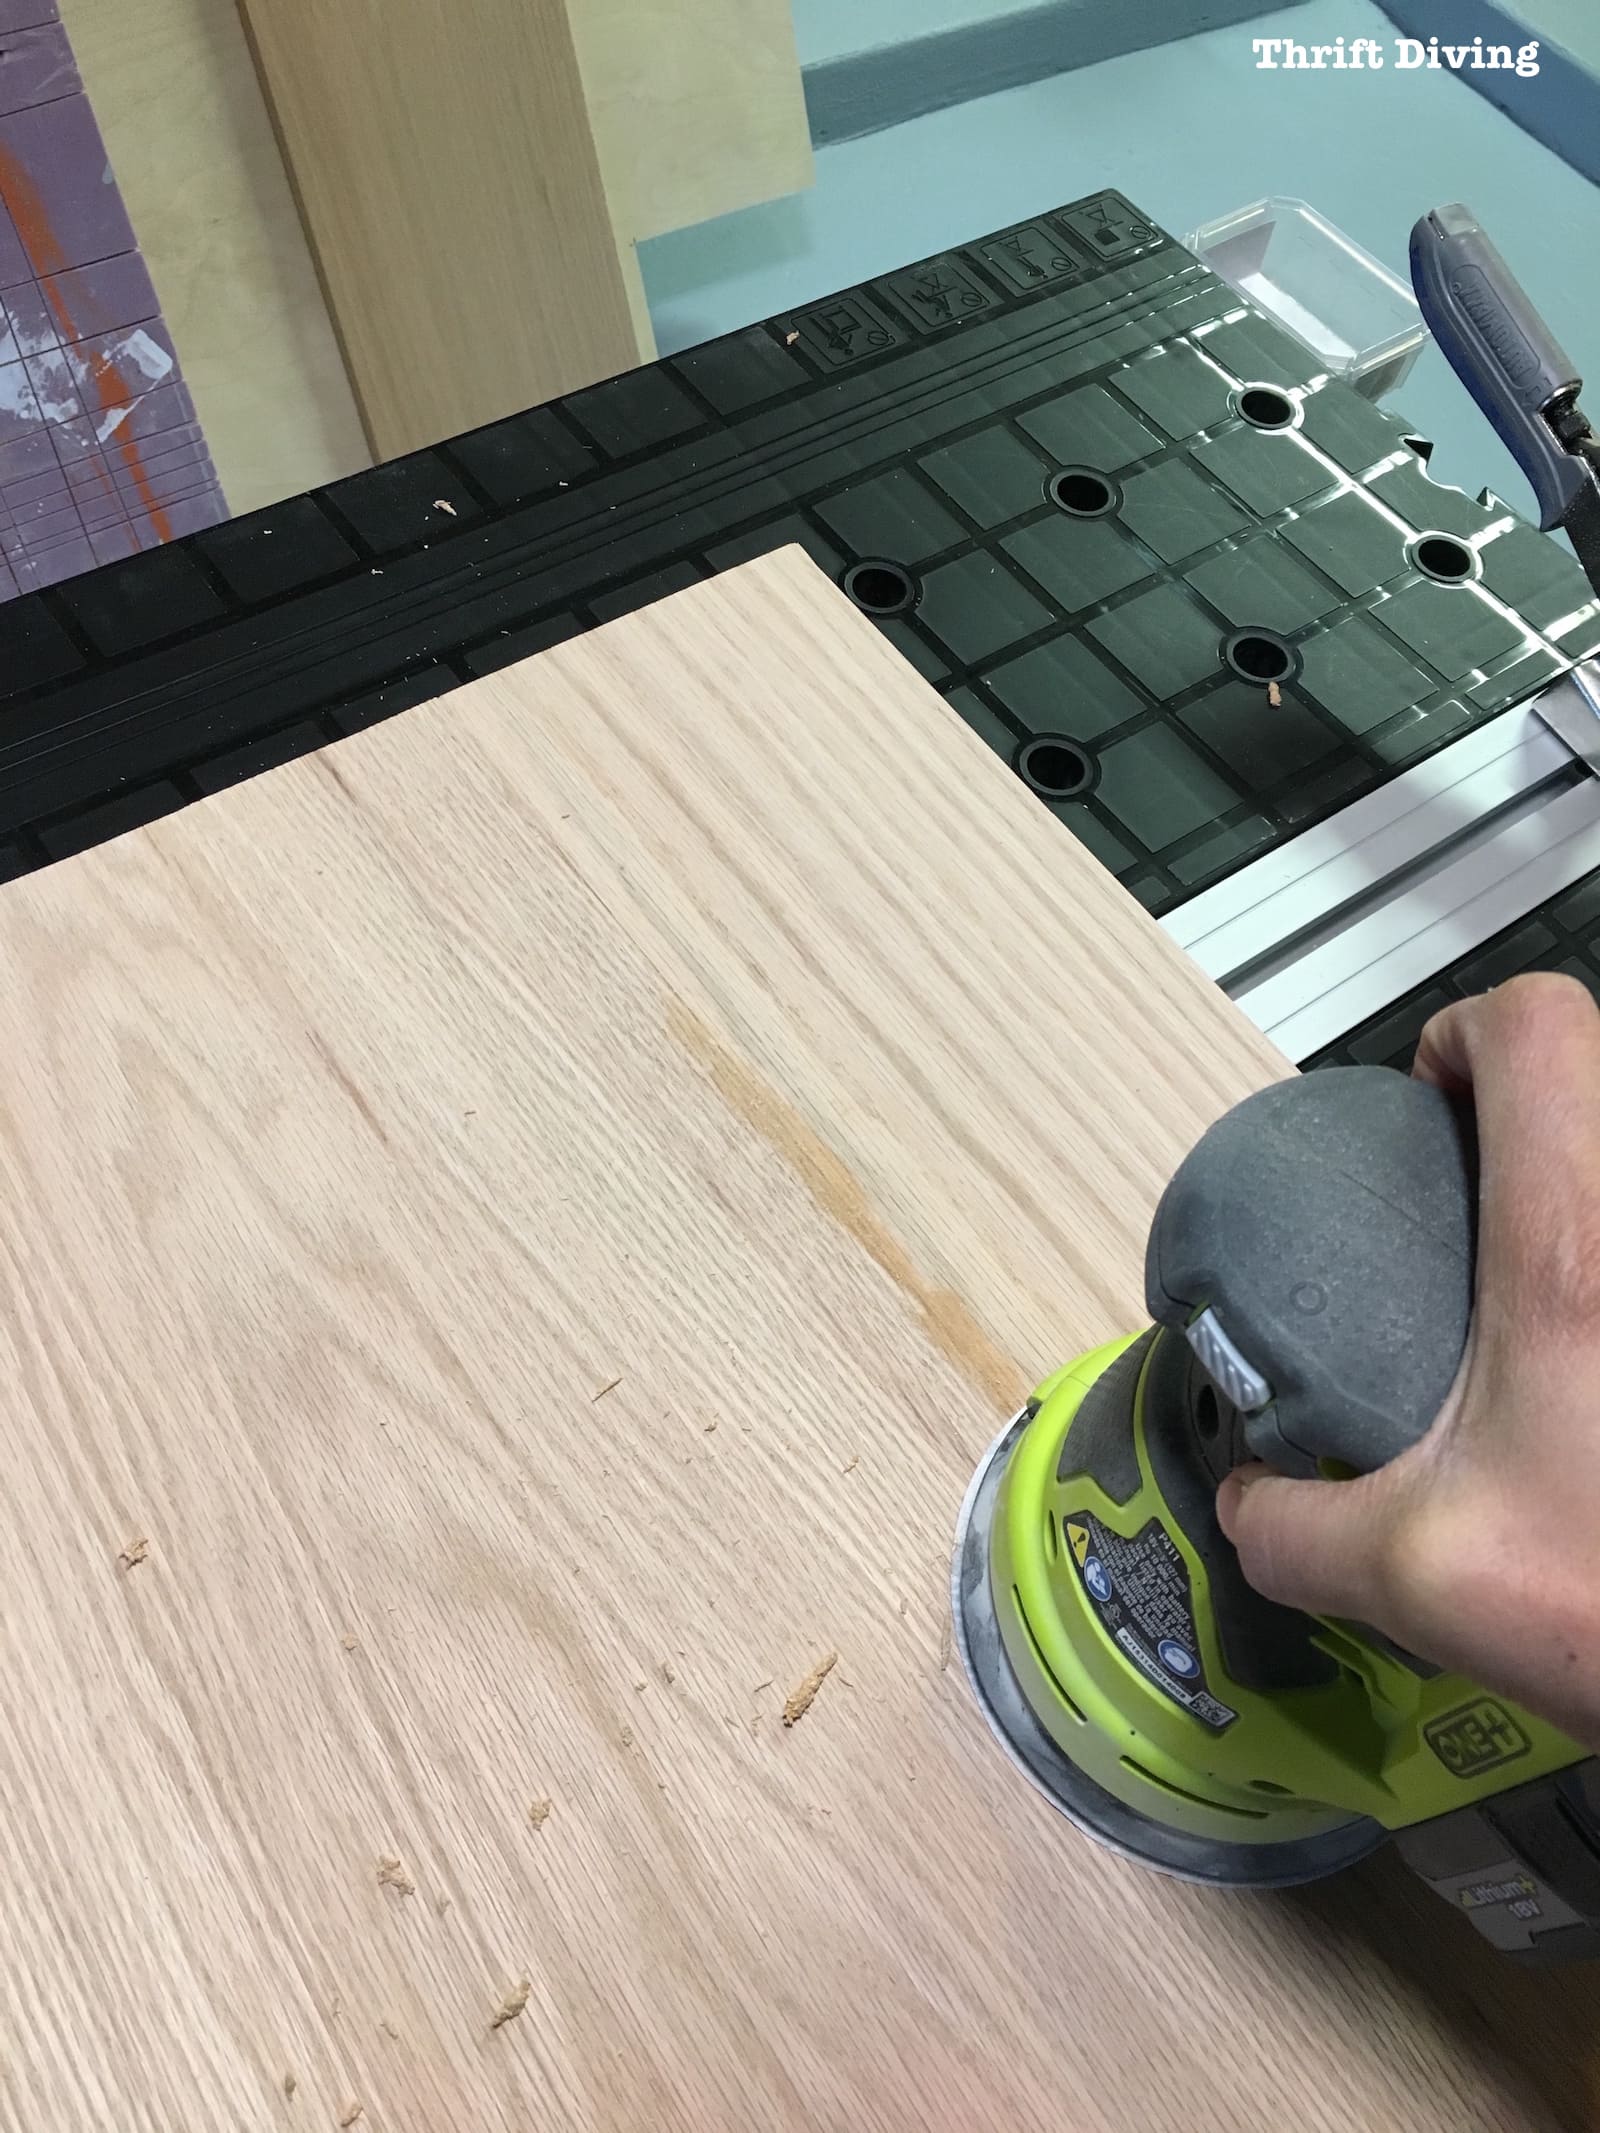
I have to admit, the result was pretty good!
You can see the difference in the wood grain, but I didn’t think it was that noticeable.
I was just glad to have cabinet doors that would fit my DIY vanity!

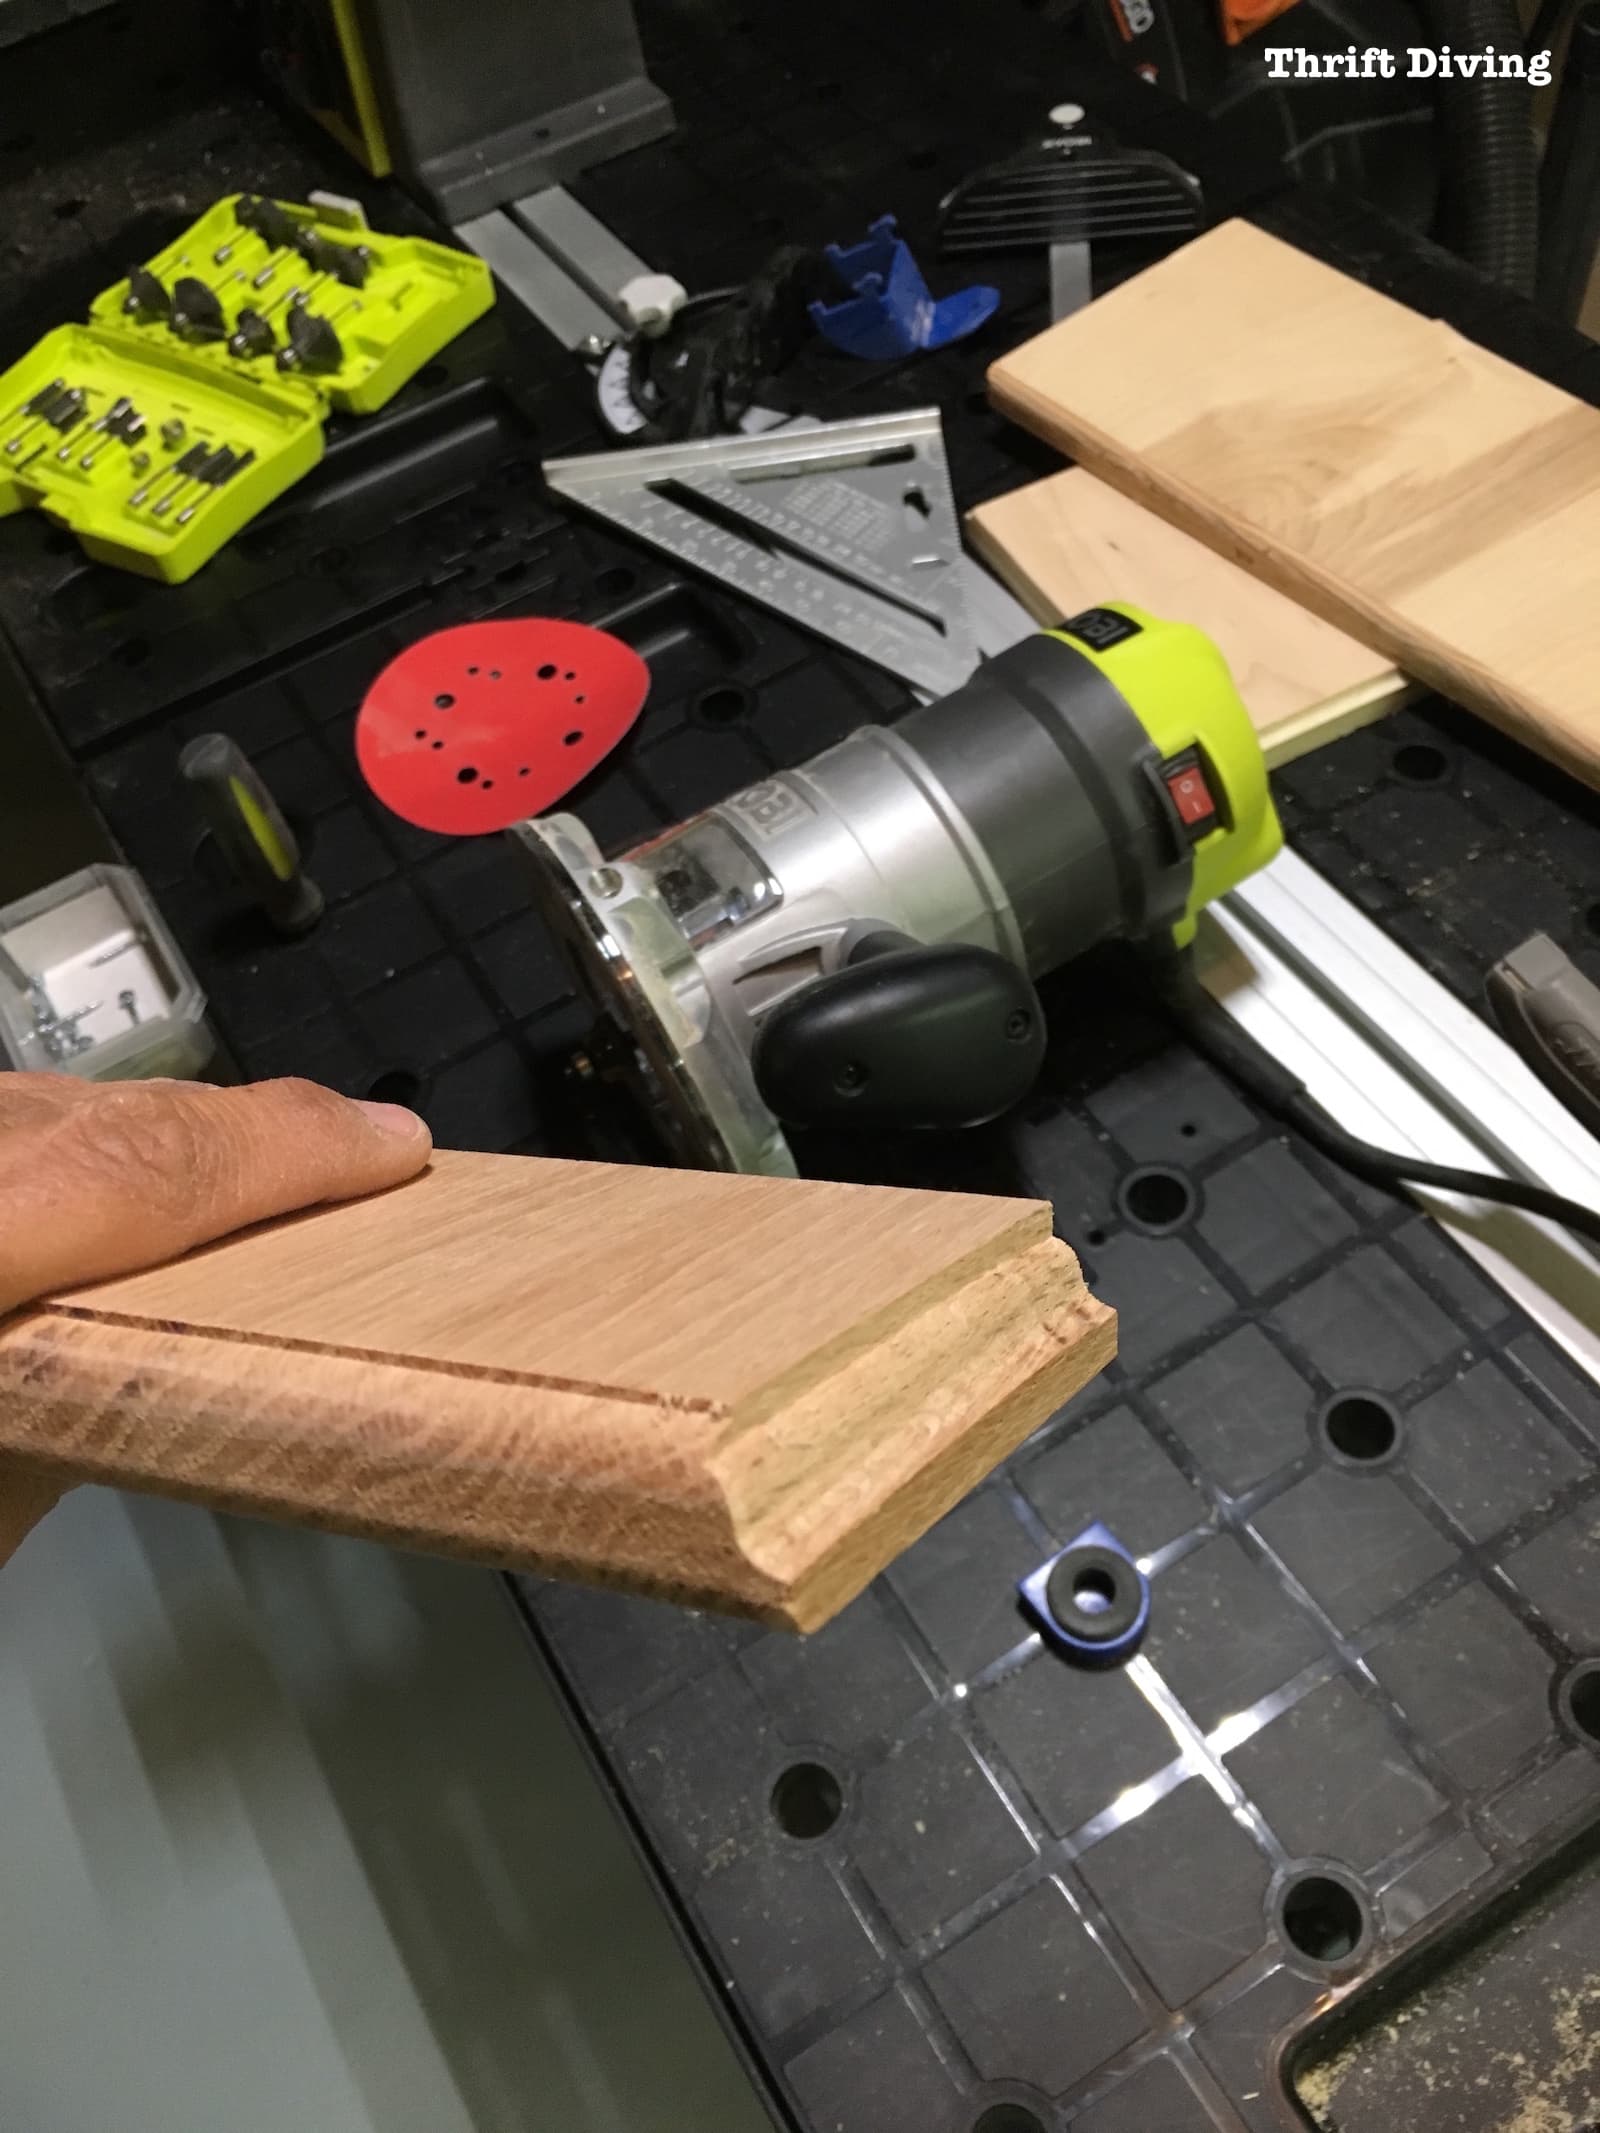
STEP 3: Routing the Edges
I wanted a decorative edge around the DIY cabinet doors and along the drawer fronts.
I’ve not used a router so often that I knew what I was doing when it came to routing Red Oak.
When I used the router by hand, I did a terrible job! LOL
Red Oak, which I later learned, burns very easily when using a router, especially if you’re going to slow.
YIKES.
I did a bunch more samples, figuring out how I wanted the wood edges to look, trying not to burn it. I decided that I liked this edge below.
TIP: Watch this great video on How to Use a Router Freehand.
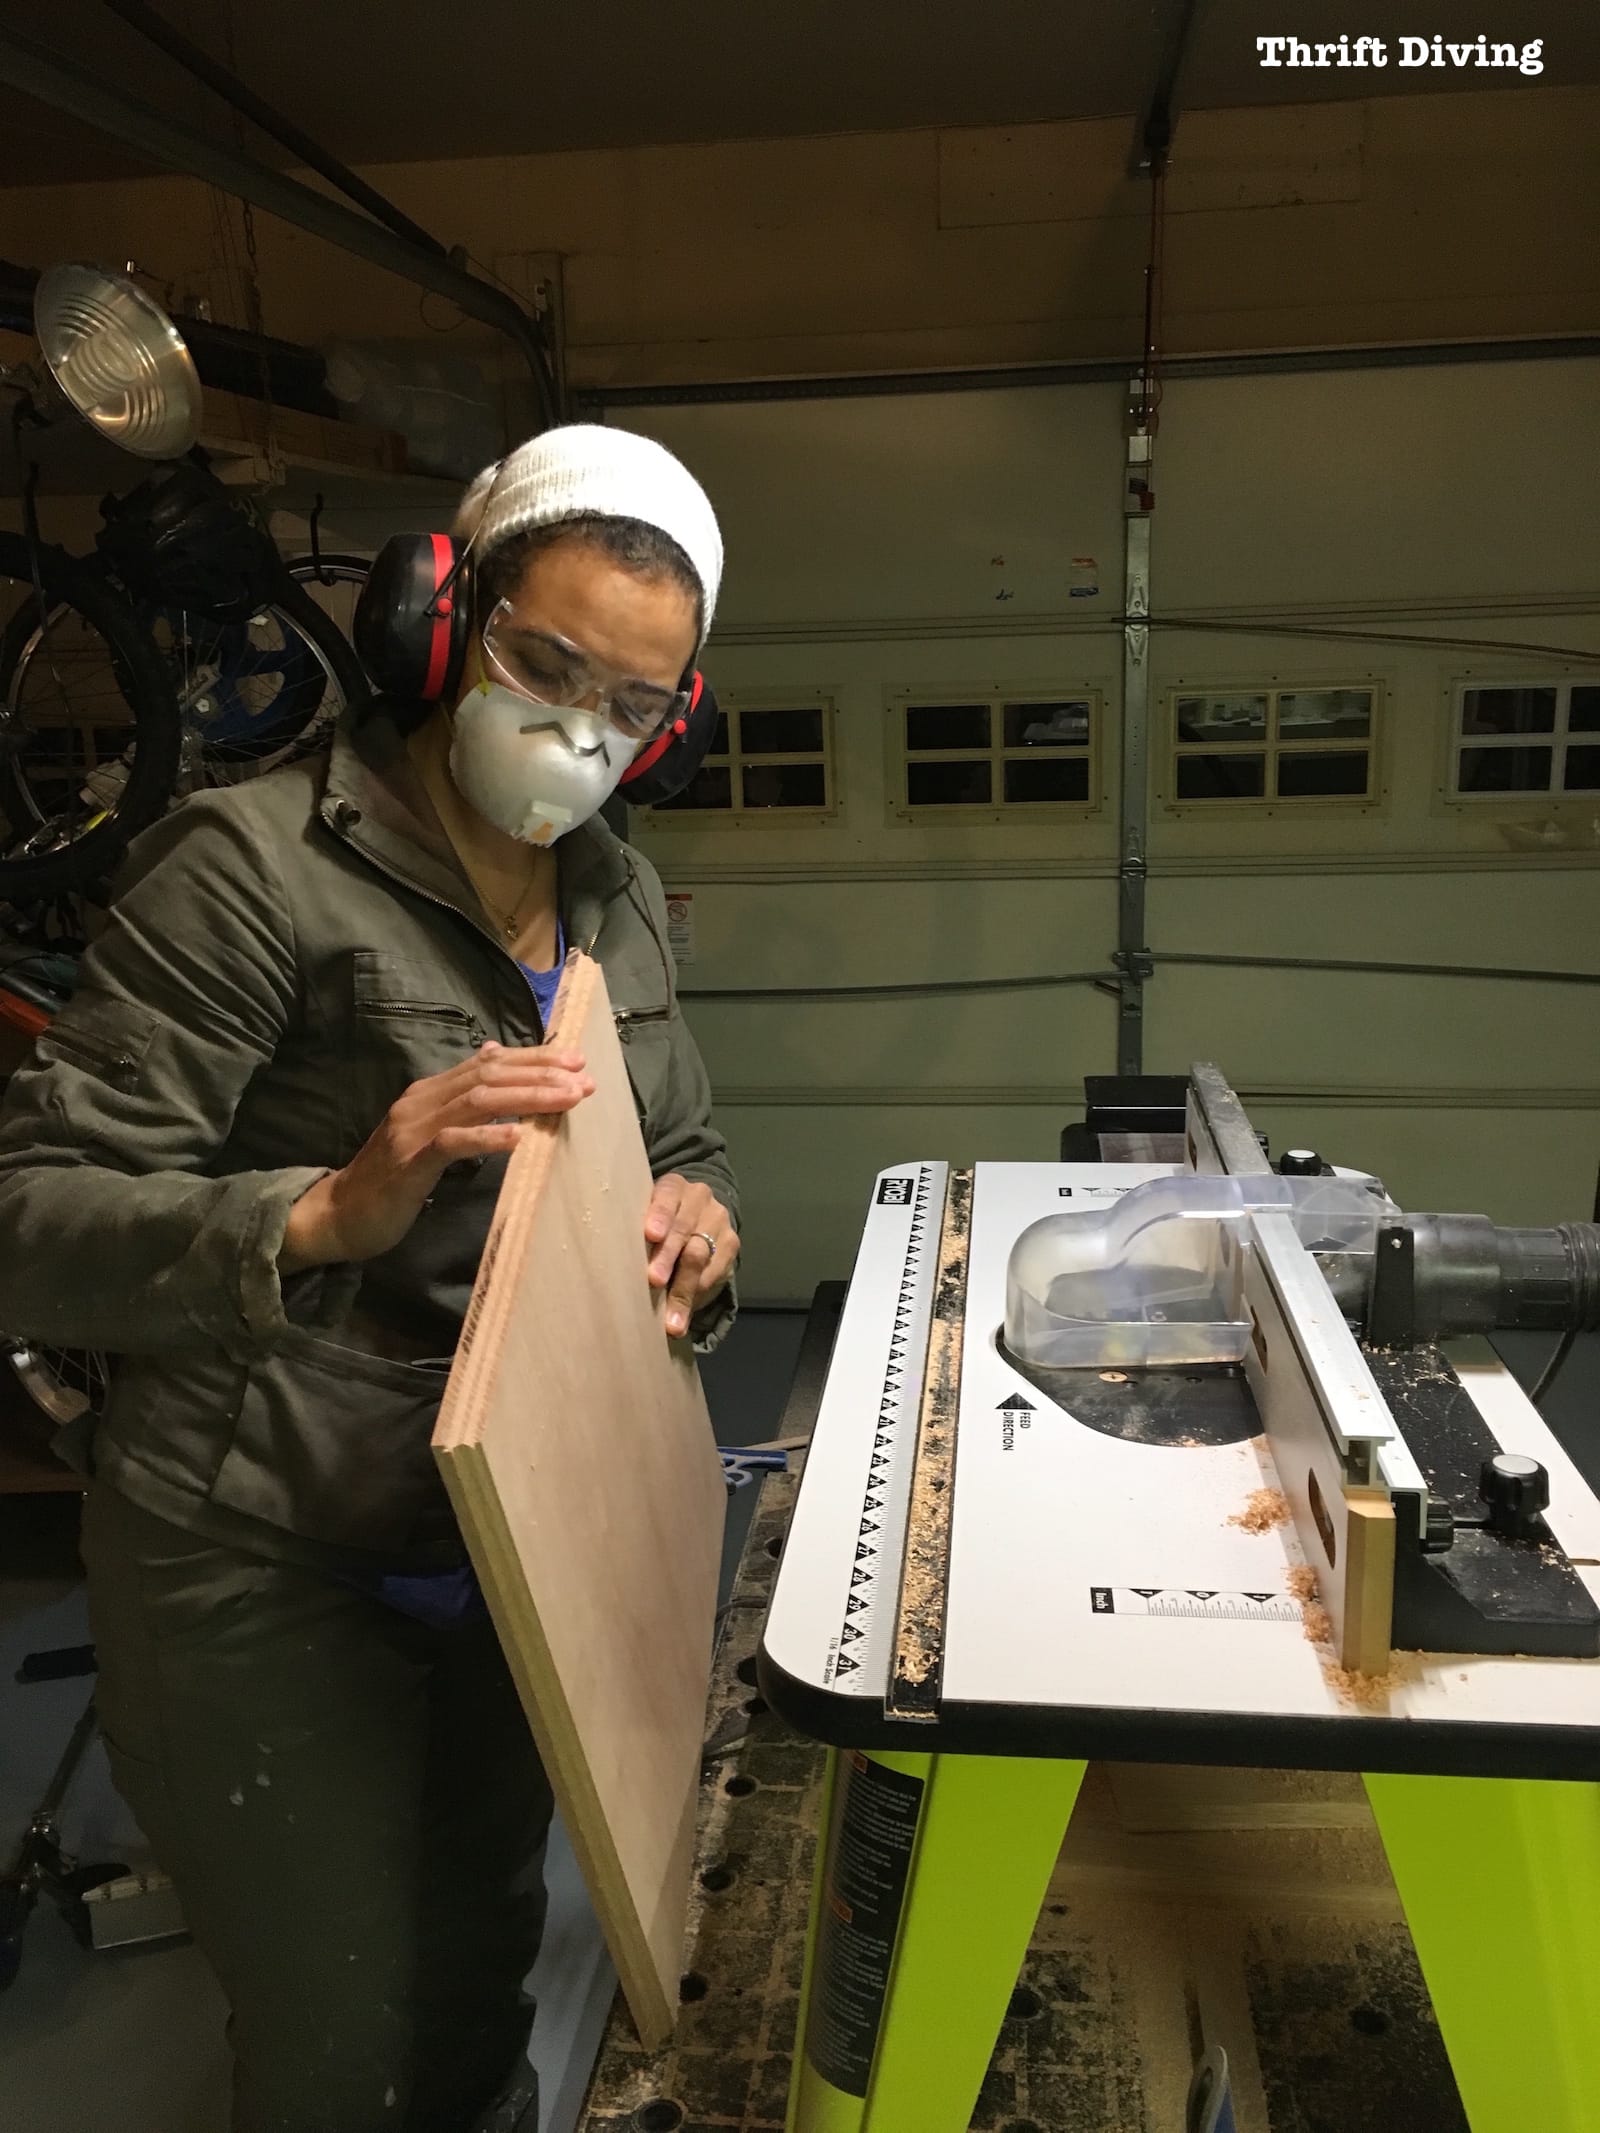
When I felt like I knew what I was doing and the look I was going for, I suited up.
You can see here how I made sure to use hearing protection, a dust mask, and glasses. Those things are noisy and messy!
I ran each edge through the router table, but I can’t remember which router bit I used!
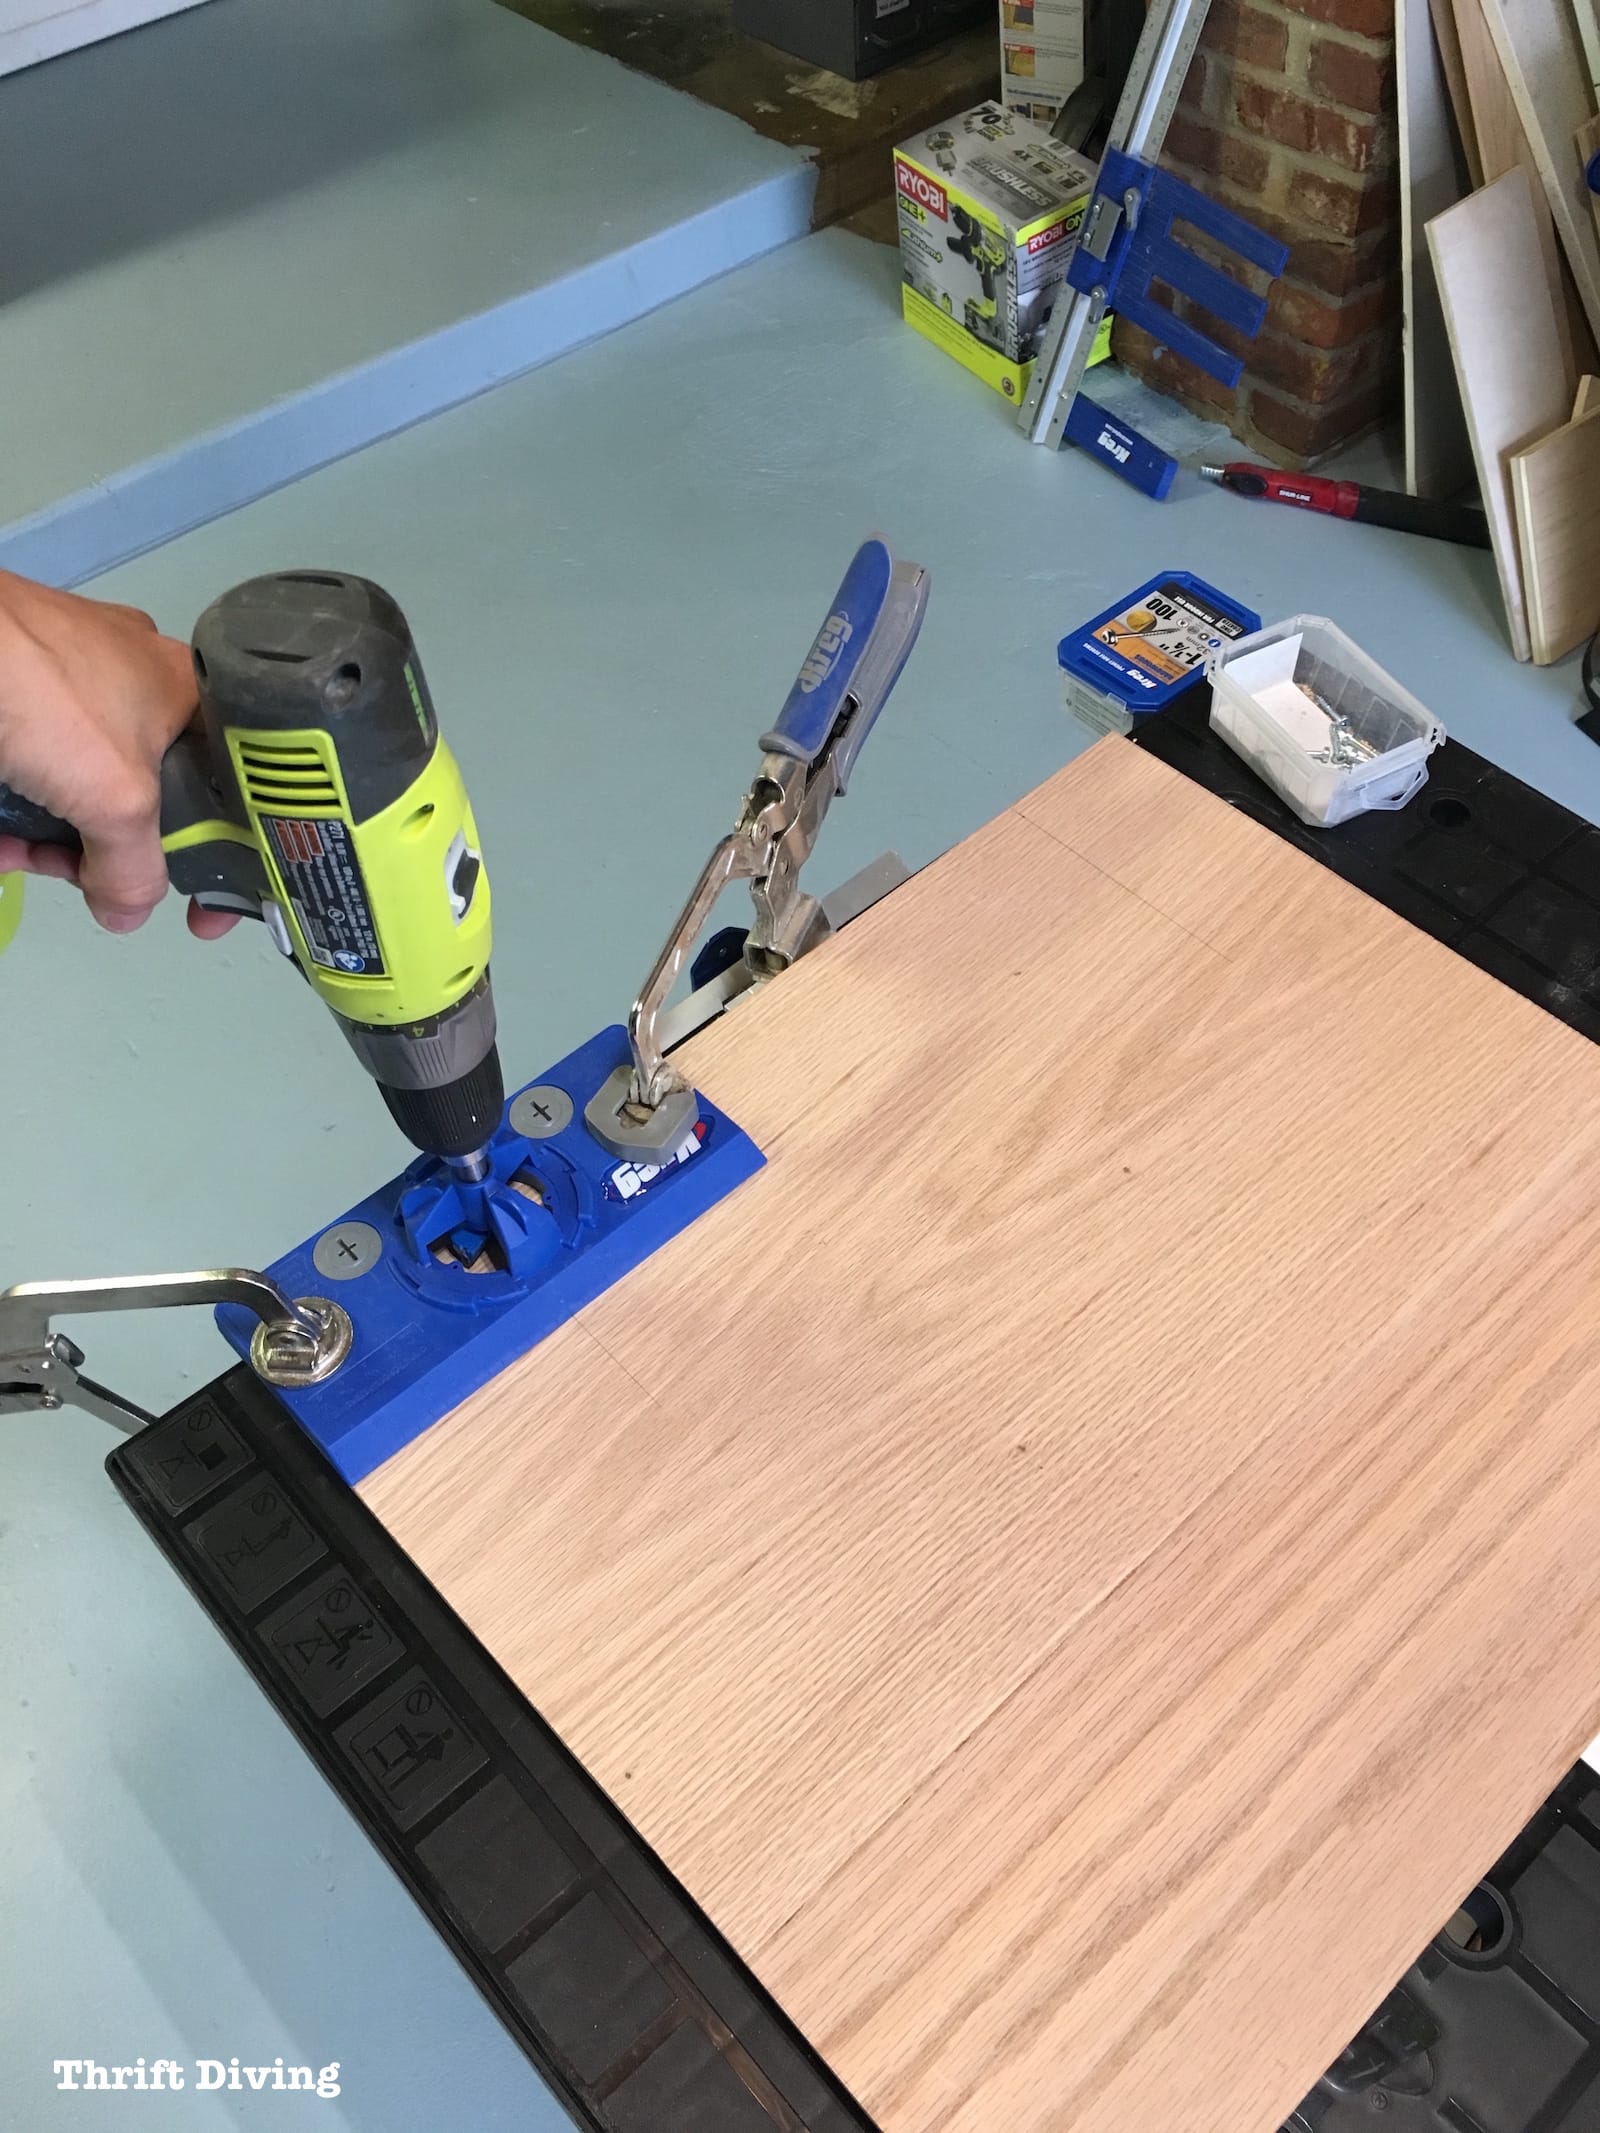
STEP 4: Installing the Cabinet Hinges
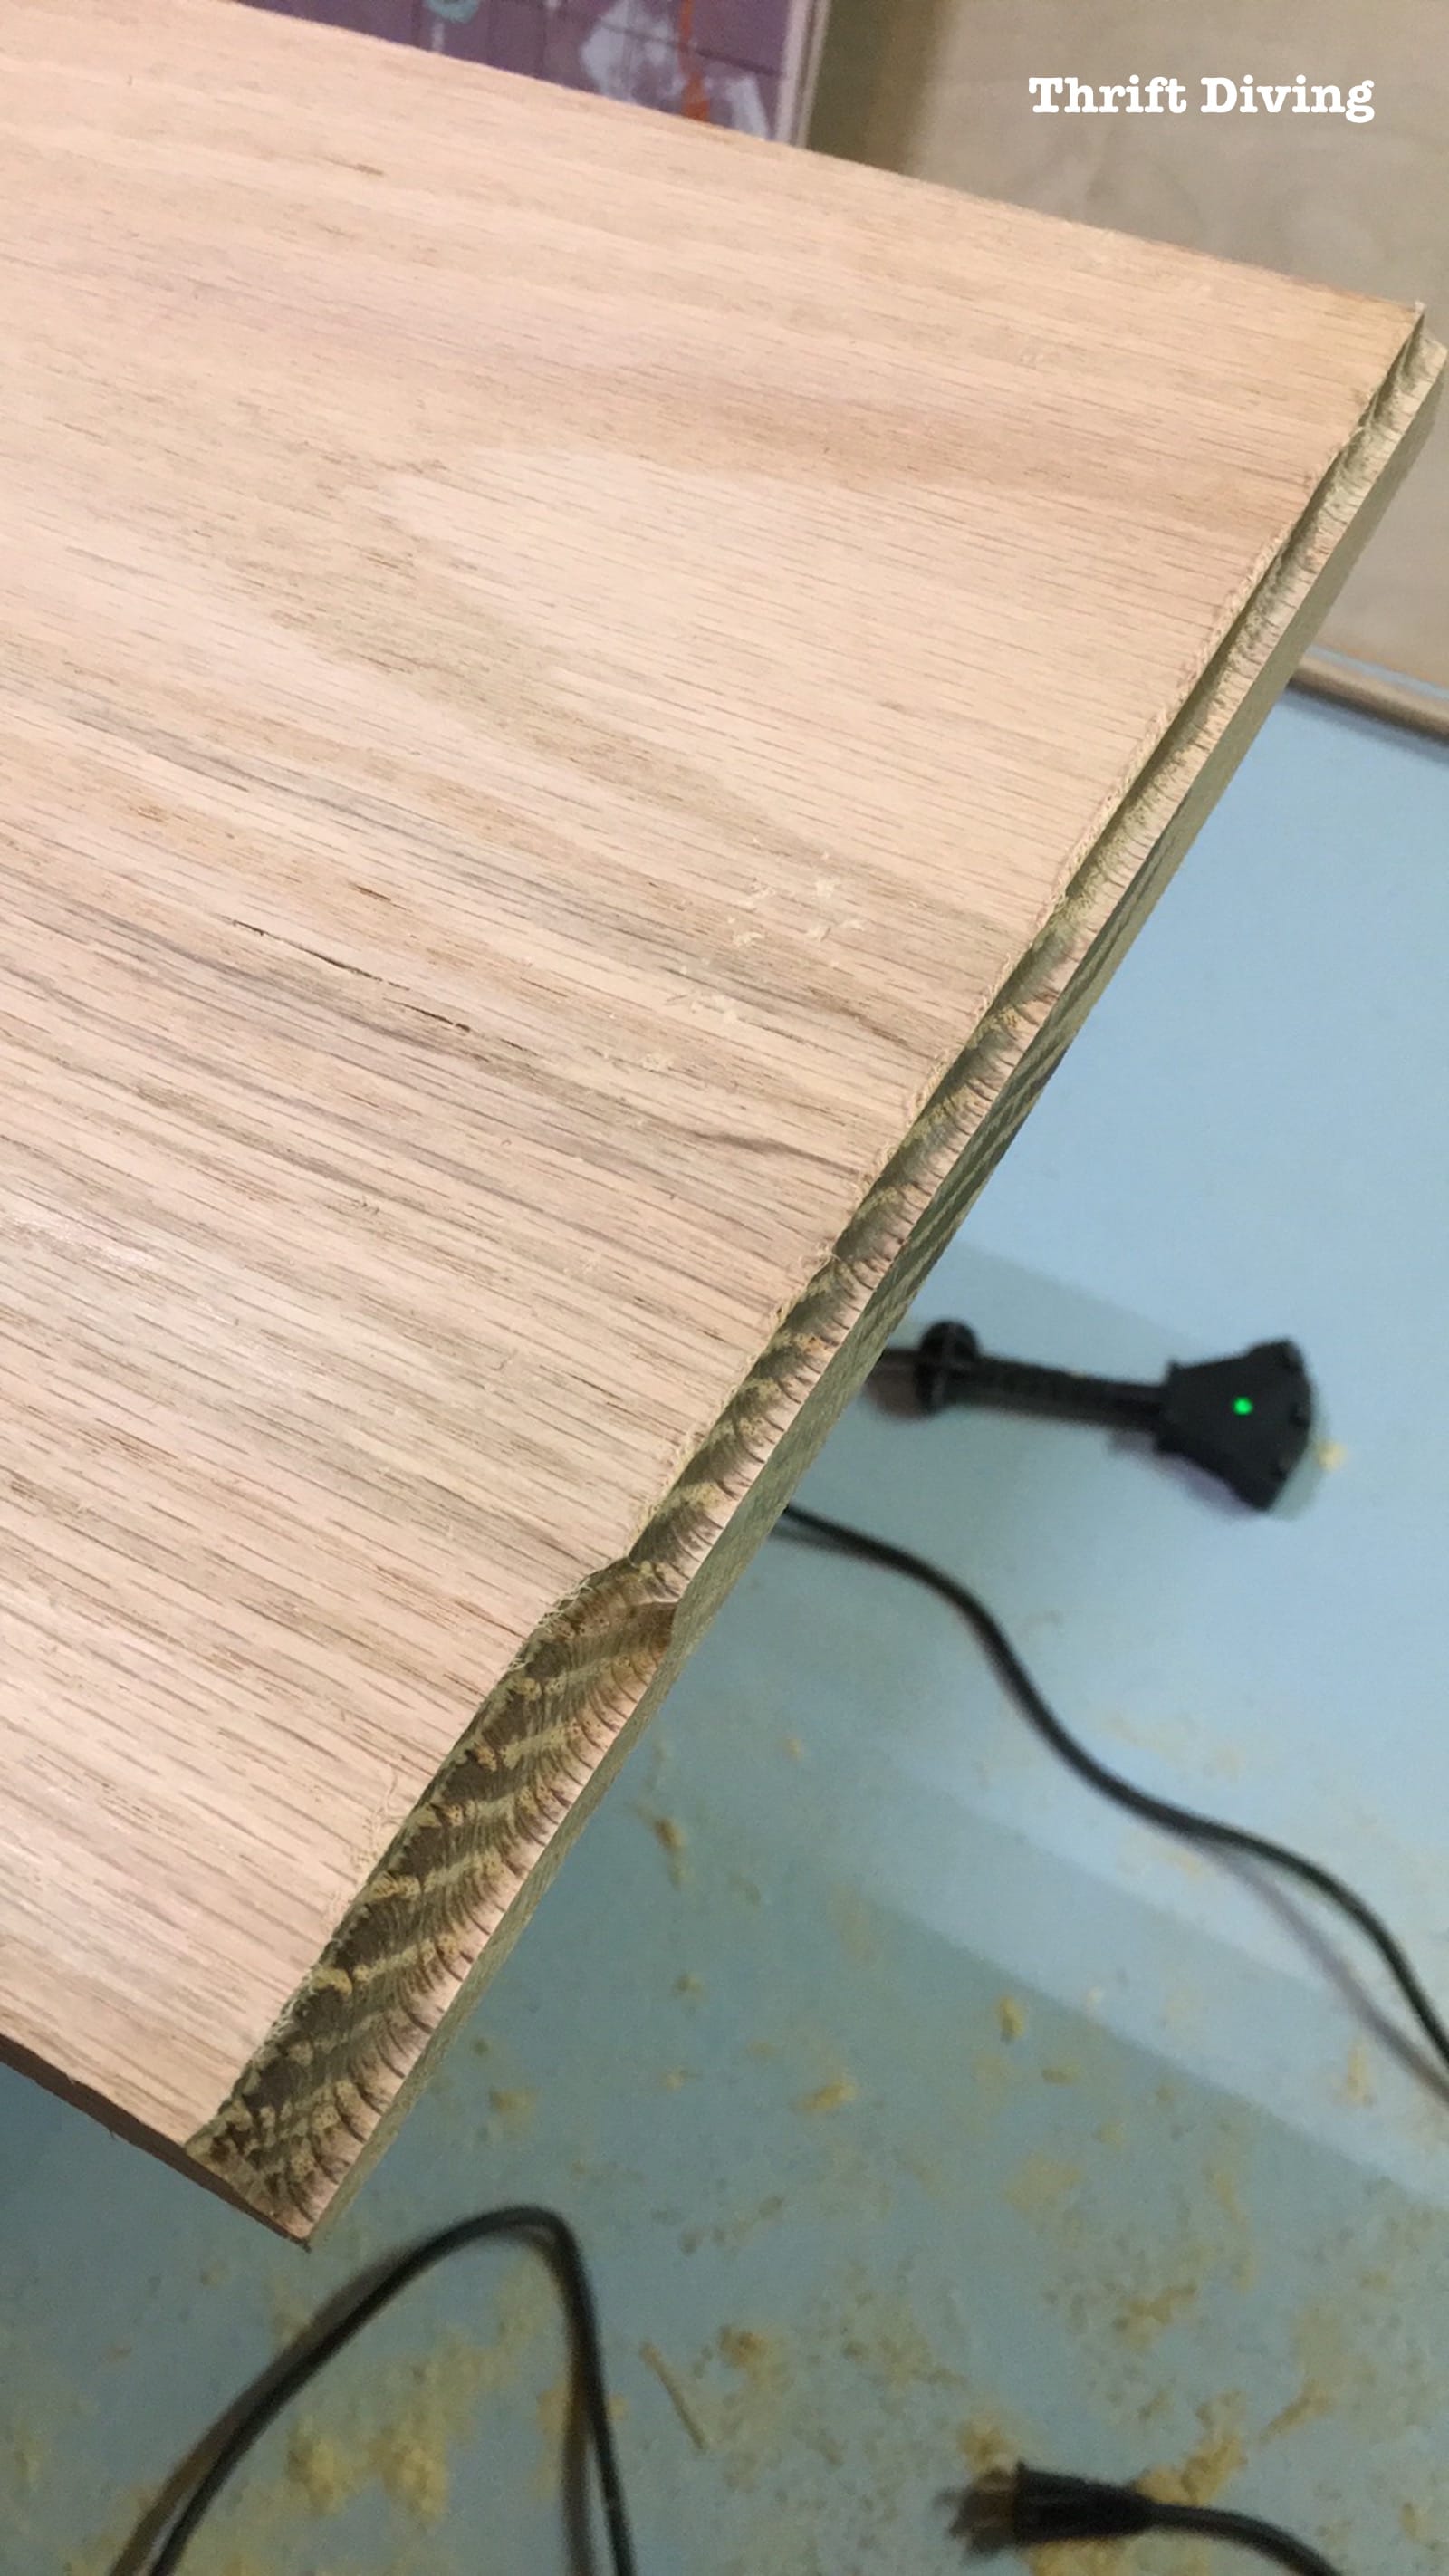
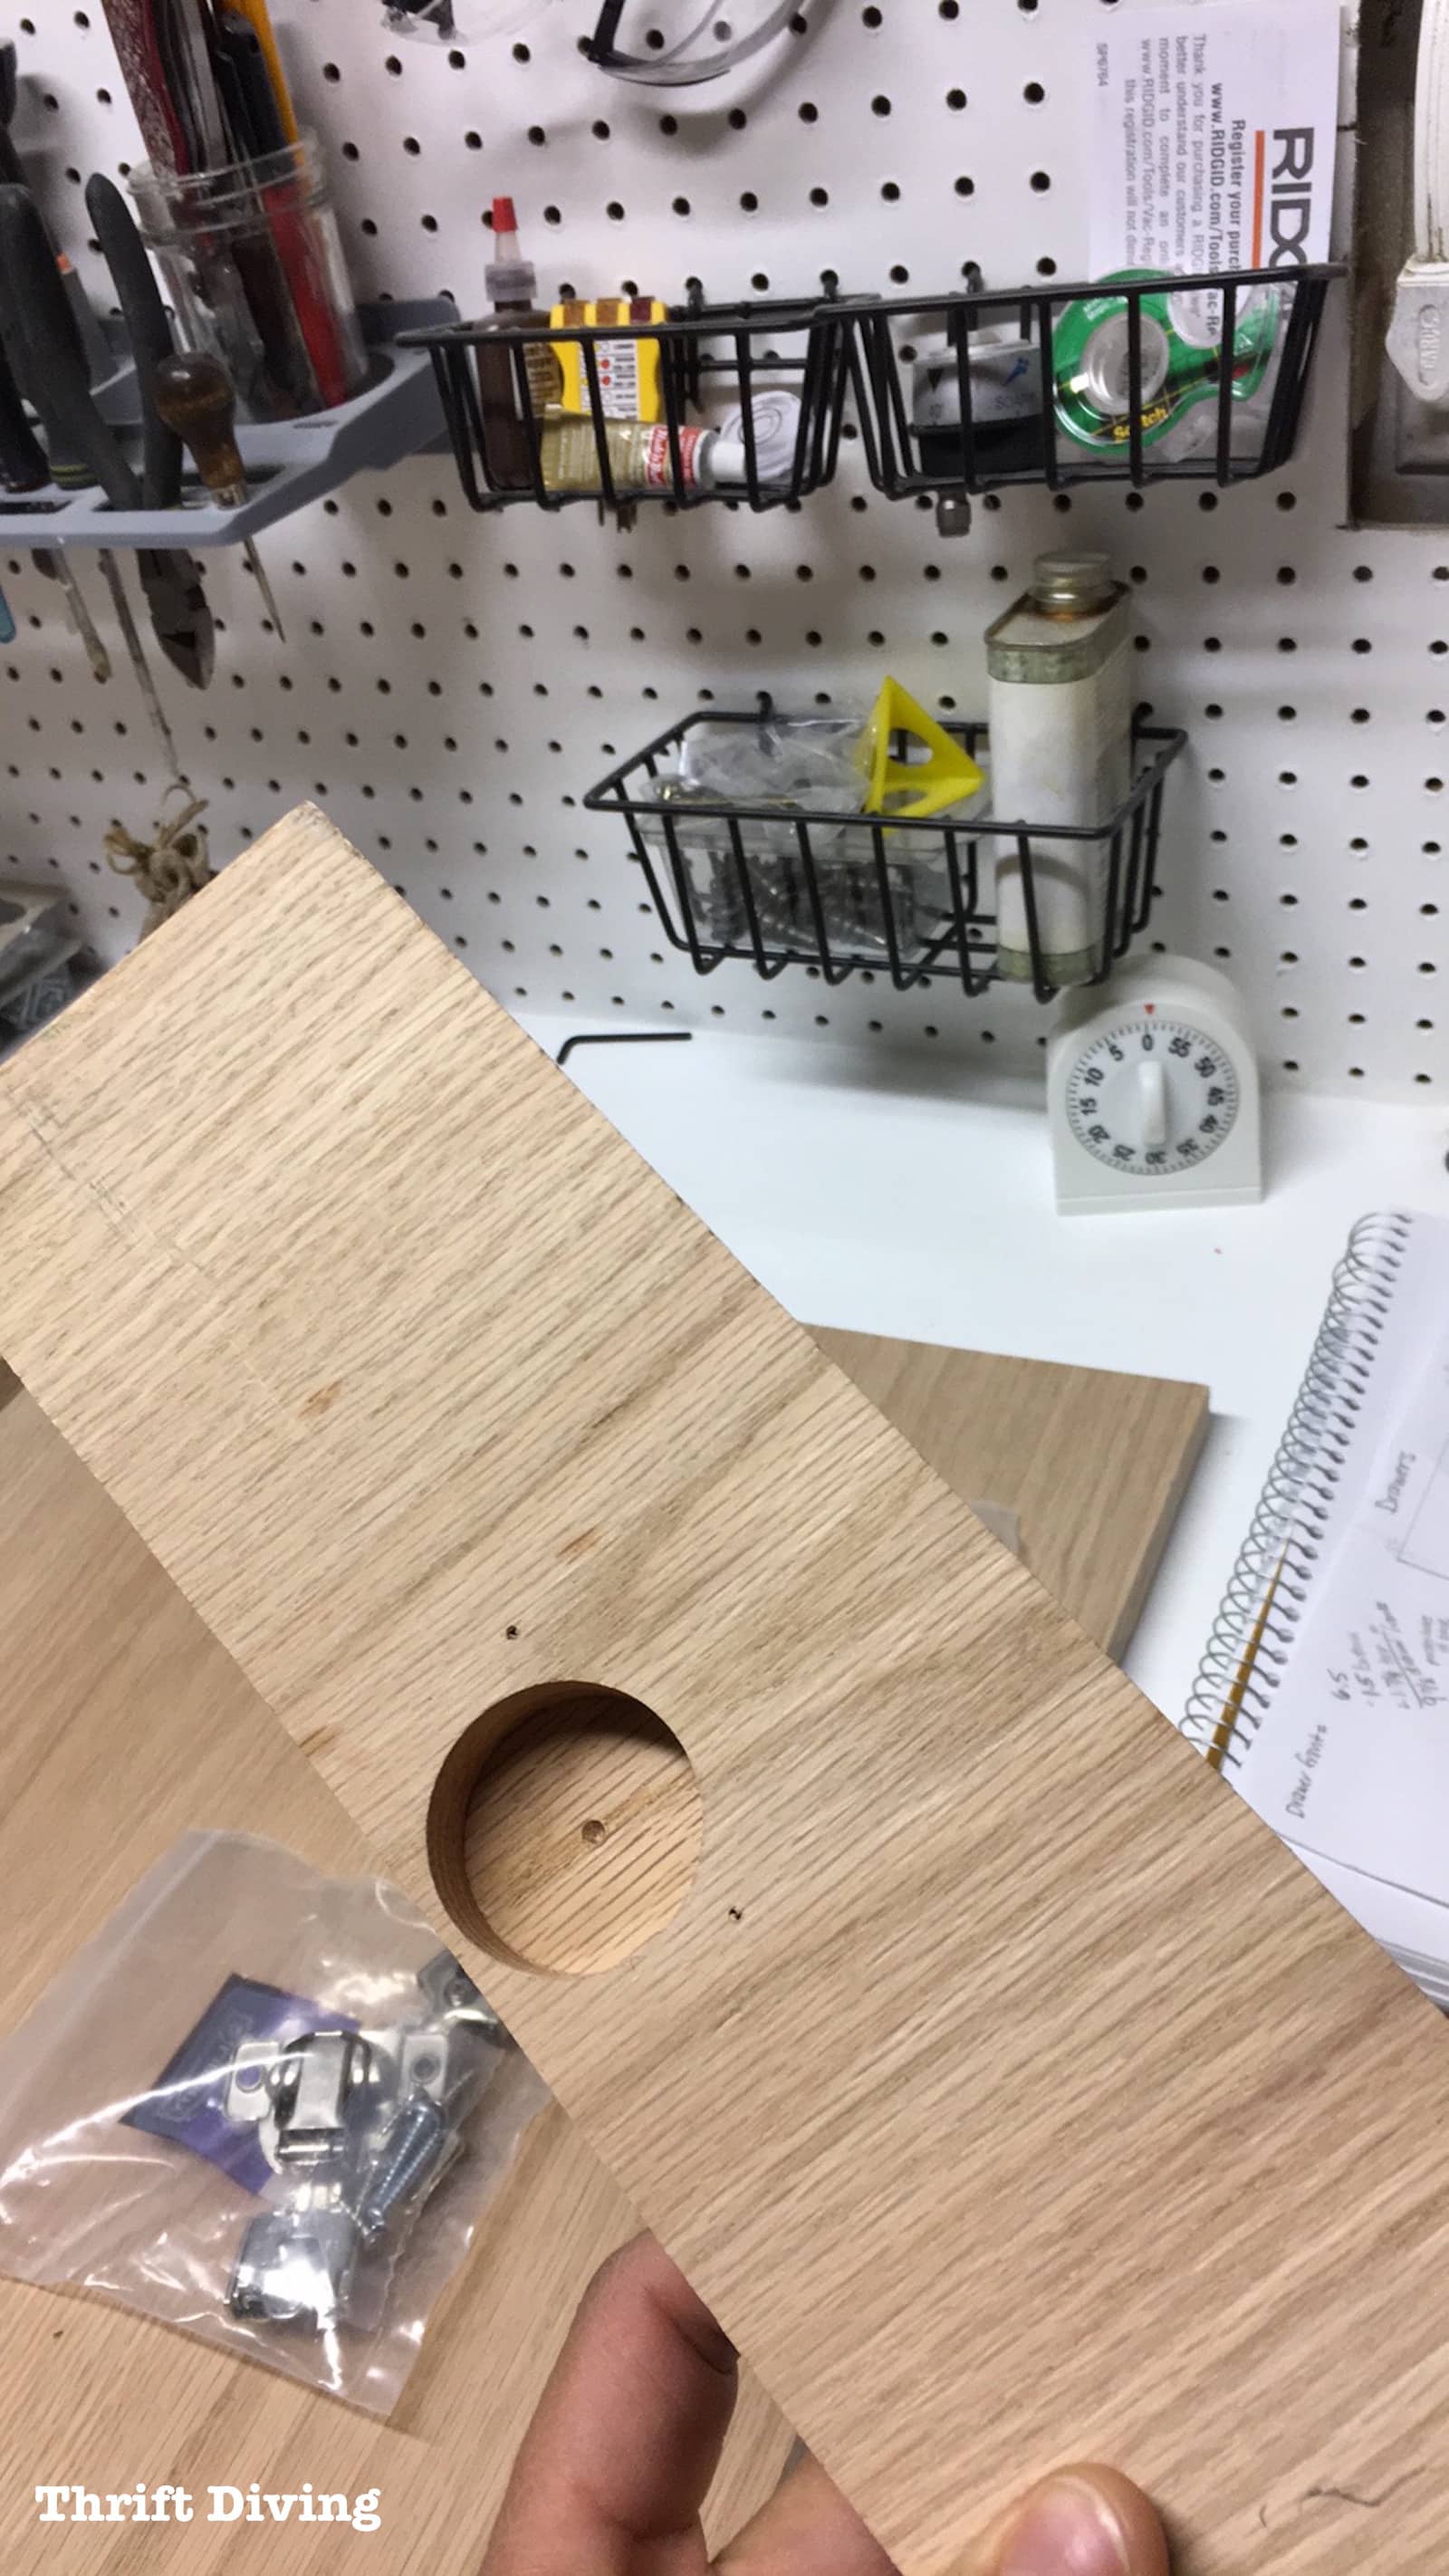
This is where I made a huge boo-boo.
I didn’t realize when I was routing the doors that I should be mindful of how deep I was cutting into those edges.
Why……you ask…?
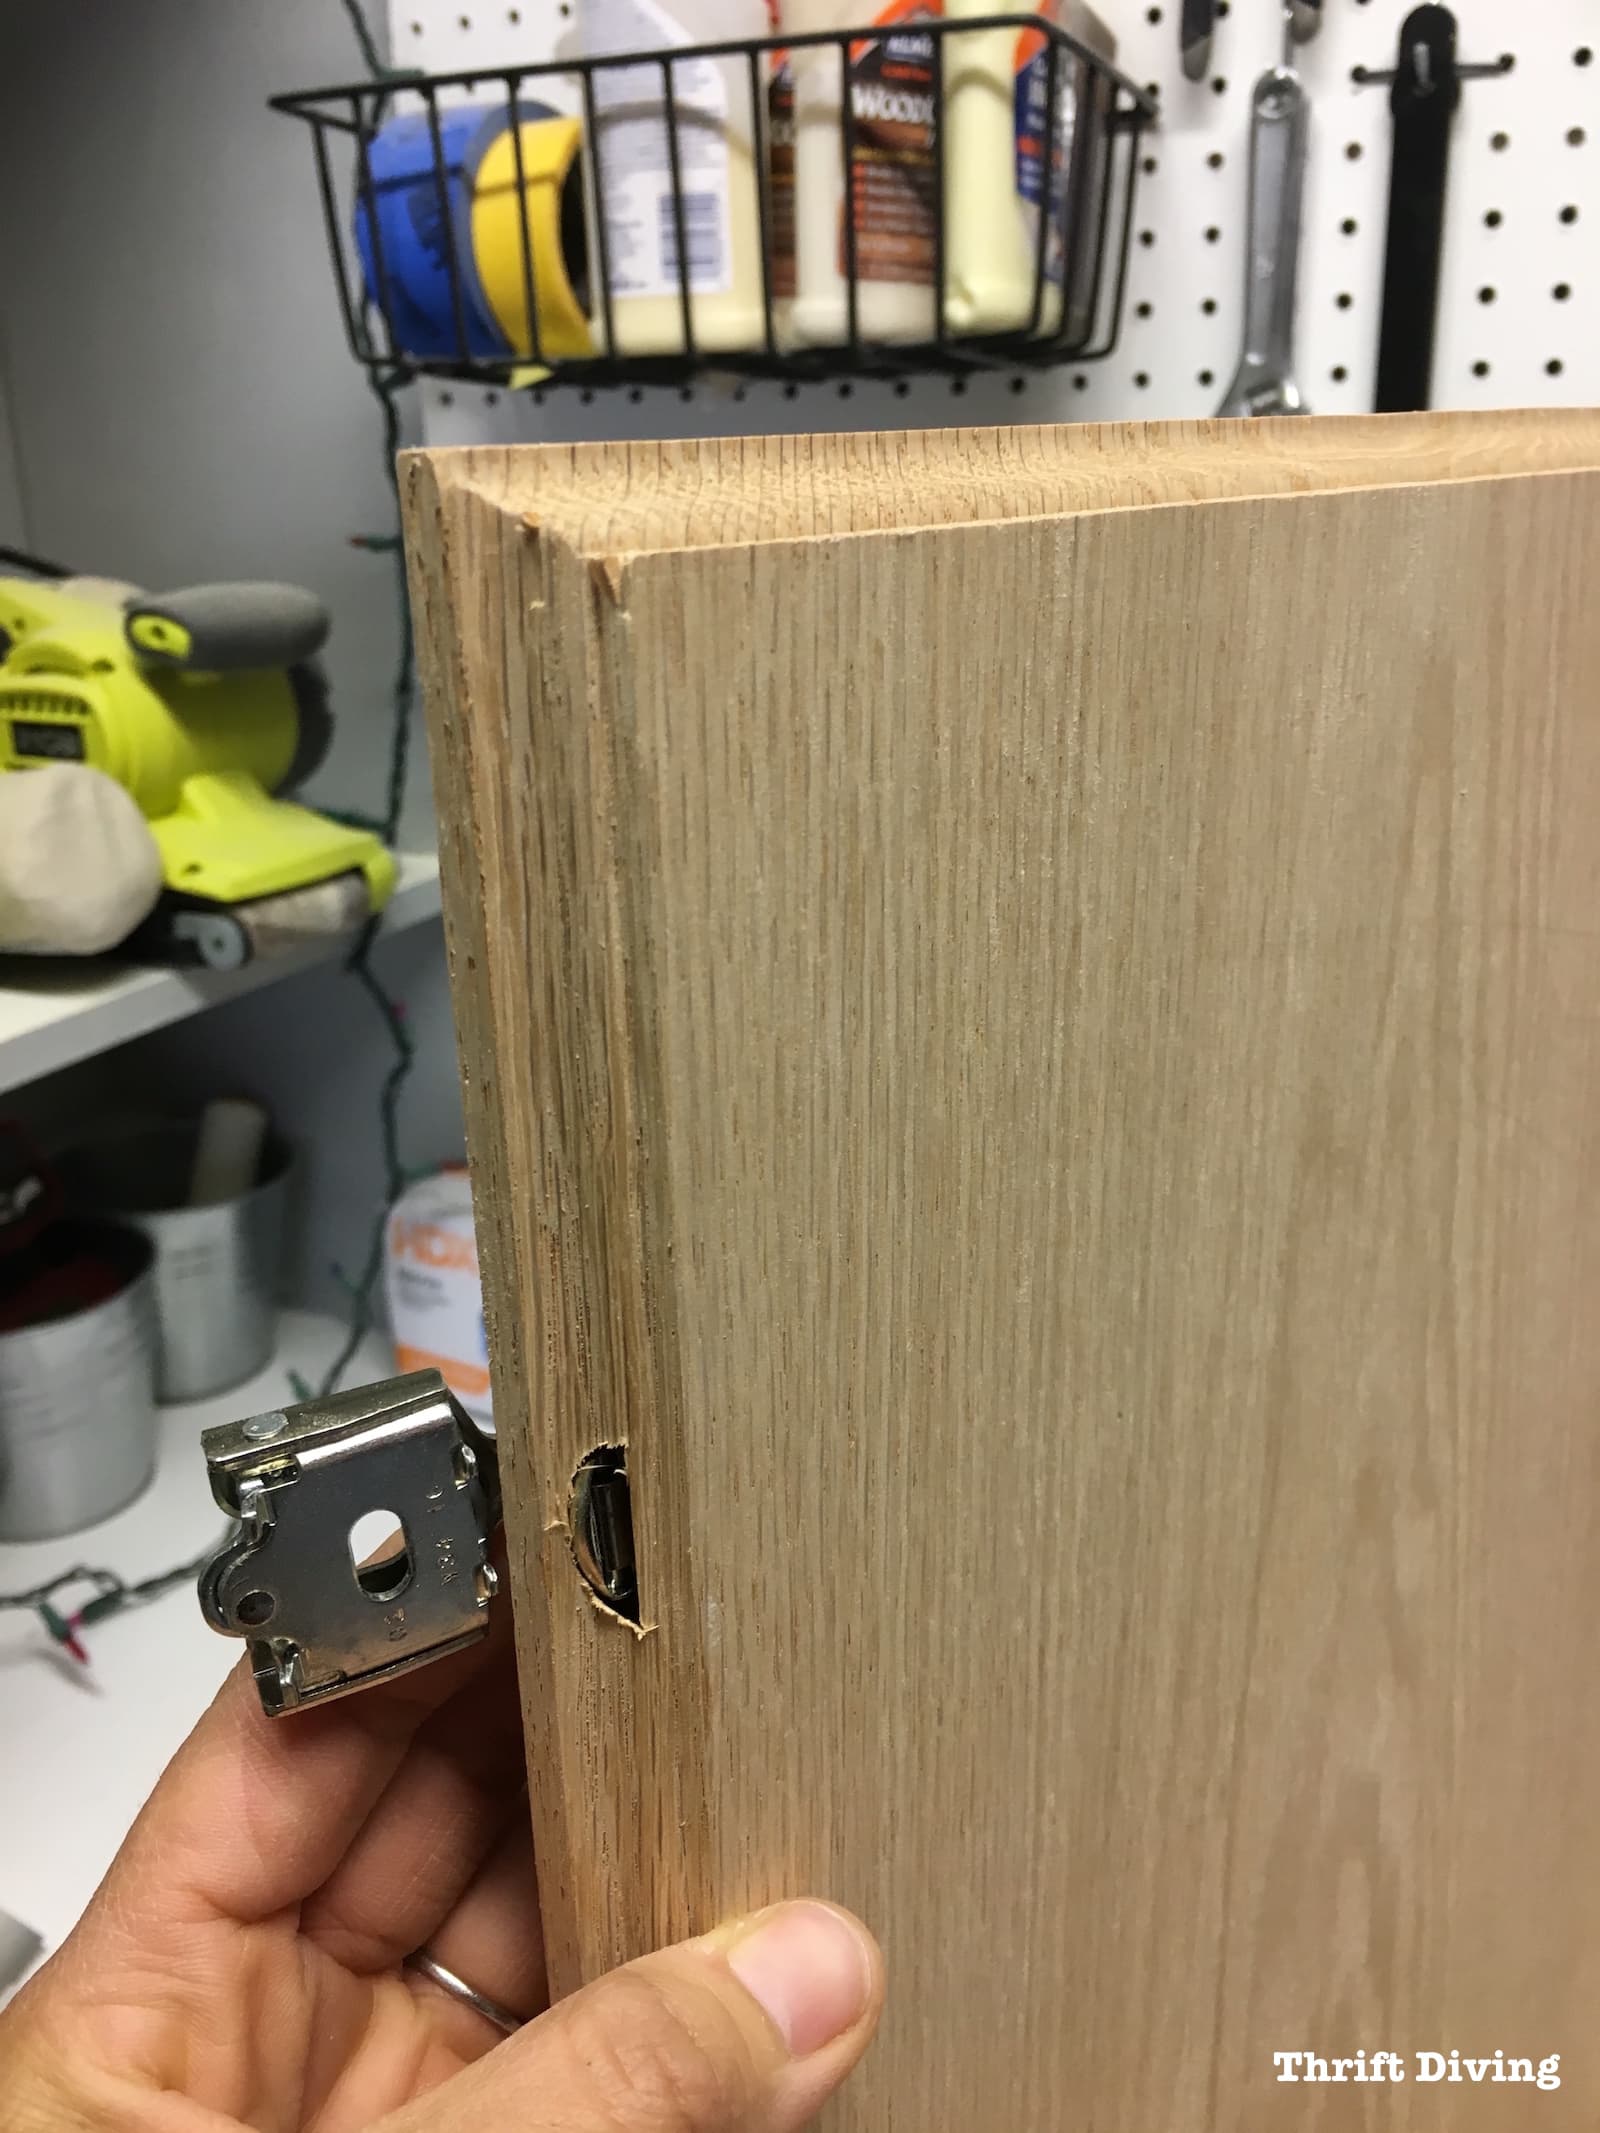
Well, because when you go to install cabinet hinges, most of them mount very close to the edge of the wood, like this:
Then you just plop the hardware in there, screw it down, and you’ve got hinges attached to your doors.
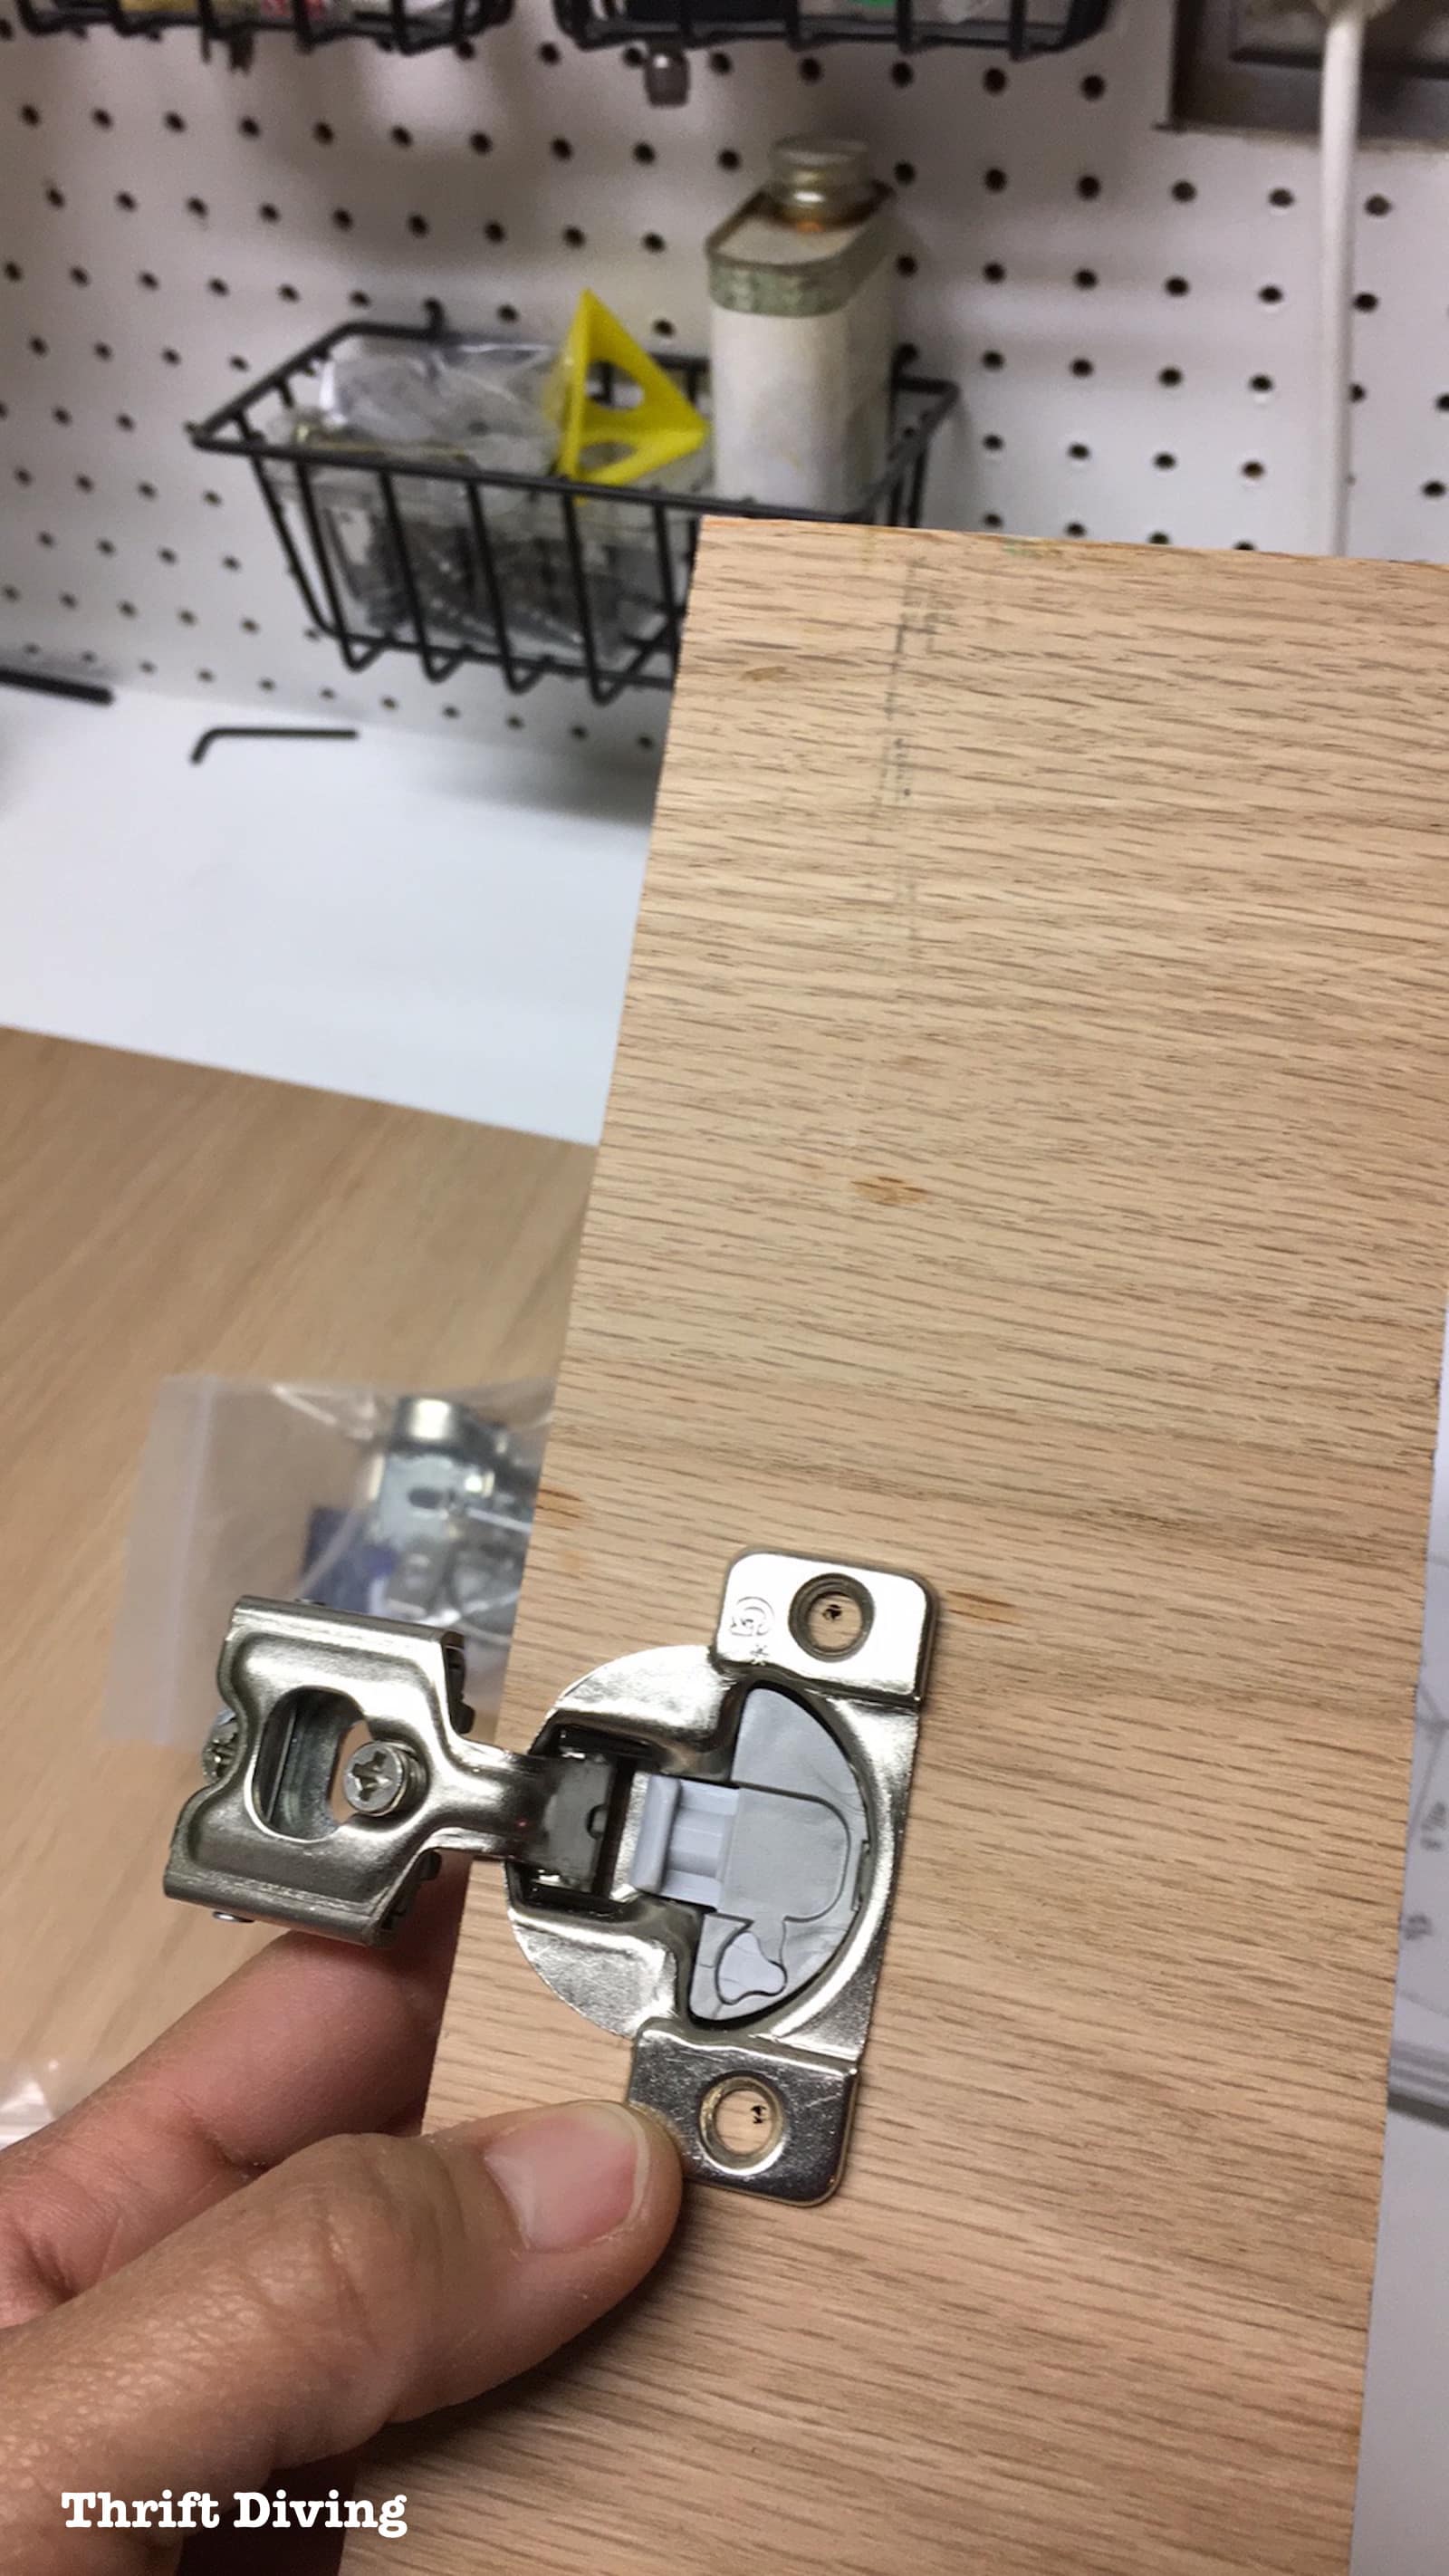
In fact, that is the sample board I practiced on, which turned out beautifully…..
Every step of the way, I practiced on scrap wood so that I didn’t mess up my expensive DIY vanity pieces.
This Kreg Concealed Hinge Jig made is super easy to create!
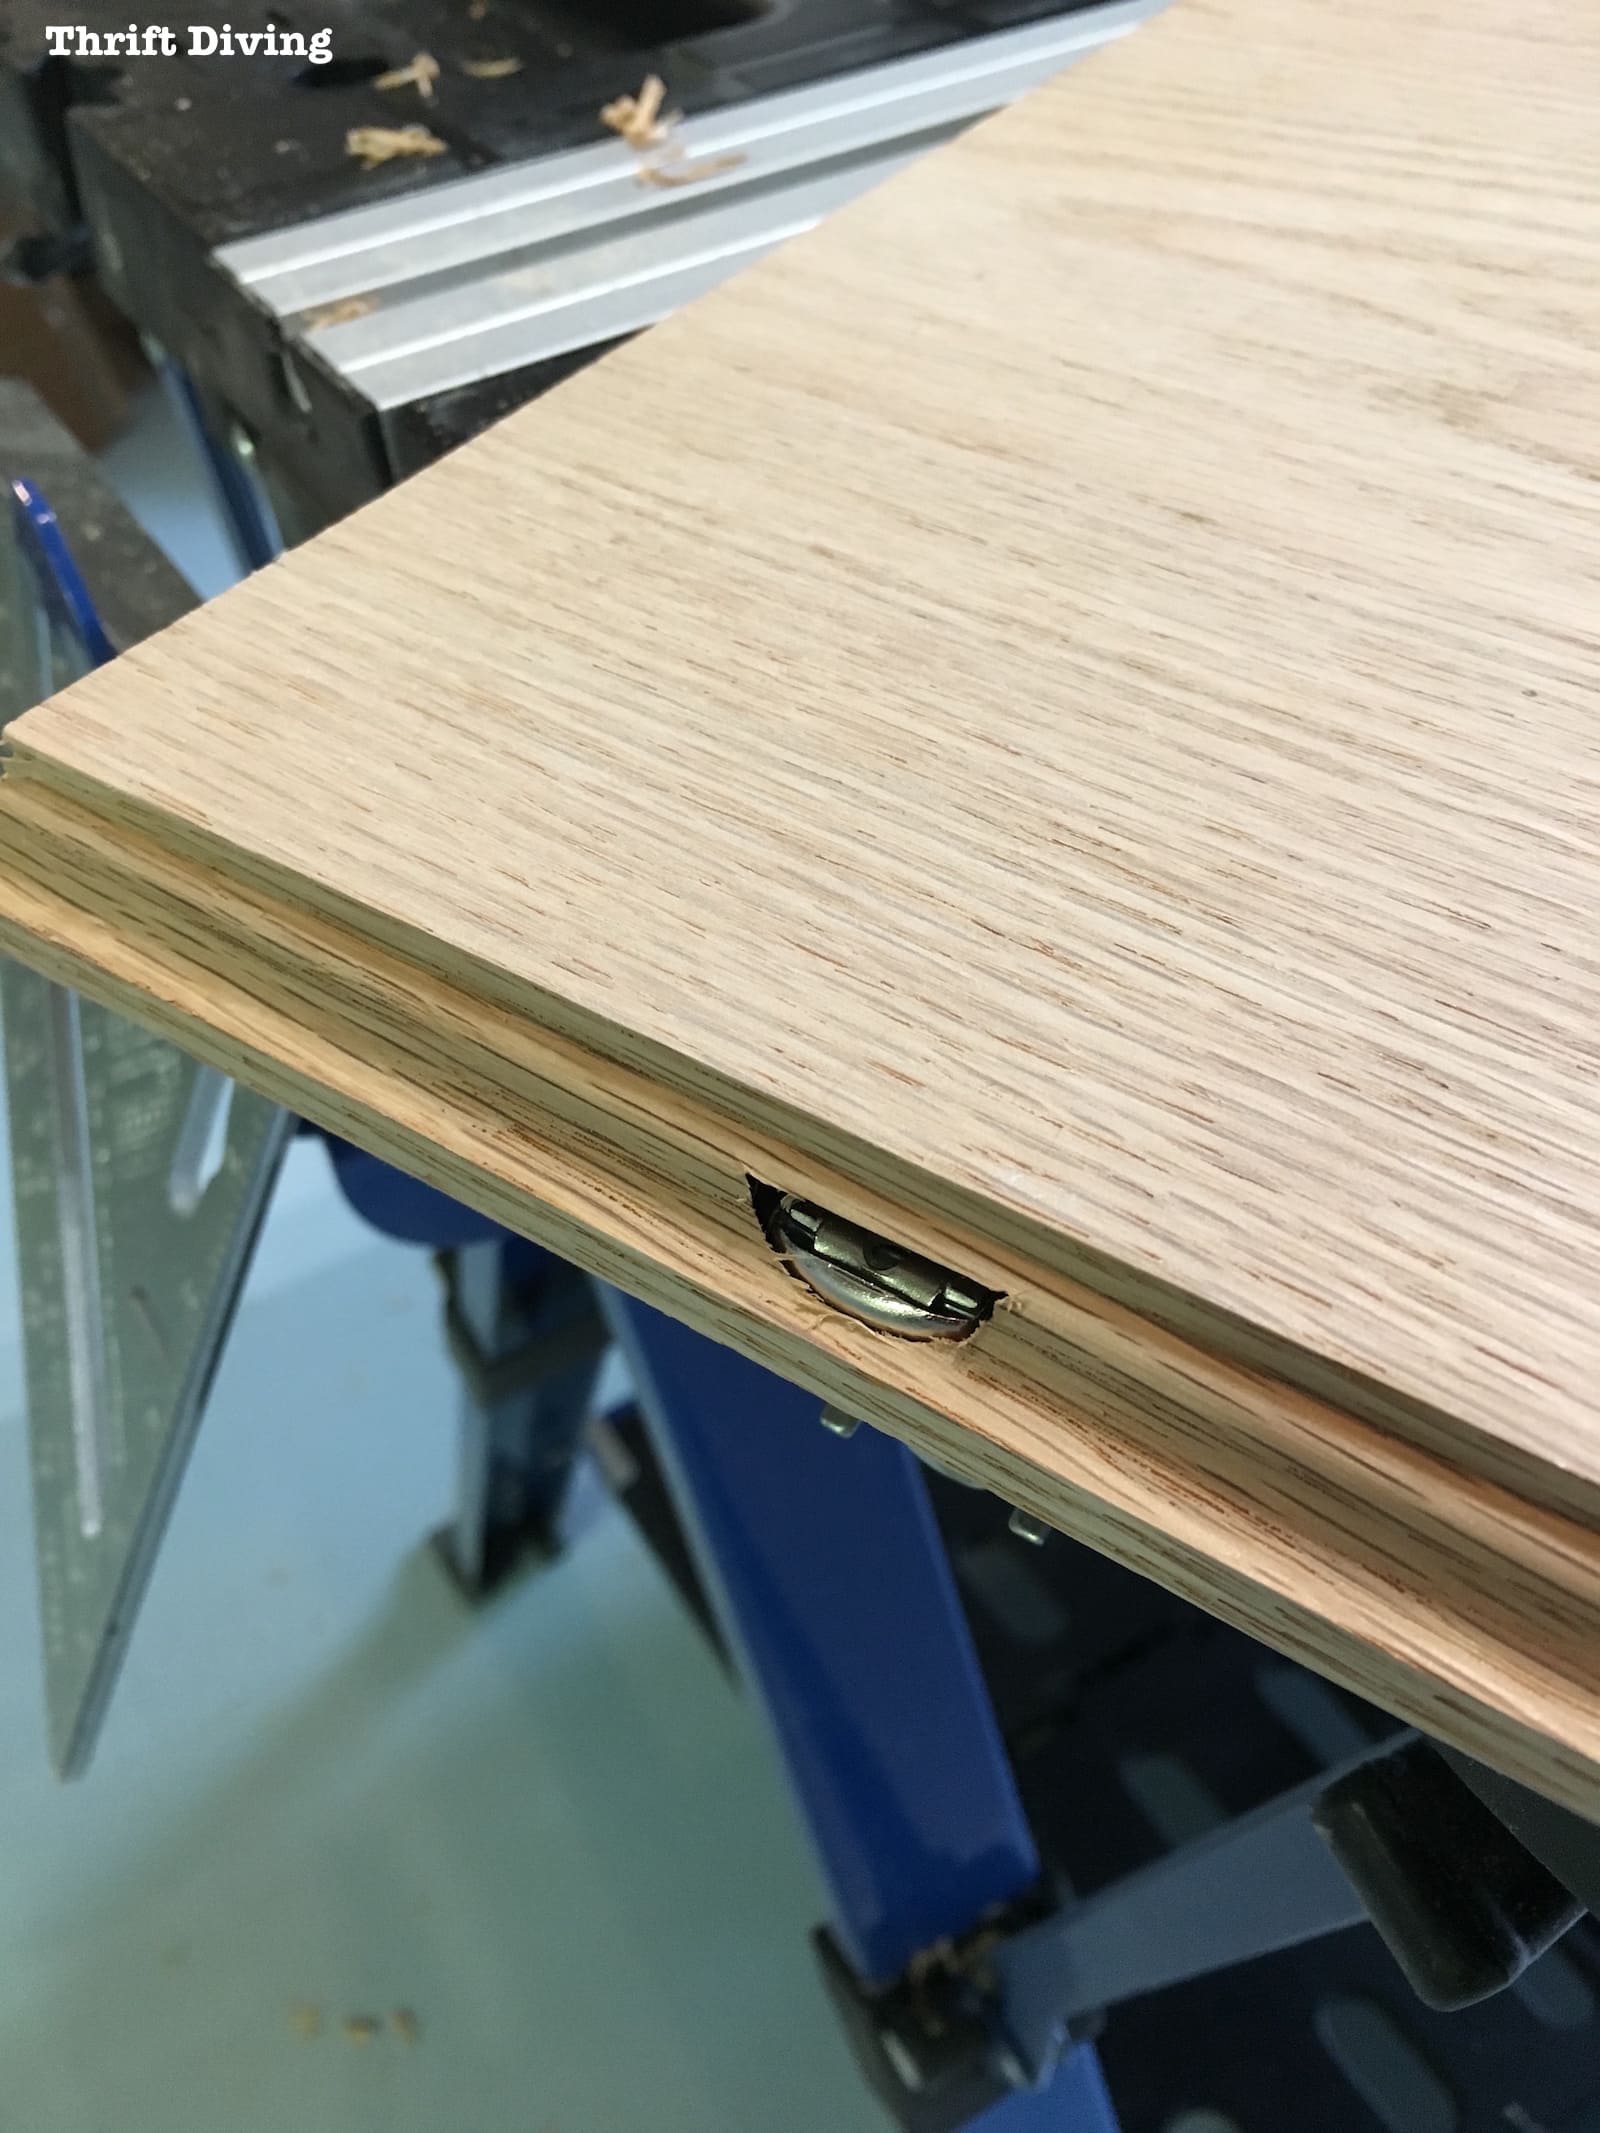
But what I didn’t realize is that the scrap wood I was practicing on didn’t have routed edges. So after practicing on it, I assumed everything was okay to proceed on my “good” cabinet doors.
Uh-Oh, We Have a Problem…
But here’s where the problem occurred on my good pieces:
When I ran my good pieces of cabinet door through the router, creating these pretty cabinet door edges…
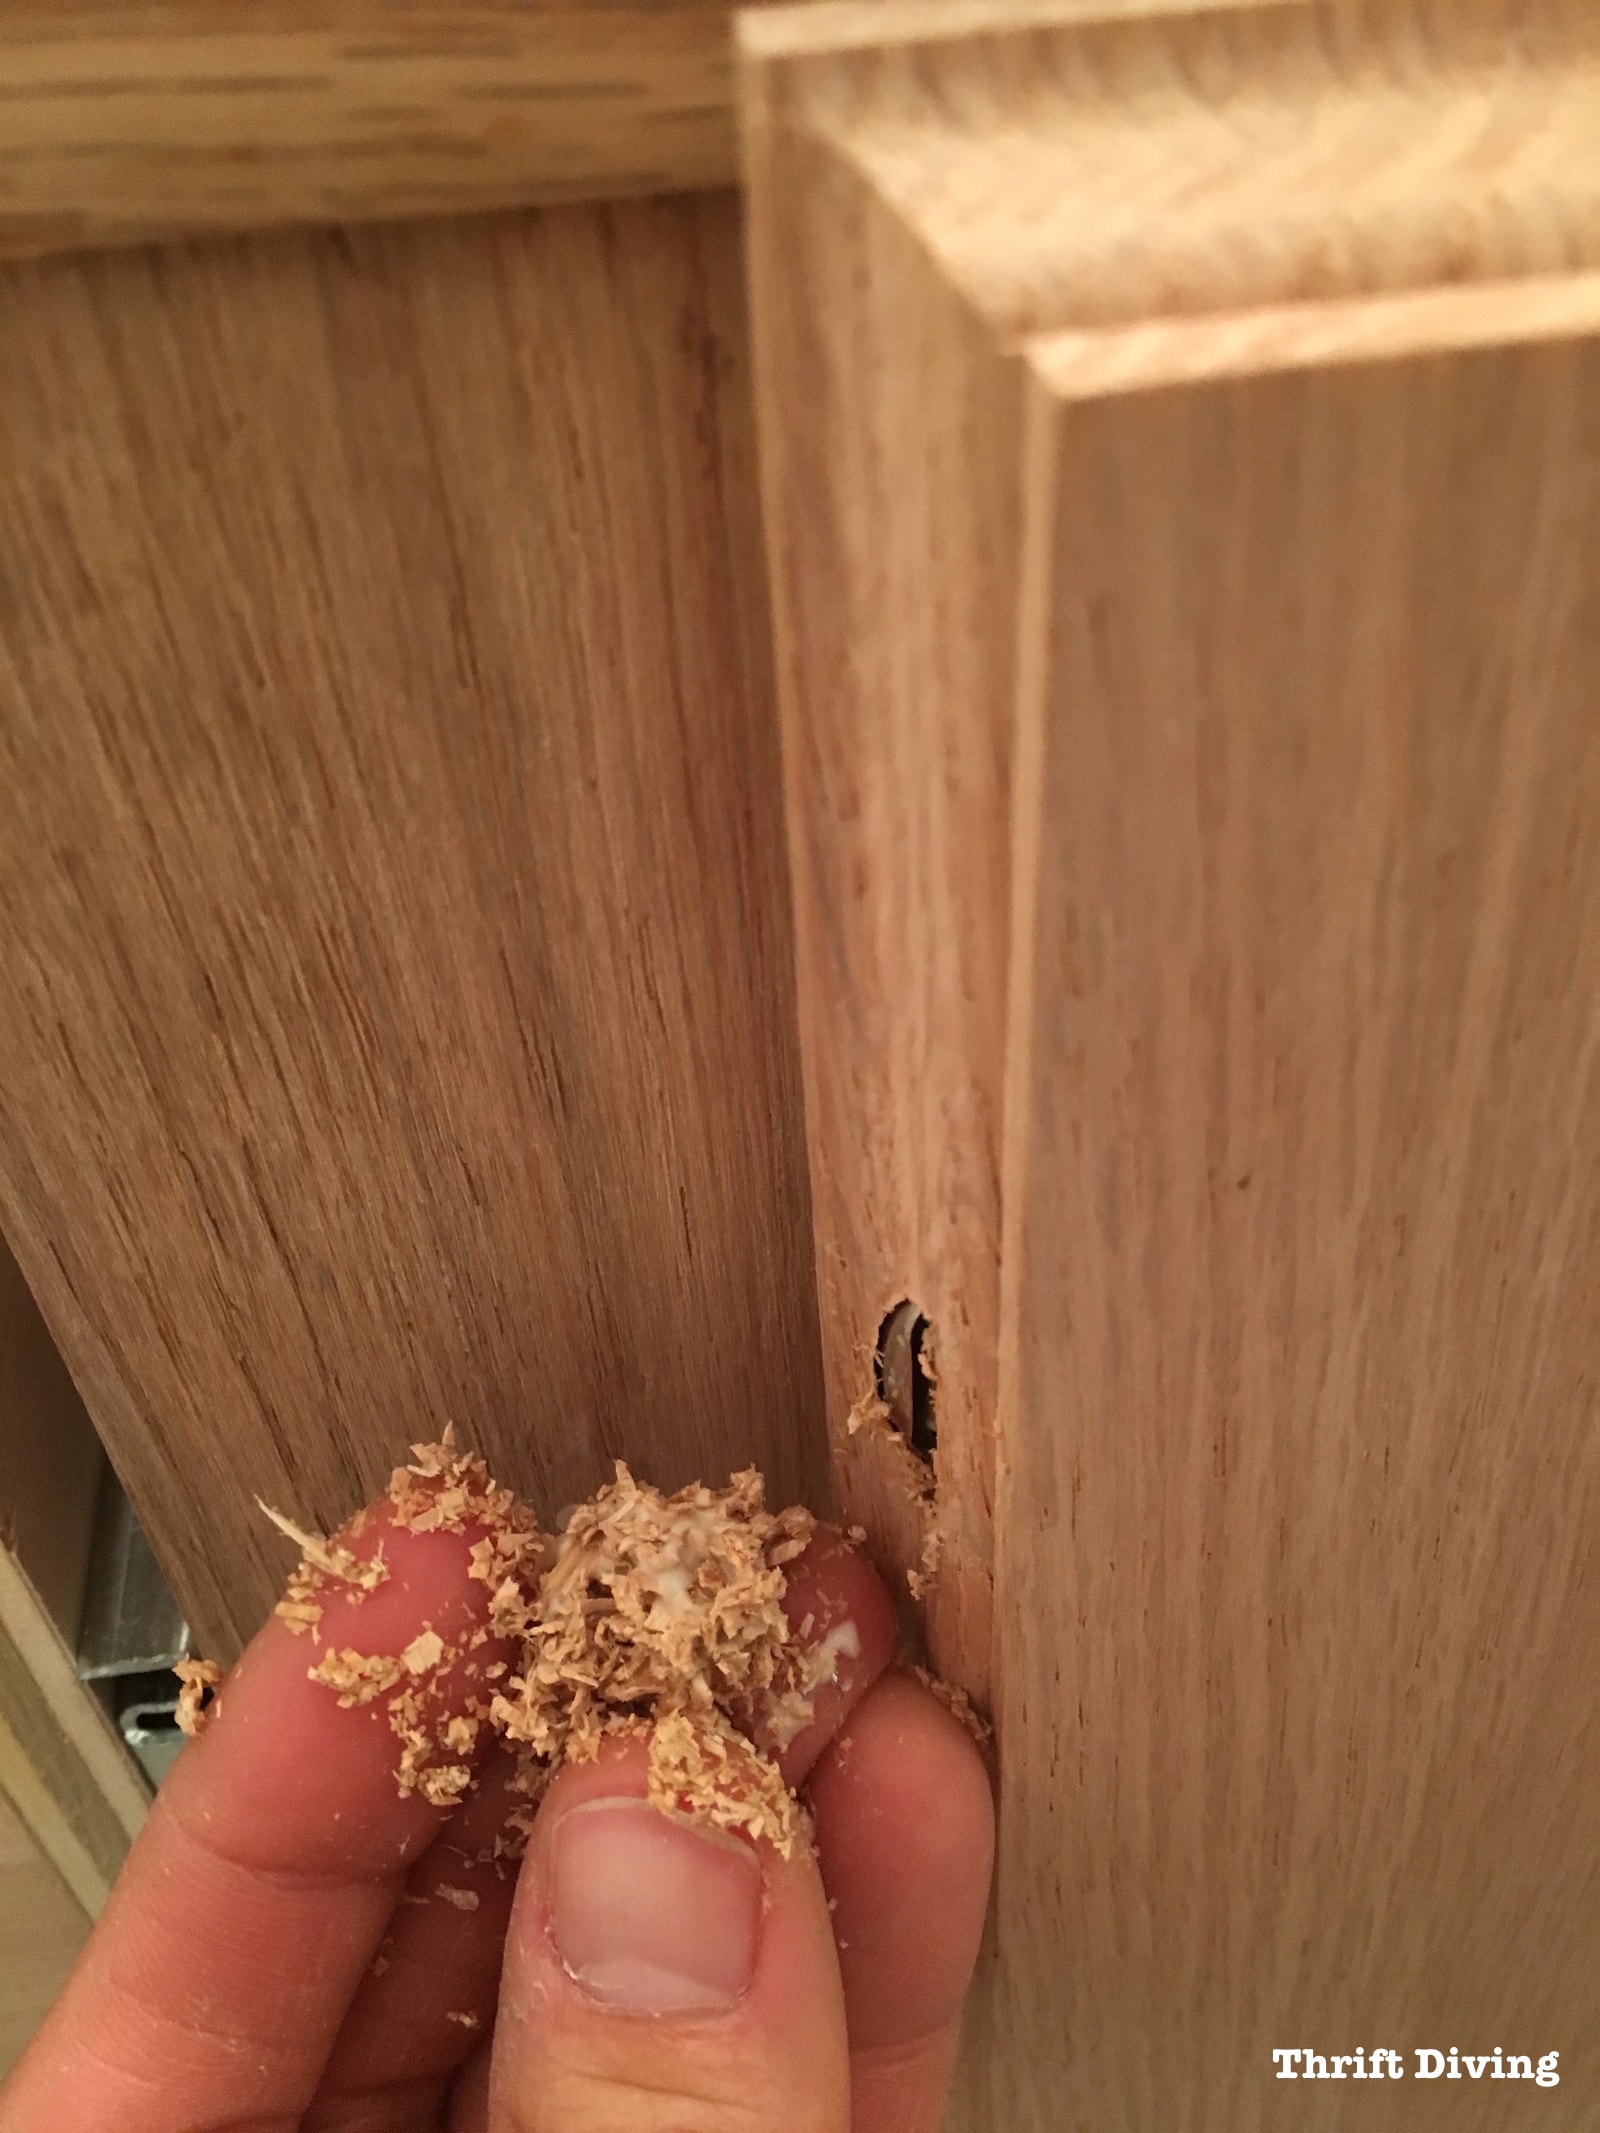
…little did I know that when I would drill for the cabinet hinges on the back side of those cabinet doors…
…that I would end up with a HOLE because I had routed out part of the area that the cabinet hinge would have needed to attached!I had
Yikes!
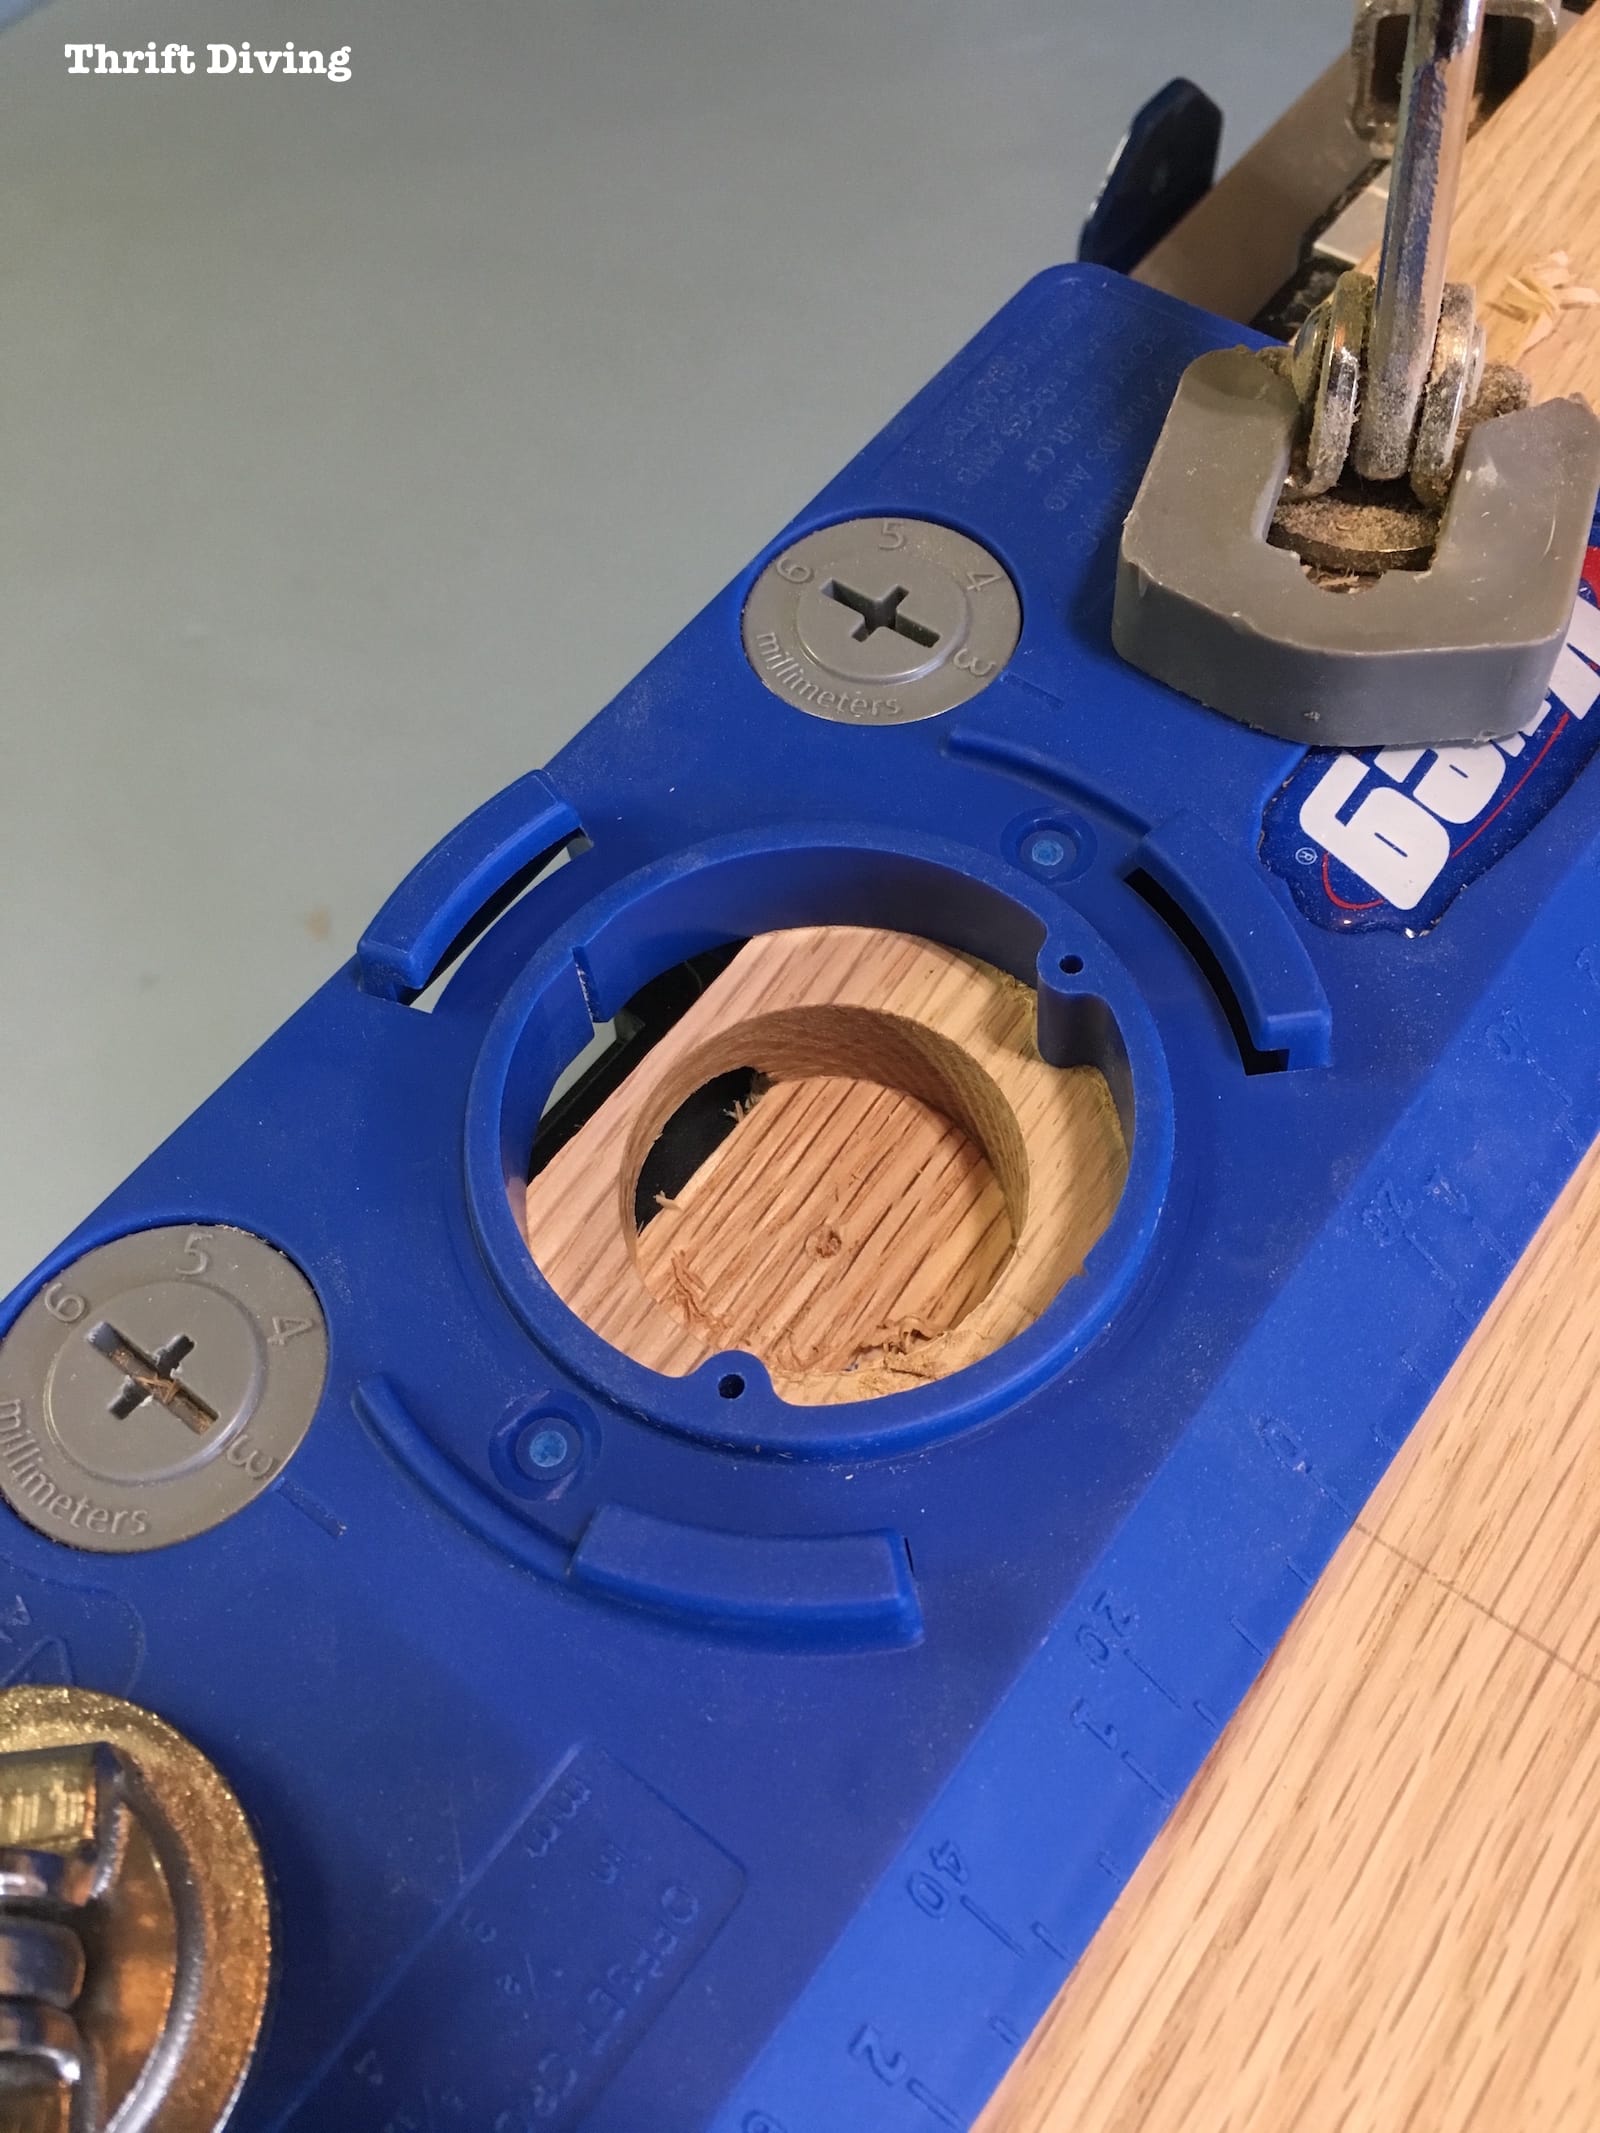
I was left with an ugly hole that would leave my cabinet hinge exposed.
Just kick me now….
(Note to self: Always check your depth when routing on cabinet doors that need hinges, Serena….).
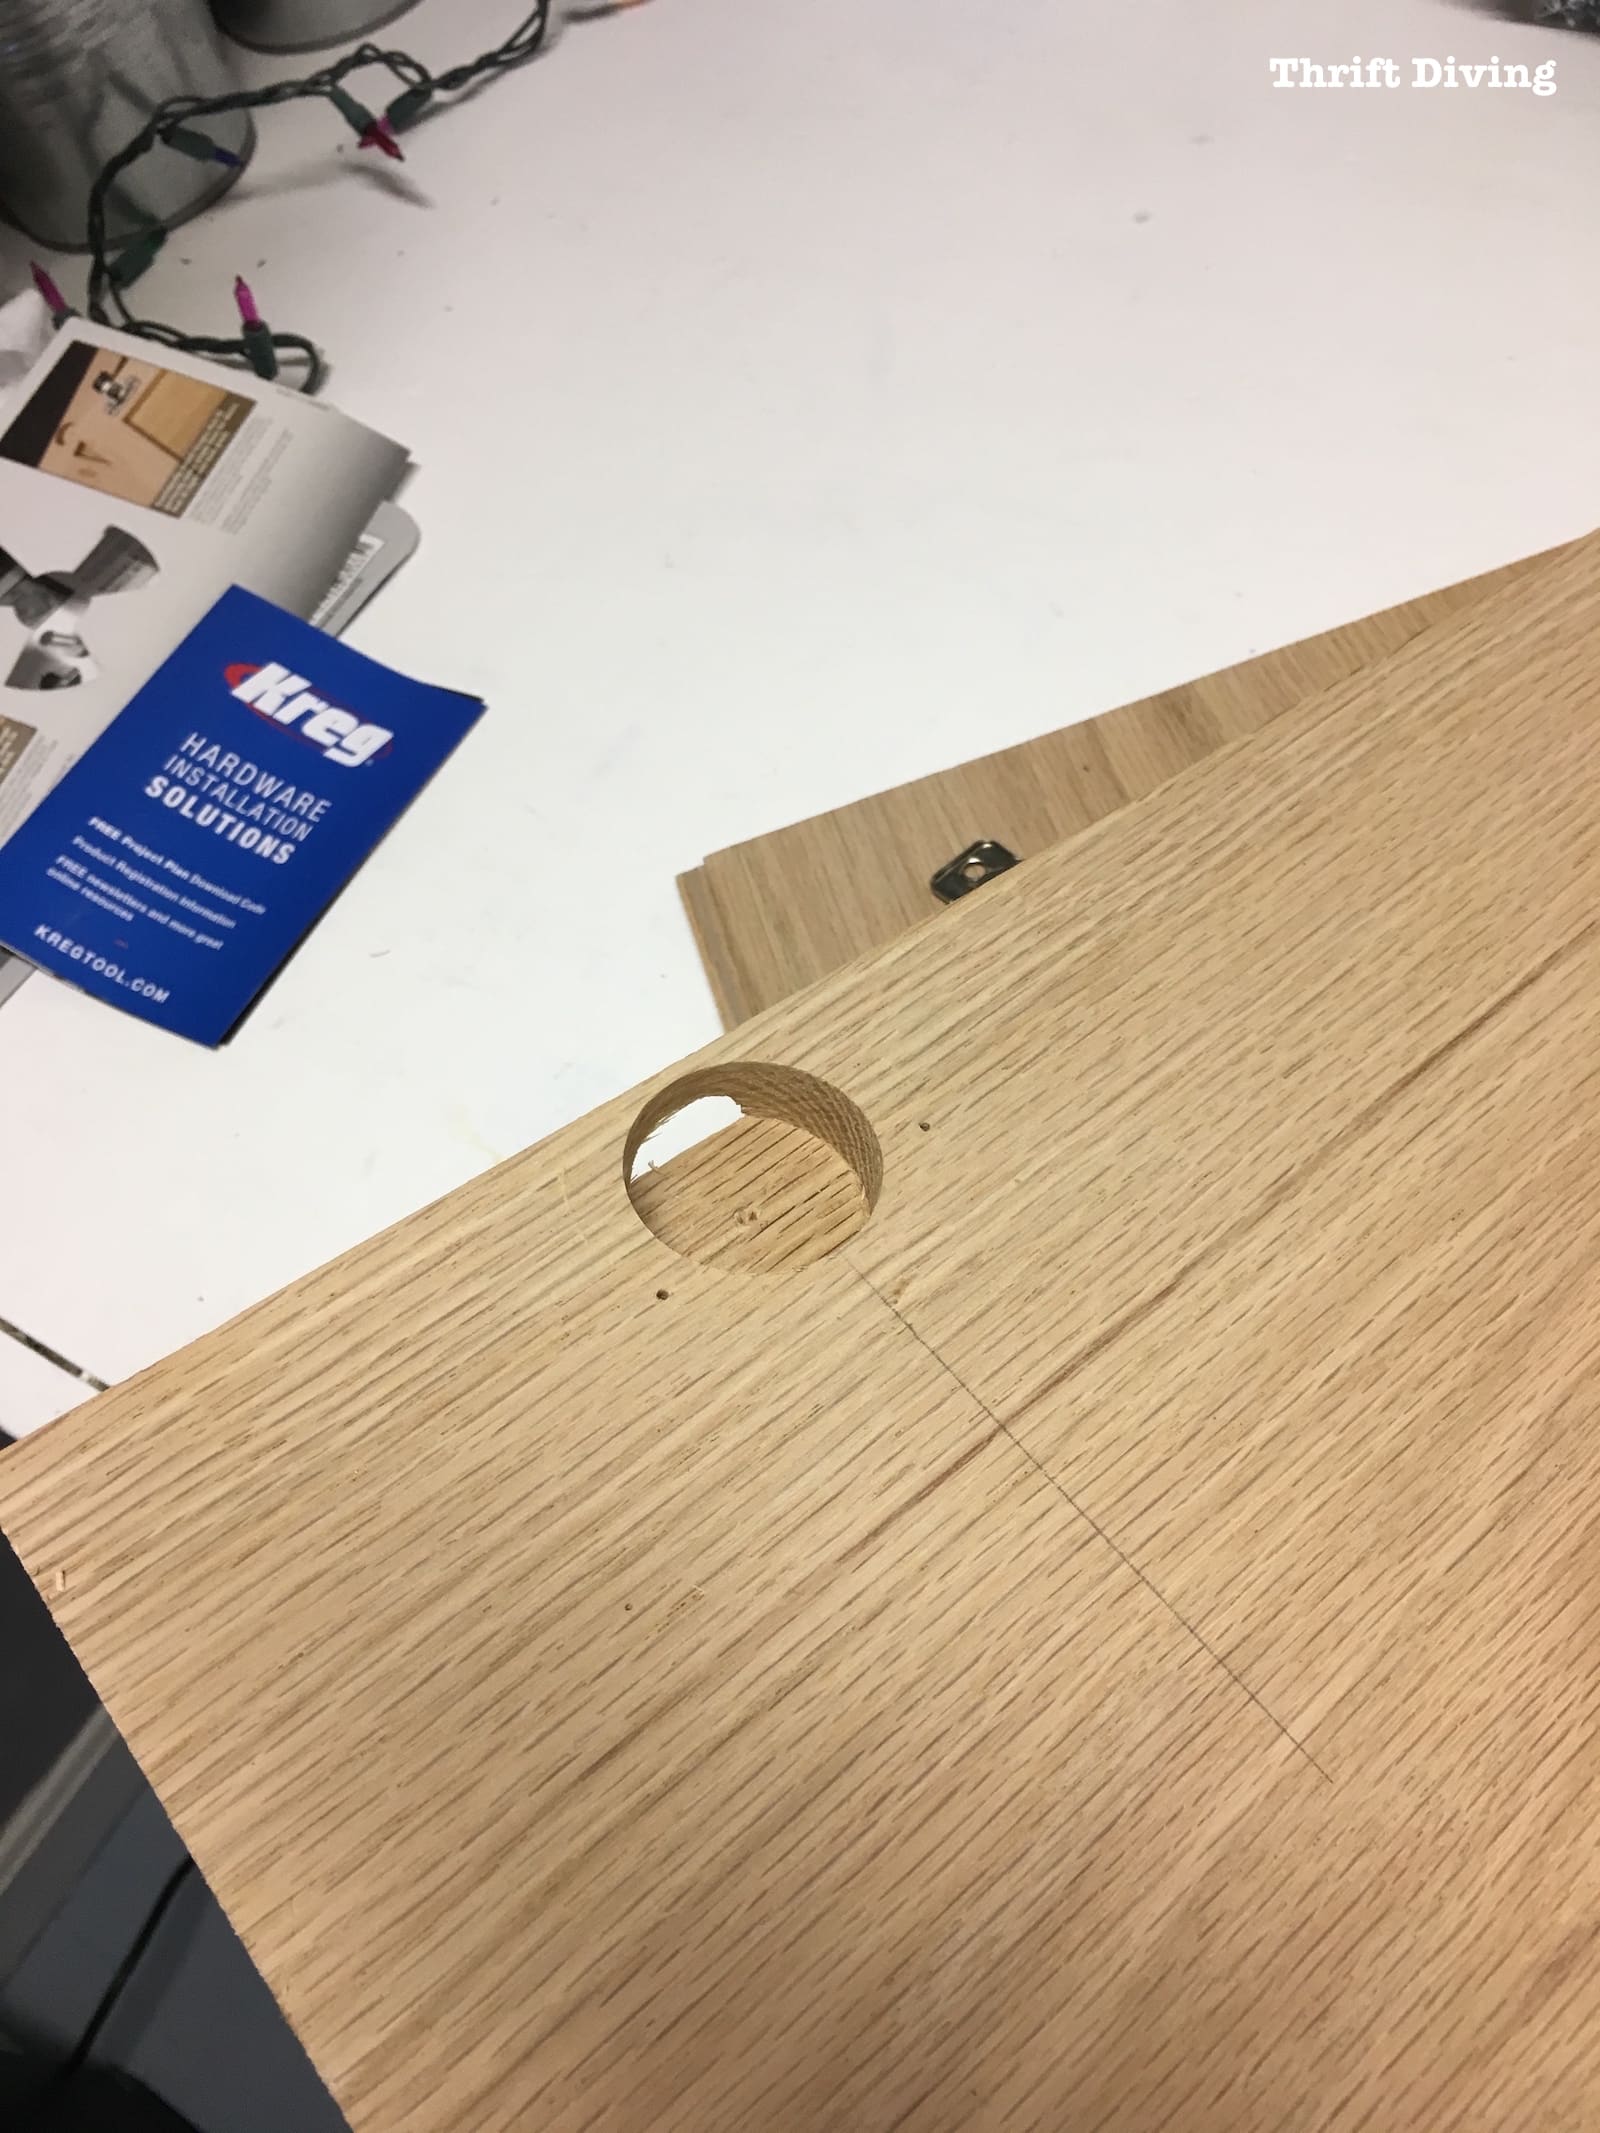
Sure enough…you can see metal peeking through…
(insert forehead slap here)….
There was no way in heck I was going to buy more Red Oak to fix this.
At nearly $9.00 per foot, it would have been another $50 to create new doors. Screw that.
I decided to make up another batch of sawdust and wood glue and try to create a DIY patch that would fill the holes.
This was not a pretty solution! LOL
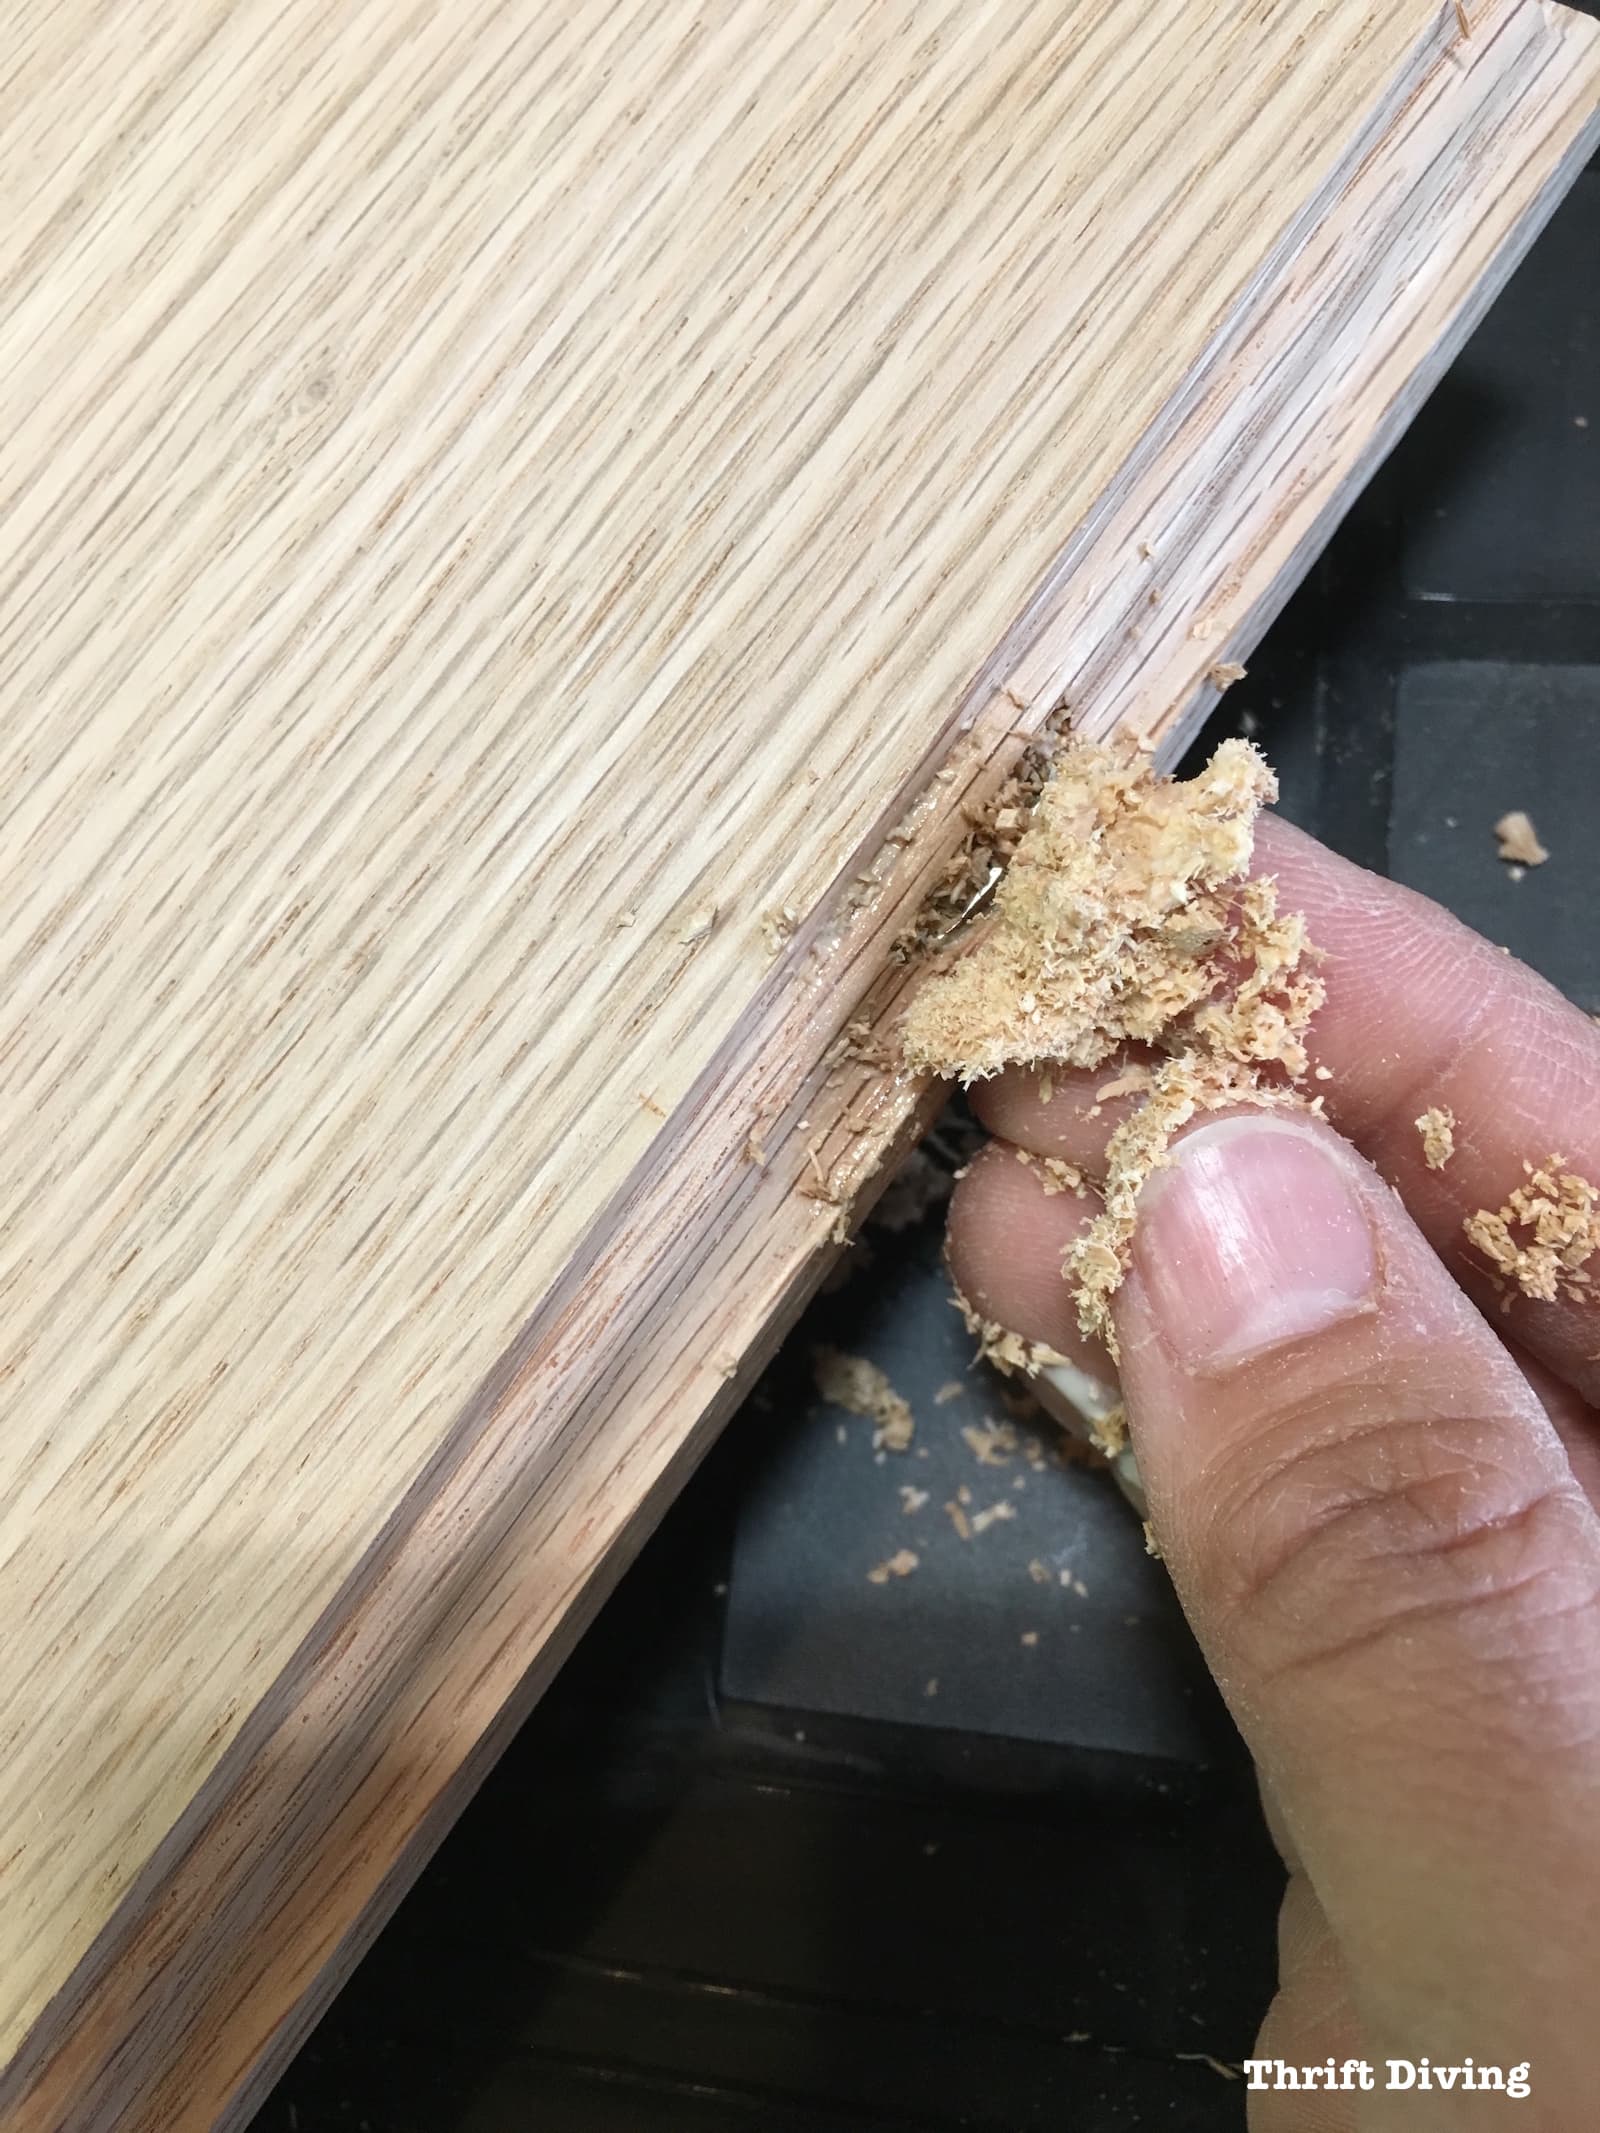
Once the doors were hung, I tried to fill the other cabinet, too.
Was it a perfect solution?
Nah…..
If you get close up, you can see where I tried to fill it.
But from fall away….we’re golden! 😉
I went ahead and mounted the doors and used them “as is.”
Screw up and all.
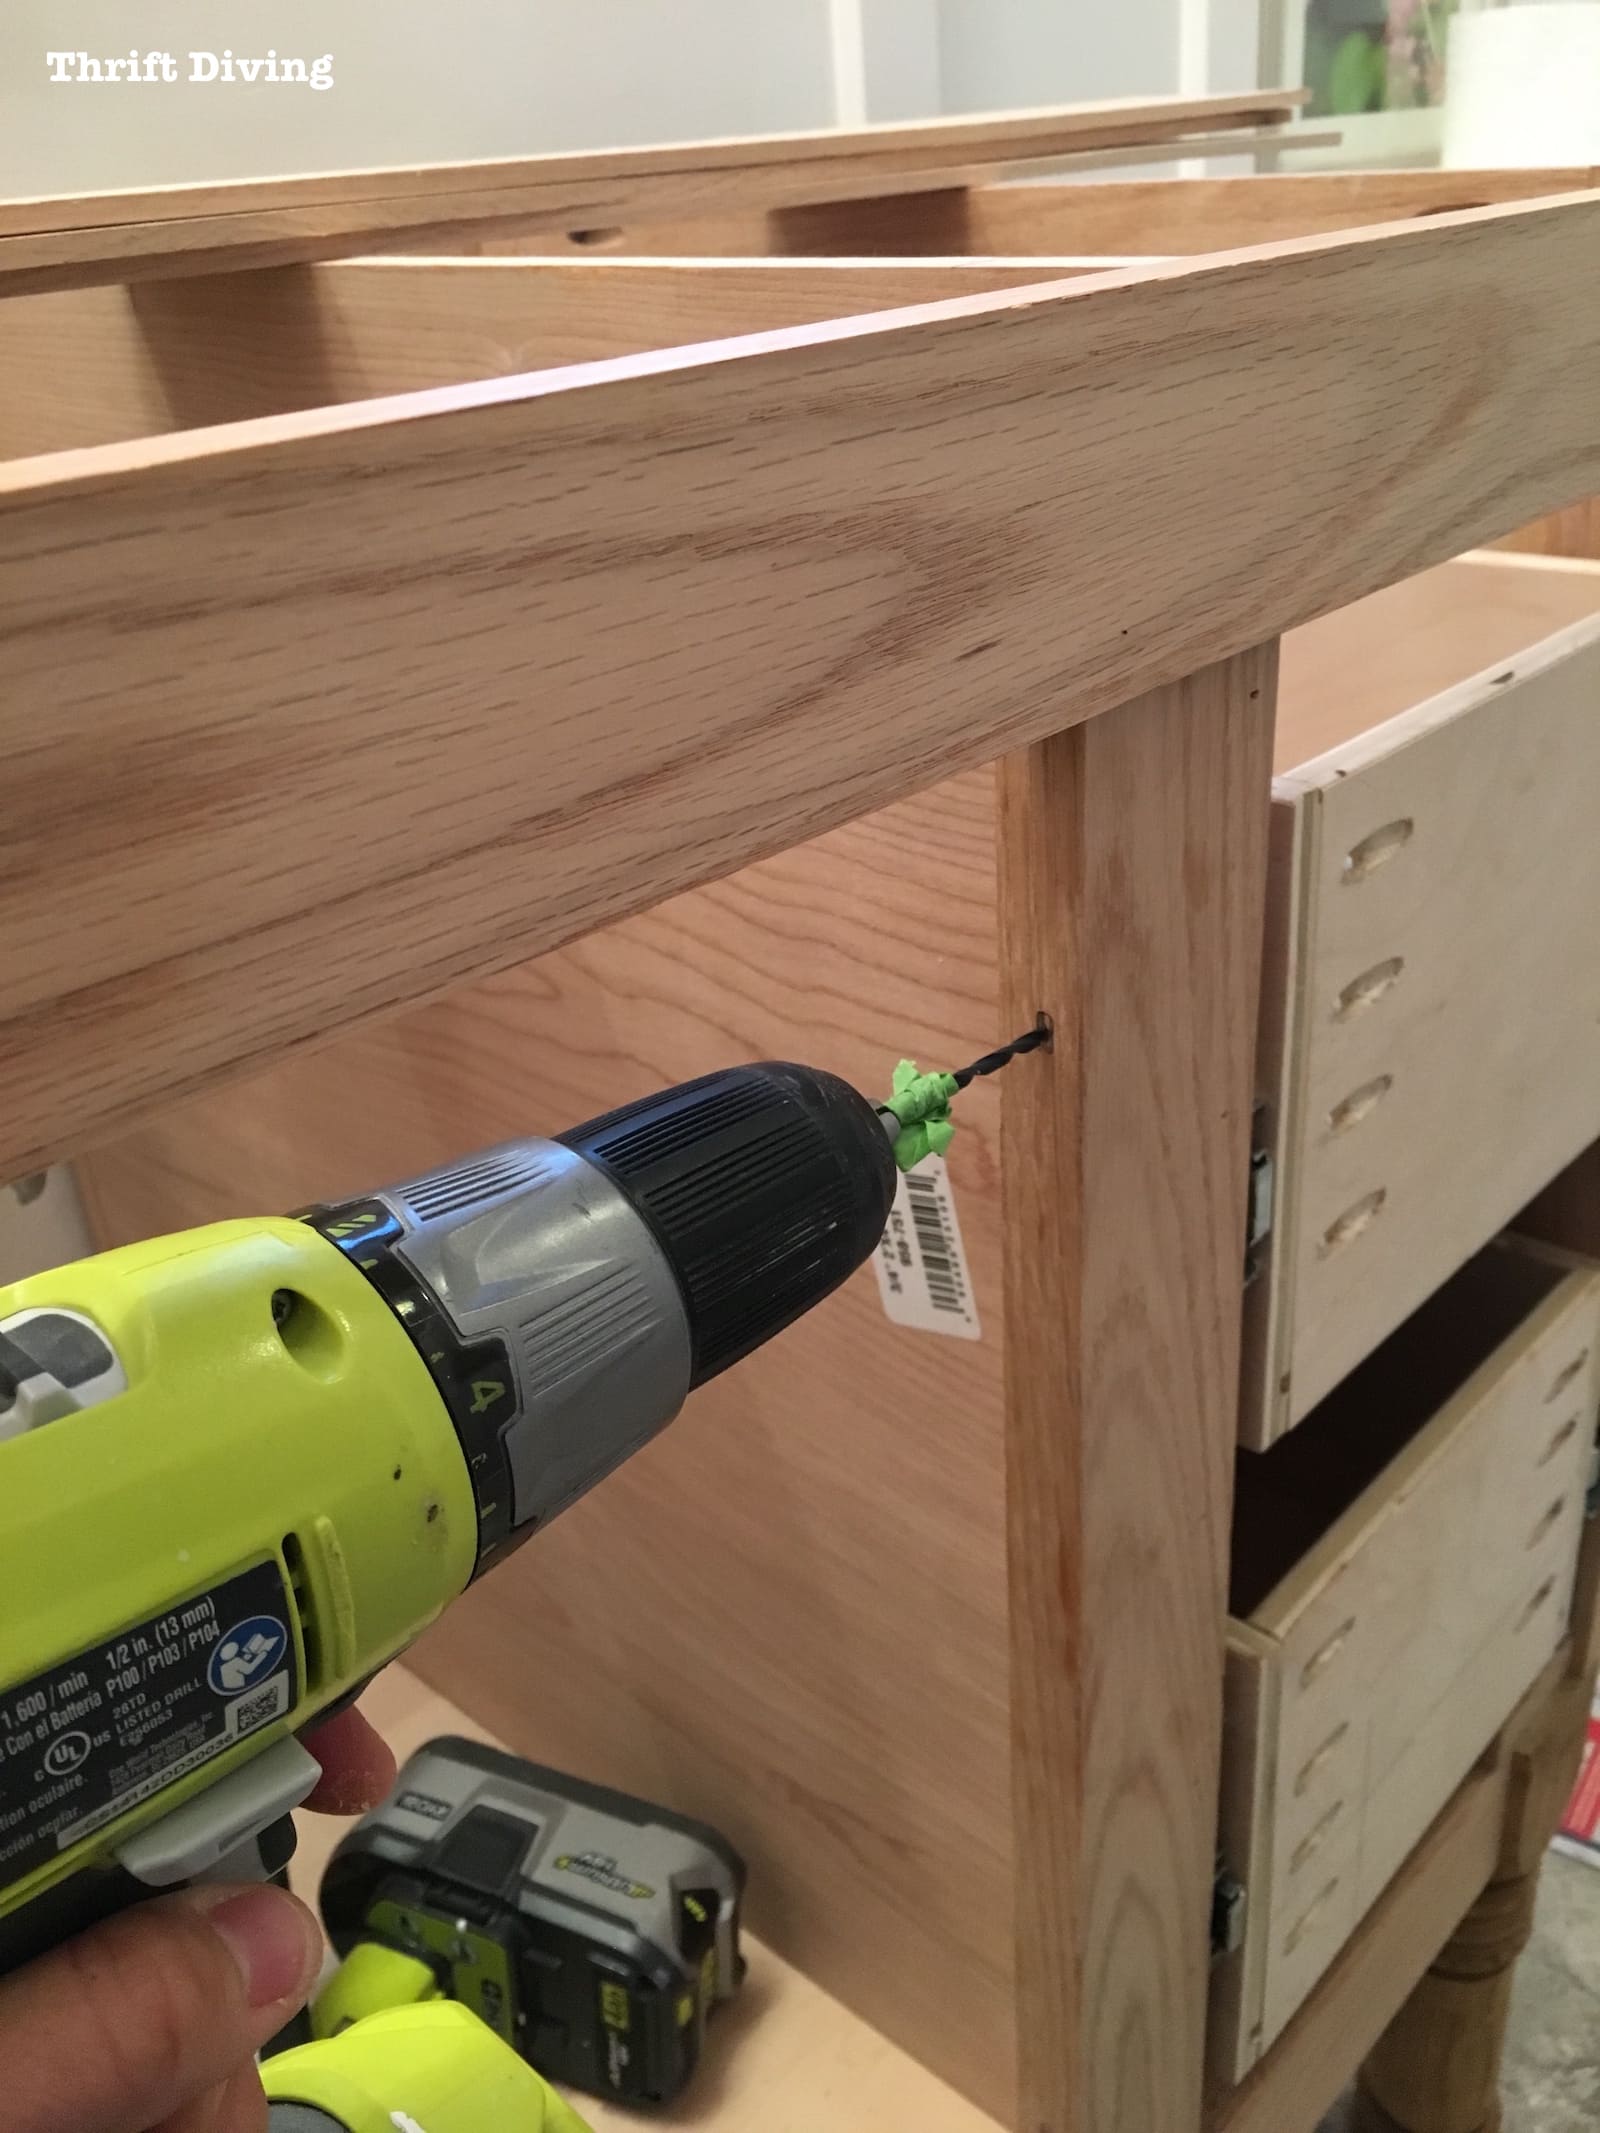
To attach the doors, I held the doors up to the cabinet and test-fitted them to see where I wanted the hinges screwed in.
Then I drilled pilot holes so that I didn’t crack the wood when screwing the hinges on.
I used green painter’s tape as a stopping point so I didn’t drill too far deep into the wood.
The first door looked pretty good, with a little bit of overlay.
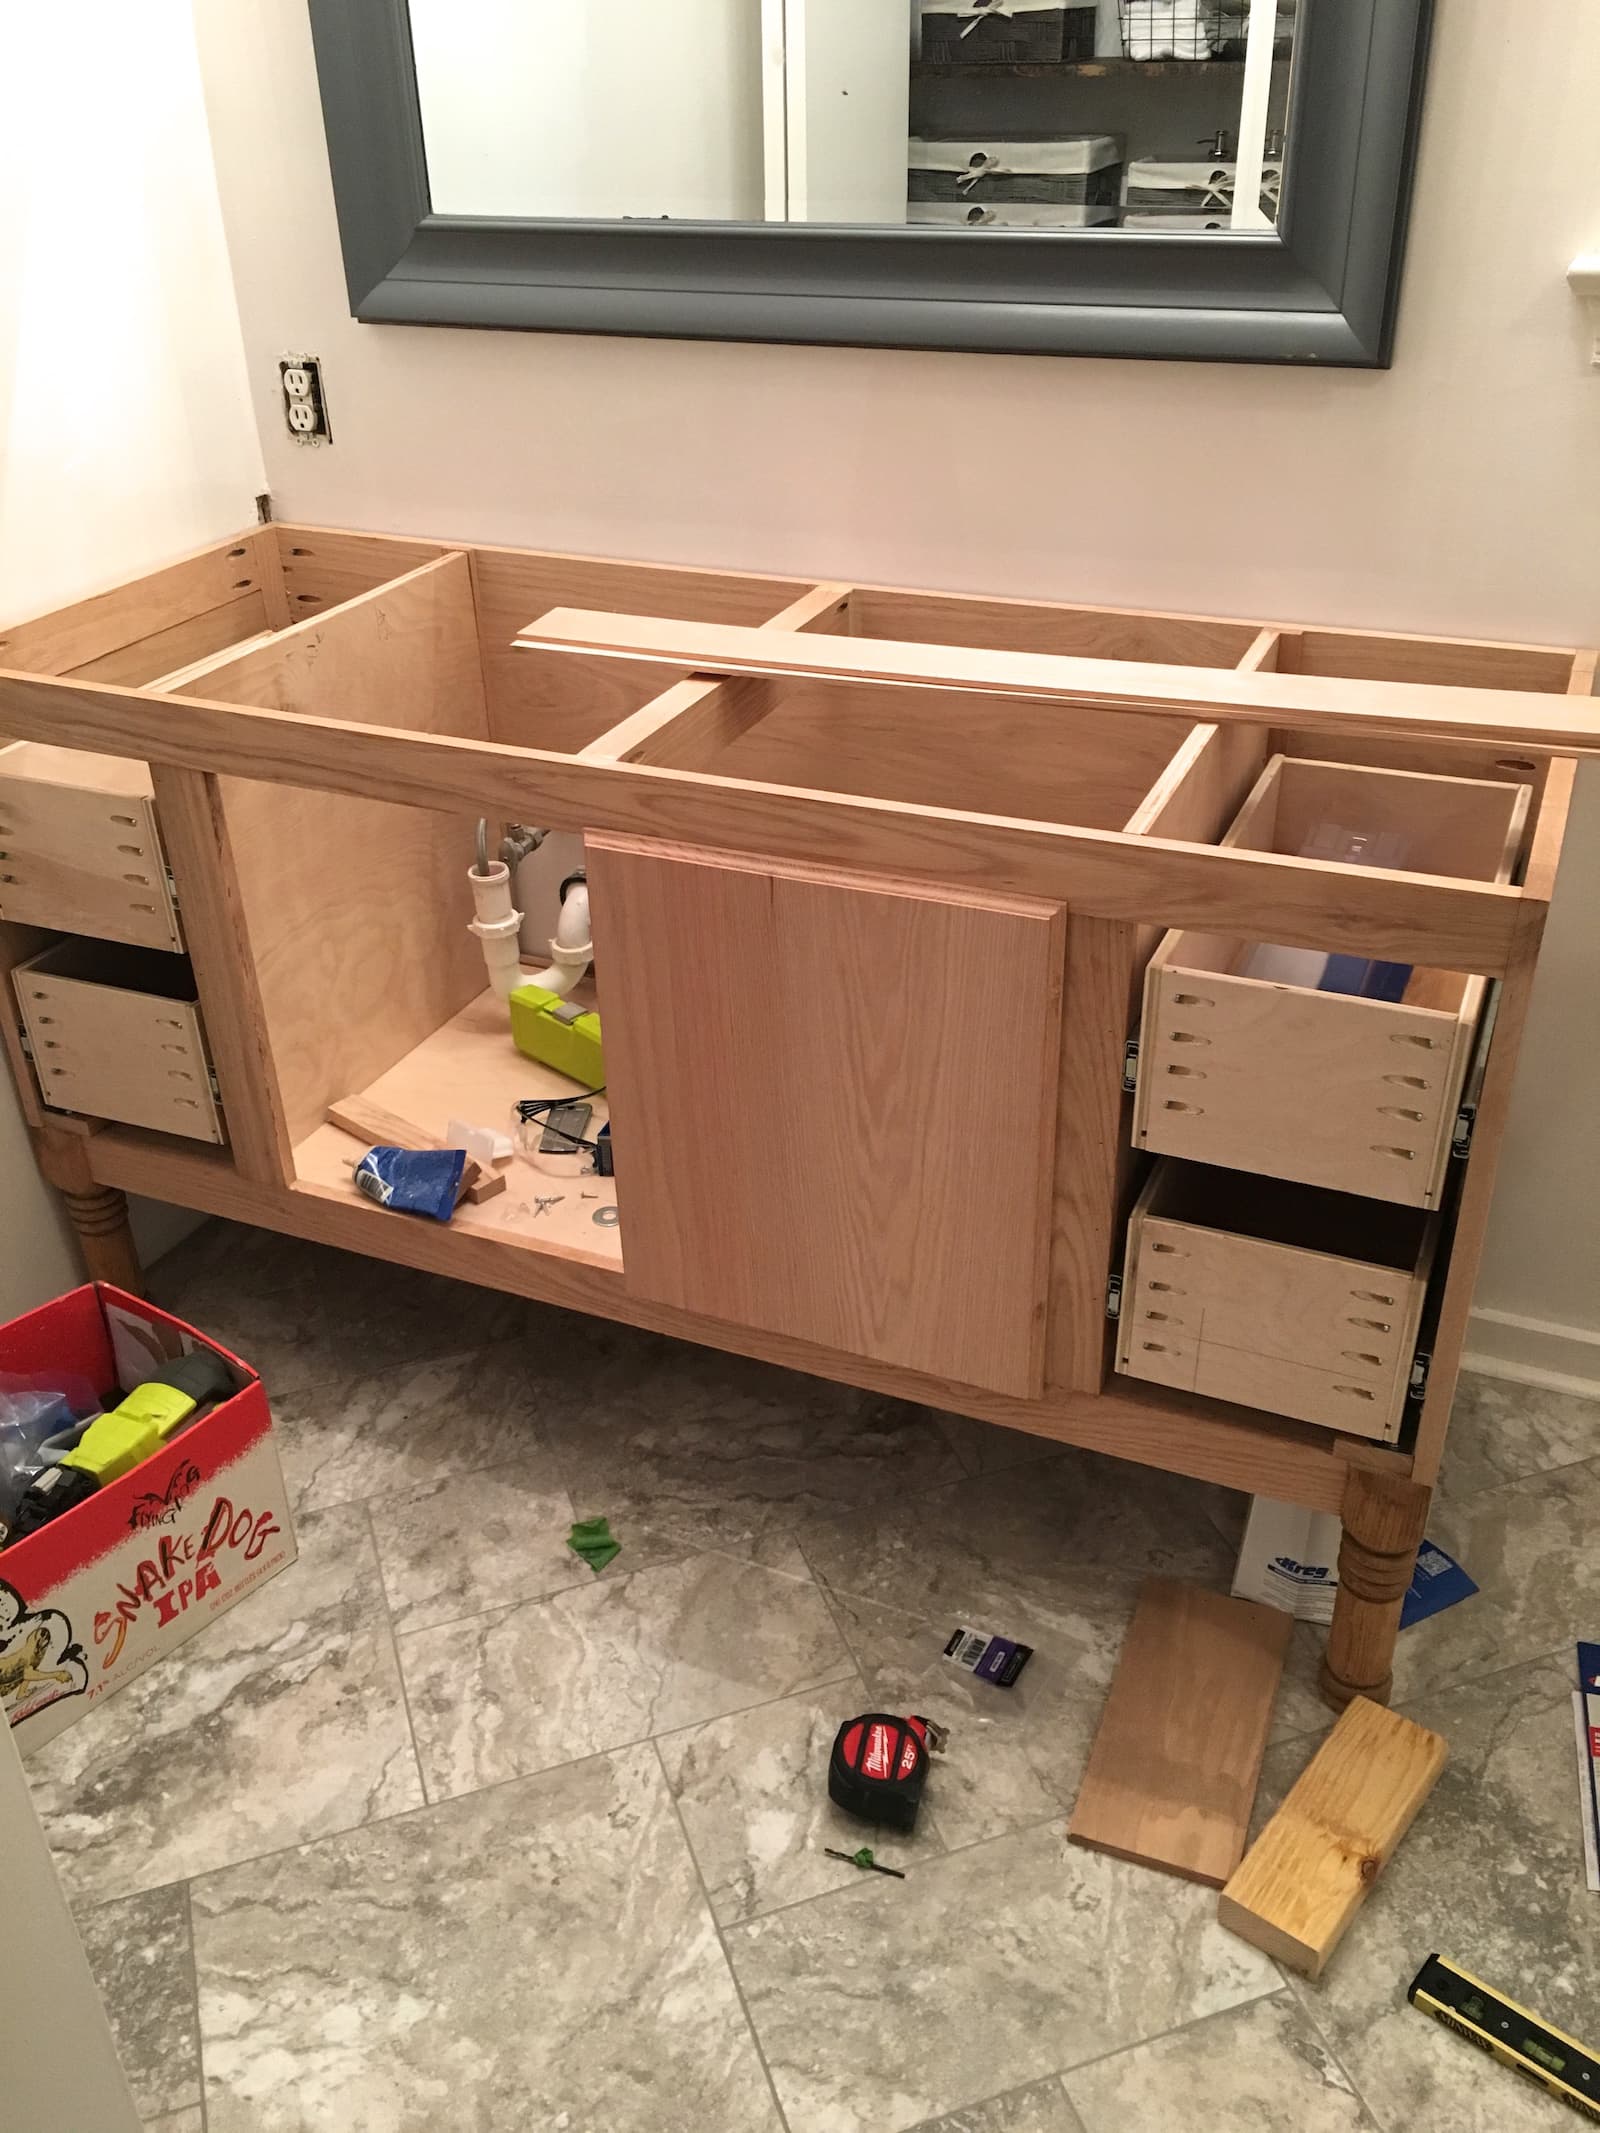
After the other cabinet door was secured, I used a screwdriver to make adjustments to the cabinet hinge screws which allows you to easily adjust and line them up perfectly.
Read More: Check out Part 4: Making Drawers to find out how I created the drawers and drawer fronts.
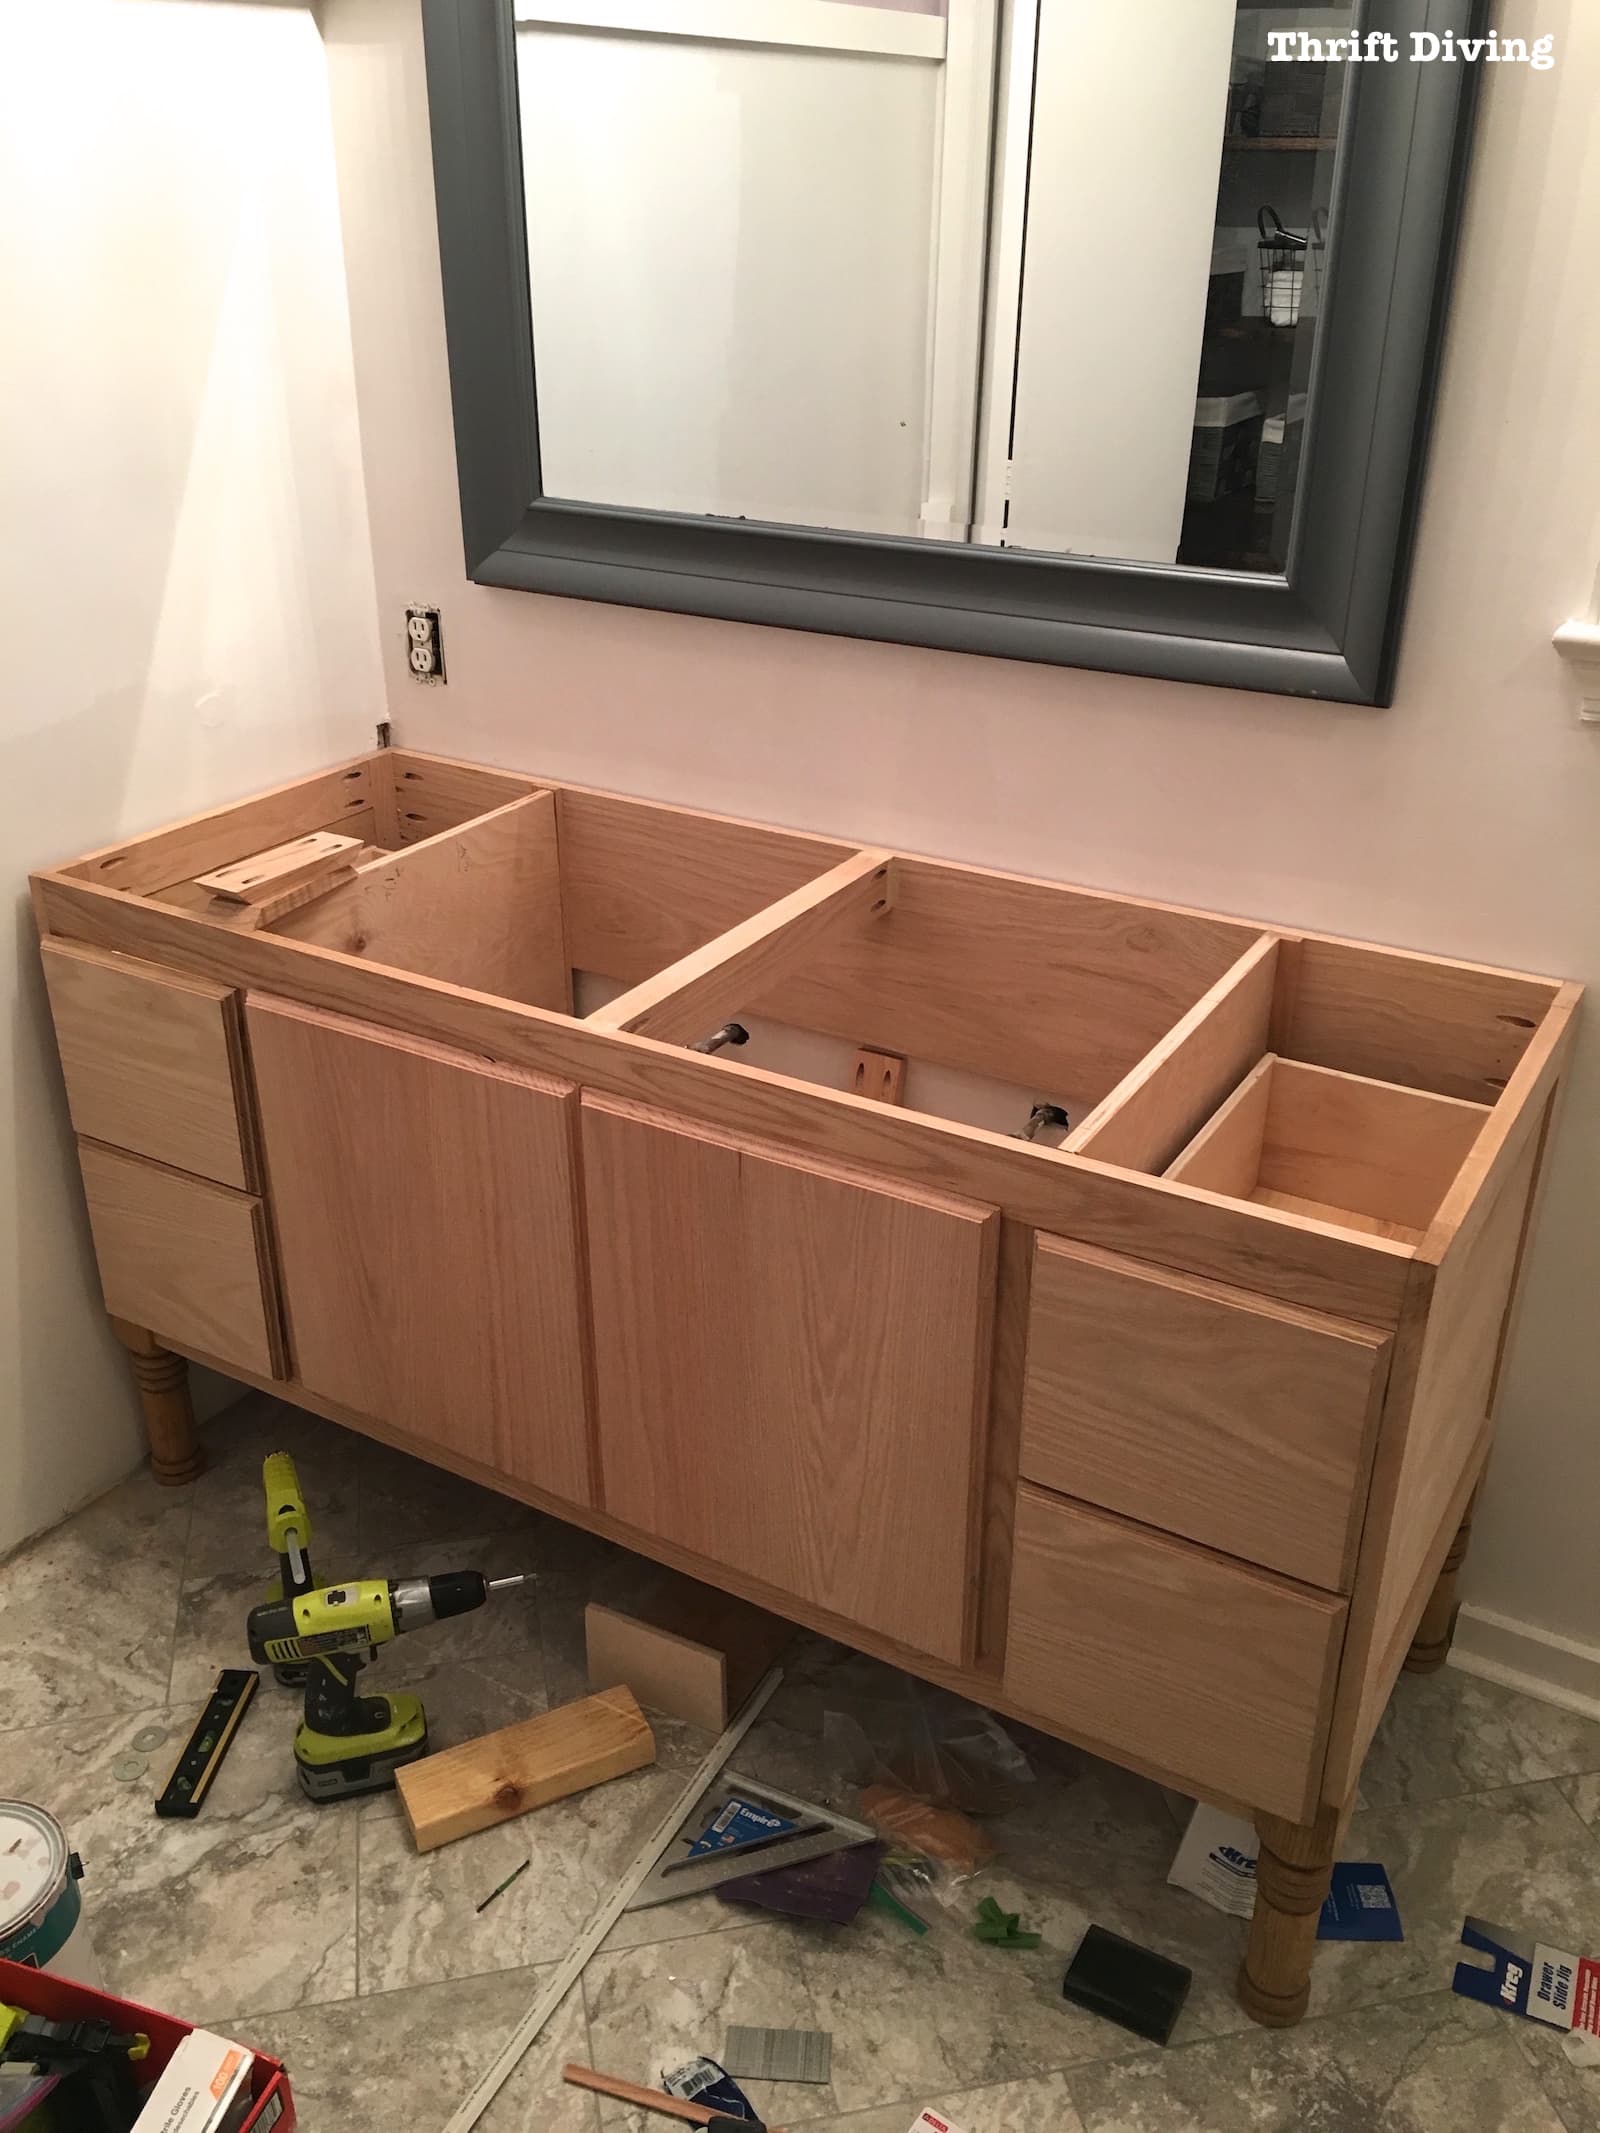
When all was said and done, this is what I was left with!
Lessons Learned
In each of my posts, I like to include a Lessons Learned section because I learned so much from challenging myself to build this DIY bathroom vanity!
Be Careful When Routing Cabinet Doors
As I mentioned above, if you’re making cabinet doors and using a router, be super careful about how far deep you’re routing the edges. If you have to install cabinet hardware, you might be cutting into that area. Do some sample boards first before working on your “good” pieces!
Be Sure You Understand and Check Wood for Straightness
I did find some mistakes with the wood I was planning to use for cabinet doors early in the project. Because it was a plainsawn board, it started to bow. So when I went to use it and tested it for straightness, there was a gap in the middle. (I suggest you read Understanding Wood: 7 Things You MUST Know About Wood Before You Refinish or Build Your Next Project).
I ended up cutting new wood that wasn’t bowed. There’s no guarantee it won’t bow over time since it’s plainsawn wood. But at least for now, it was flat.
Always Do Tests Using “Good” Wood
If you can afford it, buy extra wood so that if you make a mistake, you don’t have to live with the mistake. Expect to make some errors. You can usually return the wood you don’t use to The Home Depot as long as you haven’t cut it (if you bought it by the board).
For the wood that you bought by the foot, I believe you can actually return any un-used portion of that wood.
So what do you think so far of this project?!
Super complicated, huh?
As I mentioned, it was totally an experiment for me to see if I could do it and figure it out.
Even if you don’t follow these instructions, the lessons learned are valuable alone! 🙂
Enjoyed this post? Click HERE to pin this series for later!
![]()
Read the Rest of this Bathroom Makeover Series!
DAY 1: The Evolution of a Master Bathroom Makeover
DAY 4: Picking Out New Flooring: Which One Do You Like?
DAY 6: How to Remove an Old Bathroom Vanity
DAY 27: Removing Wallpaper, Repairing Walls, and Removing an Old Toilet
DAY 29: Installing New Flooring in Our Master Bathroom
DAY 49: The Bathroom Makeover That Would Never End (An Update!)
Day 52: How to Remove a Toilet Yourself
DAY 57: How to Install a Toilet Yourself
Build a DIY Bathroom Vanity – PART 1 – Attaching Legs and Base
Build a DIY Bathroom Vanity – PART 2 – Attaching the Sides
Build a DIY Bathroom Vanity – PART 3 – Creating the Partitions
Build a DIY Bathroom Vanity – PART 4 – Making Drawers
Build a DIY Bathroom Vanity – PART 5 – Making Cabinet Doors
Build a DIY Bathroom Vanity – PART 6 – Adding a Granite Vanity Top
Build a DIY Bathroom Vanity – PART 7 – The Final Finishing Coat
BEFORE & AFTER: The Final Master Bathroom Makeover Reveal!

Download the 5 freebies!

Thrift Diving inspires women to decorate, improve, and maintain their home themselves...using paint, power tools, and thrift stores! Use these 5 printables, checklists, and ebooks to get started!


You are so inspirational!!! Thank you for giving me confidence to do my own projects.
Aww, thank you so much, Kelly!! 🙂
Just broke the door on my bathroom cabinet and I came across your site 🙏 What brilliant tips,tricks and great way to warn of the issues I’ve always had 🤷 I’m now going to make the door rather than just trying to get another cabinet. Thanks for your inspiration
Glad to help, Nicola! 🙂 Good luck making your door!
Serena, this hinge debacle is exactly the type of thing that happens. There are just so many variables to building stuff that something is bound to go wrong. Professionals are not professionals because they are smarter than us, just because they have made all these mistakes before.
I love how you solved it – quick and dirty.
I have been planning to build a vanity for my bathroom for a year. The sink is already in place and I just need to build the box. I started like you, with a sketch in paper and pencil, then I transferred it to Sketch Up and found a lot of mistakes, next I revised it a couple of times and found more mistakes. Sketch Up is annoying, like all 3d modeling, but it is not that hard if you take the time to read the help section and watch a few YouTube videos. It does help finding mistakes, stuff that doesn’t fit or is just a couple of millimeters off. It also forces you to work out the math beforehand. I plan on making a tilt out clothes hamper and let me tell you, the math on that stumped me for a couple of days.
Hey, Leticia!
Yes, I agree with you about Sketch Up! It’s actually on my list of things to learn. Friends who use it also tell me that if you don’t use it often, you “lose it” and then up having to go back and re-learn all the things you learned. But, I think it’s worth learning. Some friends just pay others to draft up plans for them, and yes, that’s an option. But to know it yourself is golden knowledge.
Thanks for commenting! Good luck with your vanity! Sounds like you’re on the right track. Email me pics when you’re done. I would love to see it! 🙂
Daamn! That would have been so frustrating. When I saw the big hole I thought “ugh! I’d just wood putty that and call it a day!”… so naturally I was thrilled that you chose the same quick, inexpensive route. ;D Who cares, though – it looks perfect!! And for your first time building a big piece of furniture, I’d say that’s a very small mistake. You did a beautiful job on the router edges – and that homemade wood filler is fabulous! You can’t even tell that the door is two boards. I had to really look to find the seam!
One of my friends that I chat with on Facebook chat (an old associate from high school), we are woodworking chat buddies. He had told me, “Go buy a new piece of wood to remake the doors.” Ummm….no way! That Red Oak was expensive, like $8.00 per foot. To buy enough to make the doors would have probably cost another $50. No way I was doing that. Plus, you can’t even tell.
I was shocked that it looked so seamless! I was really worried about it. I’m curious to see how it will hold up over time. I’m afraid the doors will warp a little. I’ve heard that’s why cabinet makers make doors with insets and rails and stiles, so that they can move with seasonal changes. Soooooo….we shall see what happens with the doors when the seasons change. The good news is that since I made the vanity, I know who to contact if something needs to be replaced or remade. 😉 LOL
Thanks, Zovesta!
Great looking bathroom vanity, it looks like it was made by pro!
Great tips! i never would have thought to think about the depth of the routed edge and the hinge.
I know!! Girl, this whole project has been a learning experience! Lol