The Evolution of a Master Bathroom Makeover: Join This Month’s 30-Day Room Challenge!
You know, what they say is true.
You never really finish decorating and renovating your home, do you?
Our home tells a story, and that story changes year after year.
From the moment you saw it…to the times you picked out paint colors..to the times you re-painted the very next day because you hated for first choice (um…true story, LOL!).
I like to think of it as the evolution of our homes.
So as I’m sitting here looking at old pictures of ROUND 1 of my Master Bathroom Makeover, I get a little sentimental thinking of its story, which started 5 years ago.
This is the room that I’m working on for this month’s 30-Day “Naughty or Nice” November Room Challenge.
I almost forgot how much it’s changed since I had made it over the first time!
I wanted to share with you how this room has changed so much, and share the plan on how it’s going to be changing yet again.
As I said, you’re never really done a room.
If you’ve got a room you’ve been wanting to transform, too, then click below to sign up for the 30-Day “Naughty or Nice” November Room Challenge!
![]()
The Evolution of a Master Bathroom Makeover
It was August 2011.
My husband and then-5-year-old son were going to Ghana for an entire month. A whole month!!
What was a mom to do letting her husband take her oldest baby to another continent for 30 days?!
Let’s not forget that it was Africa.
You know… that place where people get malaria and get sick from drinking the water…
My son still put his hands in his mouth, for goodness sake! How would he not get sick!?
I couldn’t sit around and fret about whether my husband would as responsible as I would, or whether our son wouldn’t be picky and eat the local, cultural food.
There was my little 18-month-old son I still had to care for, not to mention the little boy growing in my belly (yes, I was 6-months pregnant at the time).
Instead of focusing on all the bad things that could happen, I decided that since I had 30 days, I would focus my attention on this horrific bathroom.
(**Note: many of these early “before” pictures are poor quality because it was years ago! Please overlook that part… LOL)
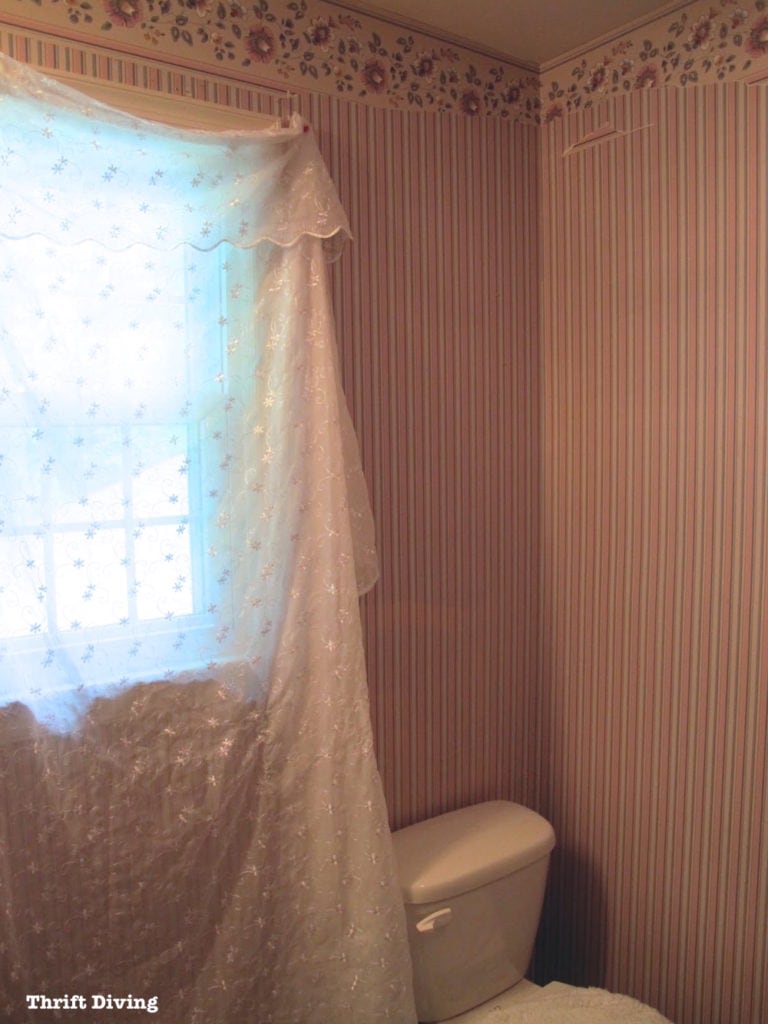
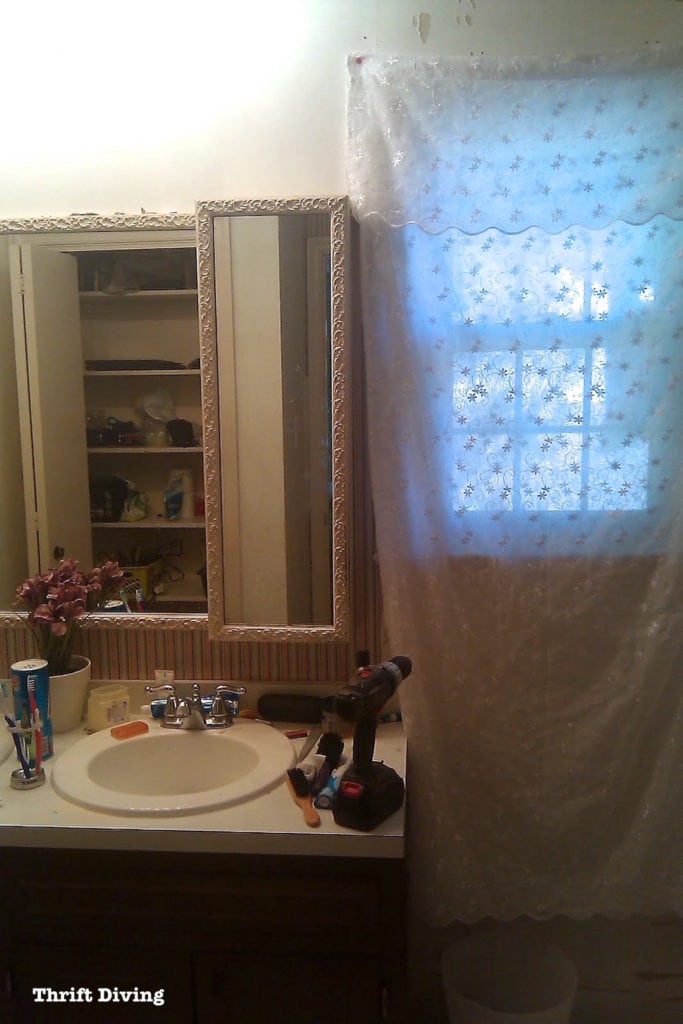
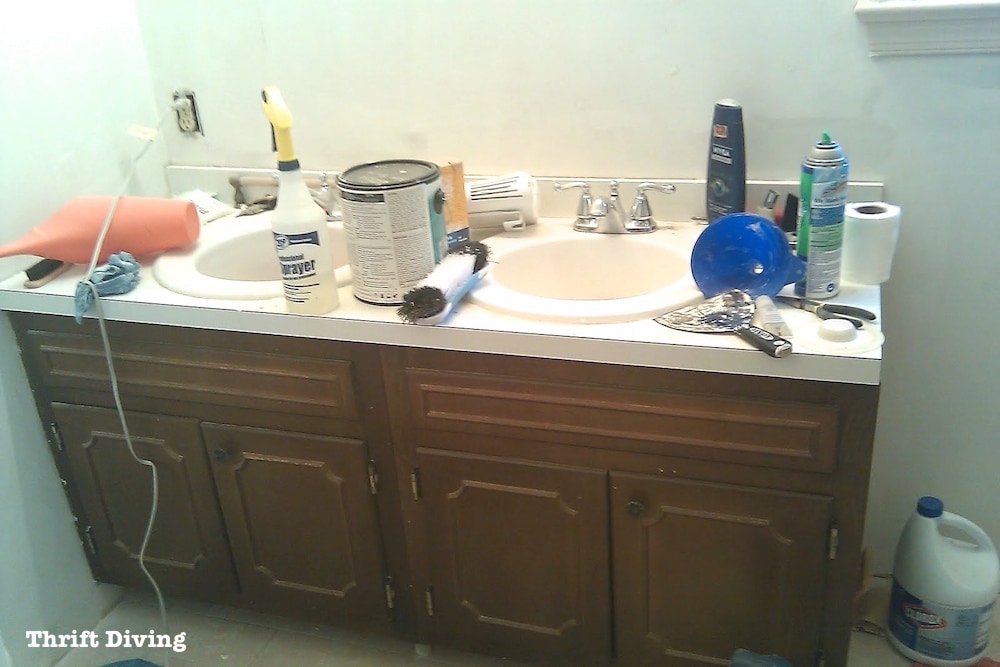
BEFORE
August was our anniversary month, so I decided it would be a nice gift if hubby came home to a total makeover!
Now…I understand that women don’t usually give the gift of home improvement, do they? LOL
But it had been nearly a year since living in this older 1973 home, plastered with wallpaper, green toilets, outdated fixtures–you name it.
If the job was going to get done, now would be the best time to start.
I thought it was a great gift idea!
I worked so hard, often times at night after putting my 18-month-old down for bed.
Mind you–he slept right outside the bathroom, snuggled up in our bed, while Mommy was sanding, painting, and sweating. LOL
It was challenging keeping quiet while doing all this work.
But look how it turned out!!!
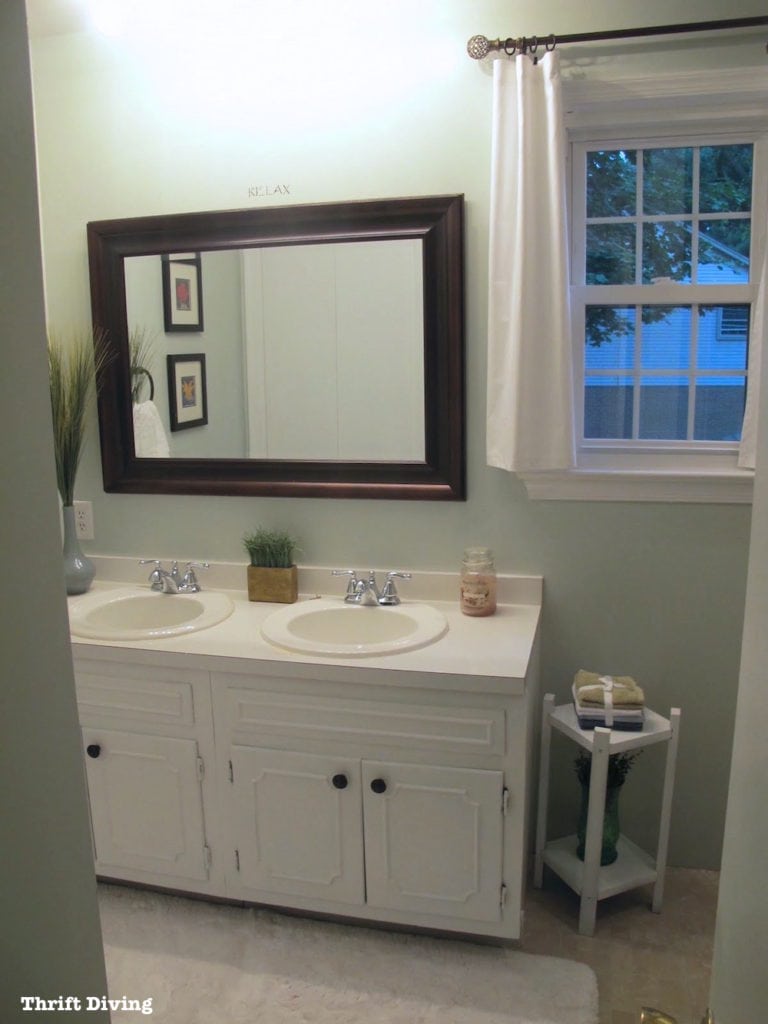
AFTER!
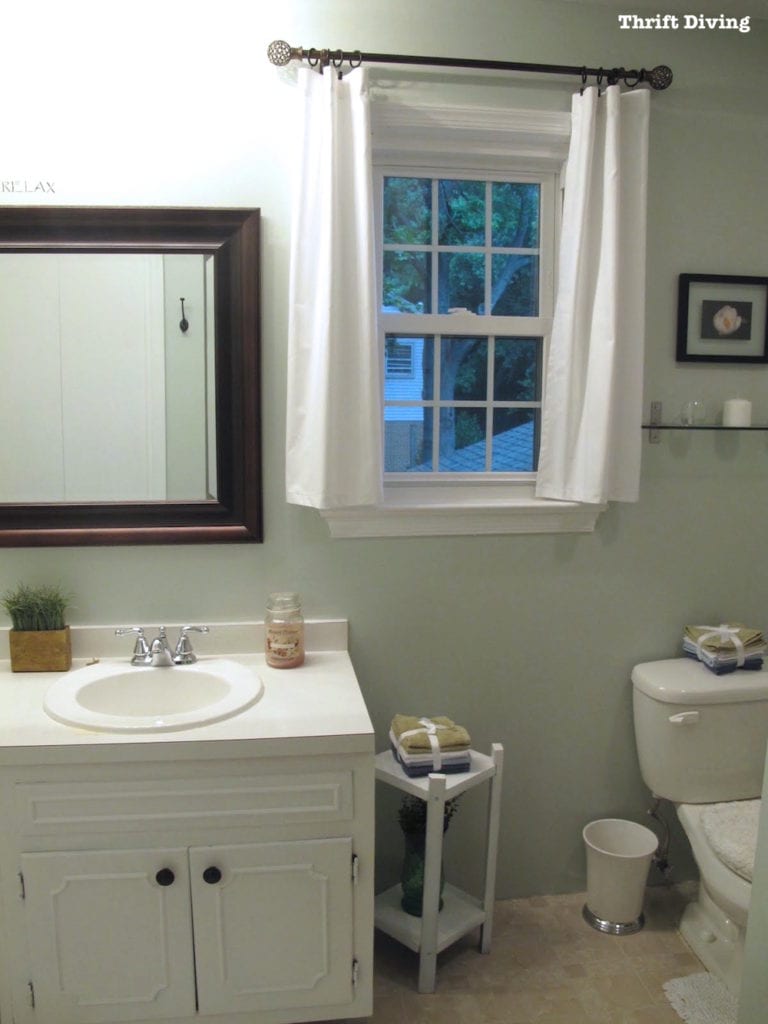
When hubby and 5-year-old son came home, they couldn’t believe their eyes!
Hubby had left with a nightmarish kind of master bathroom that had a shower stall covered in outdated beadboard, and came back to a freshly painted shower stall! (FYI, I painted the master bathroom Sherwin Williams Sea).
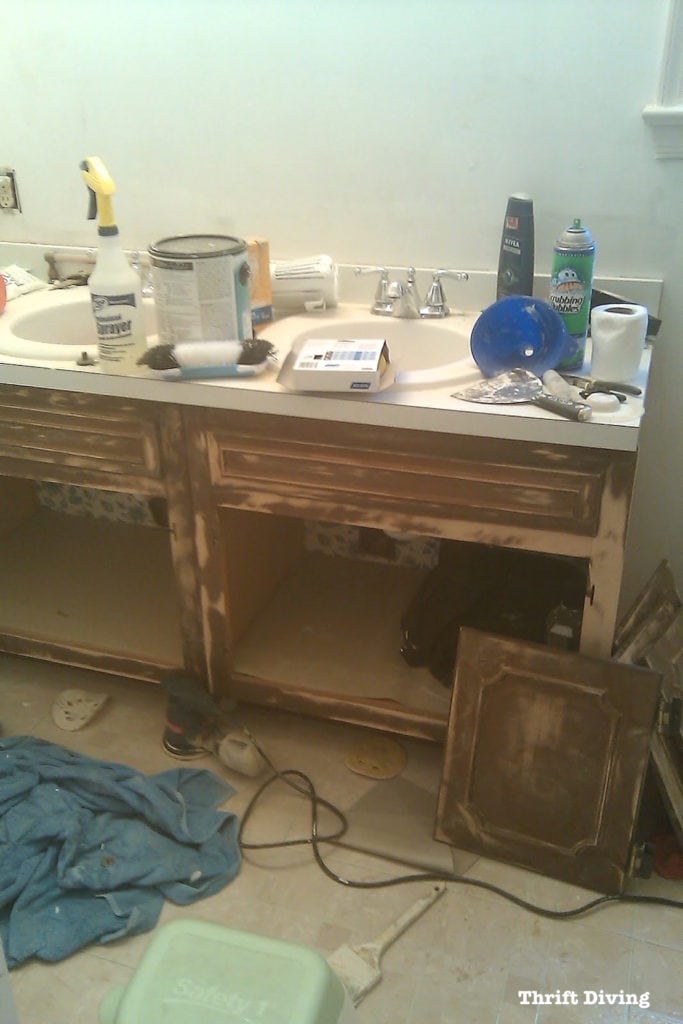
BEFORE
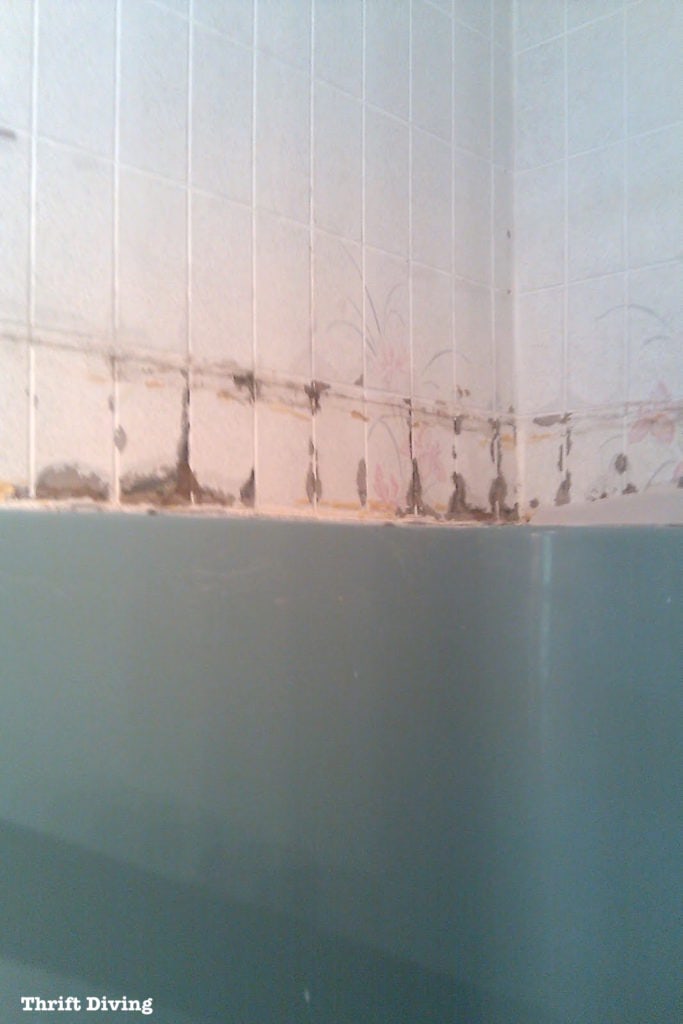
Trust me, this stuff scared (and excited!) me.
There I was… 6 months pregnant… standing on stools in an old shower stall, peeling back things I had no idea would be safe to uncover….
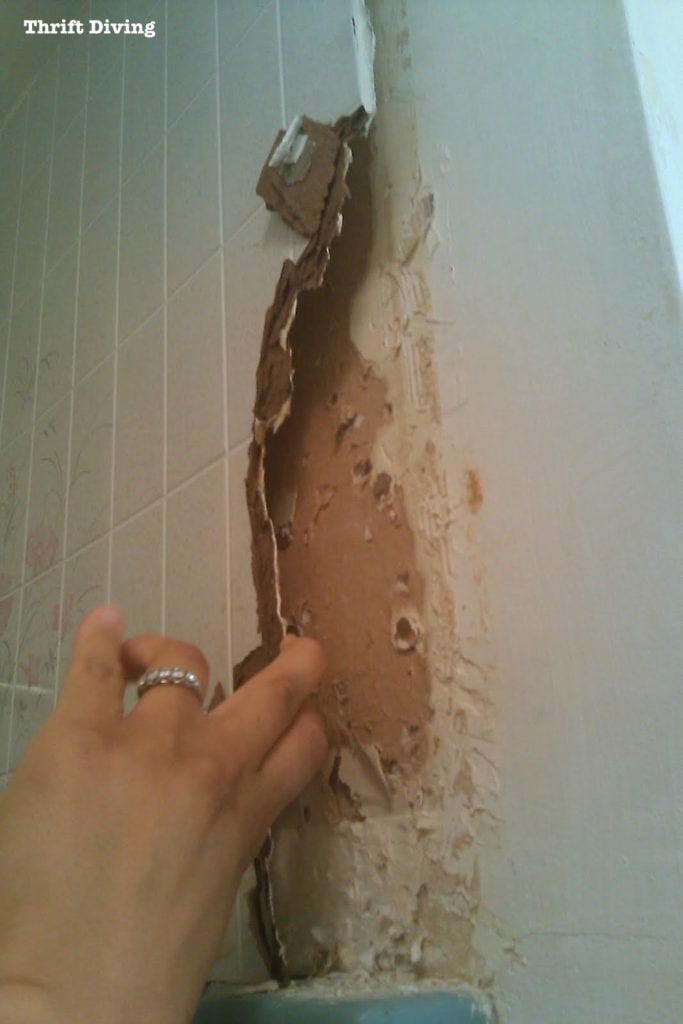
I just remember being scared, thinking, “How the heck will I get this done in 30 days?! I don’t know what I’m doing!!”


But somehow, I figured it out! (FYI: I skim-coated the wall with drywall, sanded it smooth, and then painted it).
When hubby came back, he couldn’t believe the dramatic difference!
AFTER!


I still can’t believe these old pictures as I sit here looking at them. Even hubby had forgotten how bad this master bathroom used to be!
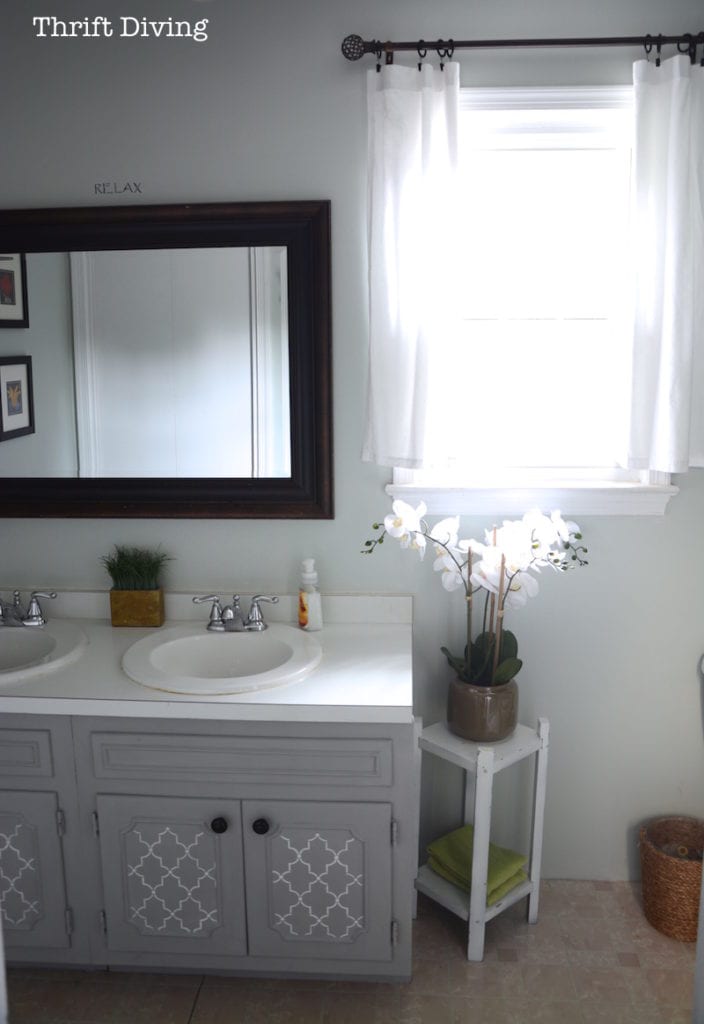
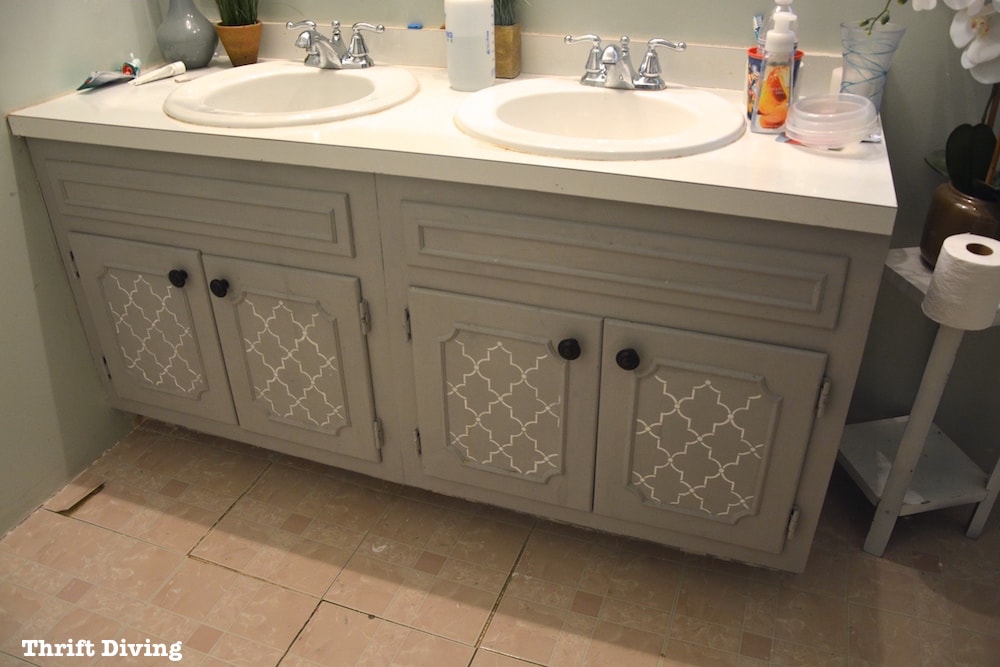
Then I Painted the Vanity Grey with Pretty Stencils
And just last year, I decided I wanted to paint the vanity from white to gray with stencils.
ORIGINAL
AFTER – WITH WHITE PAINT
CURRENT – WITH PAINT AND STENCILS
But as nice as the bathroom looked for many years (and when it’s clean, it still looks pretty good), it’s now time to make it over again.
It’s Time For an Upgrade!
In order to make my master bathroom affordable over the years, I kept a majority of the major fixtures and just decorated around them, such as the cabinet, sinks, and even the turquoise shower.
Another thing I hadn’t changed was the flooring.
It was horrible, but I worked with what I had.
But there comes a point in a room’s evolution when it’s time to upgrade.
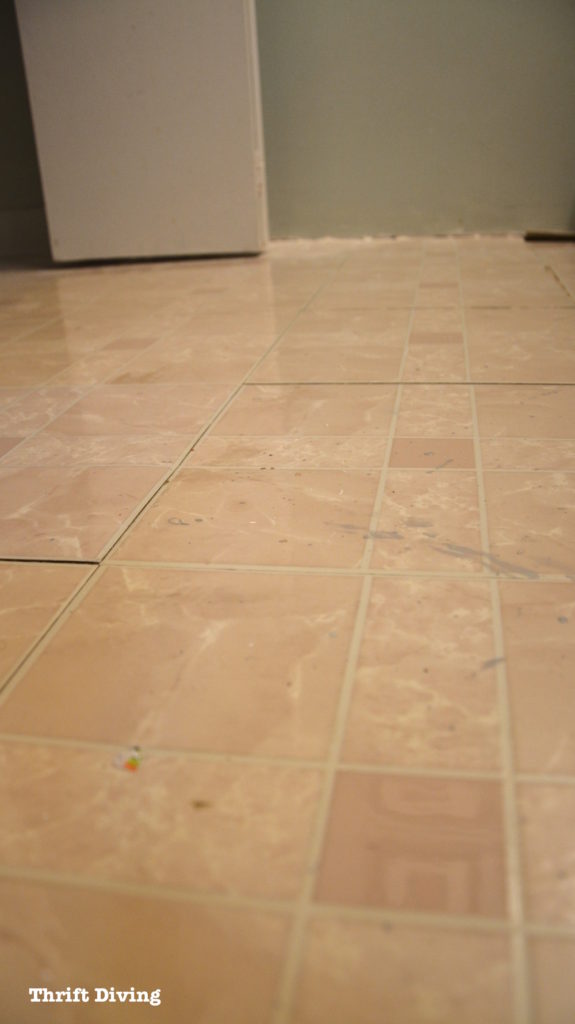
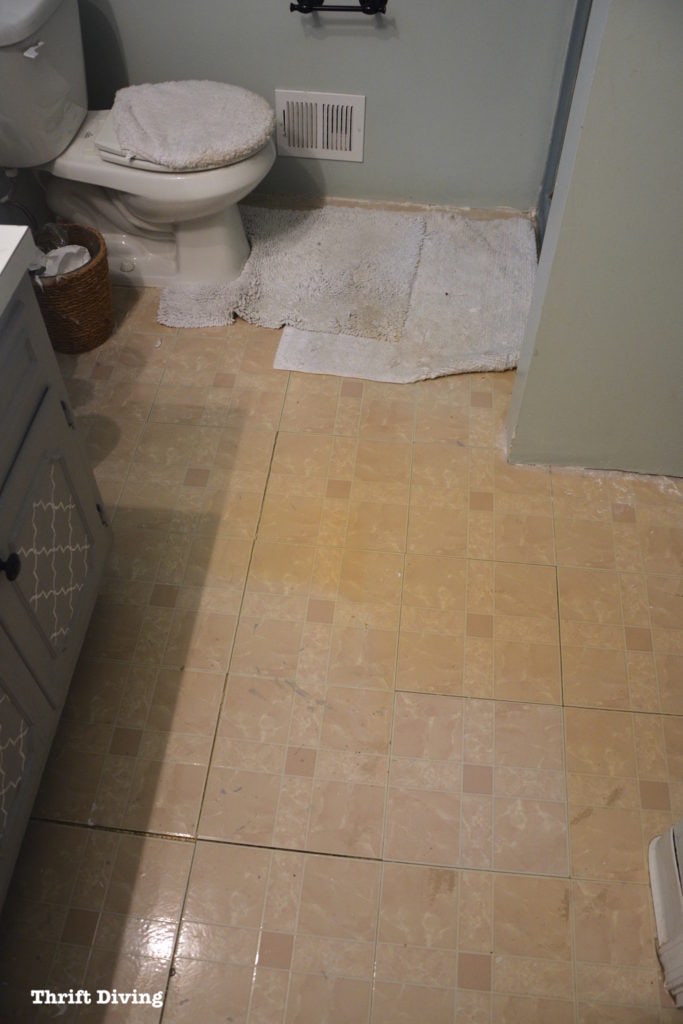
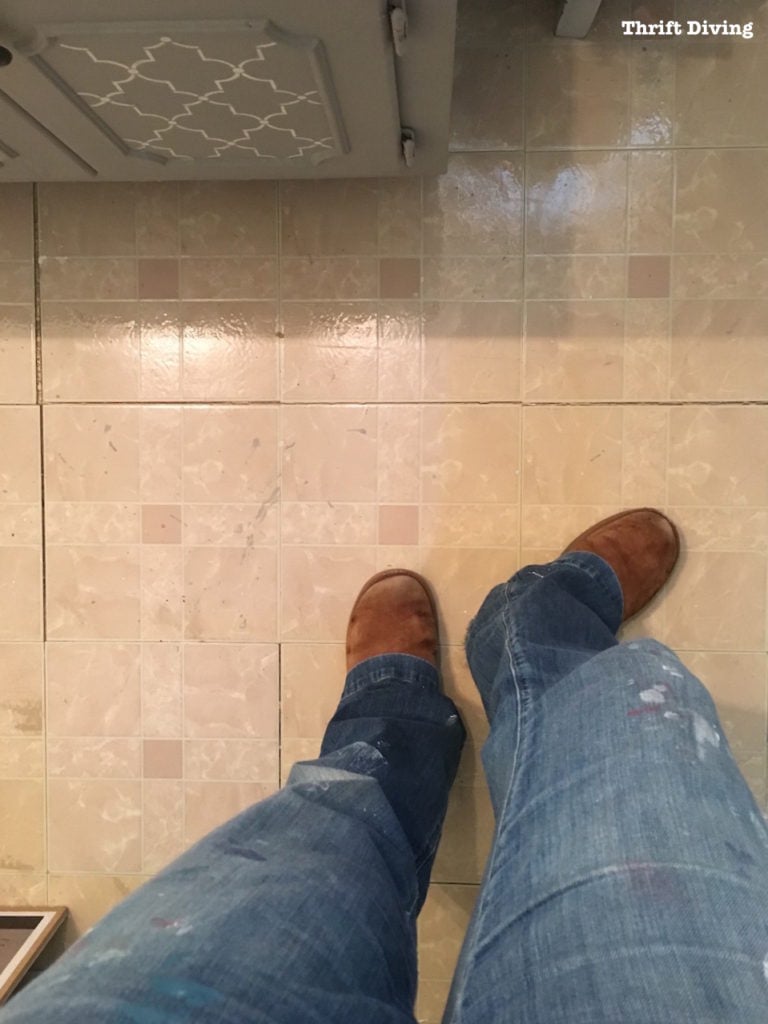
When you look at this flooring, you can see why it’s time.
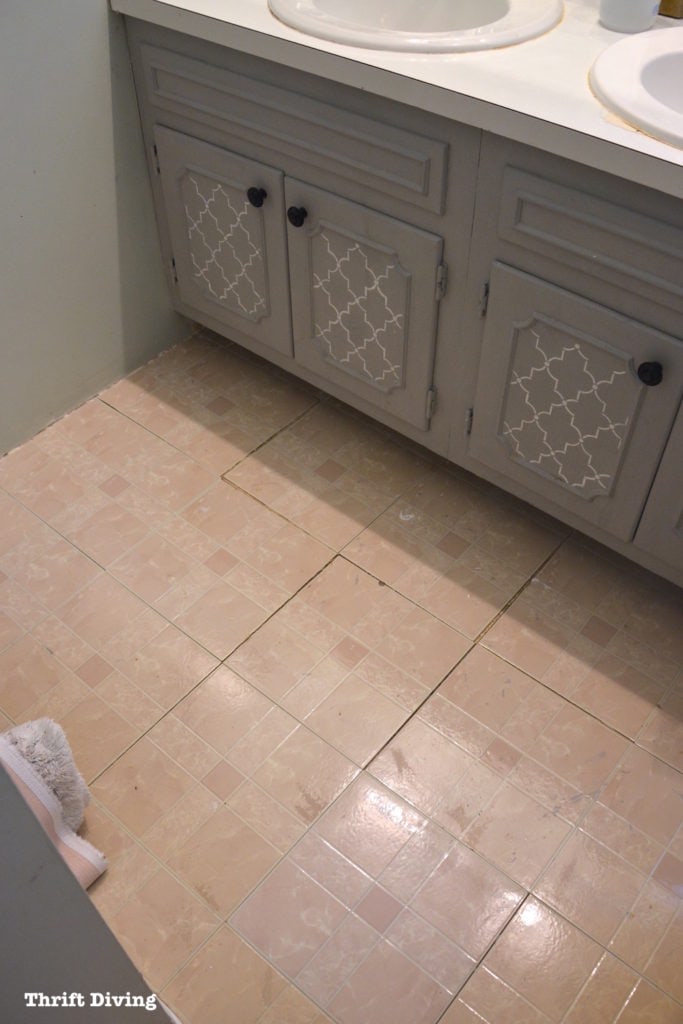
Peel and stick tiles are very bad, but I understand how economical they are and can really transform a room.
But not when the peel-and-sticks look like this.
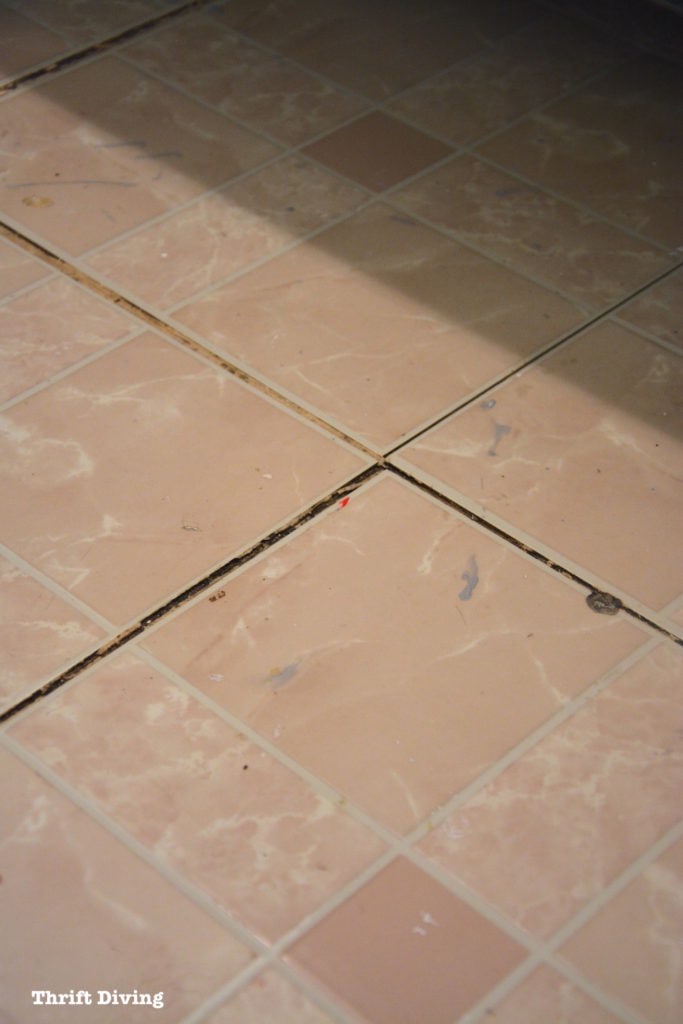
These pictures are totally untouched and show the real, raw justification for why this floor has overstayed its welcome. LOL
You can see that when the previous tenants gave this bathroom a “makeover” they went right over the old sheet vinyl with the peel-and-stick tiles.
It’s time for all of that to be ripped out!

Let’s not forget to mention that it’s discolored, too.
I could see if it was just ugly for its pattern, but it’s very yellowed in many areas.
Over time, the kids caused my cute IKEA glass shelf to fall and break, so we’re left with nail holes in the wall behind the toilet.
And I don’t know how this happened, but those cute little curtains I once sewed for the window have since shrunk and have become so wrinkled, you’d never think they once looked so inviting. HA!
Usually, when people participate in my 30-Day Room Makeover Challenges, they’re embarrassed to show the “before” pictures.
Well, I know how they feel.
I’m embarrassed to show you the inner-most intimate place in my house, with its dirty floors and stained bathroom rugs.
This is the floor we step on day-in and day-out as we brush our teeth, wash our bodies, and prepare for our day.
Of course, I wasn’t going “clean up” first before taking these pictures.
I want you to see its true “before” so that when it looks fabulous at the end of the challenge, you can appreciate the “after.” 🙂
Call it “shock value,” if you will. LOL
The Importance of Setting a Deadline
I just want to point out something so significant in this story.
Not just to shock you with these embarrassing pictures. LOL
But I wanted to point out that if it weren’t for this master bathroom makeover back in 2011, I don’t think I ever would have created the 30-Day Room Makeover Challenges here on the blog!
There was something to energizing and electrifying about having that deadline looming (30 DAYS!!) to make things happen.
Without deadlines, we simply sit around and dream about what we could, should, and want to do.
A deadline kicks your butt into action and you work to rise to the task.
I realized that many people who read this blog are like me: facing embarrassing rooms that sooooo need attention, but not sure where to begin.
But I’m here to tell you, this is where you begin: with a deadline.
And that’s exactly what we’re going to do this month!
No more excuses about being “too busy.”
It’s time to take the ugliest parts of our homes and turn them into something we can feel proud of.
And sometimes, as you can see with the evolution of my master bathroom, it takes years to achieve!
The Plan
Okay, so here’s the exciting part!
Let me explain to you what I plan to do in this master bathroom.
New Flooring!
First, the floors gotta go.
I’m sorry, floor, you’ve served us well for 6 years since we’ve been here, but we can’t look at your stained face anymore!
I’m teaming up with Carpet One and installing Verostone tiles. I’m so thankful to them for sponsoring this floor! They’re going to be doing the installation, but I’ll be documenting the entire process! Plus, Carpet One is going to be giving one lucky Room Challenger some great prizes, which I’ll tell you about in tomorrow’s post! I’ll also share my recent trip to their store to pick out the flooring.
It’s going to look so good!
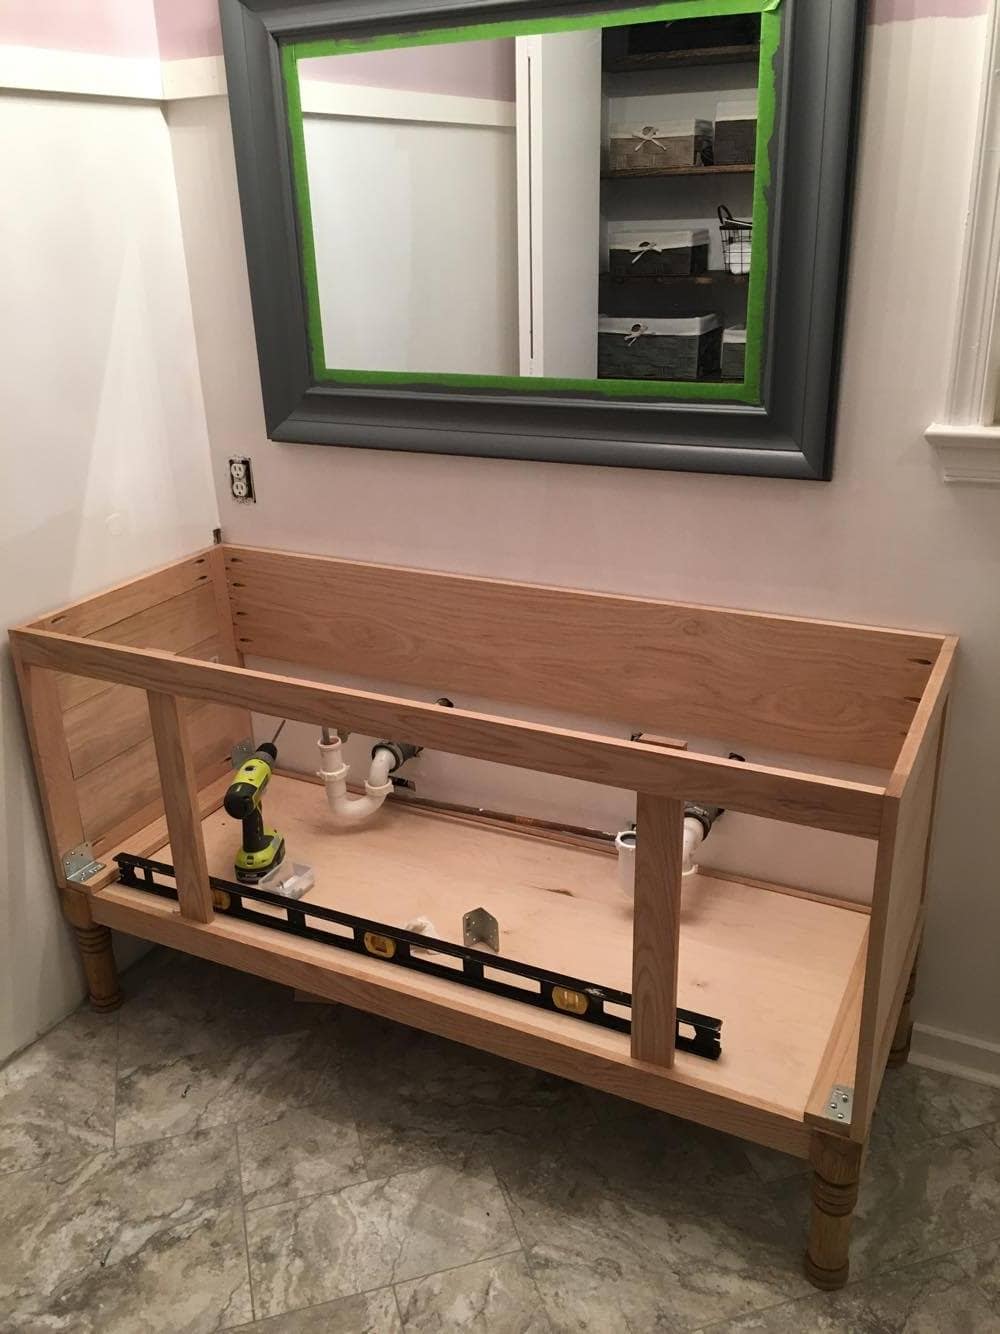
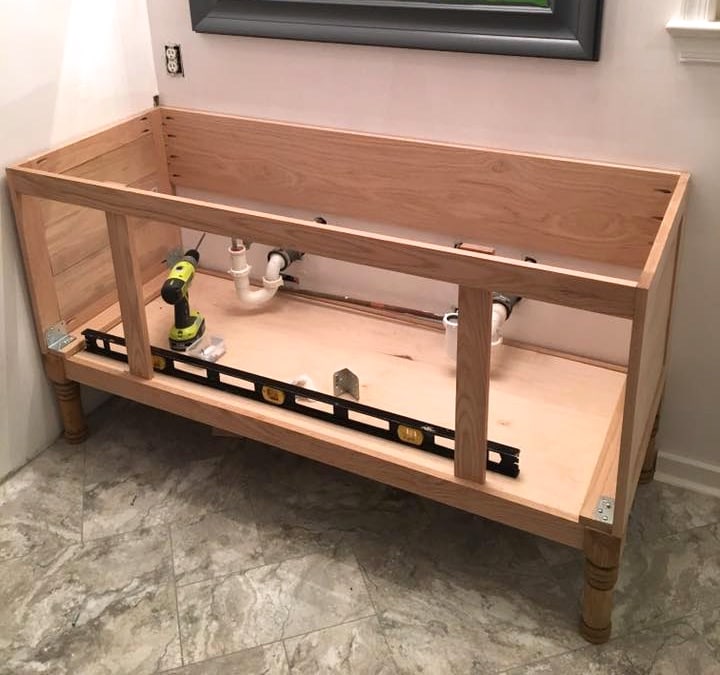
A New Vanity!
Hubby thinks we should just “go to Home Depot and buy a new bathroom vanity.” But does he realize that new vanities in 60″ lengths are at least $800??
I don’t have money for that.
So I am going to attempt to either make one…..(wish me luck….) or I will try the ReStore or another place.
I really like the idea of building one, so we shall see!

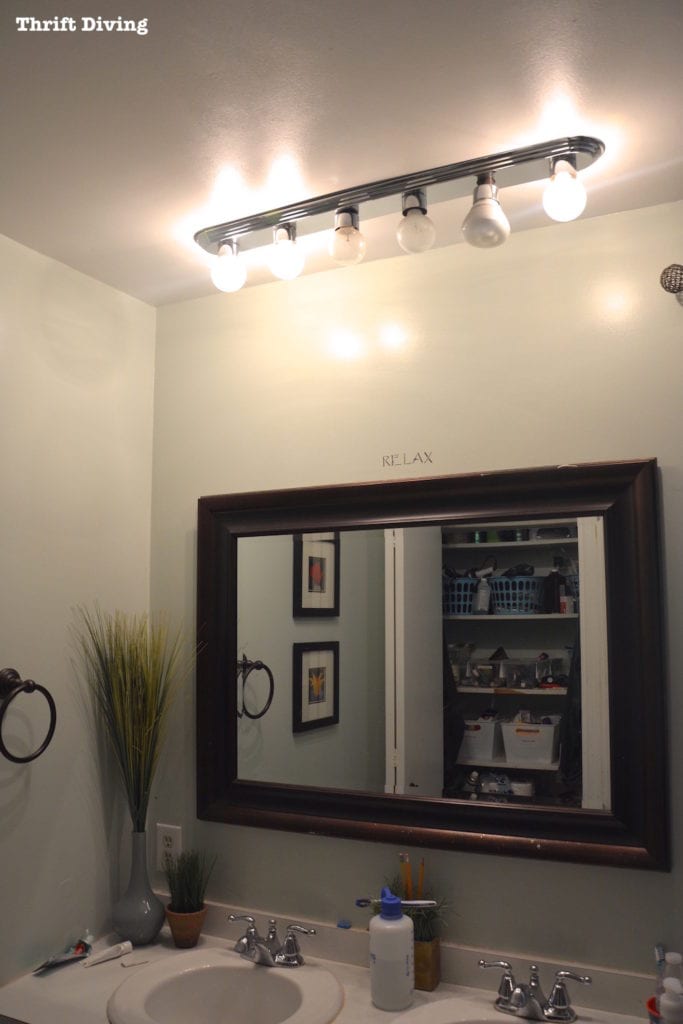
New Lighting
Sadly, this is what our lighting looks like. It needs to go.
Ideally, it will be hung over the mirror, if we decide to keep it.
LOL that 3 of the lights went out and we never replaced them. Ghetto-fabulous!
Ghetto-fabulous!
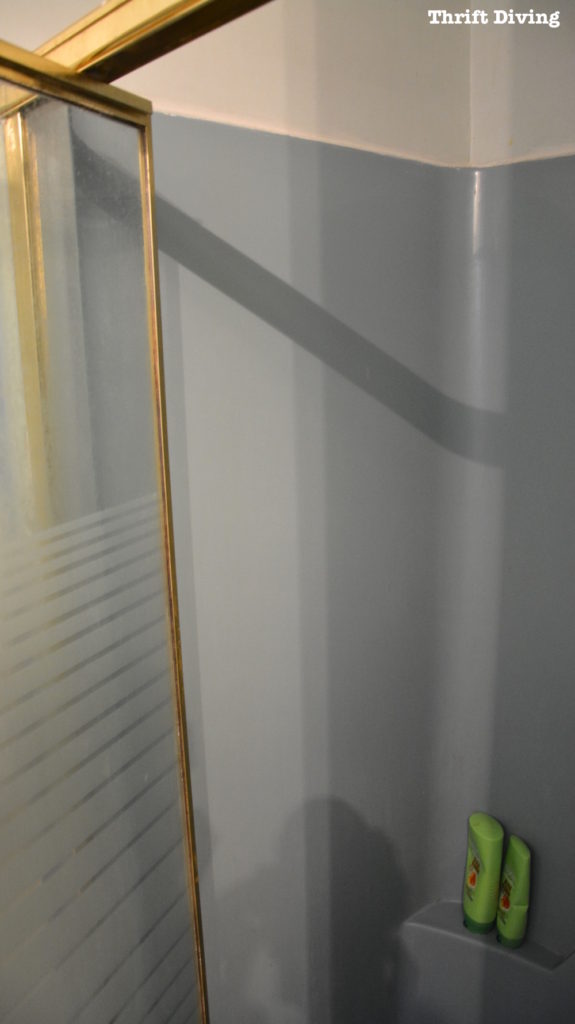
A New Shower Stall??
Not sure on this one, yet.
But at the very least, this glass door is coming off and it will be replaced. It’s nasty!
We might need to stick with the turquoise for a little while longer, depending on our budget!

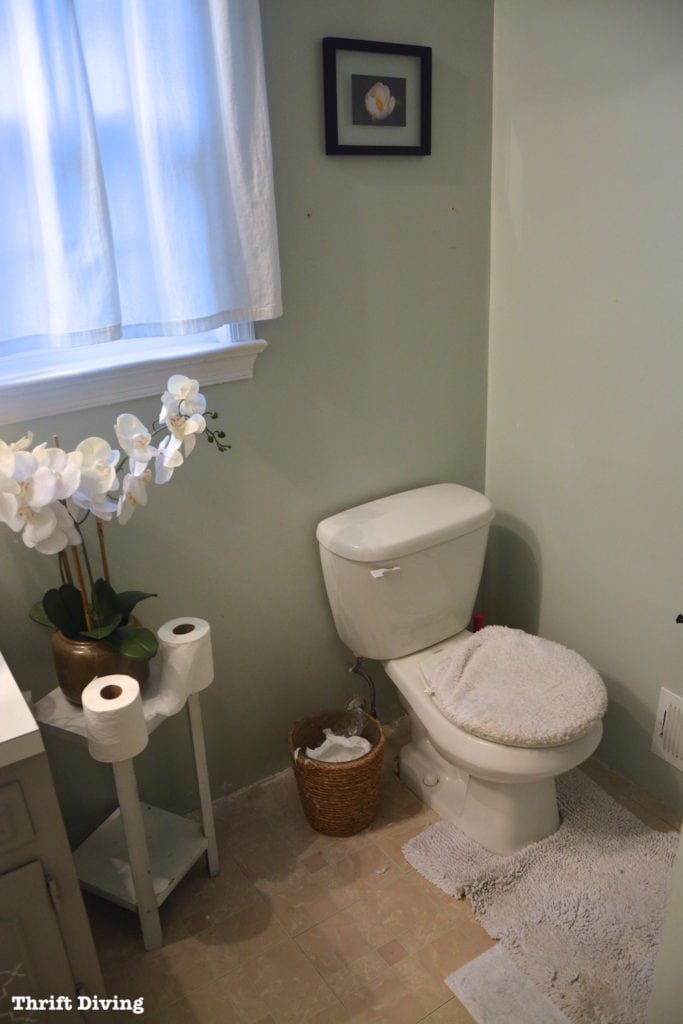
A New Toilet….and DIY Window Treatments!
Yes, indeed a new toilet.
We’ll get something a little taller and more water-efficient.
Do you remember tip #8 in this post about making DIY window privacy screens?
I think I am going to make one for this bathroom!
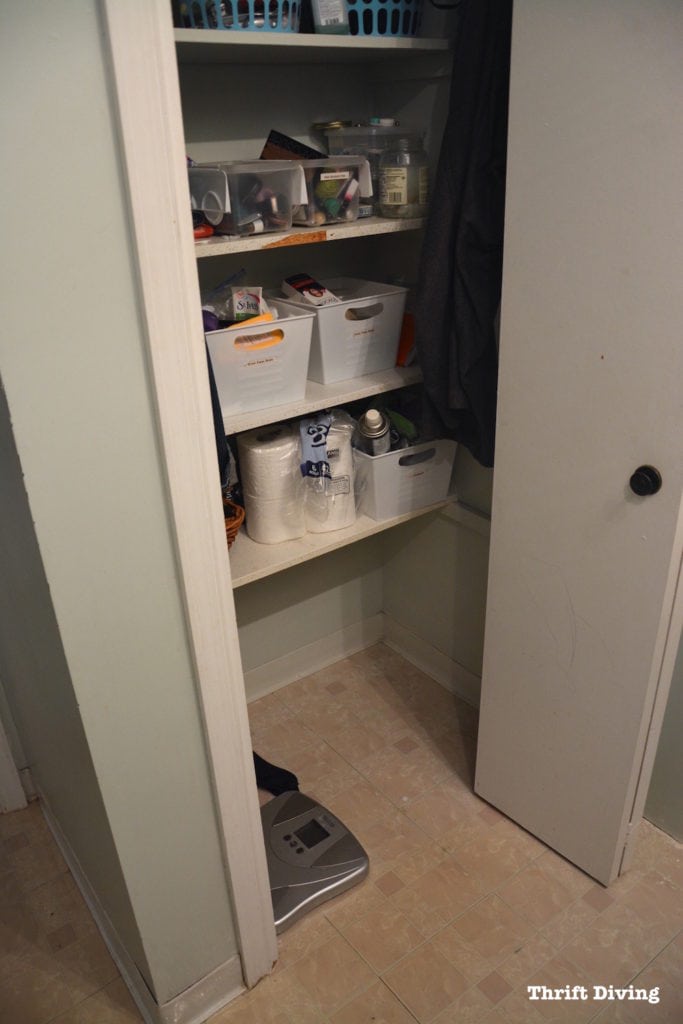
Accessorize!
I can definitely use some new DIY wall art! I’ll be making some.
Since there’s not a ton of space in here, they won’t be a lot to purchase.
However, as you can see, we have two rolls of TP sitting on the stand because our toilet paper holder is on the fritz!
I’d like to keep the little stand, which I found years ago at a thrift store. Perhaps it will get a new coat of paint. 🙂
And new rugs!! Jeez….these ones are so stained, it’s embarrassing we’re still using them.
Join the 30-Day “Naughty or Nice” November Room Makeover Challenge!
Now it’s YOUR turn!
What room in your house has gone through an evolution of change, but needs to be updated, decluttered, cleaned, and polished?
Which room are you tired of ignoring?
Sign up for the challenge by clicking below! It’s time to write the next chapter of your home’s story, too
![]()
Stay tuned because later this week, you’ll get to see everyone’s “before” pictures so you can see which rooms everyone else is tackling this month!
Read the Rest of the Master Bathroom Makeover Series!
DAY 1: The Evolution of a Master Bathroom Makeover
DAY 4: Picking Out New Flooring: Which One Do You Like?
DAY 6: How to Remove an Old Bathroom Vanity
DAY 27: Removing Wallpaper, Repairing Walls, and Removing an Old Toilet
DAY 29: Installing New Flooring in Our Master Bathroom
DAY 49: The Bathroom Makeover That Would Never End (An Update!)

Download the 5 freebies!

Thrift Diving inspires women to decorate, improve, and maintain their home themselves...using paint, power tools, and thrift stores! Use these 5 printables, checklists, and ebooks to get started!


For your shower, have you thought of using a bathroom refinishing kit to do the shower/ tub and counters? There are many types available. I used this one in my old house – http://www.armorgarage.com/baeprekit.html.
It does take a lot of work, but the results are great.
In my old house I also had a professional do the same thing to my kitchen counters and in the end, the results were pretty much the same.
Hey, Judith! Yep, I considered painting it, but I’m on the fence about that because of the horrible smell (don’t think I want the chemicals). Plus, everything else is getting replaced and I kind of want to replace the shower. I have a contractor friend that came to help me remove the vanity, and he said that tile would look nice. So I’m thinking of getting him to help me pull out the old shower stall and learn how to tile a shower from him! We shall see!!! But I’m half curious to try the painting method just to see how it works and to see if it would be a reasonable option! 🙂 Thanks for that link!!
Nice project. I have one question though. Did you use regular drywall in your shower when you fixed it up? Regular drywall will absorb water and rot. Cement board or a waterproof board of some kind is what should be used. I learned that when Hubby did our bathroom.
I have 4 rooms in the process of renovating so don’t know which one I would enter with. Painting already done but floors need to be replaced and still painting furniture.
Hey, Kathy! Yep, moisture-prone places should use the green drywall which is made for wet places. In this case, I didn’t replace the drywall, I simply skim-coated it with joint compound. Then I added a couple coats of paint. It’s been 5 years now and I haven’t seen one problem with the paint job, so I think everything went okay! LOL
Oh, and I meant to add, you can pick whichever room may be closest to being done by the end of the month! 🙂 LOL
I’m a renter, AND a senior citizen who needs new eyeglasses, AND Christmas is coming (I have five grandbrats to buy for), so I won’t be participating in your 30-day challenge, but I shall be living vicariously through all of those who do! lol
On a side note, I used to have that same shabby chic curtain with the valance in your original bathroom. I loved that thing so much I had to make myself toss it out when it got discolored from my rusty well water! Hoarding habits are so hard to break!
Good luck with your reno, and why are you sitting here reading this?? Get to work, lovey!
Hey, Linda! Yes, I loved that shabby chic curtain!!! I had that thing up in my other bathroom in our condo before we moved into this house, and I absolutely loved it! I don’t know what ever happened to it. I think I probably donated it because it started to fall apart or maybe got stained, too. I love that shabby chic style! Feels so feminine and girly! LOL….”grandbrats”!
You are doing a very nice job. I love your colors and the cabinet is my favorite. The grey and white are beautiful. You are right it will be fantastic when you are done.
Awww..thanks, Betty! When I actually CLEAN the bathroom, it doesn’t look too bad! LOL. But it’s at the point where I’m ready for a nice upgrade. I’m really excited about trying to build a vanity! Hubby is going to be soooo against me doing it, since he thinks everything should be “ready-bought” but I’m going to prove him wrong! 🙂 Thanks for commenting!!
When I was six months pregnant for the first time, I hit nesting mode big time. I took apart all the closets, had them measured and fitted with better closets systems (they were original to our 50 year old house) and got rid of a ton of stuff. (That took working on my husband bit by bit!)
I love what you did the first go around, and I’m equally excited that you have a sponsor for your new floor. All your makeovers are full of style on a budget. Most impressive.
Let’s see: mom to three, blogger, Duluth model, spokesperson, home-show guru, and all around nice person. I’m trying to sit up a bit taller in my chair. 🙂
Alys, girl, you say the nicest things!!! The nesting thing is REAL, isn’t it! I still can’t believe I did what I did at 6 months pregnant! I think back to all that sanding dust, and I simply had a little mask when I should have been wearing a flippin’ RESPIRATOR! lol. Let’s just hope no permanent damage was done! Learned my lessons there. And yes, I’m sooo thankful to Carpet One for sponsoring the floor!! And the best part is that they’re giving away a 3-item prize pack to one reader that finishes, so I’m super excited about that! And the odd thing is that some plumbing company contacted me and wants to sponsor my toilet and sinks! The luck, right? Plus, they want to give away a new toilet to a reader during the challenge. Yeah!! Free stuff all around! 🙂
I love your decorating style. Our master bath needs a complete makeover…we’ve been doing enough to just get by w/it, but we need to do the entire thing over. We just don’t have the extra finances right now. I can’t wait to see your finished work!
Pamm, you did that awesome bathroom makeover in a previous challenge, didn’t you? The dark brown one with the scrap molding, right? 🙂 Is that the same bathroom you’re talking about? I know what you mean about extra finances! We were supposed to take a family vacation in December, but I’m thinking I may use some of that $$ towards getting a new shower! I am going to call around and see if we could possibly hire something to do the shower. I’d LOVE to attempt it myself, but when it comes to water like that…I’d rather not take my chances, you know??
I think you have me confused w/someone else. I haven’t done any of your prior challenges. I did send you some of my home reno pics though. I made the headboard from the hutch & the old wood shutters. Painted the countertops, etc…
Yep, I definitely got your emails with your projects, but I could have sworn you had done some previous room makeovers in my challenges! LOL Must have been another Pam! 🙂 LOL Oops, I thought you were this Pam: https://thriftdiving.com/pam-refreshing-laundry-room-makeover/ LOL
I’m still pondering the SAME room I was wanting to do for your LAST 30 day challenge. I suppose it might not be AS much work as your bathroom…. but it needs a LOT of help.
First up would be removing the carpet, but I can’t remove the carpet OR start work until cousin Terry comes to pick up a big ole wooden display cabinet that I’ve been holding for her for years. Well… I actually bought it when she was going to get rid of it. She made it, and it’s beautiful, so I didn’t want it to get out of the family. She’s going to buy it back and give it to her son for his huge home. So, all of that would need to take place in order for me to commit.
I suppose IF I commit, then she has to come get it, right?
It’s soooo scary, but I really would love to get it done before the holidays.
gail
Yes, Gail, you HAVE to do it! Kim was saying on the call today, “I don’t know WHY you started a room makeover in NOVEMBER!” hahaha, for that very reason: so that we can get our homes ready for guests! Which room are you trying to do? Oh please, please sign up! You’ll feel so much better when you finally get it done. And if you don’t want to submit BEFORE pics, you can definitely participate off-line! And yes, tell Miss Terry to come get her stuff! LOL
Build your vanity..you can do it!
I think I’m really going to try it, Tammara!! I was researching plans today and I can totally follow directions if someone says, “STEP 1…do this….STEP 2….cut that….” I’ll try it. And if it doesn’t work, then it wouldn’t be much money wasted. And I could use it for a workbench in the garage. 😉 LOL
Wow! Ambitious plans! But you can do it! Can’t wait to see the finished result!
Thanks, Florence! I think it’s going to look pretty fantastic when I’m done! 🙂