How to Remove an Old Bathroom Vanity
This is Day #6 of our 30-Day Room Makeover Challenge that I’m doing with Thrift Diving readers! Be sure to subscribe to stay up to date with our room makeovers!
I chuckle as I write this because as of yesterday, the thought of removing my old bathroom vanity scared the crap out of me.
Today, I feel like I could do it with my eyes closed! LOL
DIY projects are like that: before doing it, it seems like the hardest thing in the world. But afterward, you realize the difficulty was all in your mind. Sometimes all you need is an experienced hand to teach you!
Thankfully, I’m blessed with a good friend named Edmundo who’s a contractor.
Edmundo had renovated our kitchen when we first moved into this old 1973 house in 2010.
Since that time, we’ve kept in contact and he helps me out with occasional projects when my “I-can-do-anything!” attitude fails me. 🙂
What unnerved me about removing the vanity was the plumbing aspect. When it comes to any plumbing or electrical, I’m a big baby (although, I can install a toilet like nobody’s business!).
But now that I’ve worked with Edmundo to rip out my old vanity, I feel confident in the new skill I’ve learned!
And I can’t wait to share with you what I learned so that if you’ve got an old vanity that needs to be removed, you can do it without the fear of, “OMG-I-can’t-do-that!”
How to Remove an Old Vanity
Tools Needed:
- Adjustable wrench
- Flathead screwdriver or power drill with flathead drill bit
- Phillips screwdriver or power drill with drill bits
- Box cutter
- Crowbar (hammer and putty knife)
- Bucket
- Towel
- Optional: Cutting tool if vanity needs cutting
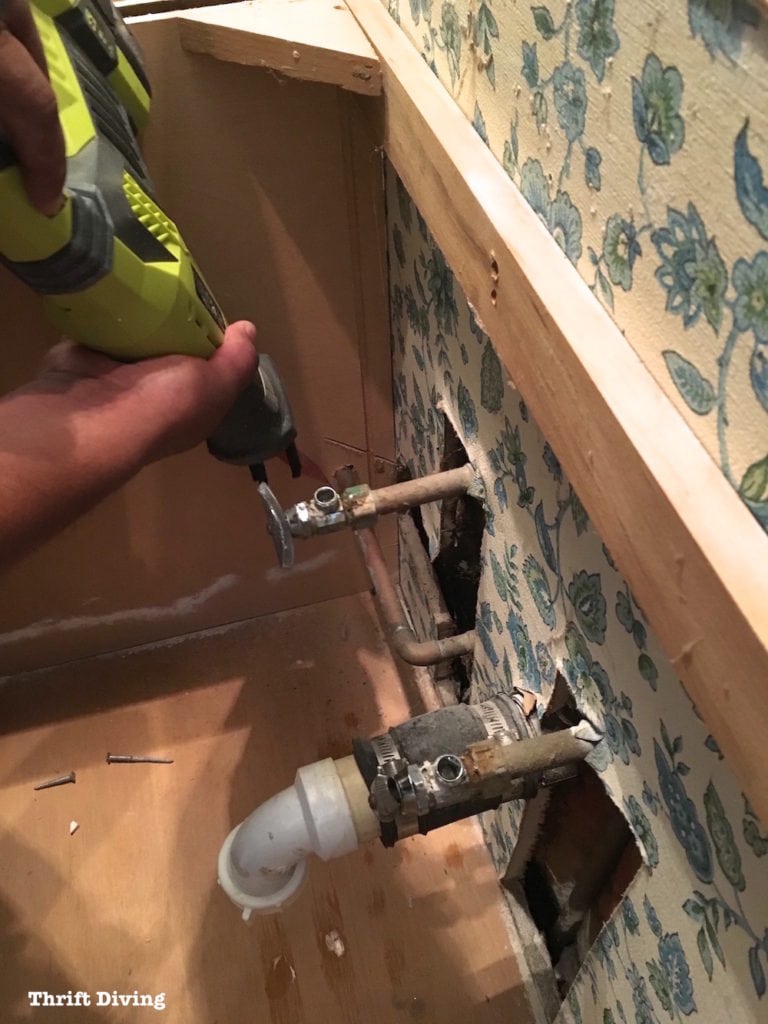
STEP 1: Disconnect the plumbing.
This is the part that made me nervous! I’ve never really done much with plumbing, so the thought of turning off the water and figuring out which parts to remove–yikes!
But Edmundo made it simple.
First, he climbed under and started, showing me how to shut off and disconnect the plumbing.
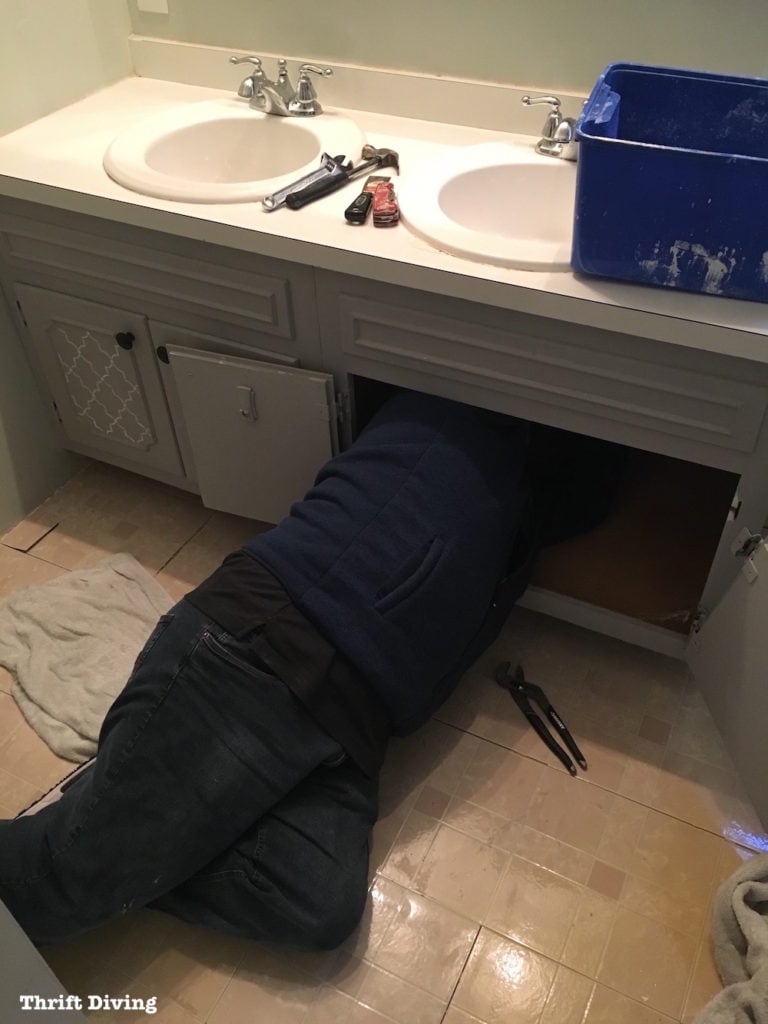
Here’s how to disconnect the plumbing before removing the vanity top:
1 – Turn off the water. Before removing the vanity, the water needs to be turned off. If it is difficult to turn by hand, use an adjustable wrench and slllooowwwwlly turn it to the RIGHT to get it un-stuck. Keep turning it by hand and fully shut off the water to each faucet.
2 – Disconnect the water supply line. Just be sure to the secure the pipe by hand when loosening the water supply line or else you could break the pipe when you’re turning too hard.
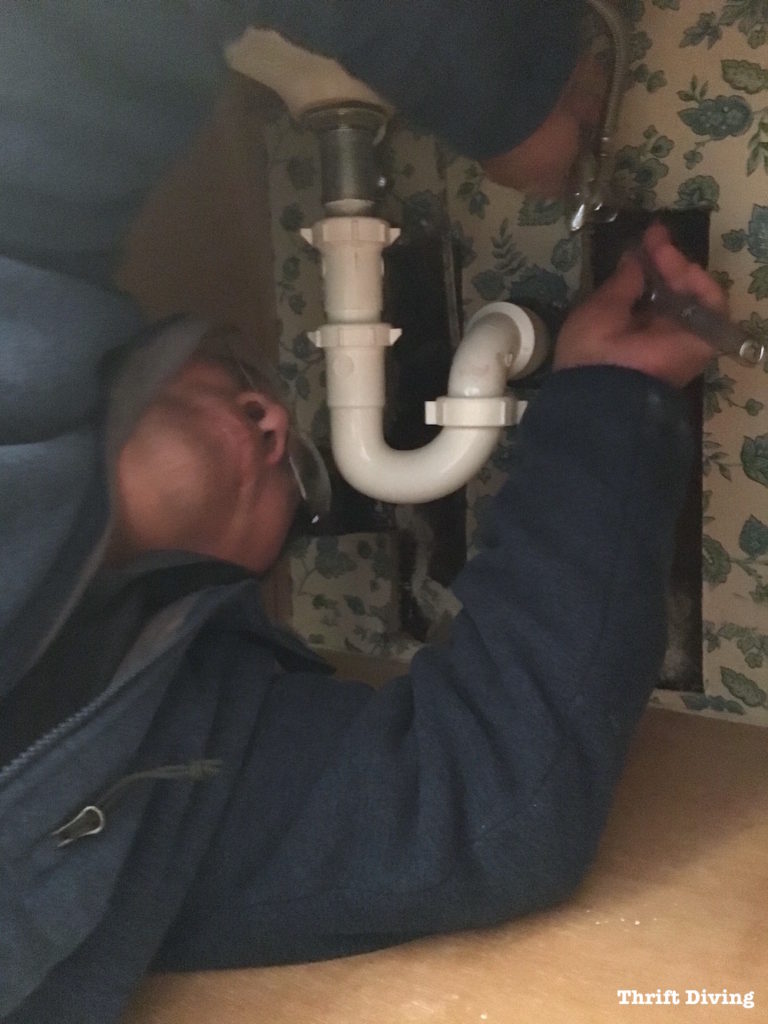
3 – Unthread the drain stopper – You know that little drainer stopper you pull up when you want to fill up the sink? That’s got to be unthreaded. Just release that skinny metal pole from the hole.
4 – Loosen and unscrew here – It shouldn’t be that tight to unscrew, but if it is, use the large adjustable wrench to give it a little loosening, then finish looseningt by hand. Be sure to use a bucket for this step! It will be a little smelly and dirty, which is normal.
5 – Now loosen and unscrew here, too. Once loosened, this will release the p-trap. You’ll need that bucket!

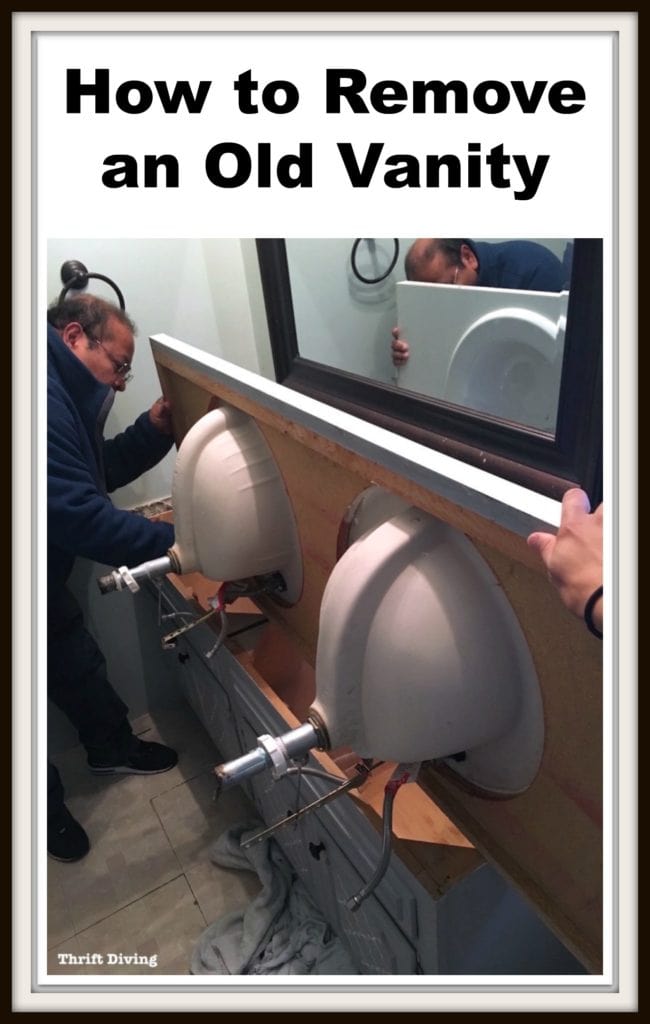
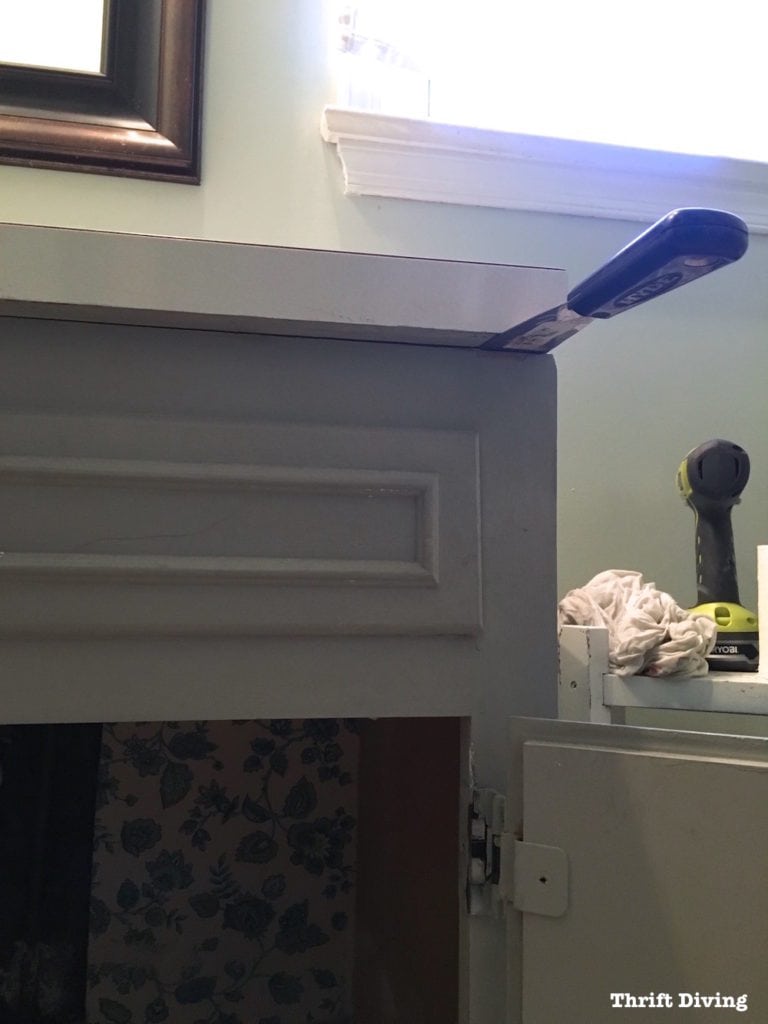
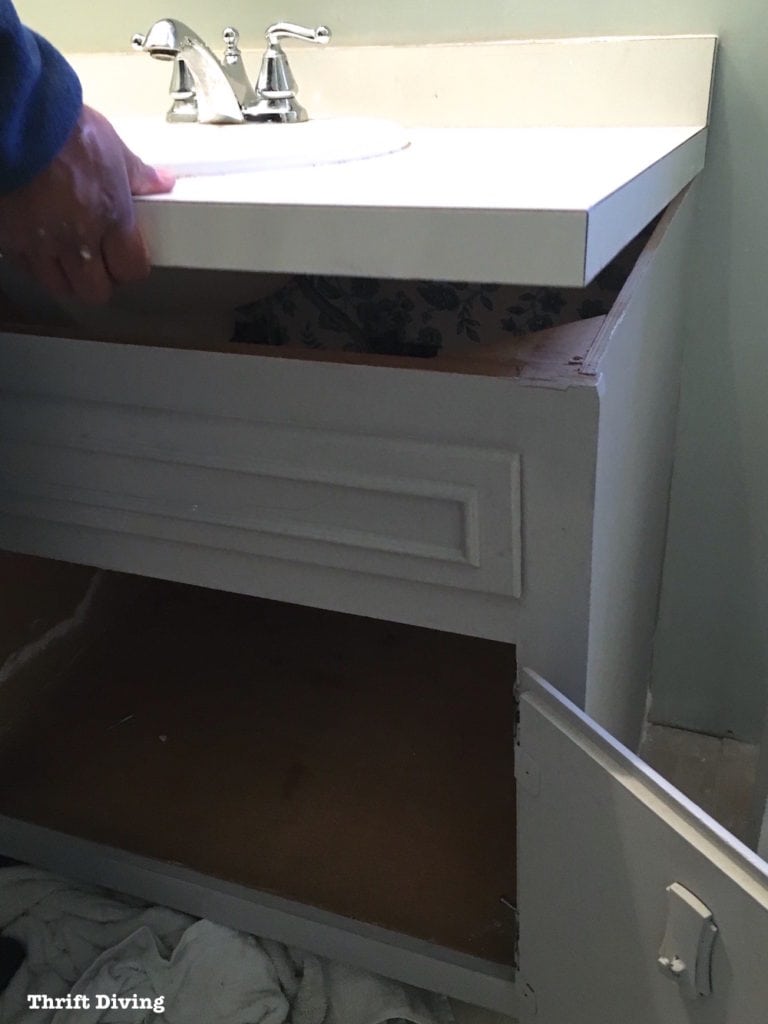
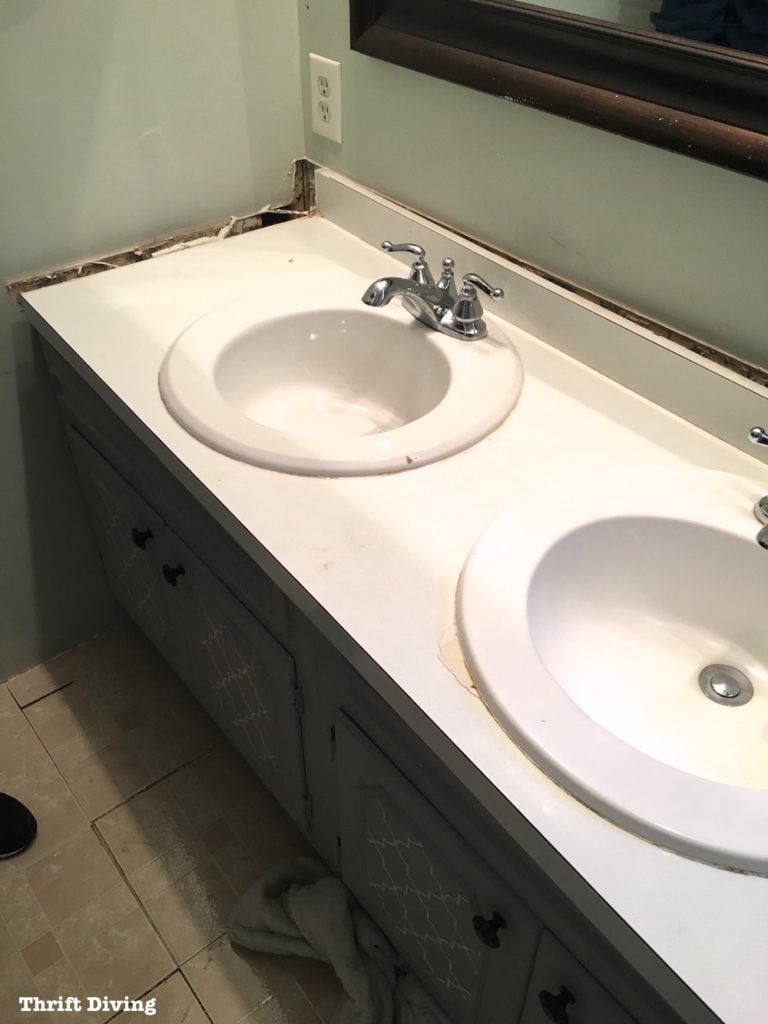
STEP 3: Unscrew the vanity top from the base.
If you look inside the vanity, on the underside part, you’ll see that the vanity top is secured to the base with screws. Use a flathead screwdriver or power drill to remove them.
Once the screws come out, you’re almost there!
STEP 4: Cut the caulking.
Now the only thing that’s keeping the top in place is the caulking. With a box cutter or some other sharp object, you can cut right through it along the seams, breaking the seal.
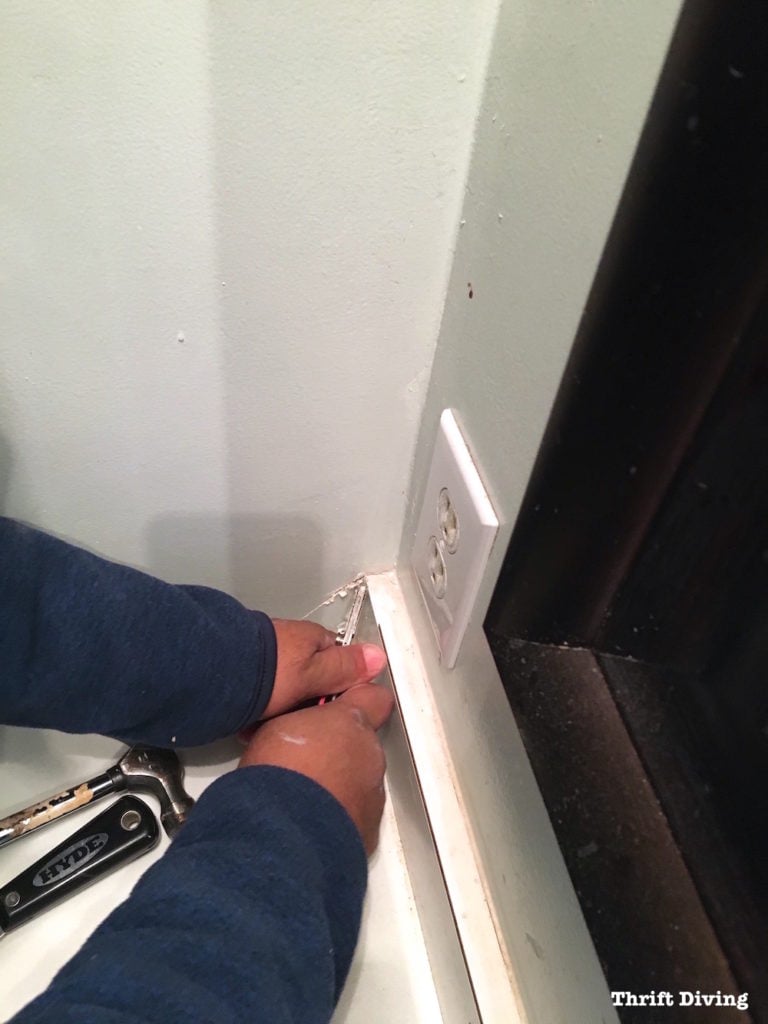
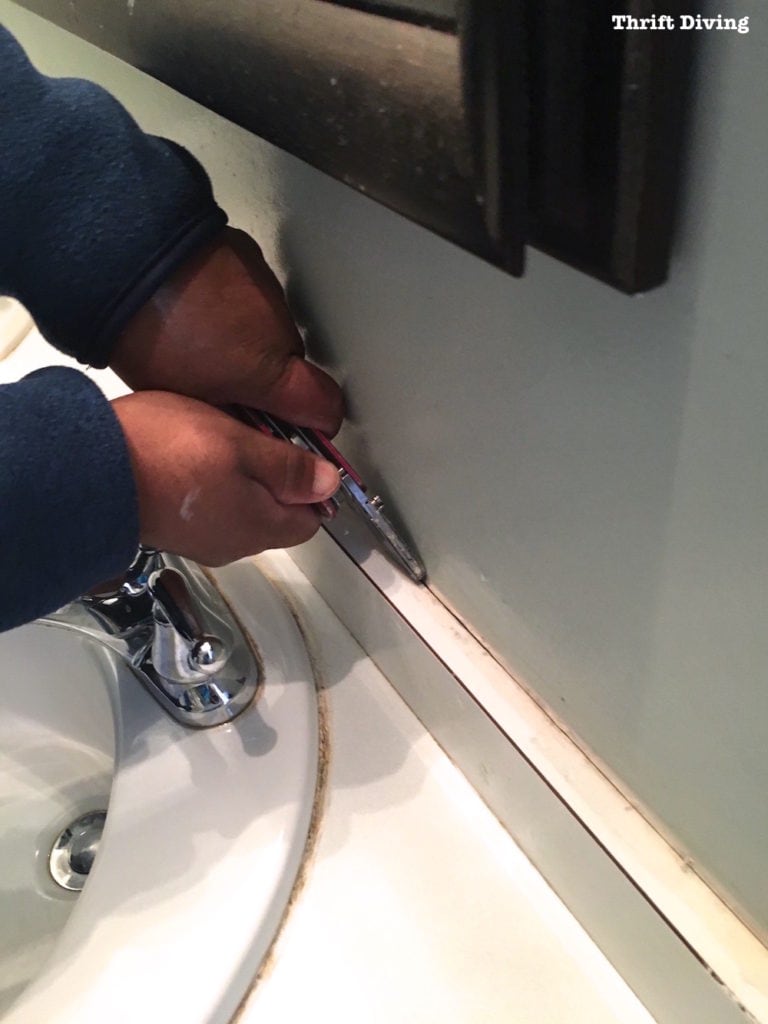
You might have to shimmy a putty knife up under the top to help loosen it up from the base.
When we gave it a tug, it came right up!
I couldn’t believe it was that easy to come up!
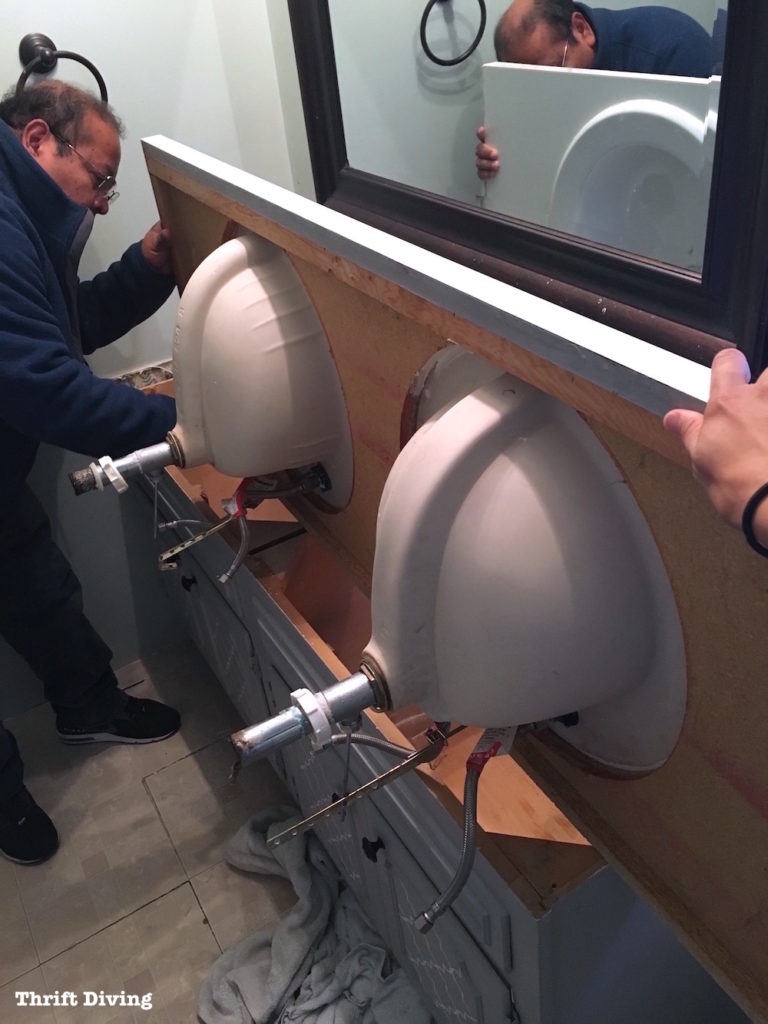
I thought that we would have had to remove the sinks and faucets, but Edmundo pointed out that once sinks are puttied to a vanity top, they’re pretty difficult to remove.
So what’s usually done is that you just take off the whole top in one fell swoop.
If you’re going to be reusing the faucets, you can remove those, but since I’ll be replacing mine, I left them on to donate to the salvage shop.
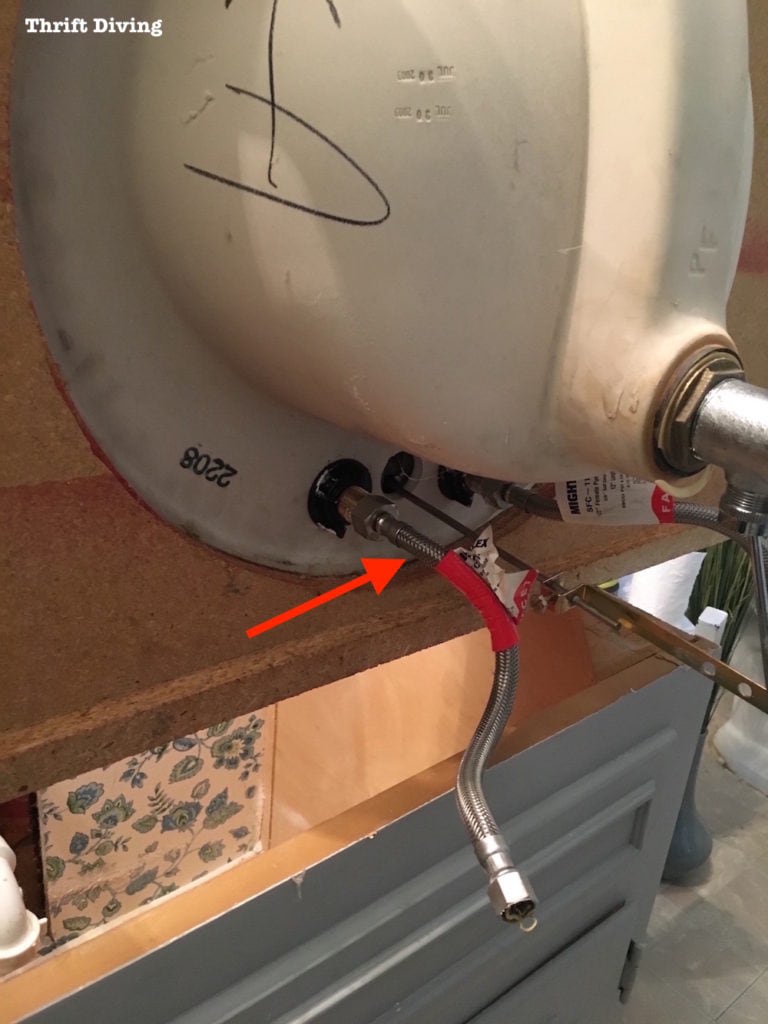
TIP: You won’t have to save the water supply lines that are connected to the sink.
Edmundo said you should replace these, too, when you put in news sinks and a vanity. You’ll also be buying a new p-trap to connect when the new sinks and vanity go into place.
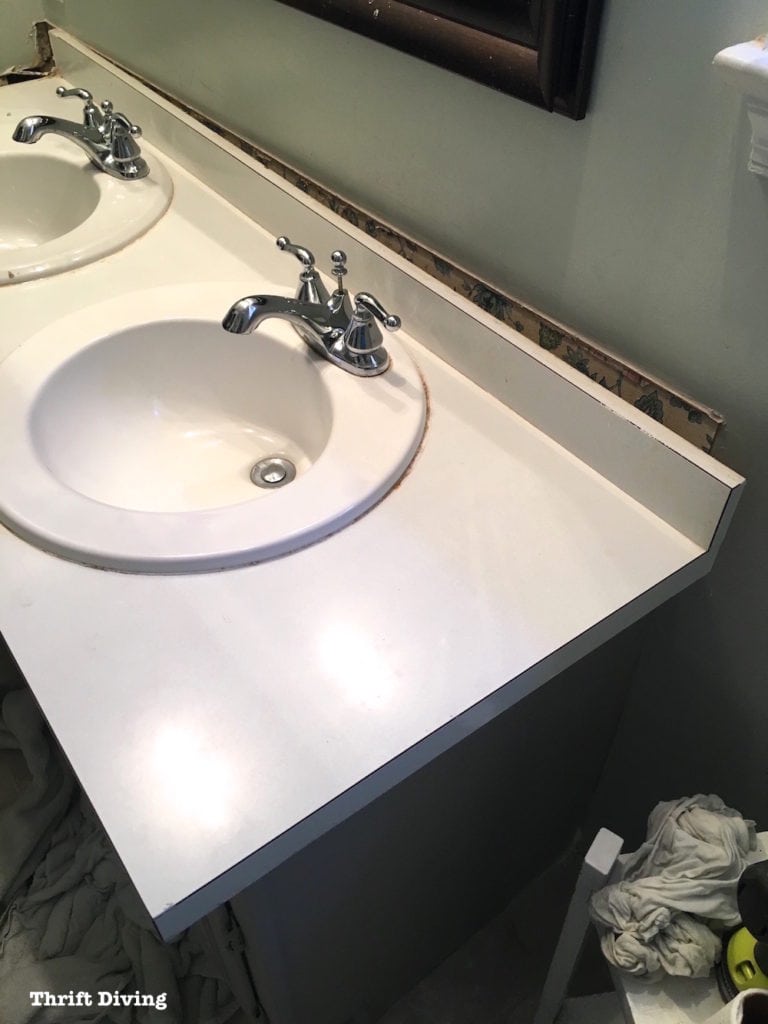
This is what was left once the top was removed.
Look at that crazy original 1970’s wallpaper!
Ick!!
STEP 5: Unscrew the base from the wall.
The base isn’t nailed down to the floor or anything: only the back is screwed into the studs.
Use your power drill to unscrew them.
If there’s any caulk holding the vanity to the floor or wall, cut through that, as well, in order to remove it.
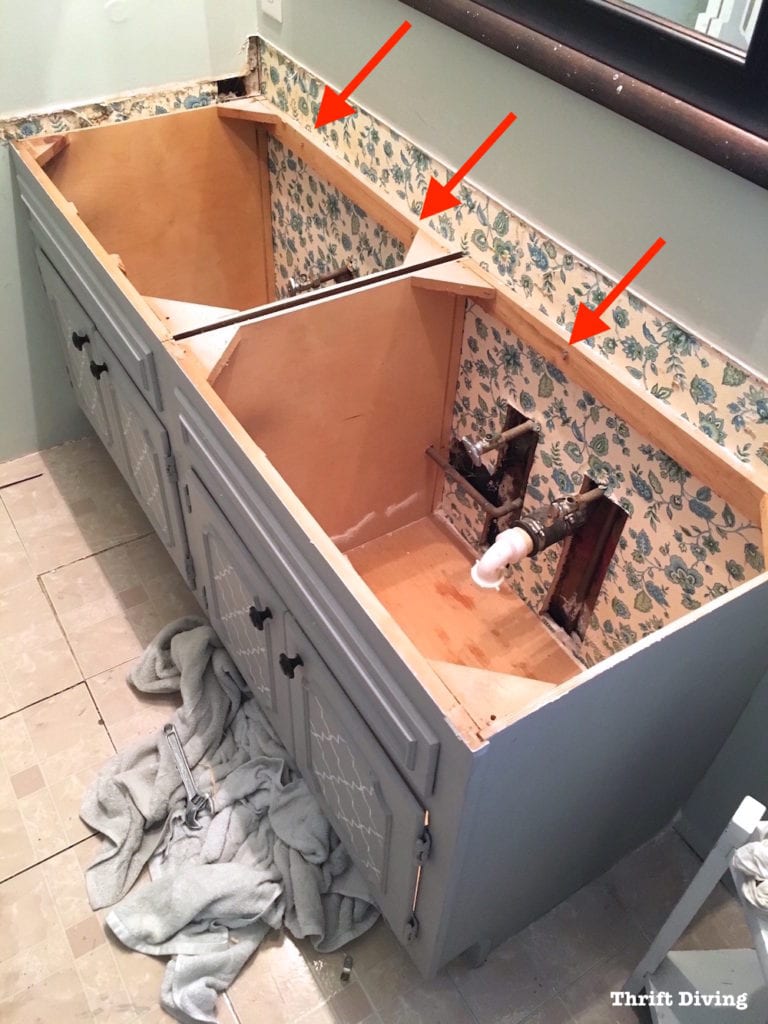
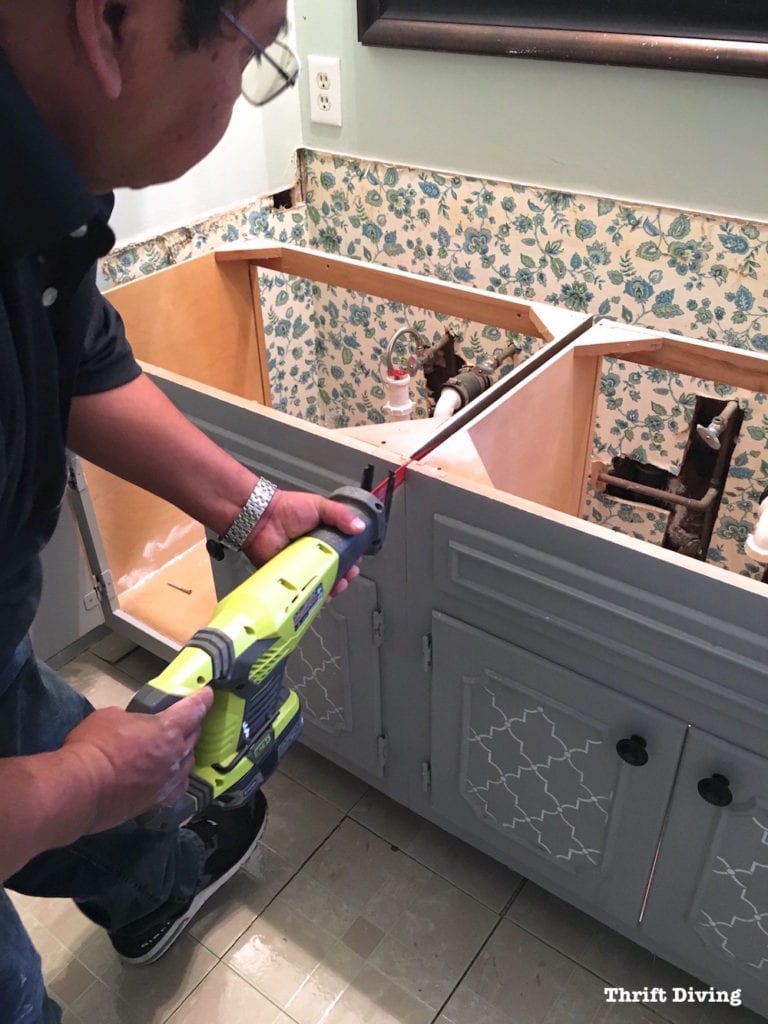
Did you notice that there is a pipe going through the inside of the vanity?
That needed to be addressed before the entire vanity could be removed (be sure to check your own vanity to see if there’s something preventing your vanity from coming out).
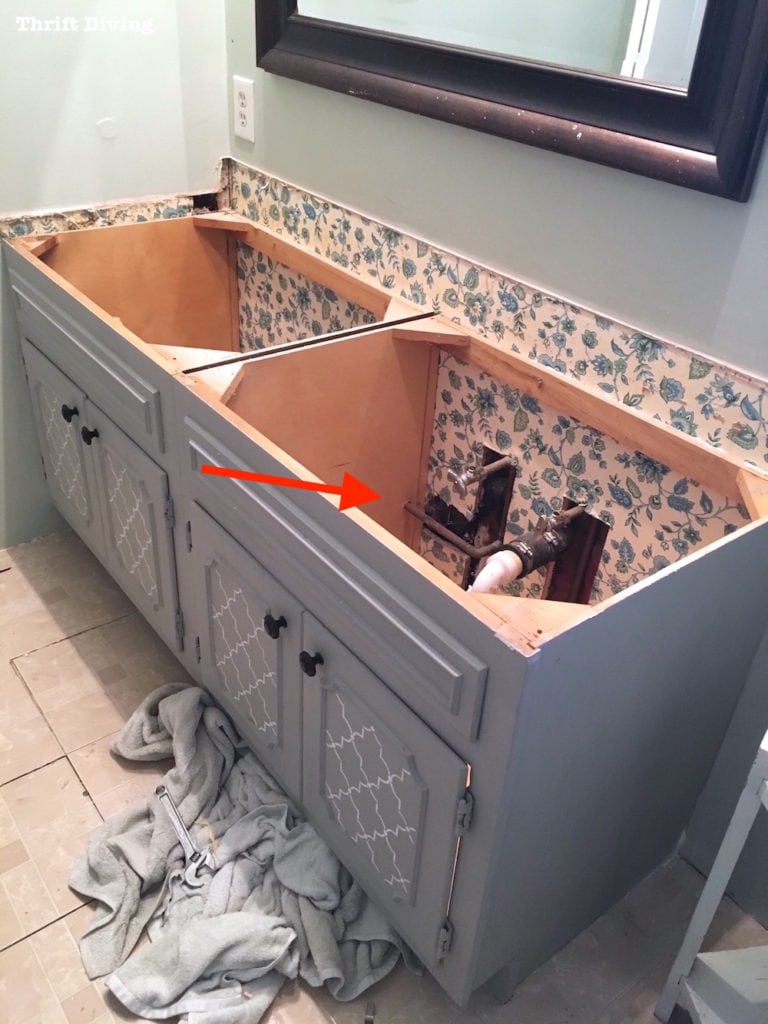
We needed to cut out the section of vanity in order to pull out the vanity.
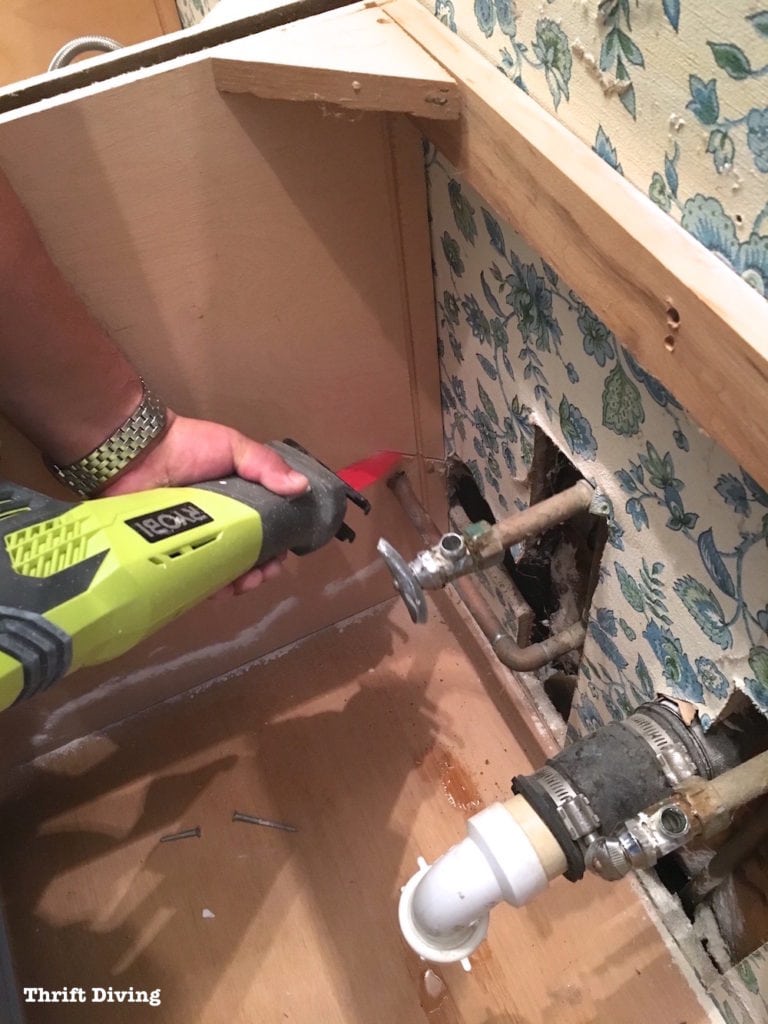
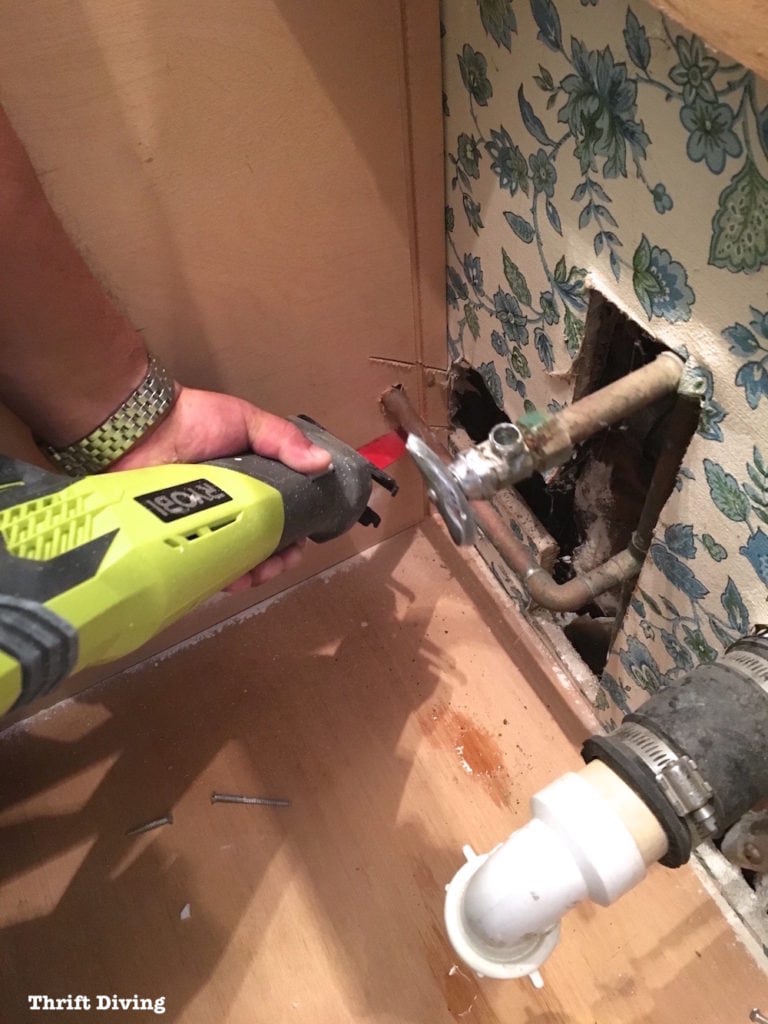
Edmundo used a reciprocating saw to cut out a section of the wood.
In order to easily carry the vanity out in pieces, Edmundo used the reciprocating saw to cut apart the two vanities into smaller sections.
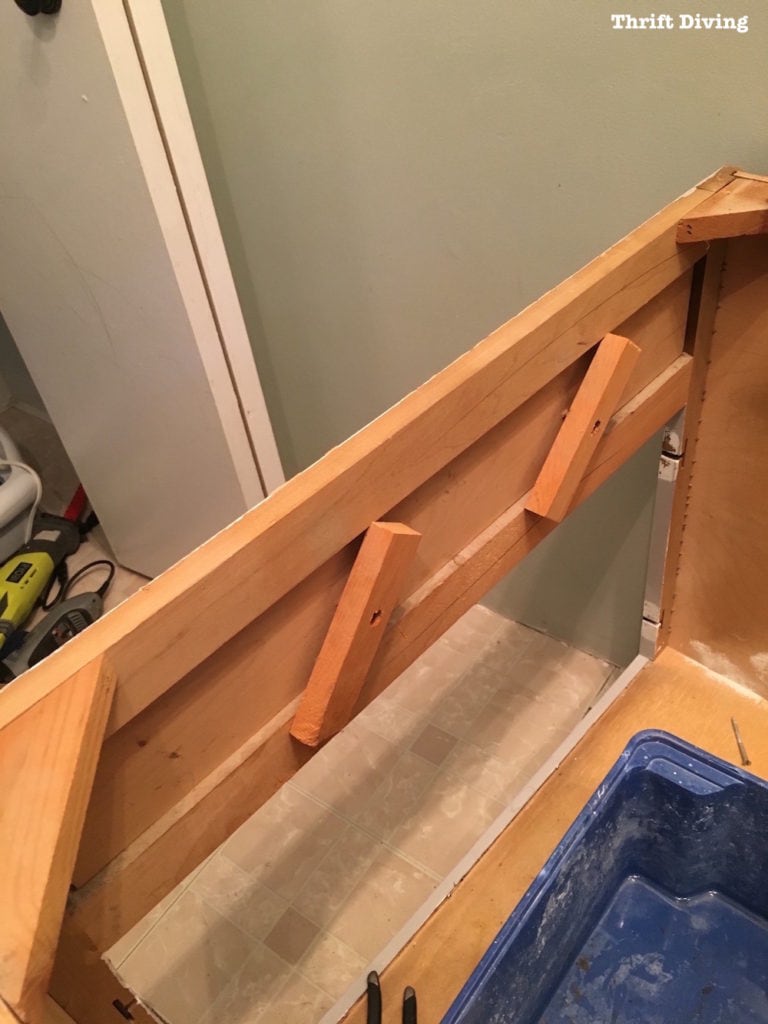
You can see the small chunk of cabinet that was cut out so that the cabinet could be removed.

We had a hard time getting the cabinets through the narrow bathroom doorway. the cabinet out of the bathroom, so we removed the cabinets and the faux front drawers first.
I had no idea that all cabinets that have faux drawer fronts are held on simply by these “stoppers” on the back (for lack of a better word). They’re simply held in place with screws and when screwed tightly, the front faux drawer front stays in place.
Oh, the things you learn when DIY’ing!
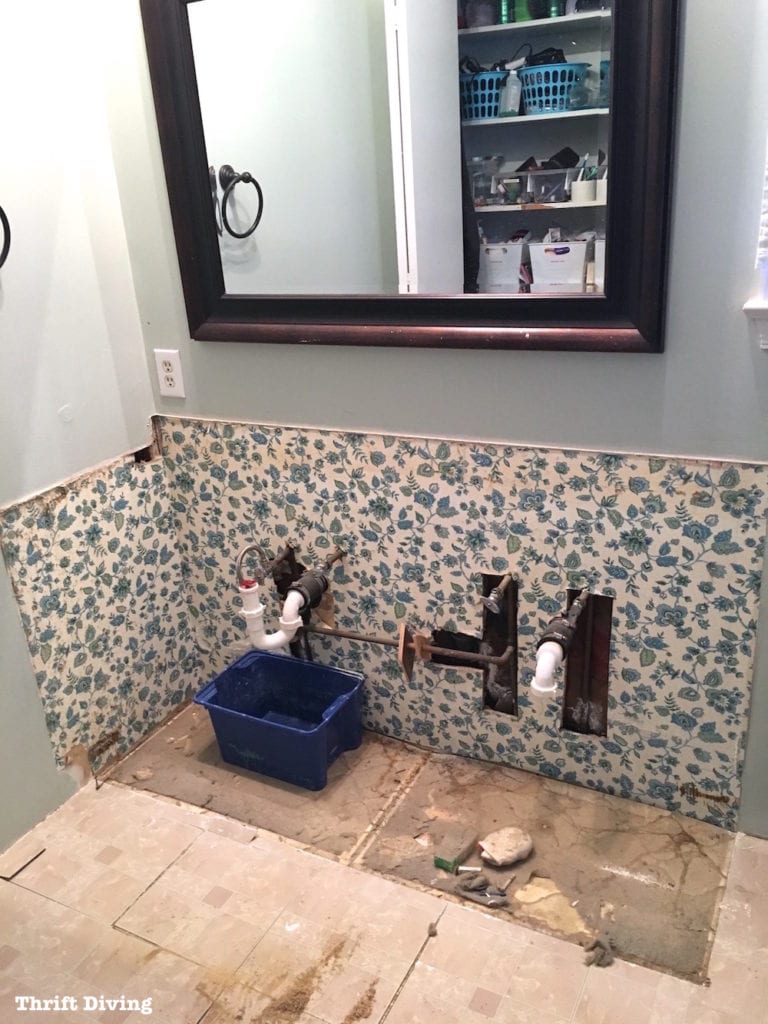
And this is what was left of the space after the old vanity was removed!
The wallpaper is simply hideous! LOL
And the amount of dust and dirty underneath was appalling. I bet that it’s been there since 1973. GAG!!
One of the pipes was leaking a little bit so Edmundo lightly connected one of the p-traps and diverted the dripping water back into the drain. We’ll need to get a new shut-off handle, which should solve the problem.
I plan to build a new DIY vanity!
Hubby thinks I’m crazy for considering it, but I love a challenge. Of course, I’ll also check The ReStore to see if there are any old (but in good condition) cabinets.
But I reeeeeeeaaally want to try my hand at a new one!
Wish me luck!
Keep Up With the Entire 30-Day Master Bathroom Makeover Series!
DAY 1: The Evolution of a Master Bathroom Makeover
DAY 4: Picking Out New Flooring: Which One Do You Like?
DAY 6: How to Remove an Old Bathroom Vanity
DAY 27: Removing Wallpaper, Repairing Walls, and Removing an Old Toilet
DAY 29: Installing New Flooring in Our Master Bathroom
DAY 49: The Bathroom Makeover That Would Never End (An Update!)
Day 52: How to Remove a Toilet Yourself
DAY 57: How to Install a Toilet Yourself

Download the 5 freebies!

Thrift Diving inspires women to decorate, improve, and maintain their home themselves...using paint, power tools, and thrift stores! Use these 5 printables, checklists, and ebooks to get started!


This is great! Thank you for the helpful information! I’m wondering if you needed to put a rag in the connection for the p-trap until the new one was installed? I need to take out my kids’ vanity and that’s the part I’m very unsure of. Thank you for this post!
I too, have told my husband when we see your commercial, hey, there’s my friend, Serena! That is too cool for school!
Uh, this Edmundo is quite the help, wish I had one in my neighborhood! …and! I am making great strides on my November fix up project! Just a little more to tidy up….
So far so good and a plumber who knows what he’s doing. That’s great. I had a plumber once who left
and never tightened all the joints, so I had a lovely water all over the place. So you have a clean slate and lot of room to work. Good luck with your cabinet. I know it will be beautiful.
Hey, Betty! Oh no! I hope you didn’t have a ton of damage because of that! 🙂 Yeah, it’s pretty exciting getting a clean slate on the bathroom. That’s why I’m happy that nearly everything is coming out. It’s time for an upgrade! I just have to figure out how to put it all together now!
Hurray for you! You tackled it and now you’ve got a clean slate (well, more or less) to work from! The wallpaper is ugly, but it’s blue, so at least the color family is right. I love that you are going to build a vanity. If you can’t make it all one long shared space, I’m sure you can figure out how to make a him/her space all in one. My late hubby and I had very different ideas about “clutter” and “organization.” It was nice when we had separate areas and I could keep mine neat and not be accused/guilty of “hiding” his stuff! LOL My challenge won’t be redoing a room in the sense that your challenge does, but I’ll still be working offline on my goal . . . to get the second bedroom sorted and organized into a workable space. Why does it take to so long to get settled after a move? Ugh!
Hi, Teckla! I remember after moving in, we still have boxes in the garage for a whole YEAR afterward! LOL So yes, I feel your pain. I guess the less stuff you have, the easier it is to move. LOL. Good luck with that, girl! And I think I’ll be running your Reader of the Month on Friday! 🙂
Oh come on now! That wallpaper is cute! So glad you had Edmundo to help you out with a tough job. And you’re going to build the new version? Okaaaay. I DO wish you luck! Don’t you put the floor down first? I sure don’t know anything.
Cute?! LOL Maybe 30 years ago it was! LOL. I just can’t imagine that whole bathroom covered in that stuff! That’s why I have always hated wallpaper, although I know that many cute styles are now out. And yes, the floor has to go down first, which is what I’m waiting on. But I feel like I should at least PAINT now, you know, so that if I drop things it won’t ruin the new floor!
I saw your commercial during the Purdue football game on Saturday and told my husband hey there’s my friend. He said you really know her? I said well I feel like I do. So there!! It was great. Donna , here in Florida.
Nice!! I have been dying to see it live, but no such luck! I don’t have cable so I keep hearing from others that they’ve seen it. So glad that we’re friends! 🙂
I’m thinking of removing my vanity and installing a new one. This are excellent, detailed instructions. Have pinned this for all the tips! I’m 73, but I think I can do it. Like you, wish I knew a little more about plumbing, yikes. Will just have to see if I have nerve enough to put it back in!!
You can do it, Linda! I was nervous about it, but after seeing things removed, it was really easy! Just a few basic tools and voila! The plumbing was really easy, too. I was thinking I would have to remove the sinks from the top and all that jazz, but nope–you just replace those along with the top! I should have done a video while Edmundo was showing me what to do! It would have helped even more!
awesome job guys! It’s the little things that make us so happy, right? 🙂
I’m so happy you’re tackling this job, and learning along the way!
gail
ps I’ve started on my room, working on it a little each day.
YAY!! Go, Gail! Are you making a lot of progress? Yeah, I was soooo excited when that vanity came out! It’s funny seeing how SIMPLE it was. When we broke it down to the basic elements, I knew that I could build a vanity. Now I just need to put on my DESIGNER hat and see what colors I want, styles, etc. Exciting!! 🙂 Good luck on your space!!!
Serena,
I think you would do an amazing job with a DIY vanity, I say you go, girl!
Btw, I saw your commercial for the first time on tv today, it was great. I was like, “I know her, I know her!”, everyone is looking at me like I have lost my mind, lol.
Hey, Wendy! LOL! That’s awesome! I keep hearing about people that have seen it but I haven’t seen it because I don’t have cable! Not sure if it’s on the local NBC and ABC channels and stuff, but I’ve heard it’s been on CNN, DIY Network, and more, which is awesome! And thanks for the vote of confidence about the vanity! The only thing is that I need to get my garage cleaned out enough to even be able to have enough space to build something! LOL! 🙂 Thanks, Wendy!