Build a DIY Bathroom Vanity – Part 3 – Creating the Partitions
This post is Part 3: Creating the Partions in the series where I thought of this crazy idea to build my own 60″ DIY bathroom vanity from scratch. Be sure to check out the other parts in this tutorial series:
- Part 1: Attaching Legs and a Base
- Part 2: Attaching the Sides
- Part 3: Creating the Partitions
- Part 4: Making Drawers
- Part 5: Making Cabinet Doors
- Part 6: Fitting the Granite Vanity Top
- Part 7: Finishing the Oak Vanity
- BEFORE & AFTER: The Final Master Bathroom Makeover Reveal!
SKIP AROUND THIS POST
No time to read this whole post? Skip around and visit each section! 🙂
Materials Used
STEP 1: Create a Visual Mock-Up
STEP 2: Measure and Cut the Plywood
I Ran Into a Big Problem
The Solution
Lessons Learned
This next part is where things started to get even trickier. This isn’t necessarily a “how to” from a professional woodworker.
It’s more of a “how I did it” from a complete novice! 🙂
The problem that arose from building this vanity is that I wasn’t working from plans. Unless you know how to create woodworking plans, most newbies just go online and find existing plans and follow them.
Sort of how you’d use a McCalls or Buttericks pattern to sew a dress if you’d never done it before, right?
But because I was working from upcycled vanity legs, I had to build on top of the legs and create the whole vanity from scratch.
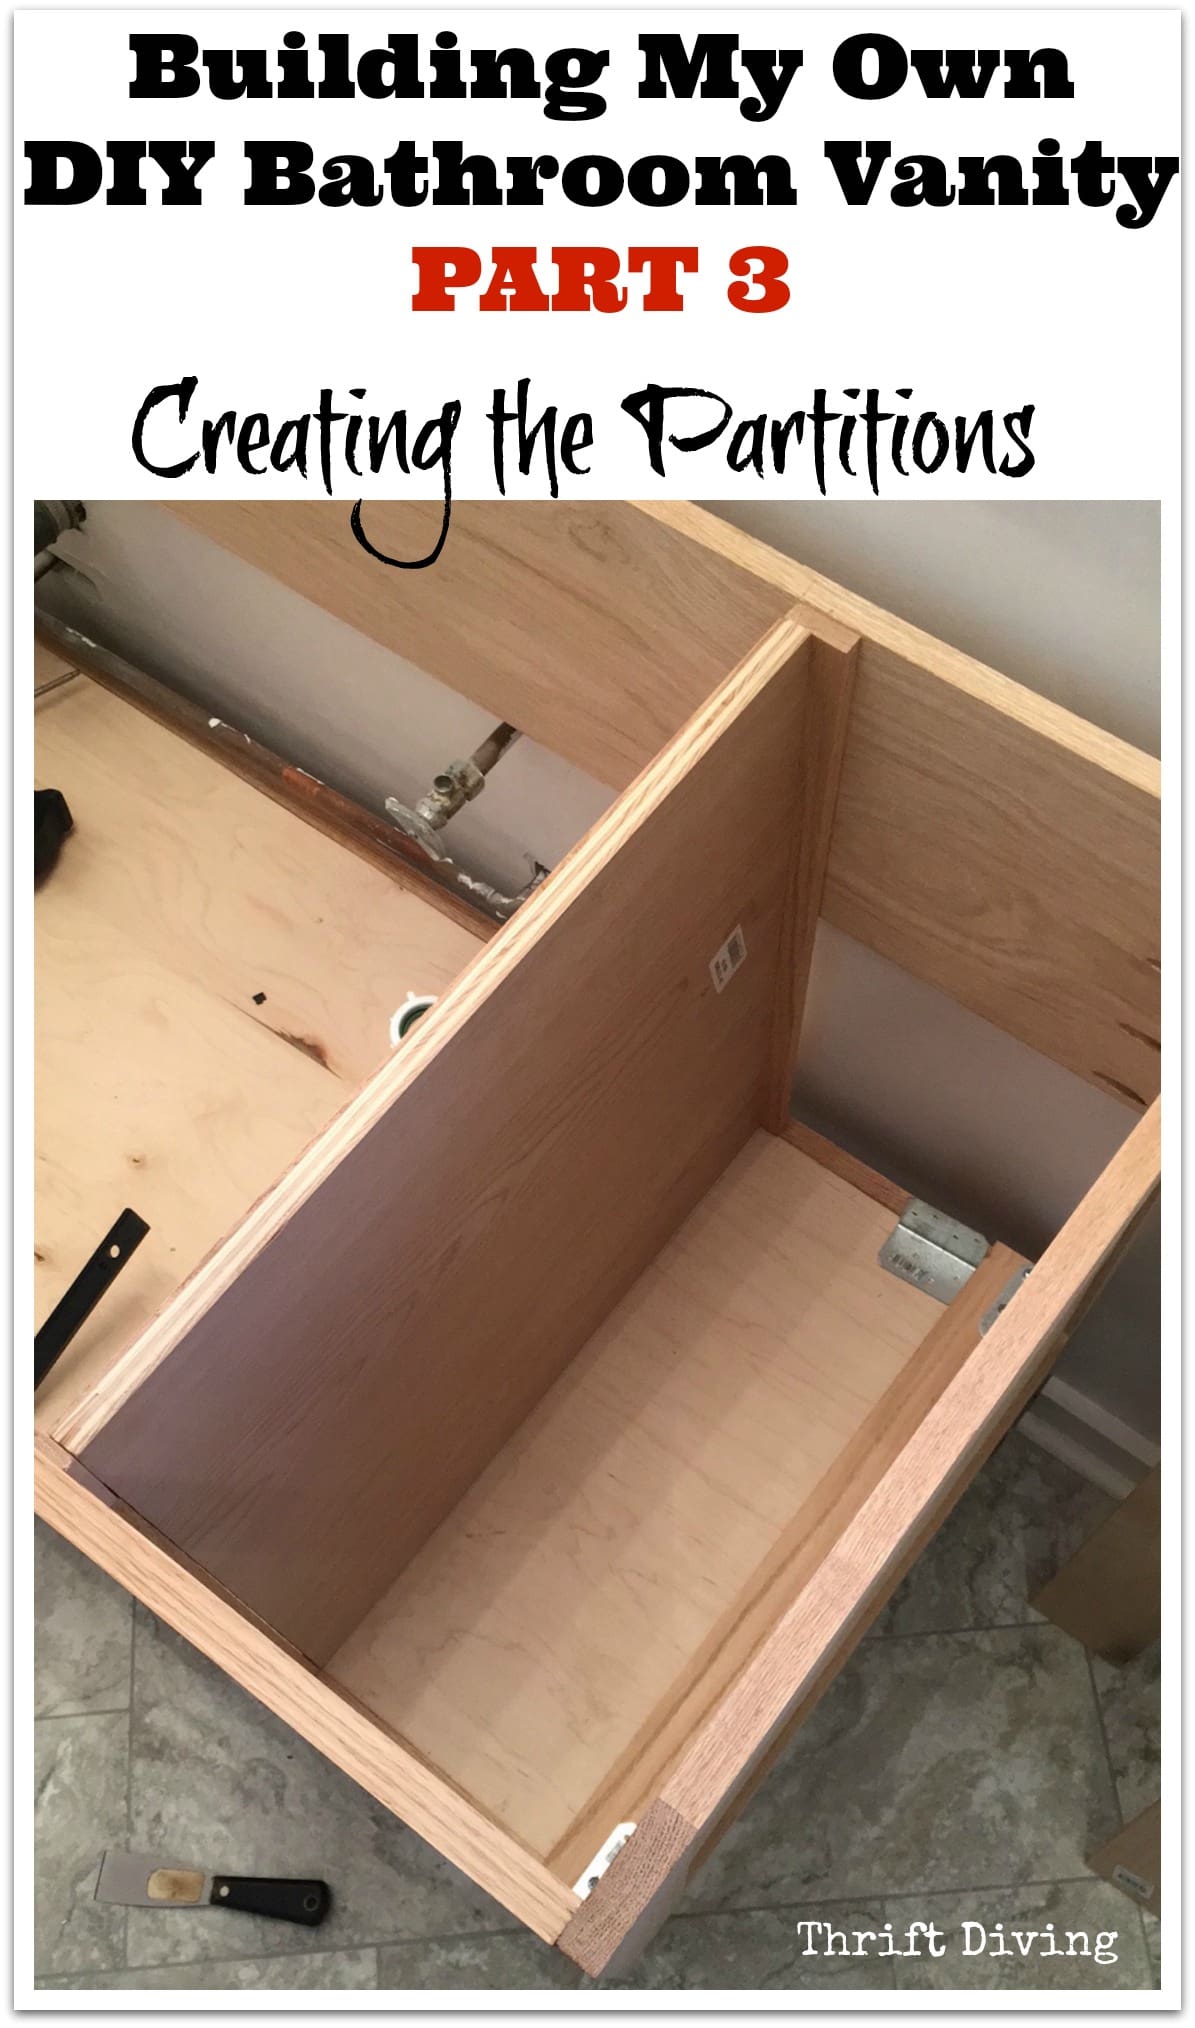
This post is about how I created the partitions to separate the vanity drawers from the other interior space of the vanity.
Building a DIY Bathroom Vanity: Creating the Partitions
Materials Used
-
- 3/4″ birch plywood
- wood glue
- nail gun
- circular saw
- paper and pencil
STEP 1: Create a Visual Mock-Up
I’m not great at using SketchUp, which is the free 3D drawing software that many woodworkers use to plan and visualize their projects.
So I decided to create my own visual mock-up with good ‘ole paper and pencil.
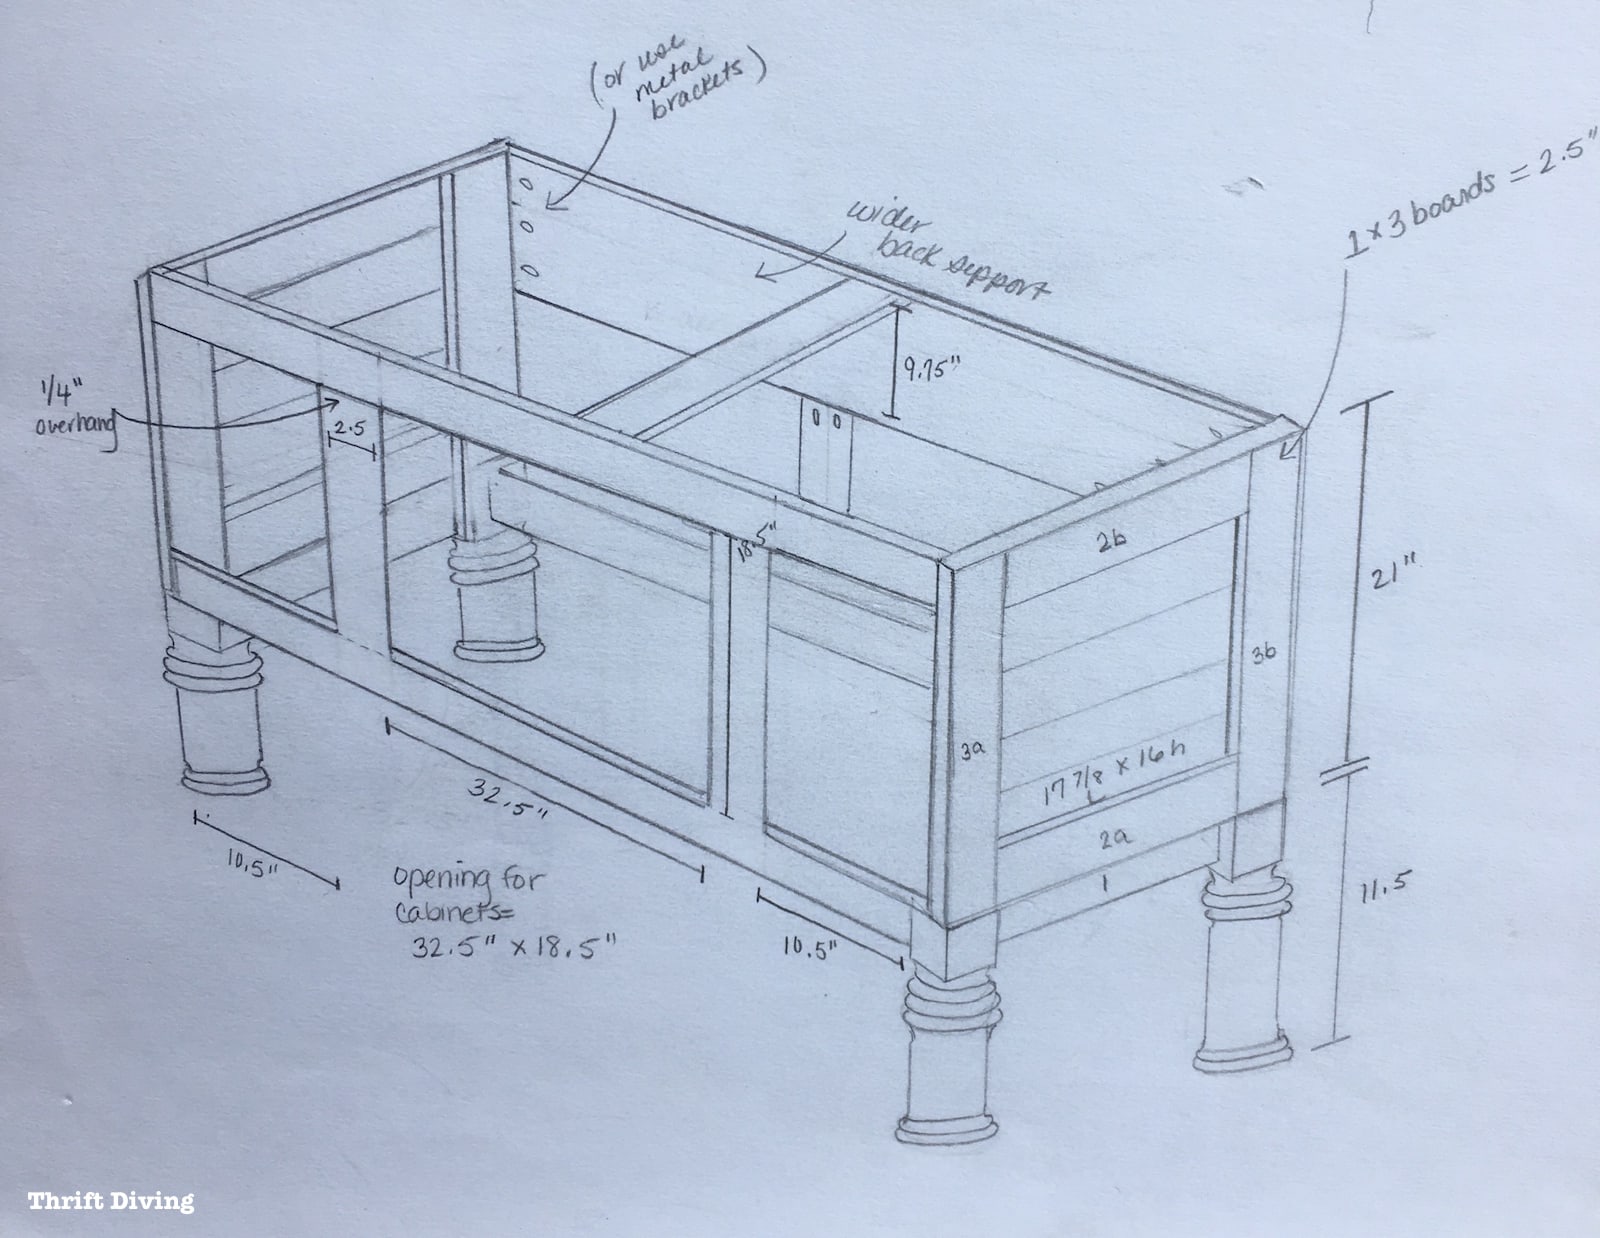
I knew that my vanity would be exactly 60″ long and just over 22″ deep and about 32″ tall.
A rough drawing allowed me to see this all on paper and to figure out how wide of opening I would create for the vanity doors and drawers. I could also see where I needed to create the partitions.
Since I’m not a master builder, I wasn’t sure if I could do inset doors (i.e. doors that would be flush with the vanity opening) or if they would be inset (i.e. hang over the vanity opening).
I figured I would just wing it and see what I could come up with! LOL
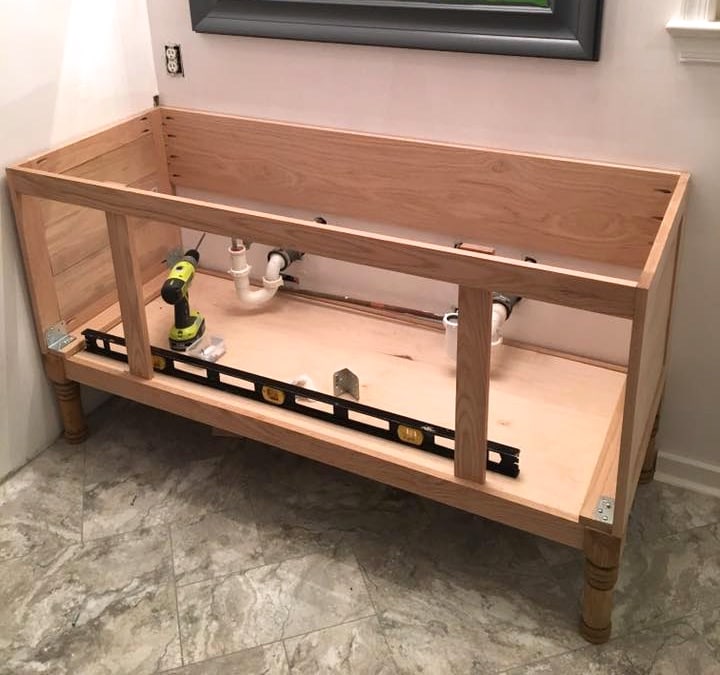
Where I left off in my last post, Part 2: Attaching the Sides, the vanity was coming along.
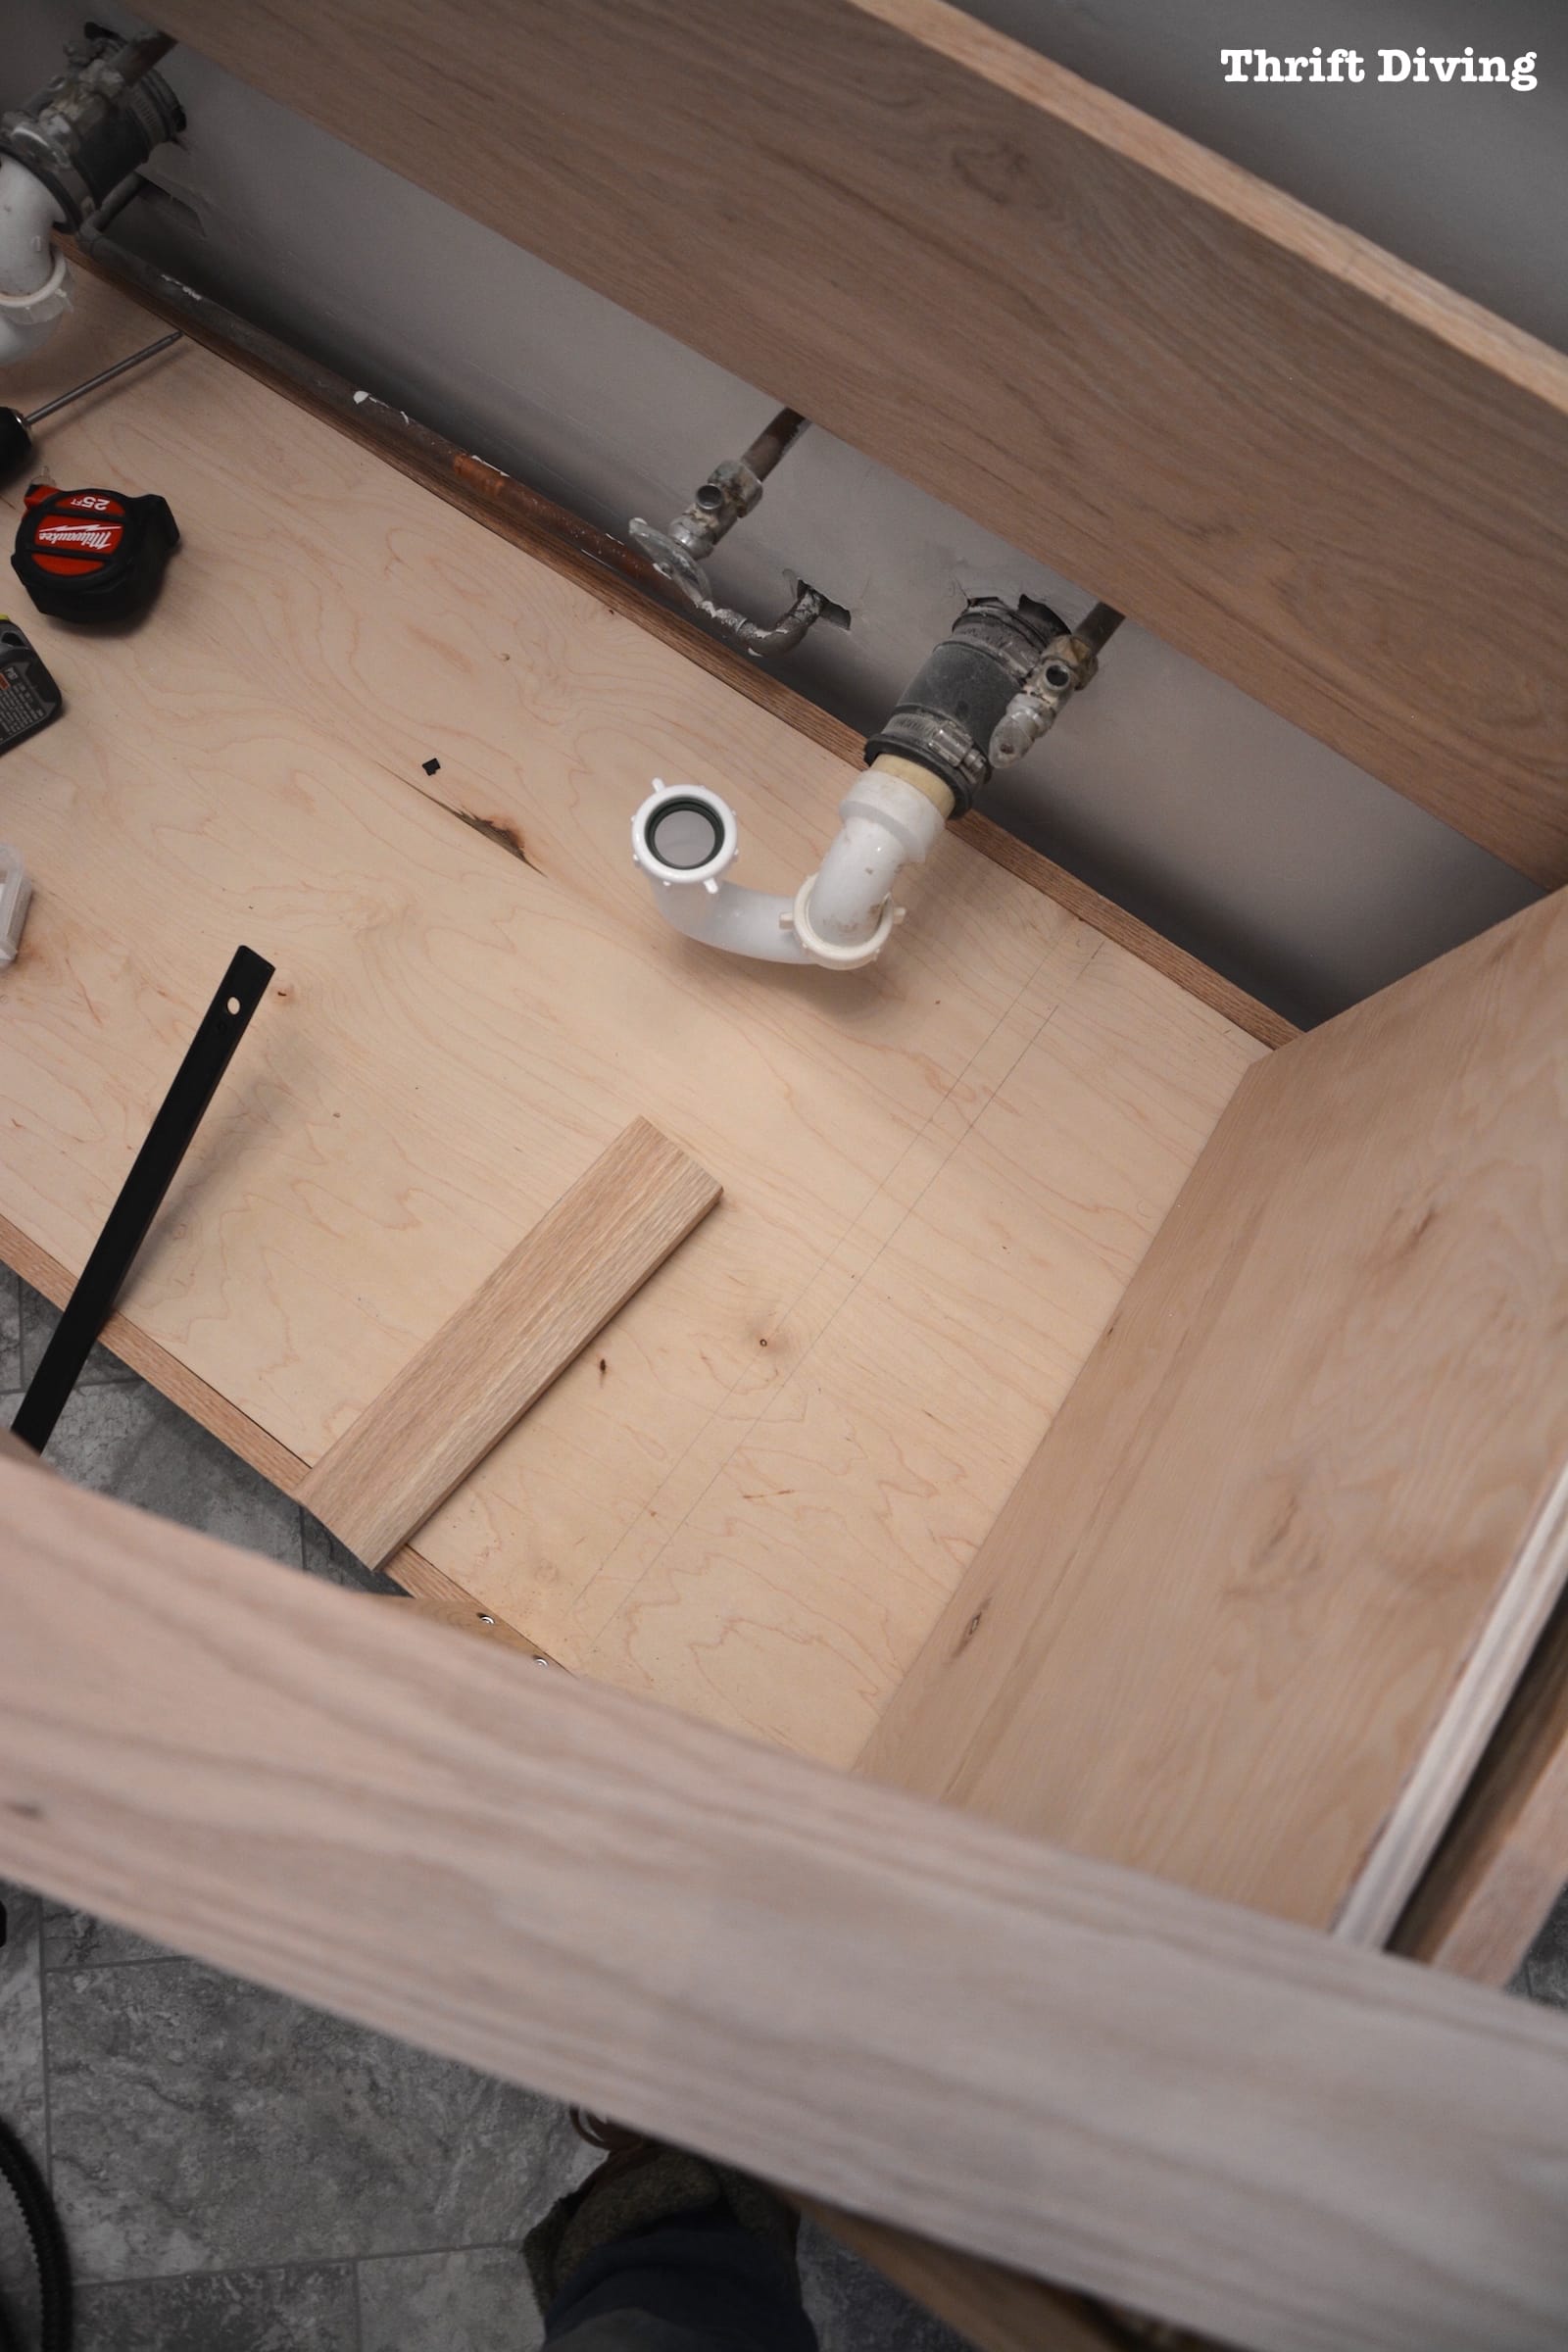
STEP 2: Measure and Cut the Plywood
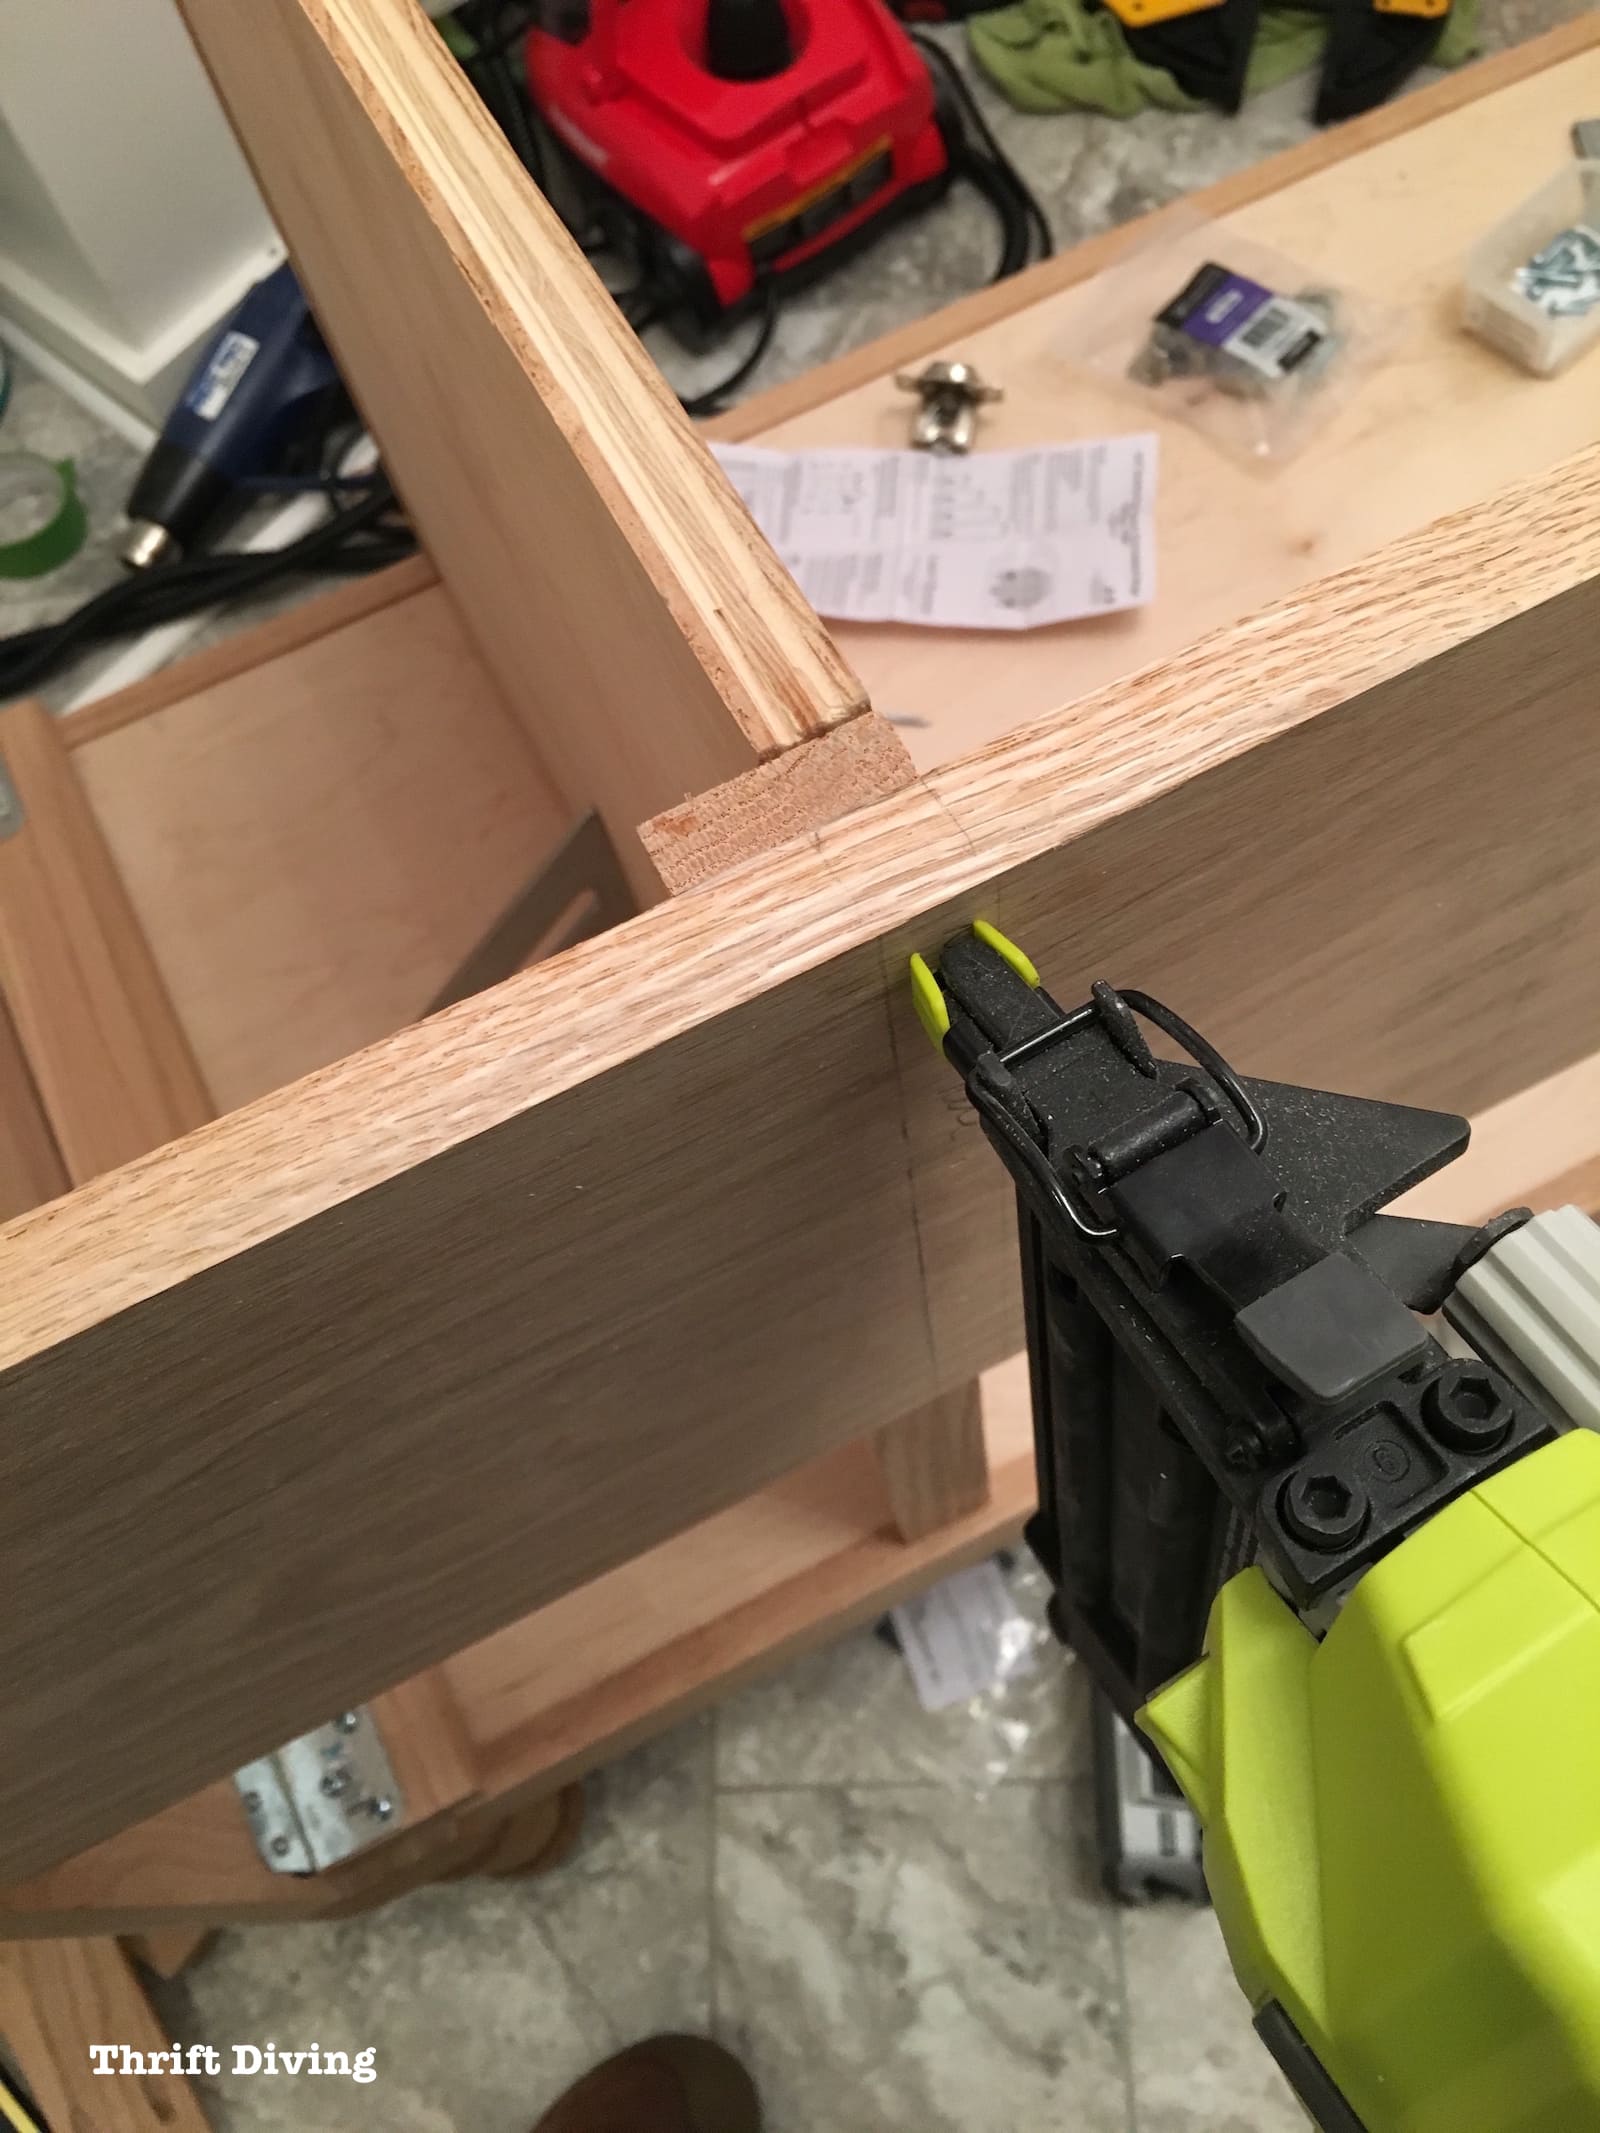
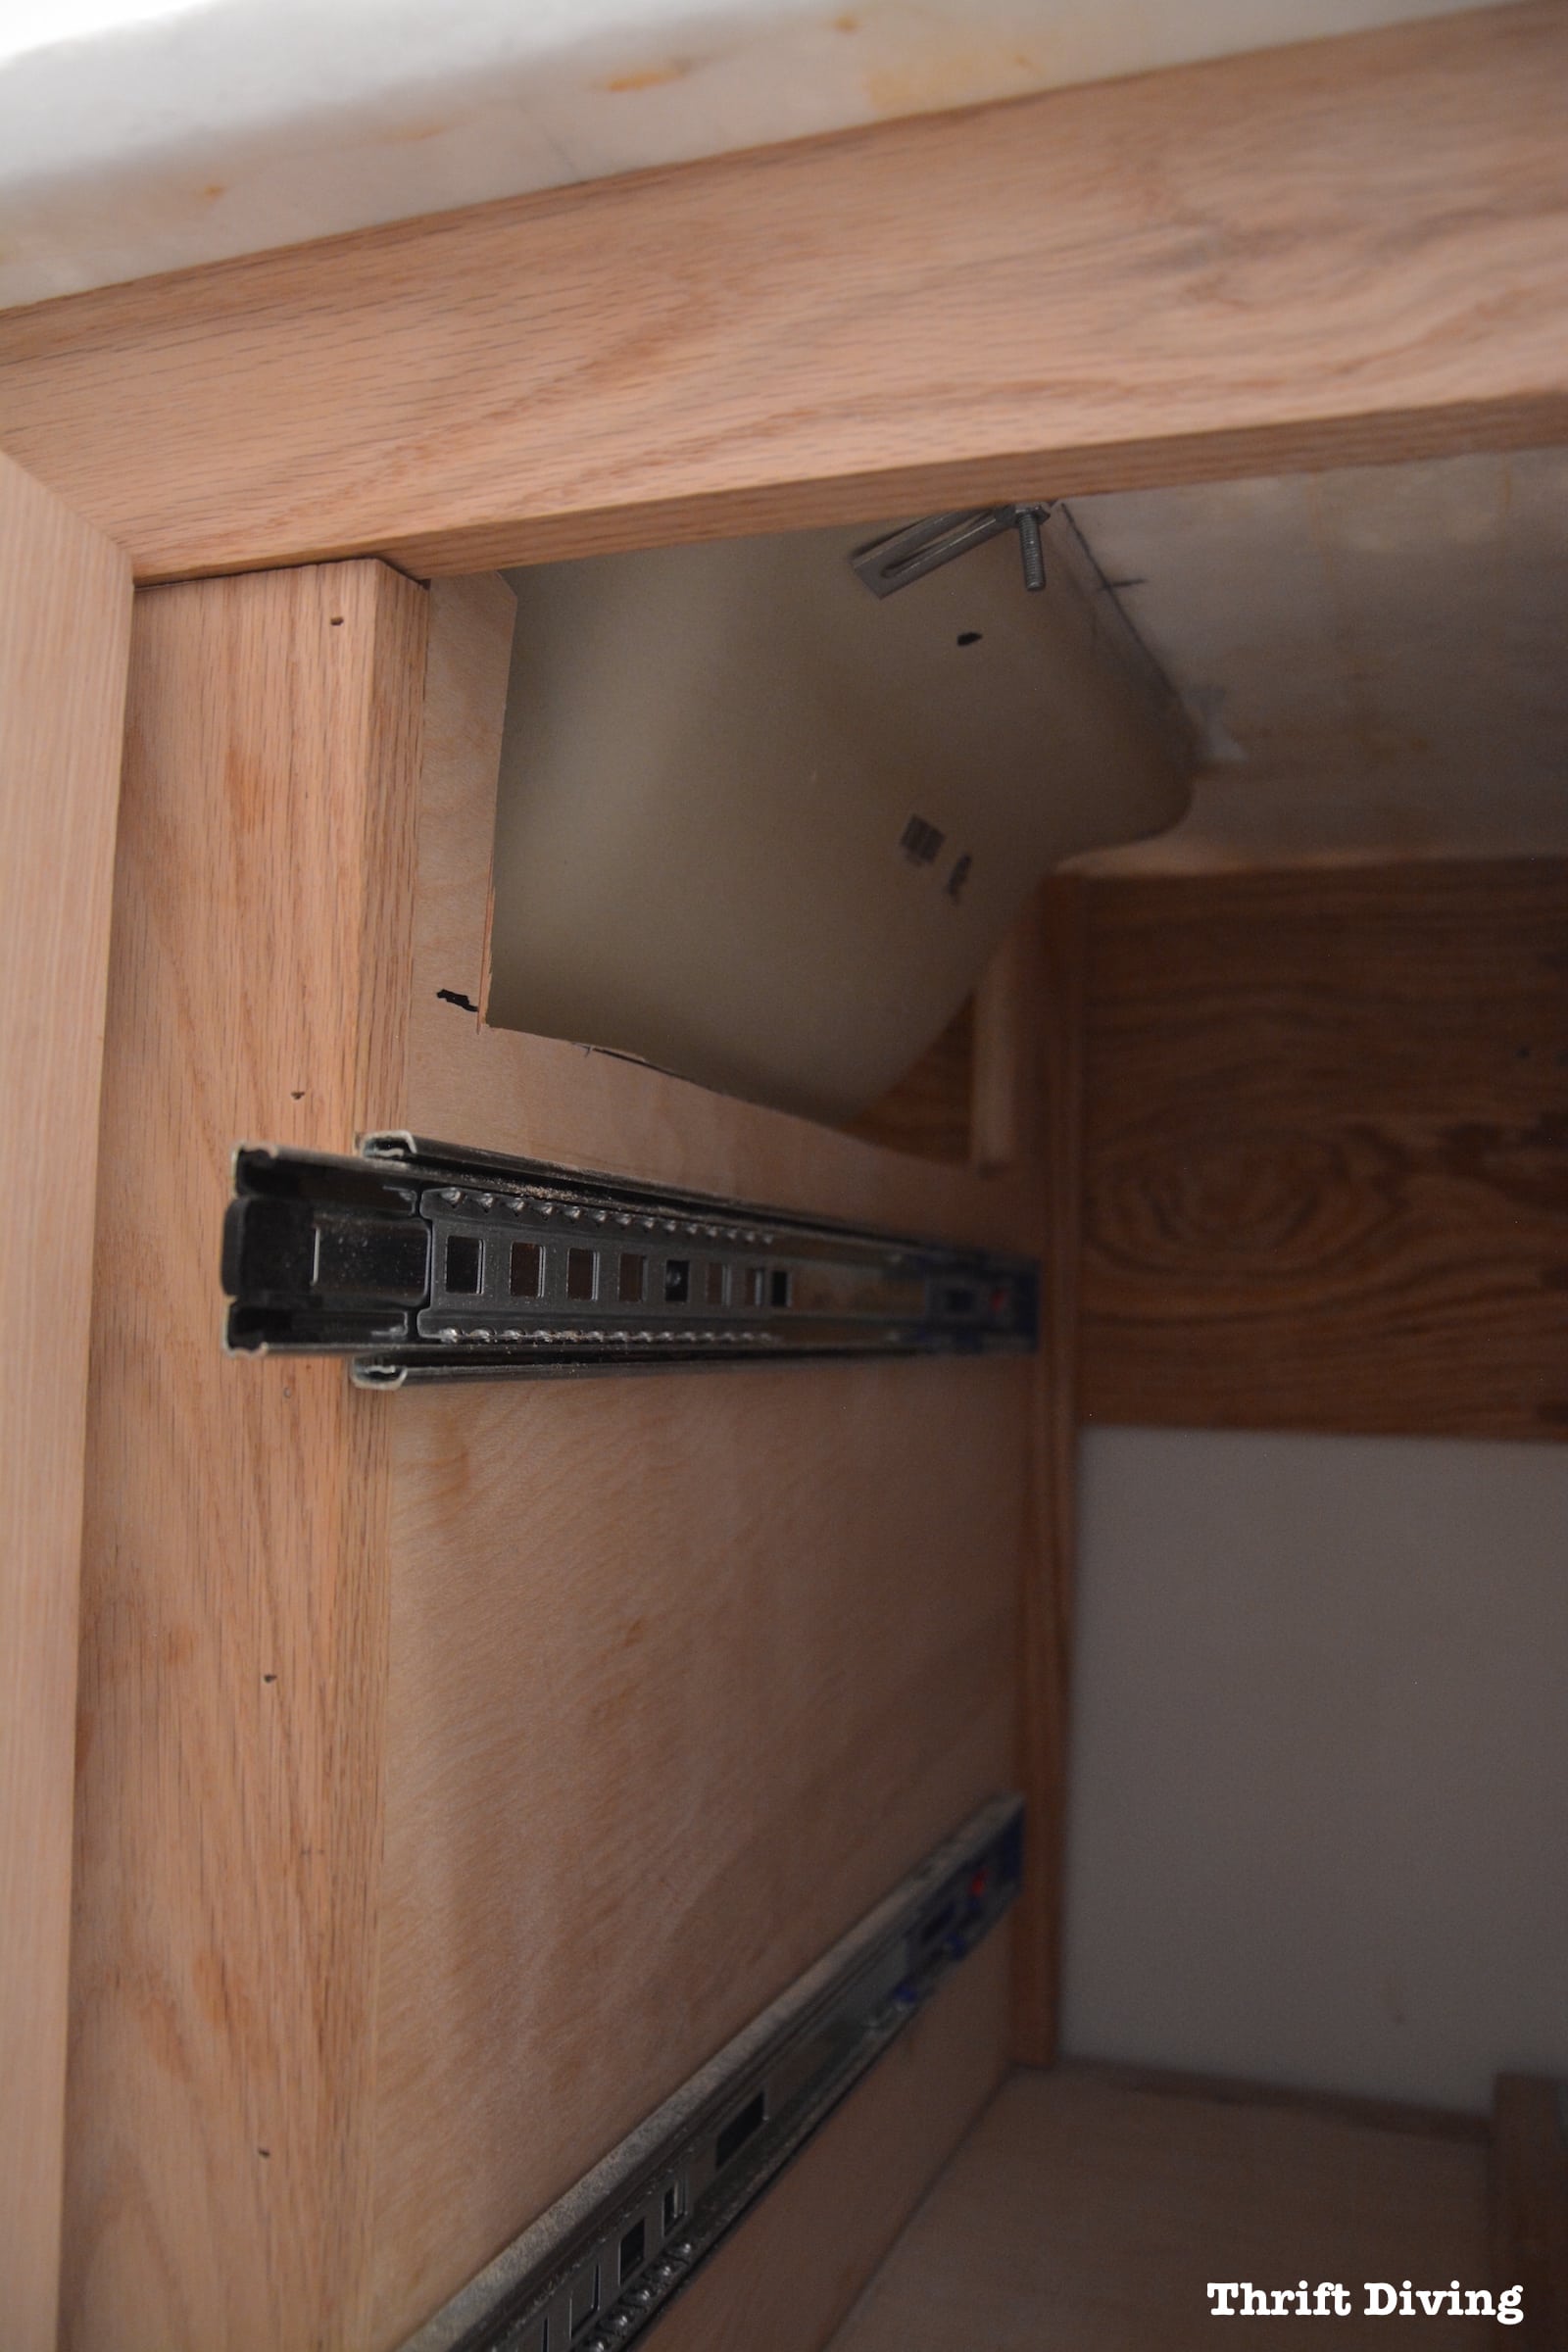
In order for me to create drawers for both ends of the DIY bathroom vanity, I would need to create partitions so that the drawers would be separated from the other area which housed the plumbing.
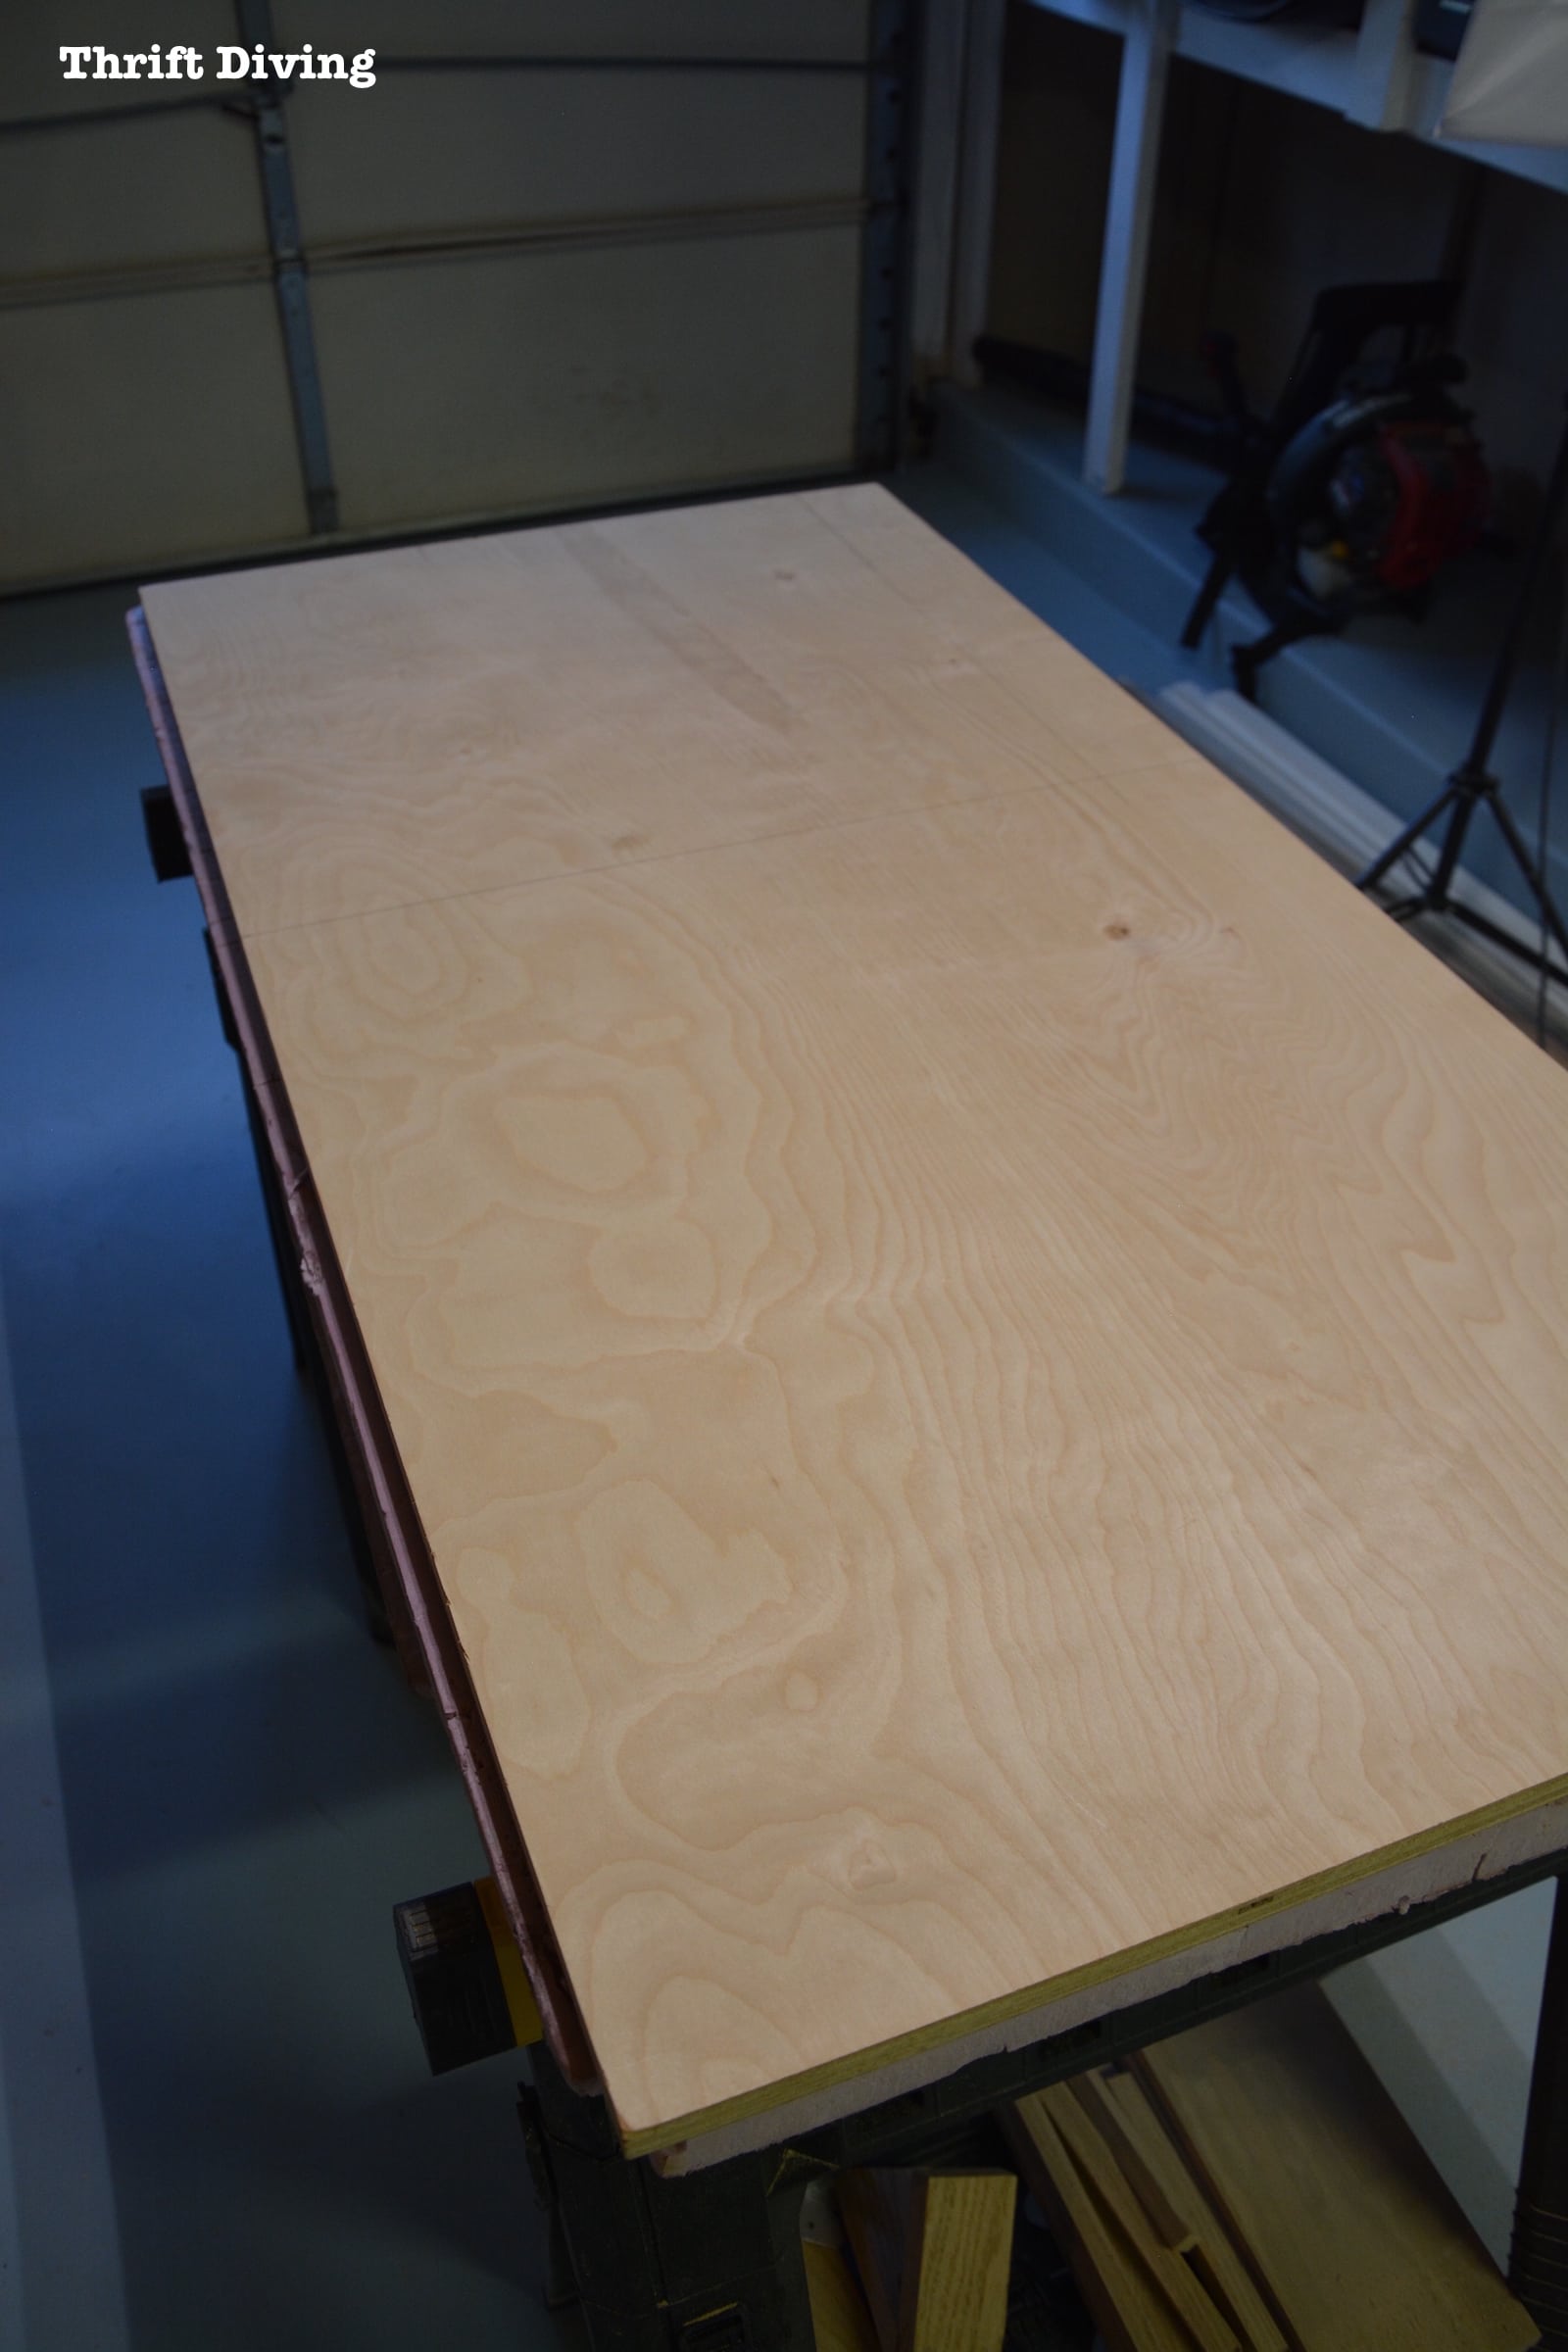
3/4″ thick birch plywood was the best option for this.
I used my circular saw to cut it.
I Ran Into a Big Problem
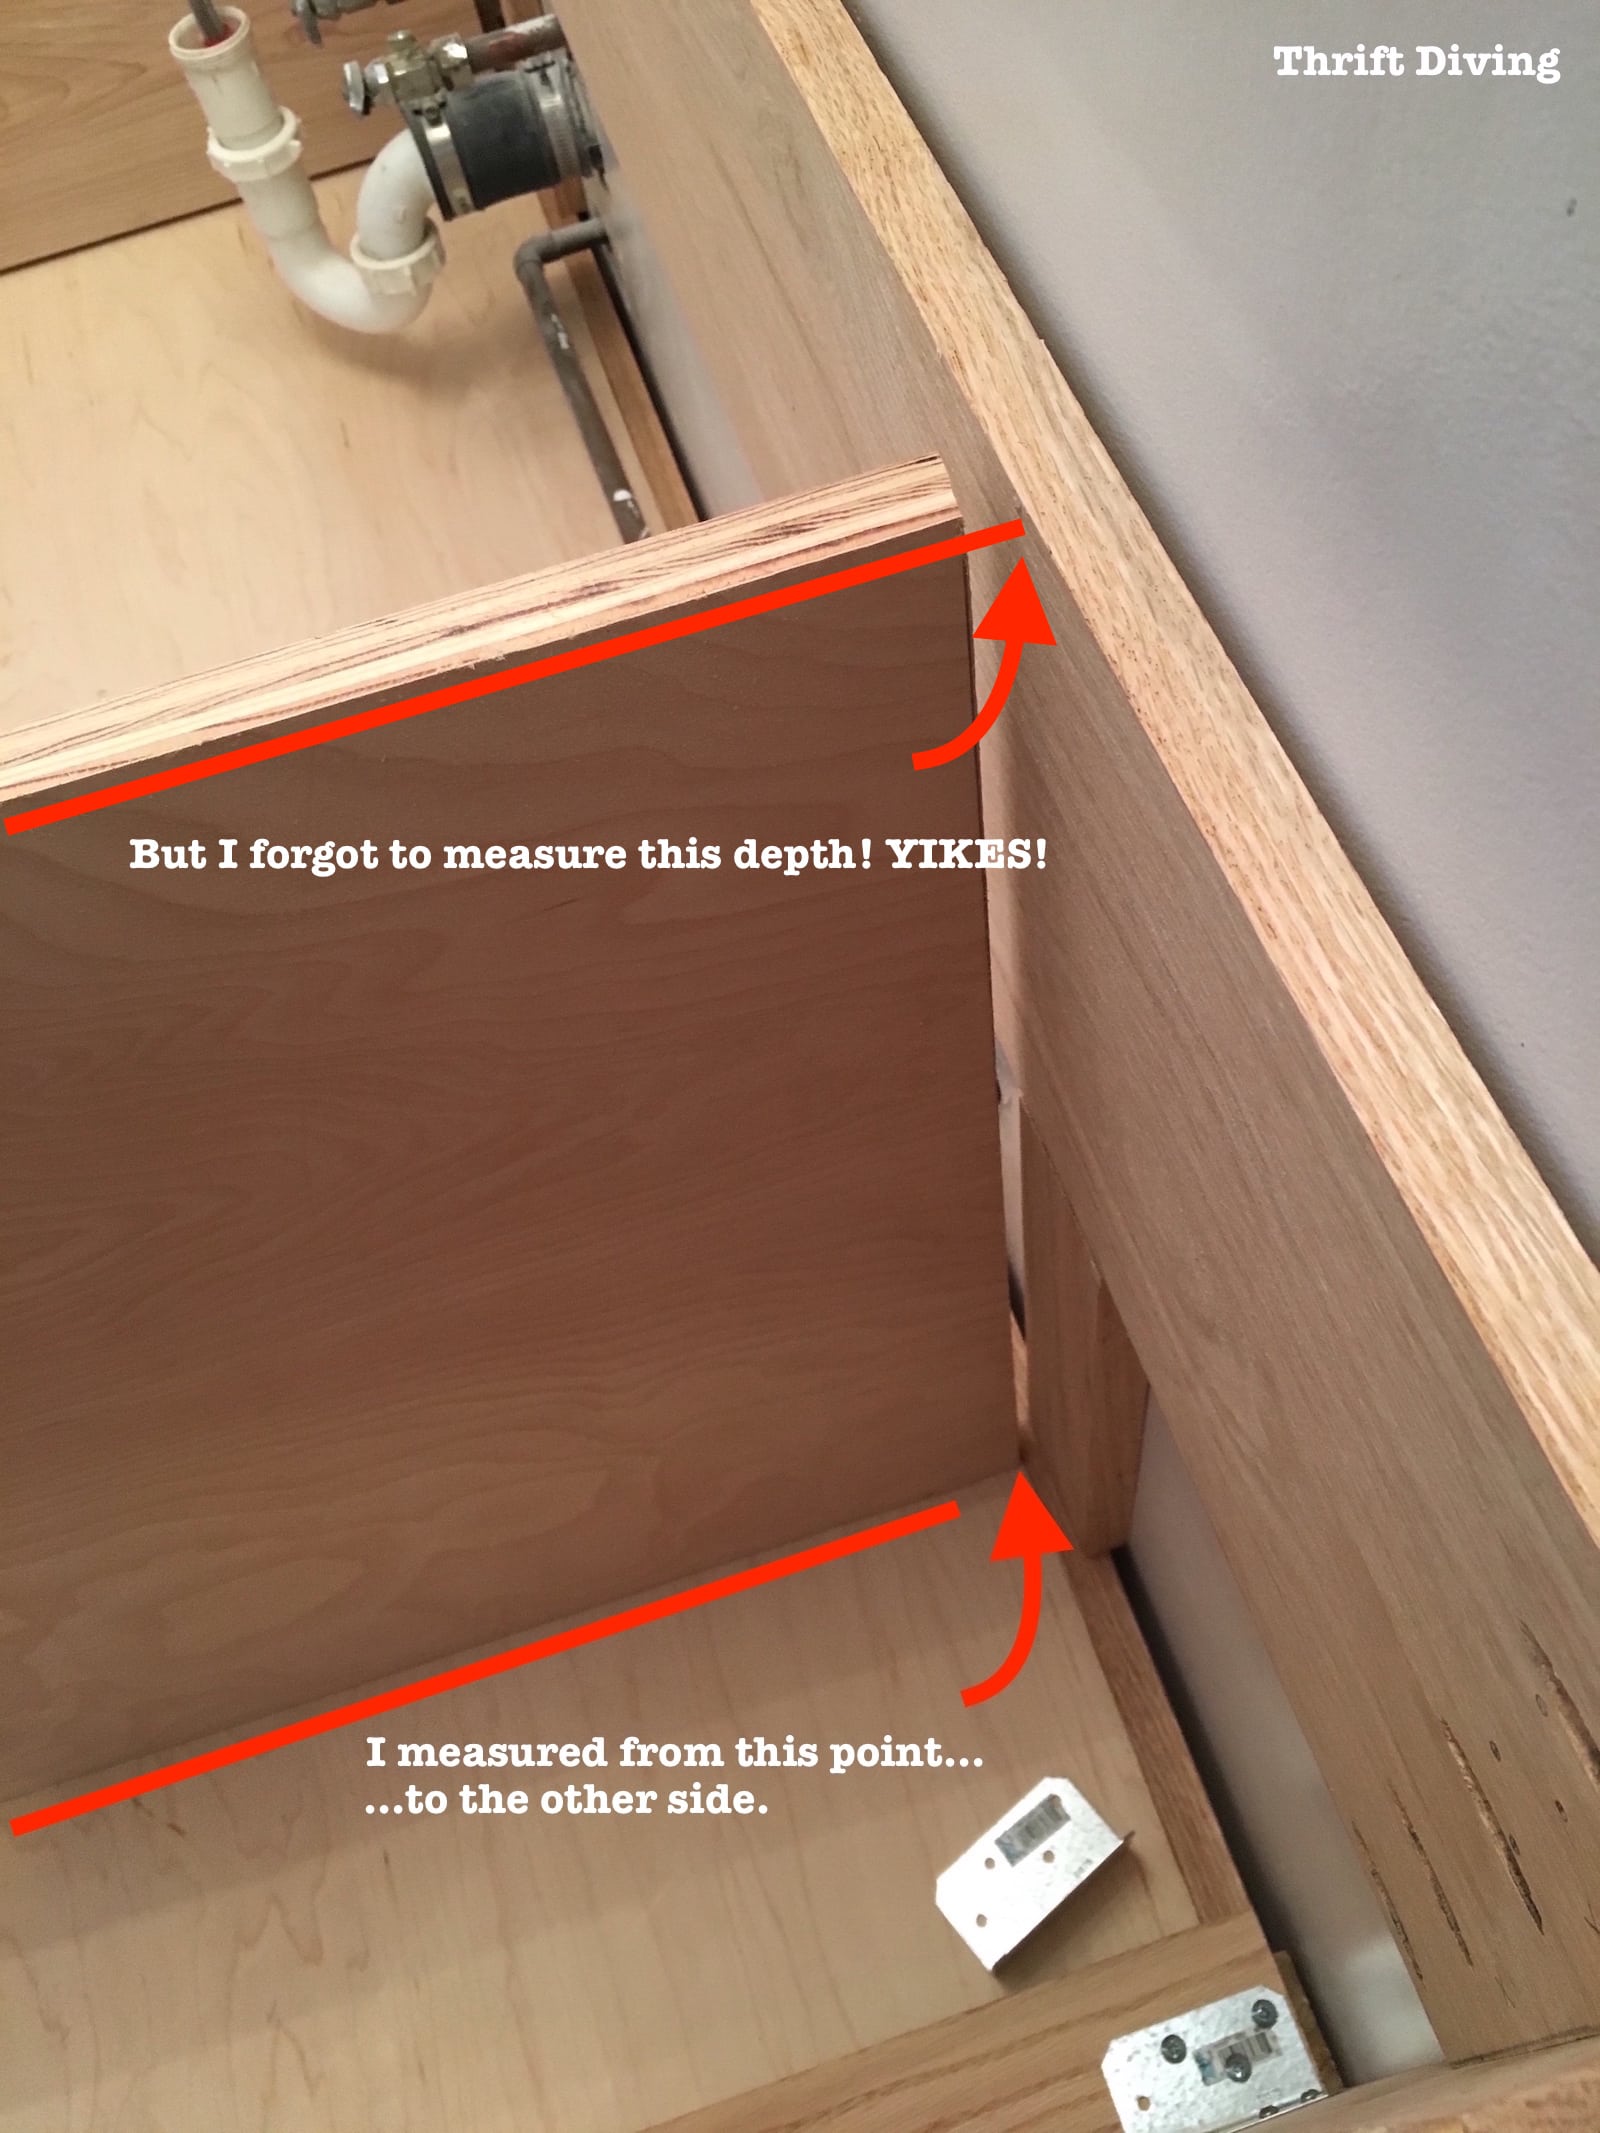
Even though I measured the base depth, I didn’t measure the top depth to make sure they were the same measurement!
As a result, the partition piece was nice and straight……..but what I found was that the top of the vanity wasn’t the same measurement as the bottom part! Which means I had a big ‘ole gap!
Yikes!
I don’t know if you can see it below (see the black arrows), but this front board was a little bowed.
Anyhow, imagine thinking you’re working with a nice rectangle of a vanity, but you’ve really got curved pieces of wood! LOL
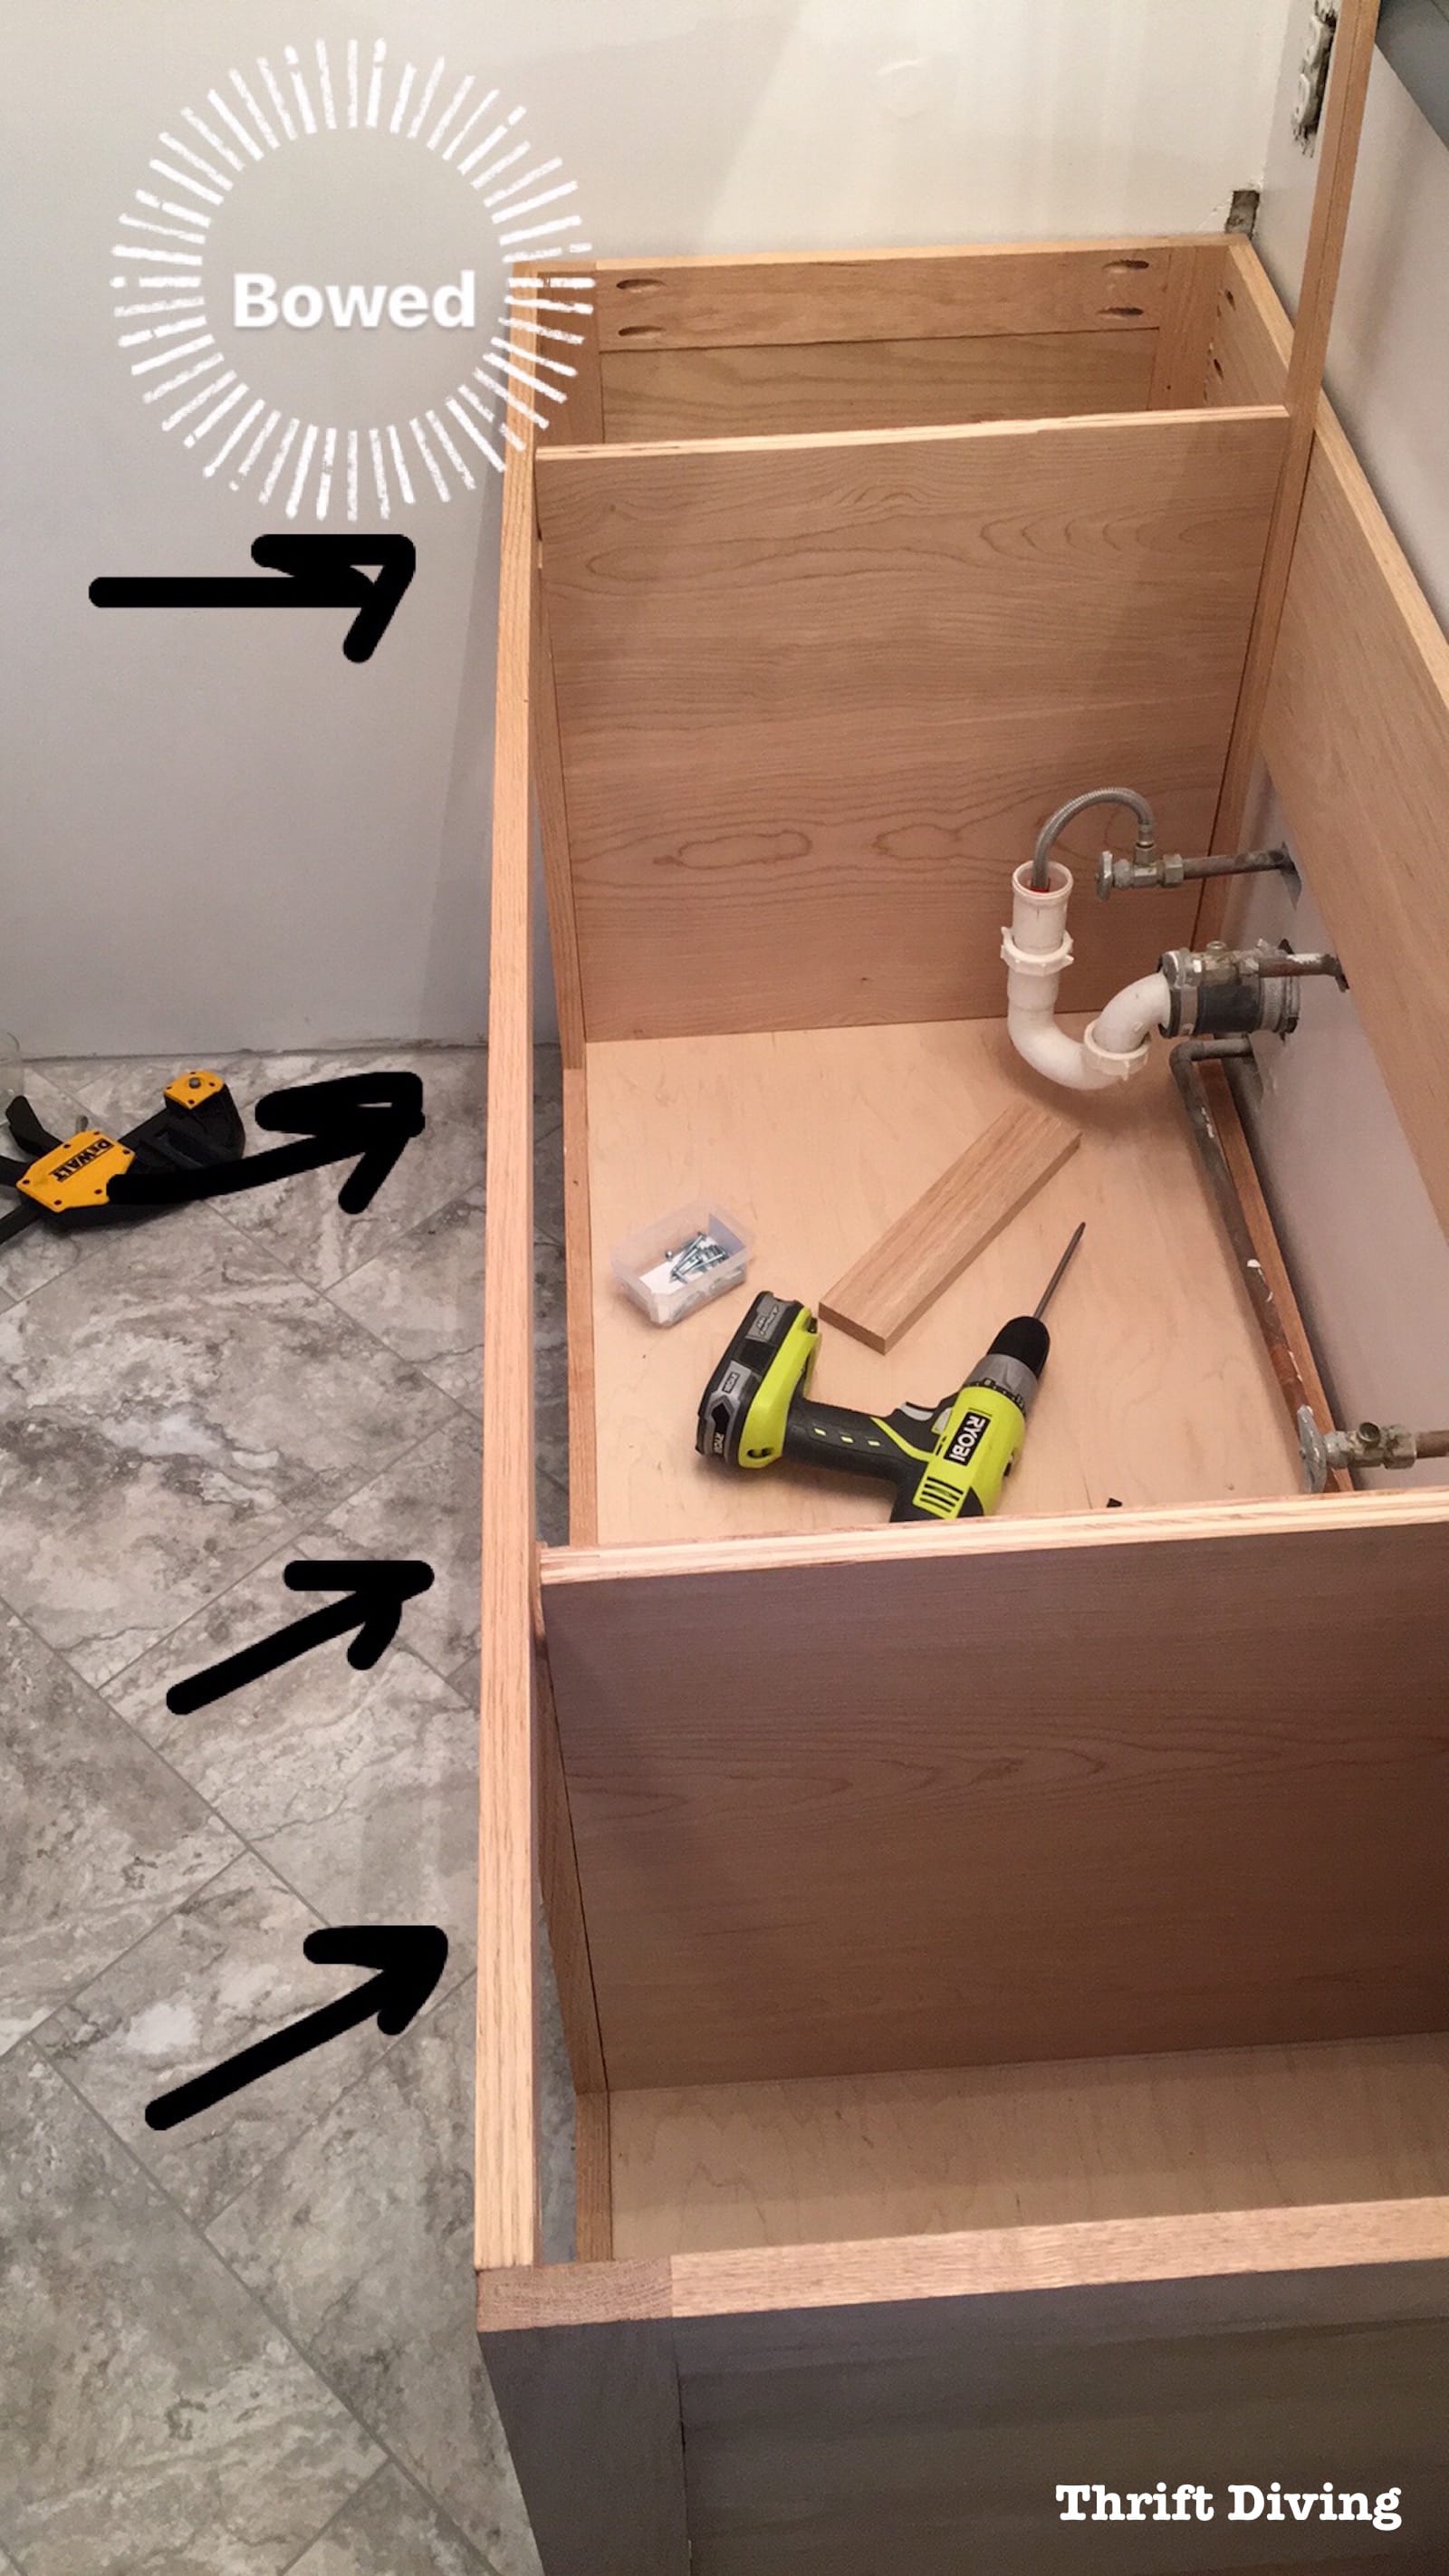
Plus, there was a problem with where the front stiles were placed.
It’s hard to explain, but I had to push these stiles back a little bit to help close the gap.
So even though I had cut the partitions perfect, the vanity wasn’t perfect.
There were a few other oddities, which I won’t get into all the nitty gritty about (unless you really want to know–then we can talk about it in the comments section).
The Solution
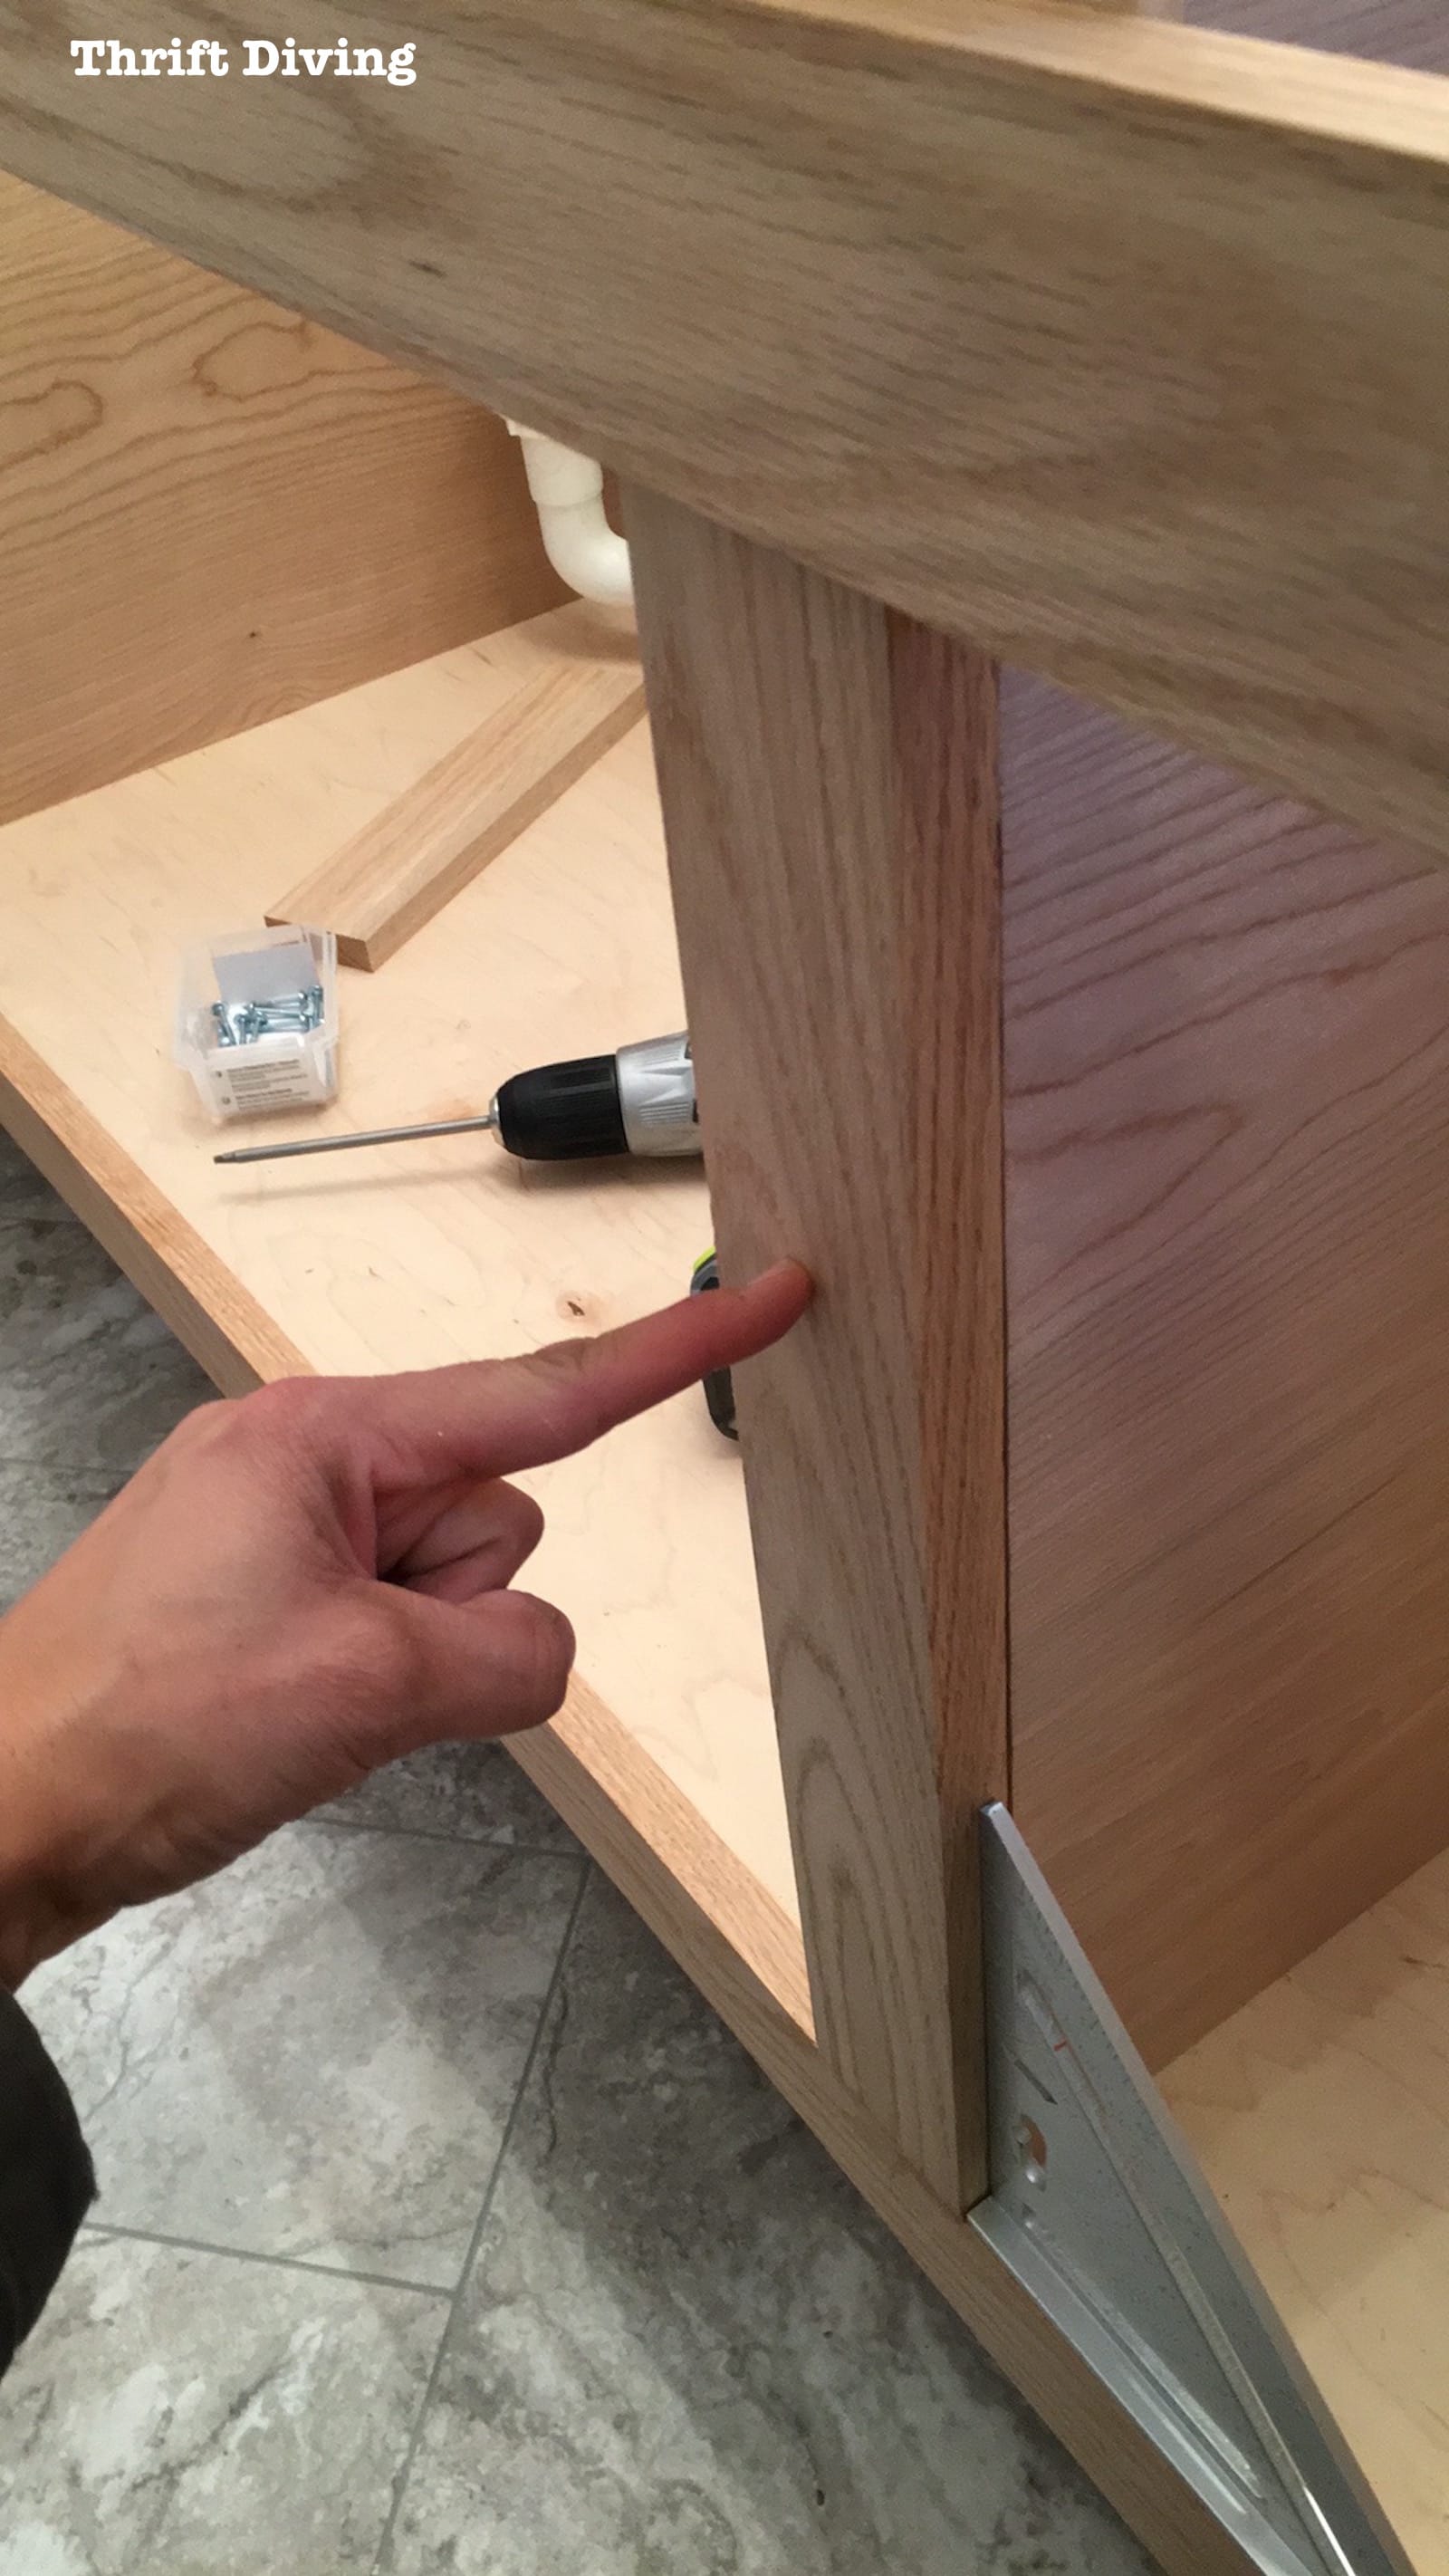
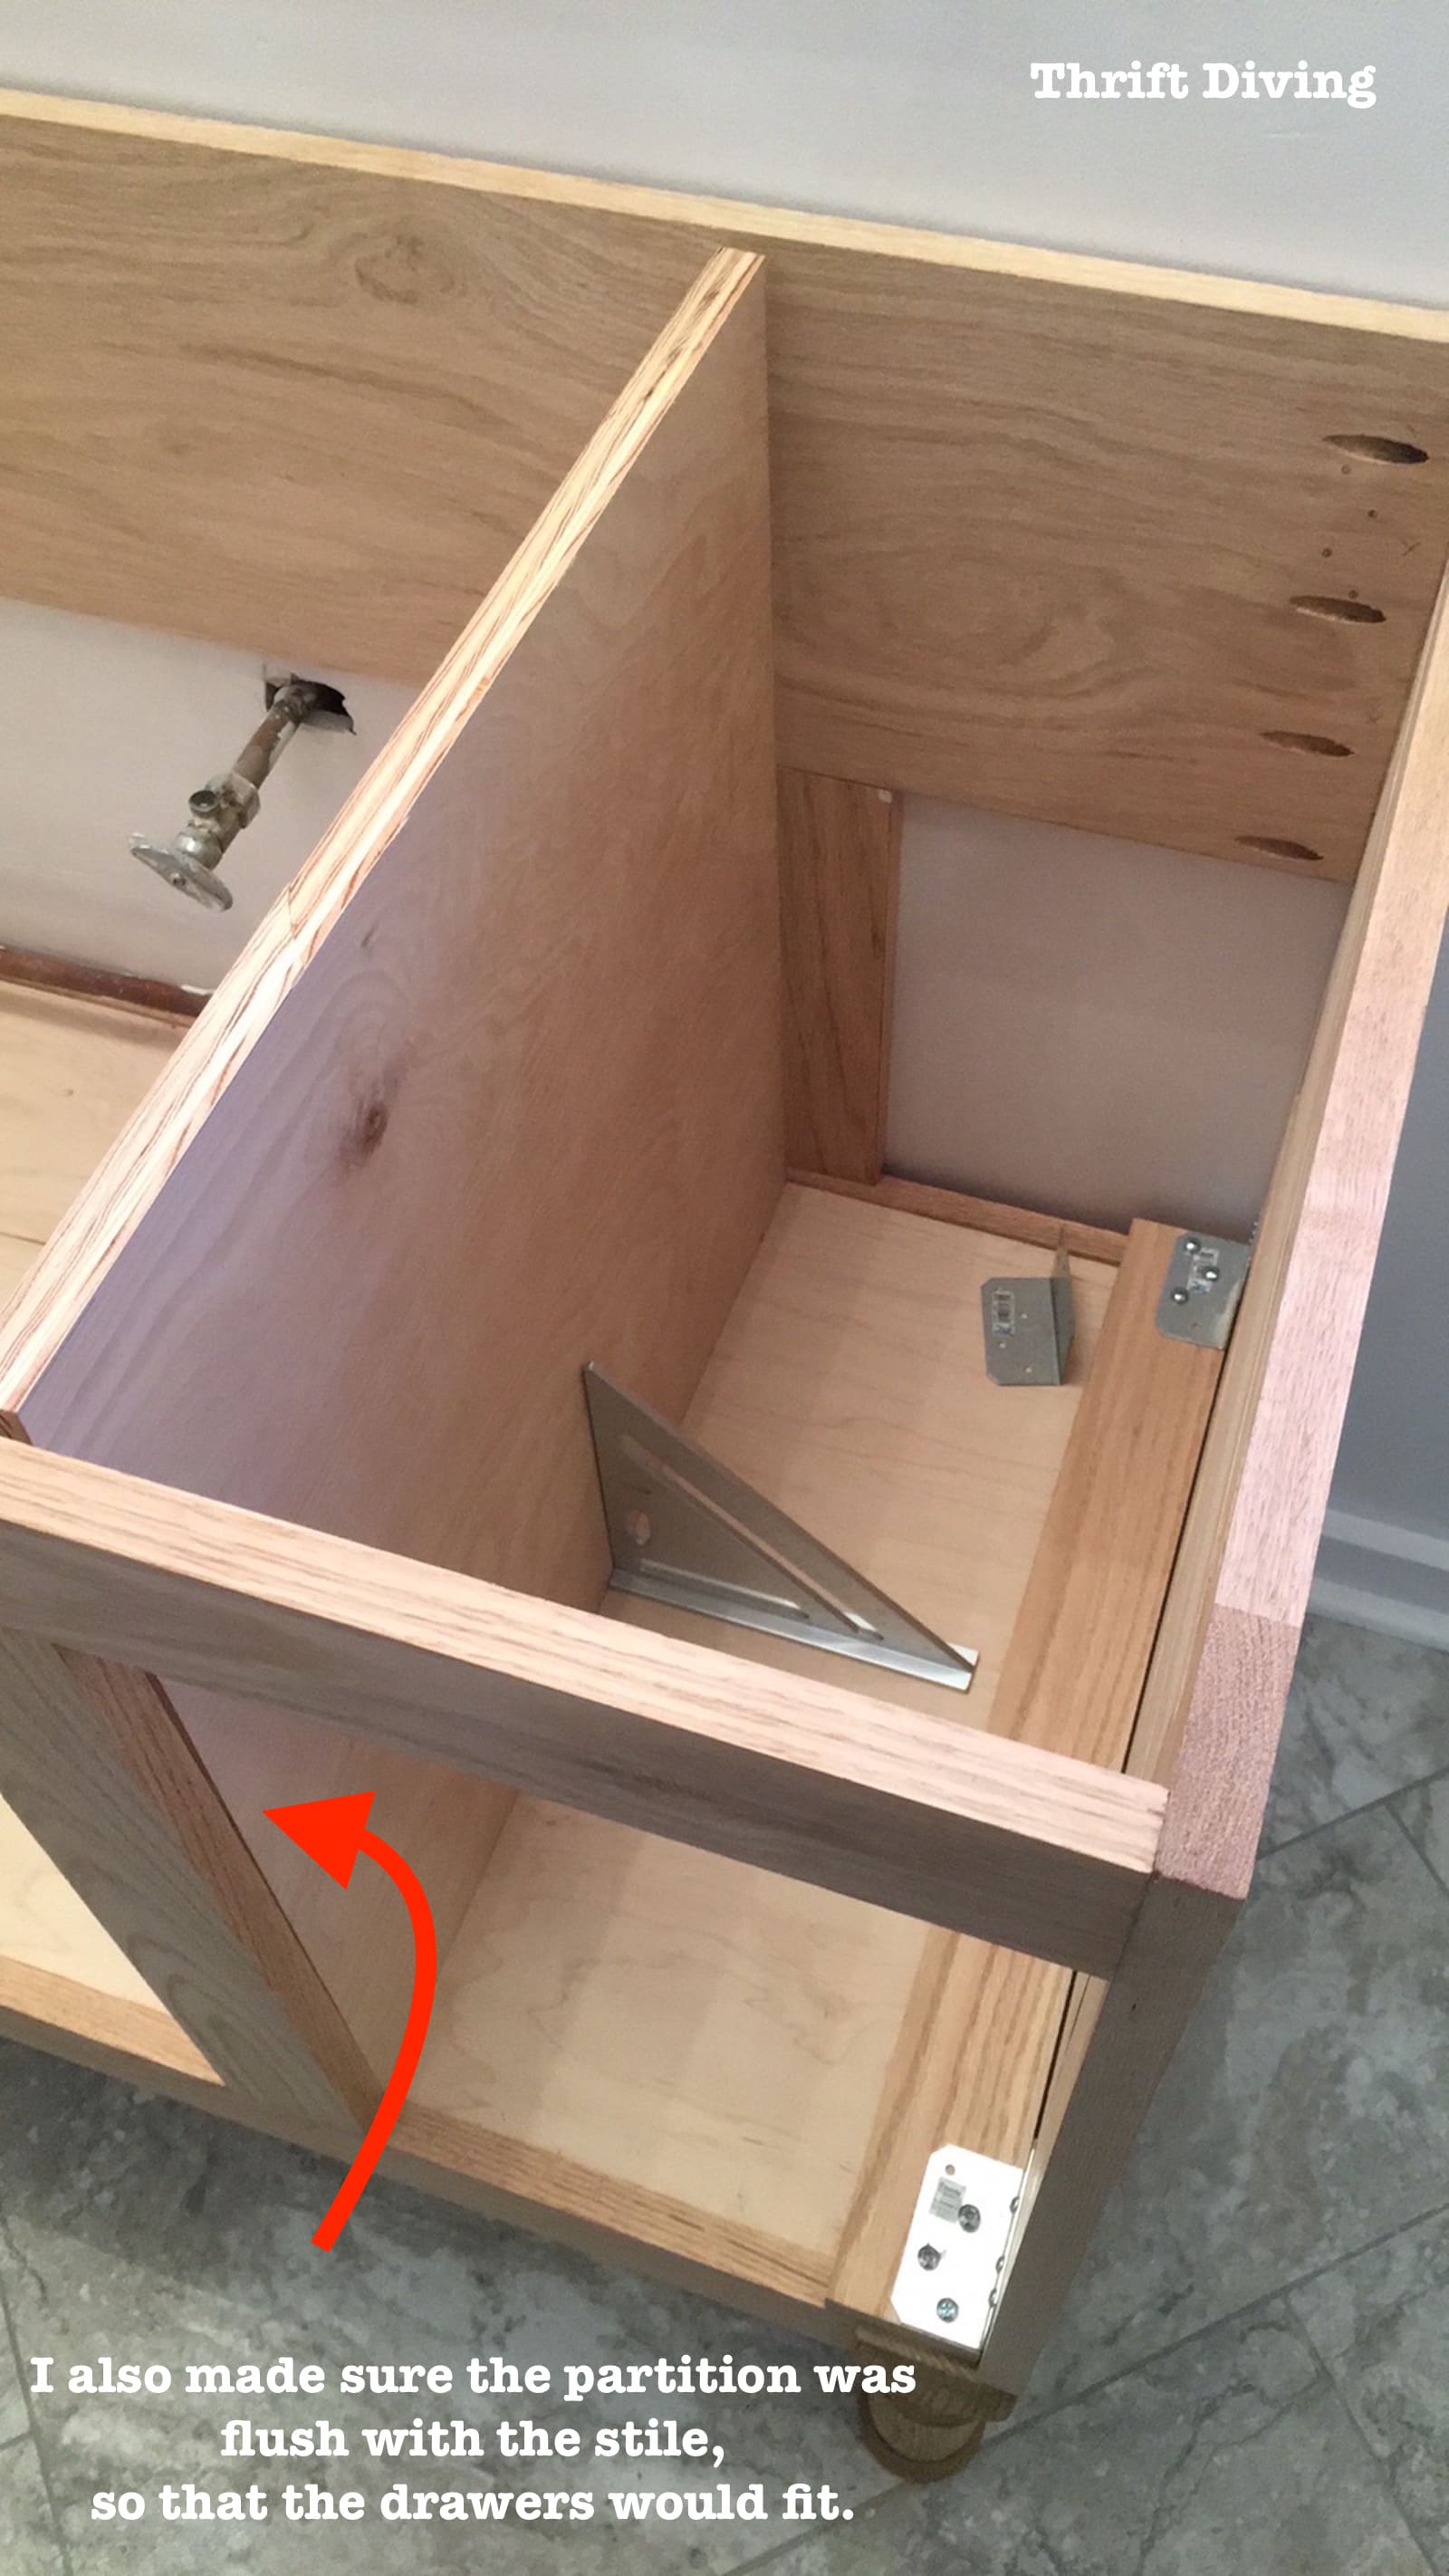
But I’ll share with you the solution: I just happened to have a small 1/2″ thick piece of Red Oak.
Before gluing the partition into place first, I placed it exactly where I wanted it to be, then traced its placement.
I made sure that it was at a right angle and not tilted. And I also made sure that it was even with the side of the vanity.
Then I glued the partition in place, and glued the wedge into place.
With a tight fit, I nailed it into place with my brad nailed, from the back of the vanity.

Lessons Learned When Building a DIY Bathroom Vanity
I hated running into all these little issues, but they were good lessons learned. I’m sure my DIY vanity will be even cleaner and better than this one!
Never Use Bowed Wood
While you’re at The Home Depot or home improvement store, lay the wood flat and check that it’s flat and not bowed or cupped. You don’t want those pieces for your vanity! Be sure to check out my post on 7 Things You MUST Know About Wood Before You Refinish or Build Your Next Project.
Always Check Your Square & Measurements
When you’re building a DIY bathroom vanity or any other type of project where you need perfect 90-degree angles, make sure you’re checking this at each stage of the project. One measurement that’s off will throw off the next step.
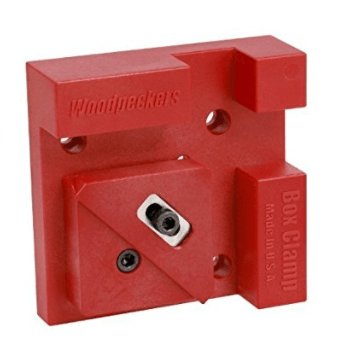
I used my speed square to make sure that the partitions were as straight 90-degree angles as possible before gluing and nailing (you’ll see in the next post why this is SOOOO important, especially when trying to fit drawers in properly).
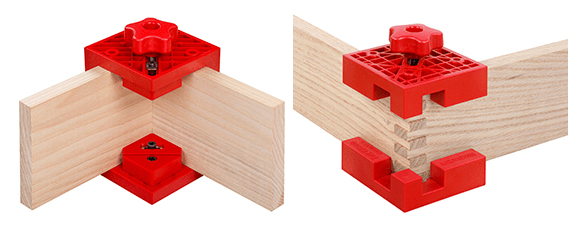
I recently went to a woodworking show and bought some of these Woodpecker’s box clamps, which clamp your wood joints at 90-degree angles so you ensure you’re getting accurate right angles. I wish I had these when I was building the main parts of the DIY vanity! I may have avoided some of the issues I ran into.
Buy Extra Wood for Mistakes and for “Shims”
Thankfully, I didn’t have to make another set of partitions for the vanity. But if I had, it would have been nice to have extra plywood on hand.
It was helpful, however, that I had bought extra Red Oak boards in various sizes so that when I needed to wedge a piece in, I had it available. Be sure to have extra wood in case you have to get creative and piece-meal things together! 🙂
Make Sure You Know the Adjust the Height Your Partitions
You’ll see in an upcoming segment of this series why this is so important.
I knew that the under-mount sinks that we were installing would require the partitions to be cut down a bit. But since I had no idea how low I’d have to cut them, I just went ahead and installed the partitions at the same height at the vanity.
Later, we had to cut them down about 6 inches to accommodate the sink.
It would have been much easier to cut the partitions to the proper height if I had known how deep the sinks would have been.
So be sure you know this info before creating partitions.
Coming Up Next
In Part 4 of this DIY Bathroom Vanity series, you’ll see how I created the vanity drawers, and the issues that came up during the step, and how I worked around them! 🙂
Did you enjoy this detailed tutorial? Then save it on Pinterest!
![]()
Read the Rest of this Bathroom Makeover Series!
DAY 1: The Evolution of a Master Bathroom Makeover
DAY 4: Picking Out New Flooring: Which One Do You Like?
DAY 6: How to Remove an Old Bathroom Vanity
DAY 27: Removing Wallpaper, Repairing Walls, and Removing an Old Toilet
DAY 29: Installing New Flooring in Our Master Bathroom
DAY 49: The Bathroom Makeover That Would Never End (An Update!)
Day 52: How to Remove a Toilet Yourself
DAY 57: How to Install a Toilet Yourself
Build a DIY Bathroom Vanity – PART 1 – Attaching Legs and Base
Build a DIY Bathroom Vanity – PART 2 – Attaching the Sides
Build a DIY Bathroom Vanity – PART 3 – Creating the Partitions
Build a DIY Bathroom Vanity – PART 4 – Making Drawers
Build a DIY Bathroom Vanity – PART 5 – Making Cabinet Doors
Build a DIY Bathroom Vanity – PART 6 – Adding a Granite Vanity Top
Build a DIY Bathroom Vanity – PART 7 – The Final Finishing Coat
BEFORE & AFTER: The Final Master Bathroom Makeover Reveal!

Download the 5 freebies!

Thrift Diving inspires women to decorate, improve, and maintain their home themselves...using paint, power tools, and thrift stores! Use these 5 printables, checklists, and ebooks to get started!
I’m thinking you did an amazing job! I watched your videos, read every word! You did it yourself. Years ago I decided to remodel my bathroom while undergoing treatment for cancer. I got as far as removing wallpaper, selecting paint (a colour very similar to your lavender) taking the toilet and the mirrored medicine cabinet out and selecting replacements, when the treatments won and I was flat on my back without a toilet! My kids called a friend who came and finished the project for me. He did the real wood tongue and groove wainscotting, looked gorgeous!
Hey there, Muriel! Ahhh….left with no toilet! That sounds horrible, but it ended up working out for you! And I’m glad to hear you’re well! Are you still ripping out toilets and doing other DIY projects now?
Thanks for the kudos for my vanity!!
I’m not sure if I’m doing something wrong ,but I couldn’t get the garage tutorial. It’s something that I’d really like to see