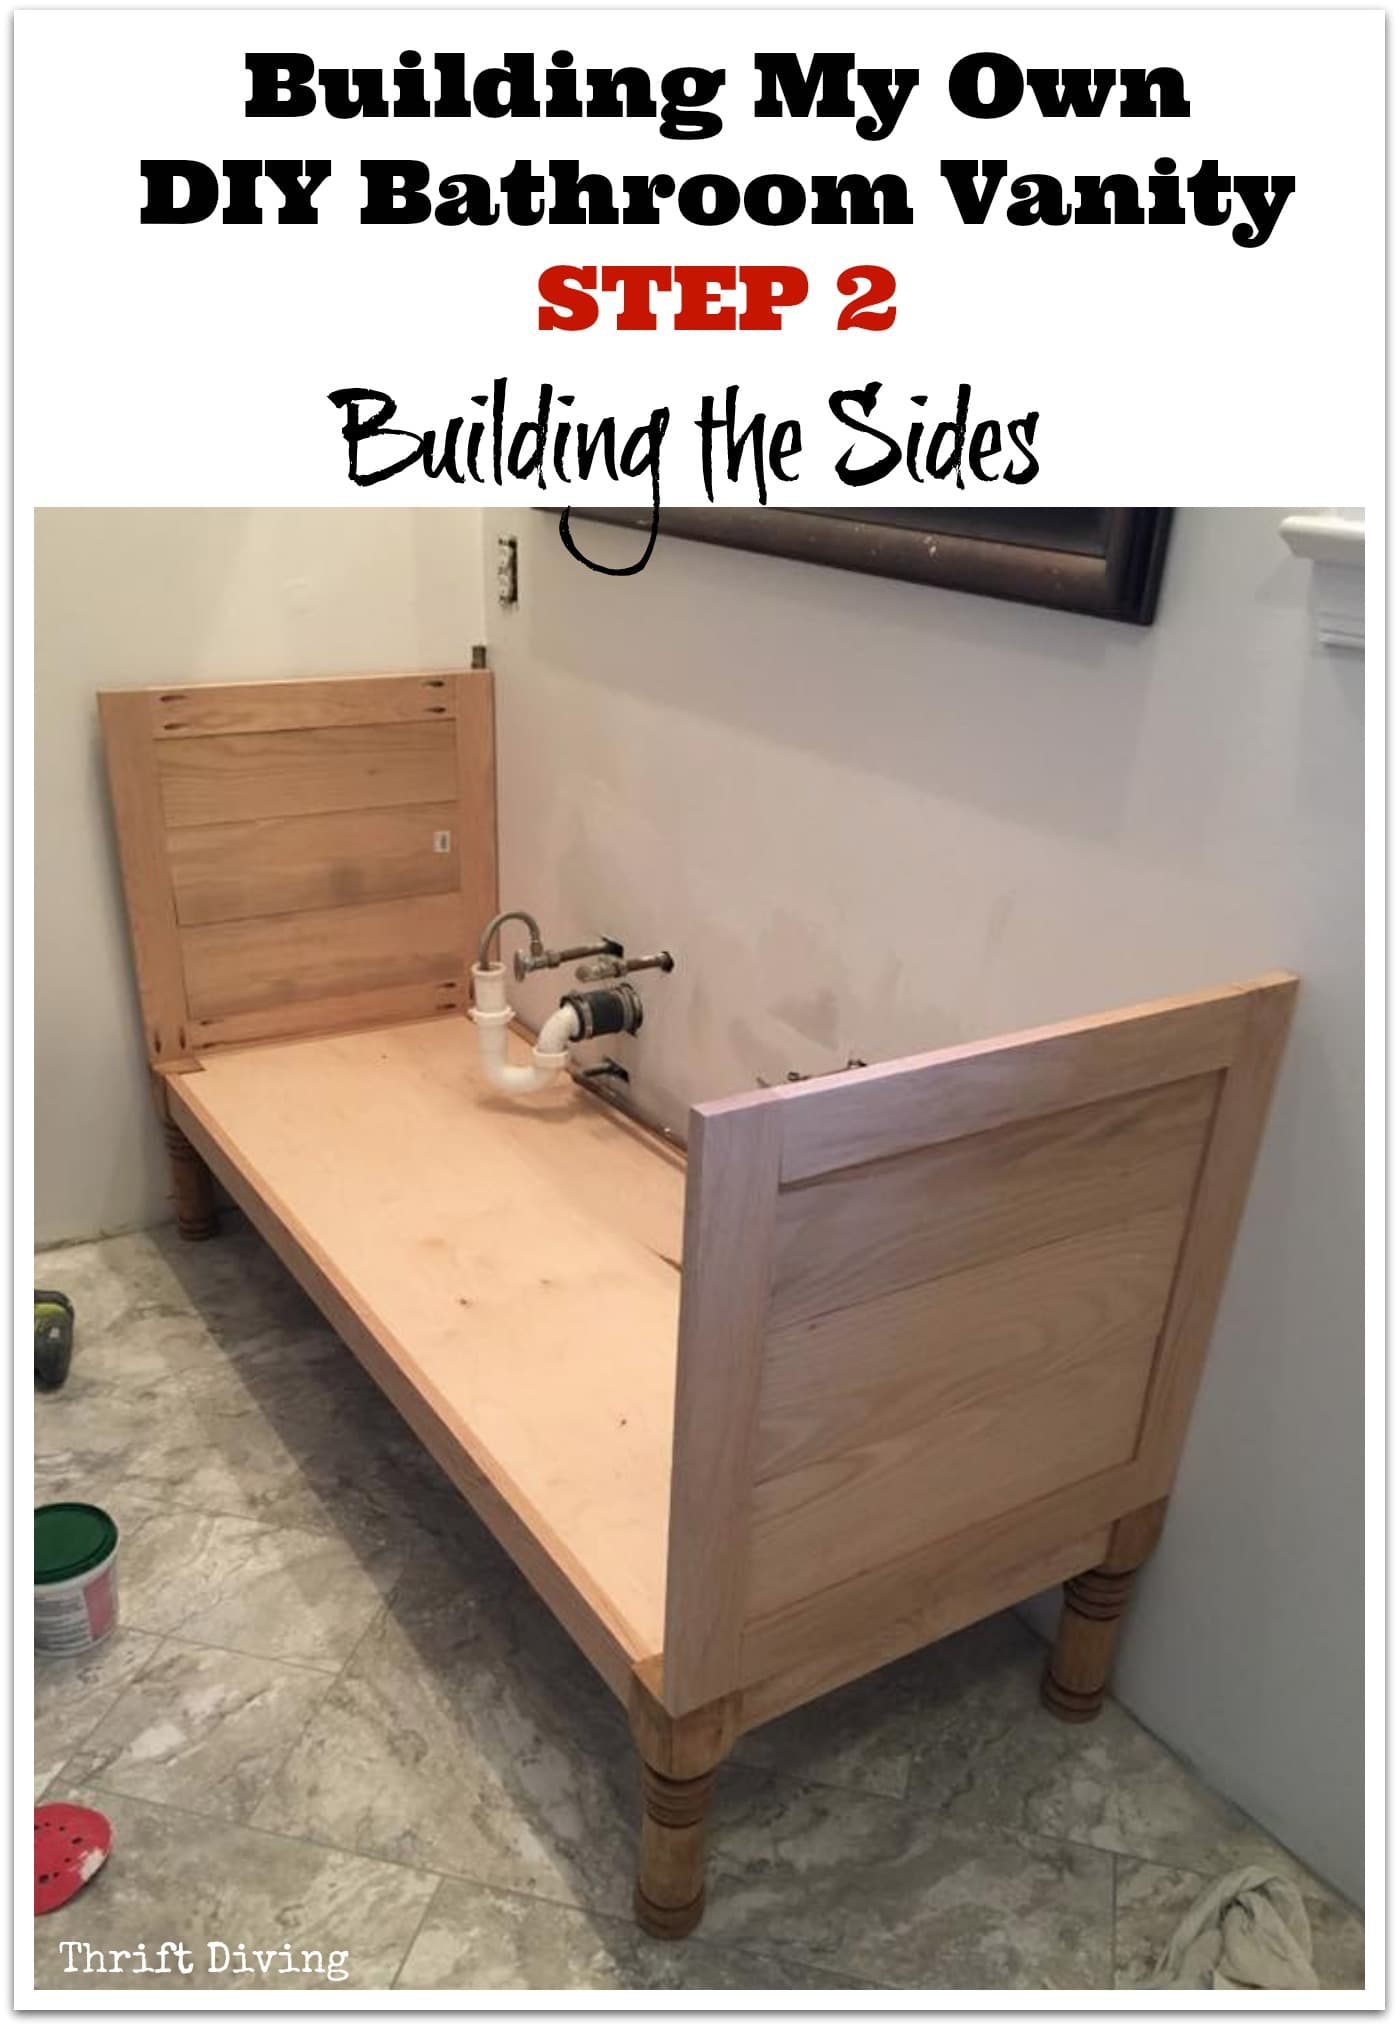
Build a DIY Bathroom Vanity – Part 2 – Attaching the Sides
This post is Part 2: Attaching the Sides in the series where I thought of this crazy idea to build my own 60″ DIY bathroom vanity from scratch. Be sure to check out the other parts in this tutorial series:
- Part 1: Attaching Legs and a Base
- Part 2: Attaching the Sides
- Part 3: Creating the Partitions
- Part 4: Making Drawers
- Part 5: Making Cabinet Doors
- Part 6: Fitting the Granite Vanity Top
- Part 7: Finishing the Oak Vanity
- BEFORE & AFTER: The Final Master Bathroom Makeover Reveal!
SKIP AROUND THIS POST
No time to read the whole post? Skip around and visit each section! 🙂
Materials Used
STEP 1: Creating a Frame for the Base
STEP 2: Cut Strips of Red Oak and Glue
STEP 3: Glue the Side Panels to the Vanity Base
STEP 4: Secure the Side Panels the Vanity Base
STEP 5: Attach the Front and Back Support
Problem With Plumbing??
But What If It Falls Apart?
Read the Rest of This Bathroom Makeover Series
Where I left off in this series Part 1: Creating the Legs and Base, was that the base had been built.
The next part I needed to figure out was how I was going to build a vanity on top of this base.
It’s easier to attach sides of a DIY bathroom vanity when you’re using tall legs such as these, because you can create pocket holes in your sides and just secure the sides to the thickness of these legs.
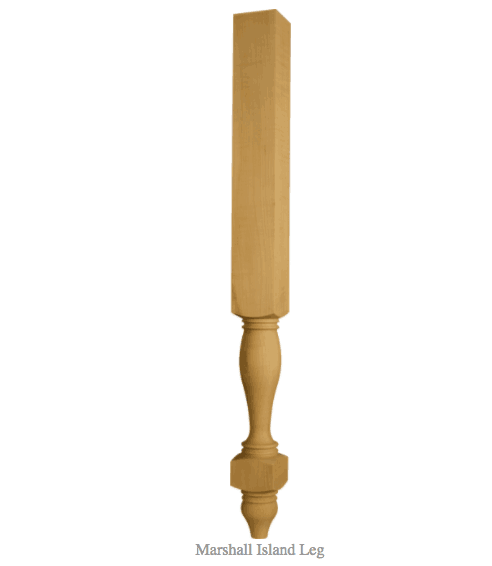
But since I was using short “stubbies” that I upcycled from wood from the salvage shop, I needed to figure out how to build up. But first, I needed the right materials.
Materials Used:
- 1/2″ thick Red Oak hobby boards from The Home Depot
- 3/4″ thick Red Oak wood
- Kreg Pocket Hole jig
- Jigsaw, circular saw, or a miter saw (any tool to cut pieces of wood)
- RYOBI power drill
- Wood glue
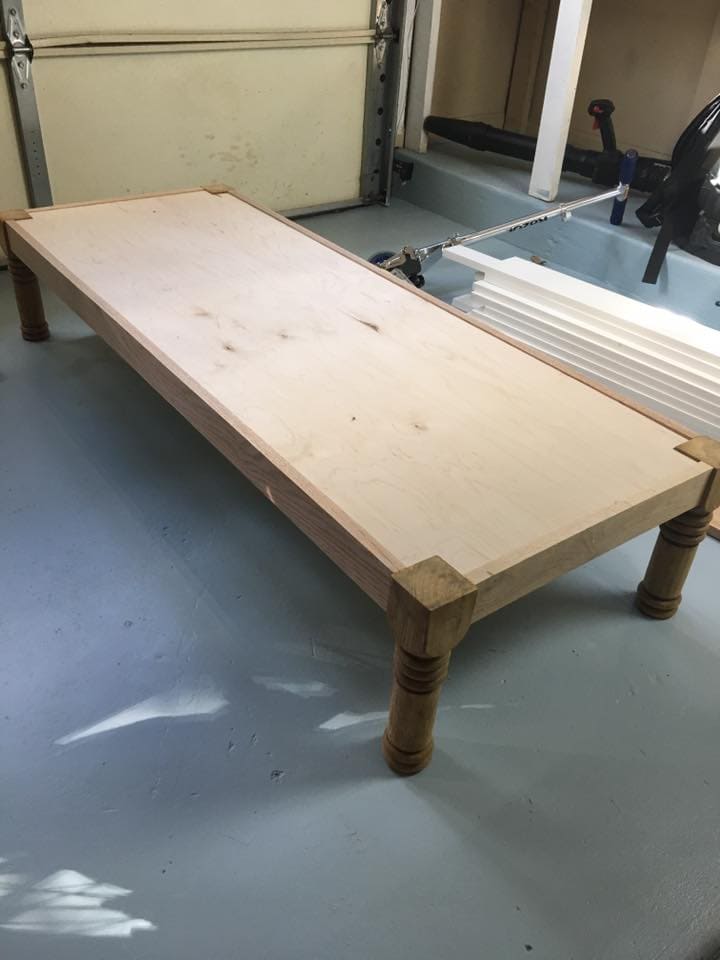
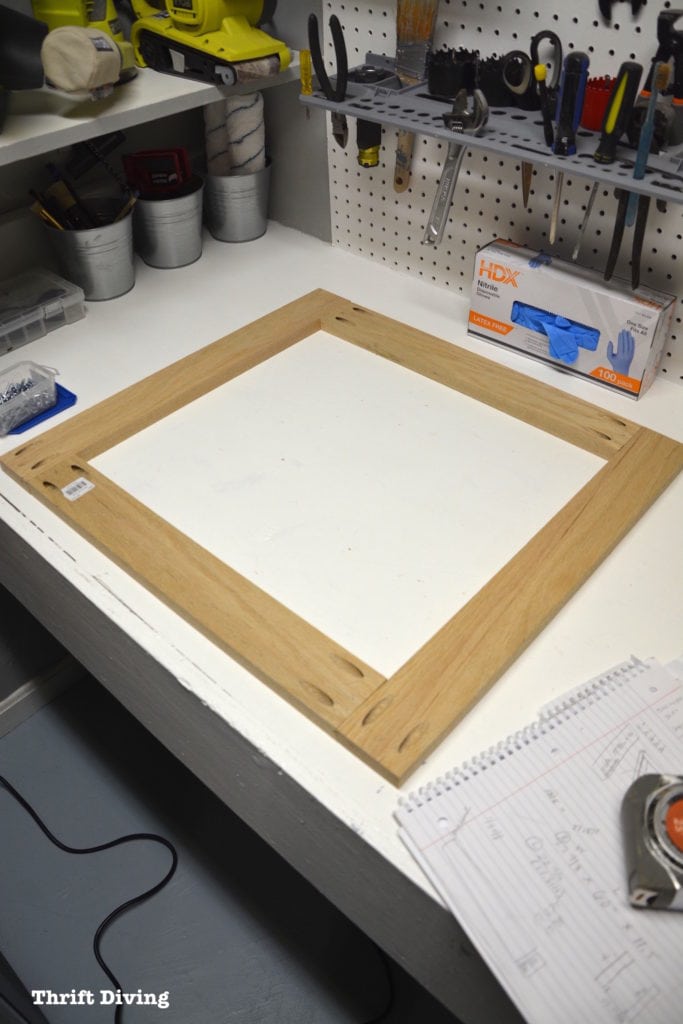
STEP 1: Create a Frame for the Sides
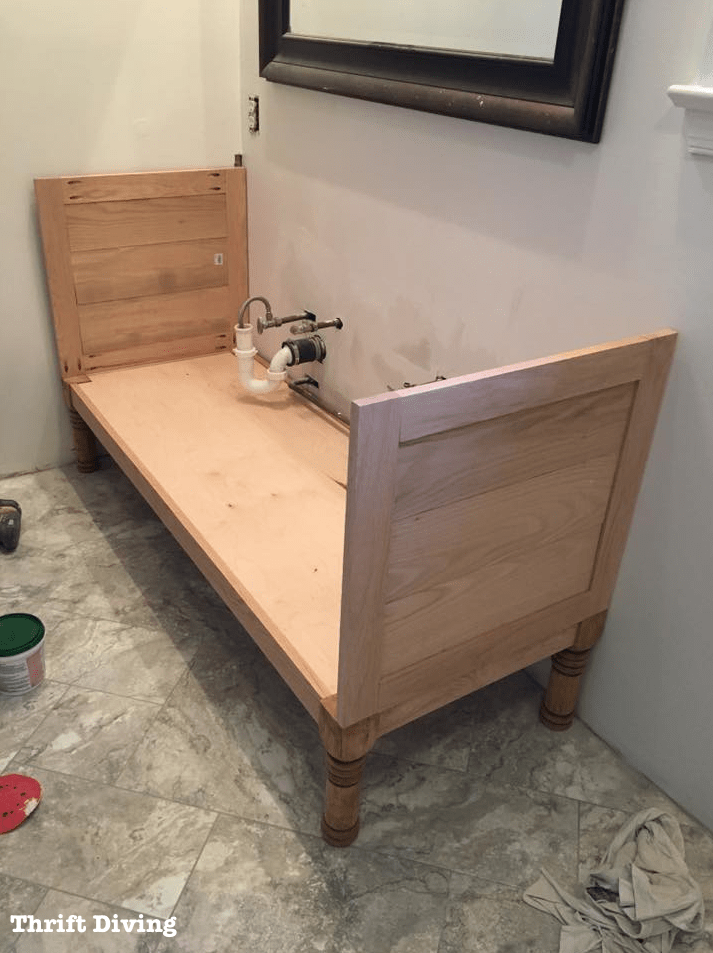
If you remember from above, my base looked like this and needed sides.
The easiest way for me to create that was to create panels using 3/4″ Red Oak plywood.
Ideally, I would have been able to fill the middle with a thin sheet of 1/4″ thick Red Oak plywood, but unfortunately, The Home Depot doesn’t sell (or, at least, I didn’t see it) that thickness of Red Oak plywood. 🙁
If I were painting this cabinet, it wouldn’t have been a big deal because I could have used just 1/4″ birch plywood, or another readily available plywood, which could have simply been covered up with paint.
However, I planned to keep this wood as natural as possible so I couldn’t mix woods. That wasn’t going to work.
STEP 2: Cut Strips of Red Oak and Glue
The thinnest Red Oak that The Home Depot carries are 1/2″ thick boards, and only about 6″ wide.
So I ended up having to cut with a circular saw three pieces of and glue them to the inside of the Red Oak frame, like so. (I worry that they’ll warp over time, but I’ll have to deal with that if the time comes).
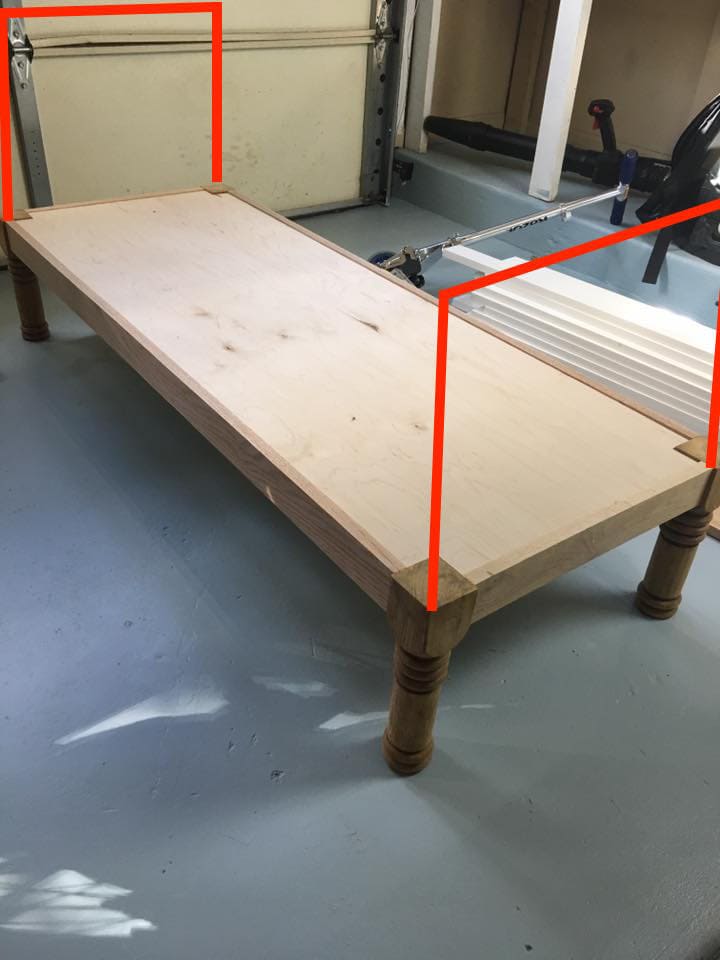
STEP 3: Glue the Side Panels to the Base
Then I made sure the panels were square, using my speed square, and then glued the panels to the base.
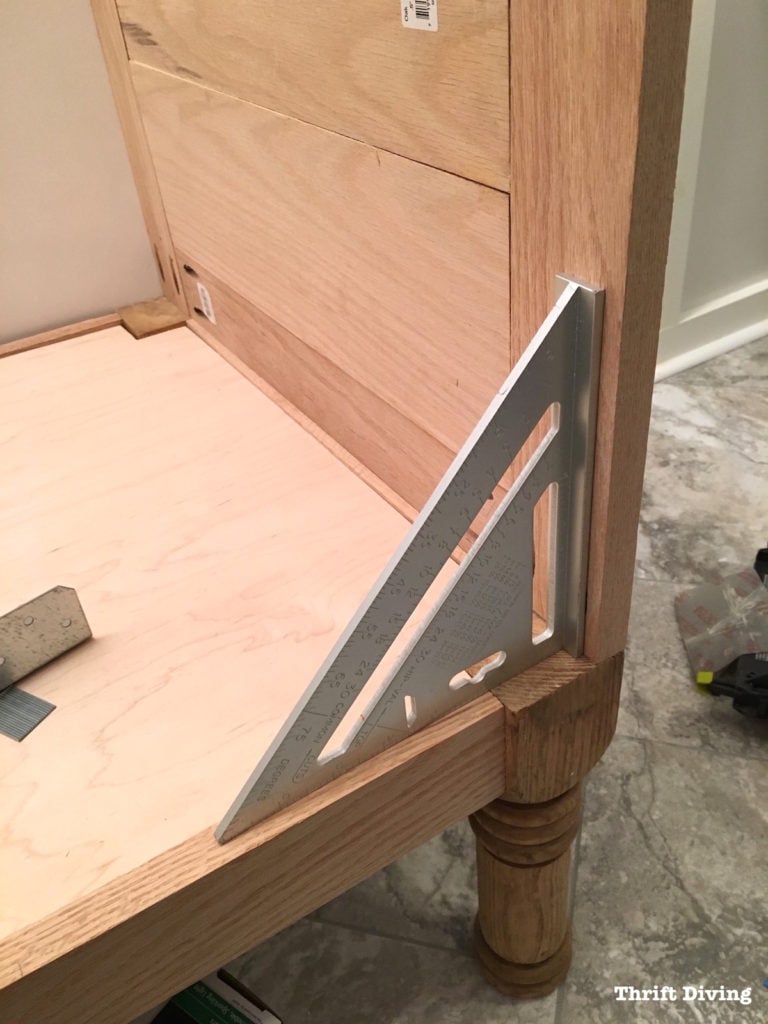
As the glue was drying, I clamped it down.
TIP: When you’re building things, always have a bunch of good quality clamps in various sizes!! I love these Dewalt clamps because they’re easy to tighten and they have soft rubber on the ends, which won’t damage your project.
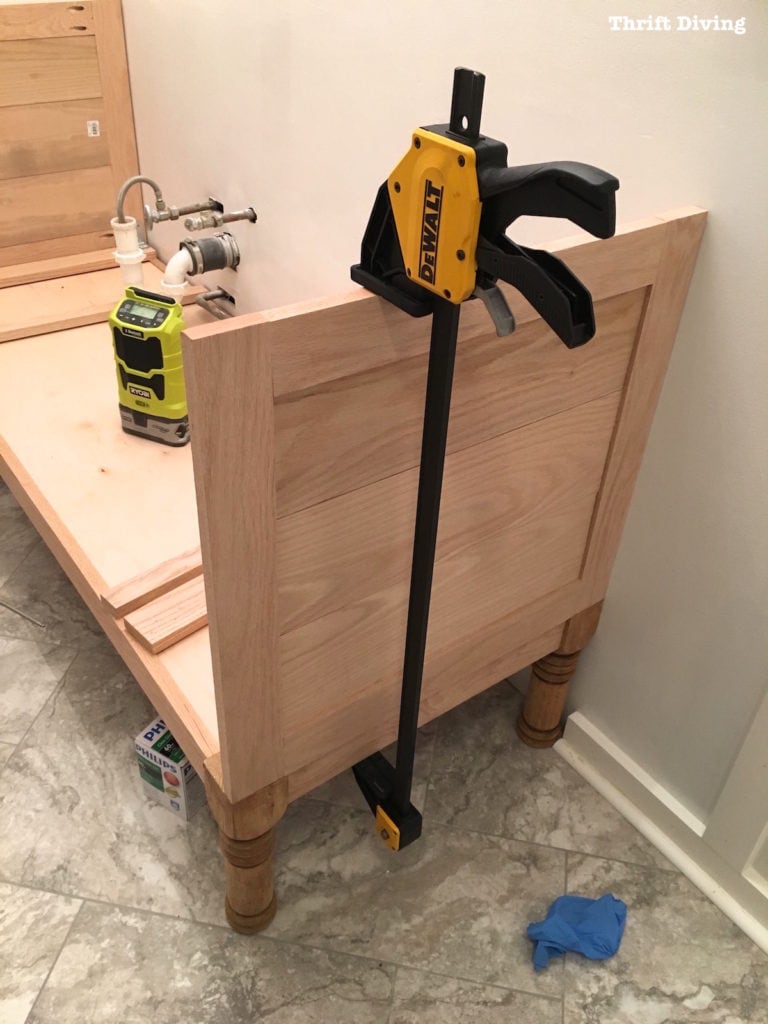
Then the glue dried, I had two vanity sides.
Next, I had to figure out how I was going to securely fasten the sides to the base!
STEP 4: Secure the Side Panels to the Vanity Base
So you know how DIYers love using the Kreg Pocket Hole jig, right?
It’s this cool little blue tool that allows us to create pocket holes to attach pieces of wood together pretty easily, with super strong joints.
Here’s a pic of me using a Kreg Pocket Hole jig on another project:

Well, here’s the thing:
You should NOT drill a pocket hole into the end grain of a board.
I had no idea. I actually just learned that tip while working on this project. (I recommend you watch this YouTube video to see exactly why it’s not a good idea!)
The reason why is because if your screw is angling down like this, into the end grain, there’s no strength in the screw staying put. It will just crack out. The strength of a pocket hole joint is when you’re connecting wood to a piece of wood’s face or its side, but NOT its end.
Plus, you definitely don’t want the screw pointing towards the outside edge, where it could just break off…..
Crap.
What was I going to do???
How was I going to secure this wonky side to the vanity??
I was going to keep going, that’s what!
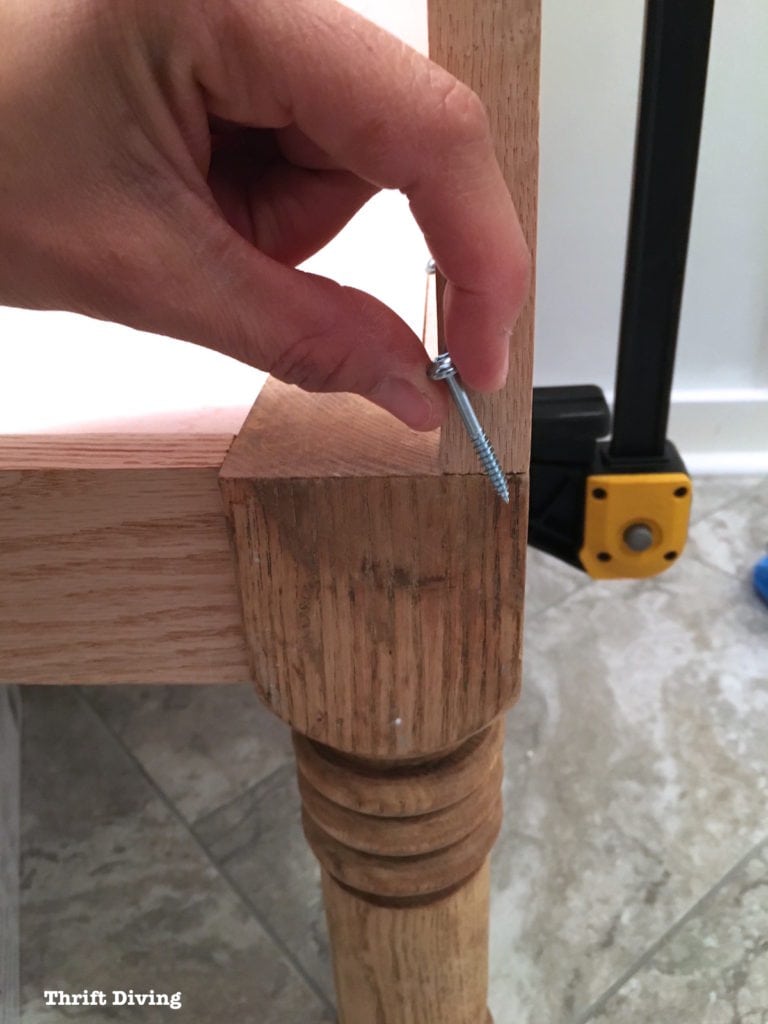
At this point, I had no other options than to just add the screws, even though it wouldn’t be a strong joint.
But I knew I would have to figure out a solution to reinforce the sides.

My worse fear was that the vanity would come crashing down once the heavy 150-pound granite top was placed on top.
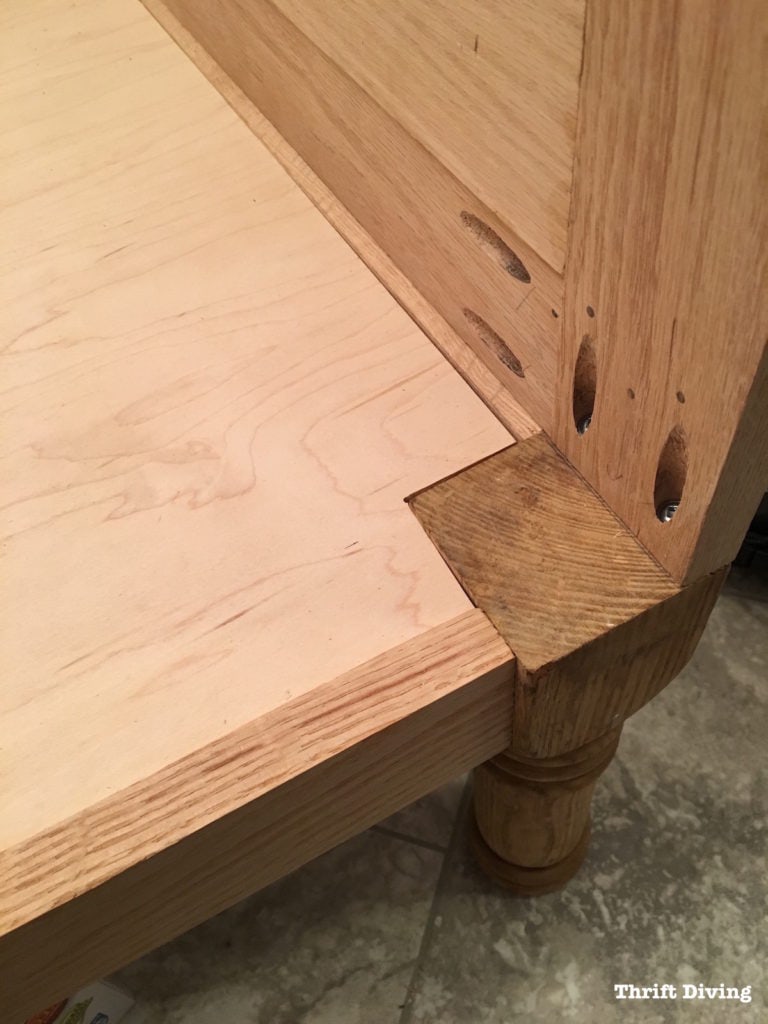
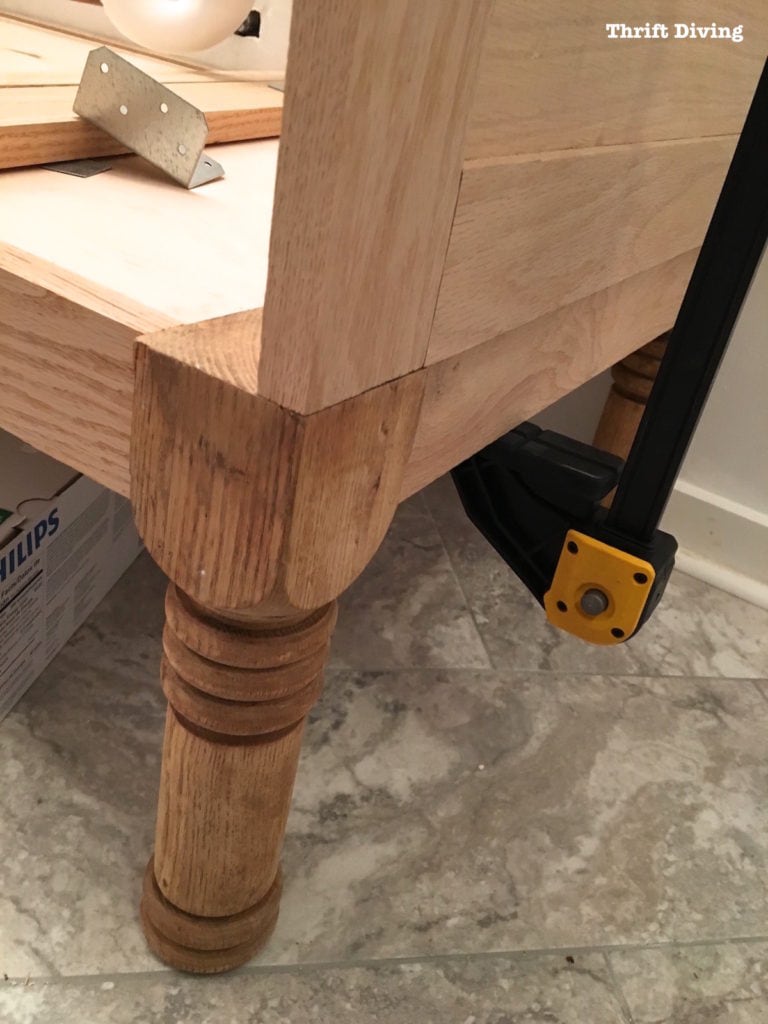
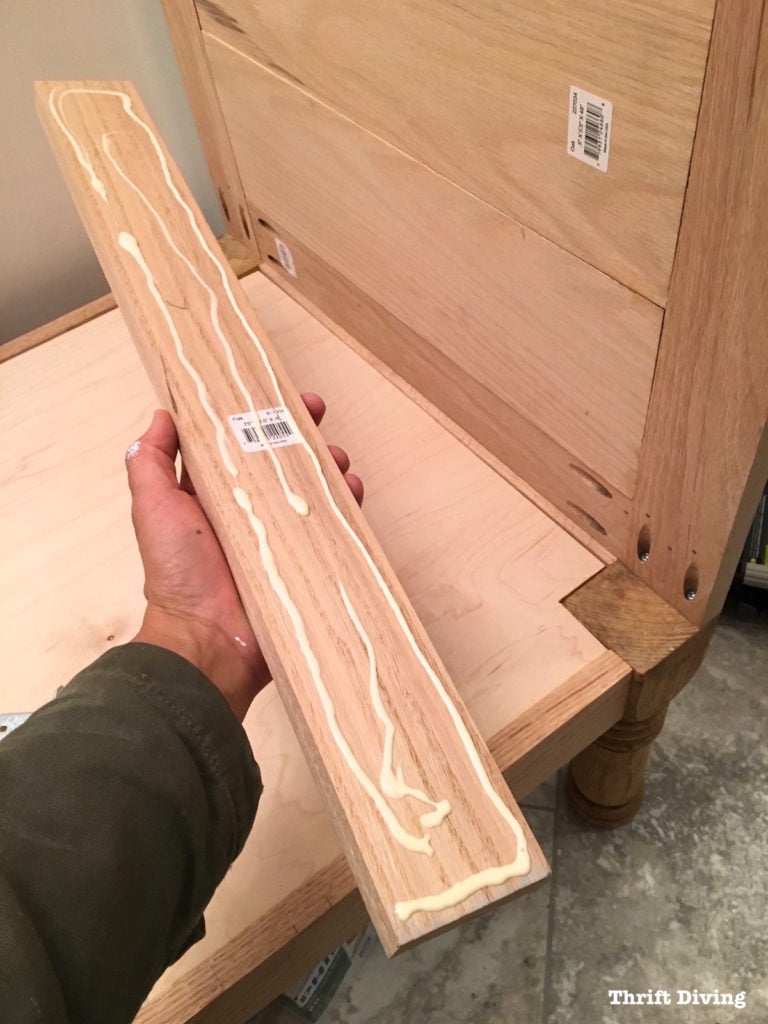
So I decided to glue and nail a support board to the base of the side.
Even though I would be screwing it into the end of the legs, it had to be better than leaving the sides “as is.”
(Guess I should have removed the stickers…. LOL).
After gluing the board to the base, I planned to add a large piece of metal to reinforce it even more.
But first, I drilled pilot holes.
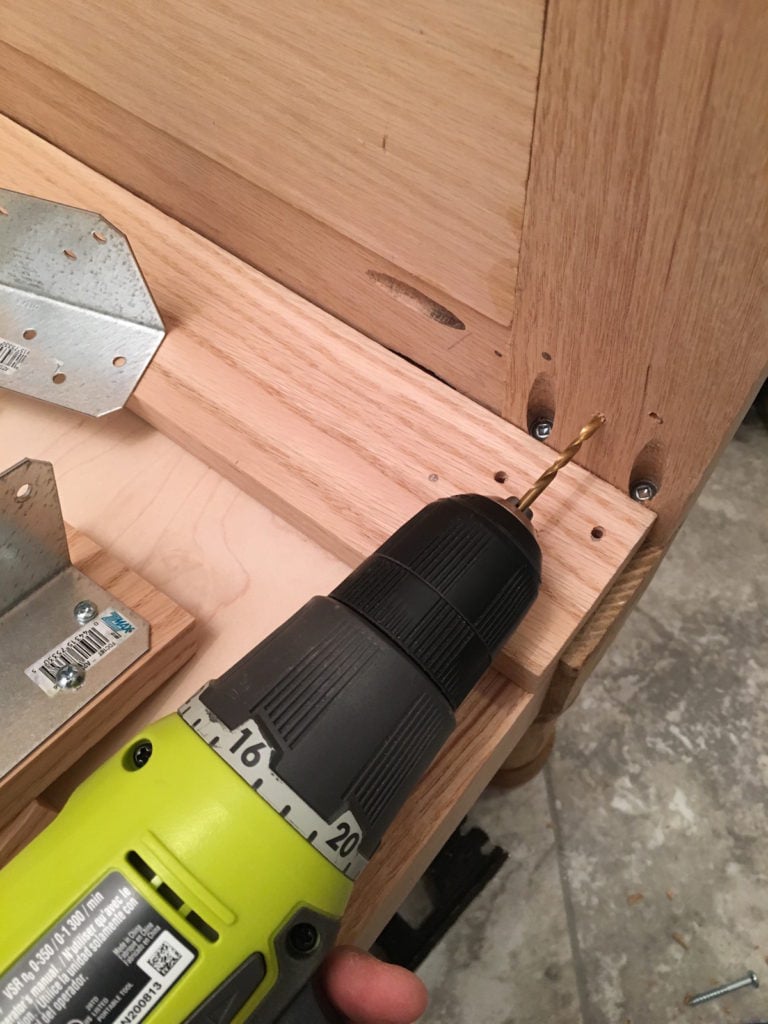
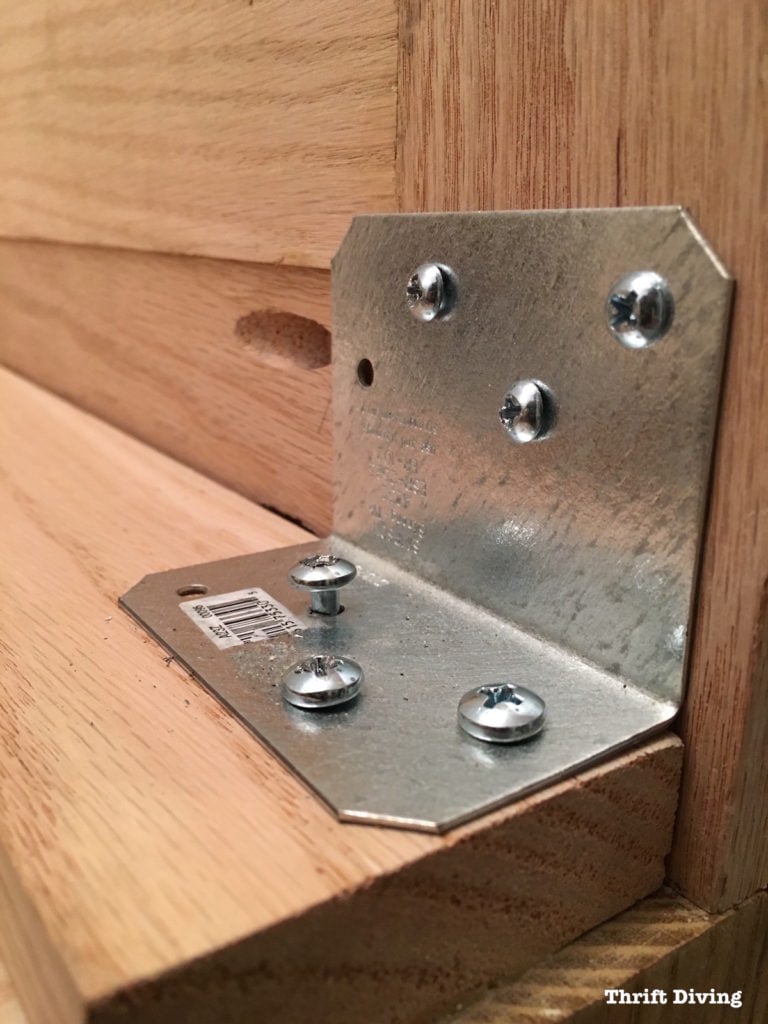
Then I attached a large Simpson Strong-Tie bracket to the front and back of the vanity.
And you want to see how crazy I am??
I kept stripping the screws and ended up totally stripping one that I couldn’t get out. LOL
You see it sticking up there??
That’s how I left it, too!
Lesson learned: drill better pilot holes and add a bit of wax or soap to your screws so that they go in easier and you don’t strip them and end up like mine!
STEP 5: Attach the Front and Back Support
Using pocket holes, I had attached 3/4″ thick Red Oak for a front support and a wider 3/4″ thick Red Oak for the back support, gluing all the joints and securing them with pocket hole screws.
I also started planning how I was going to add the stiles (rail is the name for the wood that is running horizontally; stile is the name for a vertical piece of wood).
Because I hadn’t planned out this vanity very well, I also ran into problems with how I was going to accurately attach the stiles. You’ll see in Part 3 of this DIY bathroom vanity series how the stiles not being totally straight 90-degrees created gaps when I installed the partitions.

Problem With Plumbing??
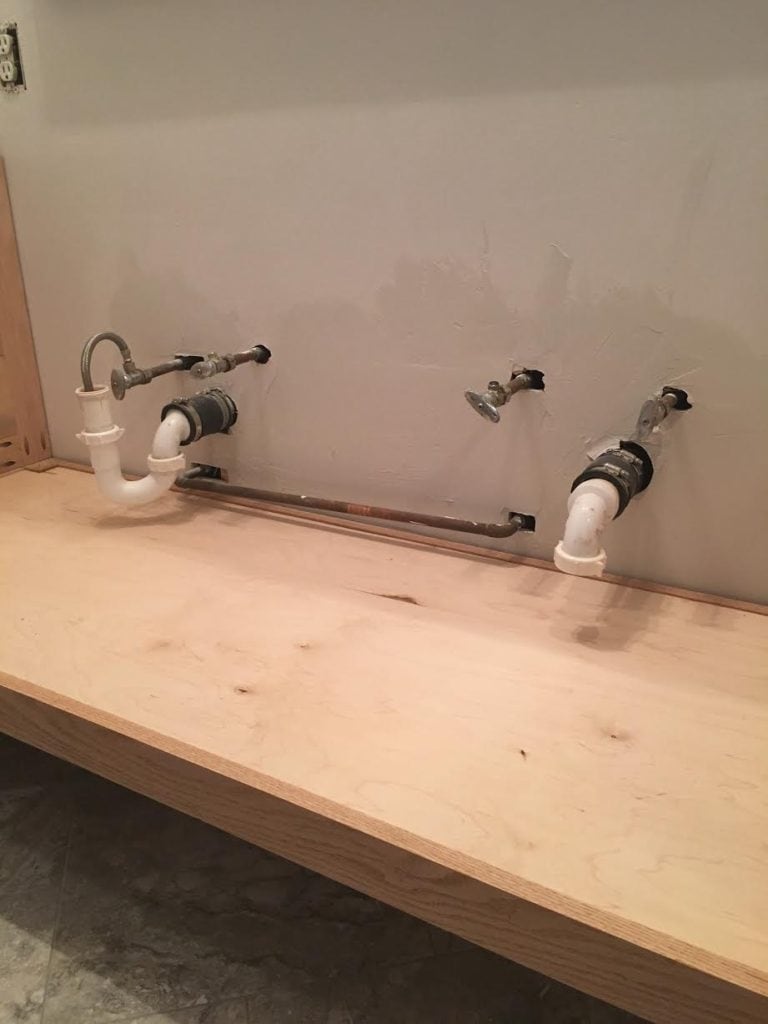
Another potential problem that arose was whether or not I would have enough clearance for the plumbing.
According to my contractor friend, Edmundo, he said I should have 6″-8″ of clearance under the plumbing for future work that would need to be done.
According to me, however, I said it was just fine and there was no way I could change it now. LOL
Honestly, I feel like there is enough room. You can see in this picture below that the plumbing clears the base just fine.
But if you decide to ever create your own DIY bathroom vanity, just make sure you account for where your plumbing is and if you (or a plumber) will have enough space to access the pipes and stuff.
But What If It Falls Apart??
I joke that this whole project has been a piecemealing of wood parts, and it’s true!
I still worry that this will fall apart down the road, as the wood starts to shift and move due to seasonal and humidity changes.
Yesterday I said to hubby, worriedly, “But what if it falls apart??”
He replied, “Well, then you build it again.”
When he said that–lightbulb moment!
It wouldn’t be the end of the world if this project eventually fails. Yes, it would suck. And yes, it would be expensive (I haven’t totaled up, yet, how much I’ve spent on wood and supplies).
But, the next one that I build would be even better than this one!
That’s just how life is when you’re learning new skills.
You suck…..then suck less…..and then even less than that….until you get better…
Cross your fingers for me!

Read the Rest of this Bathroom Makeover Series!
DAY 1: The Evolution of a Master Bathroom Makeover
DAY 4: Picking Out New Flooring: Which One Do You Like?
DAY 6: How to Remove an Old Bathroom Vanity
DAY 27: Removing Wallpaper, Repairing Walls, and Removing an Old Toilet
DAY 29: Installing New Flooring in Our Master Bathroom
DAY 49: The Bathroom Makeover That Would Never End (An Update!)
Day 52: How to Remove a Toilet Yourself
DAY 57: How to Install a Toilet Yourself
Build a DIY Bathroom Vanity – PART 1 – Attaching Legs and Base
Build a DIY Bathroom Vanity – PART 2 – Attaching the Sides
Build a DIY Bathroom Vanity – PART 3 – Creating the Partitions
Build a DIY Bathroom Vanity – PART 4 – Making Drawers
Build a DIY Bathroom Vanity – PART 5 – Making Cabinet Doors
Build a DIY Bathroom Vanity – PART 6 – Adding a Granite Vanity Top
Build a DIY Bathroom Vanity – PART 7 – The Final Finishing Coat
BEFORE & AFTER: The Final Master Bathroom Makeover Reveal!

Download the 5 freebies!

Thrift Diving inspires women to decorate, improve, and maintain their home themselves...using paint, power tools, and thrift stores! Use these 5 printables, checklists, and ebooks to get started!


I am loving the steps, please keep sharing the updates! I’m interested on embarking in a project like this, I hope my husband agrees on it. Thank you so much for sharing!
Hey, Erin! I definitely will share more of the vanity process! I’ve been backlogged with projects and posts, so I need to post Step 3: Cabinet Drawers and Doors. It will be coming, promise! Your husband is likely to say, “No, just buy one!” like mine did. LOL. But part of it was money (a 60″ vanity costs about $1,000 or more), and the other part was the challenge of could I do it. You can do it, too! It’s more challenging when you’re not working with a plan. I would recommend using Ana White’s vanity plans. They’re easy to follow! But you can also piece-meal it together like I did! LOL
You go girl! Love your tenacity and your vanity will look fabulous when it’s done. Also loved what you said.. you suck less with every bit of practice! So true, we should all have plaques made with that sentiment and post them where we see them every day:)
If you buy what we call wood screws in Canada that require a Robinson screwdriver (holes are square rather than a cross which requires Philips screwdriver) they are much less likely to strip. You can often remove a stripped screw by cutting a slot across the top with a hacksaw and using a flat screwdriver to remove. Family Handyman site is full of tips like removing stripped screws. Great for improving skills.
Charlotte
Can’t wait to see the granite installed! You go girl! What a woman!
Ooooh, it looks goooooood, Sherry! 🙂 Edmundo came over the other day to put the granite top on and it looks fabulous! But I still am not sure how I should finish off the red oak!
this is a project and a half! I admire your persistence! I don’t know if I would have had the nerve to try building something this complicated. But I’d be going the same way, trying one thing and then another – and I’d make it work! Keep up the good effort! It’s going to be pretty when you’re done!
Hey, Linda! I can’t believe I had the nerve to try it, too! Trust me, I have been on pins and needles since I started building it, hoping that it works out. It’s a little wonky with a couple of the drawers, but it’s not bad for a first try! All the things I learned were worth it!! Thanks for commenting, girlfriend.
Lookin good! I buy 1/4 inch red oak plywood at Lowes . Do you have a Lowe’s nearby? I just use my drill without a bit, close it around the screw head & reverse it out.
wow, that sounds like it should work. Cool!
Hey, Christine! Oh wow, they have it? Thanks! Thanks for the tip about removing the stripped screw. I have screw removers but I didn’t feel like trying to figure out how to use it. But I’m going to try your tip for removing the screw without a bit! You’re awesome!
I have one of those tools (bits) to help remove screws came in handy when I had to remove screws covered with hundreds of layers of paint. But recently I found a trick on one of those “hack” lists that said to use a thick rubber band by placing it in the screws grooves and unscrew…looked like it would work and I filed it away for “next time”… because there will be a next time 🙂
Hi, Kelly! Yes, I’ve heard that tip, too, about using the rubber band! I didn’t have one around to try that. I’ve tried it before but it didn’t work for me. But did you hear the tip from another reader in the comments? She said she will use a drill without a drill bit and just tighten it around the screw and remove it that way! I can’t wait to try that!
(P.S. https://s23.postimg.org/yzf7jq77f/veryexpensive.png
I thought it was intentional at first, like you kept interrupting yourself to think about the cost. LOL. Something messed up the formatting, I guess?)
I admit, this is far too dangerous of territory for me! I think I’ll stick to Ana White’s plans for now. But I am seriously envious of your courage and resourcefulness!! It’s awe inspiring. And it’s looking great so far!! I’m kind of wondering if you could cut out an inch or so notch into the legs to stick a simple 1×1 board into so you could have something to nail/screw the sides and front into? But I don’t know how sturdy that would be, or if any screws you’ve already put in would compromise that… I didn’t even think about the wood splitting!
At any rate, your husband is totally right. This would be an expensive learning experience, but definitely one you would never forget! I love the style this is heading in so far, and I love how you’re sharing everything with us, step by step.
Oh – I don’t know if you know this, but our local Salvation Army has cheap /wood/. As in, wood boards. they shoved it in a barrel in the way back hidden by mattresses and headboards. Very hard to find, but it was cheap ($.50 for a pine 1×2 that was cut down to about 6 ft). Maybe your local salvation army has a similar pile? I don’t know if it was a one-time thing or not, but I figured it was useful information worth sharing!
Serena, I think you are brilliant and talented, and I’m always excited to see what you are up to! I need a vanity for a bath redo, but I think I’ll stick to finding a vintage dresser to re-purpose.
As for the stripped screw – I recently found a fantastic tool set to remove them. It comes with 4 sizes of drill attachments that on one side drill into the screw, then you flip it over and the other side removes it. It really works! you can probably get them at any hardware store.