
BEFORE & AFTER: My Pretty and Colorful Basement Office Makeover
I feel like Mama just got a new apartment. This cluttered basement office makeover before and after was very uninspiring before I started, but is now a couple hundred of square feet of living space for my family me (sorry, family–mama needs a “she-cave.”)
I turned this boring, dreary basement into a pretty and colorful basement office! And if you think I bit off more than I could chew, you know what?
You’re right.
But if anyone could do it, it would be me! I love a good challenge.
Here’s how I tackled this cluttered basement office makeover and turned it from a cluttered space into a pretty office!
BEFORE
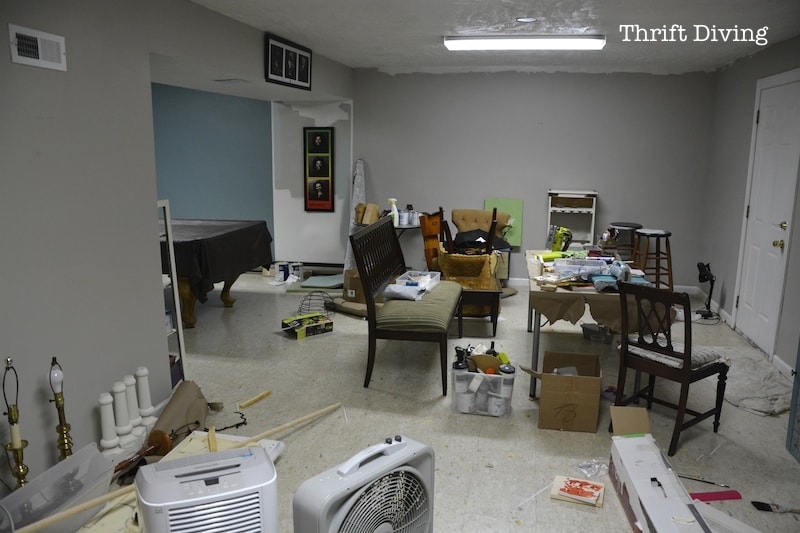
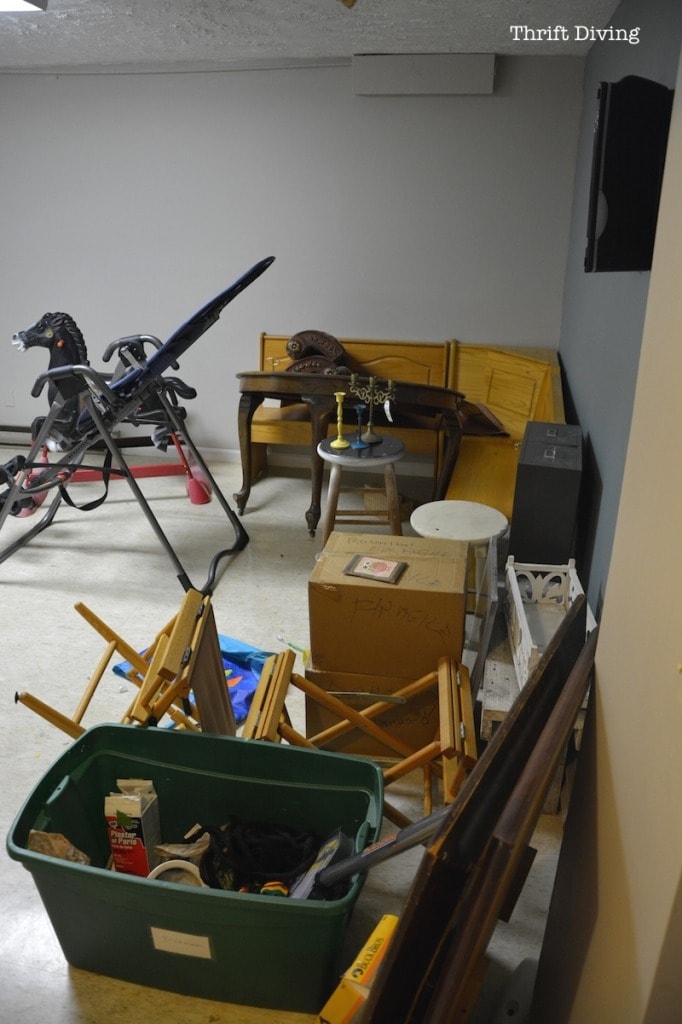
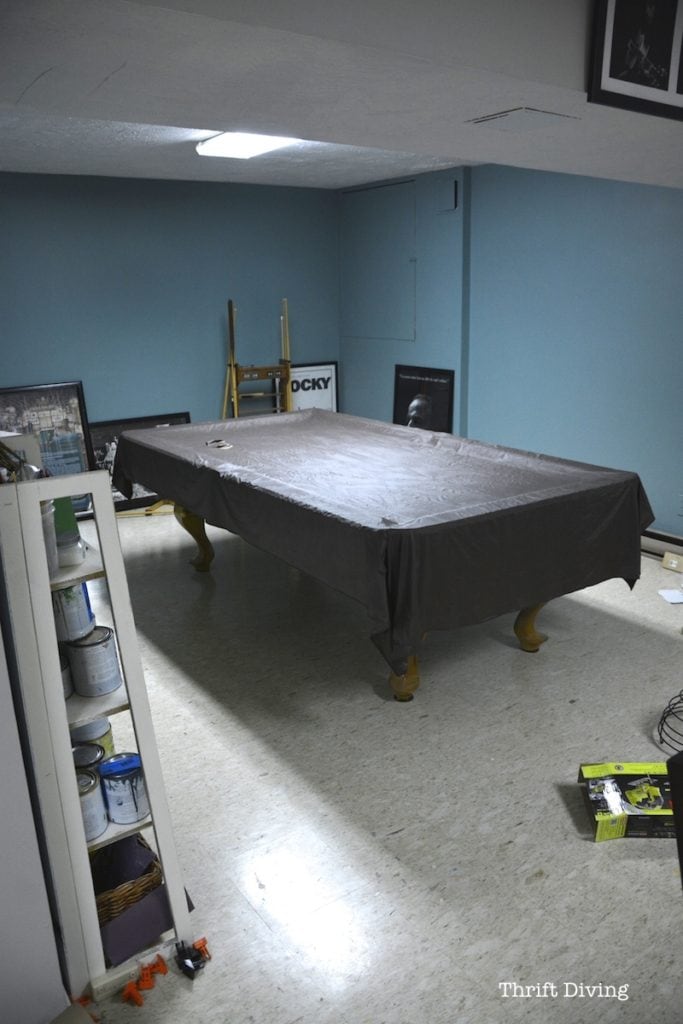
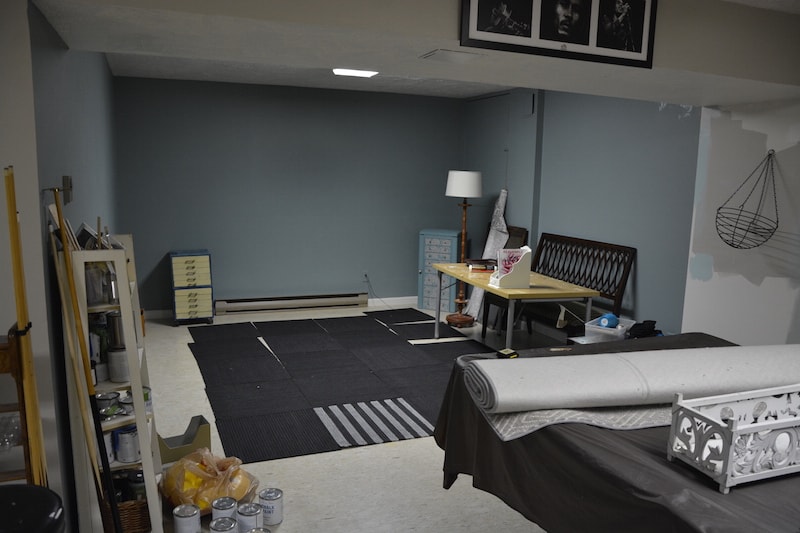
In the back section of the basement, to the left, sat our barely-used pool table, just taking up valuable space. We don’t do much entertaining (umm…..maybe because our basement was jacked up!!–ya think??), and I actually considered getting rid of it at the start of this basement makeover. But then I decided that if we just pulled it out into the main living area, I could use that space for my home office! The color needed to change. It was waaaayyy too dark. I wanted a “she-cave” not a masculine “man-cave“!
AFTER – Basement Office Makeover!
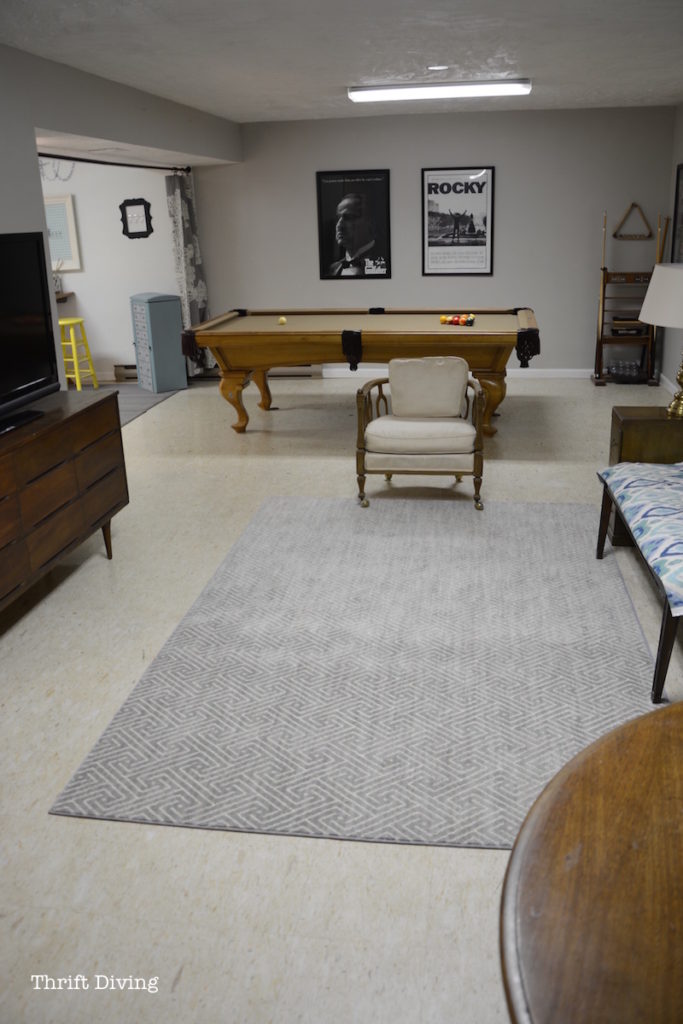
I pulled the pool table out into the main living area, brought down the TV from our bedroom to sit on top of the mid-century modern dresser I found at the thrift store. And I added same thrifted lamps, chairs, etc. I got the rug for FREE from Shaw Rugs at a blogging conference I went to one summer. (Ahhh….”free” sounds so good, doesn’t it? A rug like this would cost at least a couple hundred).
AFTER!!!!
As you walk back towards the pool table, you start to see a tiny peek of my basement office area! I added a long Ikea Hugad curtain rod and used a couple shower curtains folded in half to frame out the entrance to my basement office. I already had them on hand so I didn’t have to buy those.
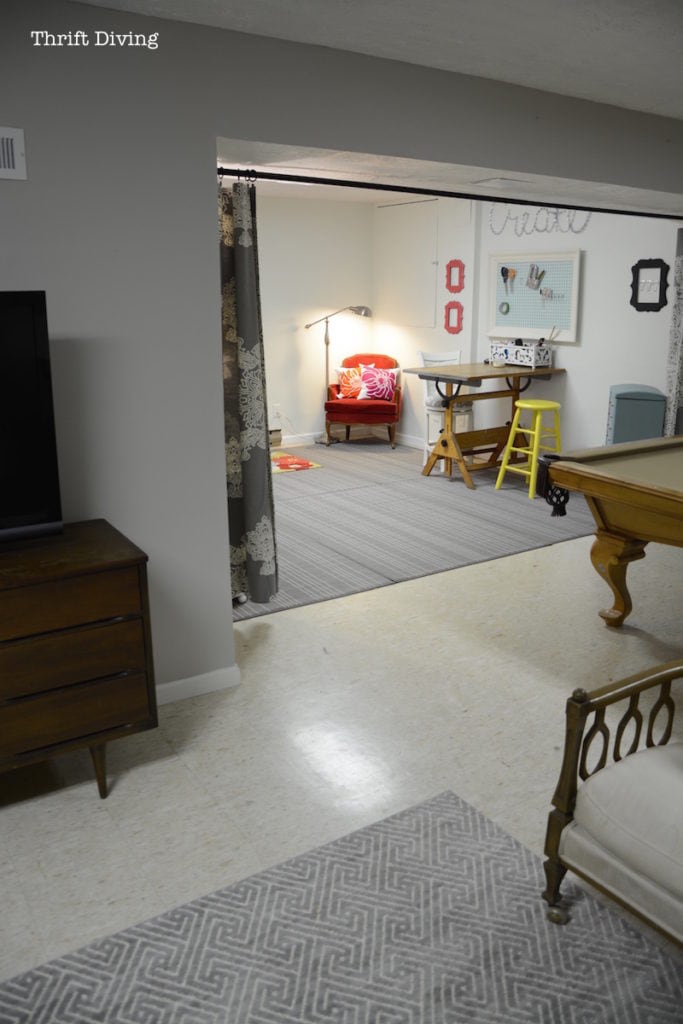
Let’s take a closer look, shall we?
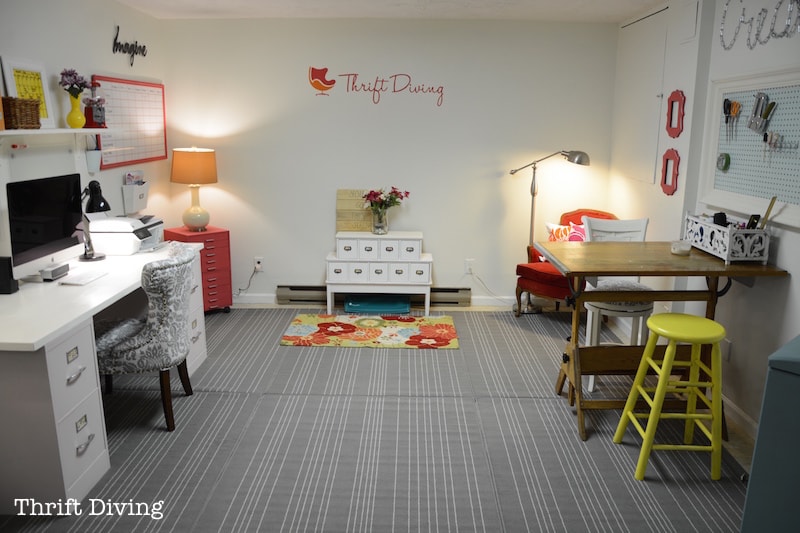
When you look head-on into my basement office, this is what it looks like!
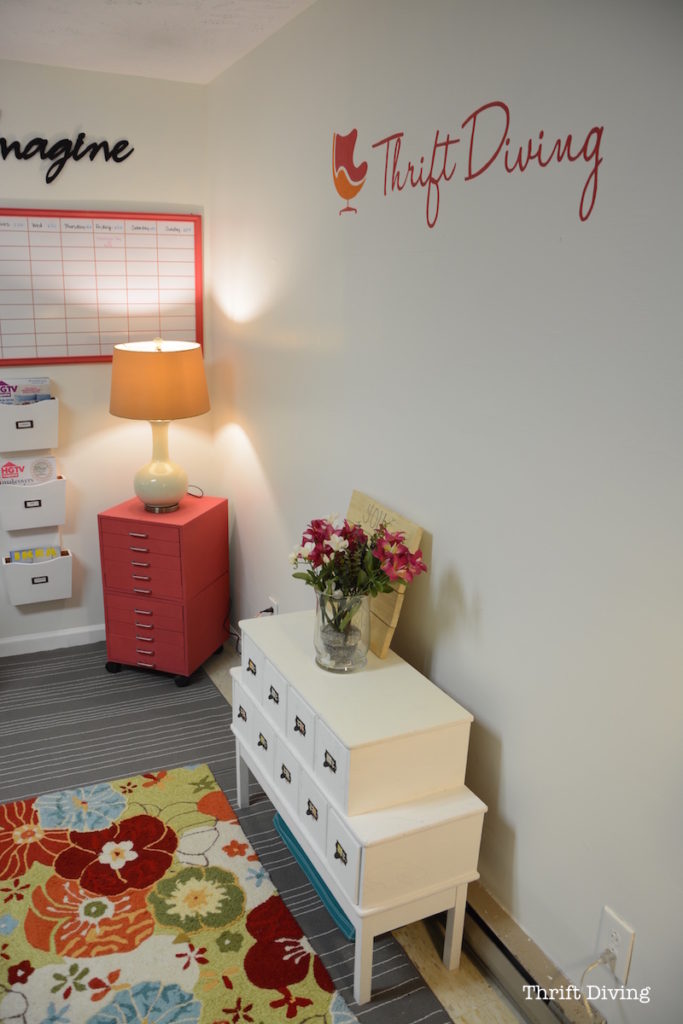
It’s officially my Thrift Diving Headquarters now!
I feel like I suddenly have this little apartment to myself down here (sans bathroom), but hey–who’s complaining??!
And here’s what’s amazing–it’s quiet!!!
I can escape the ruckus from my three boys, and retreat to total silence to work (until they come down, that is… LOL).
Basement Office Makeover BEFORE and AFTER!
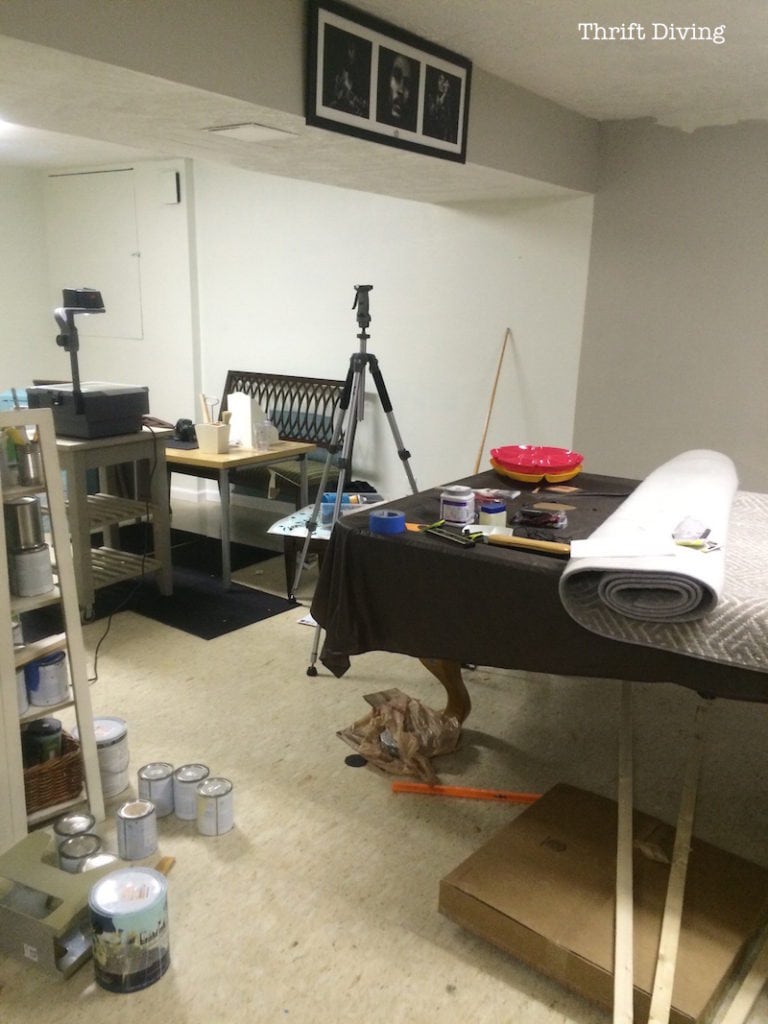
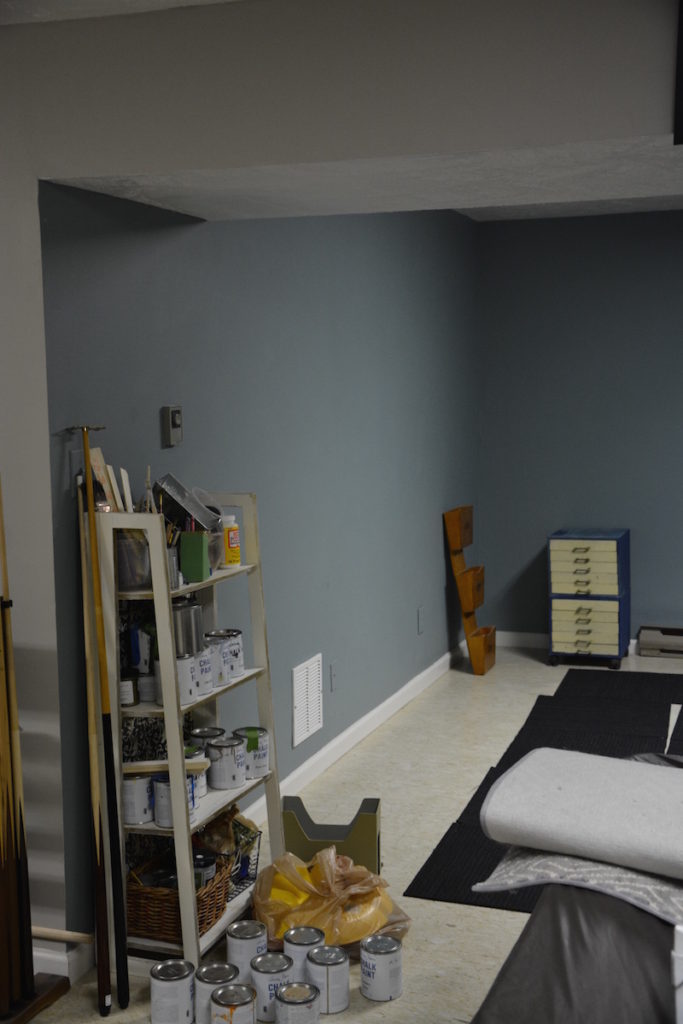
Below is how my basement office looked for a majority of the makeover. I was so unfocused and a bit overwhelmed. I didn’t know which way was UP or DOWN. And I was running out of time. AND PAINT!
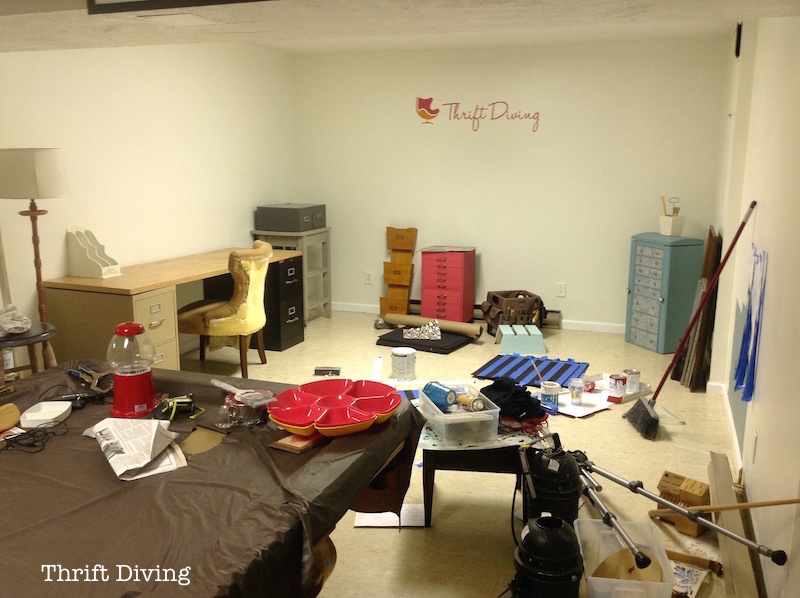
BEFORE
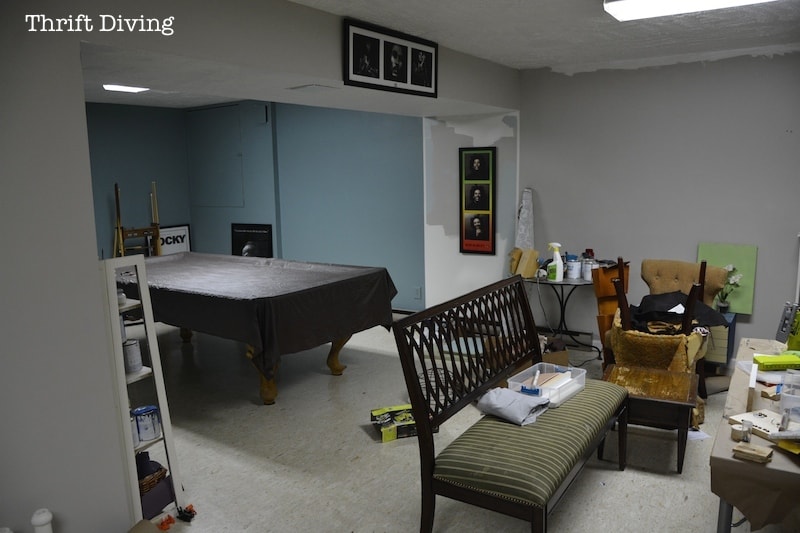
Feeling Overwhelmed
I felt like I was just shifting things from this place to that place, with no real progress. I didn’t know where I wanted to start or what needed to be done when and how.
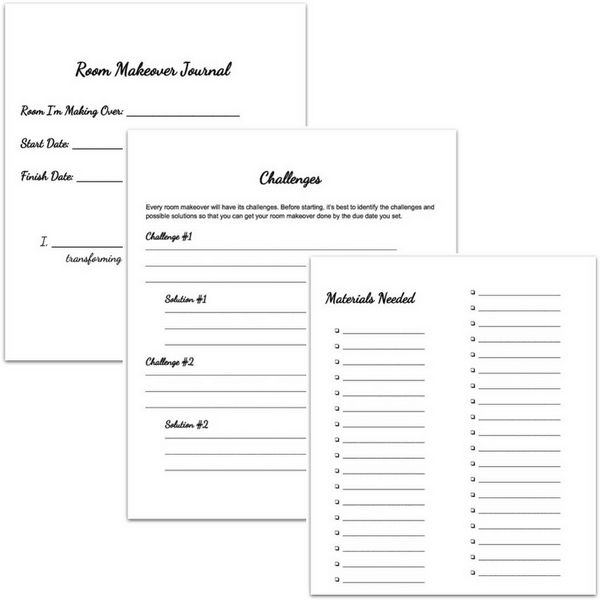
(Psssst…If you’re feeling overwhelmed with your room makeover, too, enter your name and emil to download my free room makeover Journal packet and learn how to make a DIY journal notebook out of scrapbook paper so you can track your room makeover projects. You’ll get the free download printable with pages for tracking progress!).
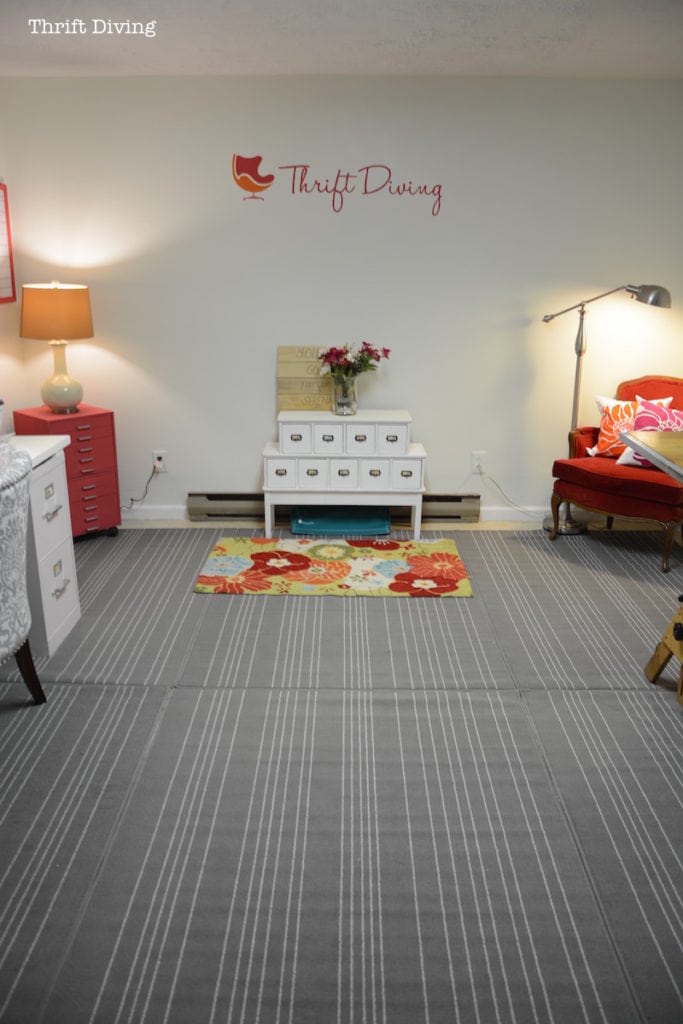
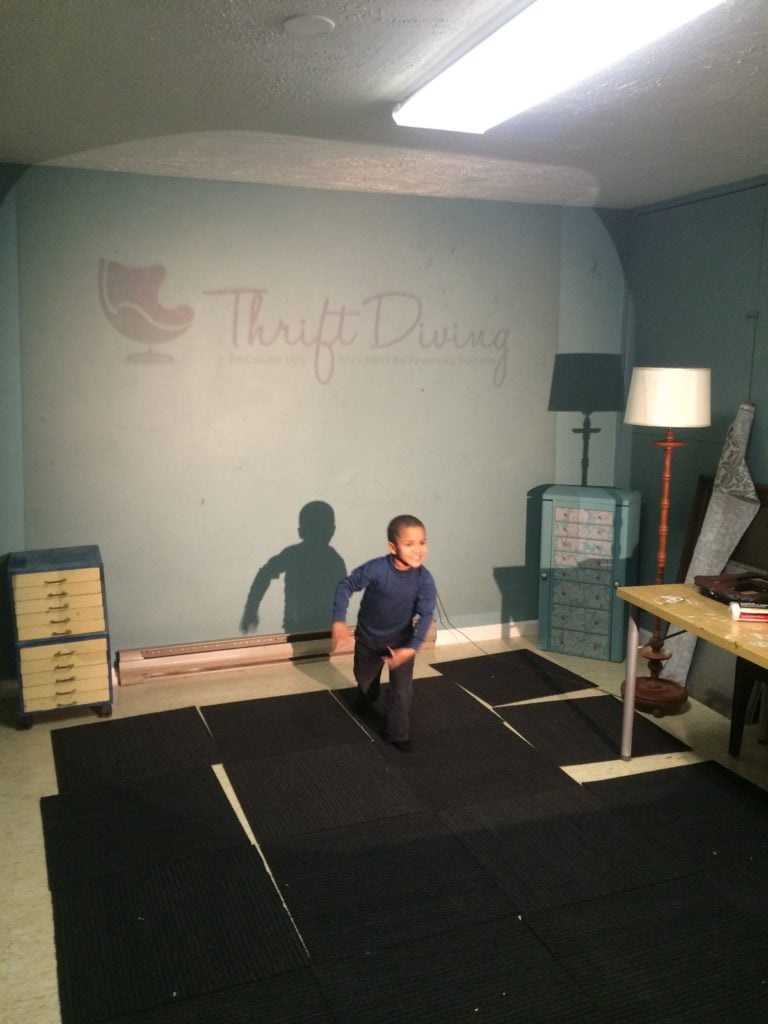
But I knew the first thing I wanted to do was to stencil my logo on the wall using a projector that I bought from the thrift store (for only $7.00!).
Related: How to Clean Up at Thrift Store: How to Thrift
I had decided that the pink and orange from my logo would be my inspiration for the room.
I wanted to keep the middle wall relatively clear from pictures and stuff because this is where I’ll be able to shoot my videos for my YouTube channel (while having the logo in the background). I’ll be able to easily move the card catalog out of the way if necessary.
BEFORE
AFTER!

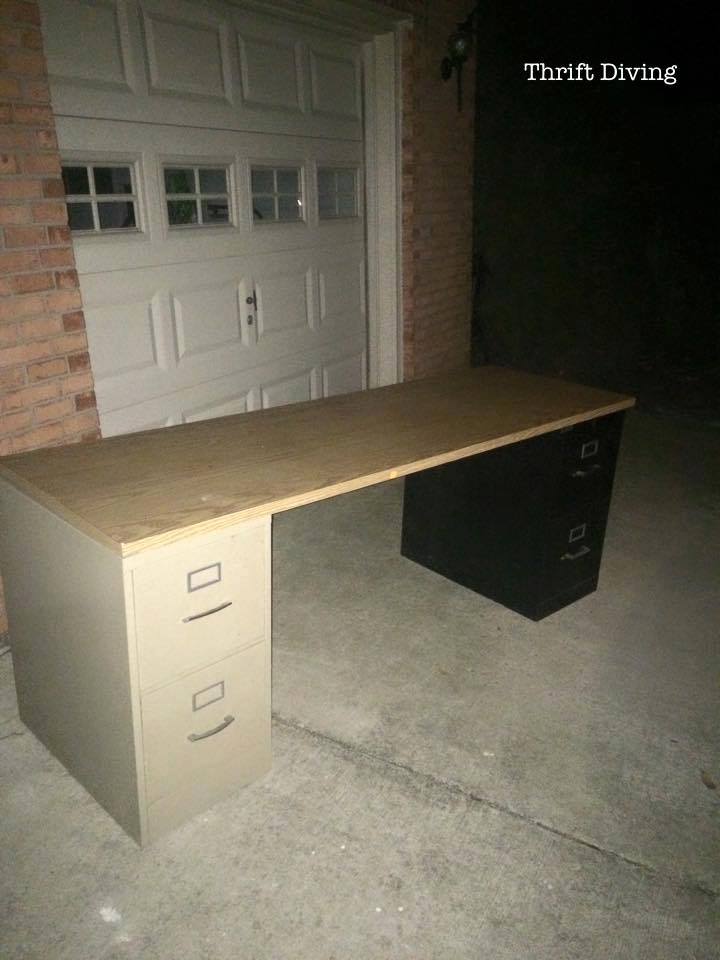
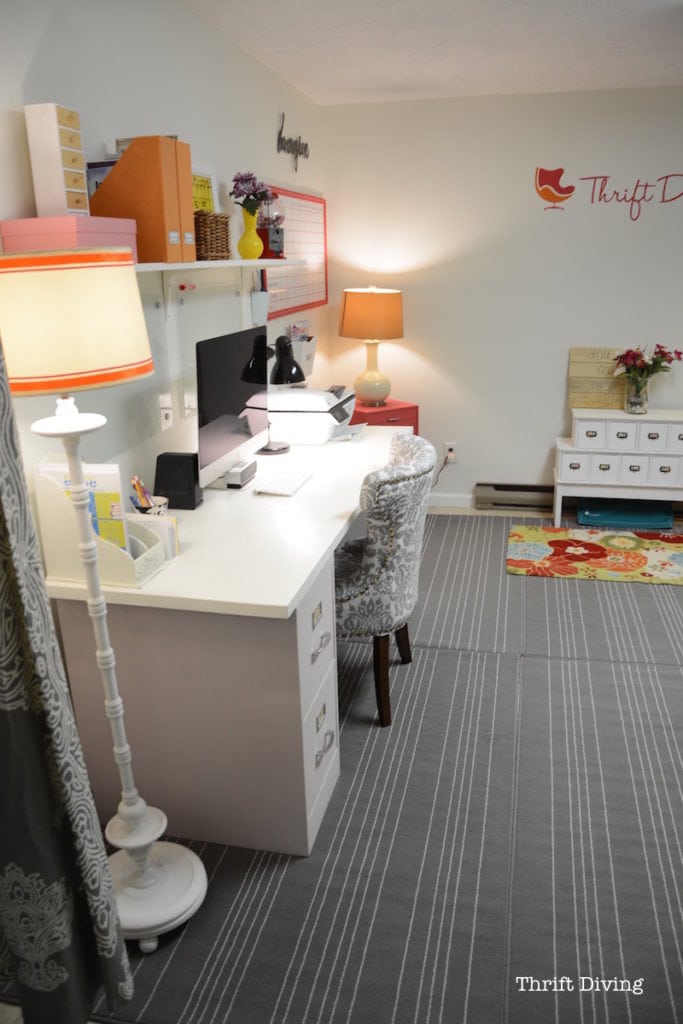
The left side houses my desk created from thrifted file cabinets and a heavy thrifted top. The whole desk cost a whopping $17.00 :). Because they aren’t the same style and height, I will have to add a piece of wood to the right cabinet to fill in the gap. For now, it works :).
Under the shelf, I added Ikea KLUDD glass noticeboards that a friend gave me a couple years ago. Perfect for taking notes.
The Desk
As I showed you in more detail in another post, this is how I made a desk from file cabinets and what it looked like before getting my hands on it:
BEFORE
AFTER!
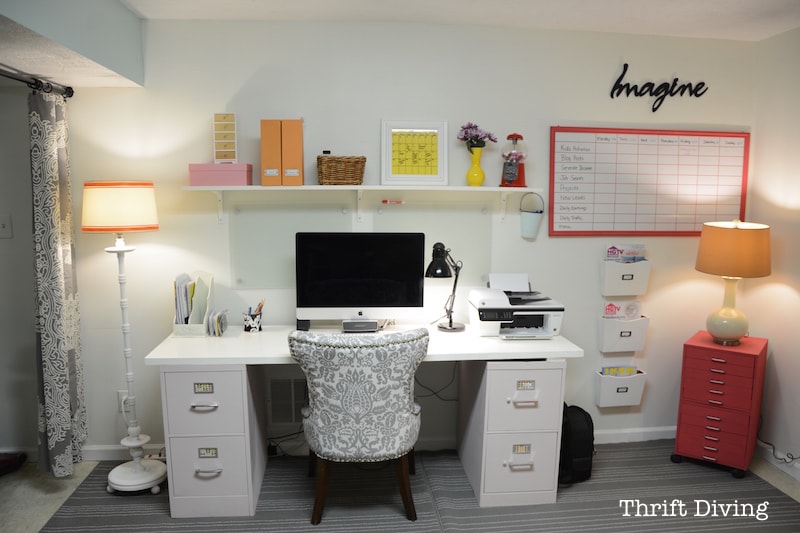
I found the lamp at the thrift store last week (the one sitting on the pink file cabinets) and it was too good to pass up! Apparently, lamps like this cost about $120. Mine?? Oh, just a measly $7.50 :).
I already had the magazine rack. I bought that probably a couple years ago, for $7.00, too! (Everything is $7.00 at my thrift store!).
The colorful small rug is from Home Goods, bought a couple years ago.
Pink DIY Whiteboard
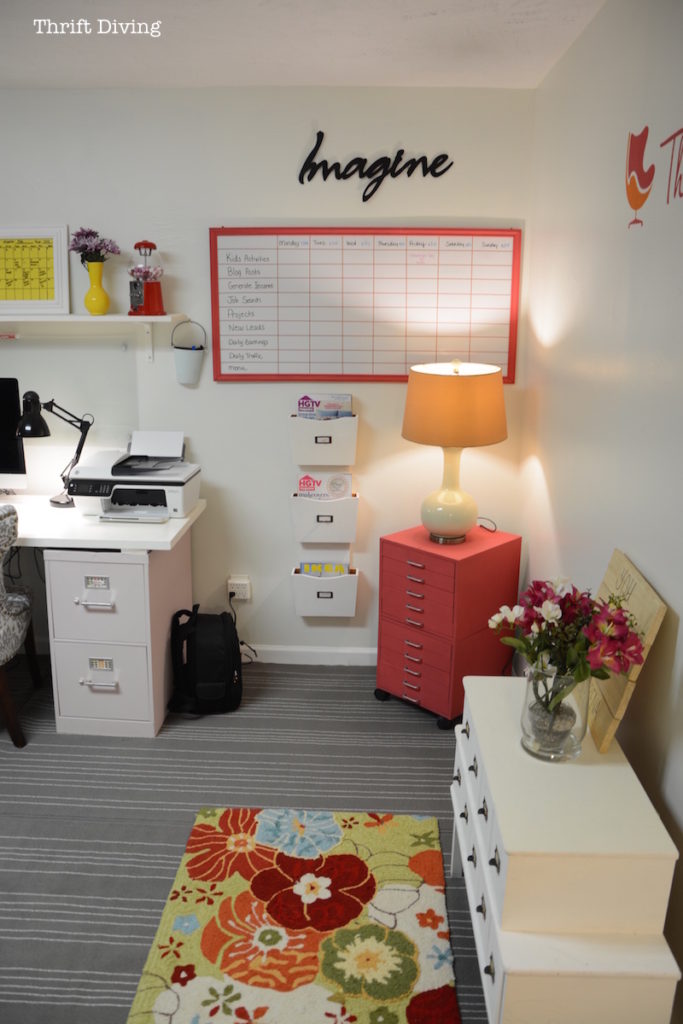
In December, I also made a DIY whiteboard like the one I did for my Mom, and it will be perfect for keeping track of my daily blog and family activities.
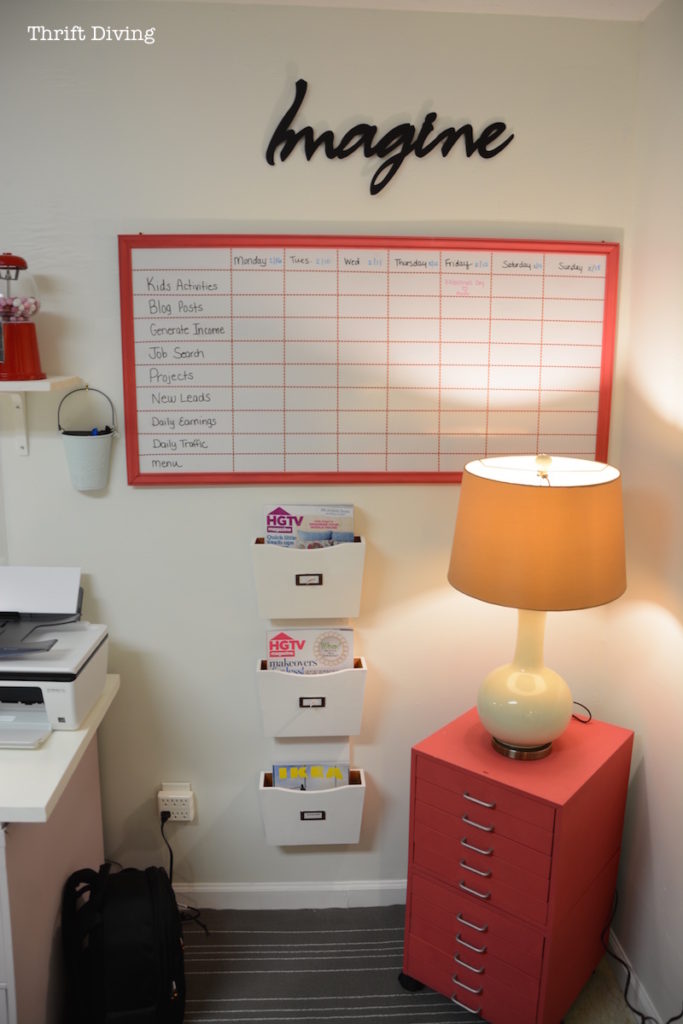
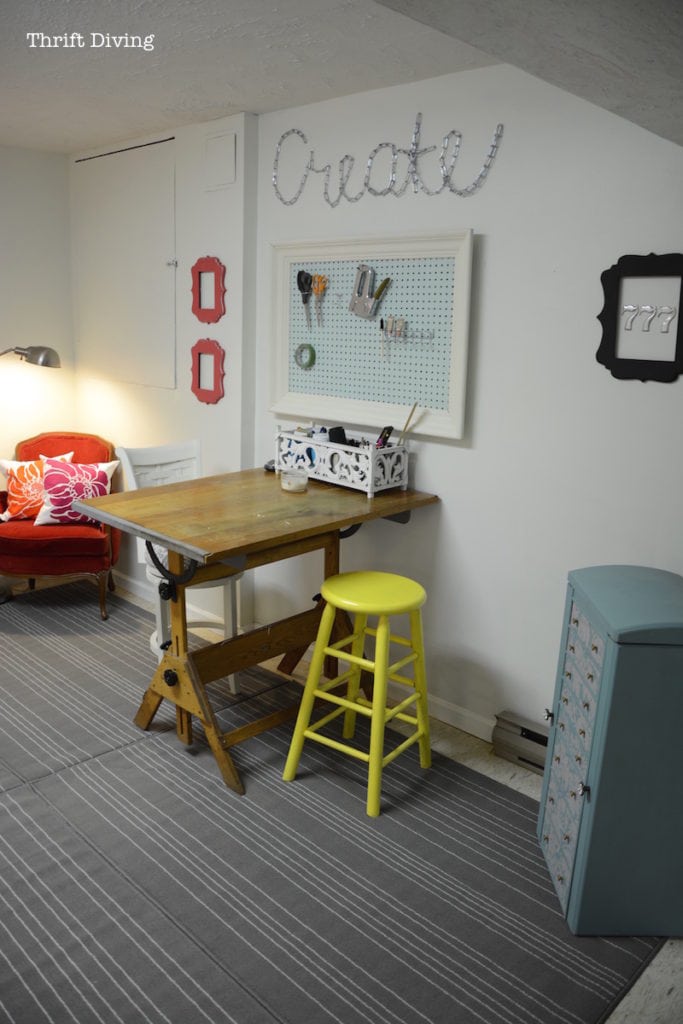
On the right side of the room, I really wanted a seating area where I could do crafts. I also wanted a place for the kids to sit and work on something while I’m working on the computer. Sometimes my 3-year old will sit here and play cars :). (That’s a spoon hanging out of his mouth). LOL
(Don’t you love my stenciled jewelry box? If you’re looking for other uses for jewelry boxes, you’ll love my jewelry box repurposed into craft storage!)
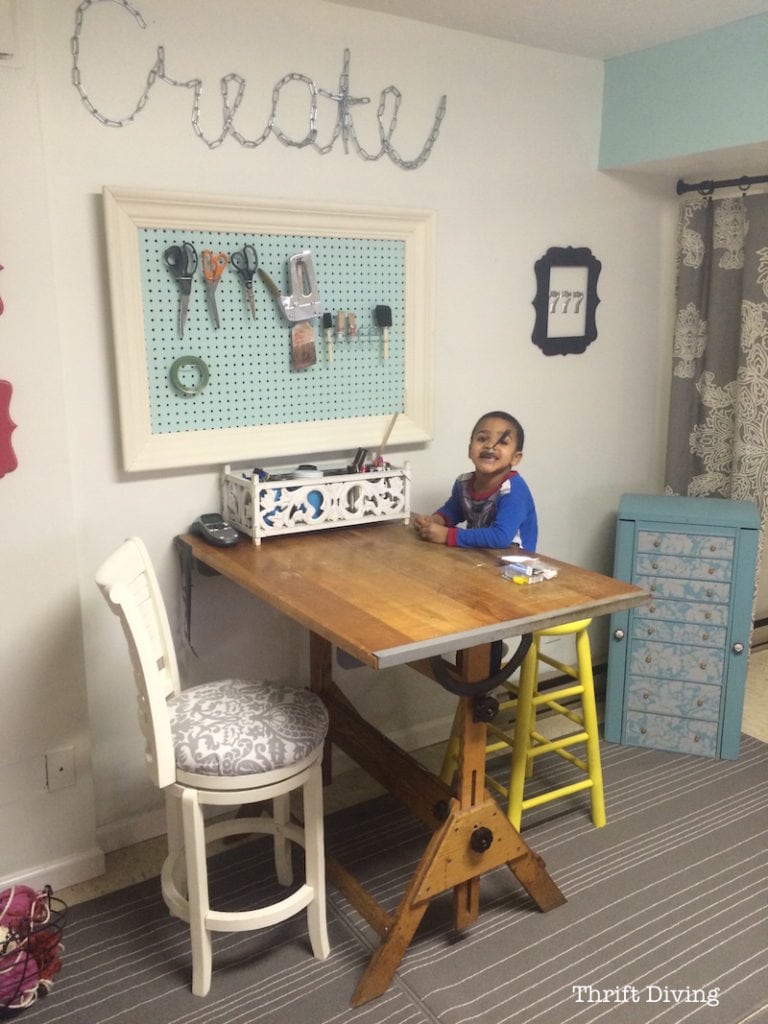
To create the pegboard, I found the frame last year on the side of the road and hoarded it in my garage until the perfect time came to use it.
Well, now is the time :). The pegboard I found at a salvage shop for mere pennies, literally.
DIY Chain Wall Art!
I love chains.
For the longest time, I wanted to do something with chains. But I wasn’t inspired.
Until now.
BEFORE

AFTER!!
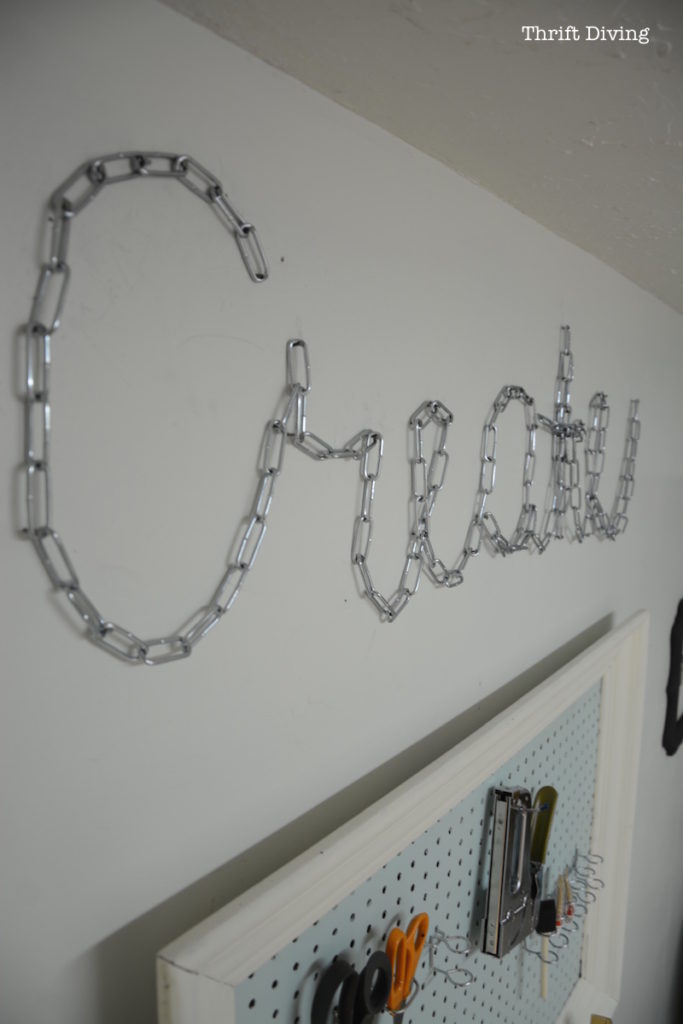
Why not create DIY chain wall art?? This is the perfect way to add some uniqueness to your walls! The home improvement stores sell chain by the foot and will cut it for you. I chose 8-foot. (And the best part is that I’ve never seen this done before, so yay!!! Originality is so hard today, isn’t it? LOL).
This space is for one thing: CREATING. So spelling out “Create” was perfect! Although, at times it looks like “Creste” but hey–who’s complaining?
The yellow stool I already owned. I couldn’t decide what color to use. I wanted something to “POP.”
BEFORE
AFTER!
The Rug
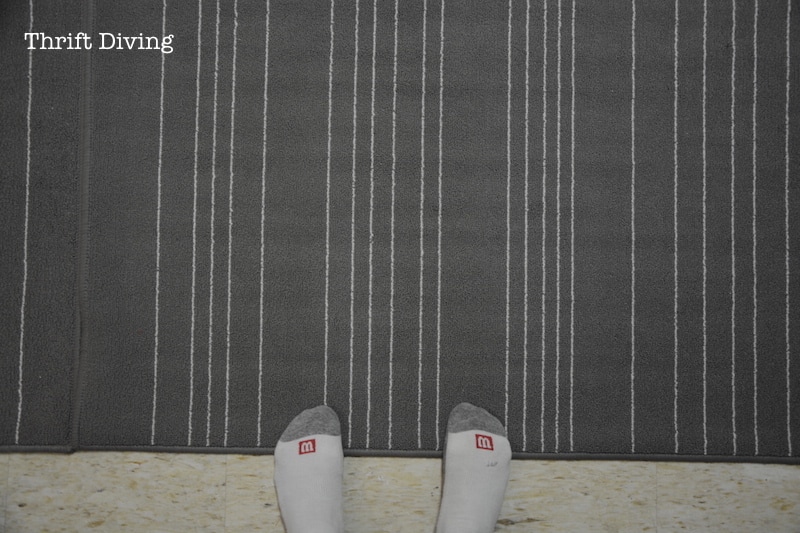
Do you know how expensive rugs are?? Ohhhh, I’m sure you do. My first attempt at warming up these floors was a total bust (more on that in the follow-up details).
Lesson learned: sometimes you just need to go to Ikea and buy what you need. LOL
And that’s what I did.
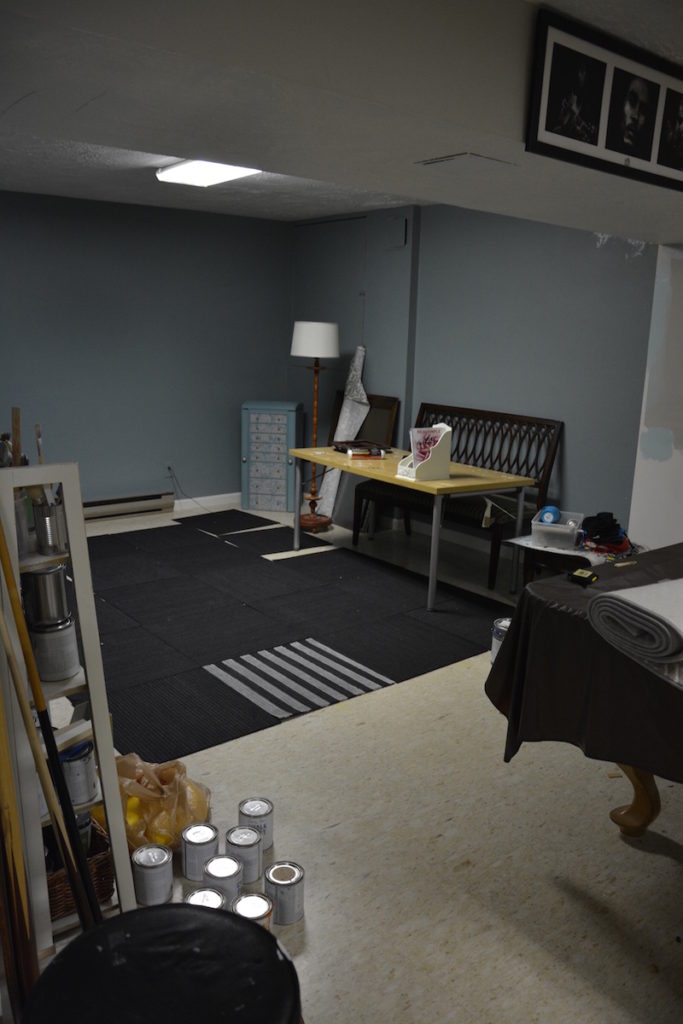
BEFORE
AFTER!
I bought 6 of these Ikea Hulsig rugs for $14.99 each and laid them together to create one big almost 12′ x 12′ rug for–miraculously–only about $90. They already had the rubber backing, so no need to lay a no-skid rug pad underneath! They stay together pretty well, with very little maneuvering, and now my feet are shielded from the cold basement floor! I honestly don’t think I could have warmed the floor for any cheaper than that.
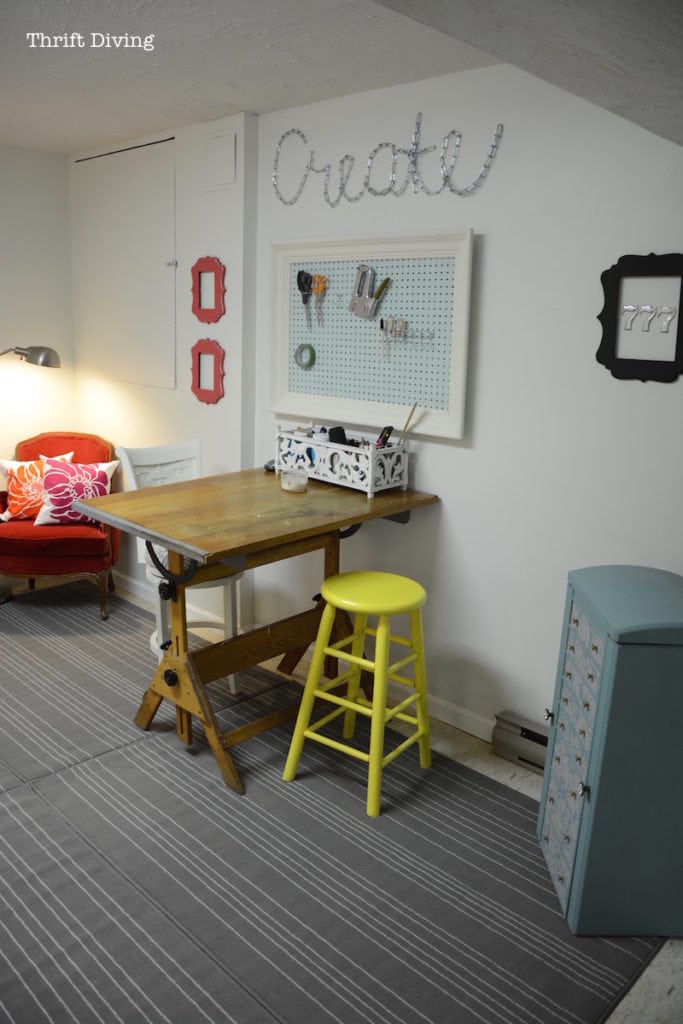

I already owned the lamp (Home Goods).
The DIY stenciled pillows were really easy, too.
It’s not the most comfortable chair, but for now, it can just look pretty :).
My Desk Chair!
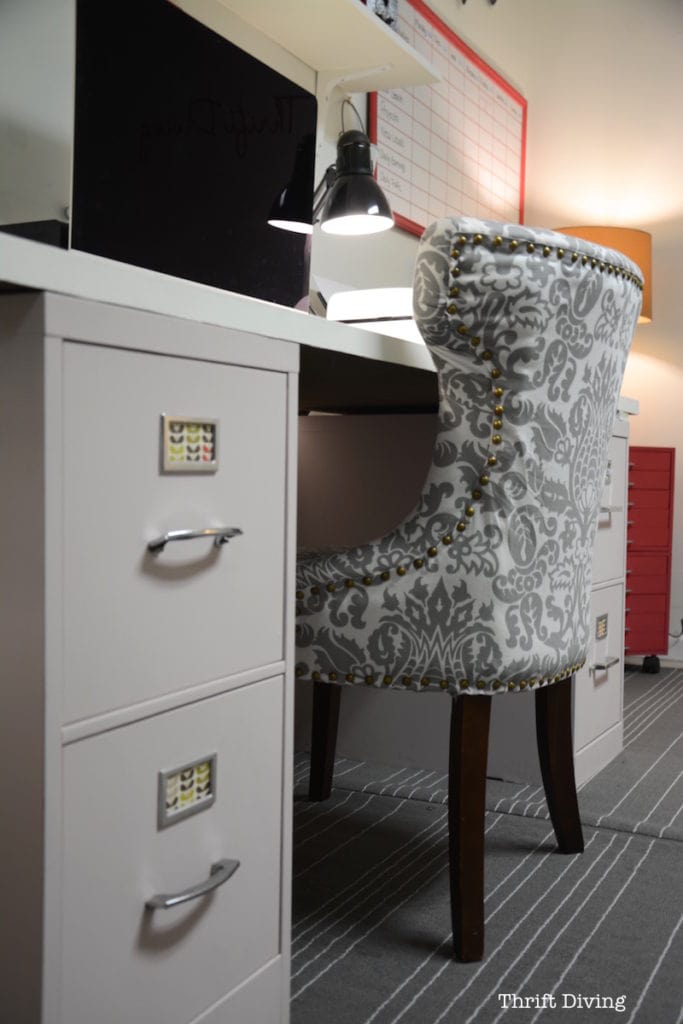
I should call this chair “The Chair That Drove Me Crazy“! It’s one of the things that held me up in completing this makeover. I have done a few reupholster projects, but nothing like this. This thing required cutting out small pieces and then sewing them all together around the curves. I break out in hives just thinking about it. Thank goodness for streaming online programs. It kept my sanity while piecing this together. I was almost ready to smash it up. Or photoshop a finished chair. HA!
BEFORE
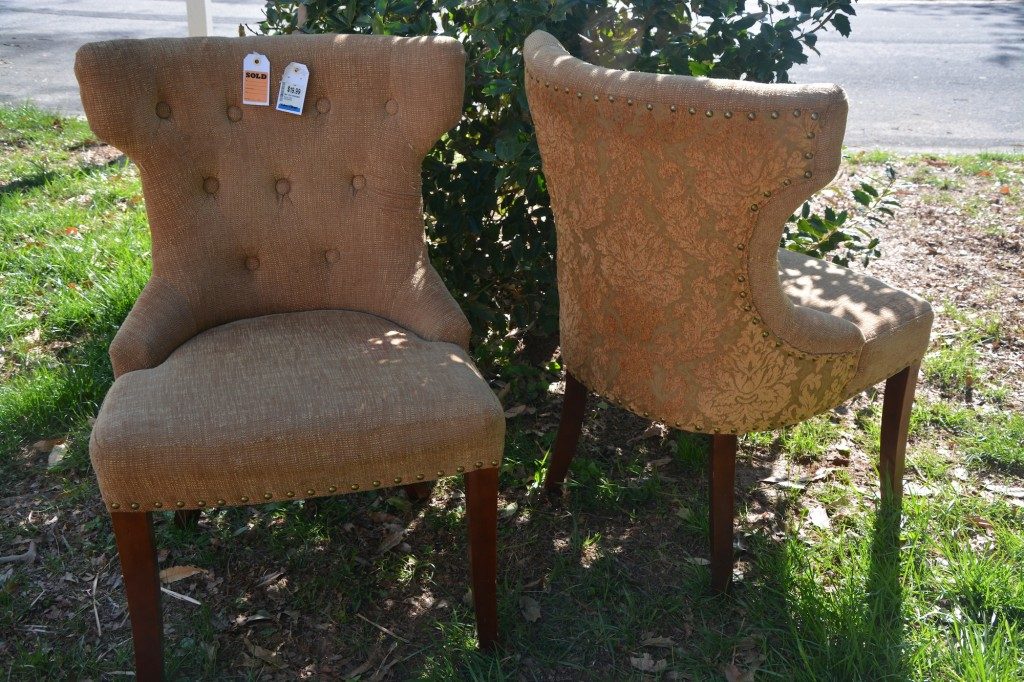

AFTER!
My husband actually doesn’t like this chair much. He says my choice of fabric was all wrong. I say he’s wrong! I understand it’s not as luxurious as the “before” fabric, but it’s what I had on hand.
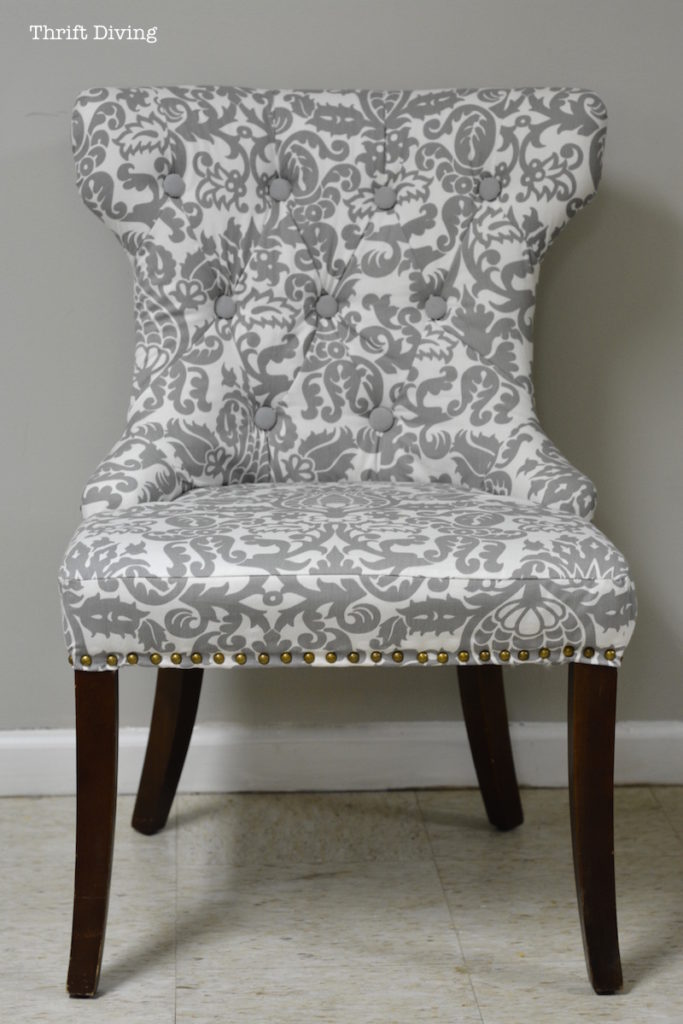
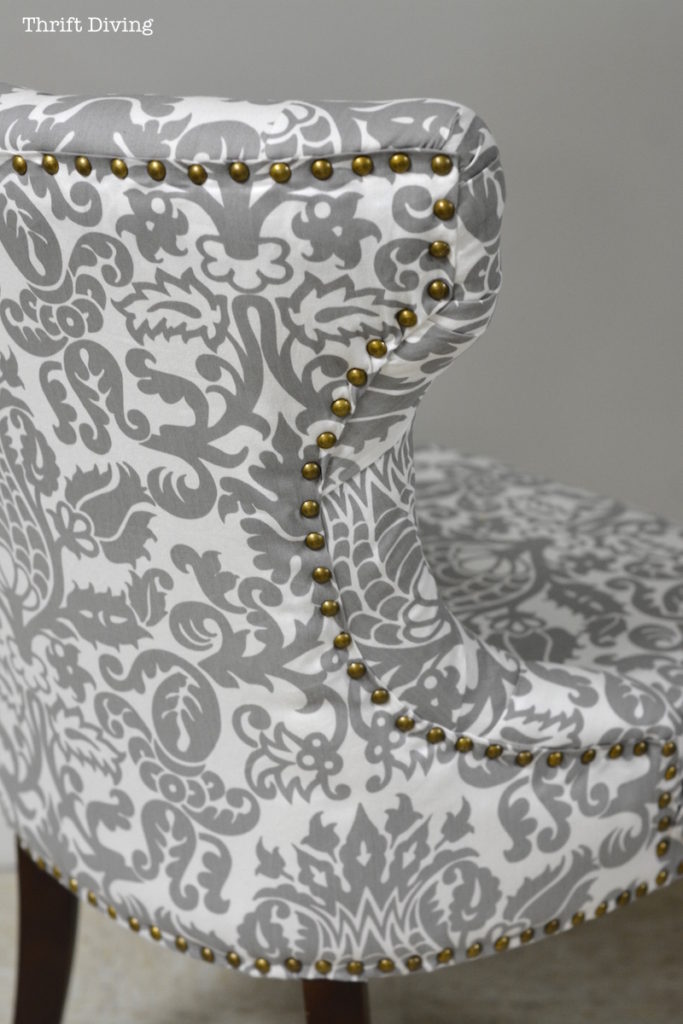
My husband also critiqued my decision to use brass-colored furniture tacks.
Okay, yes, shiny silver ones would have been nice, but you know what?? I already had a crap-load left from my thrifted vintage chair makeover from a box of, like, 1000 tacks, and I wanted to put them to good use.
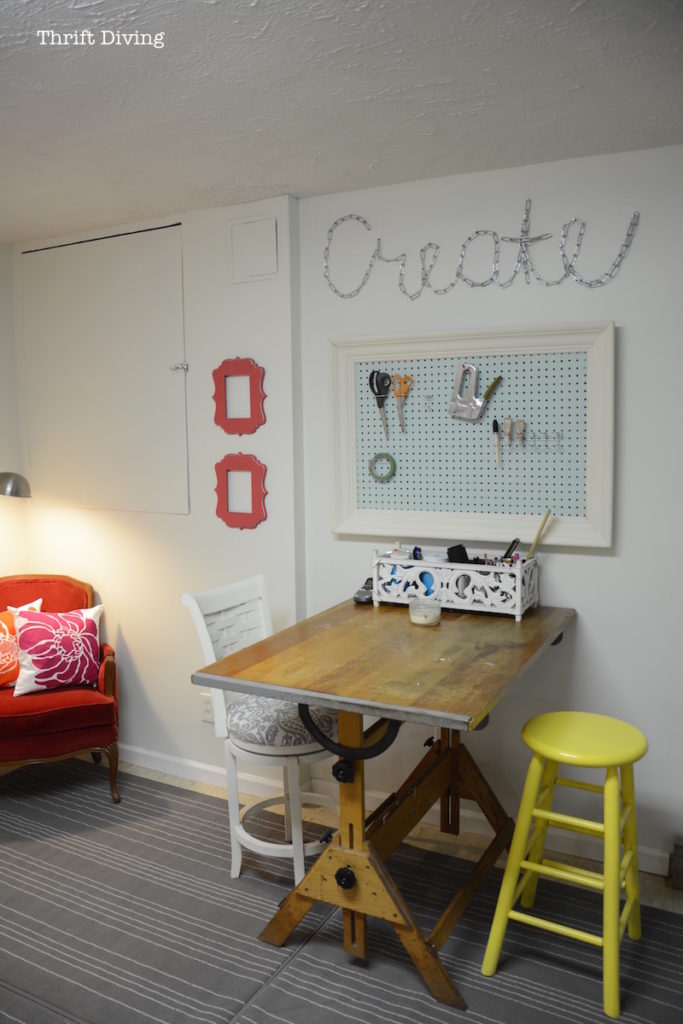
The vintage drafting table is thrifted! I got it a few years ago for–GASP!–$30, and it’s really worth about $300. The other white stool–you guessed it: thrifted for $10, and I already owned. I reupholstered it. And the white plant holder I already had ($3) was thrifted, too, and holds cans of pens and markers and stuff.
The Shelf!
This is an area I struggled with: what to put over the desk??
I didn’t want to spend a lot of money. And I didn’t have scrap wood around already.
Miraculously, I found what I needed at the ReStore here in Silver Spring. Just my luck, they had three big 6-foot boards for a total of $5.00! WOO HOO! And the brackets were $0.50 each from Ikea. I used three brackets.
Everything you see up there on the shelf (except for the basket) came from the thrift store!
Even the candy machine is thrifted (and great for my late night blogging cravings, which is why I look like I’m pregnant, but that’s a post for another day…..).
I already had everything on hand, though, except the magazine files.
And the black desk lamp was $3.00 (already owned).
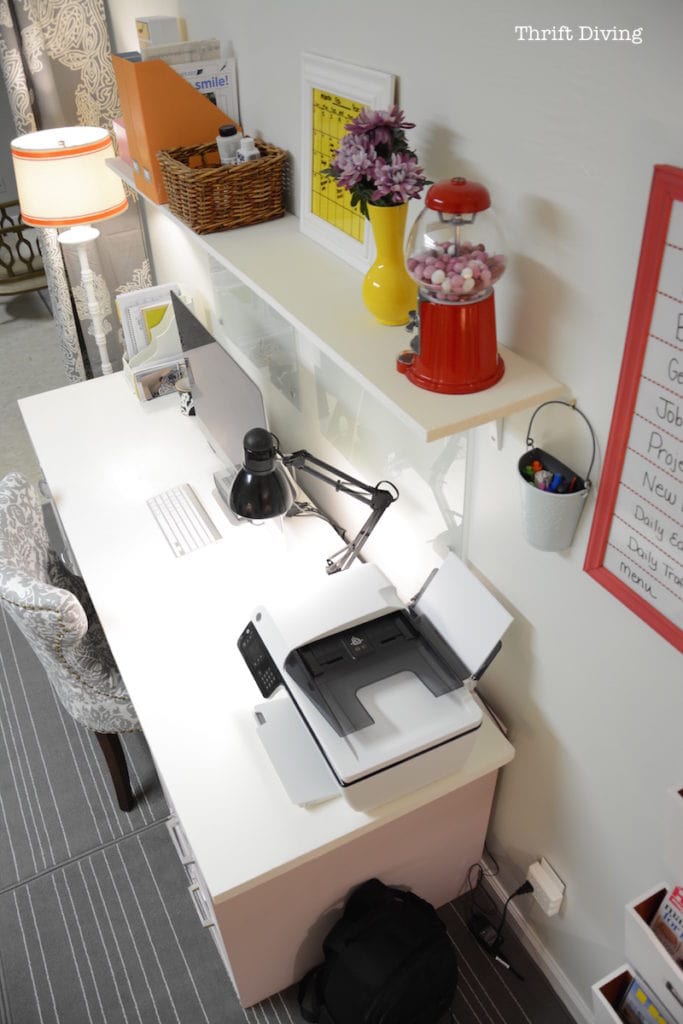
The only things not thrifted in this pic above are my Apple iMac (27″ baby….I will spend a lot on computers and gadgets, but never home decor!!!), and the printer, which I already had both.
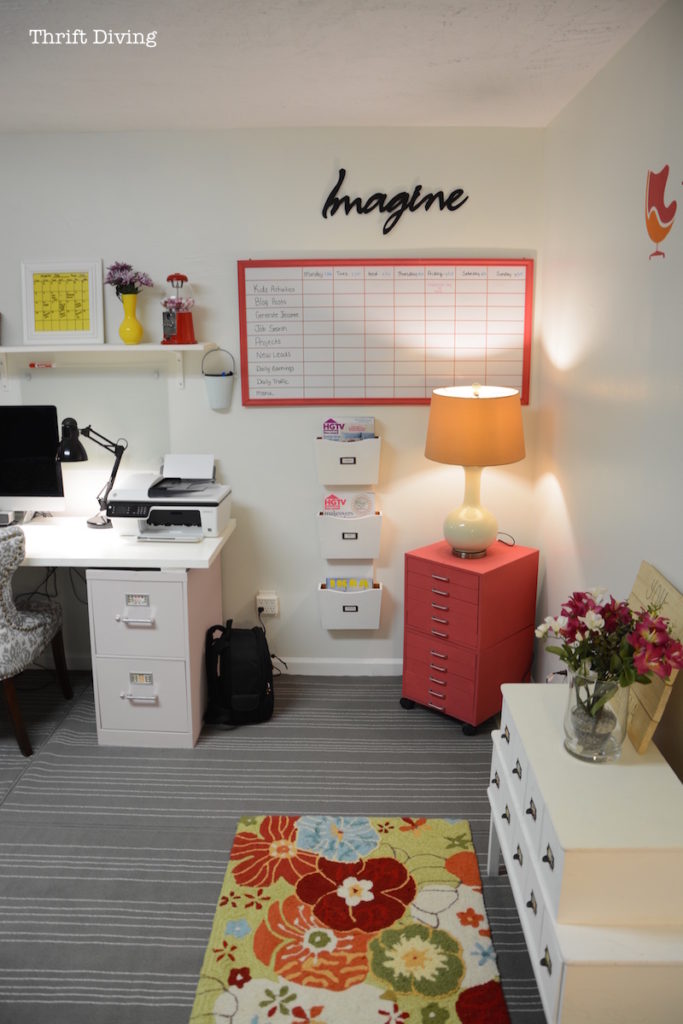
When you look out from my office, you see the pool table:
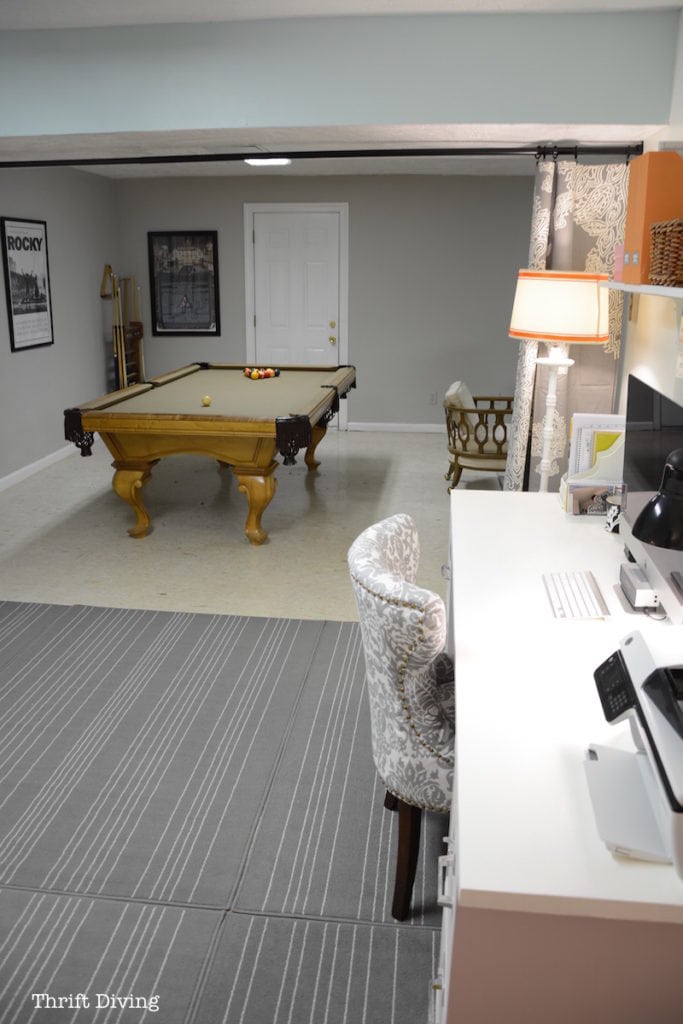
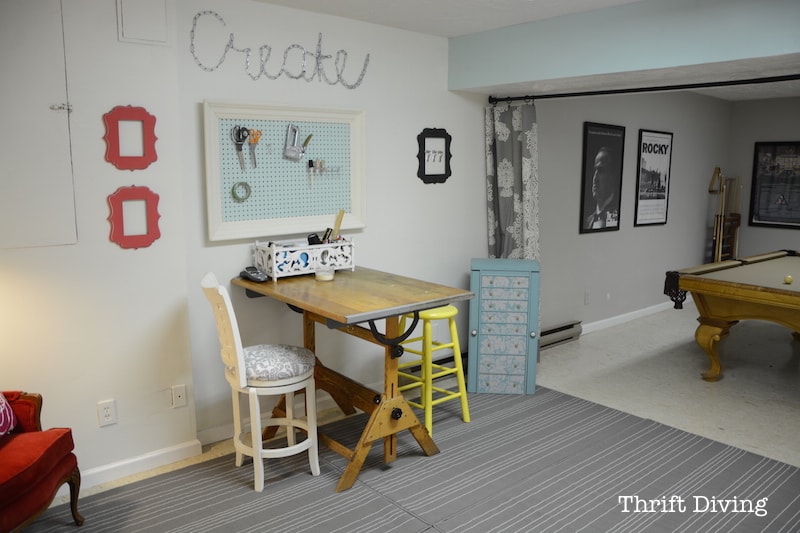
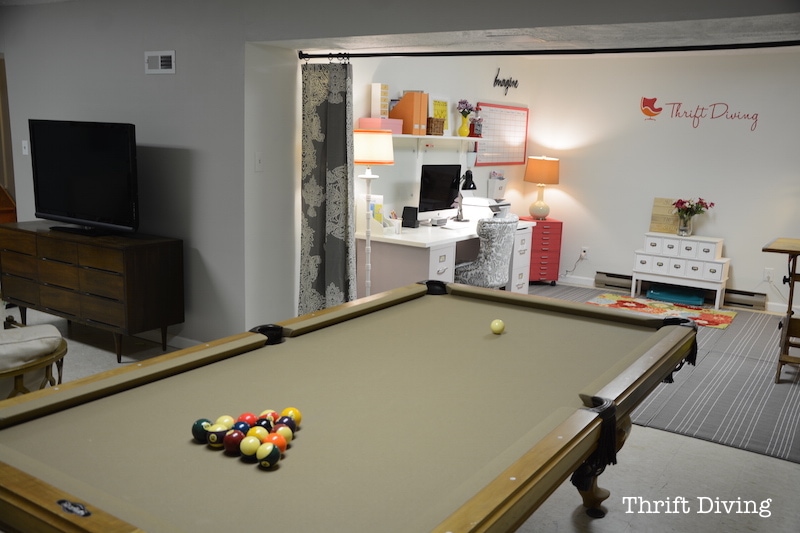

You also see the living area from here.
That’s the space I didn’t really get to finish yet (which is why I only have two pictures in the wall collage. LOL.
AFTER
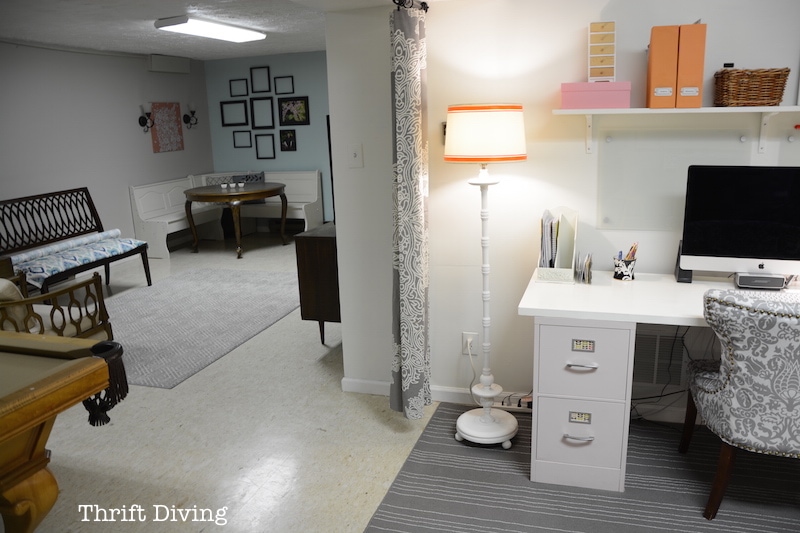
But considering what it looked like before, it looks freaking AMAZINGLY clean and organized! I can walk through without stumbling over furniture! WOO HOO!
Later, I added in this pretty pink repurposed IKEA kitchen cart which I upcycled into a command center. It holds files for tax receipts, envelopes, stamps, staples, etc.

BEFORE
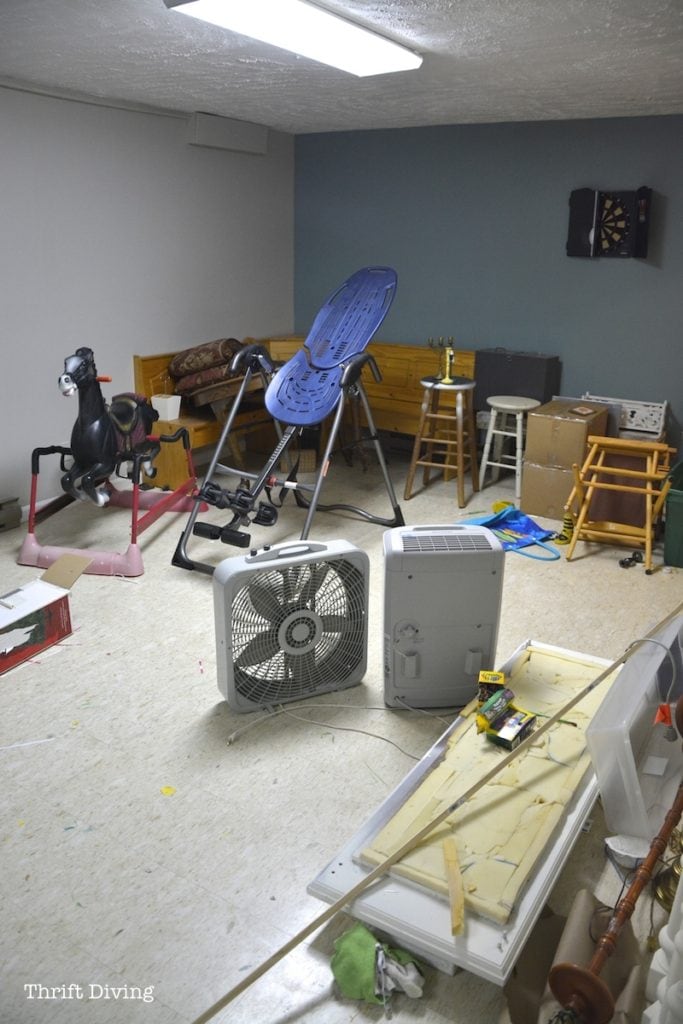
I had all these frames on hand (all thrifted, thank you very much!). I painted them all black and started trying to find pictures to put in them. I’m still not sure what I want to fill them with, so this will be done later.
I got the sconces from a seller for $10 each. The pink wall art is just a 2’x2′ piece of drywall that I stenciled. I borrowed pillows from another room, too.
AFTER
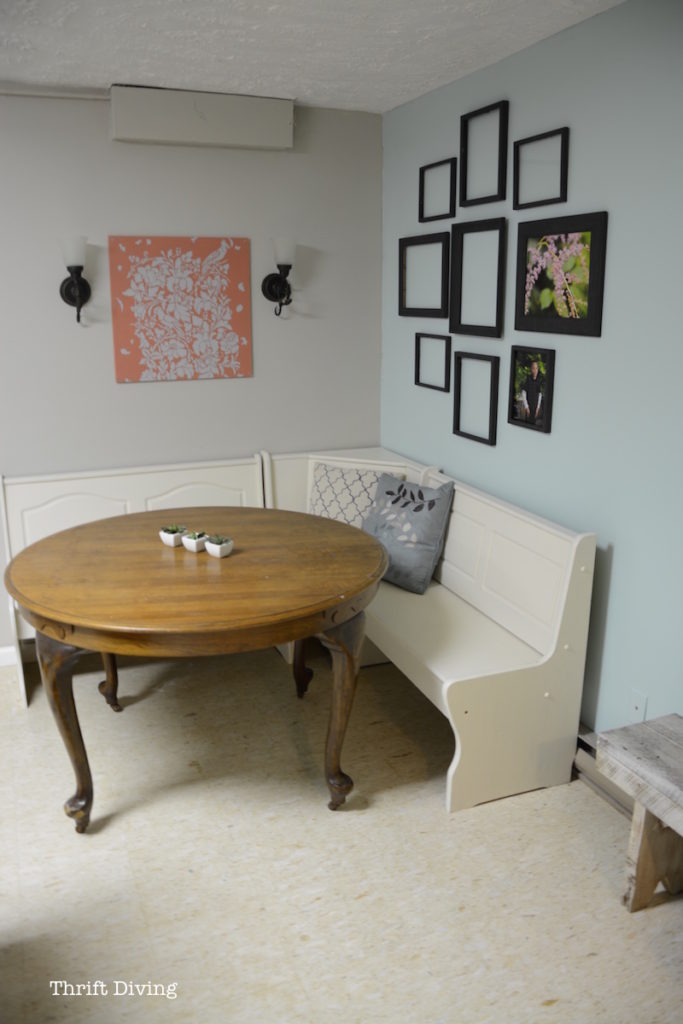
The banquet was also thrifted. I painted the banquet with leftover Beyond Paint Off-White from when I painted that pretty china cabinet.
The table was given to me by an old co-worker. I’ll probably strip it and re-stain it.
Related: How to Strip Furniture and Stain It: A Complete Guide
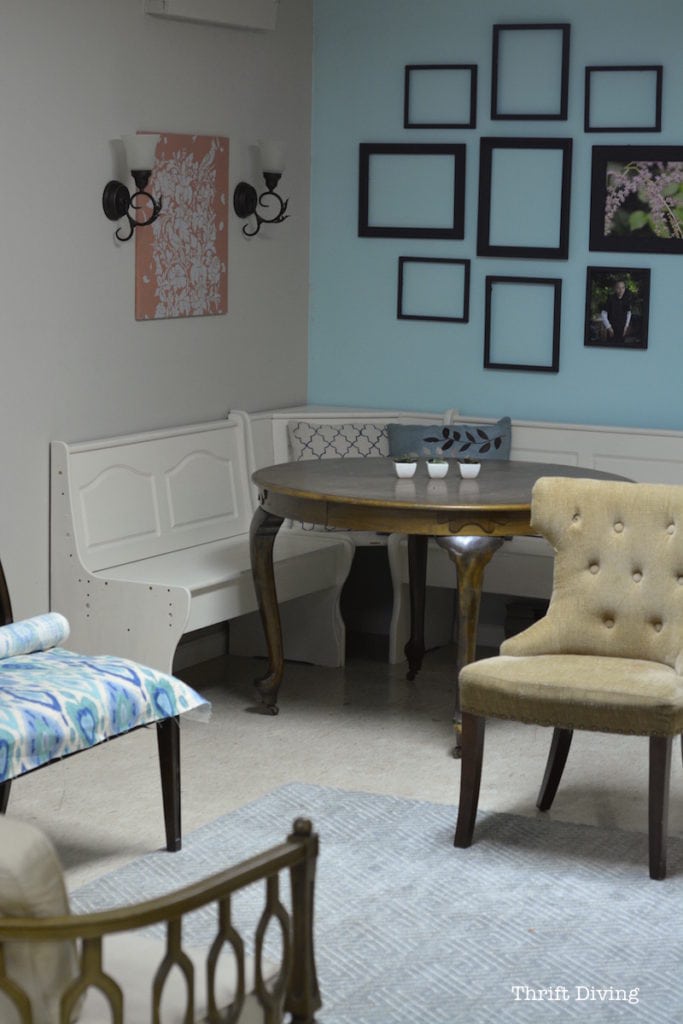
This is the view from the pool table and gives you an idea of how uncluttered the space is now!
I still have furniture in this living area to refinish, or to exchange for something else. I have lamps to paint. Shades to decorate. Pillows to reupholster. Lots to do!
Again, everything is thrifted :).
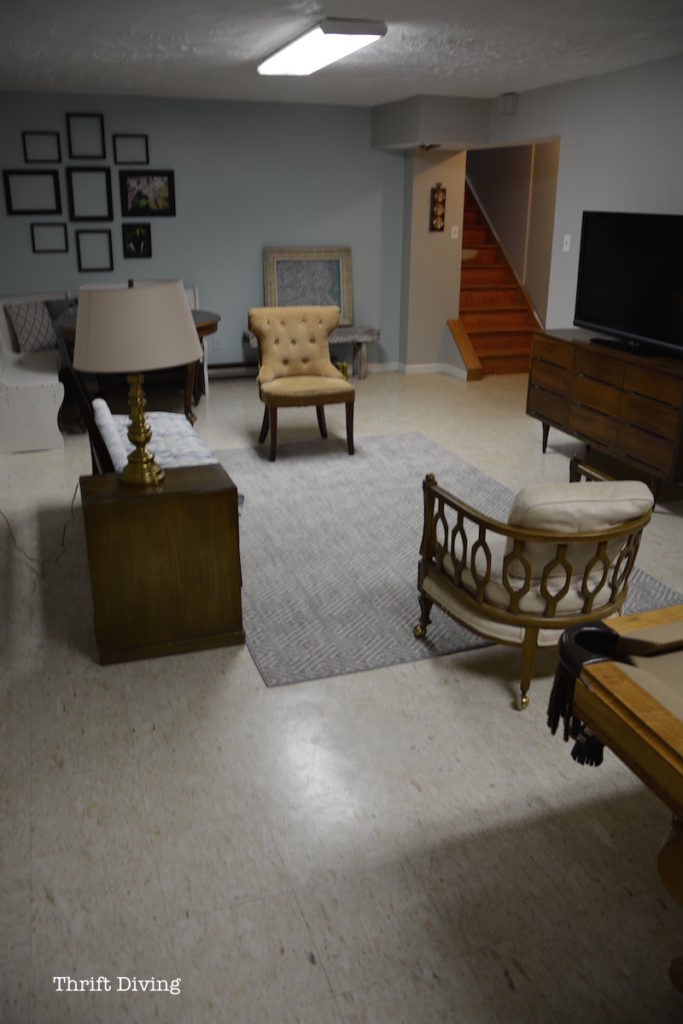
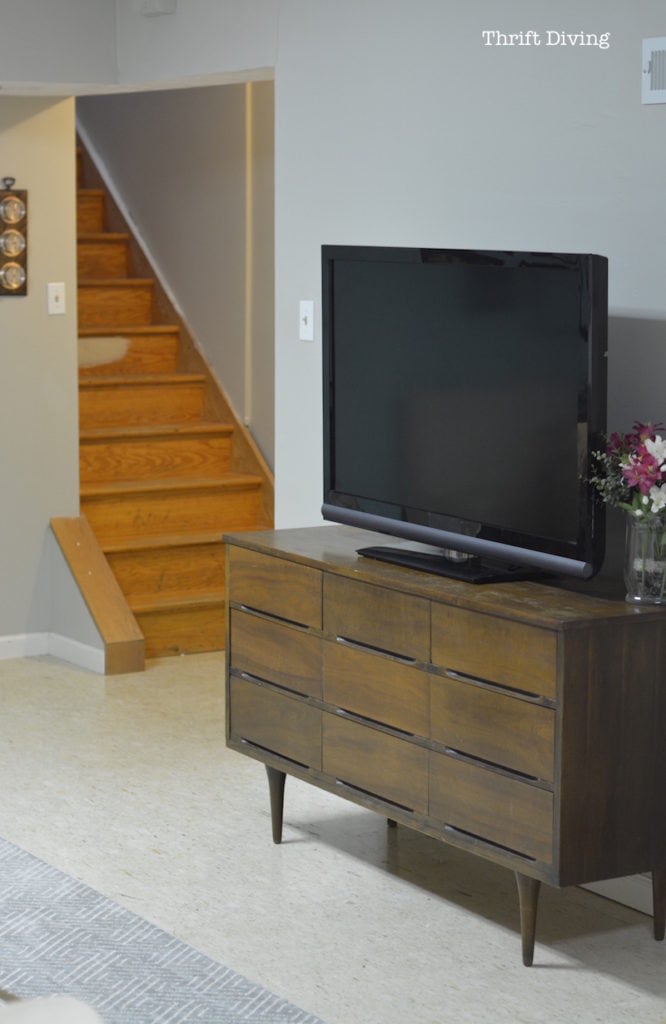
UPDATED: I have since stripped and refinished this mid-century modern dresser! I had some problems with refinishing it, which you can read in the post.
And Last But Definitely Not Least…
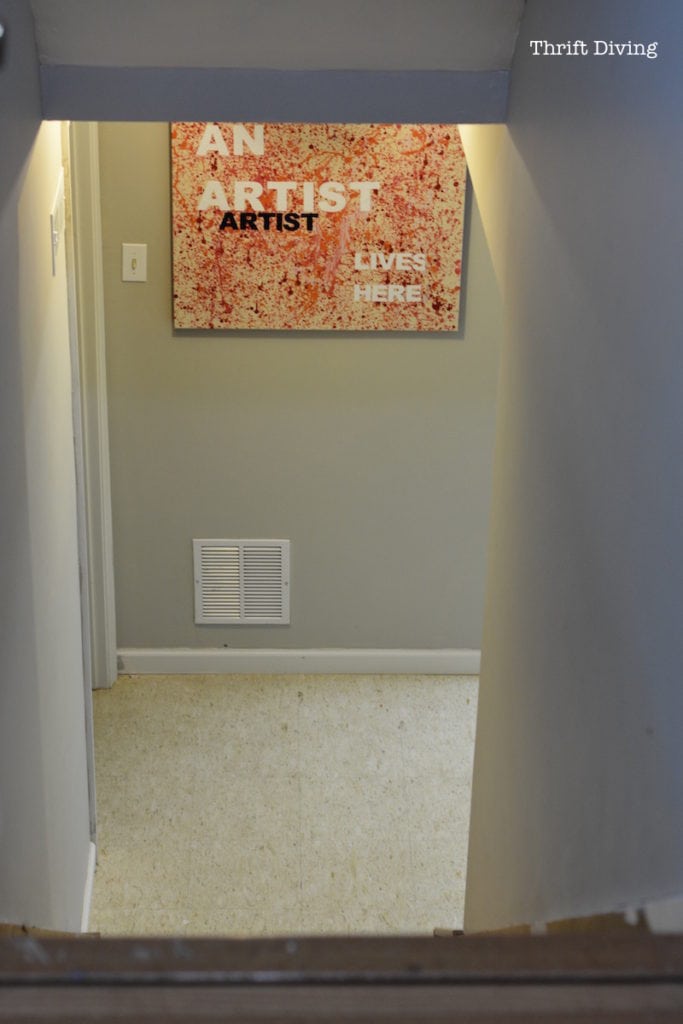
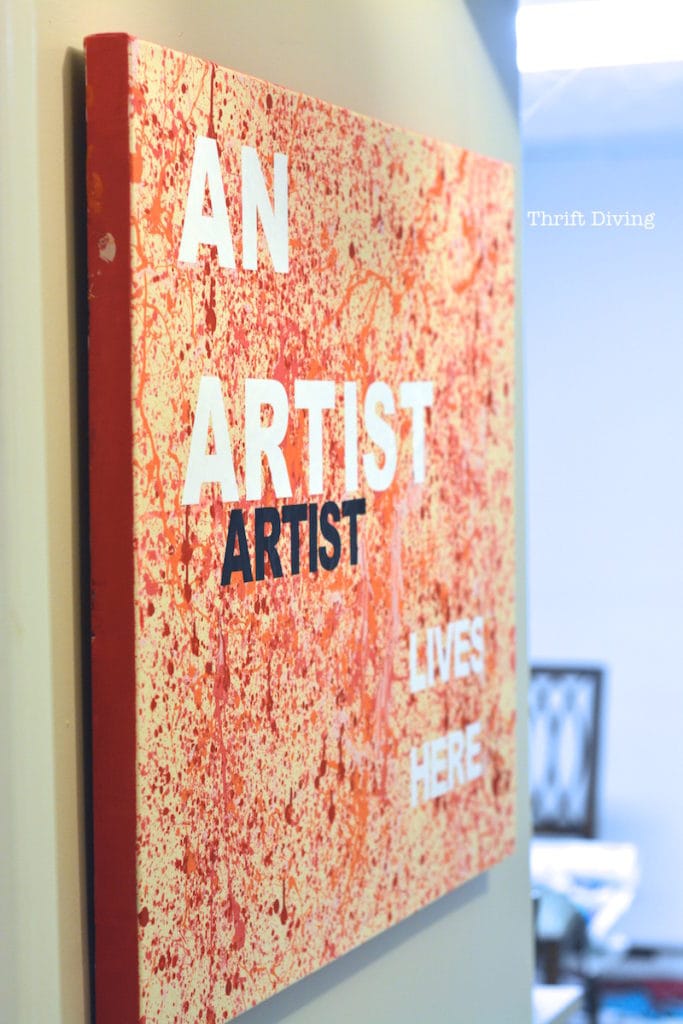
This is the first thing I wanted people to see when they enter the basement: a statement about who I am and what this space is all about.
Here are details on how I created this DIY wall art.

COSTS TO DO THIS ROOM
1. Ikea HUGAD Curtain Rod – $7.41
2. IKEA HUGAD curtain rod wall mounts – (2 ea) – $2.10
3. IKEA curtain clips 9 (1 pack) – $5.29
4. File cabinets from the thrift store – $14.82
5. Desk top from Community Forklift – $1.76
6. American chalky paint from Home Depot – approx. $9.00
7. Magazine holders from thrift store (2) – $2.35
8. Wooden magazine holder from thrift store – $3.17
9. Lamp on pink file cabinet from thrift store – $7.95
10. Scrap wood for desk shelf from the ReStore – $1.59
11. Ikea EKBY brackets for shelf (3 x $0.50 ea) – $1.59
12. Chain for wall art – $10.93
13. Pegboard – $5.30 (for the whole huge piece although I only used a small piece of it)
14. Nails from Home Depot – $3.43
15. Sample pink paint from Sherwin Williams – $5.19
16. Sample oragne paint from Sherwin Williams – $5.19
17. IKEA rugs for floor – $95.34
18. Wall anchors from Home Depot – $5.56
19. Furniture staples – $2.93
20. Photo box – $2.12
21. Canvas from the thrift store – $15.89
22. 1 gallon of semi-gloss Behr (Snow Bound) for walls – approx $35
23. 1 gallon of turquoise semi-gloss Behr (Balmy Seas) – approx. $35
Total Cost for the Basement = $278.91*
*I’m not counting any item I didn’t specifically buy for the makeover, including furniture or crafting supplies I already had on hand. I consider that stuff “FREE,” shopped from my house :).
This Post Is Soooo Long, But I Have to Say THIS…
It doesn’t take is a lot of money to transform a space. Time?? Yes. But not money. 🙂
If you ever doubt you can turn around a space in your house, remember this room. And then sign up for my next room makeover challenge, which I do a couple times per year.
Now I would LOVE to know what you think of my new basement office makeover!!!!! Leave a comment below and let me know!!

Download the 5 freebies!

Thrift Diving inspires women to decorate, improve, and maintain their home themselves...using paint, power tools, and thrift stores! Use these 5 printables, checklists, and ebooks to get started!

Serena, your basement came out fantastic!! I love that the boys have their space to be when Mom is creating. Someone said this, but how I love that your blog and projects are realistic and practical. Redeco budgets for a basement makeover under $300 are not the norm! You inspire me to shop in my own house and look for ways to repurpose. And, if I find an old drafting table while thrifting, it’s on! More about you, what a great family/creative space. Thank you for all of the pics!
You know what I’m finding, though?? That my boys generally are not downstairs when I am!! Well, being home with them, I am not down here too much during the day. That’s my time to spend with them, do an activity or whatever. I come down around 1-3 when they’re in quiet time. And when they are done with quiet time from their room, they go into the computer room (AKA formal living room, where I used to blog) and use the ipad and computer. So, it’s surprisingly quiet down here. My 3-year old has taken to driving his cars on the pool table. That’s his play area. LOL
Thank you for reading along, Sheri! 🙂
I read every word of your post and studied all the pictures and I think what you have done is amazing! Your turned a dumping ground into wonderful living space. I think having the pool table out of the back, dark corner was a great idea and that now your family can enjoy it more. I love your office space and that you used so many thrifted things and shopped your home! Yes, please do tell us details of the things that you did, that makes it real. So many tv shows have the before and the after and next to nothing of the work that it took to get there. That is how we can learn from your experiences. Onward and upward!!
I can’t wait to share all the details with you! I think I may have to put it into an ebook, something you can download and easily read. It’s a loooonnnggg story with lots of details!! LOL I was hoping to publish something tomorrow for you guys to read, but depending on how long it is, and how many steps involved, might take until next week to get it ready. No worries, it’s coming!!!
Great Job, love how you use the thrifted pieces.
Great jod, you are a wonder.
Marieanne
Awww….thanks, Marieanne! With focus, women can achieve anything! 🙂
My goodness it is all gorgeous! You did a beautiful job and while it did look overwhelming in the beginning – it looks like you took it one step at a time – and got it done!!
Thanks, Kelli! It was tough! I really did hit a lot of snags!! LOL I’m going to post about them and hopefully, tomorrow the post will go up! 🙂 All the behind-the-scene’s stuff you didn’t see. Can’t wait to show you!
Hi, great job!! I just recently decided that i had to clean up/out my 3-season porch that had become a dumping ground and i realized today that it was probably a subliminal 30 day challenge! LOL i haven’t worked outside the home in almost 30 years (have a mildly handicapped child) and thought i was pretty thrifty, but you are the queen of thrift. it’s fun to make something out of nothing, but lately i have become complacent so you have been a great inspiration–thank you for sharing so much on your blog.
Way to go, Jackie! If I can inspire people to start tackling their spaces, then my job is done! 🙂 So glad to hear you’re doing your own 30-day challenge! Be sure to take BEFORE pics and send me the before and after!! 🙂
WOW!!!!!!!! MY mouth is still open! This is great!! Too many things to comment on. Overall You have solidified your Rock-star status. Only a matter of time before the networks start calling. Love so many pieces and your ideas. “WHOLE NOTHER LEVEL” stuff here. GREAT WORK!
I thoroughly enjoyed it. you kept us waiting with your delays…. but you delivered BIG!
Oh, my favorite brother-in-law, you are too kind! 🙂 I can’t wait for you to come visit and we’ll get to chill down here. K kept complaining that I was “taking over the basement” with all my junk and that what if he wanted to invite some friends over. Now, I think he will be proud to have people over! It’s like we gained a “whole….notha….level” LITERALLY! 🙂 As in, a new LOWER level! LOL So glad you like it. Sorry for the delays, though! Things kept getting in the way!
Awesome! I am busy working on my Feb. list, and your space is so inspiring! Keep up the good work!
Are you making much progress? I think this means I have to change my February list. It needs to include all basement stuff at this point!
I am making progress! I started priming and painting all the trim in my hallway yesterday. This includes 6 doors, 2 kids, a husband, 3 dogs and 2 cats constantly needing to walk through as I am trying to paint! Not the easiest, but wow! the difference it made to brighten things up. Can’t wait to finish and enjoy my ‘new’ hallway!
Serena, it looks fantastic! The spaces are so distinct from each other now, and have very defined purposes! Anybody would be happy to have a space like that! Love you new blogging/creating space! So bright and happy! You’ll get tons done! And having a specific place to do the work and your videos will make the rest of your house feel less like work, and more like the relaxing place it should be. Kudos to you!
Hi Lindsay! Funny you should say that–today is sort of a snow day for everyone here. And I walked up into the house and there was crap everywhere because of the kids, and I was just like, “Okay, I’m retreating to my apartment now…..” 🙂 It’s nice to have somewhere quiet to go! Thanks so much for commenting, Lindsay!!
I thought Oprah’s Before & Afters were good. YOU GOT HER BEAT HANDS DOWN! So proud of you, extremely happy for you. LIVE IN YOUR PASSION!
Well, you’re the epitome of living your passion, Fran! 🙂 And hey, aren’t we supposed to meet up at some point? I think you had some furniture you wanted help with. And OMG, I still own you that display! LOL. I have it to give you.