BEFORE & AFTER: Pretty Painted Bathroom Vanity
To see more painted bathroom cabinets in my house, check out my half bathroom makeover before and after, and see how I updated my kids’ bathroom 1970’s bathroom cabinets. If you’re not sure which furniture paint to use, read this article: What’s the Best Paint For Furniture?
Watch Me Paint My Bathroom Vanity
You get “DIY amnesia” and forget that it used to look like a pigsty.
Like this bathroom of mine.
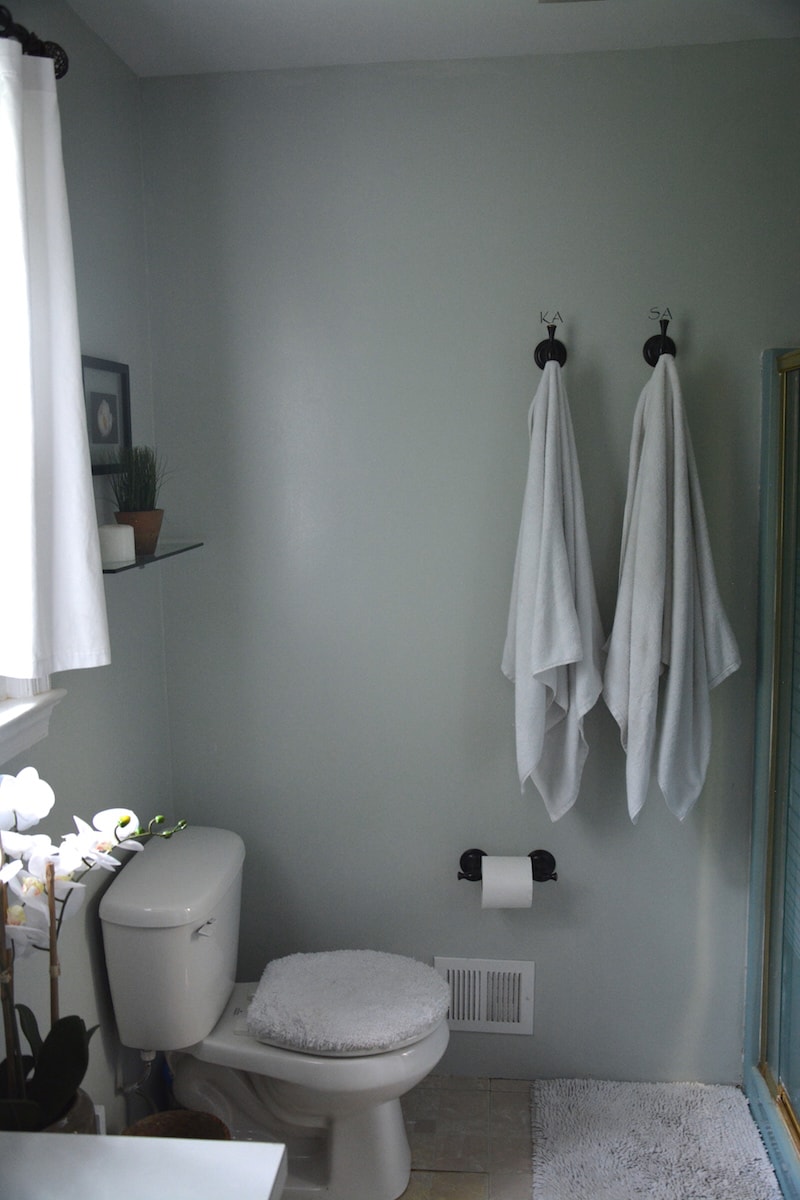
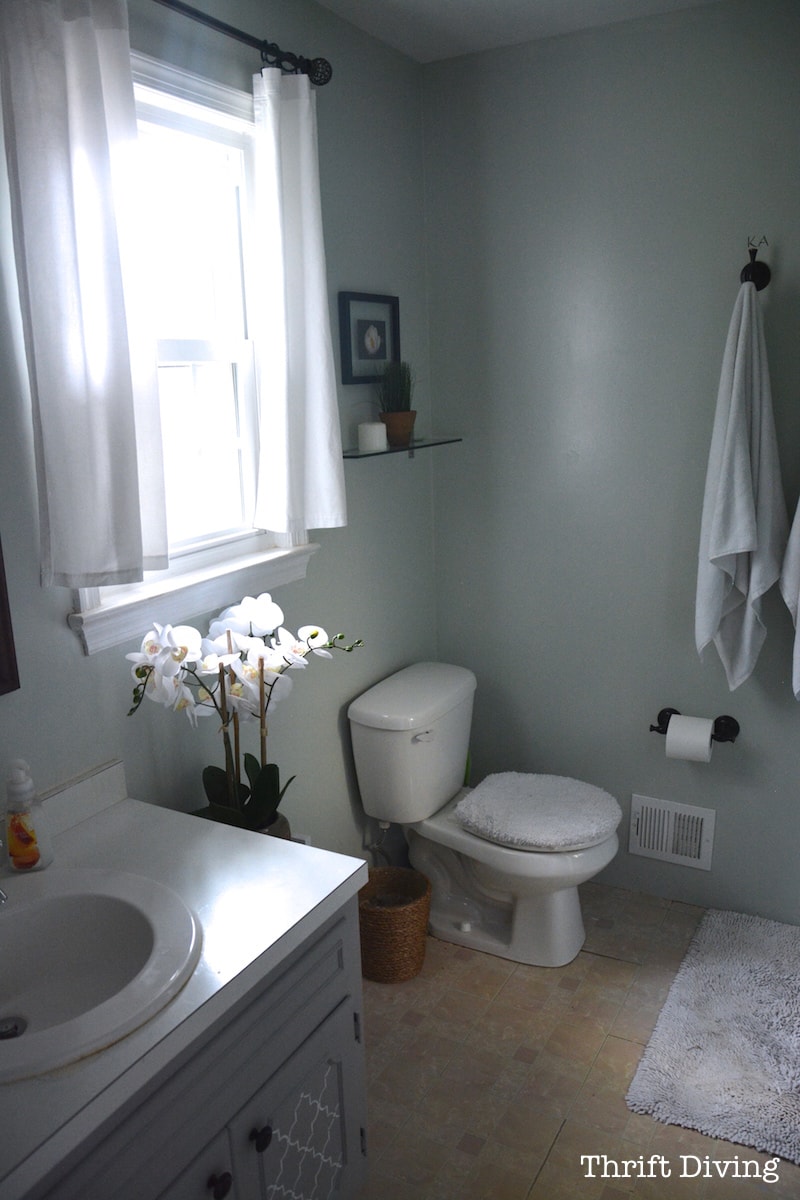
I kind of forgot it used to look this bad.
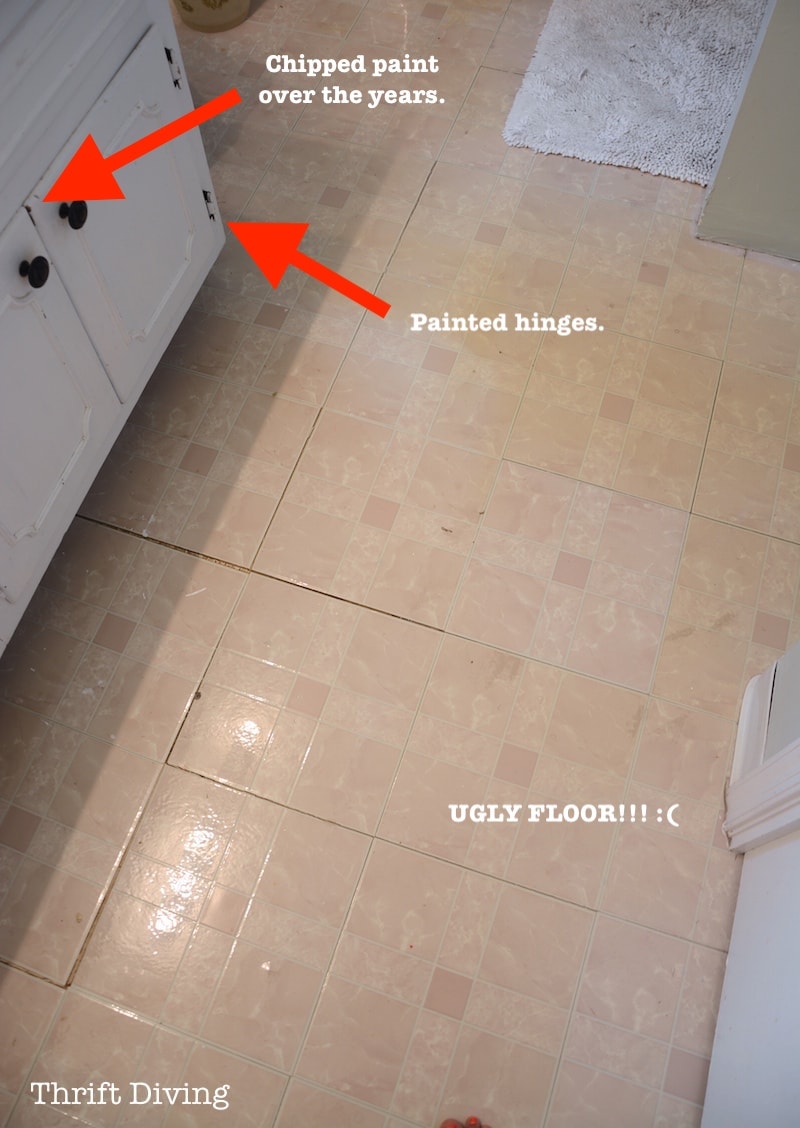
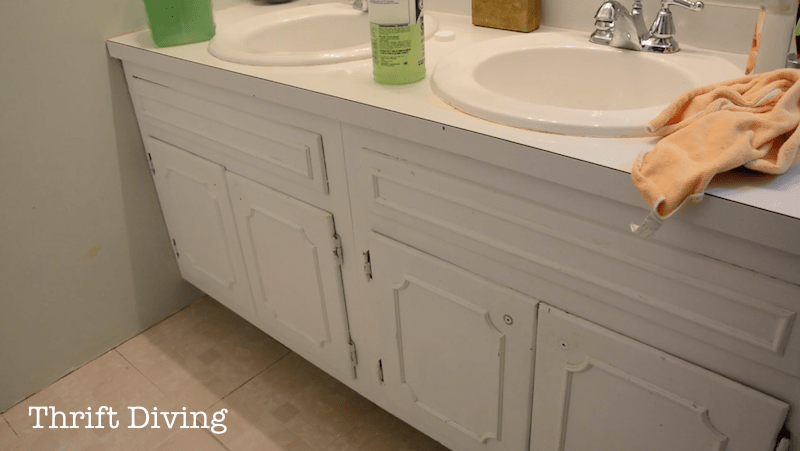
BEFORE
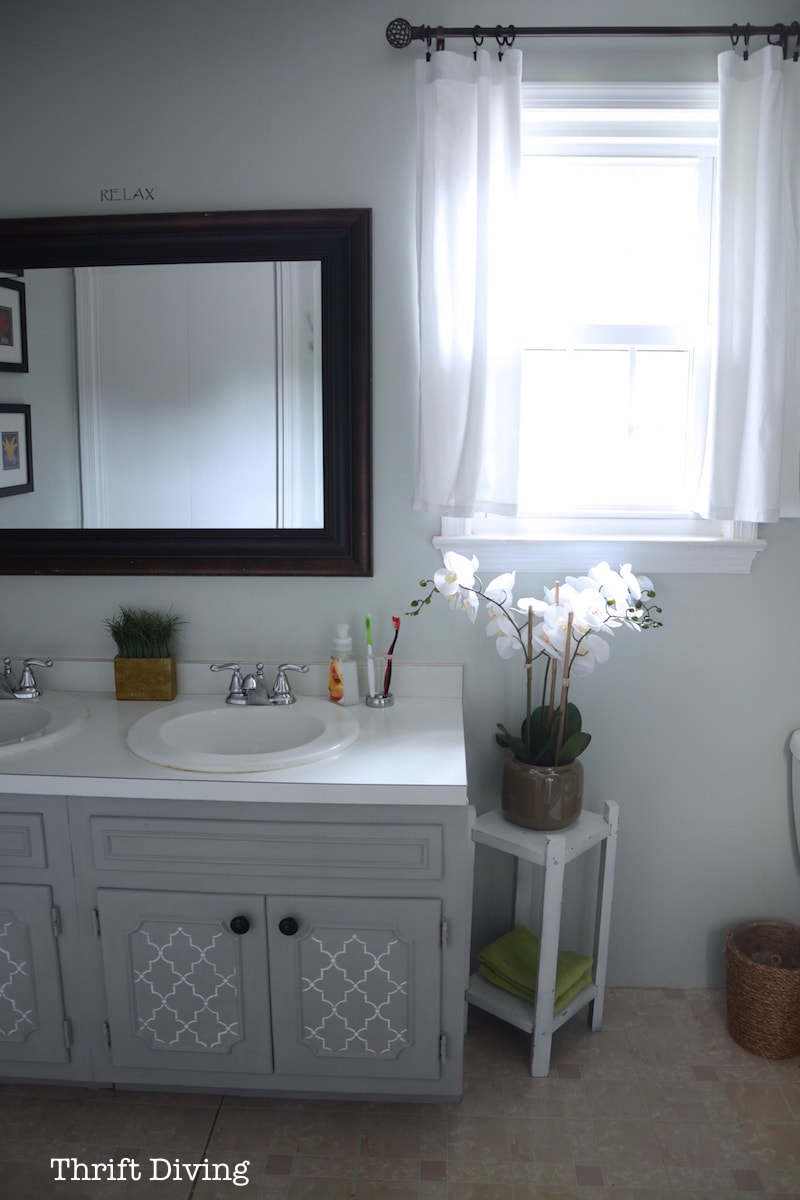
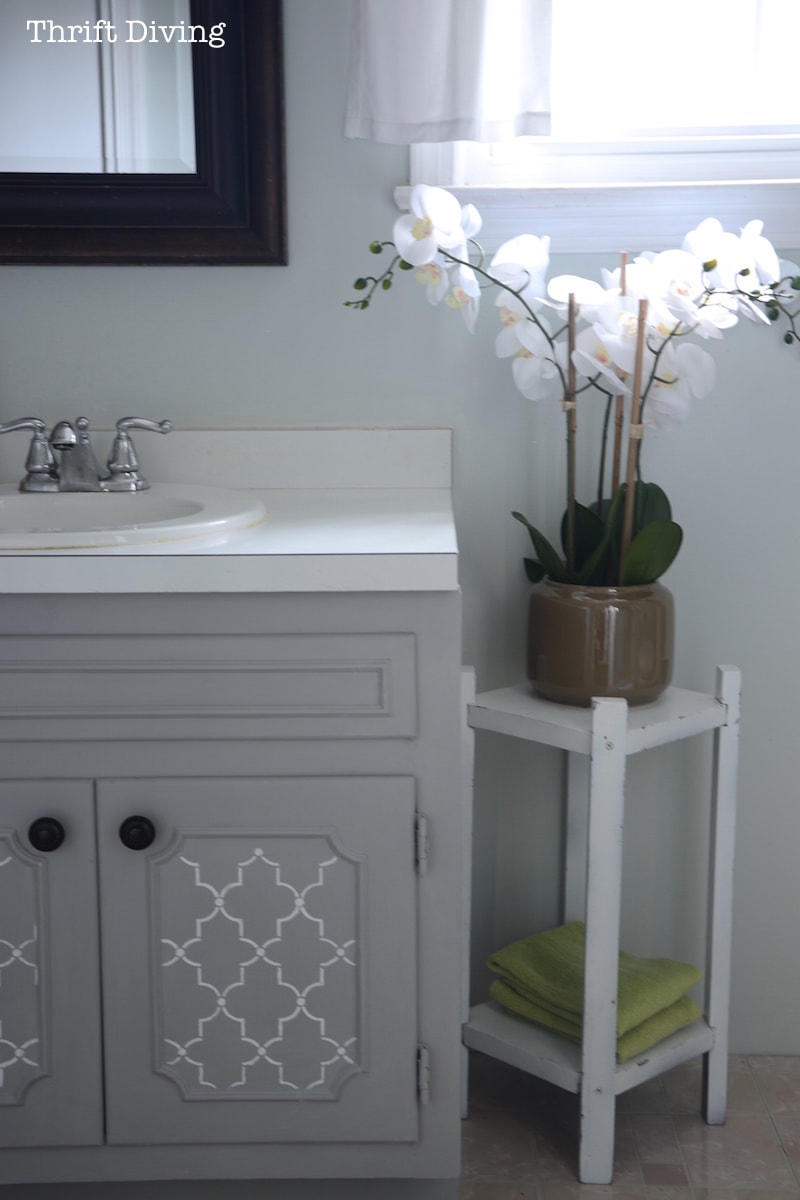
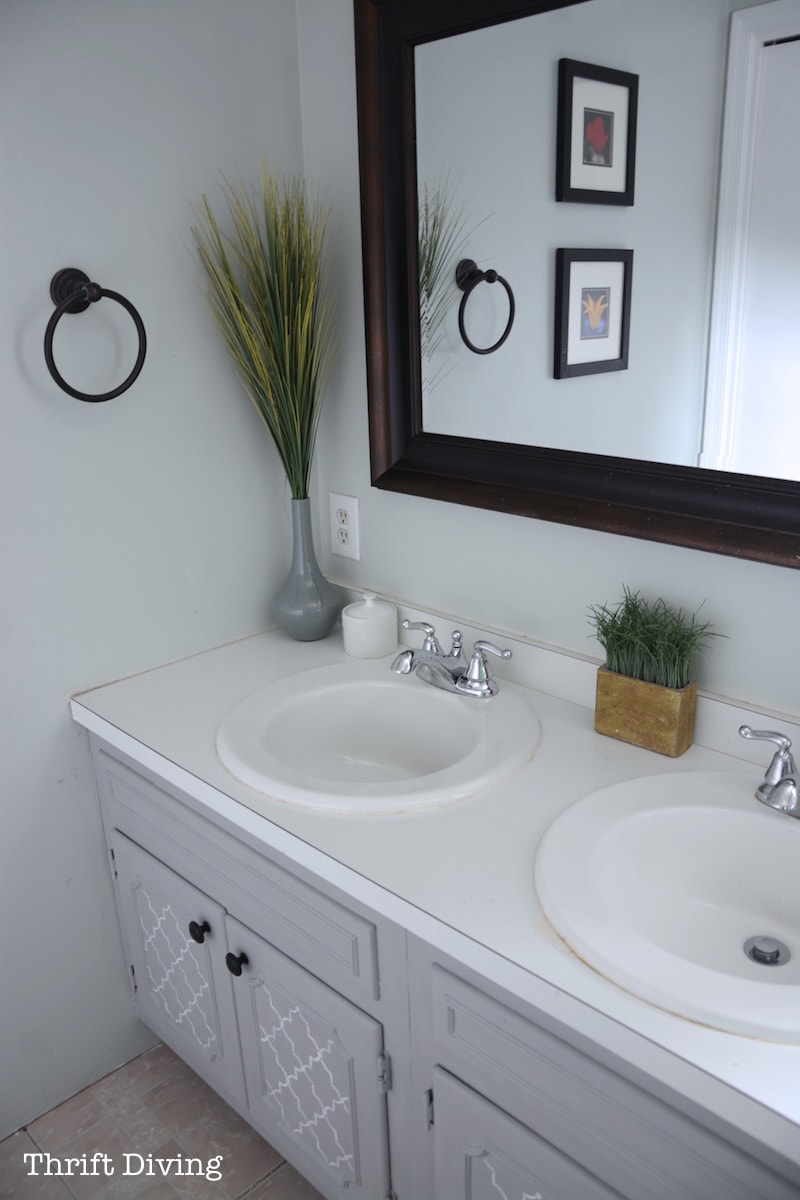
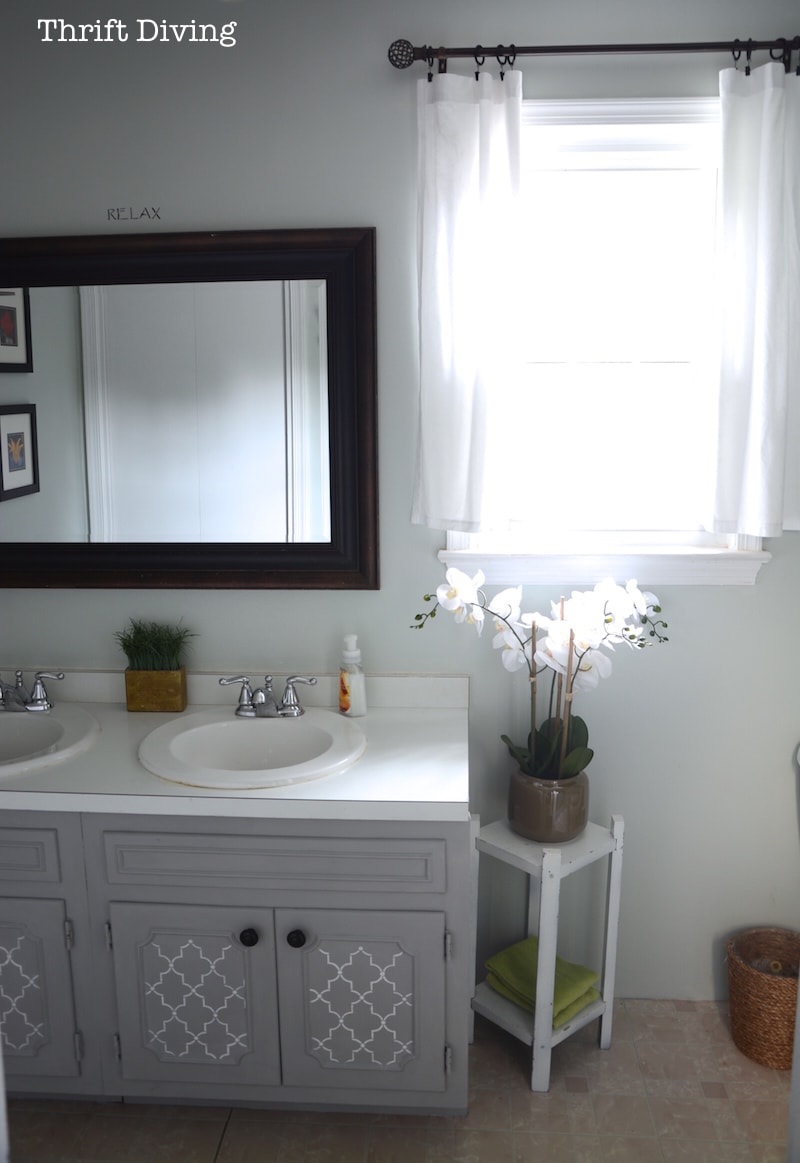
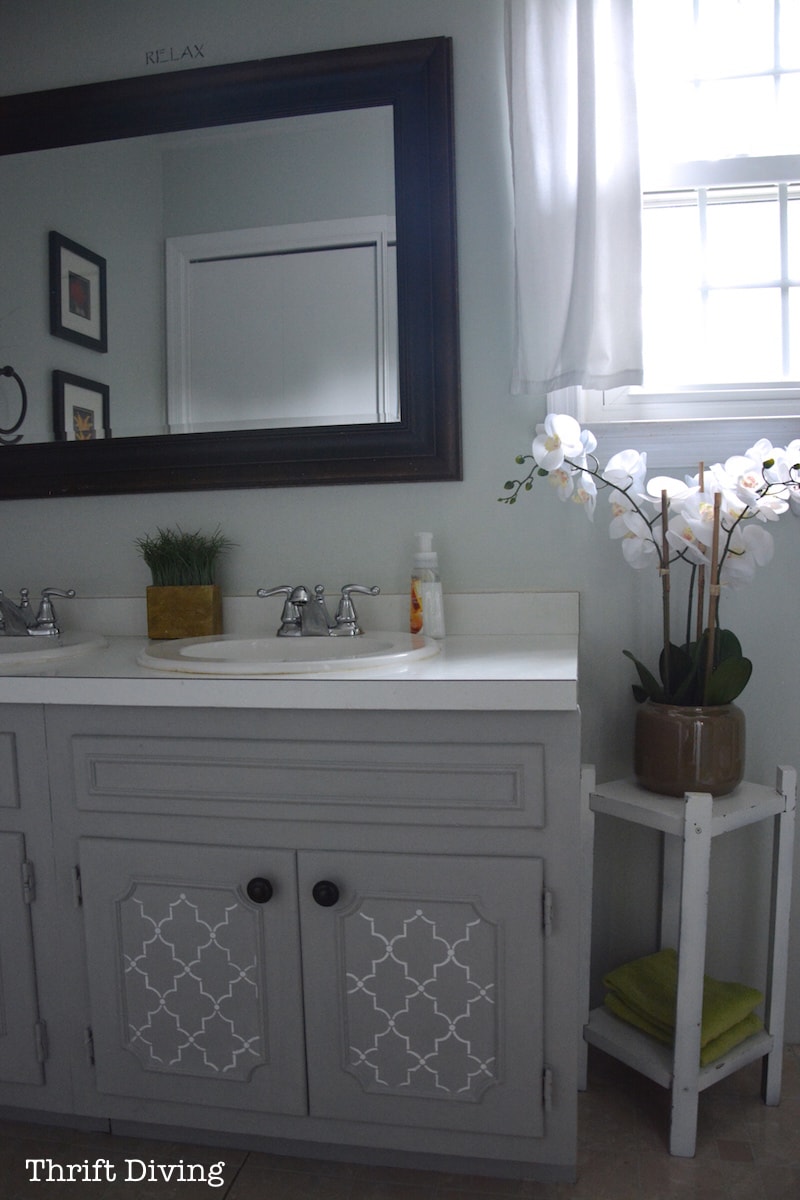
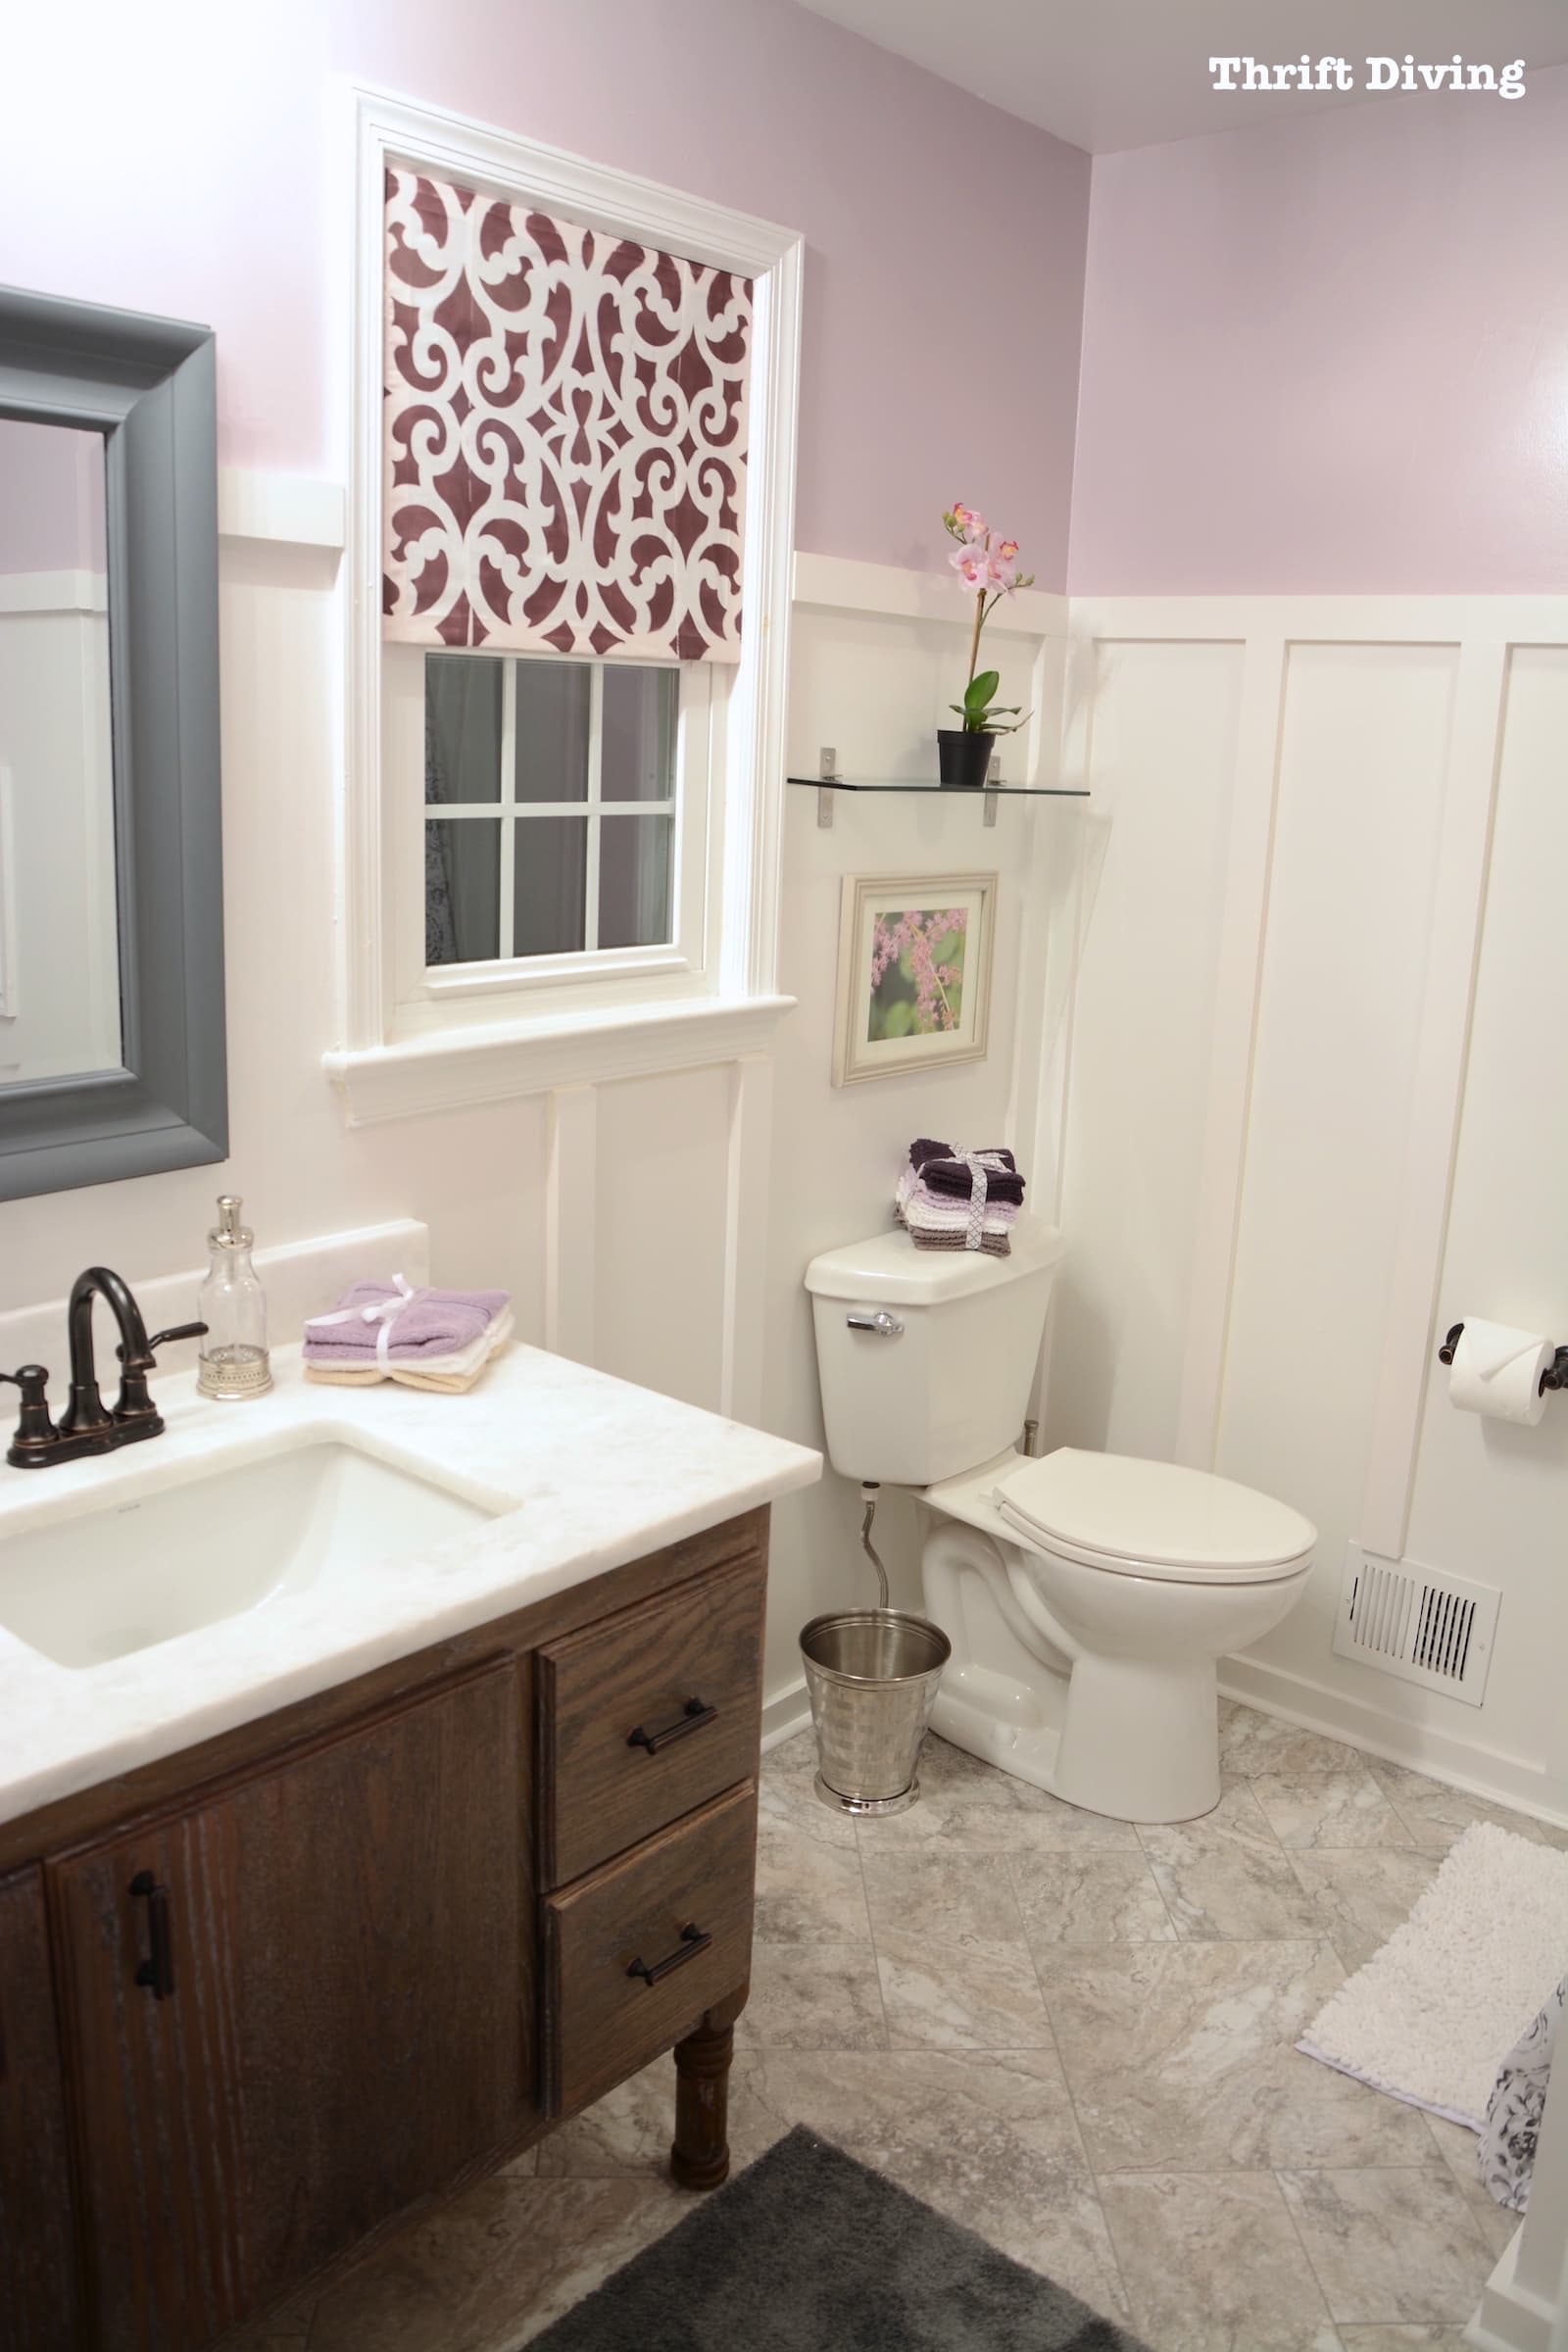
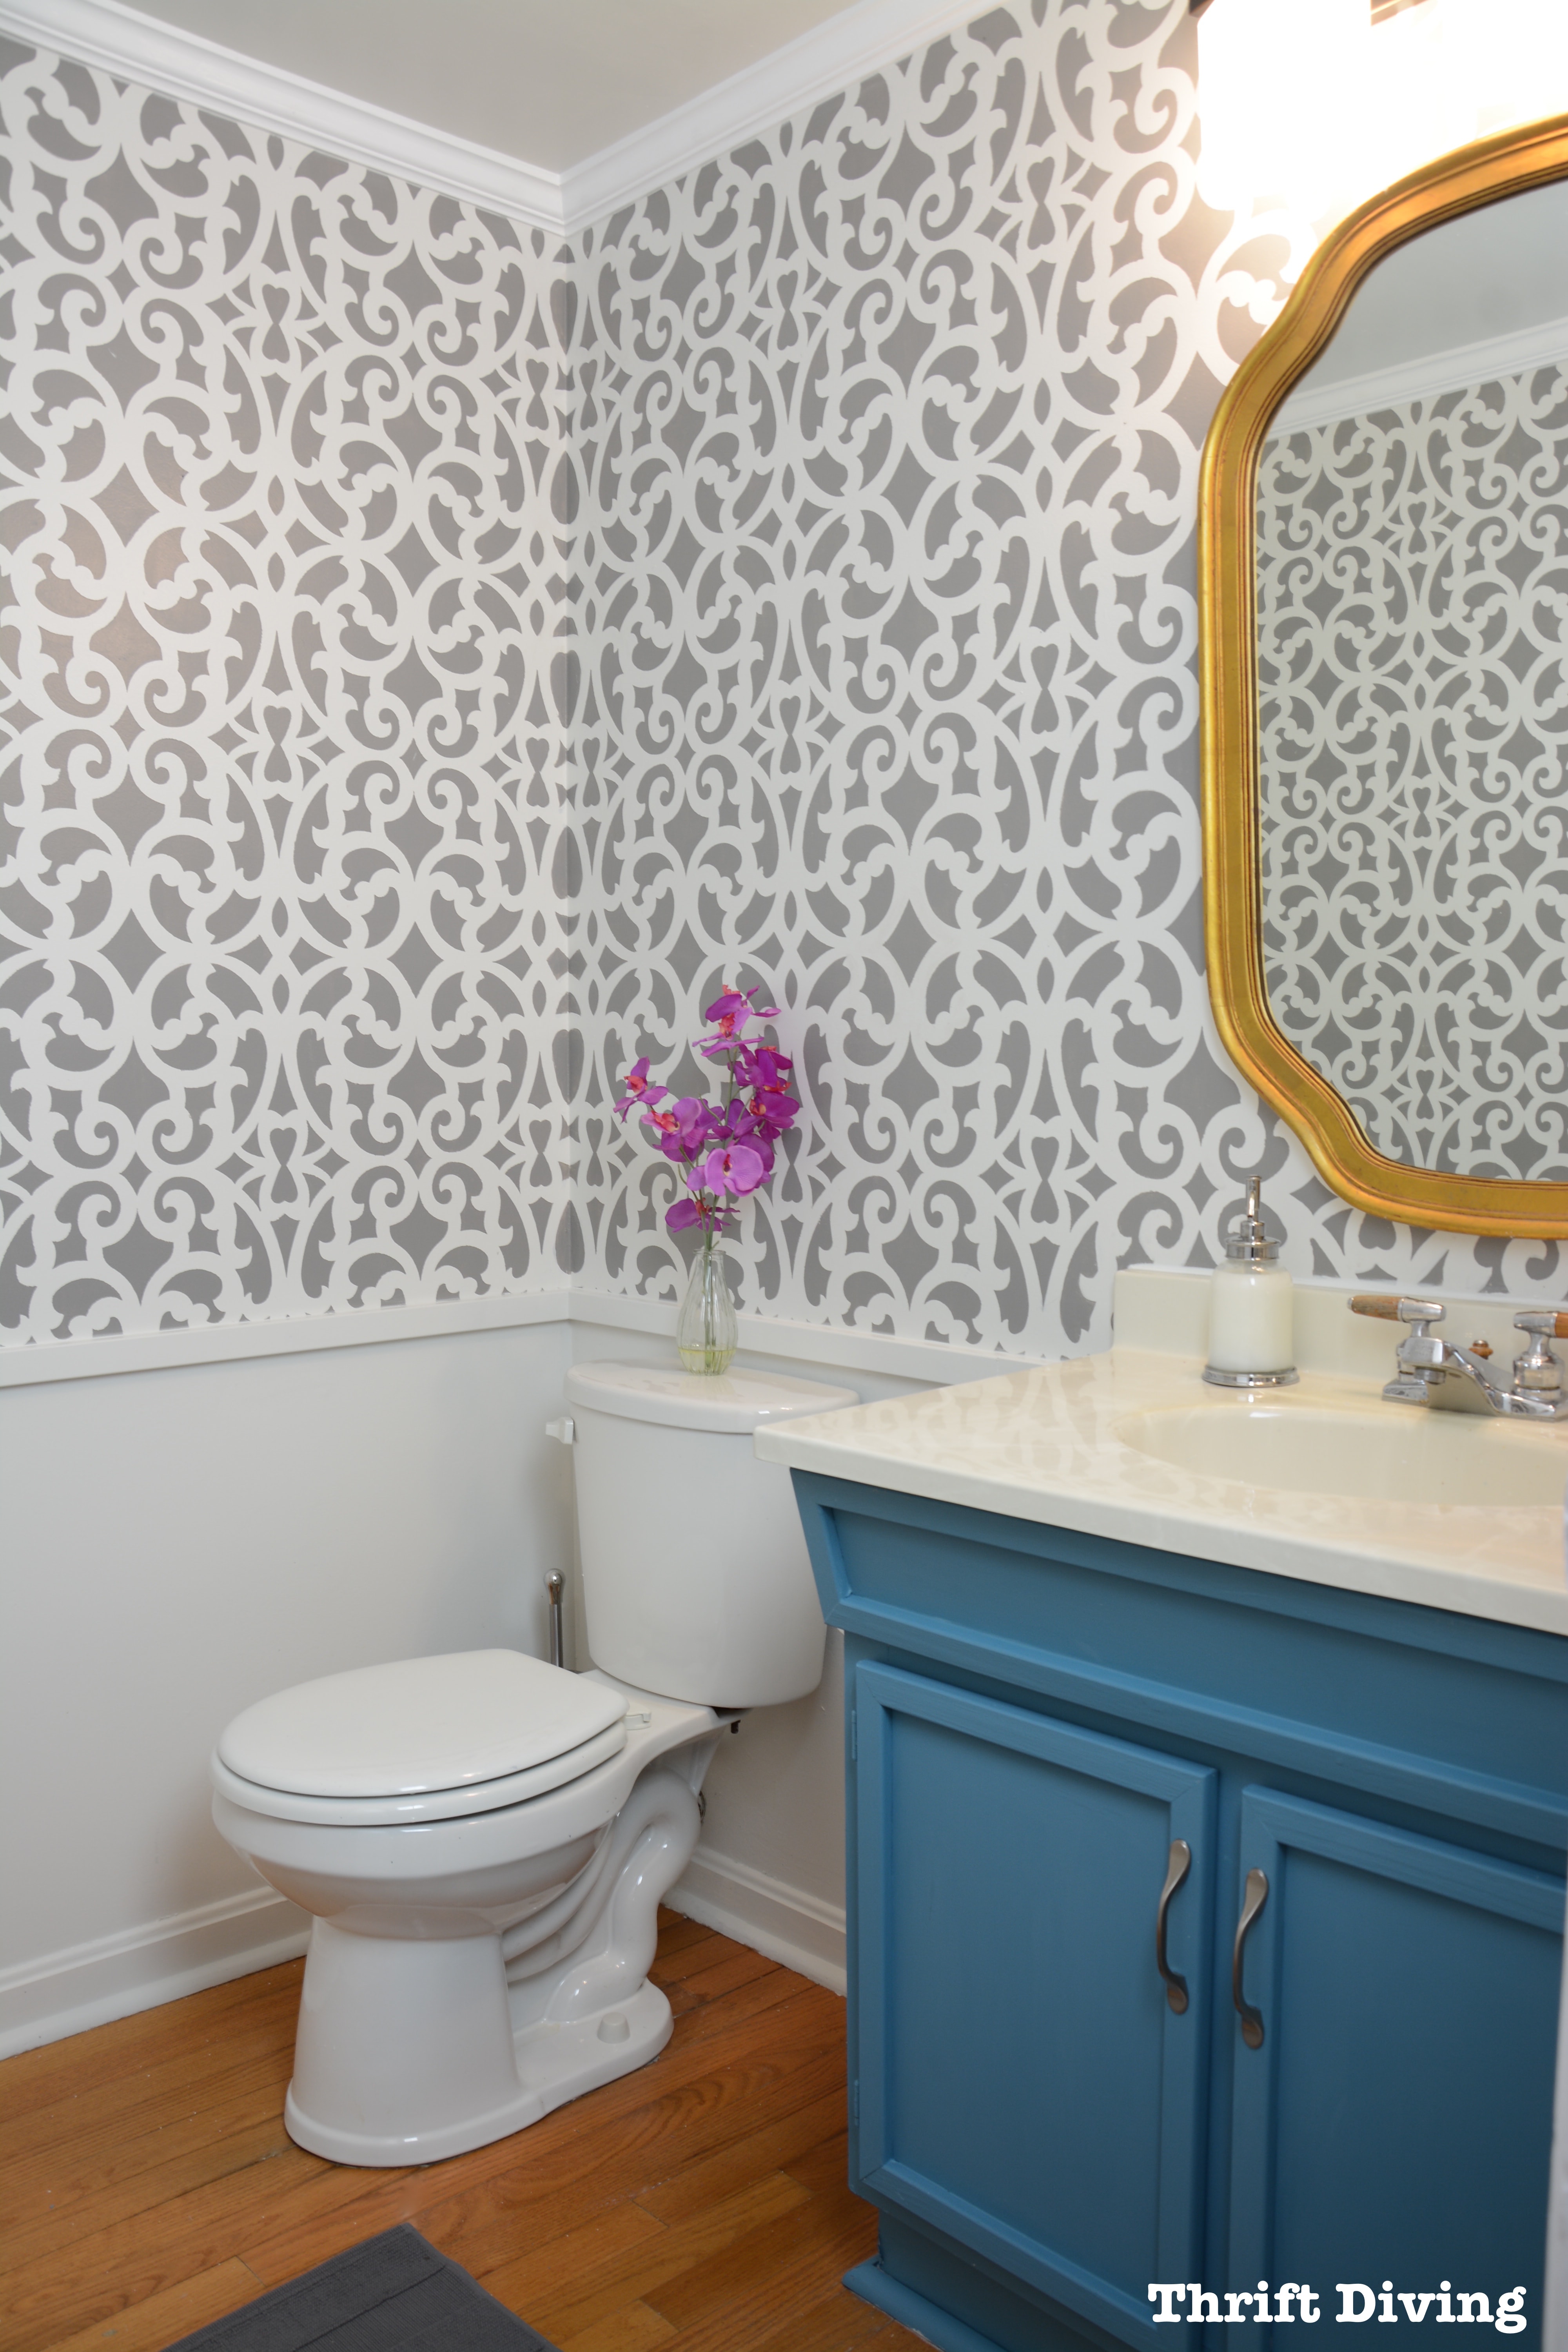
After I was done painting the vanity with chalk paint, it looked amazing and much brighter! The Sherwin Williams Sea Salt paint was the perfect shade of pale green, too!
AFTER!
Materials Needed to Paint Your Bathroom Vanity
Painting your bathroom vanity or cabinets it’s difficult and despite what people still believe, you DO NOT have to sand and prime your bathroom vanity or cabinets before painting them! Furniture paint on the market today is a lot more “hearty” and sticks to practically anything. But there are a few things you should know before you start painting.
Let’s jump into it.
(I participant in the Amazon Services LLC Associates Program and other affiliate advertising programs designed to provide a means for me to earn fees by linking to Amazon.com and affiliated sites).
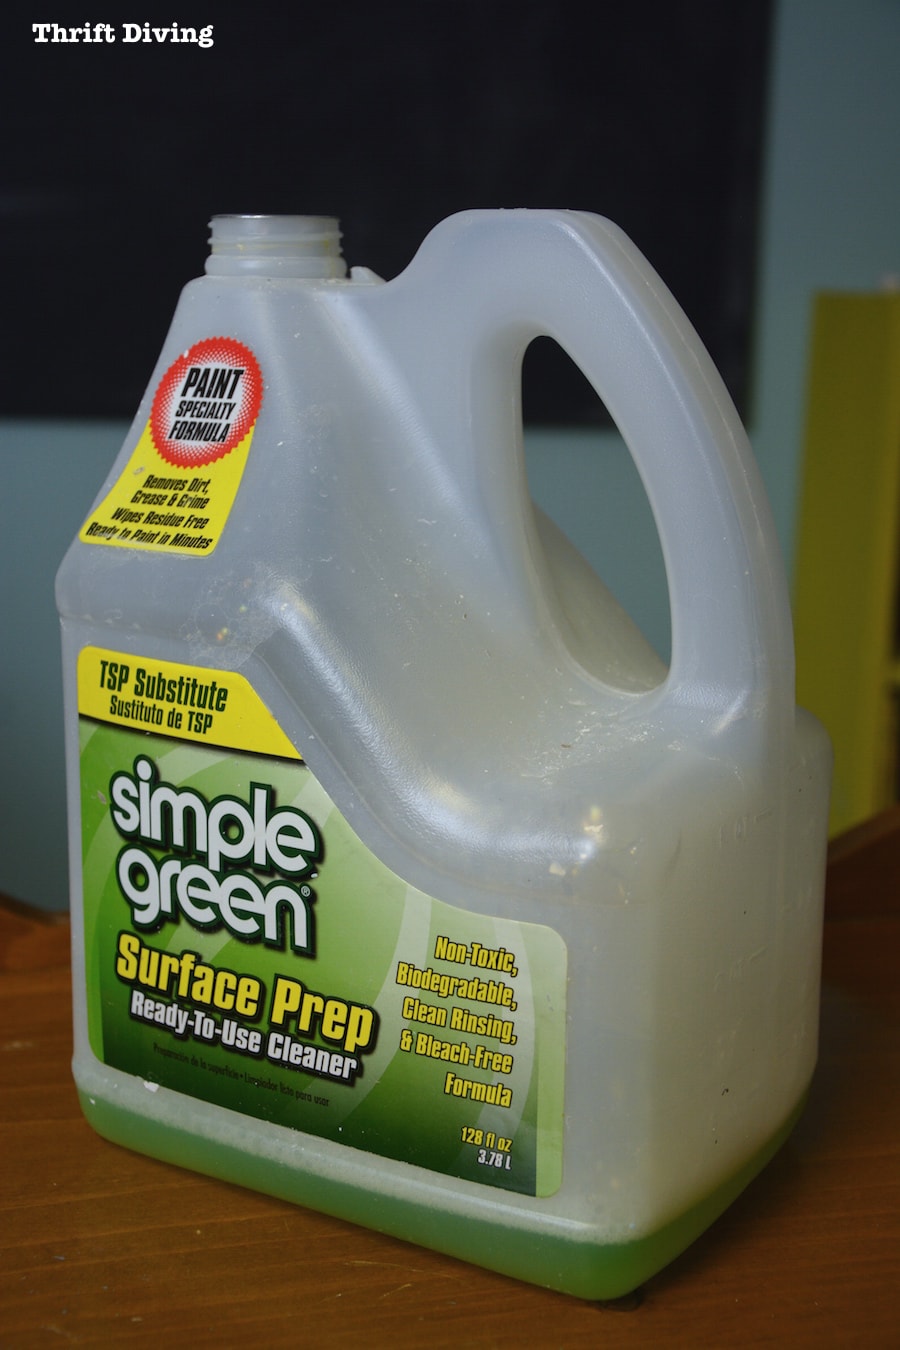
- Simple Green – This is a good degreaser for cleaning your vanity first.
- Chalked paint – Check out this post on which is the best paint for furniture to find one you like.
- Screwdriver – To remove the knobs and hinges. I didn’t remove the hinges because they were already painted.
- Stencil – Check out this post on How to Use Stencils: A Complete Guide.
- Clear wax or clear top coat – I have come to love General Finishes High Performance water-based top coat for my finishes.
Do You Have to Sand Before Painting a Bathroom Vanity?
Well, that depends. If you’re using regular ‘ole latex paint that you’d buy to paint your walls, yeah, you’d likely want to sand your vanity or cabinets down a little bit before painting them.
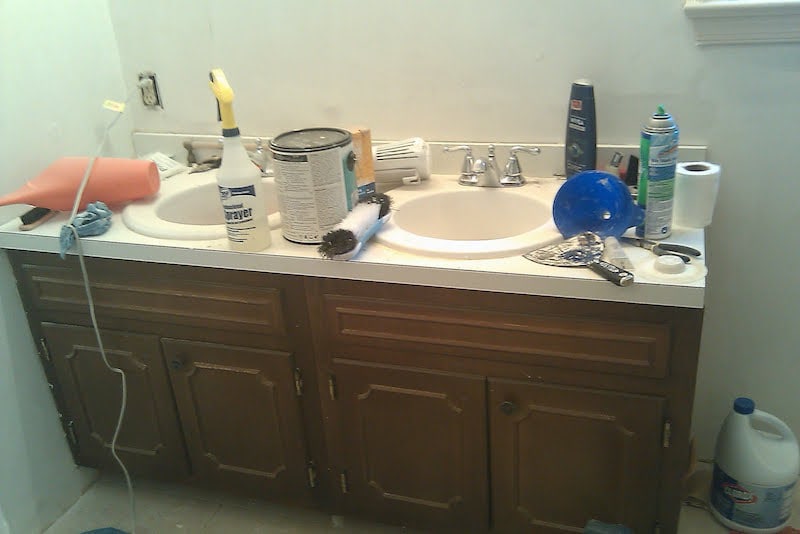
When I first made over this bathroom years ago, before expensive furniture paint was “a thing,” I sanded this old cabinet down first, added a coat of primer, and used a semi-gloss latex paint.
BEFORE
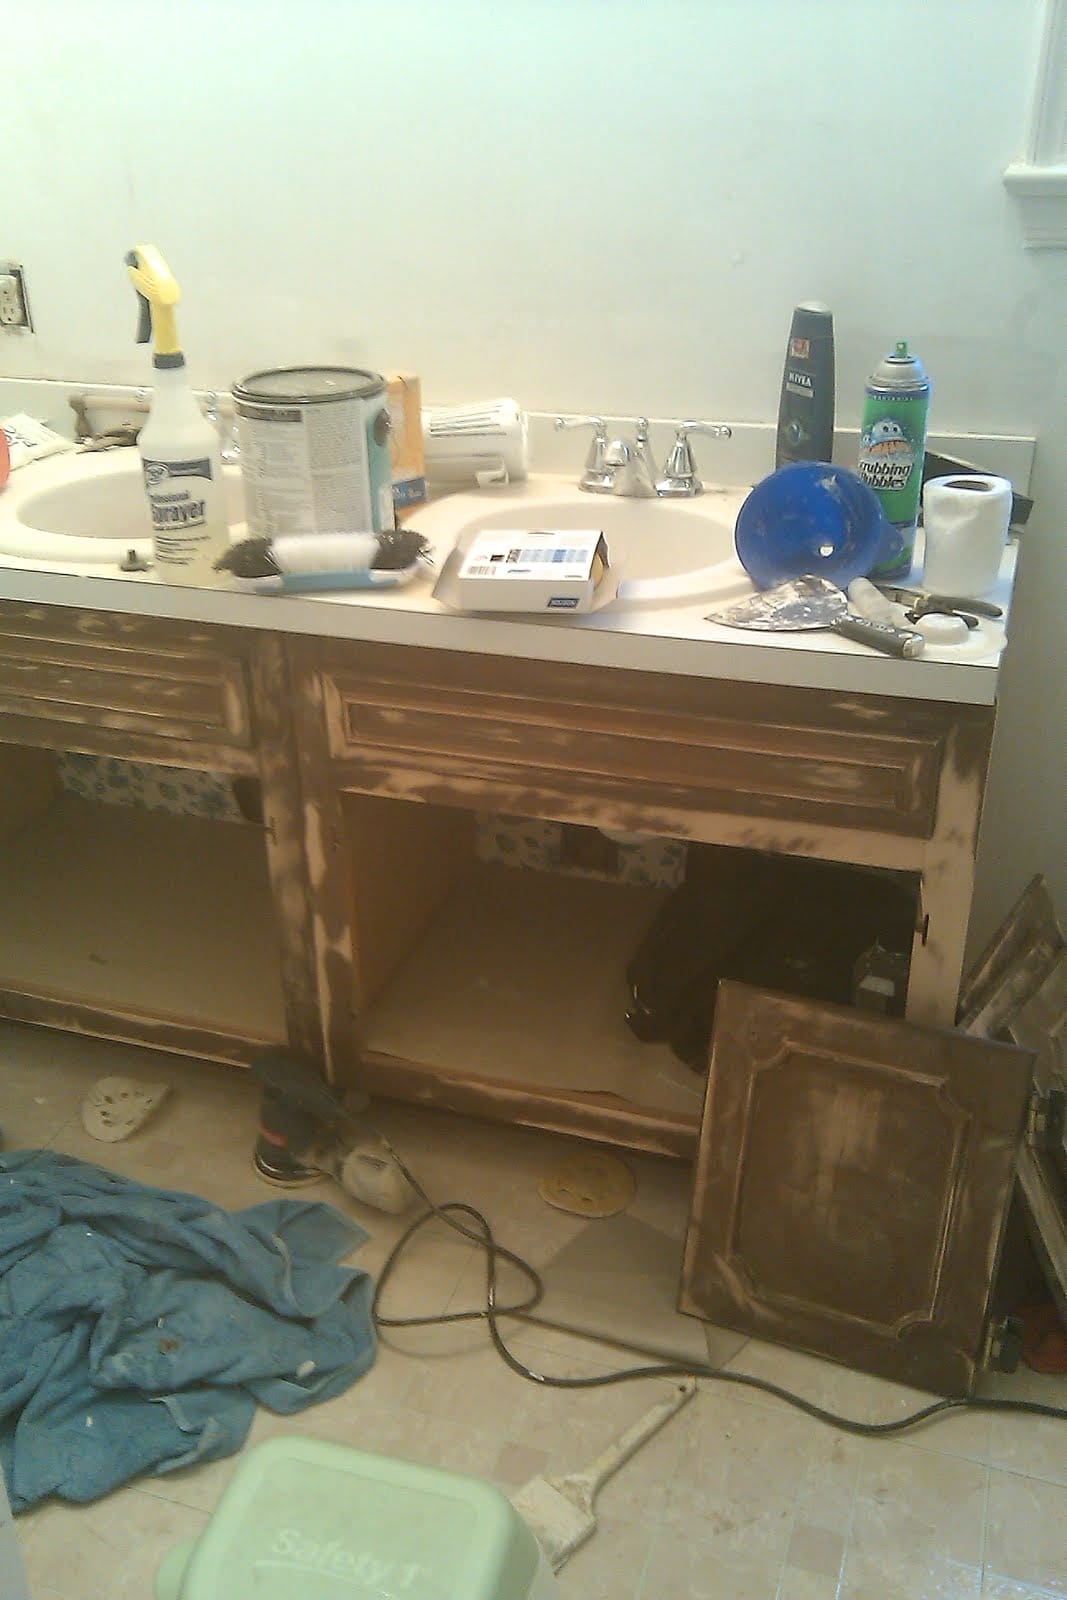
SANDED DOWN
(Please excuse the horrible pictures. This picture was snapped a-la-2011 before smartphones with high-tech cameras. LOL).
SEMI-GLOSS PAINTED VANITY
Did the semi-gloss paint on the vanity work?? Meh…..yeah, it did its job, but it was a lot of work that I didn’t need to go through with all the sanding and priming. Plus, I didn’t know what I was doing. The paint job wasn’t that spectacular, and if you look closely, you’ll see that I didn’t even remove the hinges prior to painting. I just slapped that paint on and called it a day (don’t mind the full trash can. HA!).

And you can see that it started peeling a little bit, even with the sanding and the priming. Regular wall latex paint, in my opinion, after years of using chalk furniture paint, isn’t the best option for furniture.
In this post, I’ll walk you through how to paint your bathroom vanity or bathroom cabinets properly so that you get the best results and you minimize chipping!
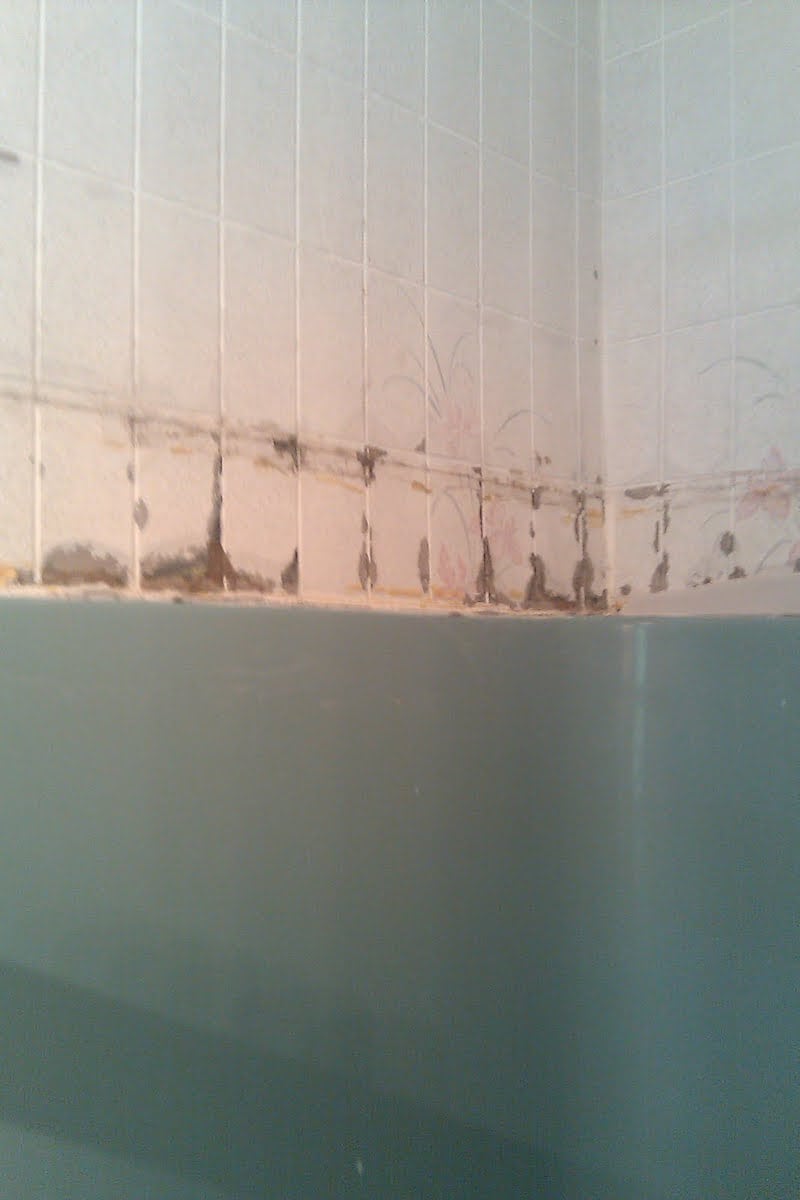
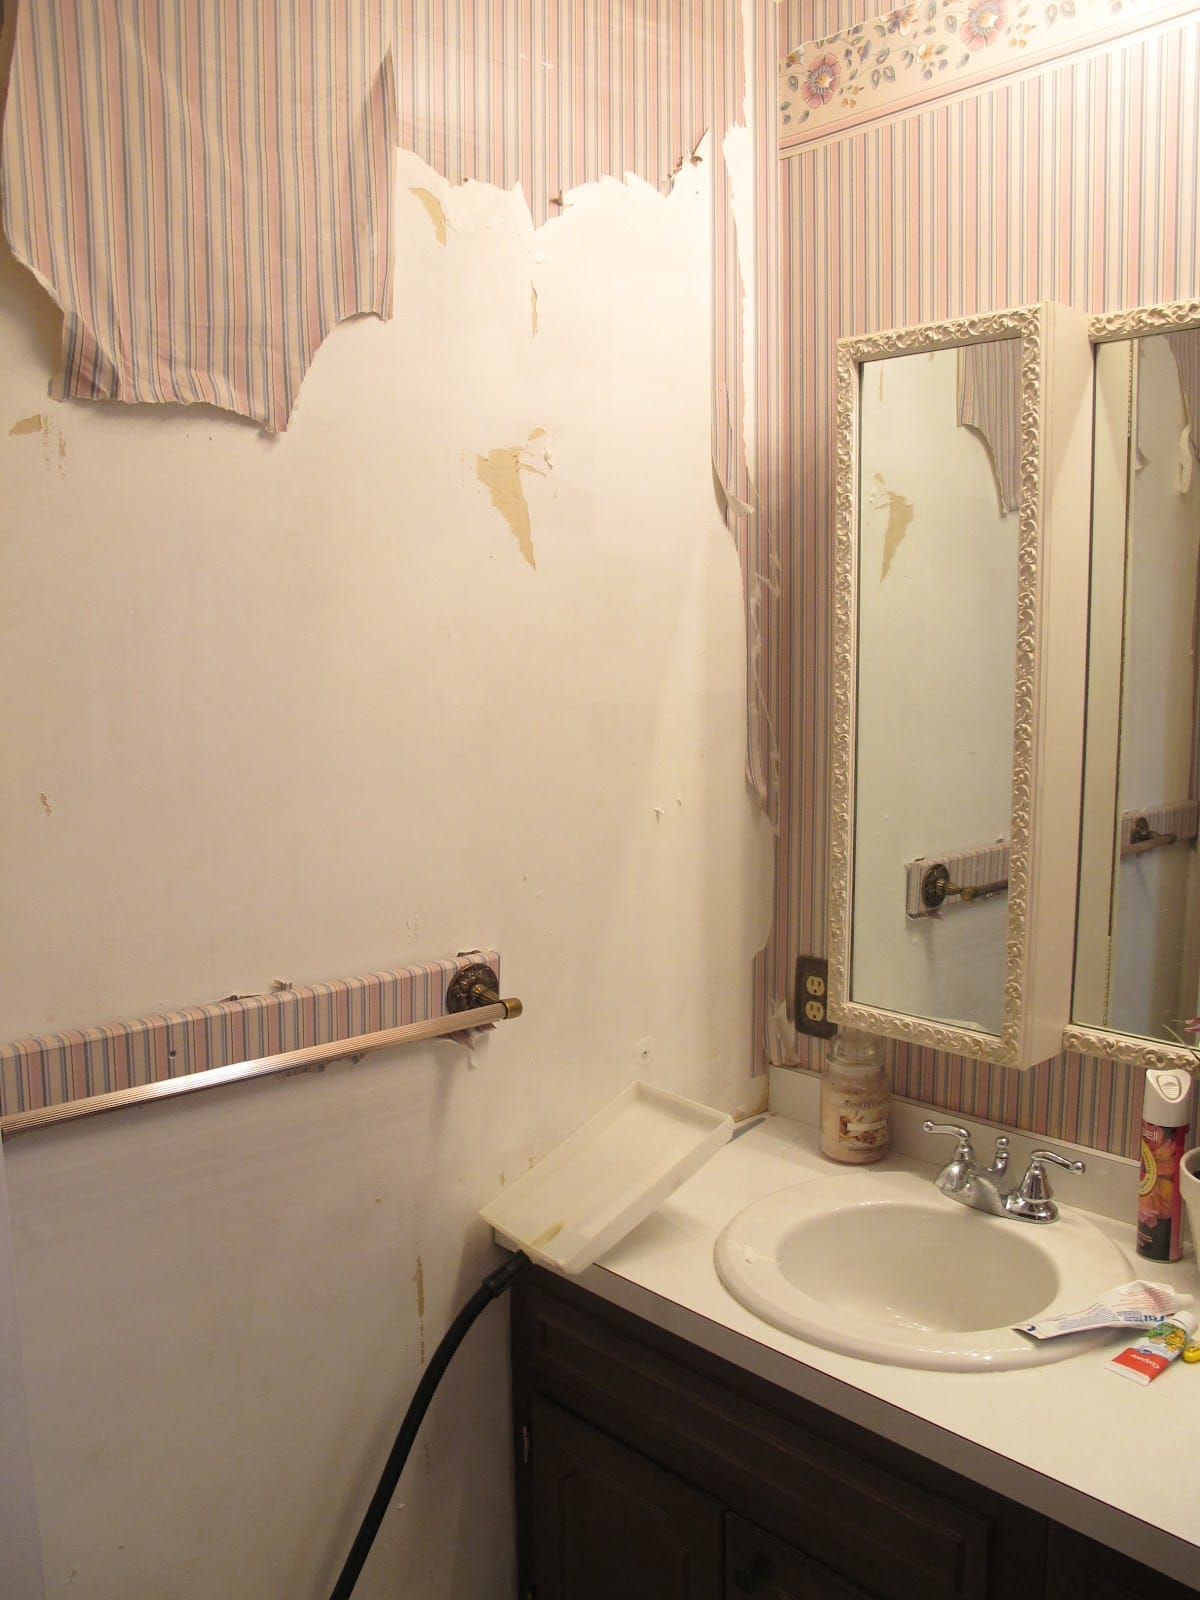
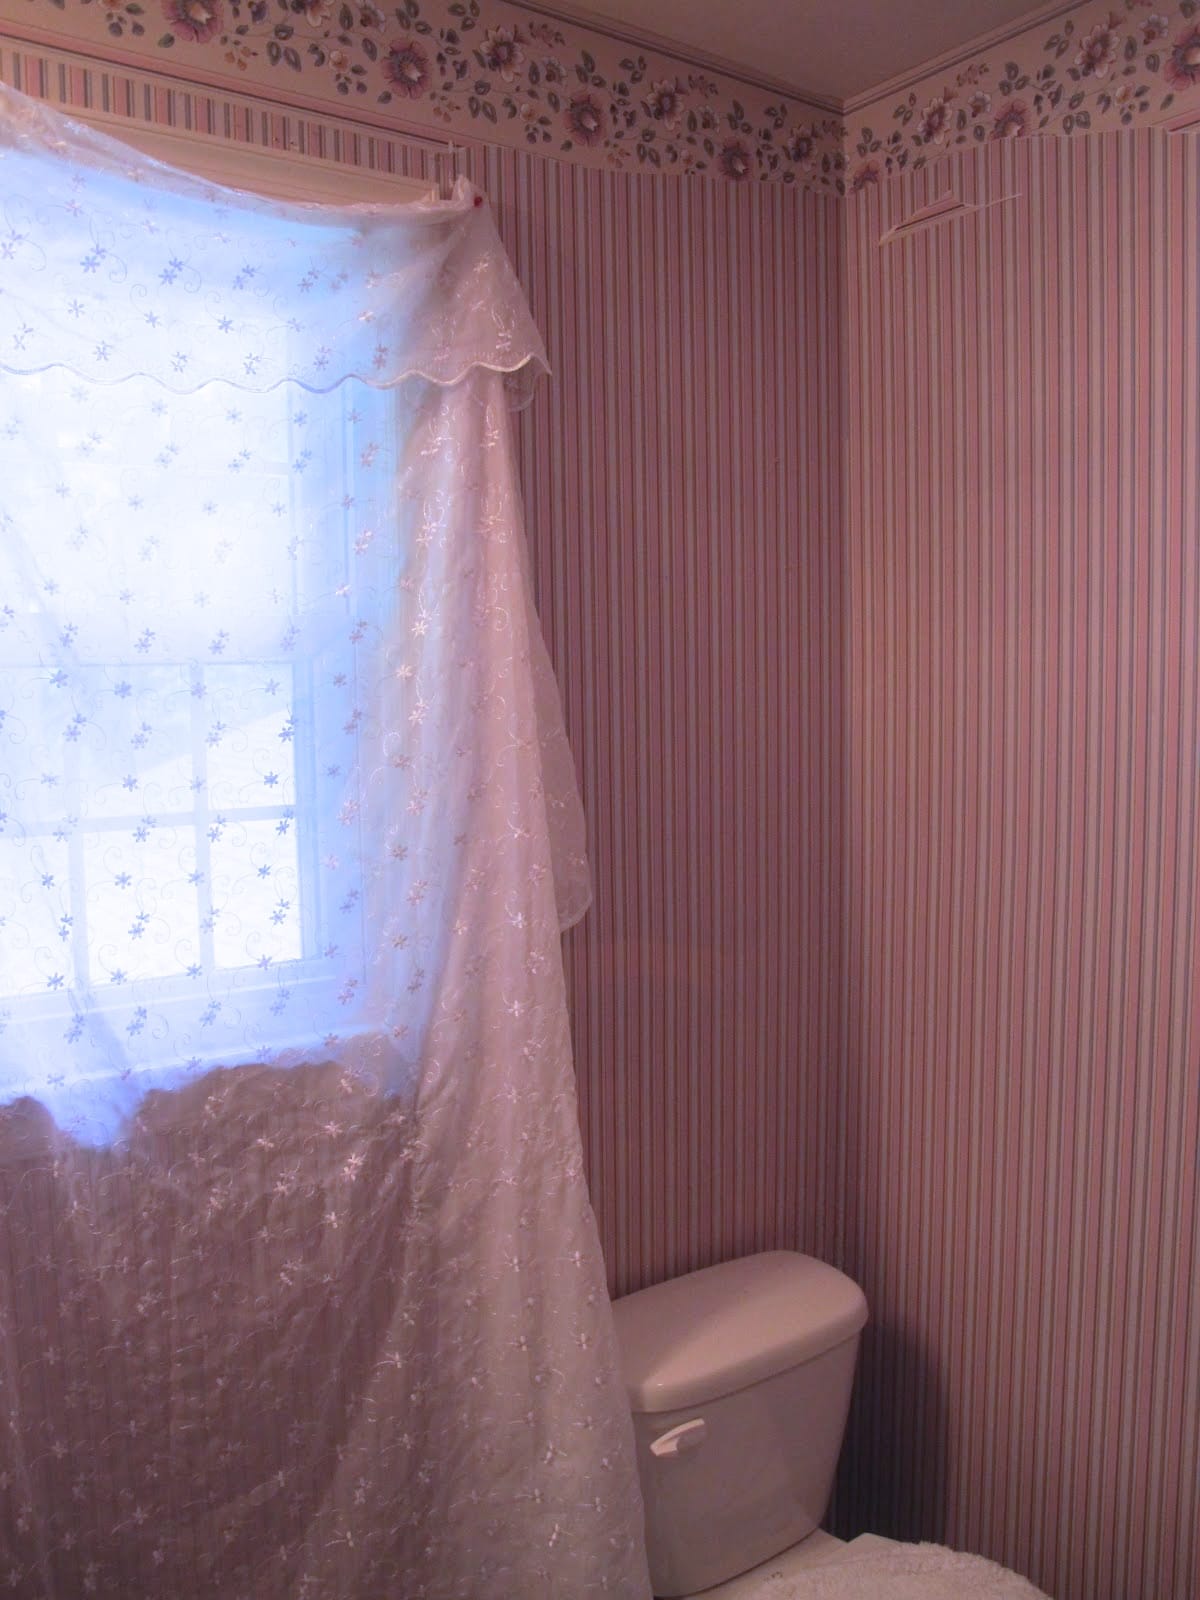
And there I was, 6 months pregnant in the shower, standing on a chair, pulling this crap off the walls.
Yes, you read that correctly. I was 6 months pregnant with I first renovated this bathroom.
What in the world was I thinking?! Must have been pregnancy hormones. HA!
You have no idea how scared I was at what could have been behind these walls!
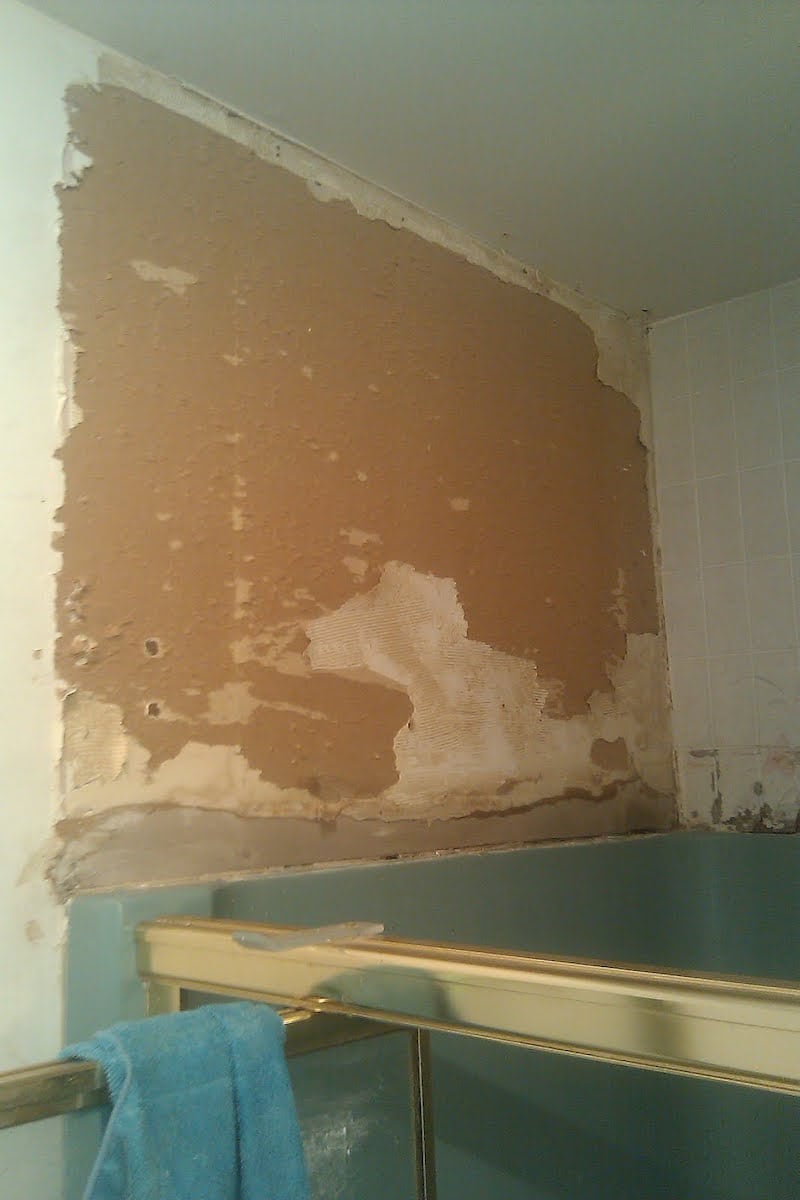
Thankfully, I repaired them through the magic of “cross-your-fingers.” And YouTube. Don’t forget magical YouTube.
The paint was fresh and if you can believe it, is still holding up 4 years now!
In fact, the whole bathroom ended up looking really nice, considering that I had a limited budget and DIY skills (and was pregnant).
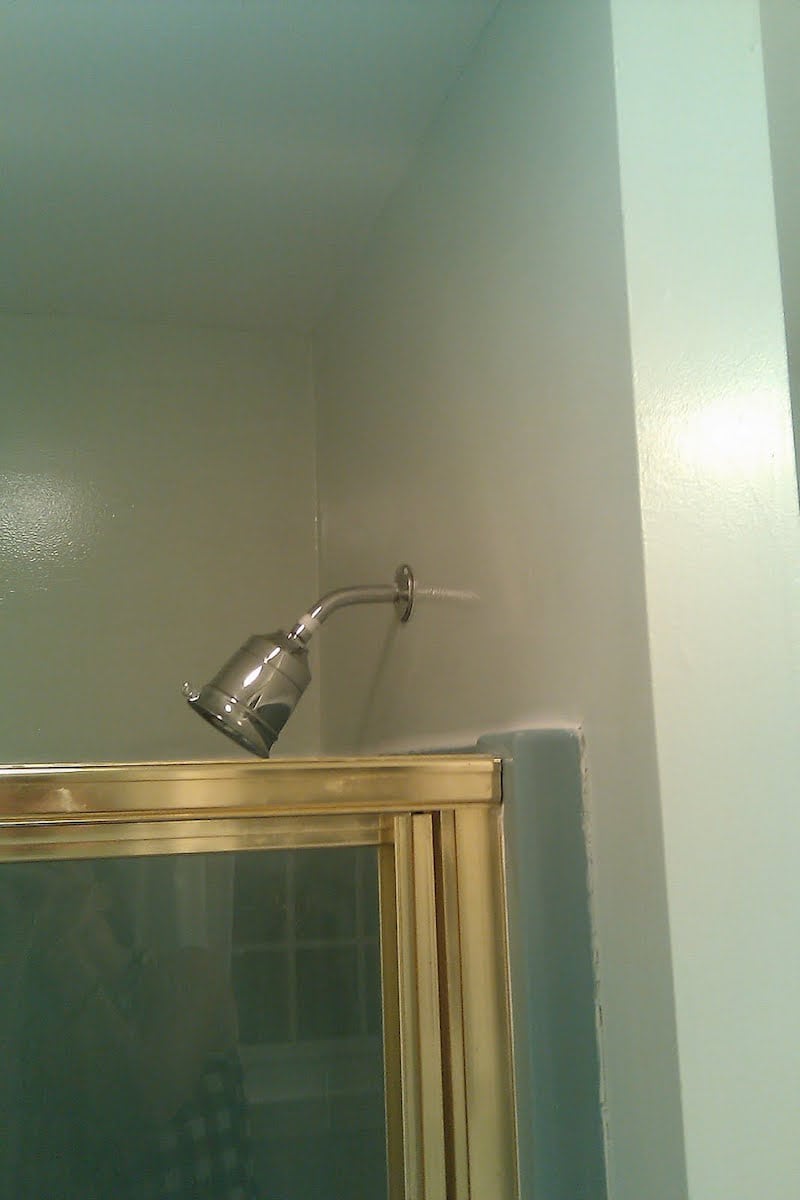
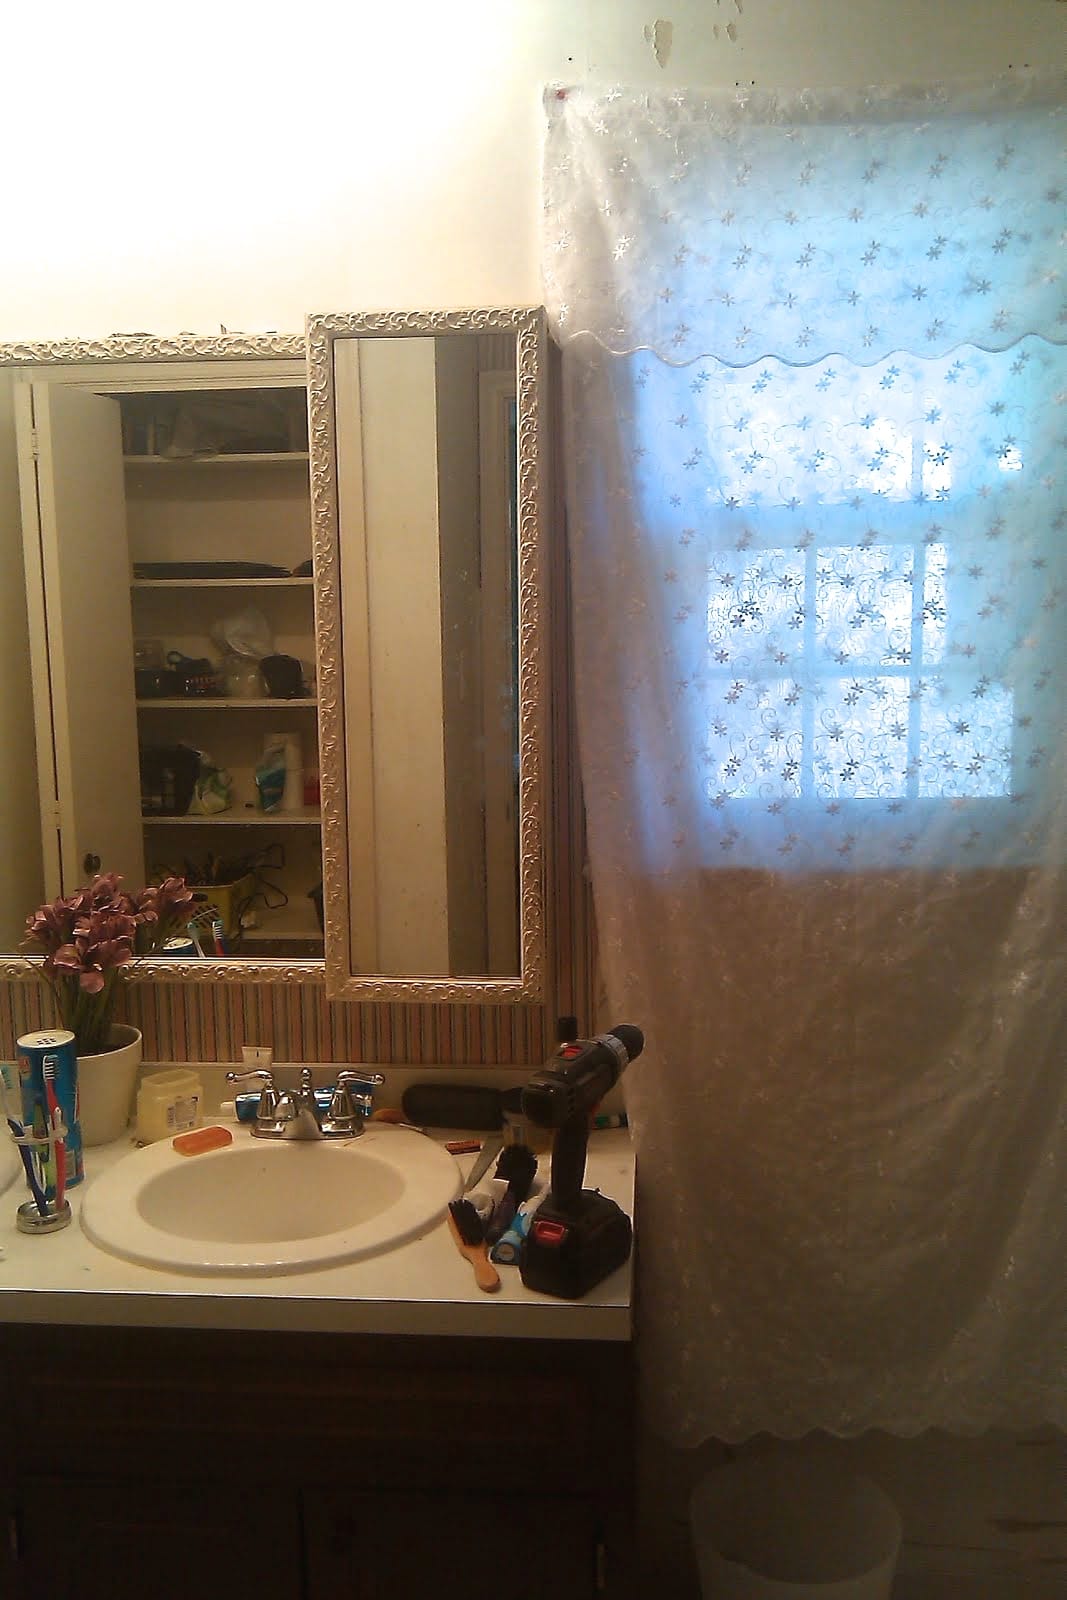
I couldn’t do anything about the turquoise shower stall or the horrific peel-and-stick tiles, but I could at least replace the mirror, sew a pair of cute little white curtains, and paint the vanity.
And I’m not kidding when I say that for a whole year we had this shower curtain thumb-tacked to the window. We were so gangsta. HA!
BEFORE (after we moved in)
How to Paint Your Bathroom Vanity
It’s really easy to do this, guys.
Watch the video to see this project in action.
STEP 1: Thoroughly Clean Your Vanity
If your bathroom vanity is dirty (and I bet you it is–mine always seems to get toothpaste on it, LOL), then you must clean it really good before you start painting it. I’ll admit that I used to be lazy and skipped cleaning, which is a terrible idea. Now, you won’t find me painting a piece of furniture or painting a vanity without thoroughly wiping it down. Paint will only stick to a surface that’s clean, my friend.
I like to use Simple Green, which is a degreaser. Get yourself a spray bottle and just fill it up.
STEP 2: Remove the Hinges and Doors
To remove the hinges or to not remove them….that is the question.
In my YouTube video, I got a lot of negative commenters who complained, “She didn’t remove the hinges before painting!” And here is what I have to say about that. The reason I didn’t remove the hinges is that I didn’t know what I was doing the first round and simply painted over them. By the time I wanted to paint the vanity again, I simply didn’t want to go through the effort of removing them since they were already “ruined.”
However….because my hinges were exposed hinges, I also didn’t want dark hinges exposed, so painting them was a way to disguise them a little bit. So I think it depends on your vanity….and on your laziness factor. LOL
If you’d like to remove the hinges, use a screwdriver or drill to loosen the screws holding the doors and hinges to the vanity or cabinet and set them aside.
TIP: Place all of your screws and hinges in a plastic baggie! Trust me–you’ll be thankful you did. Those screws and hinges have a way of walking away on their own.
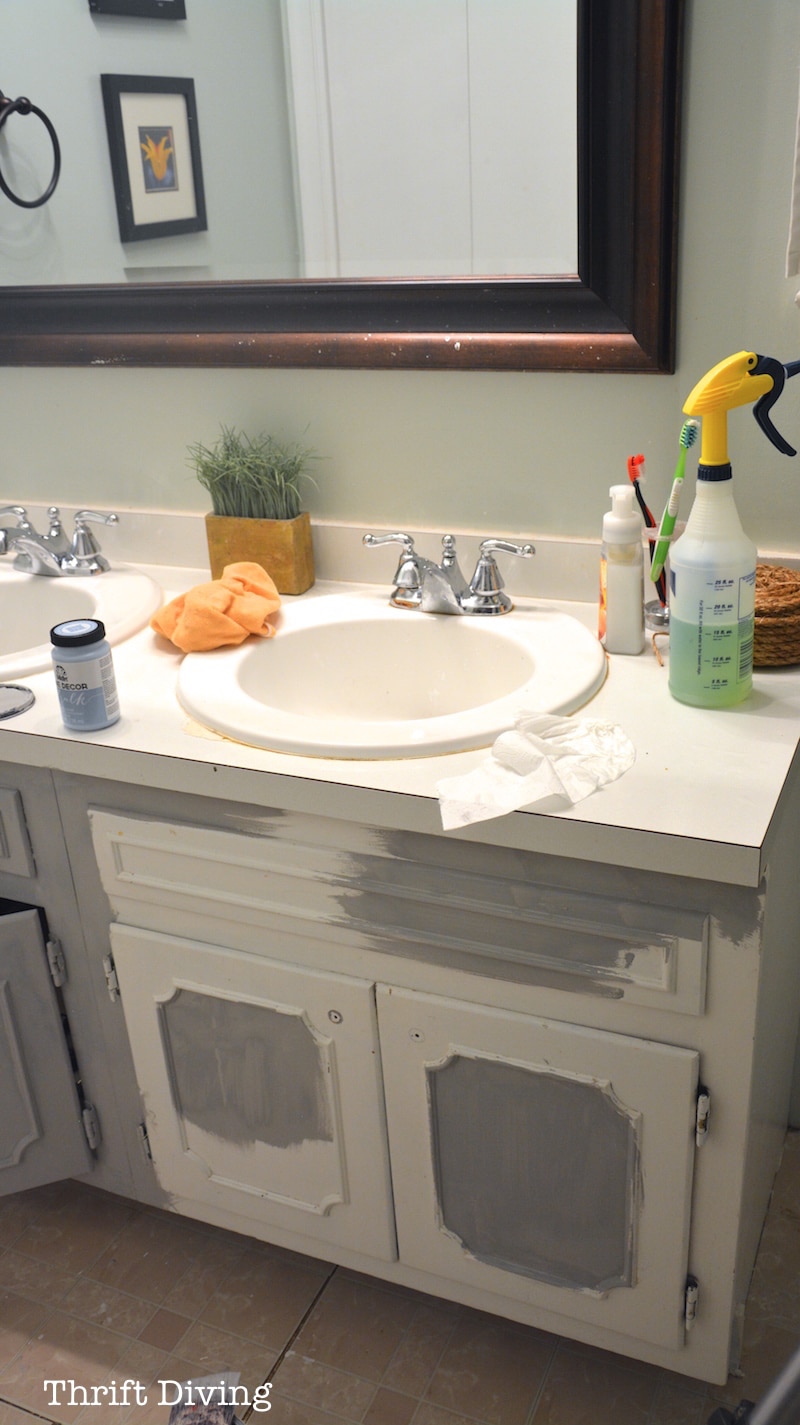
STEP 3: Skip the Sanding and Start Painting!
Now that the doors and hinges are removed, and you’ve cleaned the surface, you can start painting the vanity or cabinet! As you can see above, I simply slathered the paint on.
I didn’t need to remove the previous coat of white semi-gloss paint because most furniture paints I have used allow you to paint over previously painted surfaces. The old coat of semi-gloss paint was in decent condition, with the exception of a couple places that had slight peeling/chips. (For those spots, just use a fine sandpaper to smooth any edges and make sure there’s no additional peeling before painting over it).
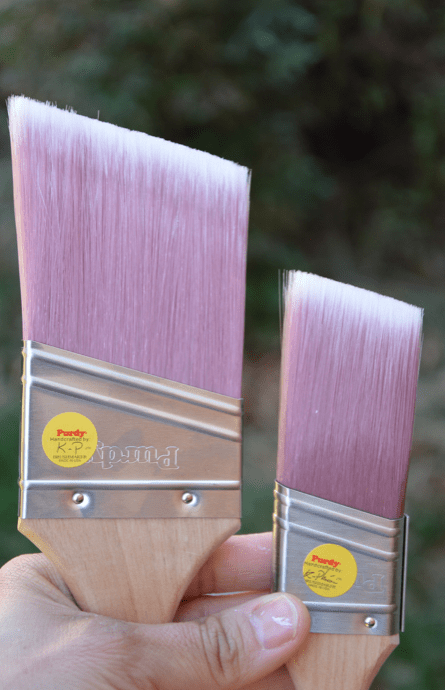
Which Paint Brush Should You Use?
I absolutely adore Purdy paintbrushes. And not just any Purdy brushes, but the synthetic ones that have the angled tips like this. The reason why I love them is because when you’re painting furniture (or even walls) there are times when you need to get reeaaaalllly close to an edge without painting over it, like along ceilings, or along the top edge of a bathroom vanity and you want to avoid getting paint on the vanity top. Angled brushes like this are perfect.
Of course, you can always tape off, but I like to skip taping off if possible. Using the right brush helps you do that.
Can You Use a Roller to Paint a Bathroom Vanity?
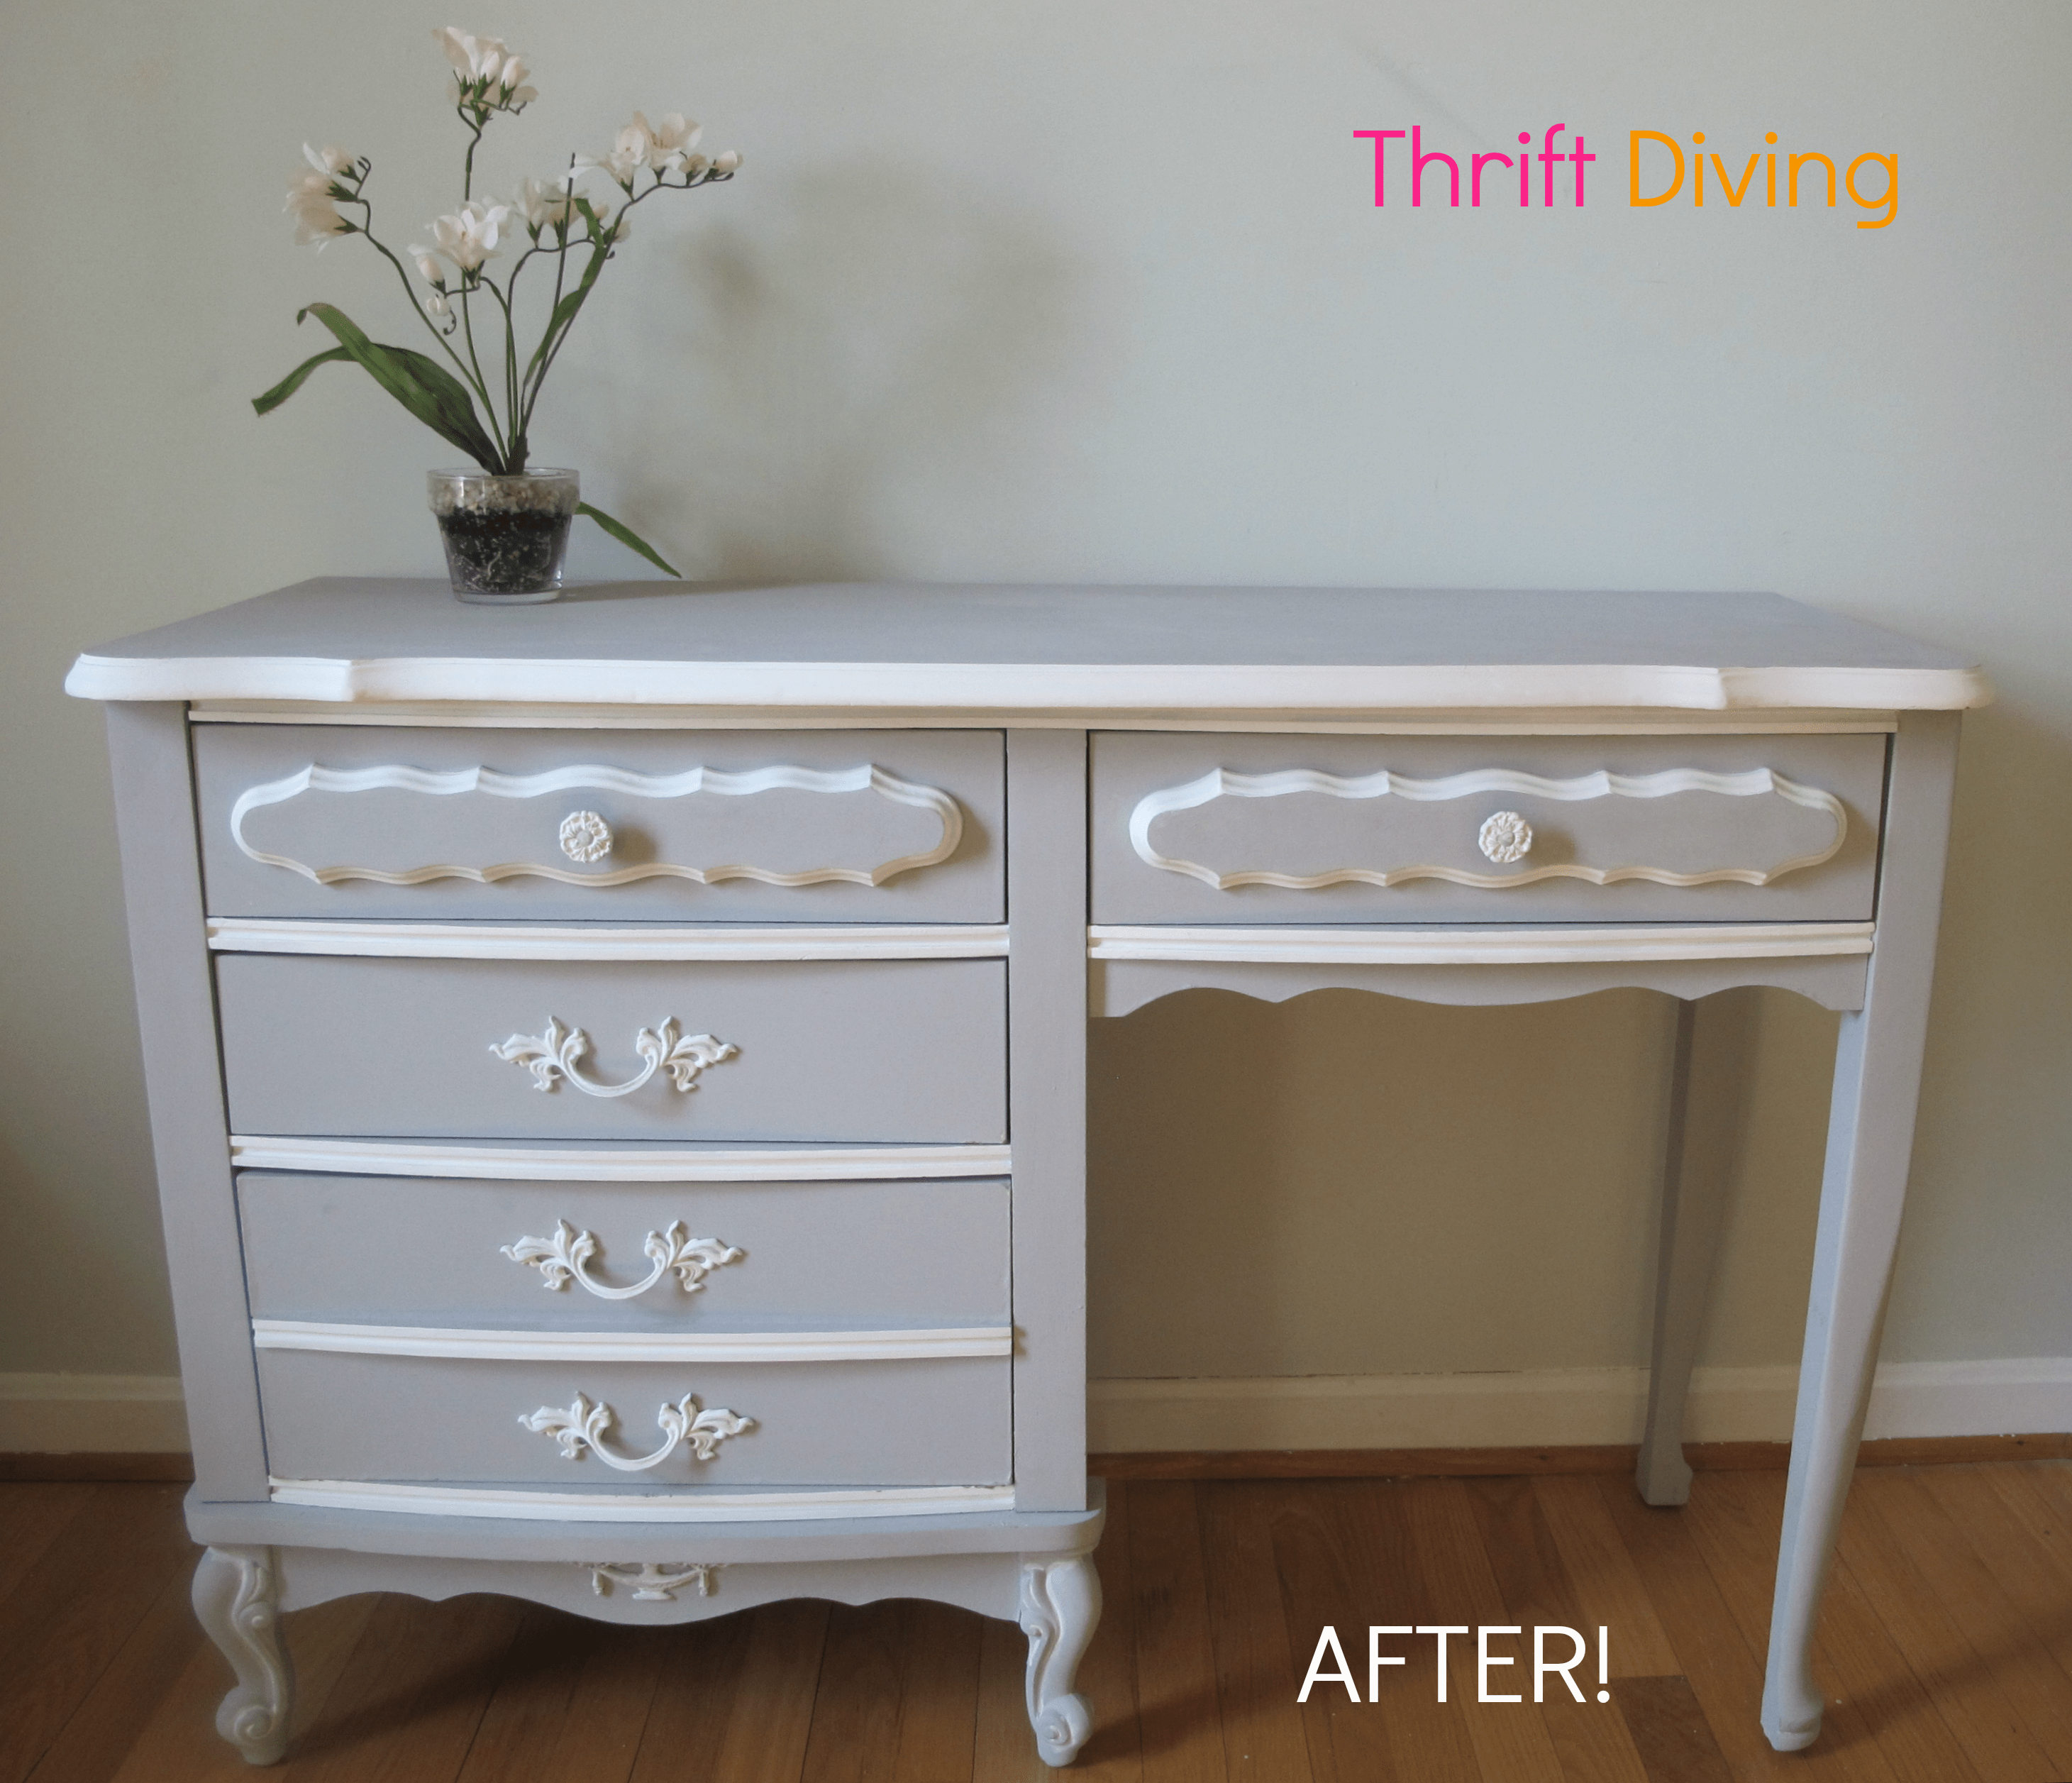
Definitely! I’ve started using rollers whenever possible to paint furniture (as you can see in this pic below where I painted my dresser). It’s much quicker and less tiring on the hand (gripping a paintbrush for a long period of time can cramp your hand if you’re squeezing too hard).
Here’s what I would recommend: Use a small mini roller with a 1/4″ nap. A large nap is going to suck up too much paint. But the mini roller with 1/4″ nap roller cover works really great on bathroom vanities, cabinets, and even large dressers, desks, etc.

STEP 4: Add a Second Coat of Furniture Paint to the Vanity
When using furniture paint, the first coat will look crappy. You’ll likely see the wood color coming through…It will look spotty…And you may start to freak out and think you did something wrong. 🙂 Don’t be surprised. This is how it looks with the first coat!
I thought those very same thoughts the first time I used chalk paint on my little DIY card catalog. The second coat is where the true coverage happens. You can think of the first coat similar to a “priming” coat. Just be sure that your first coat is normal (not too thin, not too thick) and smooth out any drips and runs before the paint dries.
Once it dries for about 2 hours, add another coat to your vanity or cabinet and you’ll see how much more coverage you get. The color will begin to take shape!
STEP 5: Add a Pretty Stencil!
You don’t have to stencil your bathroom vanity or cabinet but it sure does add that extra “oomph” to it, especially if you’re painting an old cabinet like mine and it has that 70’s trim thing going on.
But it really helps to add a bit of personality and to disguise what could be very outdated cabinet trim that you don’t feel like removing. Sometimes it’s easier to embrace than replace, right? 😉
And I have to admit that I actually like the way the painted hinges look since they’re exposed. Painting them helps them to blend in instead of screaming, “Look at me, I’m a hinge!”
For help with learning how to stencil, be sure to check out How to Use Stencils: A Complete Guide. Stencils really do add some flavor to your painted furniture and bathroom vanities!
TIP: My favorite stencil ever is this pretty floral damask stencil that I have used on numerous projects!
STEP 6: Add a Coat of Wax or Use a Clear Topcoat
You’ll want to protect that pretty paint! So you’ll want to consider adding either a coat of wax or you a clear topcoat.
I personally hate waxing furniture, I’ll admit. Certain brands of furniture wax, like Annie Sloan Clear Wax, I find to be difficult to get a consistent coat on because it’s so thick.
KILZ, which is a popular brand of primers that I have used, has released a Clear Wax to be used on chalk paints so that is an option, although I haven’t tested it out yet.
But one brand that a friend recommended that I have used on other projects is called Fiddes & Sons and I love that it’s a nice soft wax that goes on very lightly and easily.
TIP: If you wax your vanity, wax should be reapplied about every 6 months and should be done more often if your bathroom vanity or cabinets are in direct sunlight in your bathroom, which could break down the wax.

Because the wax is soft and “wet” it doesn’t take a lot of strong-arming it the way I feel other furniture waxes require.
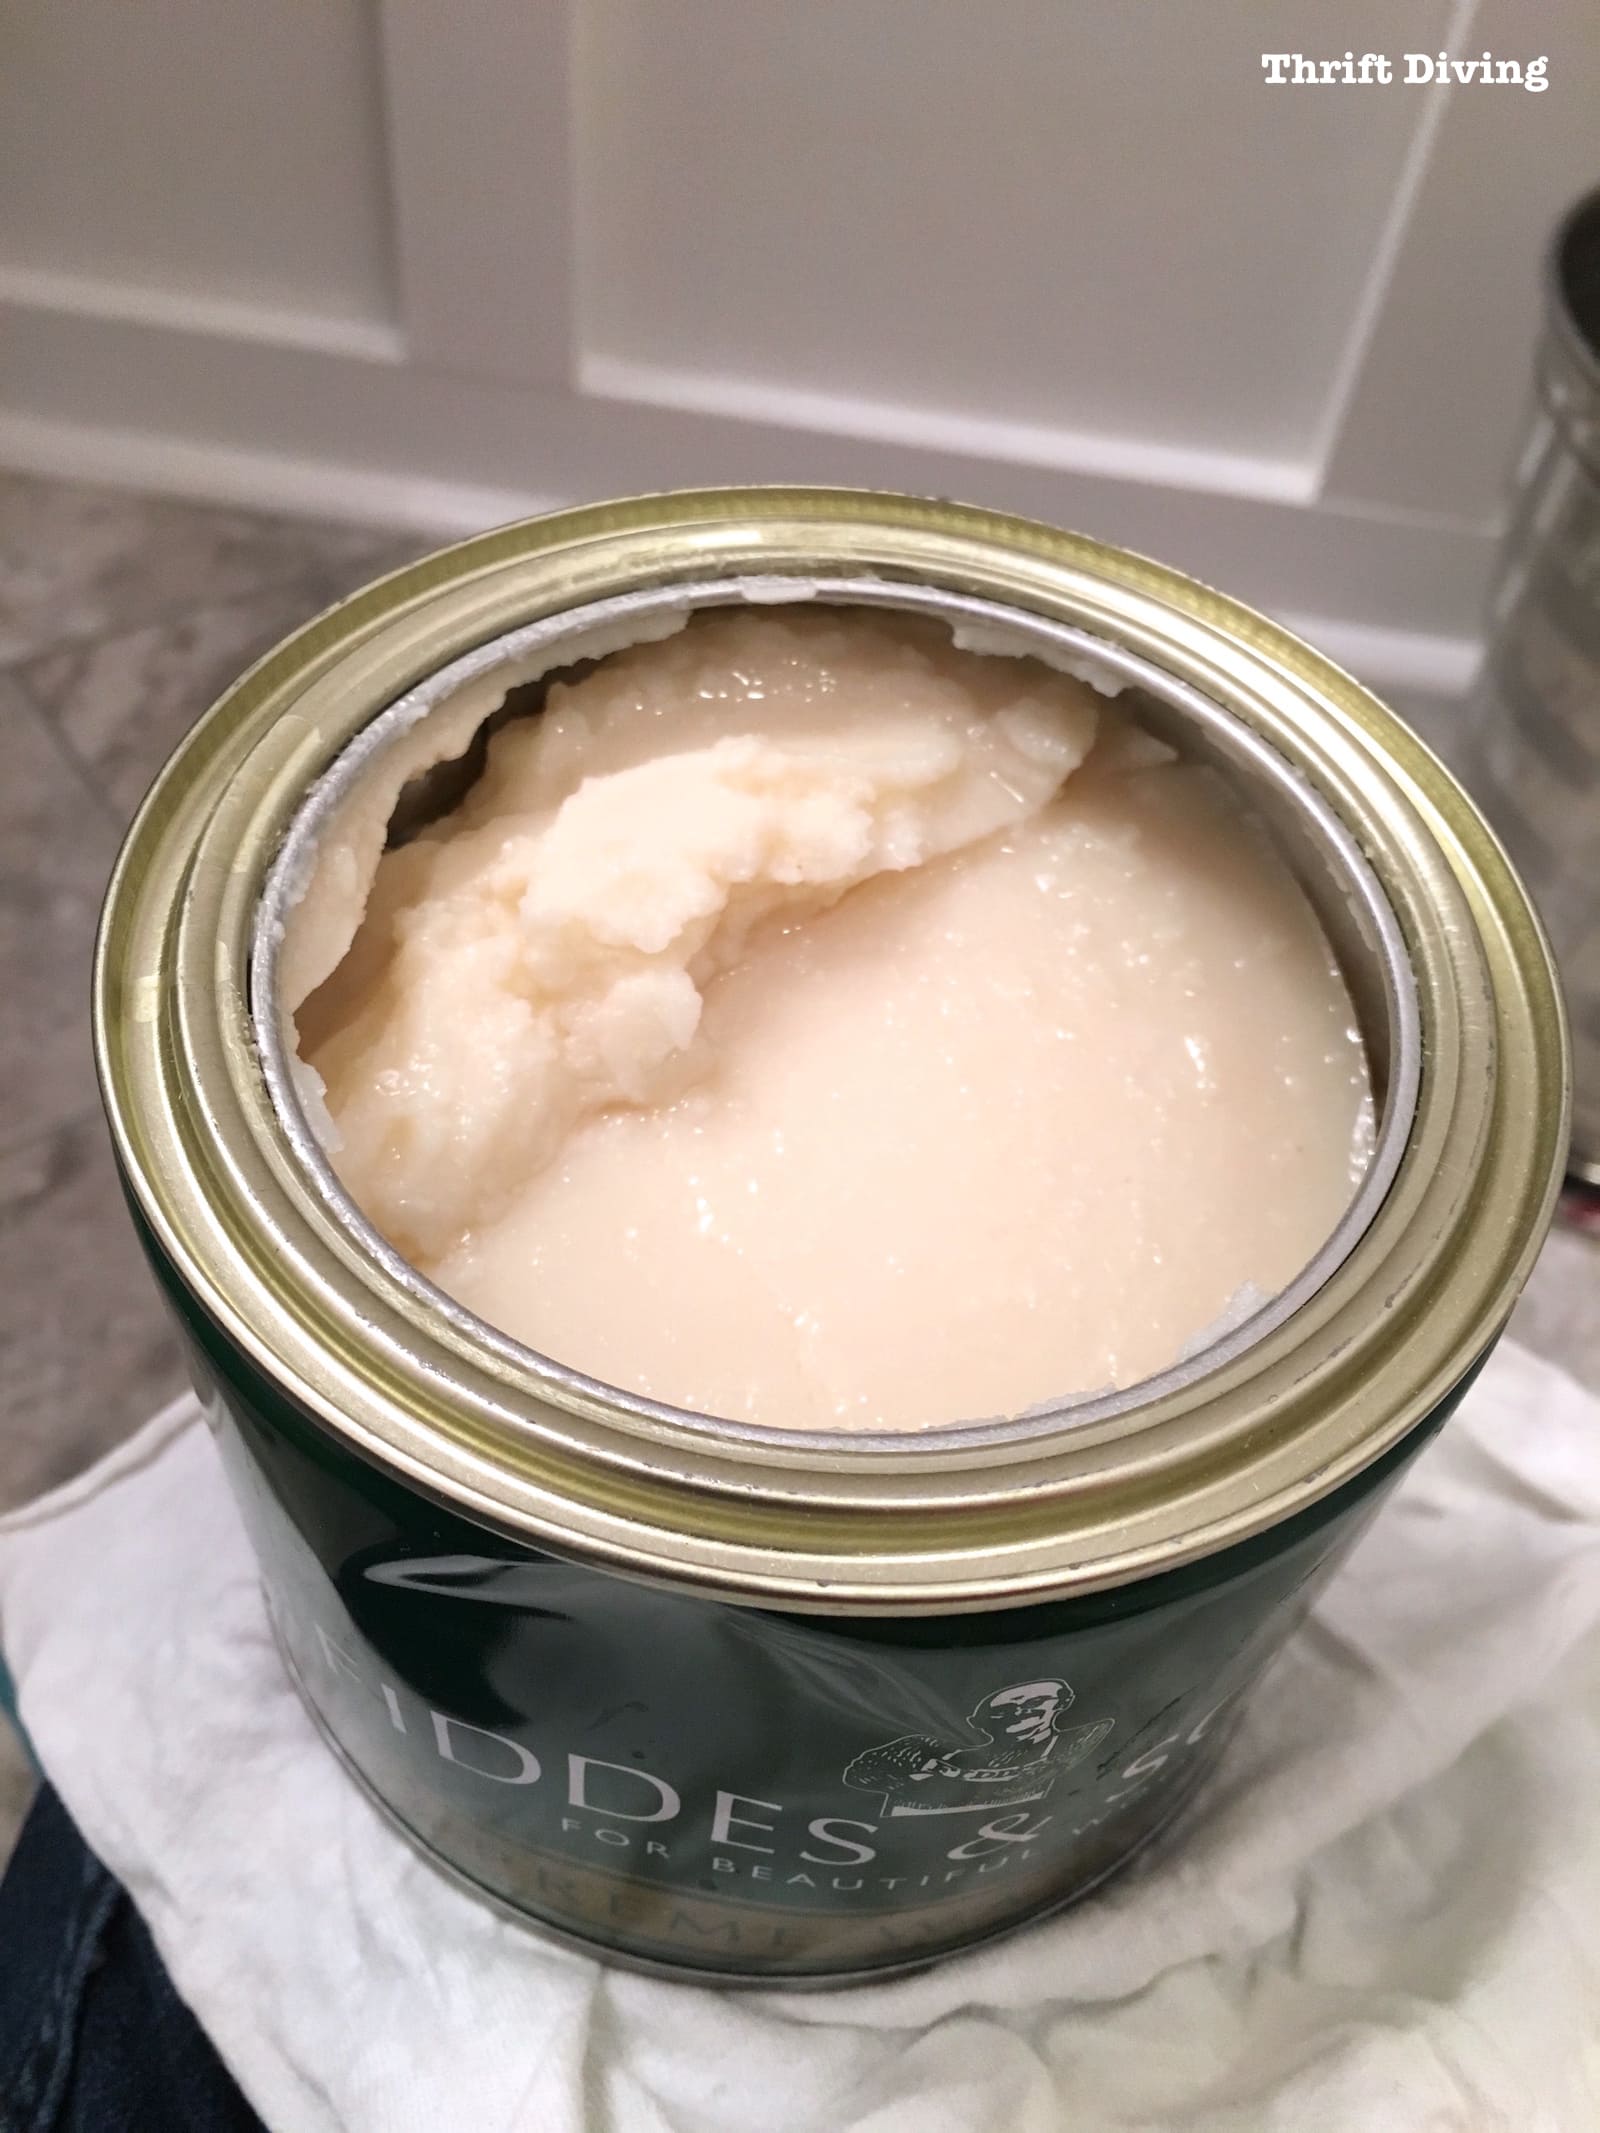
To use this furniture wax, I simply put a clump of it in a lint-free rag and just let the wax soak through the cloth, leaving a light layer behind. Let it “dry” on the furniture for a few minutes and then wipe off.
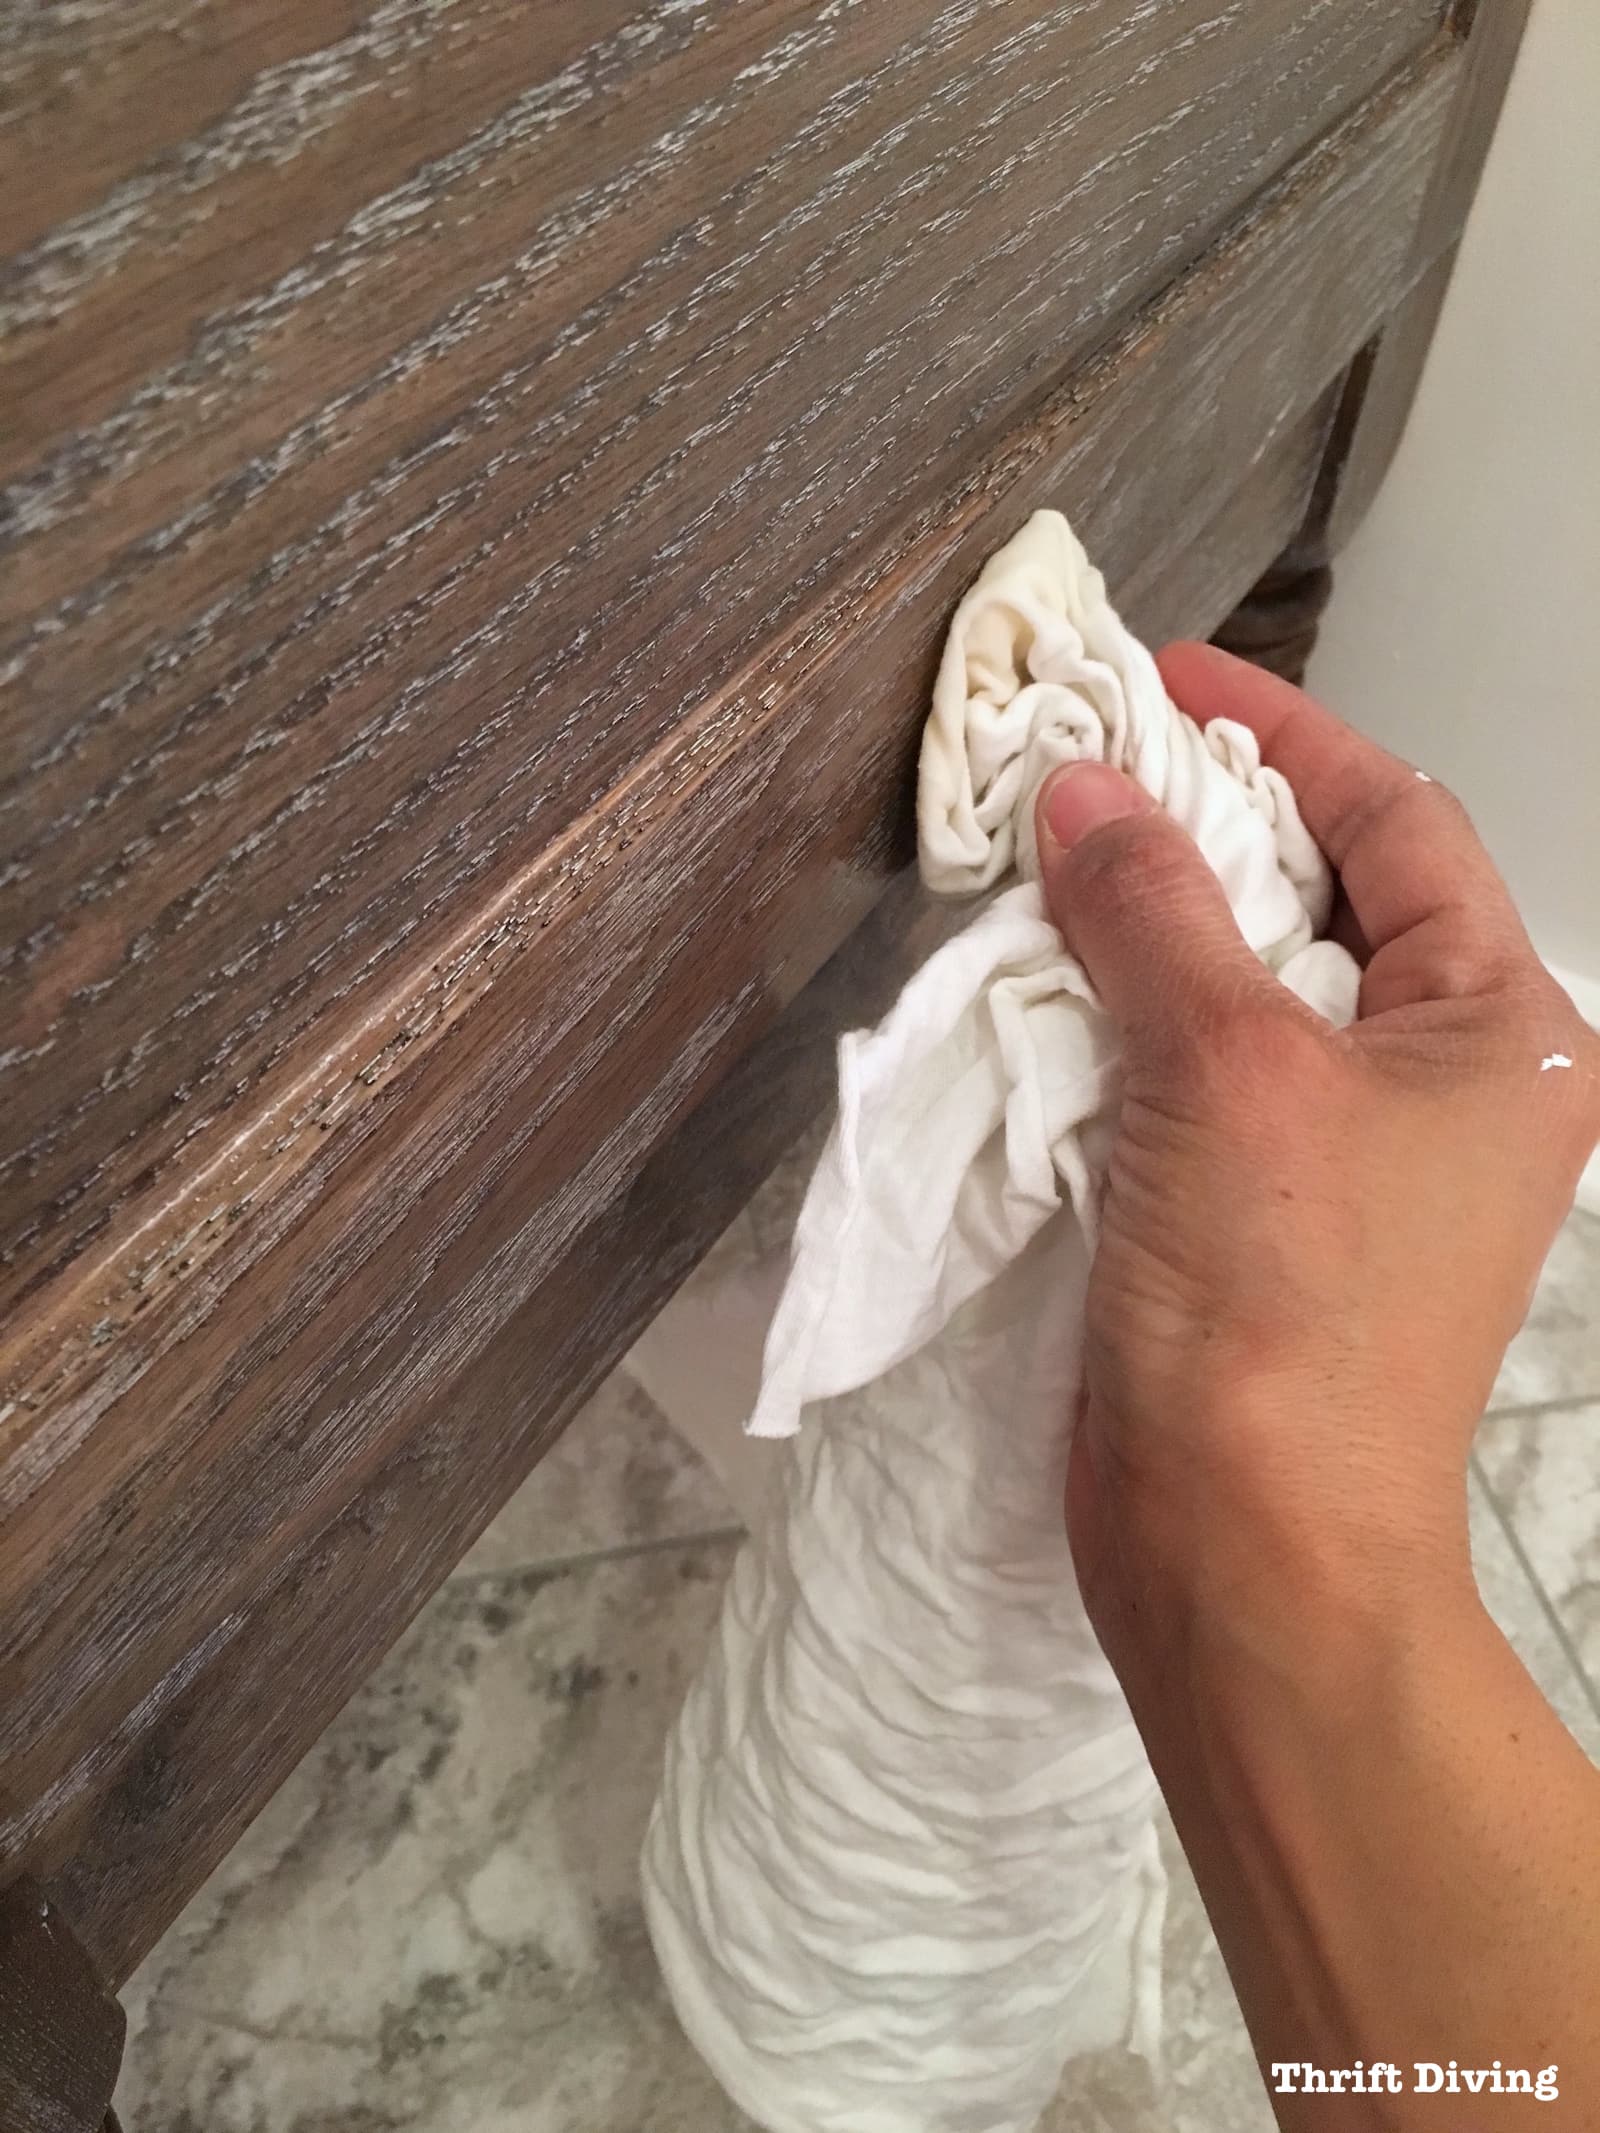
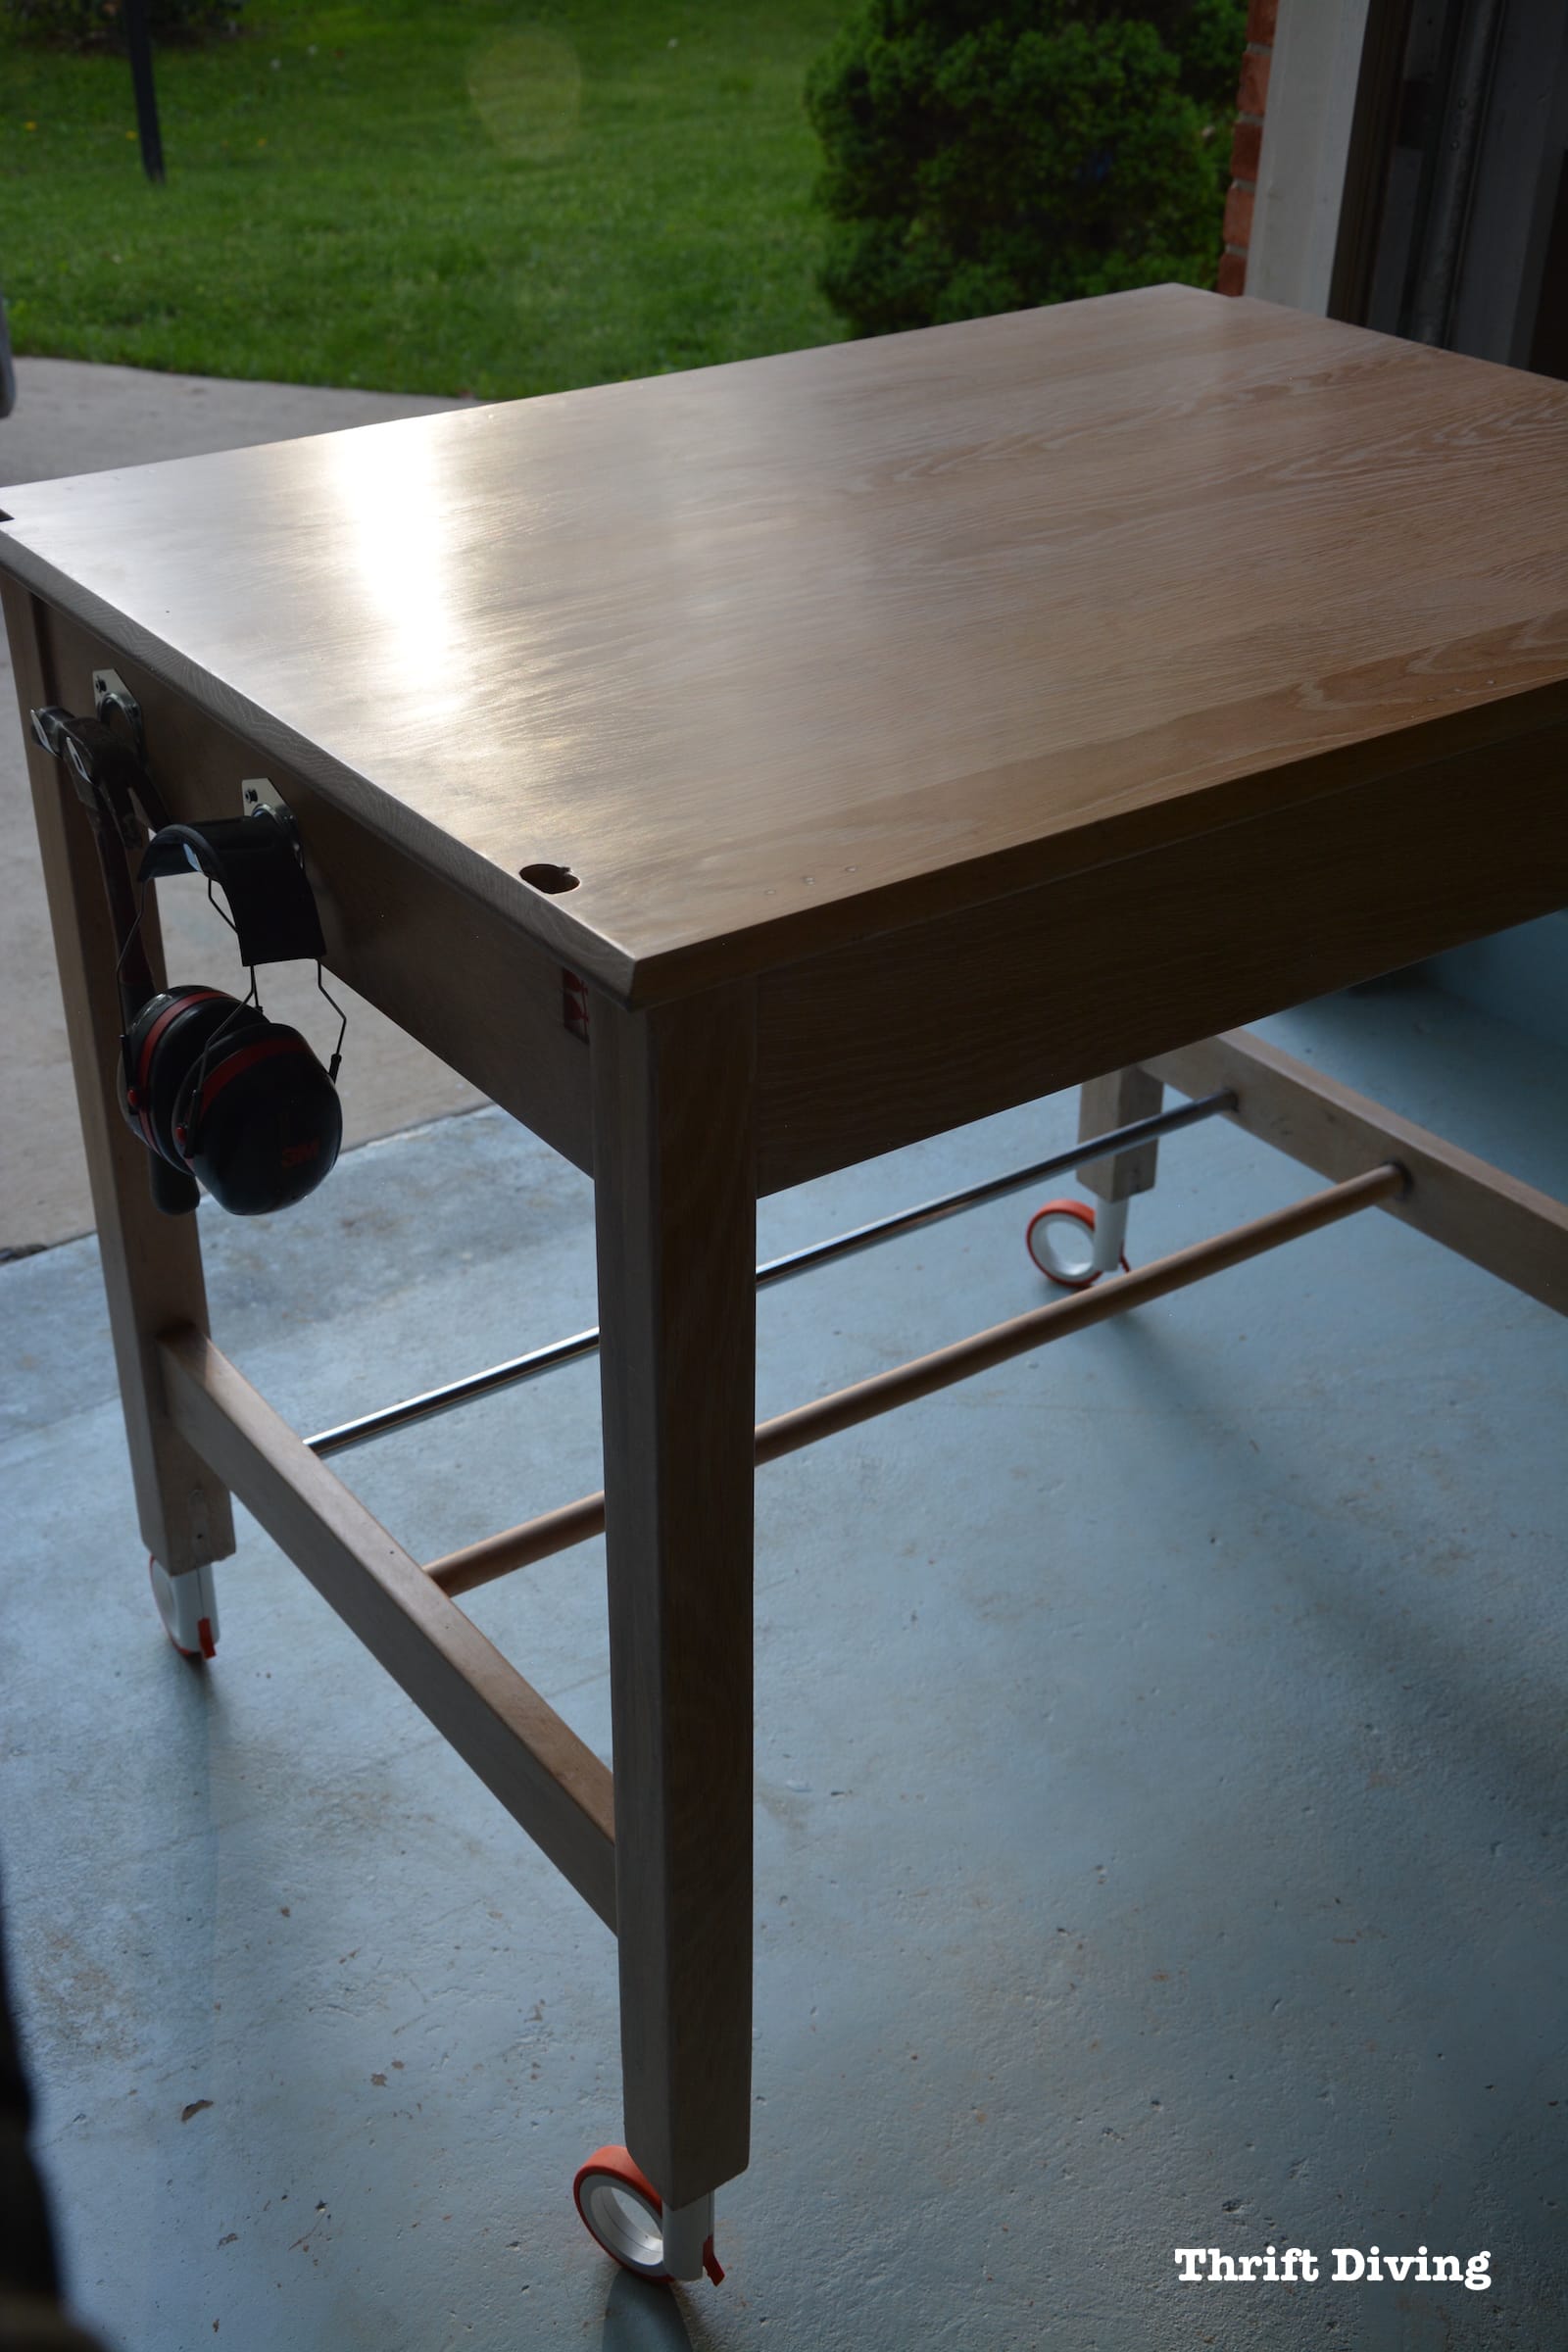
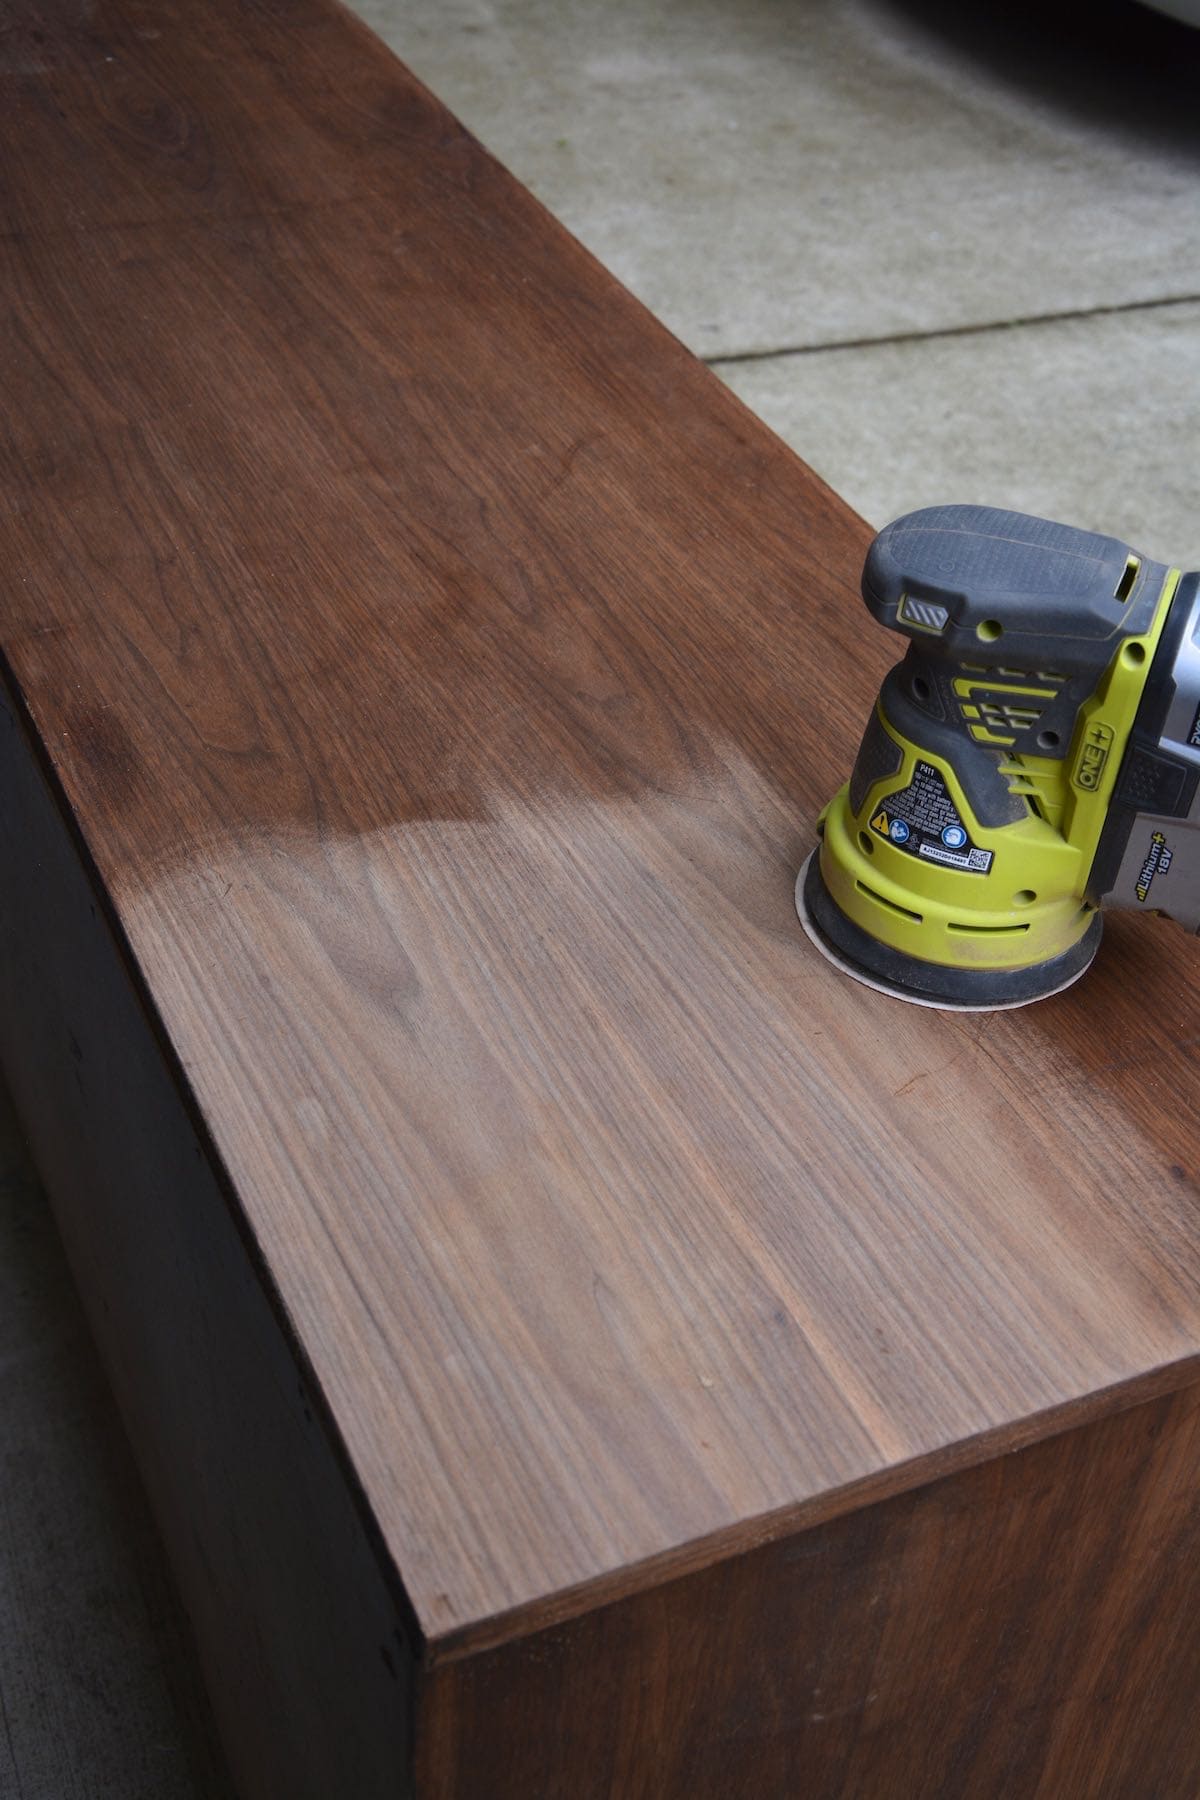
As an example to show you, this drafting table got a natural wood makeover and I used the Fiddes & Sons wax on the top and you can see the beautiful gleam the wax left on the top!
Anyhow, you’ll definitely want to use something on your painted vanity or cabinets to protect the wood, whether it’s wax or a clear topcoat. What I would recommend is trying topcoats that are known to work well with paints, such as Country Chic Tough Coat topcoat or General Finishes High-Performance Water-based Top Coat.
WARNING: If you paint your bathroom vanity a light color, such as white, and then try to use a polyurethane on top, it will likely turn YELLOW! Stick with the top coats that are known to work well on light-colored paint. And always do a small test area first before using on your finished project.

This bathroom has stumped me for the longest time, though. I soooo want to remove that peel-and-stick time and use the same Snap Stone flooring that I used in my pretty laundry room makeover and my awesome kids’ bathroom makeover.
But the problem is that if I’m going to do new flooring, I’m going to want to rip out the vanity… and to rip out the vanity means I will have to 1) buy a new vanity or B) build a new vanity. And that’s a project I’m not ready to tackle.
BEFORE
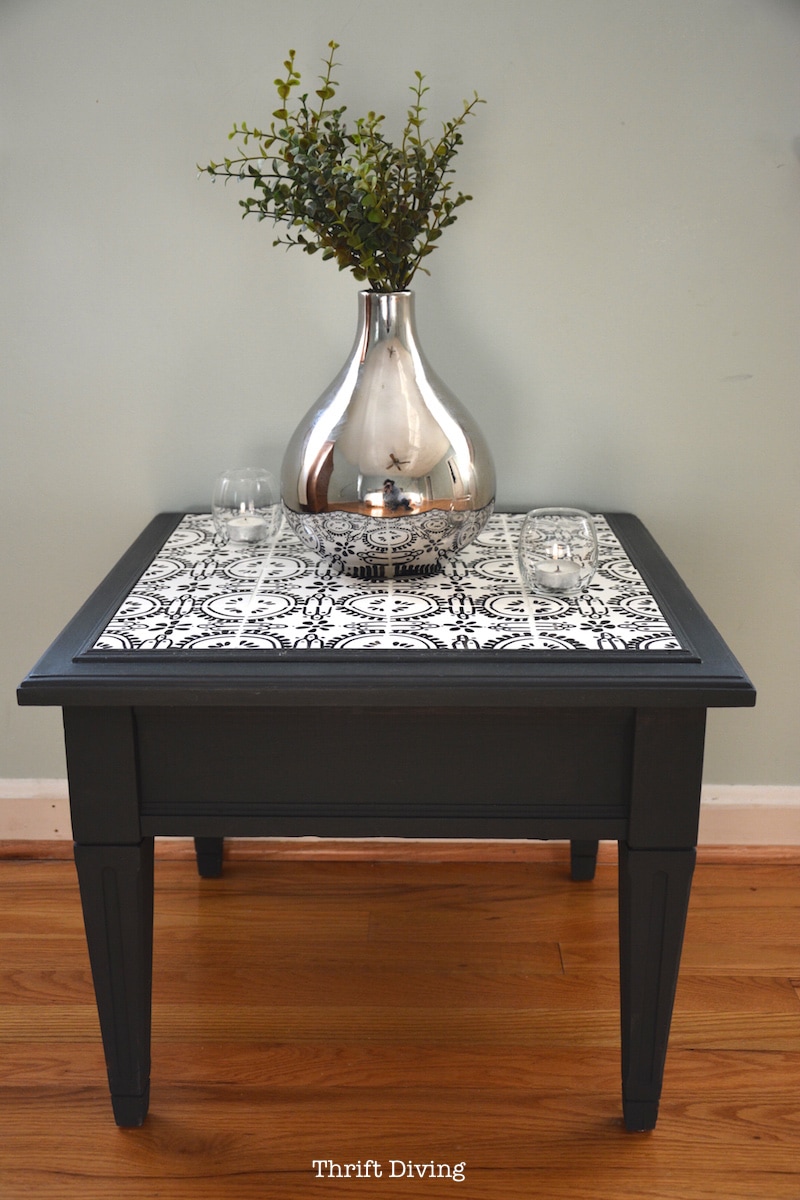
I love that little corner plant stand! I picked that up years ago at….(where else??)…. a thrift store! (Or was it a yard sale…..??). I believe it was only $15.
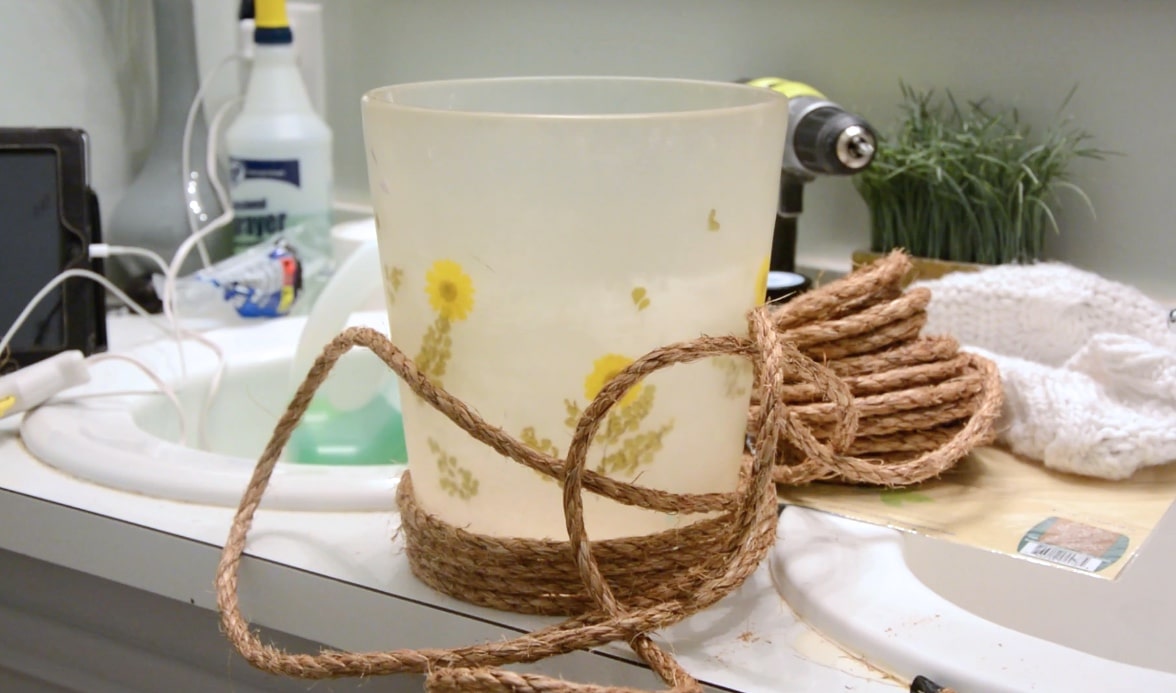
BEFORE

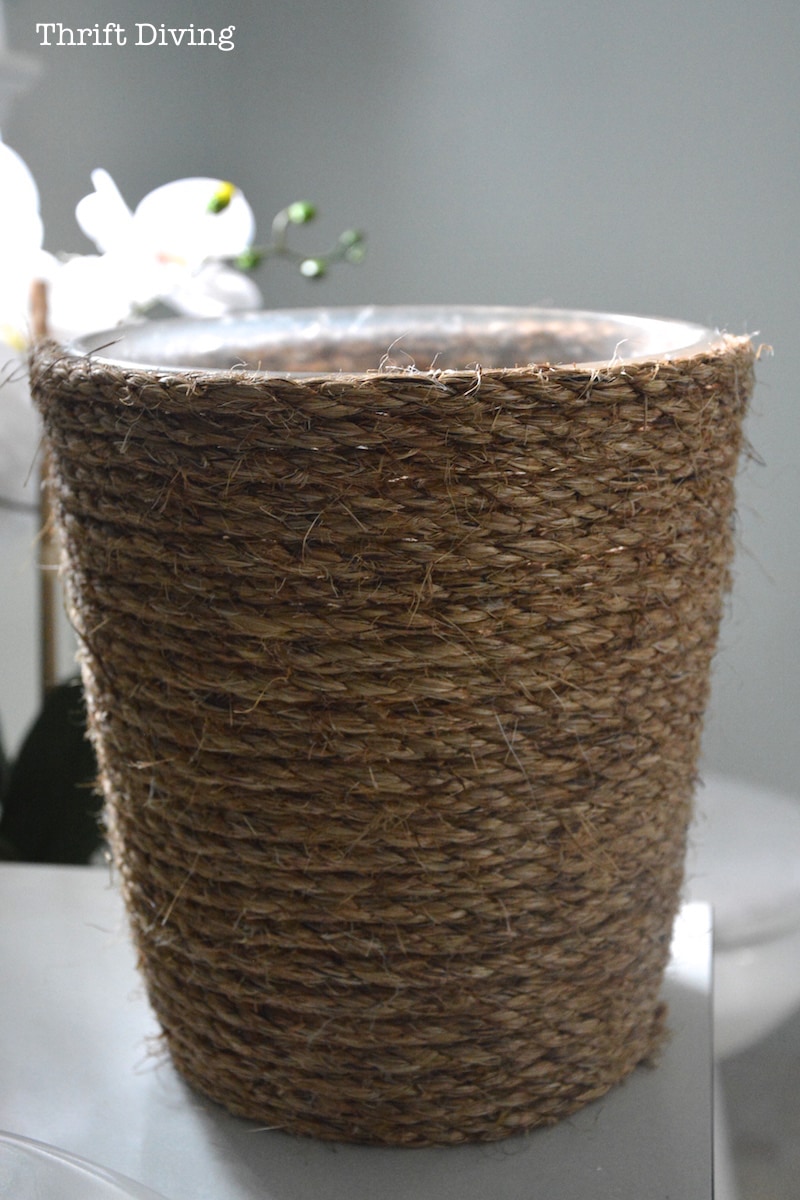
A little bit of 50-foot rope (buy it here on Amazon) and hot glue to it will stick and the ugly stains were gone! The rope is about $7-8.
AFTER
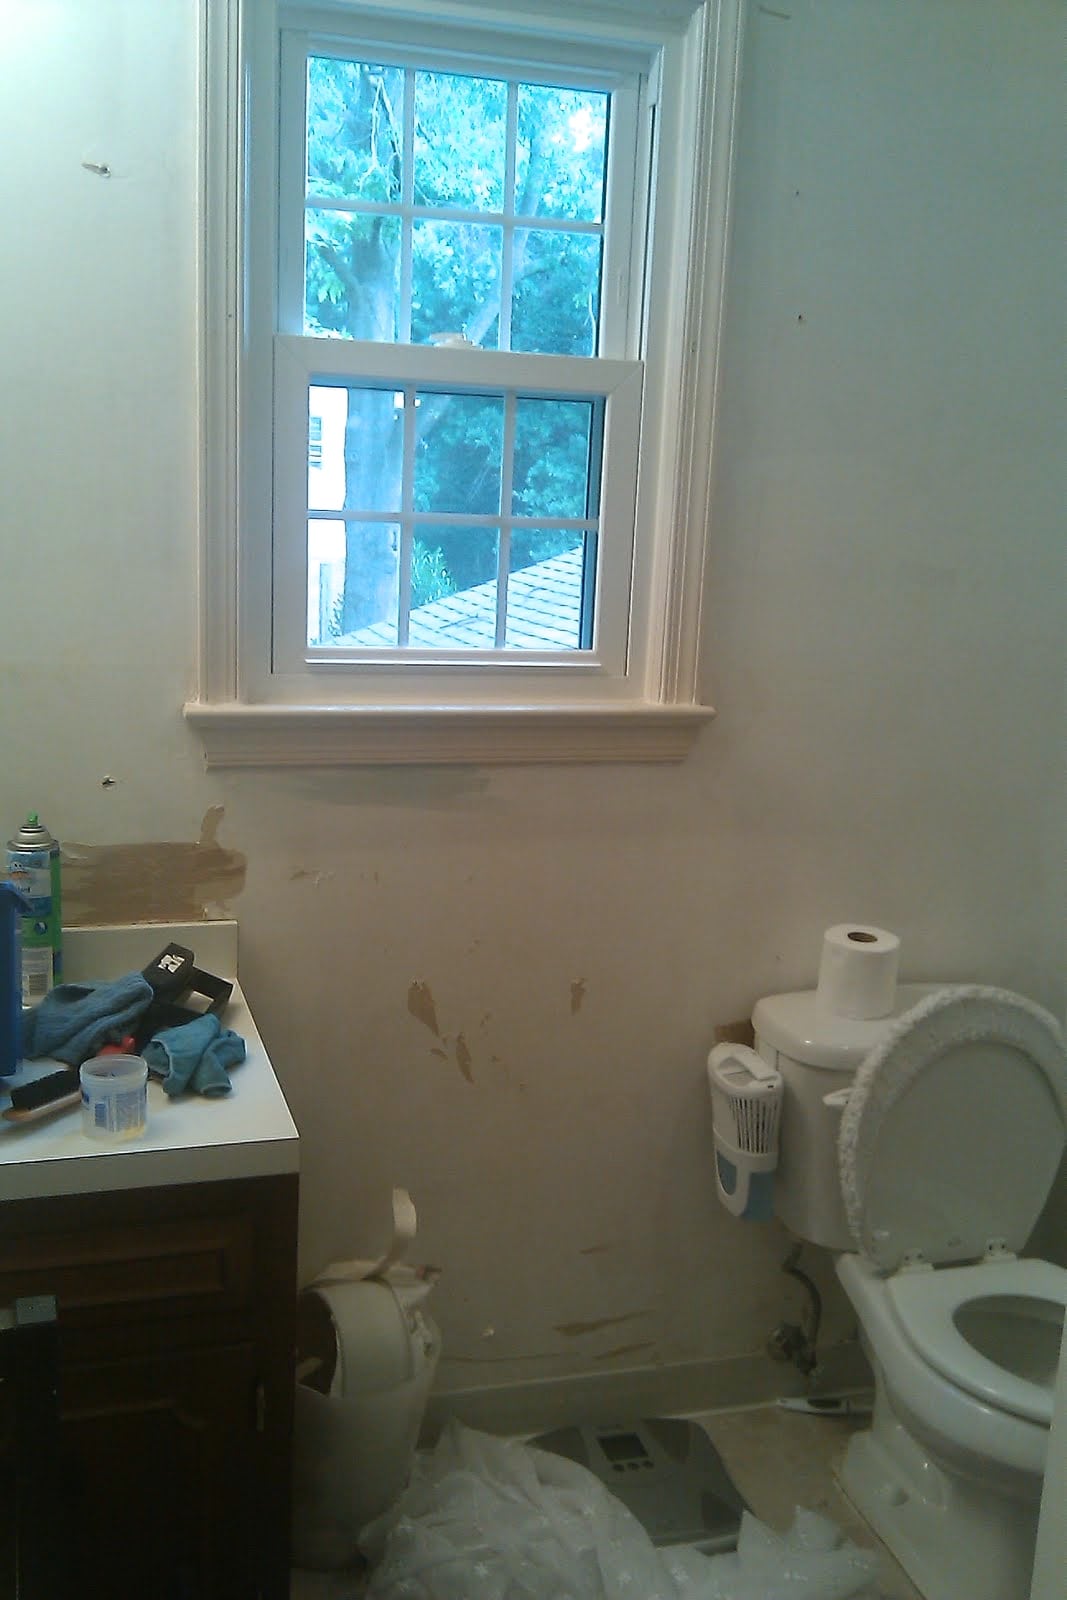
BEFORE
This is how the bathroom looked when I started working on it 4 years ago.
AFTER
And those fake flowers?
Costco, $29. LOVE them! It makes the bathroom feel very pretty!
BEFORE
DURING
AFTER!
BEFORE
Oh, have I ever said that wallpaper should be banned?
Well.
It should.
AFTER
The bathroom wall color is Sherwin Williams Sea Salt, which looks amazing next to Annie Sloan Paris Grey!
UPDATED 2017!
So after I painted my bathroom vanity, I loved it…but as you can see, the bathroom was still in need of a much bigger makeover!
So in early 2017, I turned my master bathroom into this:
AFTER!
You can find the complete master bathroom makeover here, or check out specific projects I did in this bathroom:
- How to Build a DIY Bathroom Vanity From Scratch
- How to Remove and Replace a Toilet
- New Flooring from Carpet One!
- How to Make a DIY Window Privacy Screen – most popular
- How to Paint Your Old 1970’s Shower! – most popular

Download the 5 freebies!

Thrift Diving inspires women to decorate, improve, and maintain their home themselves...using paint, power tools, and thrift stores! Use these 5 printables, checklists, and ebooks to get started!
Can you please tell me what the color is called you used for your vanity? Thanks in advance!
That bathroom vanity of yours is looking so beautiful!
Loved it.
Can’t say that I have seen the same vanity, but kind of identical here http://estatecabinetry.com/html/ec_cabinets.html. I love all of your ideas and I will definitely try and wrap my trash can with a rope, hope it turns out good.
nice job!! did you know you can paint your countertop? I had the ugliest hunter green laminate counter tops in my kitchen. I used Rustoleum countertop paint in 3 colors and transformed them!! I rolled on wheat color and then sponged on chocolate brown and cream and then sponged the original wheat color to mute it down a bit … they came out AMAZING!! My father in law who is a finish carpenter thought I had them relaminated … he was shocked!! Sadly I do not have any pictures because I divorced my husband and left him the wonderful updates to the house LOL
Hey, Cheri! Oh wow, I would have loved to have seen pictures of that! I have heard of the Rustoleum countertop paint but have never tried it! You’re inspiring me to give it a go! So much less work than ripping out the whole thing and replacing, right?? 🙂 Thanks for that tip!
Love what you did with your bathroom vanity! I have a very similar oak vanity that I was thinking about painting. I recently discovered chalk paint and am thrilled that you don’t have to sand or prime before using it. Question – Did you paint a white coat first and then a second coat with the gray color? Thank you for inspiring me!
Fantastic job!!!! Love it! When you mentioned the floor I thought, paint it. I’ve seen videos on painting different kinds of floors. Vinyl, ceramic, wood etc. That would look great in your bathroom.
The video was awesome right down to you using your feet to hold the stencil in place! THAT is exactly how real people do it. Turned out fantastic. Thanks and PS.. nice nail color. cheers
Serena,
I love how honest your diy projects are.
Thanks for showing the mistakes and even the trash. You are so REAL in a good way.
You did a great job Serena especially with not having previous experience! Painting my vanity has been on my To Do List for awhile now. I really like the stencil you used on the vanity doors. One suggestion … A small baseboard around the edge of the room would give it a more finished look.
Love the colors you used, and the little side table you got at a garage sale. The whole thing looks so serene. At first I didn’t understand why you didn’t like the first stencil on the cabinet doors. But as soon as I saw the final one, I got it. Guess one of my problems with DIY is that I hate putting in effort and then finding I don’t like what I’ve done. But, as my wonderful cousin told me, you never learn anything if you aren’t willing to make mistakes and learn from them. Love, love, love your blog.