Strip Furniture: A Natural Wood Furniture Makeover
Watch This Project in Action
Do you know how to strip furniture? I’ll admit that since I’ve learned more about wood, I’m falling in love with the look of natural wood furniture after stripping off the existing finish. I know that painted furniture is still a hot commodity, but there’s nothing like raw, gorgeous wood, guys.
I’ll explain in a moment….But first, as I was working on turning this drafting table into a DIY garage workbench makeover, I thought about all the titles I could call this post.
Like:
When You Get the “Smart” Idea to Strip Furniture and It Takes Three Days
Maybe even:
The Beauty of Blonde Oak
Or perhaps:
No One Else Said Strippin’ Was Easy…
Ahhhh….the numerous ways I could have described this DIY project makeover! HA!
All of them are fitting.
But I kept it basic. Don’t worry, though. I’ll explain everything.
Let’s start back at the beginning of this project, about six months ago, maybe less:
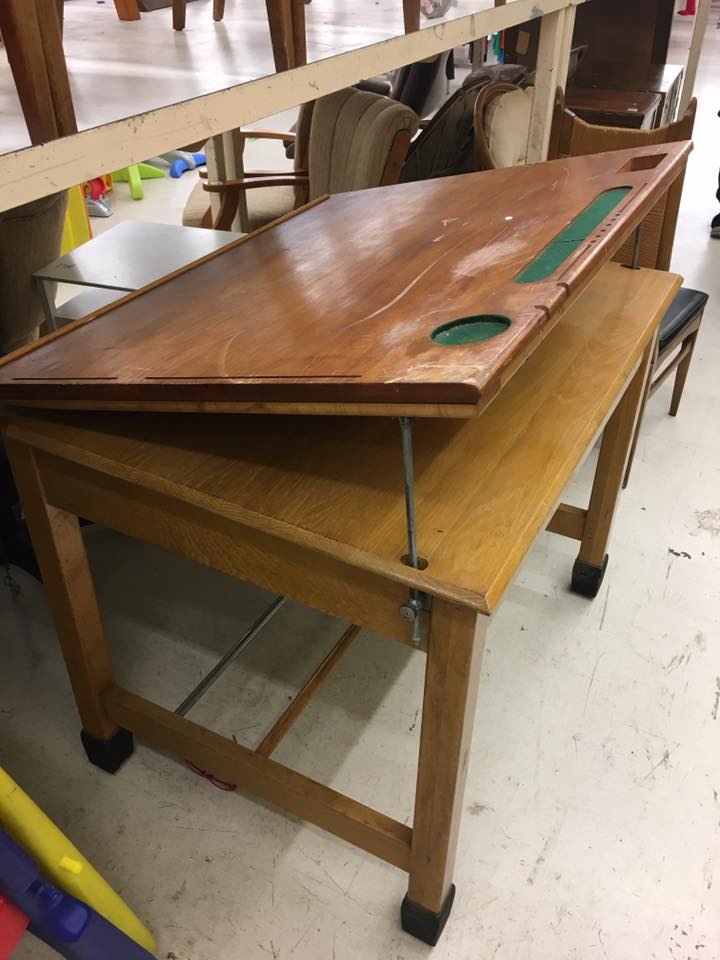
I stopped by my favorite thrift store on a discount day and happened to see this amazingly heavy drafting table marked $59.99.
Some time ago I had sworn off buying furniture because there was no room in my garage for it. Those days of sucking in the gut to get to the lawn mower had to end.
But when you find something this good and for so cheap (after the discount, it would be only $40), you’ve got to get it.
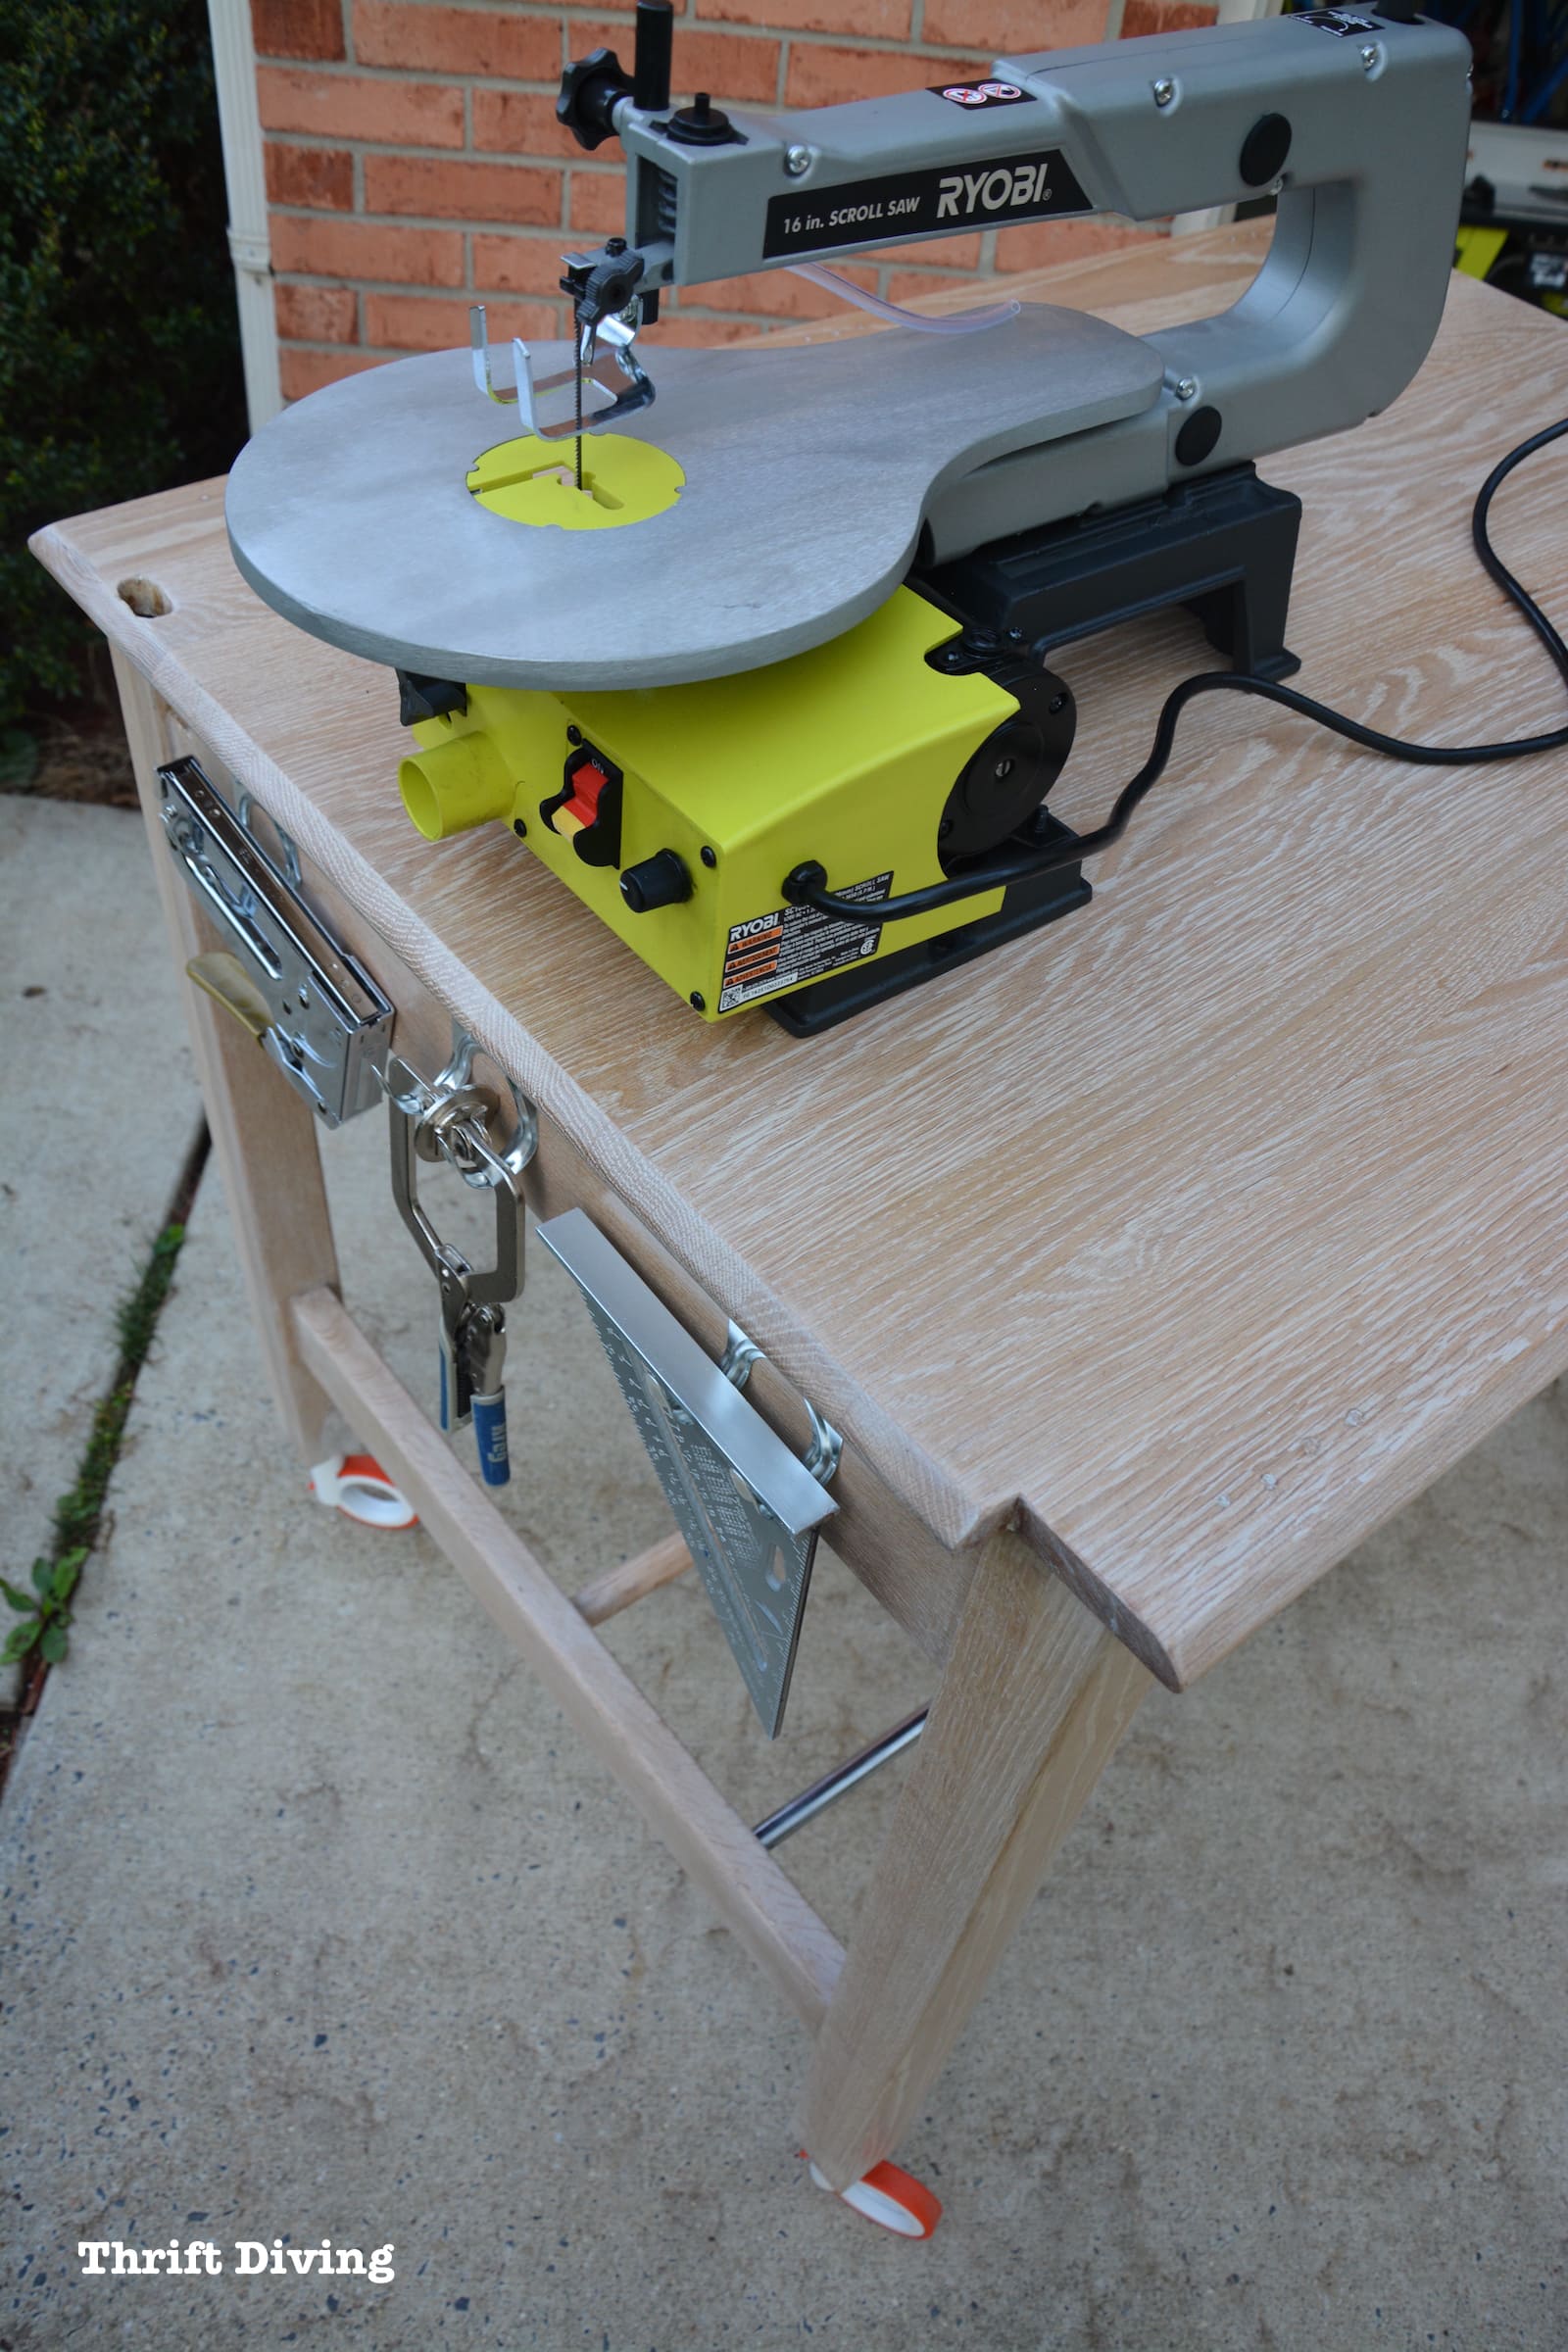
Plus, for the past several months I’ve been working on converting my garage into a functional, pretty, organized workspace. I needed a steady surface for my scroll saw and thought this would be perfect.
Yep.
This baby was coming home with me!
Strip Furniture for a Natural Wood Look: BEFORE & AFTER
Before I go on with the story of the drafting table makeover turned into a natural blonde oak DIY garage workbench, here are the materials I used for this project (contains affiliate links):
- Stripper – I used Blue Bear Paint & Urethane Stripper which is a soy gel stripper and more environmentally friendly.
- Lots of rags!
- Putty knife
- Cardboard box to discard the gunk off of the putty knife
- After Wash – removes the stripping residue
- Chemical-resistant gloves
- Metal bucket
- Small chip brushes
- RYOBI Orbit sander
- Dust mask
- Sandpapers (150, 220)
- Tack cloth for removing dust
- Briwax Liming Wax
- Fiddes & Sons wax polish
- Steel Wool (optional)
BEFORE

Now, back to the story.
Initially, I had planned to paint this table with DIY chalk paint to match the other DIY garage workbench I made out of my laundry room cabinet.
But ever since I have been learning more and more about wood, my appreciation for it has grown 10-fold.
Slapping paint on it just because it’s ugly isn’t the rule, but rather, the exception.
Now, I stop and really look at a piece of furniture and see what its wood is telling me.
Does it scream, “PAINT ME, BABY!” or is it chanting, “STRIP! STRIP! STRIP!”
Unfortunately for me, this one was chanting. But I didn’t realize it until far into the project. HA!
As I looked over this table, I started noticing the amazing grain and realized this table was solid oak!
Months ago I spent a lot of time building my DIY bathroom vanity from Red Oak, so I know how valuable “good wood” is.
This one must be stripped.
SIGH….
What a messy job waited ahead of me!
But the outcome was worth it!
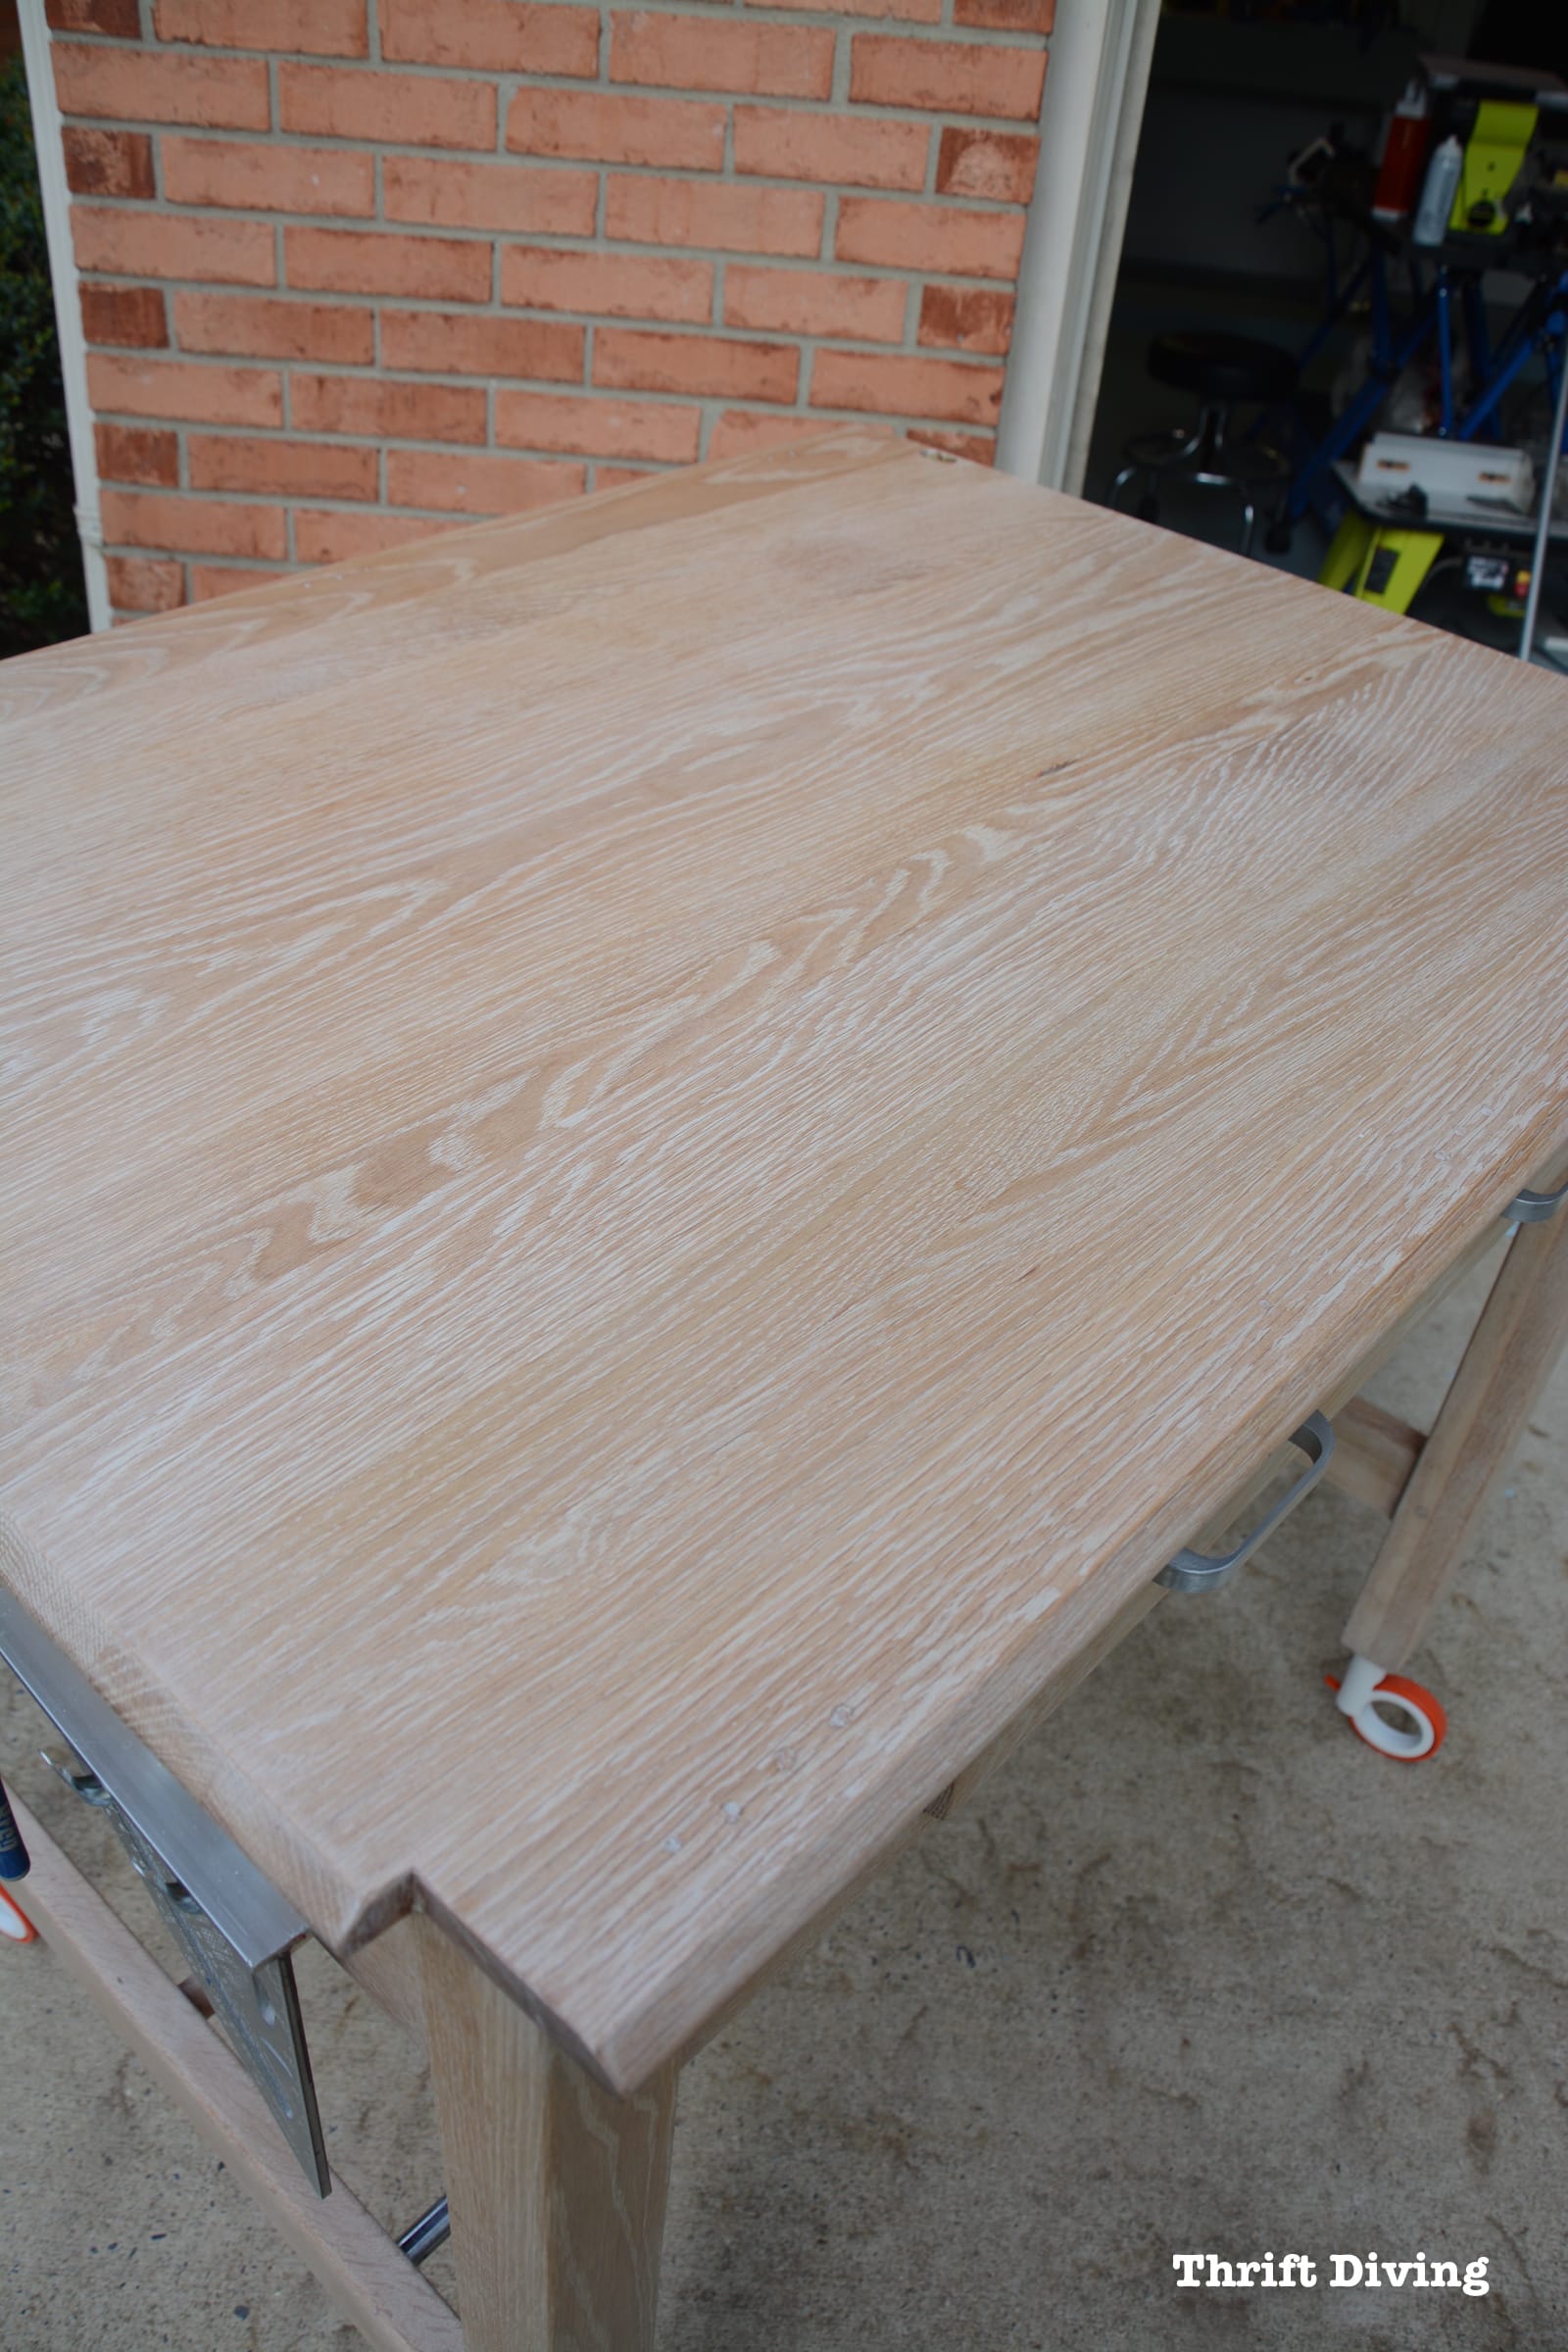
Look at that blonde oak!
AFTER!


Such beautiful grain!
With a POP of orange on the feet!
Now I’ll have a workbench on which to store my new scroll saw (that I’m itching to use!!).
So here’s how I did it!
STEP 1: Prep the Furniture
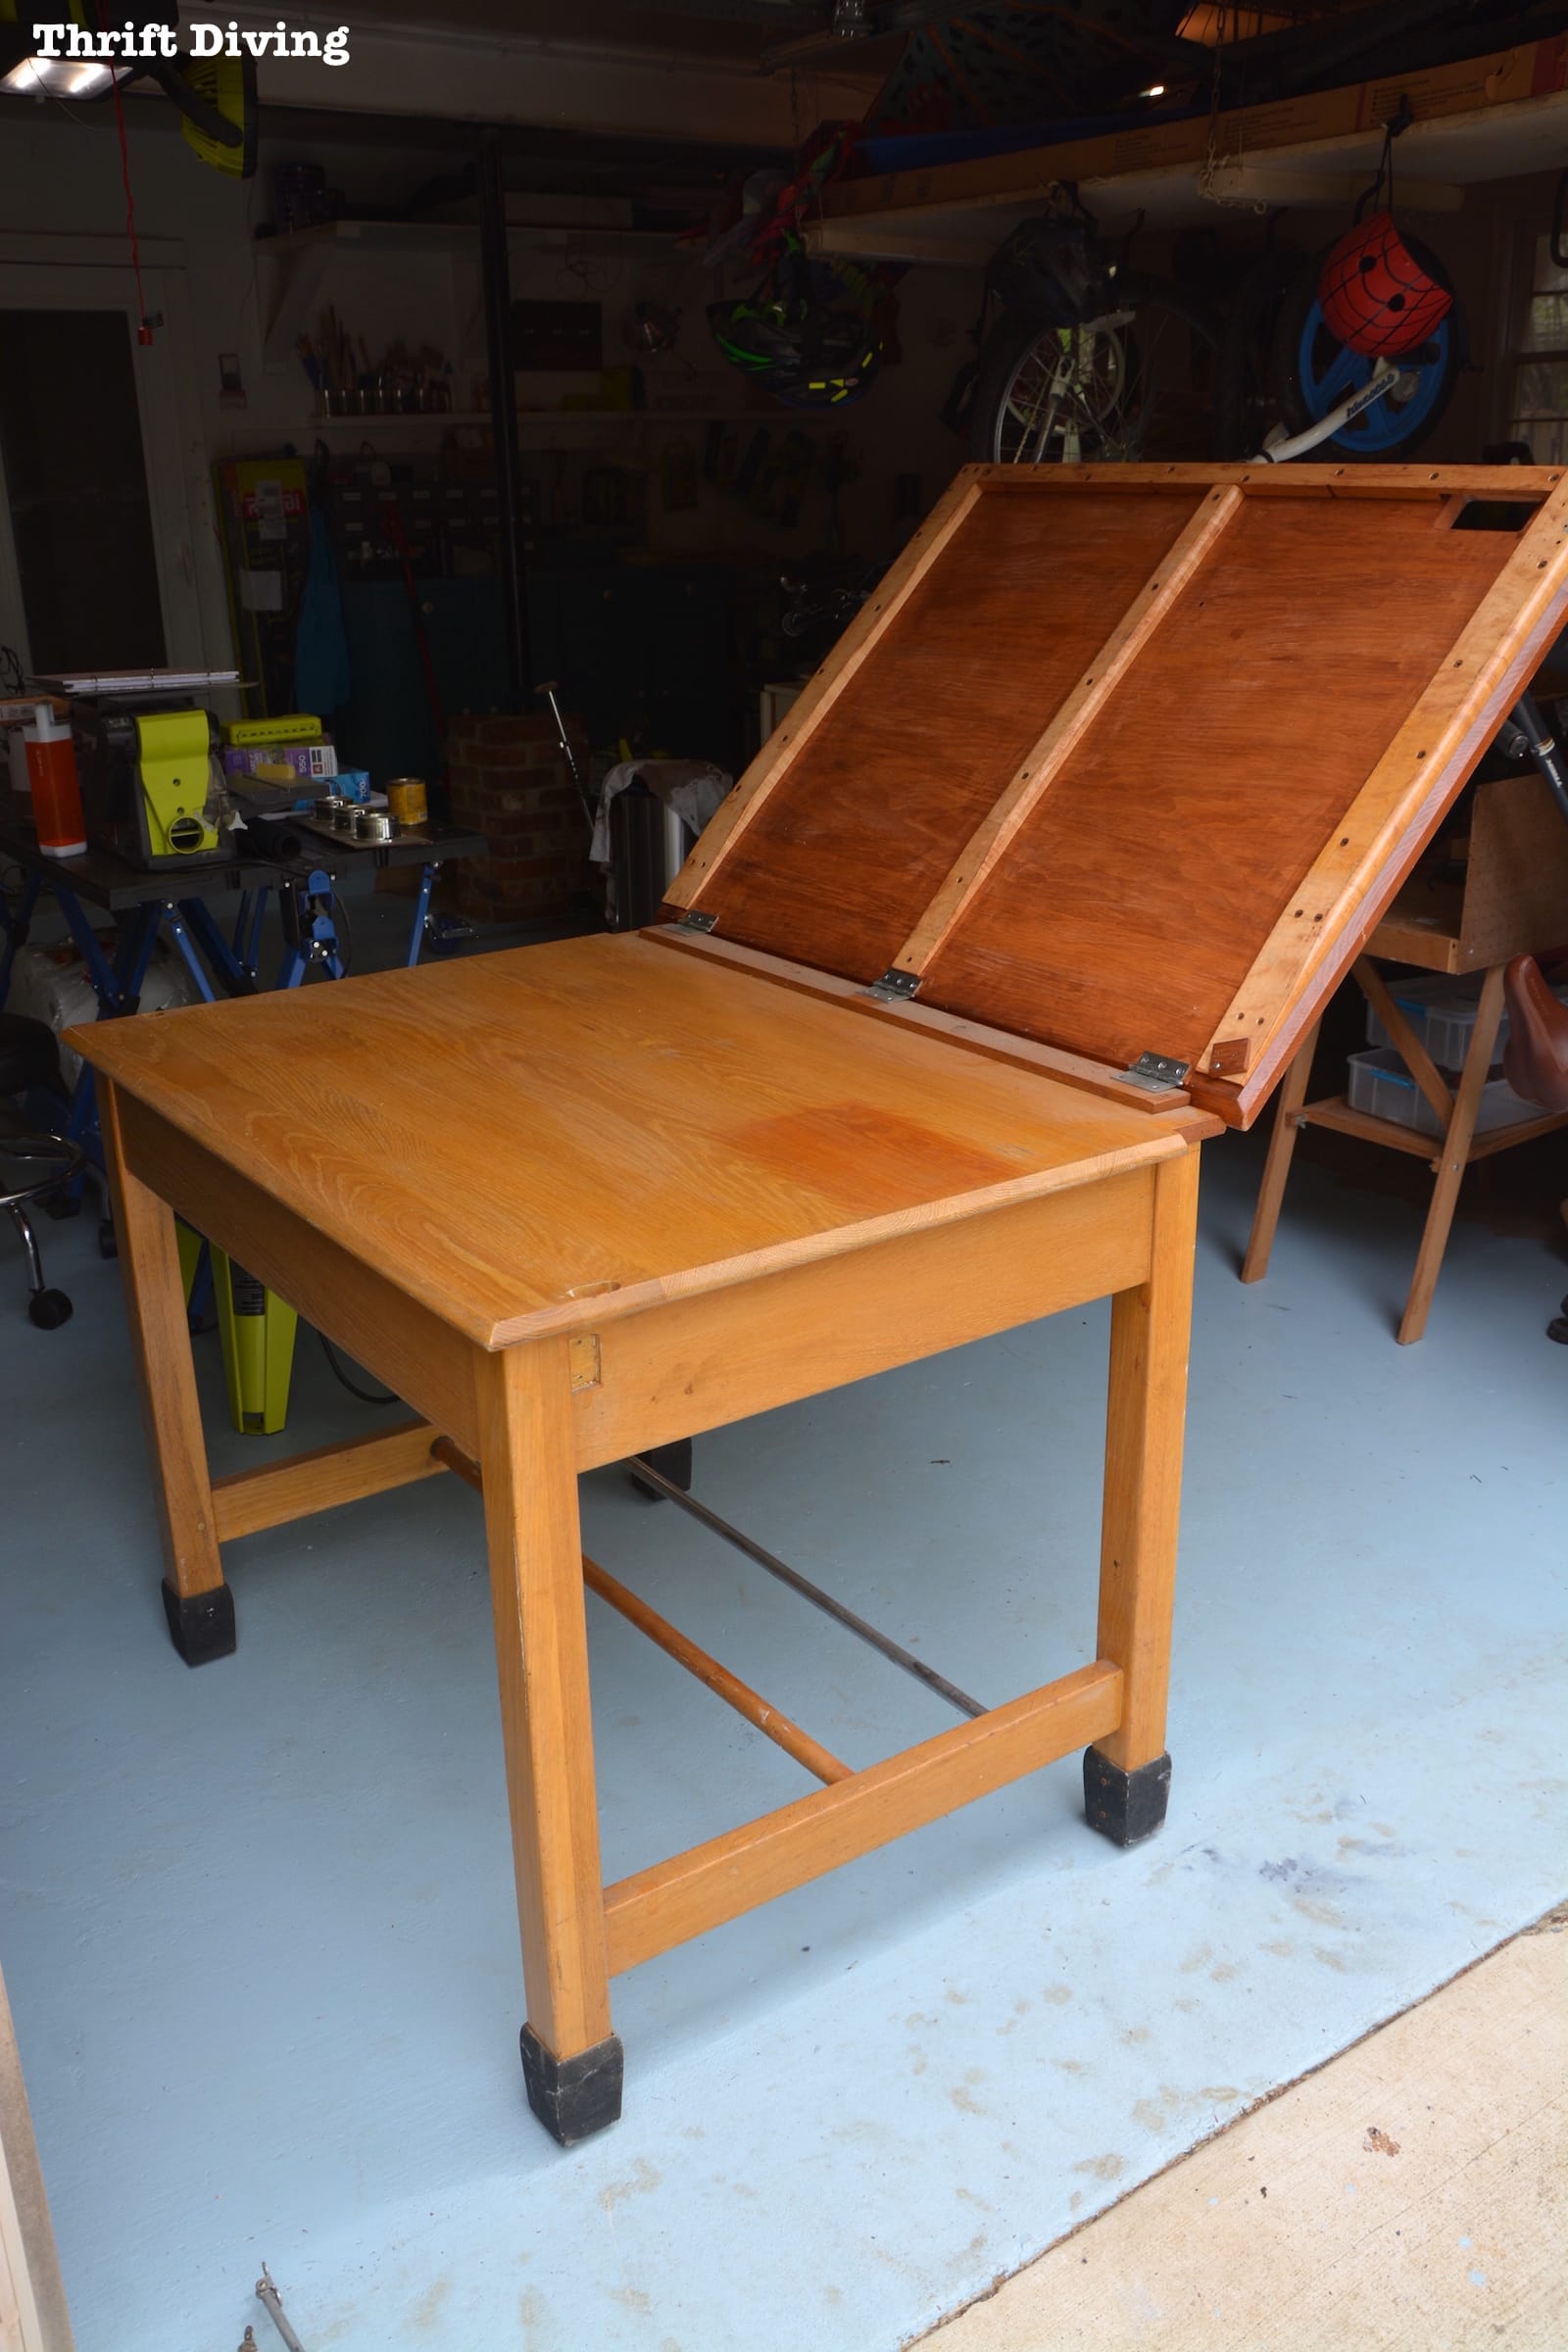
The hardware that held up the top was pretty cool, but for this garage workbench, it wasn’t needed.
Buh-bye…..

When I opened up the top, I can see that there were several discolorations. I hoped I could remove them!
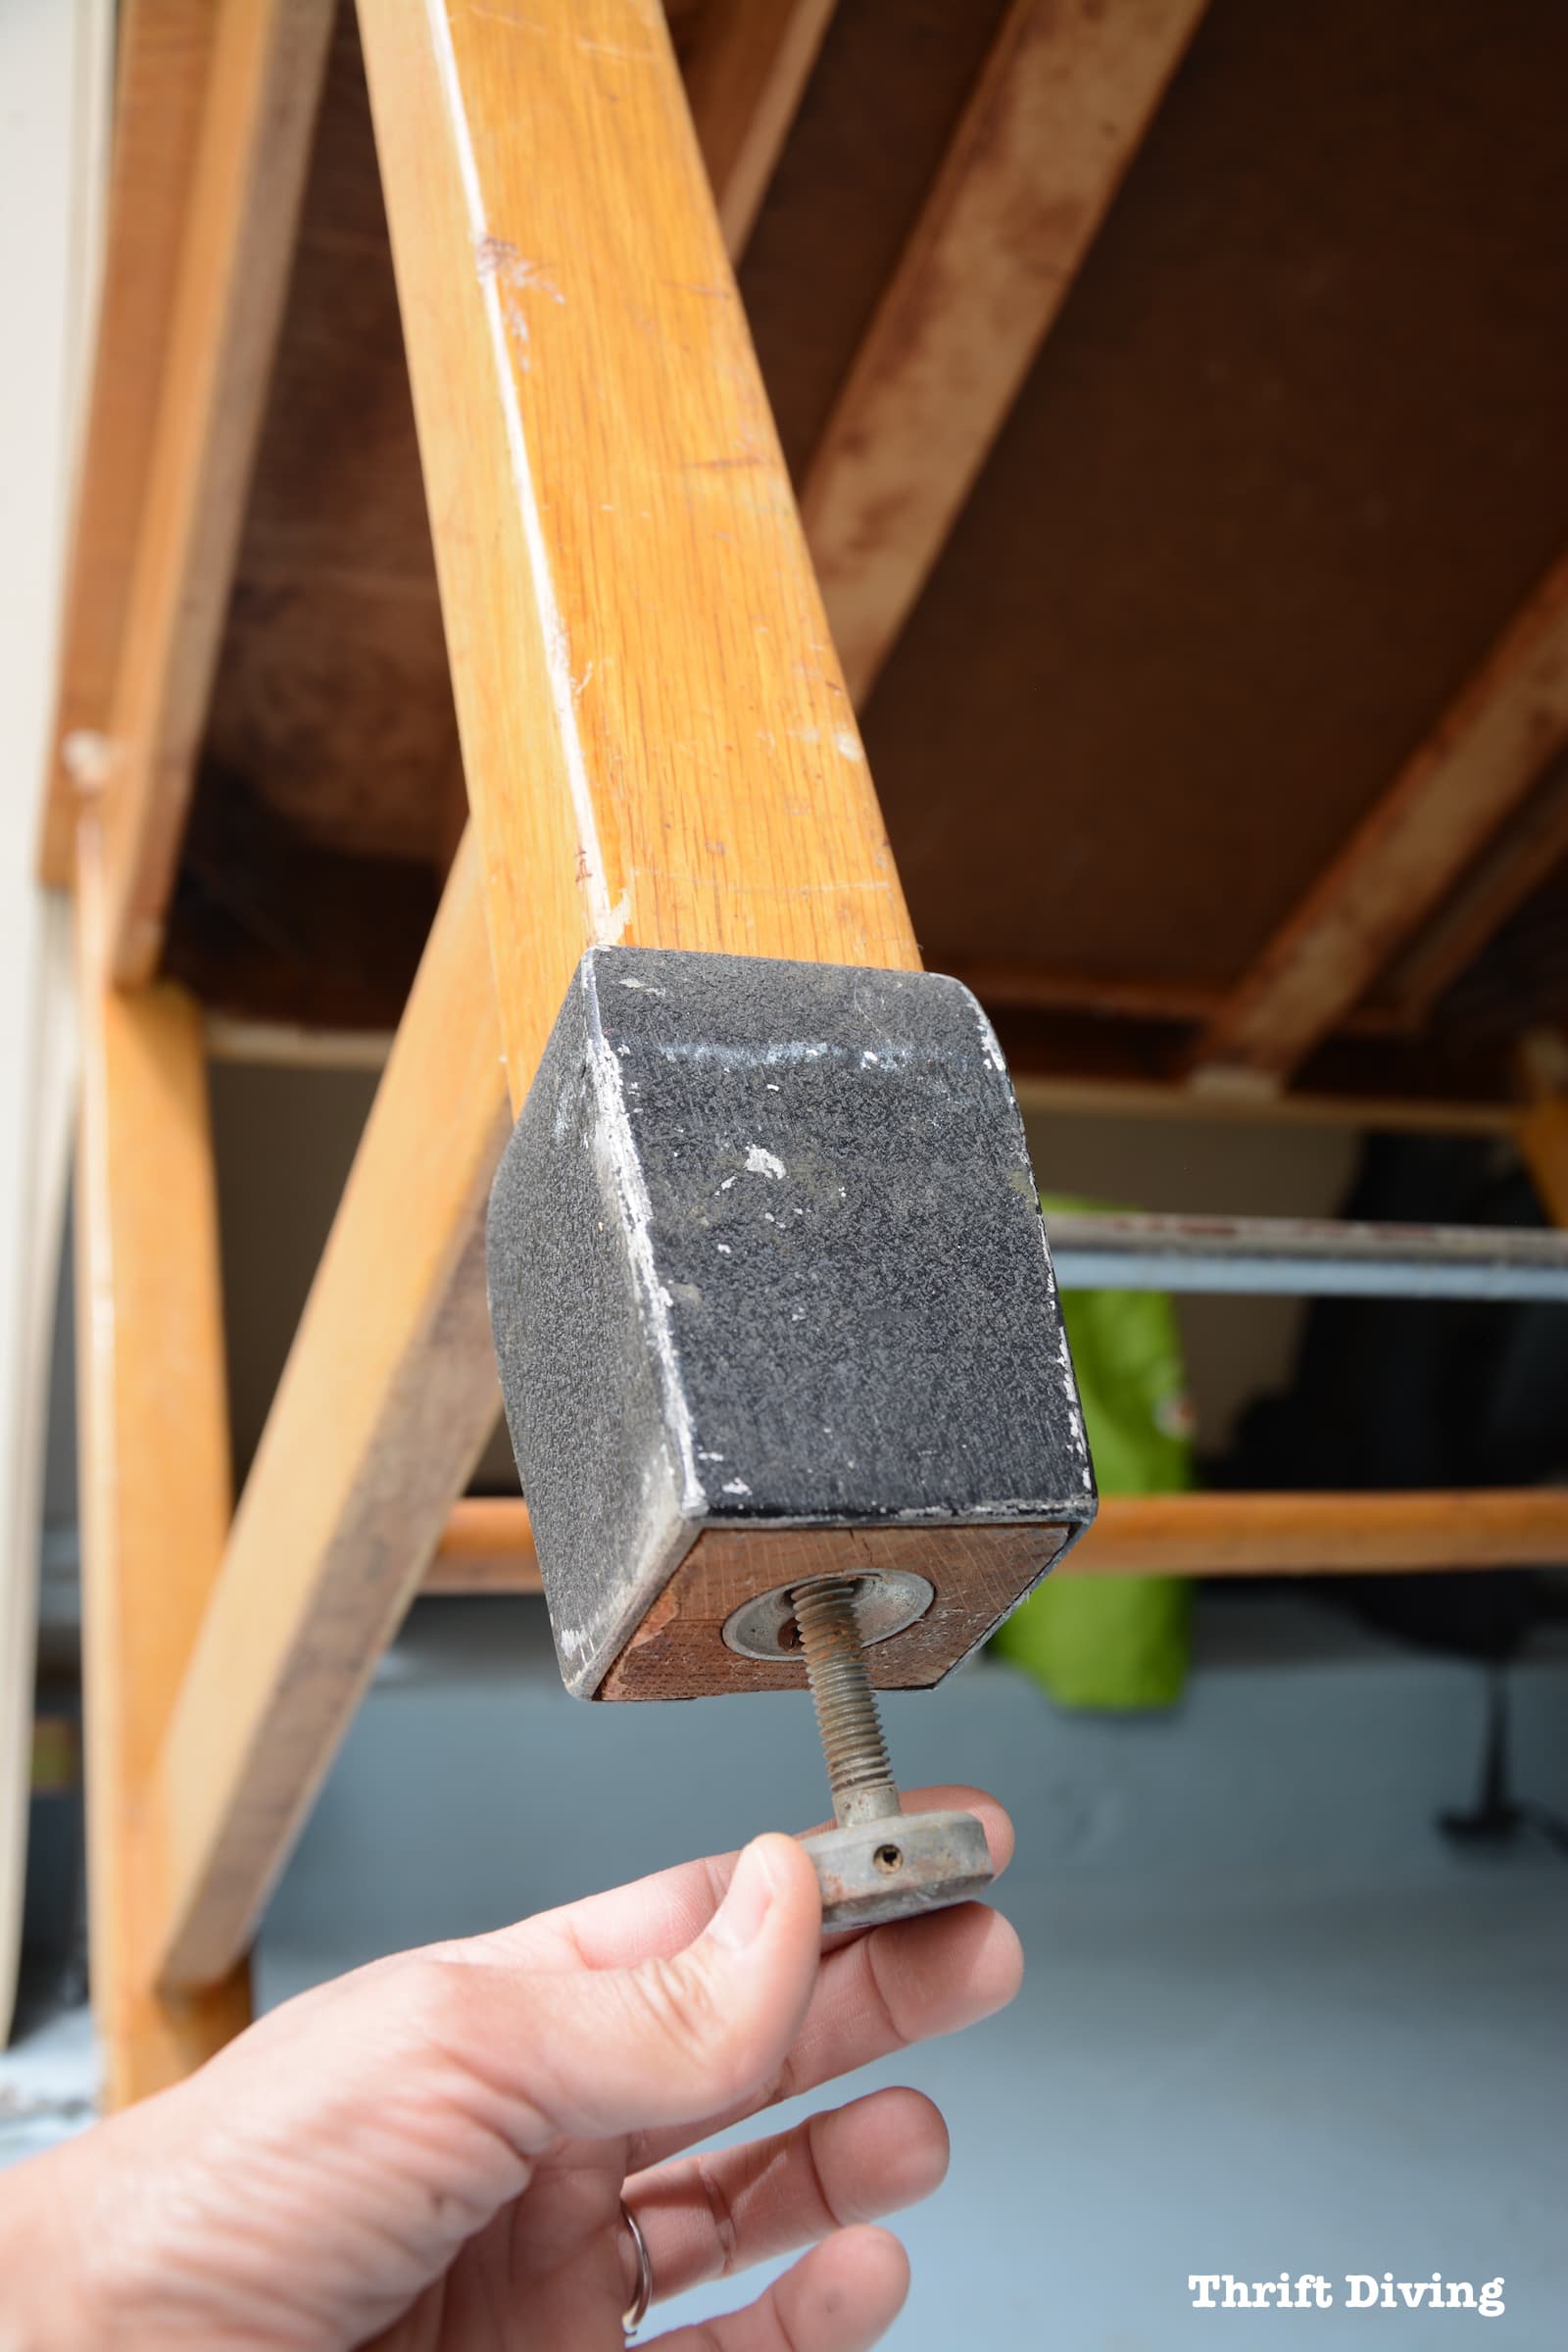
Because this table was soooo heavy, I planned to put casters on the bottom. The old feet needed to come off.
And these black metal things were like hooves. They needed to go.
I tapped off the “hooves” with a hammer and flathead.
STEP 2: Apply Environmentally-Friendly Stripper
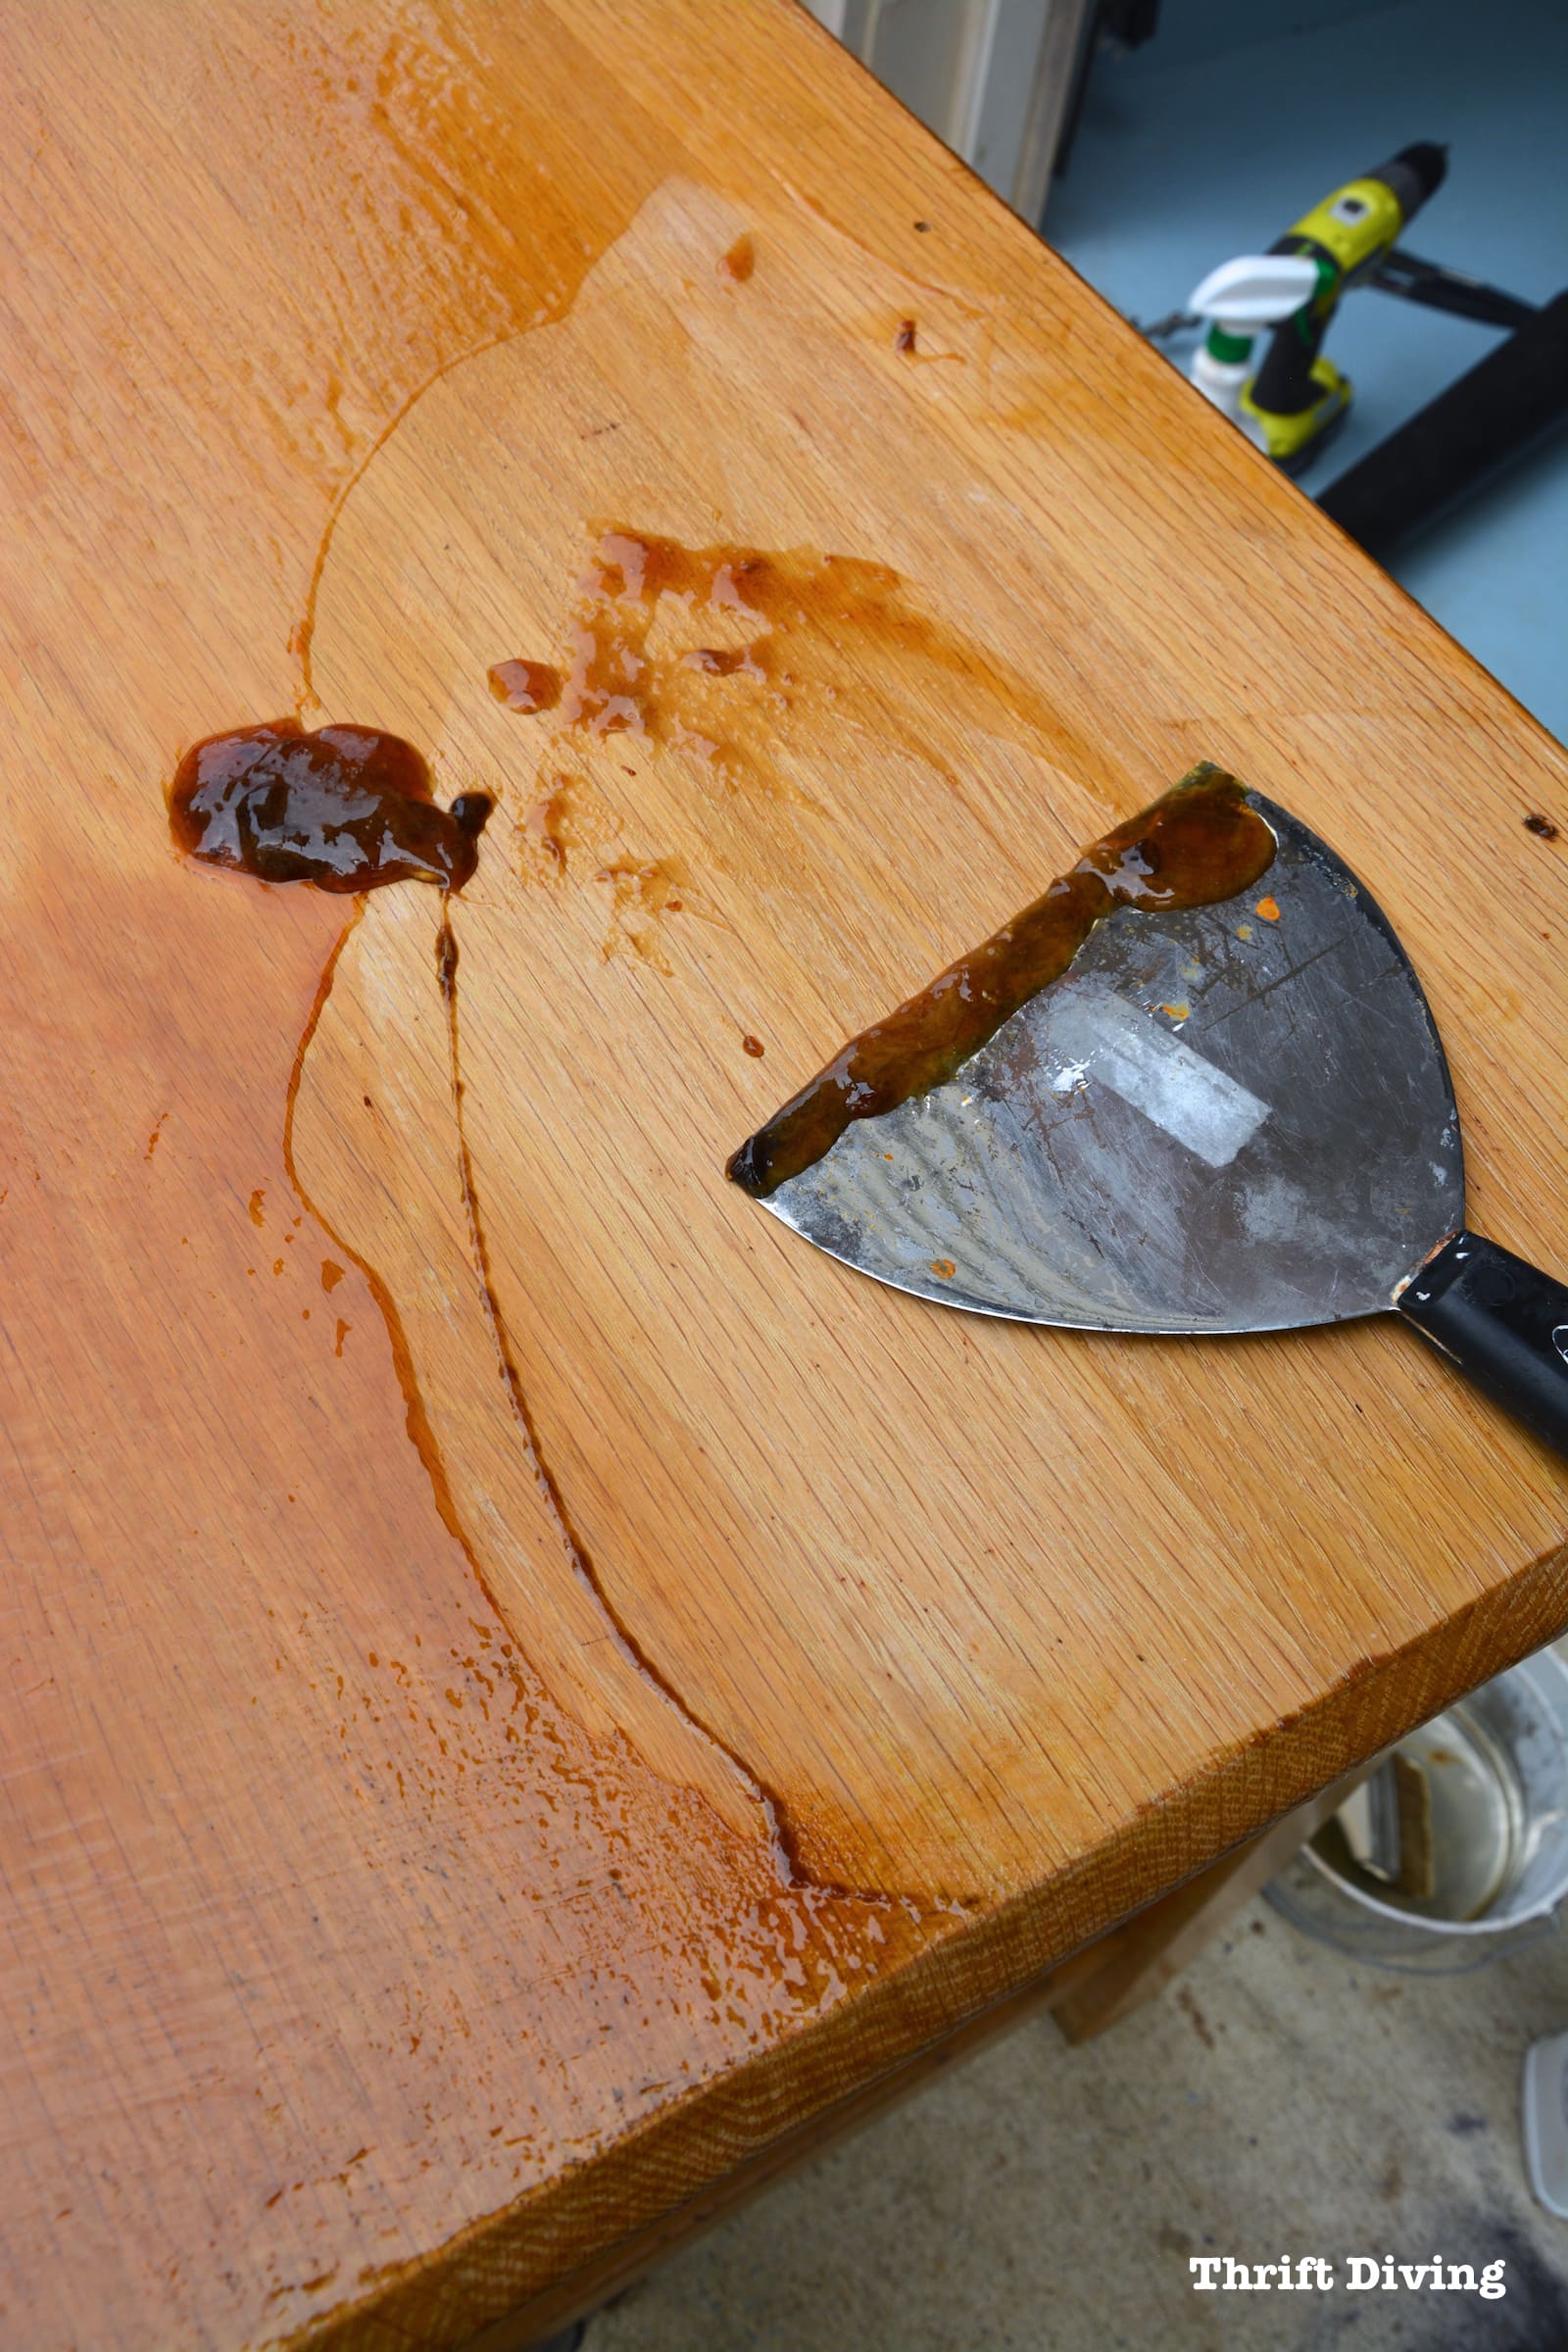
I have this love-hate relationship with stripping furniture: it’s oddly satisfying to scrape off the old gunk, but then you realize that you just signed up for the messiest job for at least one afternoon!
Thankfully, I already had a full container of environmentally-friendly Blue Bear Paint & Urethane Stripper left over from another project last year so I didn’t need to go and buy more stripper.
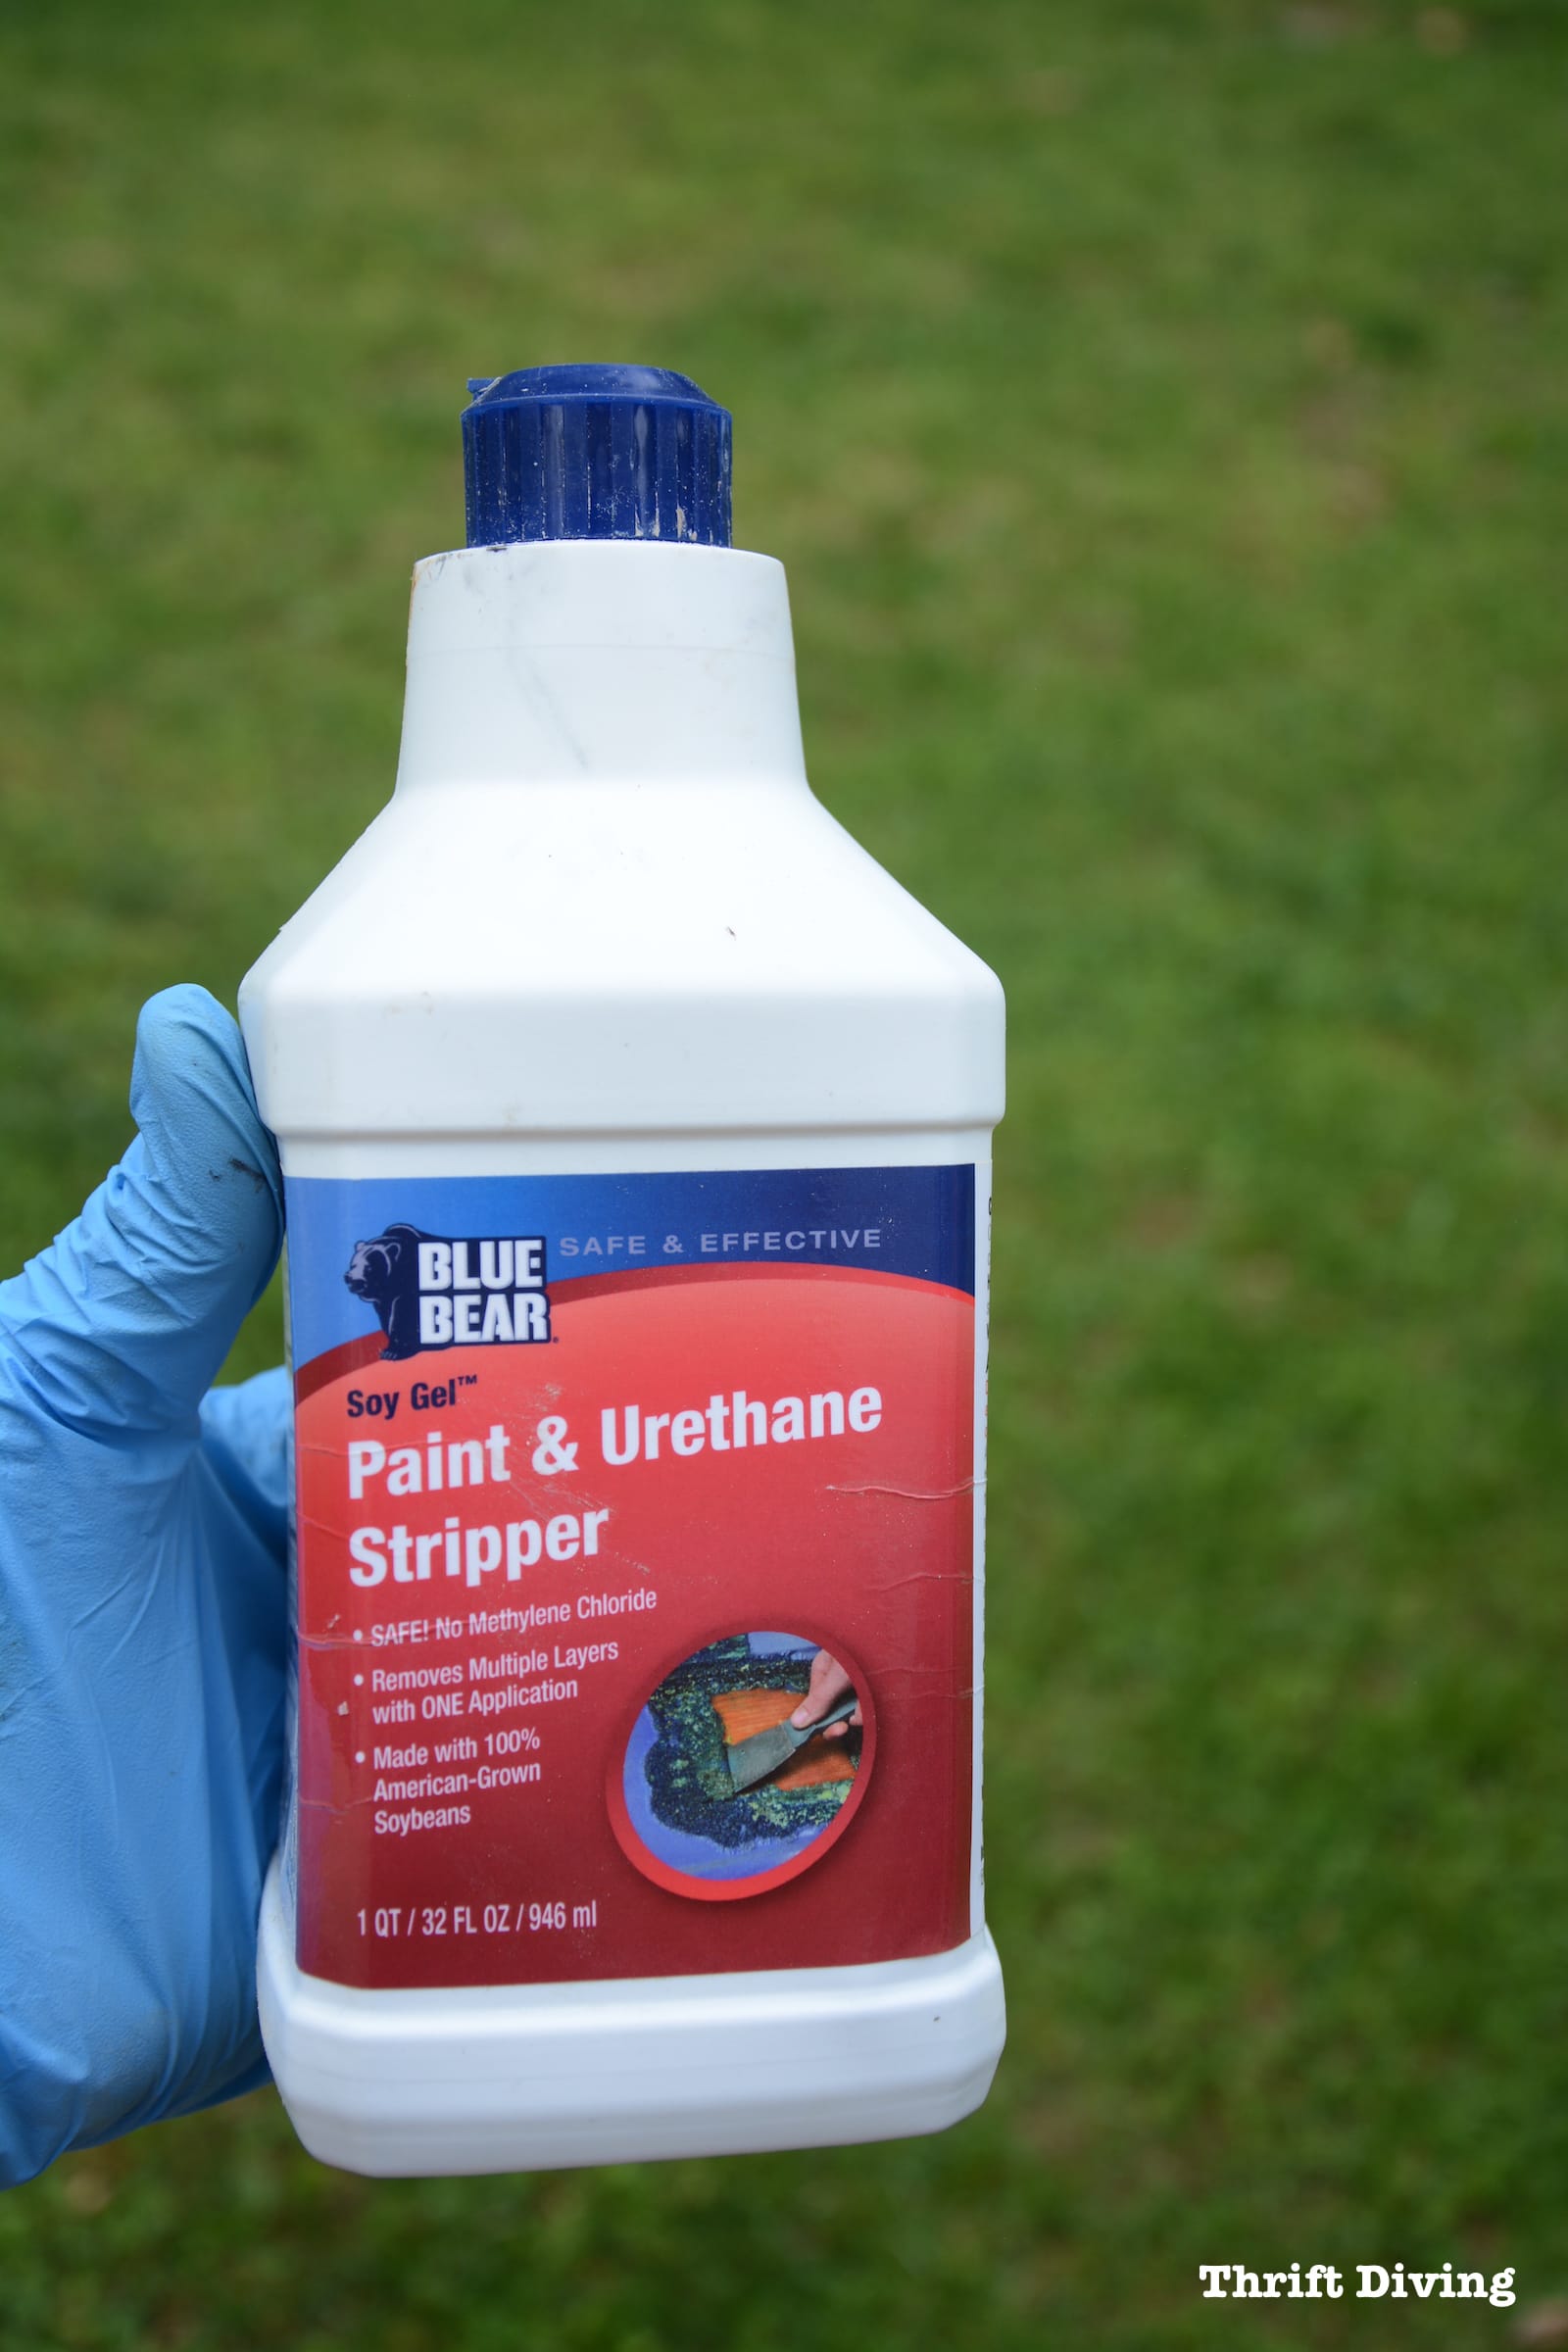
When stripping, use a metal container, chip brush, and a putty knife. And don’t forget your chemical-resistant gloves!
TIP: Make sure that the edges of the putty knife are dull so you don’t scratch the surface of your wood. I ran mine over the sidewalk to dull the edges, but you can also use sandpaper.
I made sure that I added a lot to the surface so that it didn’t dry and could remove a lot of the yellowish top coat and stain on the drafting table.
It’s easier to work in sections, so don’t coat the entire piece of furniture in the first go.
I started with the top….finished that….then moved on to another section.
I couldn’t wait to see if I could get the discoloration out of this table!

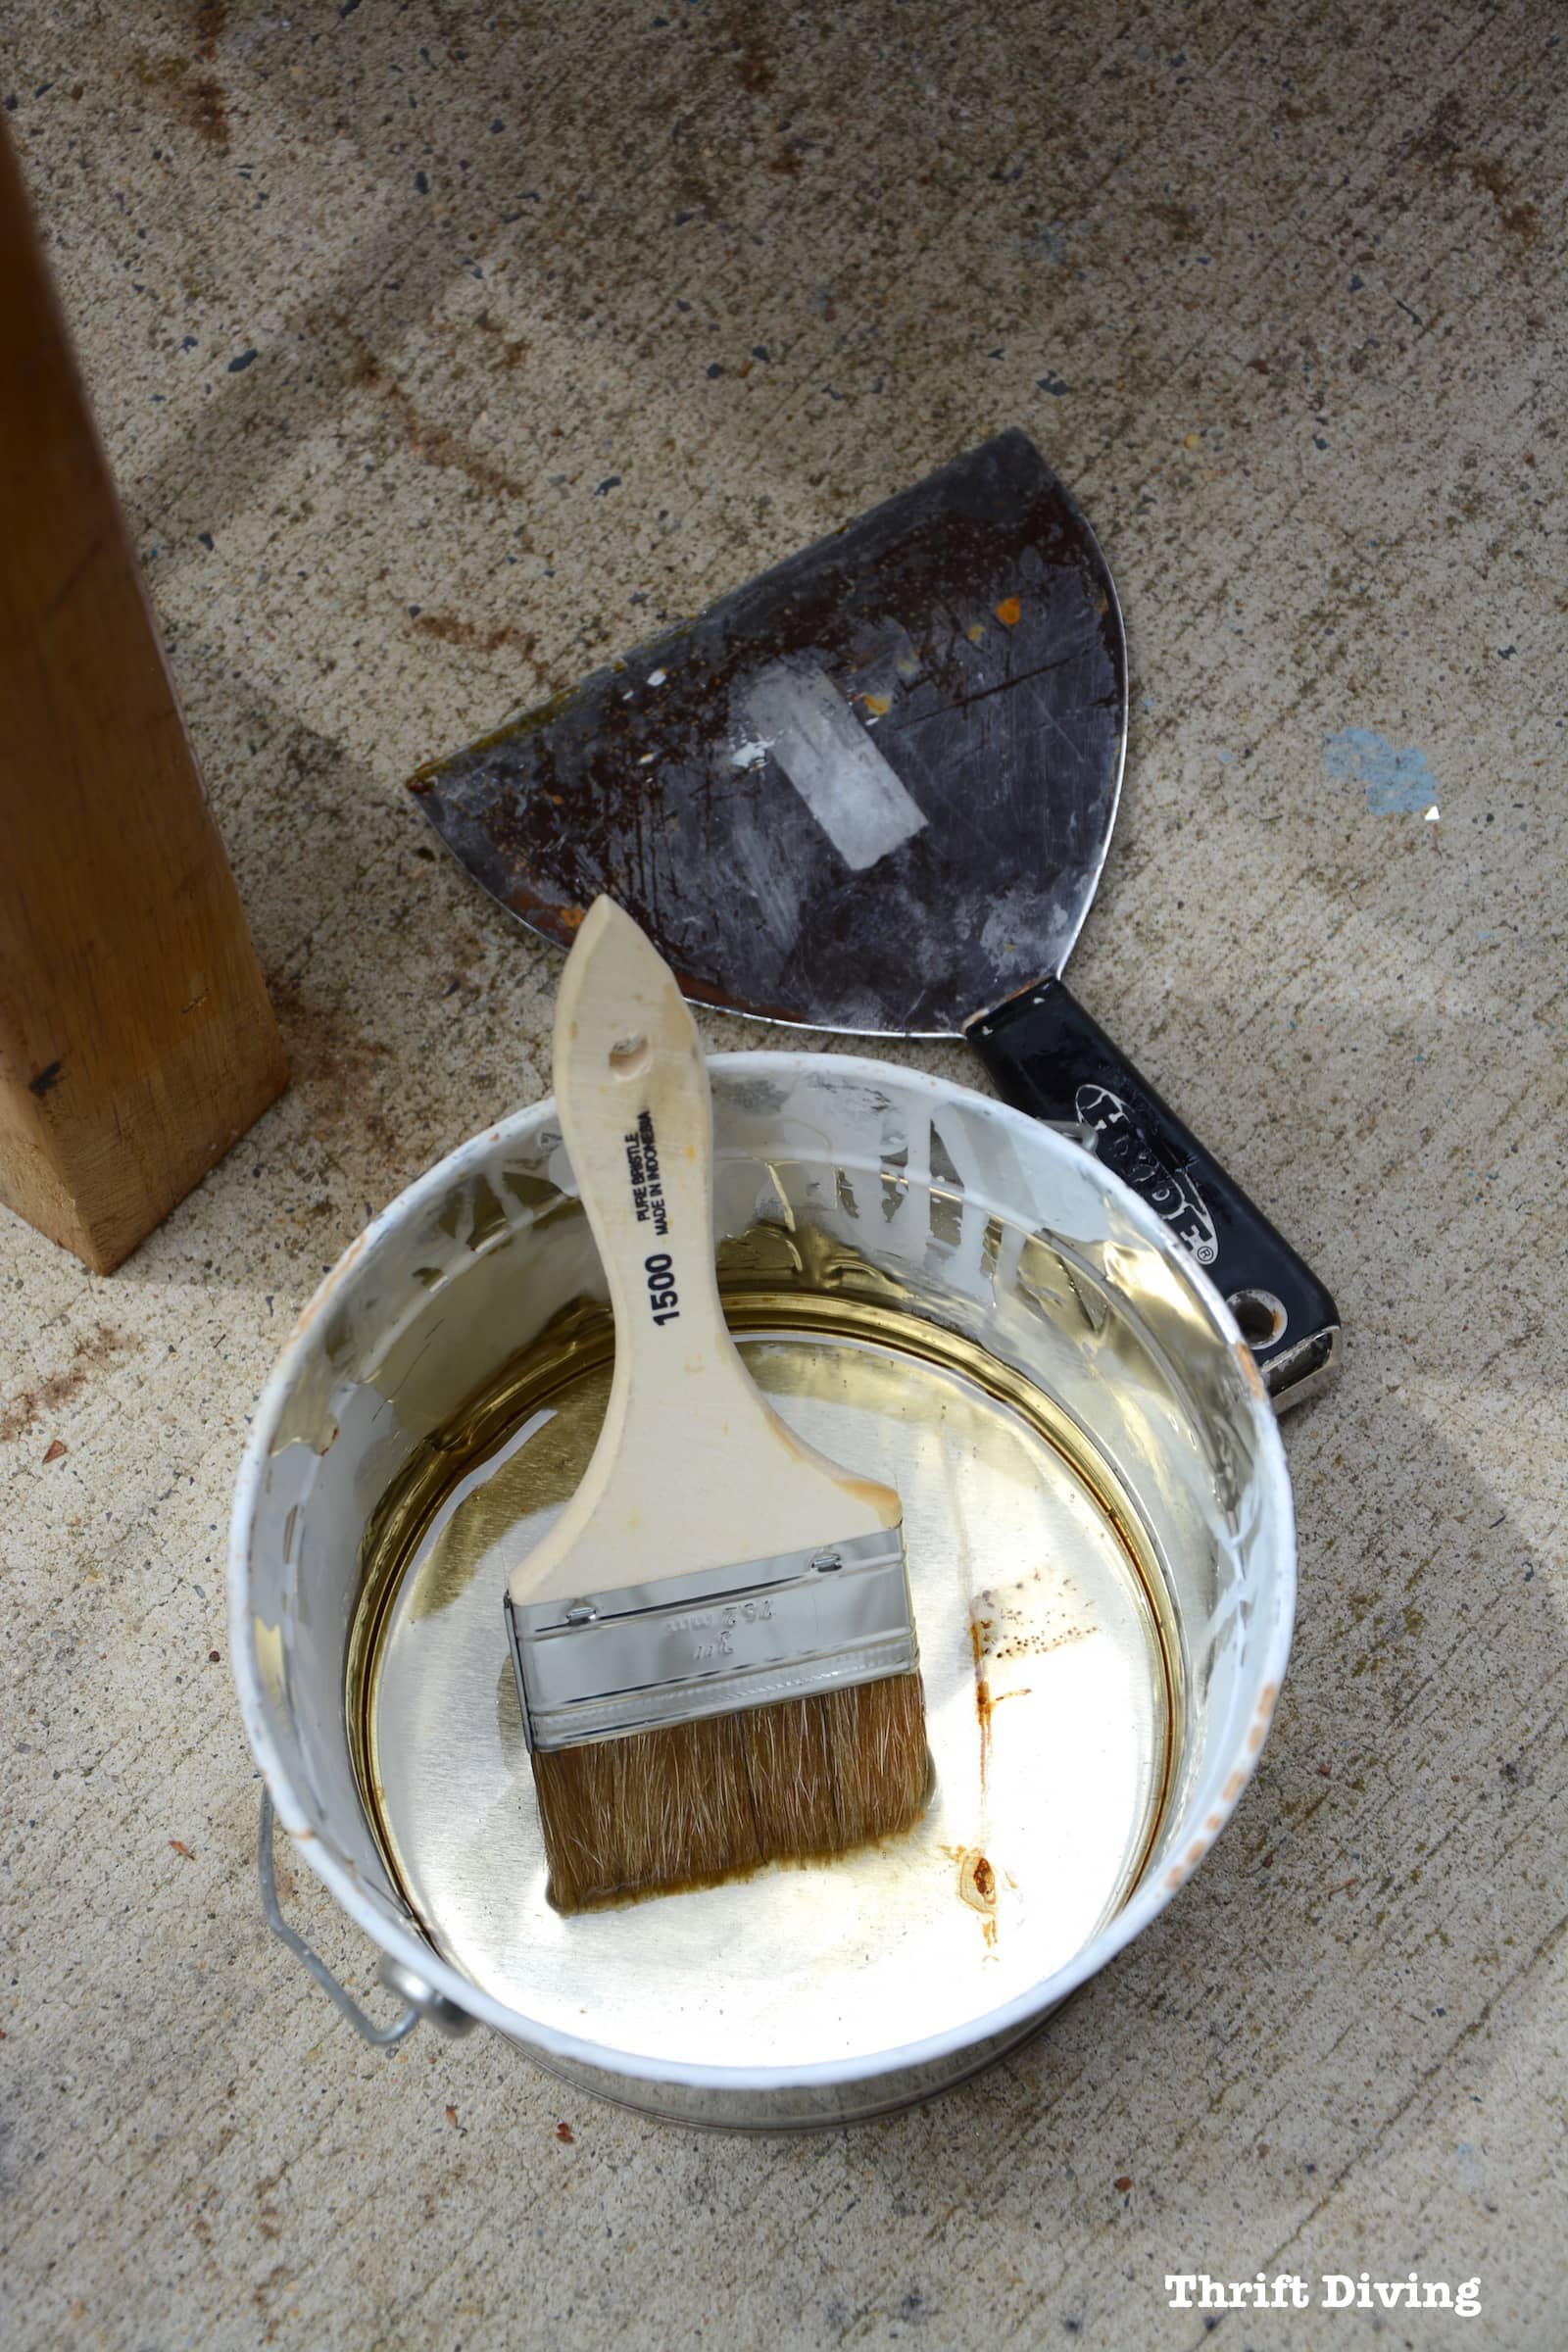
STEP 3: Remove the Stripper With a Dull Putty Knife
After about 10 minutes of the stripper working, I used the putty knife to scrape away the gunk.
This is my favorite part!
It’s so nasty you can’t help but get some enjoyment out of it! LOL
STEP 4: Remove the Residue With After Wash
After I scraped off as much as I could from the body, working in sections, I used After Wash to remove as much of the stripping residue from the wood.
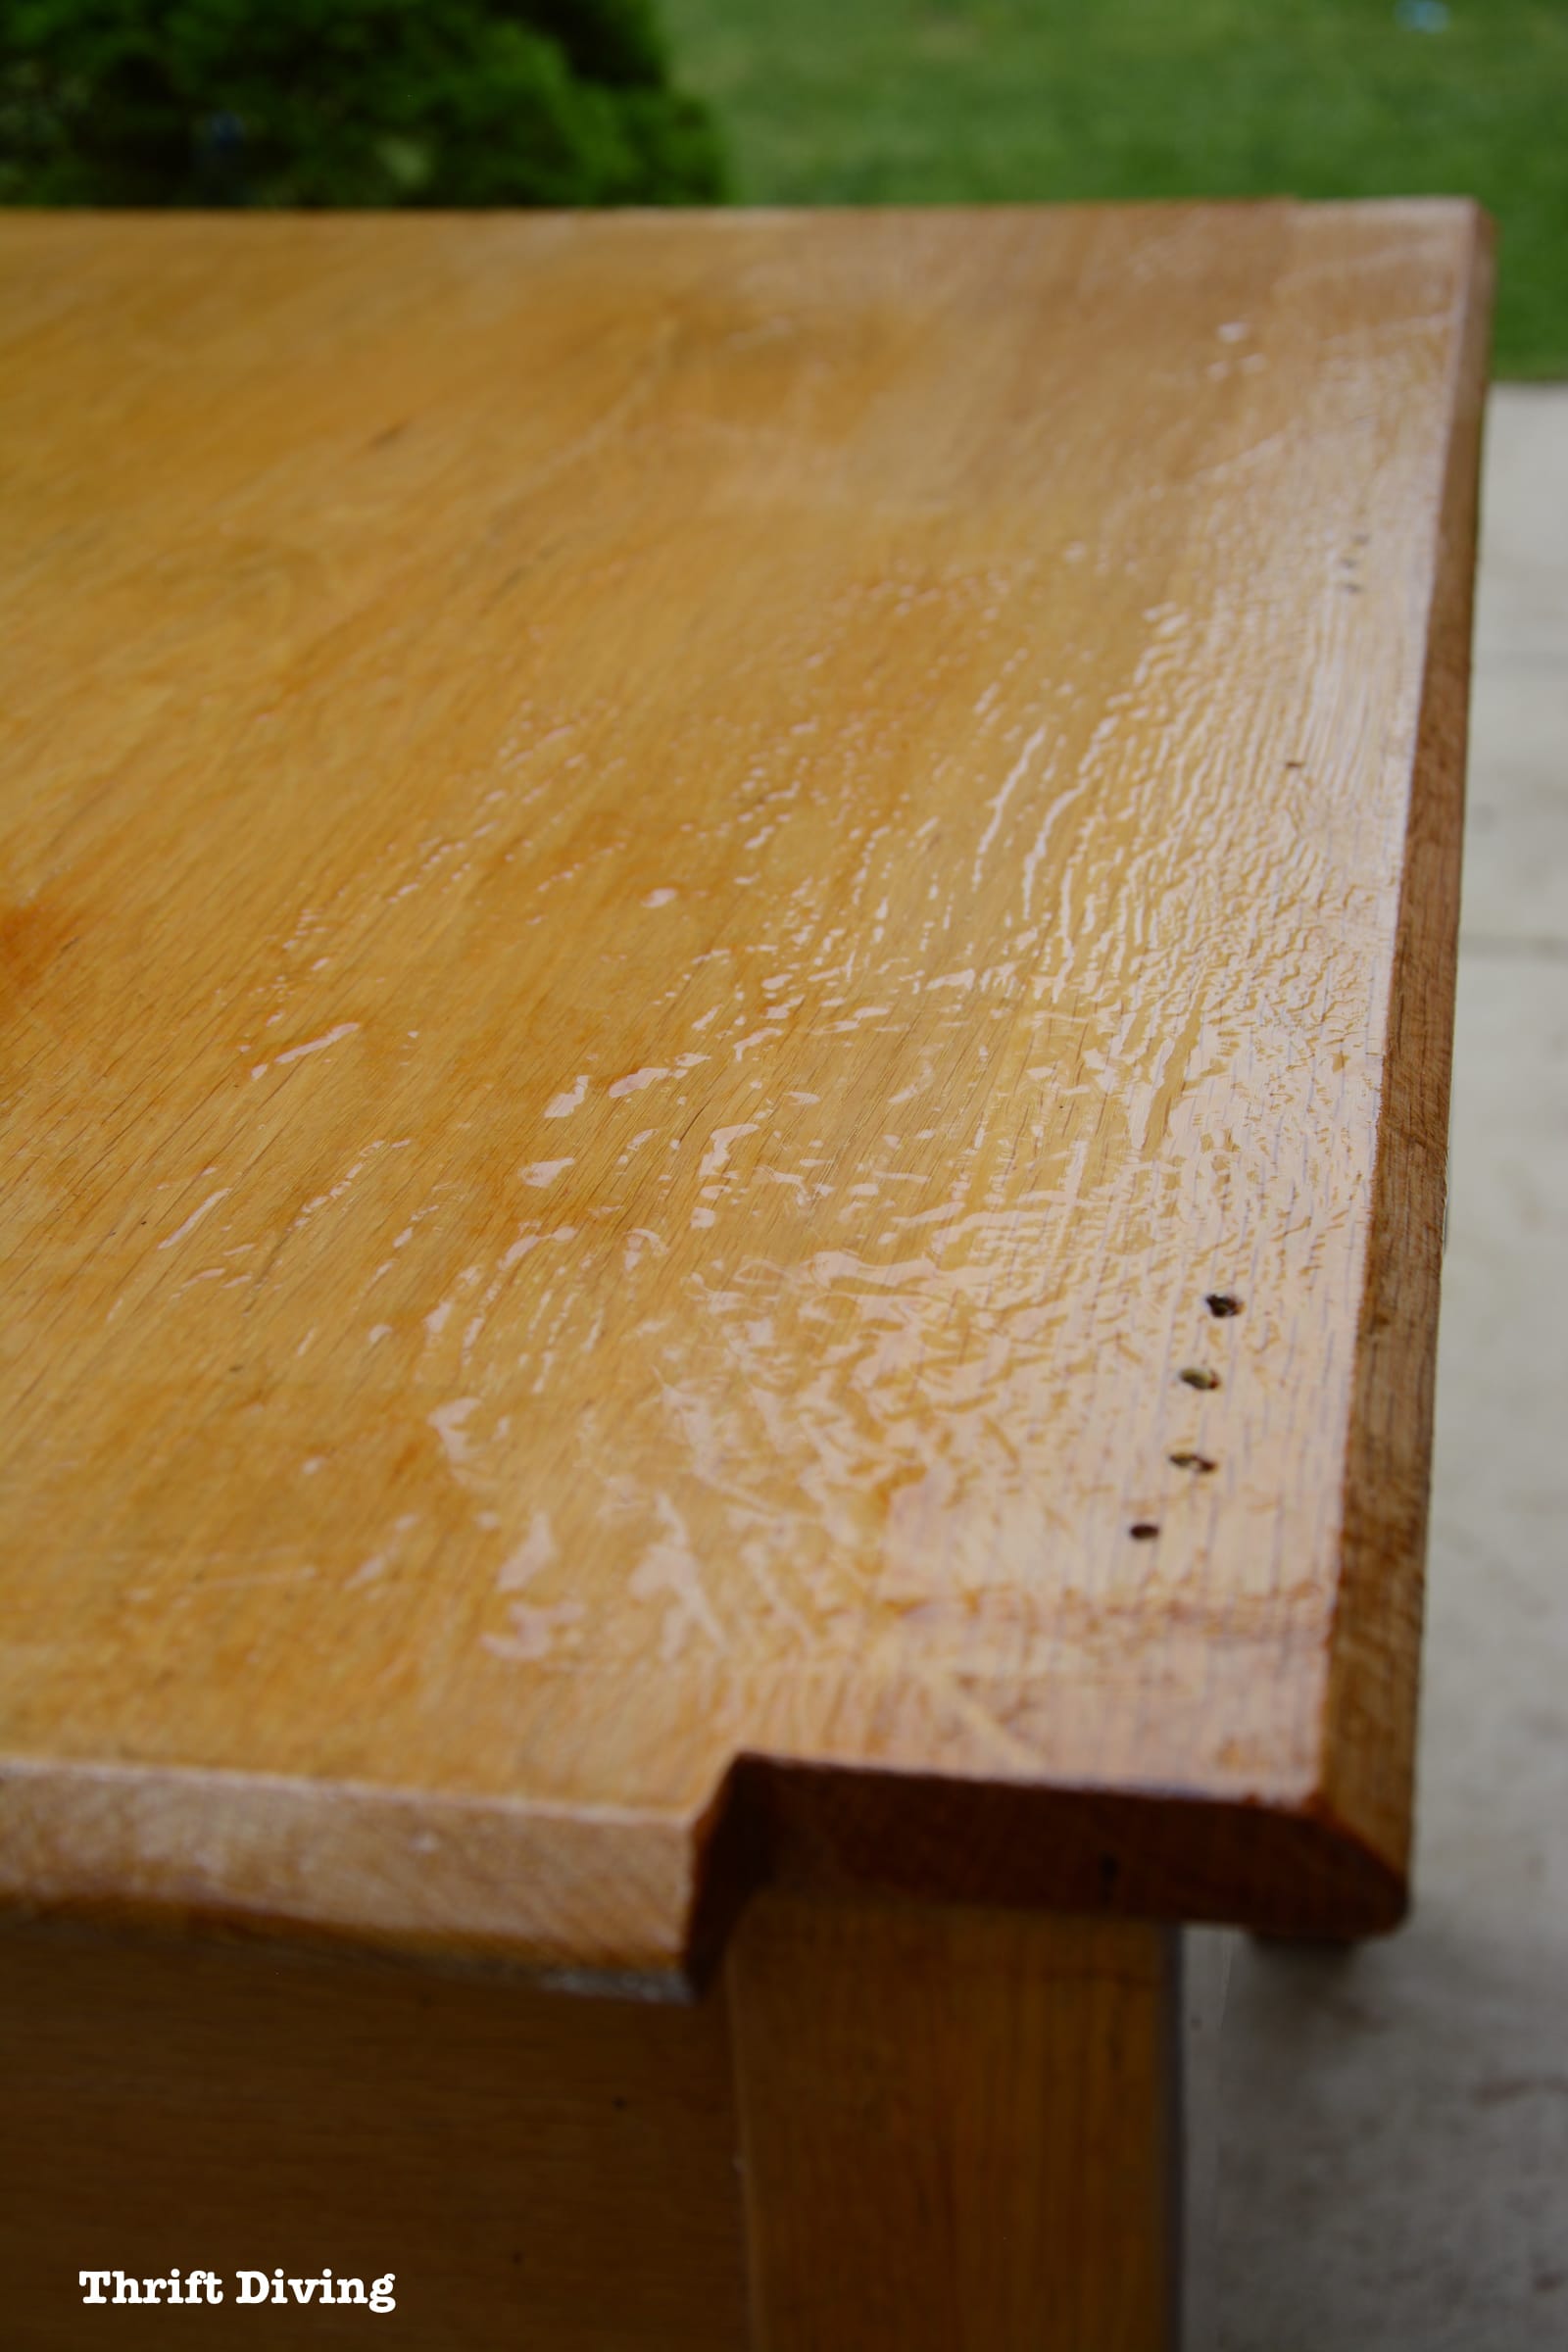
By the time I applied the stripper twice, I had removed much of the finish, but you can see below from this angle that it definitely needed a good sanding.

STEP 5: Sand It Smooth!
I ran out of After Wash so I still had some residue left over in some places.
But for the most part, the table was ready for sanding!
I typically use an orbit sander, which works pretty well.
But here’s the key: you’ve got to 1) go slow, and 2) gradually work your way from “rough” to “fine” to “very fine” sandpaper in order to get the best results (for example, start with 150-grit and then work your work down to a very fine 220-gri).
I’ll be honest: I struggled with sanding this table because I rushed through it at times (especially after spending so much time scraaaaaaping gunk away!).
In some spots, I got little swirly marks which were very irritating. I didn’t want to spend a lot of time obsessing about them, so I kept it movin’.
But the lesson here is not to rush when sanding! 🙂
(TIP: When sanding, rub pencil marks on your project so that when the marks are gone, you’ll know it’s time to move down to the next grit of sandpaper).
SAFETY IS #1 – Make sure you’re using a dust mask when sanding!

Gorgeous Colorful Casters!
Can I tell you how in love I am with these colorful casters from Mockett???

I first saw them several months ago when I attended the National Builders Show in Orlando, Florida. I had never attended and it was exciting finding out about new products that aren’t readily available in local stores!
So imagine my look of “OMG” when I passed this display at the Builders Show.
Colorful casters! Gasp!

I contacted Mockett afterward and told them about this DIY garage workbench project and they agreed to send me four of my favorite casters for this project. Thanks, Mockett!
You can see all their colorful casters here.
I drilled holes in the bottom of the legs to add the casters, adding painter’s tape to the drill bit (7/32 size bit) so that I’d have a visual reminder not to drill too deep.
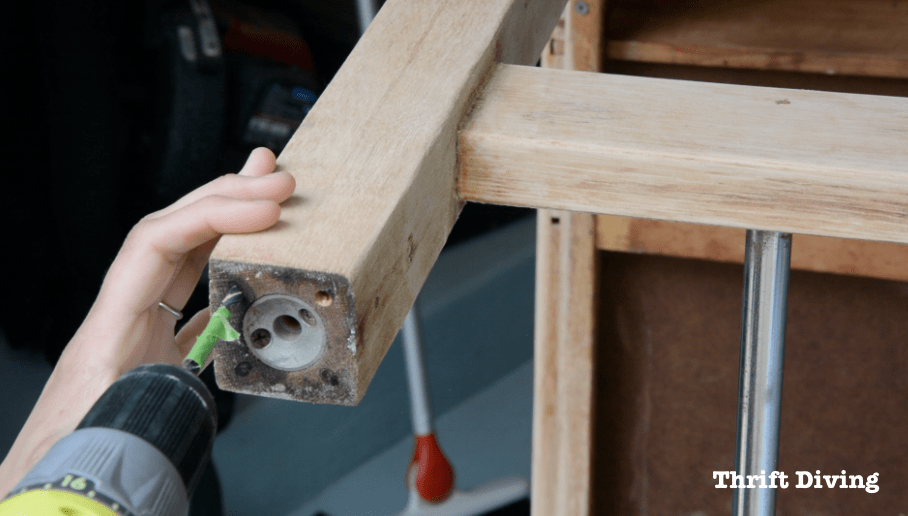

After a good stripping and sanding, and adding the casters on the bottom, this is the raw wood I was left with.
A huge improvement, wouldn’t you say??

And I like that the casters add about 4-5 inches to the table, making it countertop height, which is perfect for working with tools on top!
STEP 6: Wipe It Down With a Tack Cloth
Dust gets everywhere.
Don’t trust your eyes or hands to feel it. :)Use a
Use a tack cloth to wipe away all the dust so it doesn’t get trapped in the wax or top coat!
STEP 7: Apply Liming Wax
I considered using a clear top coat on this piece of natural furniture, but I’m obsessed with white grain on oak. One thing I noticed is that whoever made this table did a great job of adding white grain filler to the oak!
You see, oak is very porous and has a wide open grain. If you didn’t use a grain filler and you tried to write on a table made of unfilled oak, your surface would be very bumpy! I imagine your writing would look like that of a 5-year-old. LOL
But grain filler fills up those pores, making the surface super smooth.
Some people use white grain filler to accent the grain while smoothing out the table, which is what this drafting table maker did.
I was so happy when I realized it!
When I built my DIY bathroom vanity, I had used liming wax to help achieve a similar look. So to see that this table was already rockin’ the white grain was a pleasant surprise!
I still added a little bit of Briwax liming wax to the table to help accent any of the grain filler that may have been scraped away during stripping and sanding.
Also, the liming wax gave it a slight white-washed look and helped to make it a bit more modern!

You’ll have to watch the video tutorial for this project (or see the embedded video above at the beginning of this post) to hear about my almost waxing disaster.
Well…it wasn’t a disaster…but I wasn’t clear on how I was going to finish off this table. I explain it more in the video.

TIP: Be sure to work in small sections when working with liming wax. It dries fast and is harder to get off. To apply, wipe on against the grain. To remove, use a little bit of clear wax, wiping off against the grain.
Cleaning Up the Old Drawer Pulls
I thought about replacing the old drawer pulls, but I actually liked them and thought they looked appropriate for this piece of natural wood furniture. (It also didn’t help that I had no replacements! LOL)
Plus, if you can reuse something, reuse it!
The pulls were scratched and dull so I sanded them smooth with 220-grit very fine sandpaper and steel wool, which made it shine and look brand new.
You can see the difference below between the one on the left and the one on the right!
Isn’t that amazing?? Who knew you could sand the scratches and marks out of metal pulls like that??
BEFORE & AFTER

STEP 8: Add a Clear Coat of Fiddes & Sons
A friend of mine told me about a waxing polish called Fiddes & Sons.
Seriously, guys…
After using this stuff, there is no going back to other waxes I have used.

I find other waxes, such as Annie Sloan’s Clear Wax, hard to work with. It’s streaky and hard to buff it to a real shine.
But this one goes on sooooooo smooth.
You only use a very light coat. Once it dries in a few minutes and you buff it easily with a clean cloth–the shine!
Absolutely stunning!
You can see the gorgeous shine this wax polish left on top of this drafting table makeover which will now be my awesome DIY garage workbench!

Sorry for the dark pictures but it was the best way to see the shine.
My oldest son actually thought the surface was wet because it had so much shine! HA!
Nope.
It really does look this gorgeous.

Anyhow, get yourself some of that wax polish!
I haven’t used it on chalky-type paint yet, so I can’t tell you how it performs on painted surfaces, but I imagine it works just as nicely! I’ll keep you posted.
Adding Hooks For Tools!
Would you believe these amazing little hooks came from The Dollar Tree? 🙂
I’ve had them for at least a year but they came in handy for the side of this new DIY workbench.
Now I can move this workbench wherever in the garage and can keep accessories and clamps close by.


I hung some hooks on both sides.


For the Love of Oak and Natural Wood
I think oak can look very dated, especially when it has that honey-colored tone to it.
But blonde oak??
Undeniably so pretty and modern!
I’ve been in love with this look of blonde oak for well over a year now.
I first spotted it in Amy Howard’s home back in November 2015 when she invited some bloggers to her house for a little dinner party.
Wood had never looked so gorgeous!
She had done the same: stripped the oak dresser and added liming wax for a natural wood look.
It’s been a look I’ve been drying to try for awhile now!

Recently I stayed in a couple ultra-modern hotels recently on my Duluth model shoots and these hotels are using a lot of blonde oak furniture with white grain in their decor.
It’s a timeless look!

BEFORE

AFTER!


I really want to do something special on the inside of the drawers, like line them with pretty fiery orange paper or paint that will accent the open caster wheels!
In the meantime, the drawer will be perfect for holding manuals until I get the opportunity to clean them up.

The Biggest Compliment
What’s funny is that when hubby saw the table, he said to me, “This should be my new standing desk!”
The reason that’s so funny is because if you’ve been a reader of this blog for long enough, you’ll know that hubby doesn’t care much about my projects. He rarely tries to lay claim on them. So for him to say he wants this to be his new standing desk is the biggest compliment he could have given. HA!
(And no, he’s not getting it!)
But I do like the versatility of this piece and how it can be a garage workstation or a standing desk.


Several months ago I started working on the LEFT side of my garage, clearing it out, painting the floor (which I haven’t posted about yet), etc.
This summer I’m tackling the RIGHT side.
That’s where this table will live: on the right side, once it’s all finished.

And it will likely be holding my scroll saw, and perhaps my band saw if there is enough space.
I’m almost a little hesitant to use it for such heavy duty tools because surely the surface will get marred.
I’ve taken a liking to this table. 🙂 I don’t want to see it ruined.
So we shall see…


Loving this project? I’d love for you to save it!
![]()

As much as I love painting furniture, it’s not the one cure for all pieces of furniture, I have learned.
When you’ve got beautiful wood, and the stripping isn’t too complex, it’s definitely an option you should consider.
Be sure, though, that you’ve got enough ventilation and space to work. And don’t be stupid like me–put down a cloth to capture all the gunk that will fall on the floor! LOL
Anyhow, I absolutely love it and am happy that I have such a steady workbench that will last for years to come! It’s functional, too, so that if I wanted to turn it into a desk for my office or hubby’s, we can also use it in that way.
So what do you think?! Have you stripped furniture before? Do you like the look of natural wood furniture (especially blonde oak!!)?
Leave a comment below and let’s chat about this whole “blonde oak” thing, along with workbenches!


Download the 5 freebies!

Thrift Diving inspires women to decorate, improve, and maintain their home themselves...using paint, power tools, and thrift stores! Use these 5 printables, checklists, and ebooks to get started!


I have a question and sorry if it’s a stupid question but can you strip any type of wood to achieve a raw wood look? I really like this look and I would like to try it on some vintage pieces but I don’t want to screw it up. You did an excellent job on this piece.
Quick question; I viewed the video tutorial and read your blog and love the finished project!
One point of confusion though; you noted in the video that the clear wax gave you that 80’s look after you applied it; but you also used the clear wax to help wipe off the liming wax. Is it when you apply the clear wax after you are done applying/wiping the liming wax process that caused this issue? Should we stay away from using clear wax altogether if we want to achieve a similar look?
Thank you!
Hi John! Thanks for your question! Okay, so what happened was this: when the wood was stripped and sanded and ready to wax, I started applying the liming wax to it. If you notice, the oak of the table already was already filled with a white grain filler. I was using the liming wax to add more to the grain but noticed that it wasn’t really “doing” anything. I was using the clear wax to help remove the white liming wax. Then I decided that I would just see how the wood looks with clear wax over it. It turned the wood a darker color, more orange and “1980s” looking, which I don’t like. So I realized that I couldn’t put the clear wax directly on the oak, because it darkened the wood. Howeve, using the white liming wax FIRST then using the clear to help remove the white liming wax, gave it right now look, and it was still getting the protection I wanted it to have. Hope that makes sense! Always test your wood if you can to see what effect different products will have on it. 🙂 Thanks for commenting!
I am working on my first project (round kitchen table) I was planning to paint it but once I got it stripped and sanded the wood is awesome and I hate to cover it up. I have been looking for a way to enhance and still show the wood with a creamy white color. I am not sure what kind of wood it is so can the lime wax process work on all woods? Are there other colors of wax and if so can they be mixed to create a richer color than just the white? Also can I put some sort of thick coating such as lacquer, shellac, polyurethane over the wax it for easy cleanup & protection? Thanks any suggestions are appreciated
I love this! Can I do this to an oak dining table? Round with a leaf?
I am amazed. It is so beautiful. I am older and live in a condo so I can’t take on big projects, but I recently stripped a small cigarette table and a French chair. They are raw right now. How do I know whether I should use grain filler for the oak table or just use the lime wax?