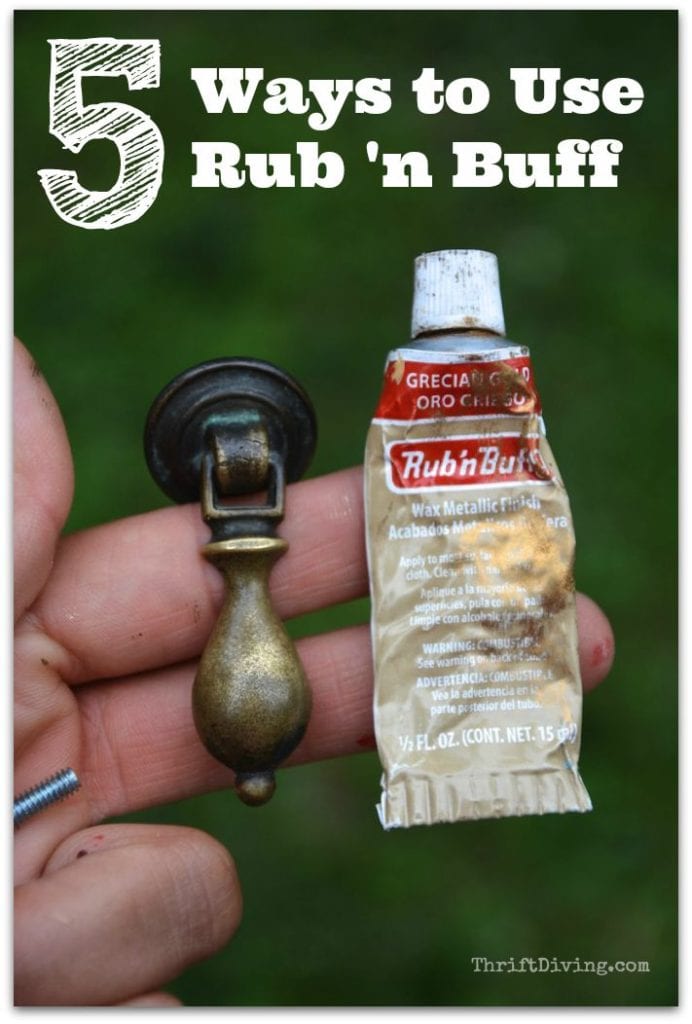
5 Ways To Use Rub n’ Buff
So funny the amazing craft material is called Rub ‘n Buff, because, while I do the “rub” part, I tend to forget the “buff” part. HA! They should have named it “Rub ‘n Walk Away.” Because that’s exactly what I do. And I ain’t afraid to admit it.
(I participant in the Amazon Services LLC Associates Program and other affiliate advertising programs designed to provide a means for me to earn fees by linking to Amazon.com and affiliated sites).
This stuff is amazing, and I’m going to show you why. And you can buy Rub ‘n Buff for only a few dollars!
What is Rub ‘n Buff?
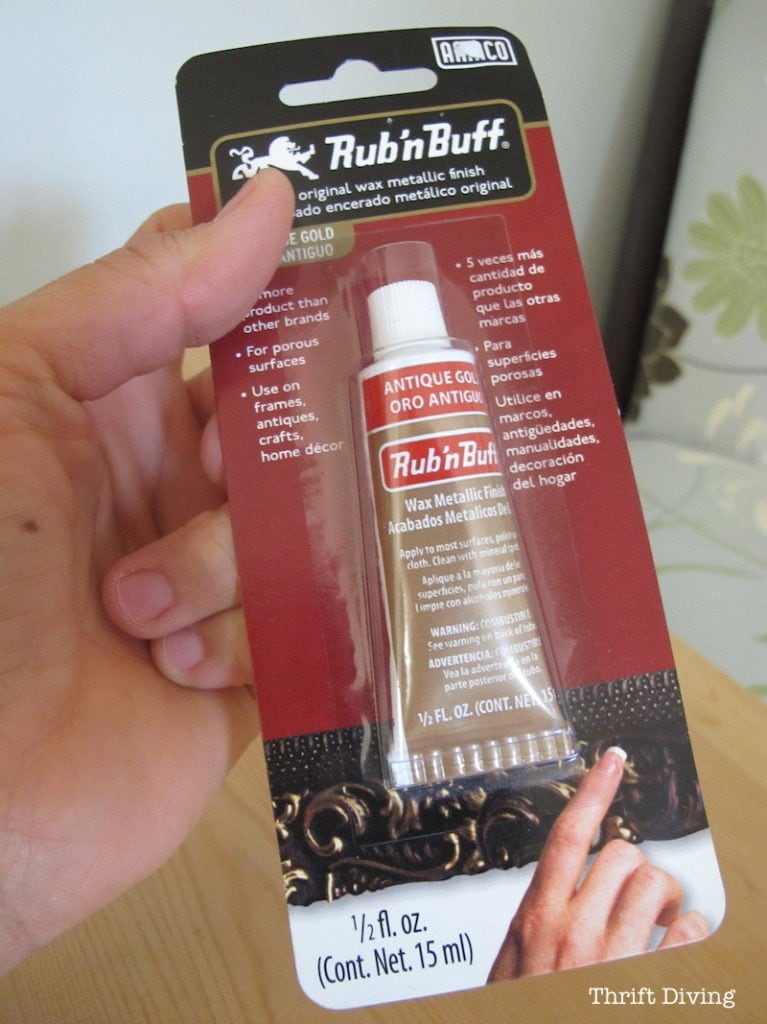
Rub ‘n Buff is a waxy finish made from imported carnauba waxes, fine metallic powders and pigments. I tend to use Grecian Gold and Antique Gold over and over, but it comes in 12 colors total (you can buy a sampler of all the colors from Amazon). The smaller single tubes are about $6.00 and you can buy it on Amazon or pick it up from AC Moore or Michael’s. It comes in the following colors:
- Gold Leaf
- Antique Gold
- Grecian Gold
- Autumn Gold
- European Gold
- Antique White
- Ebony
- Pewter
- Silver Leaf
- Spanish Copper
- Patina
- Ruby
How to Use Rub ‘n Buff
To apply it, just take a small amount and rub it on with your finger (it stains, so watch out!!) or a lint-free cloth, then rub it over the things you want to “paint.” Then buff to a shine. I tend to add a few coats to get even coverage.
Ways to Use Rub ‘n Buff
1. Save Tarnished Old Knobs
Have you seen the price of knobs and pulls lately?? Okay, yeah… you can score some good ones on coupon days at the craft store, but if you need 6 – 8 or something, that adds up pretty quickly. I don’t like to spend a lot of craft supplies or materials, so reusing what I can is ideal. Plus, I just like to save old hardware because there’s something so pretty about using the same hardware. It’s as if it’s just made for that piece, right? Here’s the hardware I saved from a desk I gave my mom for Mother’s Day, and it looked great! The tarnished handles magically were covered up.
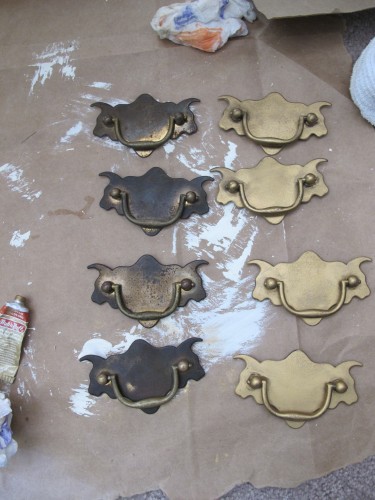
You might be asking why I didn’t just spray paint them. While that’s an option for old knobs and hardware, spray painting something leaves a coat of….well…..paint. It looks obviously painted. Rub ‘n Buff doesn’t look coated or thick the way spraypaint would look. It just looks new.
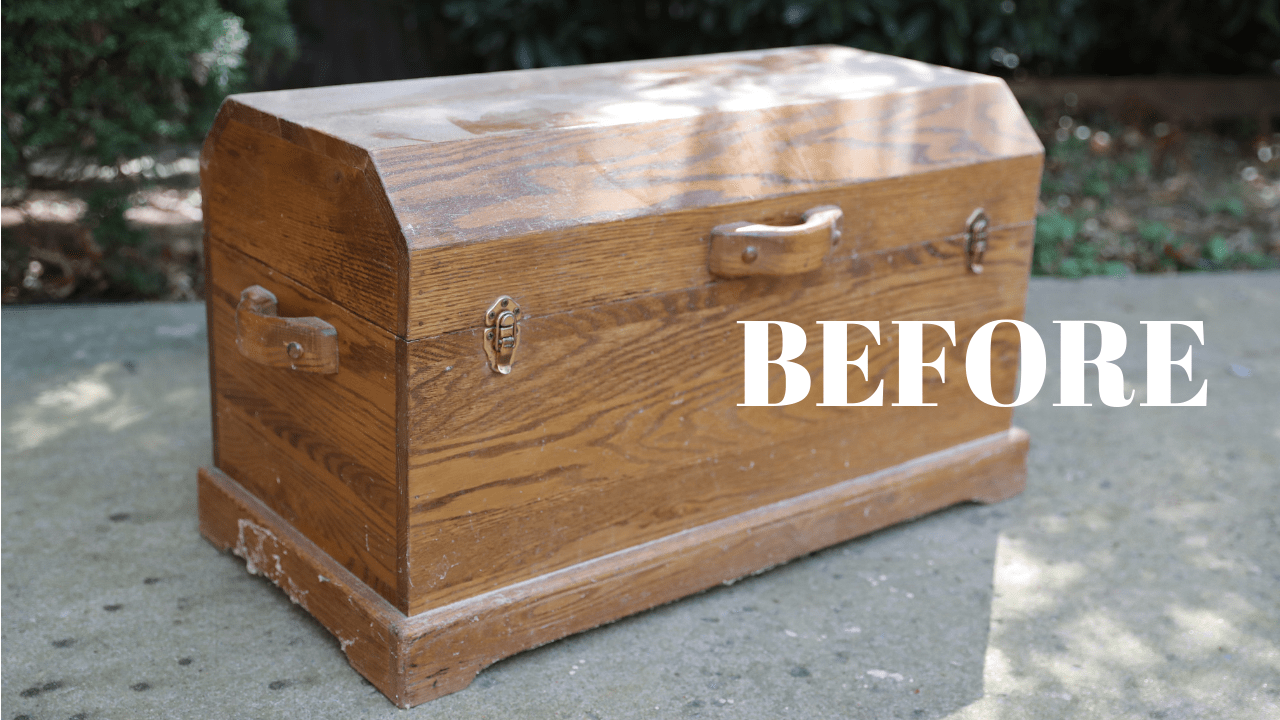
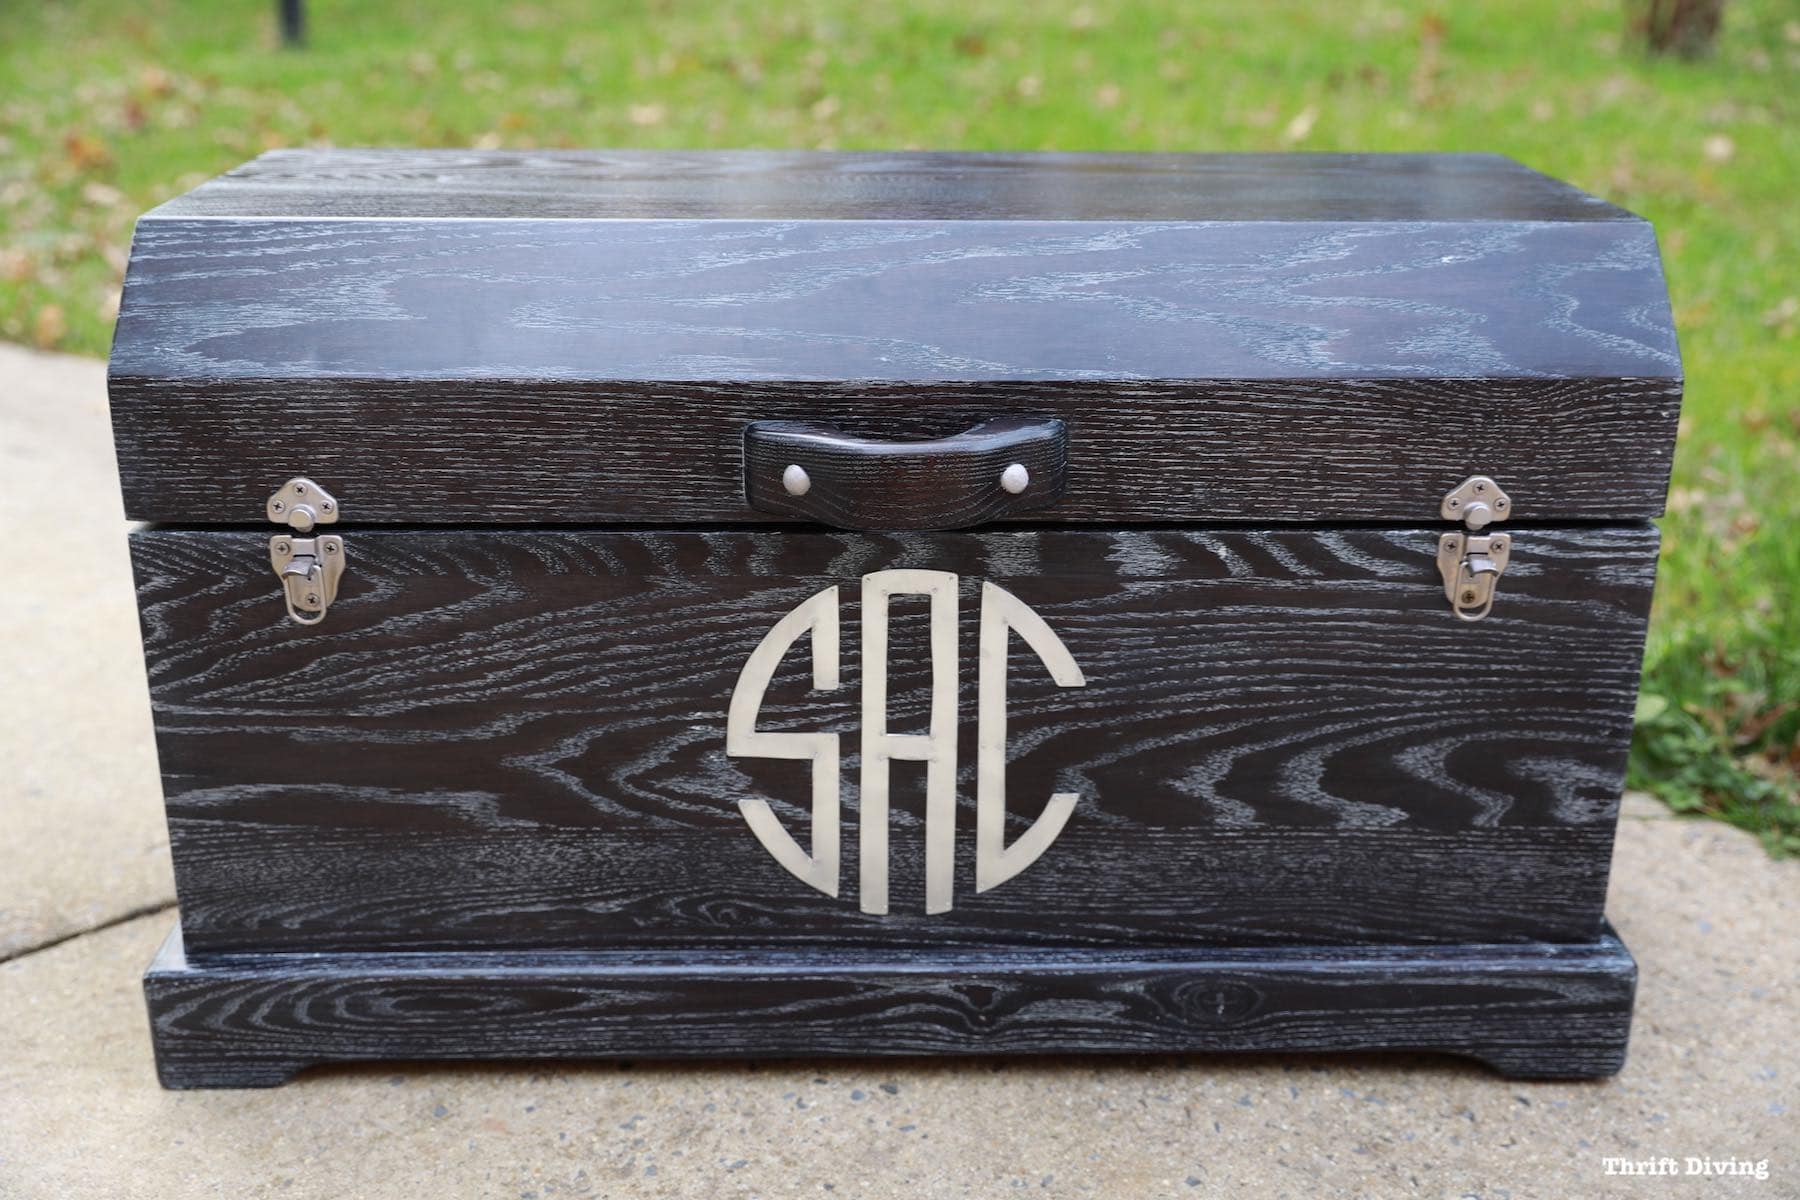
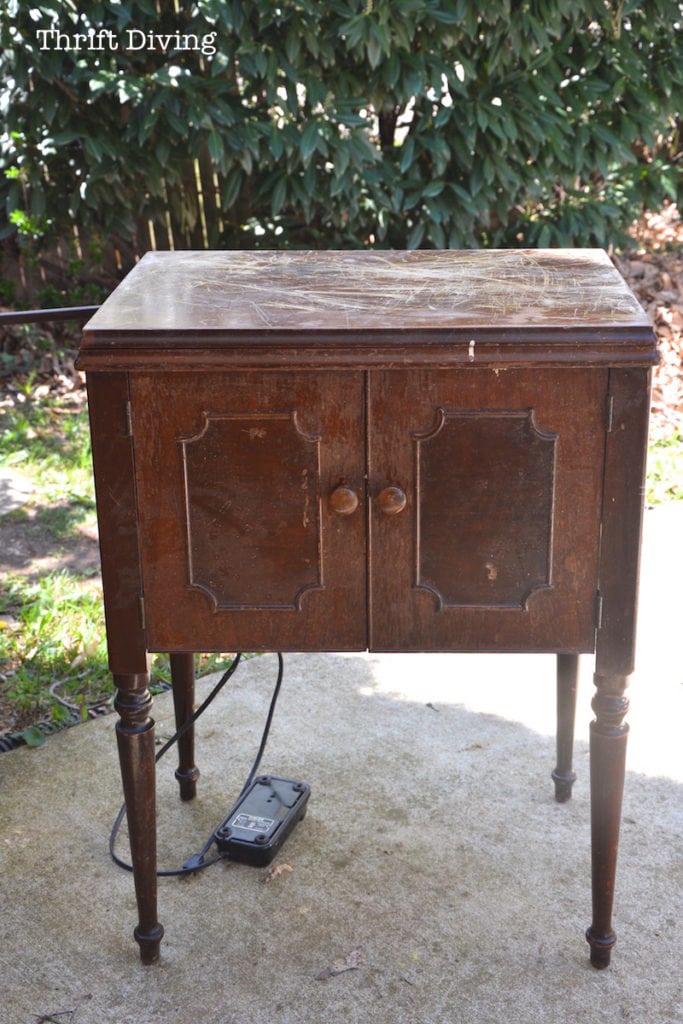
I made over this awesome oak chest from the thrift store and wanted to freshen up the clasps on the front of the chest, too. Instead of buying all new hardware, Rub ‘n Buff transformed the clasps from worn-out gold to silver to match the rest of the newly refinished oak chest!
I was also able to reuse the pulls from this old vintage dresser just by using Rub n’ Buff!
2. Line Furniture in Gold
I don’t just love to paint old furniture. I love to find the details and them highlight them in creative ways.
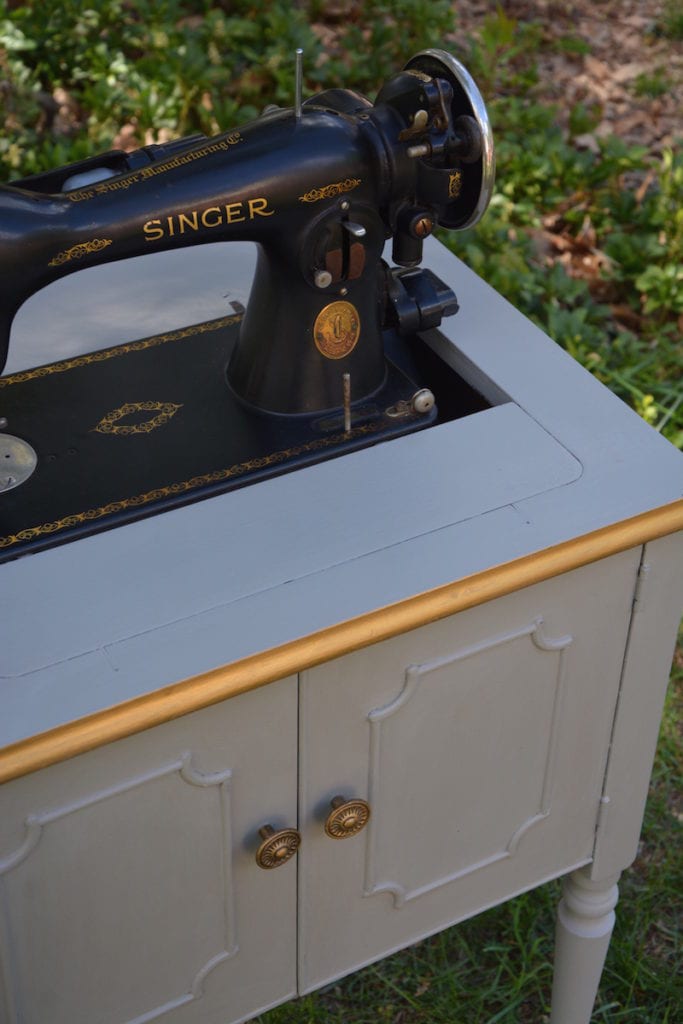
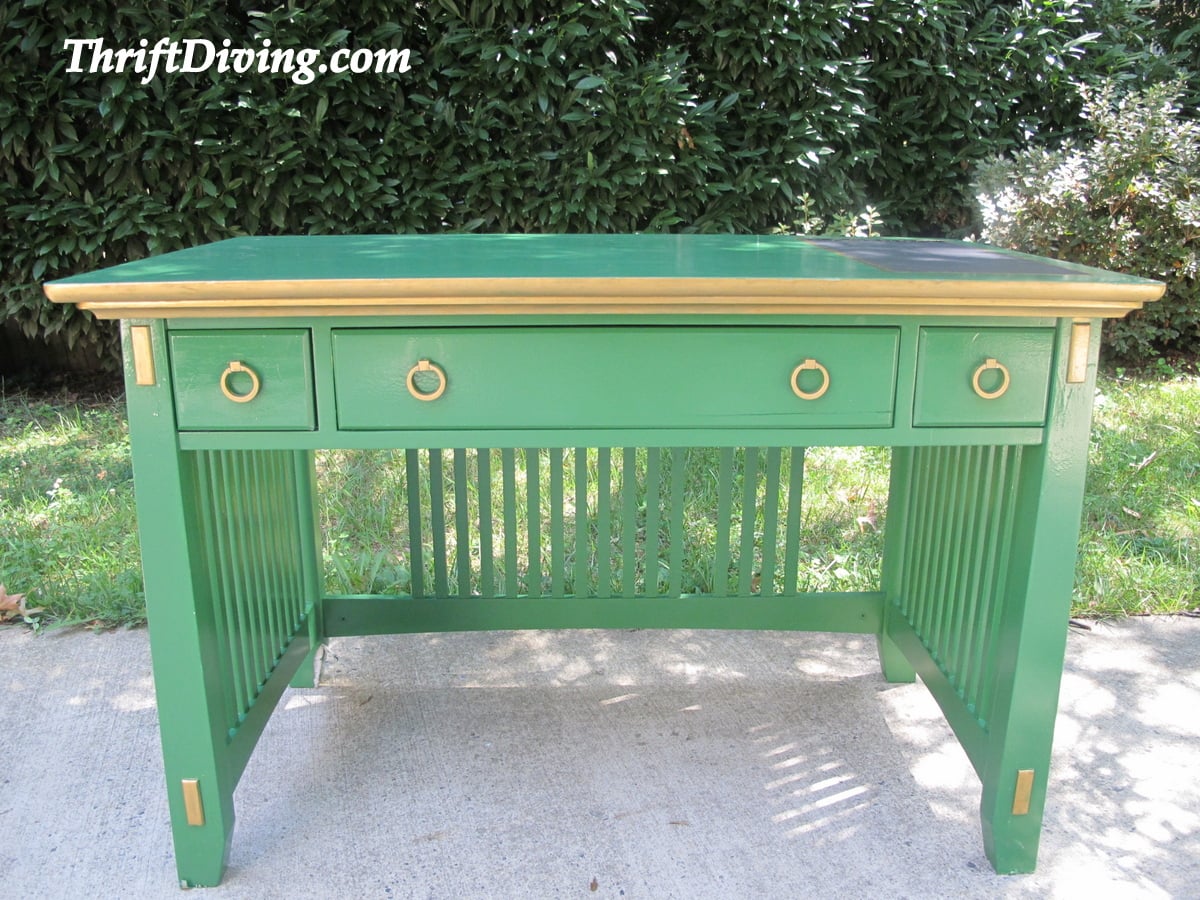
I had found this old vintage Singer sewing machine and used Rub ‘n Buff along the edge to bring out the detail of the piece, to match the goal in the sewing machine. I did the same thing to this green and gold desk I did a few years ago.
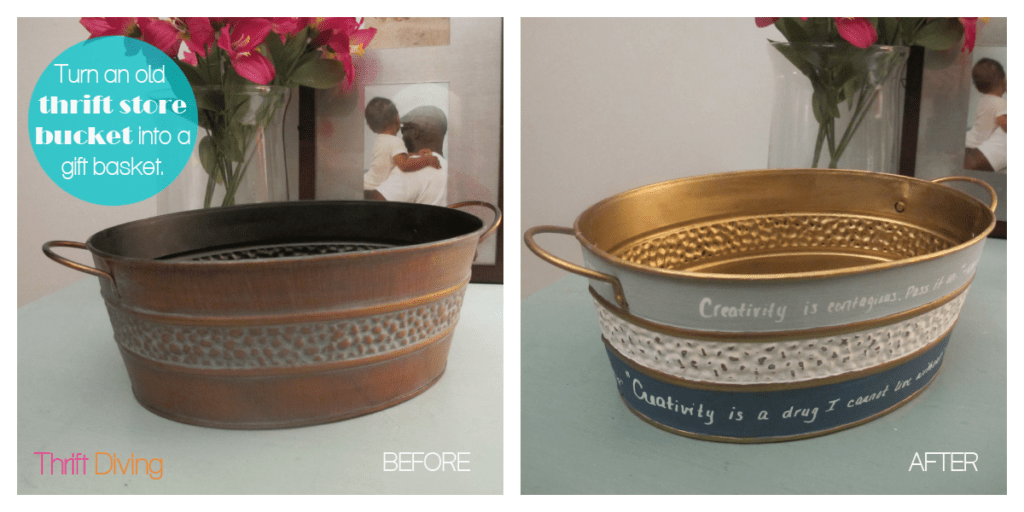
3. Freshen Up Old Metal Buckets
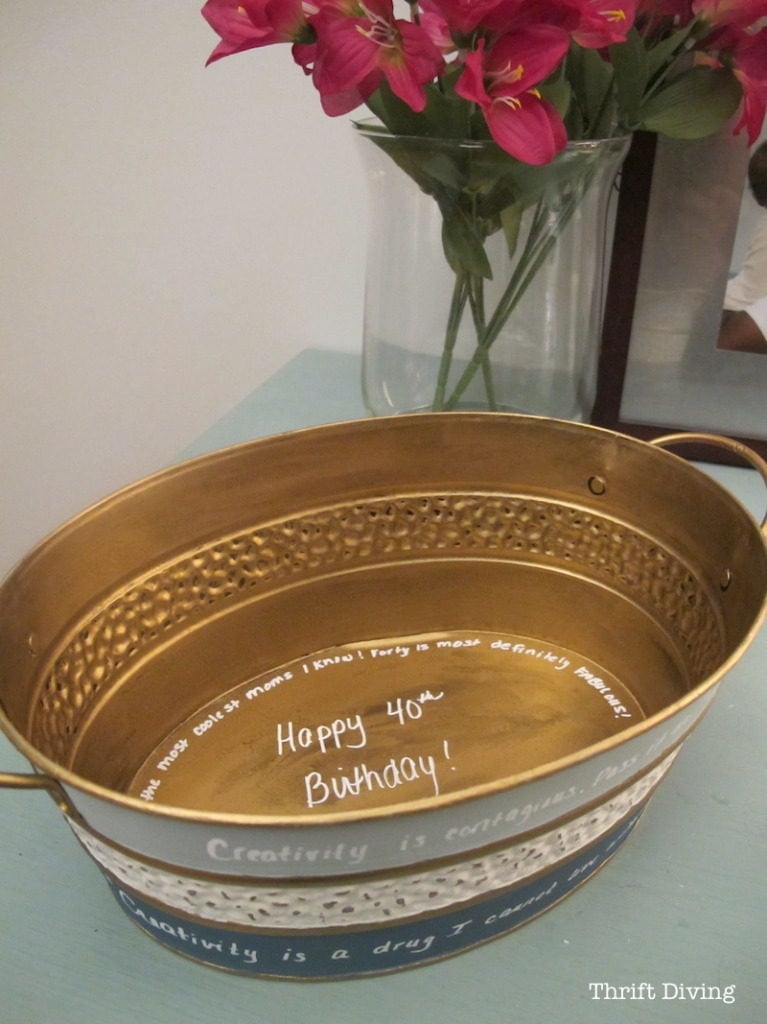
I loved the way this thrifted metal bucket turned out! I needed a great 40th birthday gift for my friend and decided to make a DIY craft pack for her with my favorite crafting supplies. I loved how pretty the inside turned out! I also used it on the bottom.
4. Gold-dip Your Legs
This is one project I haven’t tried yet, but with Rub ‘n Buff, it’s easy. But use painter’s tape around the legs of a chair or table, then wipe on Rub ‘n Buff below the tape, then buff, and peel off the tape. Super easy!
5. Update ANYTHING!
So here are some fun posts I found of things that people have used Rub ‘n Buff for. OMG, I’m loving the toy gun! LOL
Have you ever used Rub ‘n Buff? What is your favorite use for it? Leave a comment below and share your DIY skillz!

Download the 5 freebies!

Thrift Diving inspires women to decorate, improve, and maintain their home themselves...using paint, power tools, and thrift stores! Use these 5 printables, checklists, and ebooks to get started!
Have you ever used it on silver faucets in the bathroom?
Hi Kindall, I haven’t used it on faucets in the bathroom. I would think that it might not be a good idea because I don’t know how it works in a wet area. If anything, I would probably try spray paint if you want to completely change the faucets. Hope that helps!