The Bathroom Makeover That Would Never End
The saga continues with my master bathroom makeover.
This room was part of my 30-Day Room Makeover Challenge.
If you remember, it was extended to 40 days because my readers and I needed more time.
But I “failed” my own challenge because I didn’t get done by the due date.
So I’m essentially on Day 49. 🙂
I tried to chuck up the delay to the new floor being installed on Day 28.
But considering we’re already 30 days beyond the floor being installed–yeah–that’s not a good excuse. 🙂
The Real Reason For the Delay
The real reason for the delay in getting my bathroom done is because I’m scared of messing up.
You see, one thing I absolutely love is pushing myself further than I’ve ever gone before.
So I decided I would go outside of my DIY comfort zone and build a 60″ bathroom vanity.
Let’s keep in mind, folks, that I’ve hardly ever built anything bigger than a breadbox. HA!
(Oh wait, I did build a DIY bench with storage, but that was simple compared to the idea of building a vanity!)
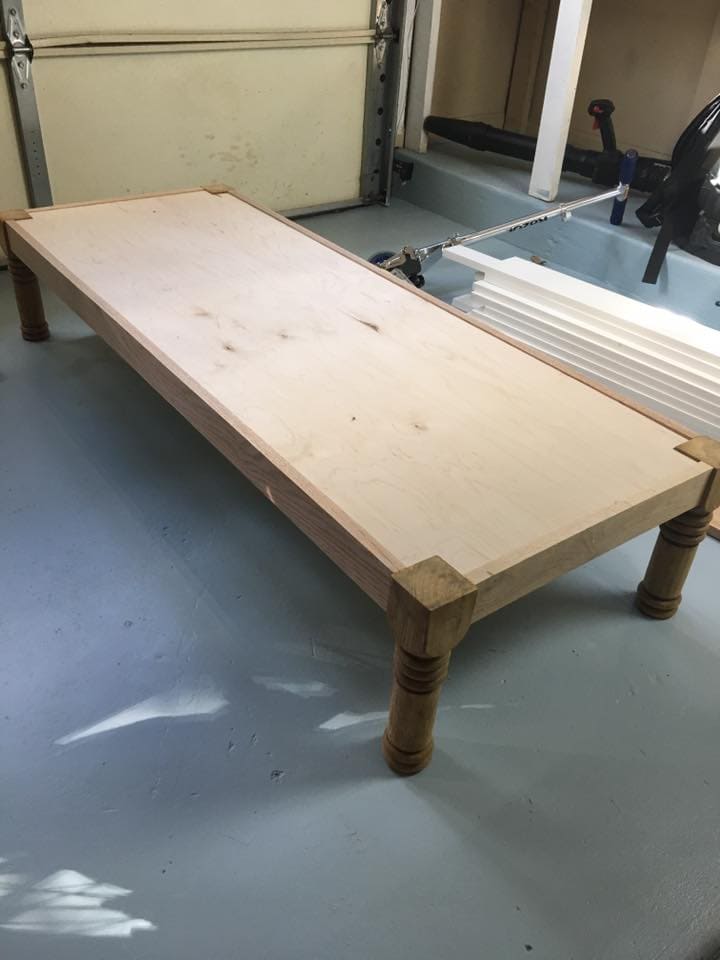
The last update I provided, I had shown you how I planned to upcycle these old legs from the salvage shop into vanity legs.
I knew they’d be perfect, even though I didn’t know exactly how I would use or attach them.
BEFORE
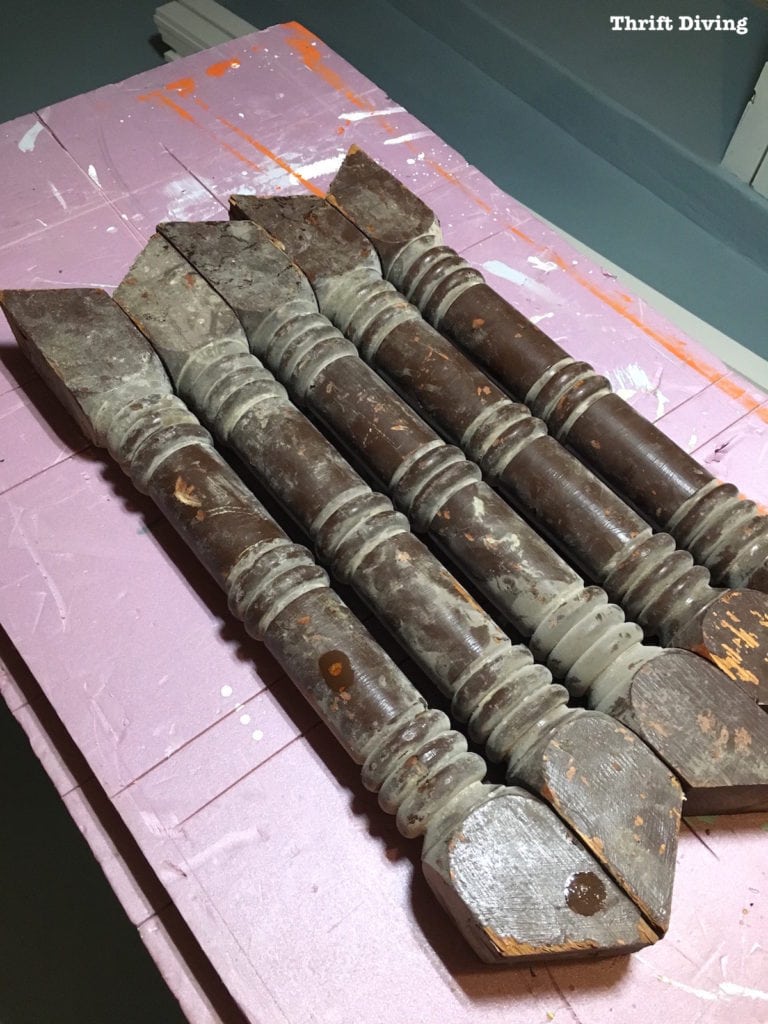
AFTER!
I hate stripping and sanding curved surfaces! LOL.
Thankfully, I binge-watched HBO’s new series with Sarah Jessica Parker called Divorce while I sanded (you must watch!), so the job was less tedious in between fits of laughter. 🙂
Once clean, they were ready to be used to start designing and building my DIY bathroom vanity!

The Fear is REAL…
This whole challenge, I’ve been scared that:
- I’ll build pure crap.
- It won’t be anatomically correct.
- I’ll get halfway through and realize I screwed something up and have to start all over.
- It will look good initially but it will crack under the weight of sinks, granite, or climbing kids.
- Did I mention I am afraid it will crack….?
It’s different if you’re building a vanity from DIY plans that someone has already painstakingly crafted for you.
But when you’re using upcycled legs, there are no plans for that.
You gotta wing it…and then you cross your fingers and hope it doesn’t crack. LOL
My Progress!
As I sit here pouring over tons of project pictures, I realize that there are so many things to share with you, including how I removed and installed a new toilet… how I fixed huge holes in my drywall… how I did the board and batten…
So I promise I’ll share more detailed step-by-steps, but for now, here’s where I am with things!
The Vanity!
Normally I’d not want to share any parts of a room makeover with you until it’s all done, but why make you wait?? 🙂
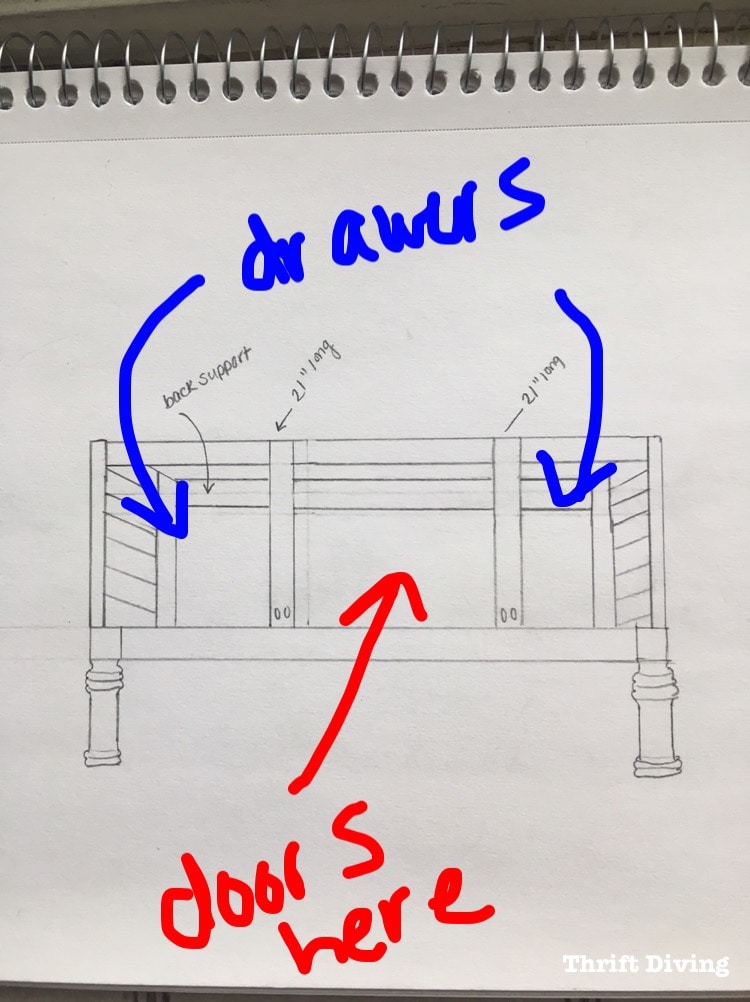
If you recall above, those vanity legs were the only thing I started with.
But after buying some solid oak, I started sketching what I thought it would look like.
I didn’t know how to create this in SketchUp, an easy way to draw in 3D which a lot of builders use to plan and create projects. But it would have taken me just as long to learn how to draw it in 3D as it did to build it!
Sometimes you got to go old school, yo!
So far, so good!
I can’t wait to explain to you how I’ve done it so far!
This week I am hoping to be done.
Just got to get the drawers built and inserted, along with making some cabinet doors.
The granite should be ready by the end of the week!
Woo hoo!
In case you’re wondering if I am going to stain or paint it, I’m going to be painting it, but with a very light wash of gray, following by liming wax which will settle into the grain and highlight the grain.
It’s a technique I learned at an Amy Howard painting workshop and I have always wanted to do a piece in that manner.
I plan to practice on sample boards first so I don’t ruin this piece!
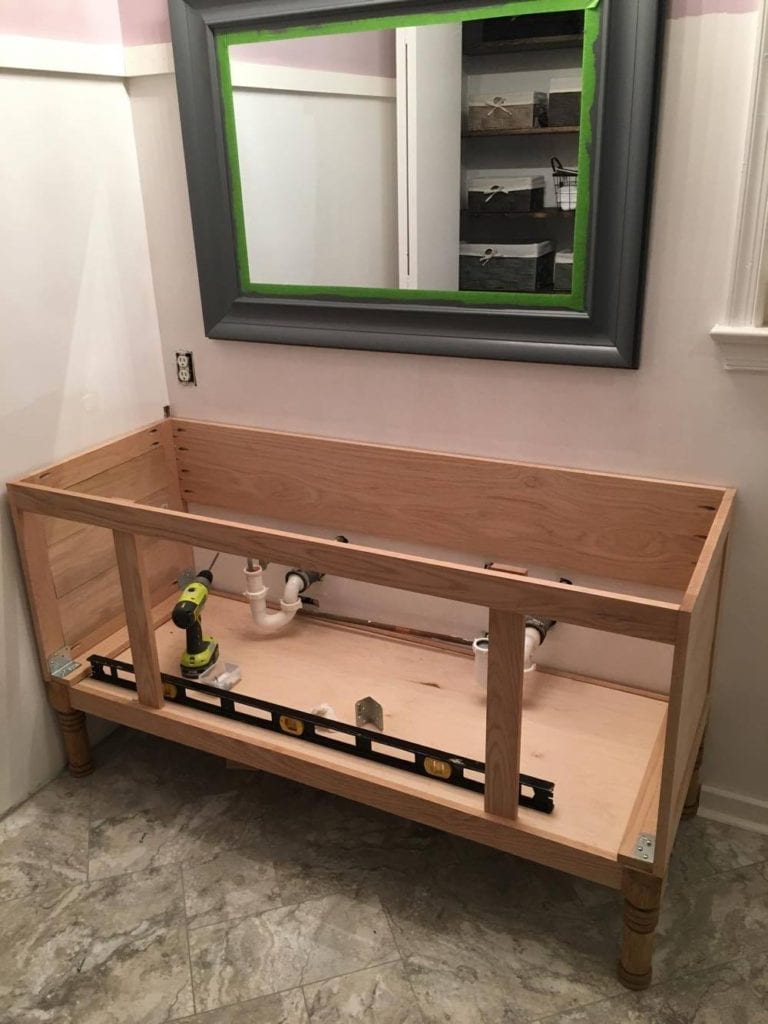
What you don’t see are the hours of agony over, “Is this going to work?” and “Okay, what’s the next step?? Think, Serena….think…”
I ran into issues such as whether there was enough room for the plumbing. My friend Edmundo said there should be at least 6″-8″ of space under the pipes to work, but I’m sorry–in taller vanities like this, how can that be possible unless the plumbing is super high on the wall?
My thought is this: as long as the cabinet doors in the middle swing open, there should be plenty of room to do basic plumbing. Anything more extensive would need the vanity removed from the wall, anyway, right?
There’s no turning back now.
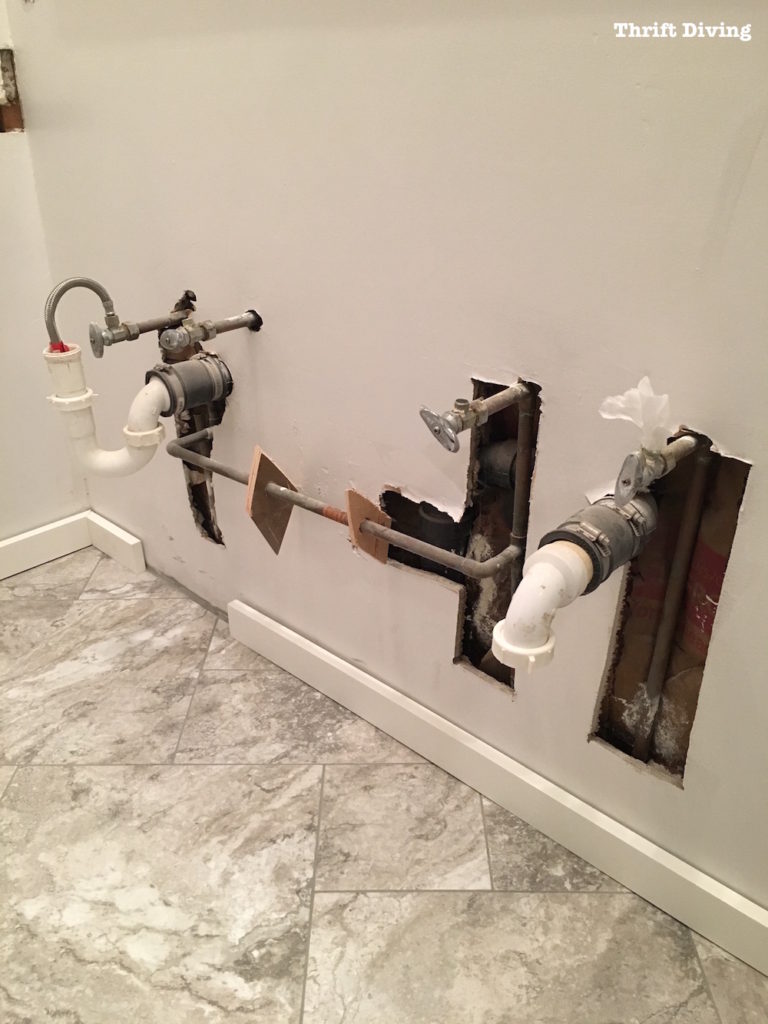
The Drywall Repairs!
Remember those nasty, ugly holes behind my vanity, where the plumbing must have been updated years ago, but the holes never filled?
BEFORE
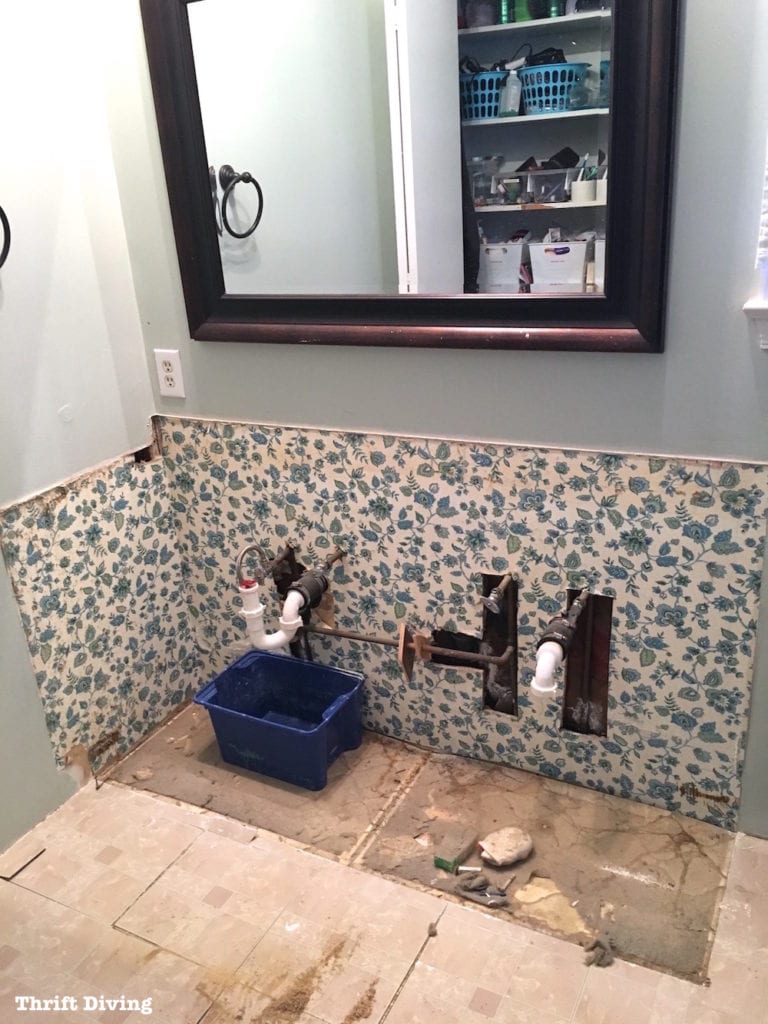
Once the wallpaper was removed and some paint added, it looked better.
I was actually going to take the lazy route and not repair these big drywall holes, but it wasn’t a good idea to do that because of pests, humidity, and other things.
Plus, when I open my pretty vanity cabinet doors, do I really want to see gaping holes??
Nah!
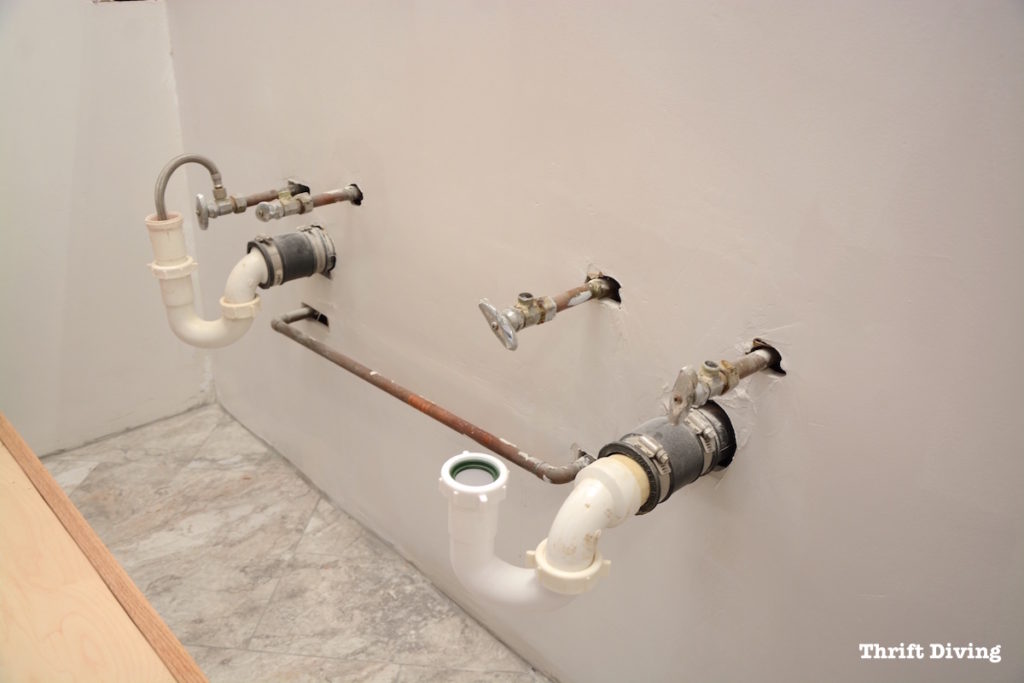
AFTER!
It was challenging as heck to drywall around plumbing!!
It was even harder to apply drywall mud and sand smooth around the plumbing, so some areas are little rough. But considering it’s going to be behind a vanity, it does the job!
I’ll share this tutorial on how to fix and repair big drywall holes with you soon!
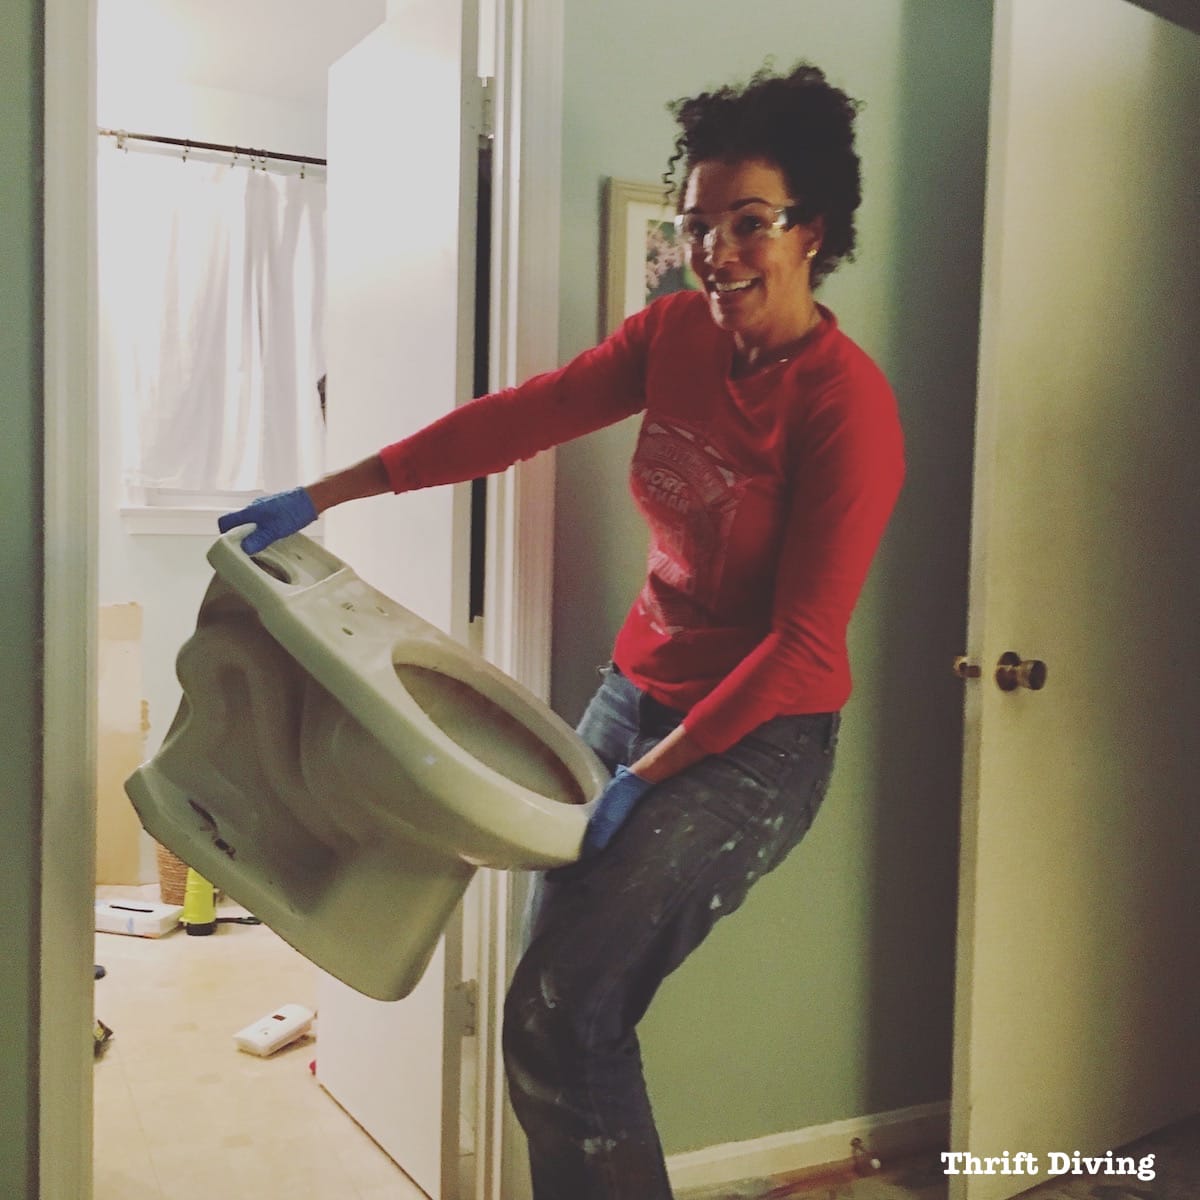
The New Toilet!
I’m excited to say that I’ve now removed and installed two toilets. 🙂
Since I had removed the toilet in my kids’ bathroom makeover previously, this toilet was a cinch to remove and replace!
I’ll be sharing this tutorial with you, as well!
BEFORE
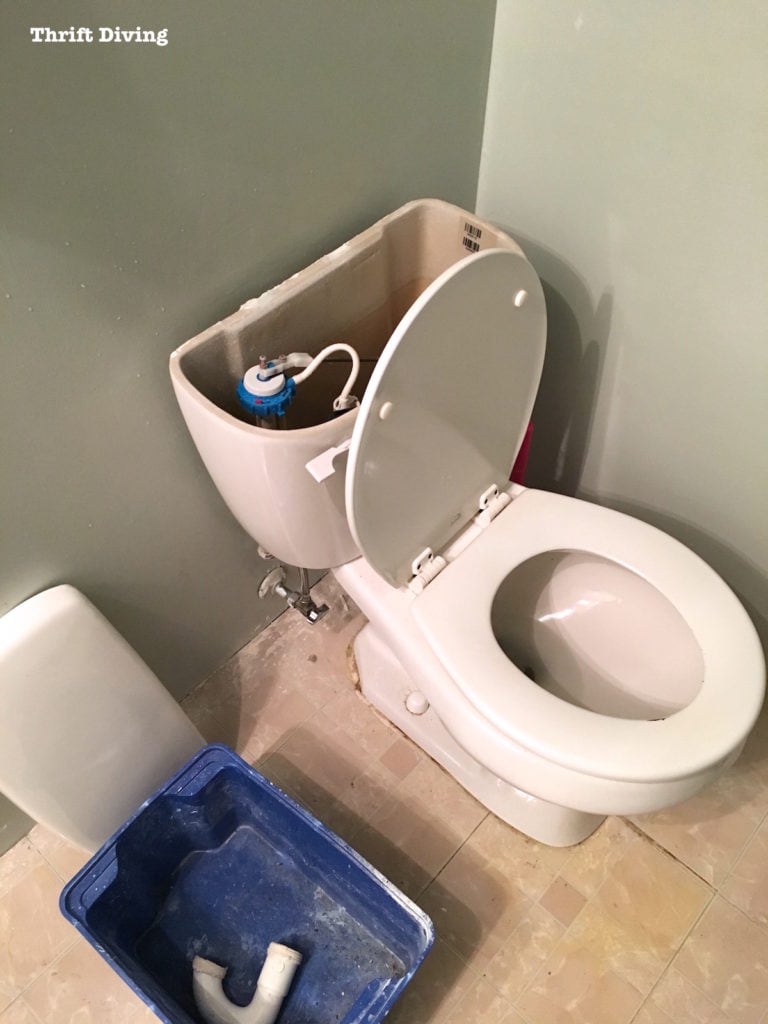
The New Toilet!
Of course, I don’t want to give away too much of the room makeover! 🙂
So I’m only giving you a sneak peek of the new Mansfield toilet I installed. I’ll give you the full tutorial soon on how to remove and install your own toilet. It’s actually very easy!

My Goal
My goal is to finish up this project by Friday.
The holidays start this weekend, and I would rather not be in the bathroom working on New Year’s Eve! lol
I haven’t forgotten about you guys!
I’ve just been in the throws of a challenging (yet exciting!) bathroom room makeover and trying to figure out how to build a DIY bathroom vanity from scratch!
In the meantime, have you checked out all the other room makeovers from readers in the makeover challenge? You can see them here!
I’ll be back on Wednesday with another update!
Catch up on this entire master bathroom makeover series!
DAY 1: The Evolution of a Master Bathroom Makeover
DAY 4: Picking Out New Flooring: Which One Do You Like?
DAY 6: How to Remove an Old Bathroom Vanity
DAY 27: Removing Wallpaper, Repairing Walls, and Removing an Old Toilet
DAY 29: Installing New Flooring in Our Master Bathroom
DAY 49: The Bathroom Makeover That Would Never End (An Update!)
Day 52: How to Remove a Toilet Yourself
DAY 57: How to Install a Toilet Yourself


Download the 5 freebies!

Thrift Diving inspires women to decorate, improve, and maintain their home themselves...using paint, power tools, and thrift stores! Use these 5 printables, checklists, and ebooks to get started!
Serena,
I am also in the midst of a huge renovation and move so I definitely feel ya (some DIY projects and some being done by the contractor). I definitely understand wanting to ensure that the DIY project is done but also that it looks fantastic. You are an inspiration so keep up the great work and I can’t wait to see the finished product. YOU CAN DO IT!! 🙂
Hi, Jocelyn! Wow, what kind of renovation are you doing?
Serena,
I feel your anxiety! My biggest issue about DYI’s is that it LOOKS DIY. I want to save the money and do it myself but I want it to look good at the same time. You are definitely doing a great job and I can’t wait to see the finished product. You should construct some 3 sided boxes to fit in front of the pipes, so the pipes aren’t always visible, but are easily removed when you need to get to the pipes.
Also, I thought you were also working on the garage, will you be sharing your progress there as well or will you do it on a separate post?
You are doing GREAT, step back and look at how wonderful it is. See what we see and keep going!
Thank you so much! My nerves are getting the better of me sometimes. But there’s no turning back. Too much pretty oak invested! LOL. Thanks for the boost to my confidence!
Serena,
The vanity is awesome! I can’t wait to see it finished. You did a great job on the drywall too. You are amazing!
Sue
Hi, Sue! Awww…thanks! I love trying new projects, and this bathroom has really taught me a think or two about building and repairs, like the drywall! 🙂 Can’t wait to share the details with you guys! 🙂 Thanks for following along!
can’t wait to see the finished job!!! i never even started my room make-over–just too afraid i couldn’t do it all. you are so right–if you don’t begin your project then you can’t fail at it!!! this is my big problem, too. well, you are doing a fantastic job and learning so much as you go along. now, i just need to gather my courage the way you have. best wishes
You can do it, Jacqueline! It’s hard being scared and stuff taking the plunge. First of all, the money invested….the time invested….and what if it doesn’t turn out or looks horrible?? I feel your fears! One thing I learned this time around though is that baby steps definitely count as long as you’re moving forward! The day I did that drywall, it freakin’ took me all day while the kids were at school! I’m not exaggerating. And just when I was about to do it wrong, there was a step I realized I missed and I had to go back and do that step before moving on. These days, I’ve been walking around feeling anxious because I’m so worried that the vanity won’t turn out. I’m running into some problems, but I am only hoping that I can turn it around!! So it’s okay to be scared. Just don’t be afraid to start. 🙂
Can’t wait to see the final reveal! You’re going to get ‘er done! You are brave!
Thanks, Florence! Today I’m a little worried because I realized that the vanity isn’t even. Because of the way I did the legs set-back a little, it doesn’t line up with the top. Soooo, this is throwing off everything else at this point, and I don’t know if I should keep going with everything thrown off and just make adjustments as I go, or if I should back up a step and try to make a correction that could fix things (but can also damage the wood). Ahhh…decisions, decisions! Thanks for commenting!!
It looks like your walls are painted a shade of grey. If so, could you please tell me the color? It’s hard to find greys that retain their shade and don’t show a blue or purple hue.
Thanks for all of your shared wisdom!
Hey, Bonnie! Sadly, I don’t know the color of the walls because I used some custom match that I already had. When I ran out, I just had Behr color-match it. I can email you the code on top of the can! It may look gray, but I have been calling it an off-white. I tried using a bright white, but I much preferred the off-white. Can you send me an email and I’ll send you a picture of the can, if the code is still visible? 🙂
The trick to getting a good gray is to look at the color deck carefully. Some grays are with lavenders and others are with black.
I made the mistake of getting a lavender gray once and ended up hating it!
good luck!
gail
Stuff steel wool around the pipes to keep mice out.
Ahhhh….great idea, Elizabeth! I didn’t think about that! You rock! Will do!
You are a brave lady! Braver than me! We are getting ready to do our master bath as well. A total gutting of our 30+years bathroom . We found an antique sideboard we will turn into a vanity. I am lime you though I don’t want to mess it up because I will have to live with it for a long time. Bedroom will also be getting some updates. I look forward to seeing your finished bathroom.
That’s a great idea, Debbie, to use an old sideboard! MUUUUUCCCH easier than building one yourself! HA! Are you doing much of the work yourself, or do you have installers coming in?
Hey Serena,
Thank you for showing us that everyone has challenges that don’t always go the way we want them to, but if you keep moving forward they will get done. I can hardly wait to see your beautiful new master bathroom!! Keep your head up and your heart full and you’ll be done in no time…… 50 or 60 days….lol Love ya’
Oh, Patricia, girl, the challenges are REAL! I’m freaking out a little today because I realized that the top part of the vanity isn’t even with the bottom part, because of how I attached the legs, in the standard way that legs are usually attached. But that 1/4″ makes a big difference to how the drawers will line up, possibility even making me forego drawers the way I wanted to so that it’s not that noticeable. I’m still in the game, but I’m having to change the rules BIG TIME! 🙂 Thanks for following along! I promise not to follow screw this up! LOL
I’m sorry this project is causing you so much stress. Cabinet making is an enormous challenge and you are brave to take it on. Marrying a sink, drawers, pipes, counter tops…my goodness it’s any wonder you’re nervous. I wish you great success and admire your tenacity.
Thank you, Alys! I just sat down and thought of some goals for 2017 and I decided that I will do 4 projects in 2017 that “scare me.” Not sure what they’ll be, but I am sure one of them will be to build a shed! 🙂 LOL. This vanity is just preparing me for the things that are to come!