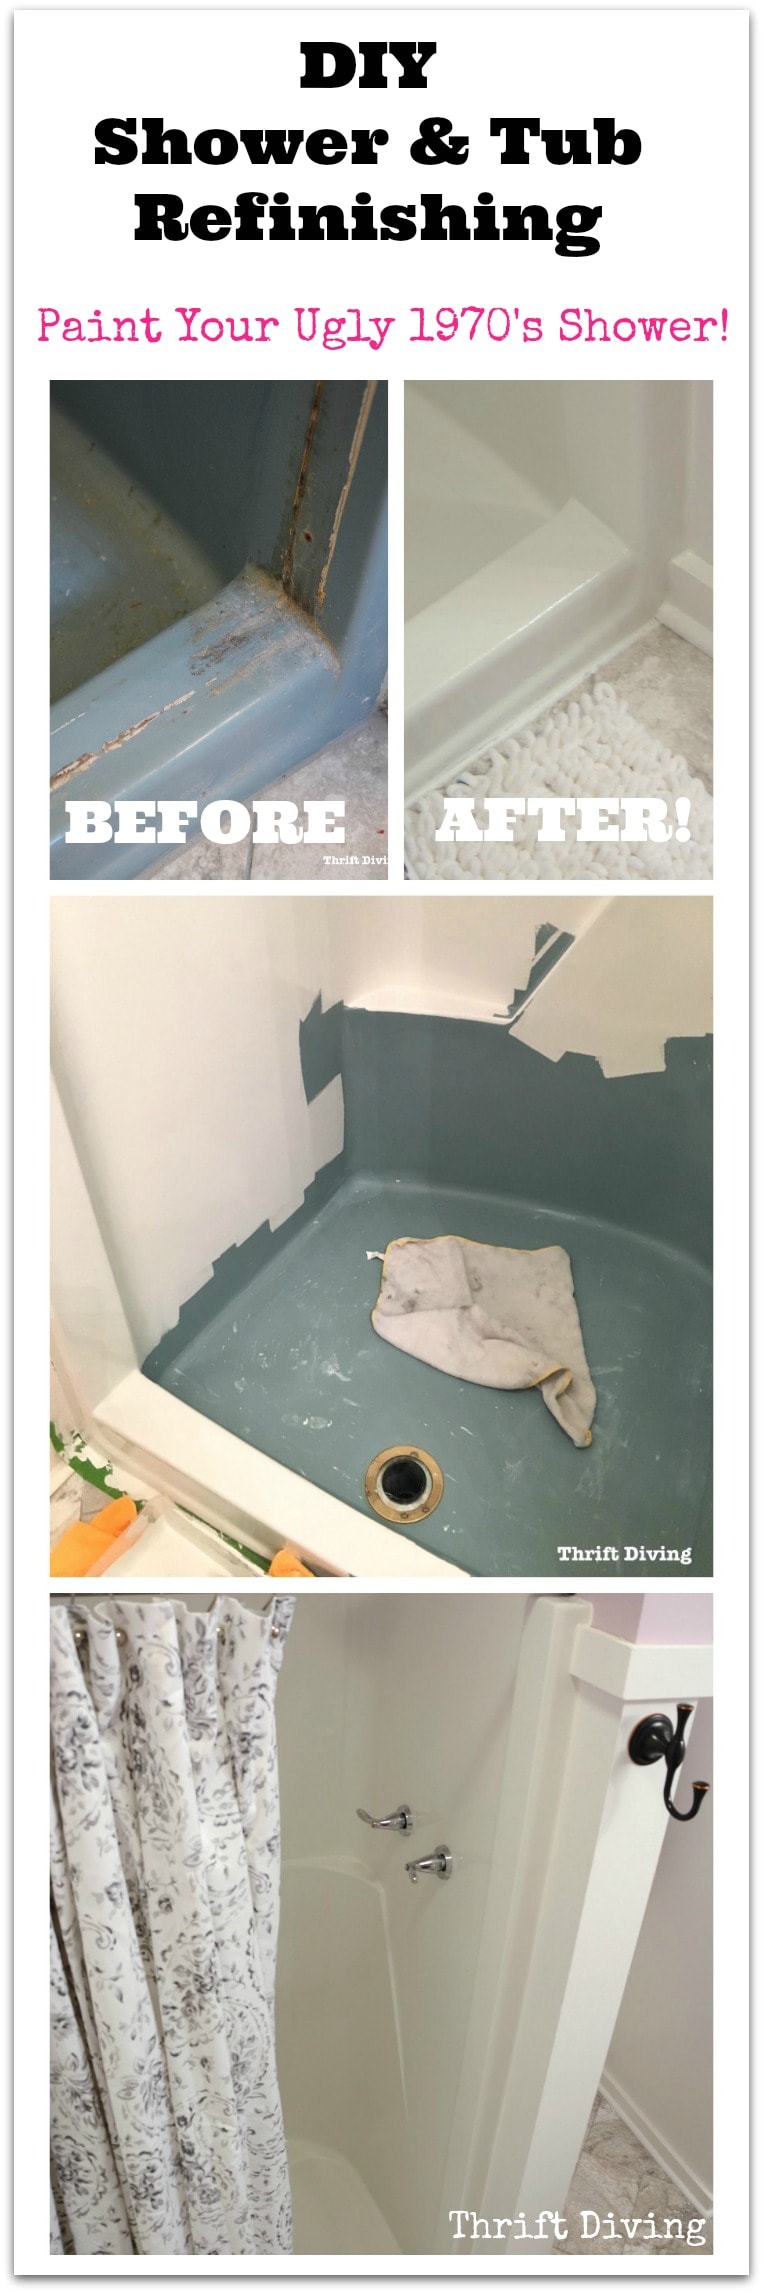
DIY Shower and Tub Refinishing: I Painted My Old 1970’s Shower
This tutorial on Shower and Tub Refinishing: How I Painted My Old 1970’s Shower was sponsored by Bathworks.
When we moved into this old 1973 home six years ago, shower and tub refinishing was the furthest thing from my mind. I was simply happy to double our square footage, get an awesome backyard, and live in a neighborhood where parents actually participated in school functions.
I followed the sage advice to “buy the worst house in a good neighborhood…”
But there were other questions I should have asked before buying a house.
Such as “How much time will you have to update this house?” because people fail to tell you that you’ll spend years fixing up and upgrading all the ugly crap inside of the home. And you’ll likely do it yourself because you’ll never be able to afford professionals to come and do it for you.
HA!
It’s true.
At least, it was for us.
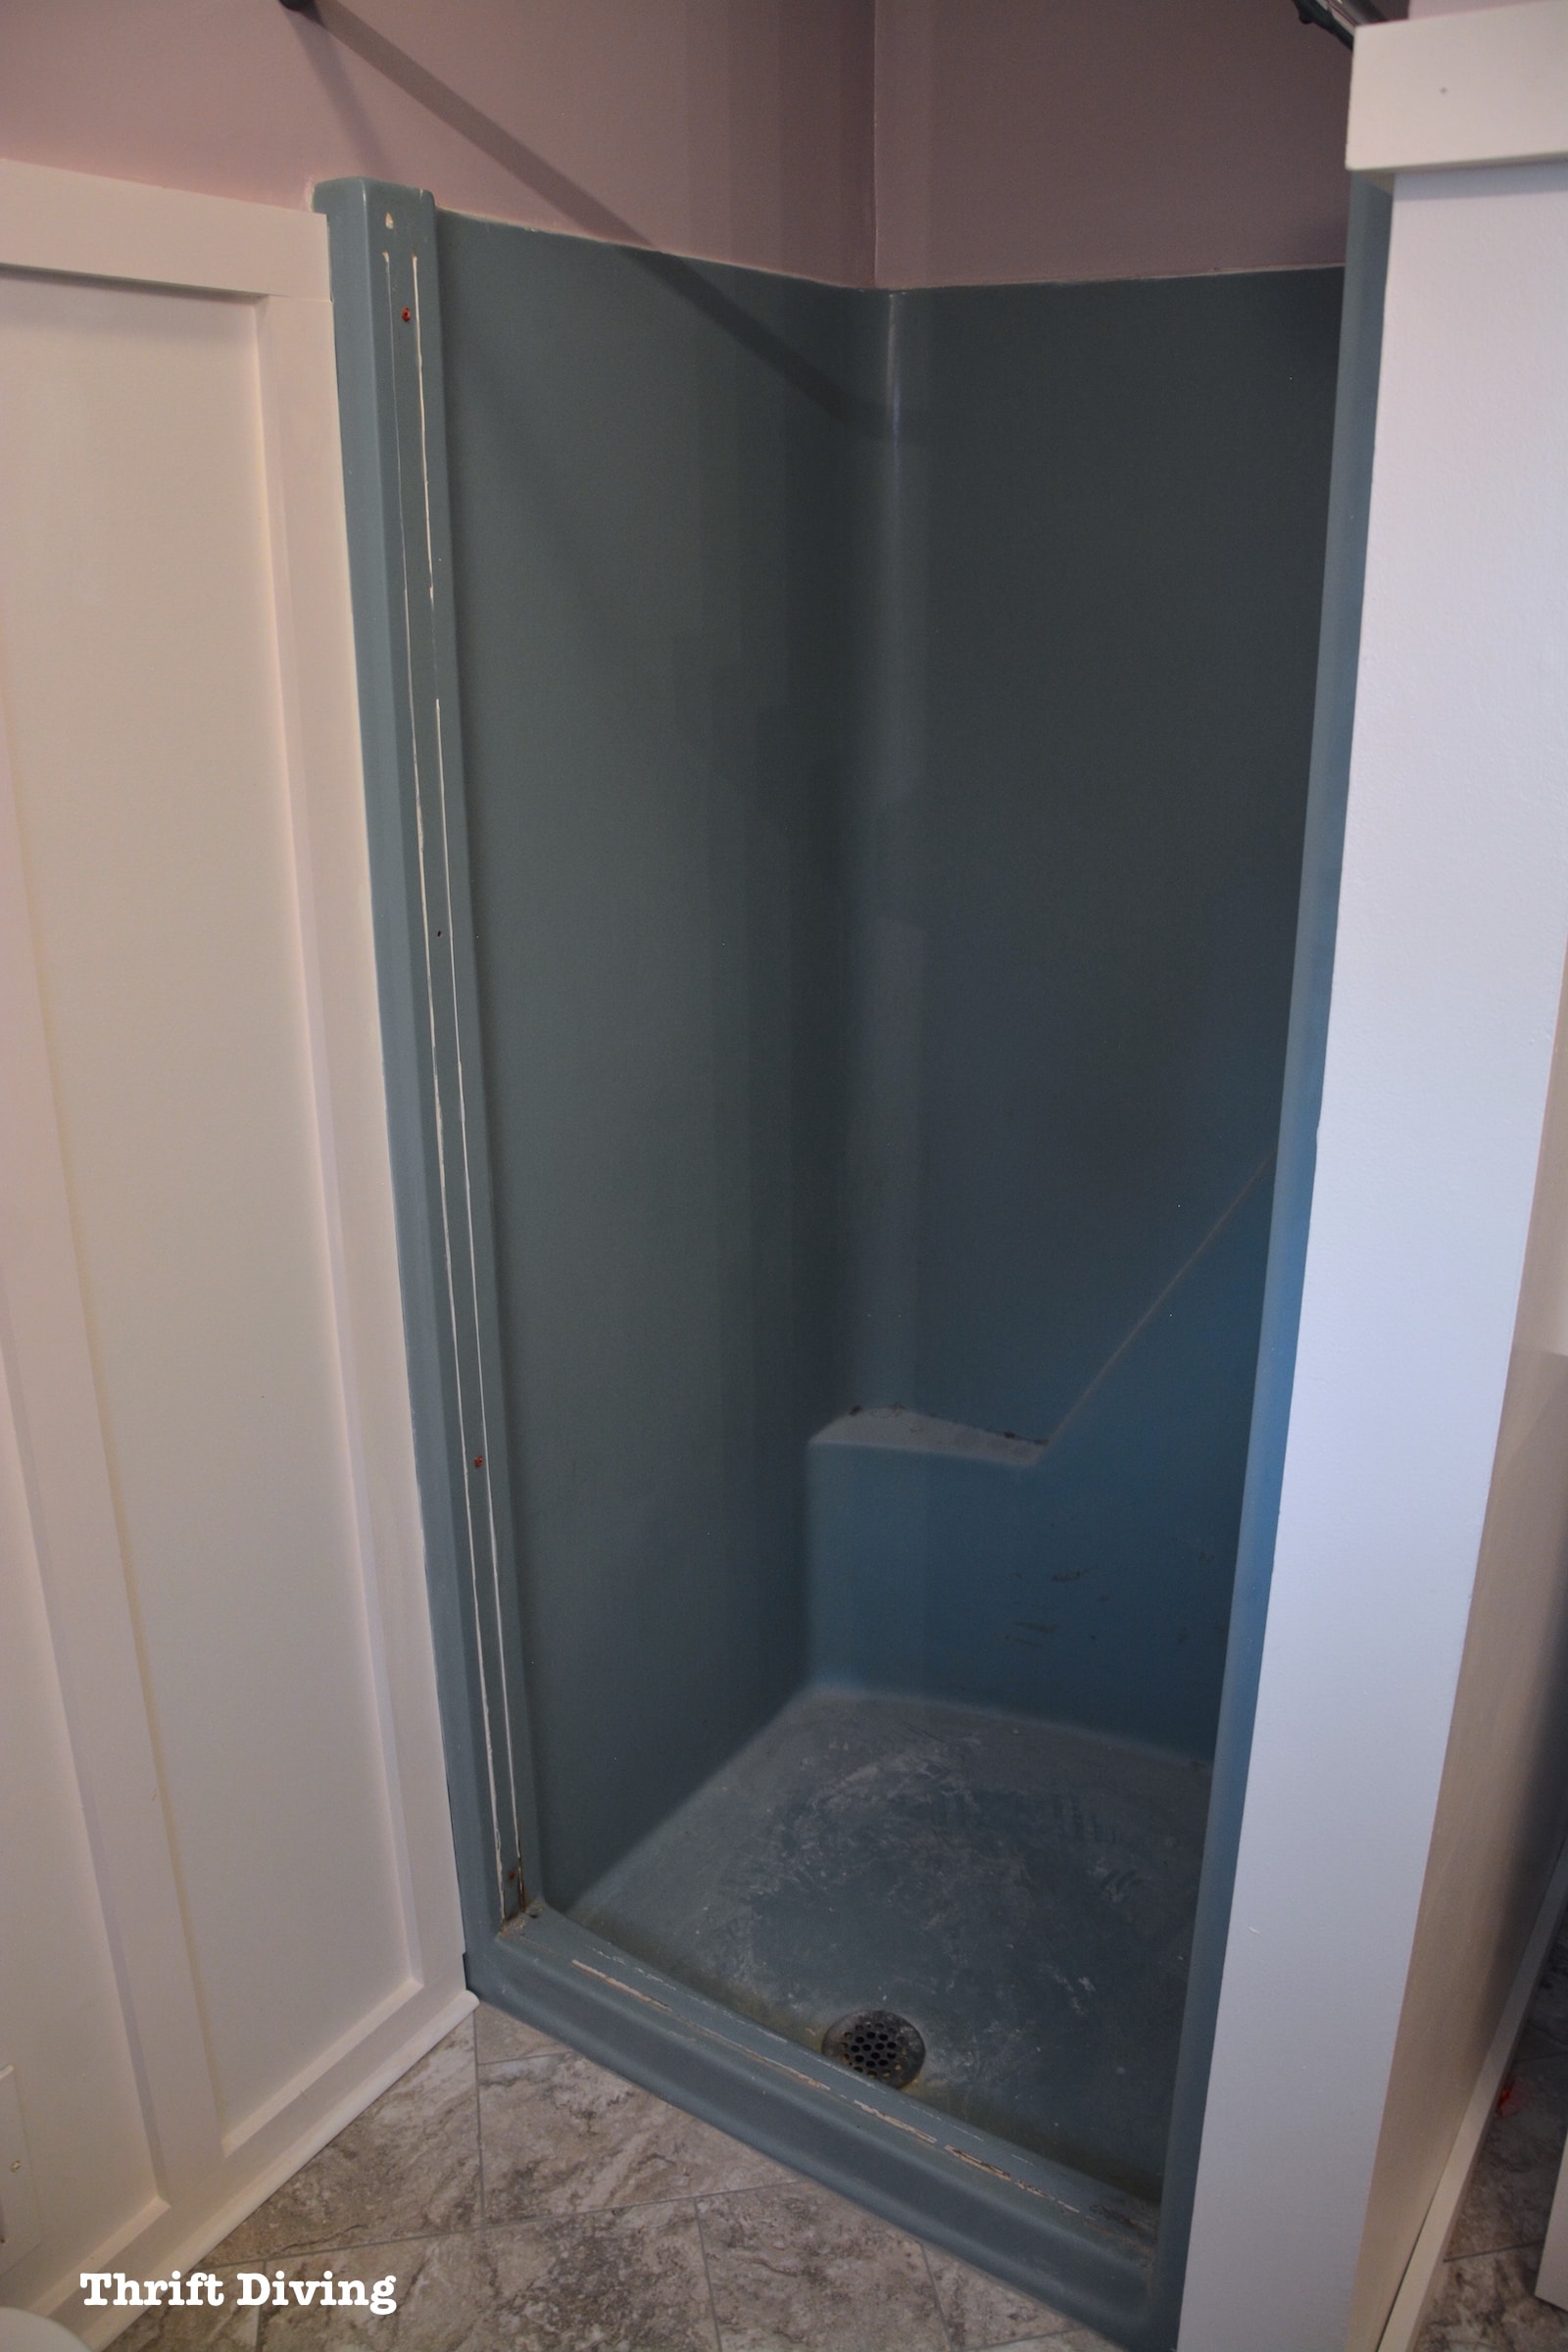
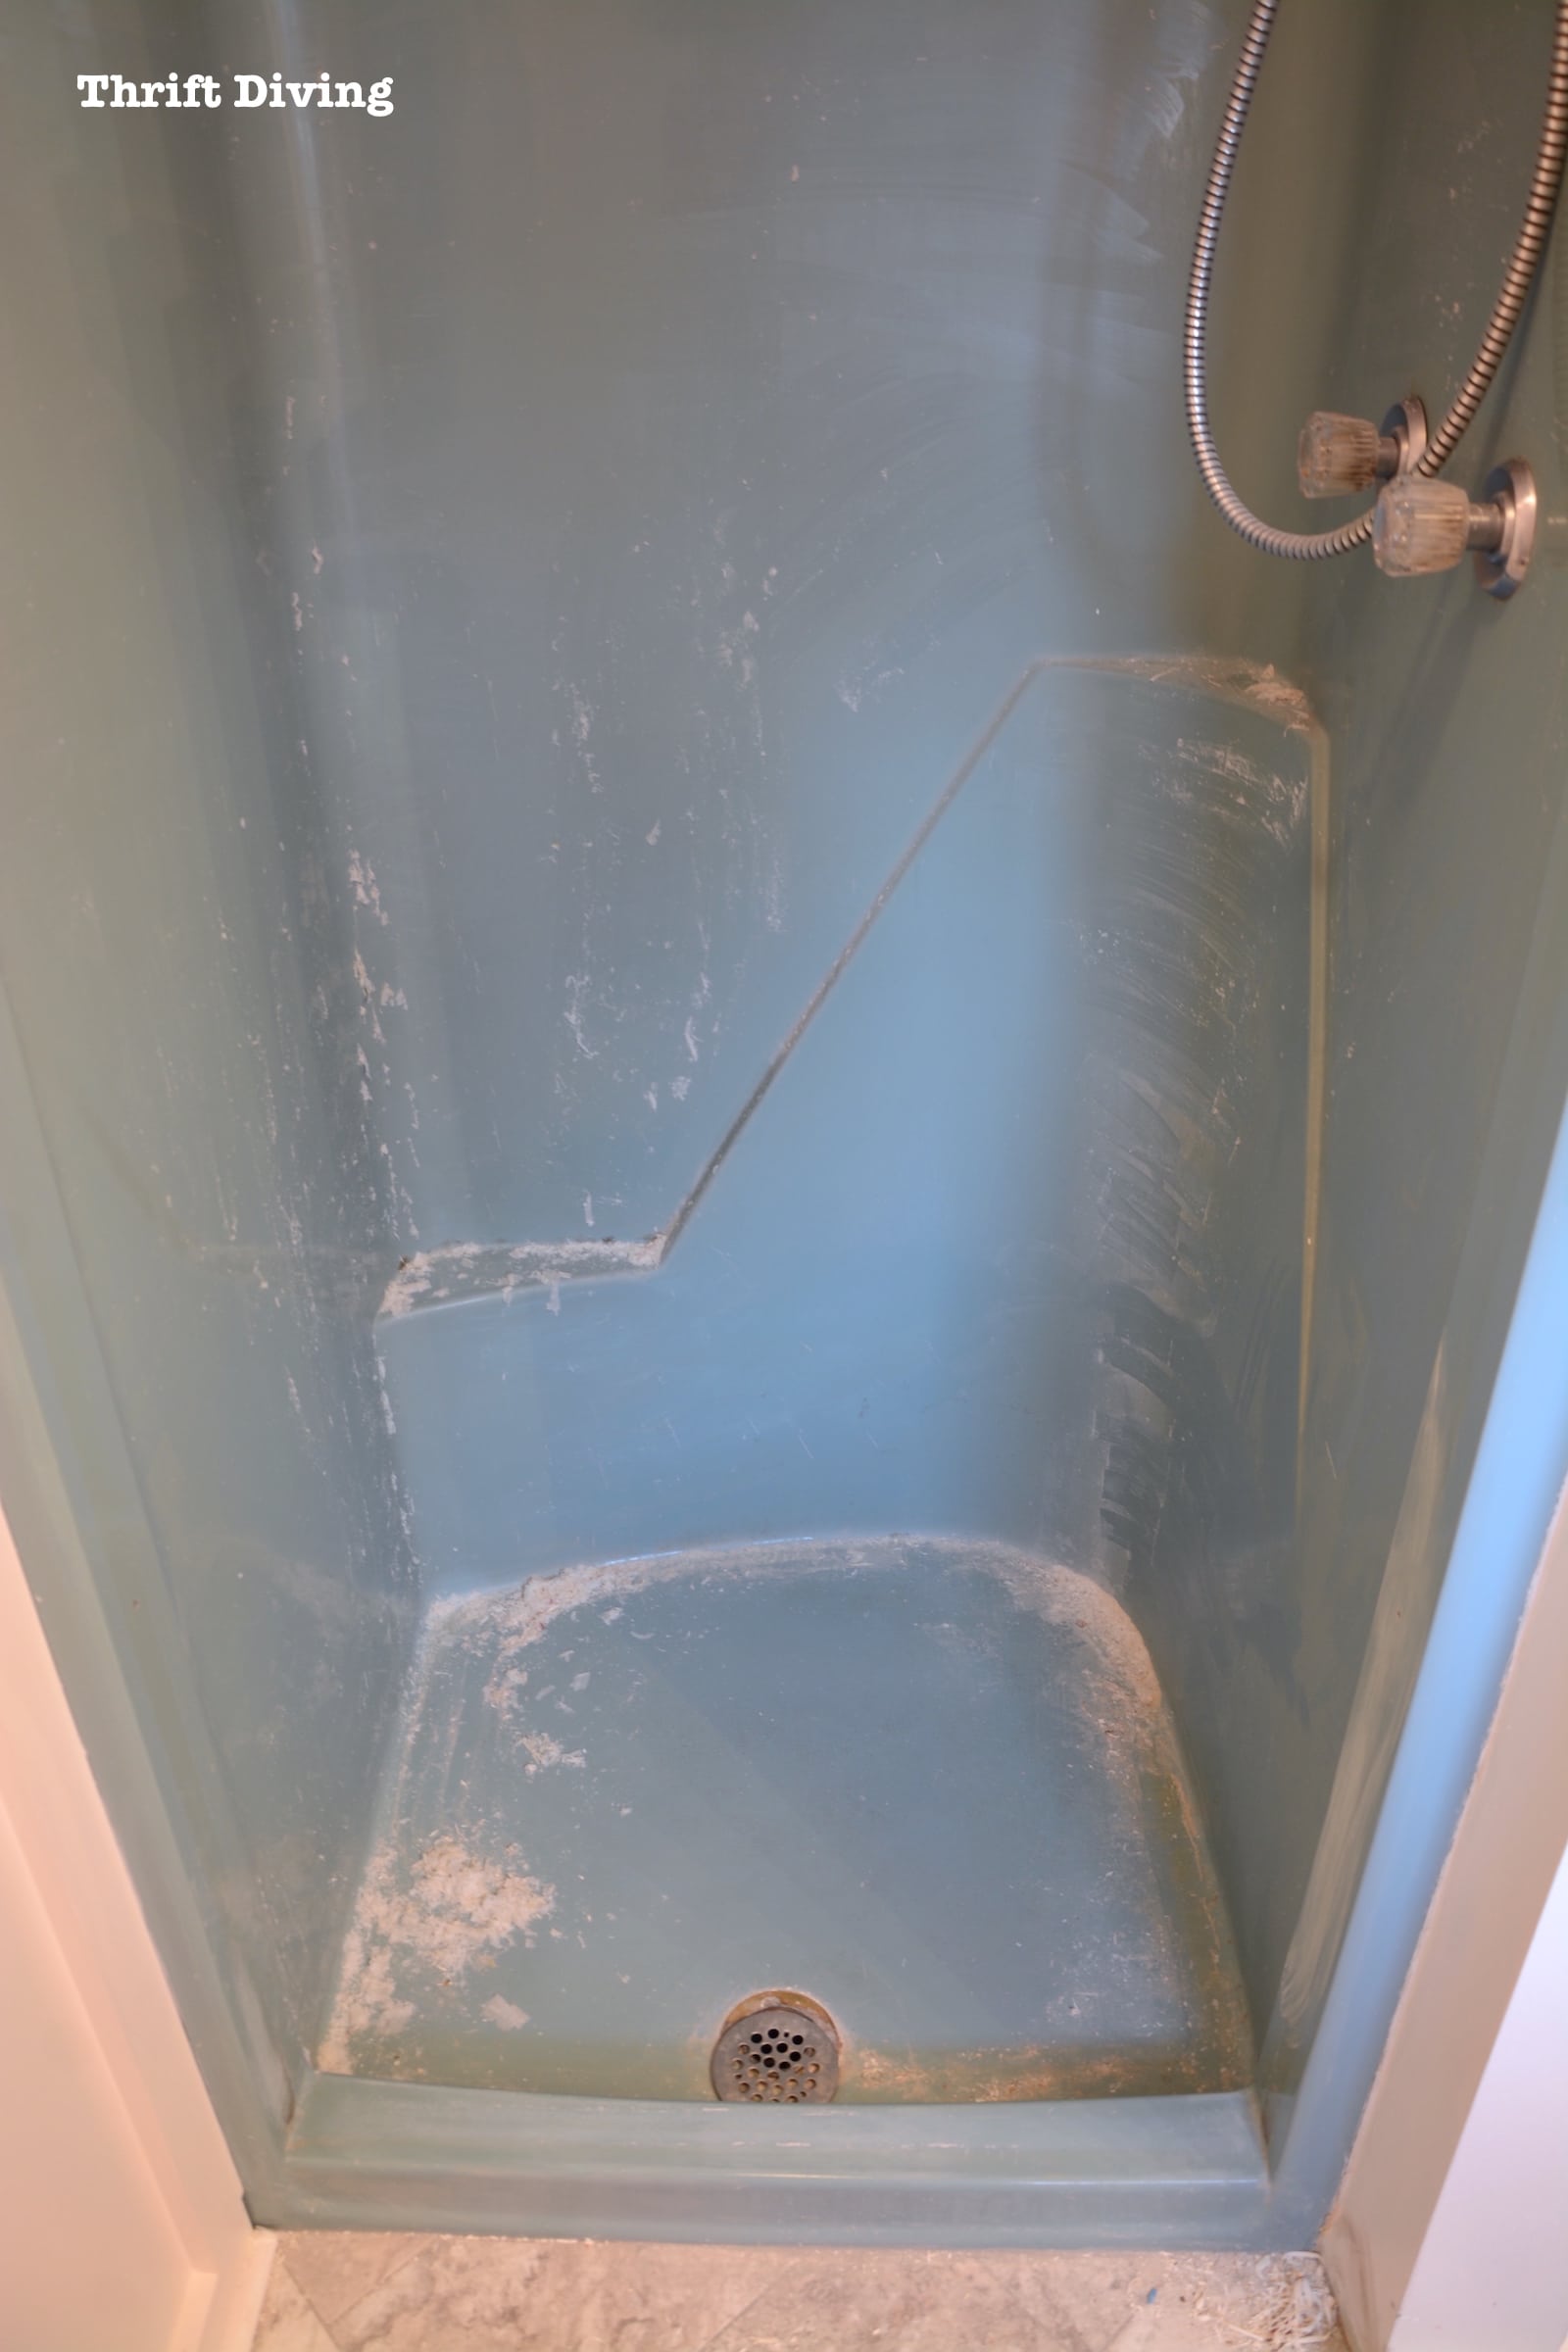
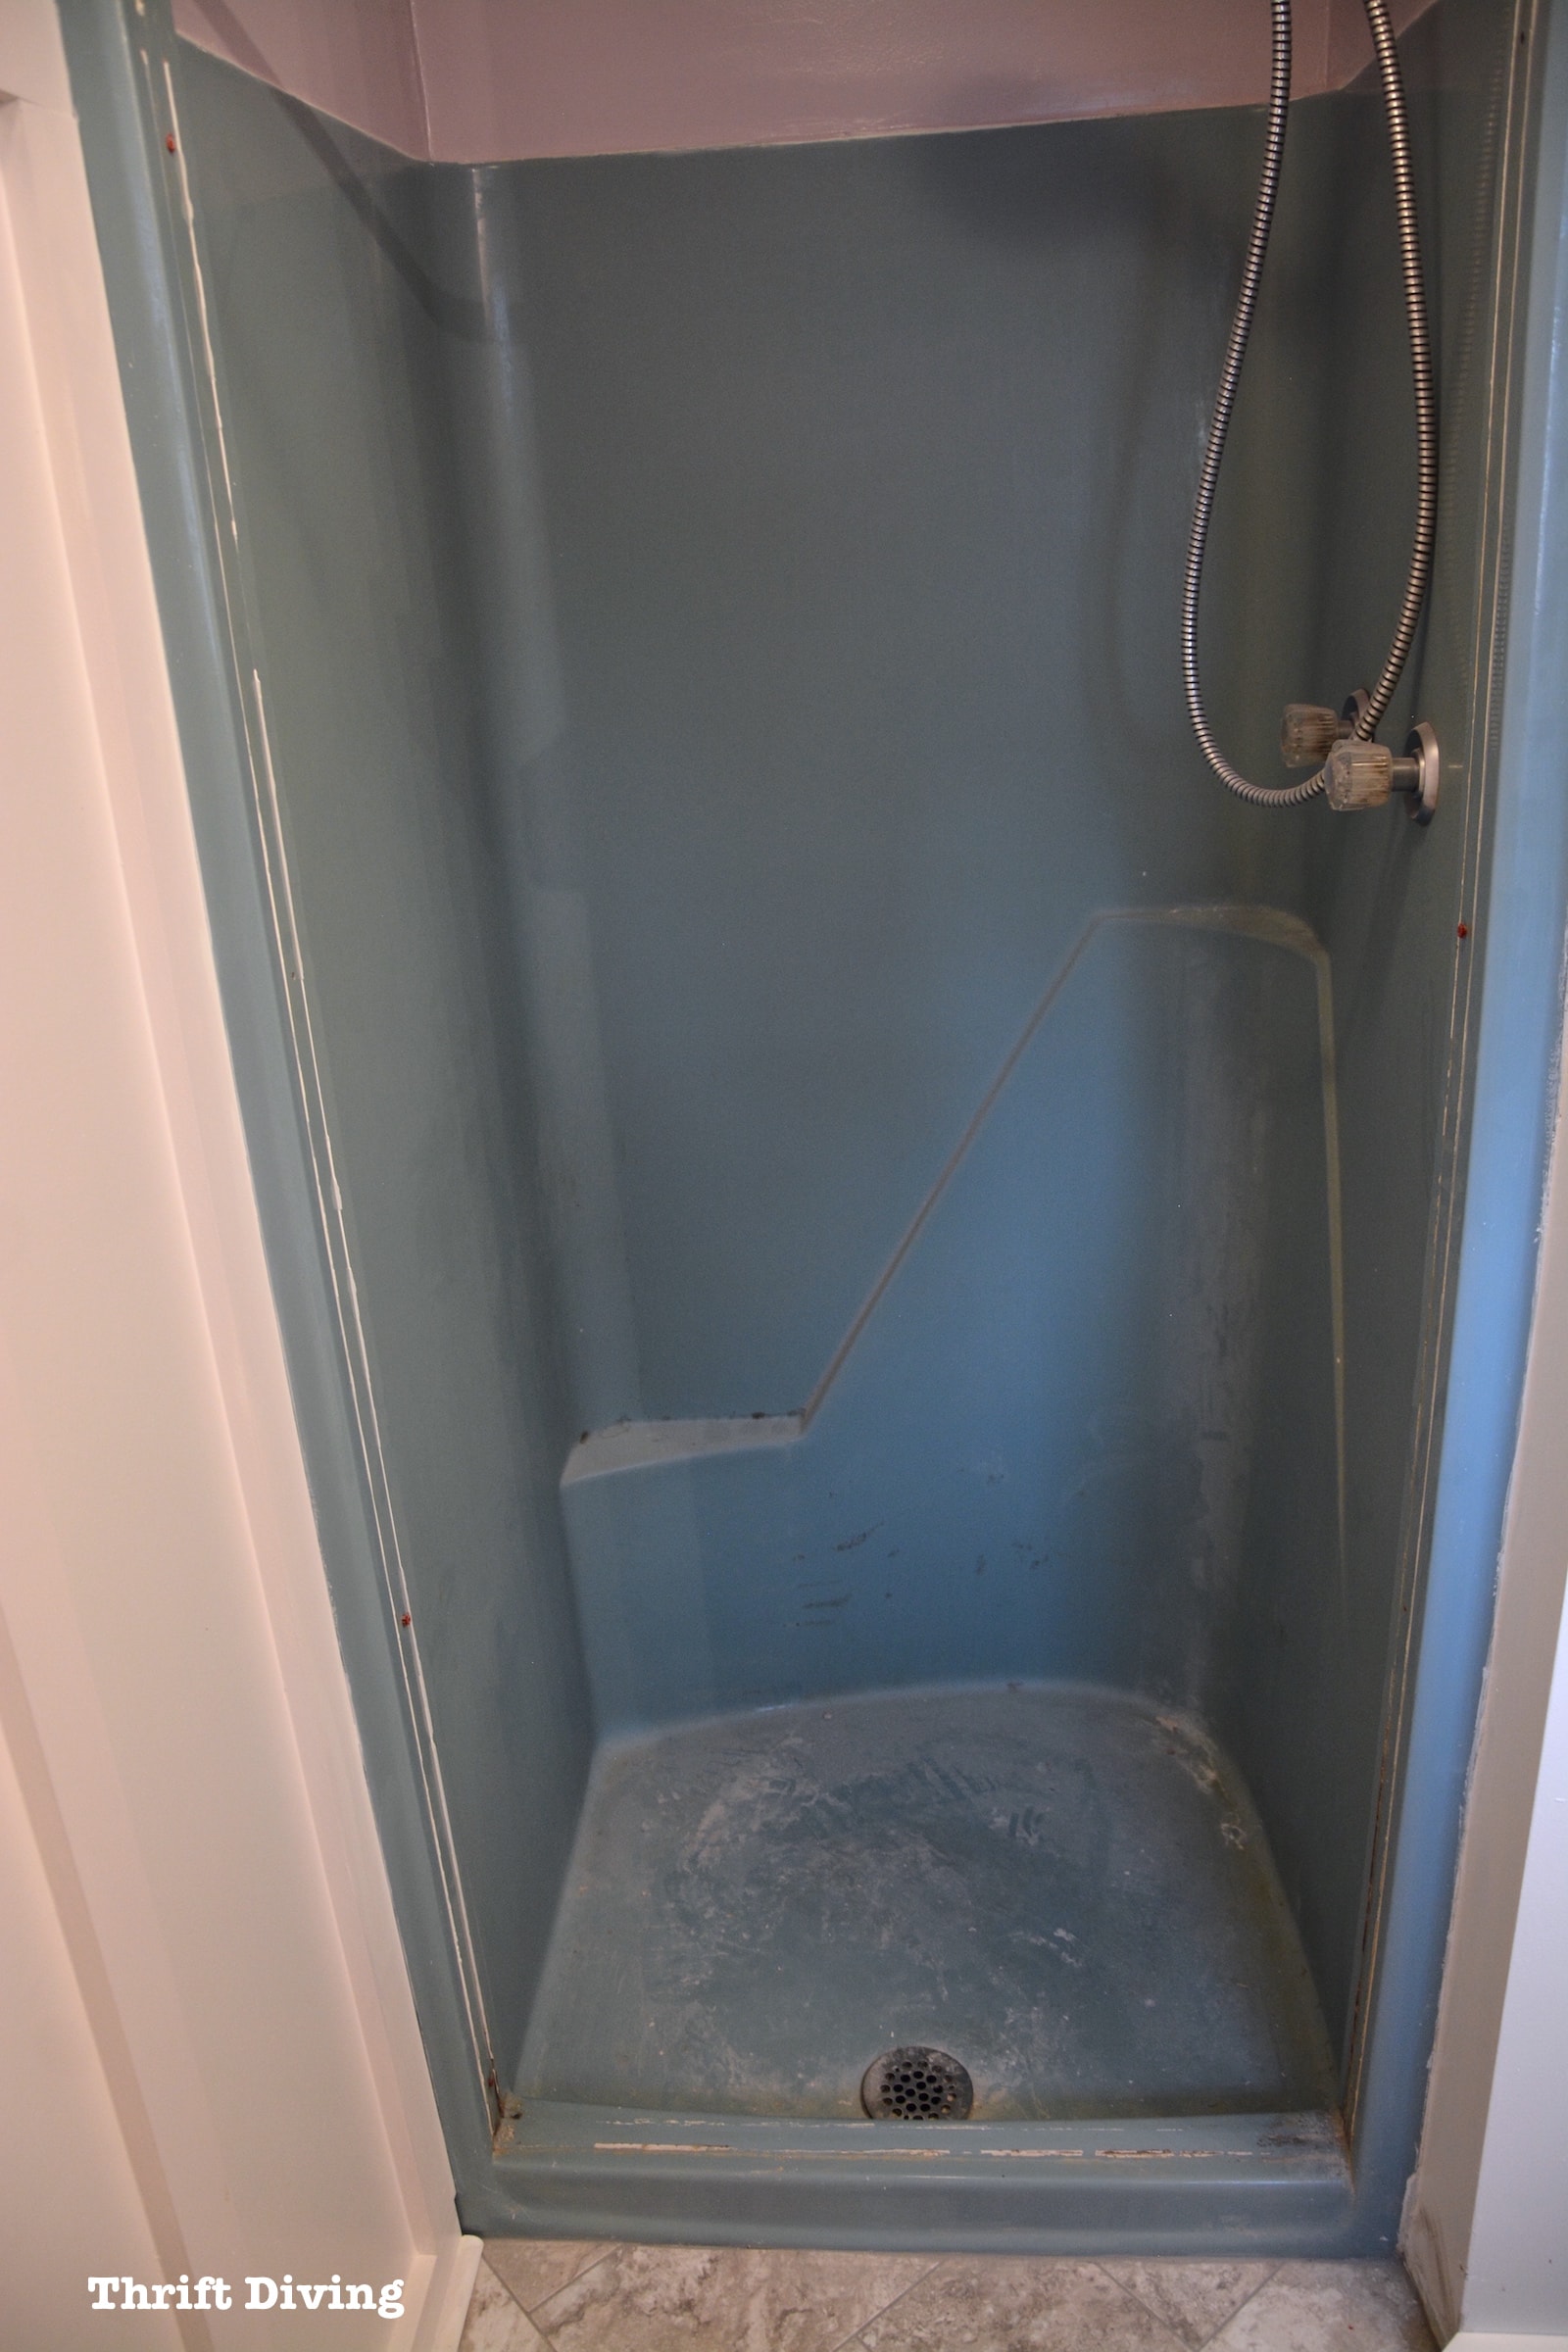
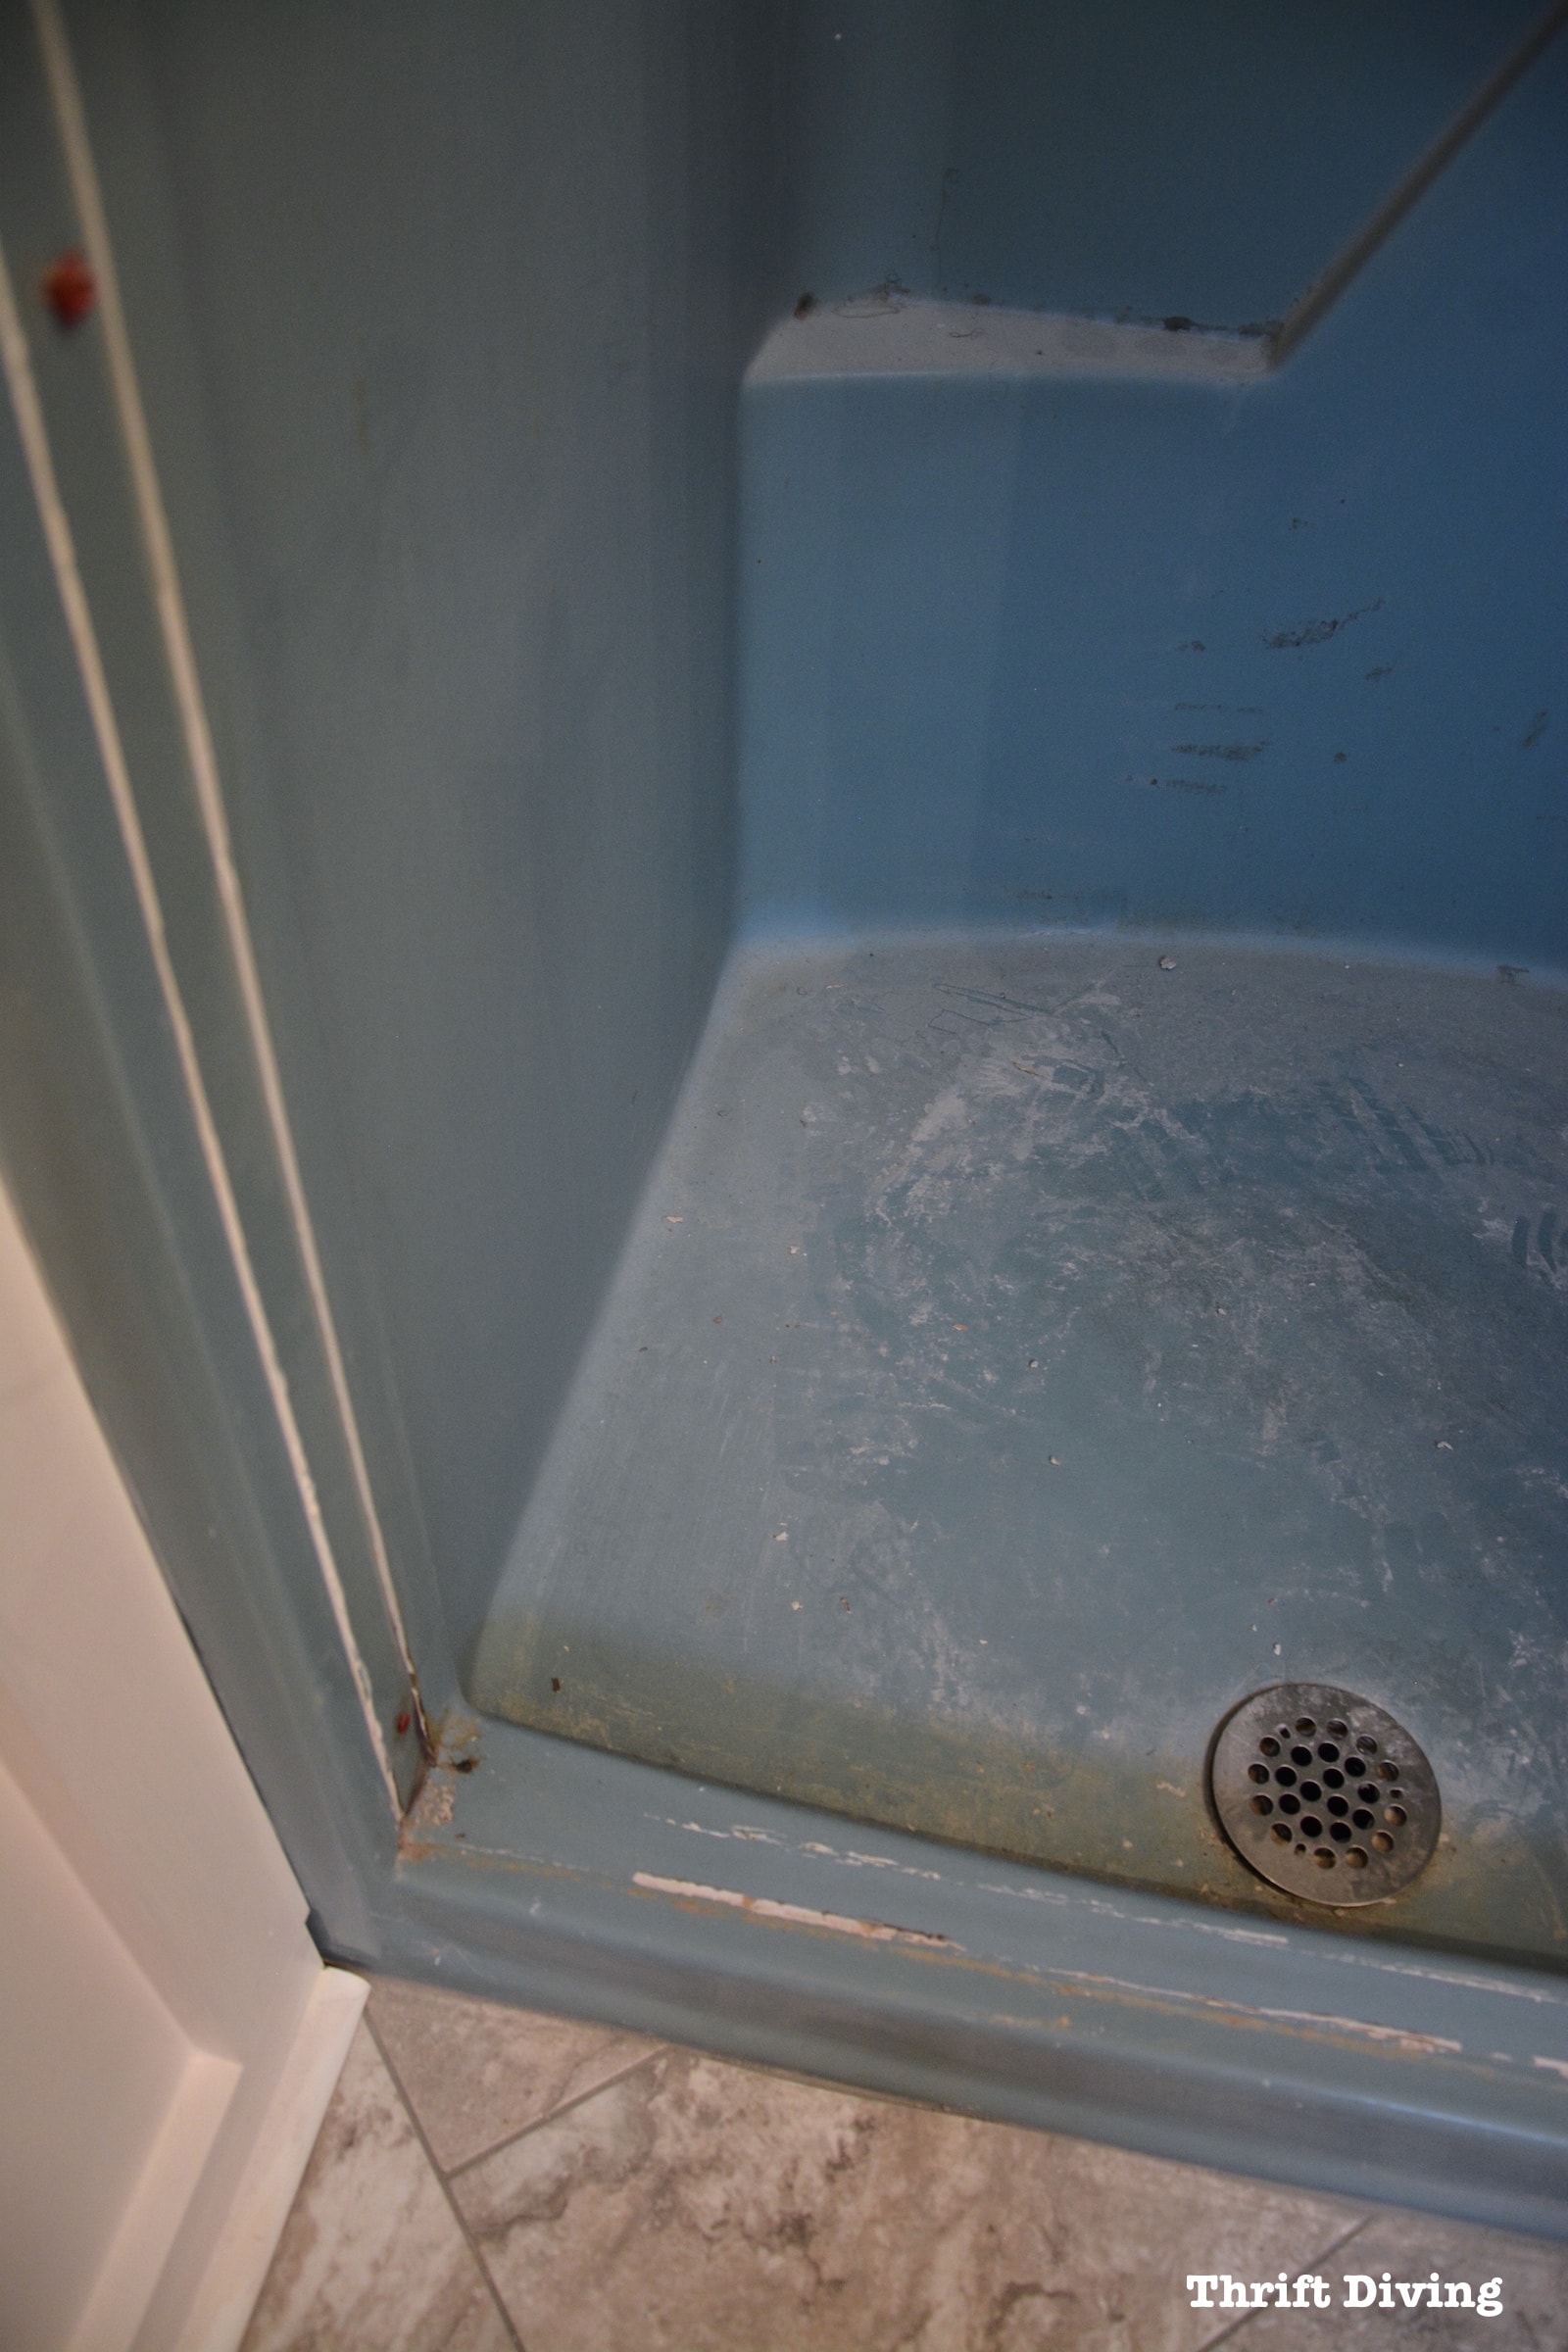
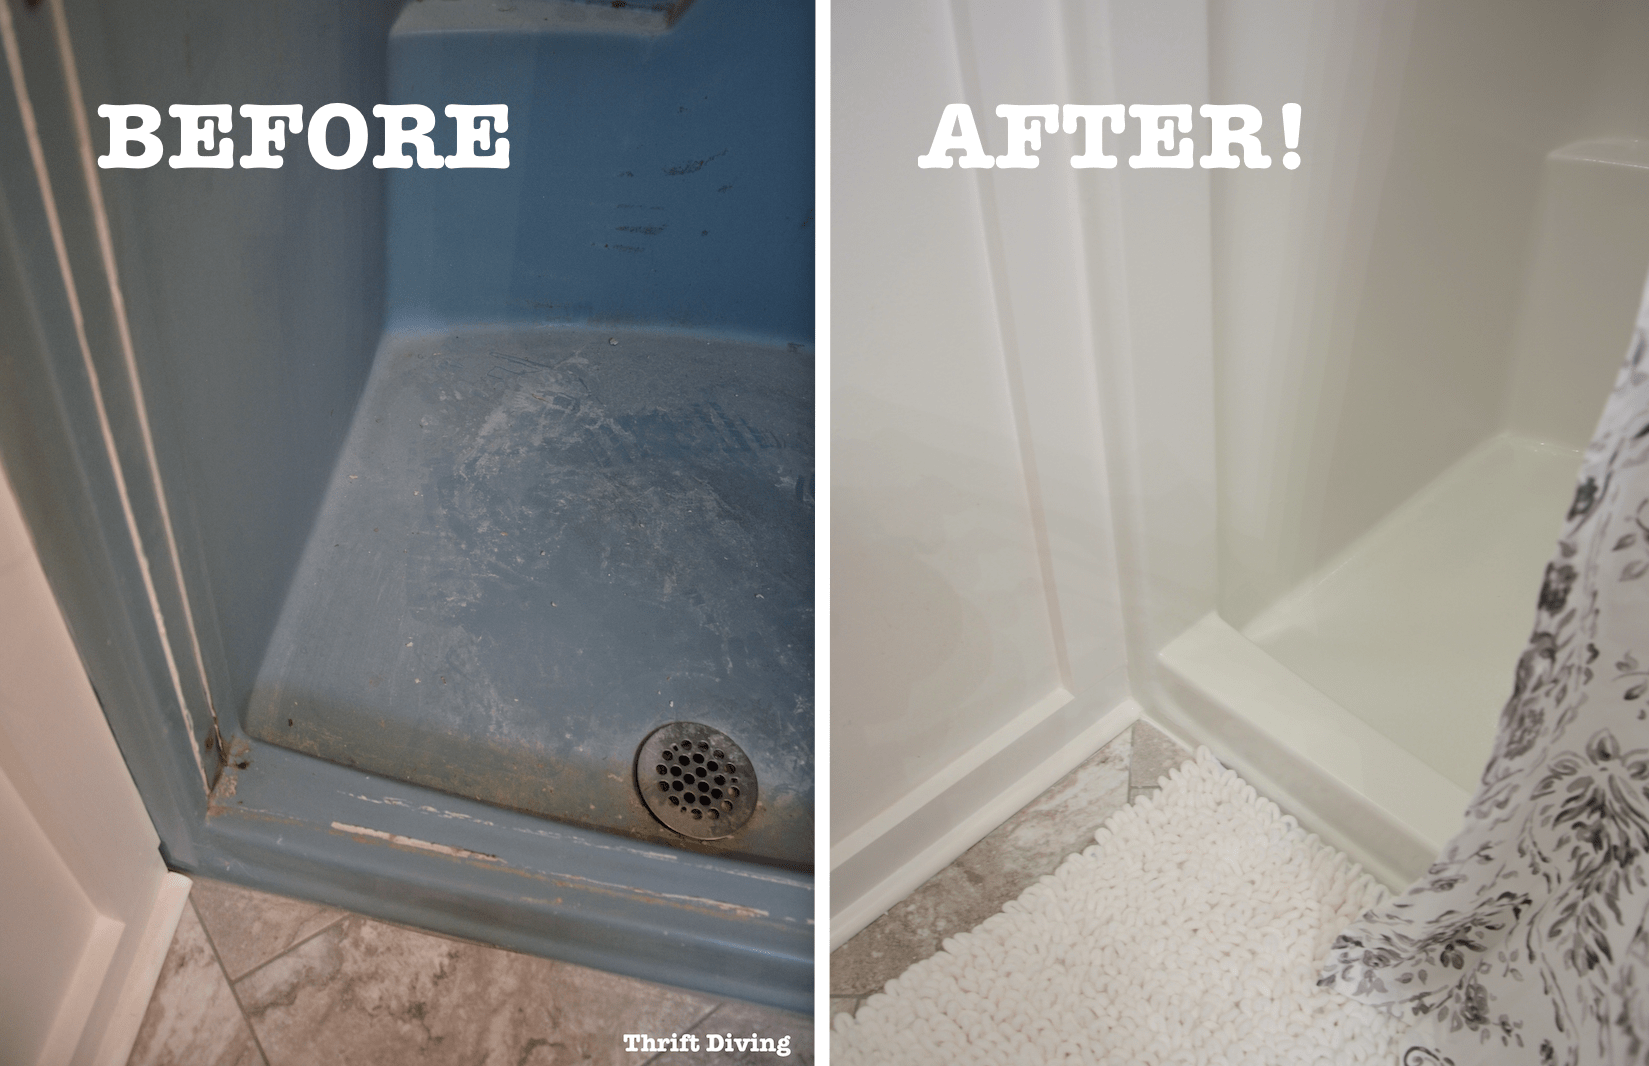
Take this old 1970’s turquoise shower, for example.
(Updated September 2023: I’m happy to report that my shower is still looking as great as it did when I first painted it! It’s been 6 years now since I refinished my shower and the Bathworks has not peeled or cracked. Be sure to subscribe to my YouTube channel where I will soon be doing an update to show you how the tub looks, as well as how I care for it to keep it looking great! Feel free to email me with any questions you have about this project!)
Watch How I Refinished My Shower:
When we moved into this old 1973 home six years ago, shower and tub refinishing was the furthest thing from my mind. I was simply happy to double our square footage, get an awesome backyard, and live in a neighborhood where parents actually participated in school functions.
I followed the sage advice to “buy the worst house in a good neighborhood…”
But there were other questions I should have asked before buying a house.
Such as “How much time will you have to update this house?” because people fail to tell you that you’ll spend years fixing up and upgrading all the ugly crap inside of the home. And you’ll likely do it yourself because you’ll never be able to afford professionals to come and do it for you.
HA!
It’s true.
At least, it was for us.
Take this old 1970’s turquoise shower, for example….
As ugly as it was, replacing it with tile and seamless glass show door wasn’t an option at a tune of $4,000 – $6,000. I mean, who has that kind of money??
We surely didn’t when we moved in back in 2010, and we still don’t have that kind of loot to sink into prettying up our home.
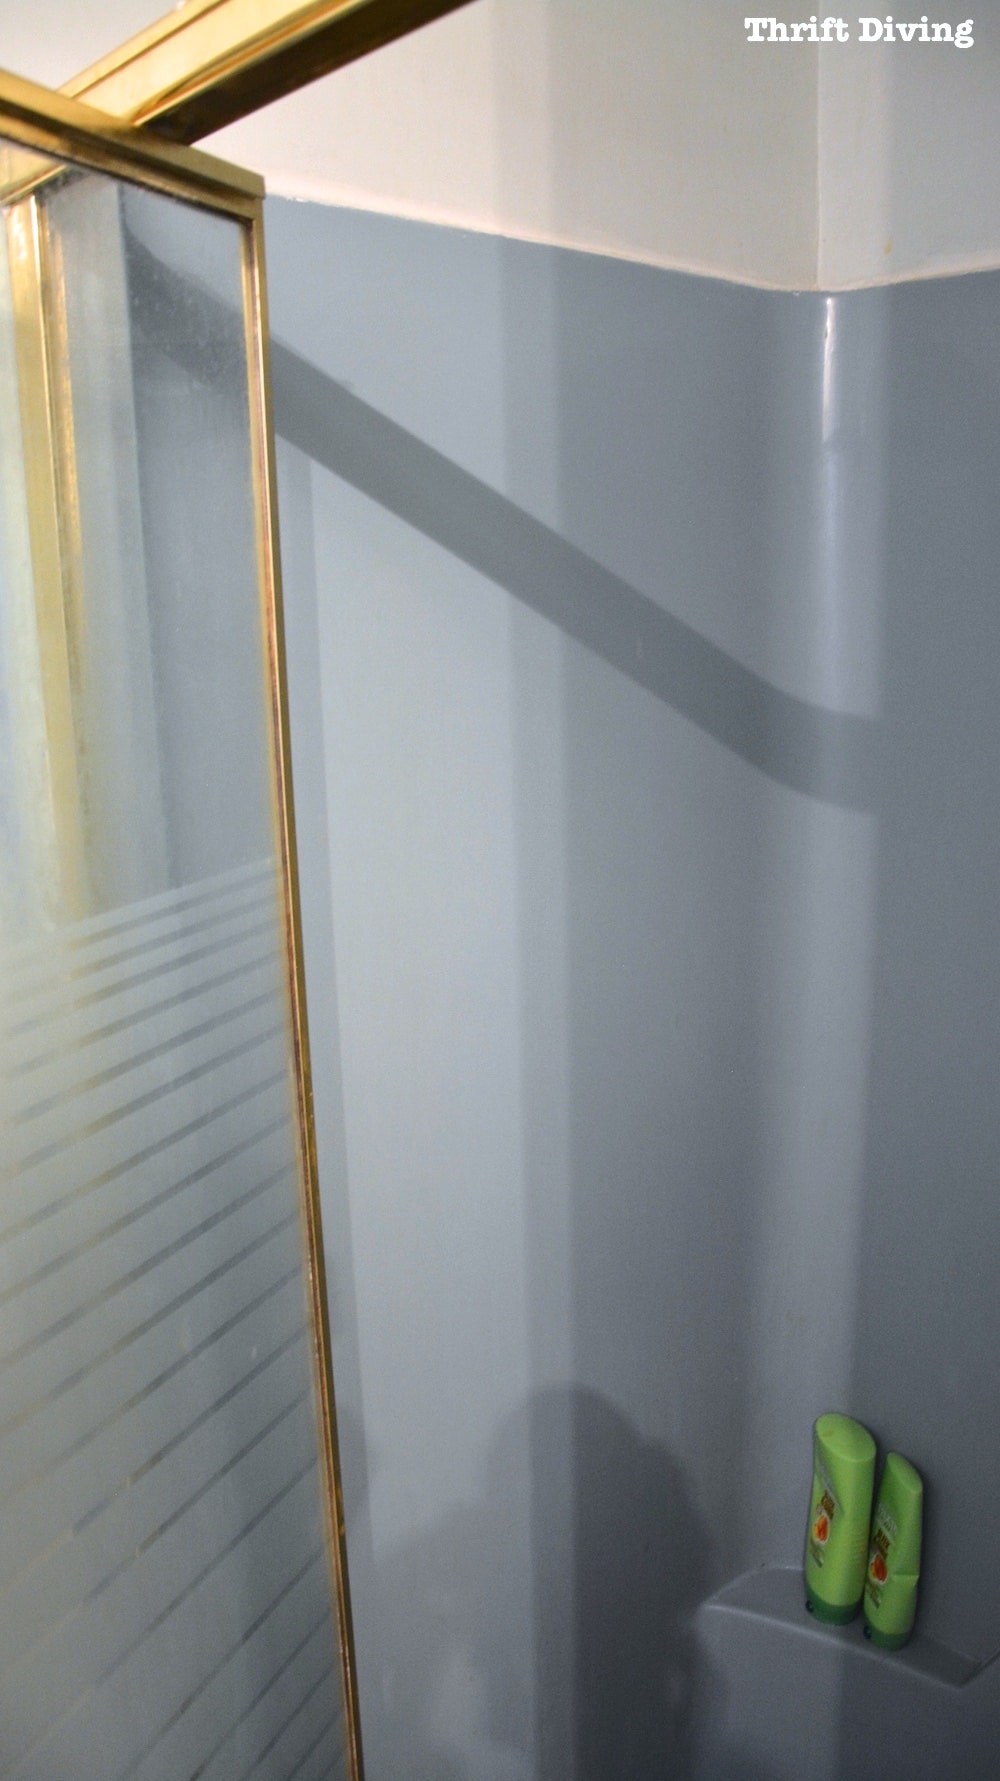
So over the years, I kept the shower hidden behind ugly, brassy, old shower stall door and even went as far as to pick a paint color (Sherwin Williams Sea Salt) that complimented the turquoise so it didn’t stick out like a sore thumb.
BEFORE

It never occurred to me to refinish the shower.
And if the thought ever crossed my mind to paint the shower, I had horrific visions of long strips of paint peeling off, leaving the shower an even bigger mess than where it started.
But guess what???
It didn’t happen!
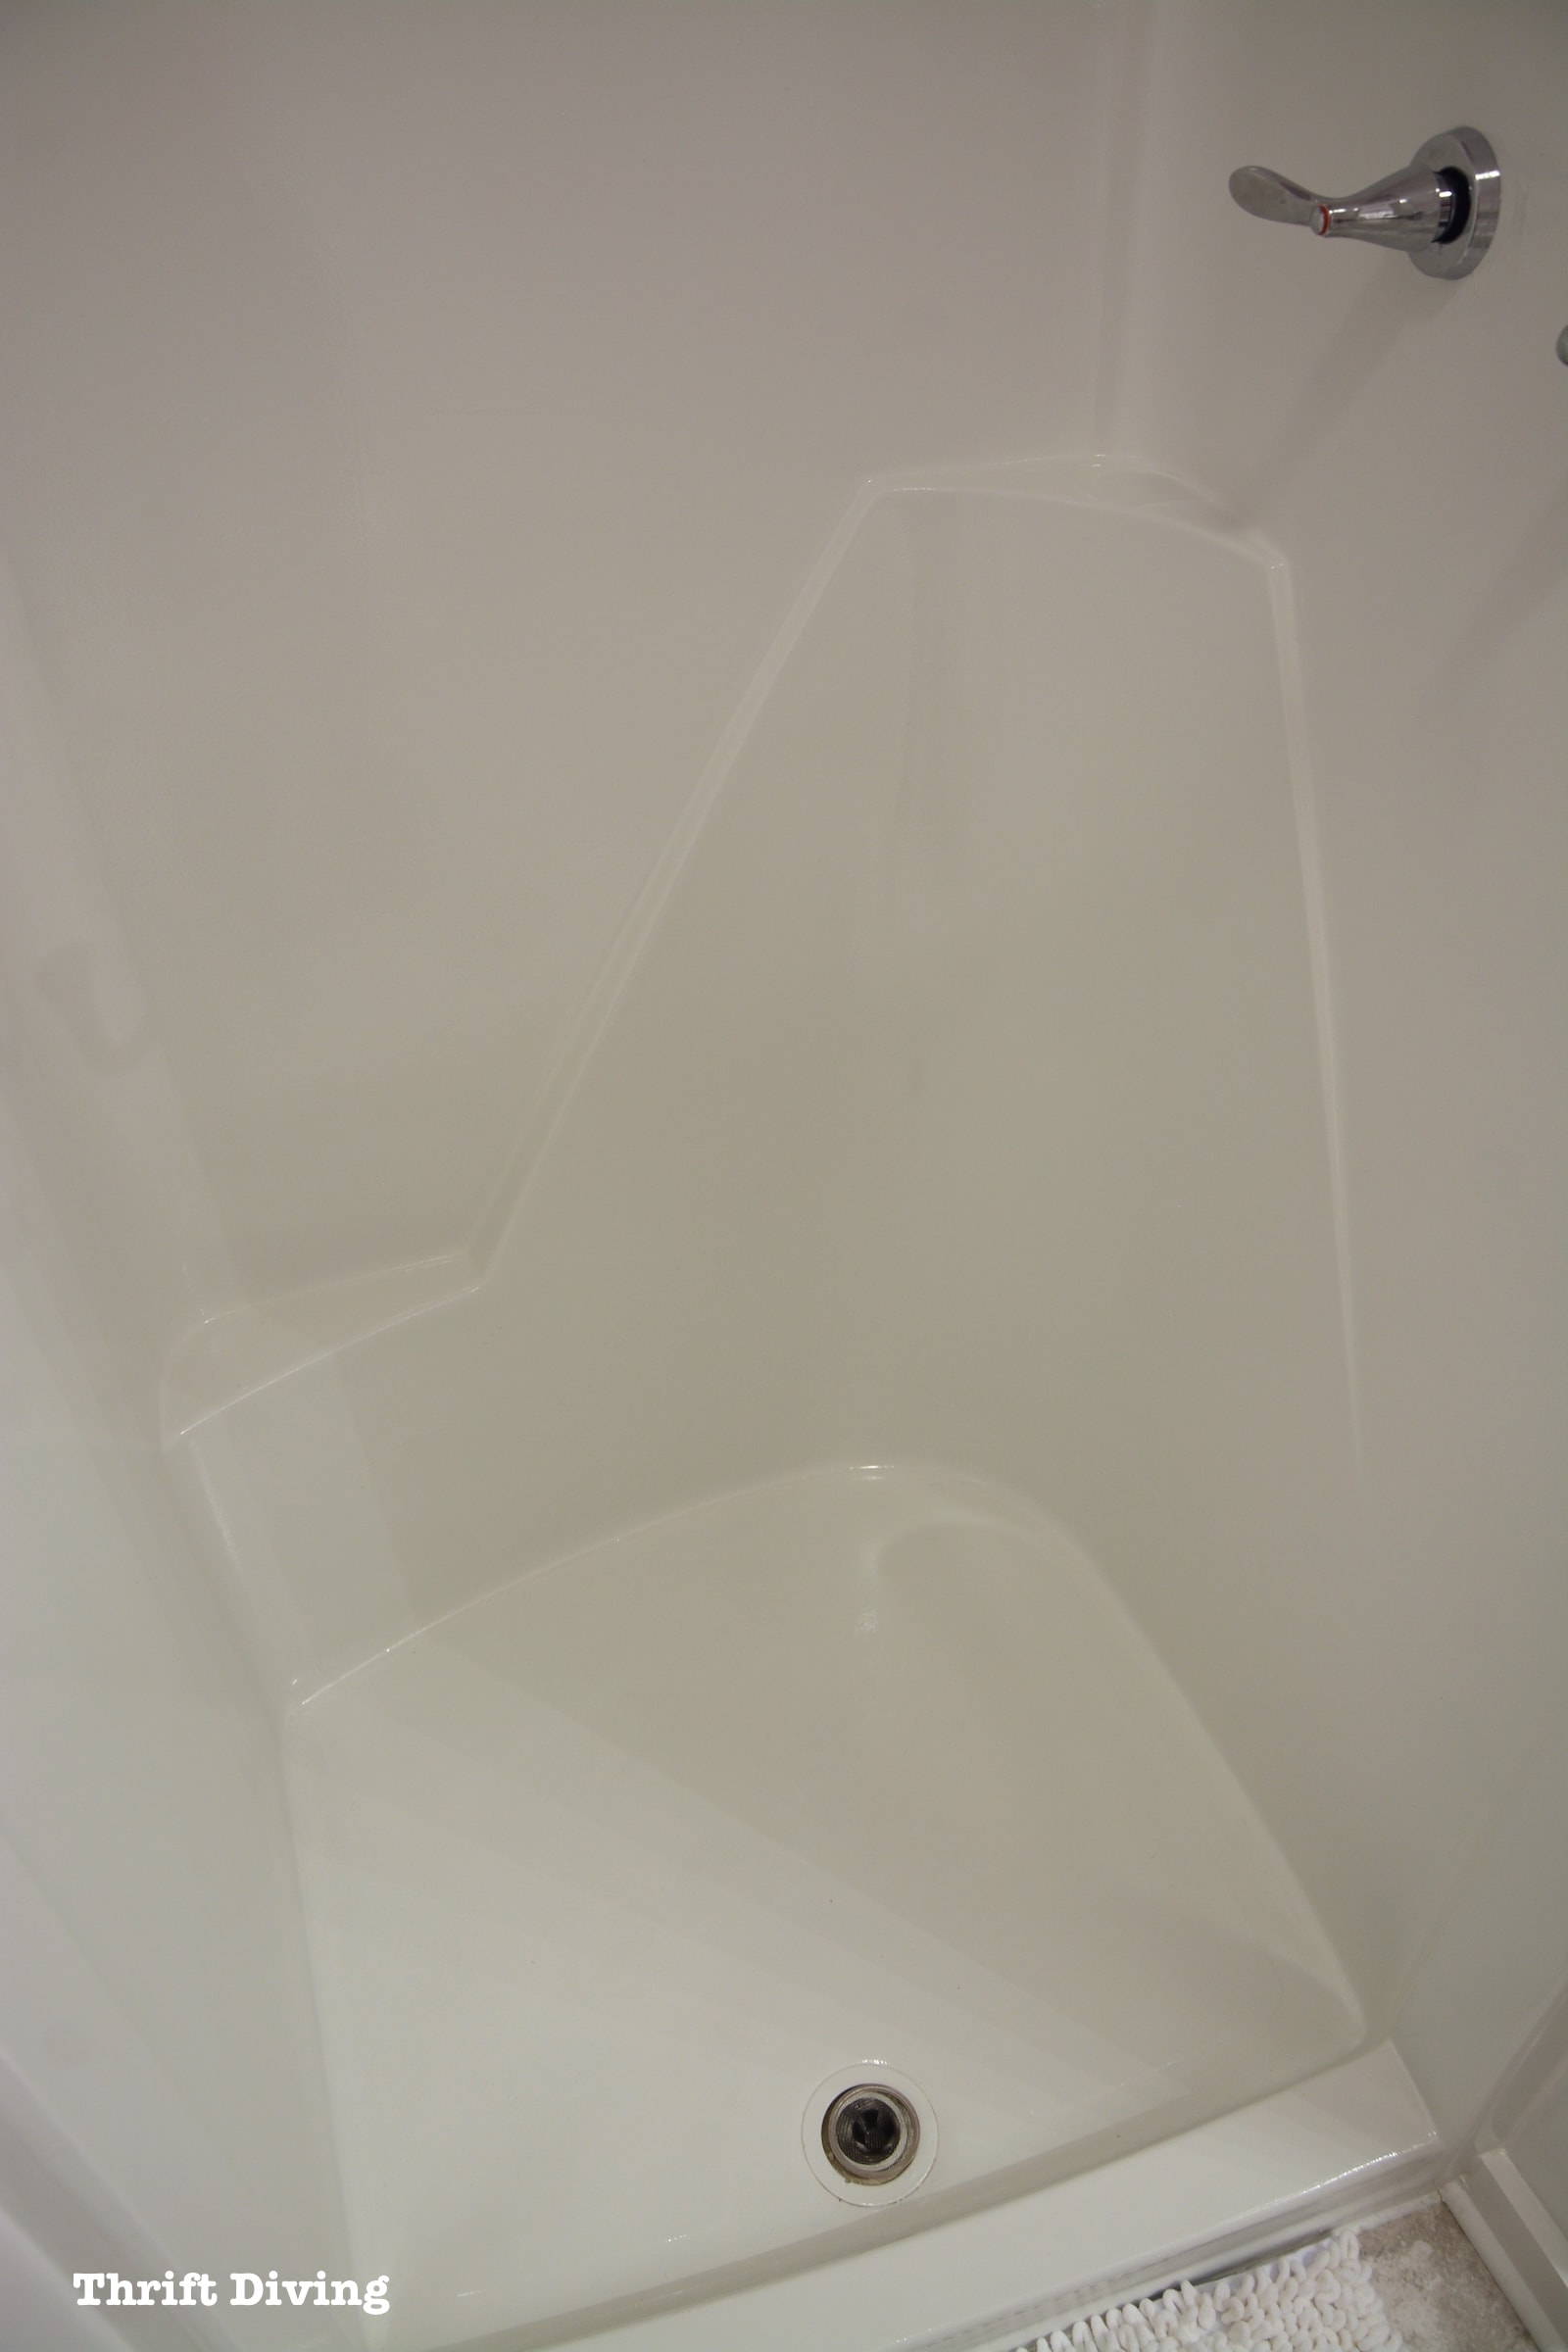
I jump in with two feet on this DIY shower painting project, and I’m happy to report that after “putting up” with an ugly shower for years, I’ve just successfully painted my ugly, 1970’s turquoise shower!
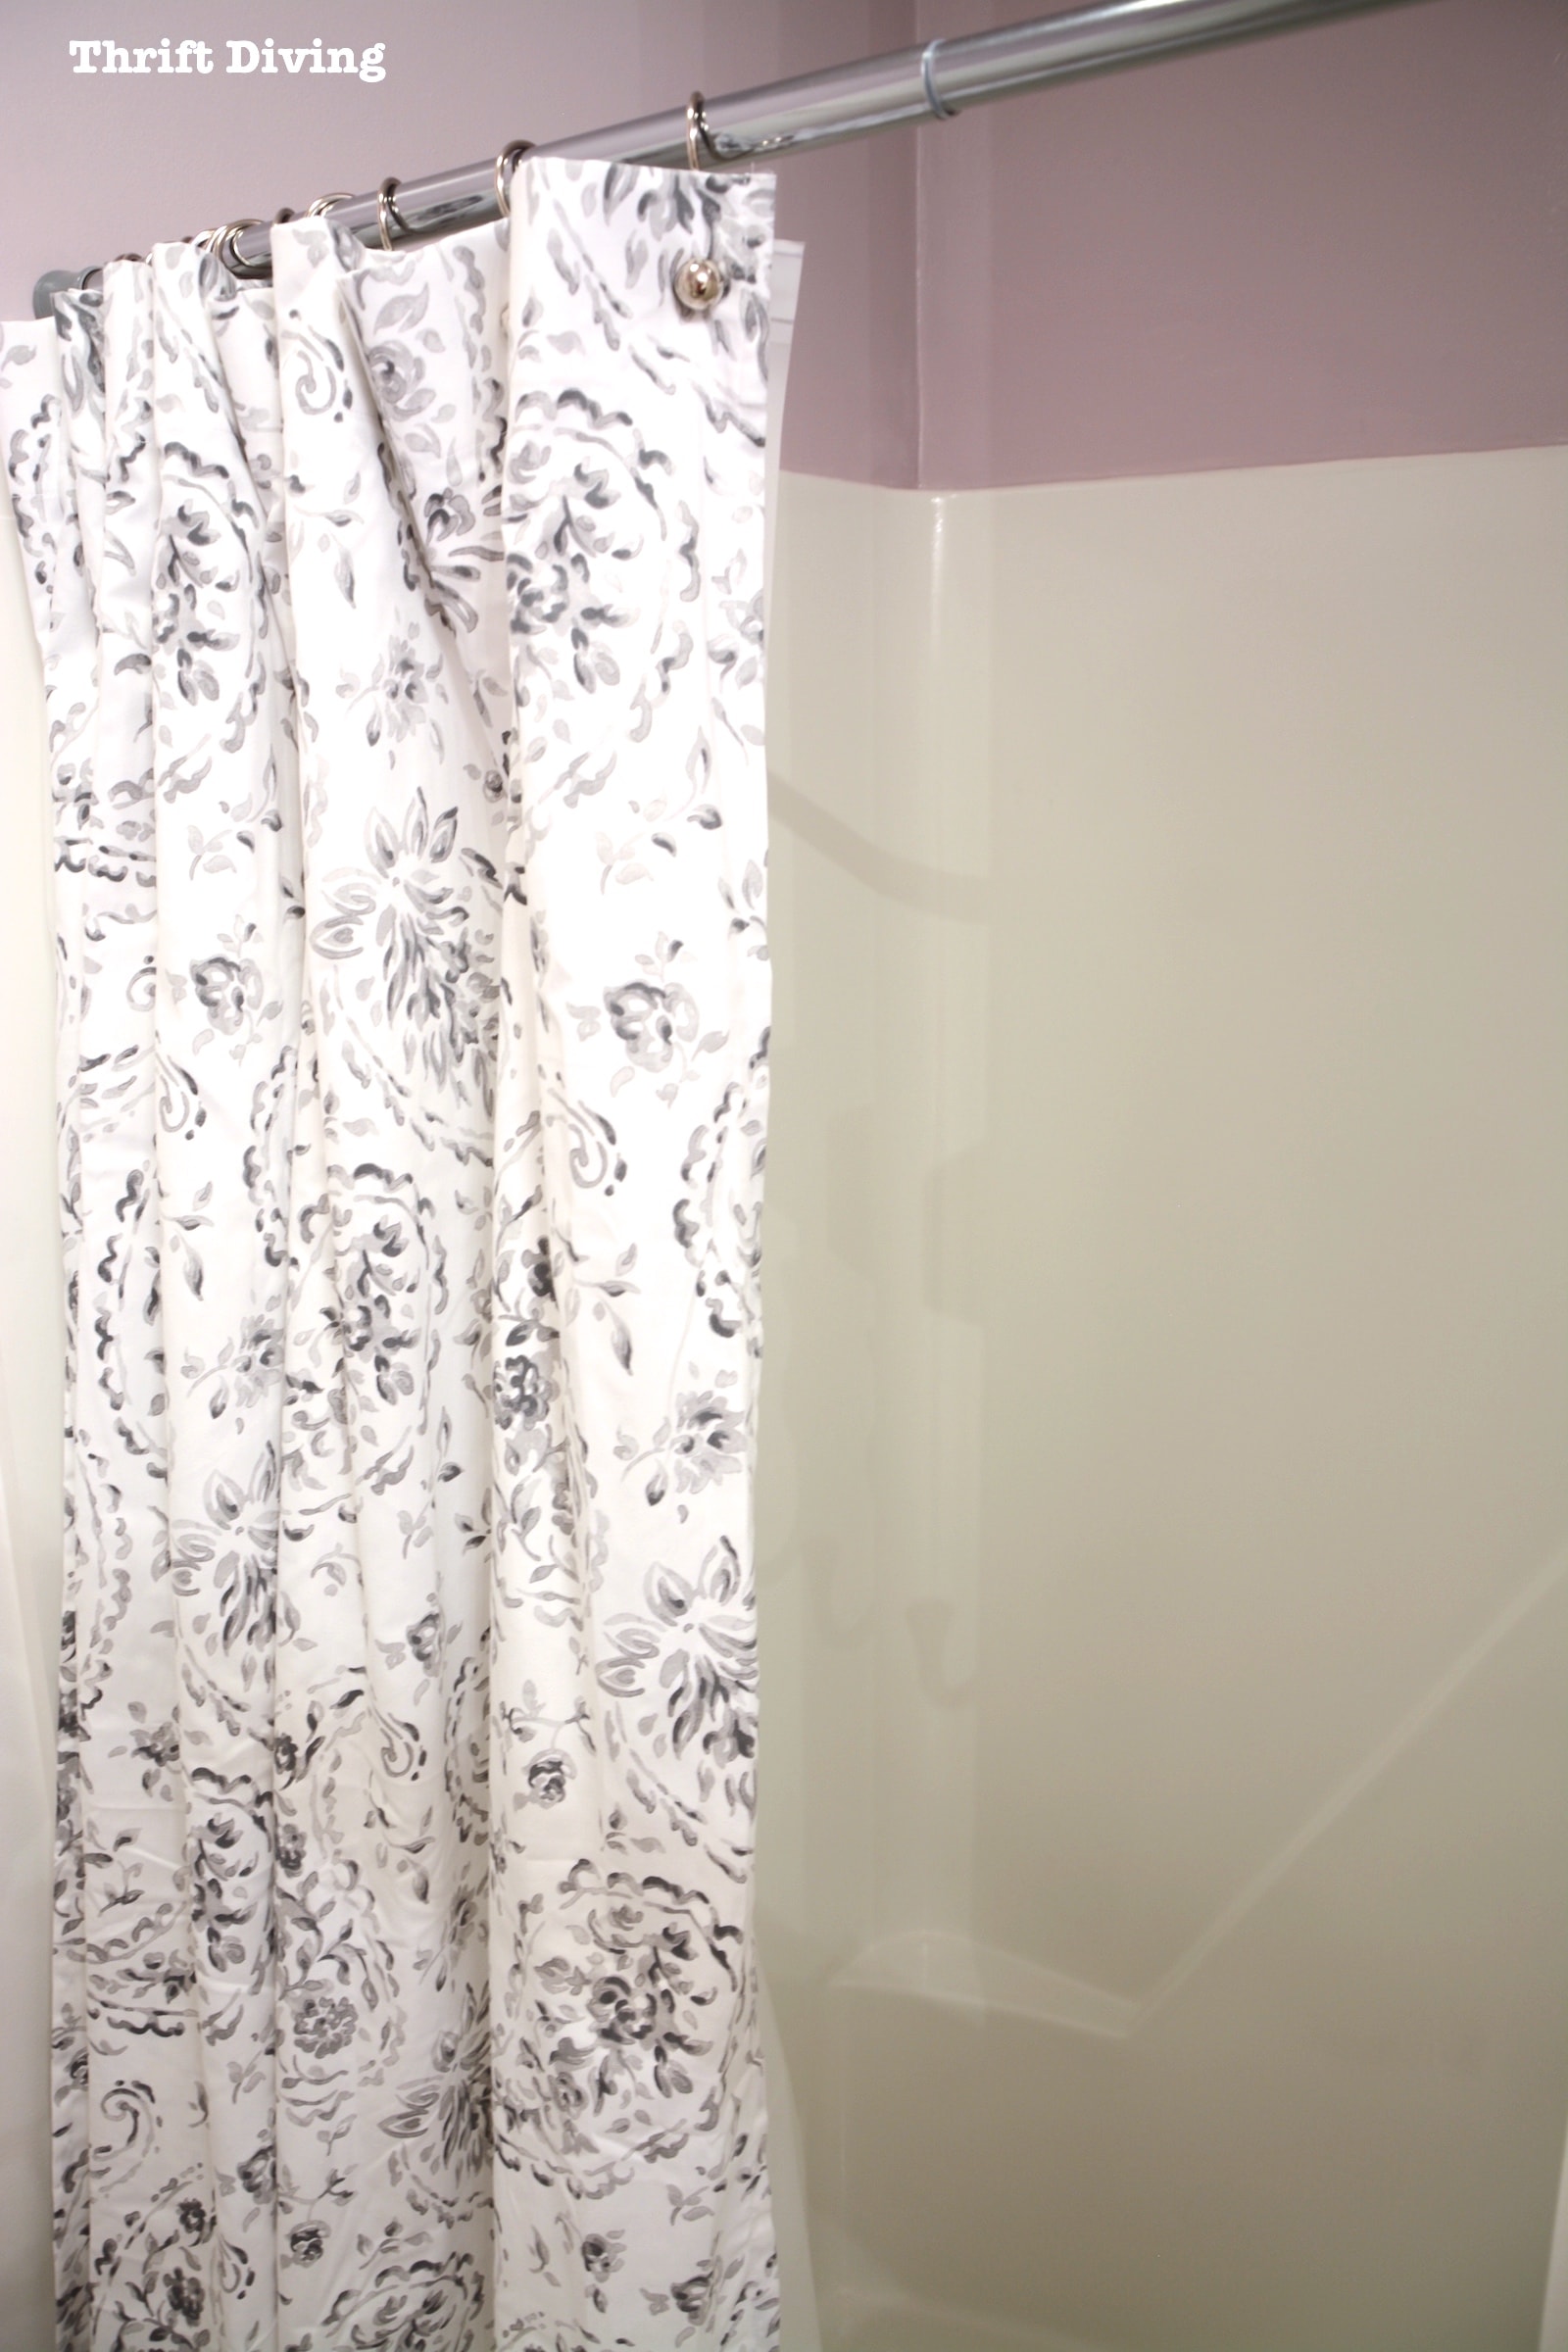
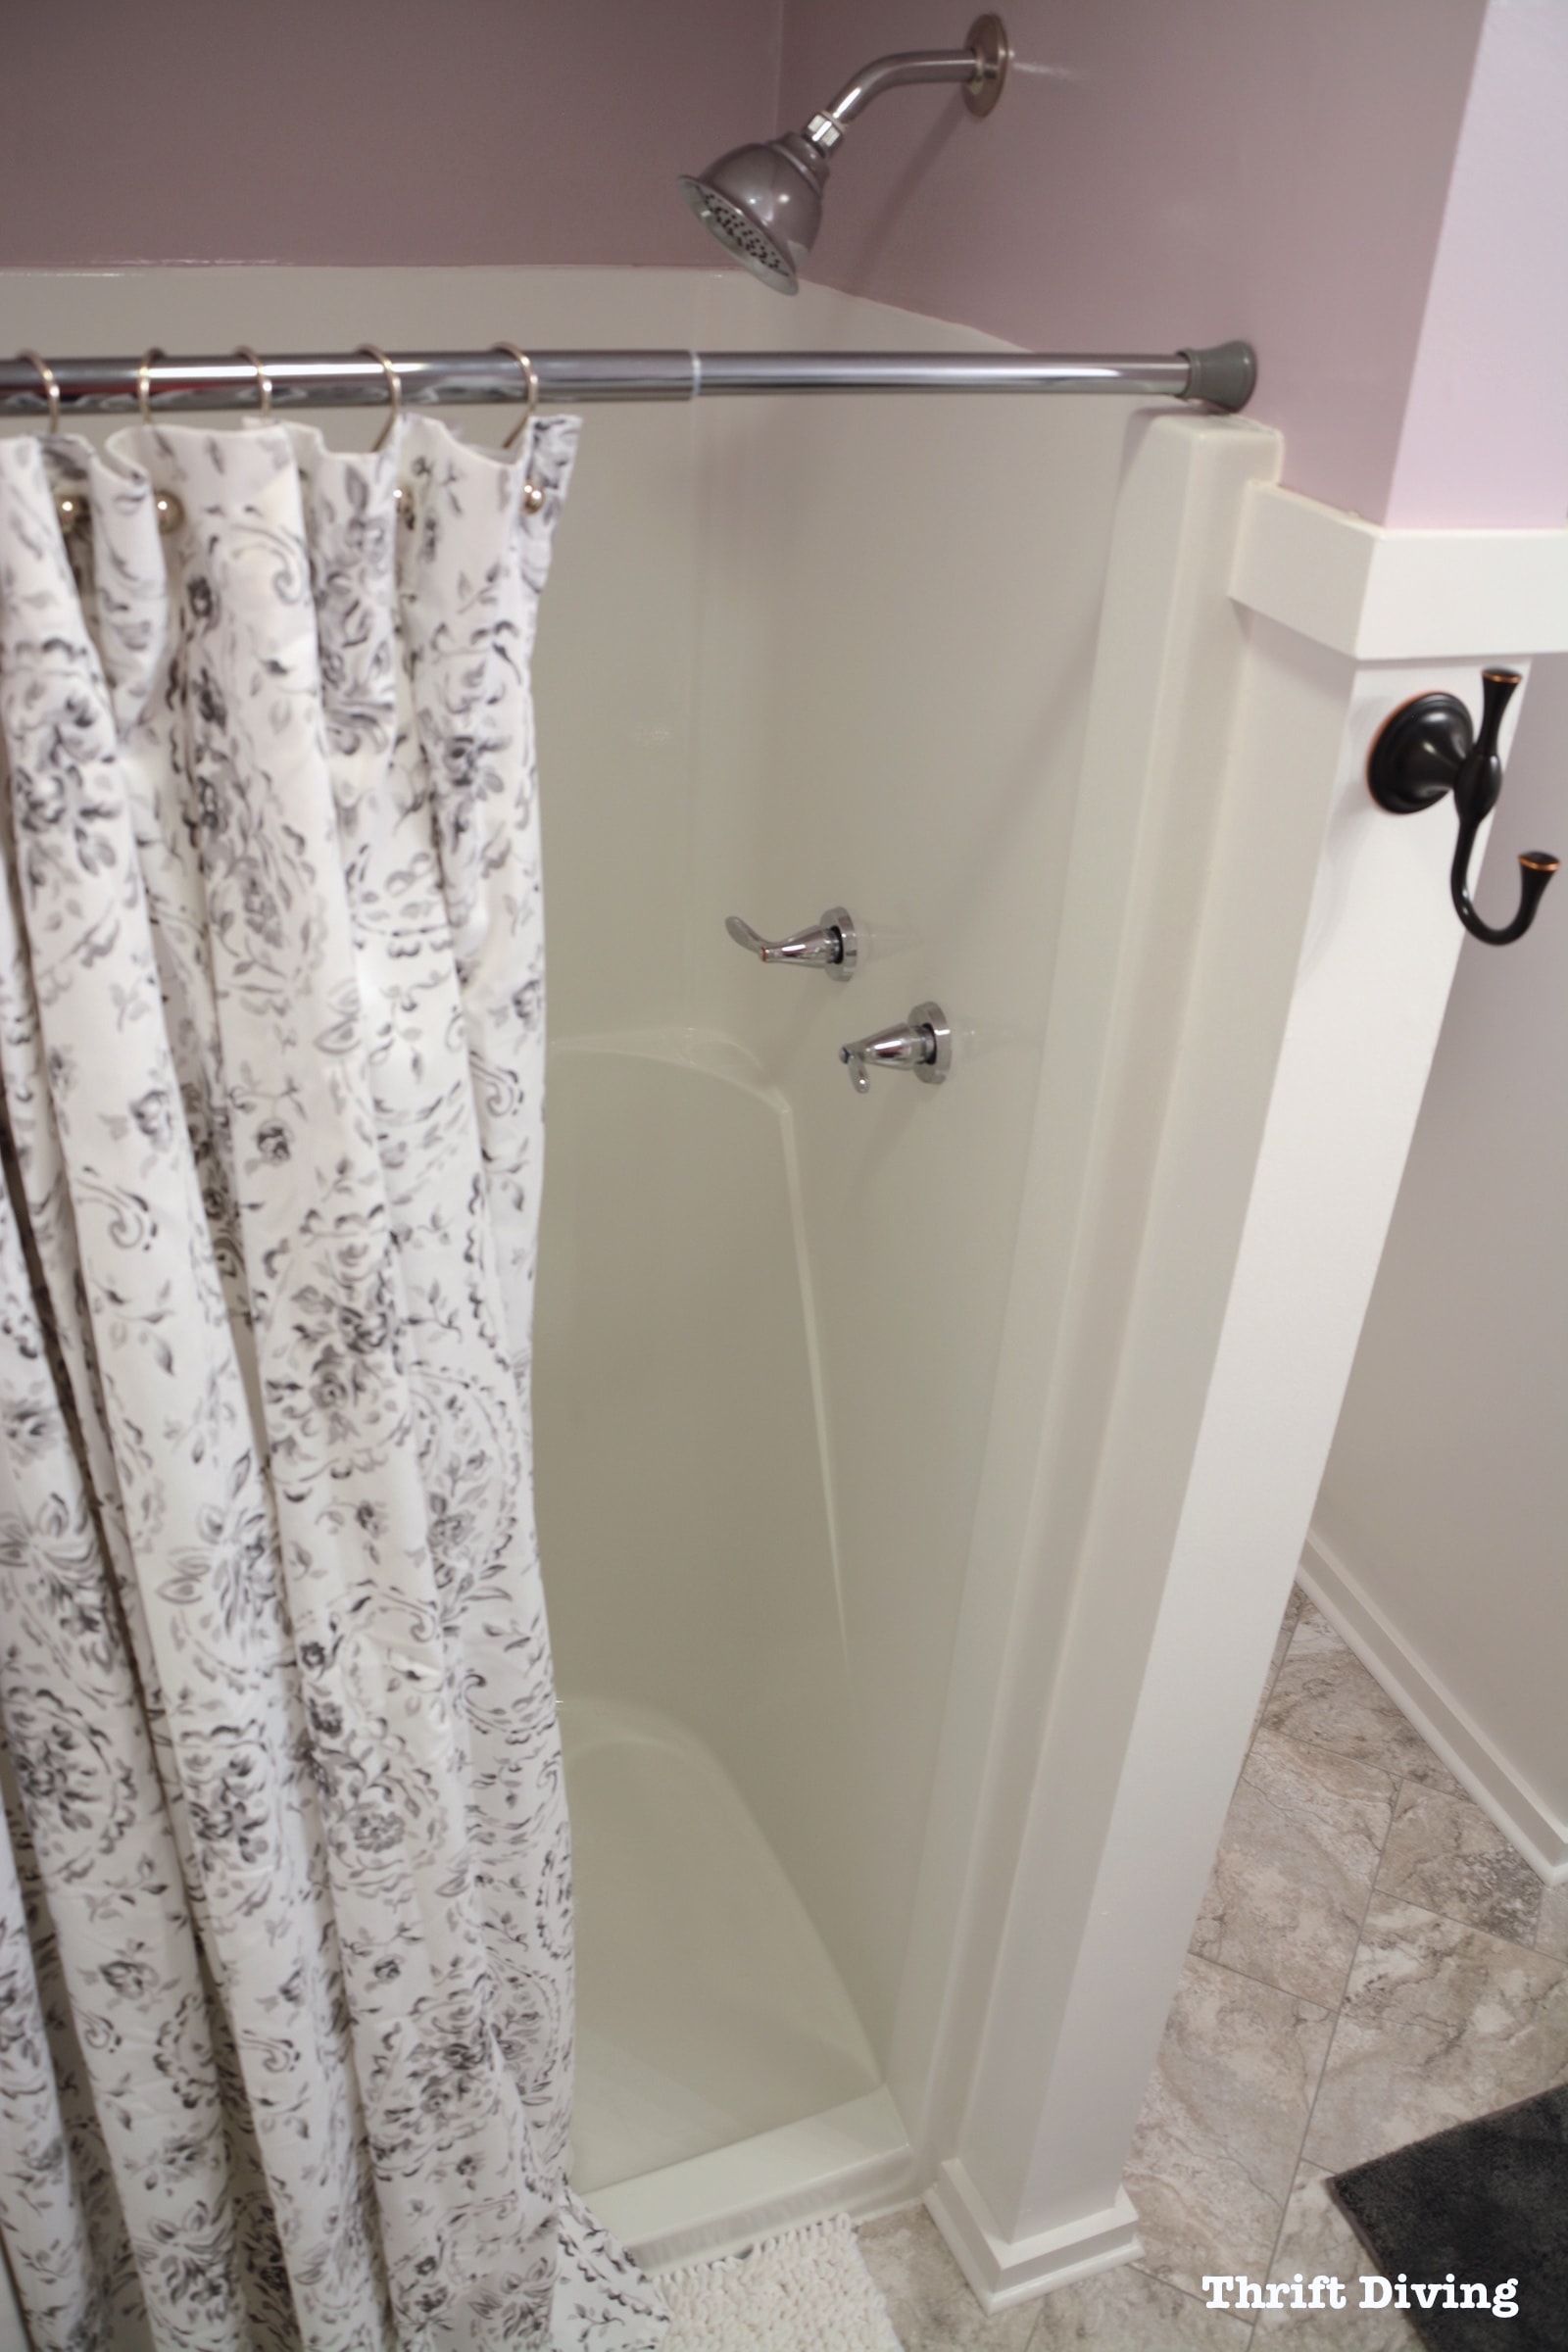
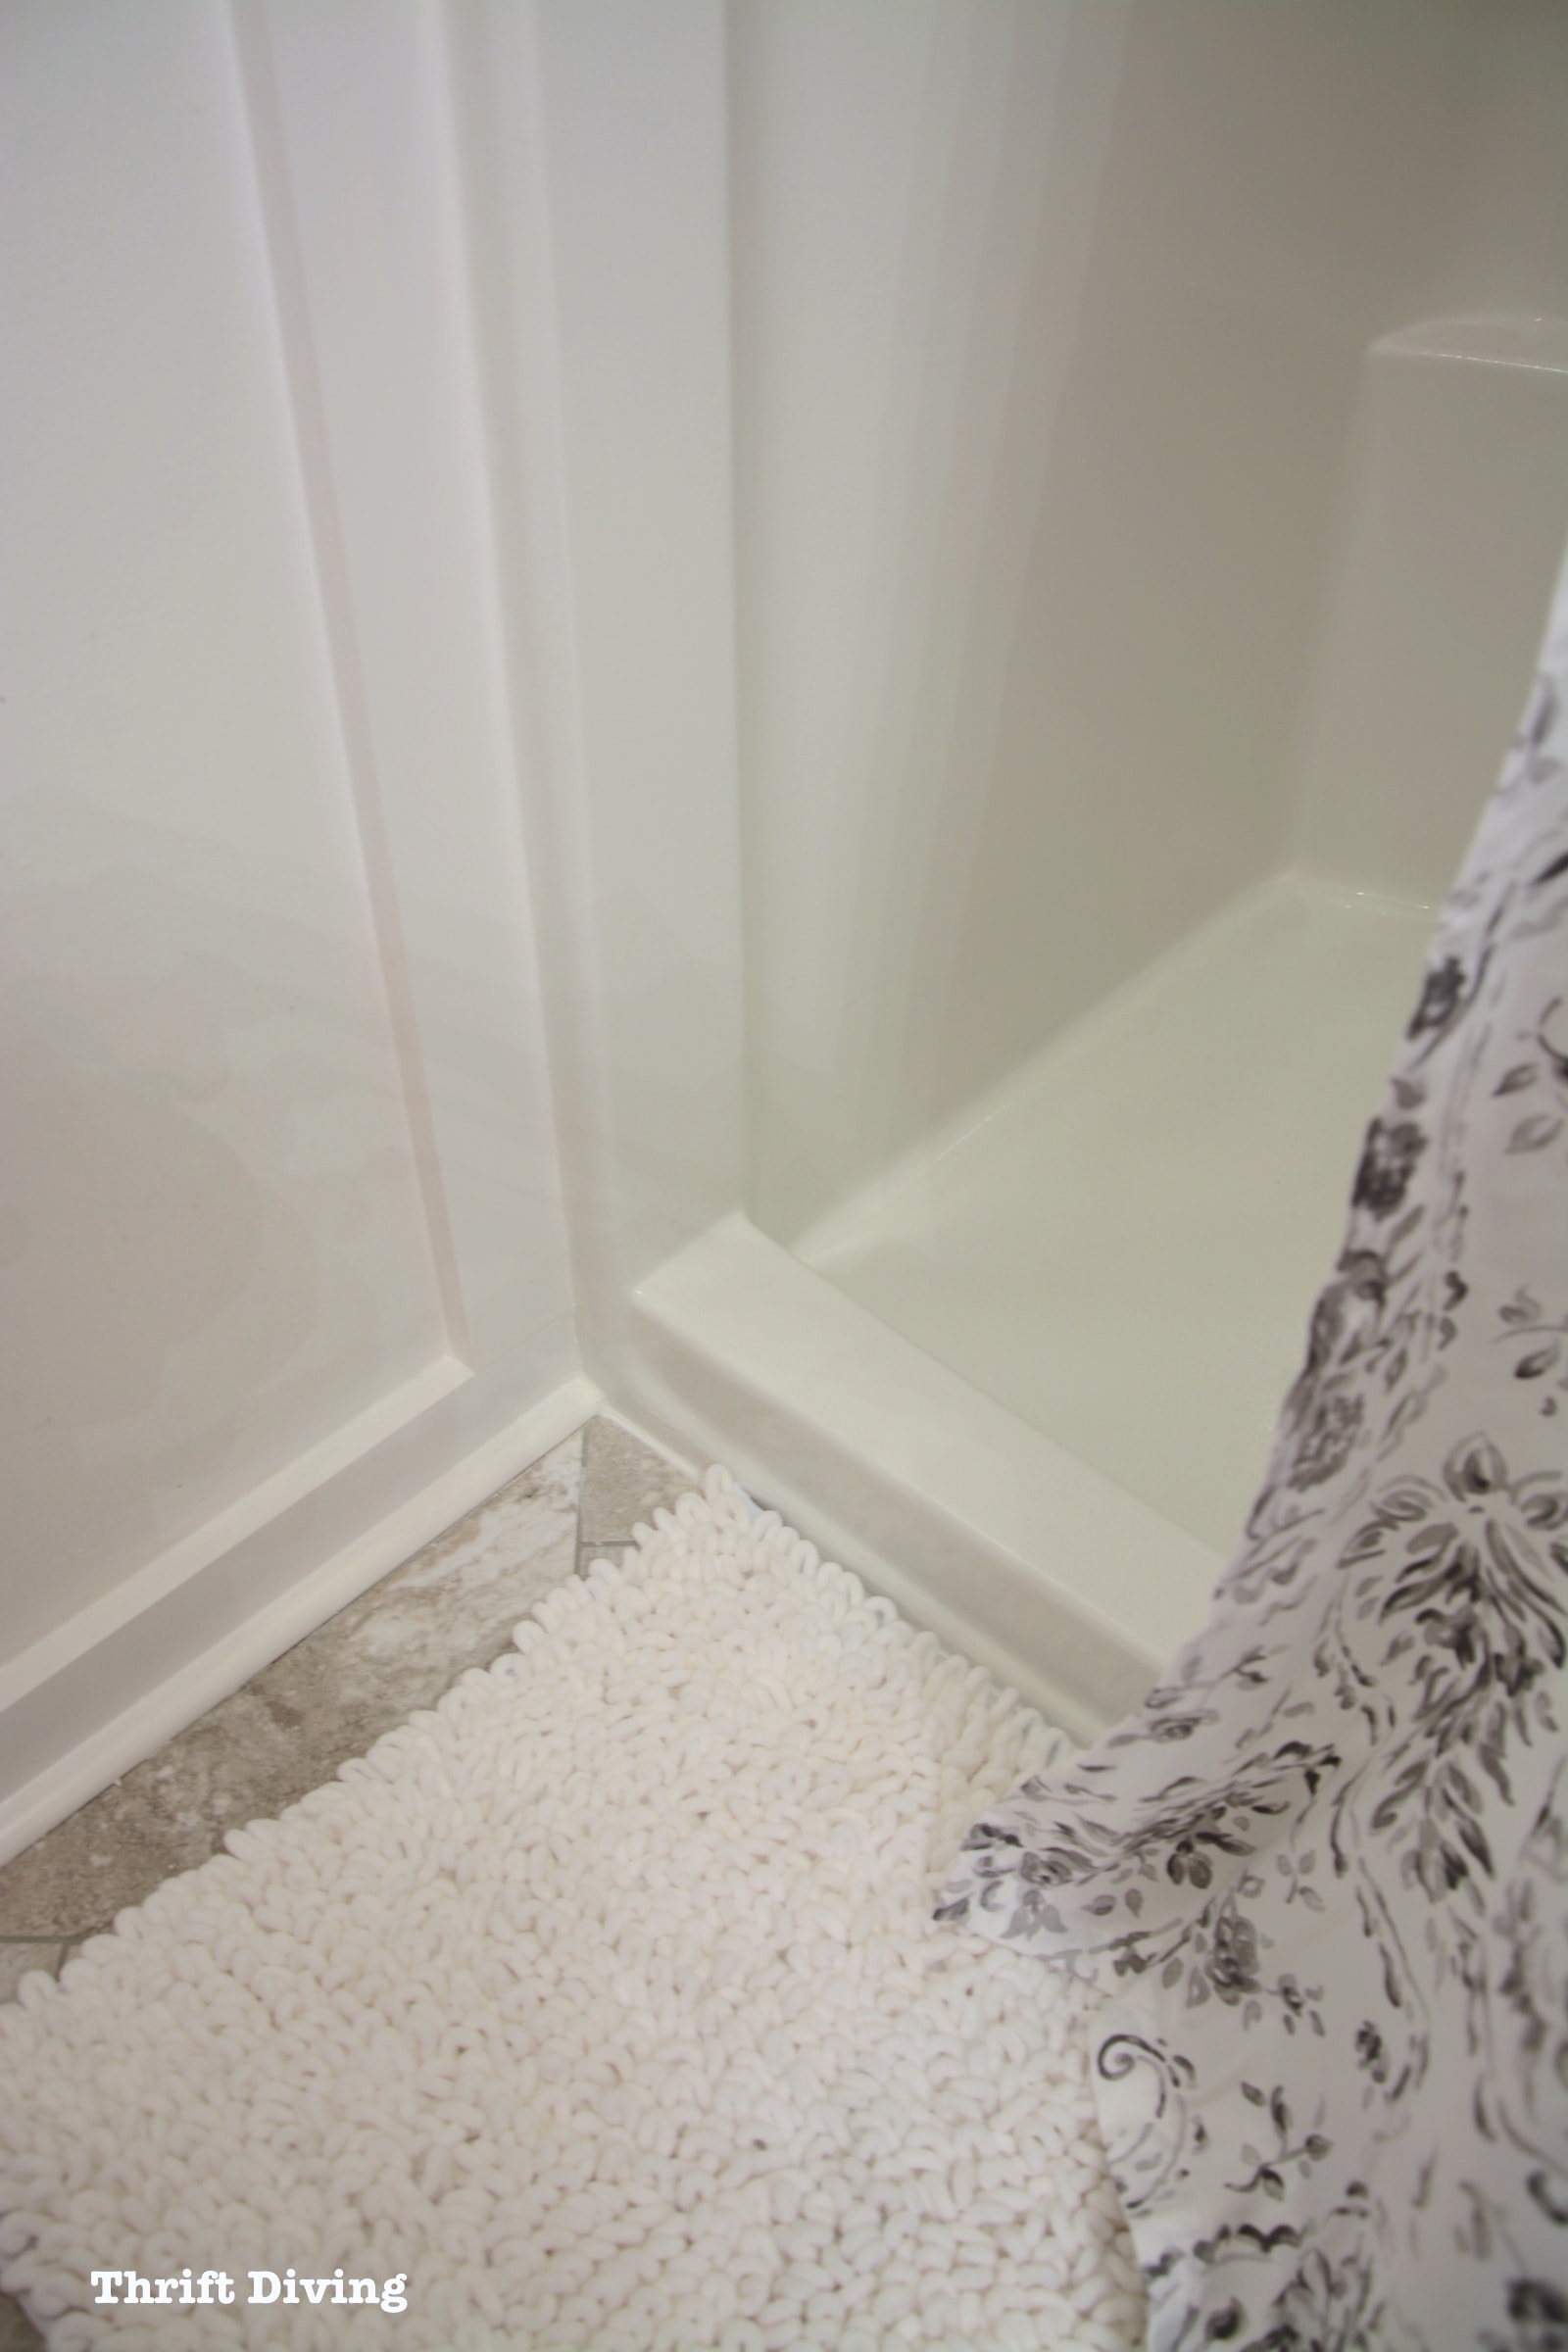
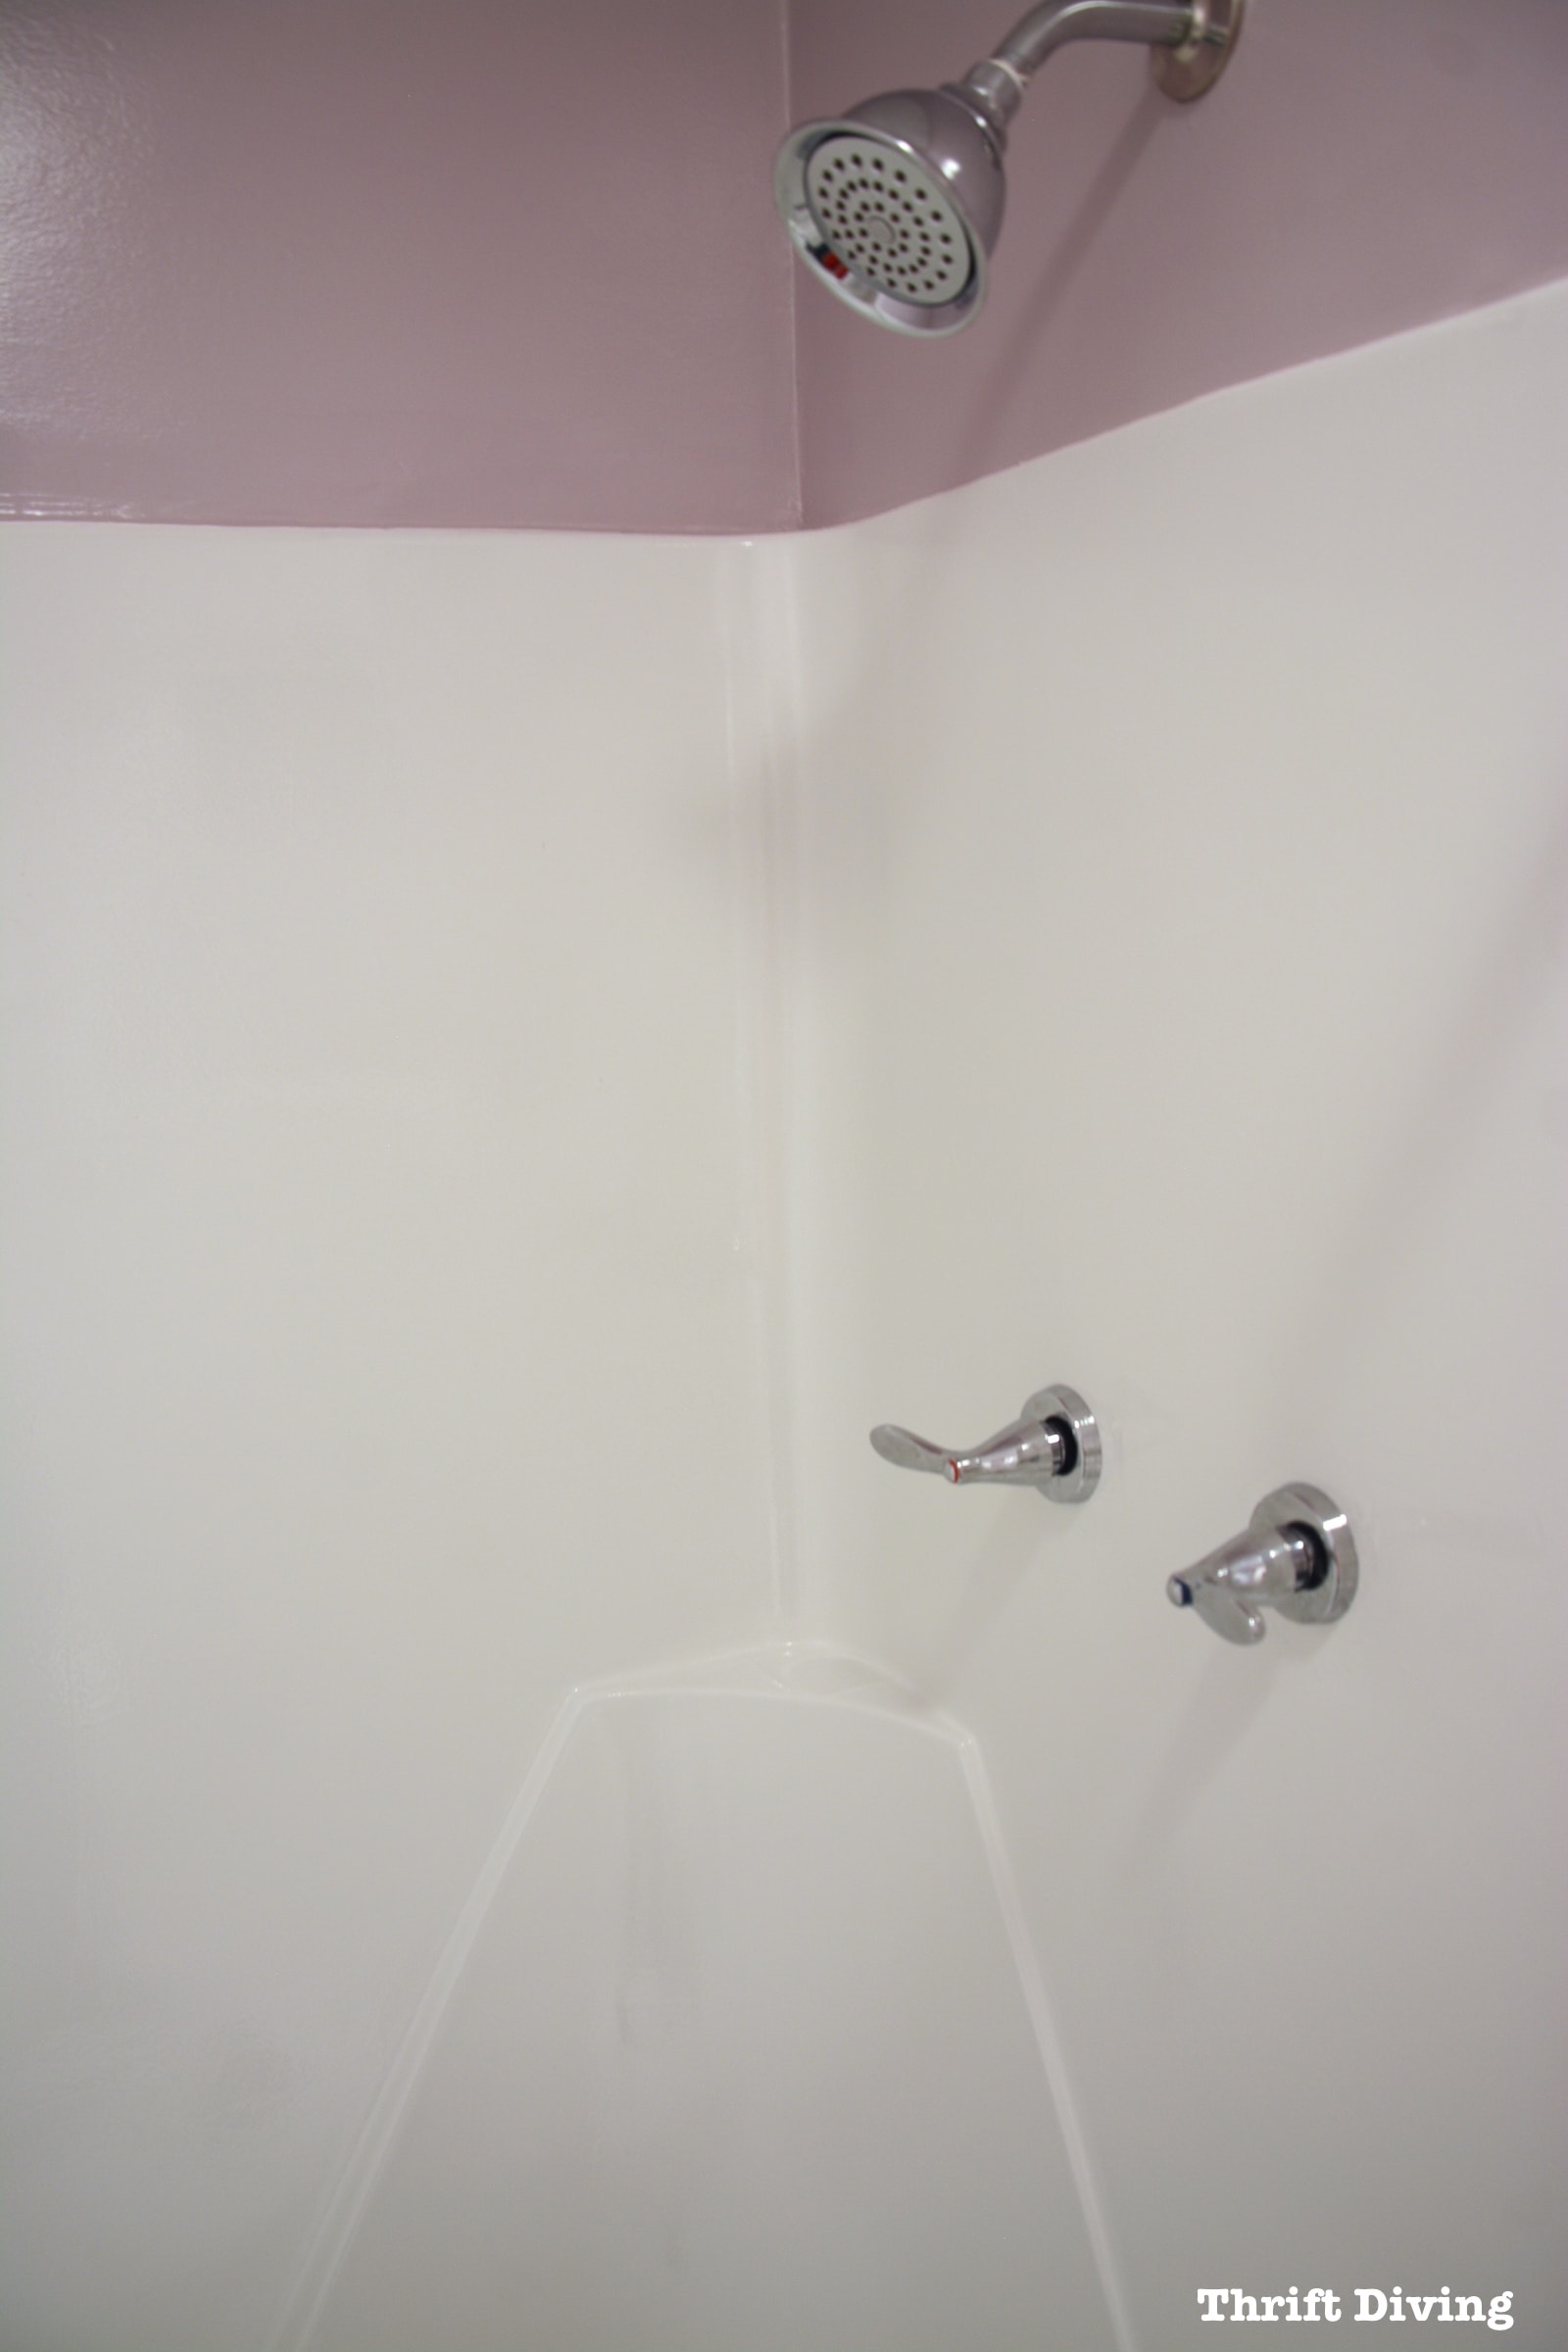
Doesn’t it look absolutely fabulous, like a whole new shower???
AFTER!
BEFORE
AFTER!
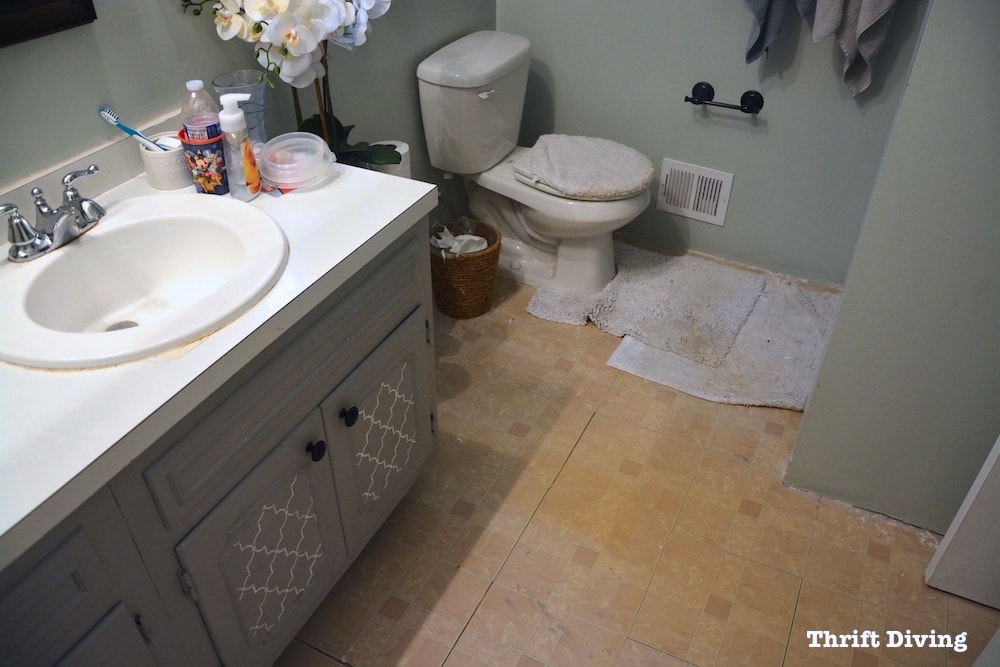
BEFORE
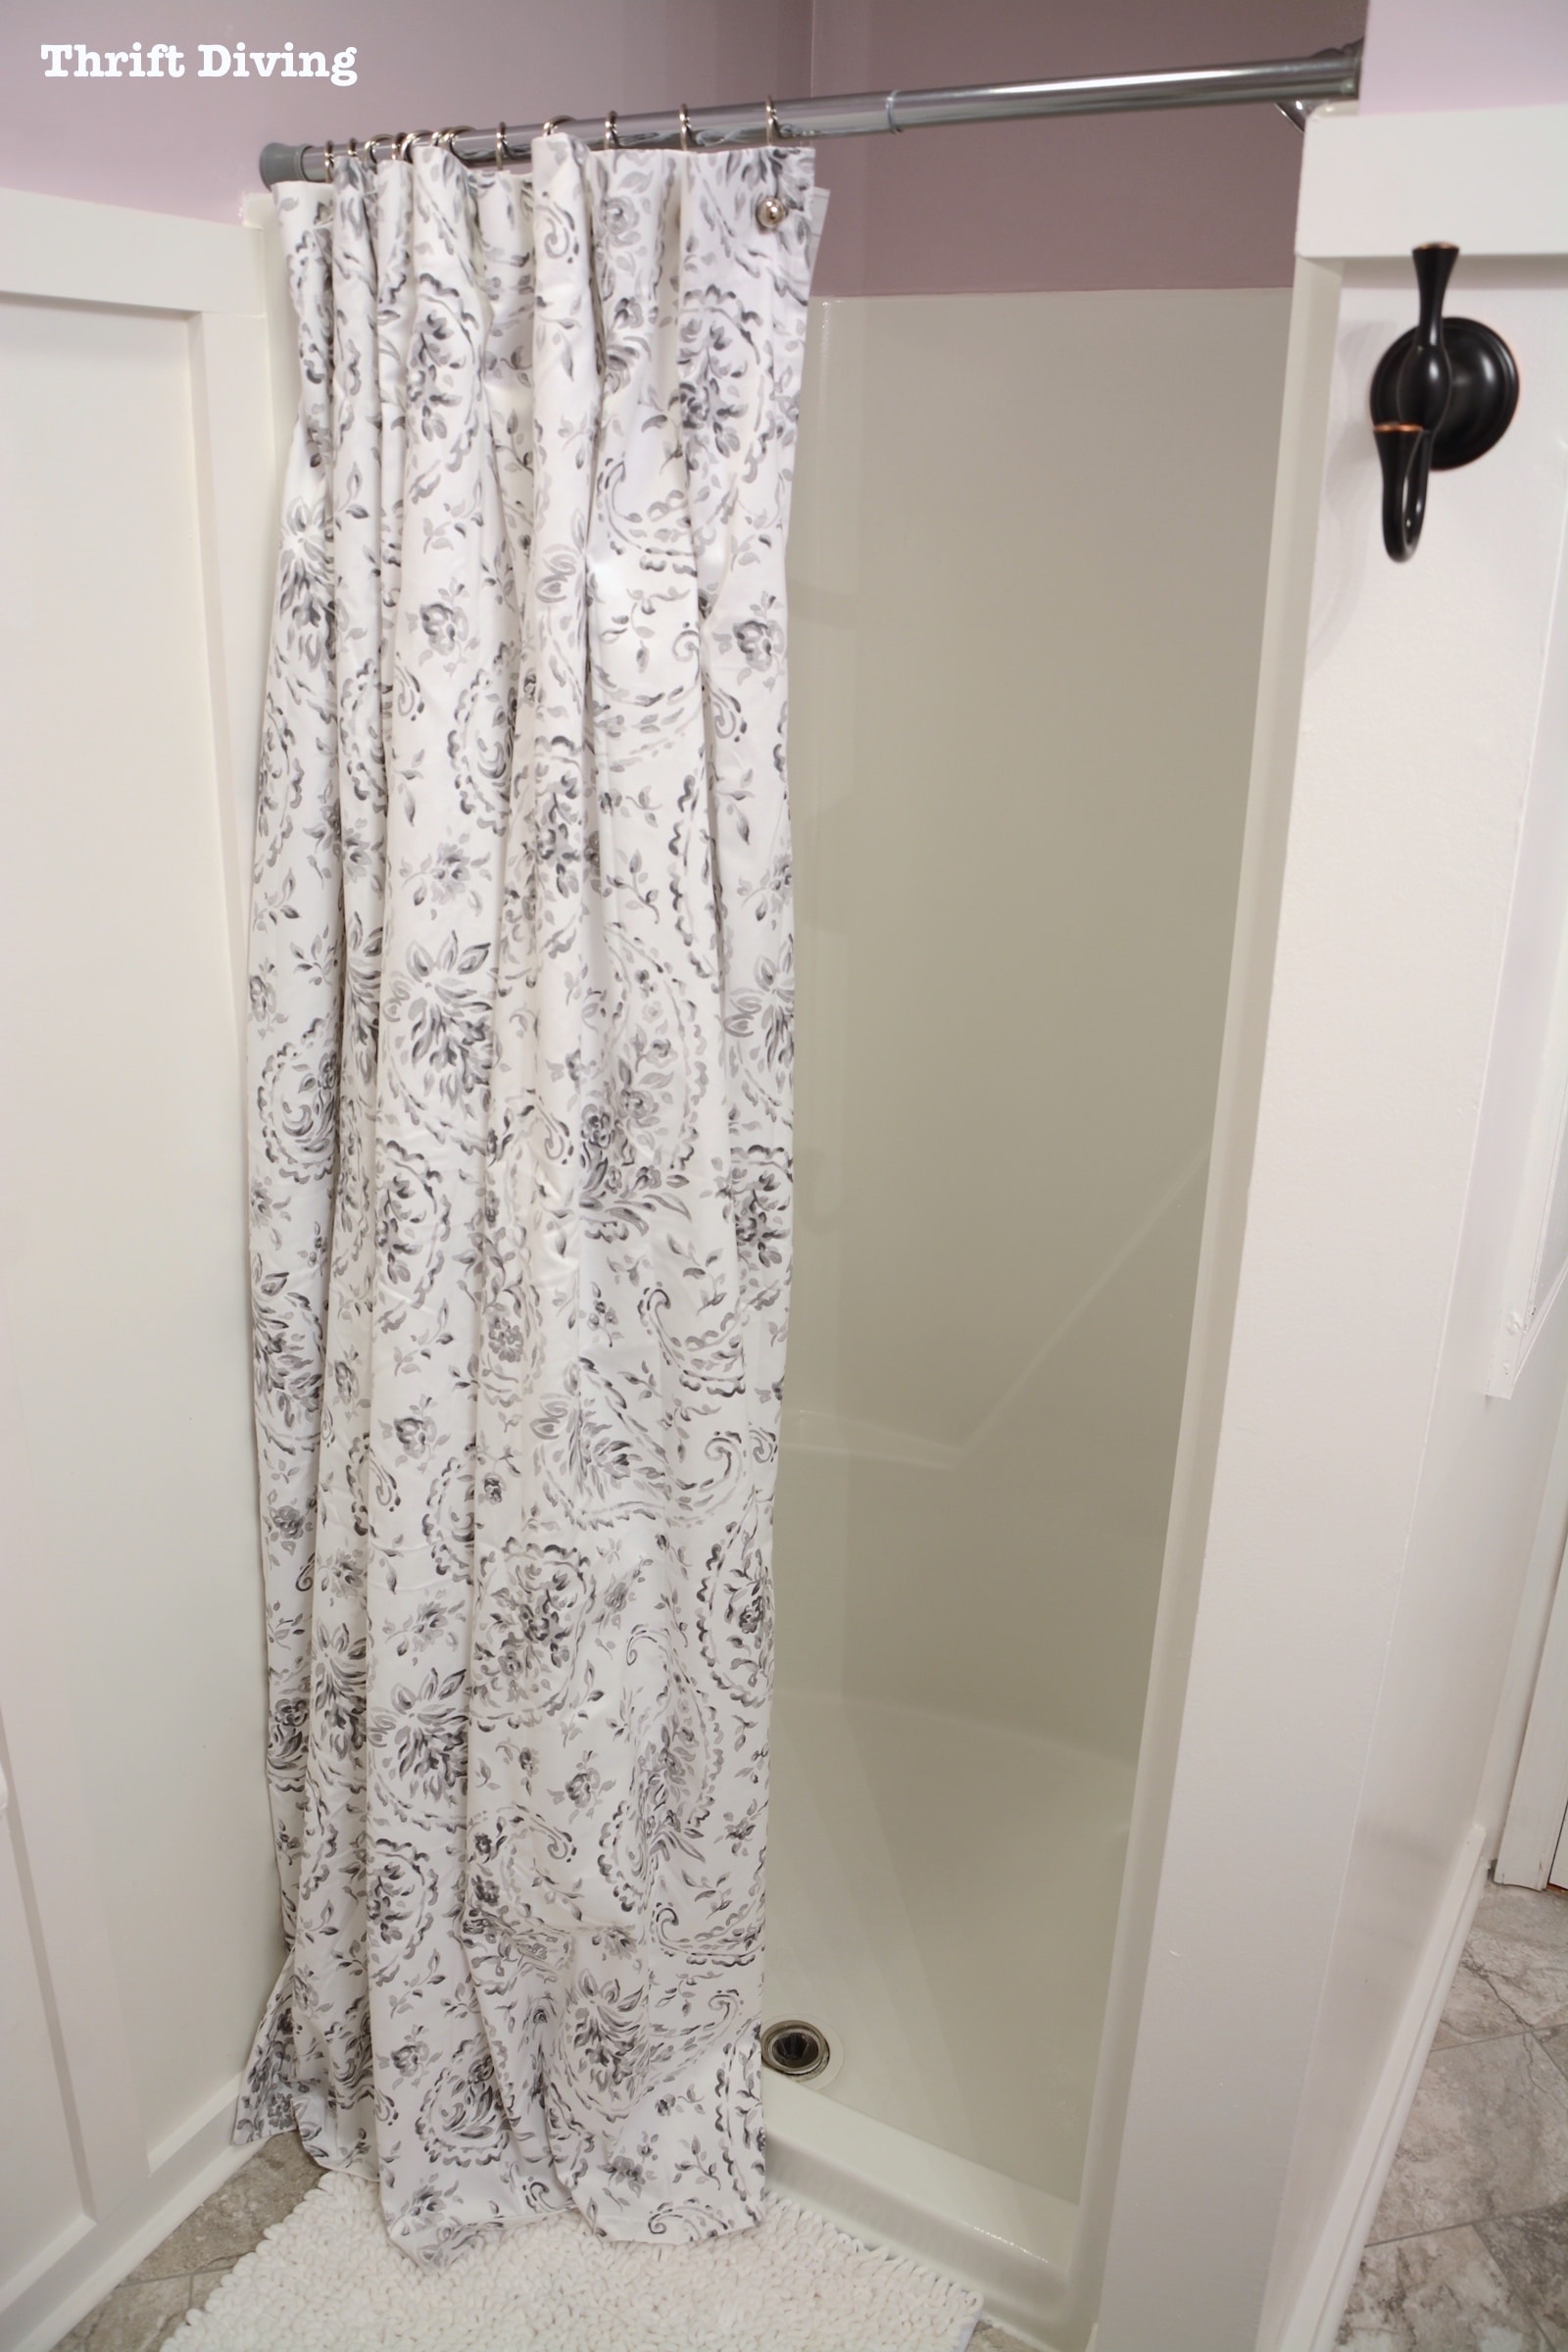
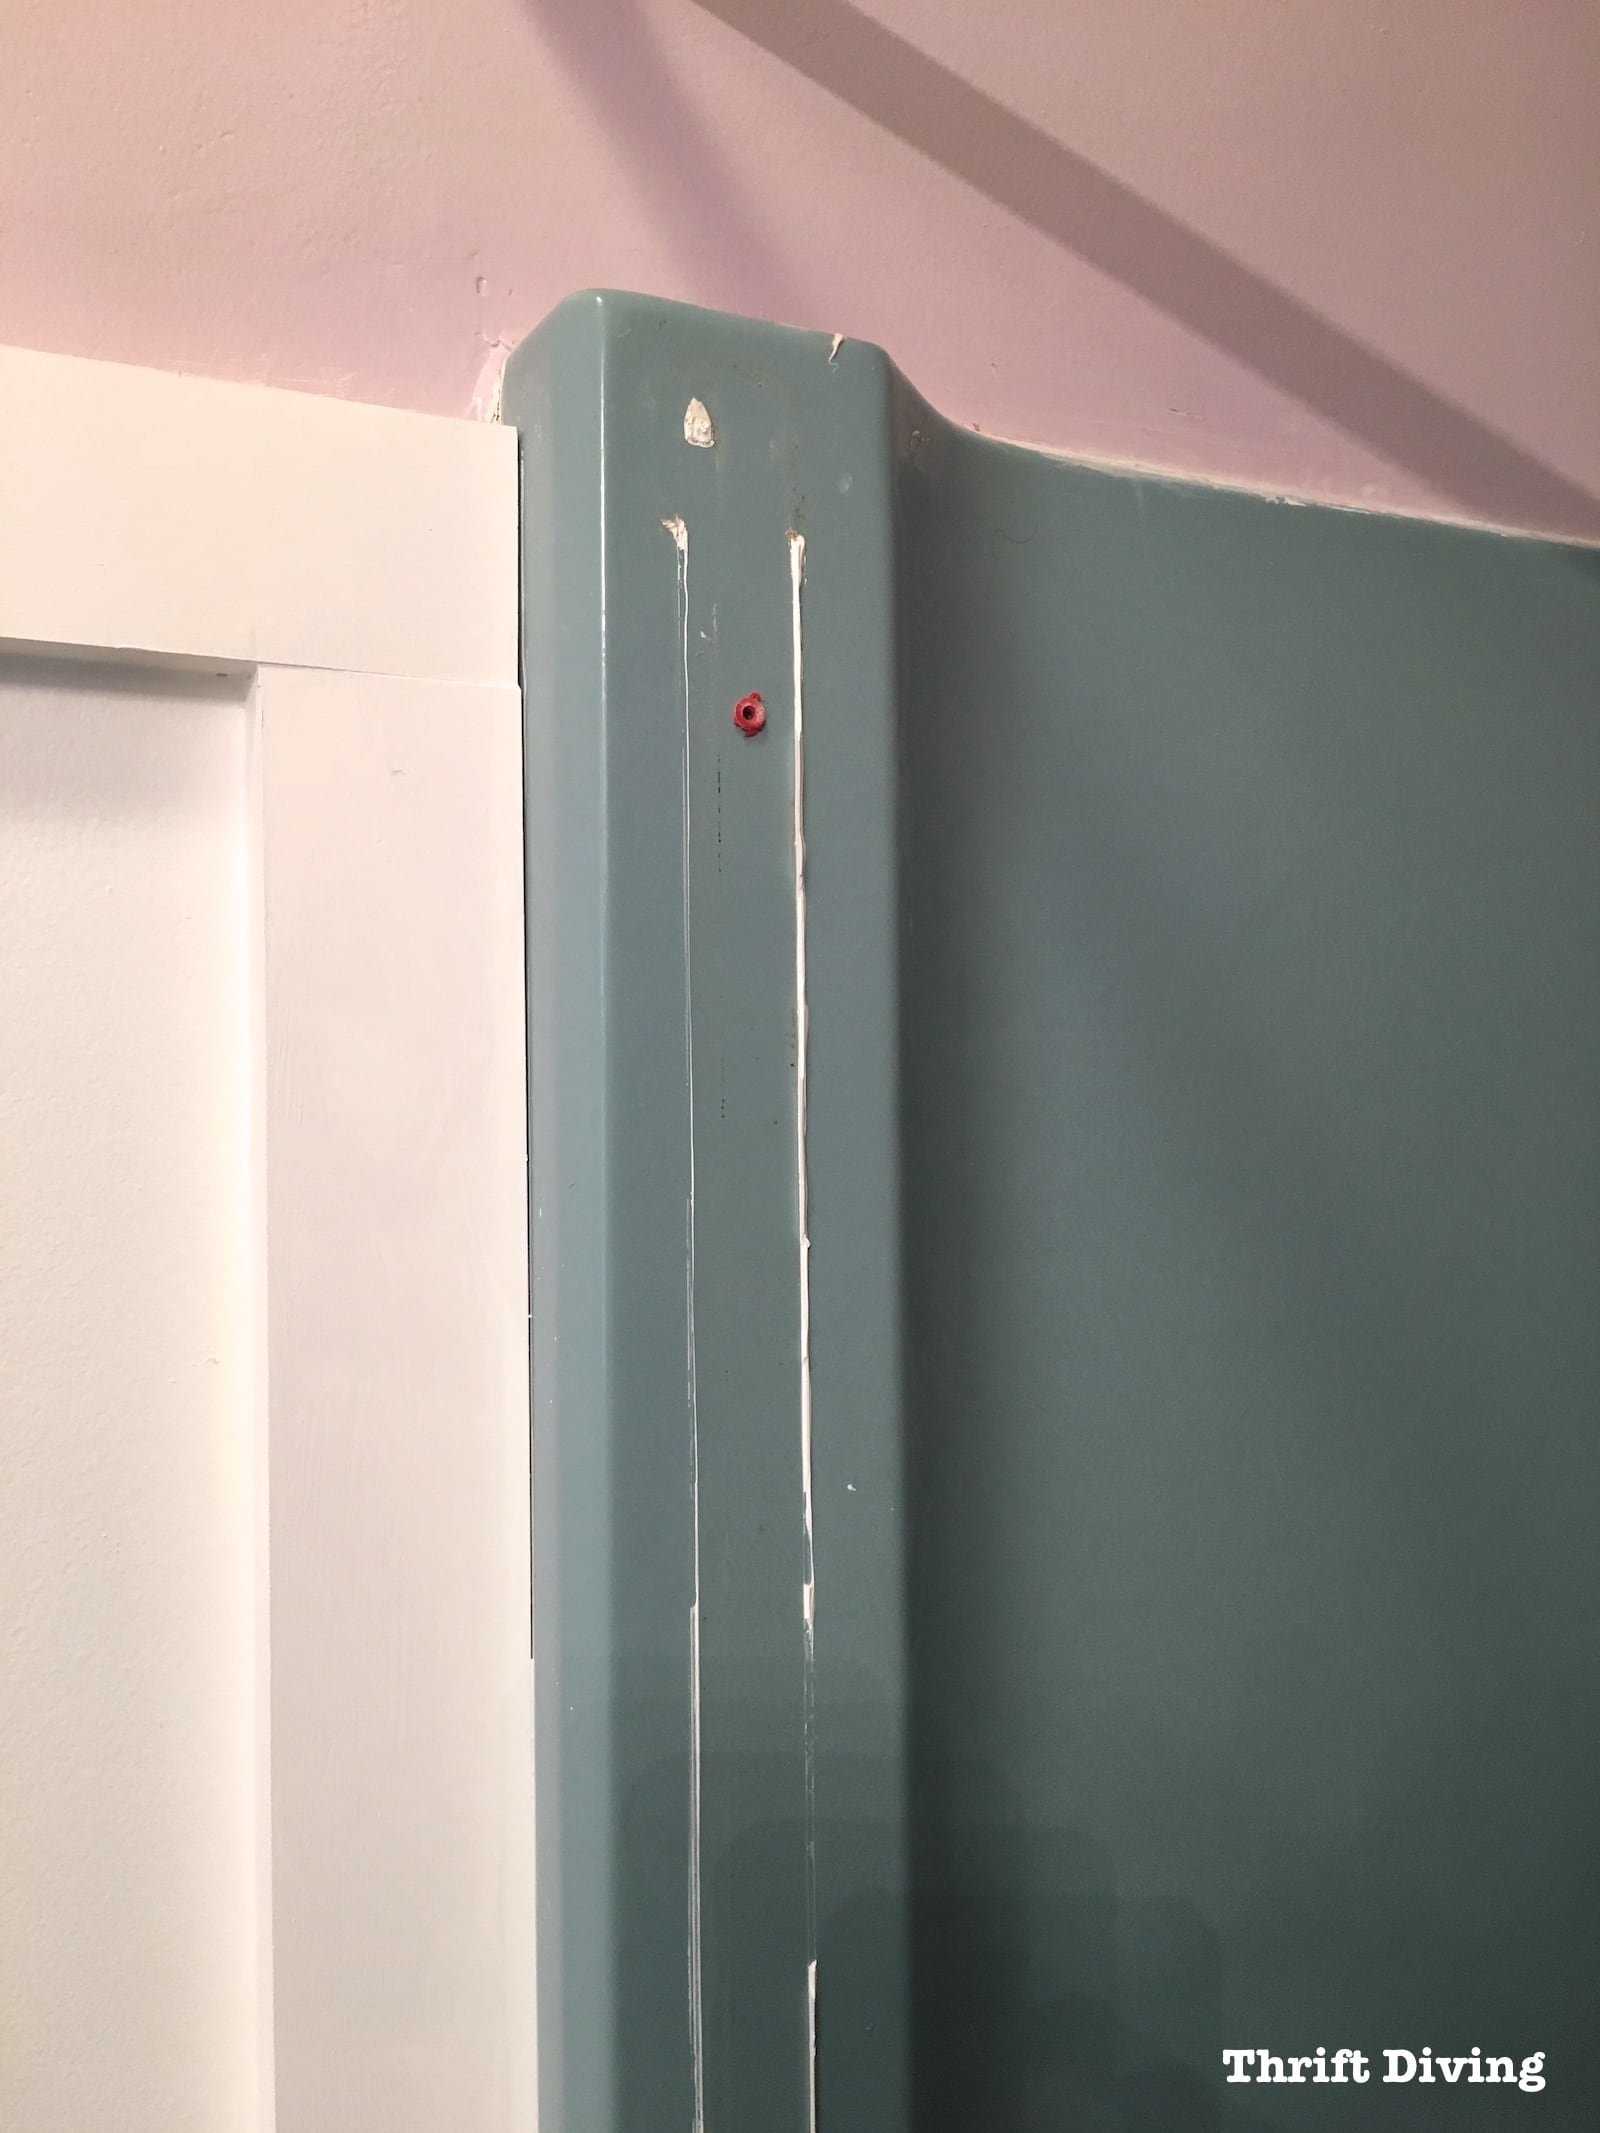
The entire bathroom got a makeover. It needed it badly!

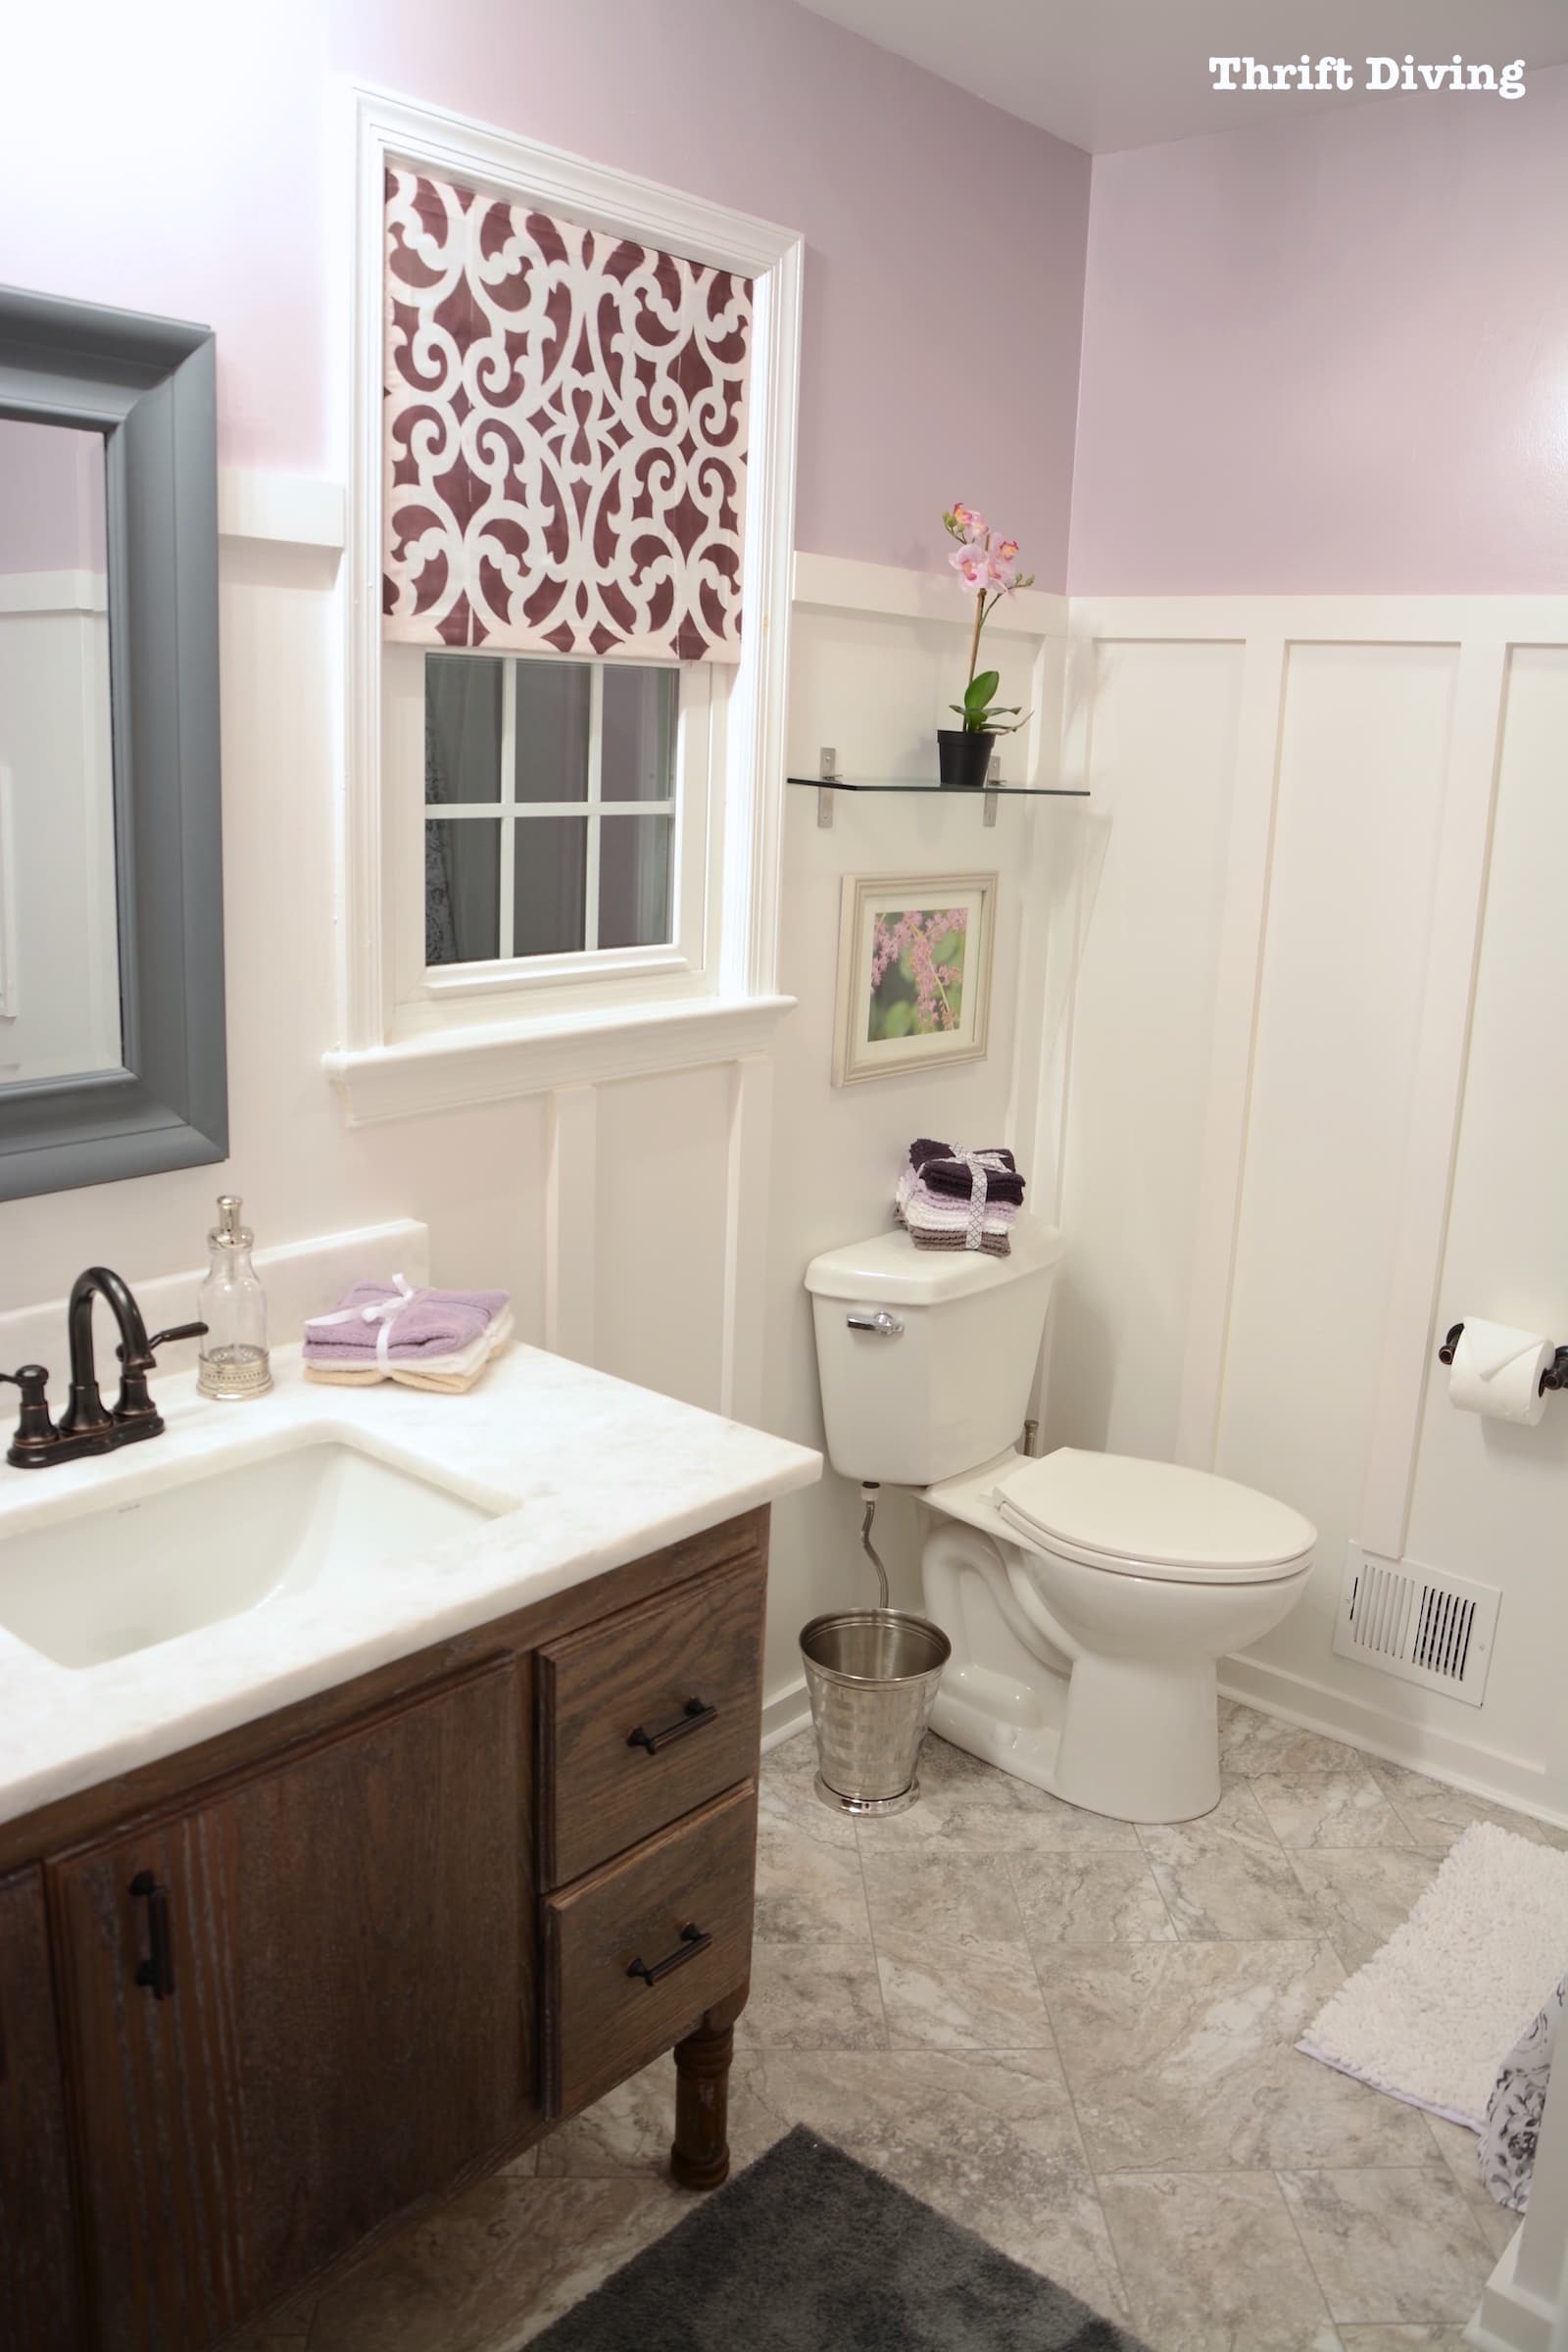
AFTER!
I couldn’t be happier with the results!
Click here to learn more about each element in the bathroom makeover:
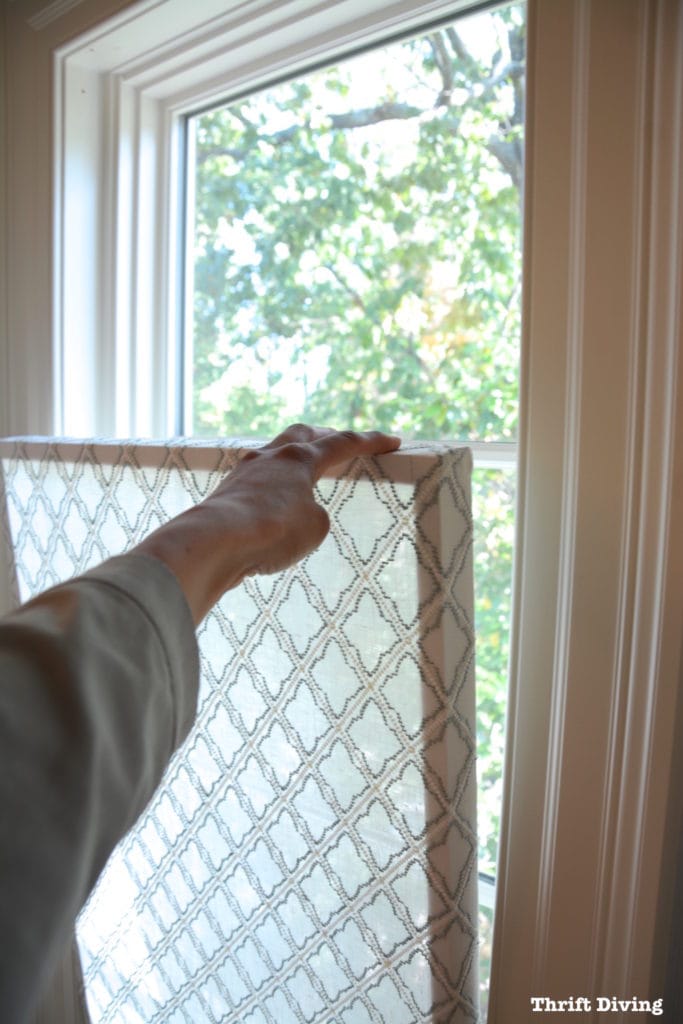
- DIY Pretty Window Privacy Screen
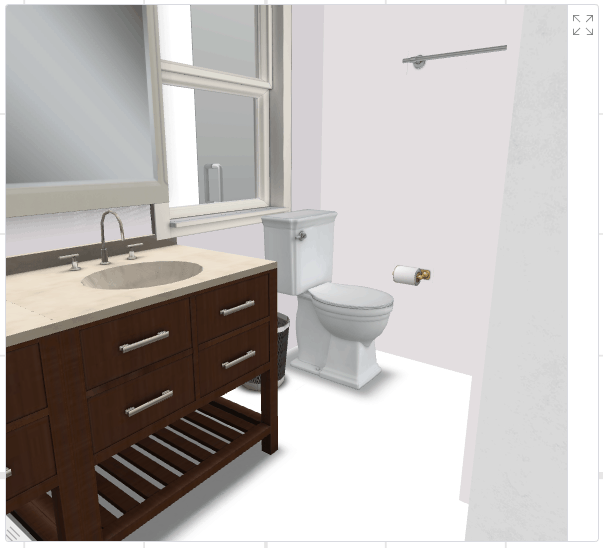
- DIY bathroom vanity built from scratch
- How to Remove a Toilet Yourself
- How to Install a Toilet, No Plumbers Needed!
- Installing New Verostone Flooring
Shower and Tub Refinishing: How to Paint a Tub or Shower
Let’s jump right into this tutorial because there are a lot of steps involved, so we have a lot to cover!
Time involved: Give yourself about a day to do this. It won’t take you much longer than that. But you will need to let it thoroughly dry about 24-48 hours before you use the shower.
SKIP AROUND
No time to swipe through the whole post? Just click to skip around!
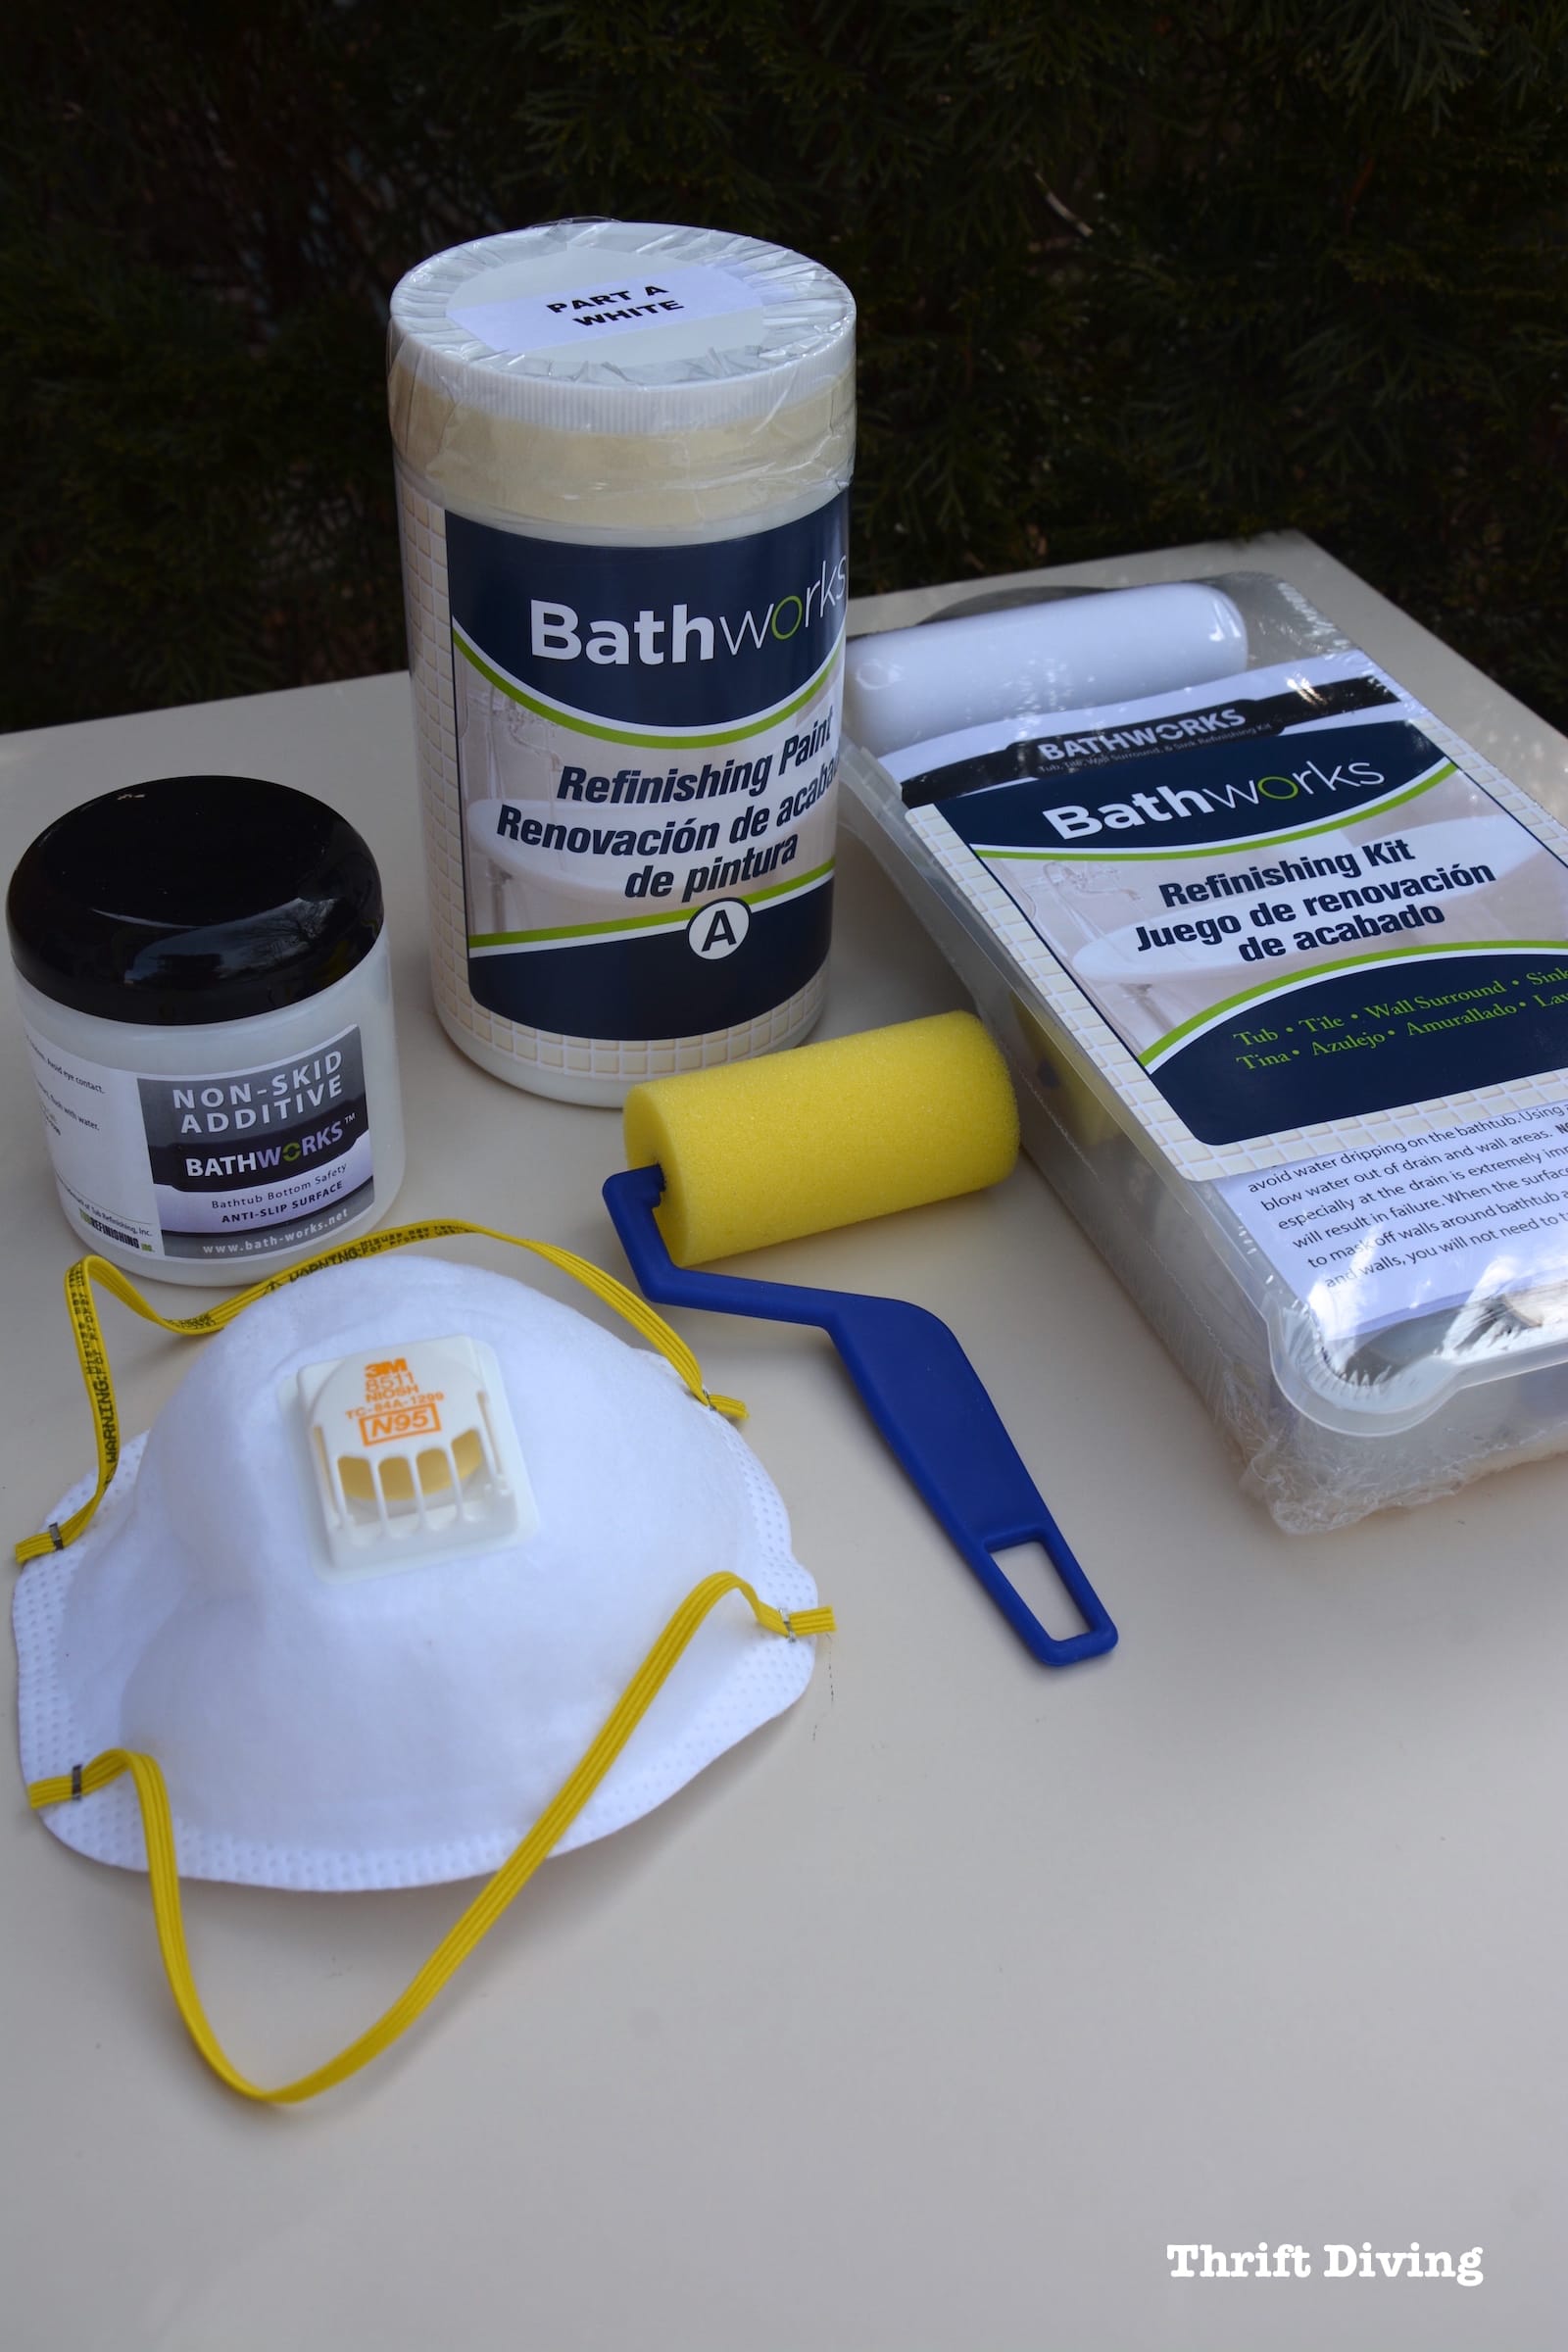
Materials Needed
STEP 1: Remove the Shower Door and Frame (if applicable)
STEP 2: Clean Up the Caulk and Remove Fixtures
STEP 3: Scrub Down the Shower or Tub
STEP 4: Sand Down the Shower or Tub
STEP 5: Use the Etching Cleaner
STEP 6: Fill Holes or Chips With Chip Filler
STEP 7: Wipe on the Liquid Primer
STEP 8: Mix Part A and Part B
STEP 9: Roll on Two Coats of Paint
STEP 10: Add the Non-Skid Coating
STEP 11: Let It Dry 24-48 Hours
How Much Did It Cost?
What If You Make a Mistake?
How Do You Clean It?
YouTube: Watch the Video Tutorial
PIN IT
Subscribe
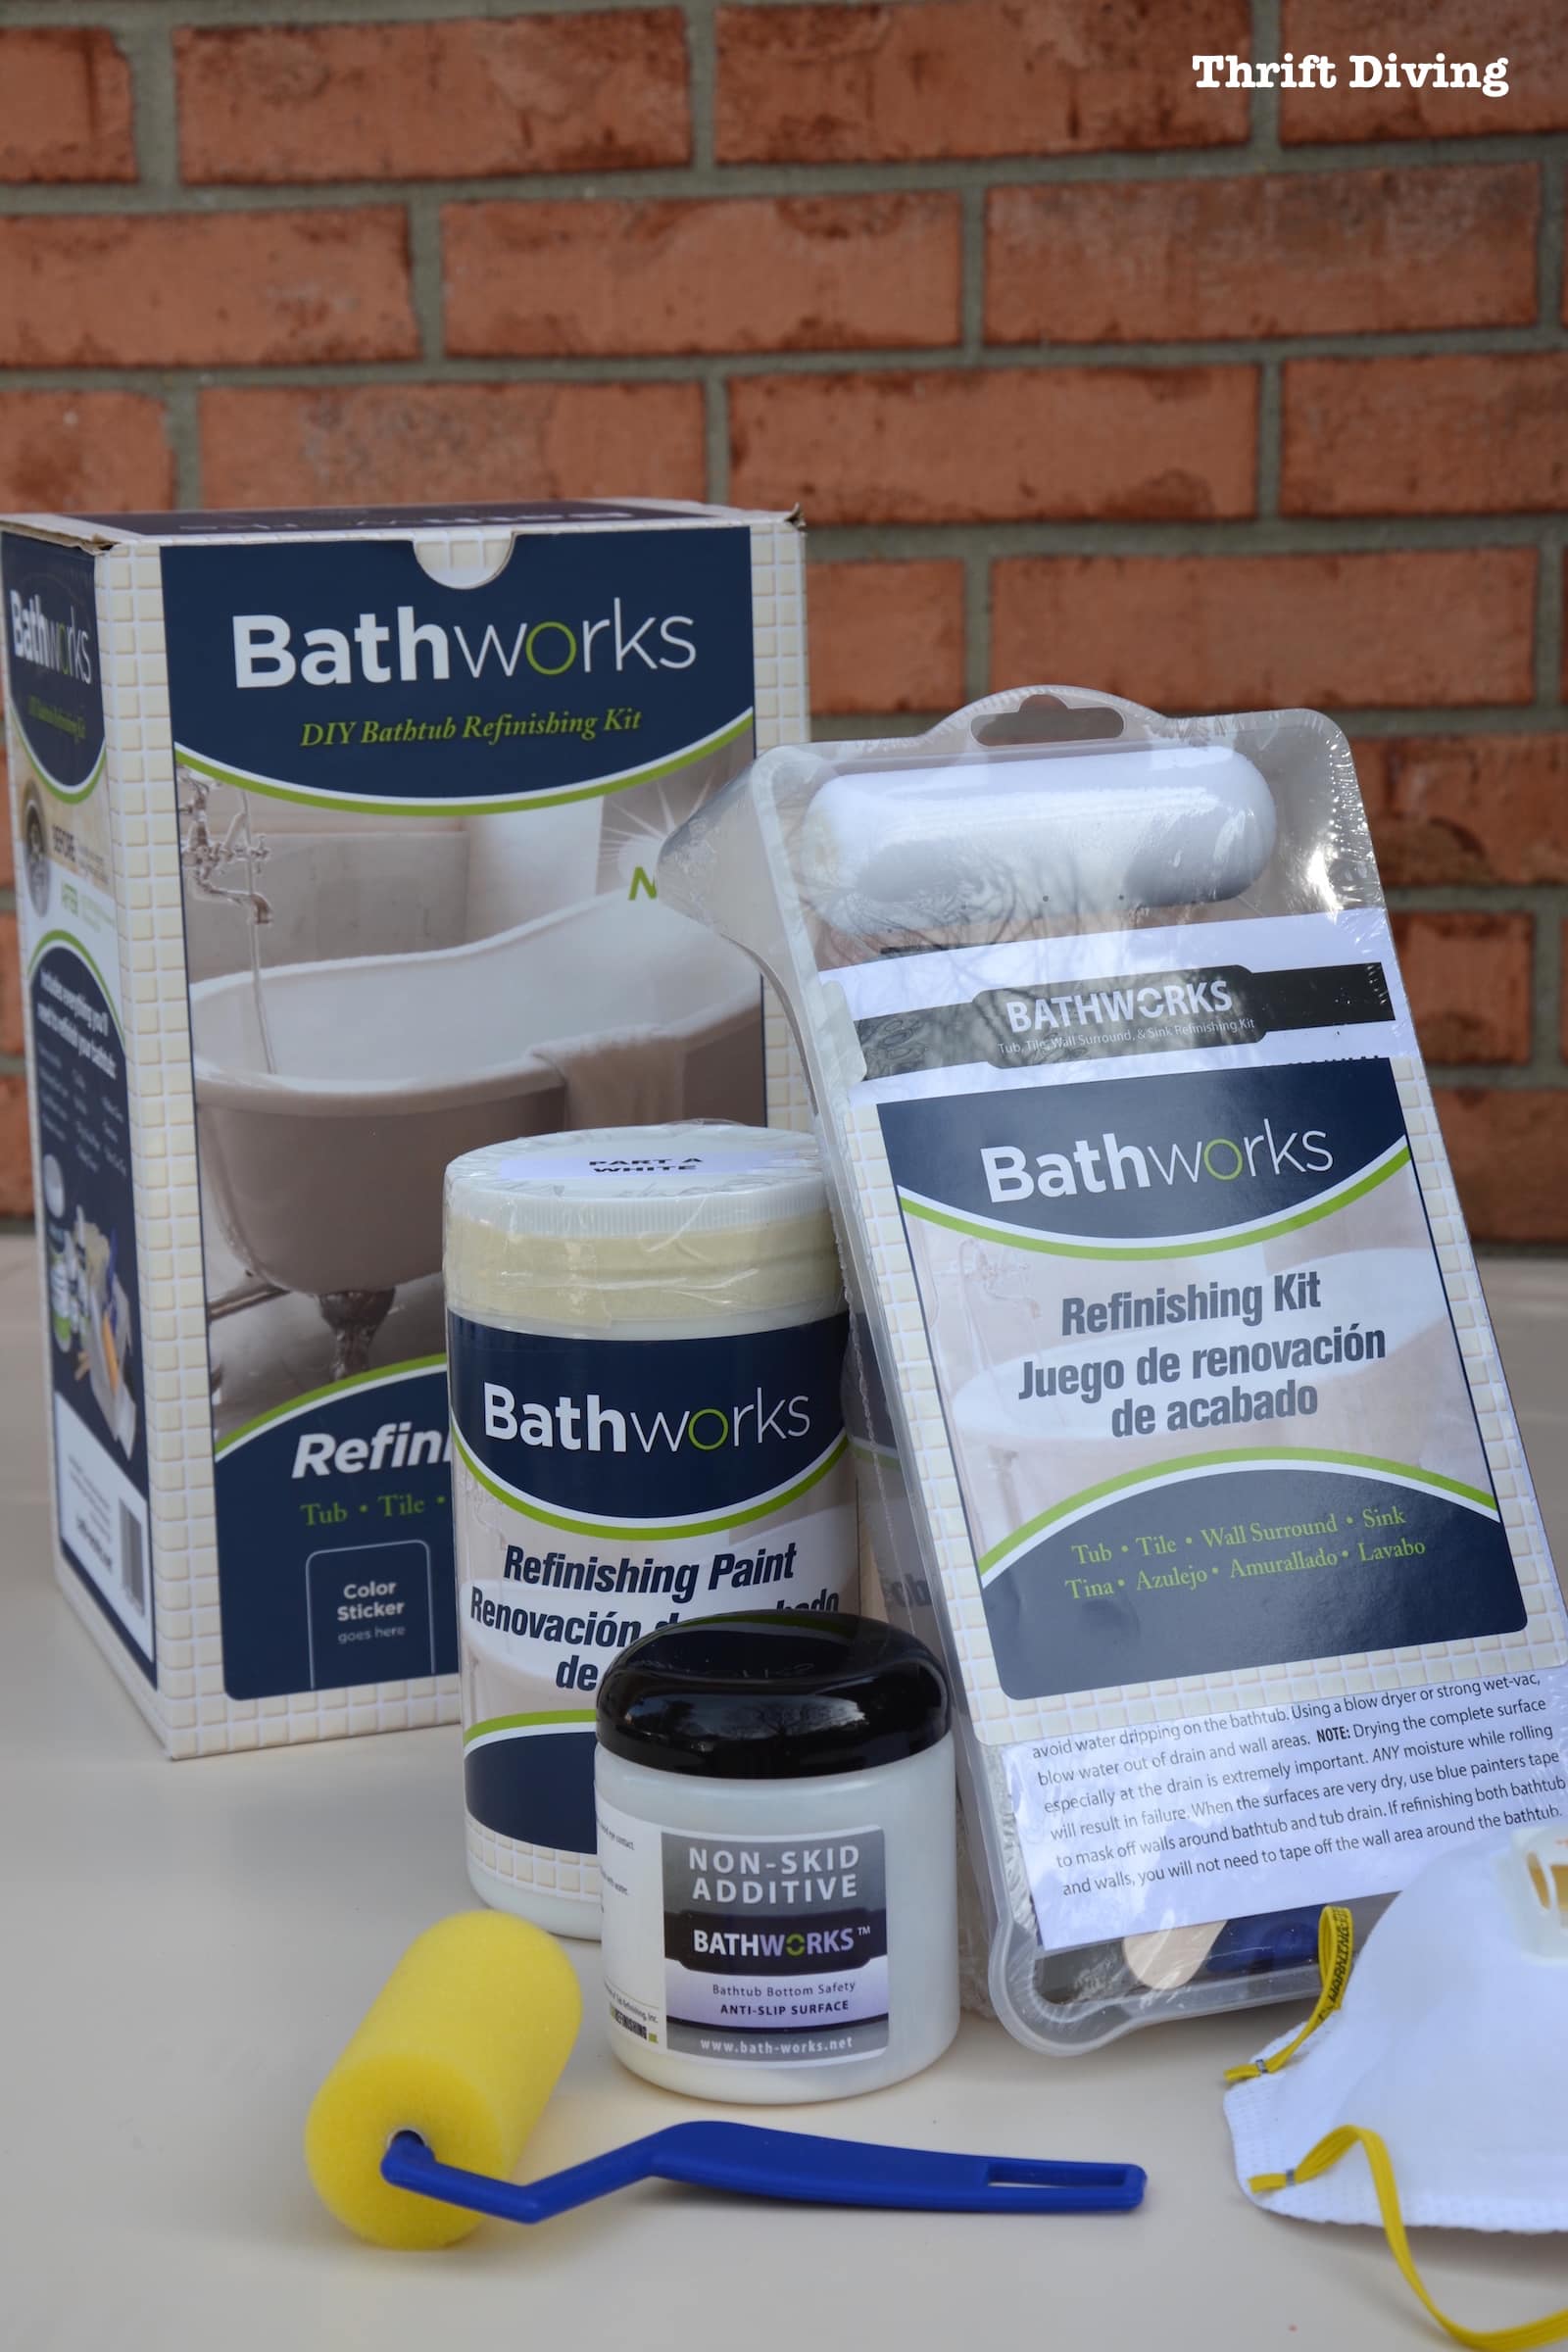
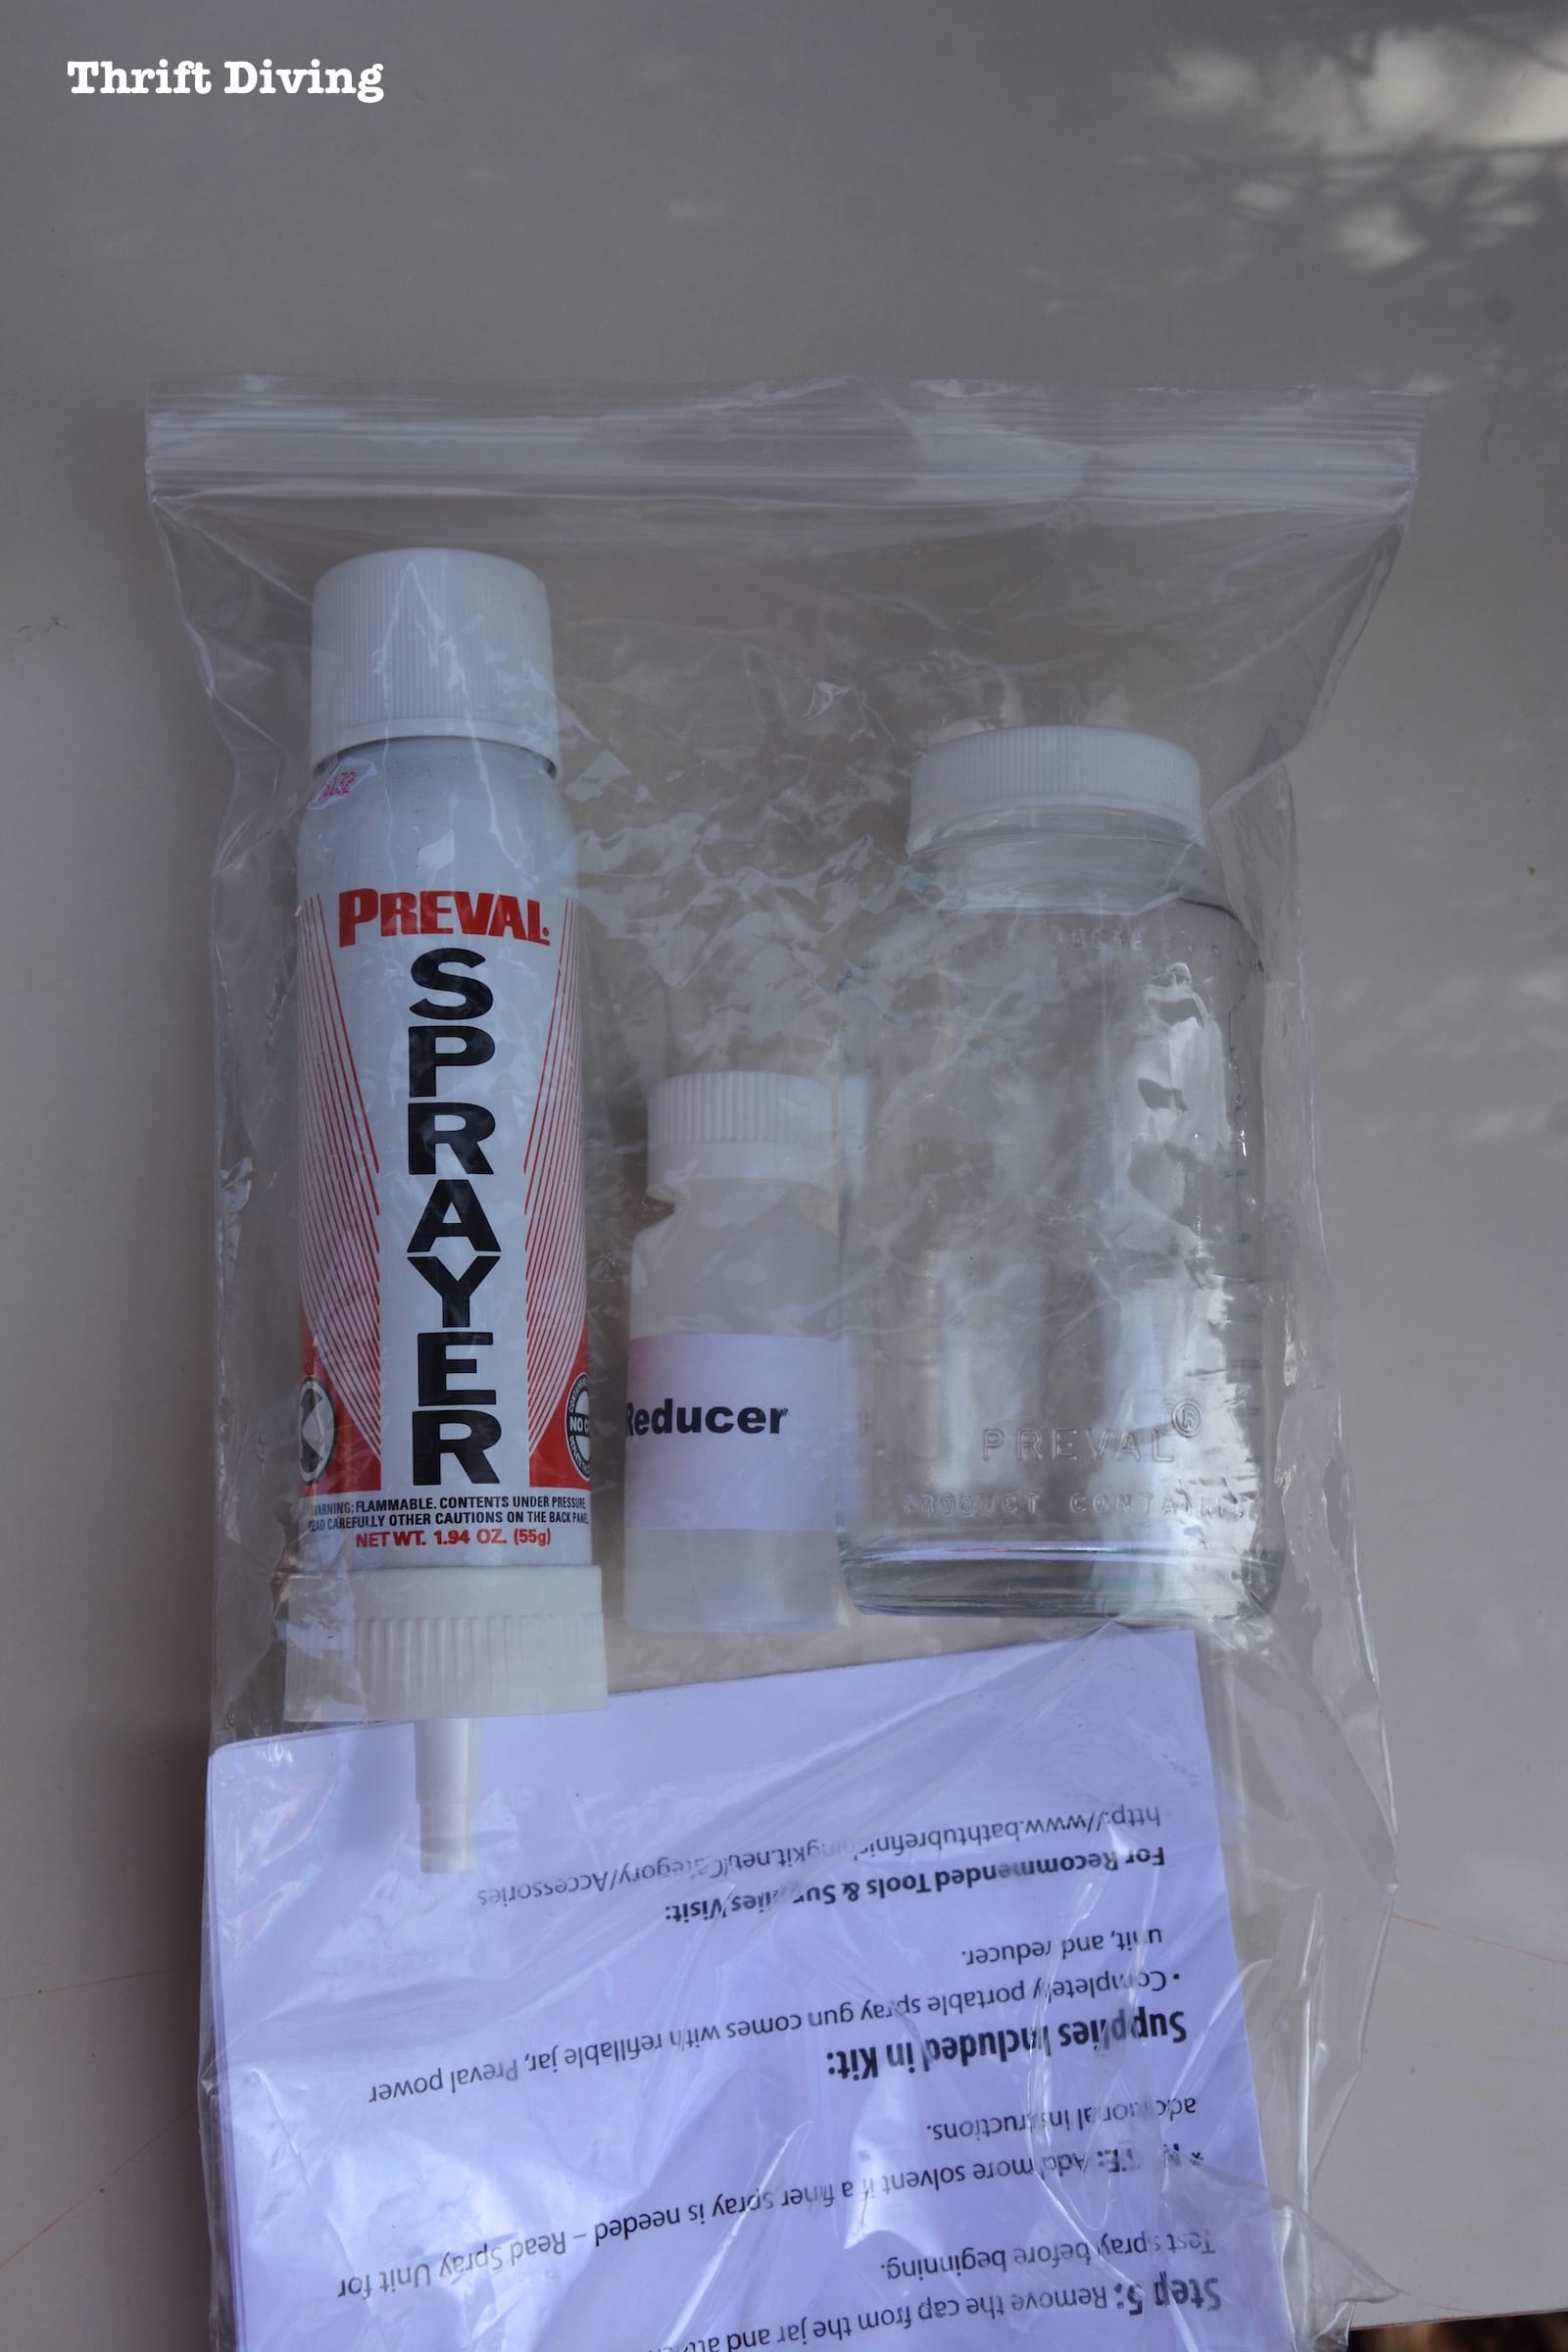
Materials Needed
- Bath-Works Shower and Tub Refinishing Kit
- Chip refinishing kit
- Extra gloves
- A 3M respirator mask
- Screwdriver
- Box cutter or knife to remove old caulking
- Razor blade scraper
- Painter’s tape
- Small sponge brush
- Small paint brush
- Comet
- Paper towels
- Fan or open window
- Orbit sander (optional)
For this project, I was testing out the BathWorks DIY Bathtub Refinishing Kit, which they sent to me for my bathroom makeover. It came with everything inside of it that I needed for the shower makeover.
After spending about 45 minutes on the phone with the company, asking them a lot of questions about their product, I came to the conclusion that this was going to be right product because:
- BathWorks is a commercial-grade resin that works better than epoxy, is more durable, and lasts longer (click here to read why).
- This is the same product that their professional shower and tub refinishers use in hotels and for residential showers and tub refinishing projects.
- My shower was in good condition–it just wasn’t the right color.
- It’s easy for people to order this kit from Home Depot online.
I couldn’t wait to find out how my turquoise 70’s shower would look after I was done.
Here’s how I did it!
STEP 1: Remove the Shower Door and Frame (if applicable)
My shower came with this horrible, brassy, shower door and frame. It had to be removed.
Just unscrew along the top and along the frame.
Use an extra pair of hands so it doesn’t fall on you!
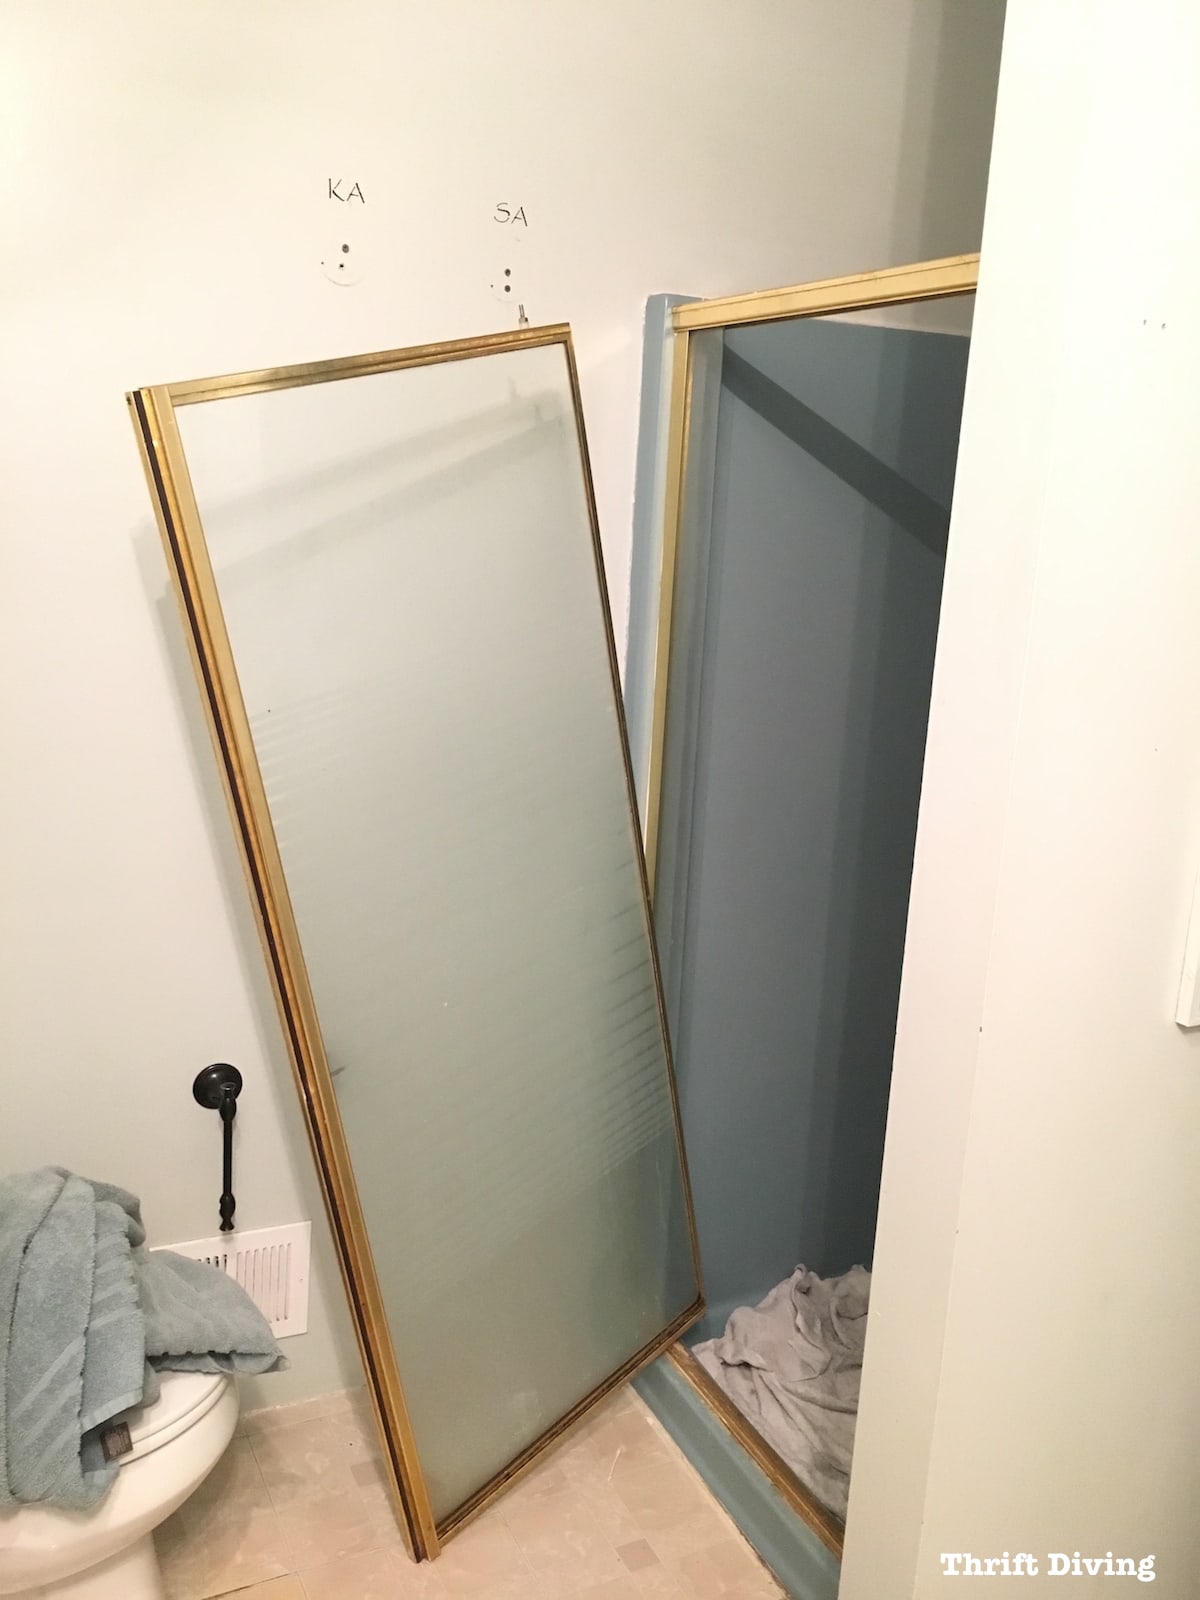
I’ll clue you in on a little something:
You will find disgusting gunk up underneath of your shower frame!
I’m almost embarrassed to show you how gross it was.
Hey–don’t judge. 😉
This is to help you. Remember?? LOL
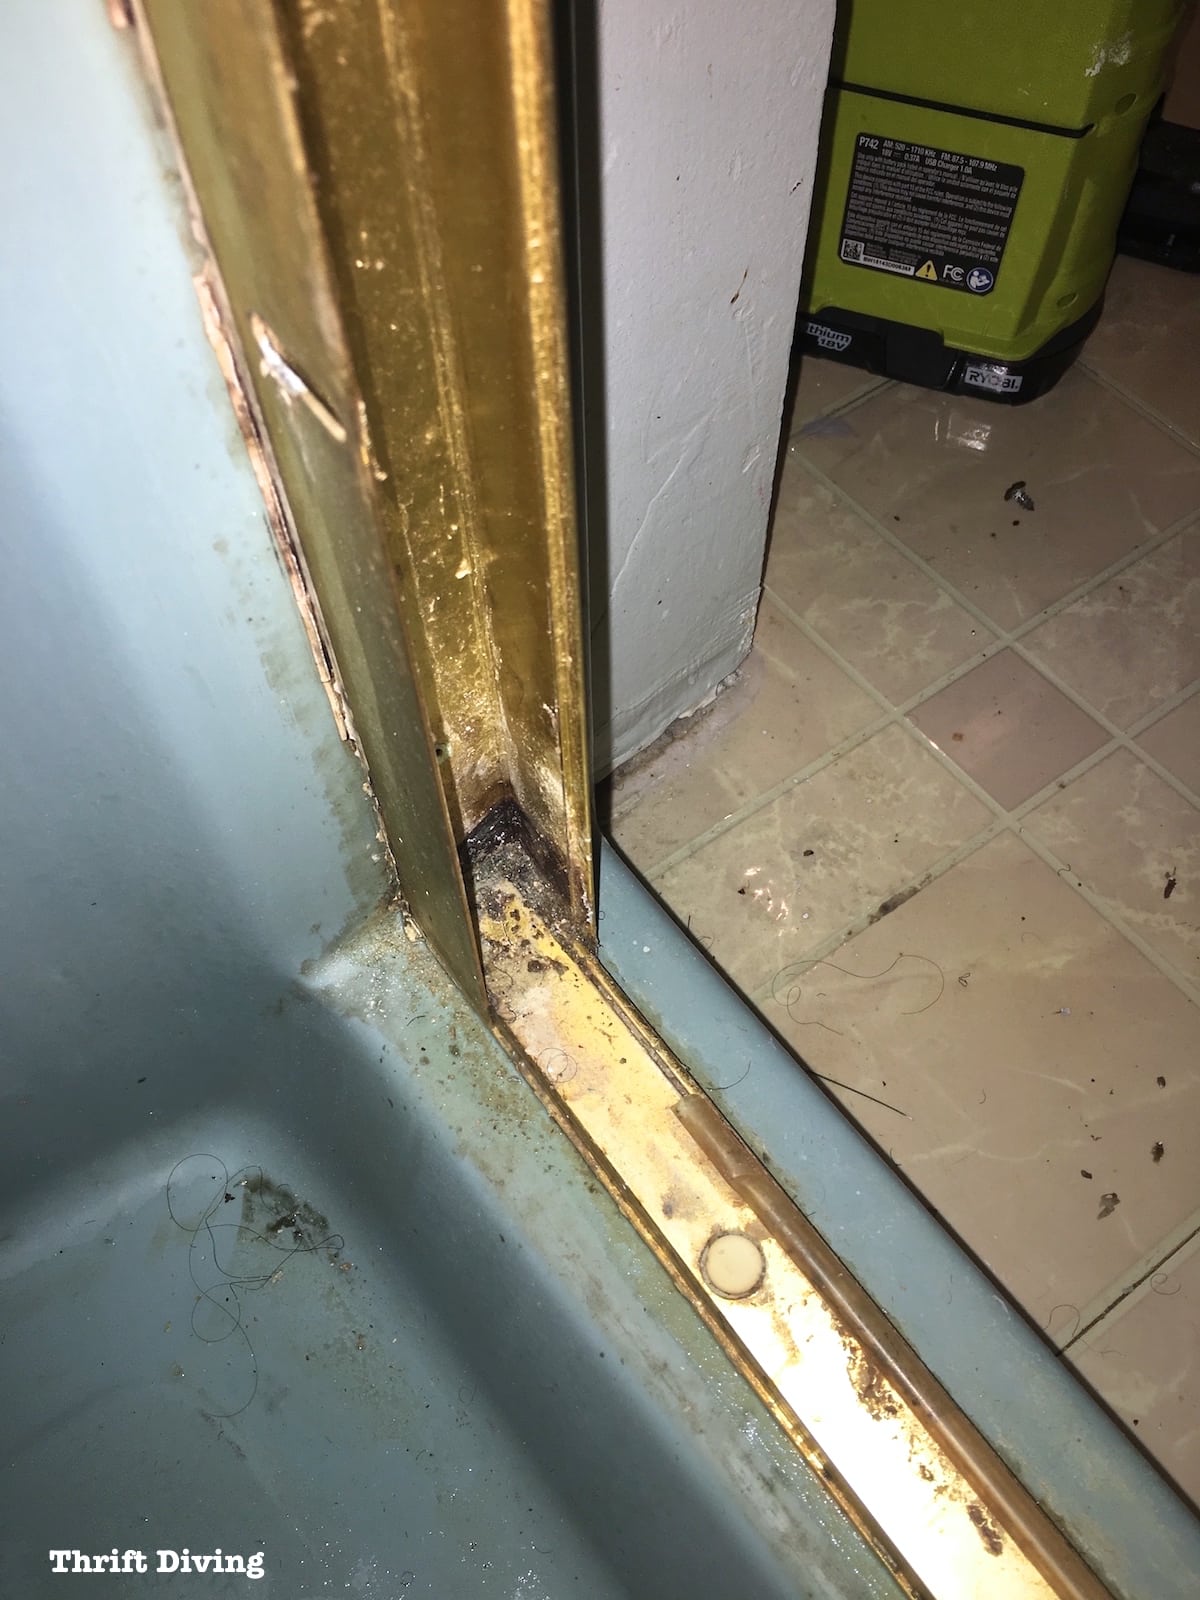
There will be organisms you didn’t even realize were living and growing under your nasty shower door and frame! And you will question how you ever thought you were clean in that shower…
ICK!

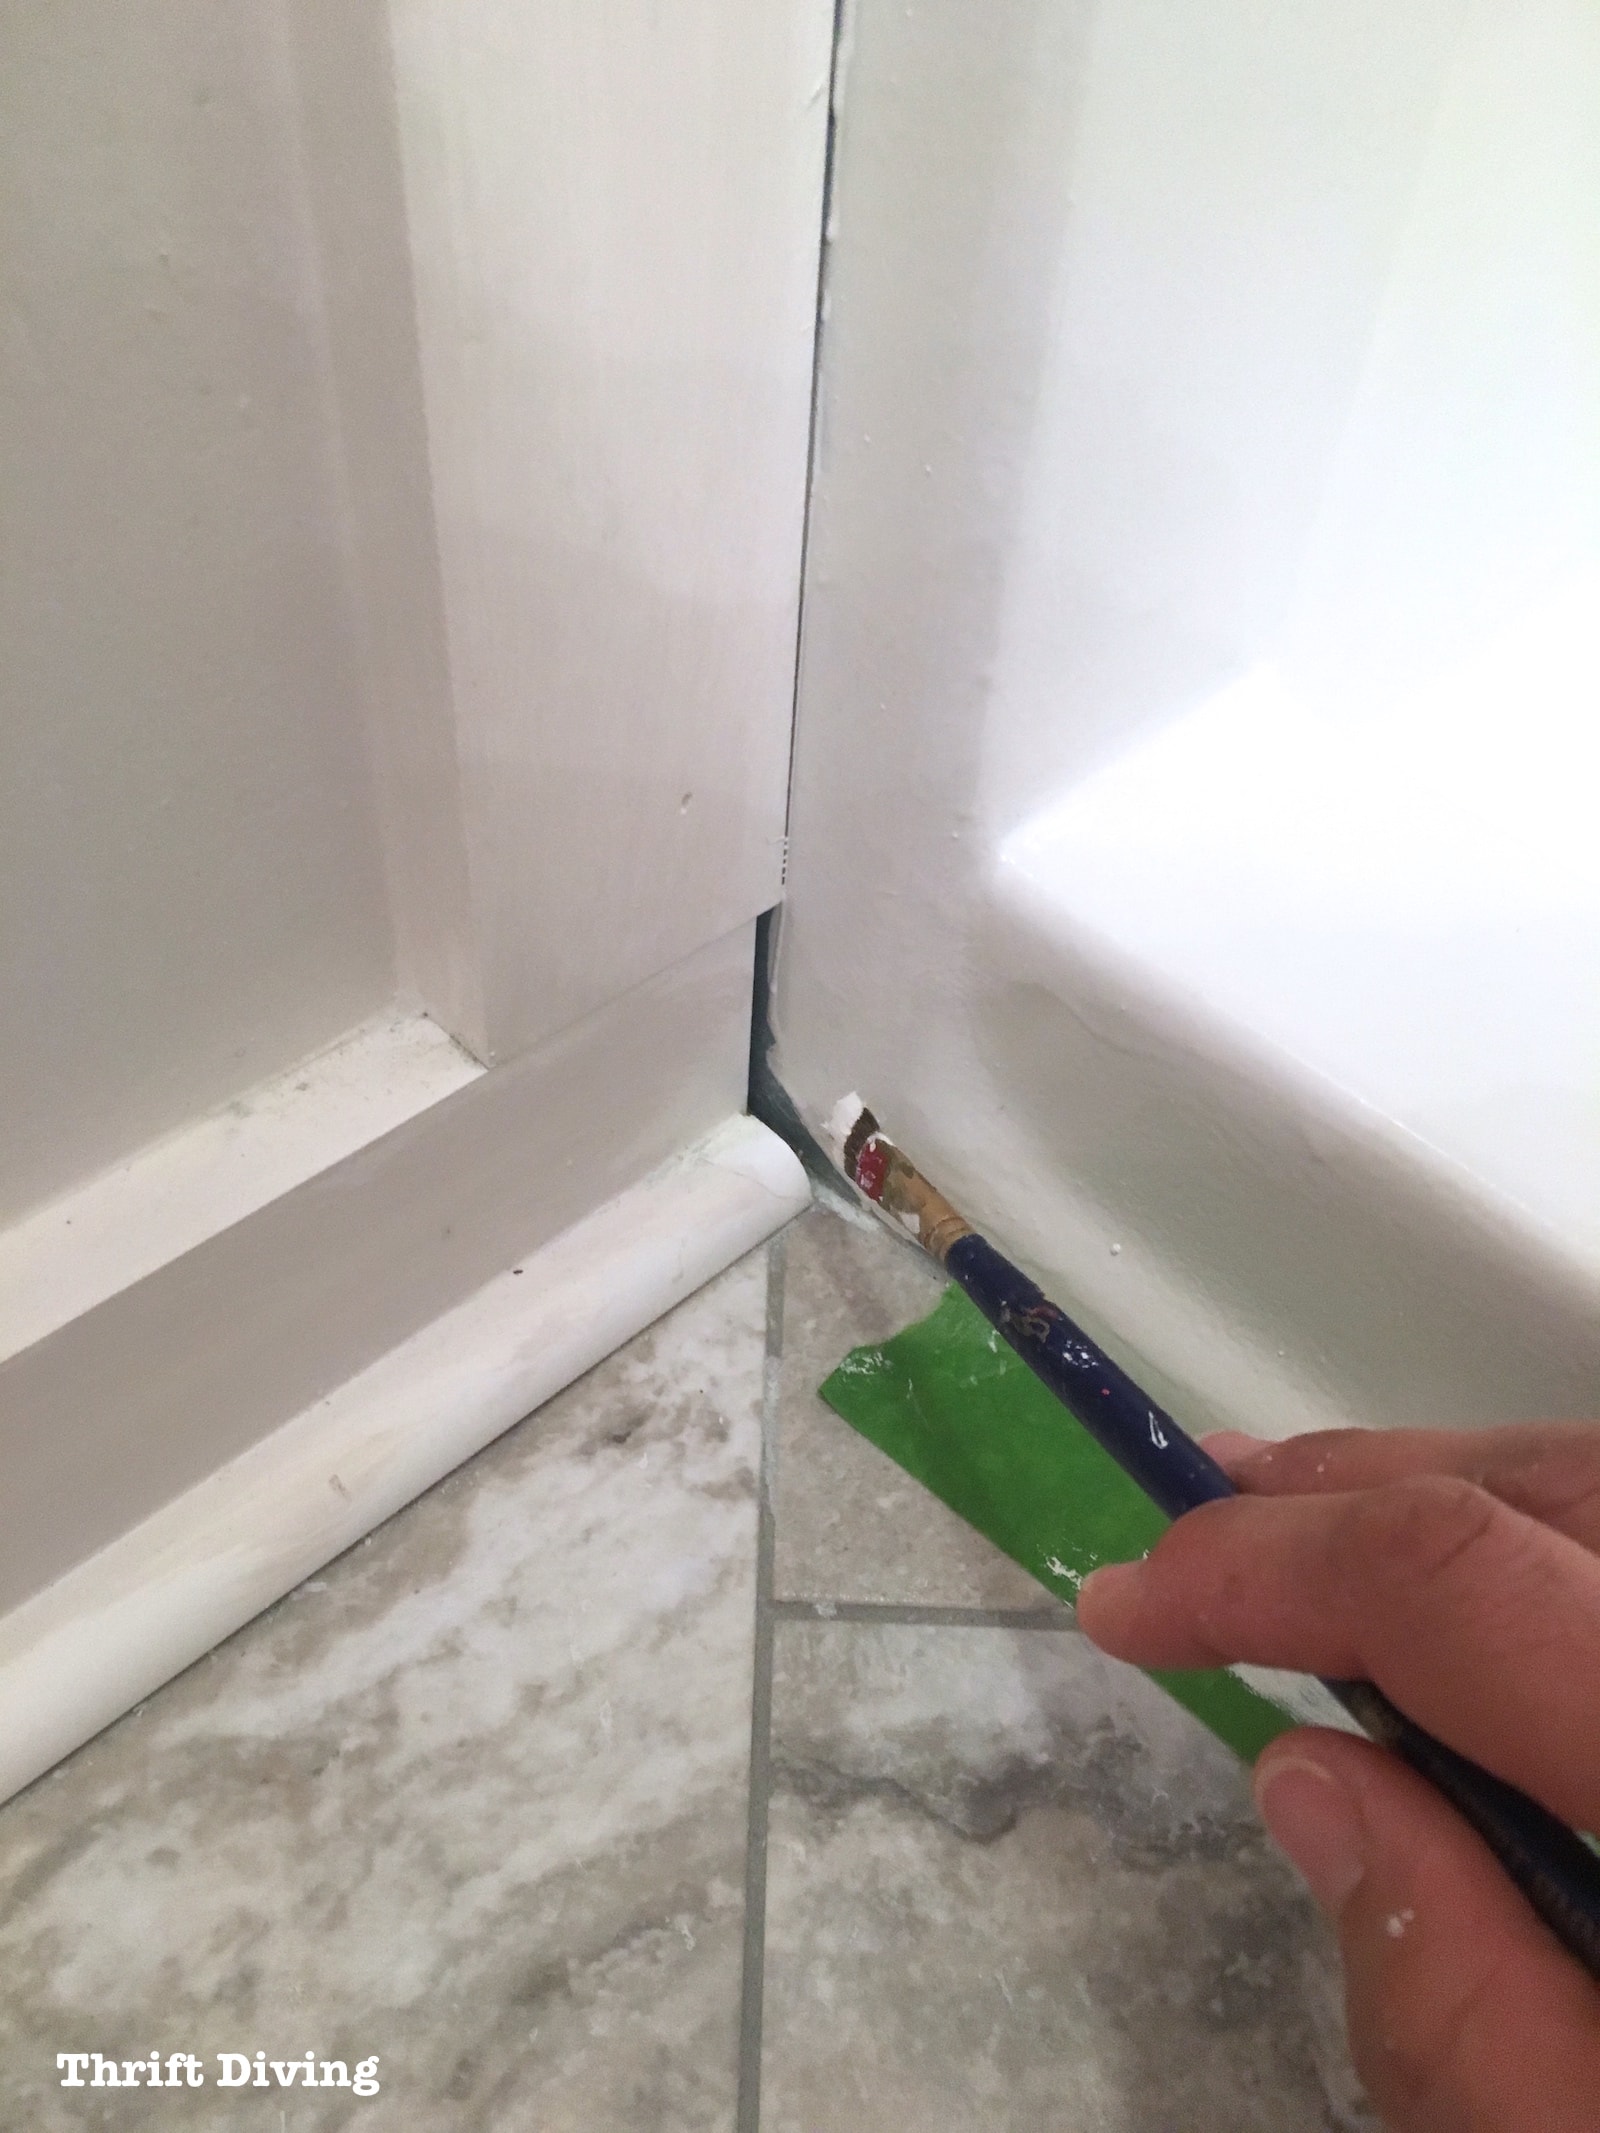
STEP 2: Clean Up the Caulk and Remove Fixtures
You’ll probably have caulk along the shower or tub, or along the shower door. All of this must come off before you can refinish your shower or tub. The paint won’t stick to this.
It’s optional to remove the caulk from the shower or tub edge, but I think you should remove it. Fresh caulk always looks better than old caulk, right? 🙂
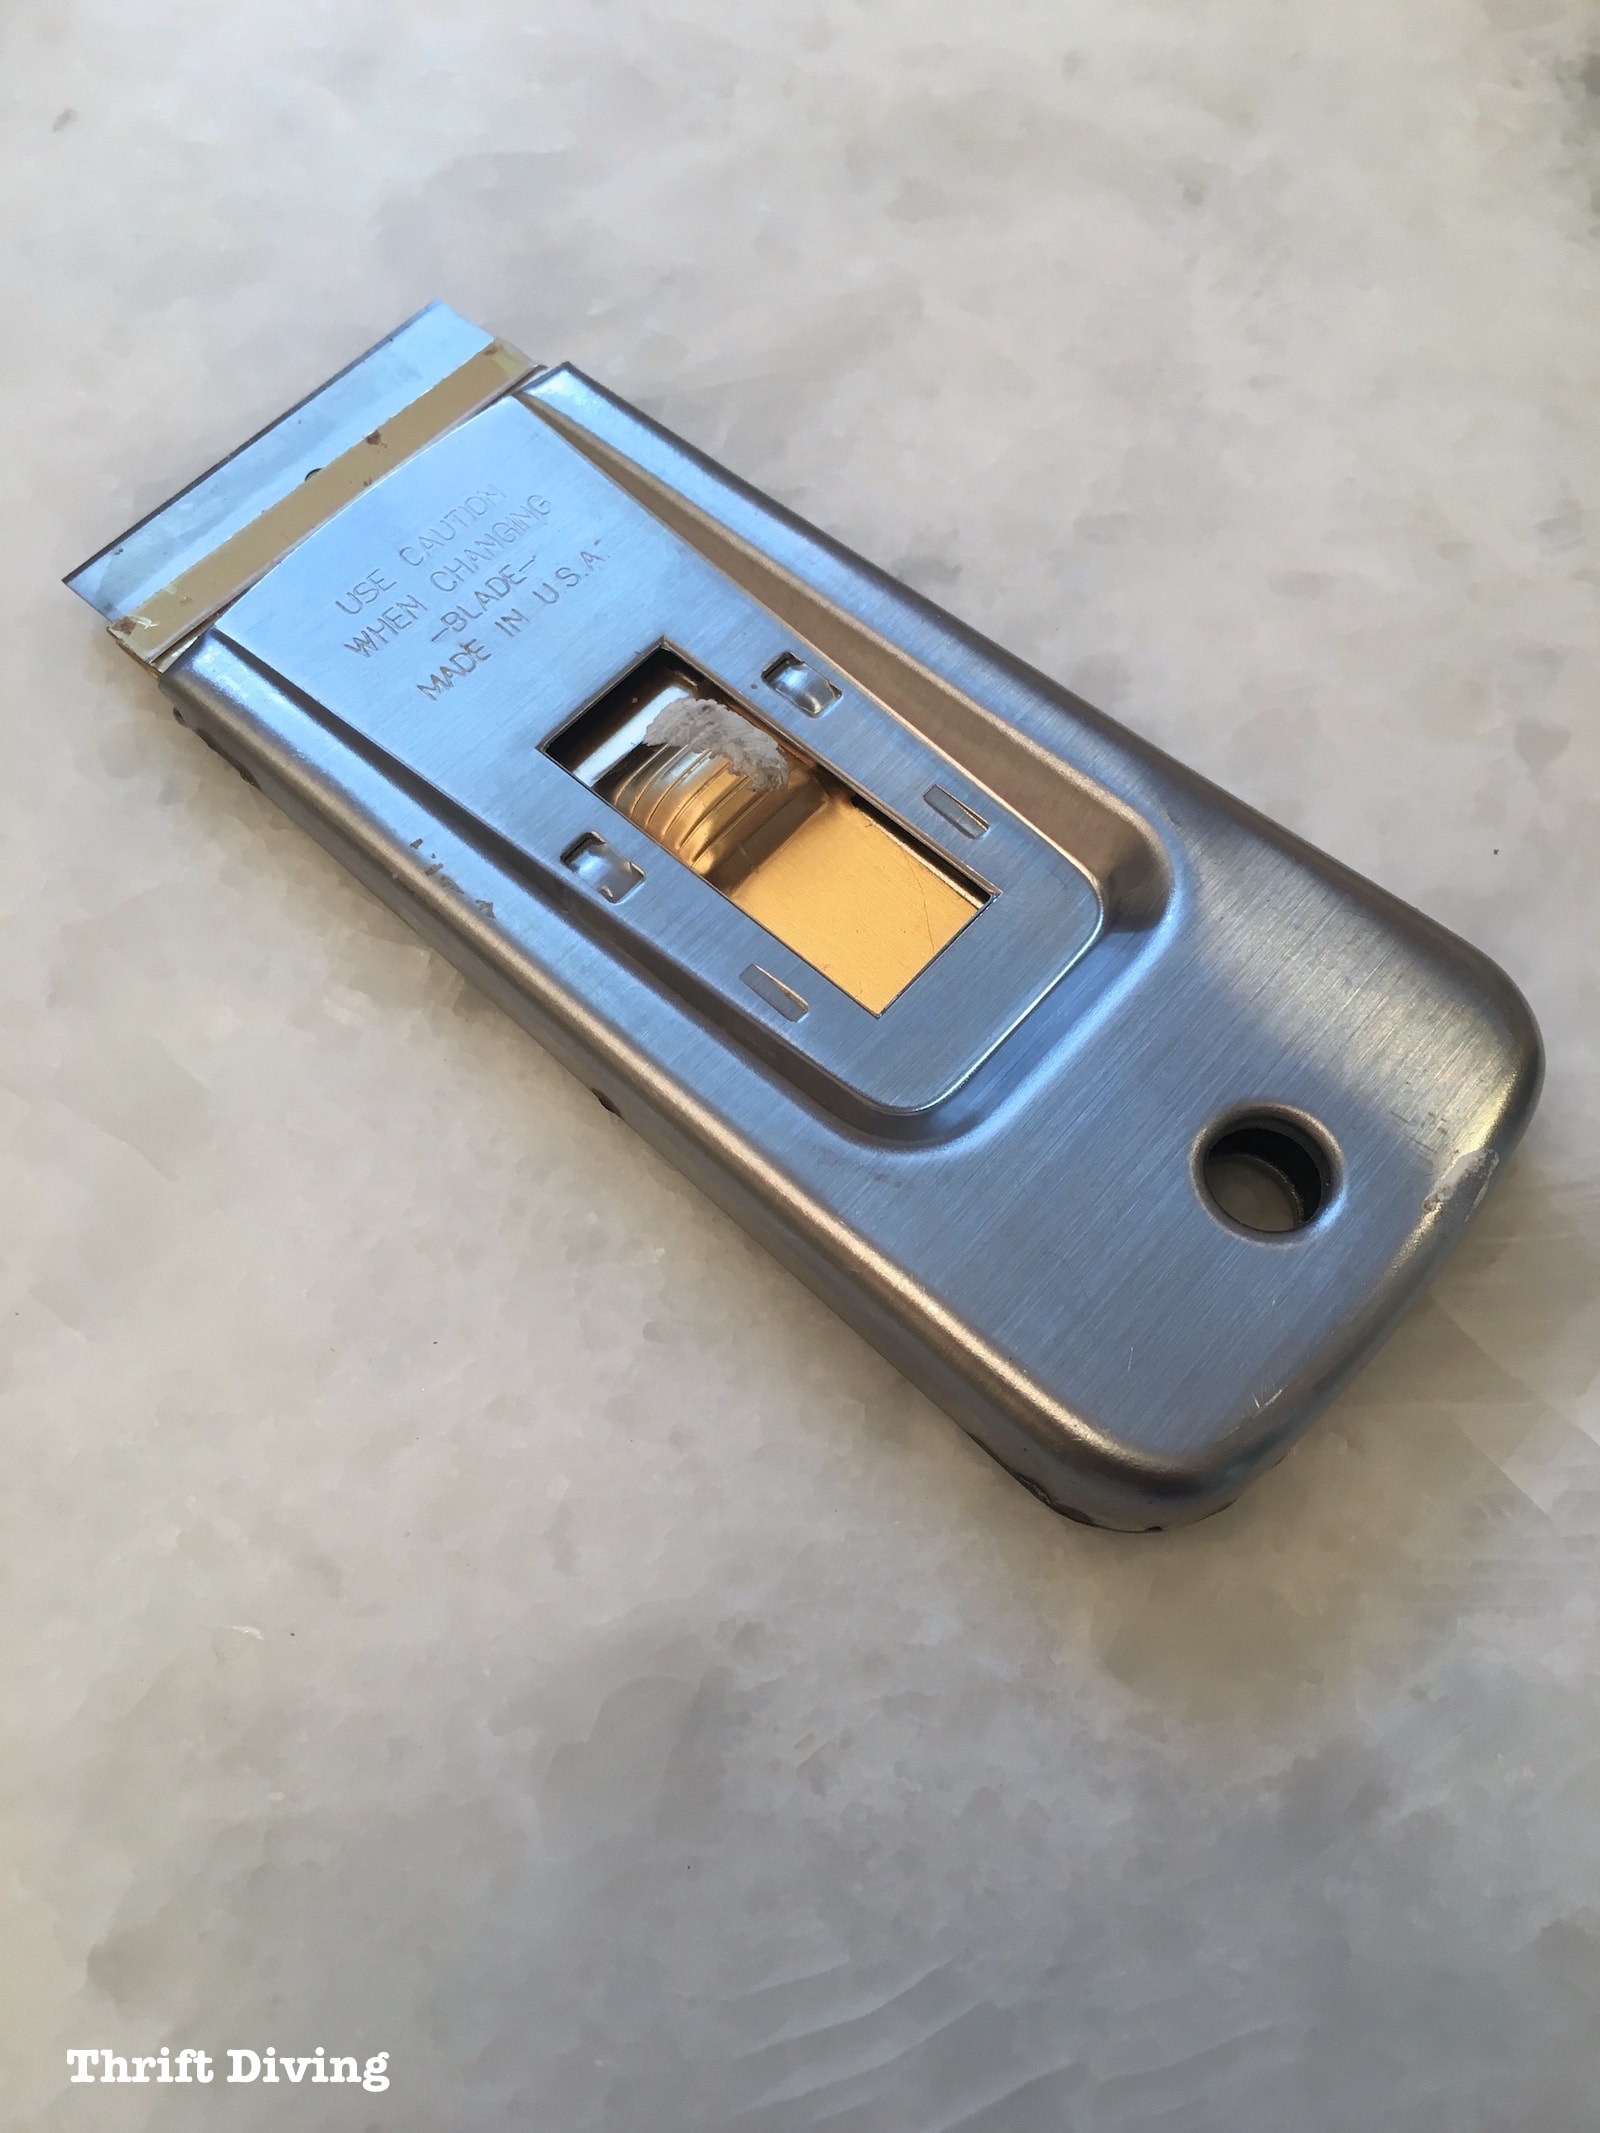
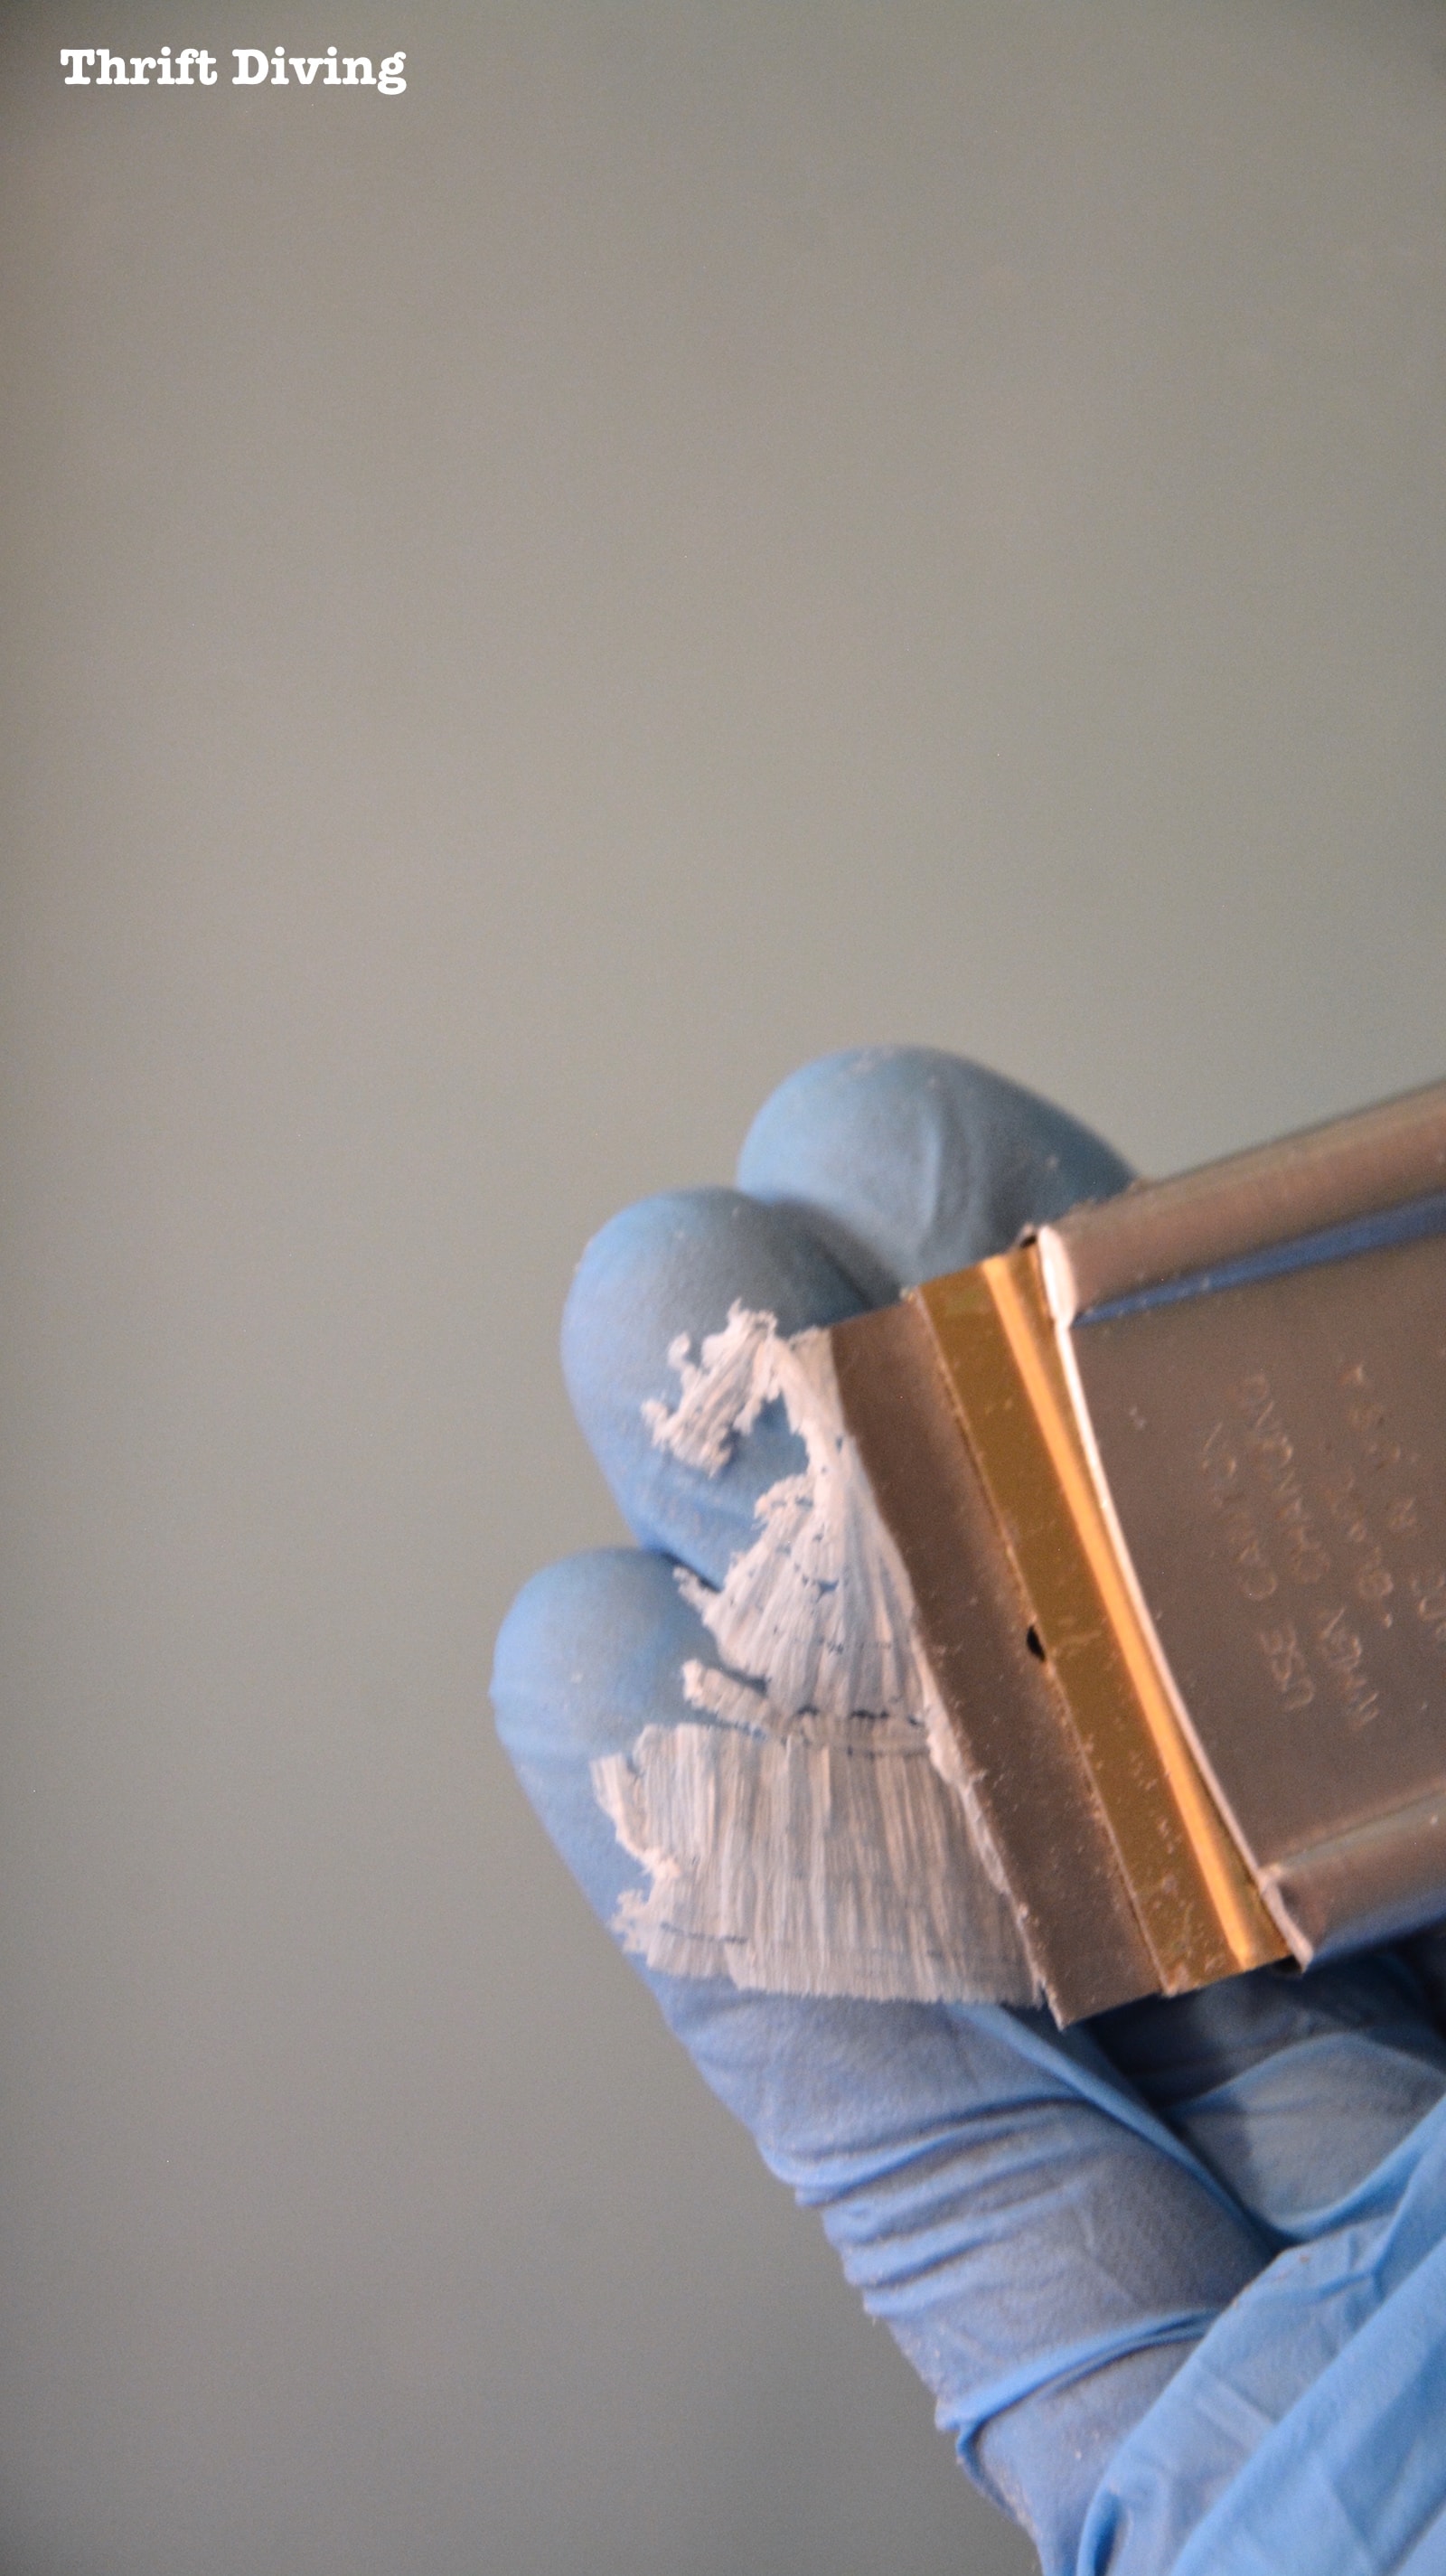
The easiest way to remove caulk from the shower or tub is with a razor blade scraper tool like this, with a razor blade inside, or with a knife.
Just be super careful you don’t cut yourself!
At this time you’ll want to remove the HOT and COLD fixtures, or the downspout, too. With a screwdriver, you should be able to easily remove them.
STEP 3: Scrub Down the Shower or Tub
Do you want the new paint the stick?
Of course, you do.
Well, the success of your newly painted shower to tub will depend on how clean you can get your shower.
This is the point where you need to scrub your shower like your shower or tub’s life depends on it. LOL
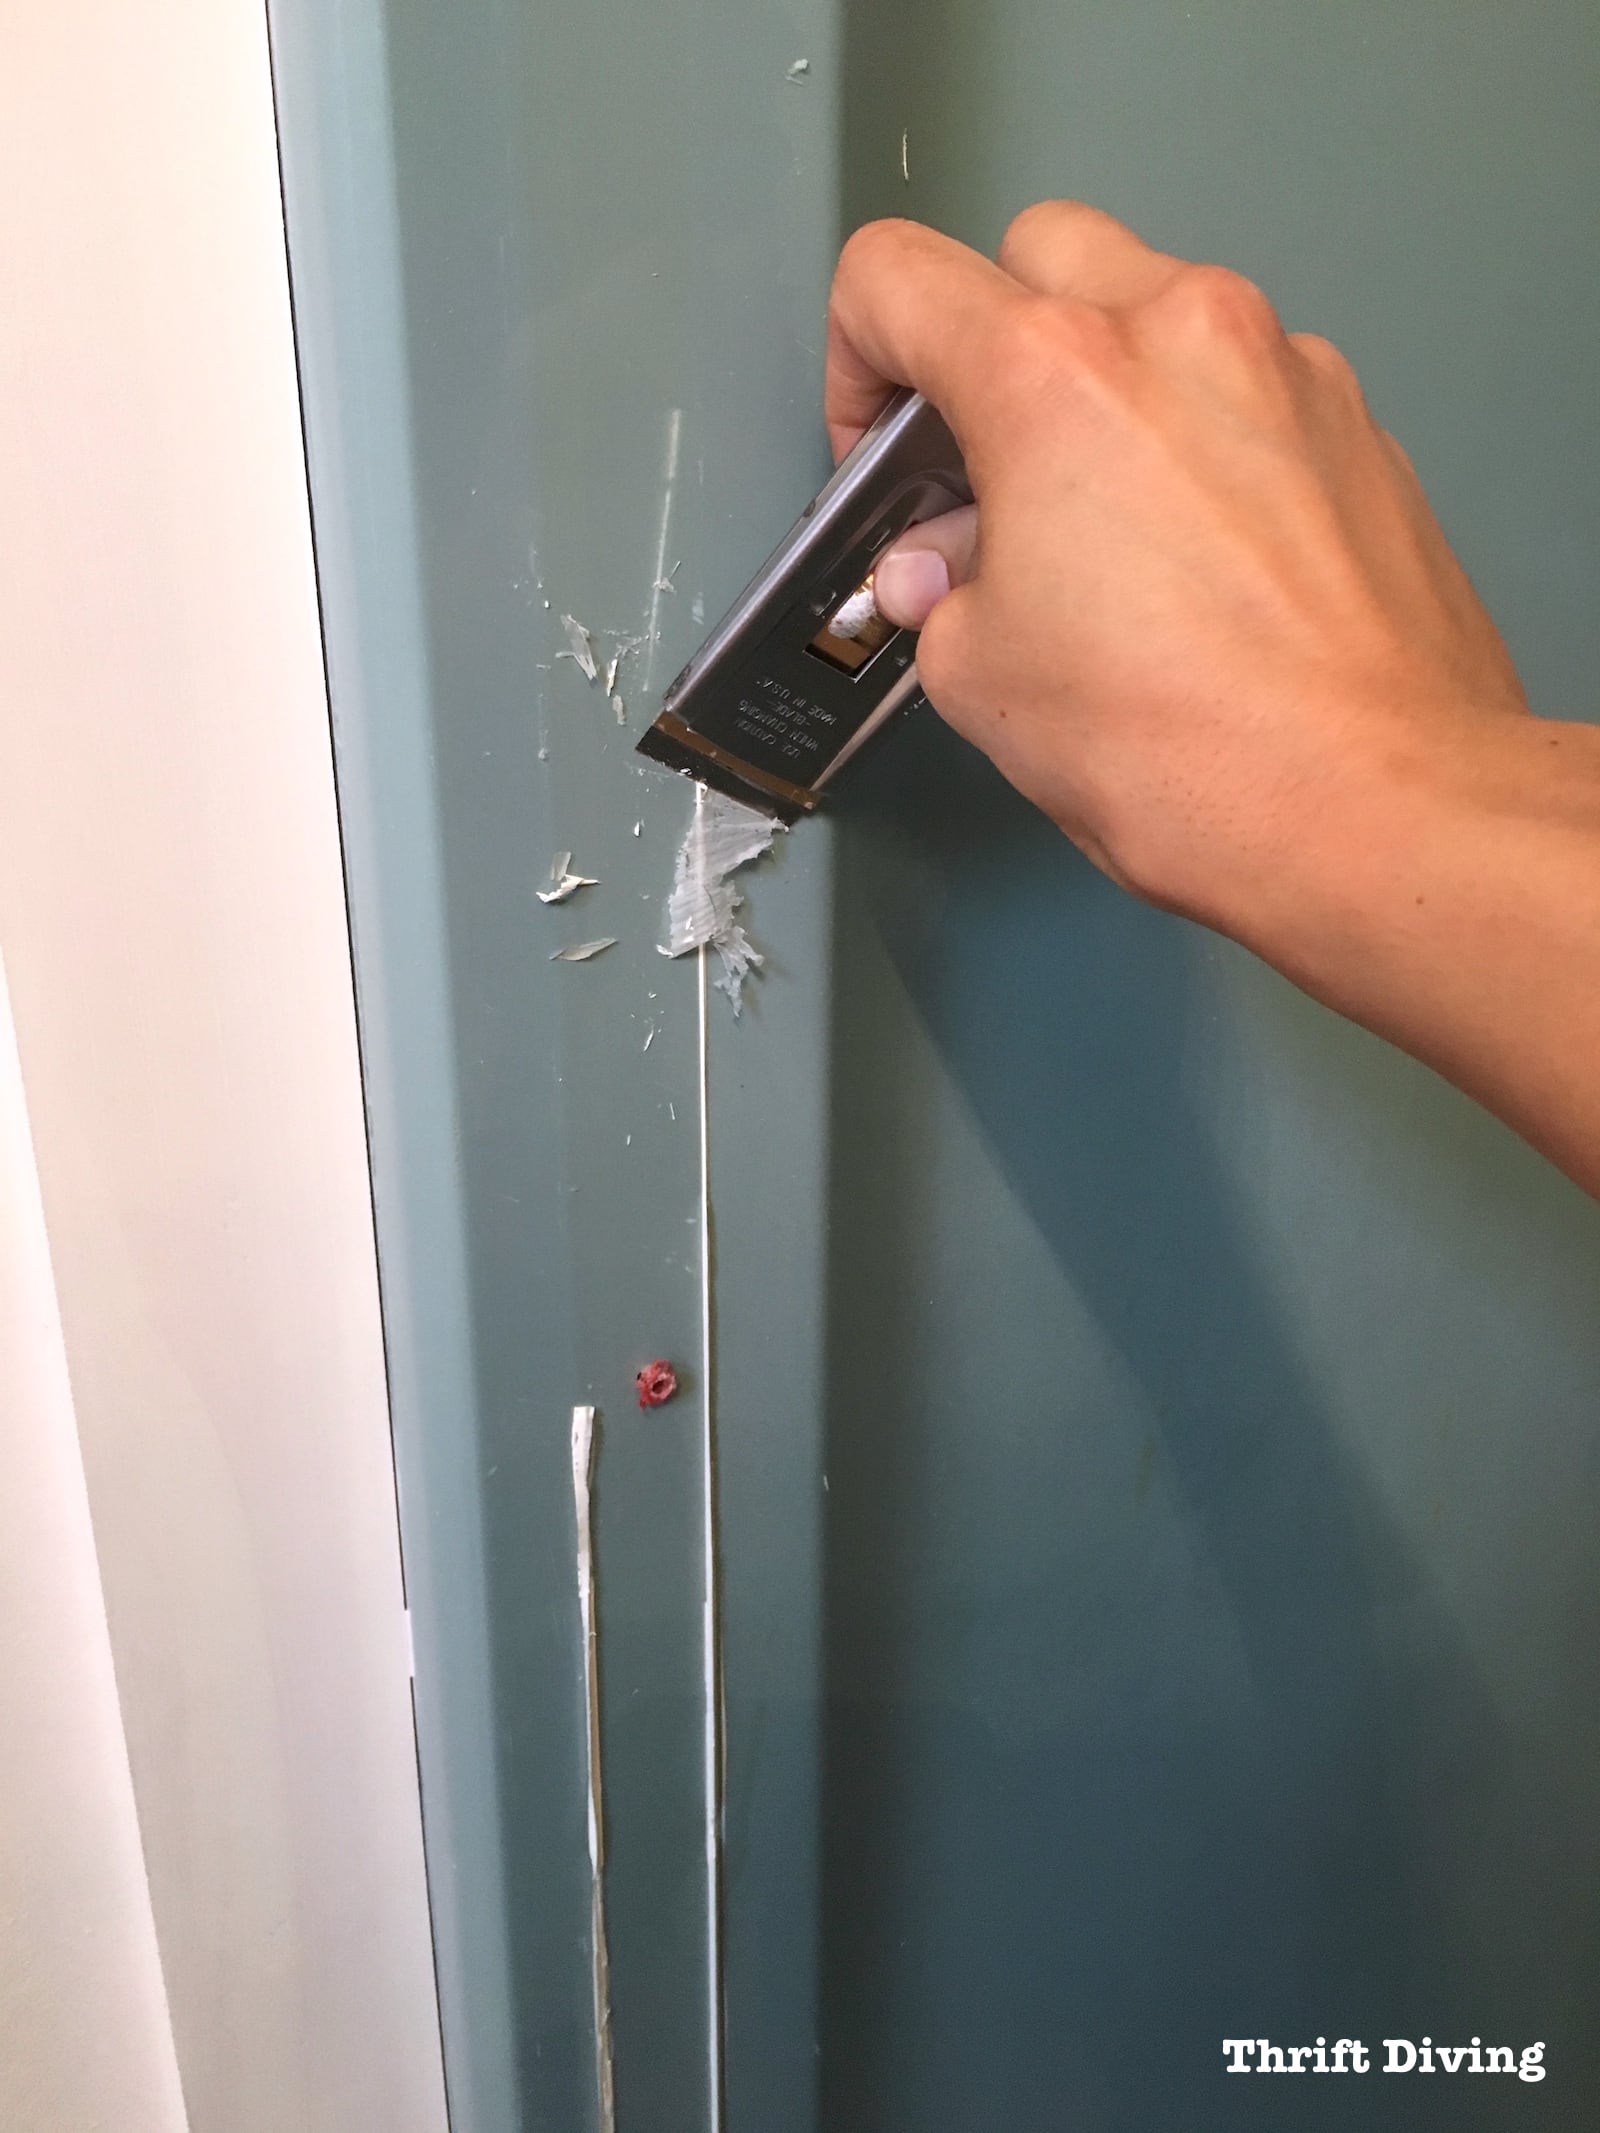
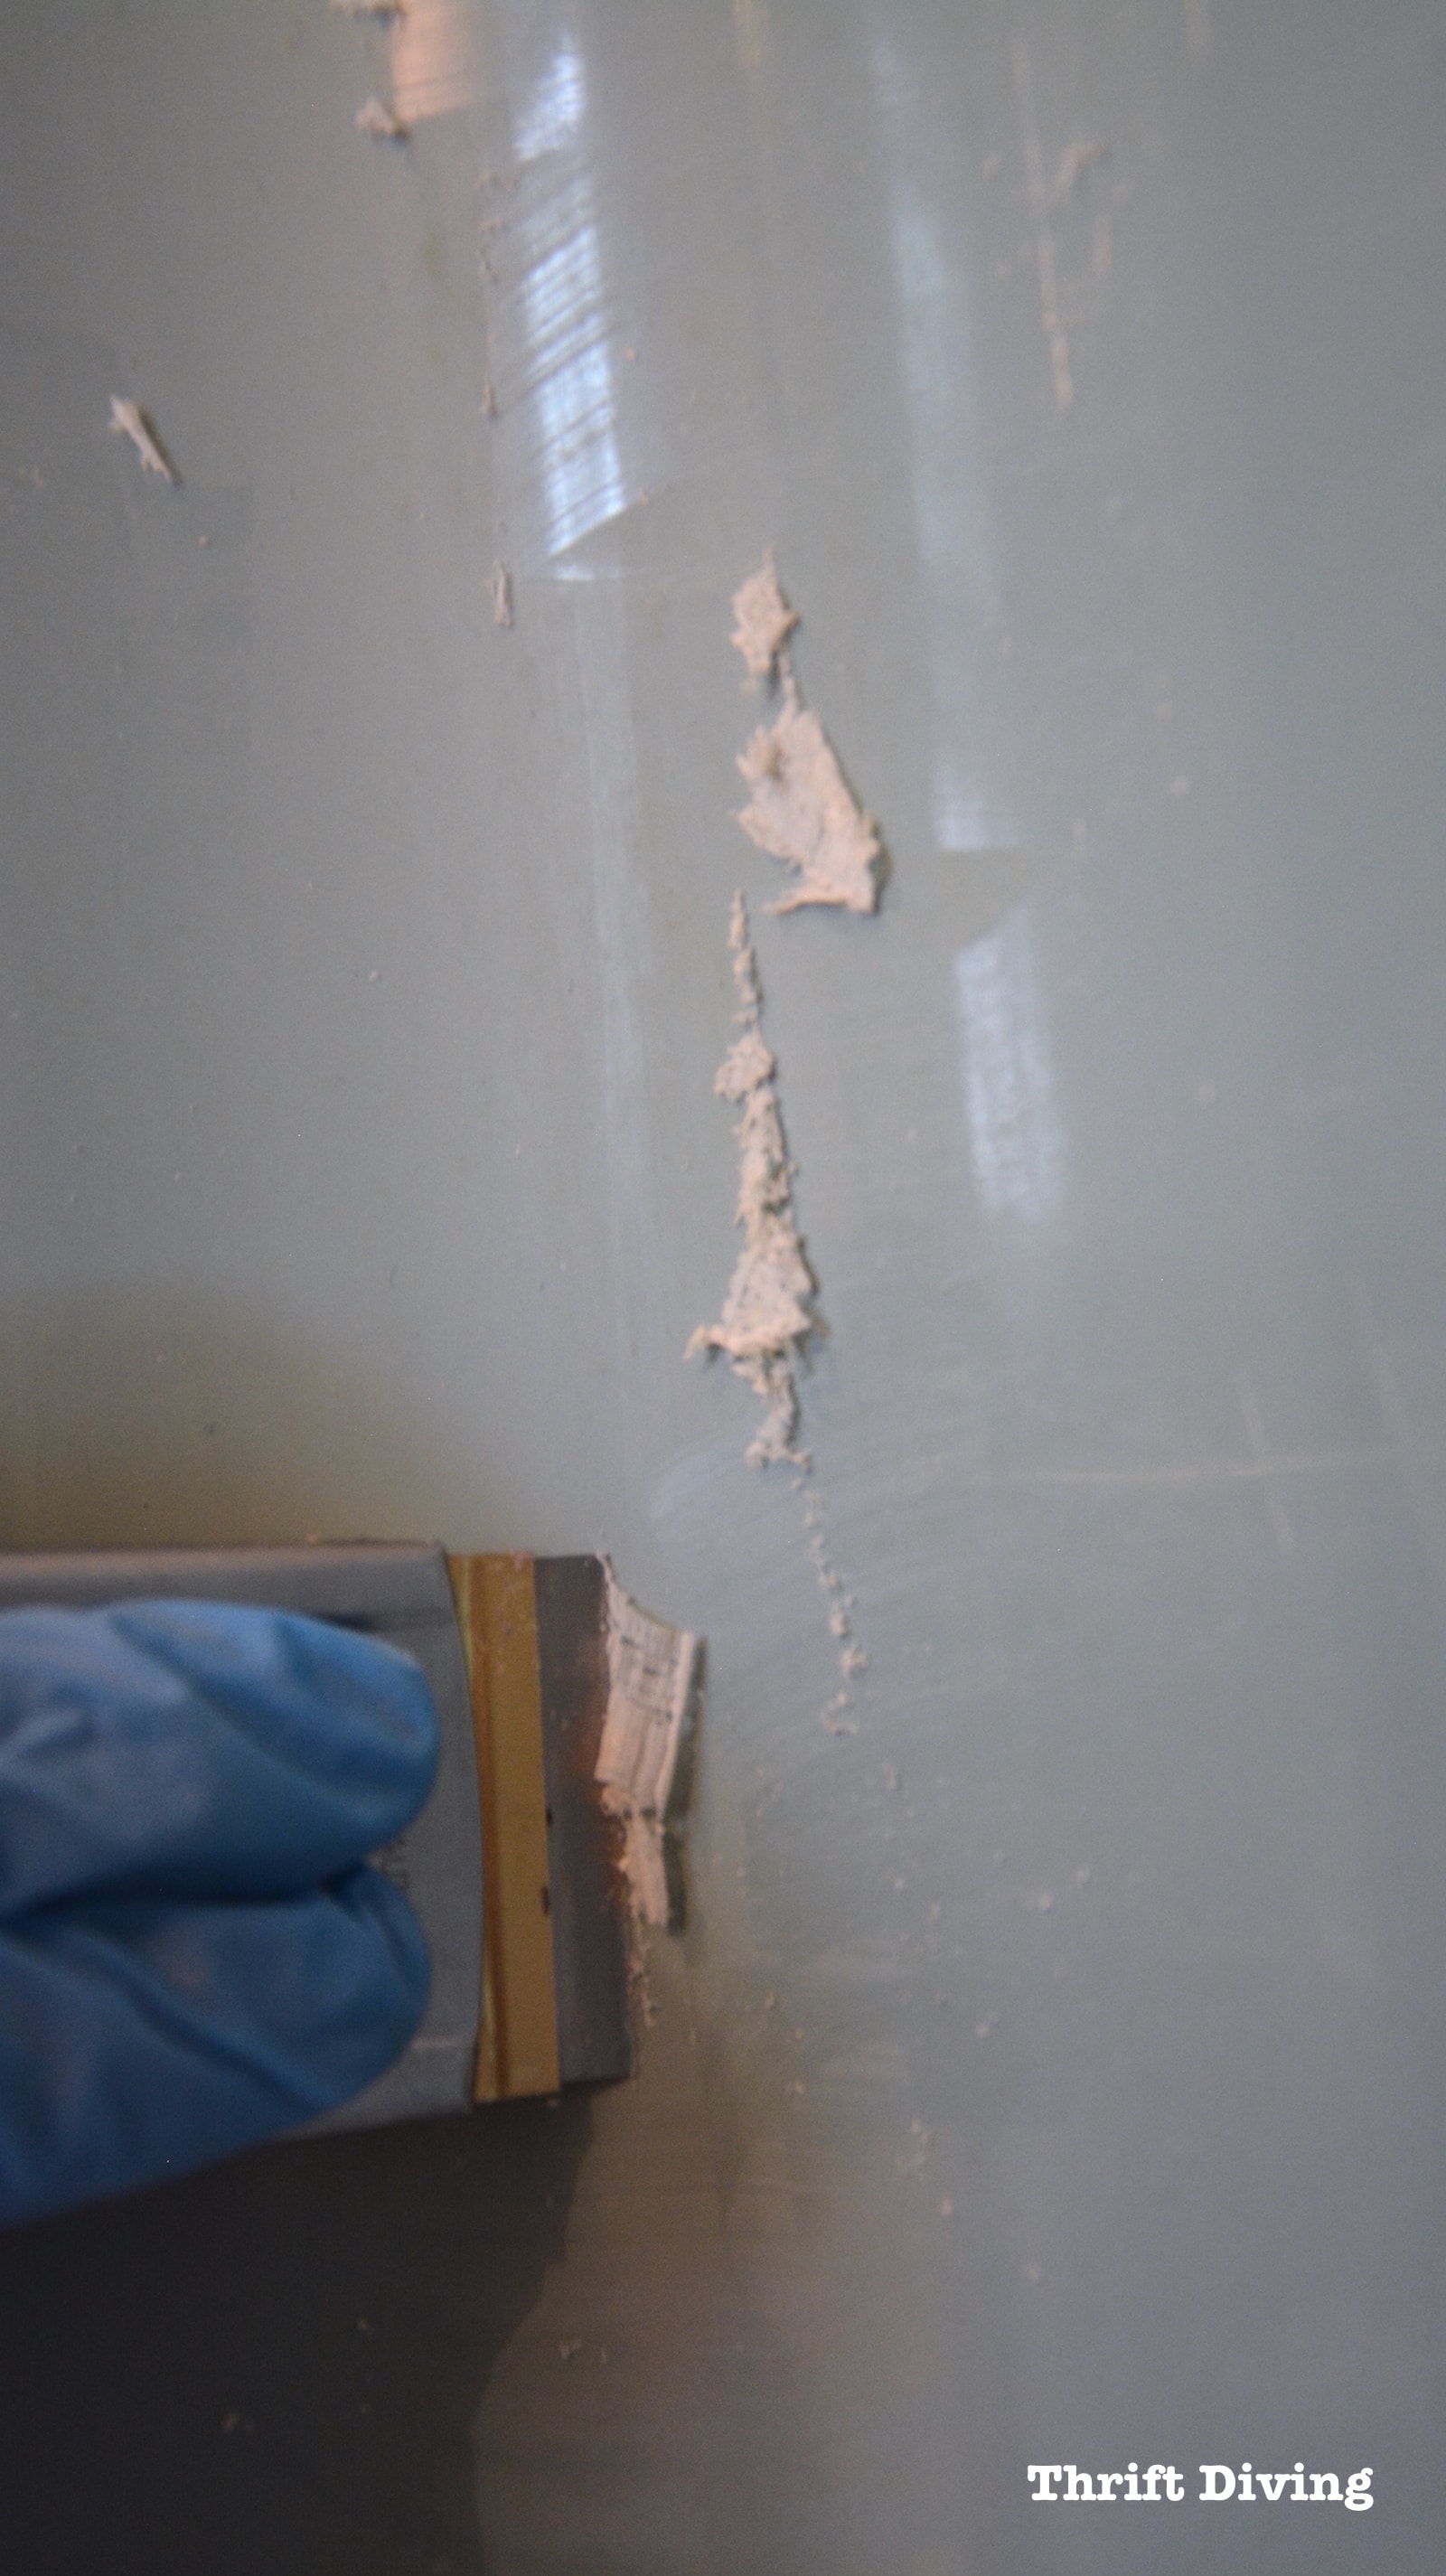
But here’s what I did first: I used the razor blade scraper and shaved my tub.
There was a lot of soap scum on the walls that I couldn’t see.
As gross as it sounds, it was actually pretty satisfying in a sick kind of way. LOL
I figured it was easier to shave my shower first and then scrub it down with Comet.
The instructions tell you to use a razor scraper after the tub is clean, to ensure there is no soap scum left. But for me, removing the soap scum first worked best.
Once shaved, I then used Comet and a textured sponge to clean it. Make sure you rinse it several times to remove all of the Comet.
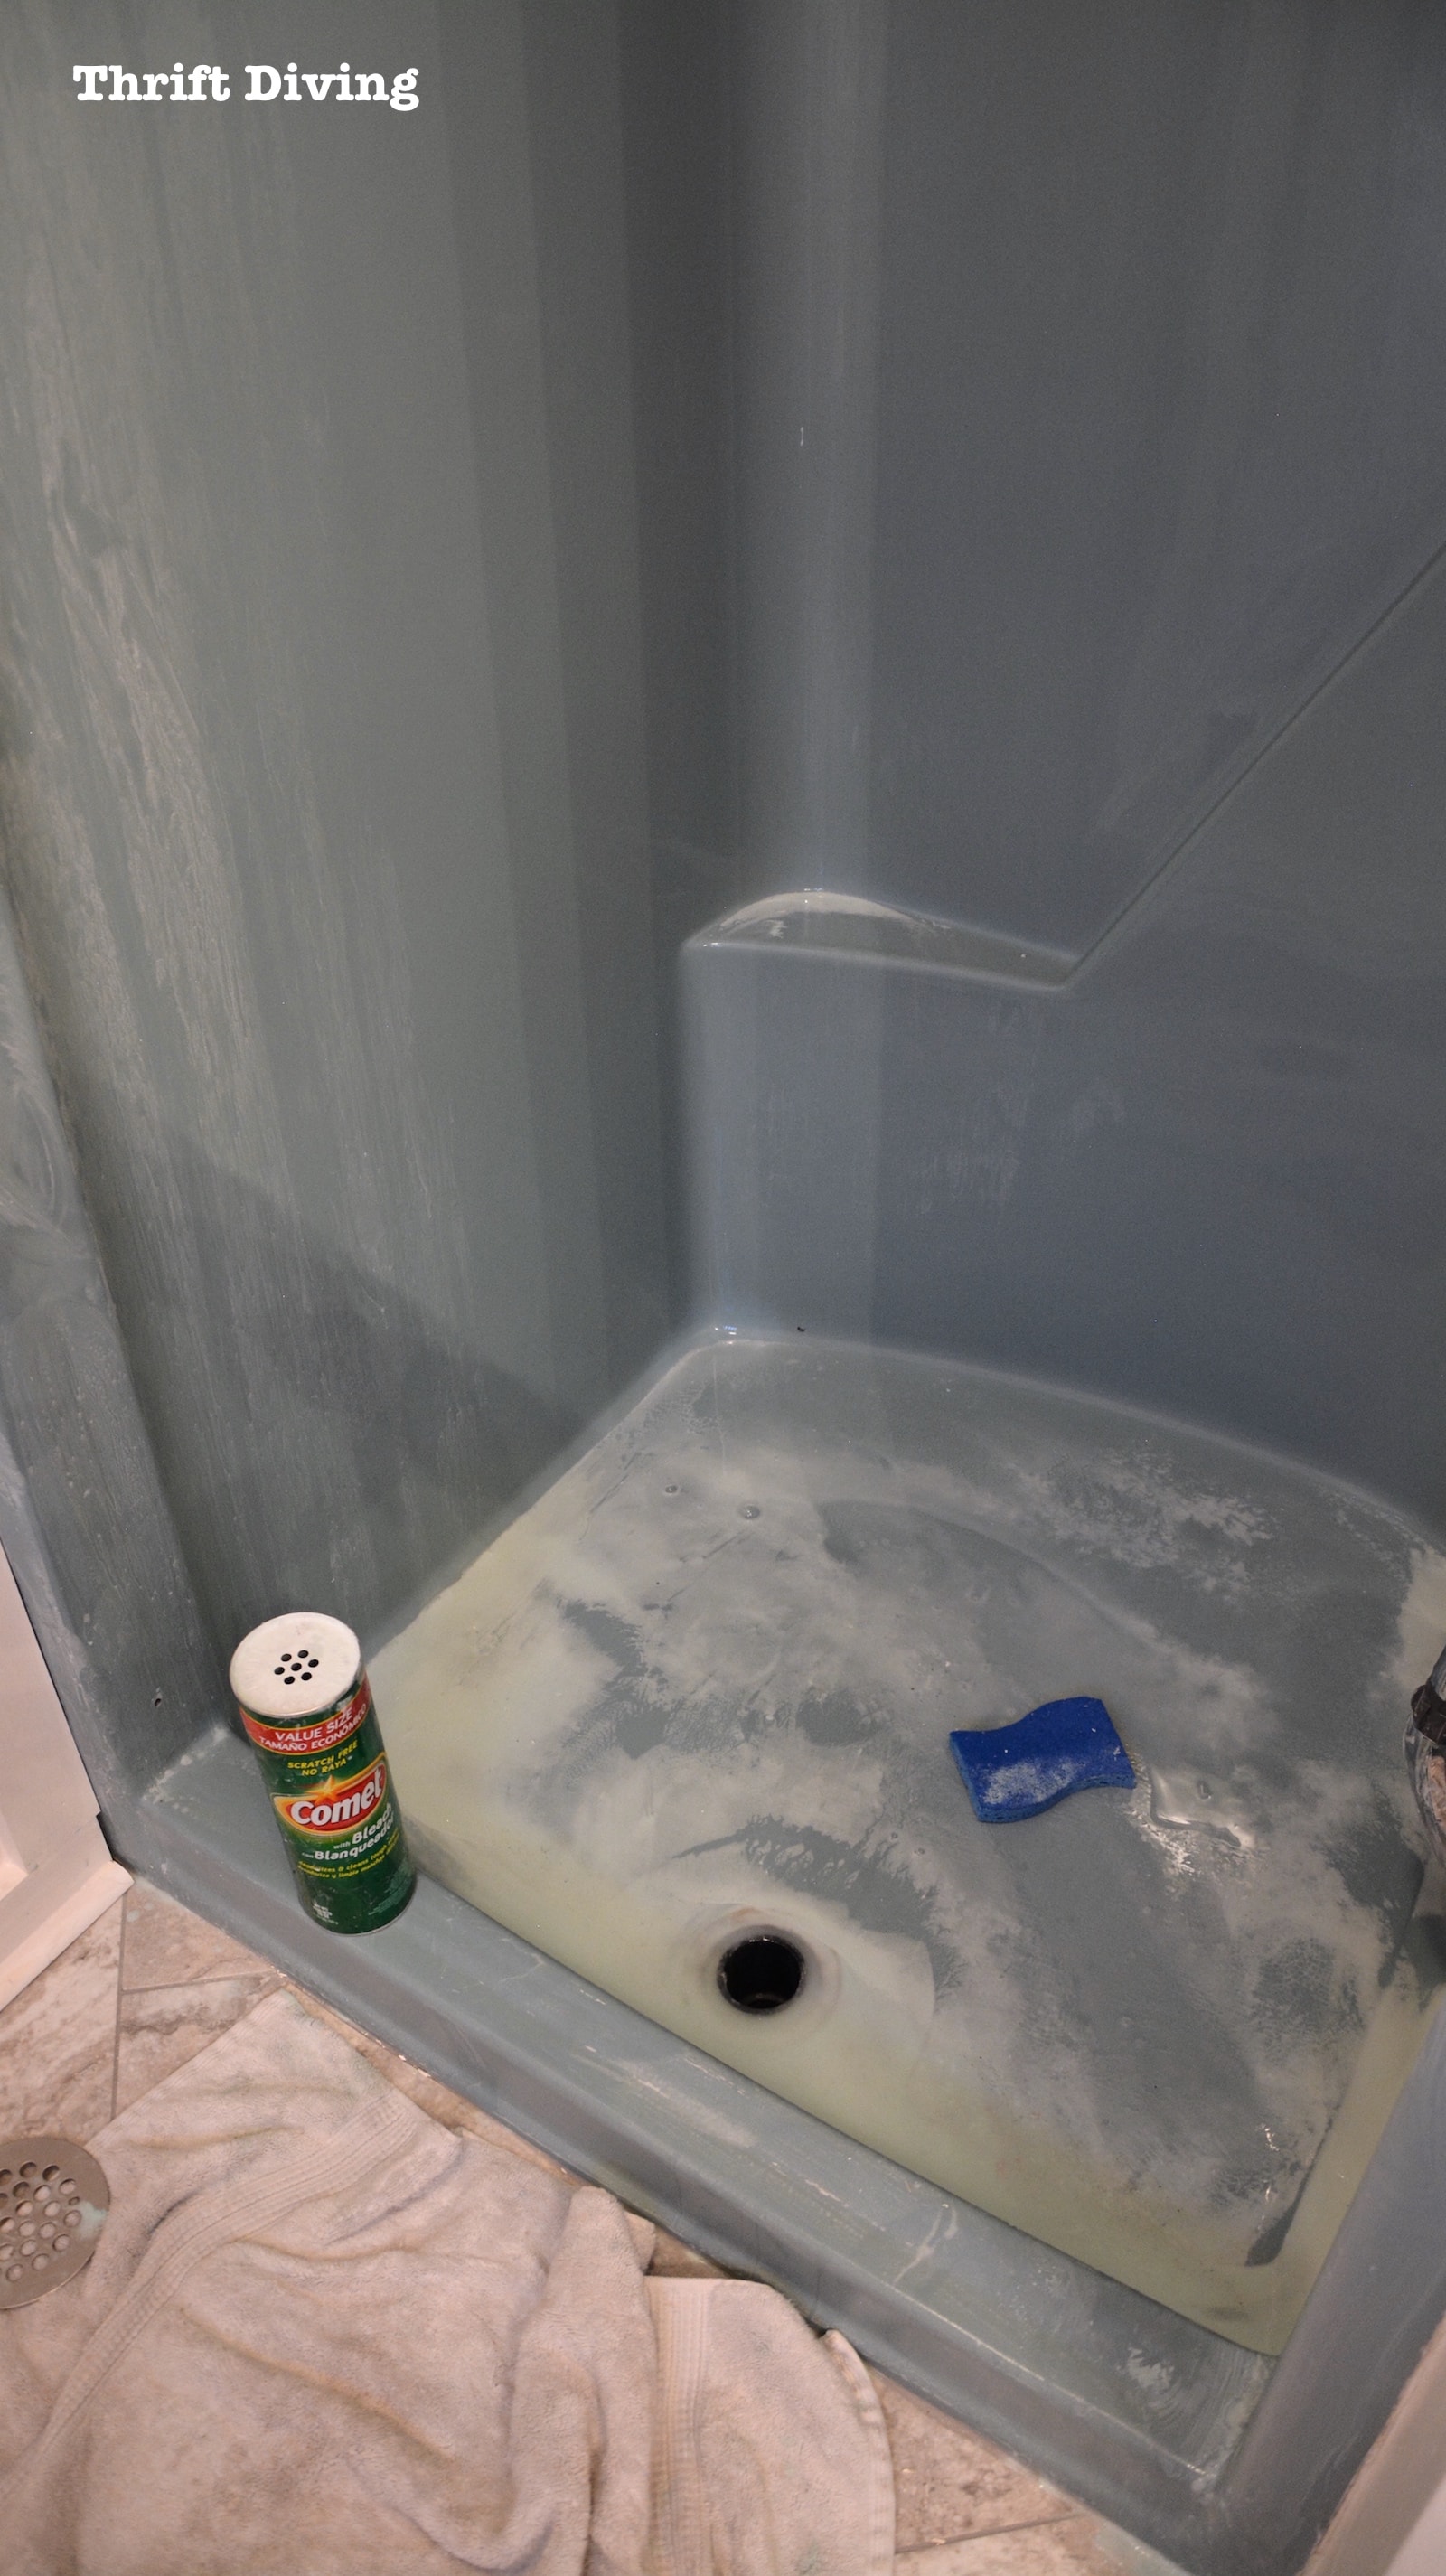
After everything was rinsed and clean, I used the razor scraper again to make sure that the shower didn’t have any left-over gunk on the walls.
It was clean as a whistle–the cleanest I have ever seen it! LOL
STEP 4: Sand Down the Shower or Tub
Now that the shower or tub is totally clean, it’s time to sand.
The instructions say to take the sandpaper that comes with the kit, and while the shower or tub is still a little wet, go ahead and sand it down.
The bathtub refinishing kit comes with some pretty resilient sandpaper.
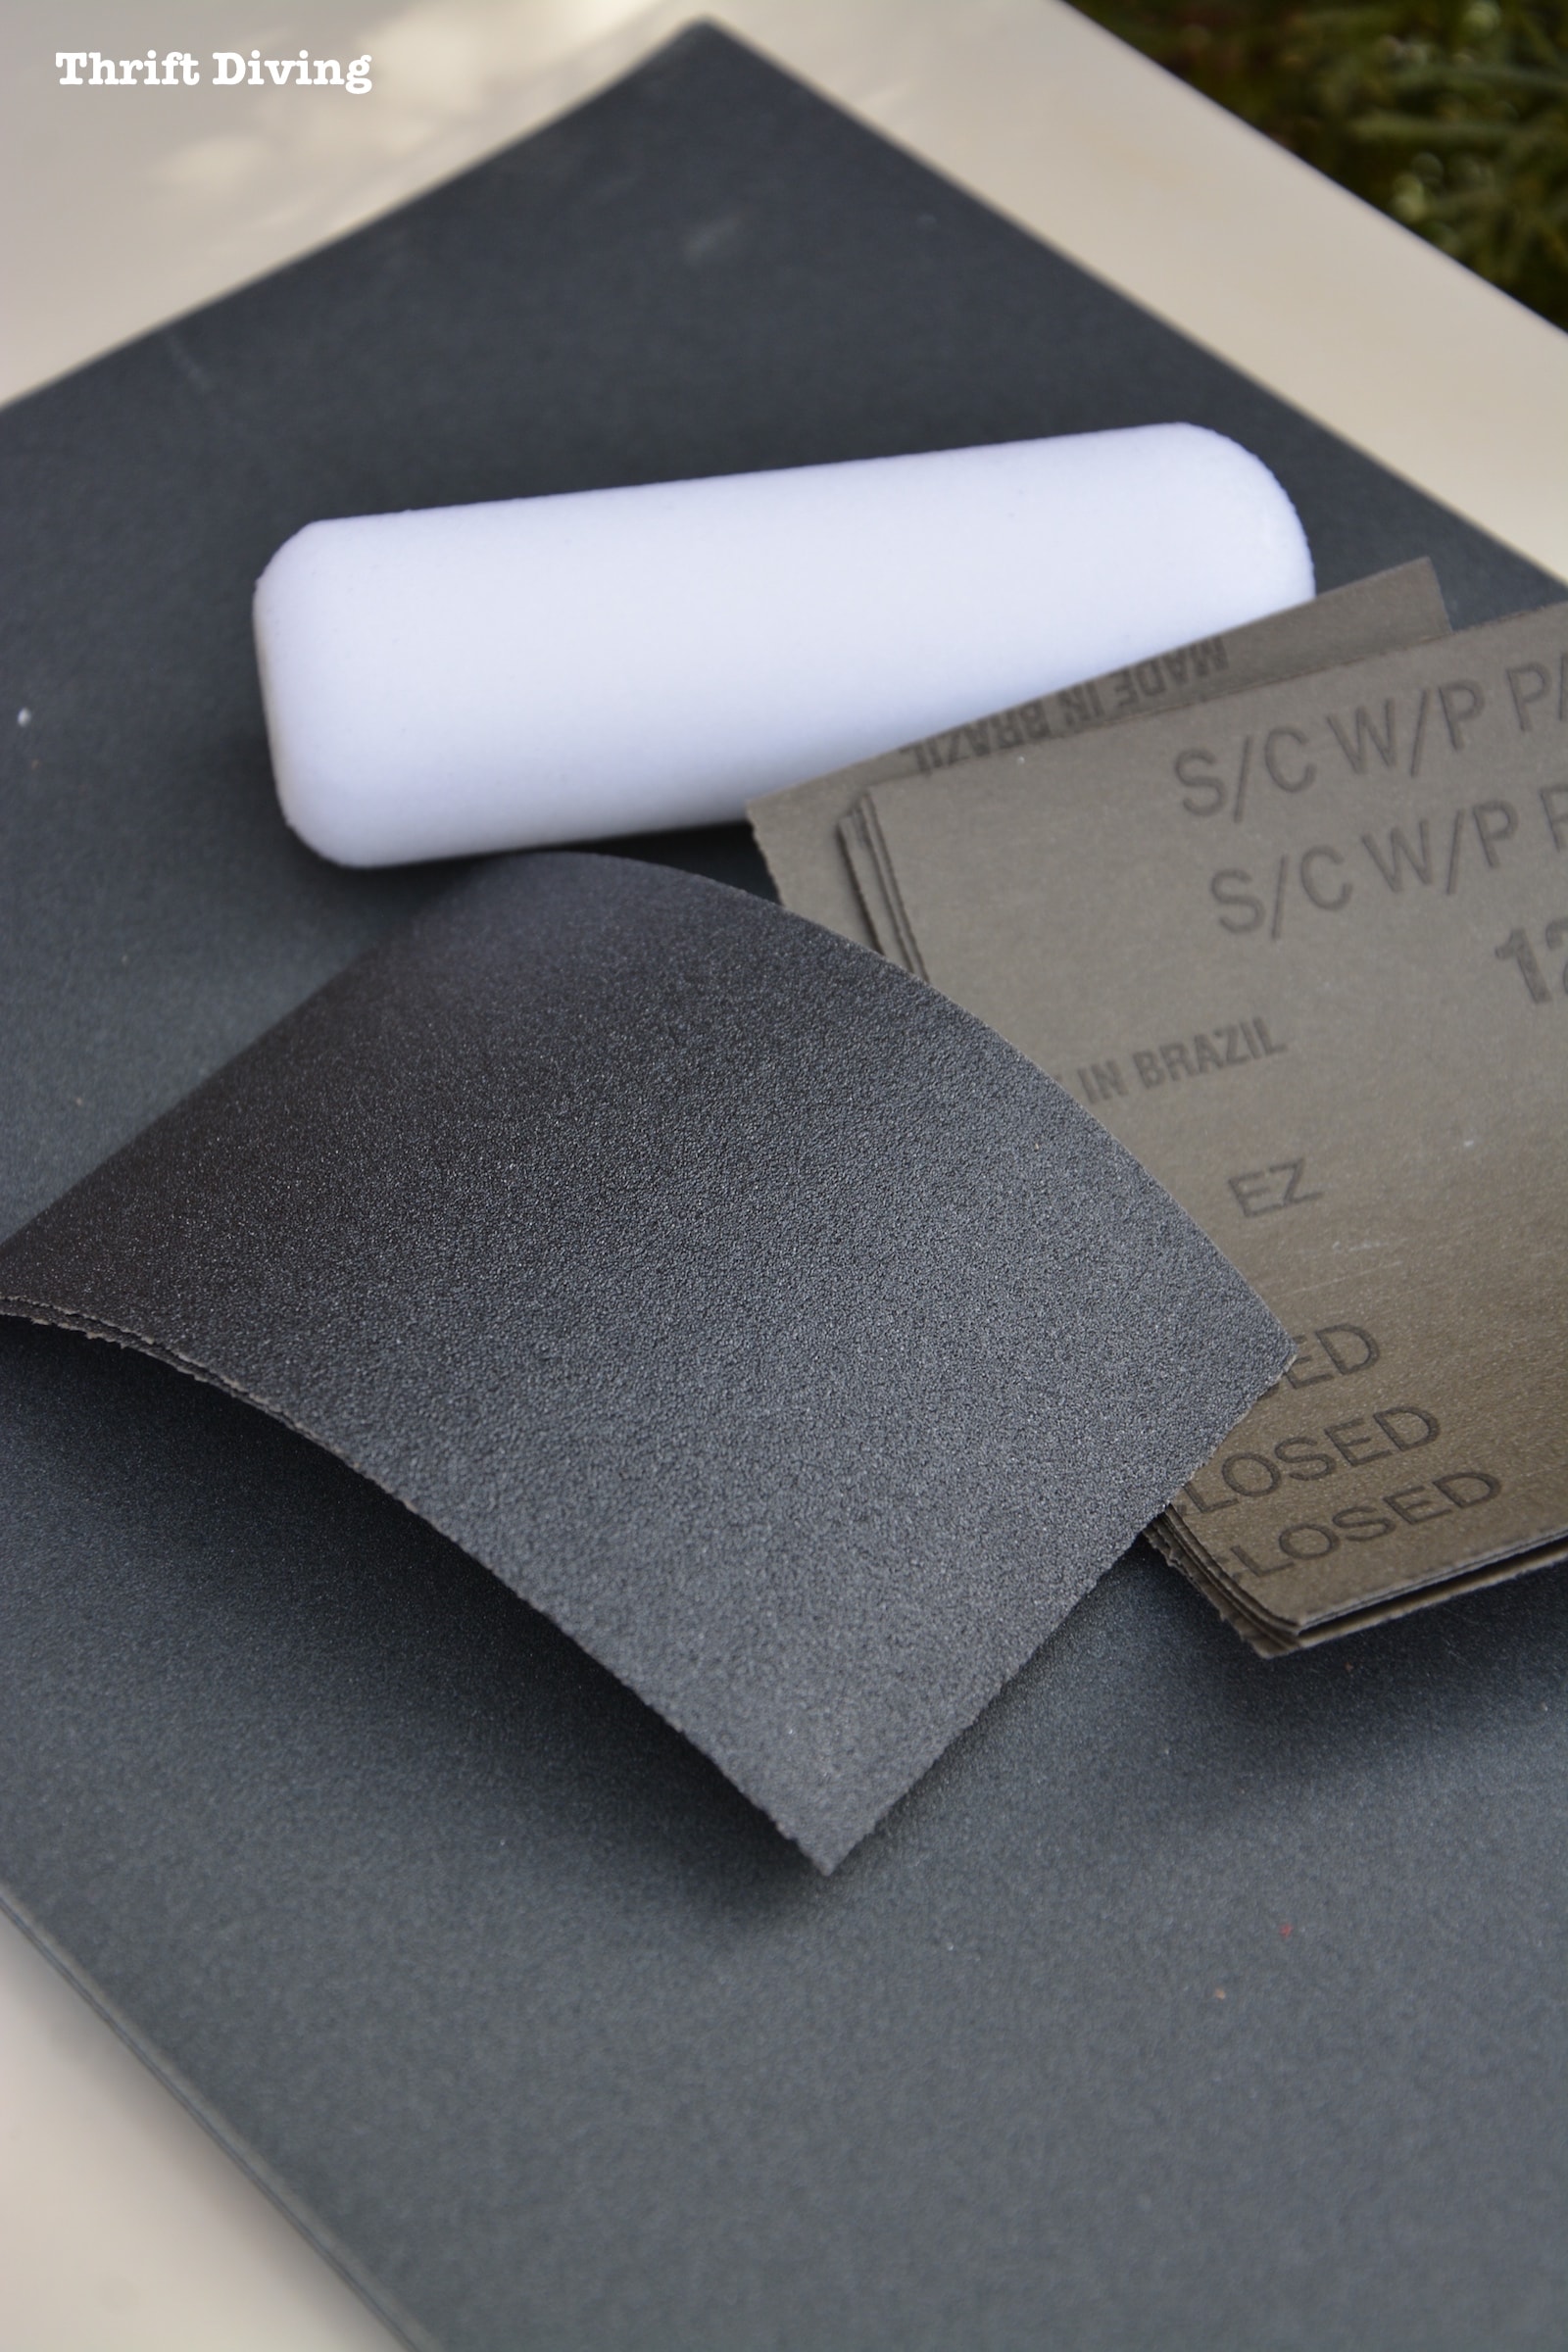
I found that my shower dried very quickly, so I made it a point to dip my sandpaper in a bit of water, which helped to control the dust. (Be sure to wear a mask!).
This is the part where you want to spend a lot of time sanding the shower or tub because you want that surface nice and roughed up the liquid primer and paint that’s about to be applied.

The 120-grit sandpaper held up nicely despite the repeated wetting and sanding.
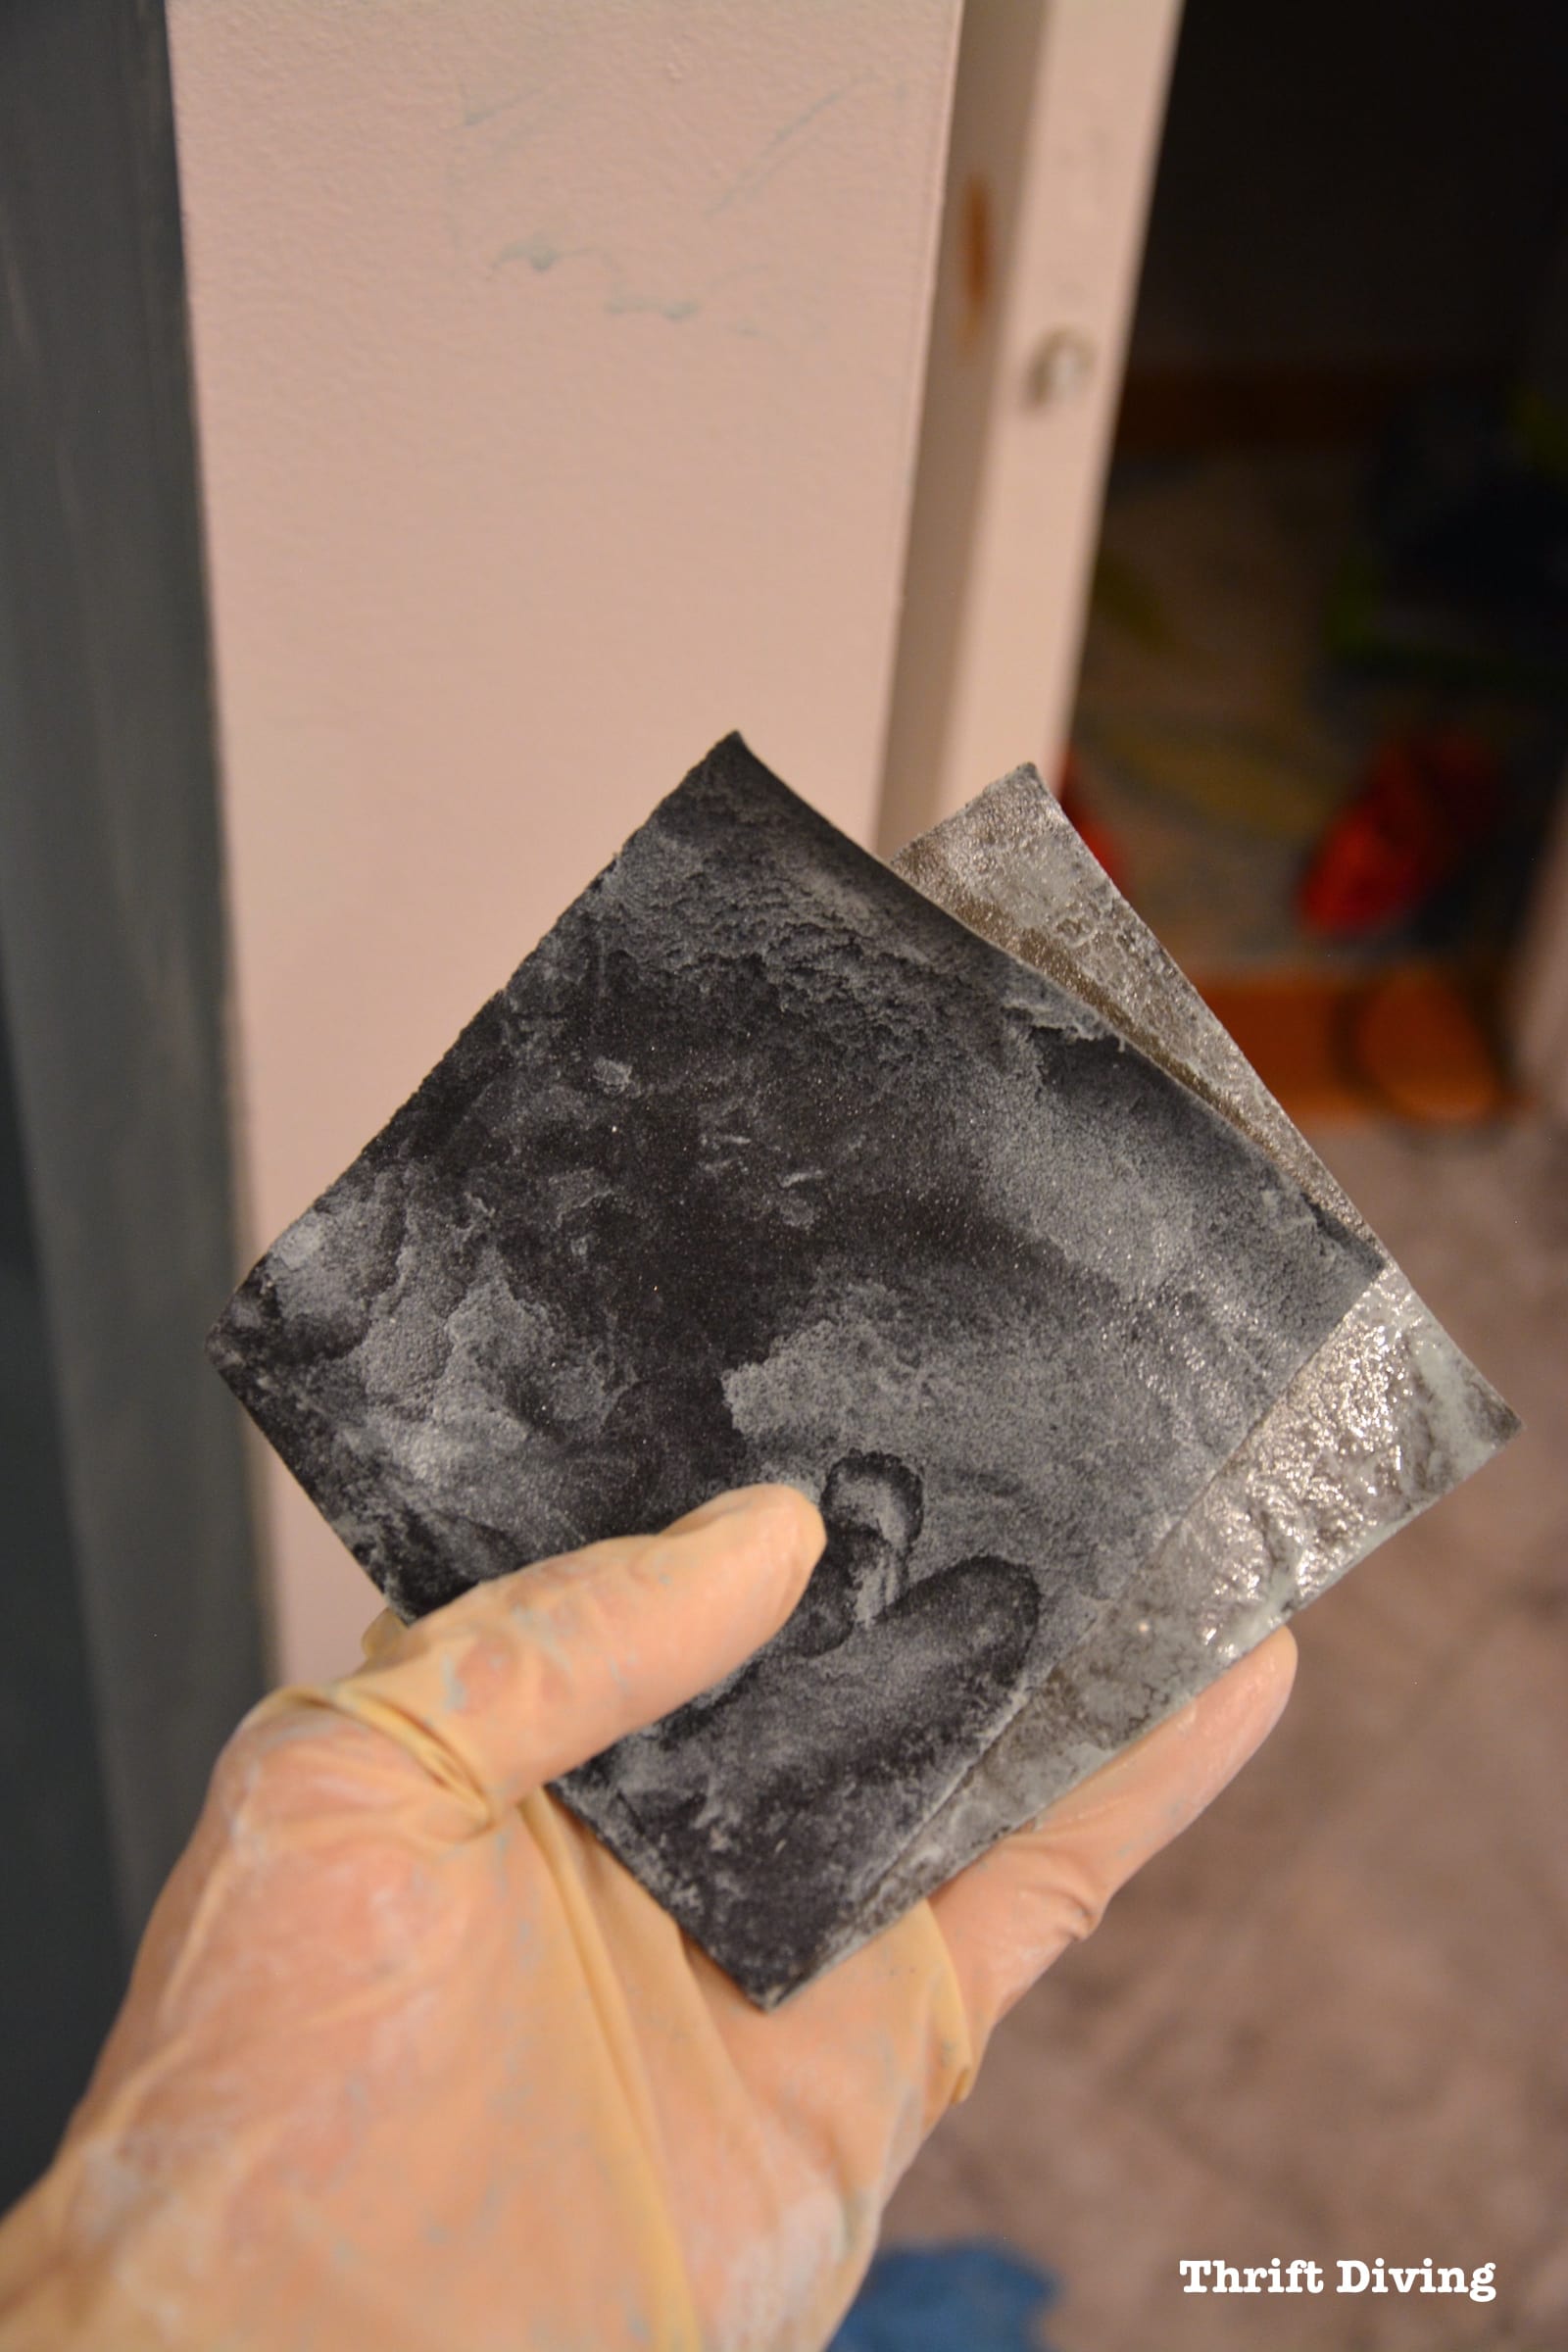
Once I washed away all the dust, I realized that there were some spots that I didn’t get very well. So I actually went back over the shower using my orbit sander, making sure that I didn’t miss any spots.
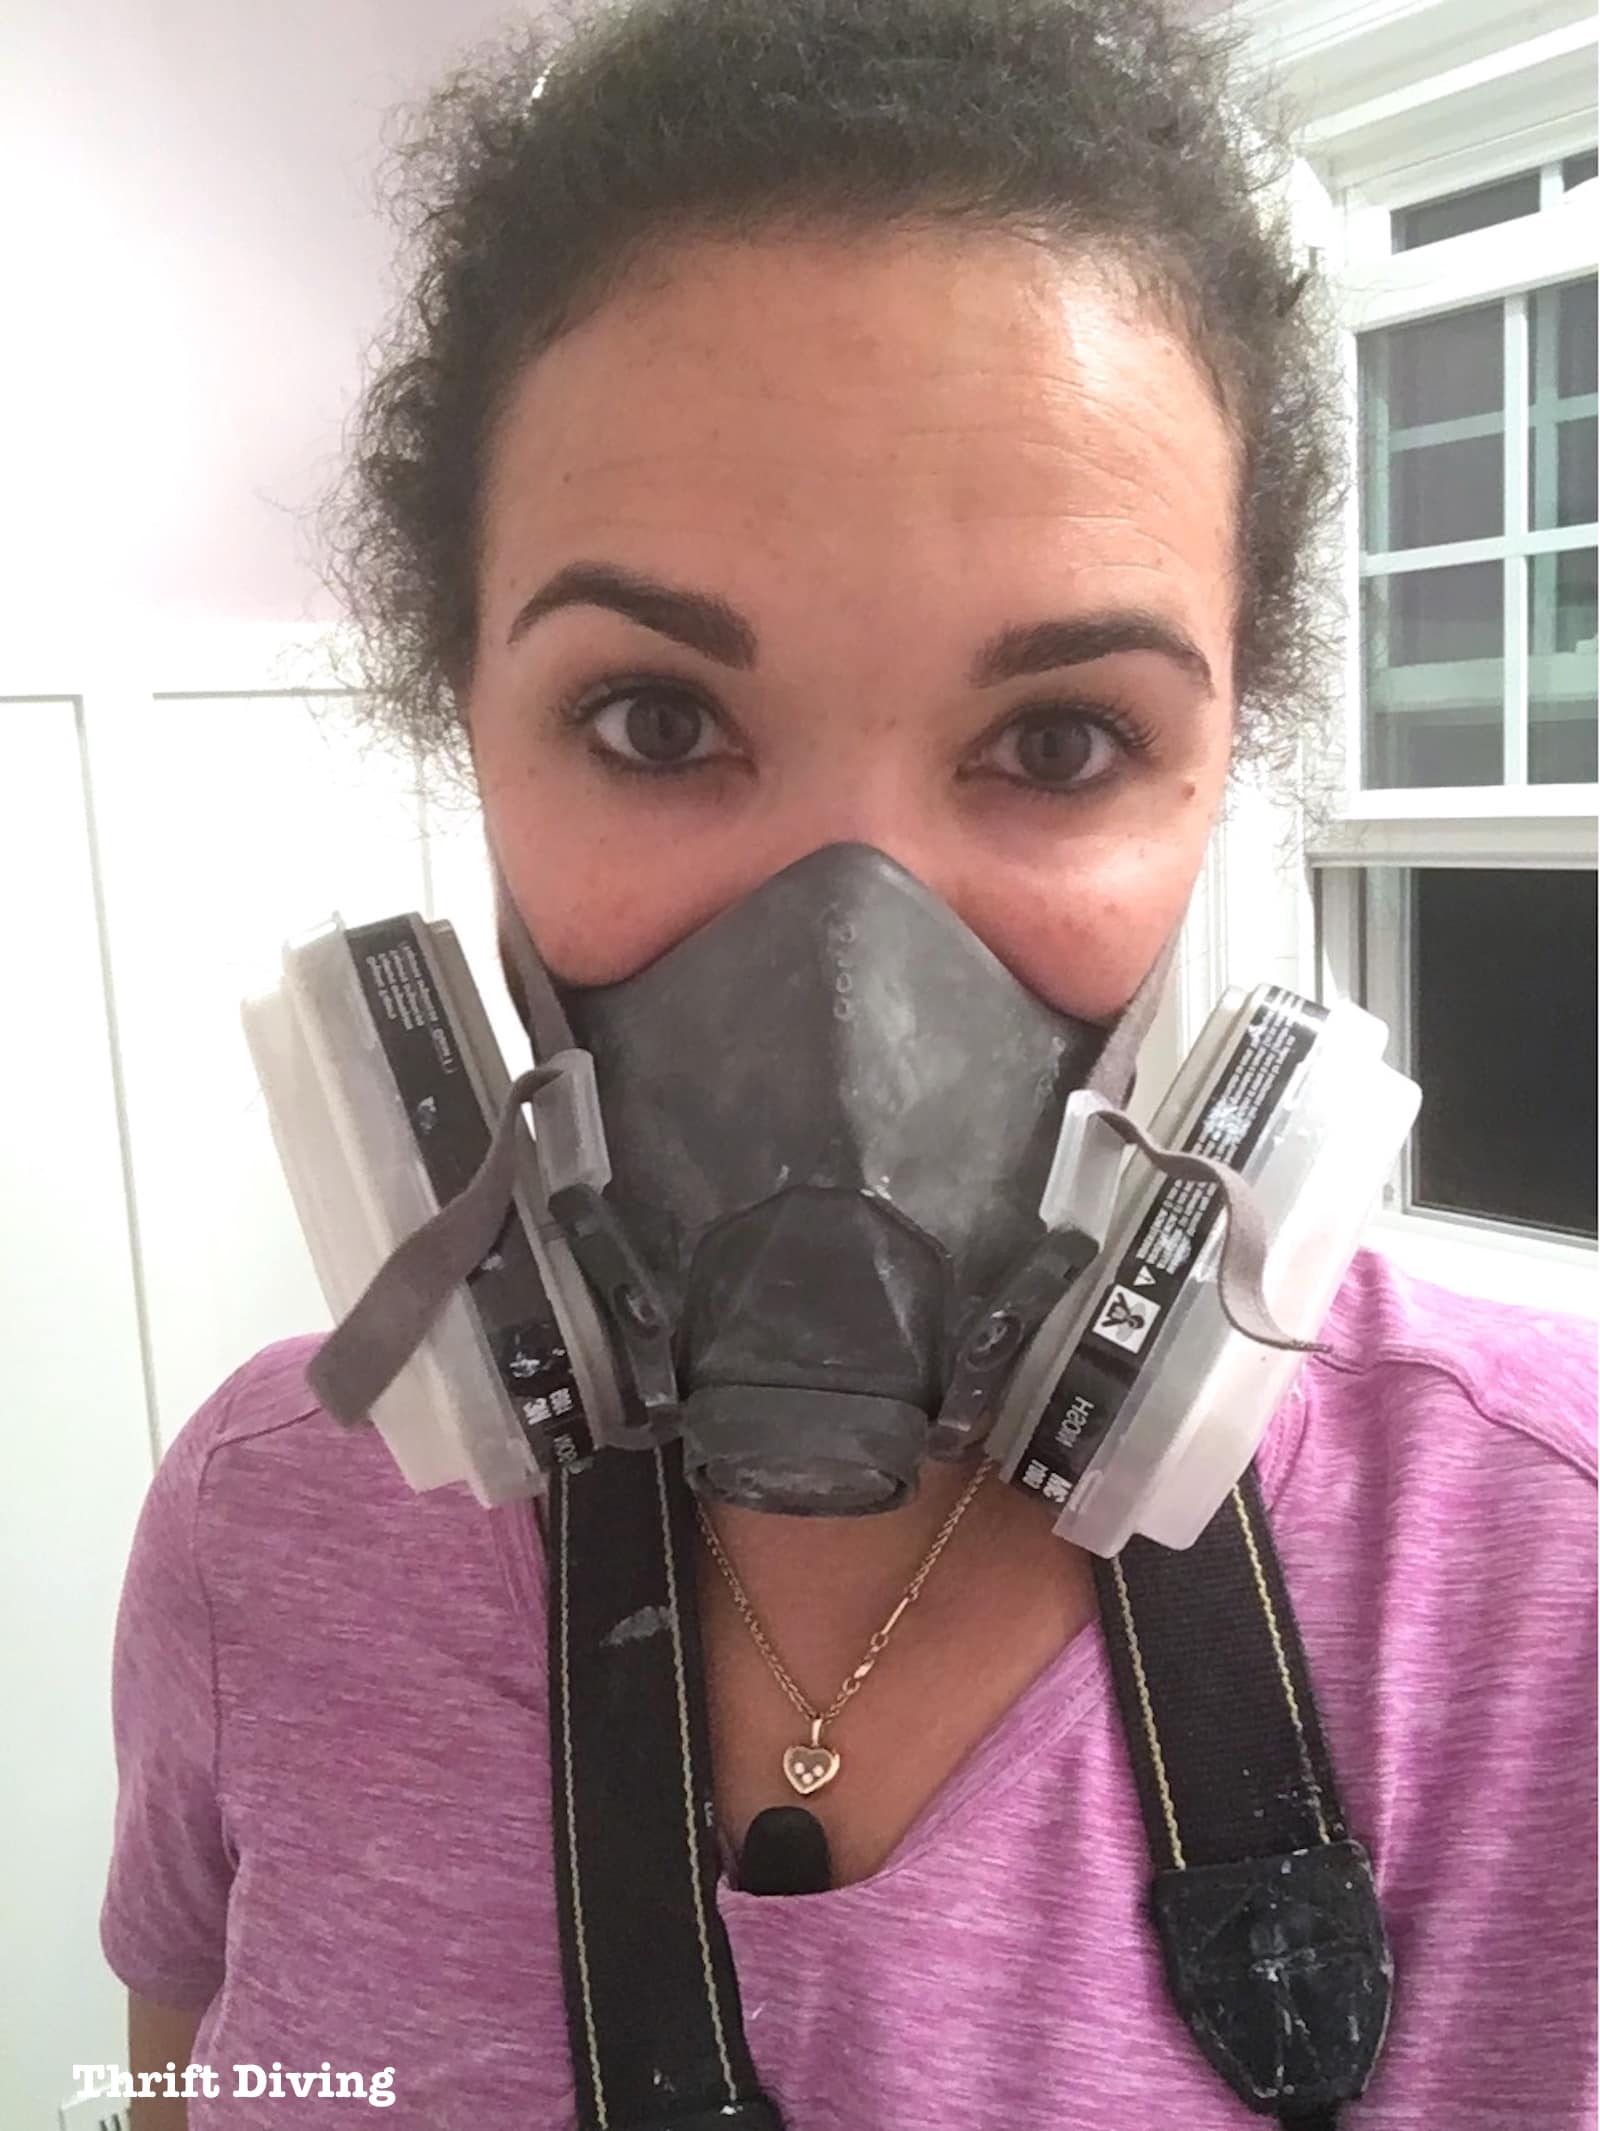
Just a warning here: this stuff really stinks.
Do yourself a favor and wear a mask!
The BathWorks Refinishing Kit comes with a paper mask, but trust me–the smell of all the chemicals will make you sick with a small paper mask. Invest in a 3M respiratory mask to block much of the odors so you can work uninterrupted.
These types of masks are awesome to have for doing spray paint projects around the house, along with general sanding, so you will definitely get your money’s worth by having this in your DIY toolbox.
Be sure to bring fresh air into the bathroom with a fan, run your bathroom exhaust fan, and keep the window open.
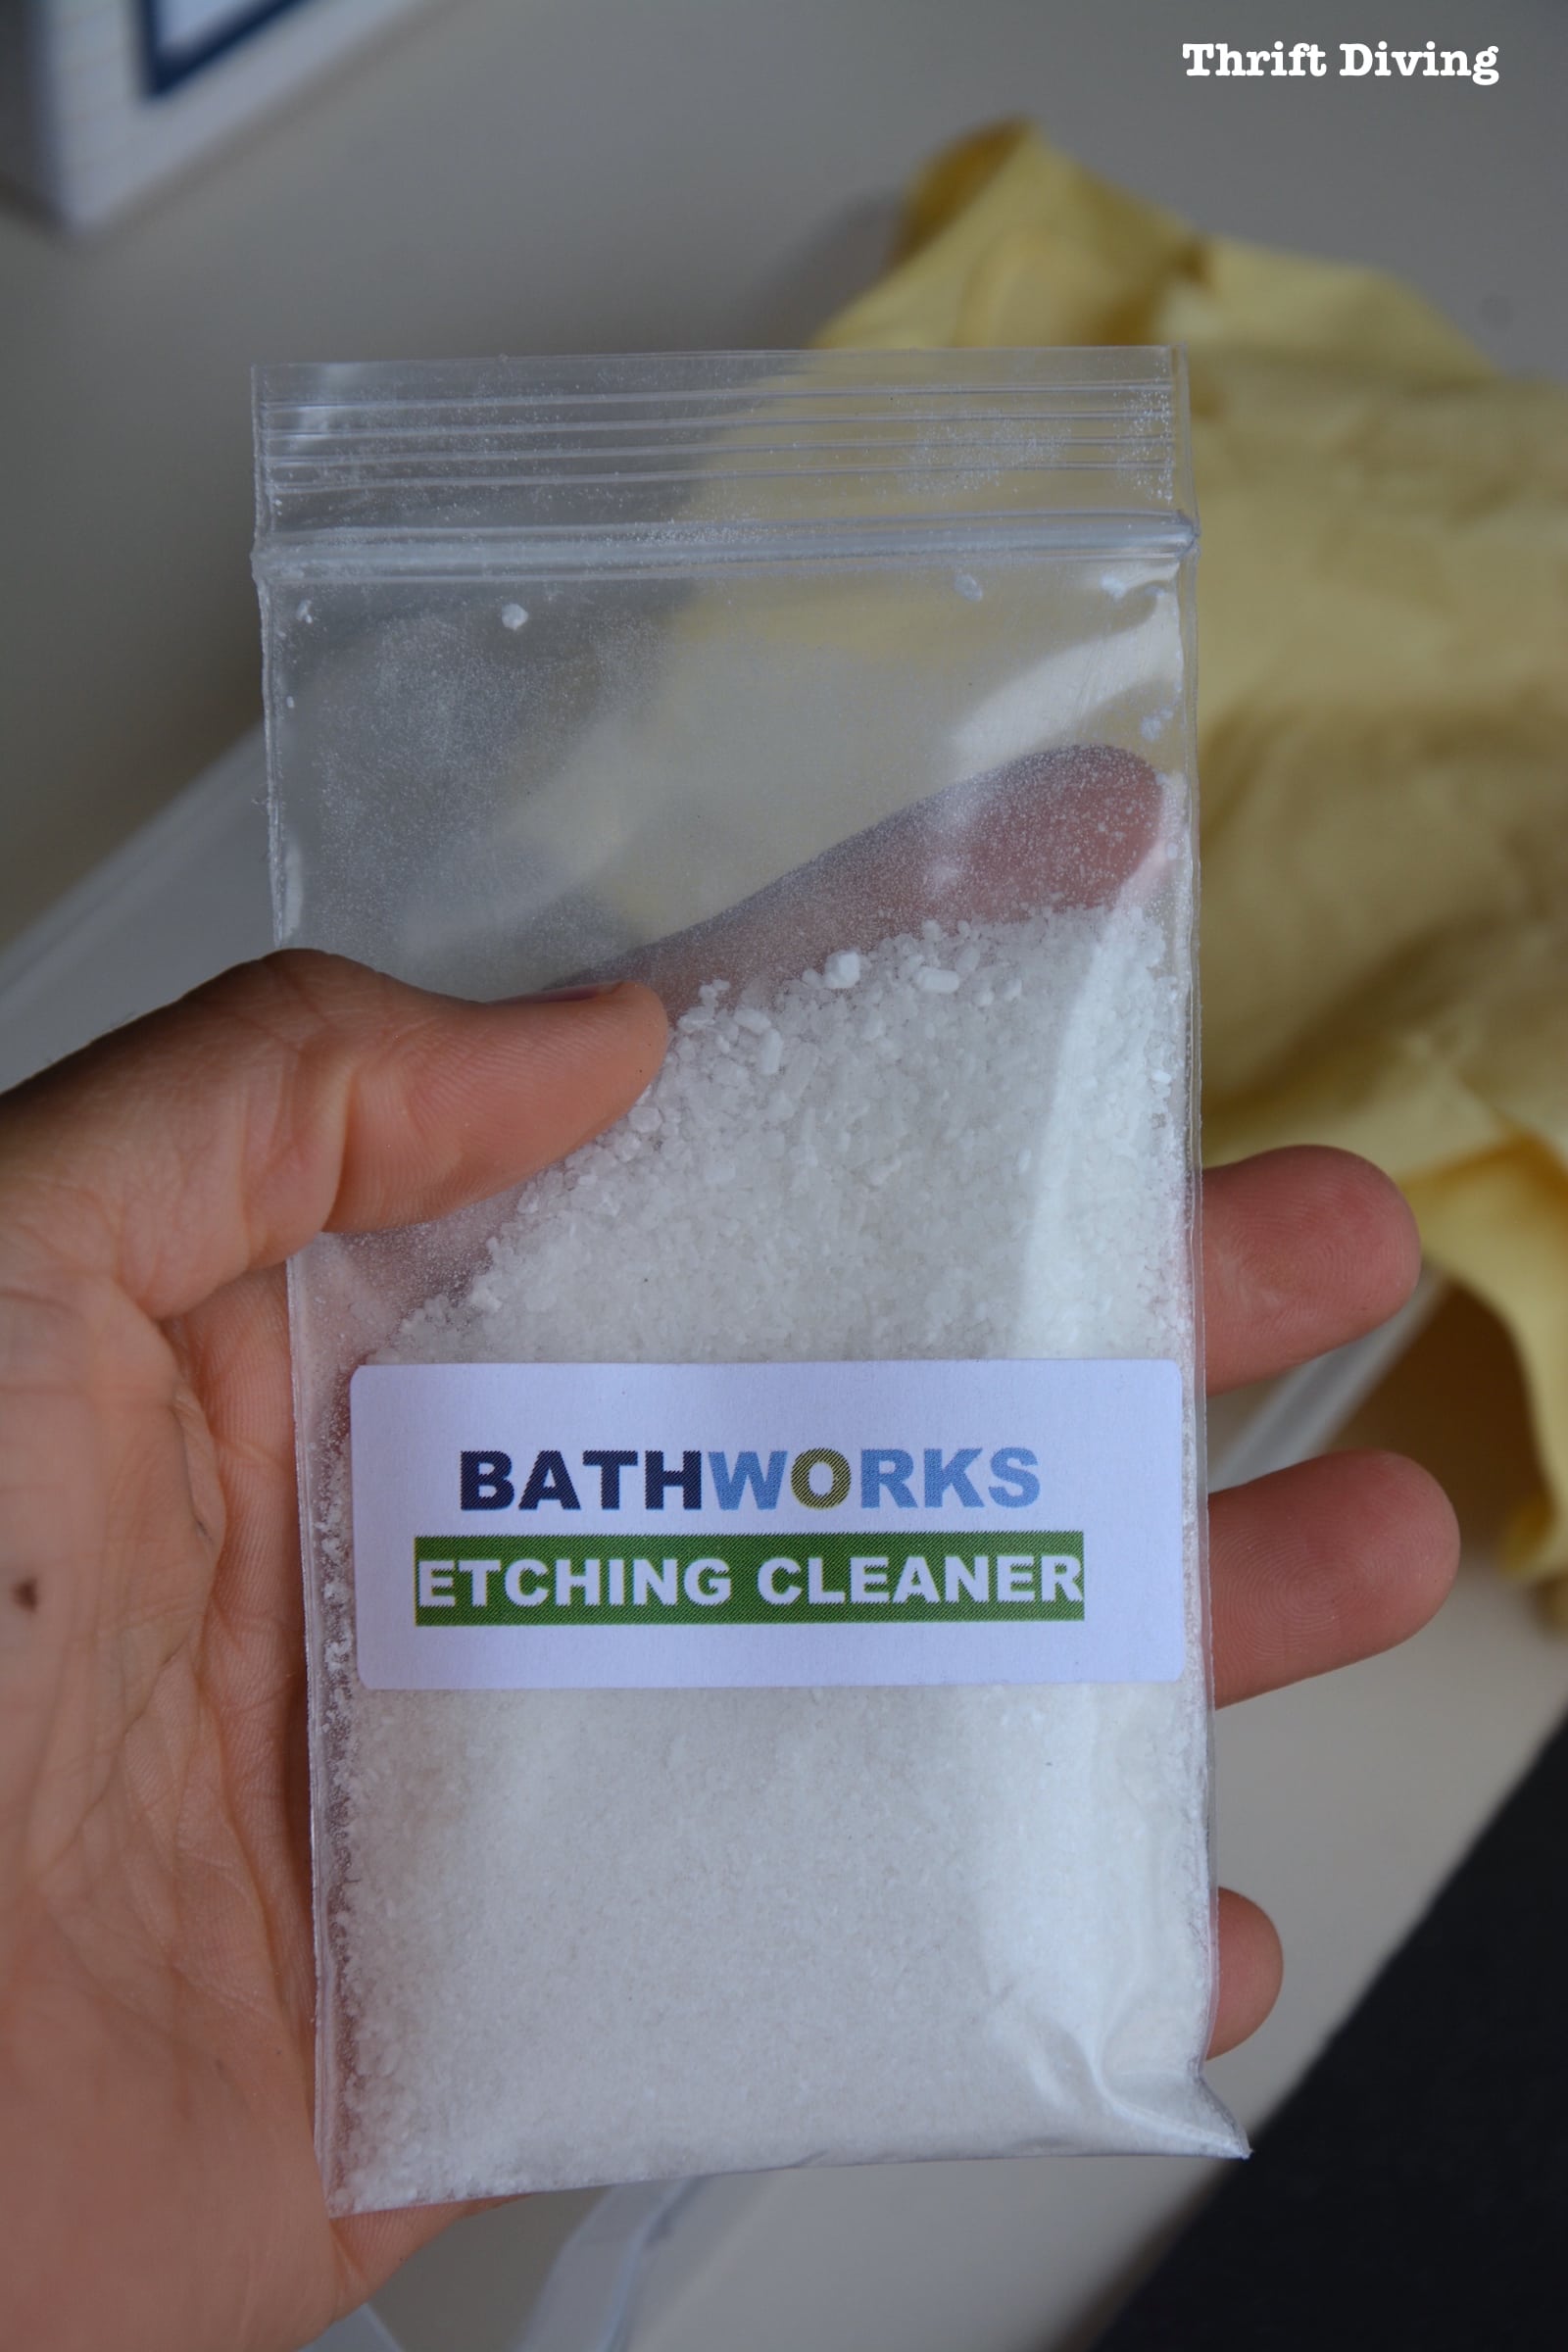
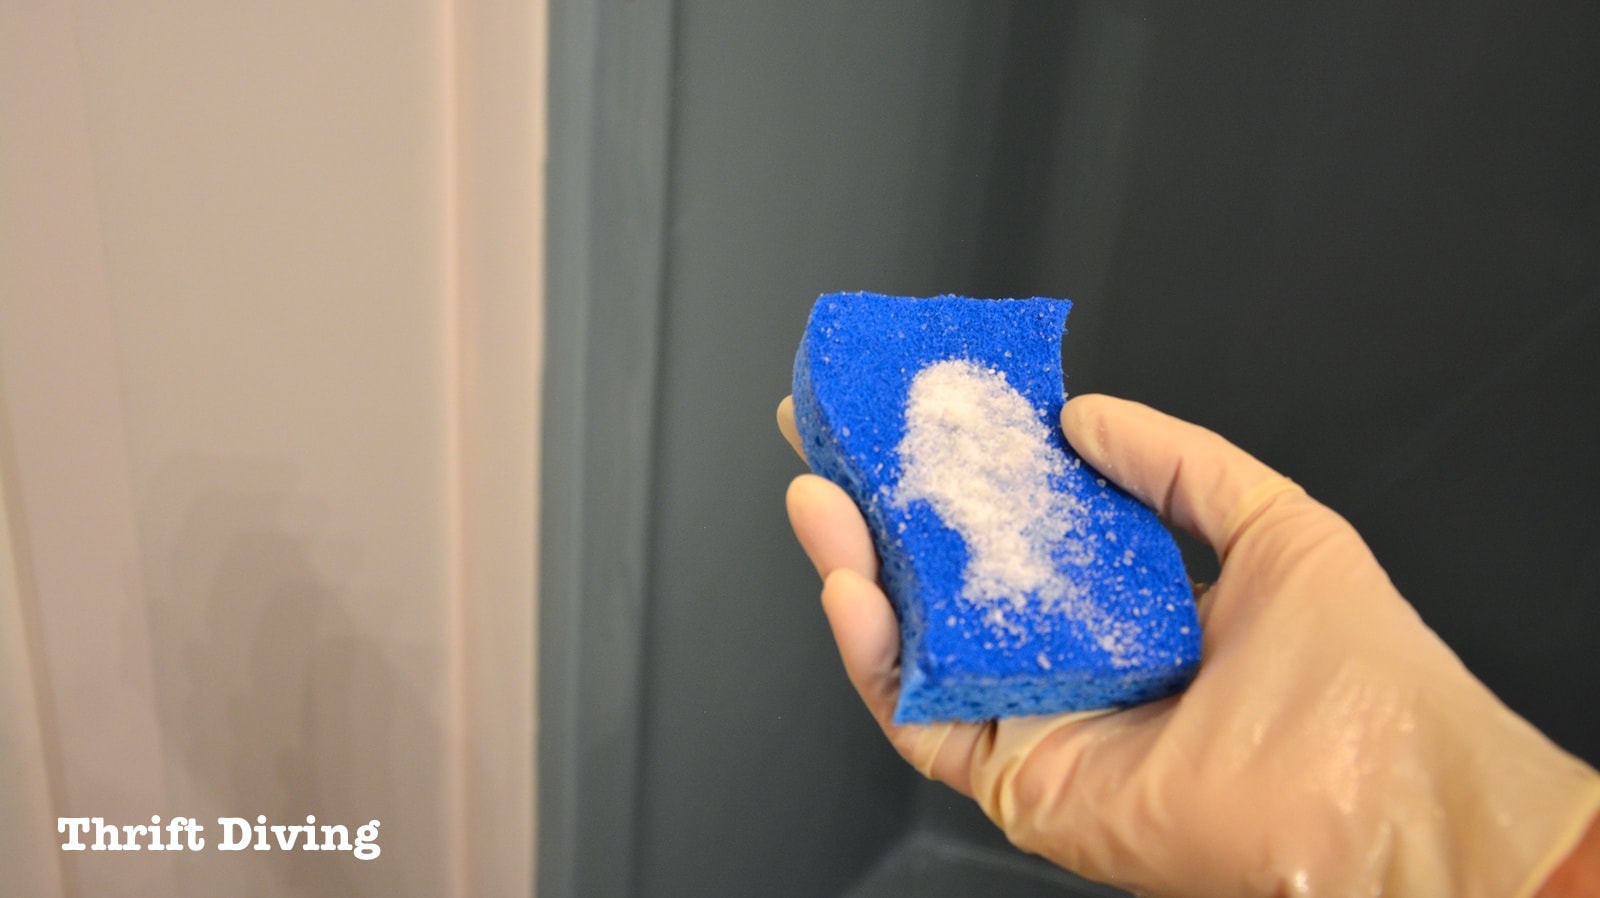
STEP 5: Use the Etching Cleaner
The instructions say to use the etching cleaner before sanding, but I accidentally sanded first and then used the etching cleaner.
So, be sure to follow the instructions. 🙂
But my results were okay, despite the slight mix-up.
Once cleaned with the Etching Cleaner, I rinsed it thoroughly away.
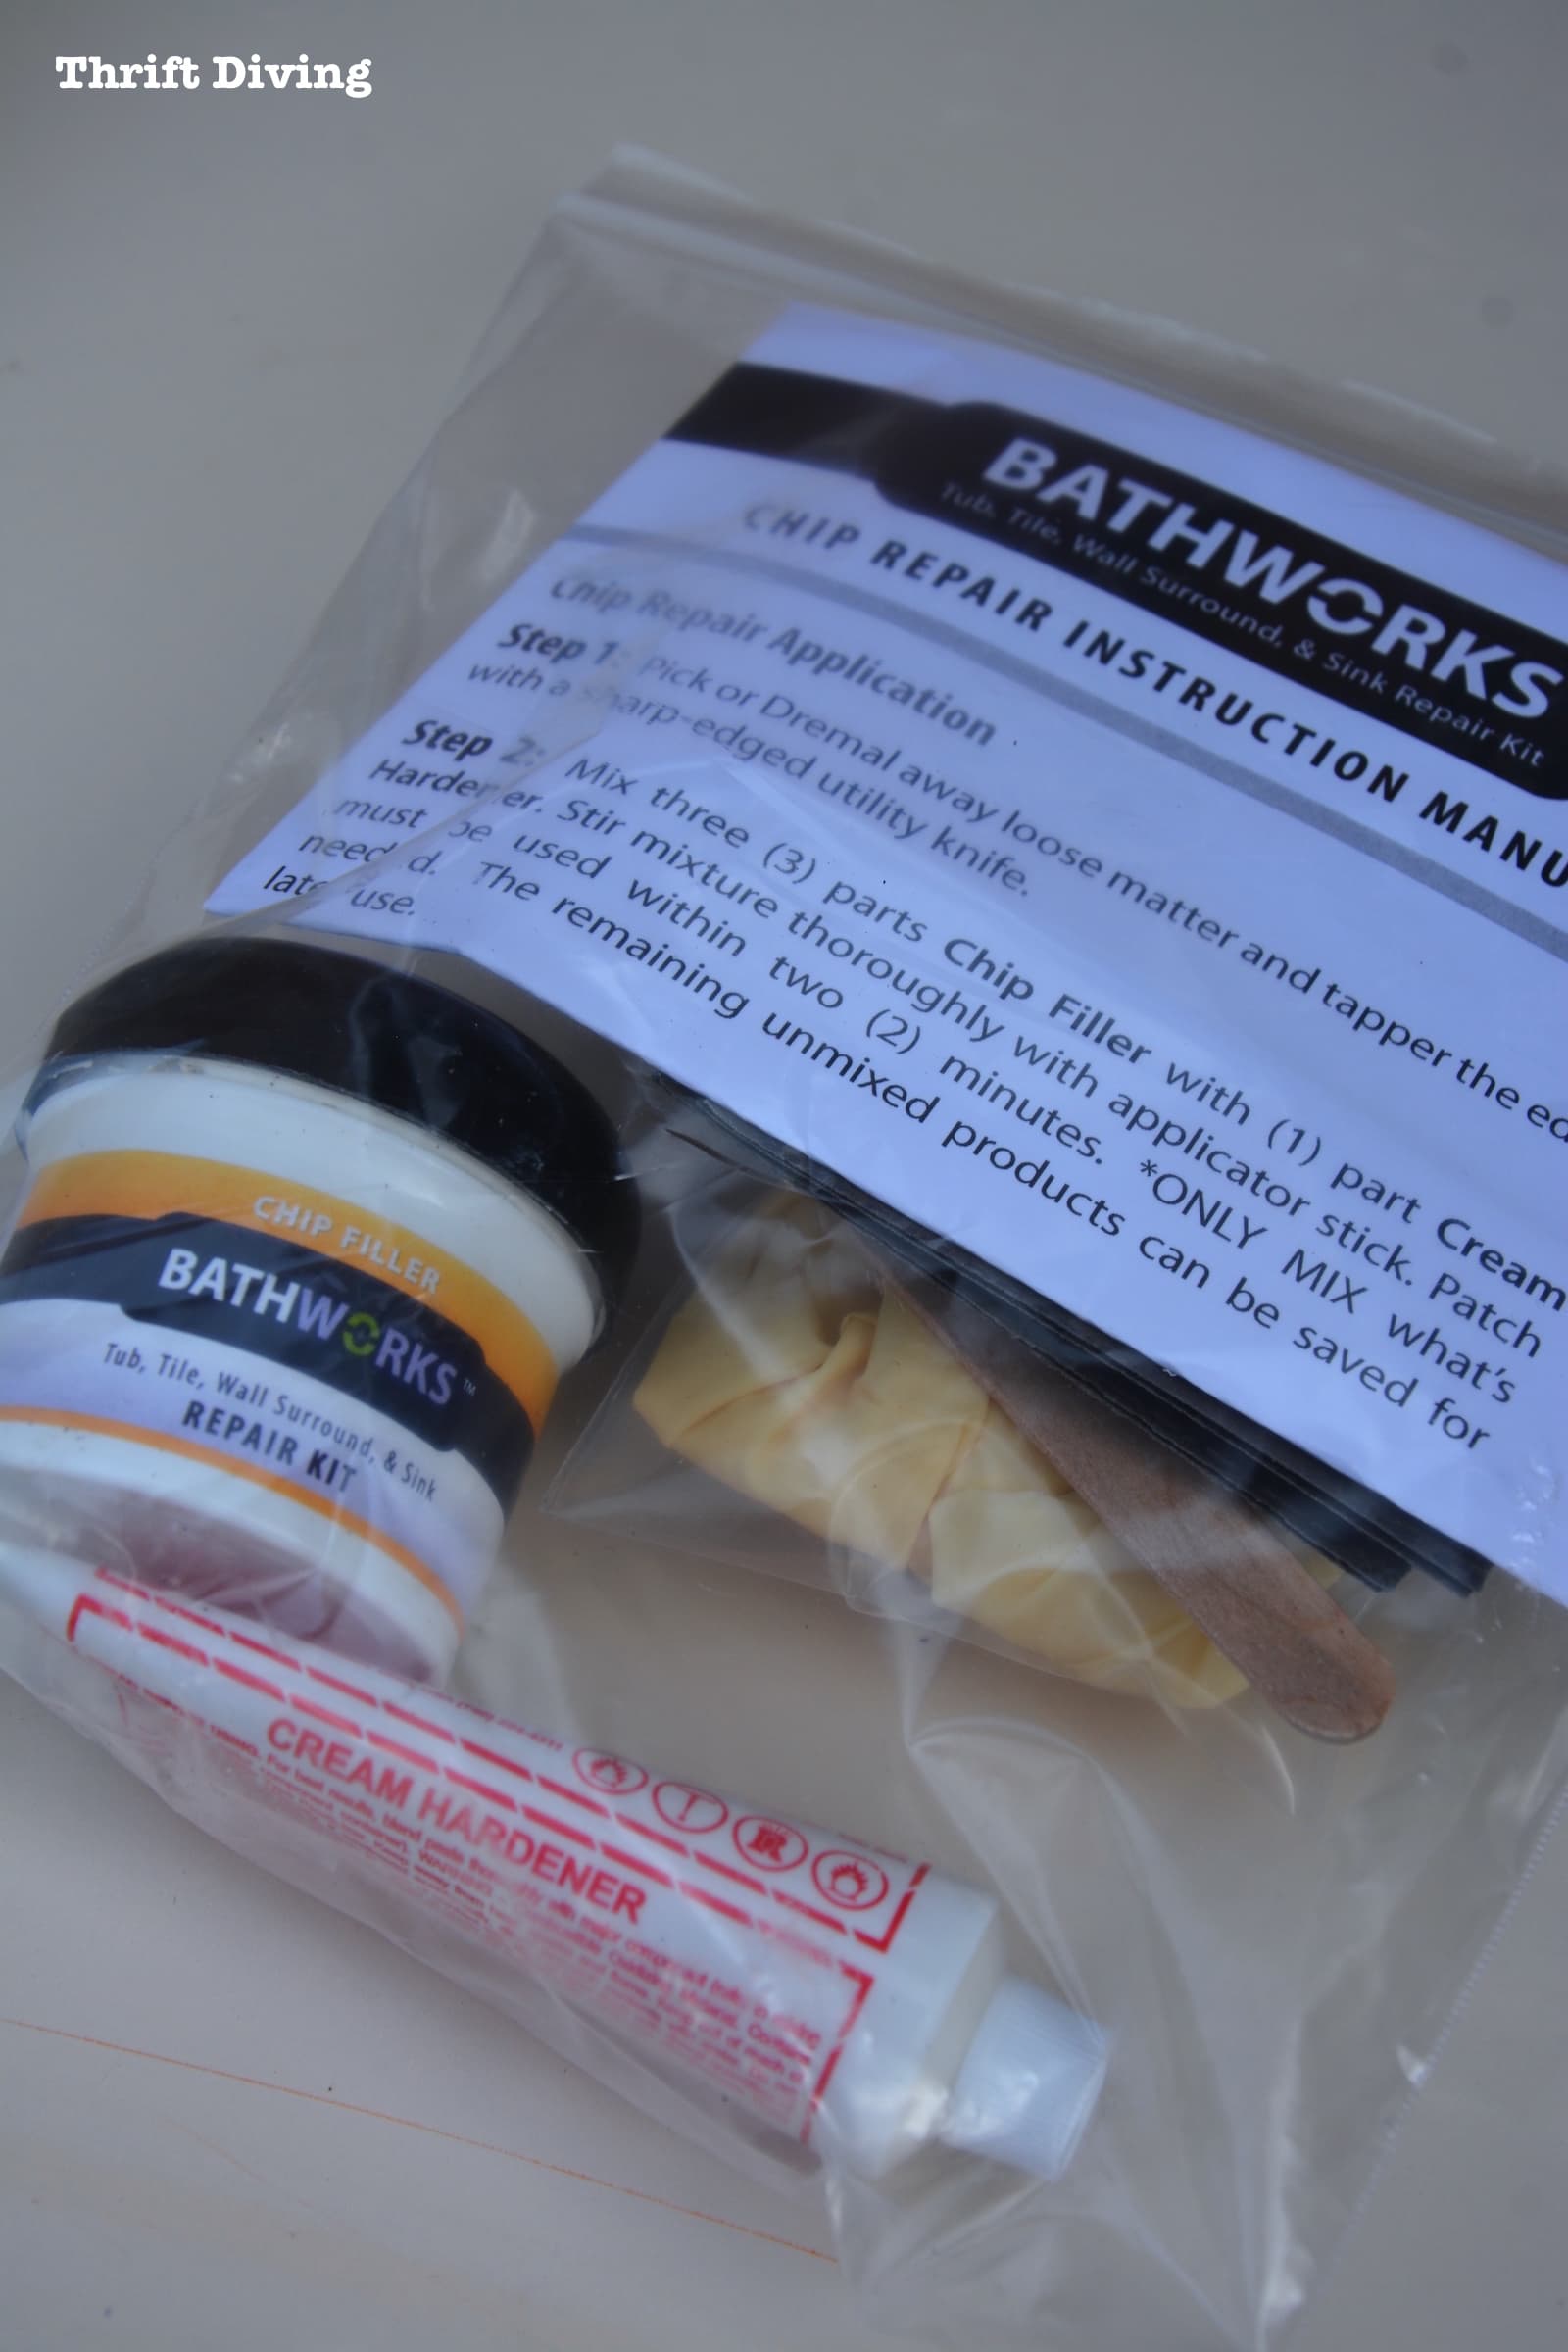
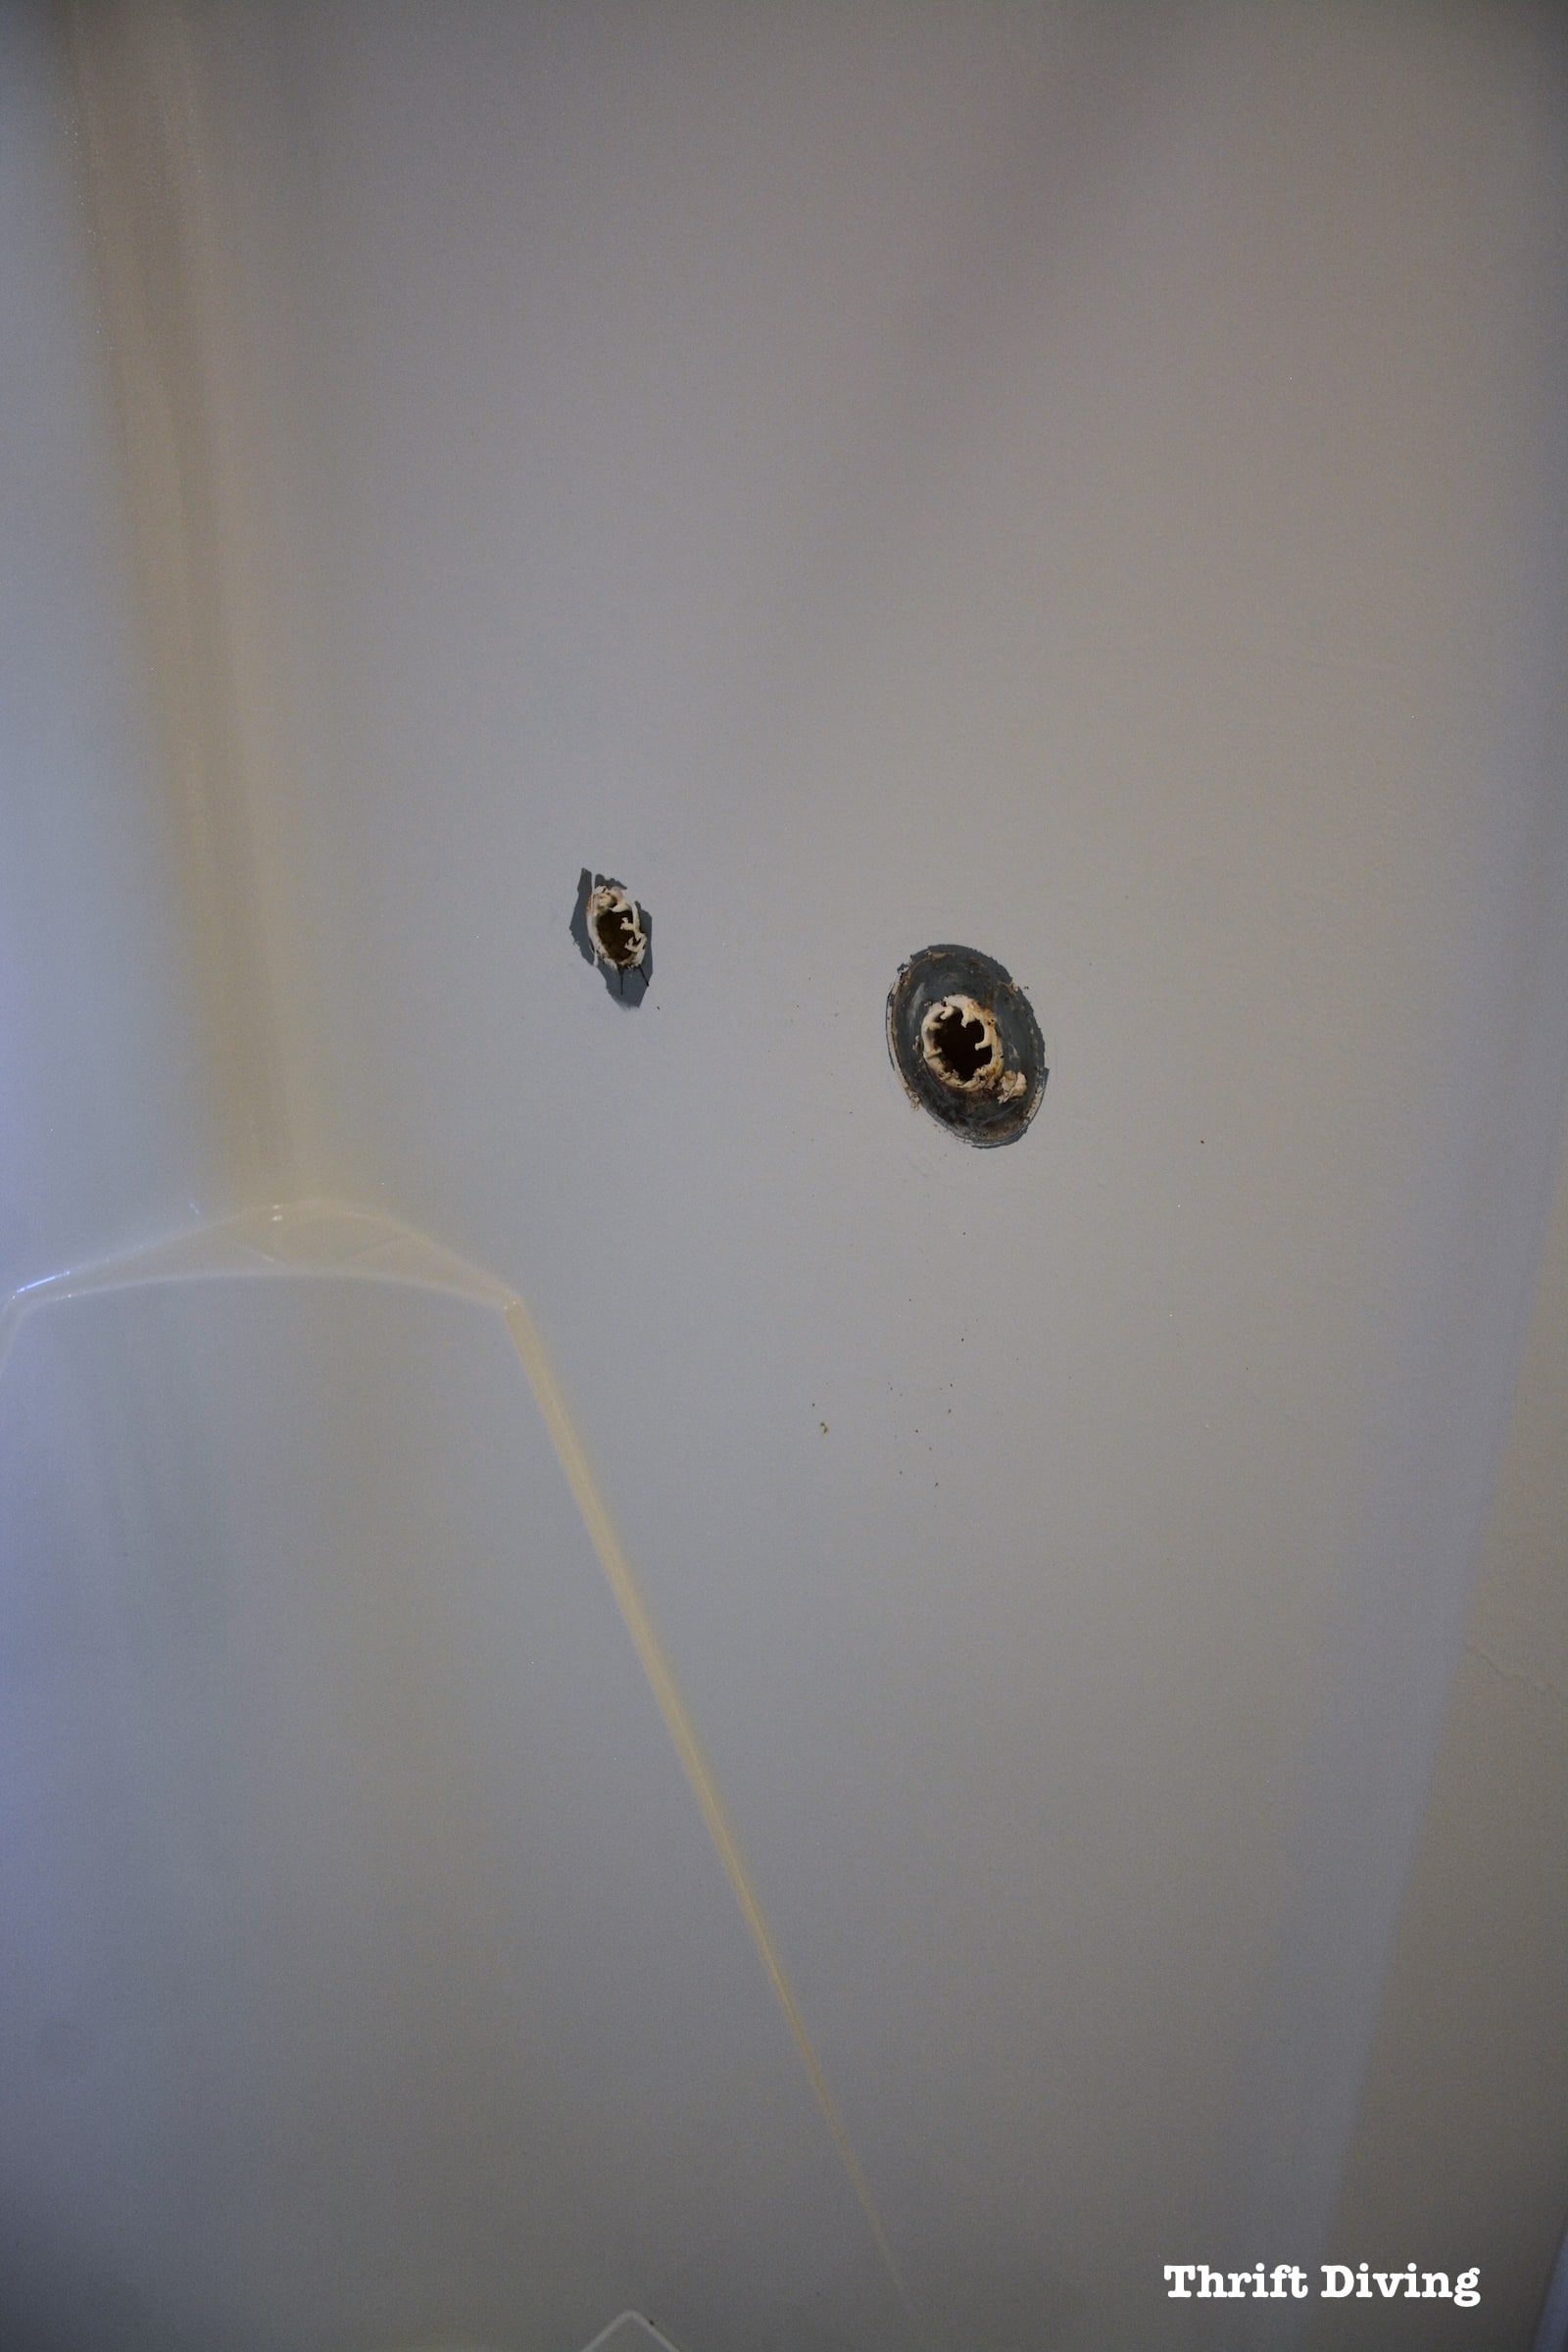
STEP 6: Fill Holes or Chips With Chip Filler
Don’t think you can just paint over any chips, holes, or imperfections. 🙂
Sorry, dear, you’ve got to fill those.
Now that the shower is all sanded, rinsed, and smooth, you should fill any holes or chips in your shower or tub.
BathWorks sells a Chip Repair Kit that you mix together to fill the holes.
Thankfully, BathWorks also sent me one of these kits, too.
When applying the chip filler, slather it on just like this. Don’t worry about it looking perfect. Because when it dries, you’ll simply sand it smooth with the sandpaper that comes in the kit.
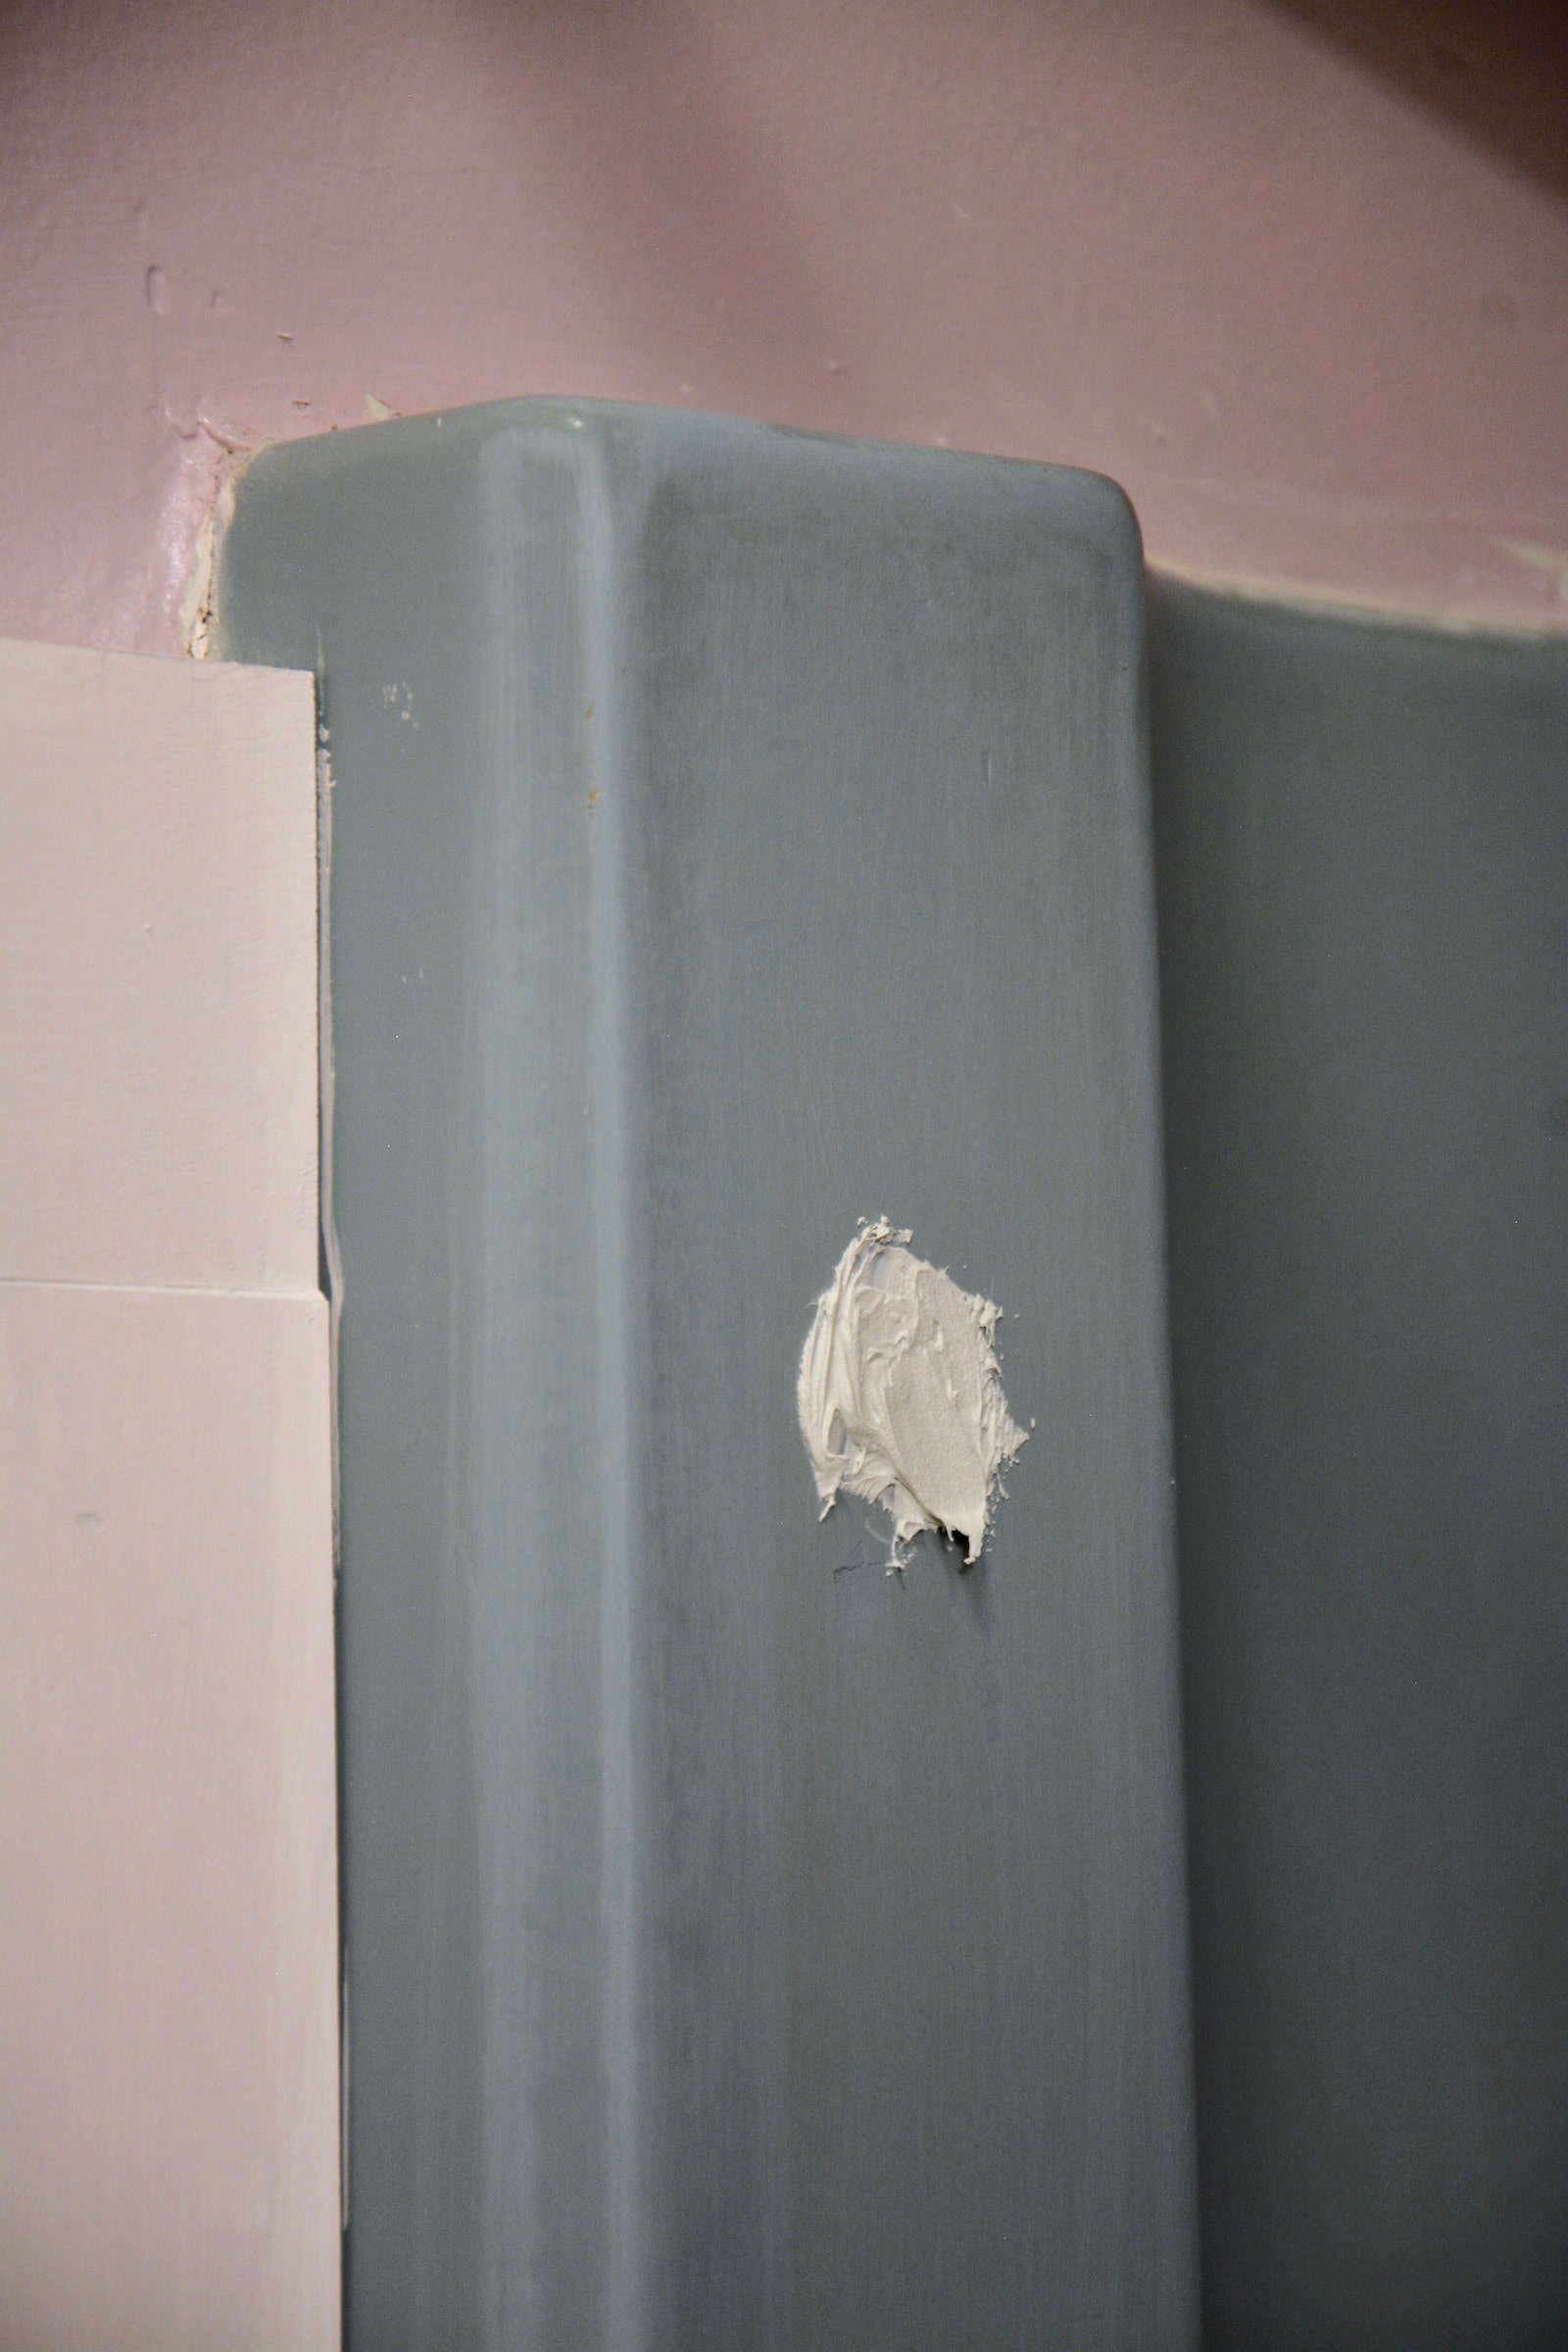
I had several holes on each side where the shower door had been attached. Each hole was filled and sanded smooth after it dried.
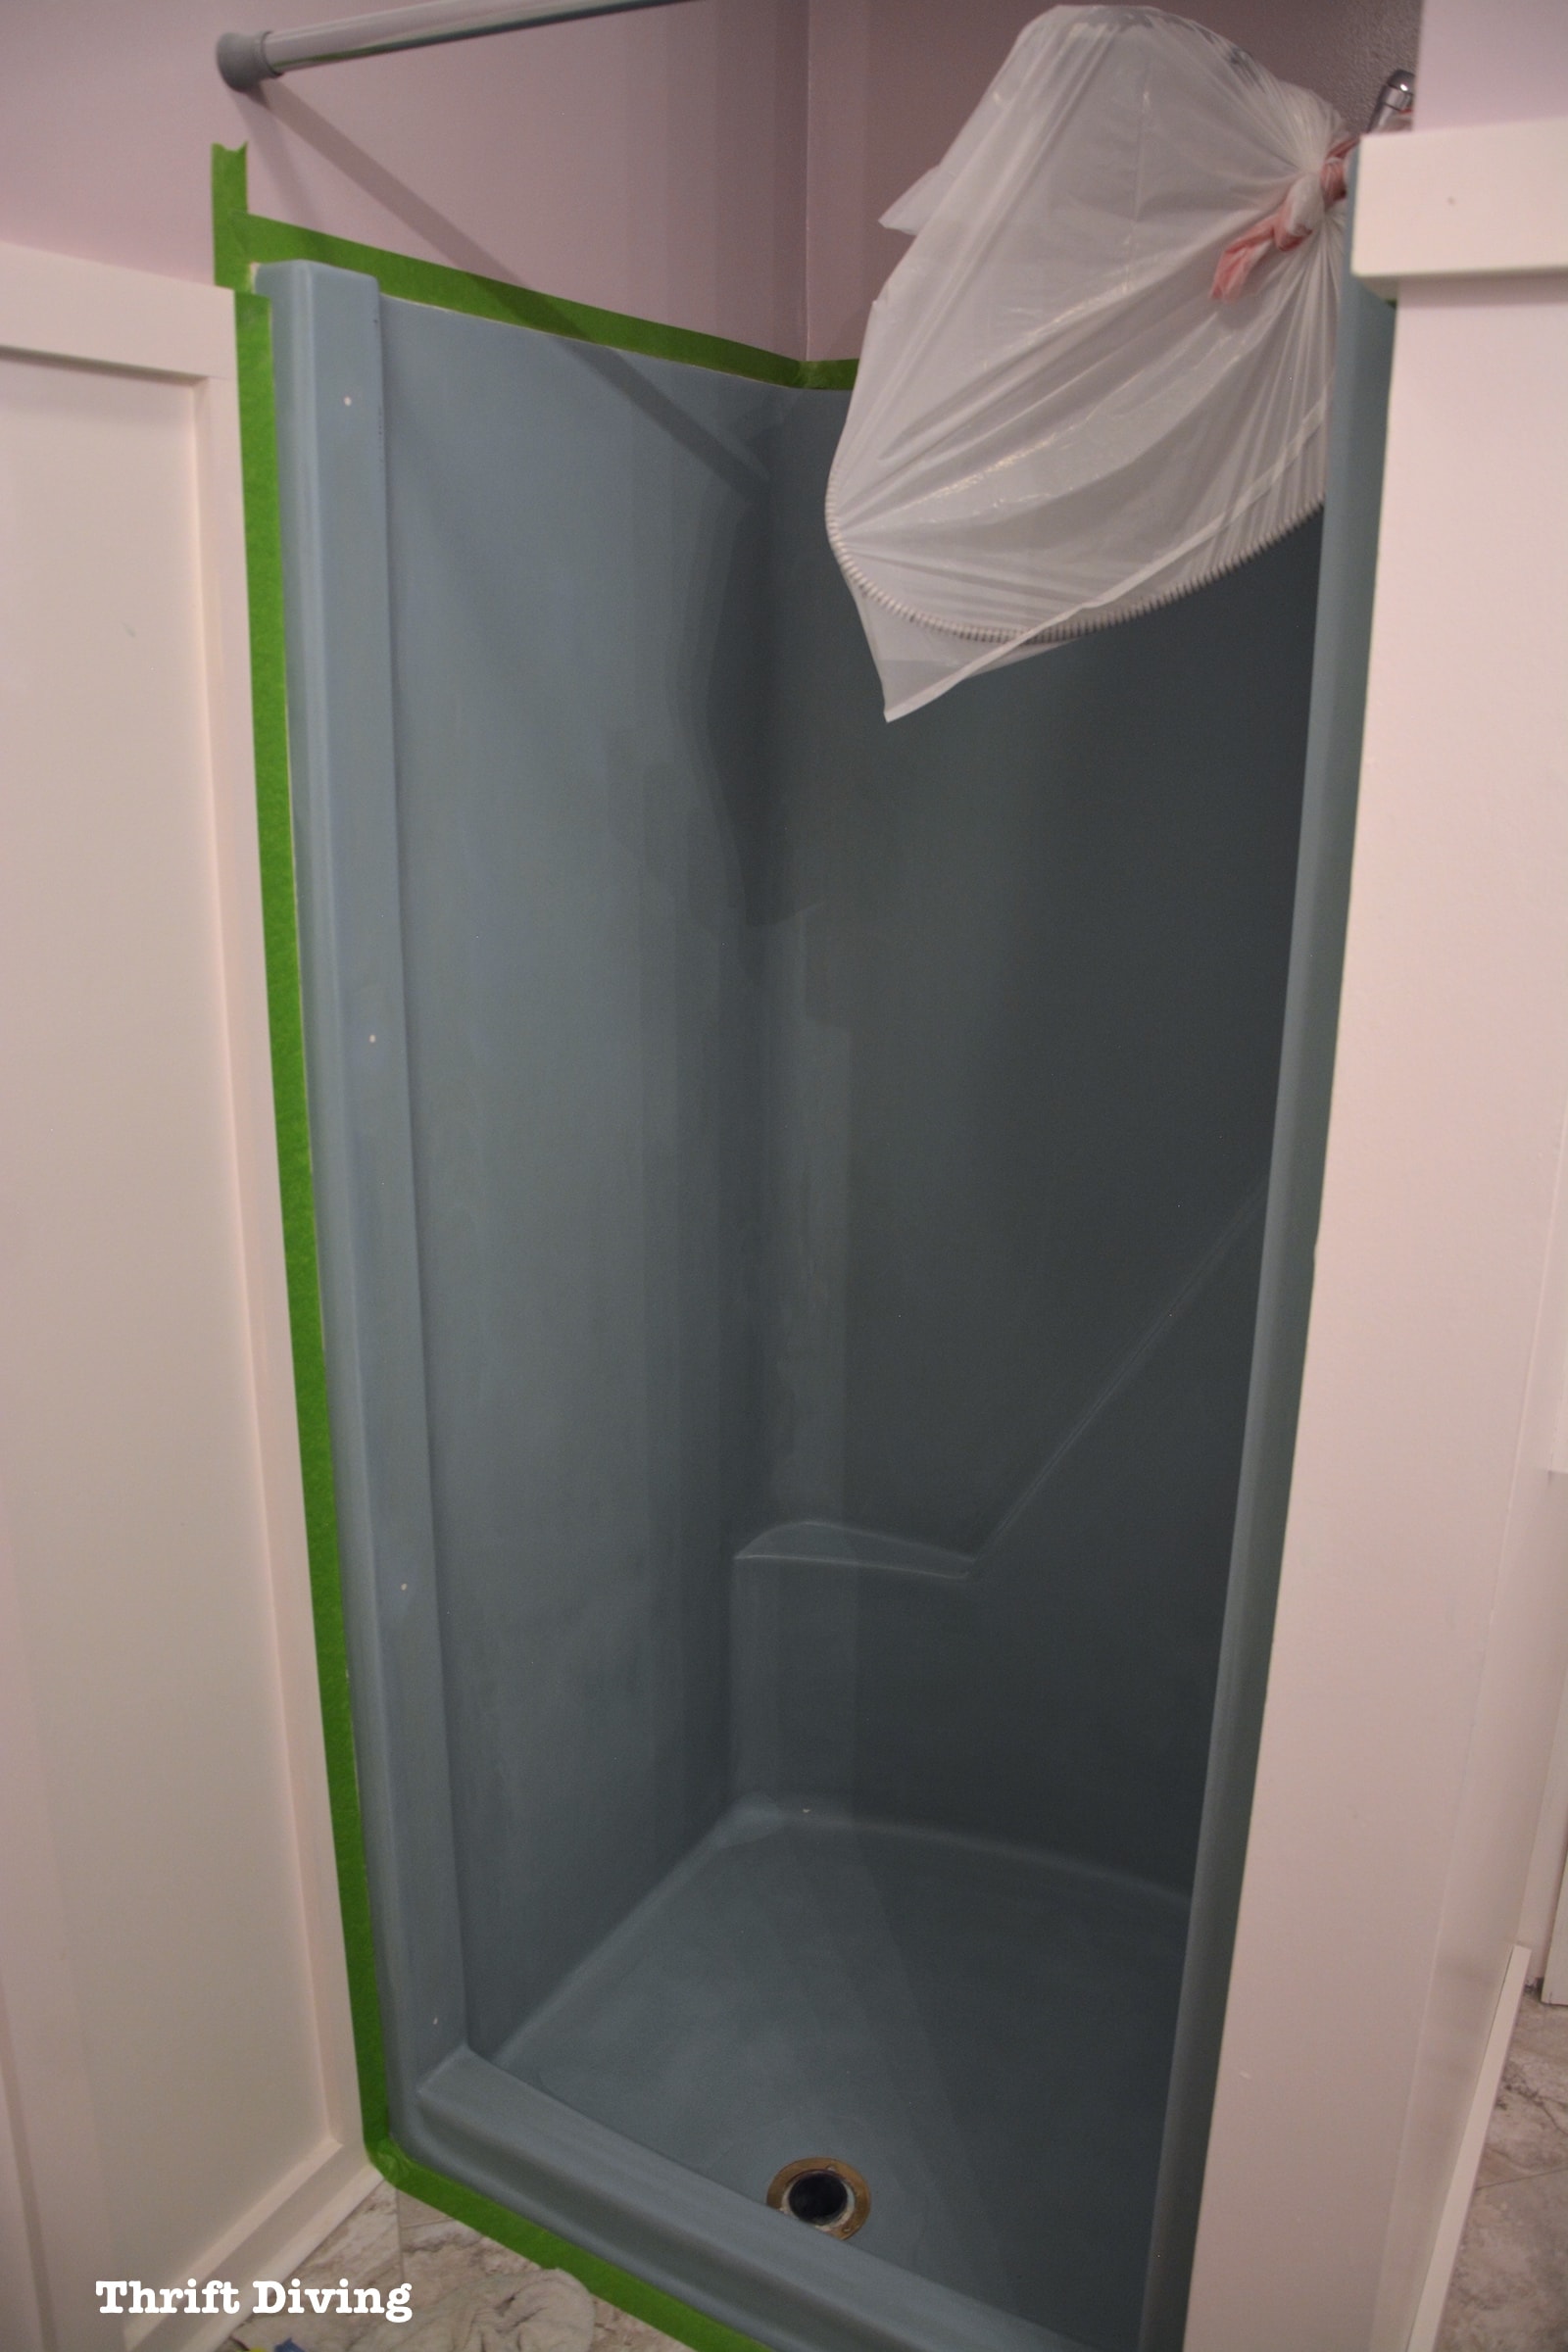
Now’s the time to tape off so that you don’t get paint on the surrounding surfaces.
STEP 7: Wipe on the Liquid Primer
This is where things got critical. 🙂
You do not want any water whatsoever in your shower or tub when you start wiping on the primer with a paper towel.
My shower dripped a little bit, so I tied a plastic bag over the top and let any drips accumulate in there.
A helpful tip is to use a blow dryer to make sure that there is absolutely no water left over in your shower.
Use a paper towel to wipe the small liquid primer container on the surface.
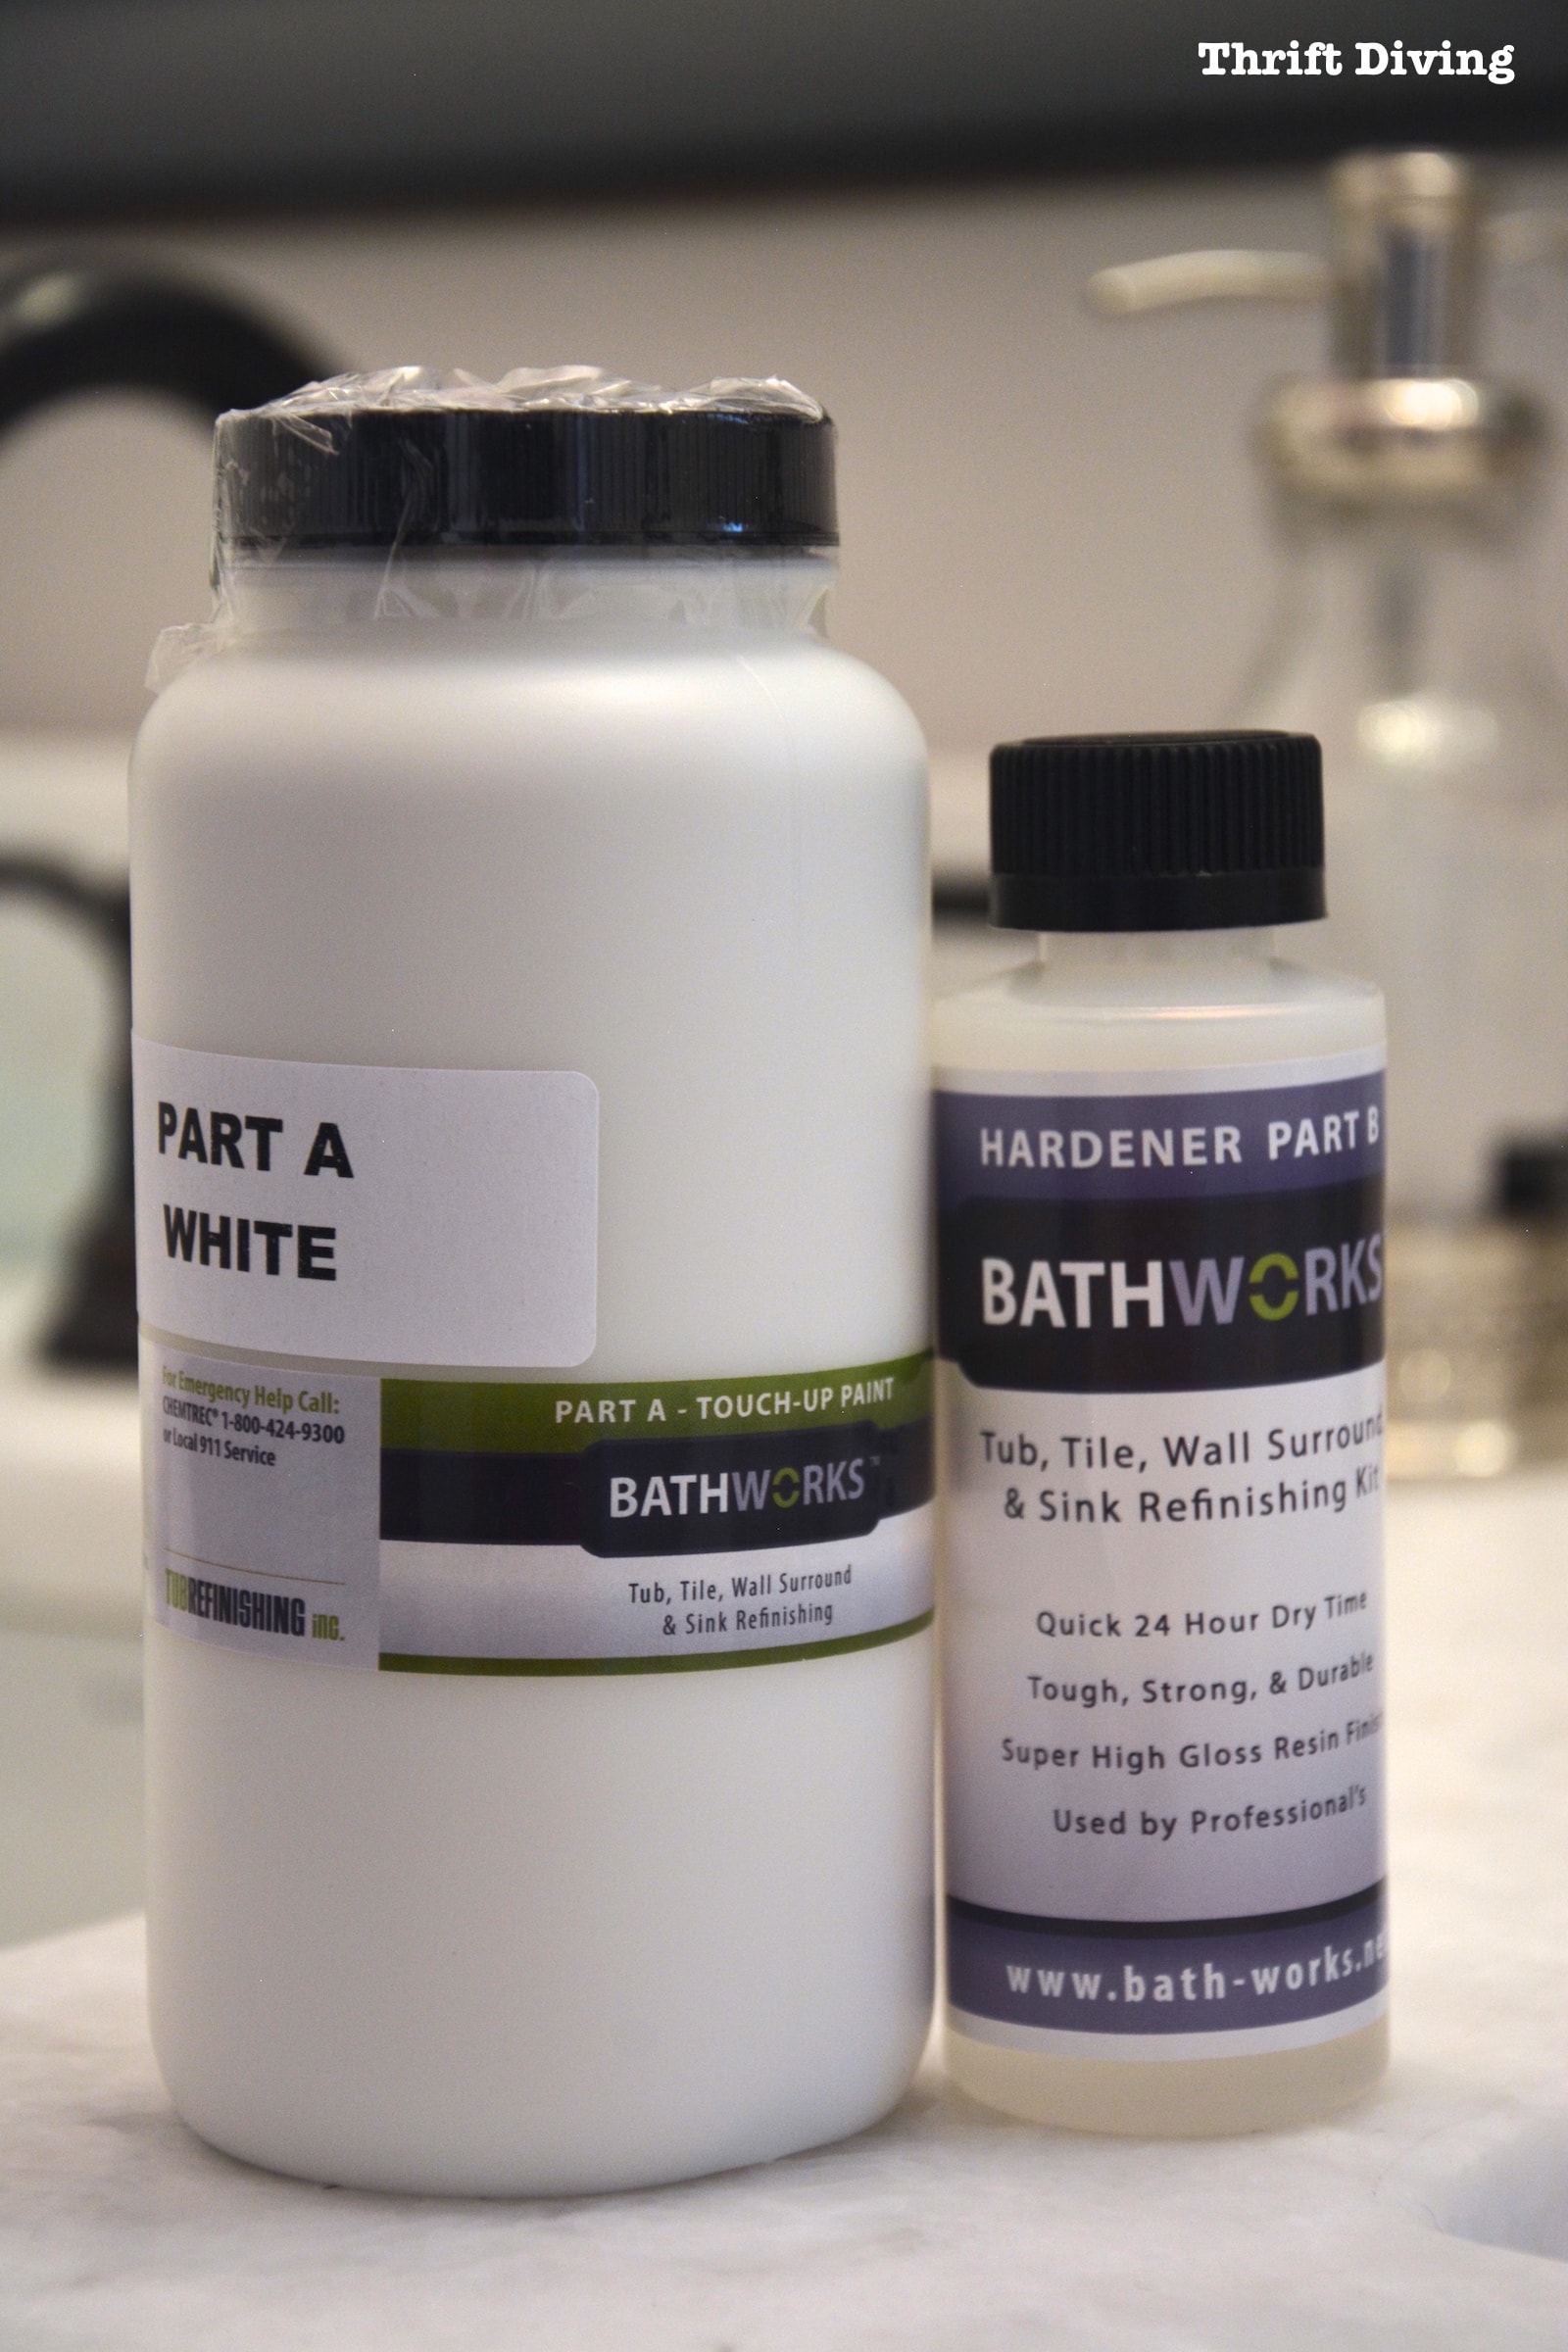
STEP 8: Mix Part A and Part B Together
Now that the shower is cleaned, etched, wiped down, with the liquid primer smoothed on and dried, it’s time to mix the refinishing paint (A) and hardener (B) together.
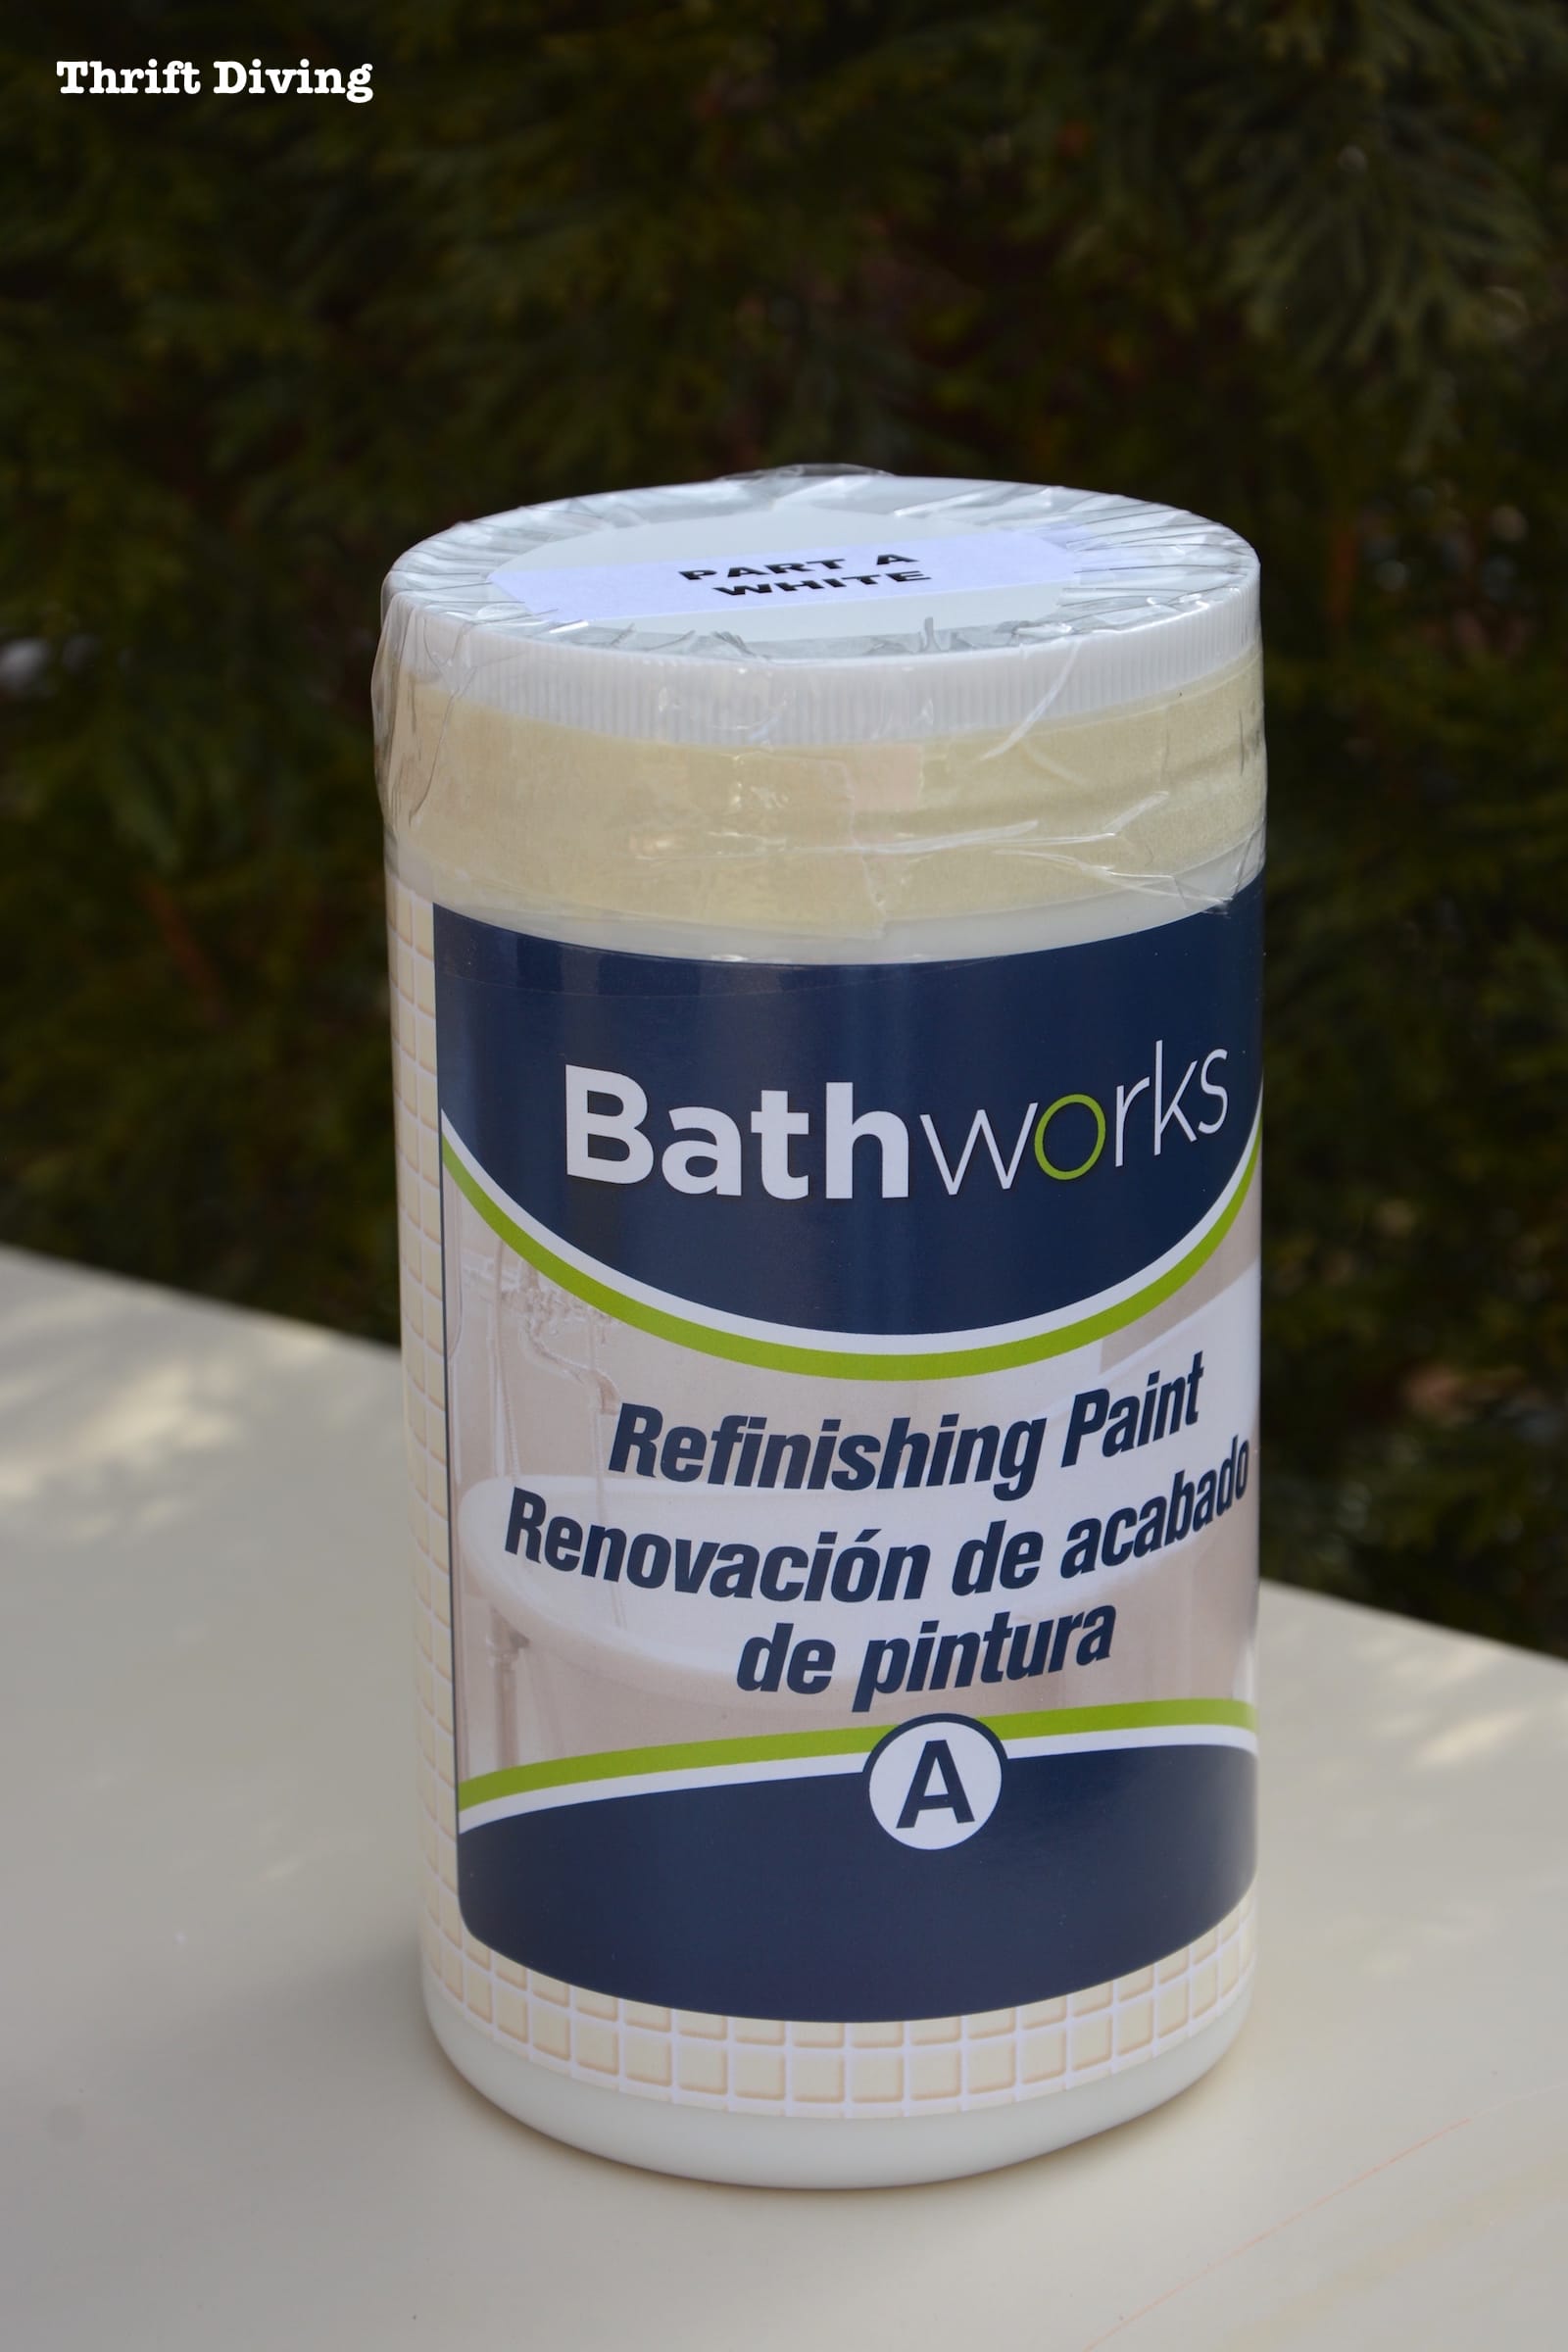
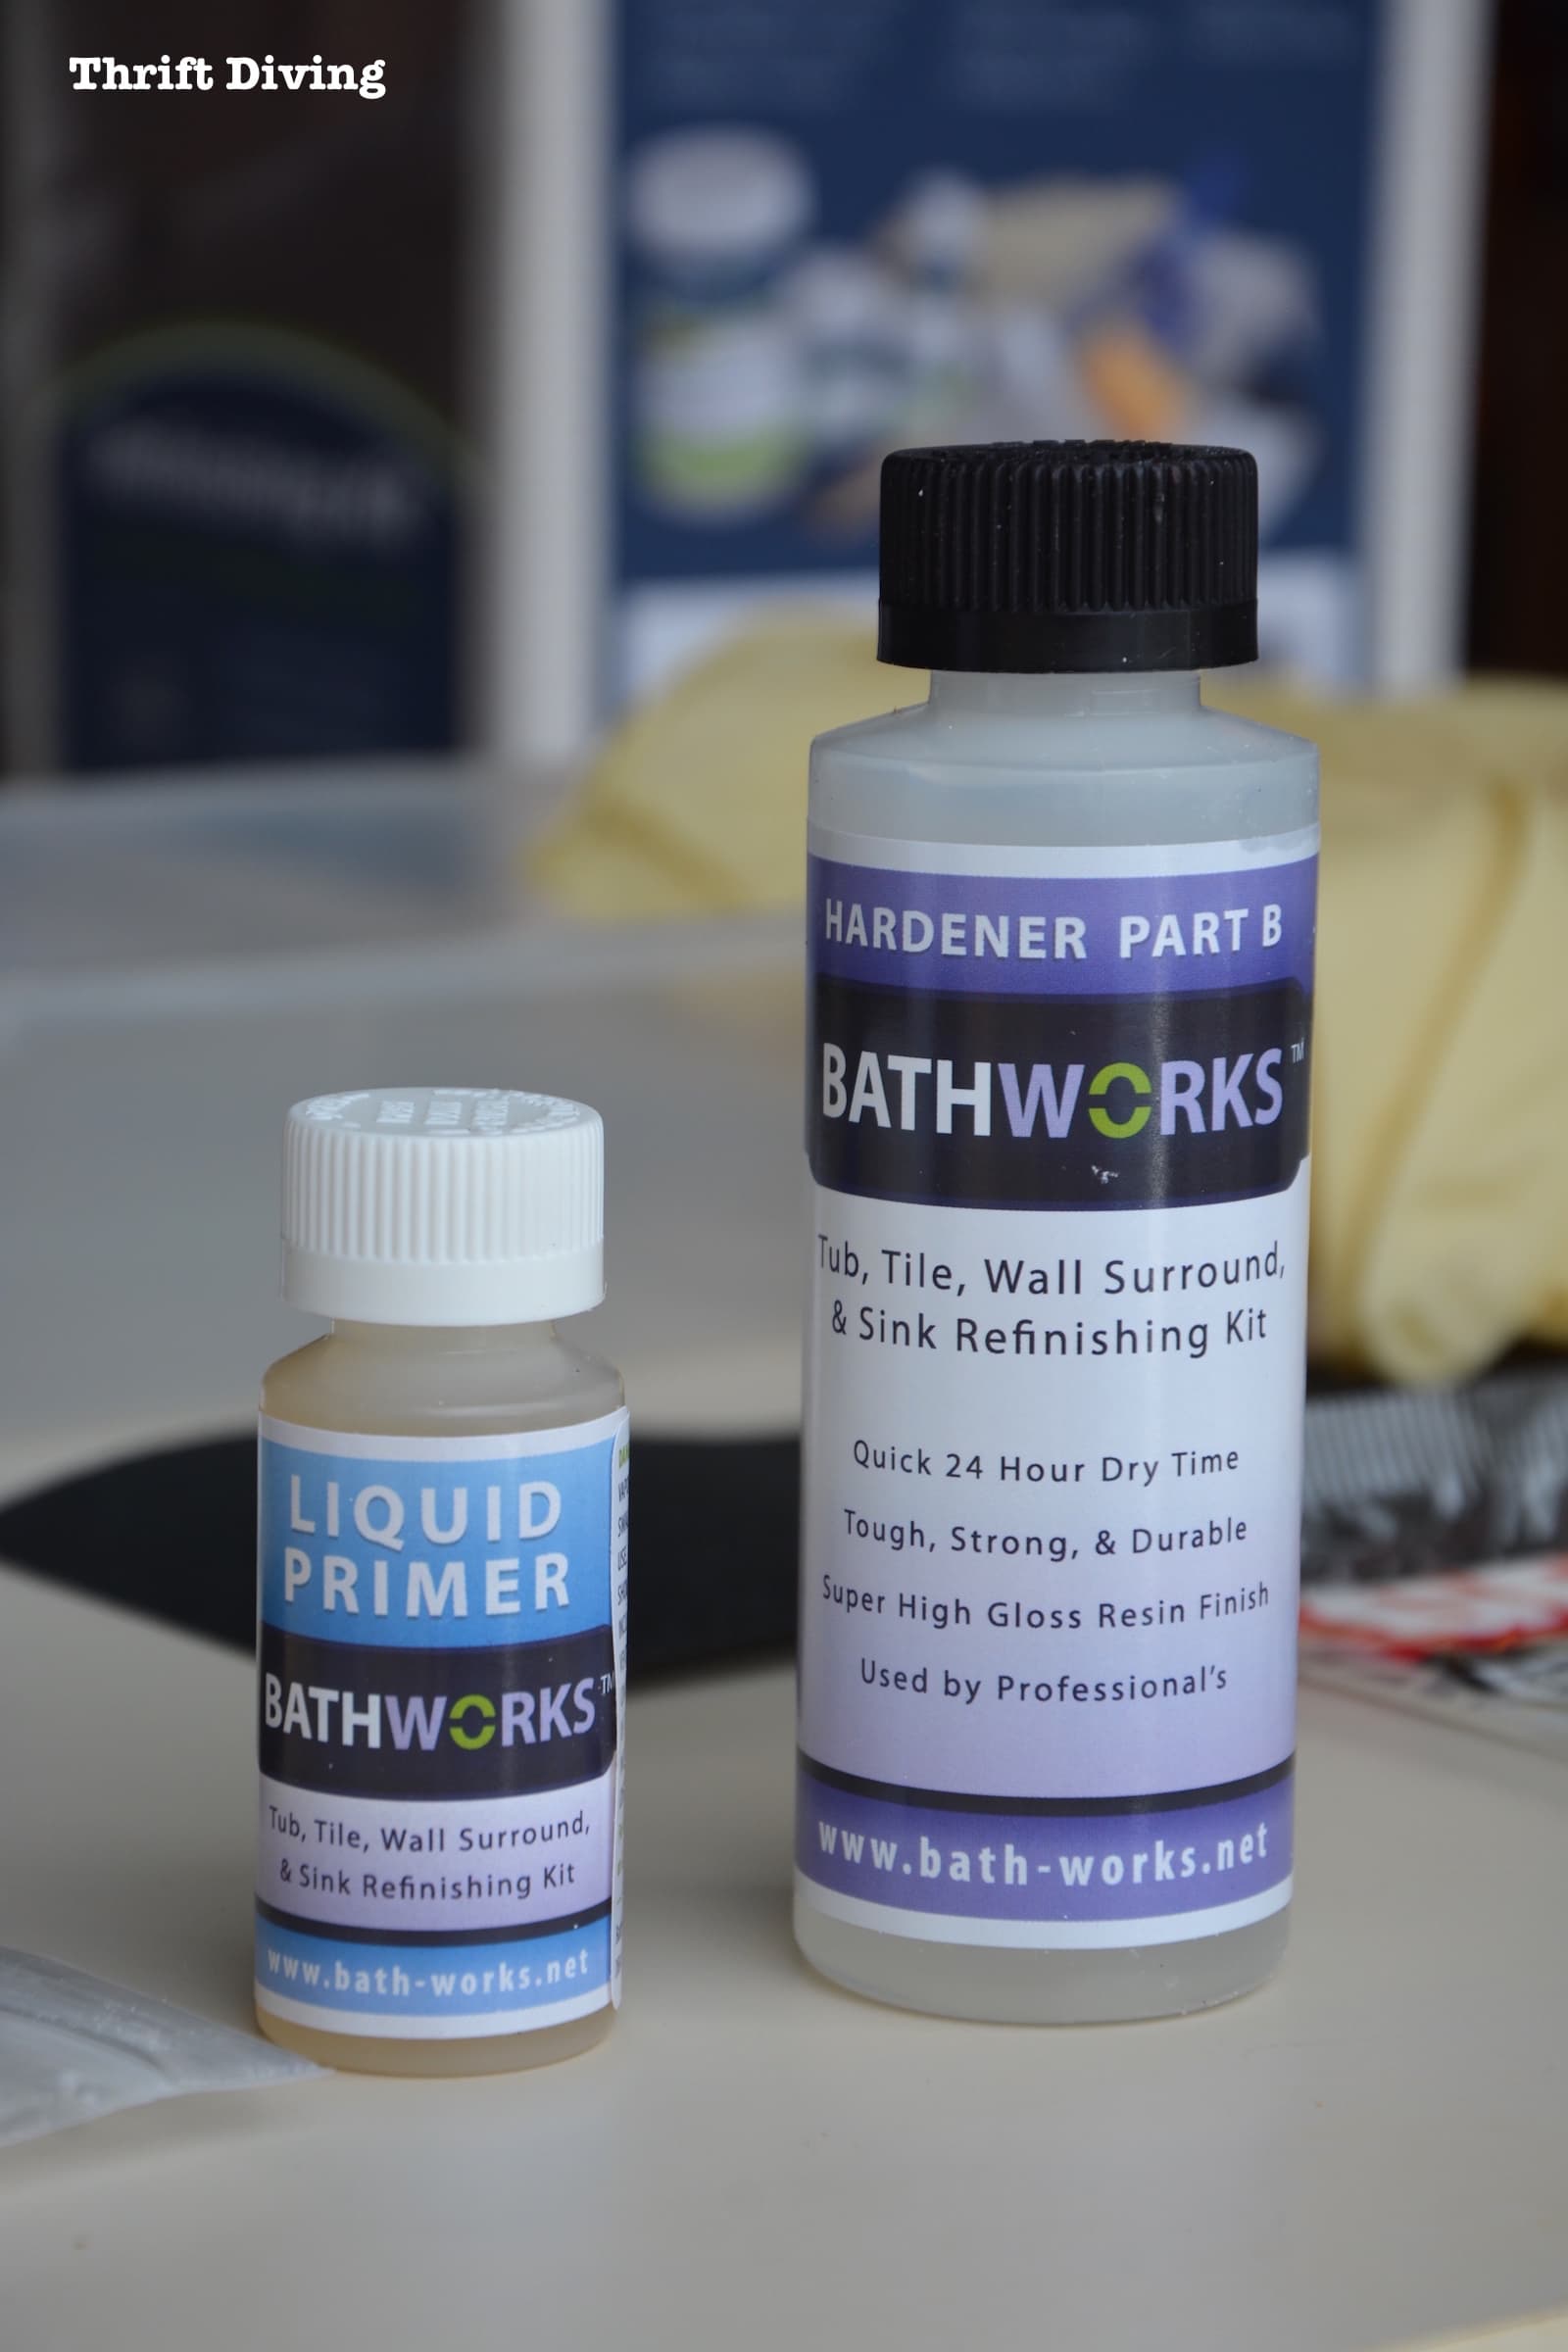
I just opened the hardener and poured it into the paint, stirred well, then shook it up and let it sit for 5 minutes.
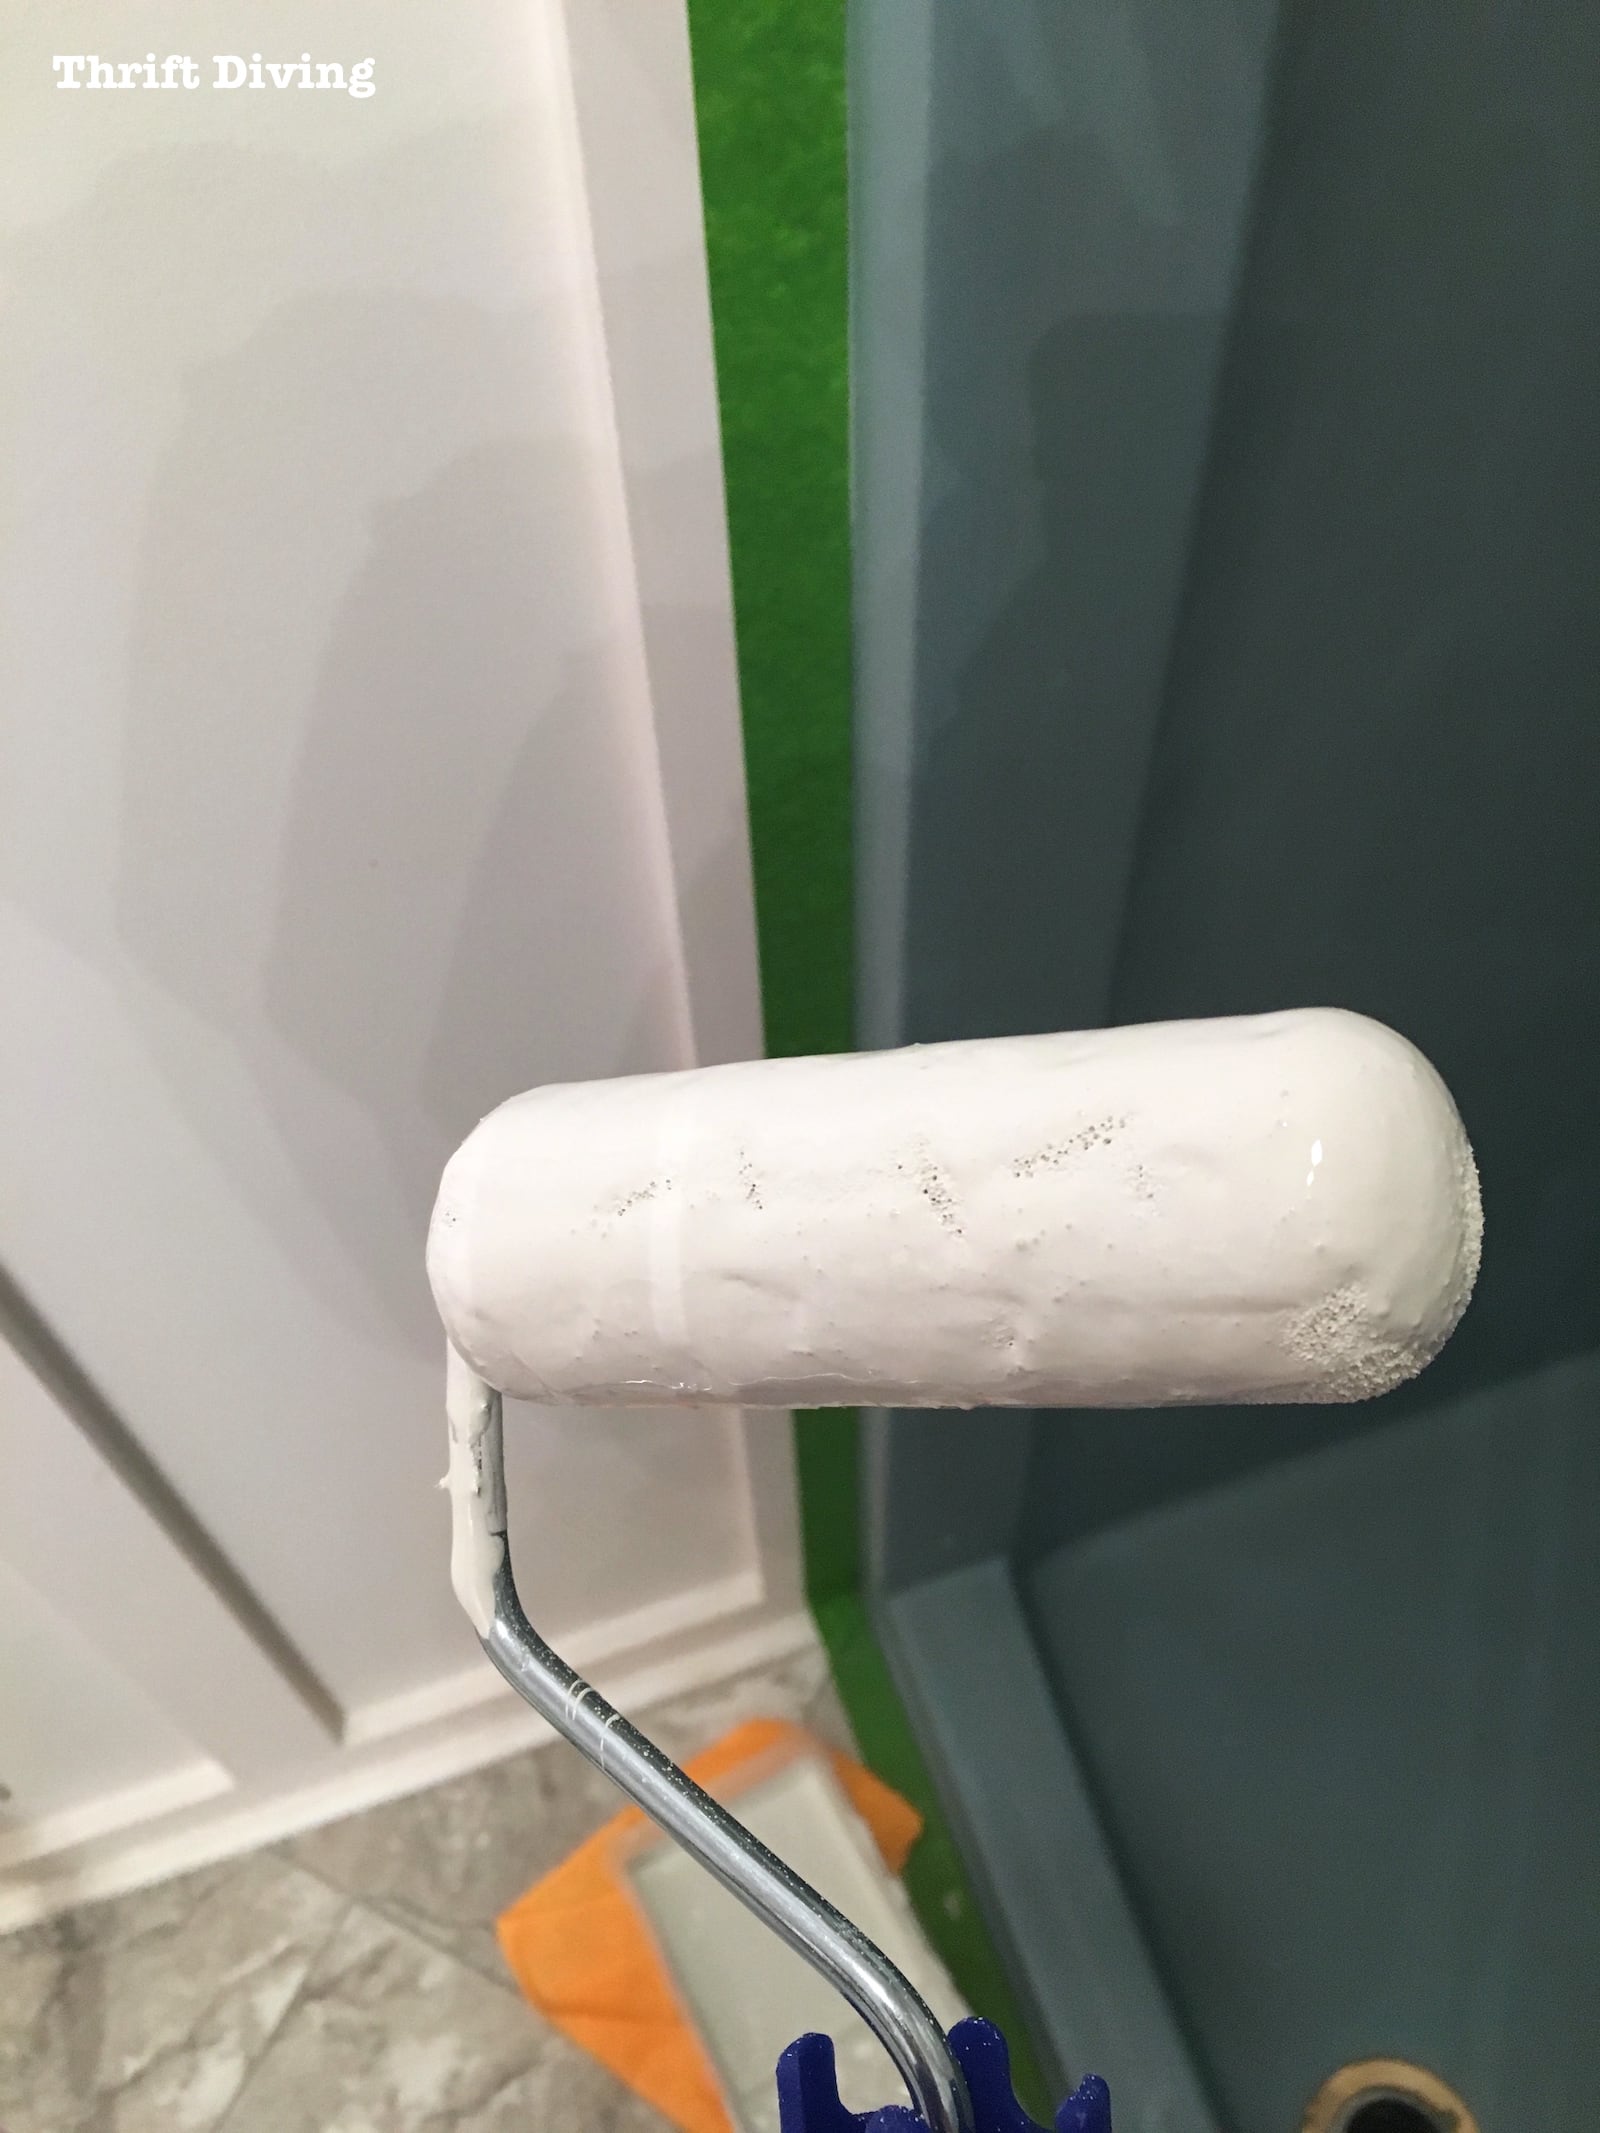
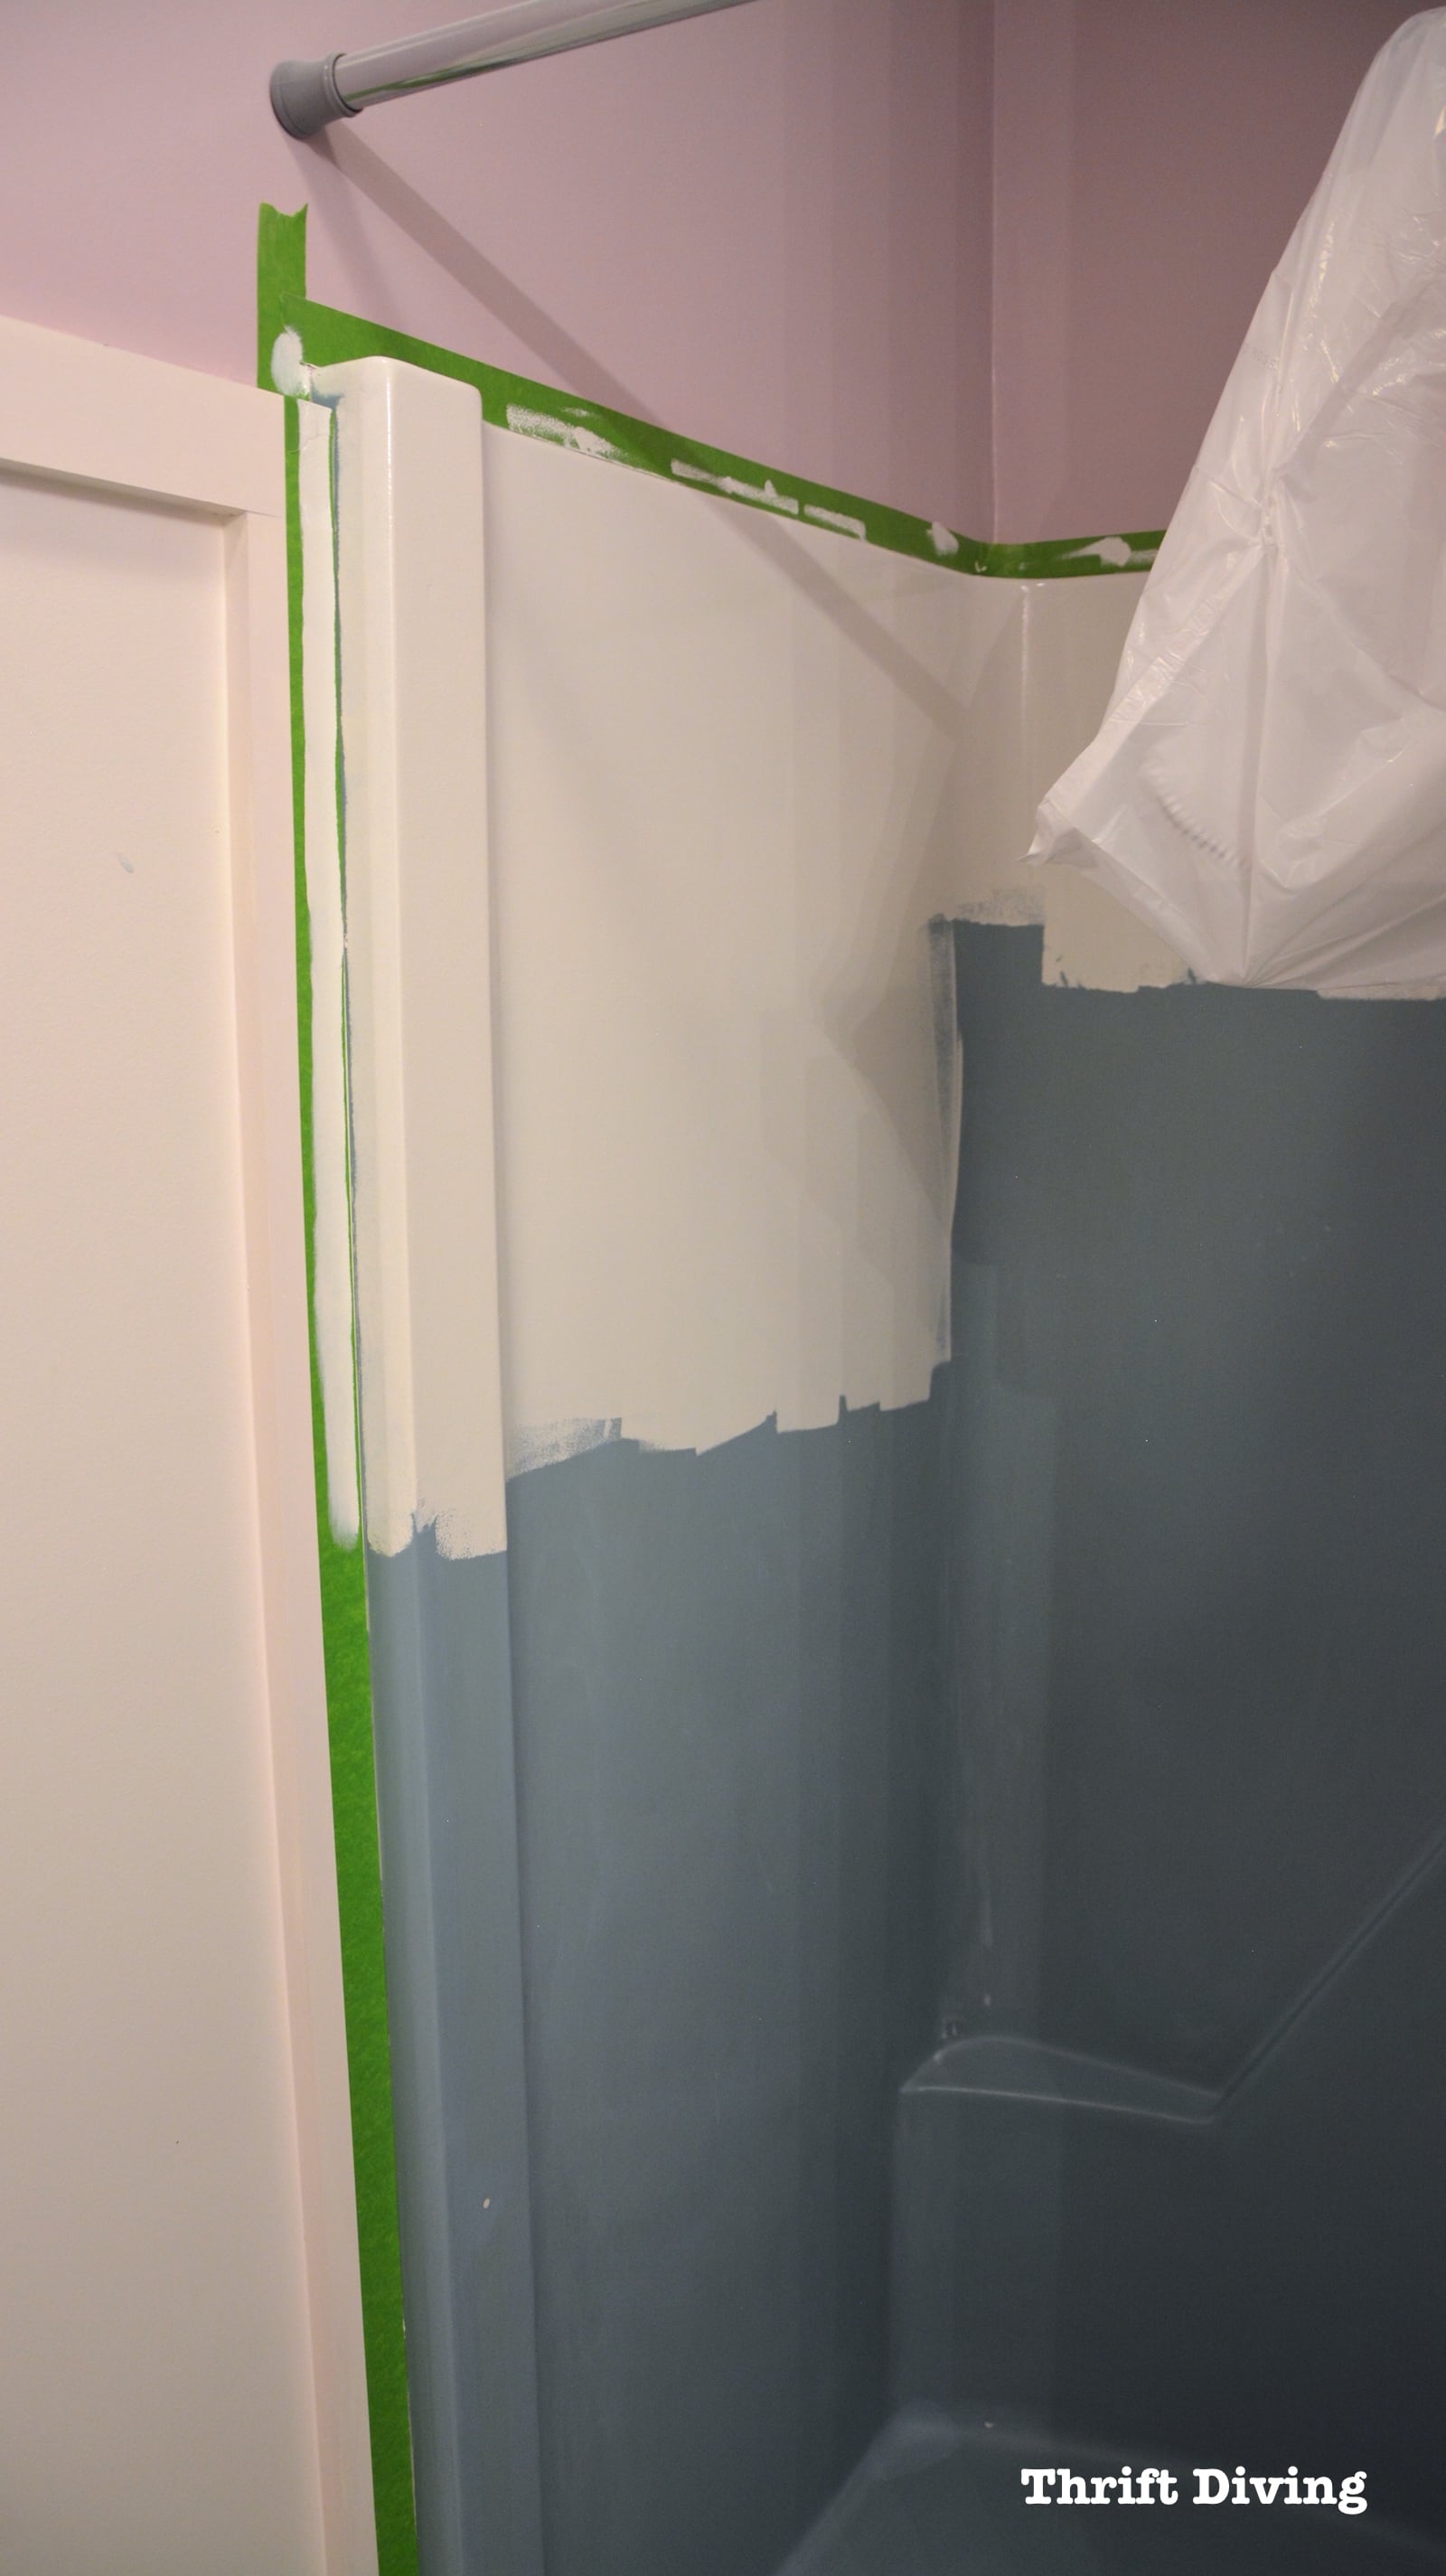
STEP 9: Roll on Two Coats of Paint
You want to make sure that the roller (which comes with the kit) is well-coated when rolling it on.
Just be sure you don’t add too much, otherwise, you’ll get drips, like I did in some places.
They’re not too noticeable but probably could have been prevented if I hadn’t loaded up the brush quite so full.
Here is another tip:
The folks at BathWorks instructed me to work from left to right, and then move down.
As you can see here, I started at the top and tried to work horizontally.
Each section, I tried to slightly work back into that section, overlapping the previous section.
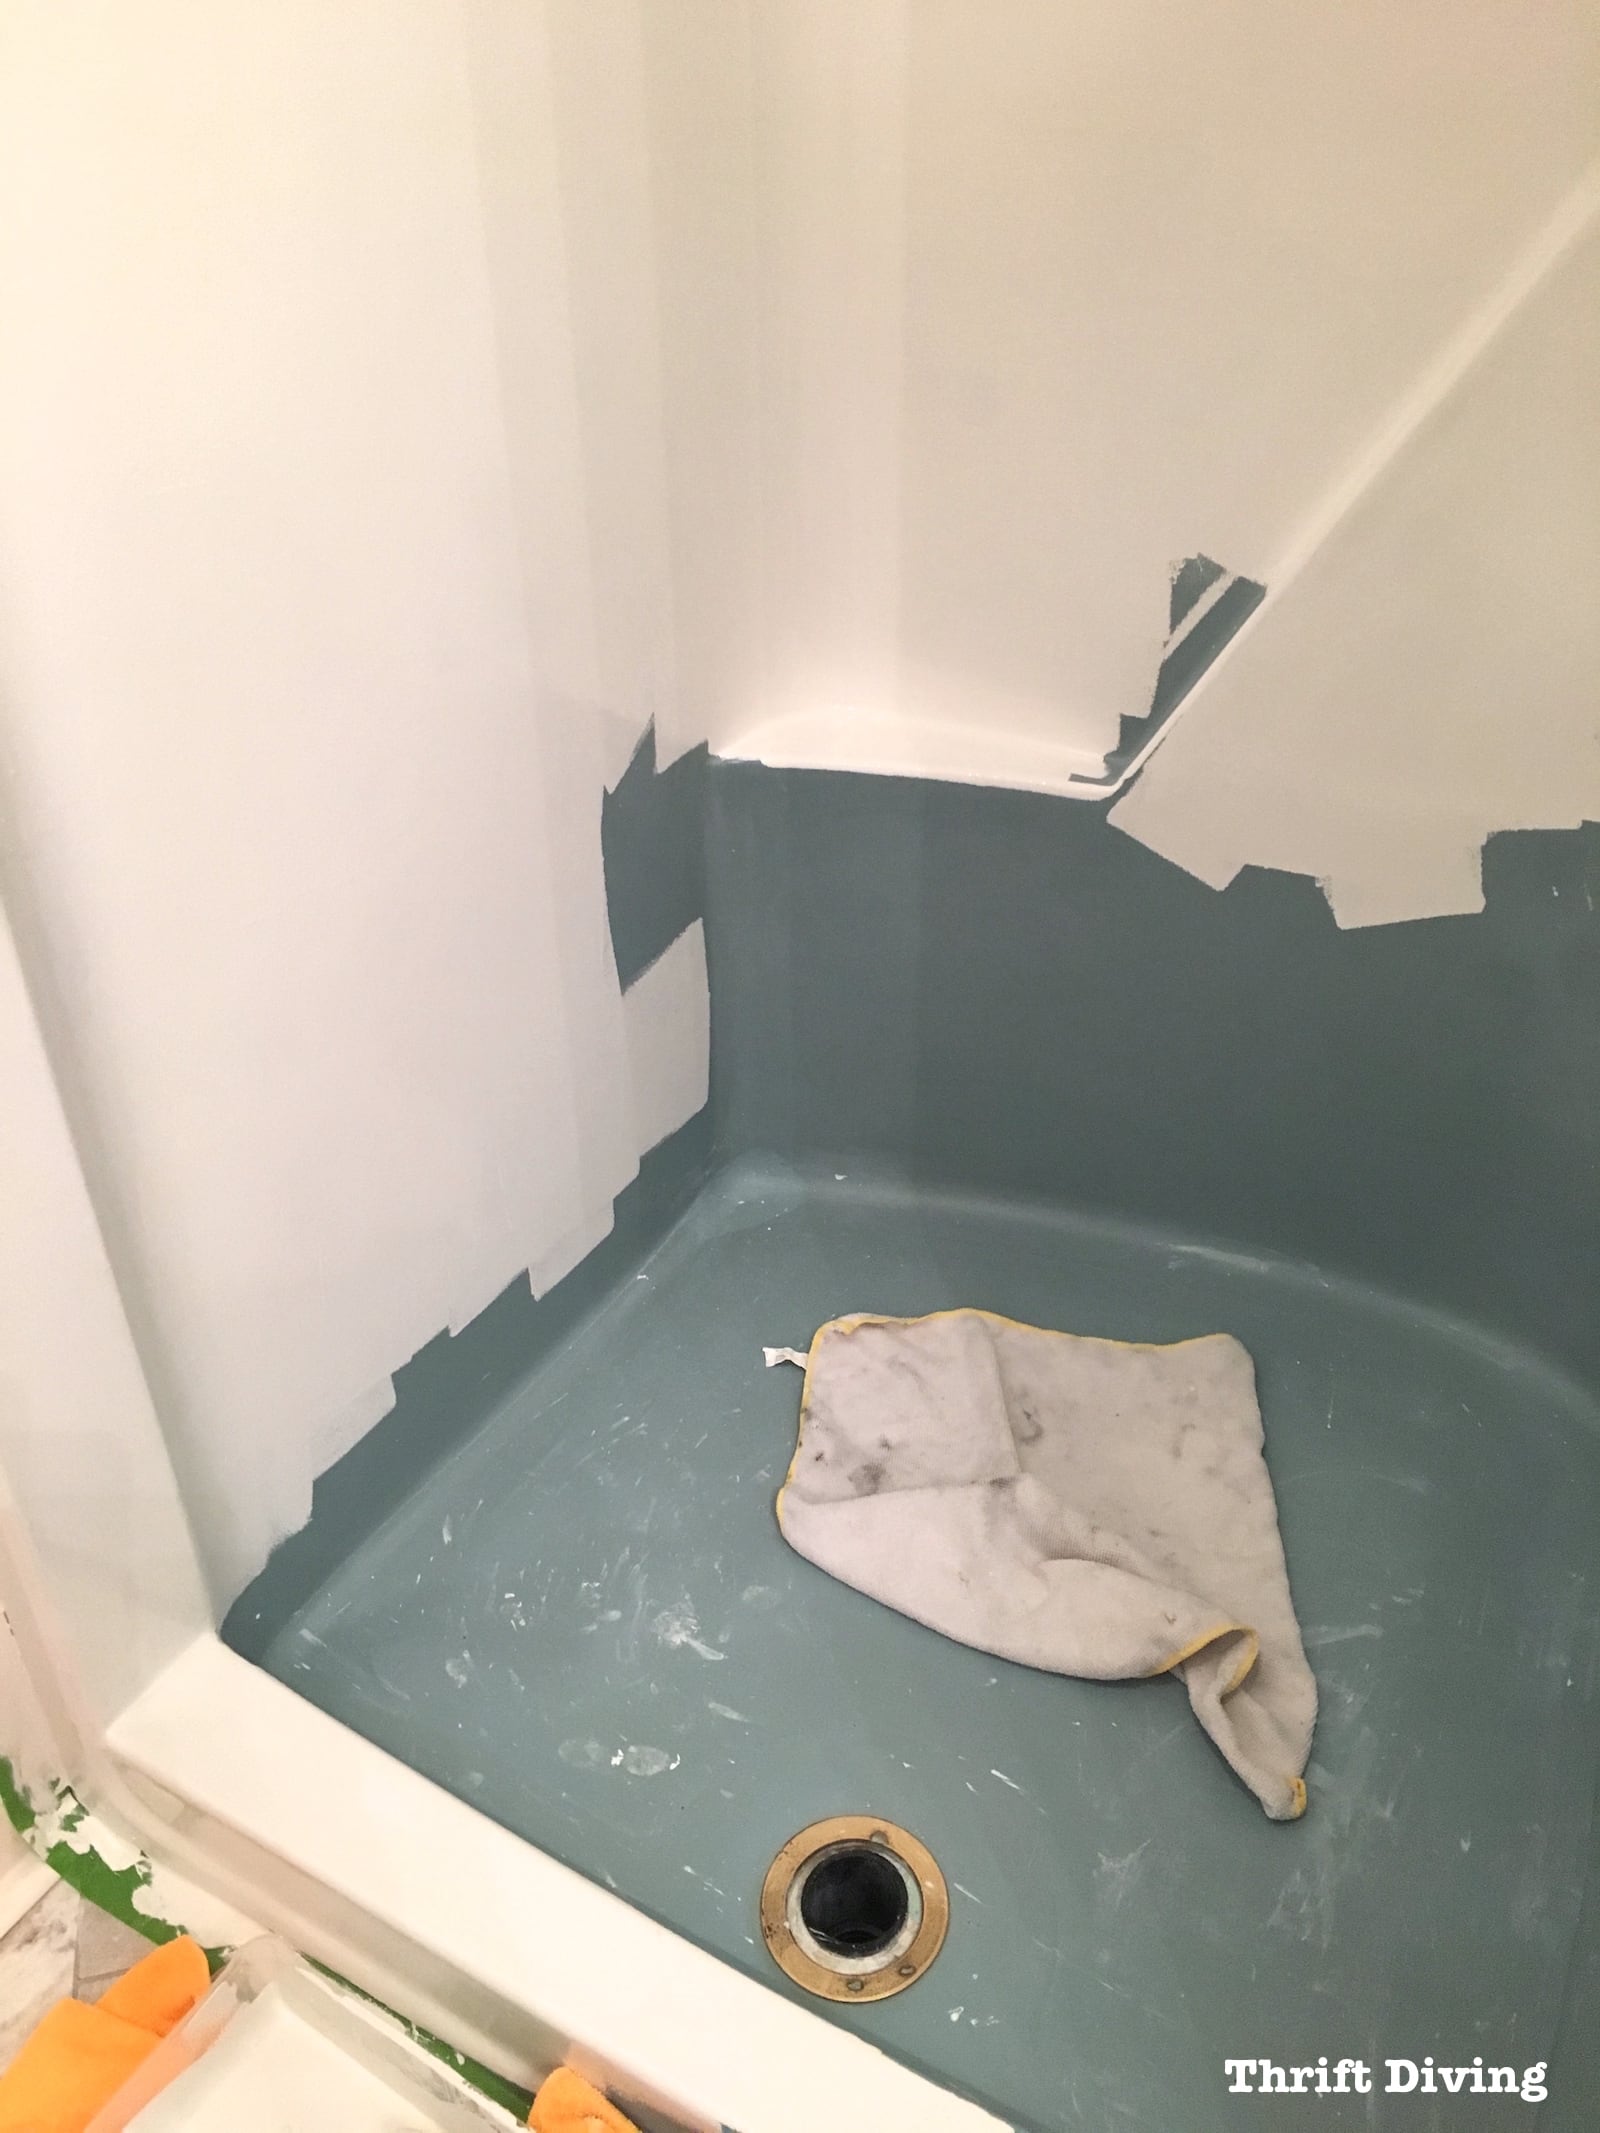
Around curved parts, I turned my roller sideways to accommodate the curve.
I did find that if I didn’t work quickly enough, the area above that was just painted would dry too quickly and I had some overlapping marks.
Nothing that was a serious problem and is only really noticeable when the light hits the shower in a certain way.
Otherwise, the finish was smooth and effortless!

I didn’t have any super intricate angles or parts to my shower, but if I did, they had sent me this aerosol sprayer that would have allowed me to load some of the paint into it and spray the paint in areas where the roller may not have reached very well.
I didn’t need it, but it’s good to order this sprayer, as well, if you have those types of curves or hard to reach areas in your shower or tub.
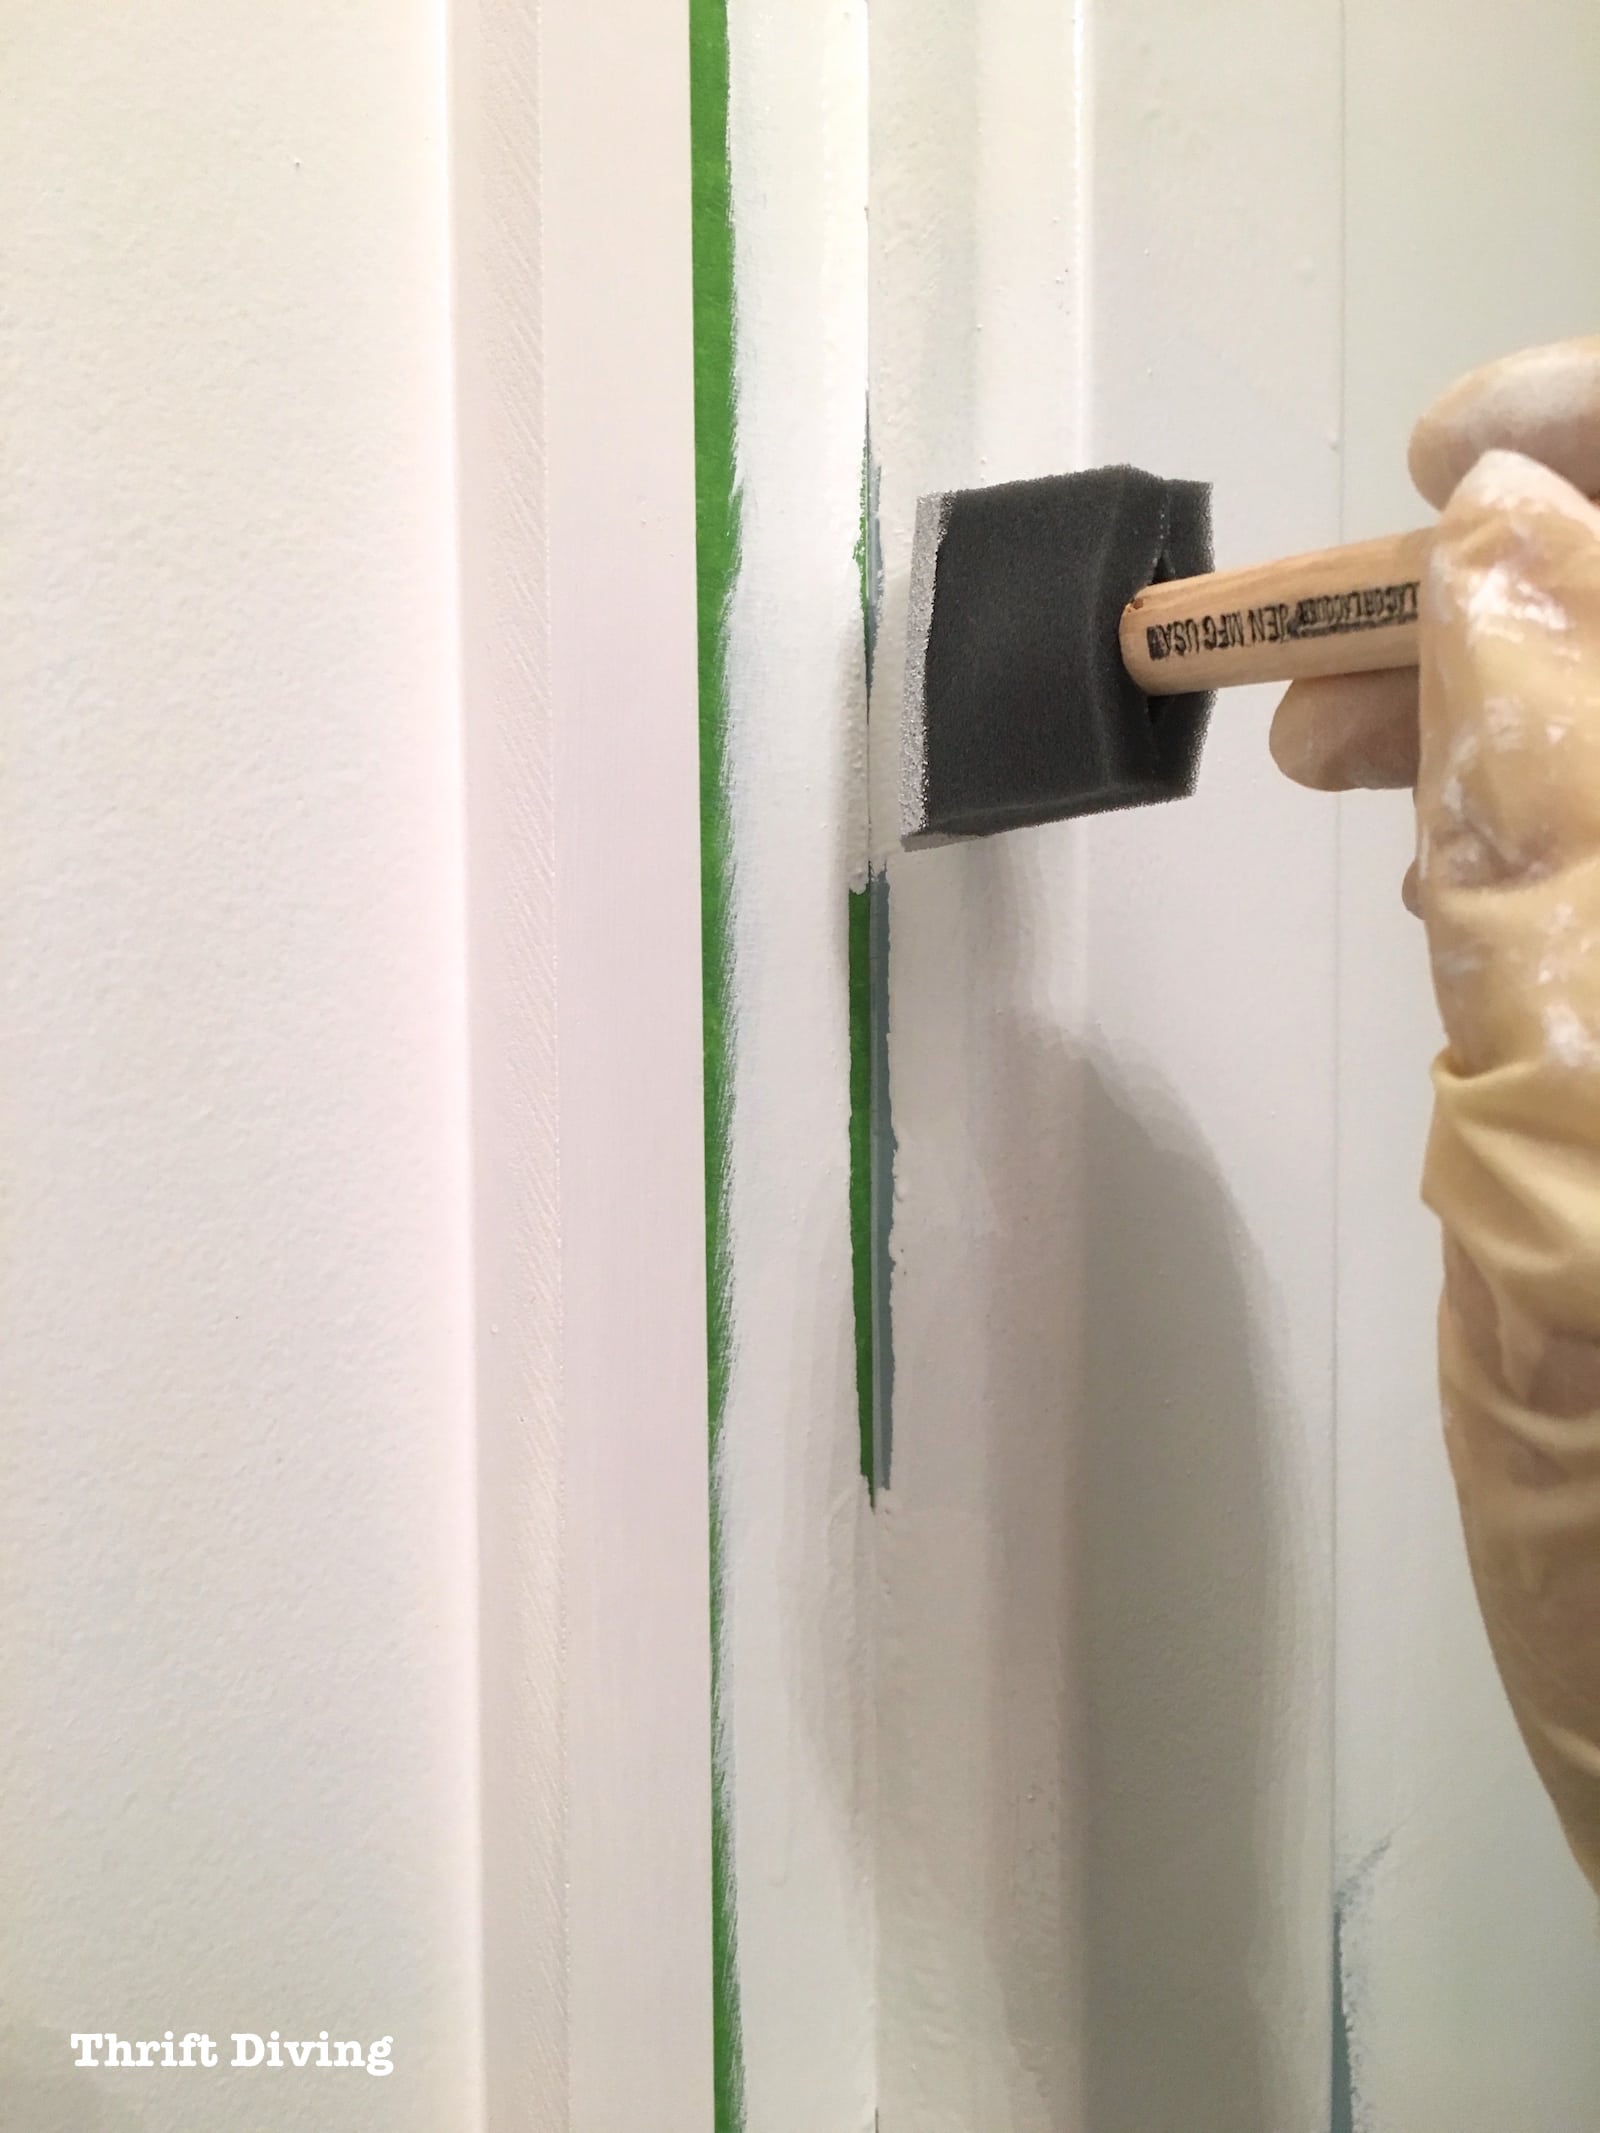
If there are any small areas that need coverage, like near the floor or in cracks and corners, use a small brush.
I used the small sponge brush along the edge, as well.
STEP 10: Add the Non-Skid Coating to the Bottom
Some of the kits can be purchased with the non-skid additive that is added to a little bit of paint and then rolled onto the floor of the shower or tub.
When it dries, it leaves a gritty texture that helps your feet gain some traction in what could be an otherwise very super slippery shower or tub!

STEP 11: Let It Dry 24-48 Hours
Finally, after two coats, it’s done!!
You’ll want to let it thoroughly dry.
You can remove the tape after 45 minutes.
New caulking can be added after a day.

How Much Did It Cost?
Well, since BathWorks sent two kits at no charge, it didn’t cost me anything, which is great. But if you could see how much time it took me to do the project, create this post, and create and edit the video, I earned my keep. HA!
If you buy the kit from Bath-Works directly, it would cost you about:
- Bathtub Refinishing Kit – $92
- Chip repair kit – $39
If you order it from Amazon, it looks like it’s a little more expensive and I don’t think Amazon sells the chip repair kit if you need to fill any holes or chips prior to painting:
- Bathtub Refinishing Kit via Amazon – $113
Regardless of where you order it, spending just over $100 versus $6,000 for a new shower is no-brainer!
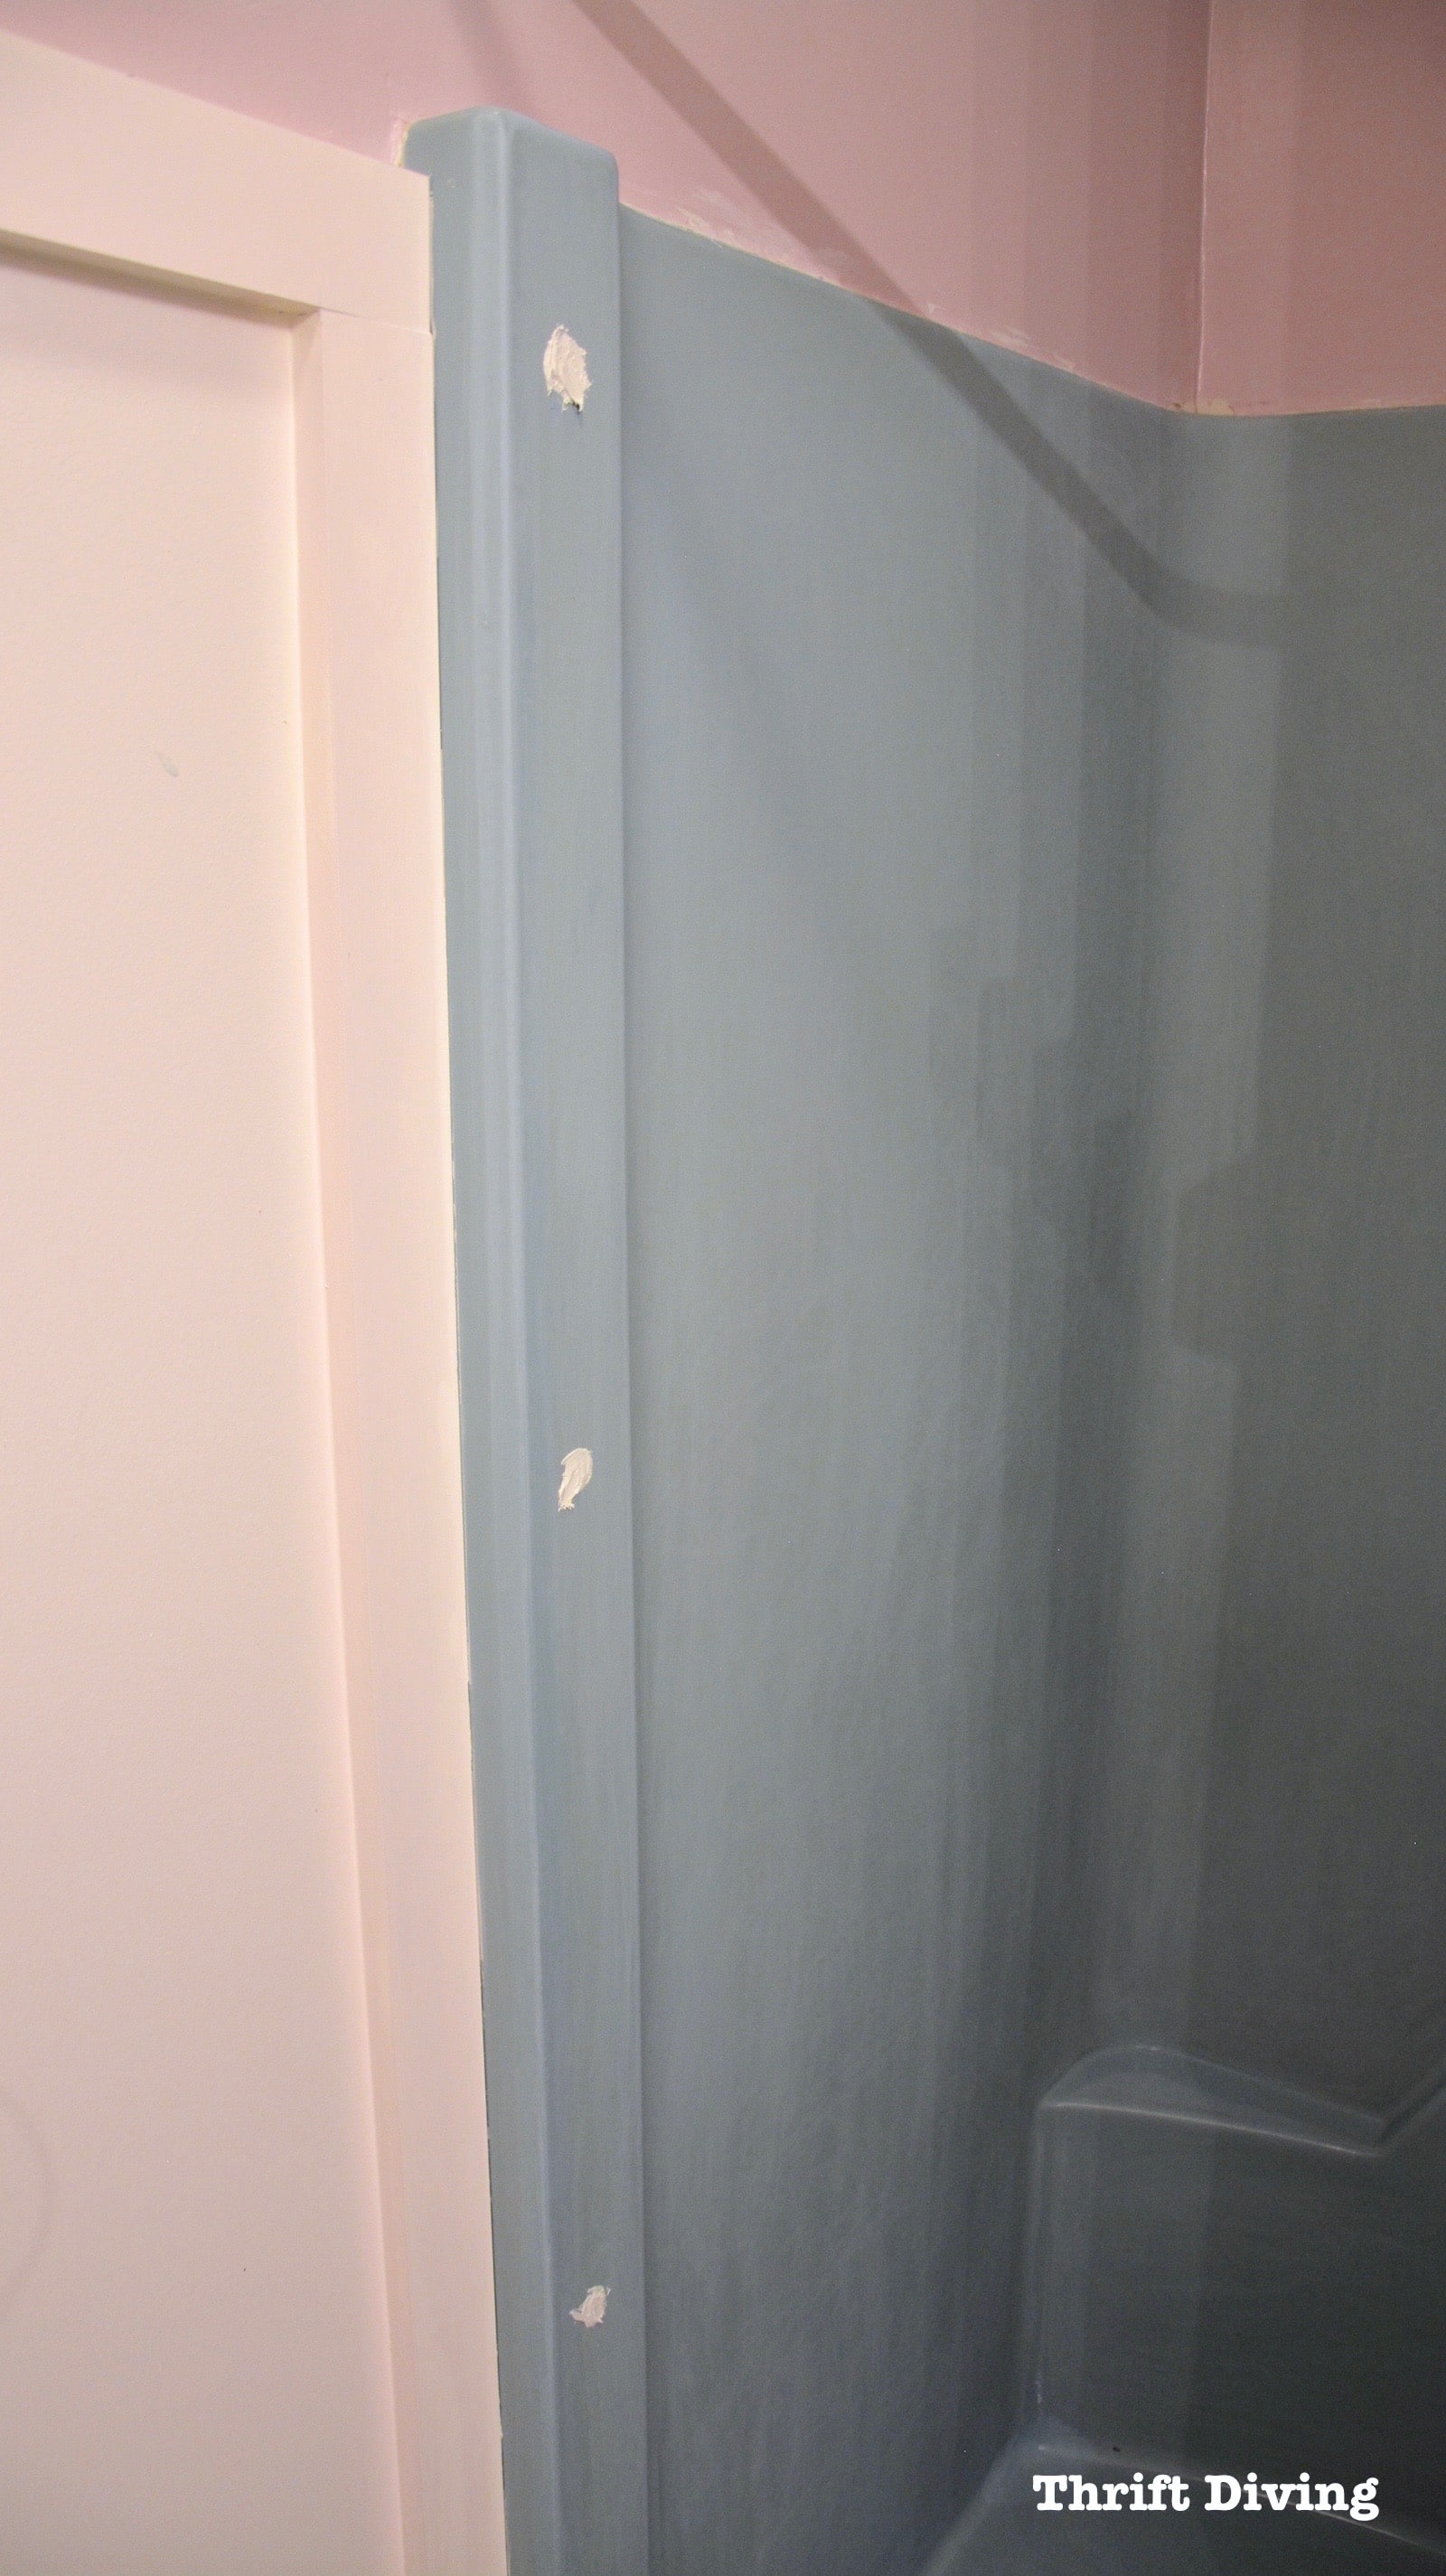
What If You Make a Mistake?
Oh, I did make a big mistake! 🙂
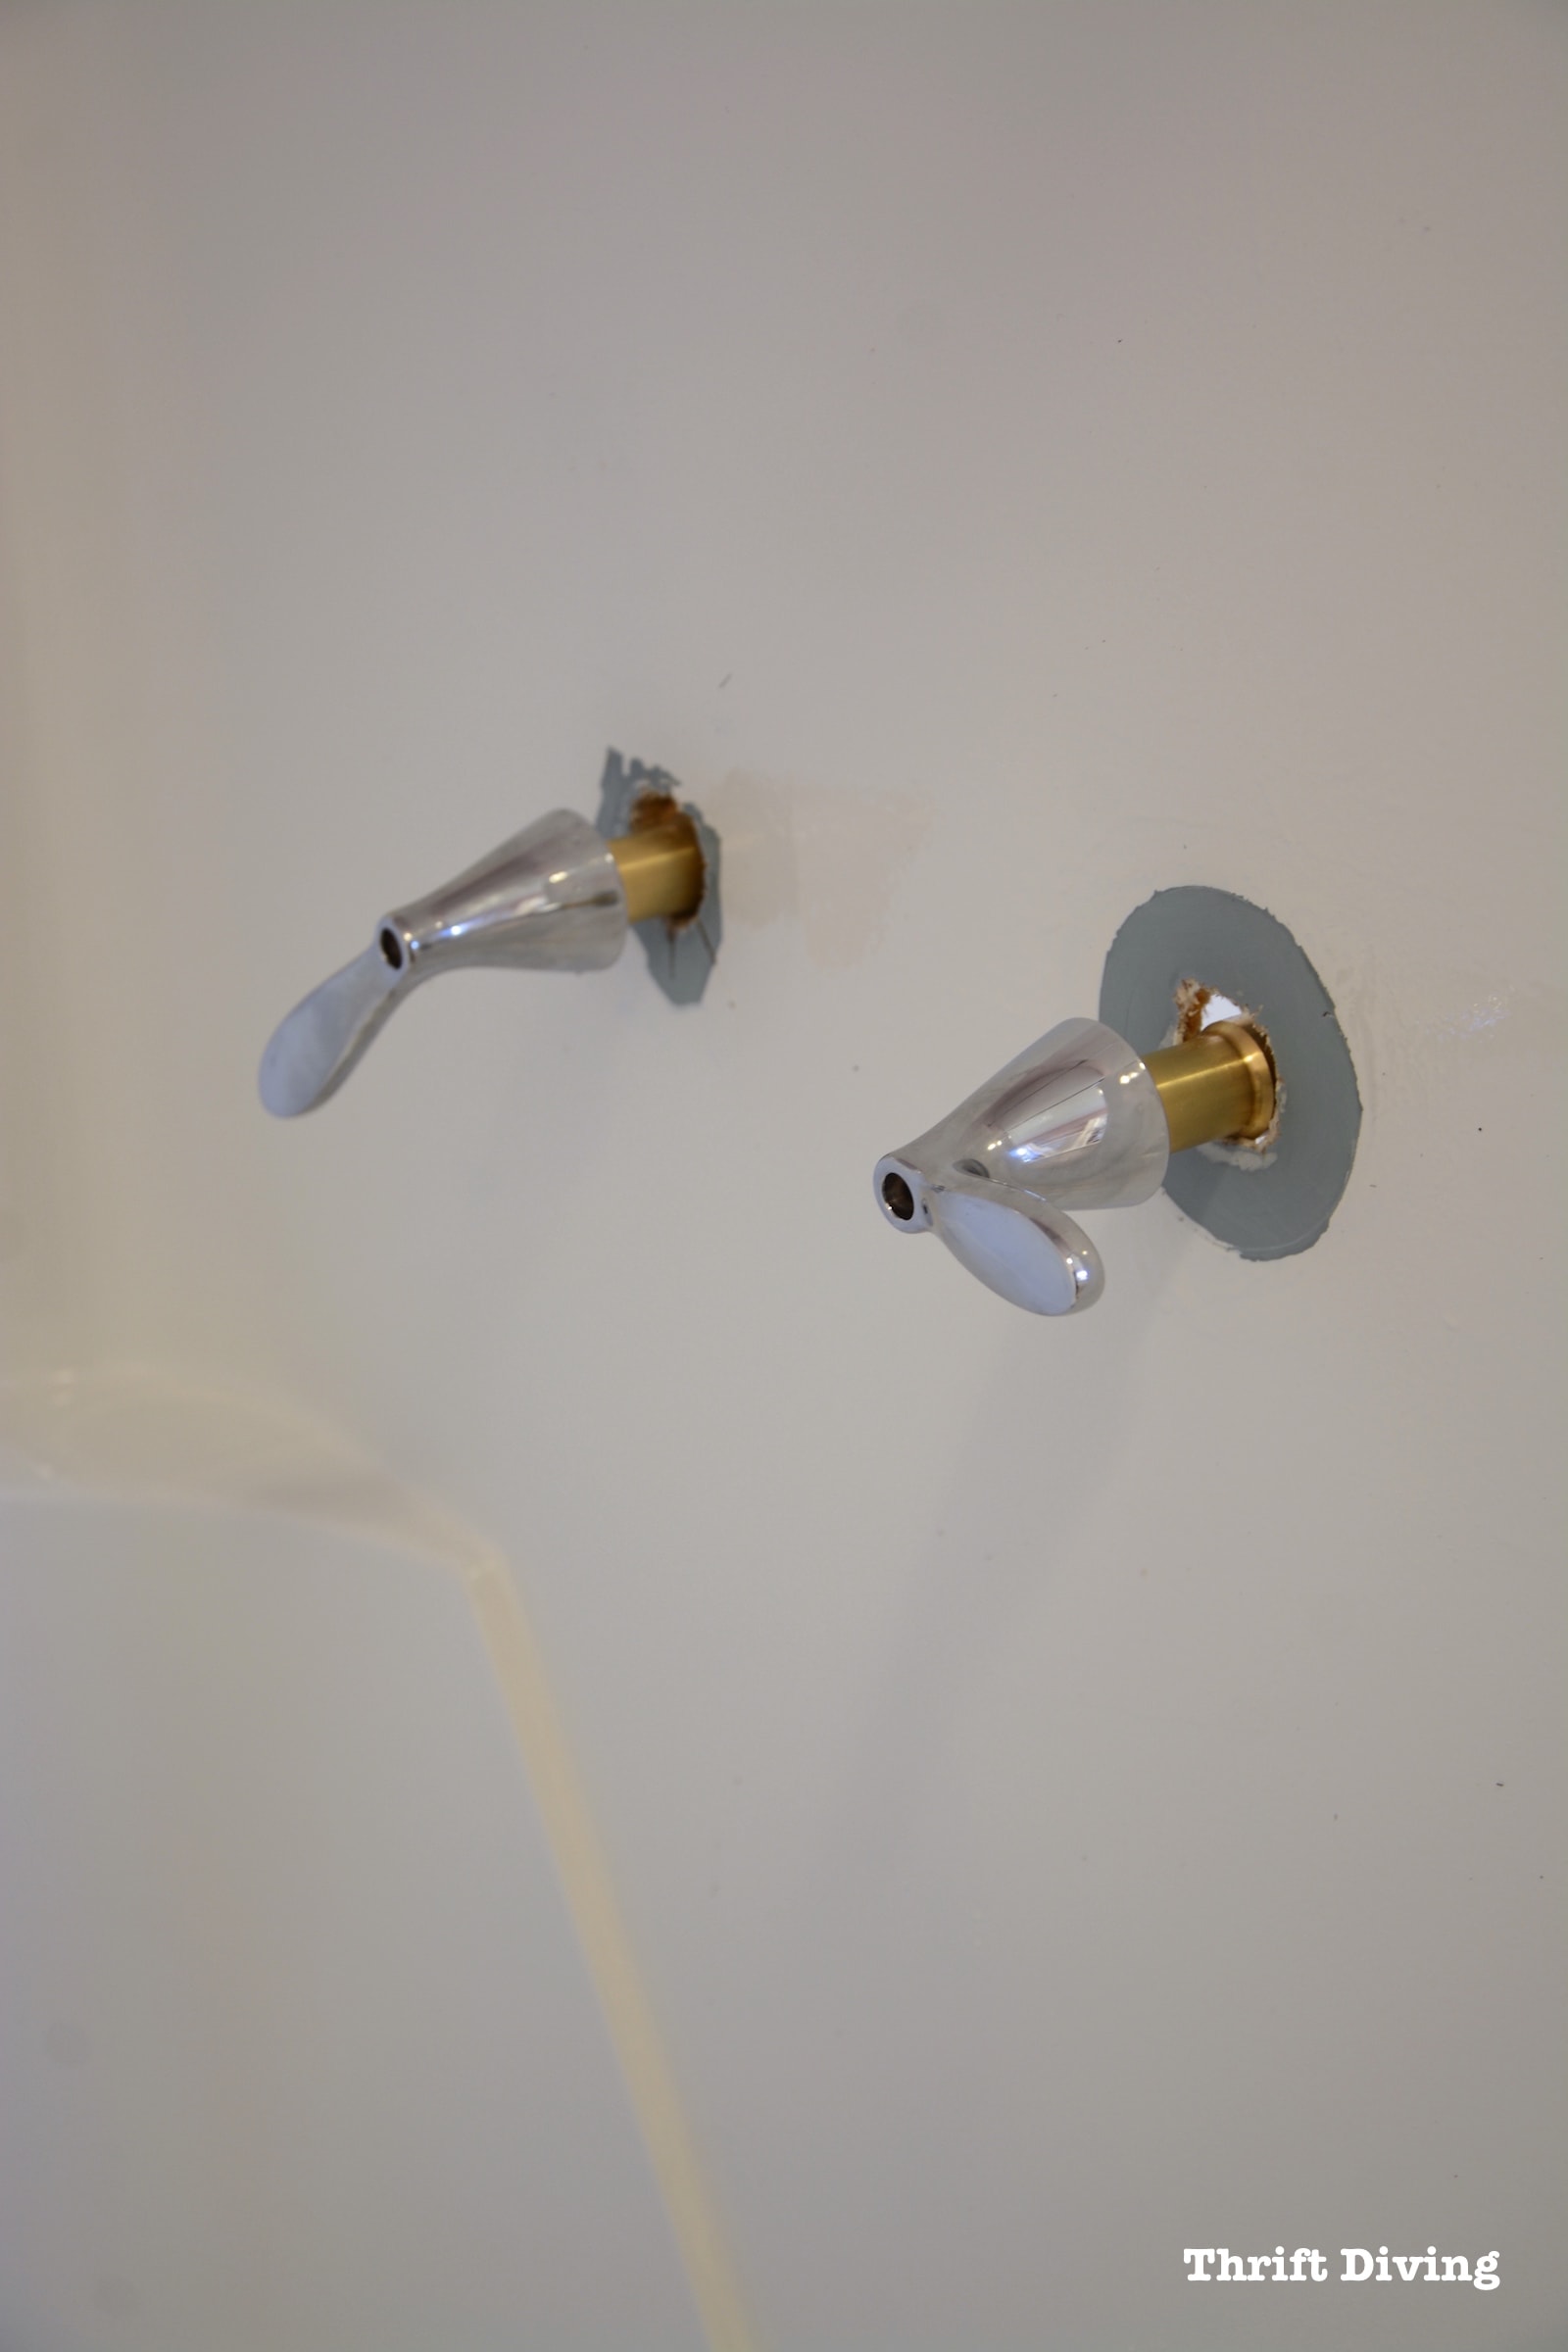
I stupidly didn’t remove the faucet handles because I knew that I was going to be changing them. I figured I could just paint around them since I would be later removing them anyhow…
But I didn’t realize was that the replacement handles would be a different size.
Therefore, I was left with ugly turquoise green circles around the new faucets.
So don’t be stupid and lazy like me. 🙂
Be sure to remove all of your faucets so that you’re not trying to paint around them. It will be a cleaner finish.
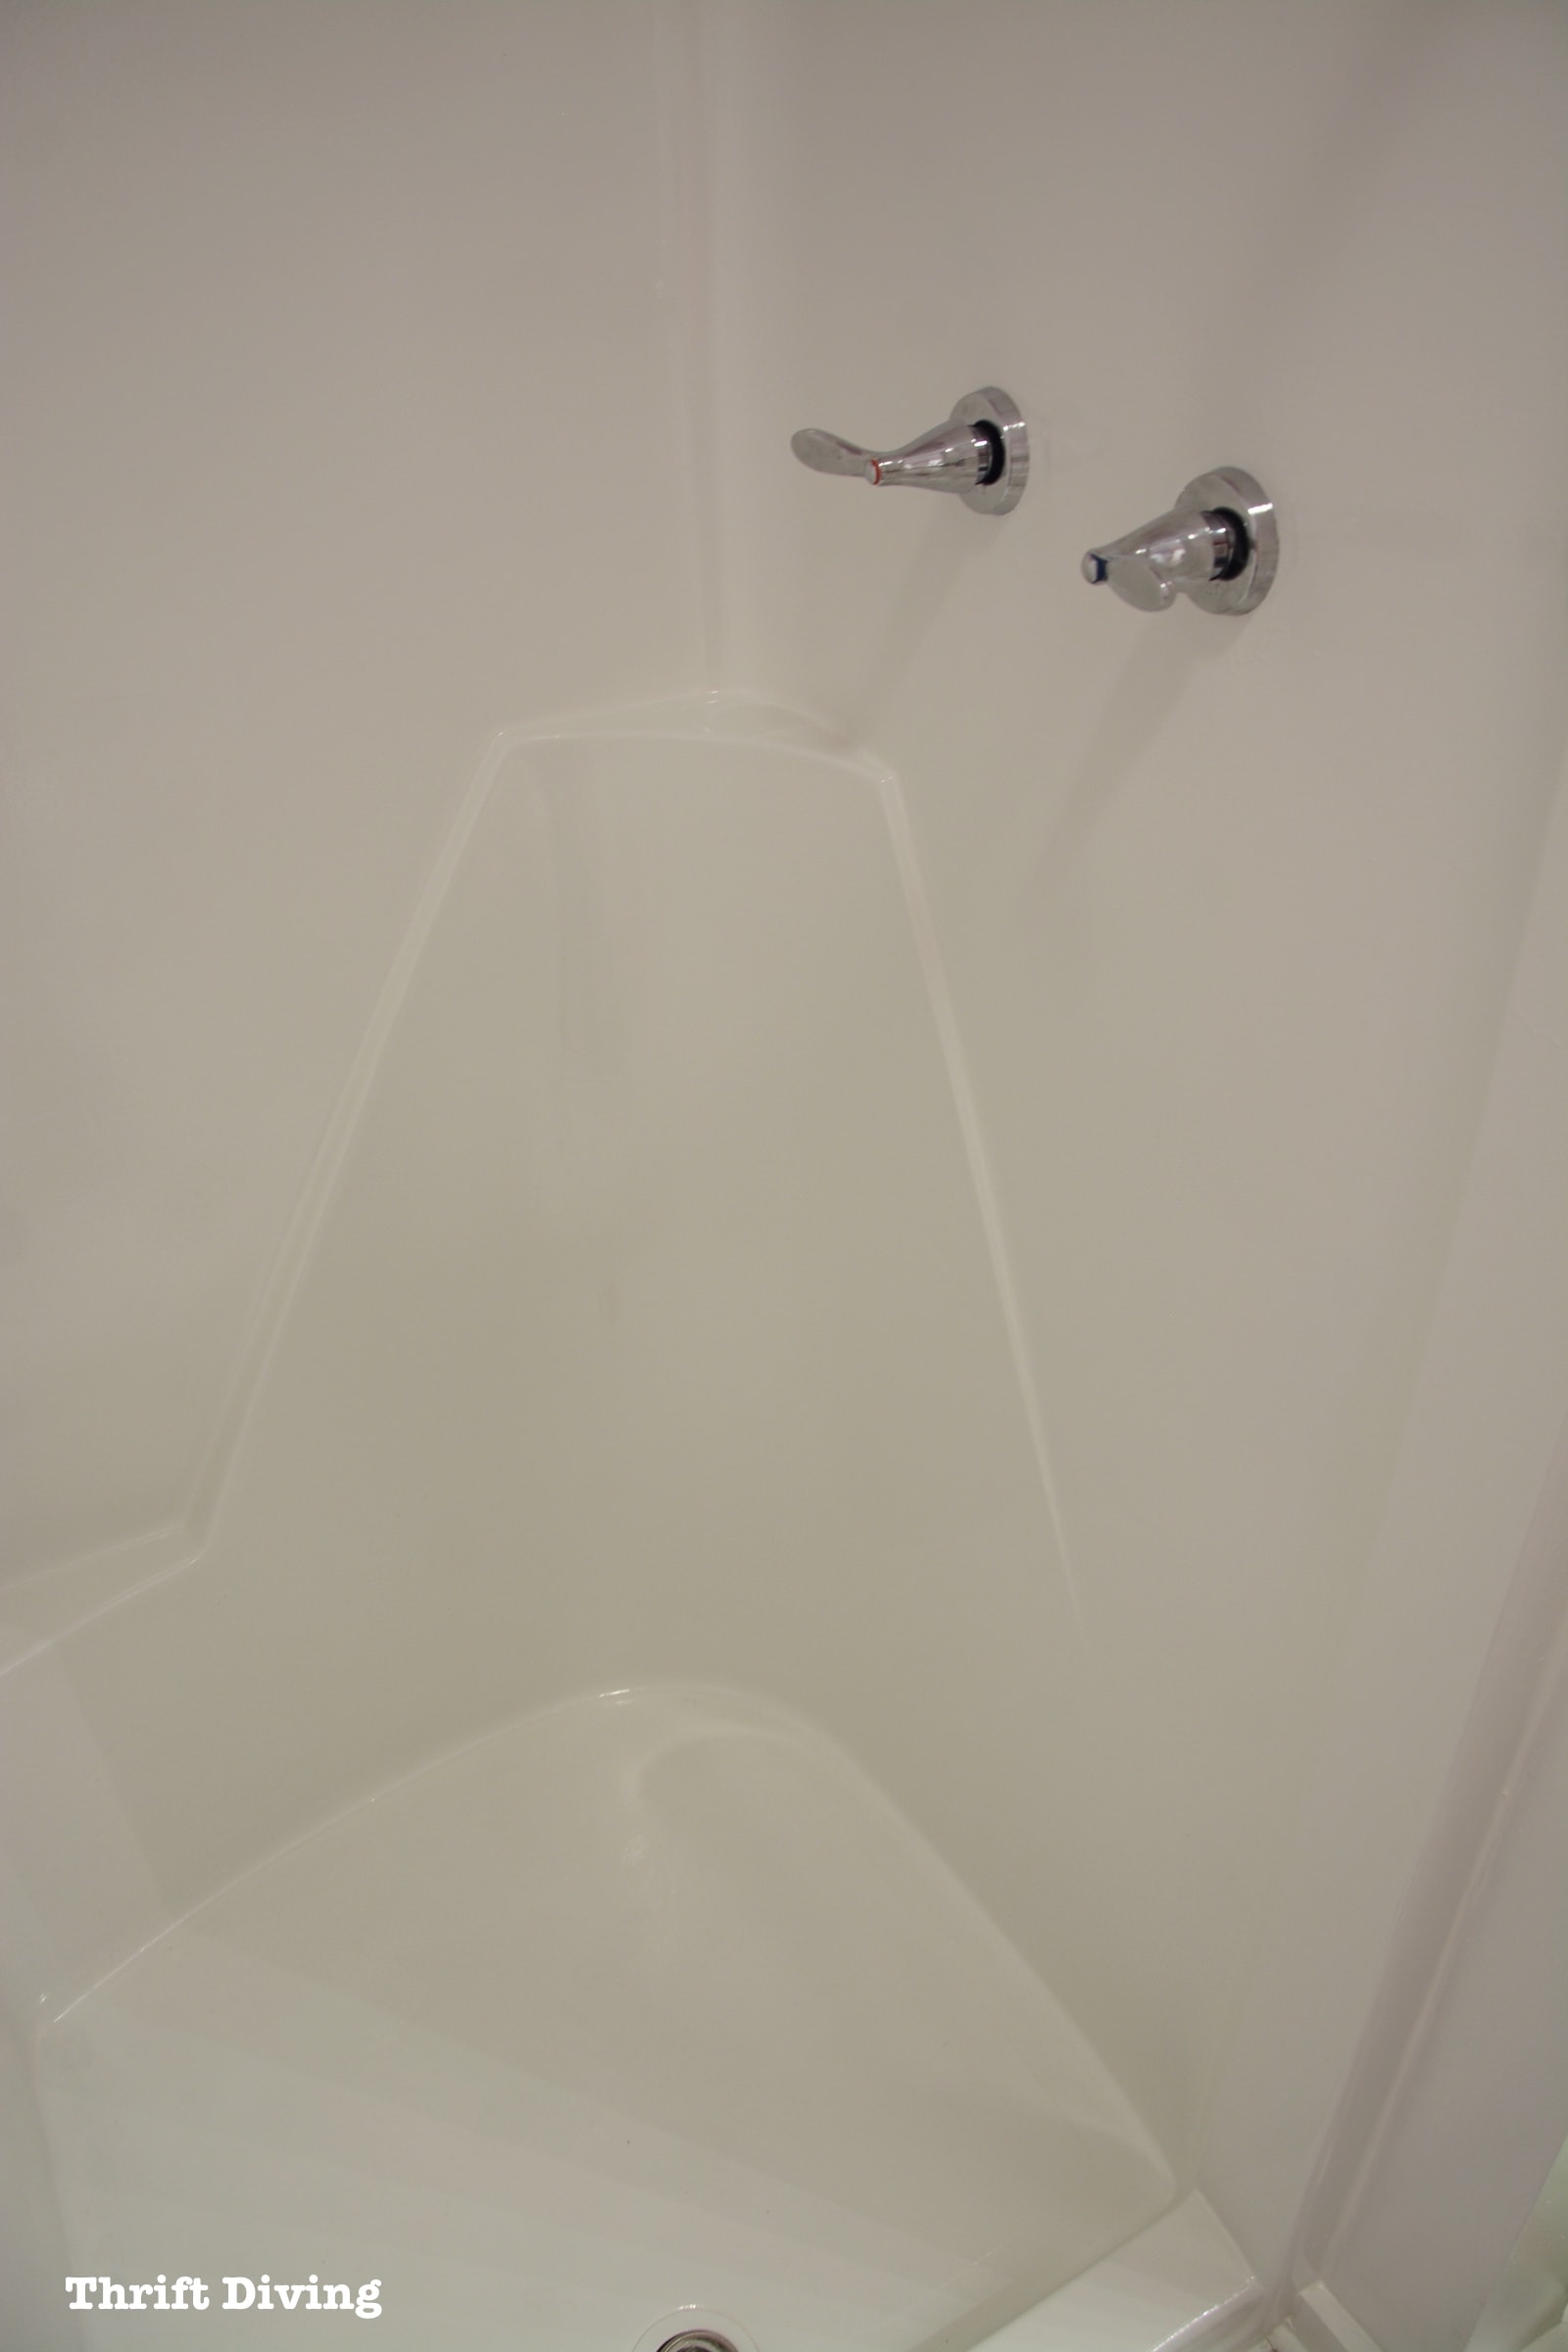
If things do go wrong, including any chips or imperfections that might happen that need touched up, BathWorks makes a touch-up repair kit.
Thankfully, the touch-up kit was just what I needed to finish off the faucet area.
So How Do You Clean It?
Good question.
Bath-Works recommends any non-abrasive cleaner, such as Scrubbing Bubbles, Fantastic, or Liquid Ajax.
Guess I better go stock up on some of those cleaners!
One More Look
I really can’t get over how much more clean and fresh the shower looks now!
Since moving here, every day we showered here, we were reminded that the house is old and outdated.
Not everyone can afford to pay $6,000 to rip out a shower and replace it with fancy metro tiles or some other amazing tile.
Thankfully, there are solutions for budget-conscious people like us so that we can have a nice house, too.
It just takes a little bit of elbow grease and some paint to make it happen. 😉
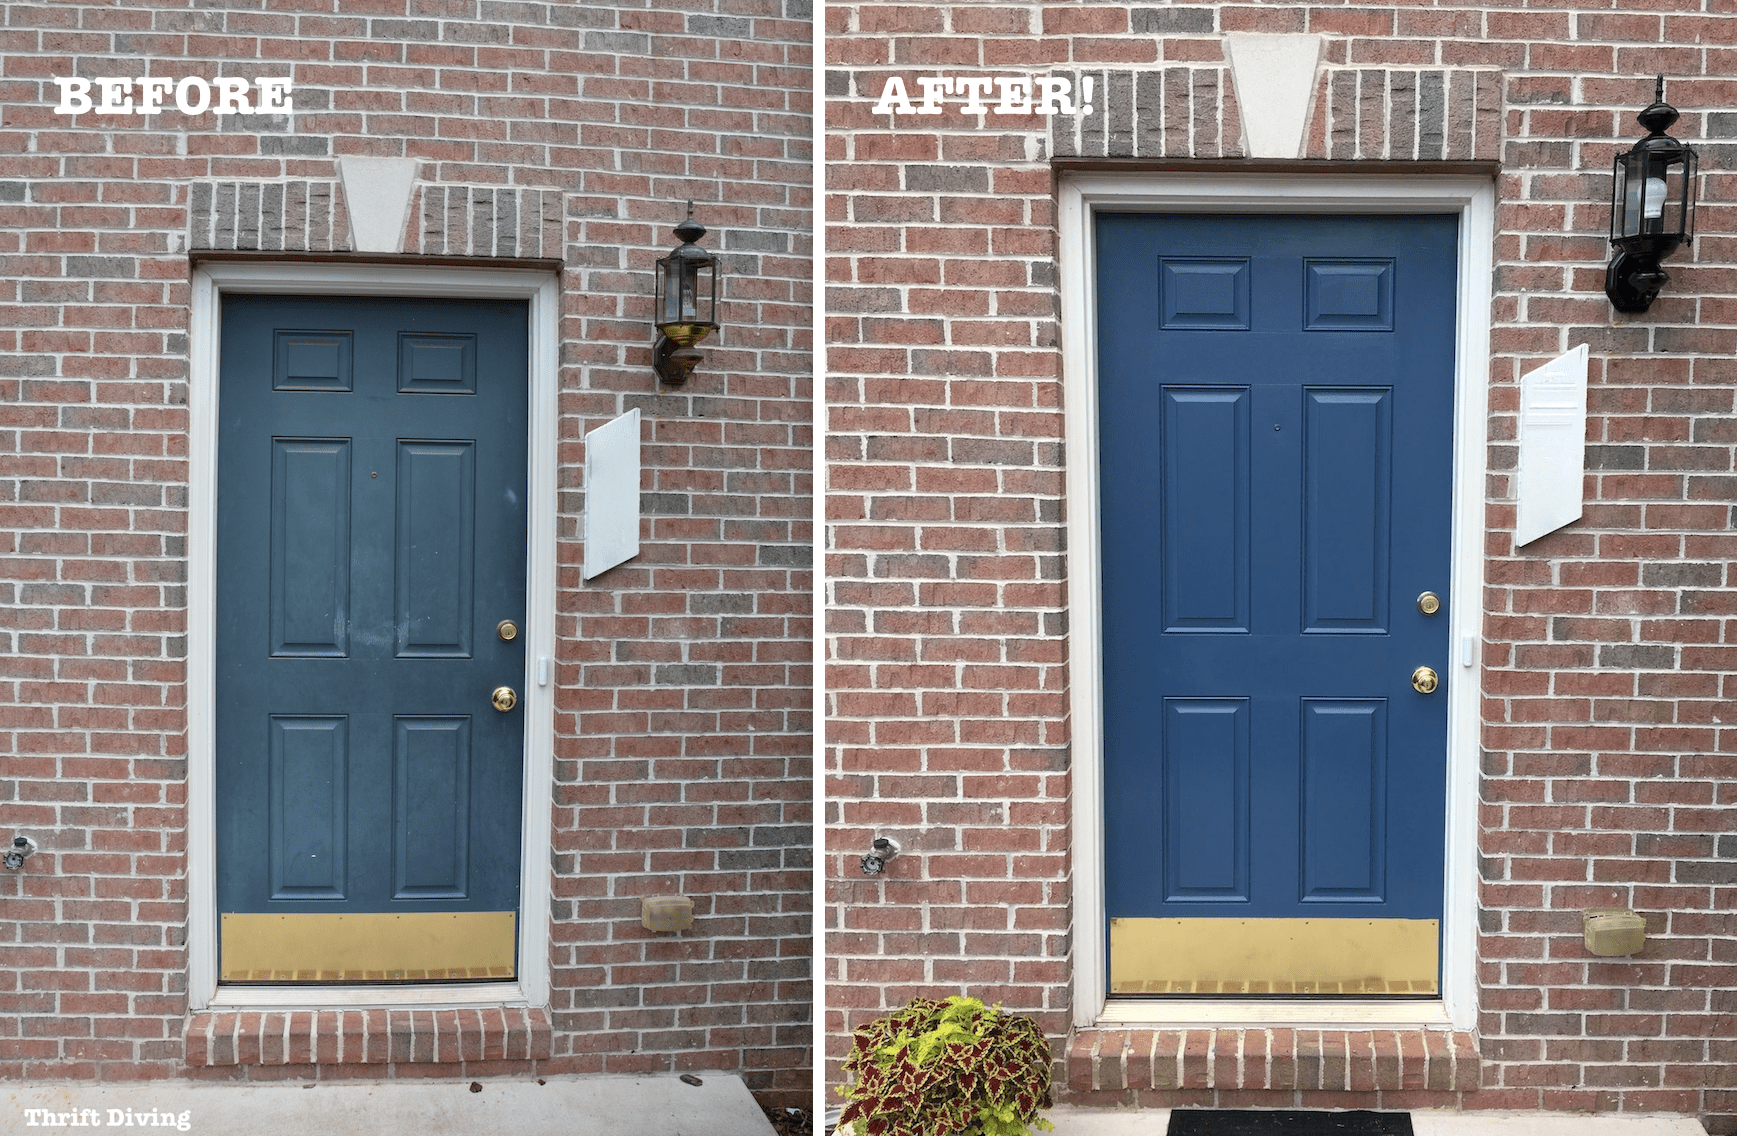
BEFORE
AFTER!

BEFORE
AFTER!
Big thanks to the folks at Bath-Works.net for allowing me to test out their awesome Bathtub Refinishing Kit!
Here are my final thoughts.
The Pros
- Cost-effective. For waaaaay less than ripping it out, you now have a fresh shower or tub in either white or almond. You don’t have to live with a horrible colored shower or tub anymore!
- Dries quickly. This can be done in a single day, usually about 2-4 hours, and it fully dries in 24 hours. So you won’t have to be displaced from your bathroom for too long.
- Instant facelift. If your shower or tub is in good condition, but just a bad color, you can instantly give your bathroom a facelift just be painting it!
- Lasting results. This is the exact same formula and kit that the professionals with BathWorks use for their clients, so I feel comfortable using the same thing in my home, knowing the results will last.
The Cons
- Lots of bending and sanding. If you’re an older person or someone with disabilities, this might be a challenge, because it does require a bit of bending and sanding.
- Your shower or tub won’t be fancy. It will still look like the same shower or tub, only cleaner and fresher! The metro tile will have to wait until you hit the lottery. 😉
- The smell is strong. This is true for most types of refinishing kits for DIY projects around the home. The smell takes about 24 hours to dissipate.
Clearly, the pros outweigh the cons. I think this is an excellent option for making your bathroom look great on a budget!
So Is BathWorks Right For Your Shower or Tub Refinishing Project?
Well, that’s up to you to decide. But for me and my bathroom, it was the perfect solution for what could have been a very expensive problem!
I’m 100% happy with the results and would do it again in a heartbeat!
In fact, my kids’ bathroom still has an avocado green shower. As soon as I get other projects done around the house, you can get I’ll be using this kit again for that bathroom! 🙂
Did You Find This Tutorial Helpful?
If so, then go ahead and SAVE IT for later!

Download the 5 freebies!

Thrift Diving inspires women to decorate, improve, and maintain their home themselves...using paint, power tools, and thrift stores! Use these 5 printables, checklists, and ebooks to get started!
Help I guess I can’t understand what you do after you mix Part A & B and let it sit.
What then? It doesn’t state to put in the Paint or I’m so Confused. I love your After and Did Did Amazing Work! I’m in a House Apartment and am trying to do Updates when I can afford. It’s not the Landlord’s responsibility because it’s just Cosmetic. I really plan on Staying her forever. He. Approves of any Colors I do and don’t need any Permission now. Because he Knows I’m Not going to paint it a BRIGHT Purple as he Said lol. Super Nice landlord and an Amazing Retal Price. Just Help me with my Question. I may have missed it!!
Hi Michelle! After you mix the paint color (PART A) and the hardener (PART B), you don’t have to let it sit. I just happened to sit it down and began cleaning up a few things. But at that point, you would then pour the mixed Part A and Part B concoction into the paint tray and get started with applying it. Sorry for any confusion! I think you’ll love the results for your apartment. 🙂
OMG!! We are moving back into our family home my father built in 1974, and I thought you were in our master bath shower! LOL We have the exact blue shower! Our 2nd bath is the Harvest Gold yellow! We also have the origional Maytag Harvest Gold dishwasher that actually still works! Thank you so much for sharing this product! I was dreading having to gut the bathrooms, and the price for it all. I also didn’t want to use the cheap paint stuff that peels. We are doing a total renovation on the home, including some electrical and foundation repairs. This is going to save us a bunch of money until we are able to complete updates on the bathrooms!! One question I do have is, would you have been able to put the door back on or replace it? Ours is silver, and I wondered if i could paint it a bronze or a mat black color and reinstall it. It has frosted plexi glass instead of real glass too. Thanks again! Susan
Hi Susan! So glad I was able to show you how to do this project! 🙂 I don’t know what it is about those 70’s home, but for some reason, they loved the powder blue and harvest gold (let’s not forget avocado green!). LOL. To answer your question, I likely could have put the door back on if I wanted to, but it was so old and ugly that I didn’t want to install it back on. I think it couldn’t hurt to try to paint yours and then reinstall it. I’m trying to think of what paint you could use on the door to make sure it doesn’t peel or chip. You might want to look into Heirloom Traditions Paint. They sell a de-glosser that you could use on the door frame that will “etch” it up a little so that it accepts the paint nicely. Good luck!!!
Hi!😀
I found you through Pinterest. You have a great blog…..very helpful info!
I, too, have a 70’s home. Wallpaper and tile in allll the bathrooms. I’m considering painting the tile in/around the bathtubs. Do you have any experience with that?
I’m thinking I can remove the wallpaper and tile everywhere else and put beadboard up to cover what’s left behind.😜
Hi Jennifer!
You can certainly paint the tile in the bathrooms with the Bath-Works product, for sure. Just follow all the same prep rules so that it works well! 🙂 Best of luck!
I don’t know when this blog was written, but I’d love to know how the shower has aged. Any chipping or peeling?
Hi Brea! The shower still looks great! It’s been about 5 years now and it’s not peeling. There were a couple chips around the drain that happened early on due to the metal shower drainer cover that chipped it. But it never spread and it was a small chip. Overall, it still looks great! I promise to do an updated video of it soon! Hope that helps!
Your video is inspiring. I have been dreading the process of removing the old shower/tub unit. Thanks for the solution to my problem.
Looks great
So glad you found it helpful!! 🙂
You really did a nice job. The shower looks great and so does the entire bathroom. Did you end up using one box or two to complete the shower with two coats?
Thank you, Rhonda! I apologize for the delay in responding. I used 2 boxes, but not the entire two boxes. I think I needed just a little bit of the second box. Hope that helps!