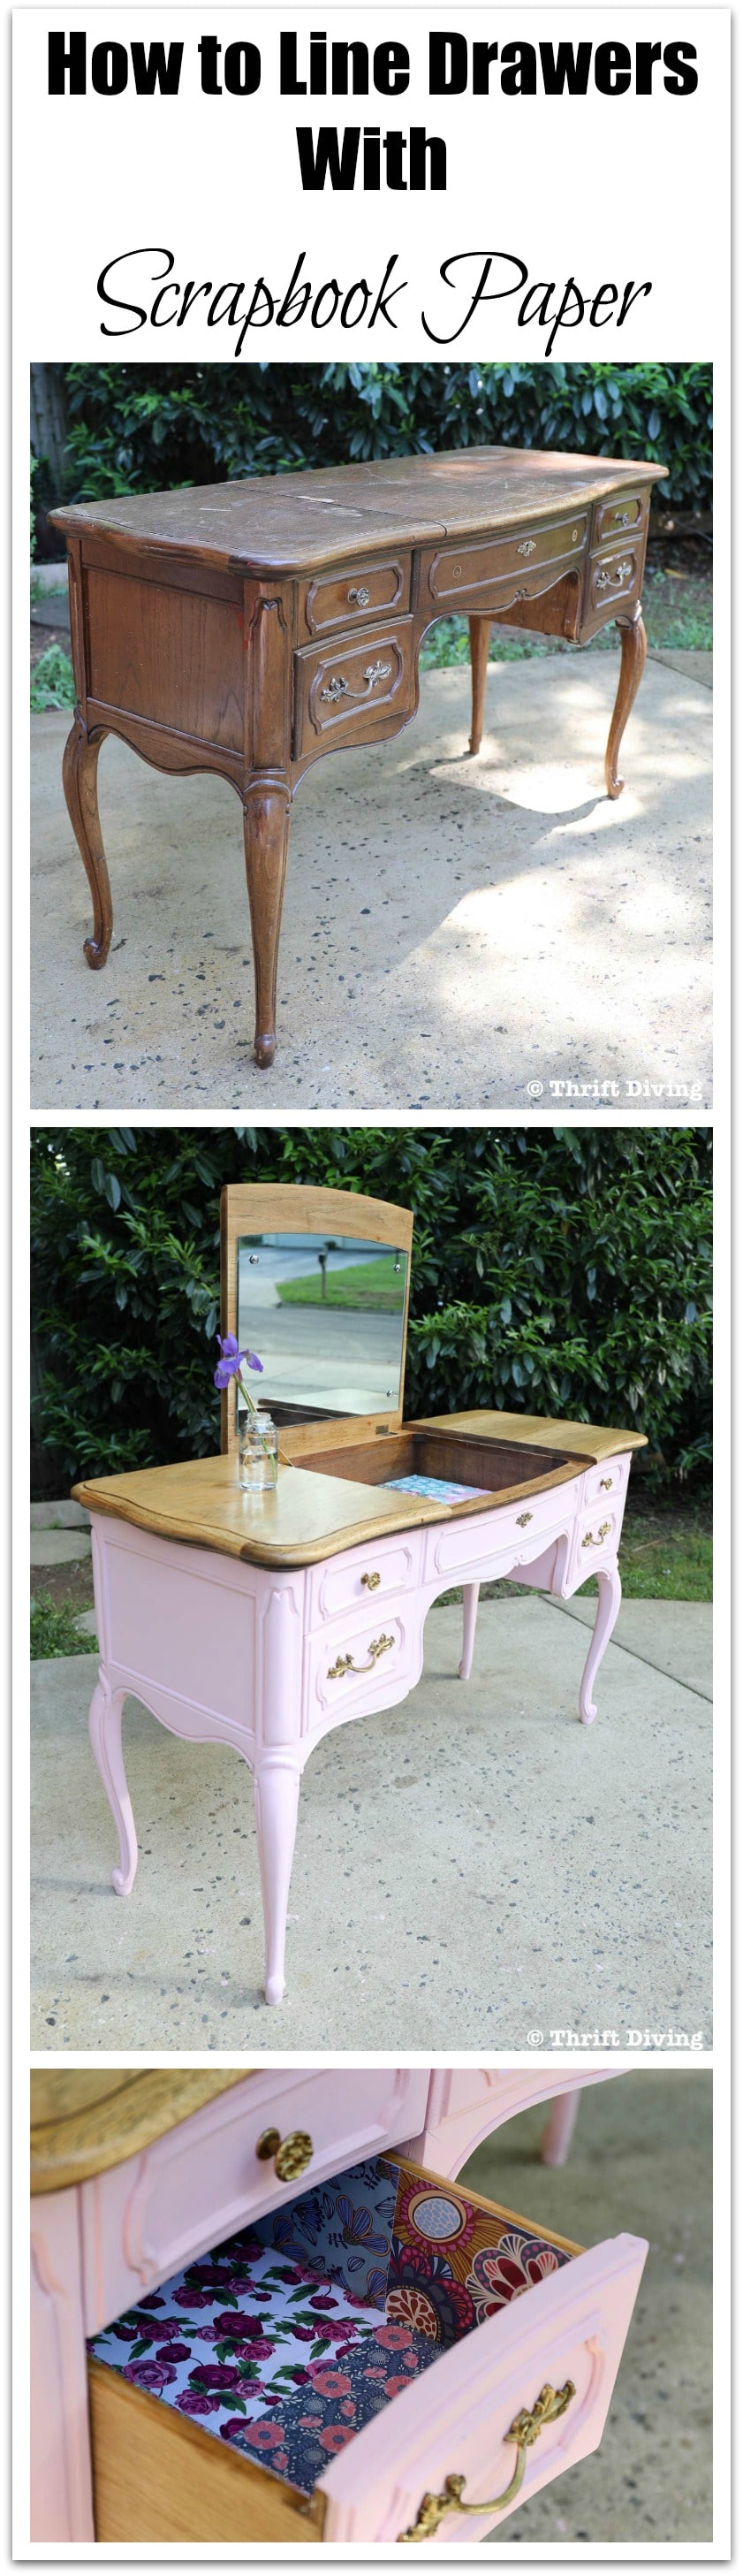
How to Line Drawers With Pretty Scrapbook Paper
This is a sponsored post written by me on behalf of A.C. Moore. All opinions are 100% mine.
I know….insanity, right??
I struggled with what I wanted to do to it because I have learned how to love wood, after building my DIY bathroom vanity from scratch and knowing how expensive wood can be!
So to paint this, seemed like it would have been a travesty.
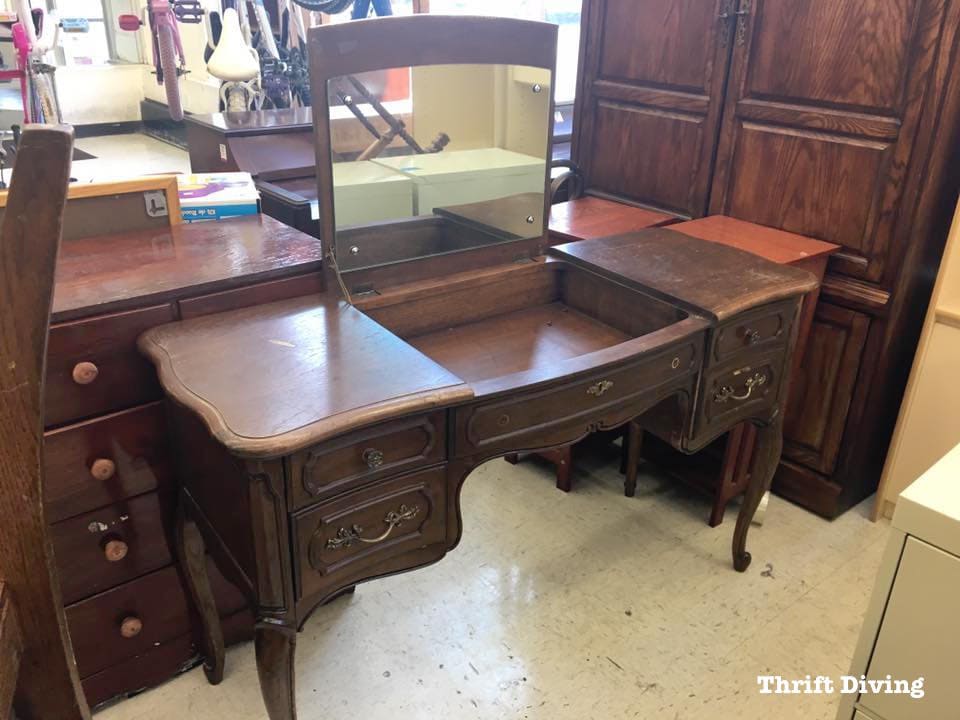
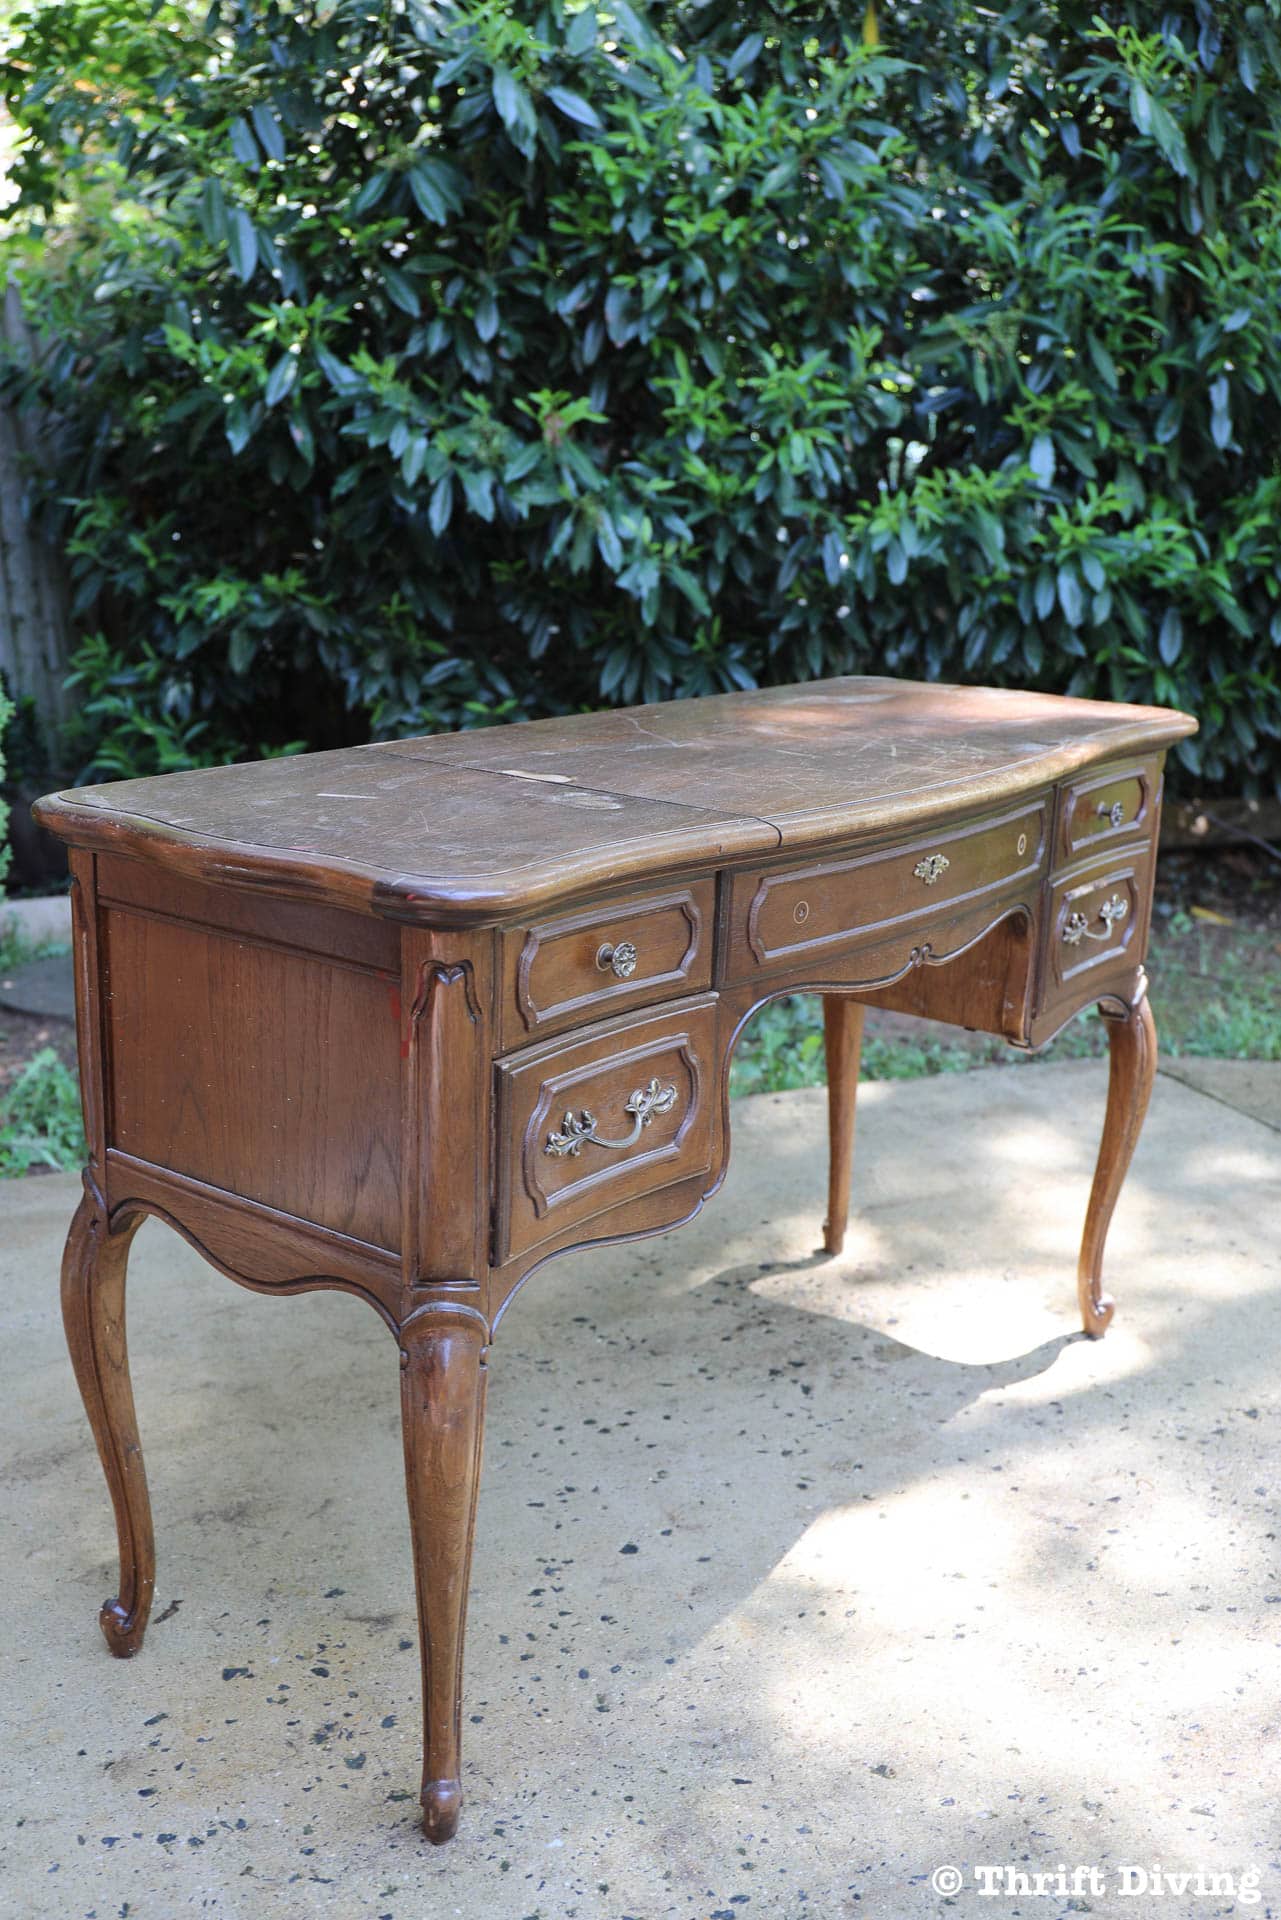
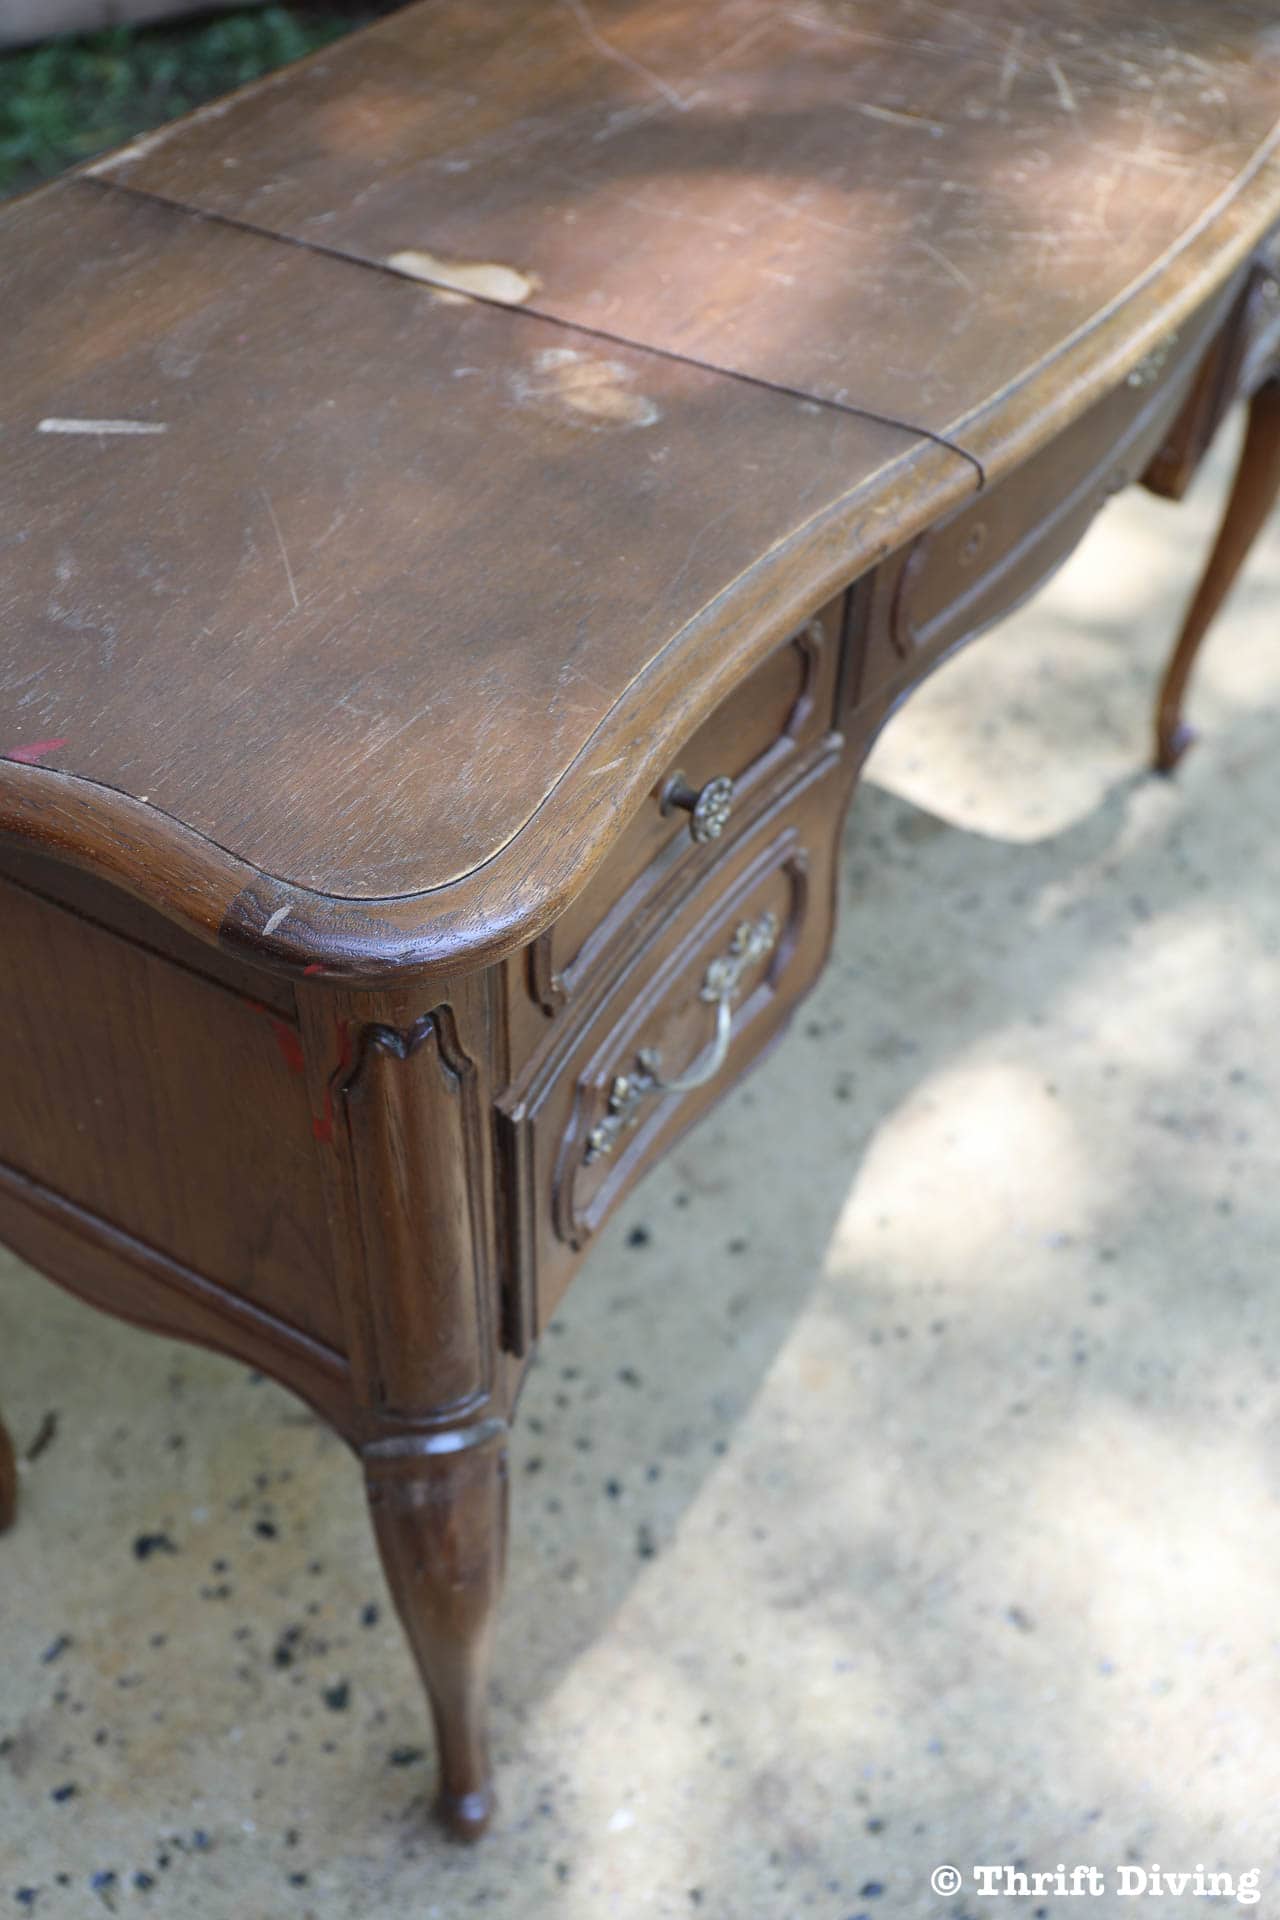
Yet, the top was all scratched up, the brown wasn’t doing it any justice, and it was taking up valuable real estate in my garage.
Stripping down a French Provincial vanity like this would have been a pain the butt. So many cracks, crevices, and molding. I’ve got more important things to do with my time than to scrape out gunk from the cracks of thrift store furniture. 😉
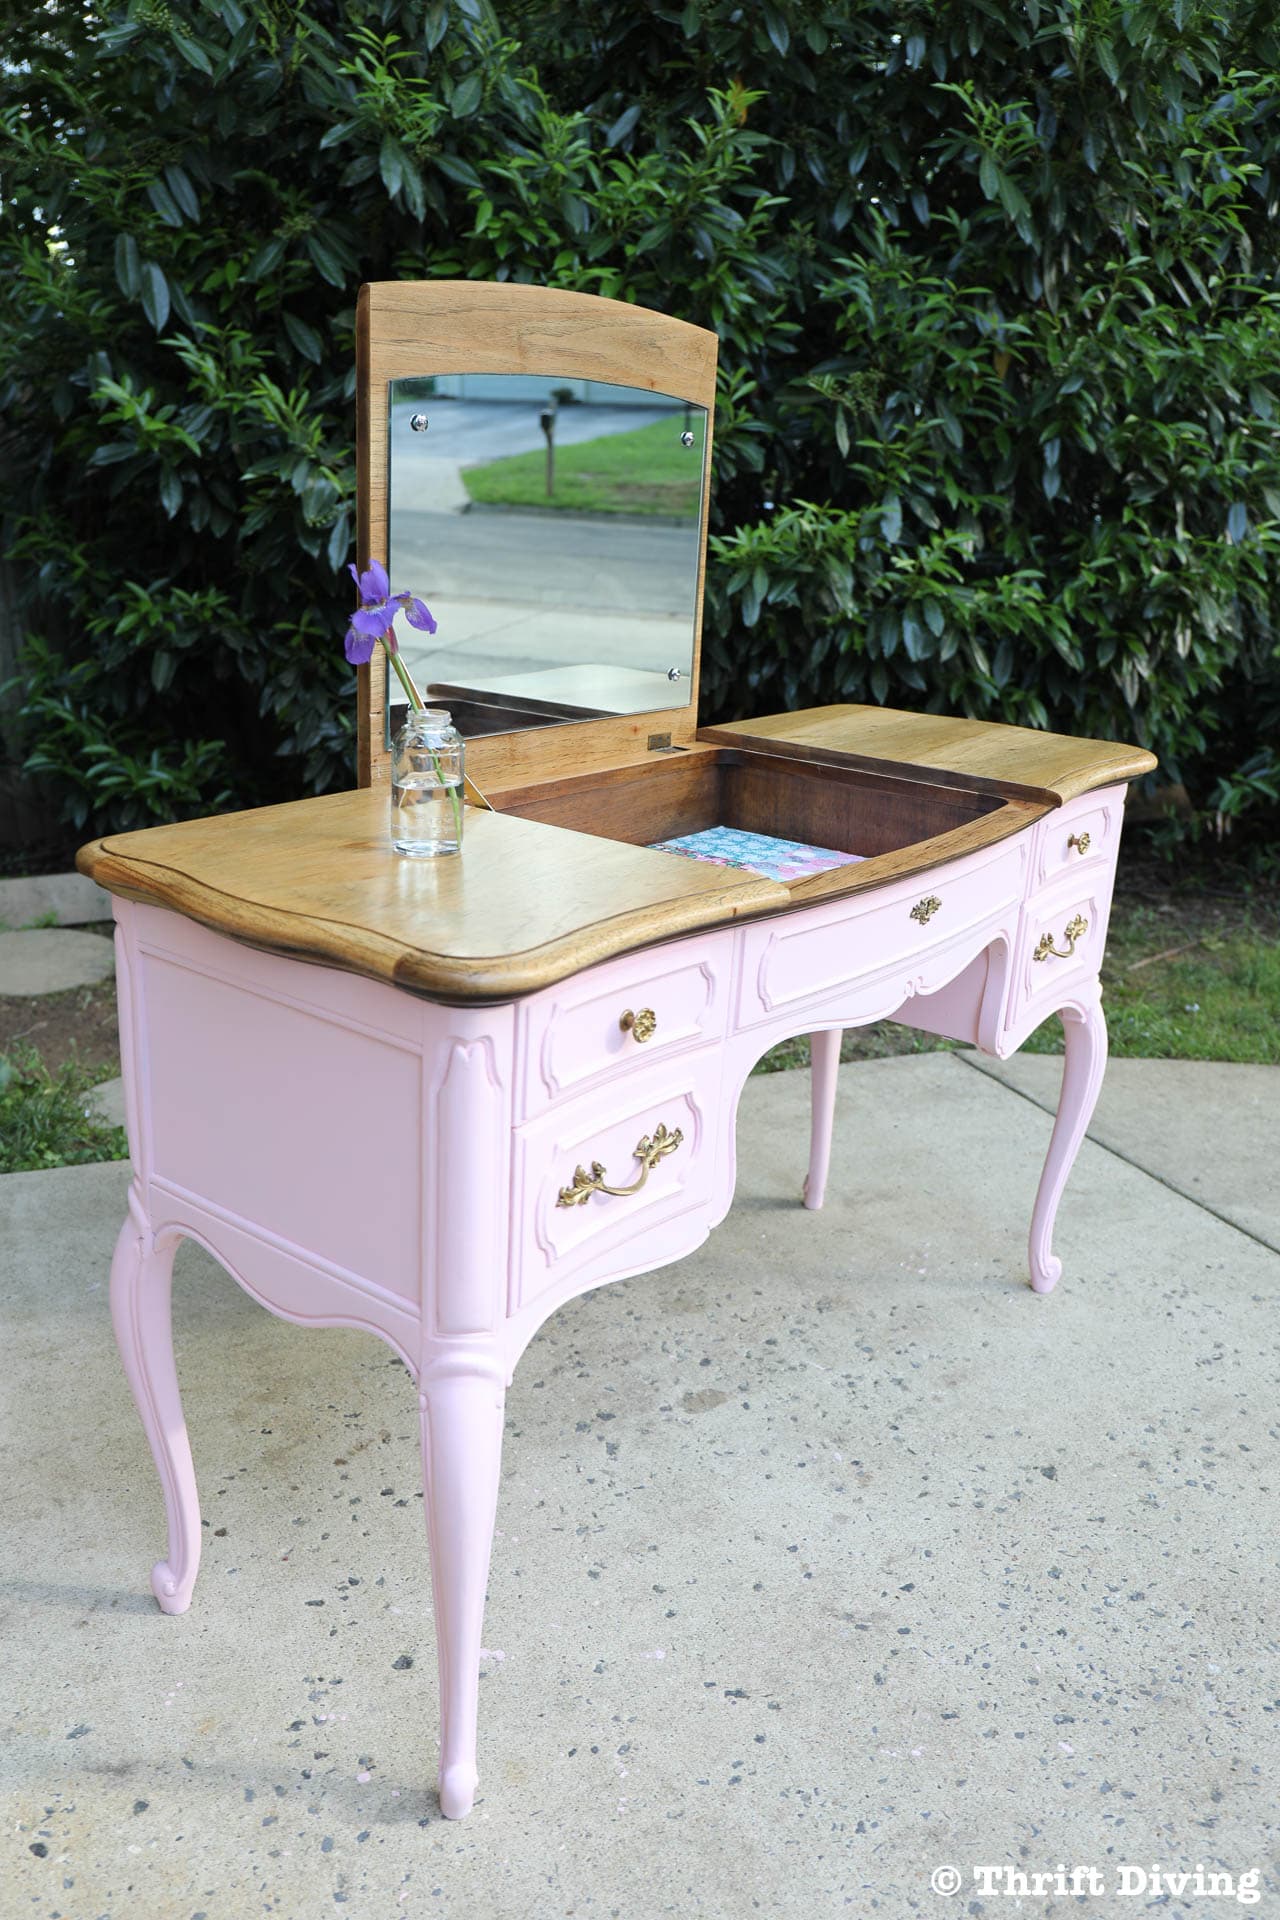
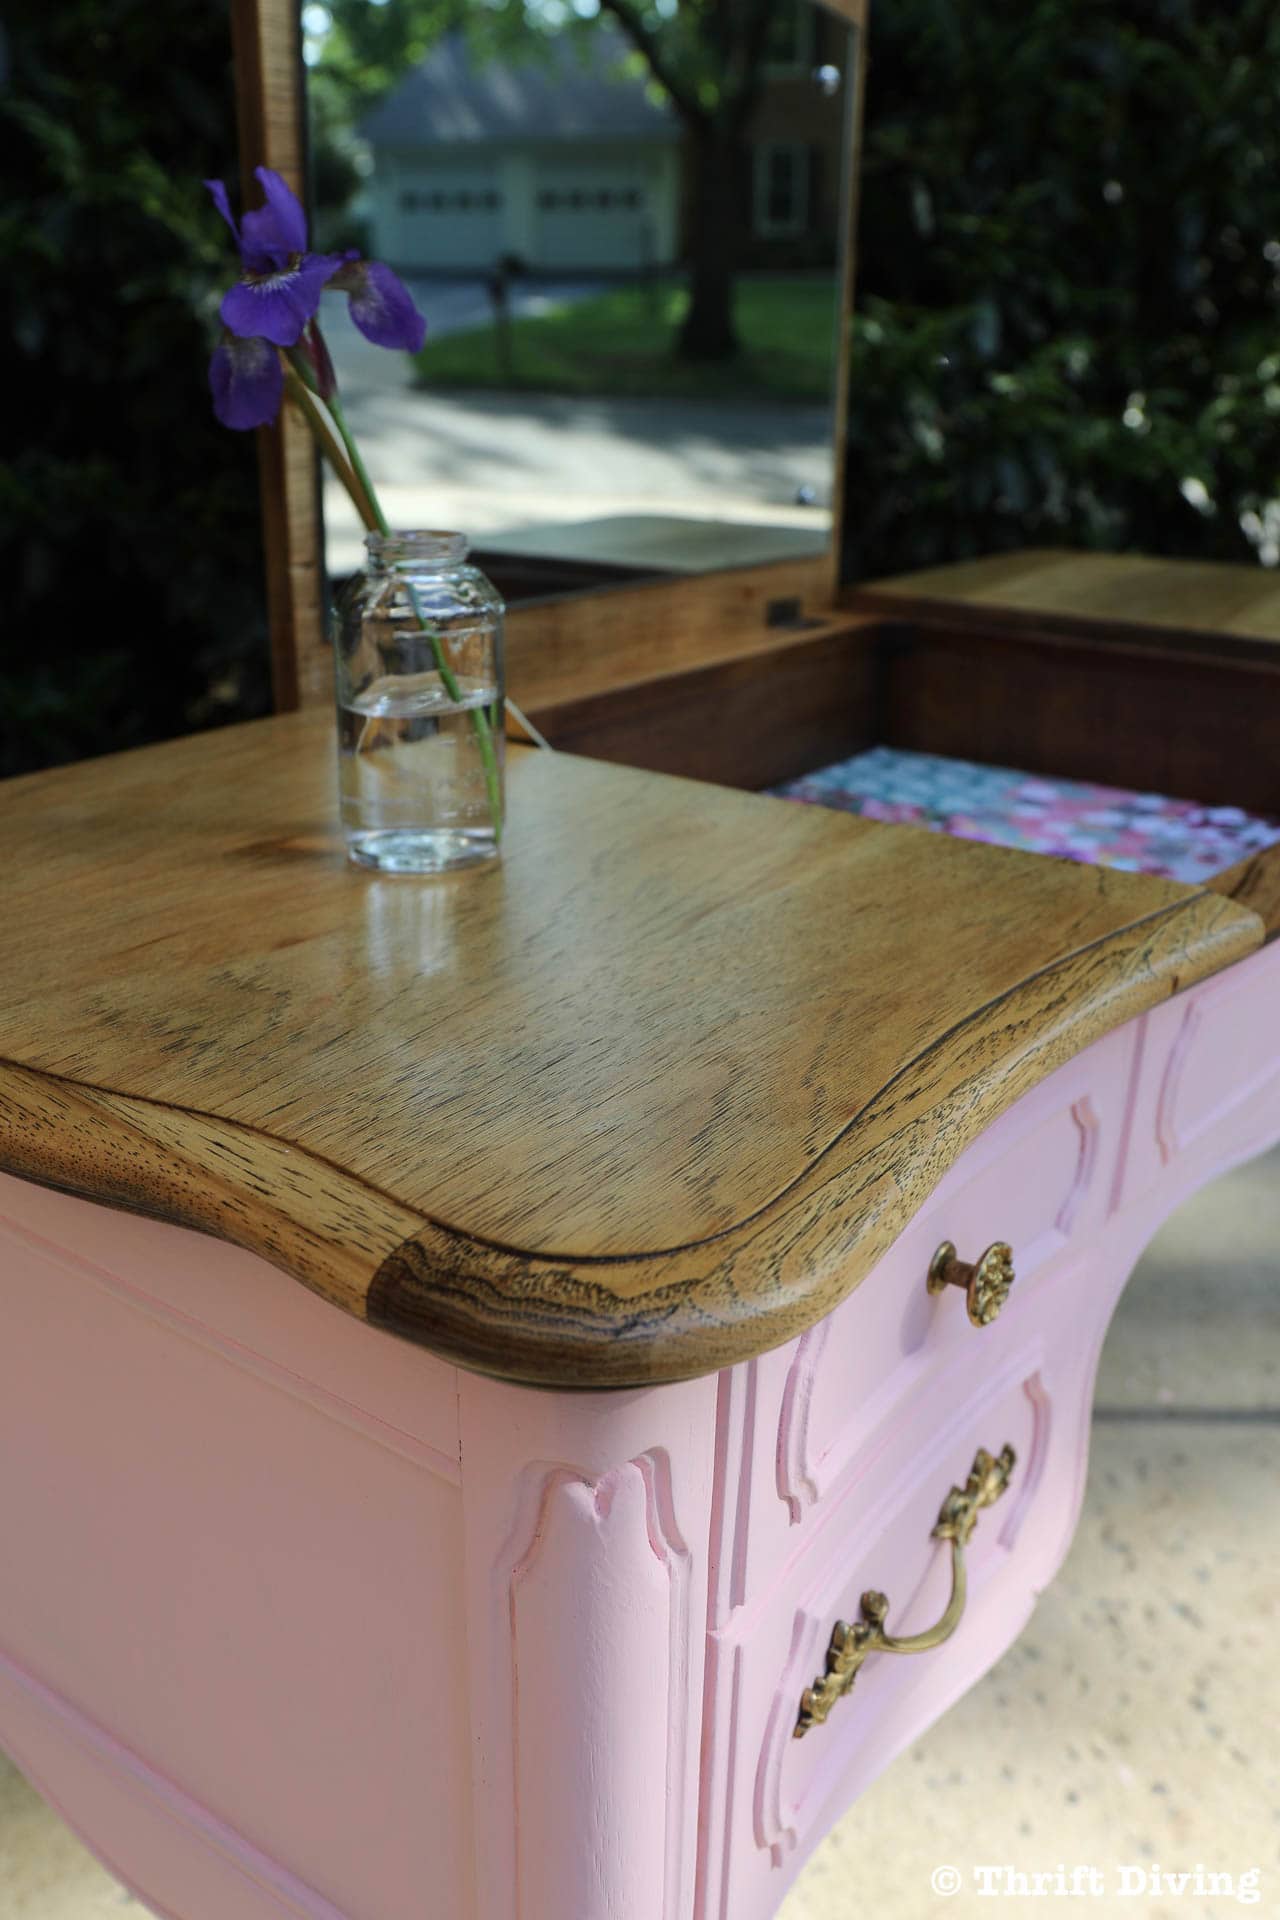
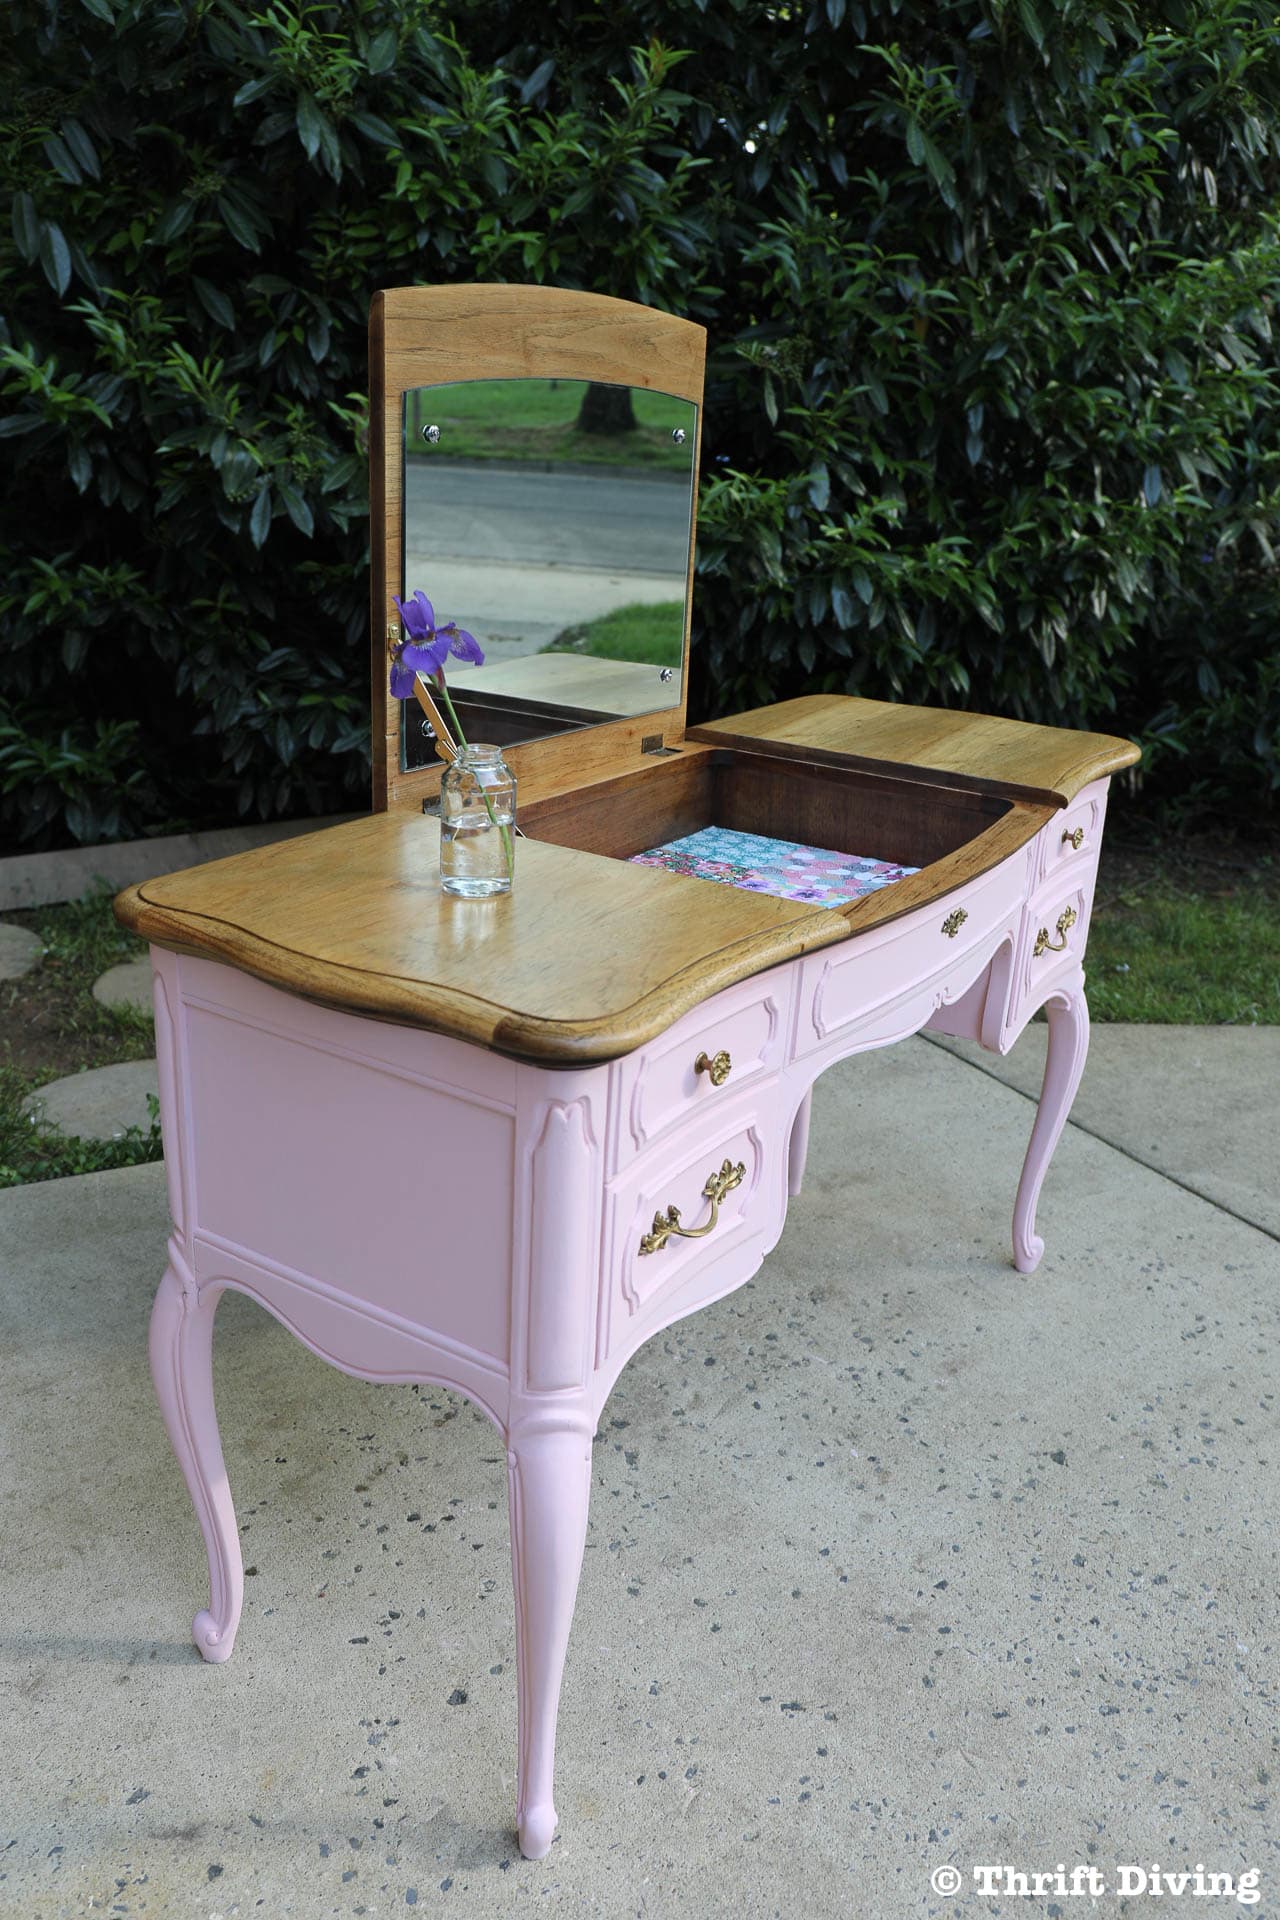
So I decided to give this French Provincial vanity the best of both worlds: a stripped top and a painted body with a custom-mixed baby pink chalked paint!
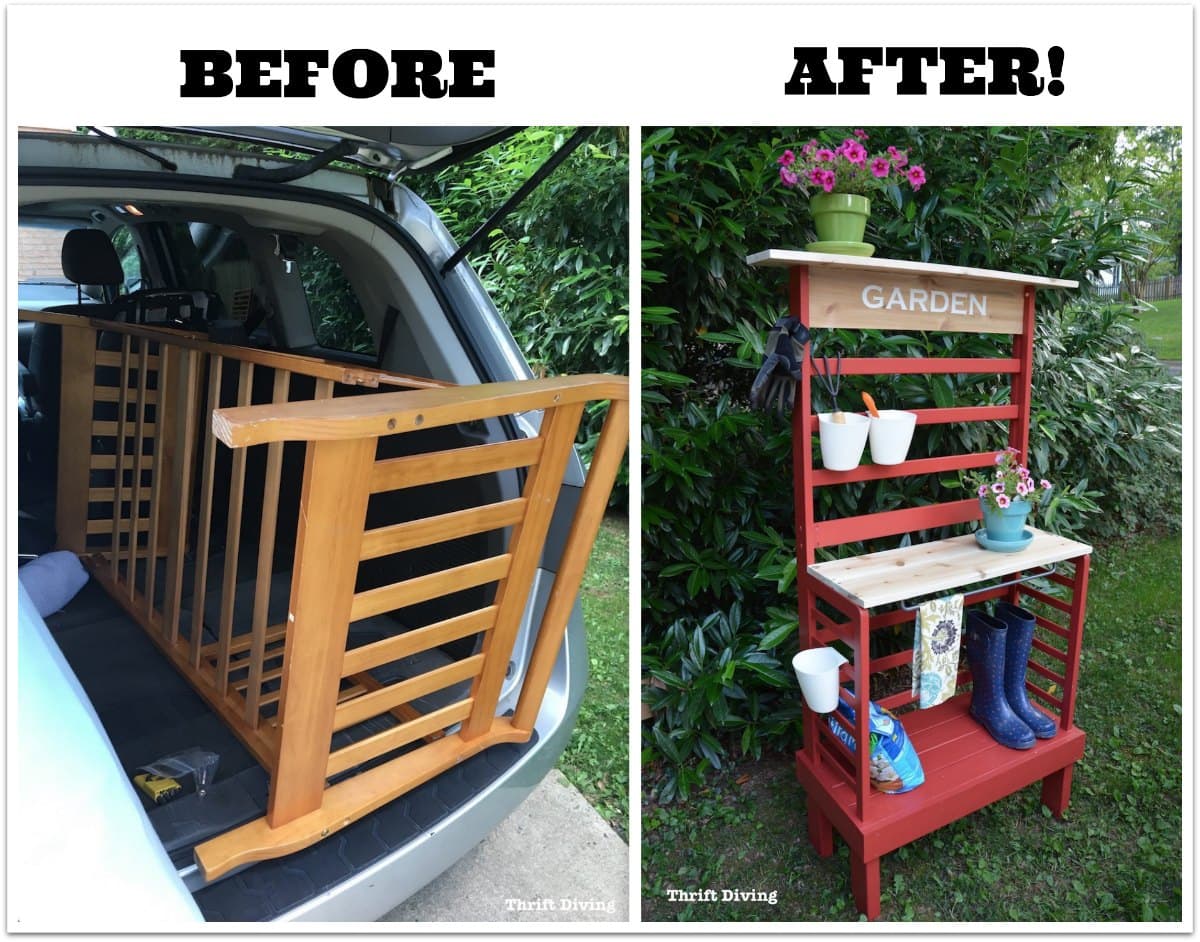
BEFORE
AFTER!
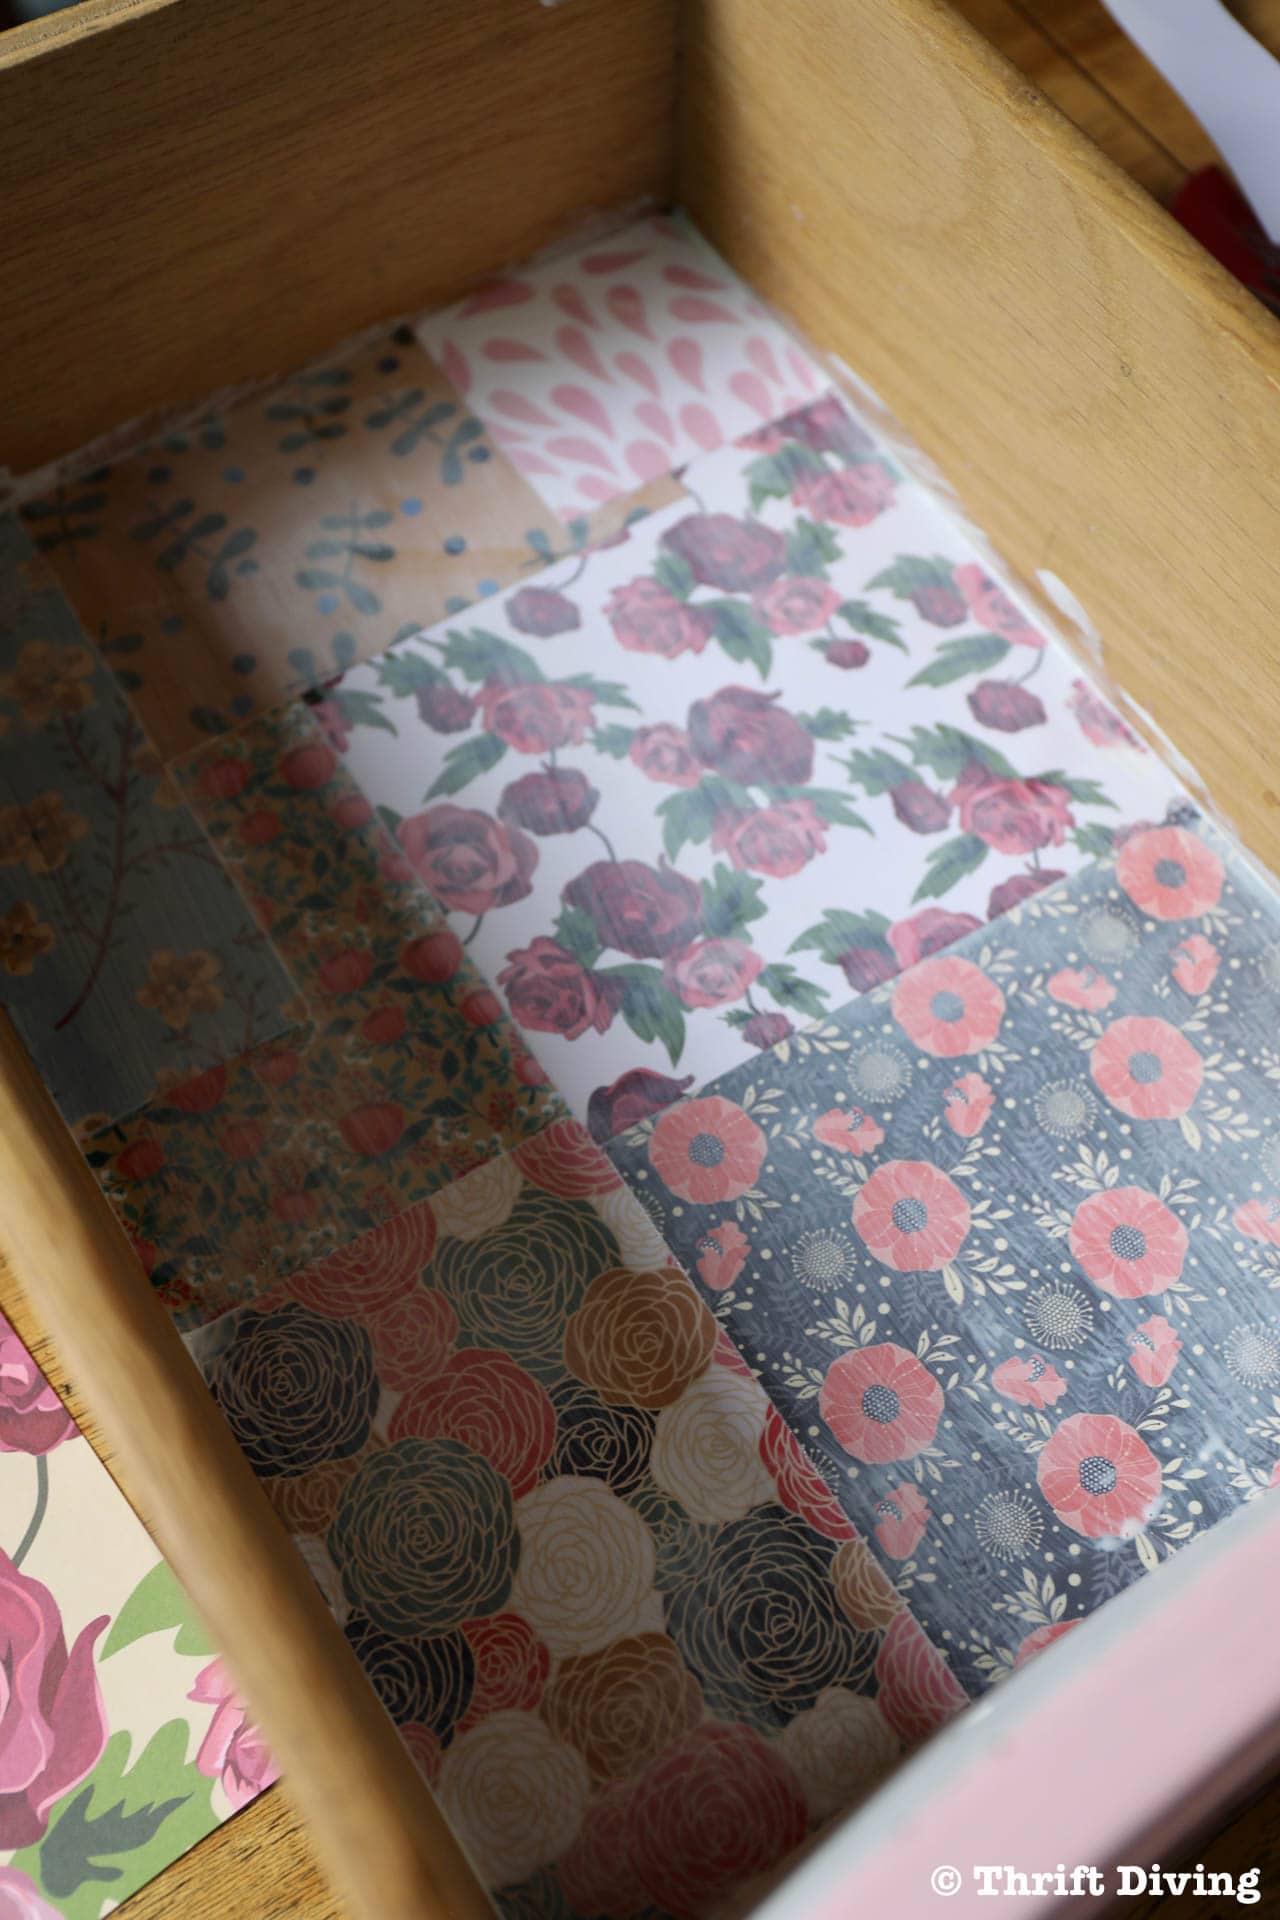
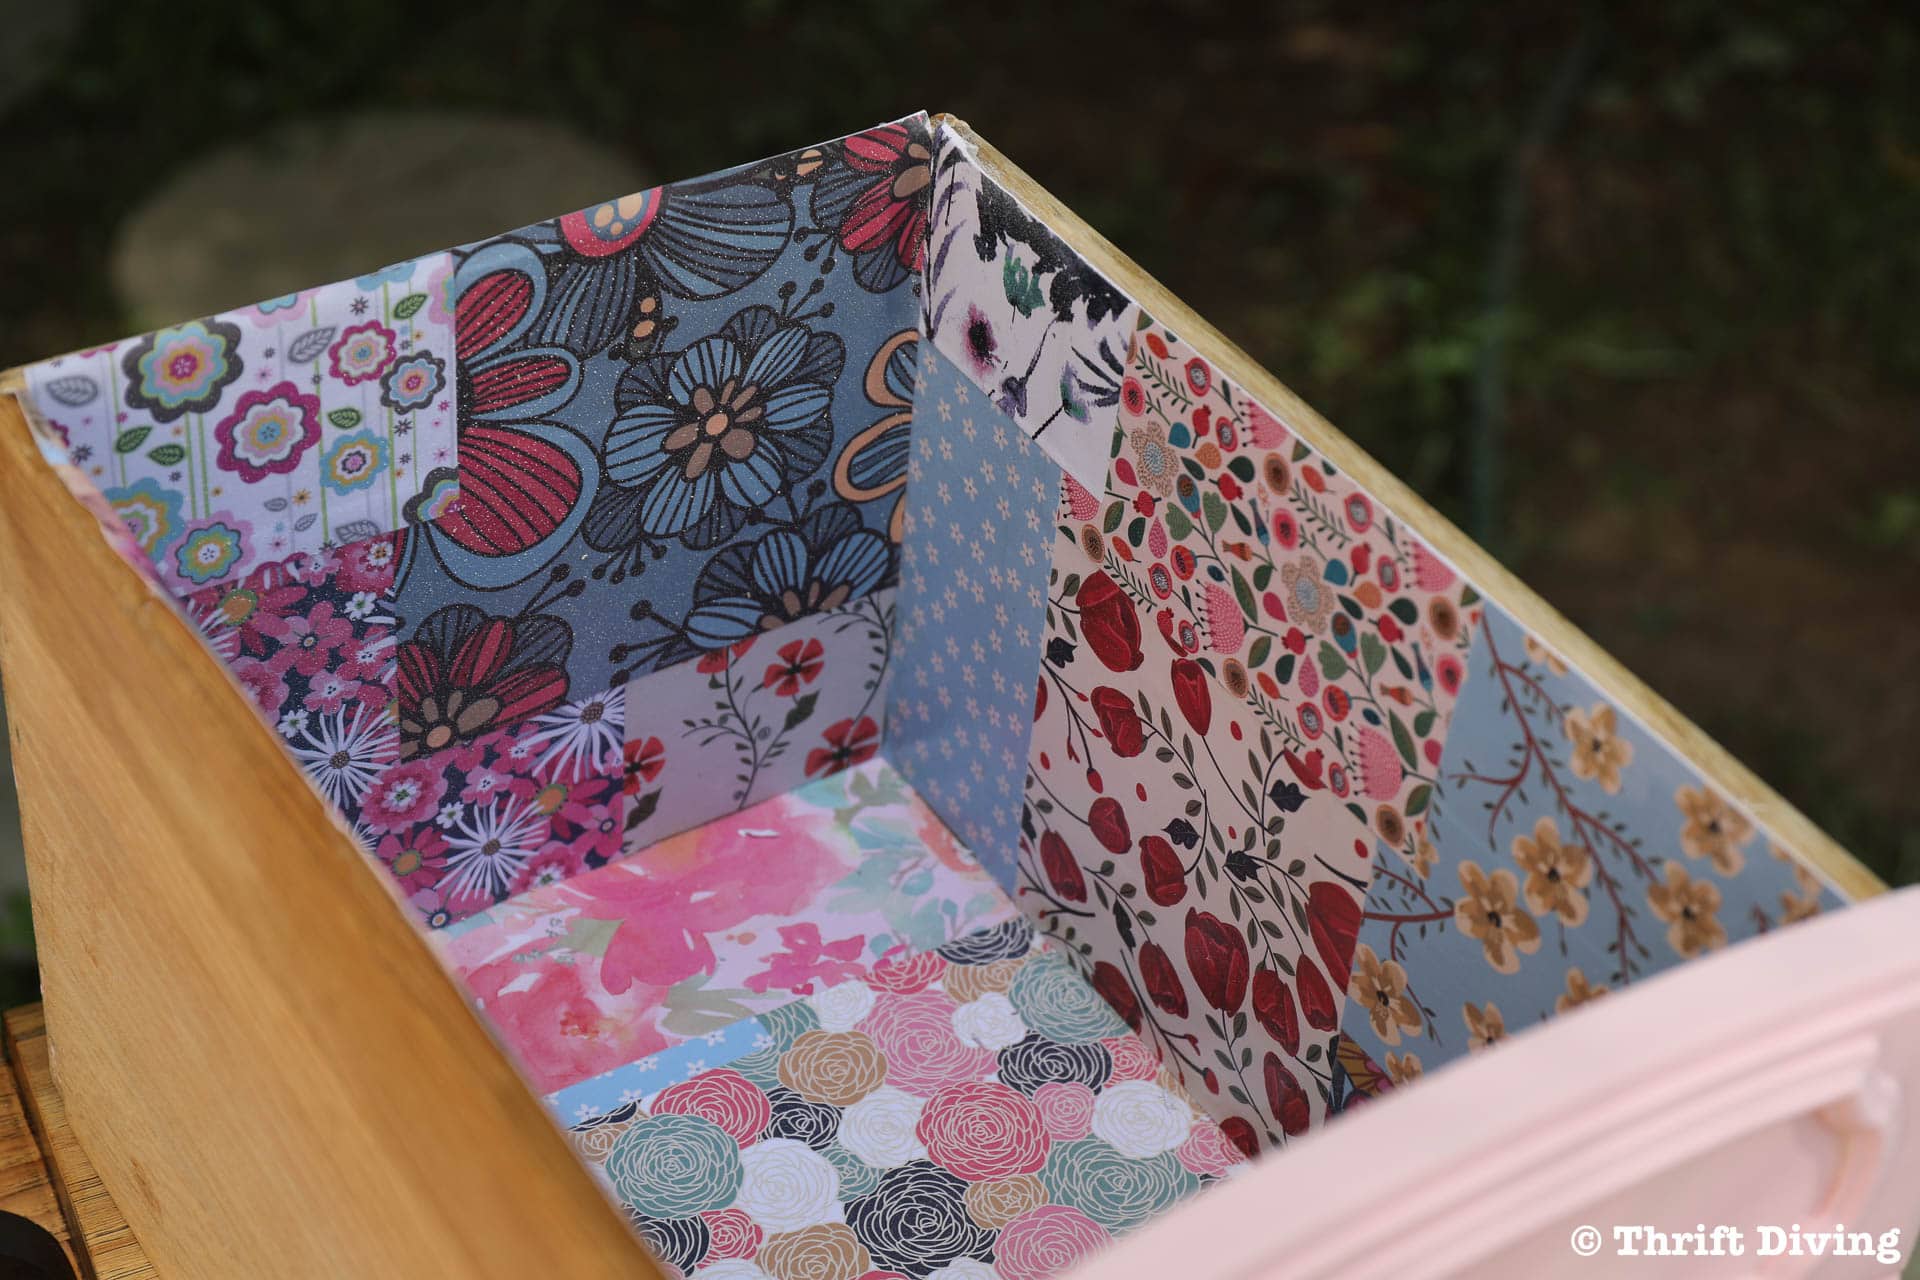
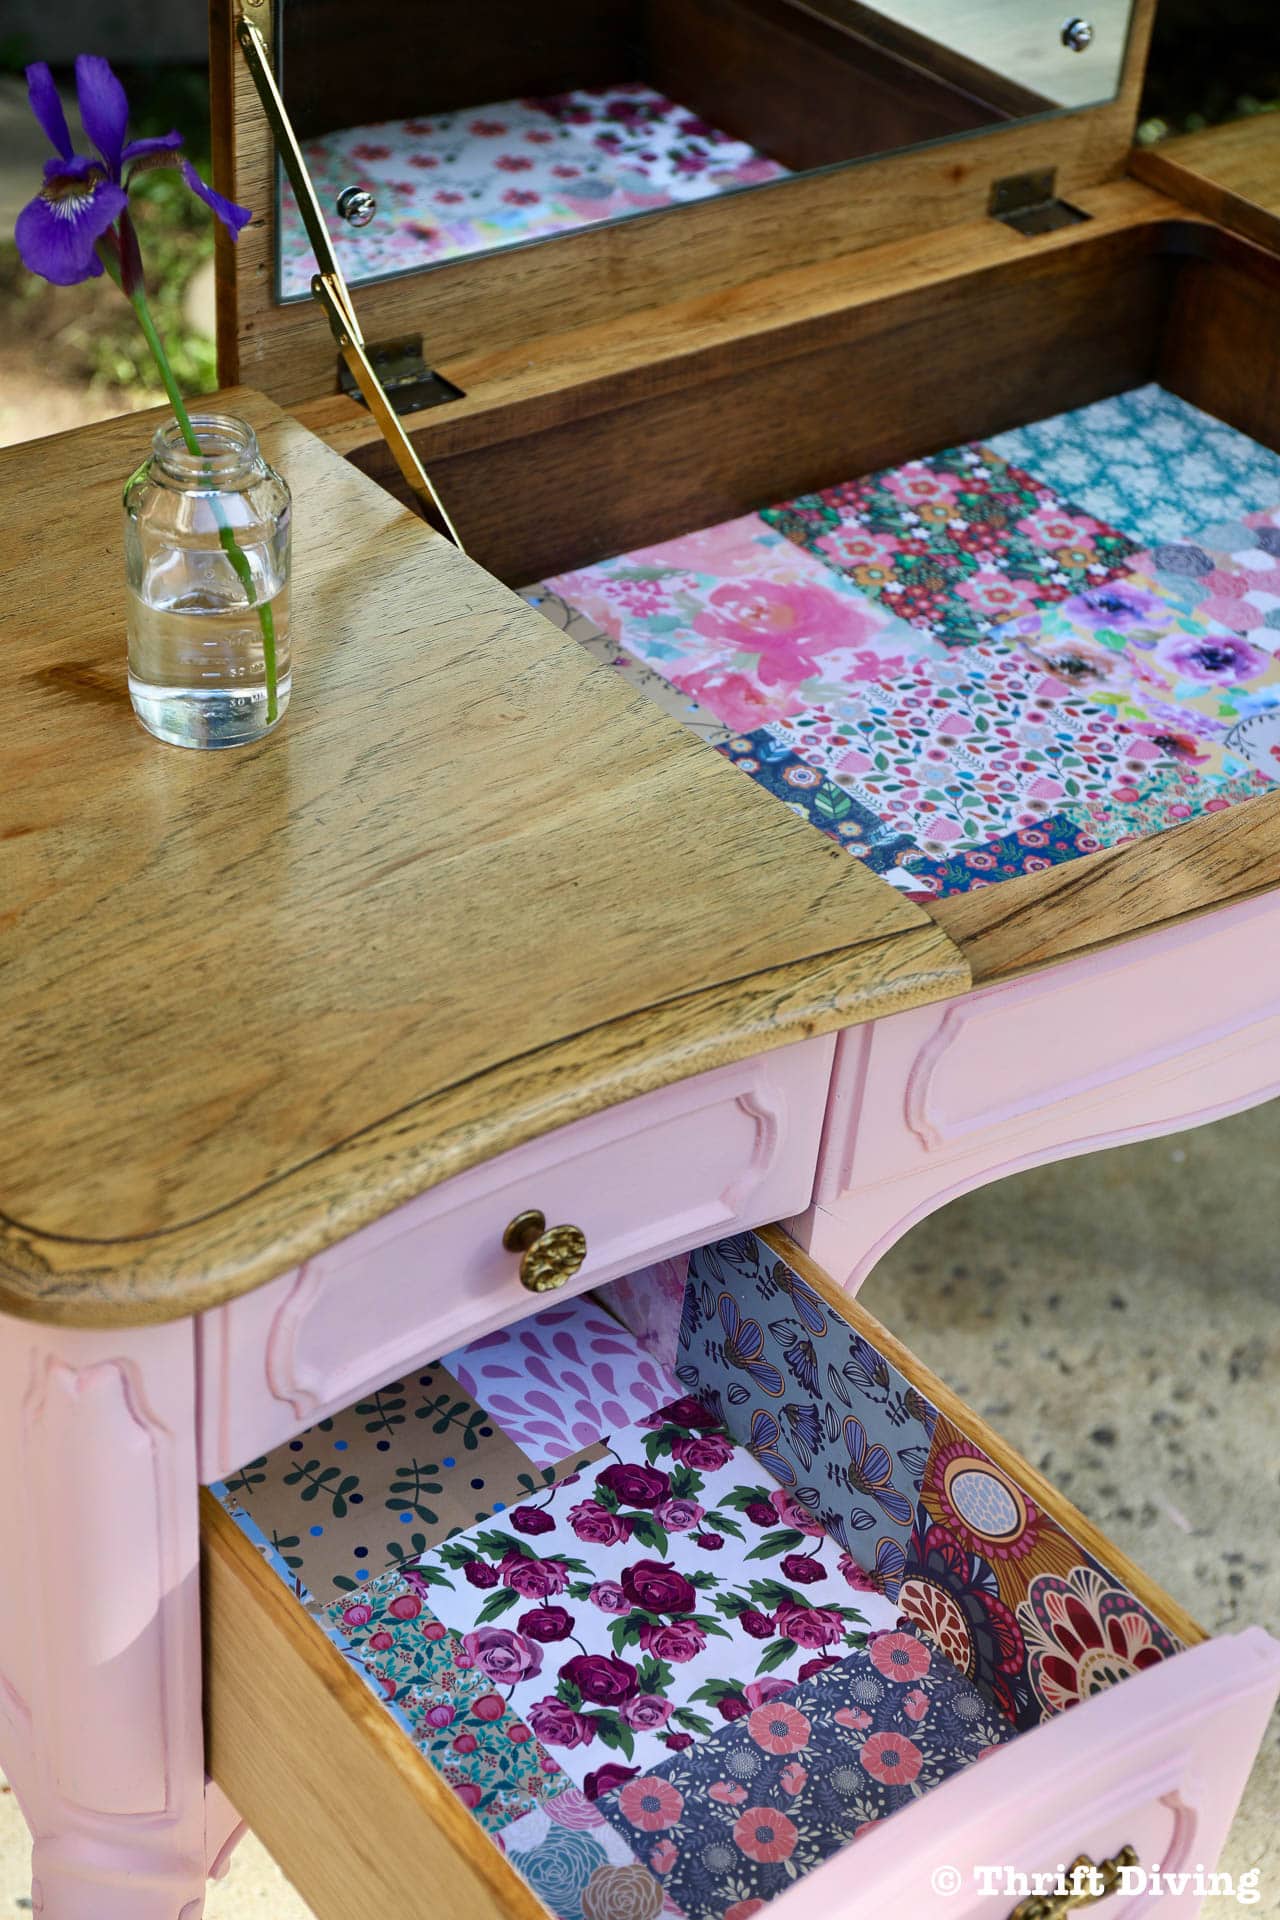
But it gets even better because, on a whim, I decided to do a fun patchwork decoupage with pretty scrapbook paper from A.C. Moore to line the drawers of this French Provincial vanity!
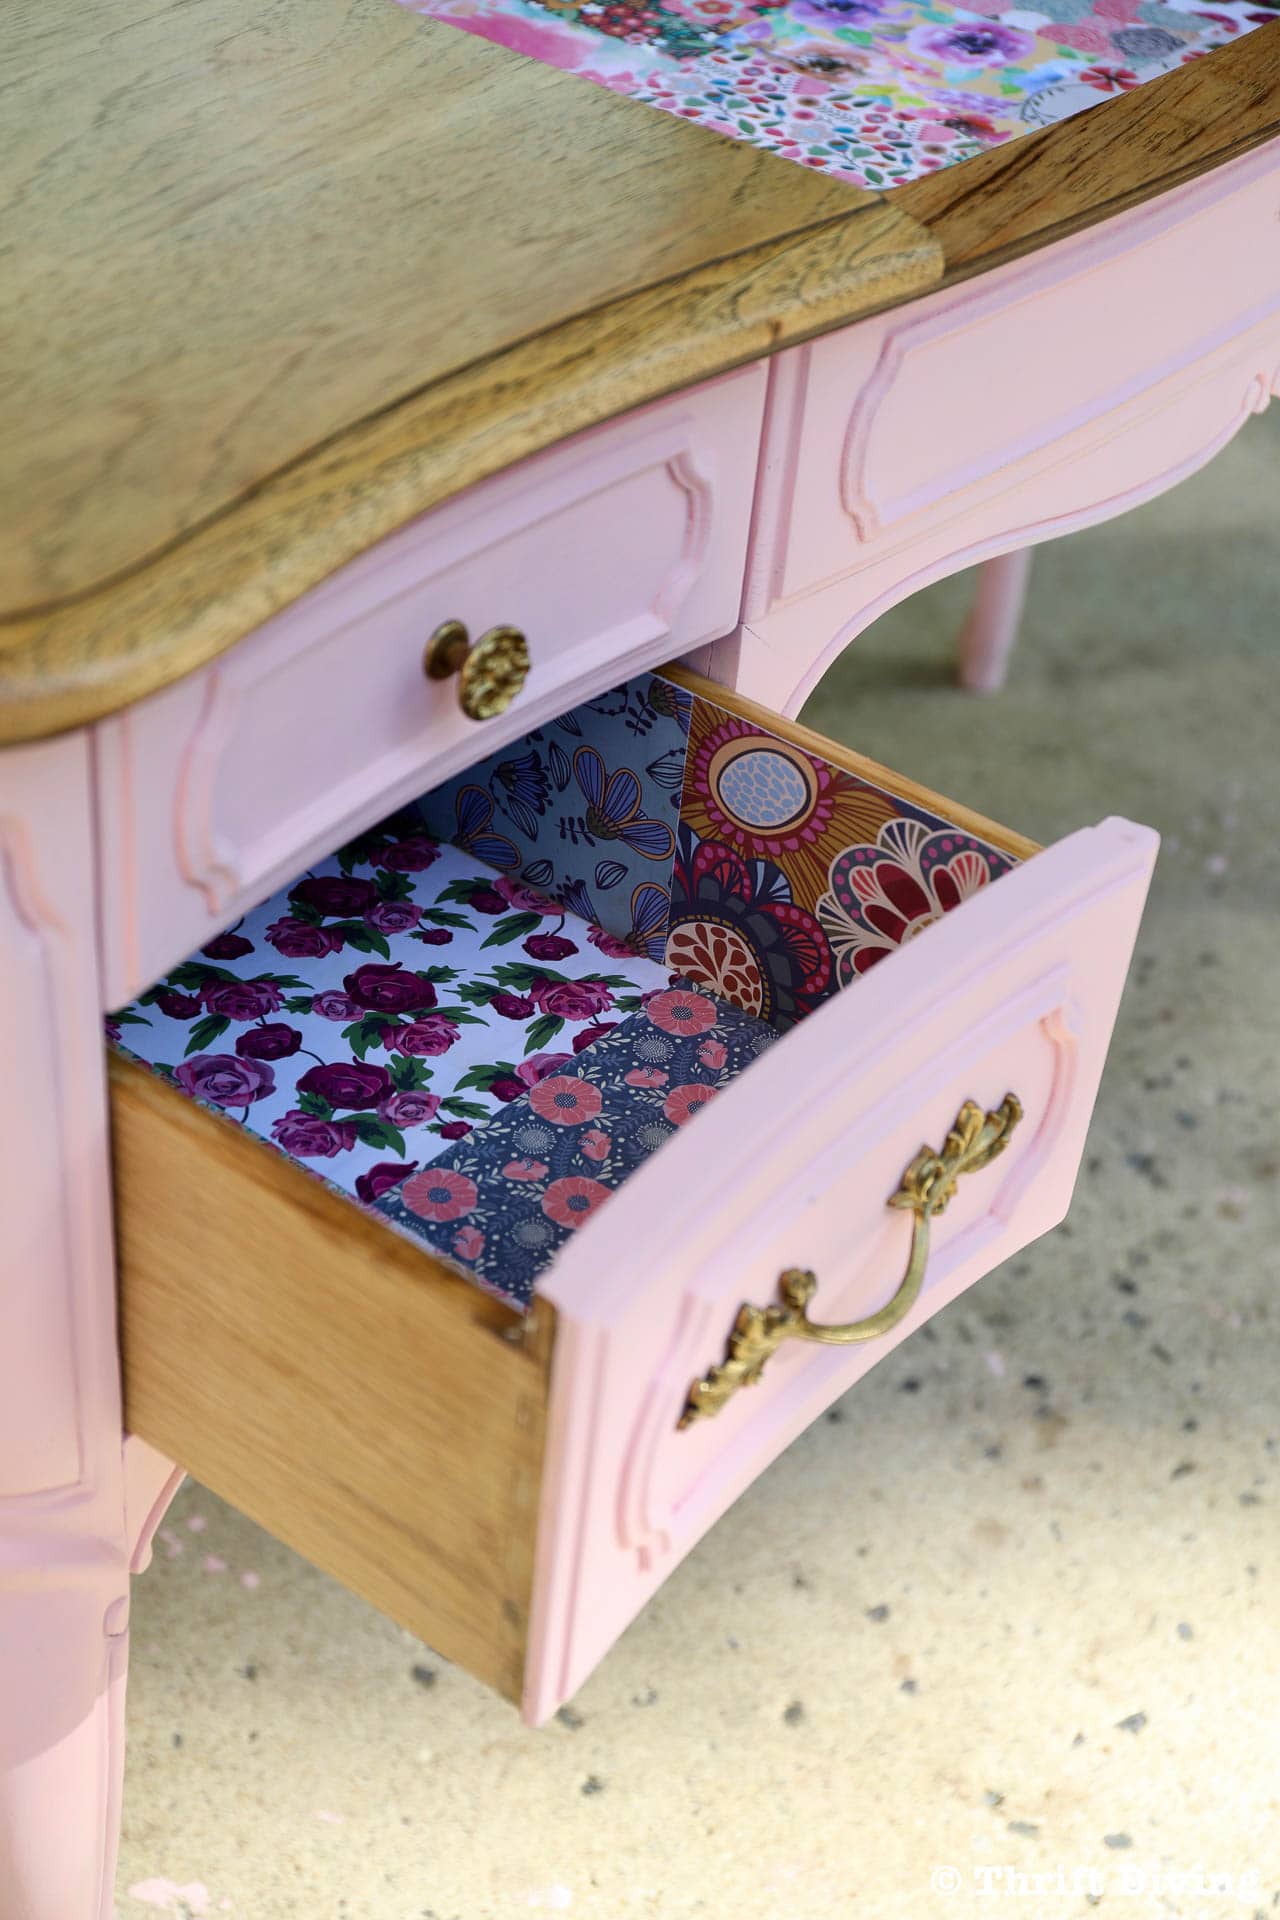
In this tutorial, I’m going to show you the easiest way to line drawers with pretty scrapbook paper, creating a patchwork pattern that will leave you wanting to open the drawers just to take a peek inside! 🙂
How to Line Drawers With Pretty Scrapbook Paper
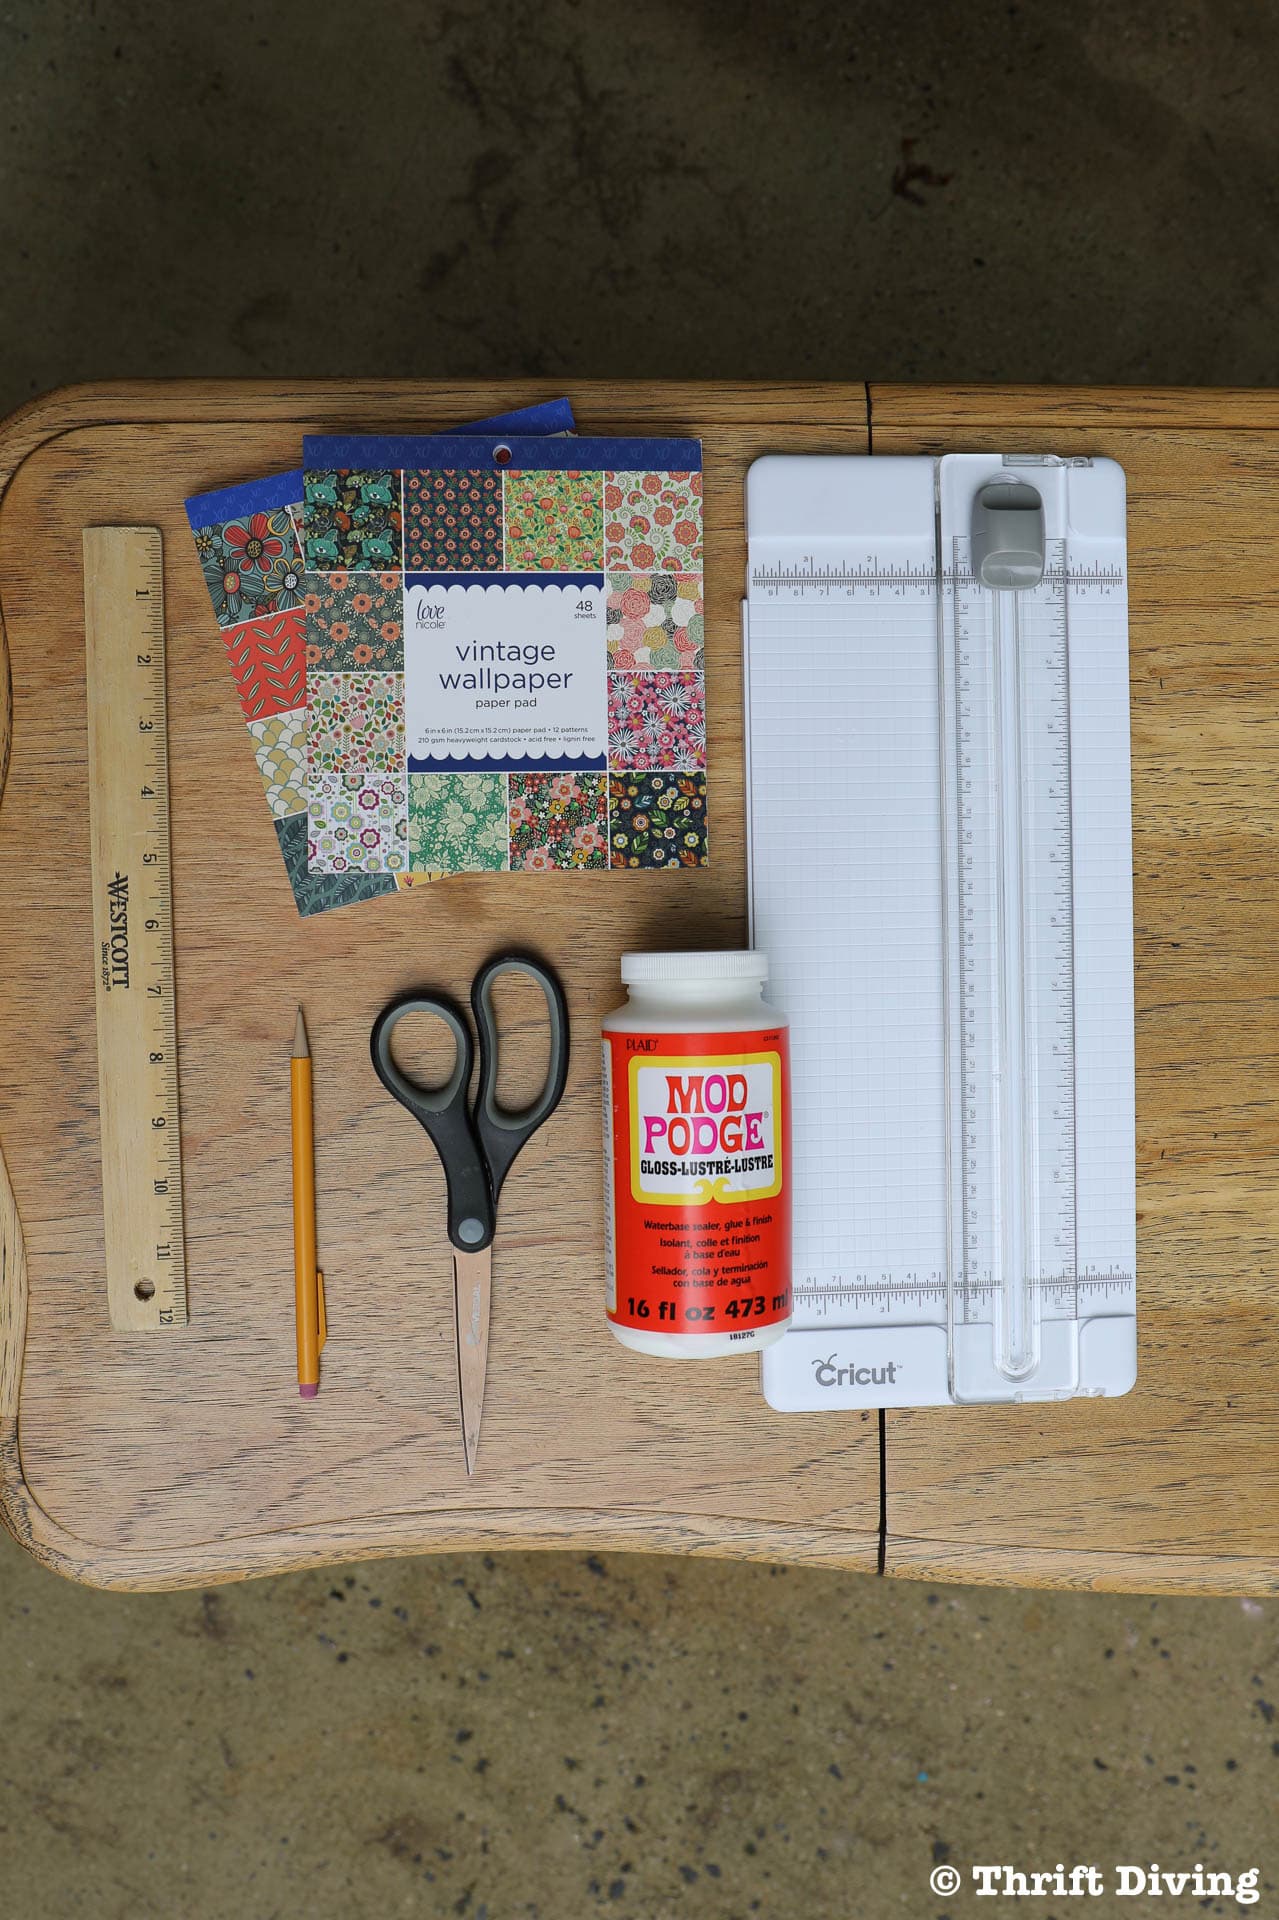
Here are the materials that you’ll need for this project, which can be found at AC Moore.
Materials
- Love Nicole Vintage Wallpaper Paper Pad scrapbook paper from A.C. Moore
- Mod Podge Glossy sealer
- Paper Cutter
- Scissors
- Sandpaper (220 or 150 grit)
- Brayer
- Paintbrushes or foam brushes
- Bowl for pouring in Mod Podge
- Pencil
- Cleaning towels
- Ruler (optional)
STEP 1: Pick Your Pretty Scrapbook Paper
I had a whole stack of the Love Nicole scrapbook paper, supplied to me by AC Moore, but the sheets I was most interested in were the pretty vintage floral designs in the 6″ x 6″ size. These were perfect for layering. And while they were all different colors, the patterns all worked well together.
I don’t know about you, but I love me some scrapbook paper. I find myself wanting to use all of it but never having enough craft projects to get through an entire pack. However, with this project, I was able to pull out all of my favorite sheets!
(Psst! A.C. Moore recently partnered with Create and Craft to bring you the A.C. Moore Hour, airing every Wednesday at 11 AM Eastern time! Now you can tune in to your TV and regularly get great craft ideas. You can watch Create and Craft on DISH Network or stream online at createandcraft.com).
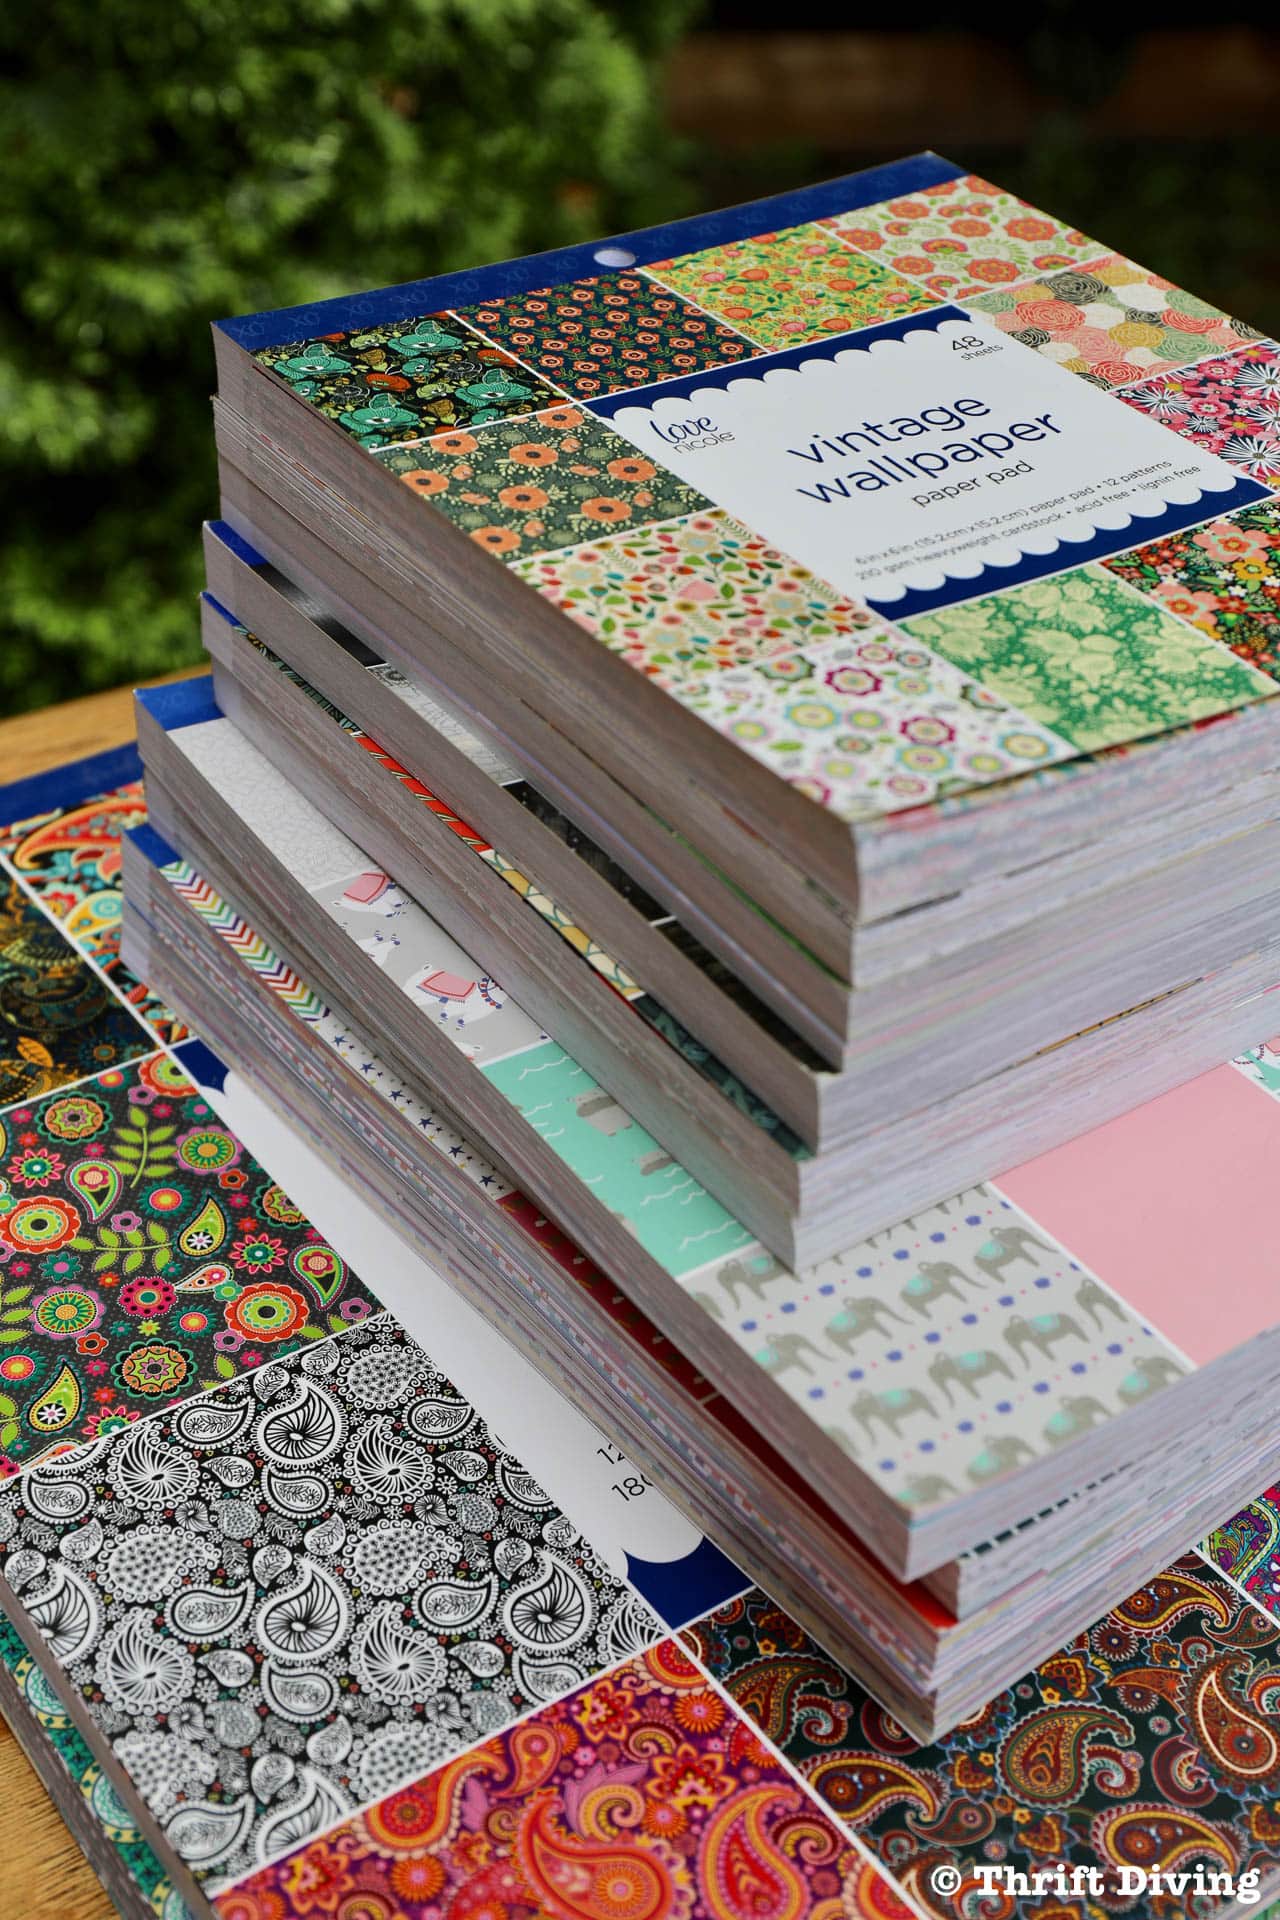
These were some of my favorites!

STEP 2: Do a Test Fit to See Where You Want to Place the Sheets of Scrapbook Paper
Before gluing and sealing the paper to the drawers, do a test fit to see what works well together.
With the patchwork pattern of pretty papers, you can do whatever you want! I decided to do both the bottom and the sides of the drawers.
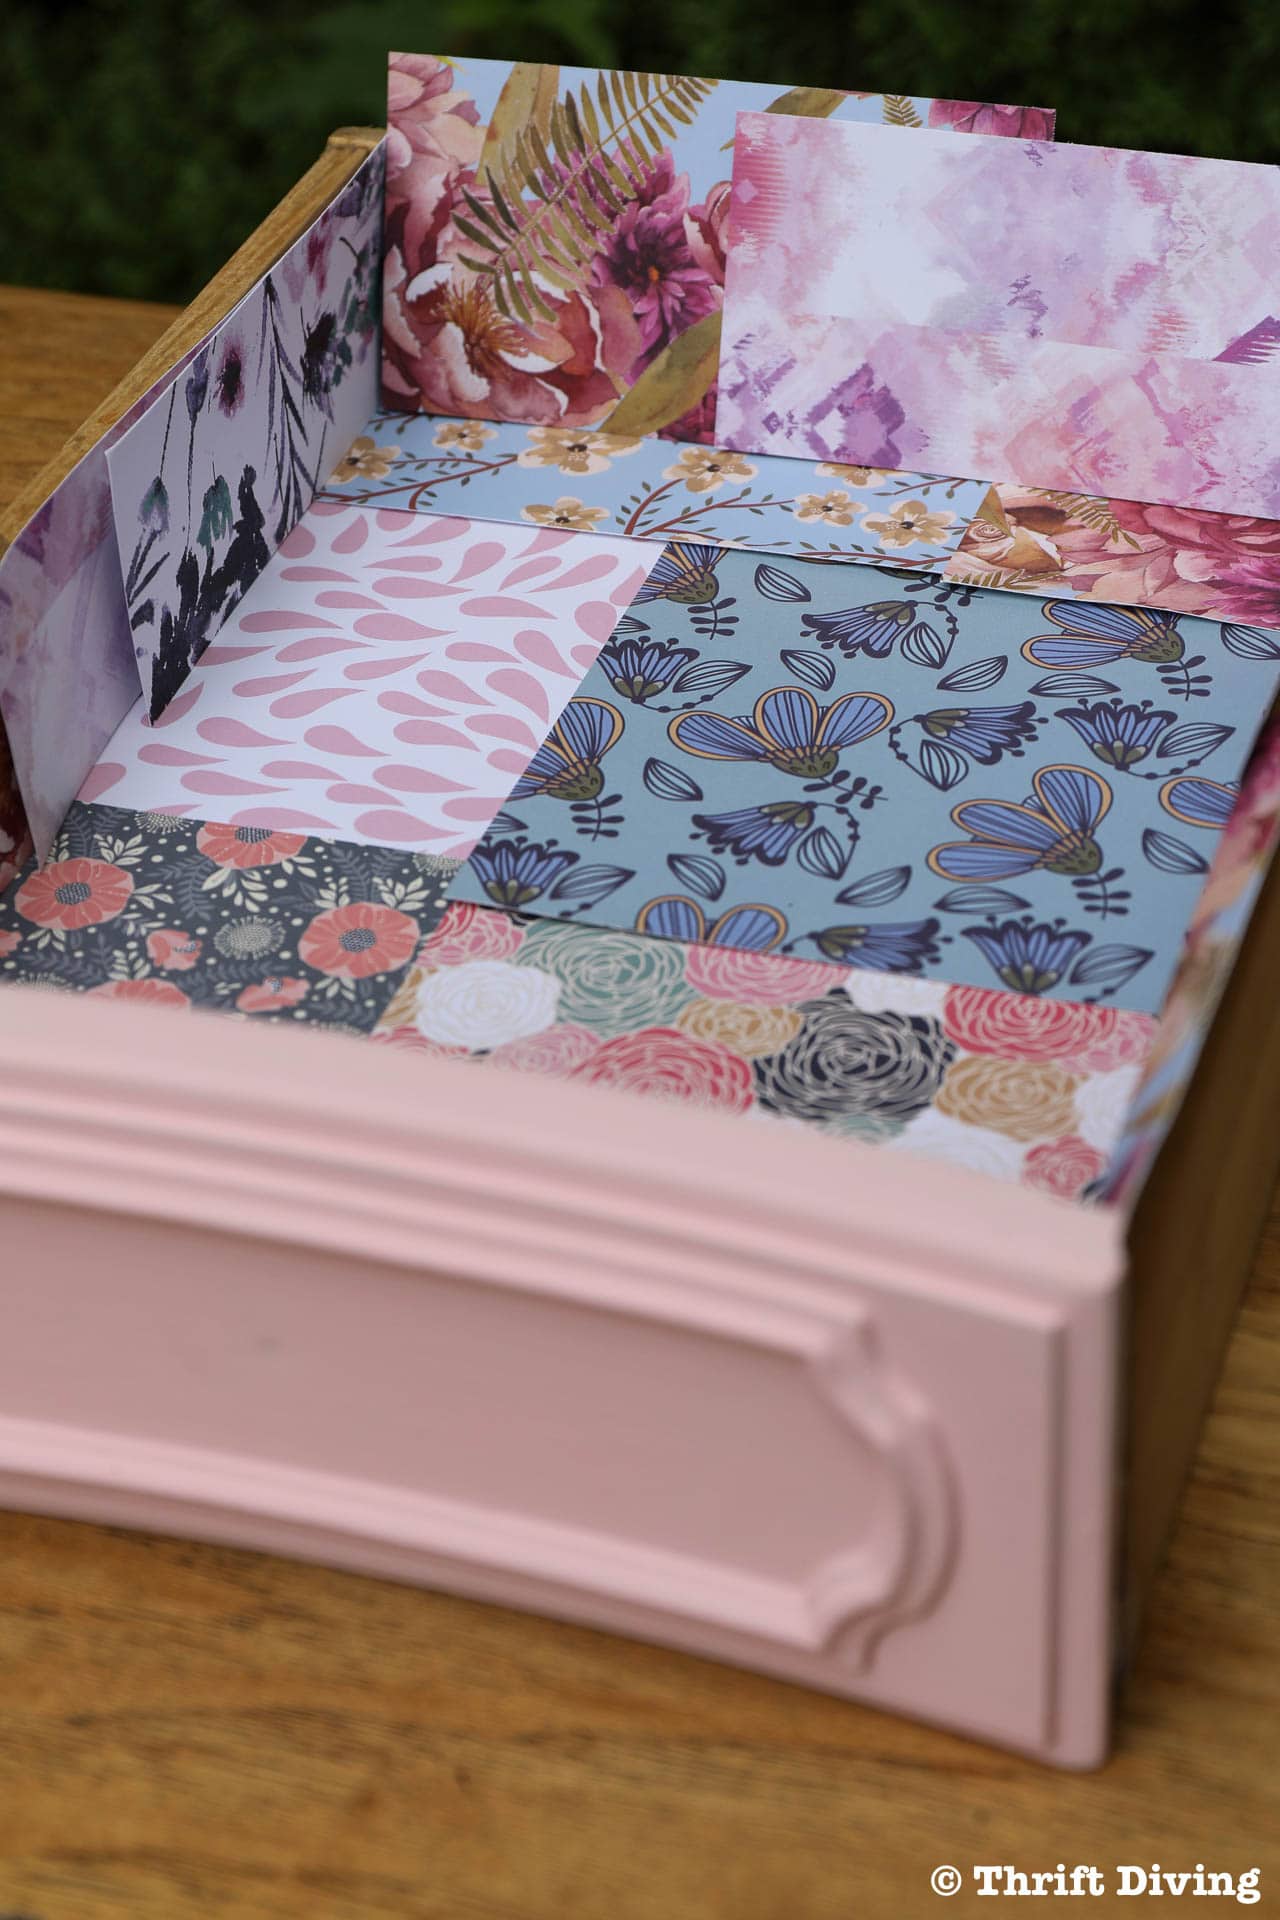
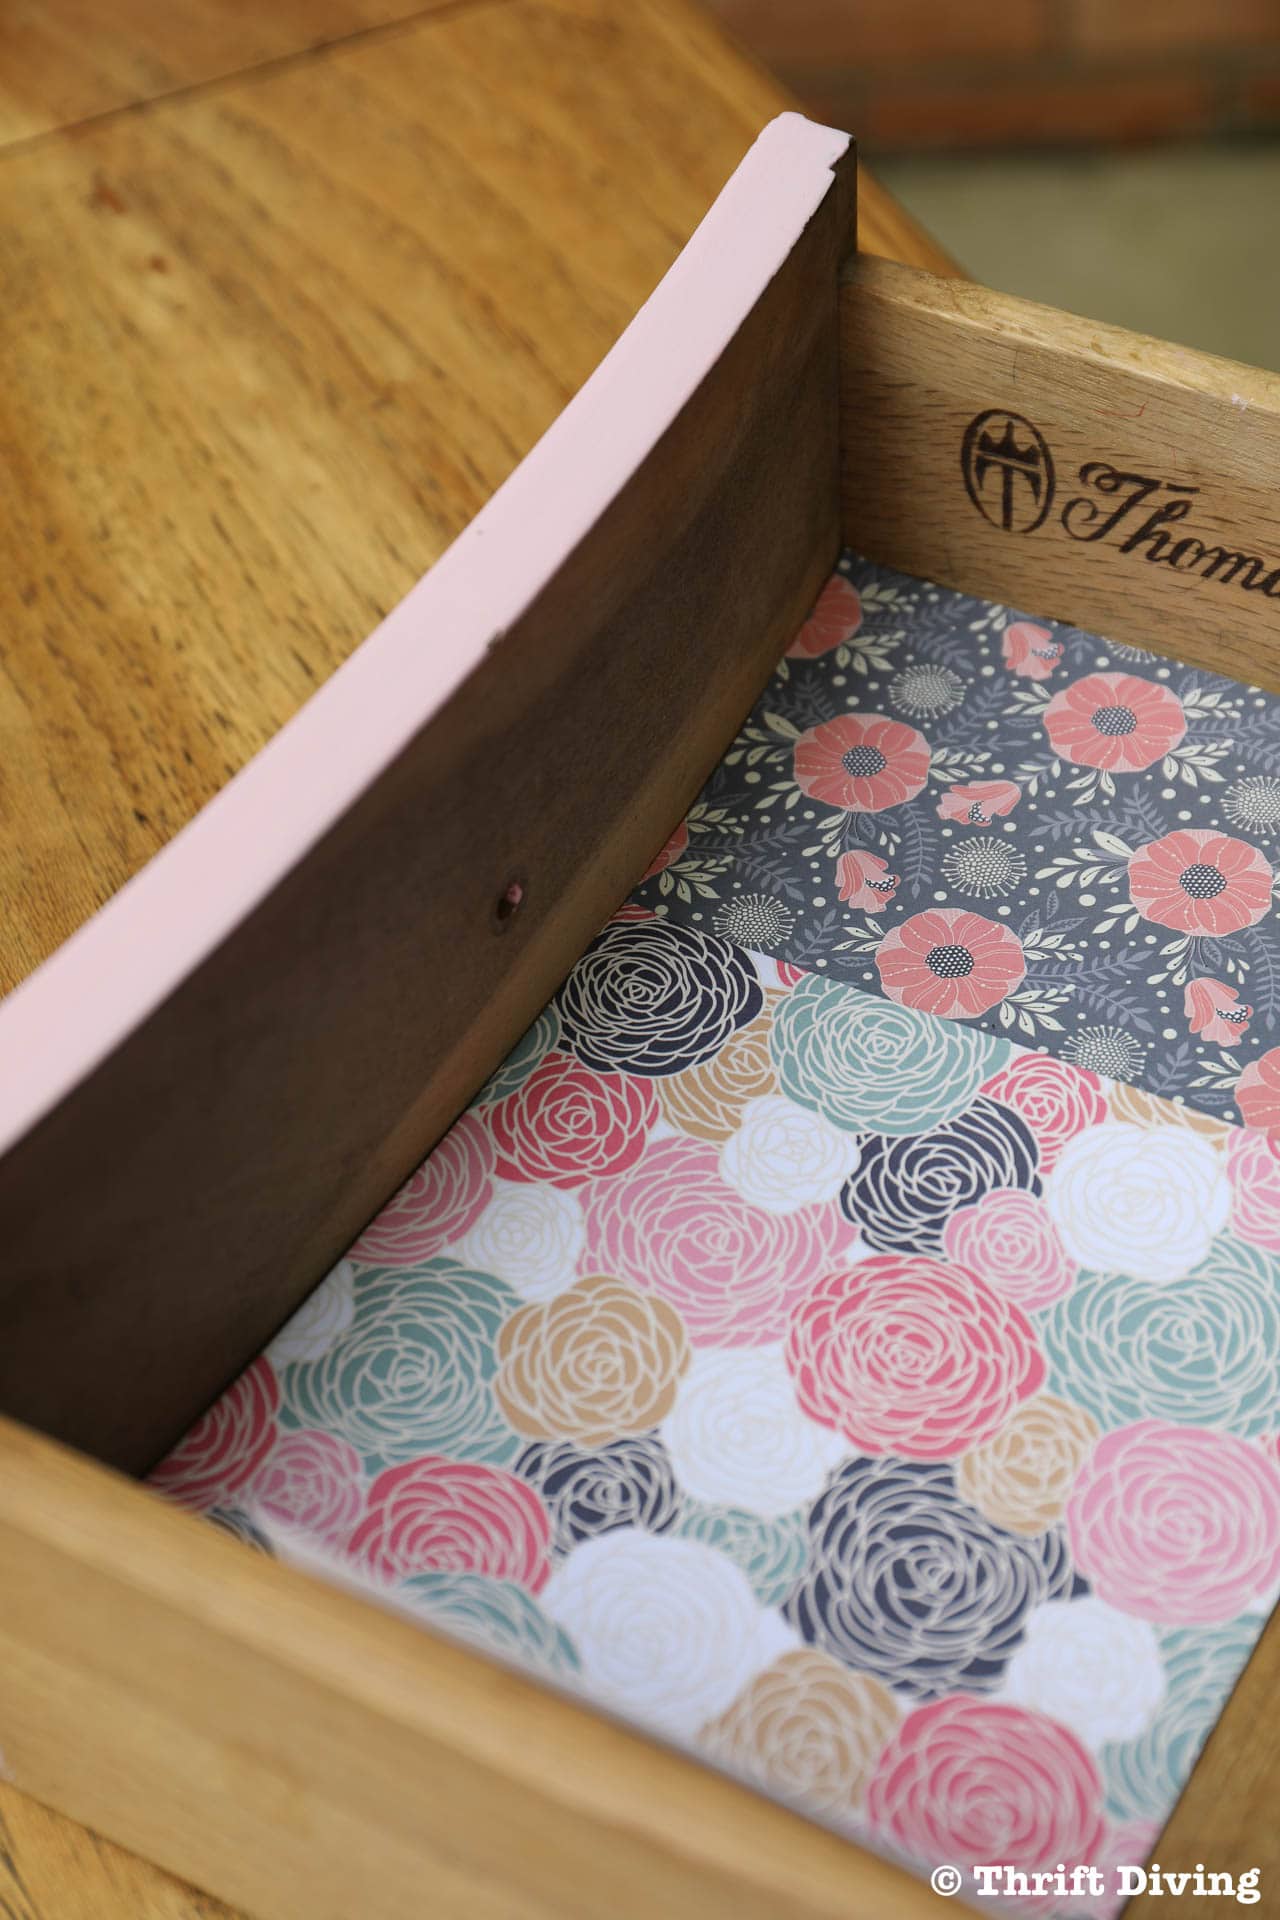
My drawers had a slight curve, so I had to plan for which papers would be trimmed along the curve.
To account for the curve, I placed the square scrapbook paper in the drawer against the curve and pressed it, marking where the paper curved, then trimmed it with scissors.
Surprisingly, I got a good fit on that slight curve! 🙂
STEP 3: Add a Layer of Mod Podge Sealer to the Drawer
If your drawer is huge, work in sections at a time. Otherwise, your sealer will dry too quickly and you’ll waste it by having to apply more.
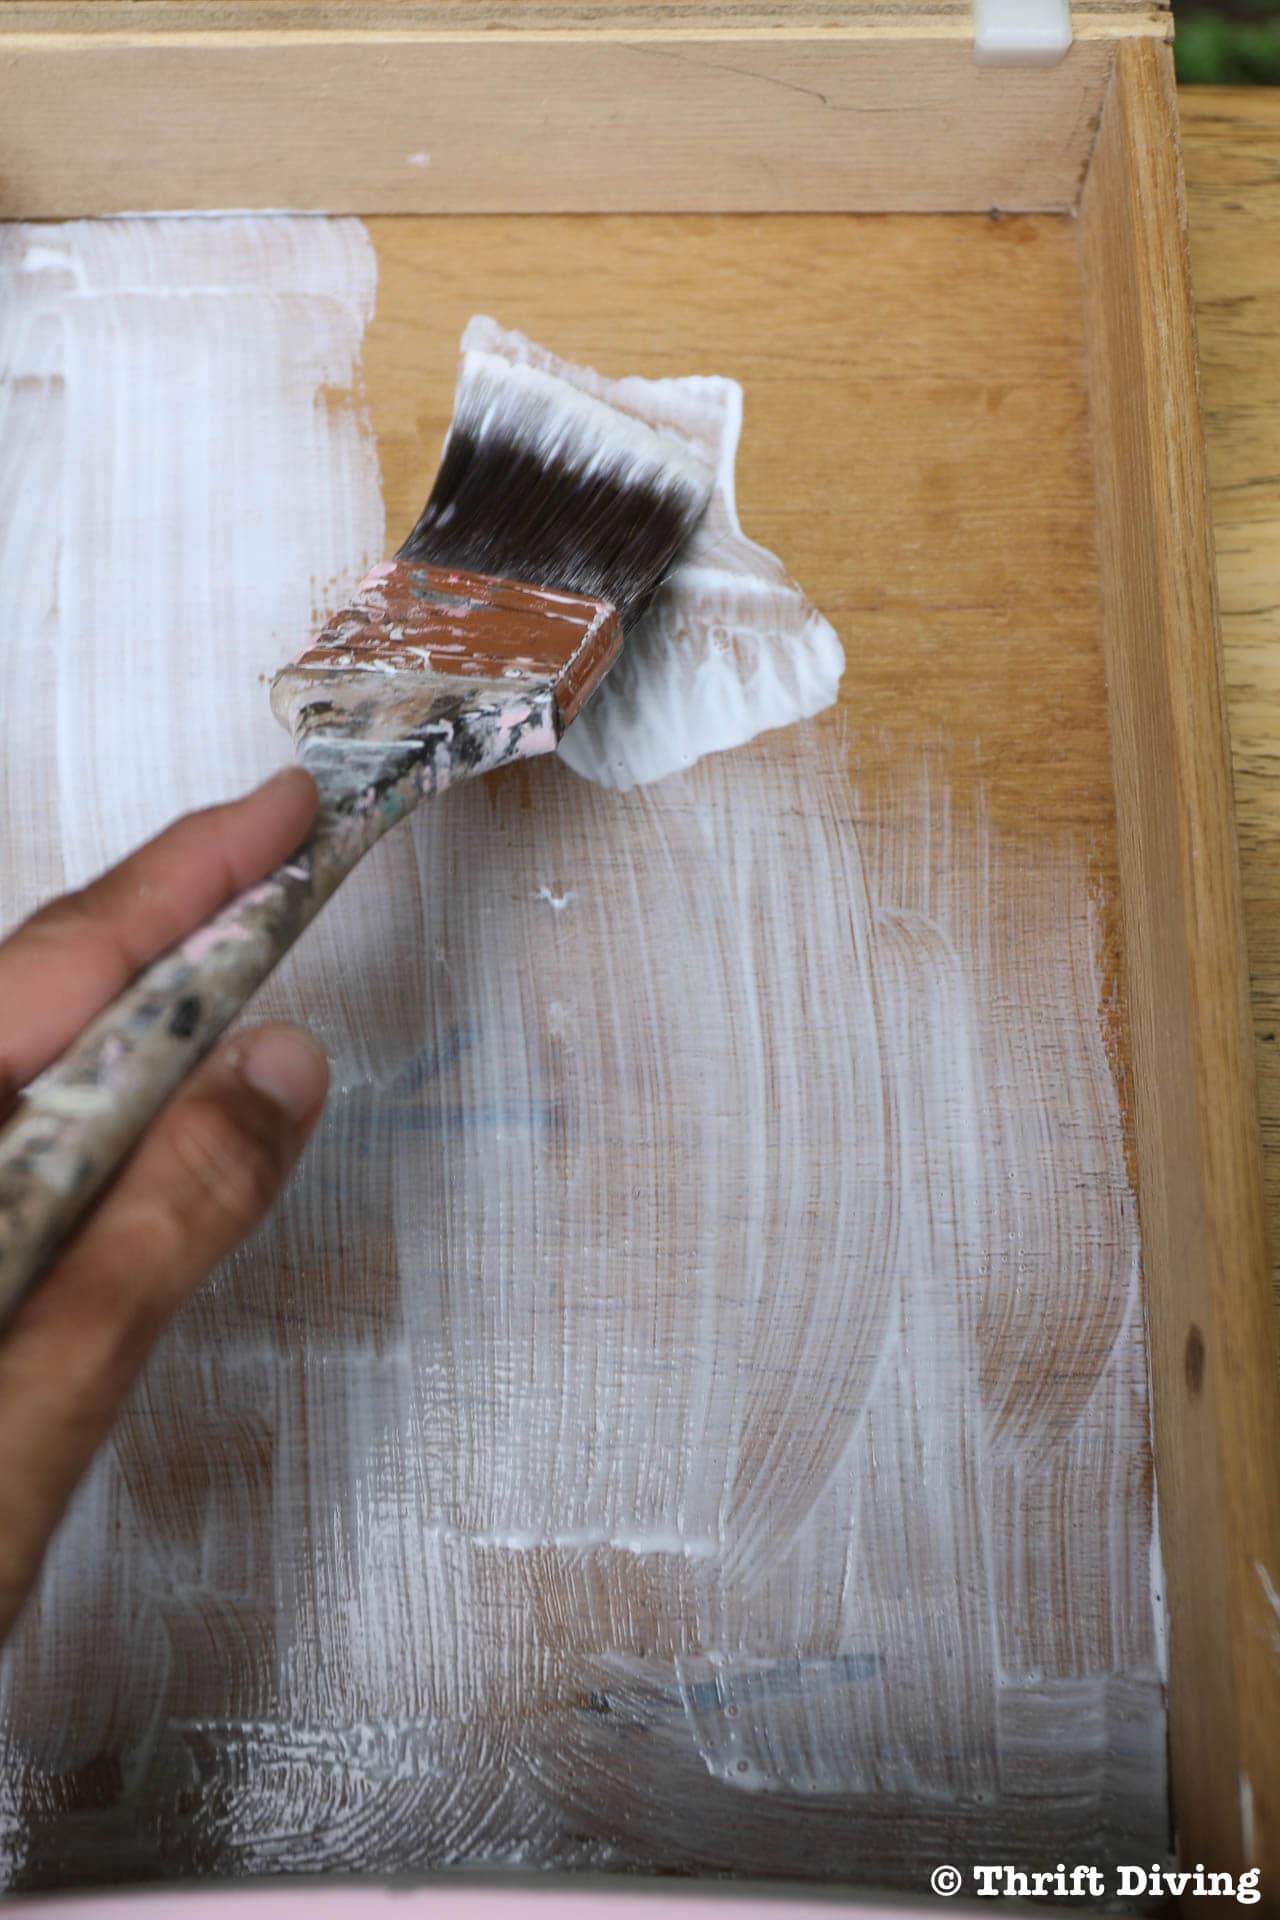
STEP 4: Coat the Back of the Paper With Sealer and Place
Scrapbook paper is super thick, so don’t worry about applying too much sealer. It won’t seep through or ruin the paper. Place enough so that there will be good adhesion. Apply the paper to the sides in the same way by adding a coat of sealer to the drawer, sealer to the back of the scrapbook paper, then use a brayer to remove any bubbles trapped underneath.
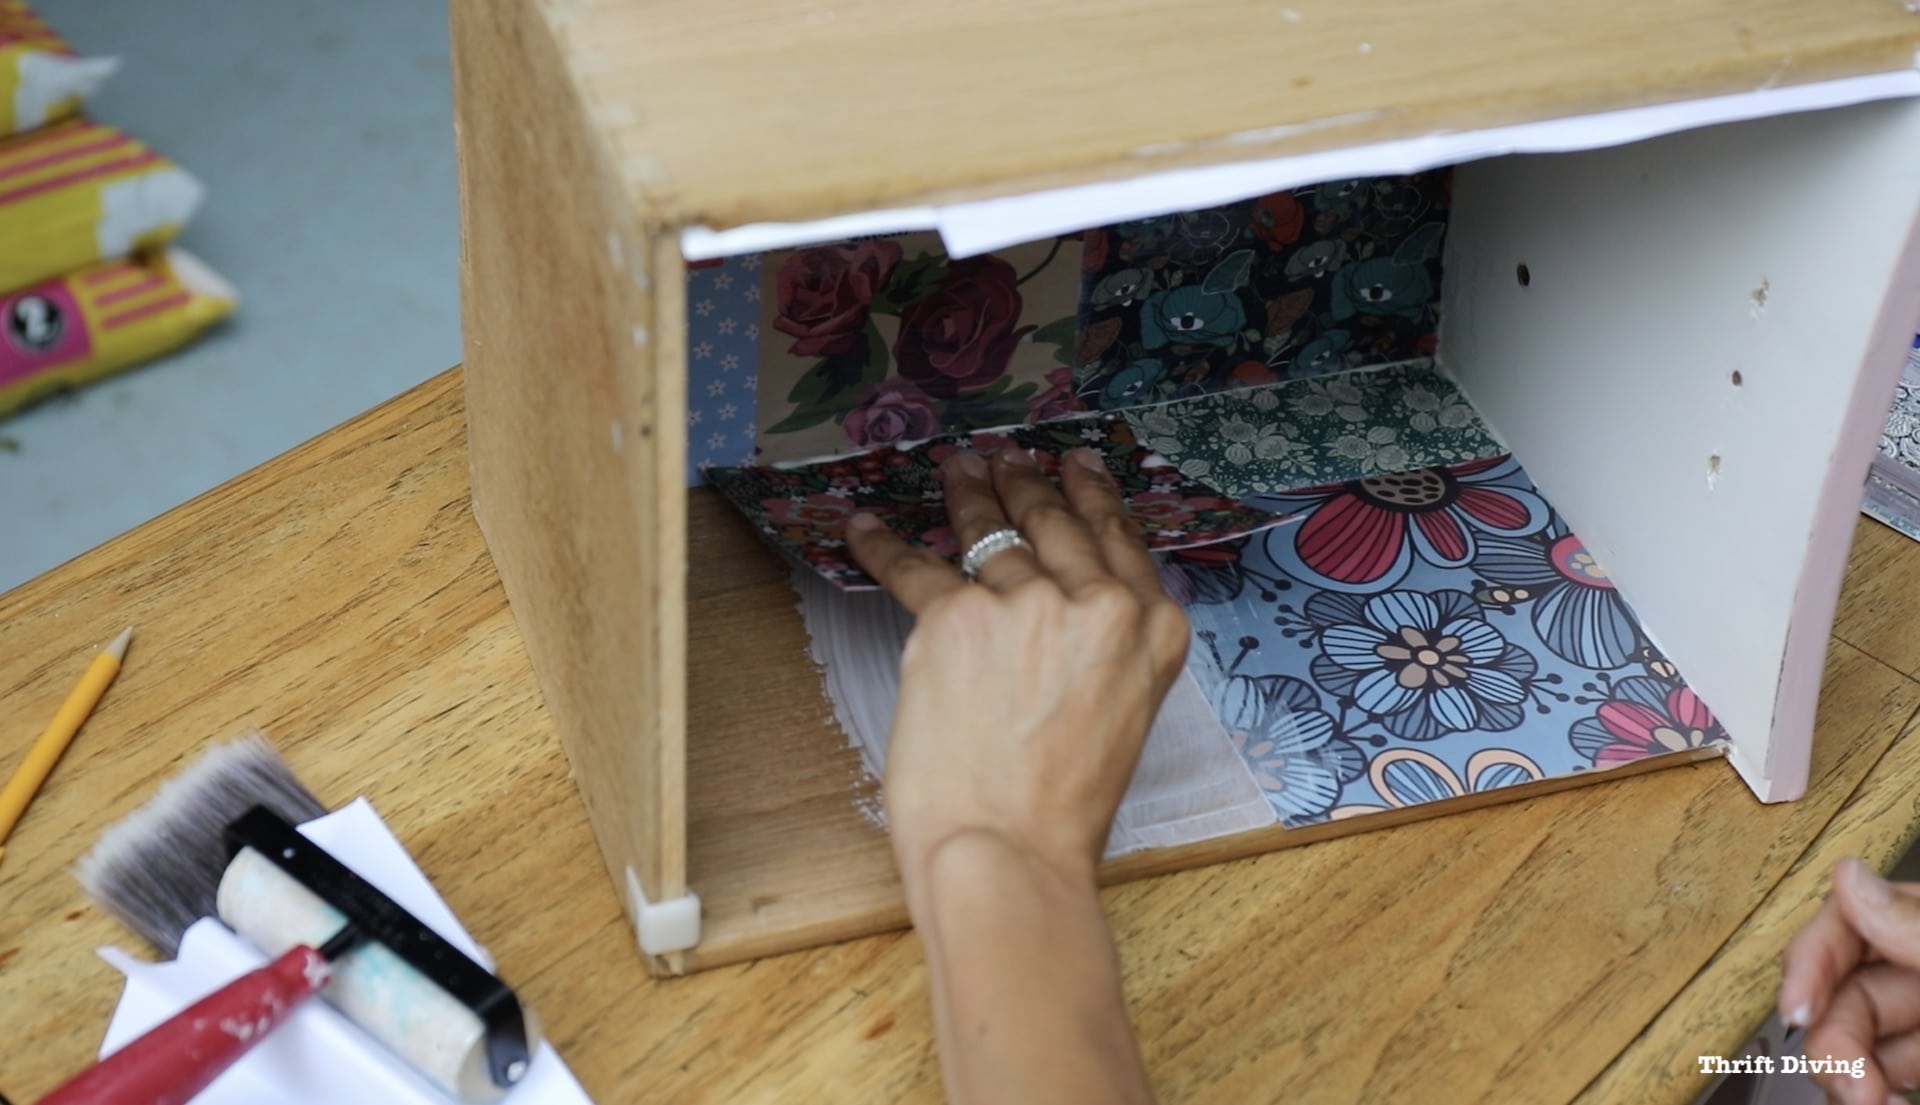
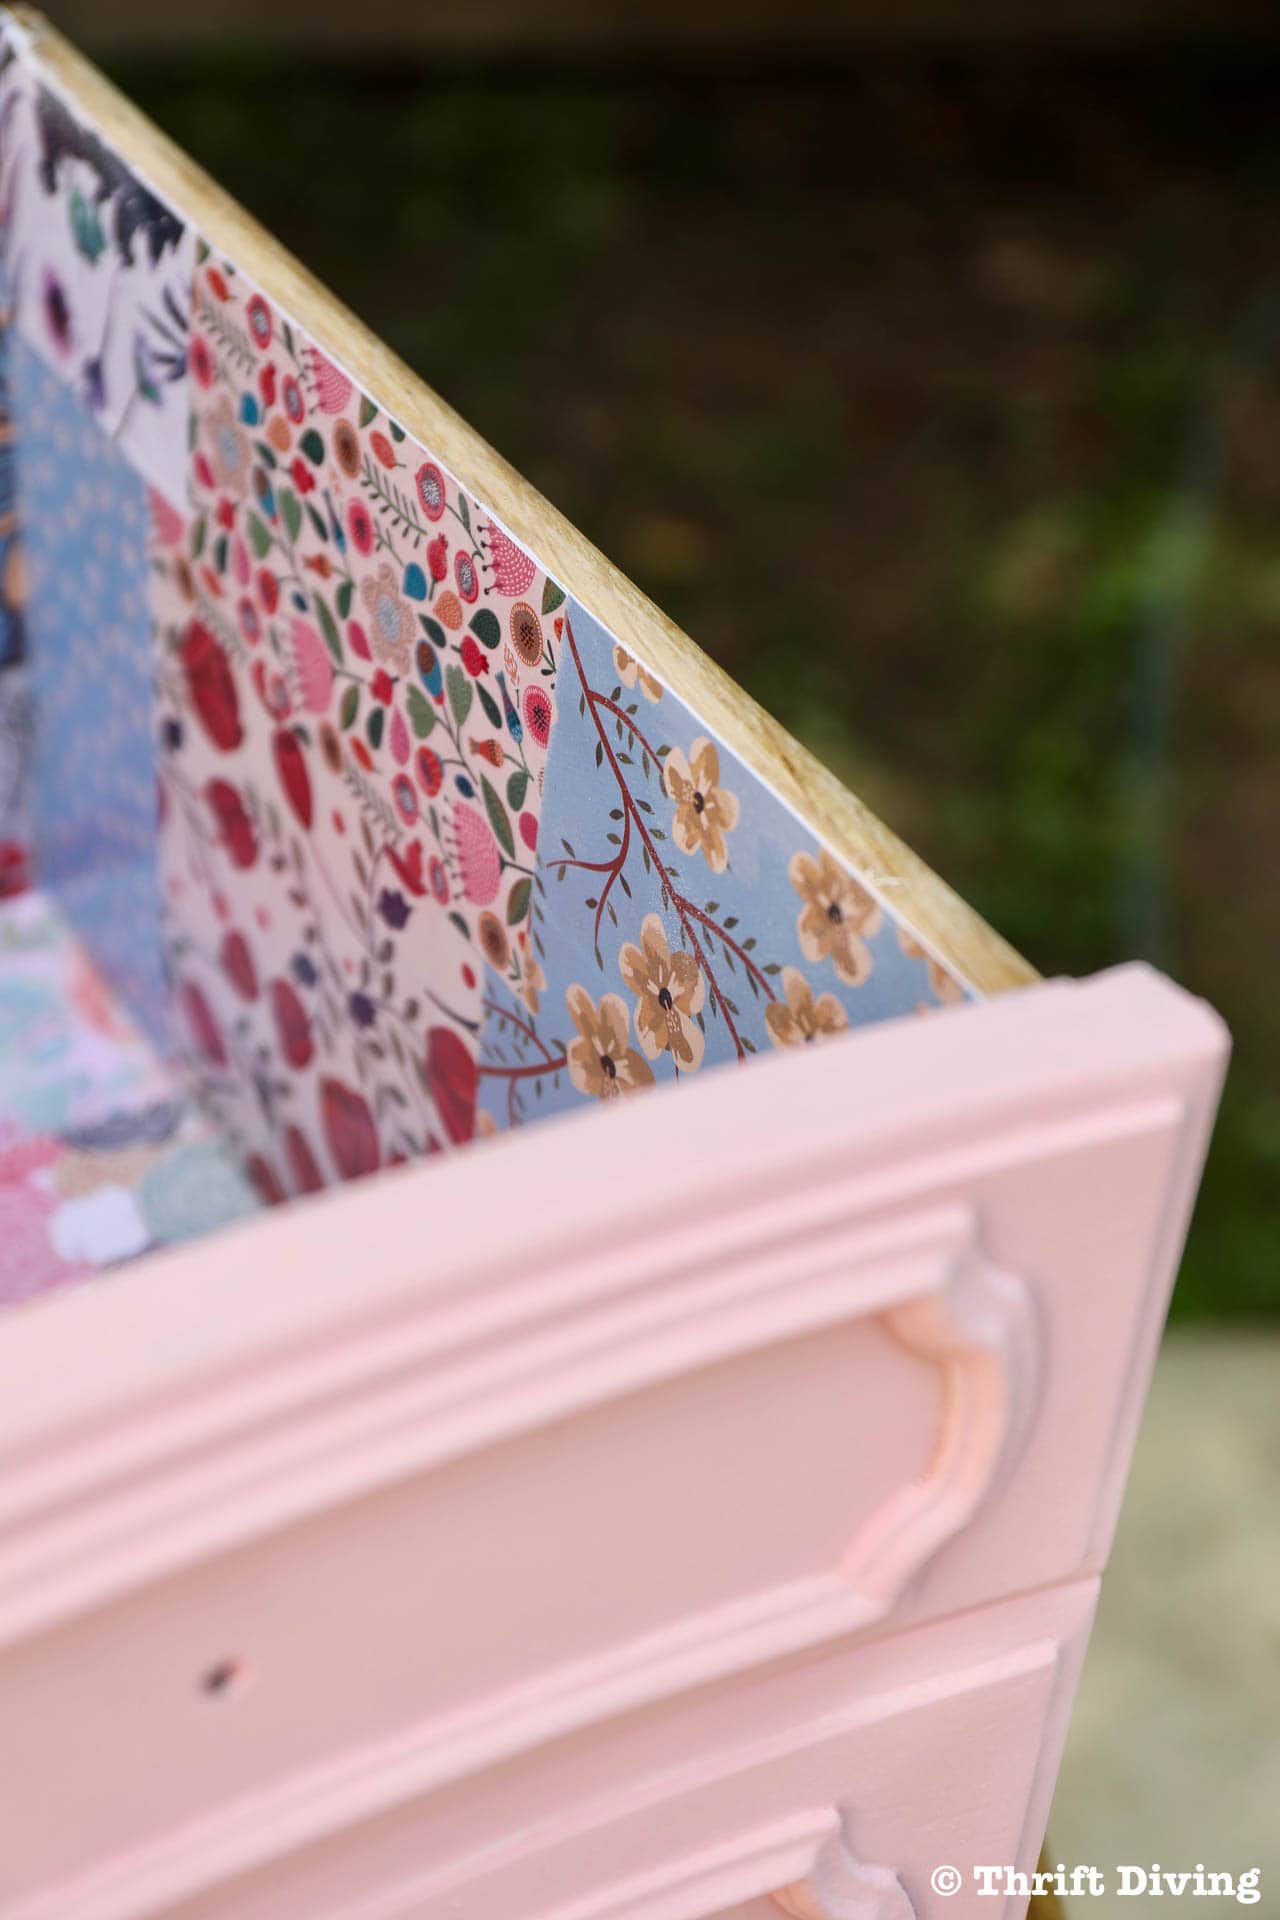
Here’s the trick to making this turn out nice: be sure to extend the paper past the side of the edges about 1/4″!
The reason why is because if you try to cut a precise piece of scrapbook paper to fit the dimensions of your drawer, you’ll likely be slightly off and you’ll waste paper re-cutting new pieces, or you’ll have sections that look a little uneven and bare along the edge. You want a crisp-looking fit, not a fit that looked like you cut the paper with your eyes closed. HA!
Stick with me here, because I’ll show you a little trick to getting a good, exact fit!
STEP 5: Add a Coat of Sealer on Top
Next, add a coat of sealer on top of the scrapbook paper. This will help to seal it from any spills in your drawers.
If you choose not to add paper to the sides, then skip that part and just paper the bottom and add a coat of sealer.
STEP 6: Let It Dry a Little Bit, Then Sand the Edges
This is where the magic happens to get the paper to fit nice and crisp to the edges.
As I mentioned in Step 4, the paper should be longer than the edges of the drawer. If needed, trim it down with scissors, but leave about 1/4″ to 3/8″ extended past the edges.
Once it dries a little, take some 220-grit sandpaper and sand the edges at an angle.
But make sure you only sand in one direction. Don’t sand back and forth because it will loosen the paper at the edge.
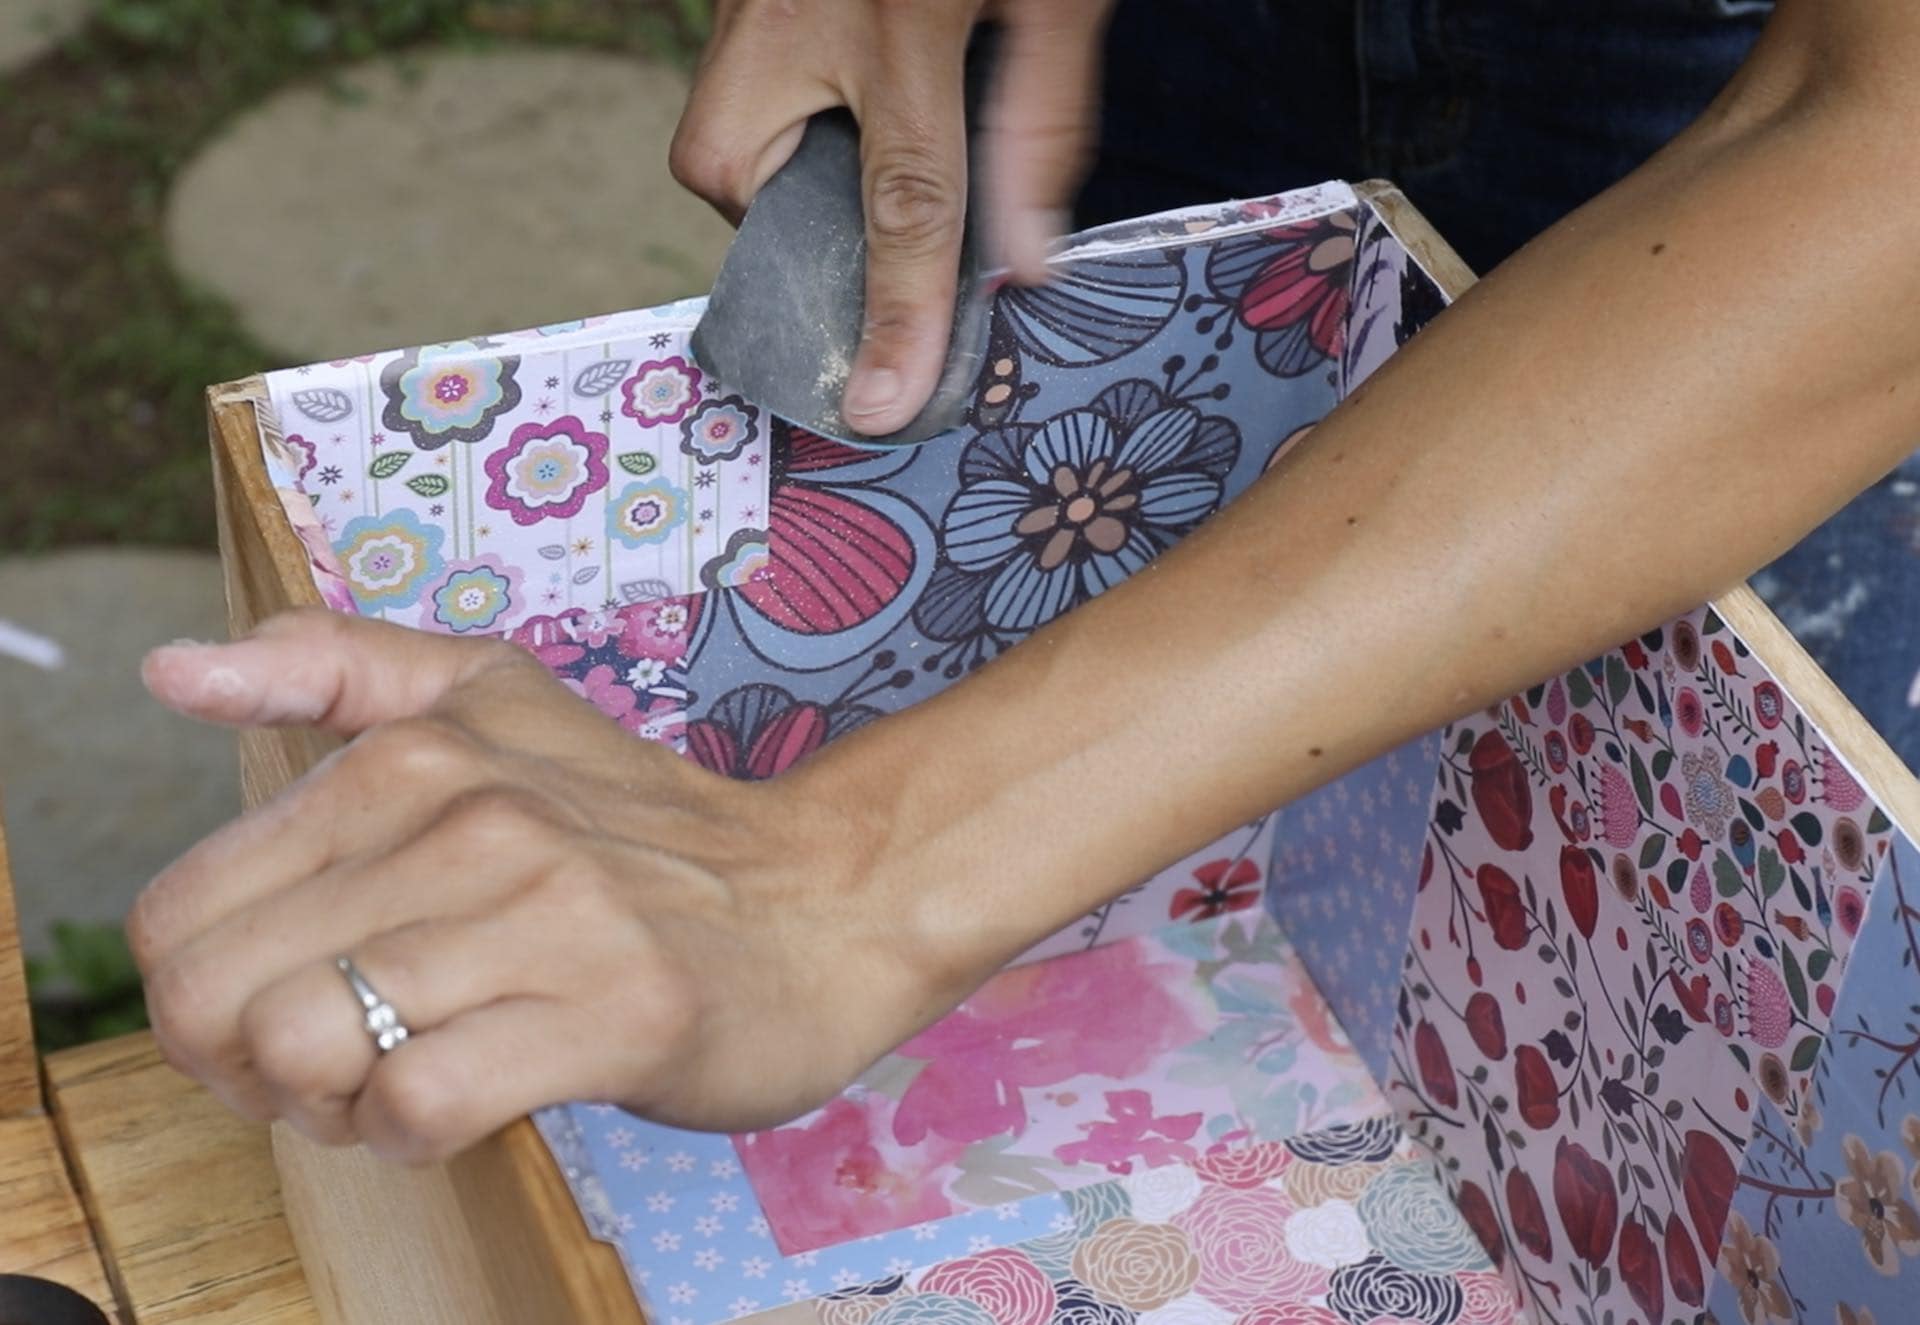
Sanding in one direction (towards you) at angle cuts the paper off right at the edge of the drawer, creating a perfect fit!
Notice how crisp the paper is on the right side of the box? That side had been sanded. The back and other side hadn’t been sanded yet.
Trust me, fits this precise with scissors or a paper cutter just ain’t happening, my friend! Not for this girl! LOL
The sanding method works great every time when gluing paper onto a surface with a sharp edge!
When the edges are all sanded and perfect, apply a light coat of sealer to the edges of the drawer, extending the sealer onto the edges of inside drawer, helping to re-seal any of the paper due to sanding.
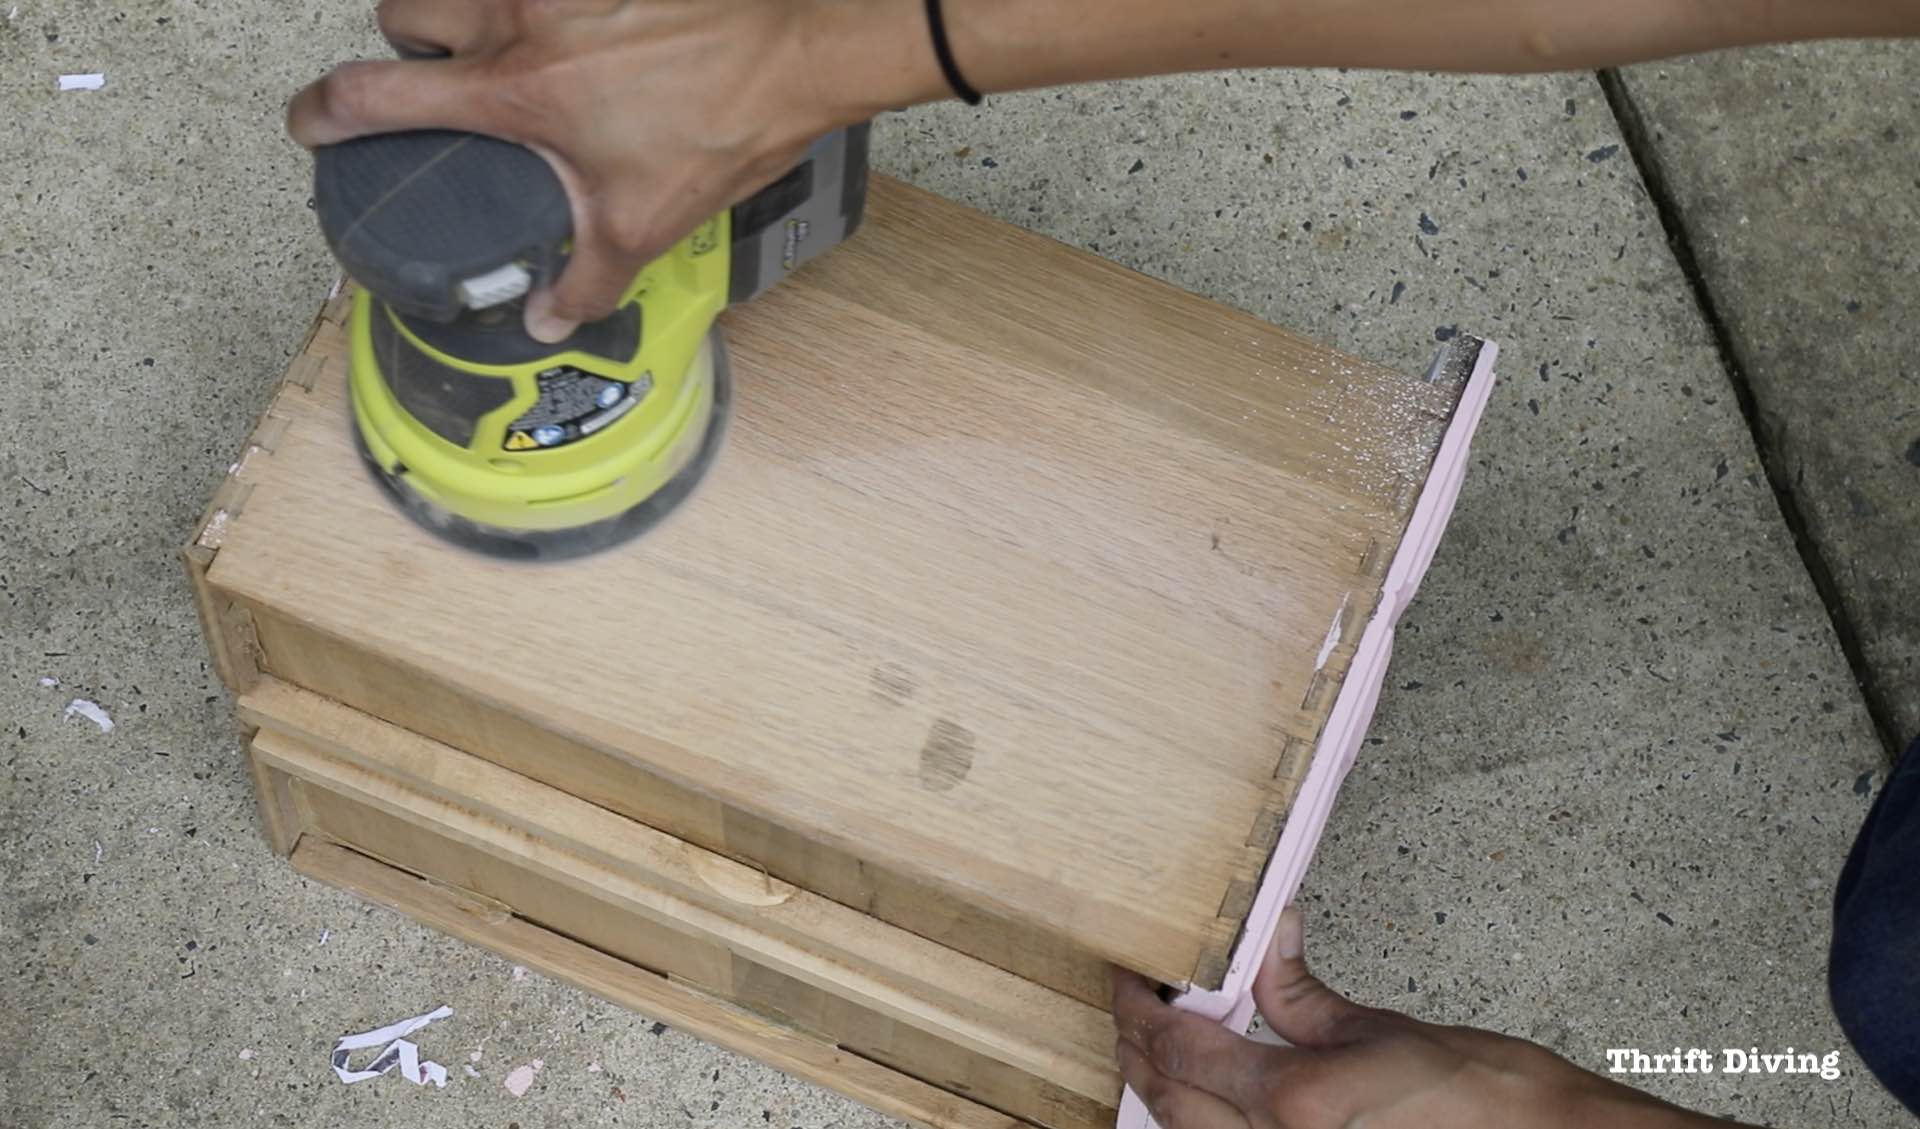
STEP 7: Sand the Sides of the Drawer
This is another little trick I like to use: when refinishing furniture, use an orbital sander to sand the sides of the boxes if you’re not painting them.
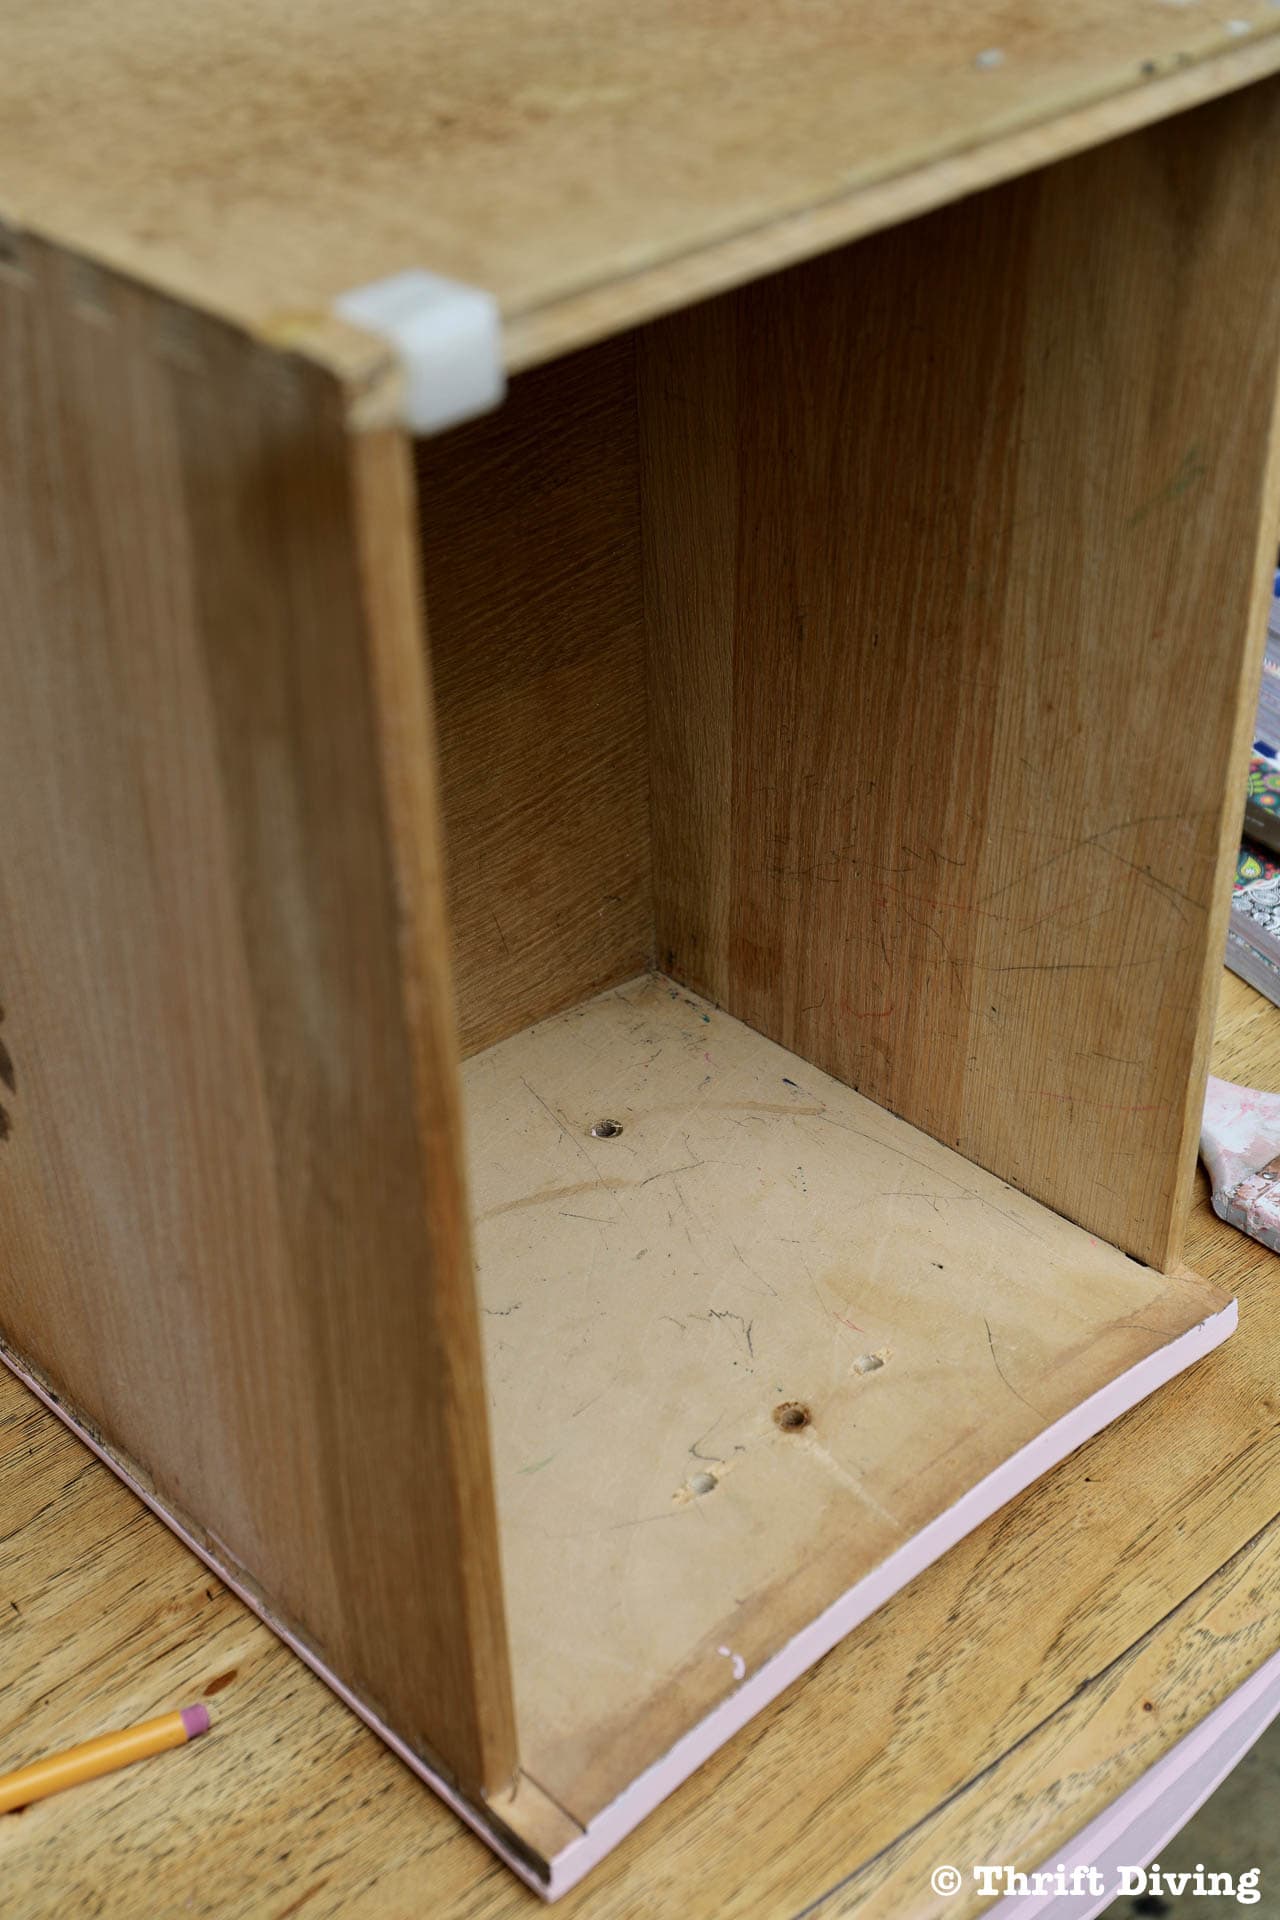
Usually, the drawers are all old, yellowed, worn out or stained. A quick swipe over with them with the sander helps to get out blotches and yellowing and makes the outside of the drawer boxes feel fresher! You can see here how it’s lightening the yellowed wood!
Let’s have another look at the drawers!
BEFORE
AFTER!

I loved the look of the patchwork scrapbook paper that I decided to use to line the inside of the French Provincial vanity, as well!
Who wouldn’t want to open this and see their favorite papers inside?! 🙂
BEFORE
AFTER

Check Out More Awesome Craft Projects With Scrapbook Paper!
- How to Make a Gift Box Out of Scrapbook Paper
- Ugly Lamp Makeover From the Thrift Store (See How I Covered the Shade With Pretty Paper!)
- Ugly Lamp Makeover From the Thrift Store
Enjoy this tutorial? Be sure to SAVE it!
![]()
So what do you think of my thrifted French Provincial vanity makeover with drawers lined in pretty scrapbook paper?!
Visit your local A.C. Moore or find them online for more product information and inspiration!


Download the 5 freebies!

Thrift Diving inspires women to decorate, improve, and maintain their home themselves...using paint, power tools, and thrift stores! Use these 5 printables, checklists, and ebooks to get started!
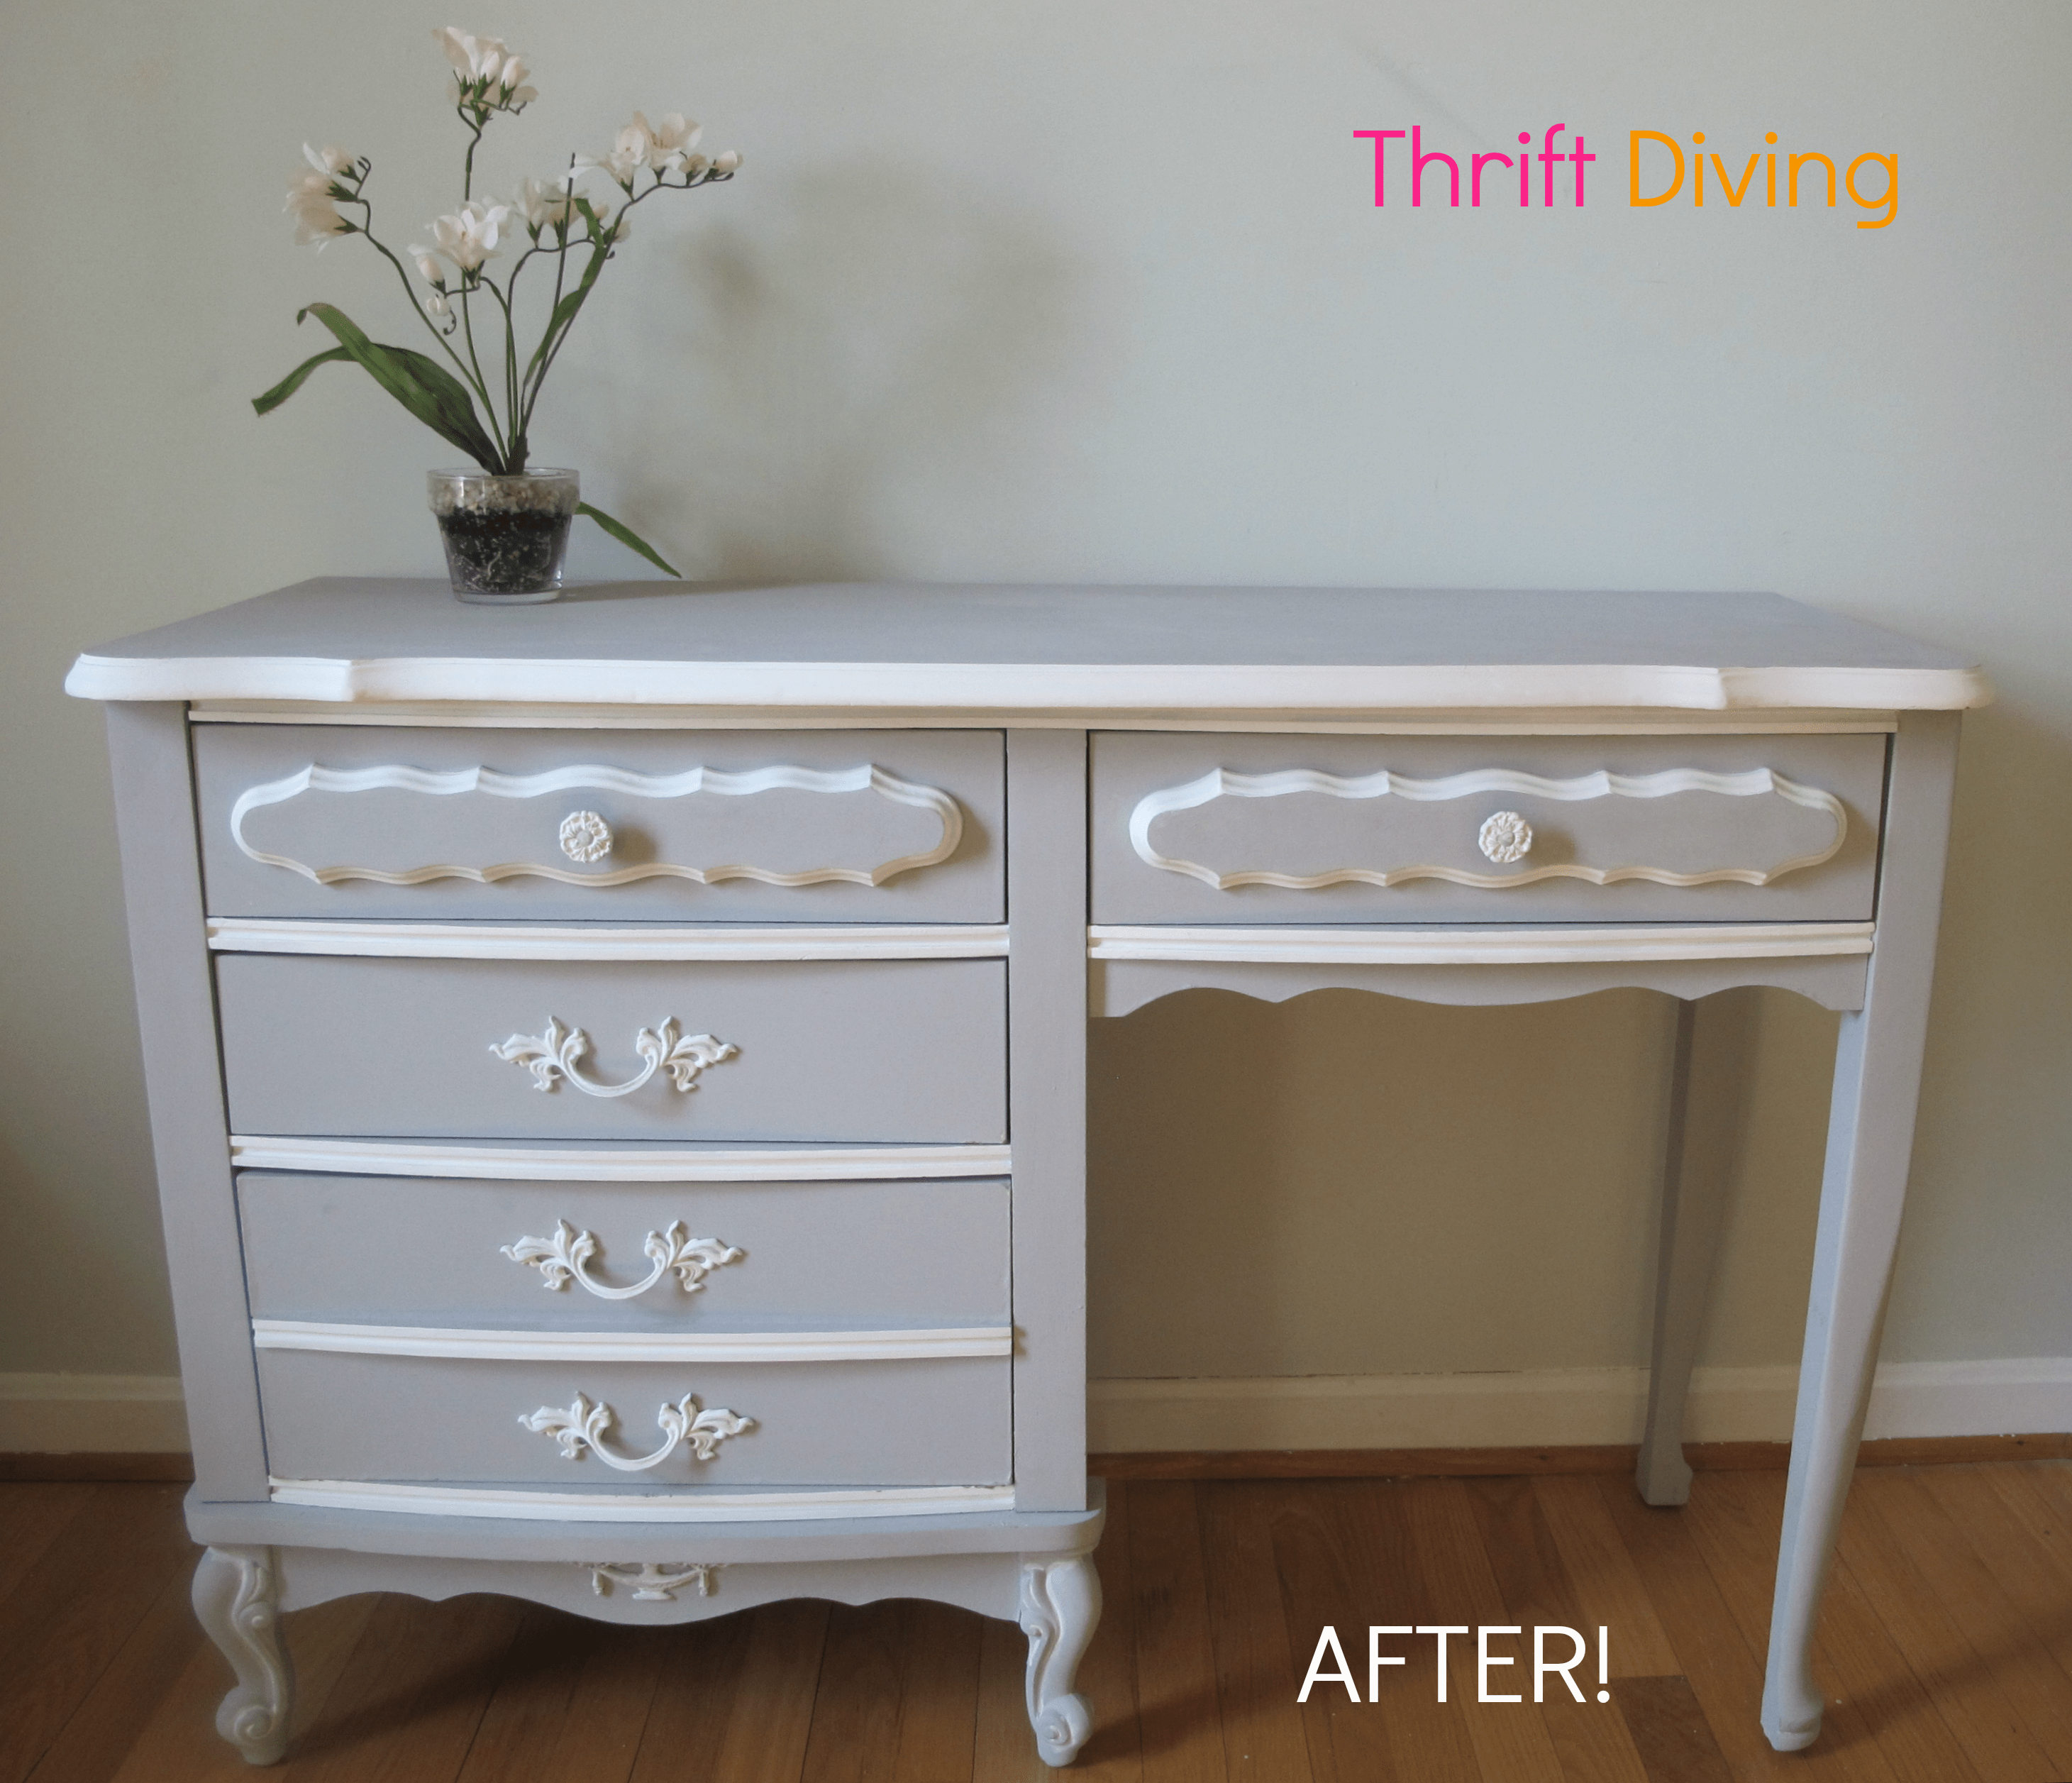
It sure doesn’t look like a $10 piece anymore!! Great job, Serena!
I also am behind in my emails. Hope you continue to heal and enjoy your new found health. You are a shining example to us all. I honestly believe I can line the drawers just the way you did. You make it look so do-able. Blessings to you and take care.
I’m rather behind on my email, but I’m so sorry to hear of all you had to go through. Glad to hear your feeling better and hopefully much more so, since I am responding so long after your post. The vanity looks great!
The top was solid wood which is so rewarding to see the wood almost breath after removing all the old varnish and goop, I am a novice and would love to see your steps in taking it from yucky to beautiful, what kind of stripper did you use? did you use stain with sealer? did the stain have a “color” Please give this novice your play by play “how to do”. I felt my creativity come alive with your scrap paper ideas, Thanks for sharing.
This is a beauty. You made a miracle happen with her. of course I have seen you turn so many old and worn out pieces into treasures. I expect nothing less from your work. Do the same with your healing process. Take the recovery time to dream up new wonders to share with us. Blessings on you and your health.
Very happy to hear that you’re feeling better, and are finally able to eat without discomfort. Take it easy, and give your body a chance to recover completely. Your dedicated fans will be here waiting!!
BTW, absolutely LOVE what you did with this vanity!! I would so buy this piece from you, but more importantly, I wish we lived closer so you could teach me where to find these jewels. I go to my Goodwill store here in town, and the pieces I find are all composite wood. I have yet to come across a beauty like that vanity. You can tell it has good bones, even in the before picture!! Love the soft pink color, but the lined drawers with vintage paper is absolutely gorgeous!! Do take care of yourself, so you can recover and keep these great posts coming!!
Prayers for continued speedy recovery! I love this post so much, I am all about pretty prints in paper and fabric, and love Modge Podge. I have a collection of scrapbook paper that will probably never make it into an actual scrapbook, lol, but there are so many possibilities with this idea. I recently thrifted a wooden bookshelf I plan to repaint for my daughter’s college apartment, and I may try this in the back of the shelf. Thanks for the tip about sanding the edge of the paper to get a clean edge!
Hi Serena! Glad to hear the surgery went well. And yes..please listen to the doctors and take it easy! Your followers and fans will be right here waiting for you! 😊
What a nice job yo did on this vanity! Love the soft pink and the paper lining. Very inspiring 🙂
What a great idea! Can’t wait to get to this stage on my current project. Best wishes for a speedy recovery!