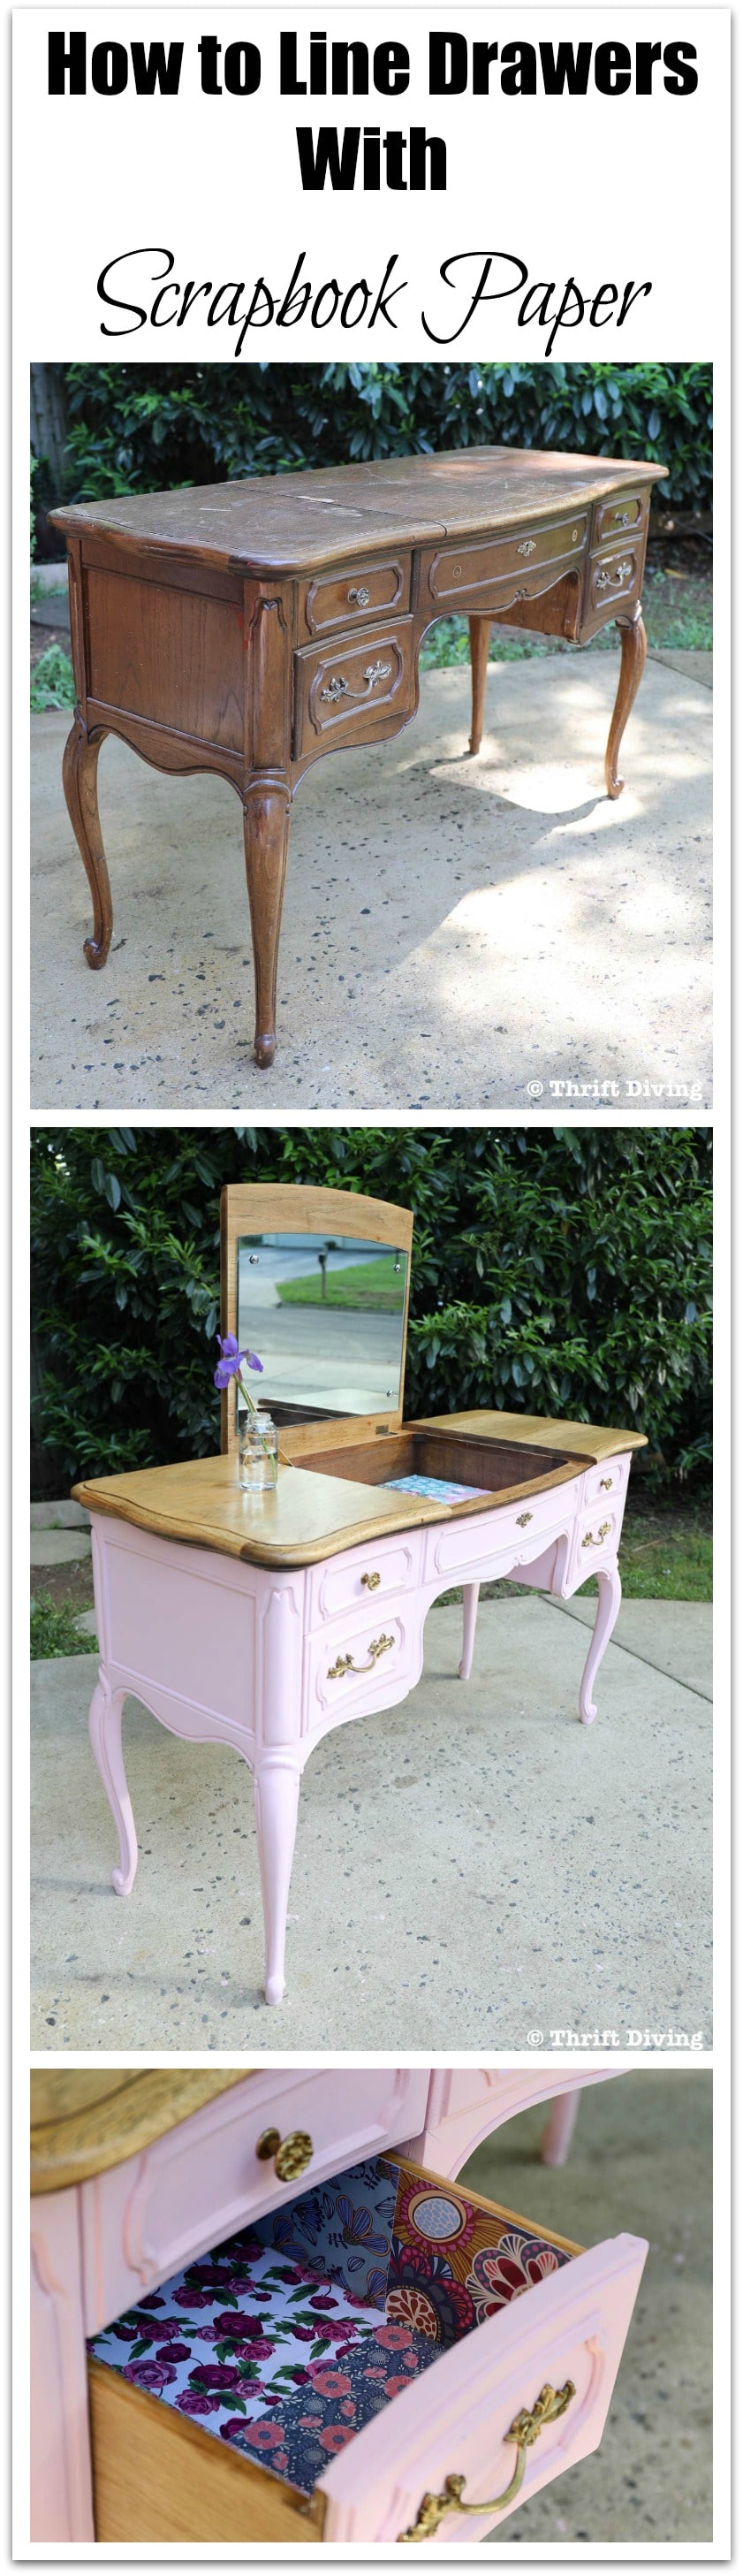
How to Line Drawers With Pretty Scrapbook Paper
This is a sponsored post written by me on behalf of A.C. Moore. All opinions are 100% mine.
I know….insanity, right??
I struggled with what I wanted to do to it because I have learned how to love wood, after building my DIY bathroom vanity from scratch and knowing how expensive wood can be!
So to paint this, seemed like it would have been a travesty.
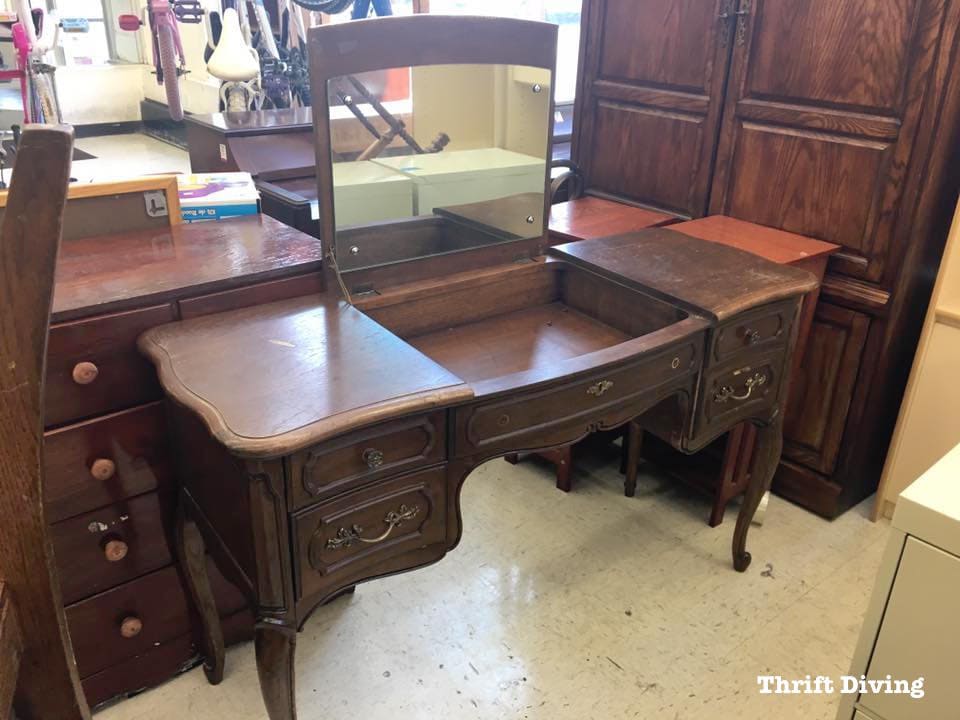
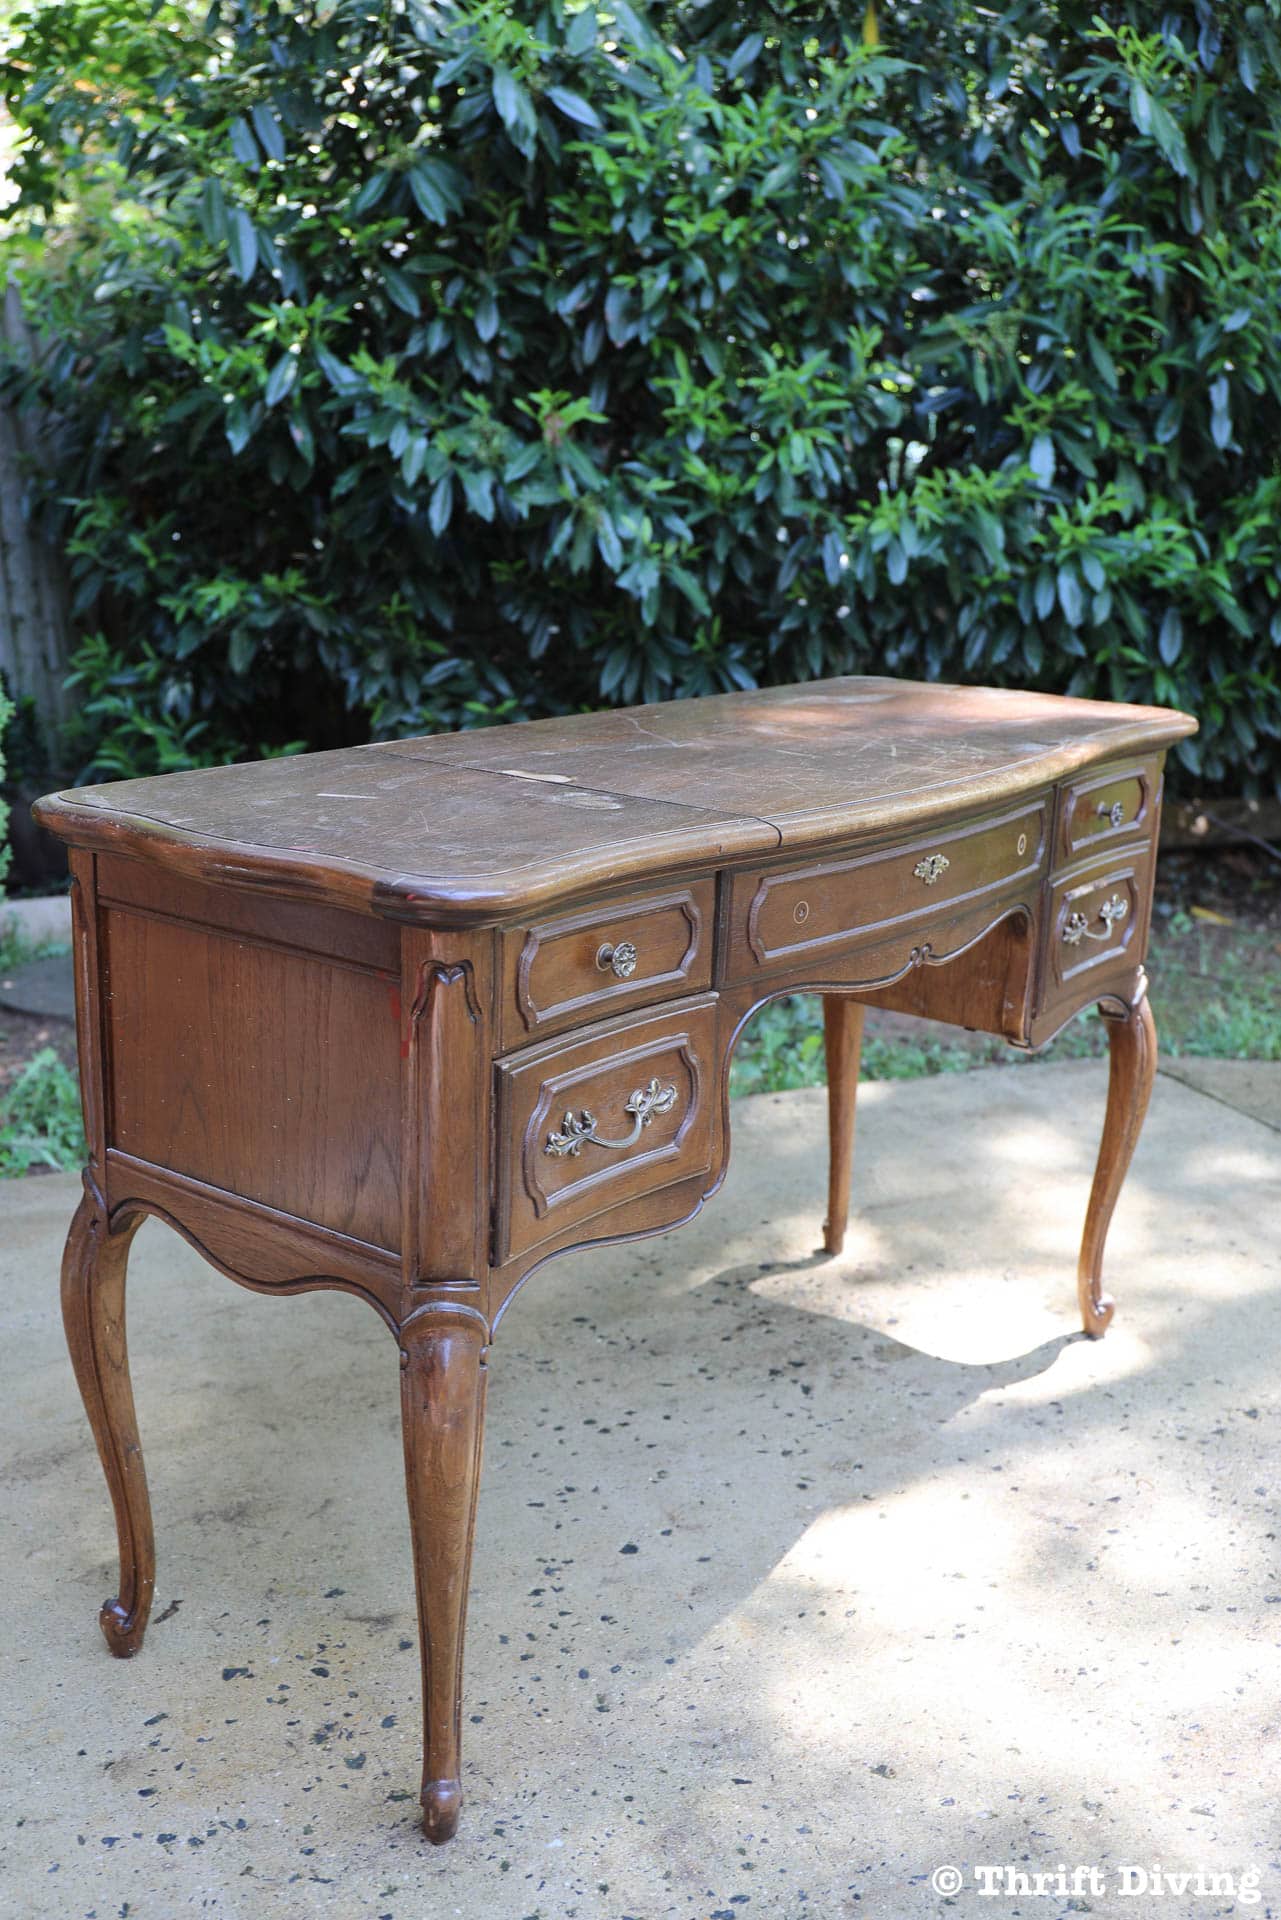
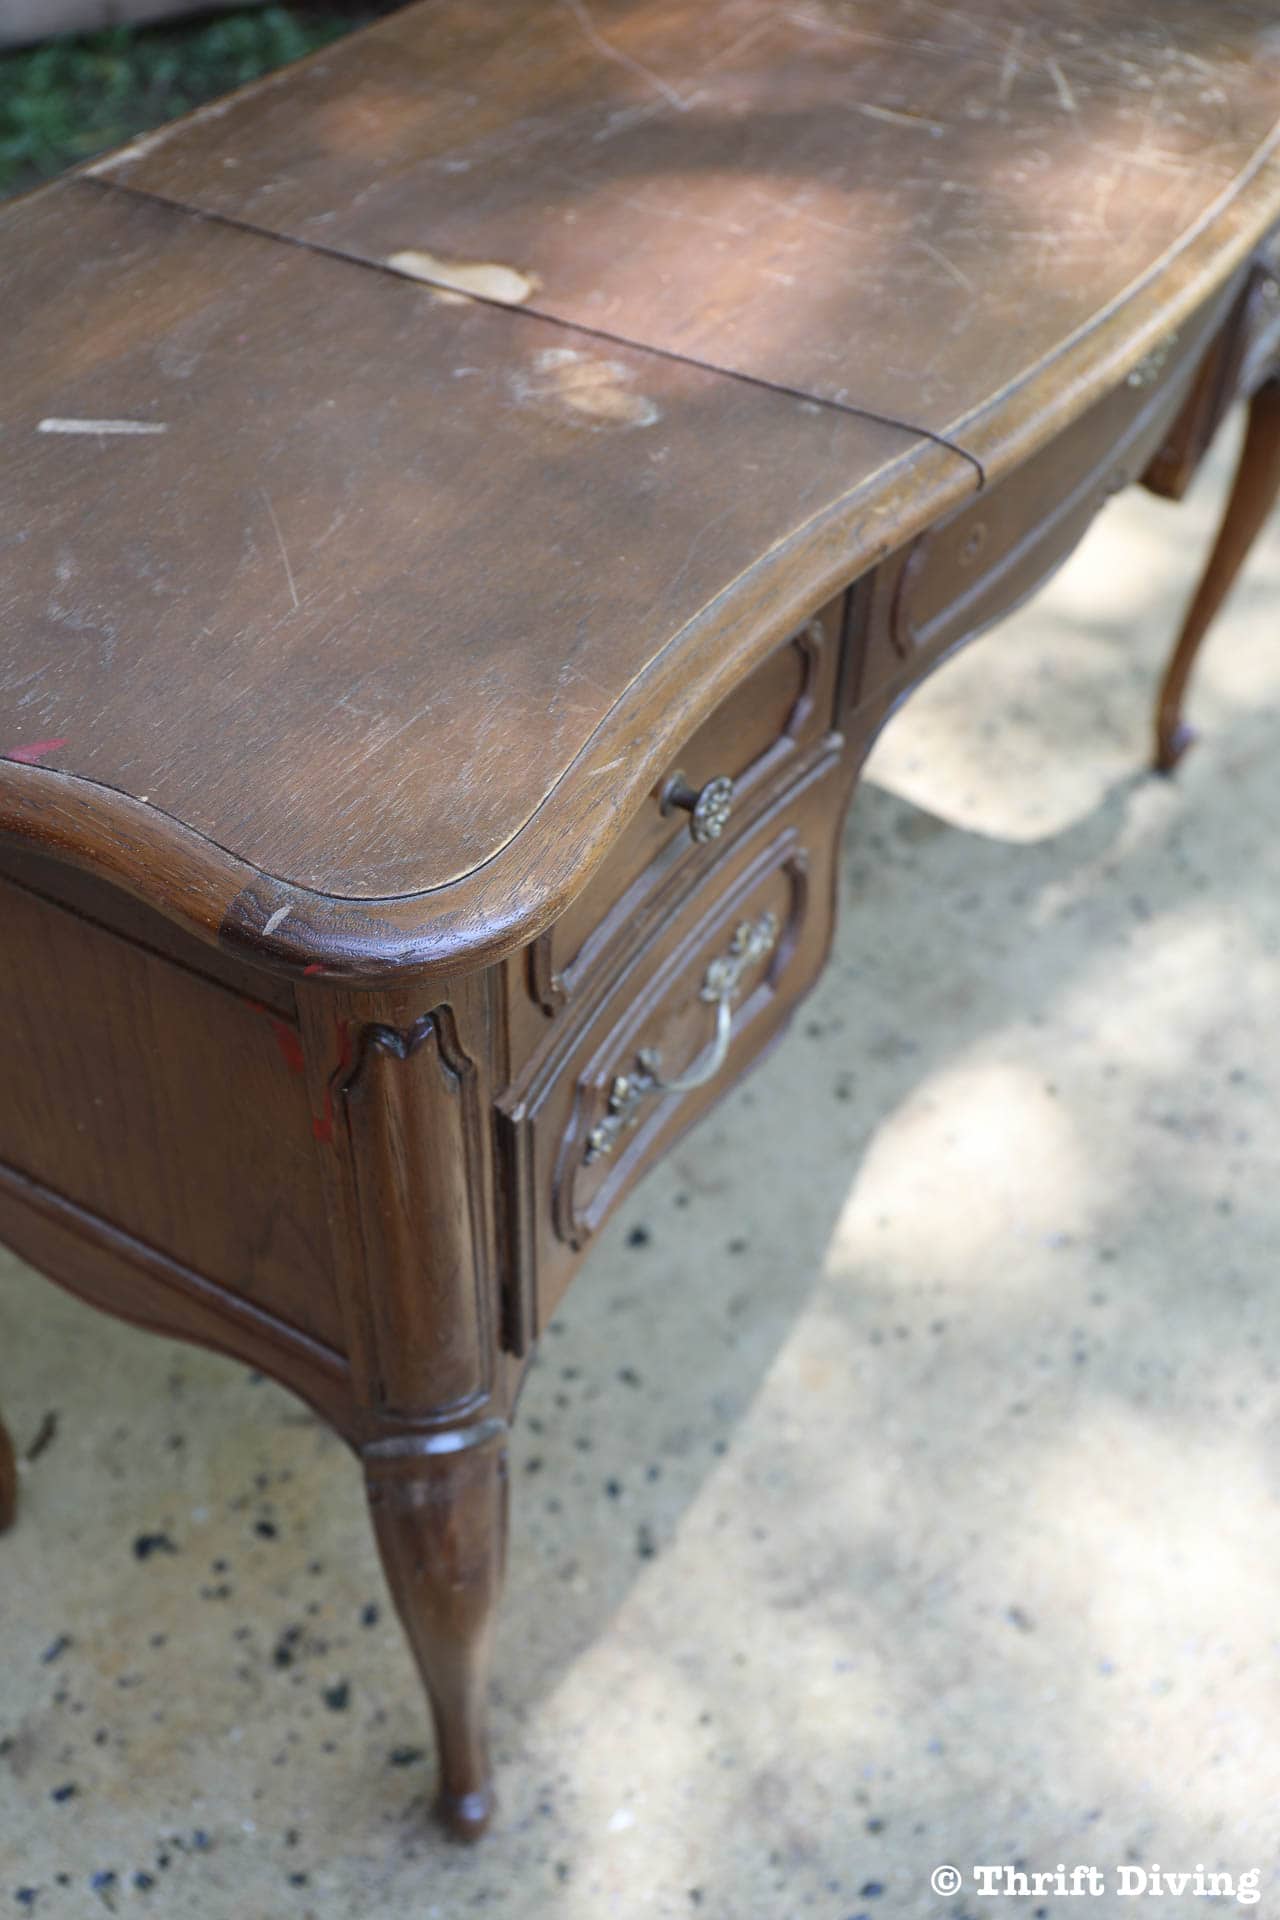
Yet, the top was all scratched up, the brown wasn’t doing it any justice, and it was taking up valuable real estate in my garage.
Stripping down a French Provincial vanity like this would have been a pain the butt. So many cracks, crevices, and molding. I’ve got more important things to do with my time than to scrape out gunk from the cracks of thrift store furniture. 😉
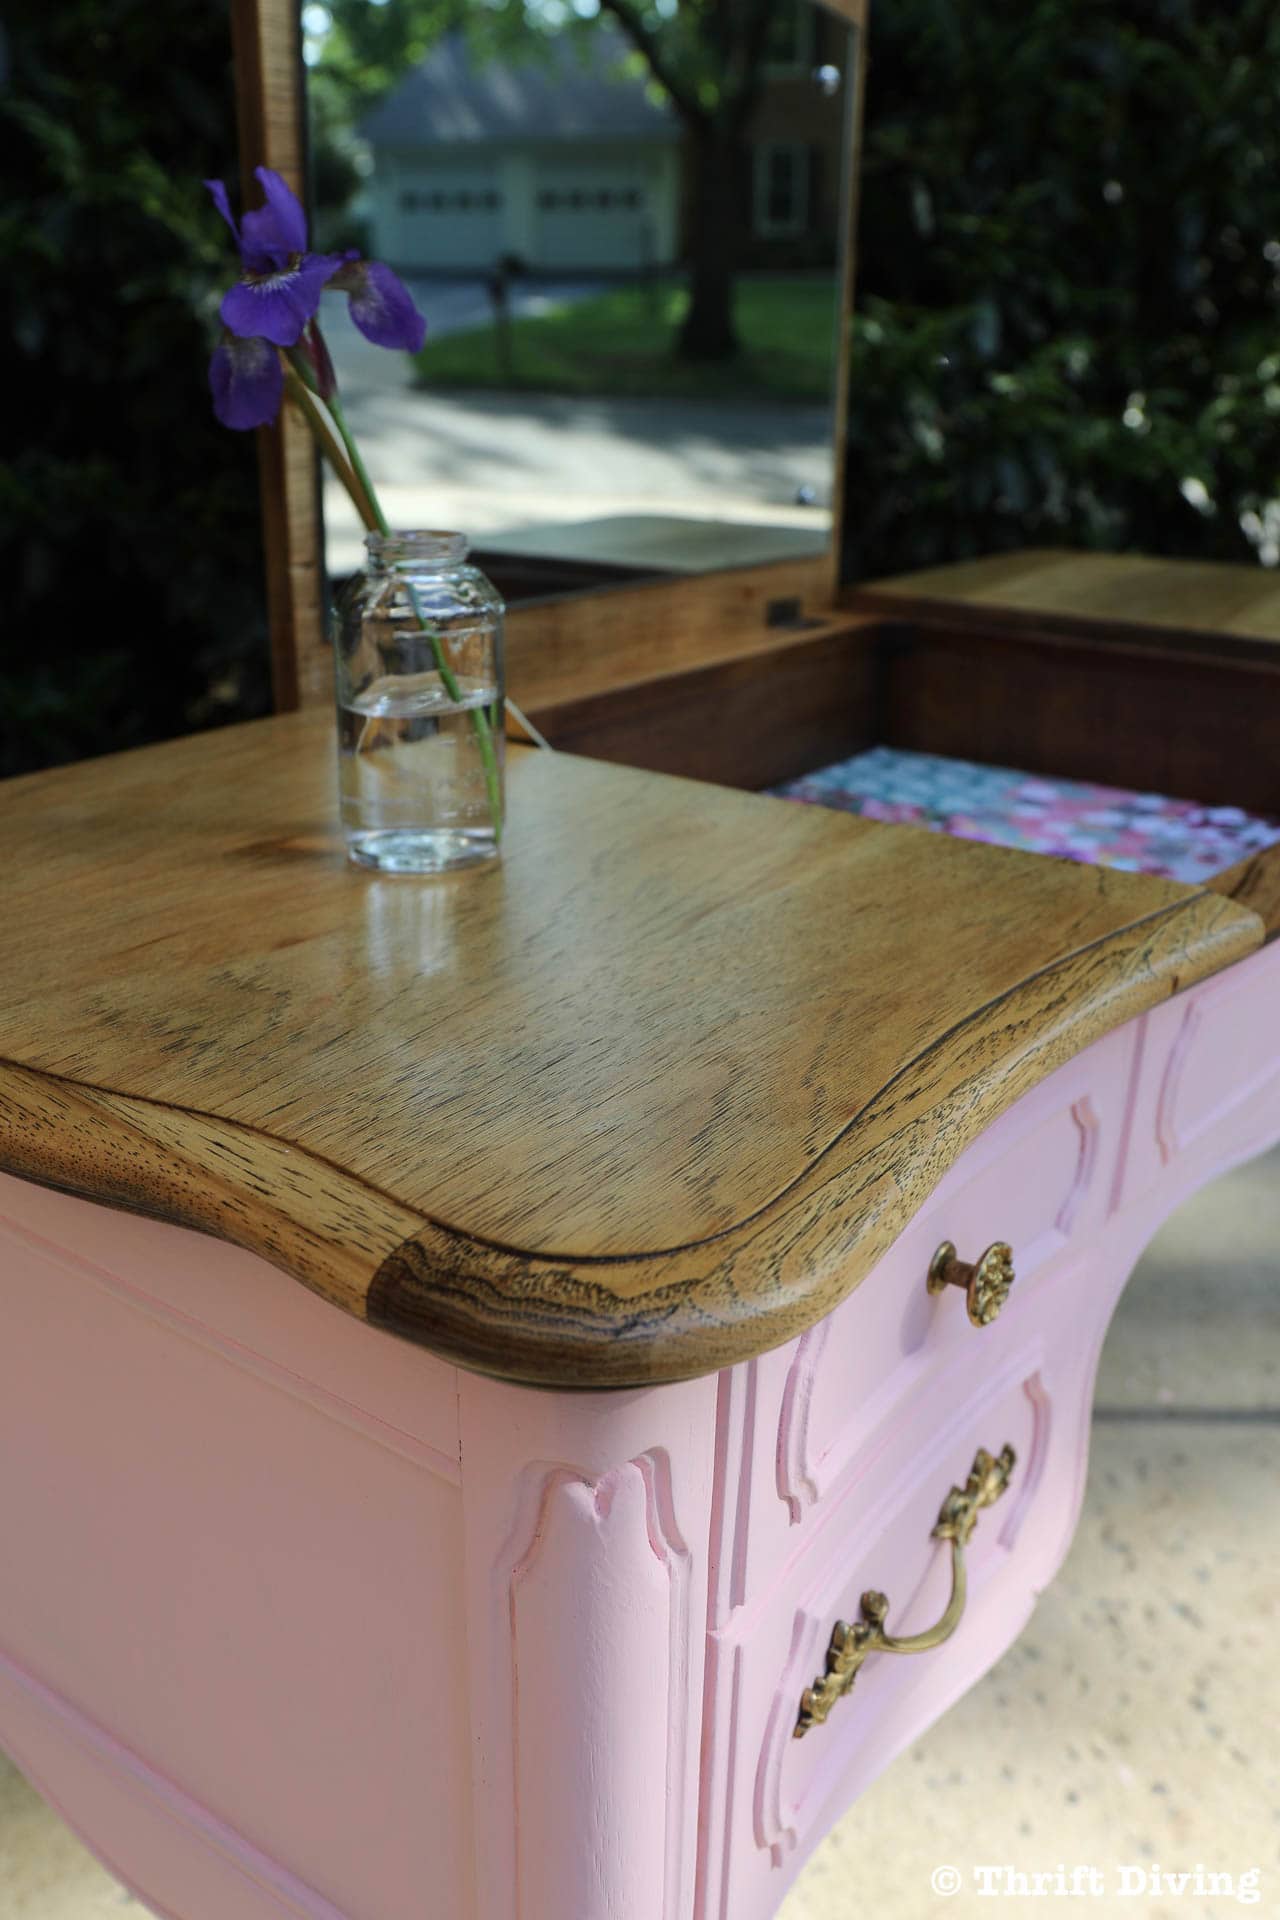
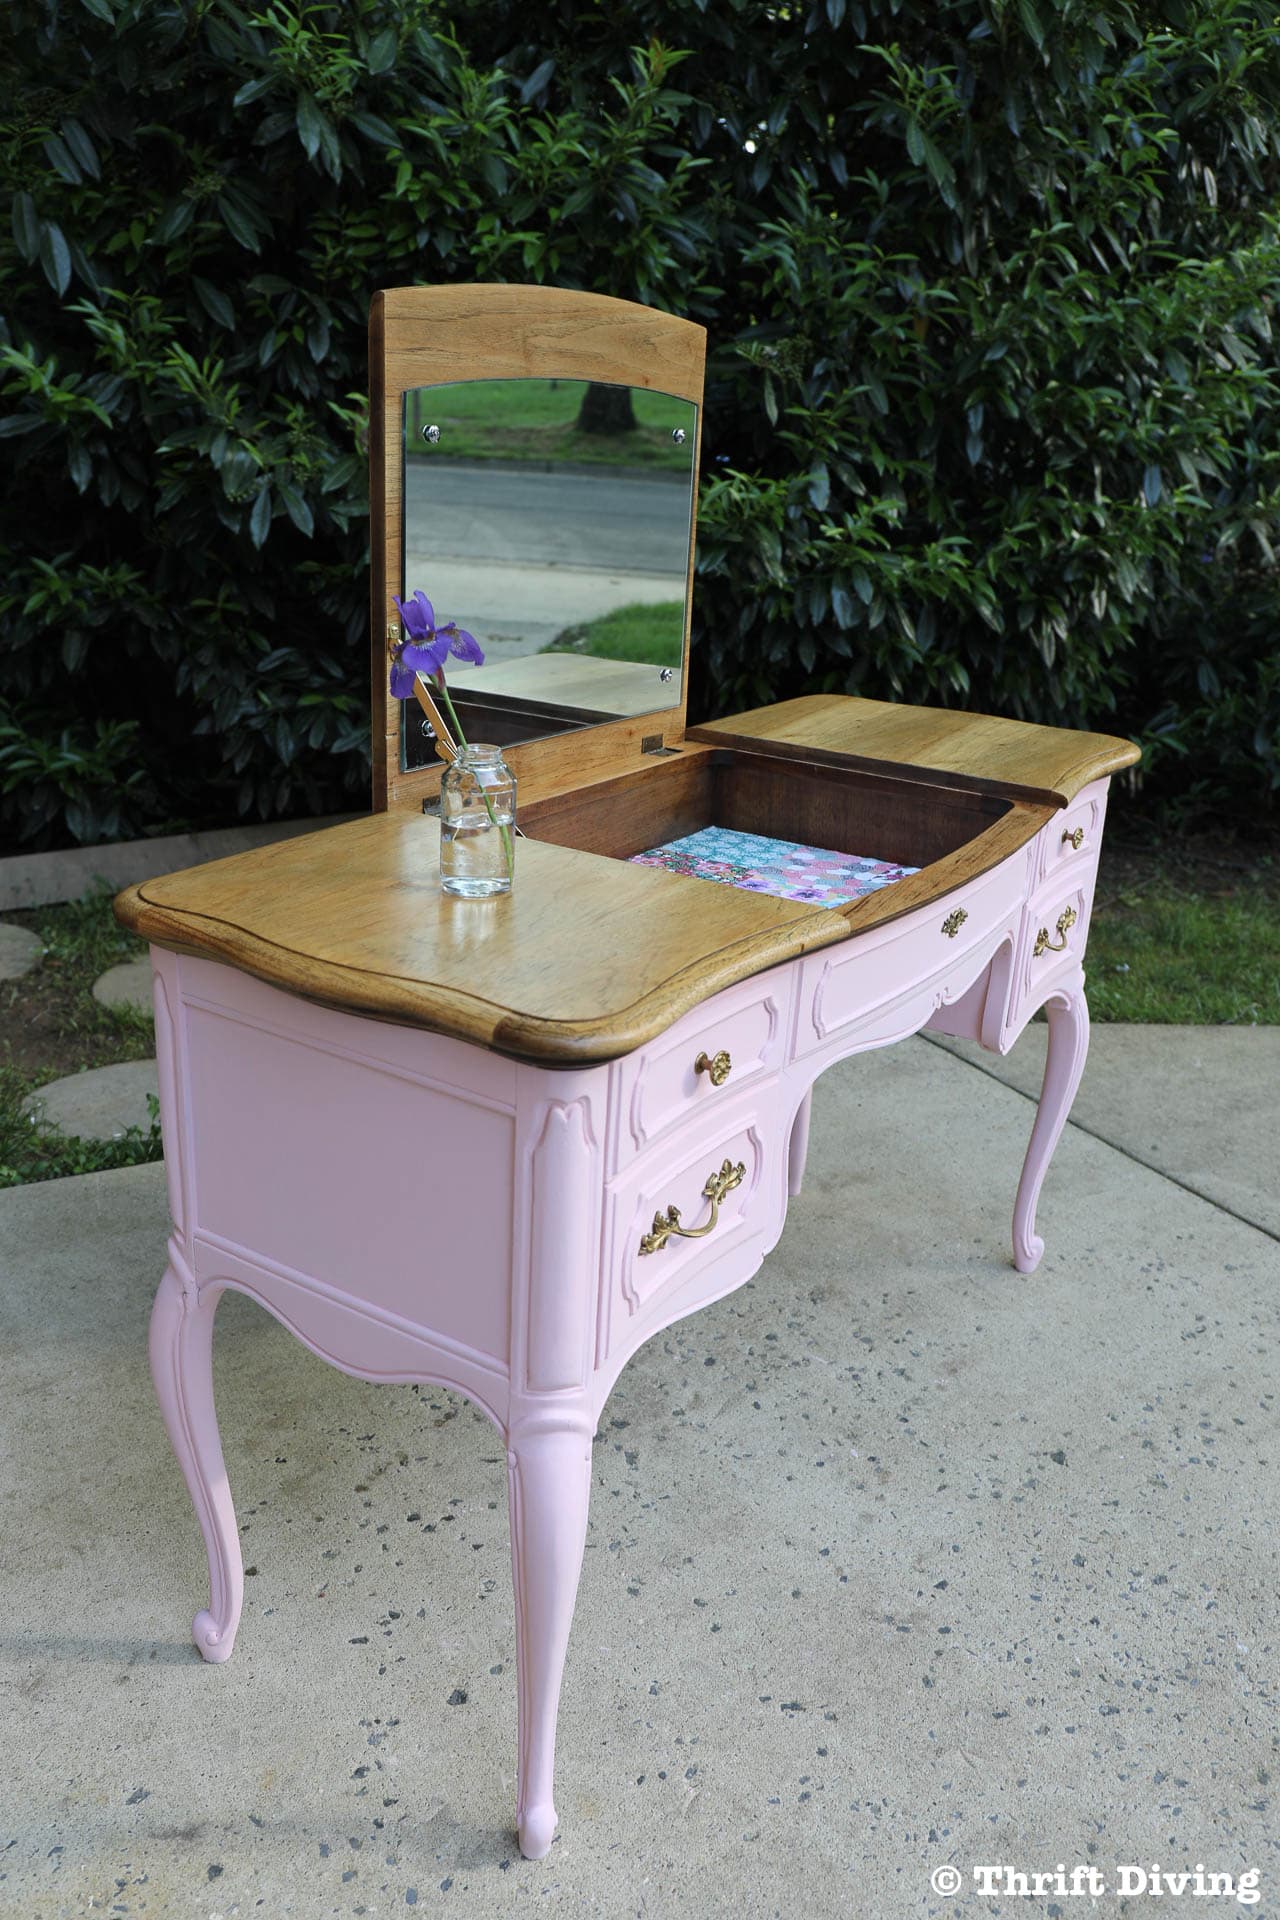
So I decided to give this French Provincial vanity the best of both worlds: a stripped top and a painted body with a custom-mixed baby pink chalked paint!
BEFORE
AFTER!
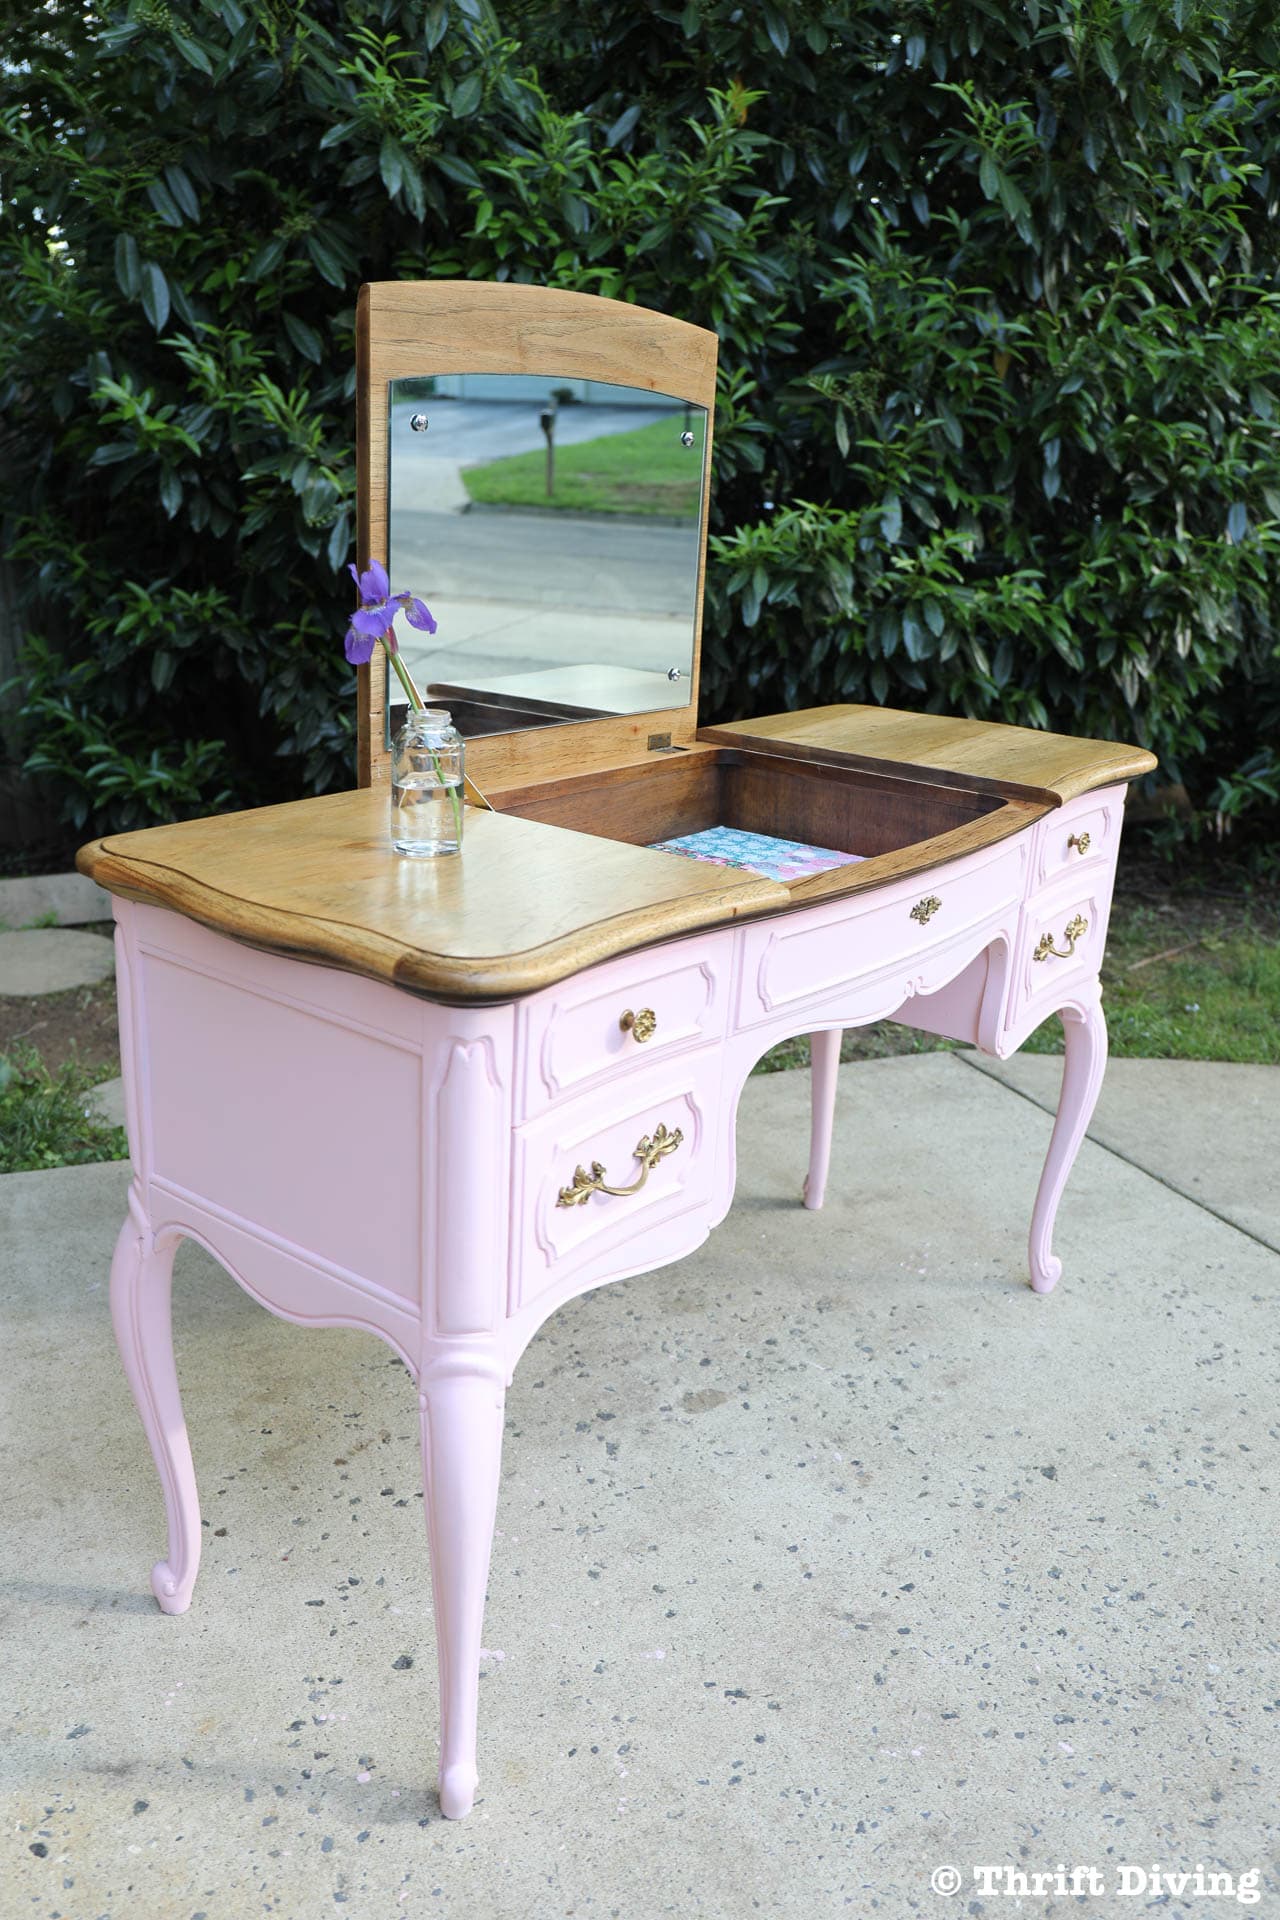
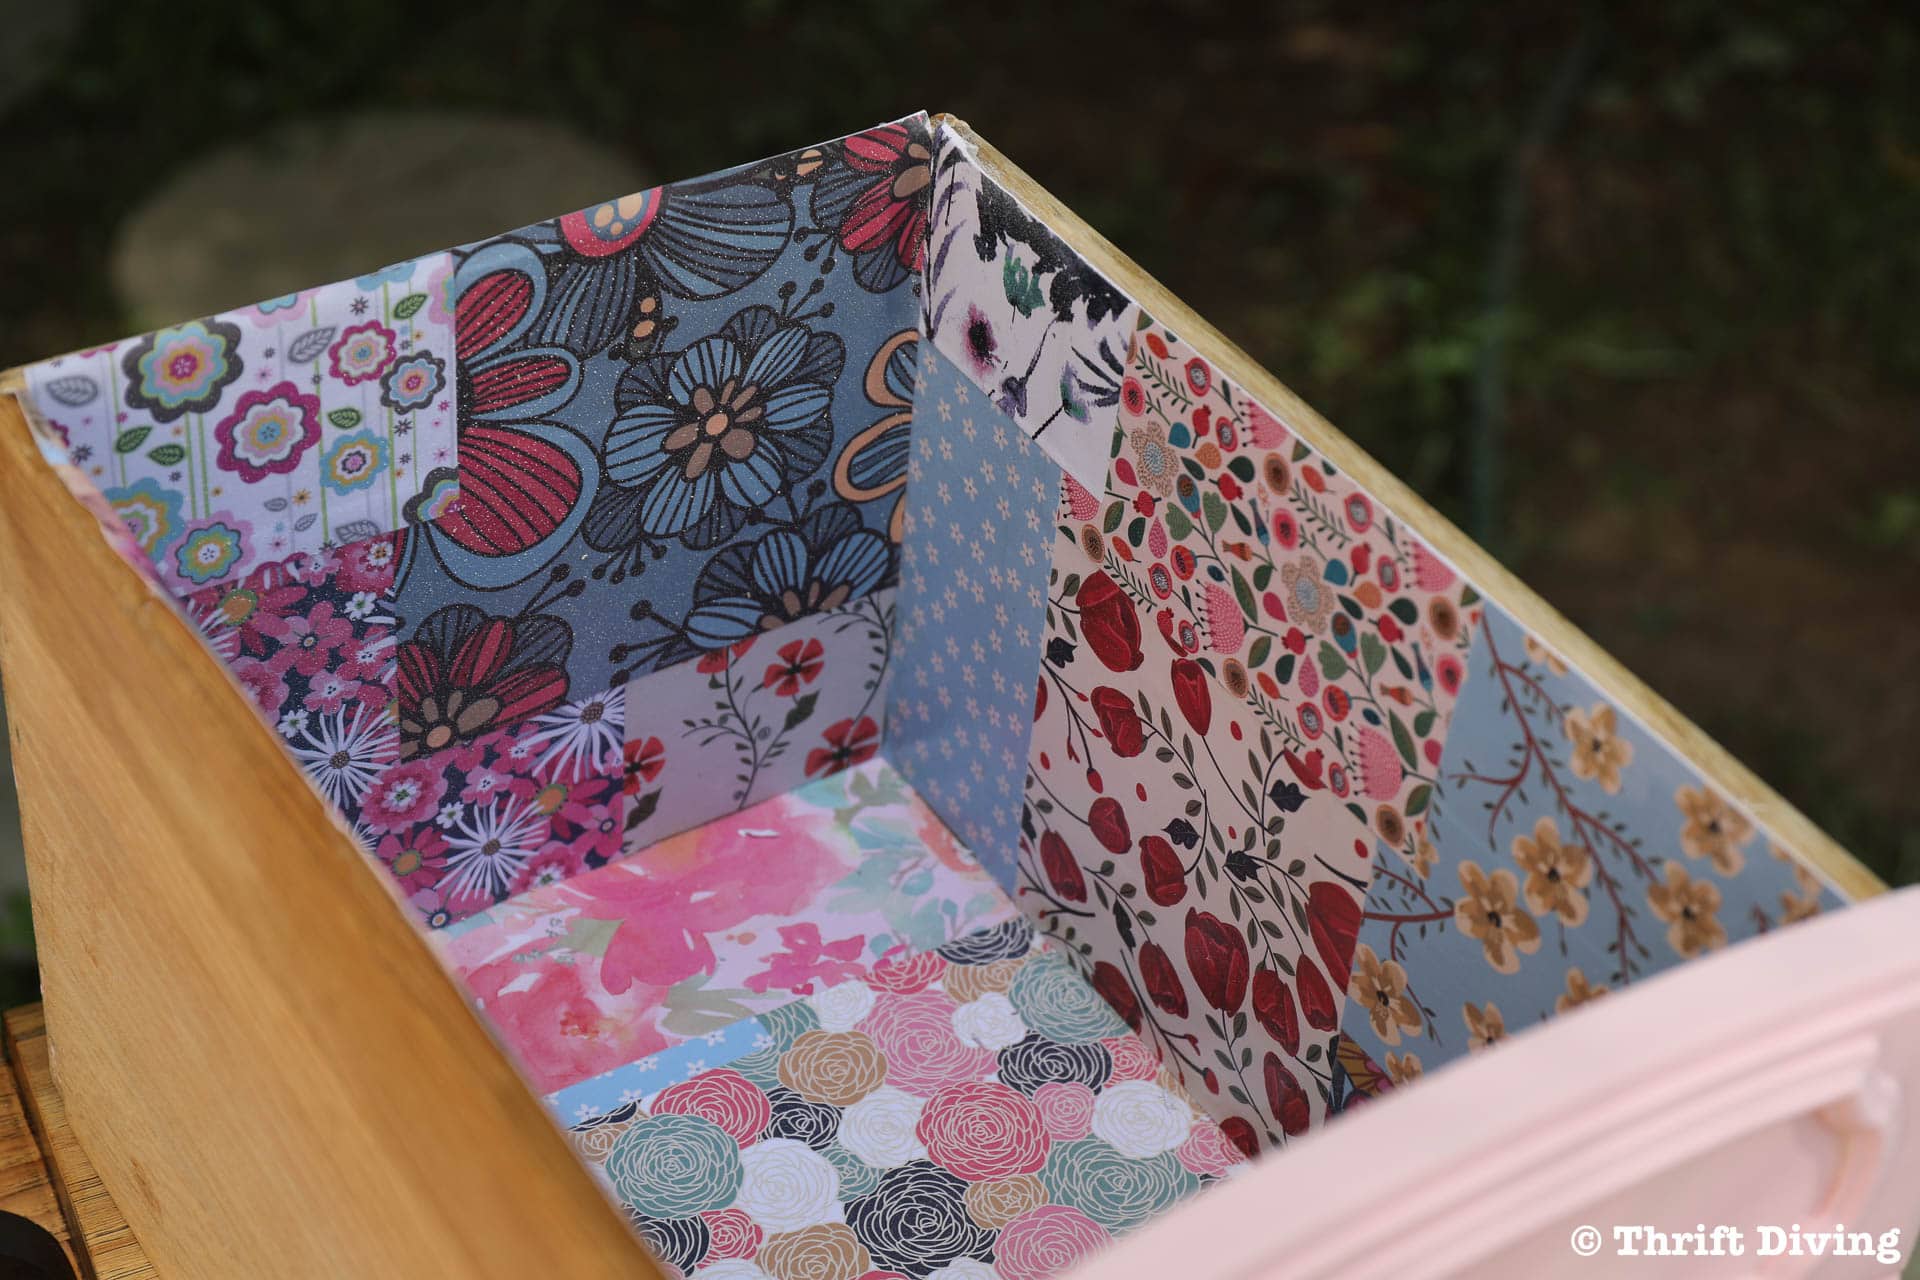
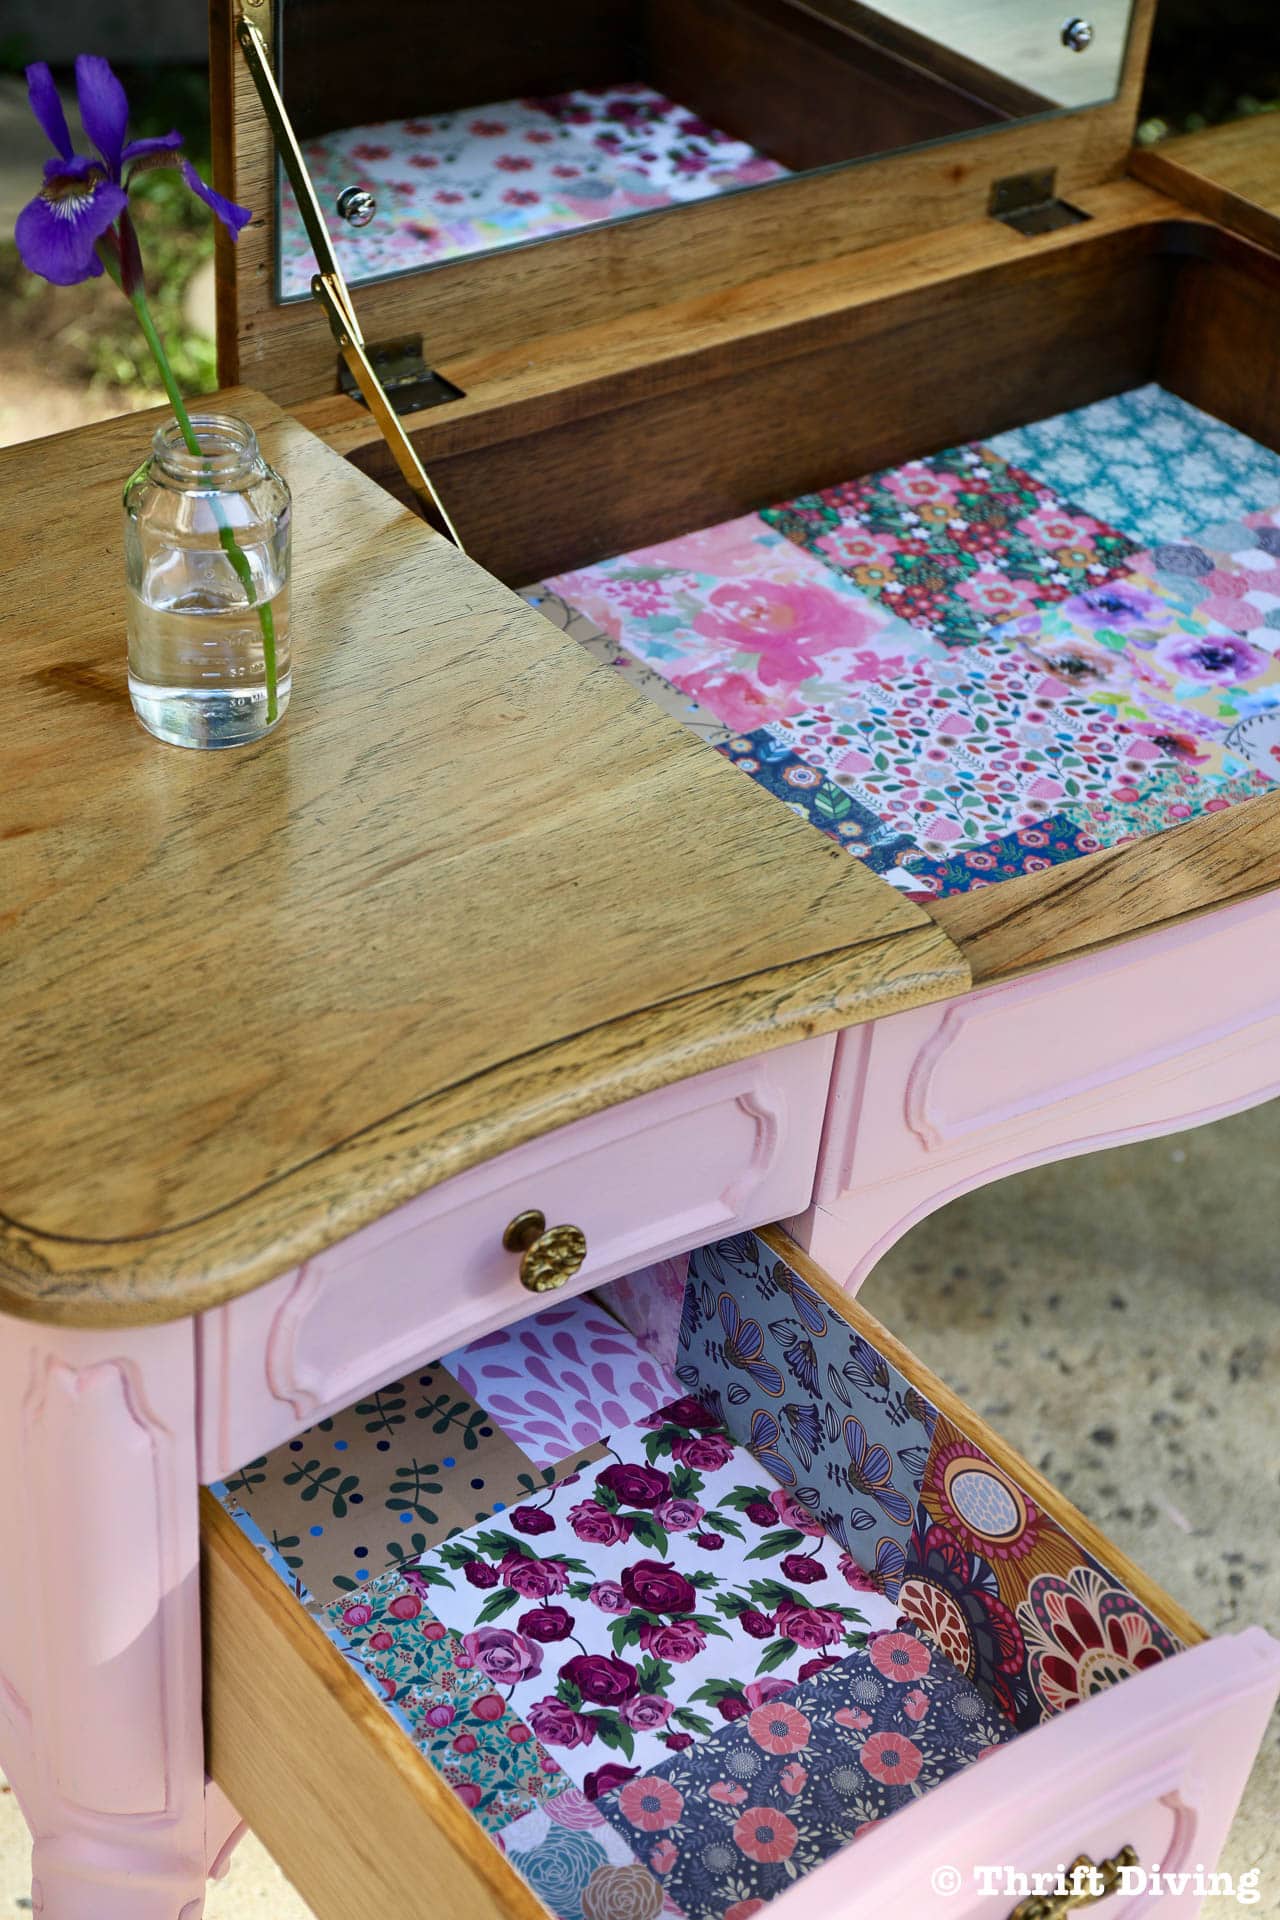
But it gets even better because, on a whim, I decided to do a fun patchwork decoupage with pretty scrapbook paper from A.C. Moore to line the drawers of this French Provincial vanity!
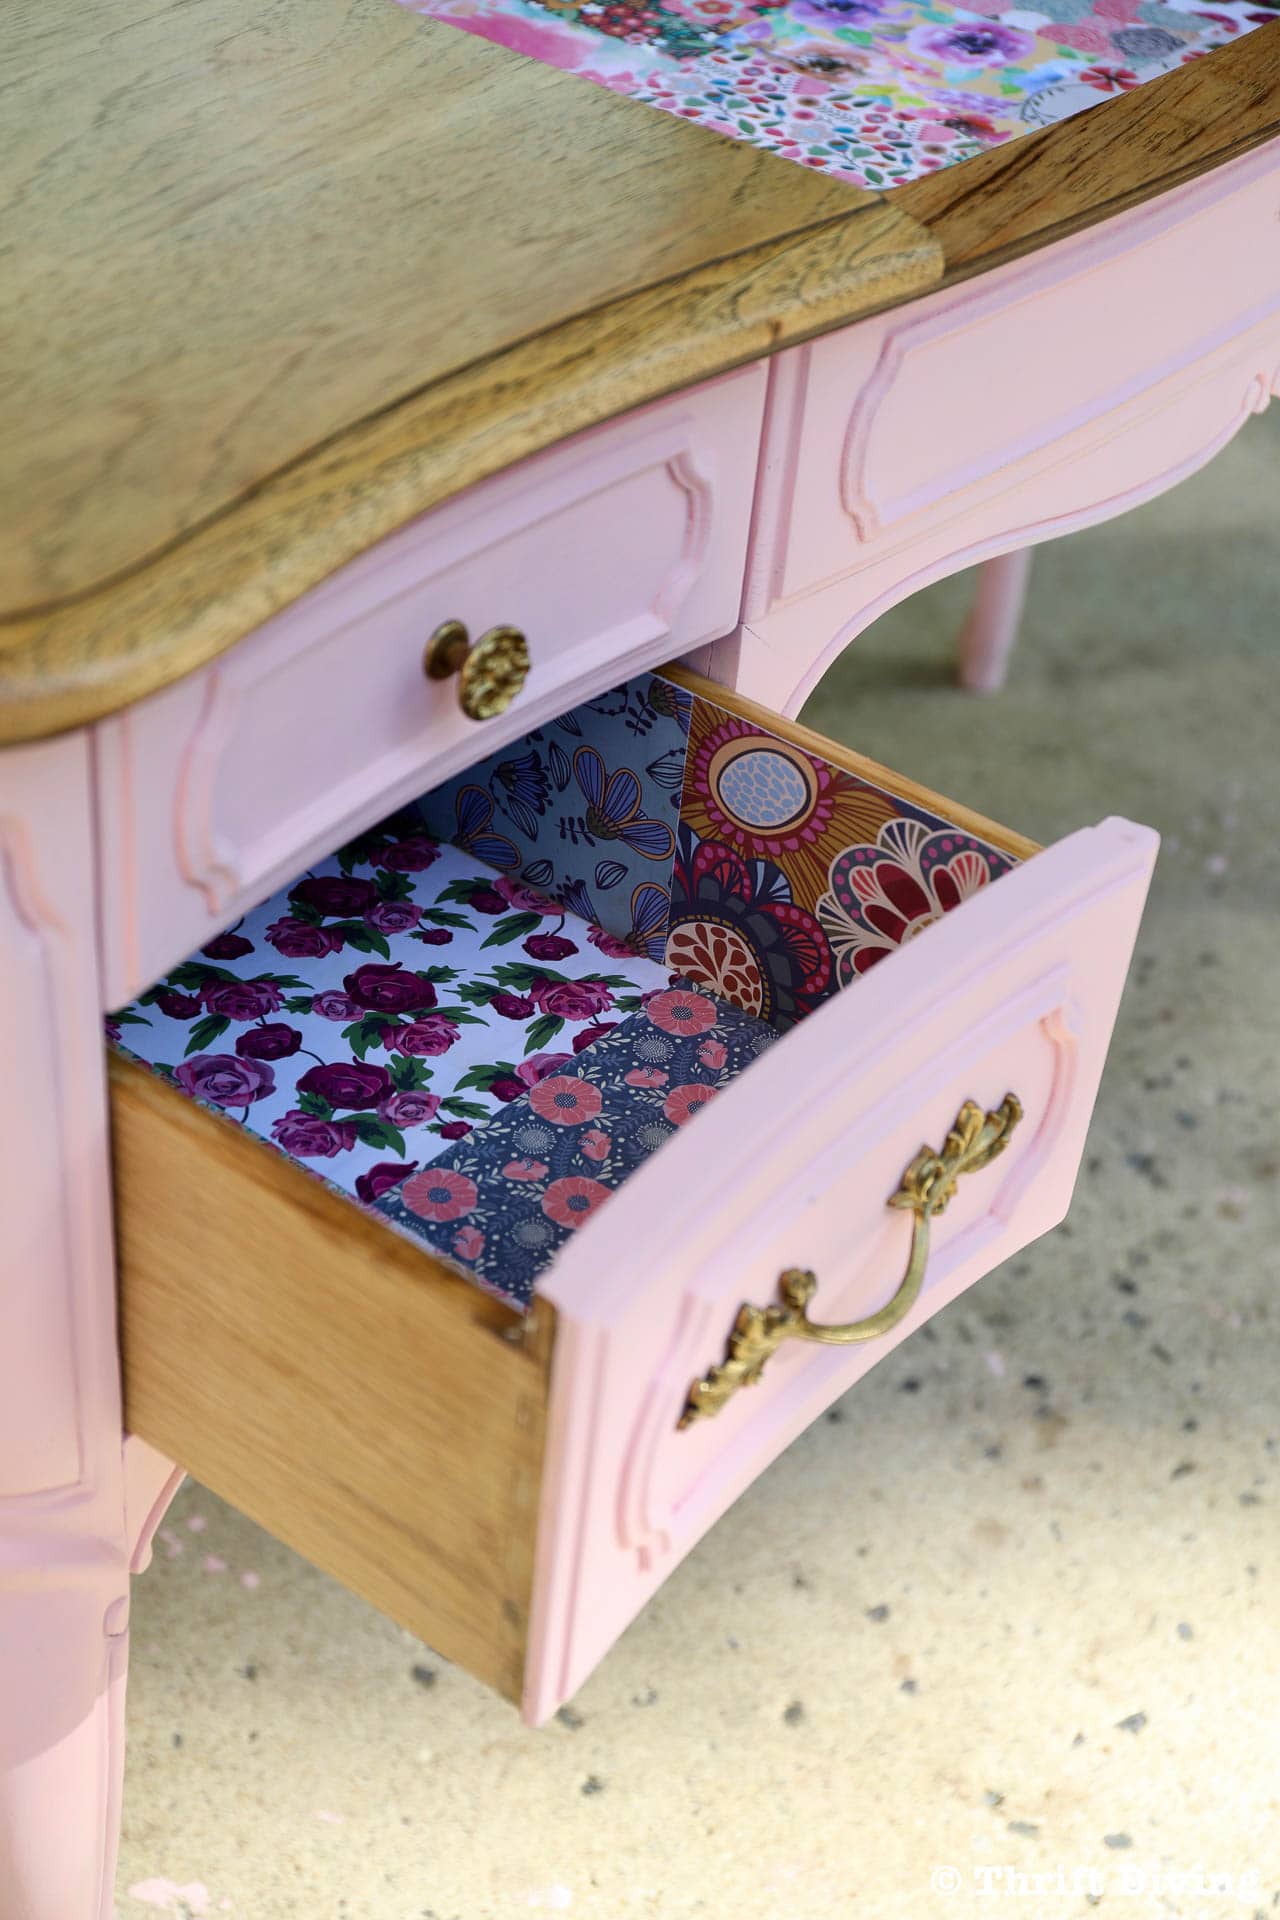
In this tutorial, I’m going to show you the easiest way to line drawers with pretty scrapbook paper, creating a patchwork pattern that will leave you wanting to open the drawers just to take a peek inside! 🙂
How to Line Drawers With Pretty Scrapbook Paper
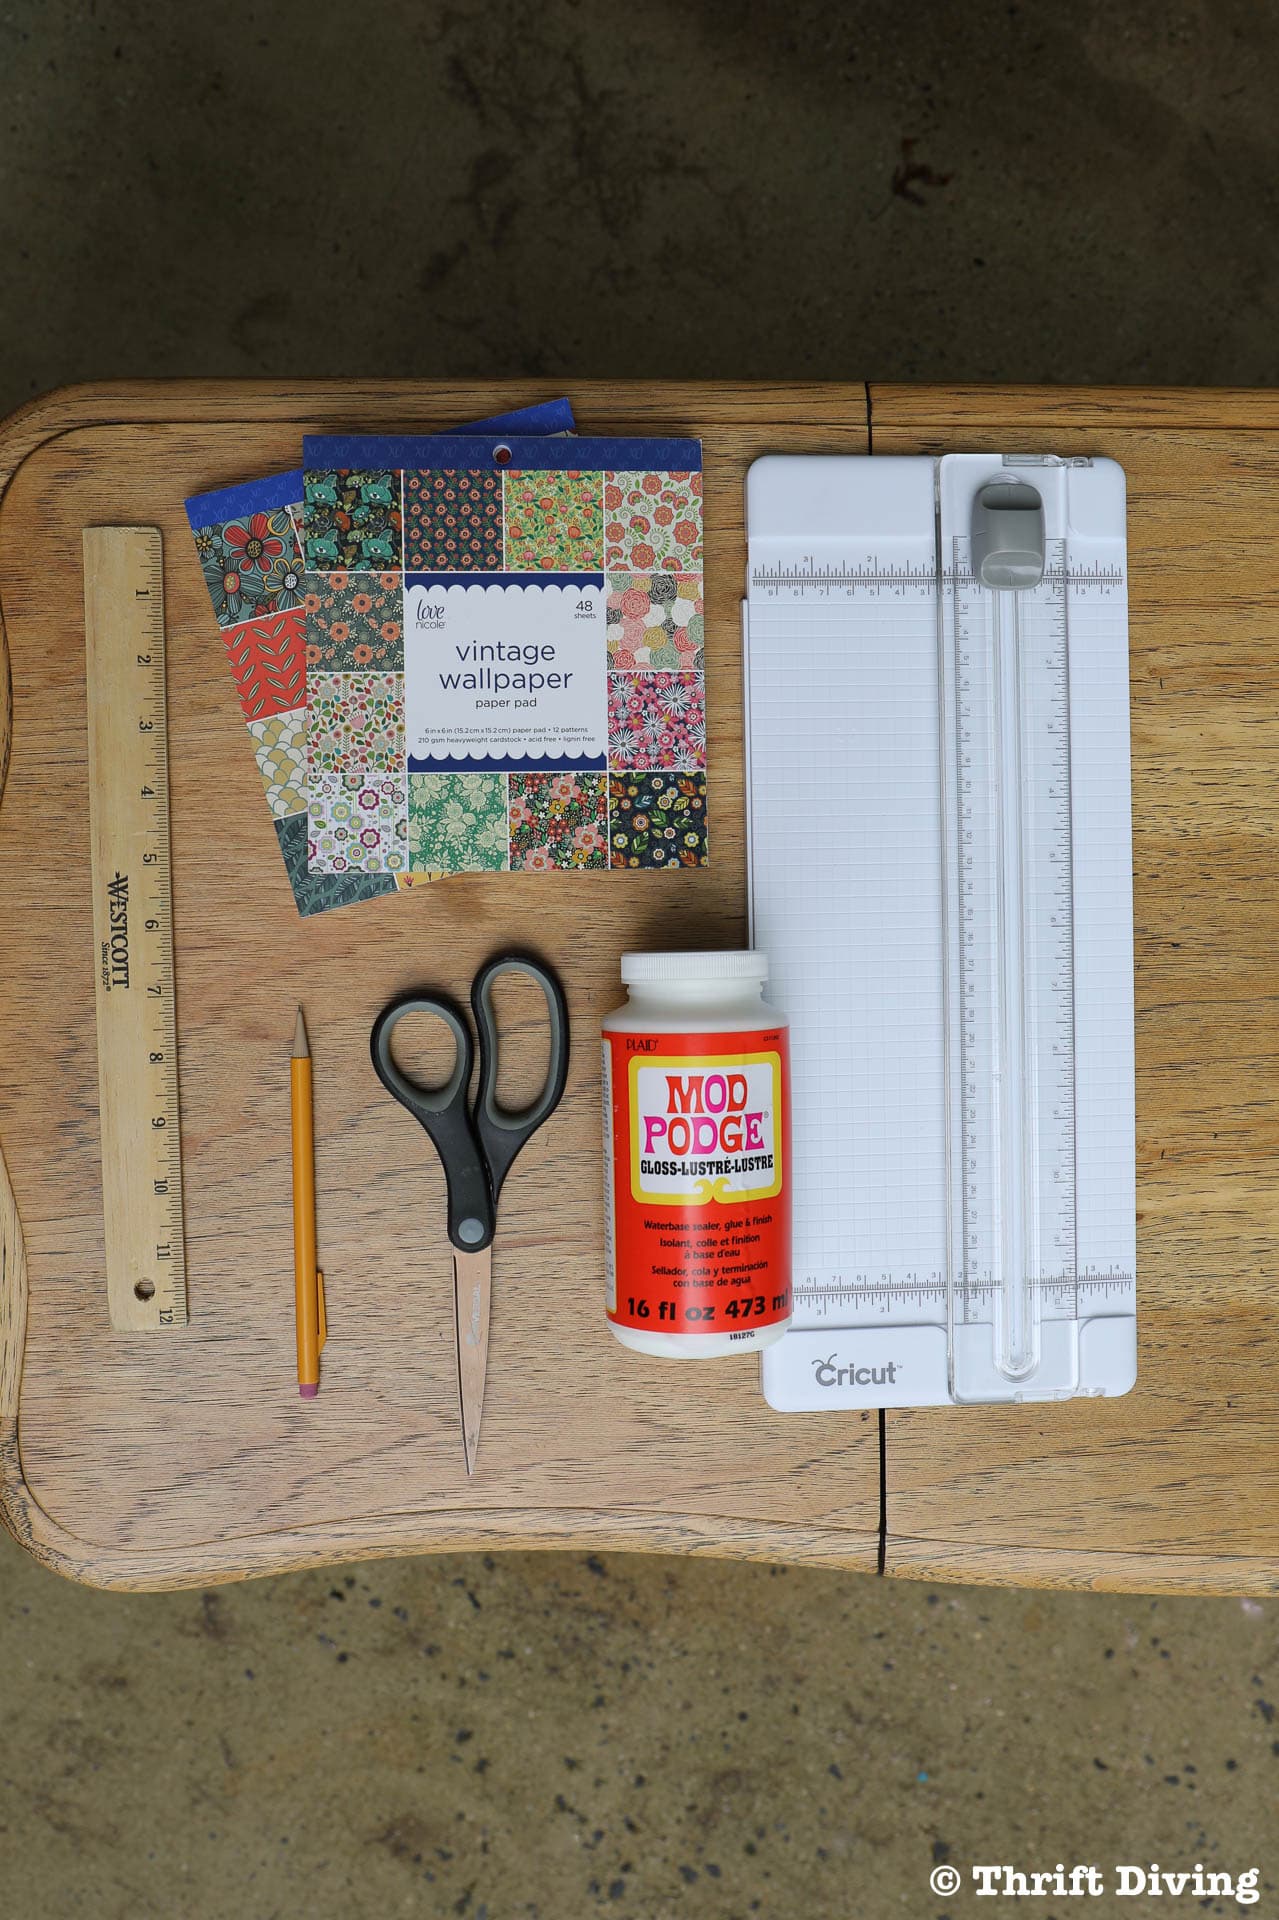
Here are the materials that you’ll need for this project, which can be found at AC Moore.
Materials
- Love Nicole Vintage Wallpaper Paper Pad scrapbook paper from A.C. Moore
- Mod Podge Glossy sealer
- Paper Cutter
- Scissors
- Sandpaper (220 or 150 grit)
- Brayer
- Paintbrushes or foam brushes
- Bowl for pouring in Mod Podge
- Pencil
- Cleaning towels
- Ruler (optional)
STEP 1: Pick Your Pretty Scrapbook Paper
I had a whole stack of the Love Nicole scrapbook paper, supplied to me by AC Moore, but the sheets I was most interested in were the pretty vintage floral designs in the 6″ x 6″ size. These were perfect for layering. And while they were all different colors, the patterns all worked well together.
I don’t know about you, but I love me some scrapbook paper. I find myself wanting to use all of it but never having enough craft projects to get through an entire pack. However, with this project, I was able to pull out all of my favorite sheets!
(Psst! A.C. Moore recently partnered with Create and Craft to bring you the A.C. Moore Hour, airing every Wednesday at 11 AM Eastern time! Now you can tune in to your TV and regularly get great craft ideas. You can watch Create and Craft on DISH Network or stream online at createandcraft.com).
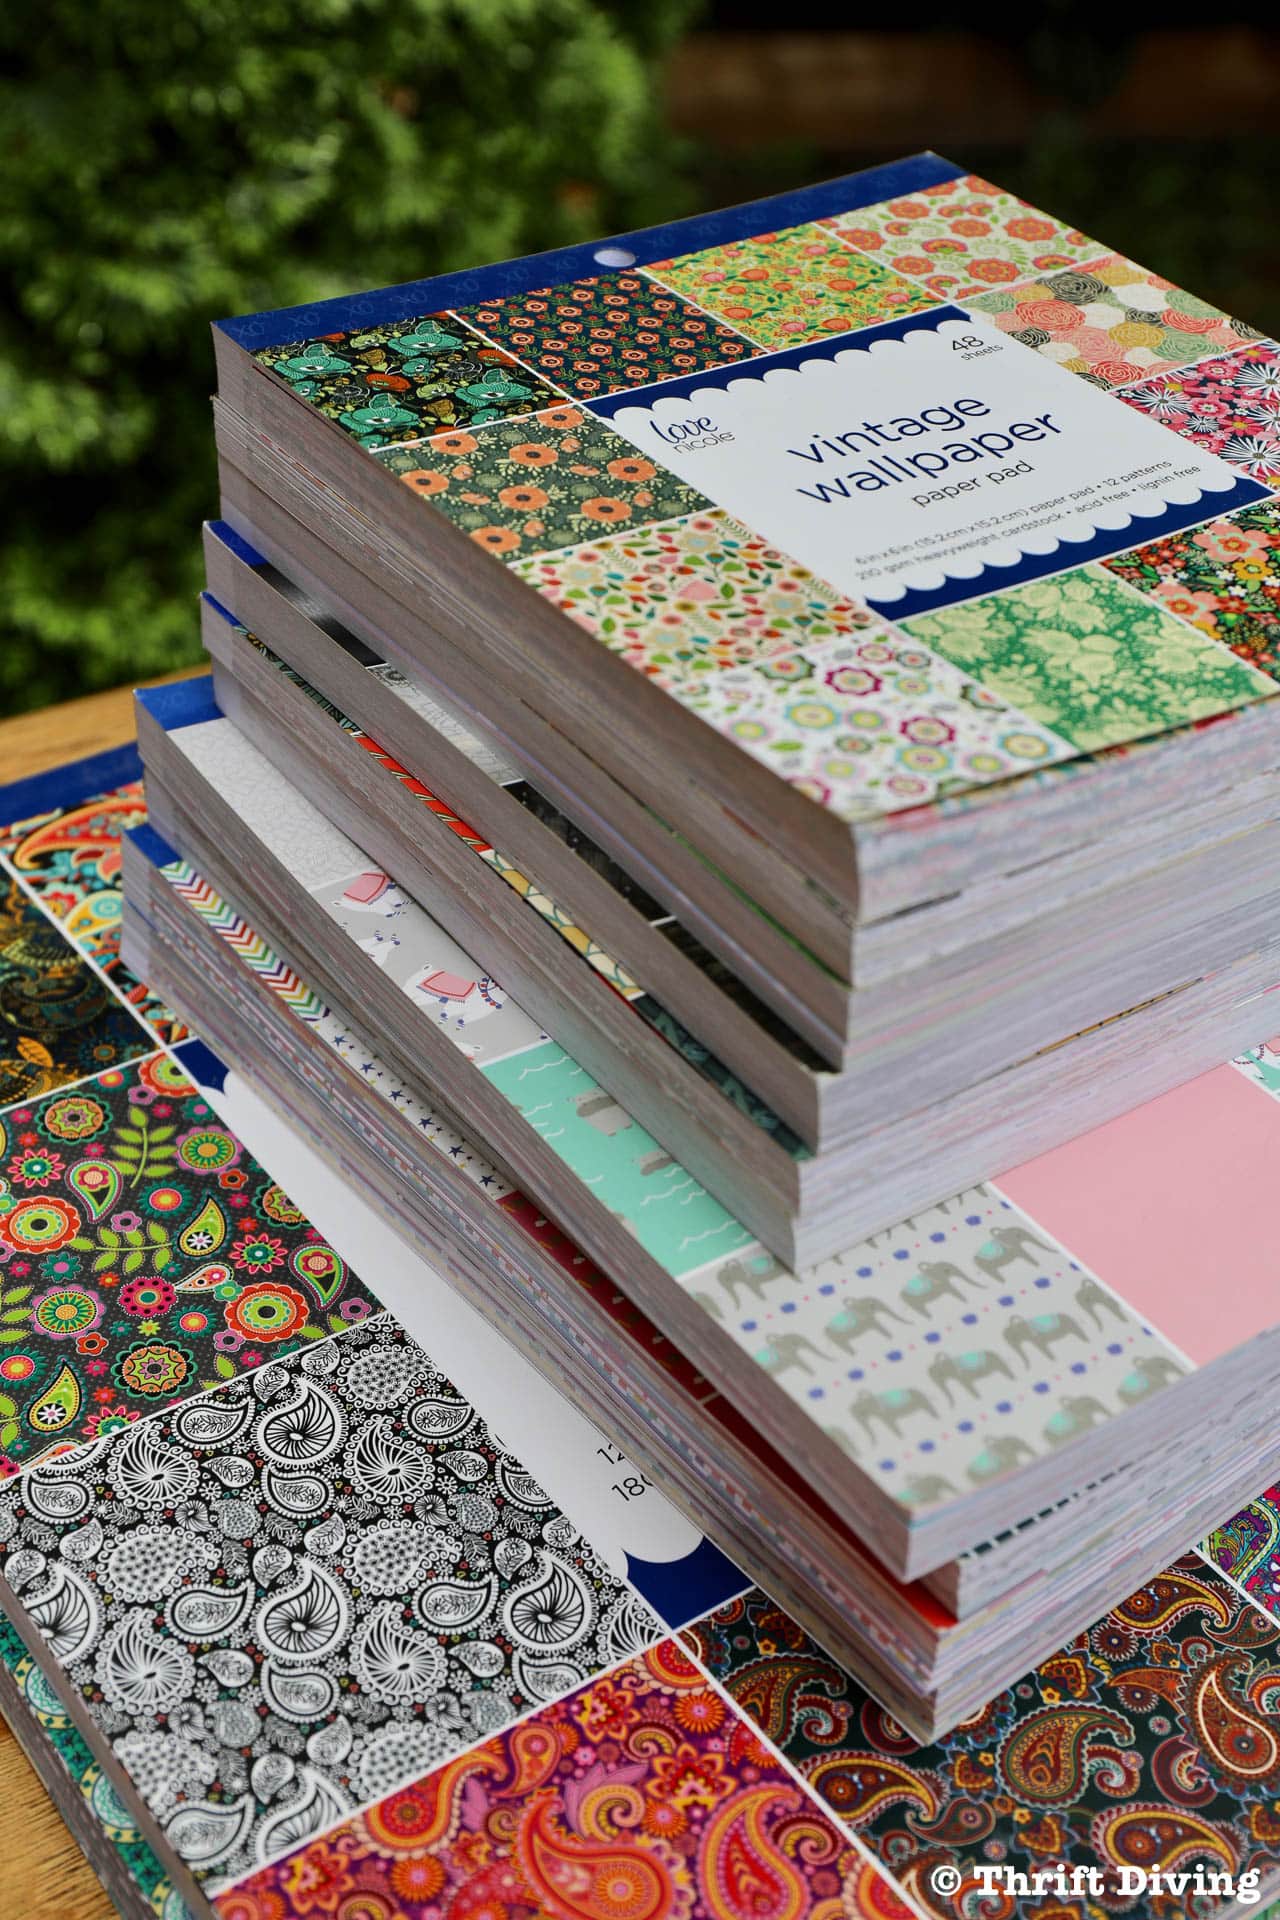
These were some of my favorites!

STEP 2: Do a Test Fit to See Where You Want to Place the Sheets of Scrapbook Paper
Before gluing and sealing the paper to the drawers, do a test fit to see what works well together.
With the patchwork pattern of pretty papers, you can do whatever you want! I decided to do both the bottom and the sides of the drawers.
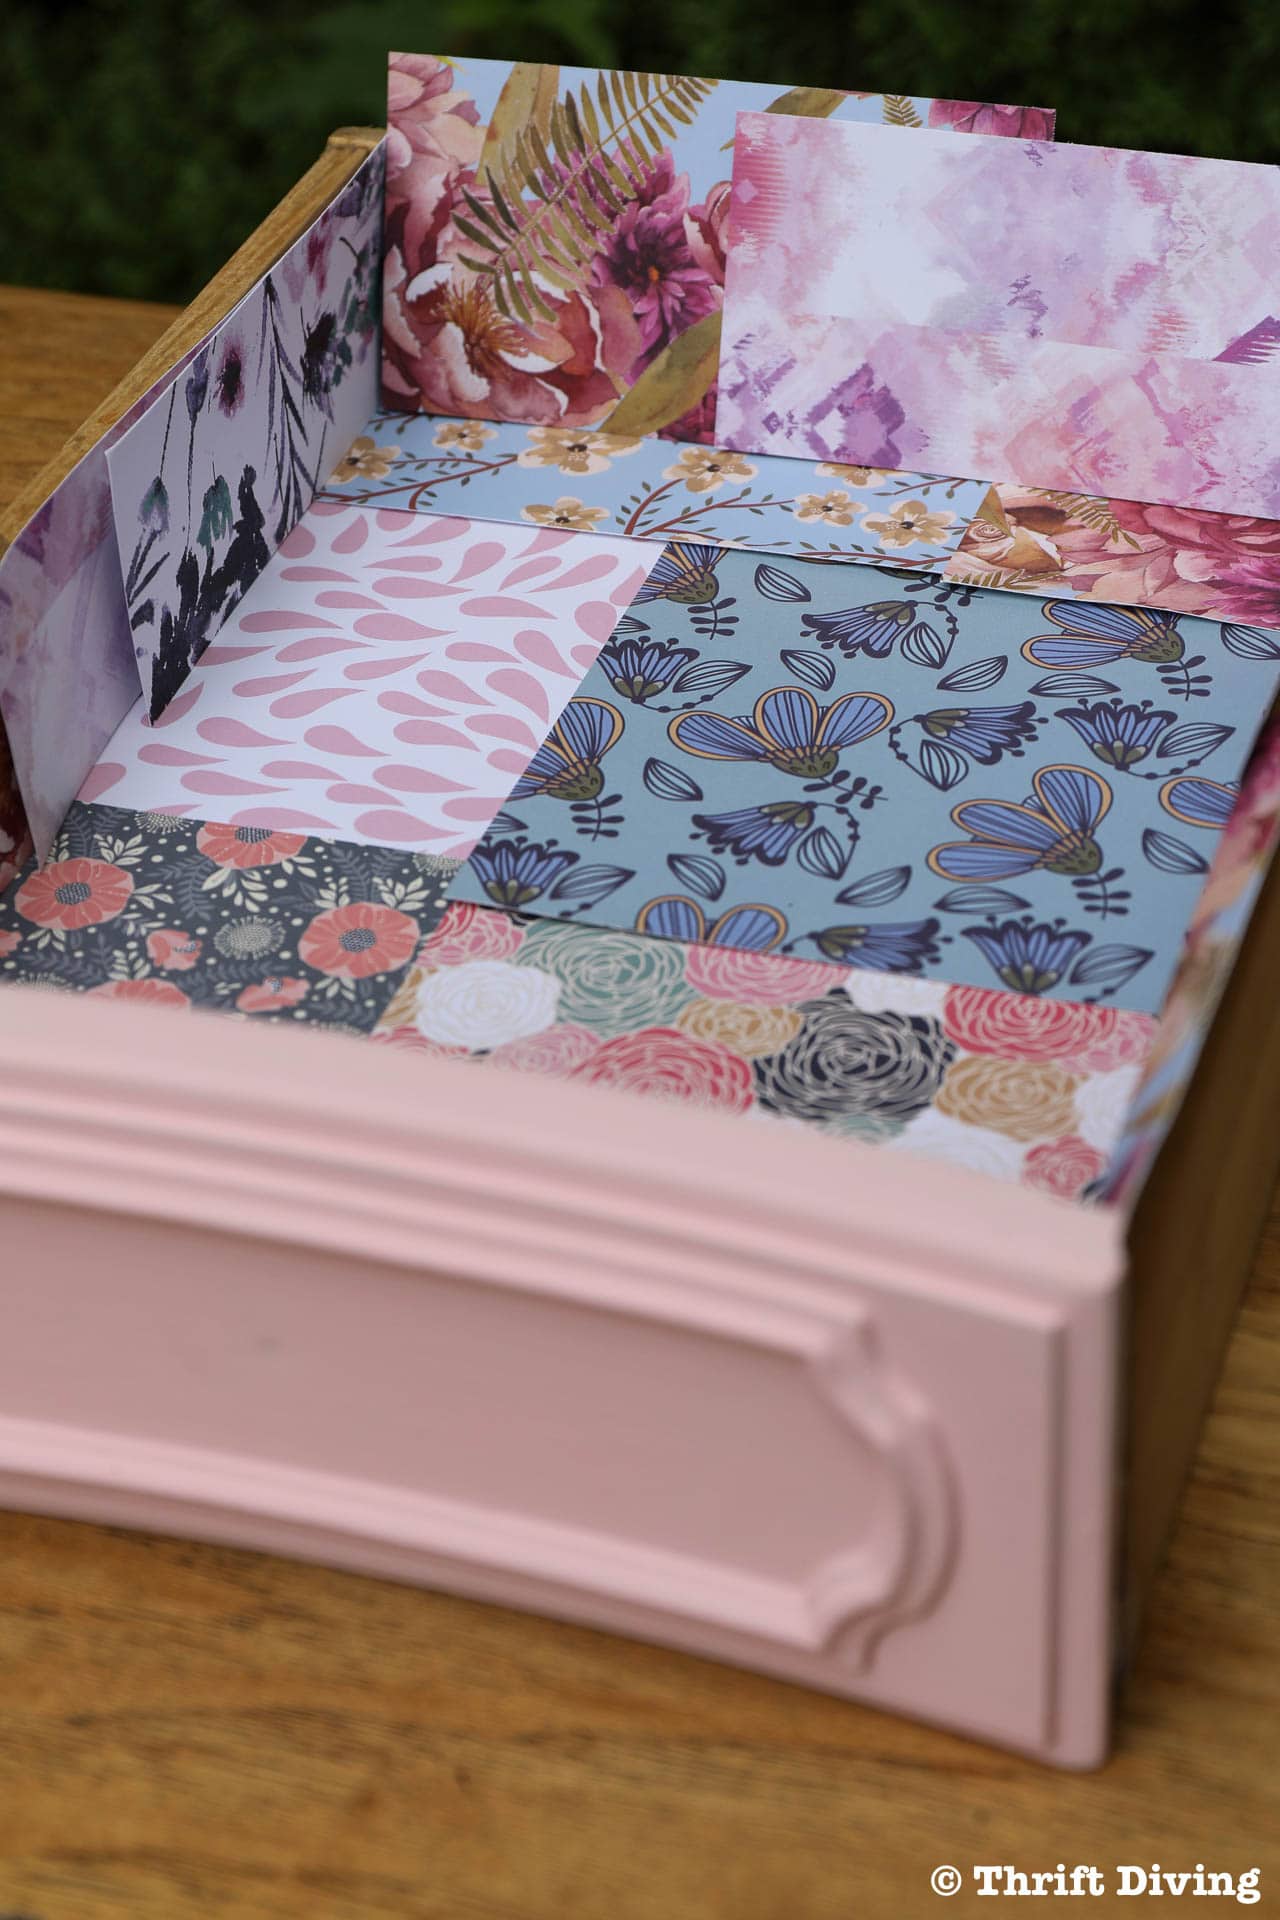
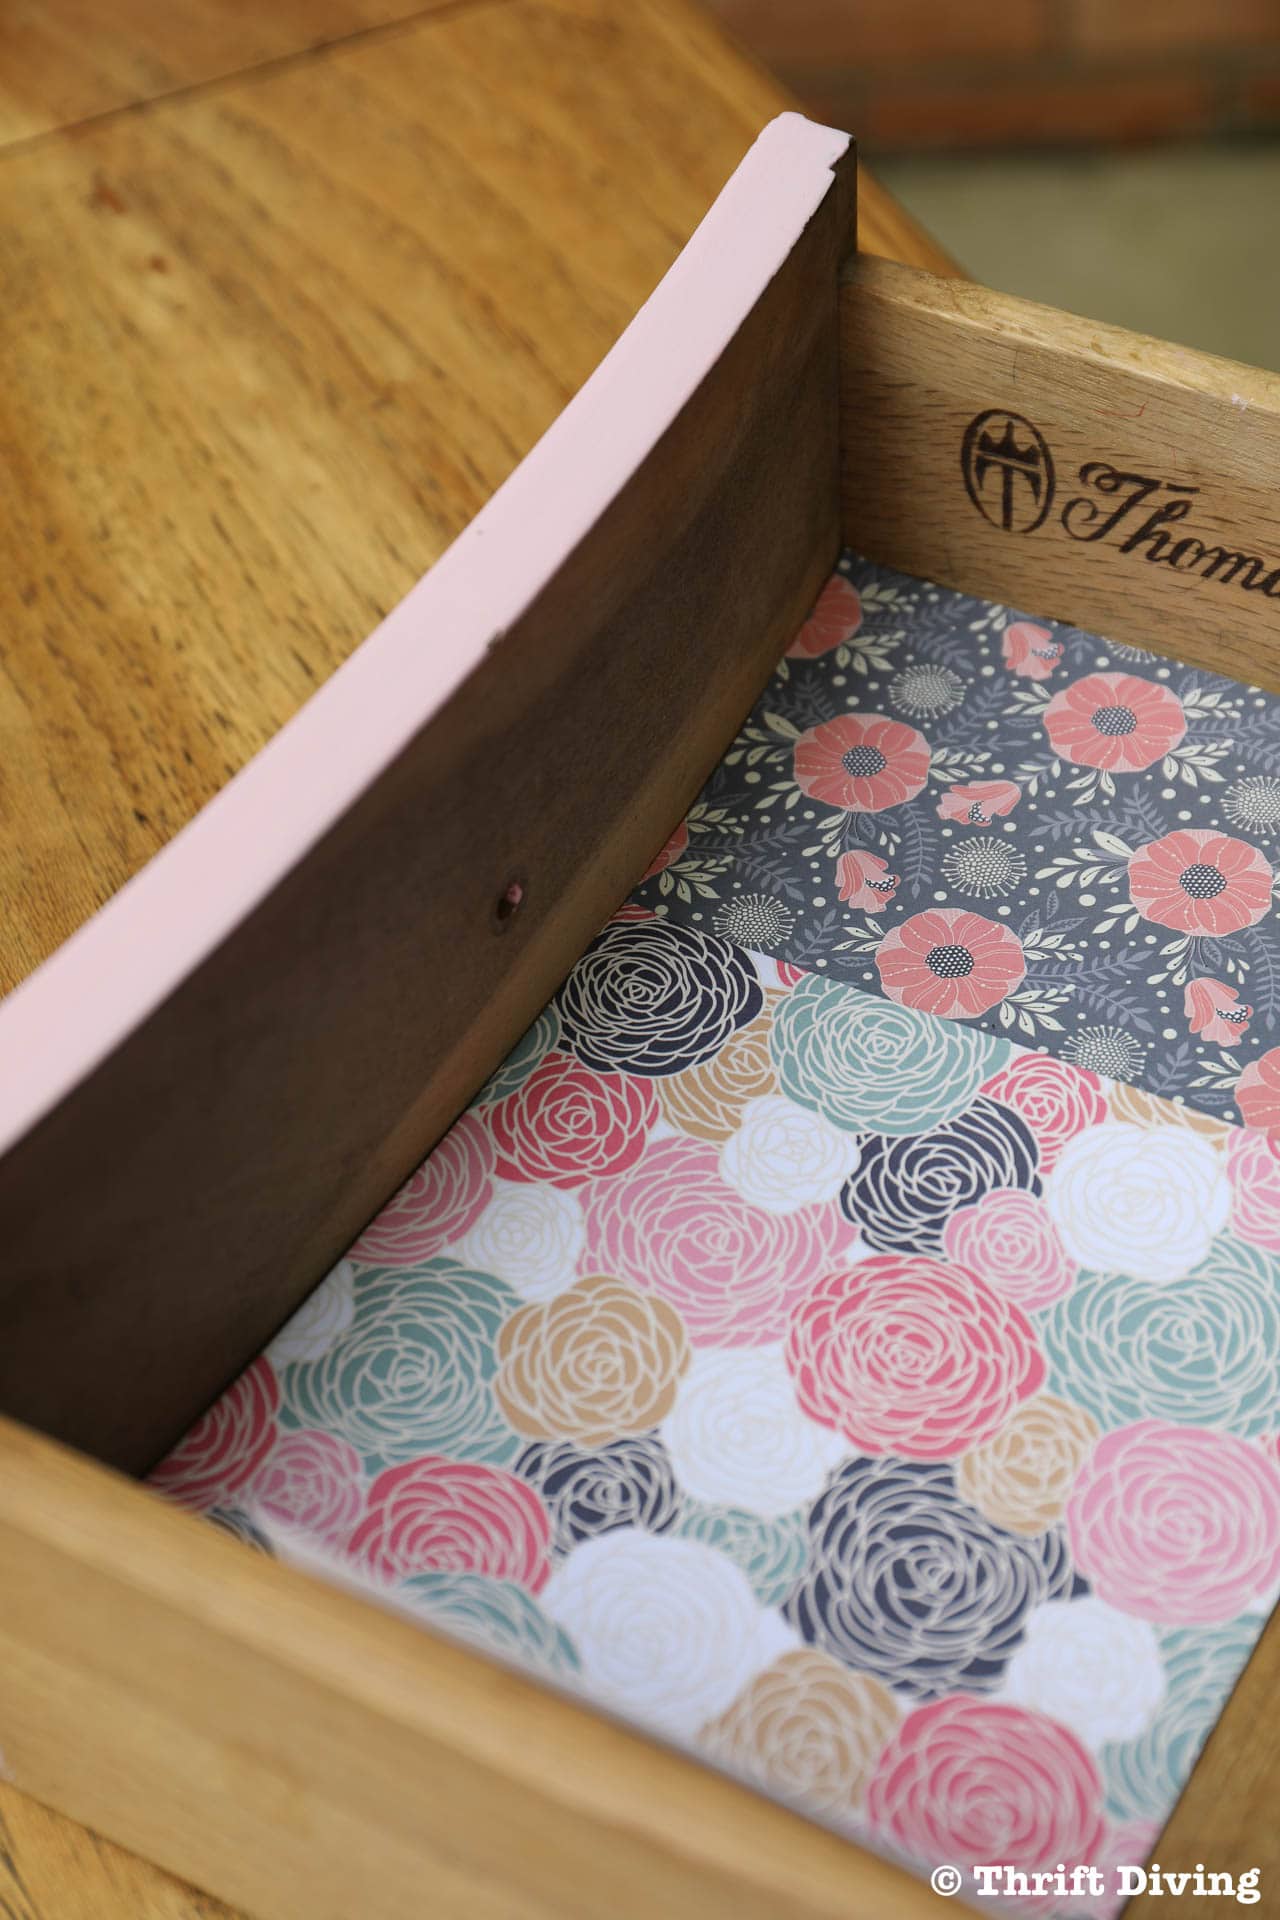
My drawers had a slight curve, so I had to plan for which papers would be trimmed along the curve.
To account for the curve, I placed the square scrapbook paper in the drawer against the curve and pressed it, marking where the paper curved, then trimmed it with scissors.
Surprisingly, I got a good fit on that slight curve! 🙂
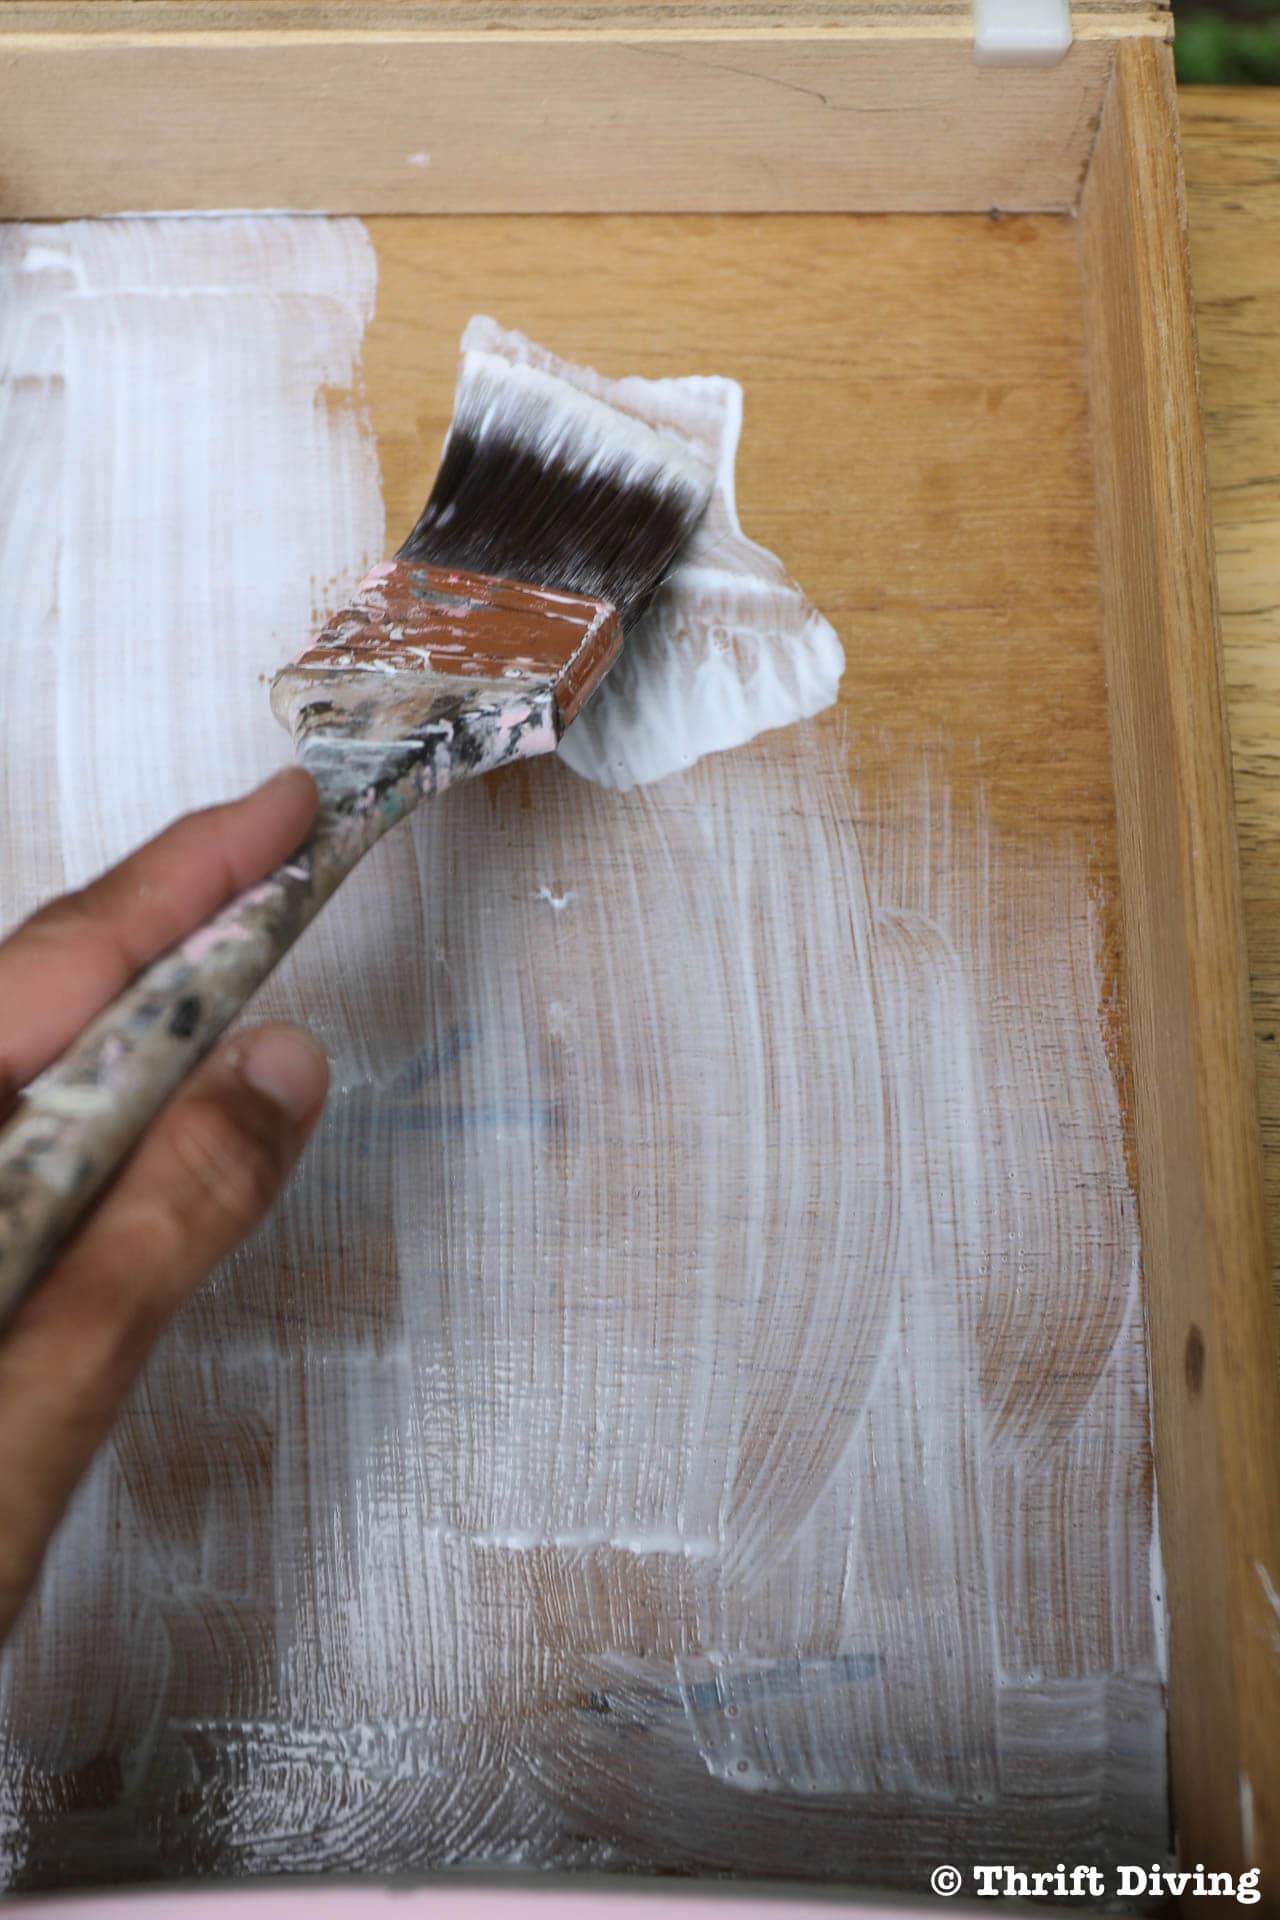
STEP 3: Add a Layer of Mod Podge Sealer to the Drawer
If your drawer is huge, work in sections at a time. Otherwise, your sealer will dry too quickly and you’ll waste it by having to apply more.
STEP 4: Coat the Back of the Paper With Sealer and Place
Scrapbook paper is super thick, so don’t worry about applying too much sealer. It won’t seep through or ruin the paper. Place enough so that there will be good adhesion. Apply the paper to the sides in the same way by adding a coat of sealer to the drawer, sealer to the back of the scrapbook paper, then use a brayer to remove any bubbles trapped underneath.
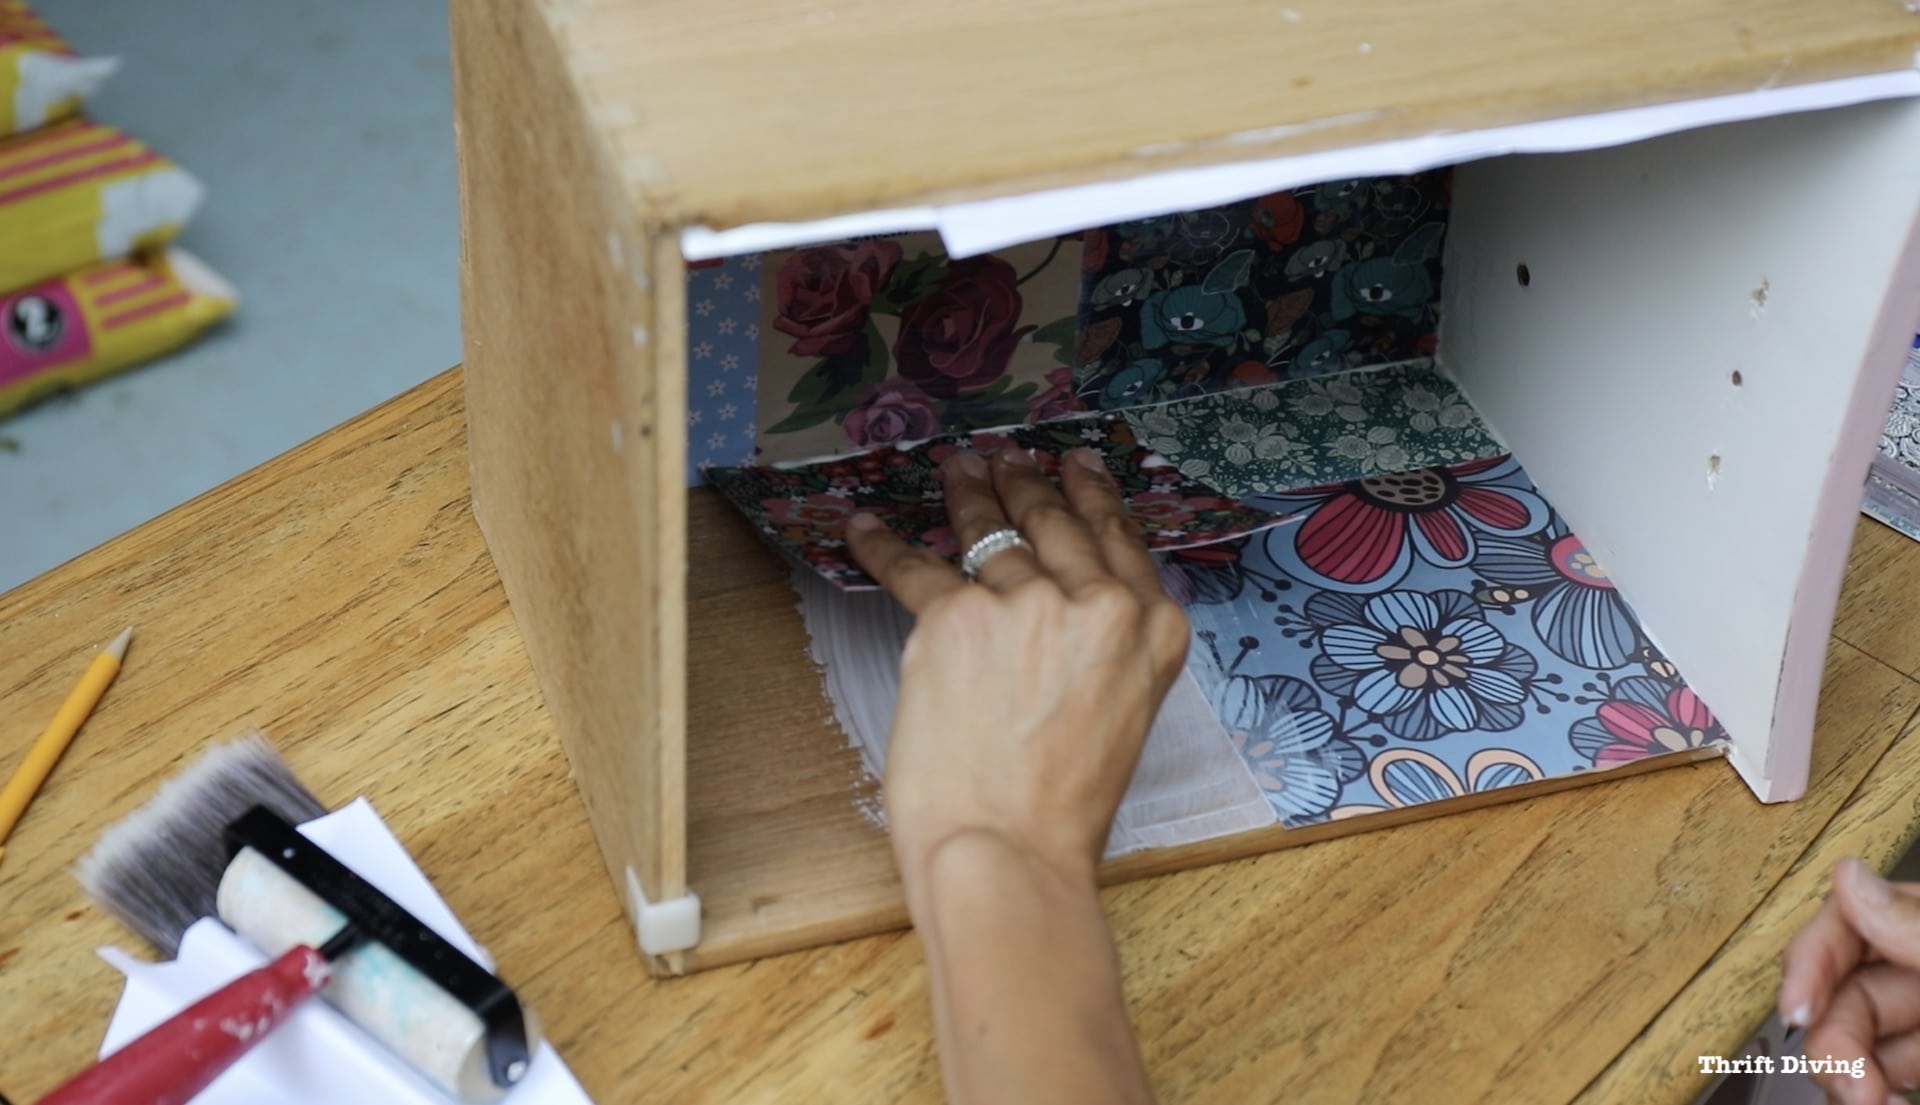
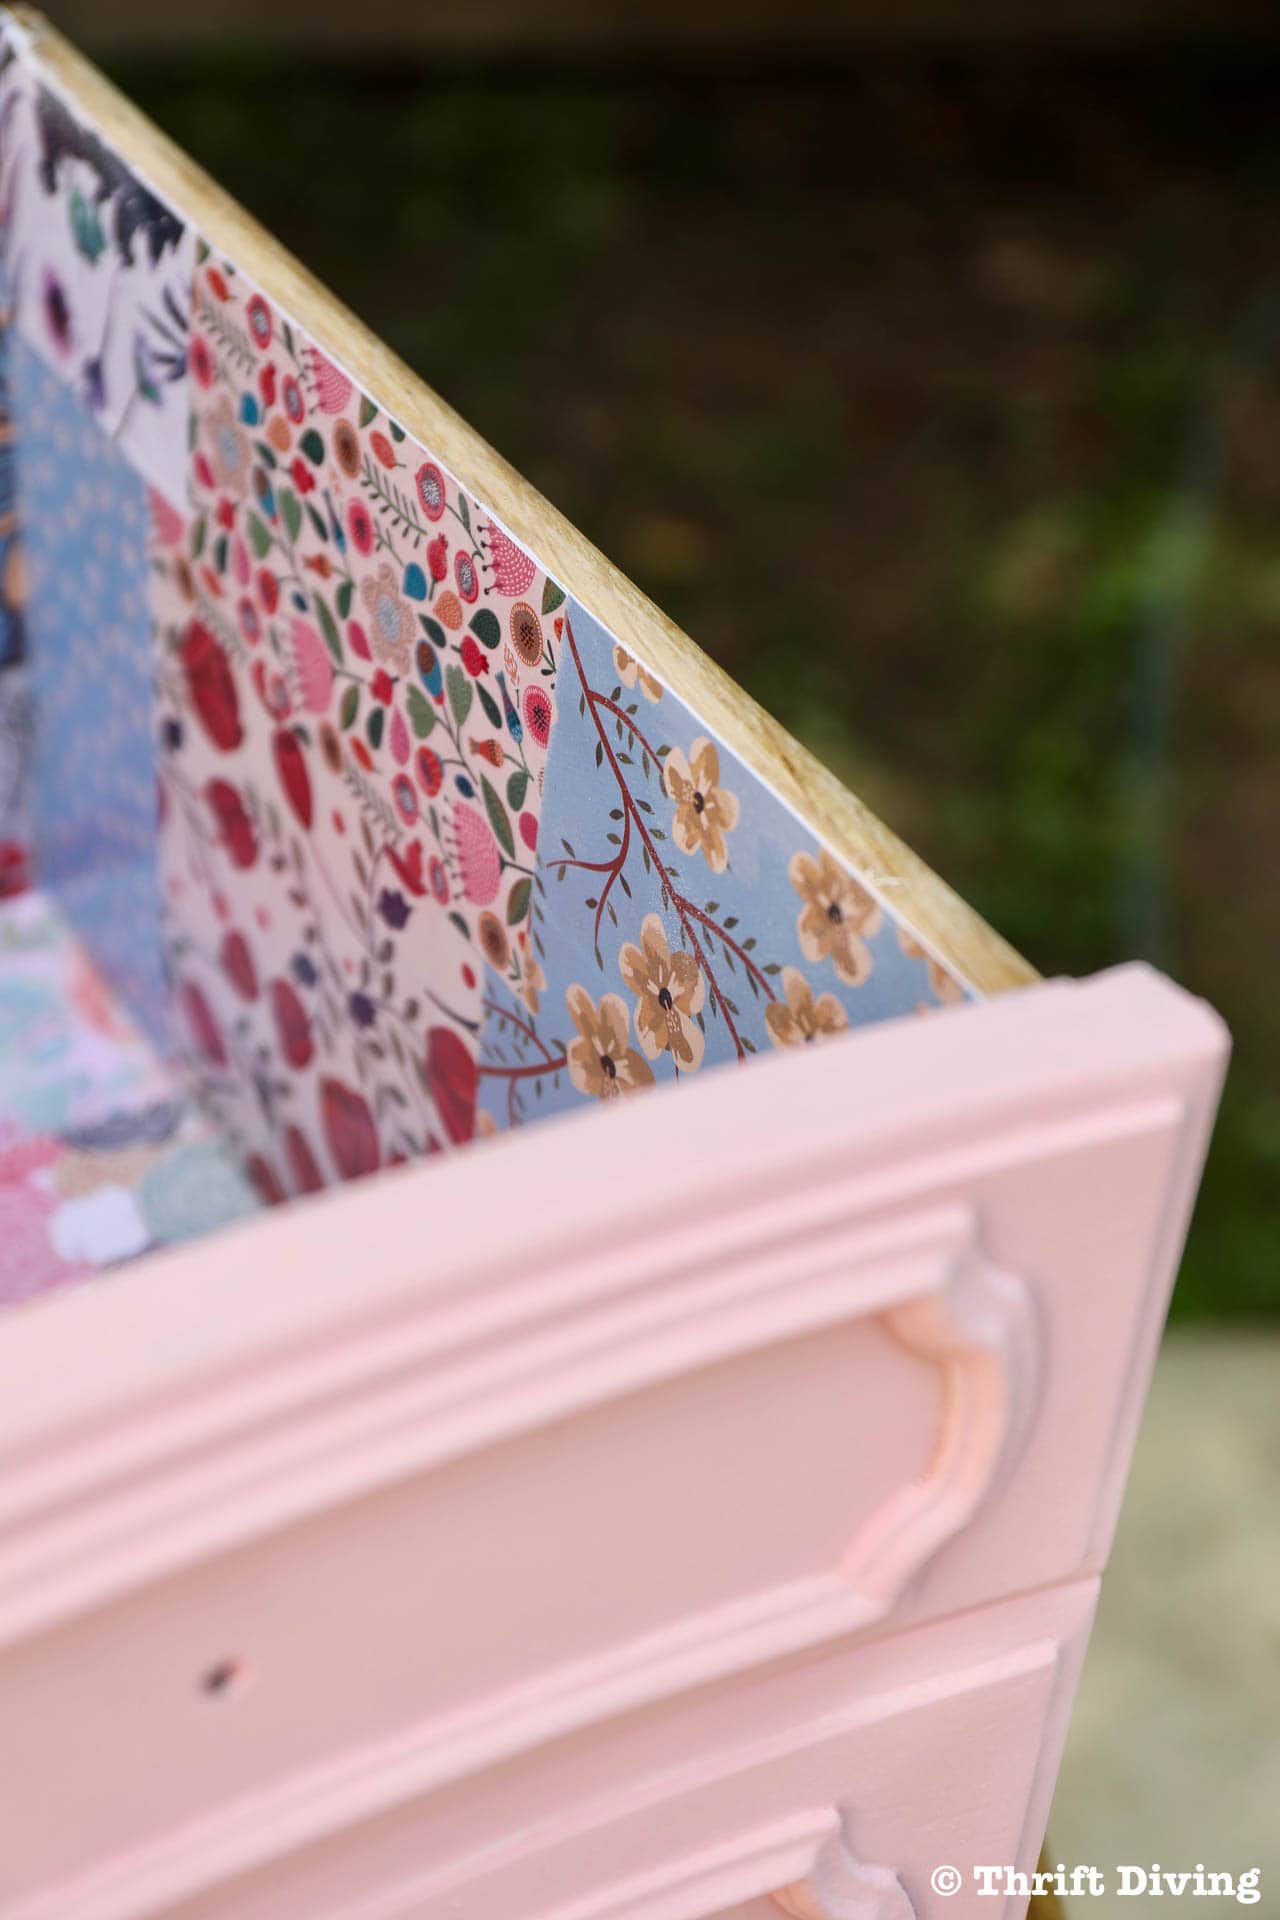
Here’s the trick to making this turn out nice: be sure to extend the paper past the side of the edges about 1/4″!
The reason why is because if you try to cut a precise piece of scrapbook paper to fit the dimensions of your drawer, you’ll likely be slightly off and you’ll waste paper re-cutting new pieces, or you’ll have sections that look a little uneven and bare along the edge. You want a crisp-looking fit, not a fit that looked like you cut the paper with your eyes closed. HA!
Stick with me here, because I’ll show you a little trick to getting a good, exact fit!
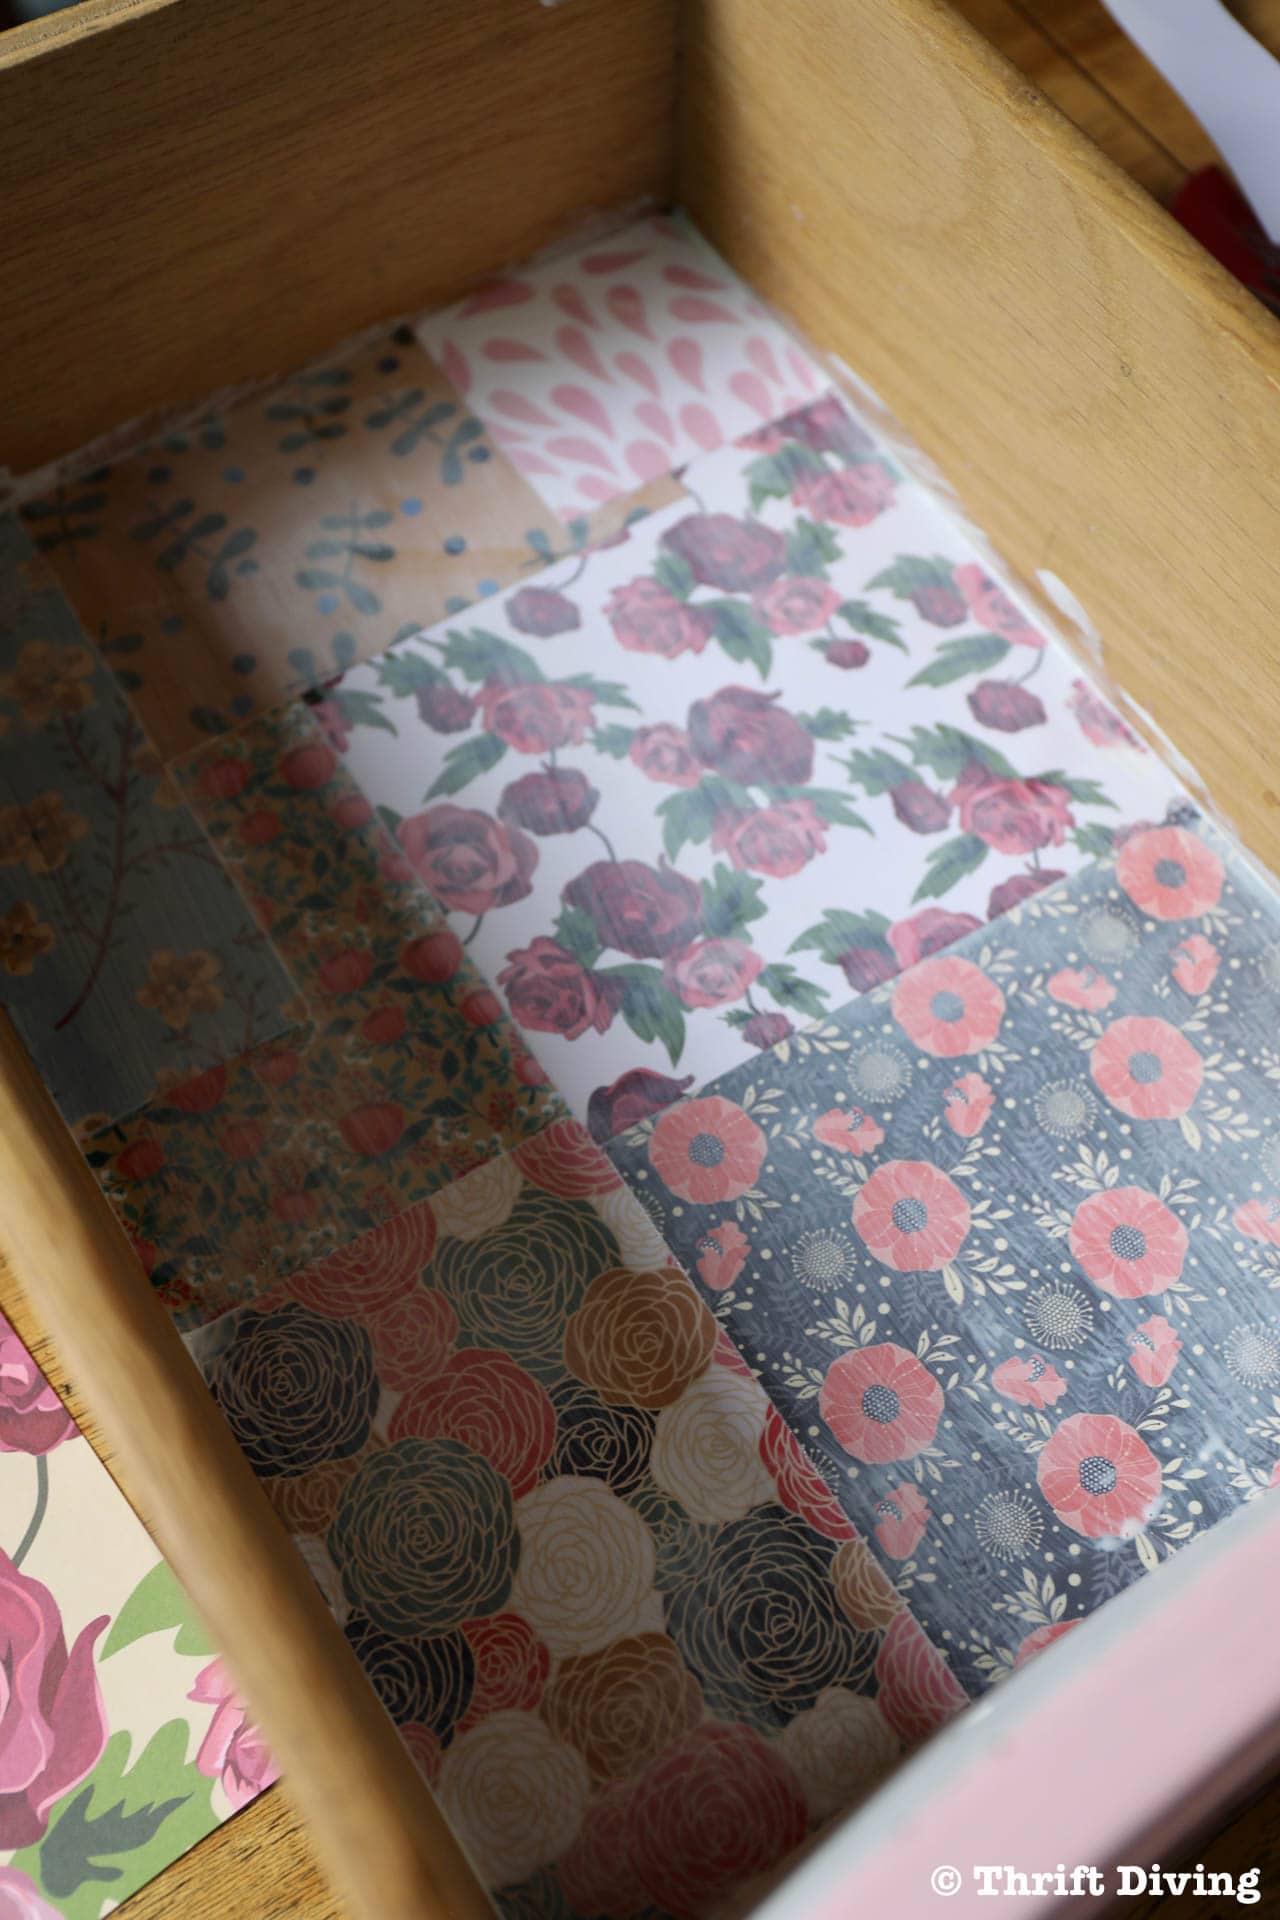
STEP 5: Add a Coat of Sealer on Top
Next, add a coat of sealer on top of the scrapbook paper. This will help to seal it from any spills in your drawers.
If you choose not to add paper to the sides, then skip that part and just paper the bottom and add a coat of sealer.
STEP 6: Let It Dry a Little Bit, Then Sand the Edges
This is where the magic happens to get the paper to fit nice and crisp to the edges.
As I mentioned in Step 4, the paper should be longer than the edges of the drawer. If needed, trim it down with scissors, but leave about 1/4″ to 3/8″ extended past the edges.
Once it dries a little, take some 220-grit sandpaper and sand the edges at an angle.
But make sure you only sand in one direction. Don’t sand back and forth because it will loosen the paper at the edge.
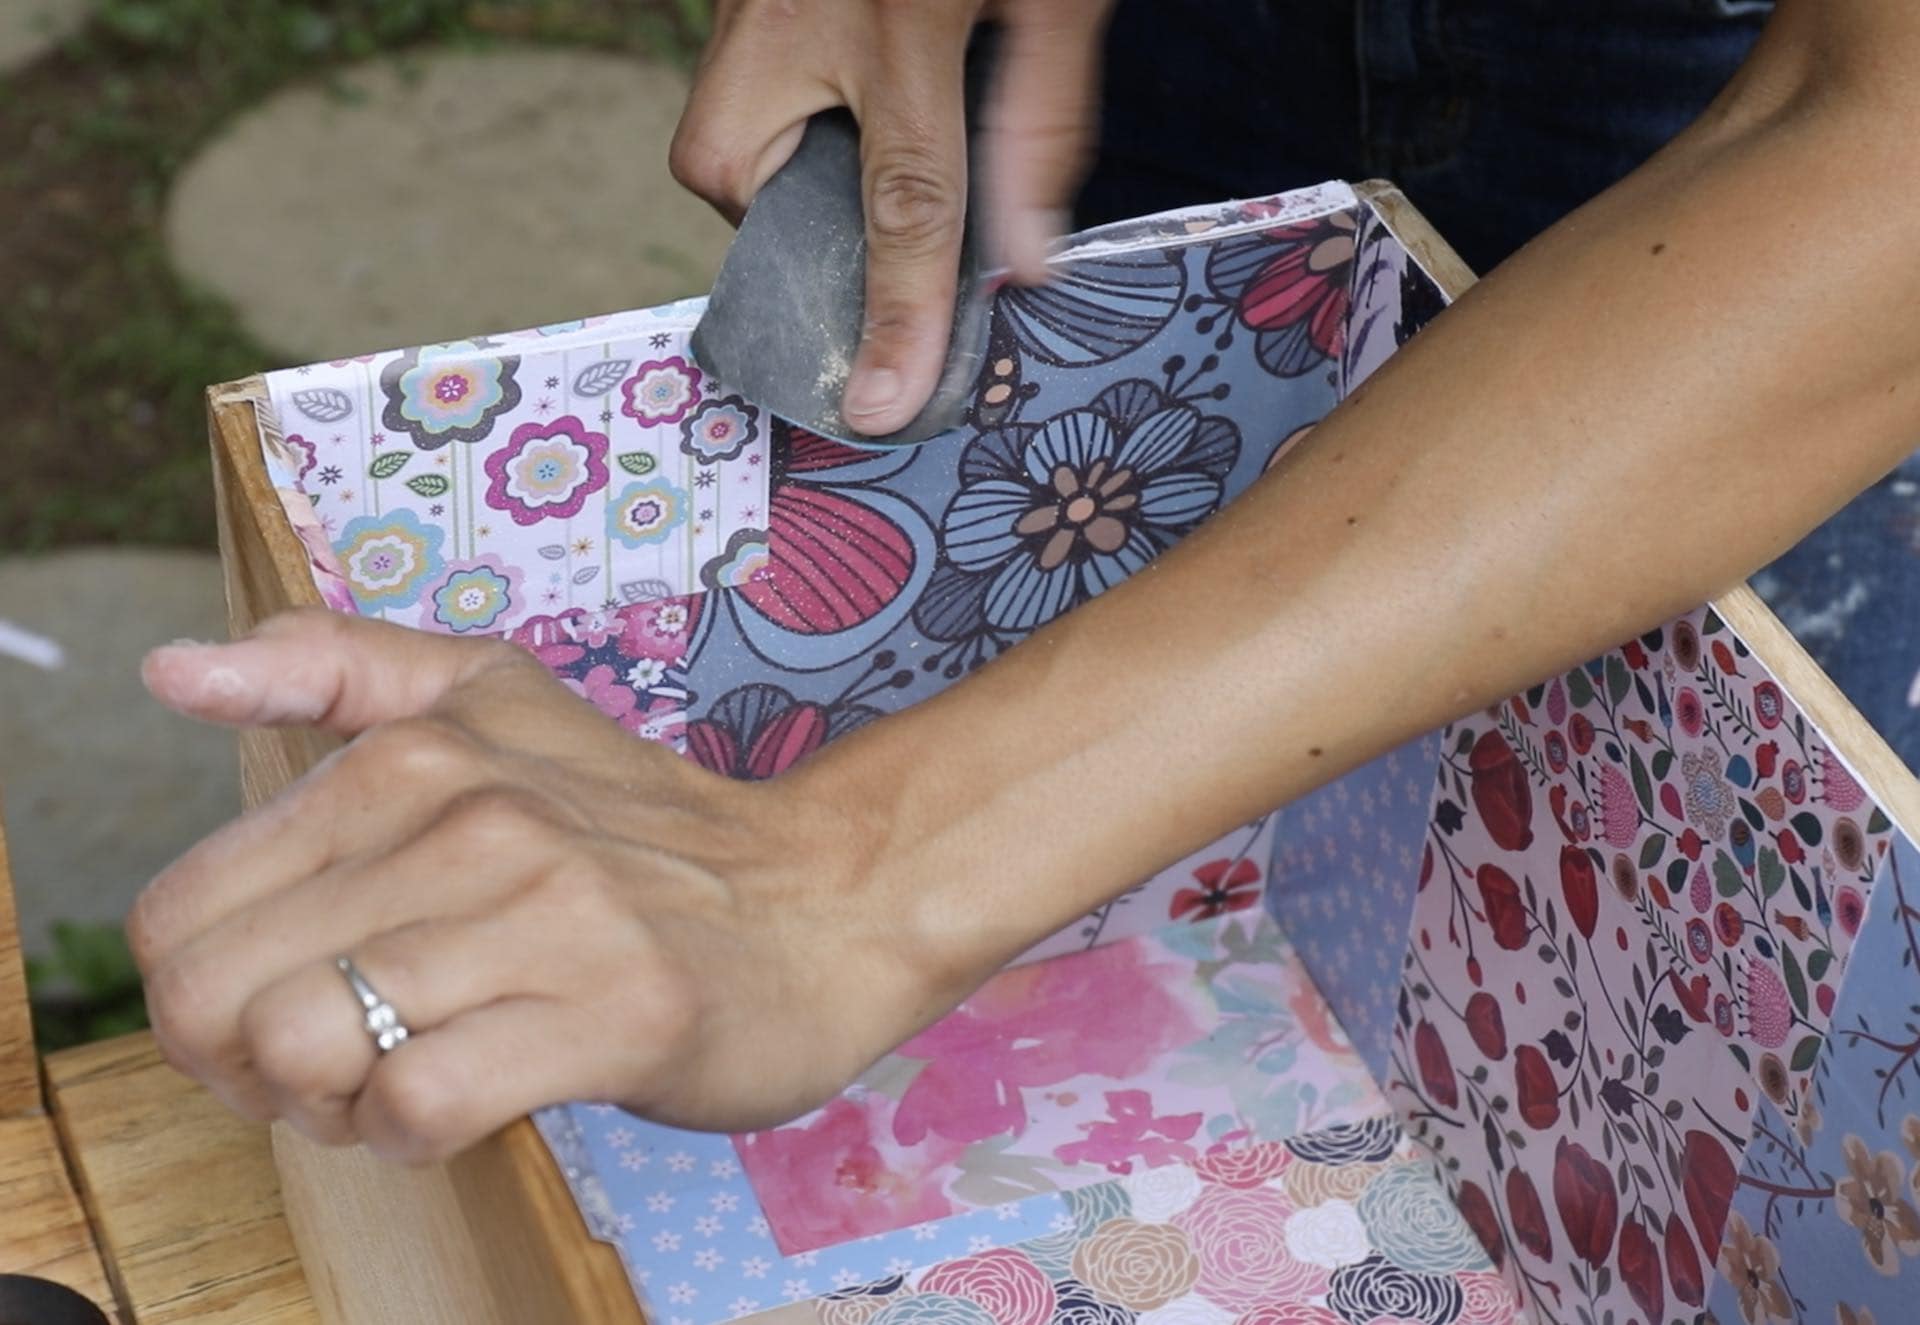
Sanding in one direction (towards you) at angle cuts the paper off right at the edge of the drawer, creating a perfect fit!
Notice how crisp the paper is on the right side of the box? That side had been sanded. The back and other side hadn’t been sanded yet.
Trust me, fits this precise with scissors or a paper cutter just ain’t happening, my friend! Not for this girl! LOL
The sanding method works great every time when gluing paper onto a surface with a sharp edge!
When the edges are all sanded and perfect, apply a light coat of sealer to the edges of the drawer, extending the sealer onto the edges of inside drawer, helping to re-seal any of the paper due to sanding.
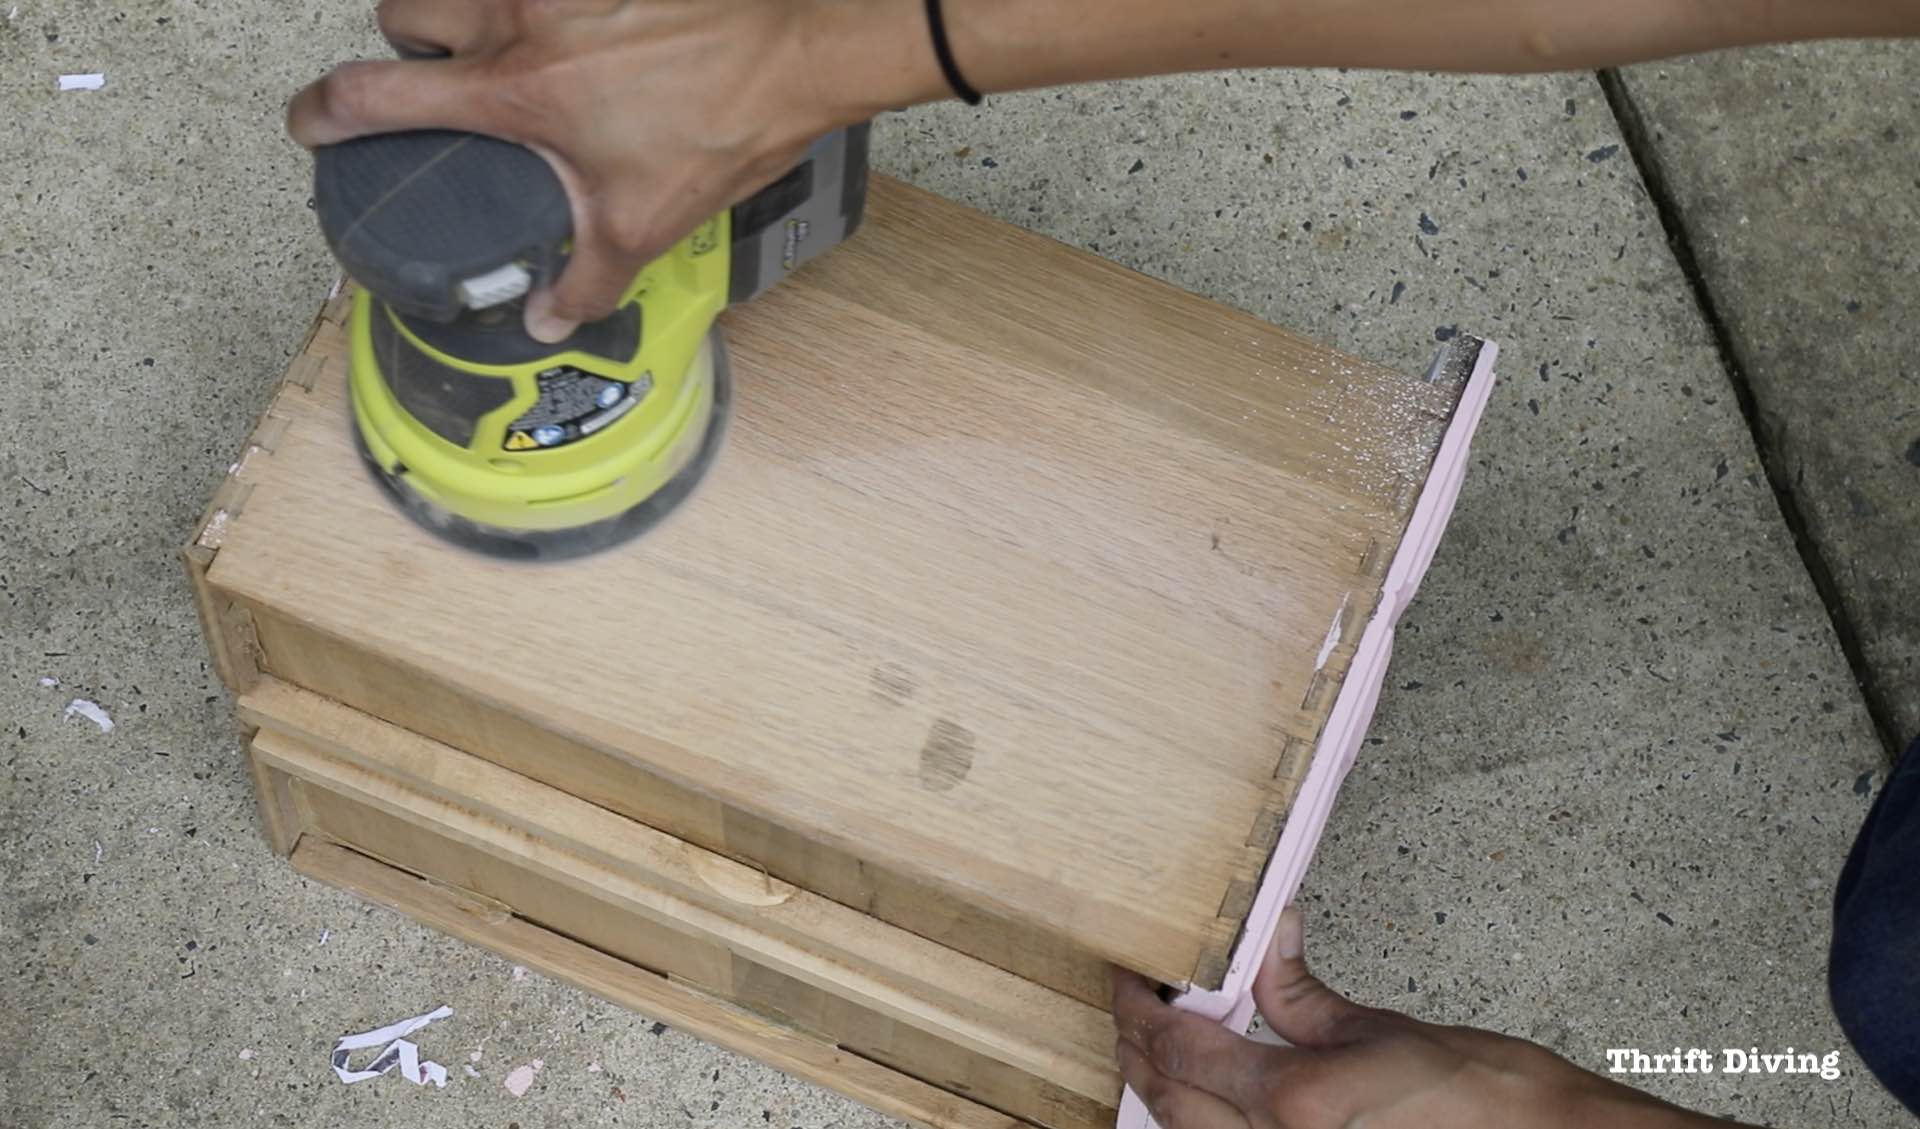
STEP 7: Sand the Sides of the Drawer
This is another little trick I like to use: when refinishing furniture, use an orbital sander to sand the sides of the boxes if you’re not painting them.
Usually, the drawers are all old, yellowed, worn out or stained. A quick swipe over with them with the sander helps to get out blotches and yellowing and makes the outside of the drawer boxes feel fresher! You can see here how it’s lightening the yellowed wood!
Let’s have another look at the drawers!
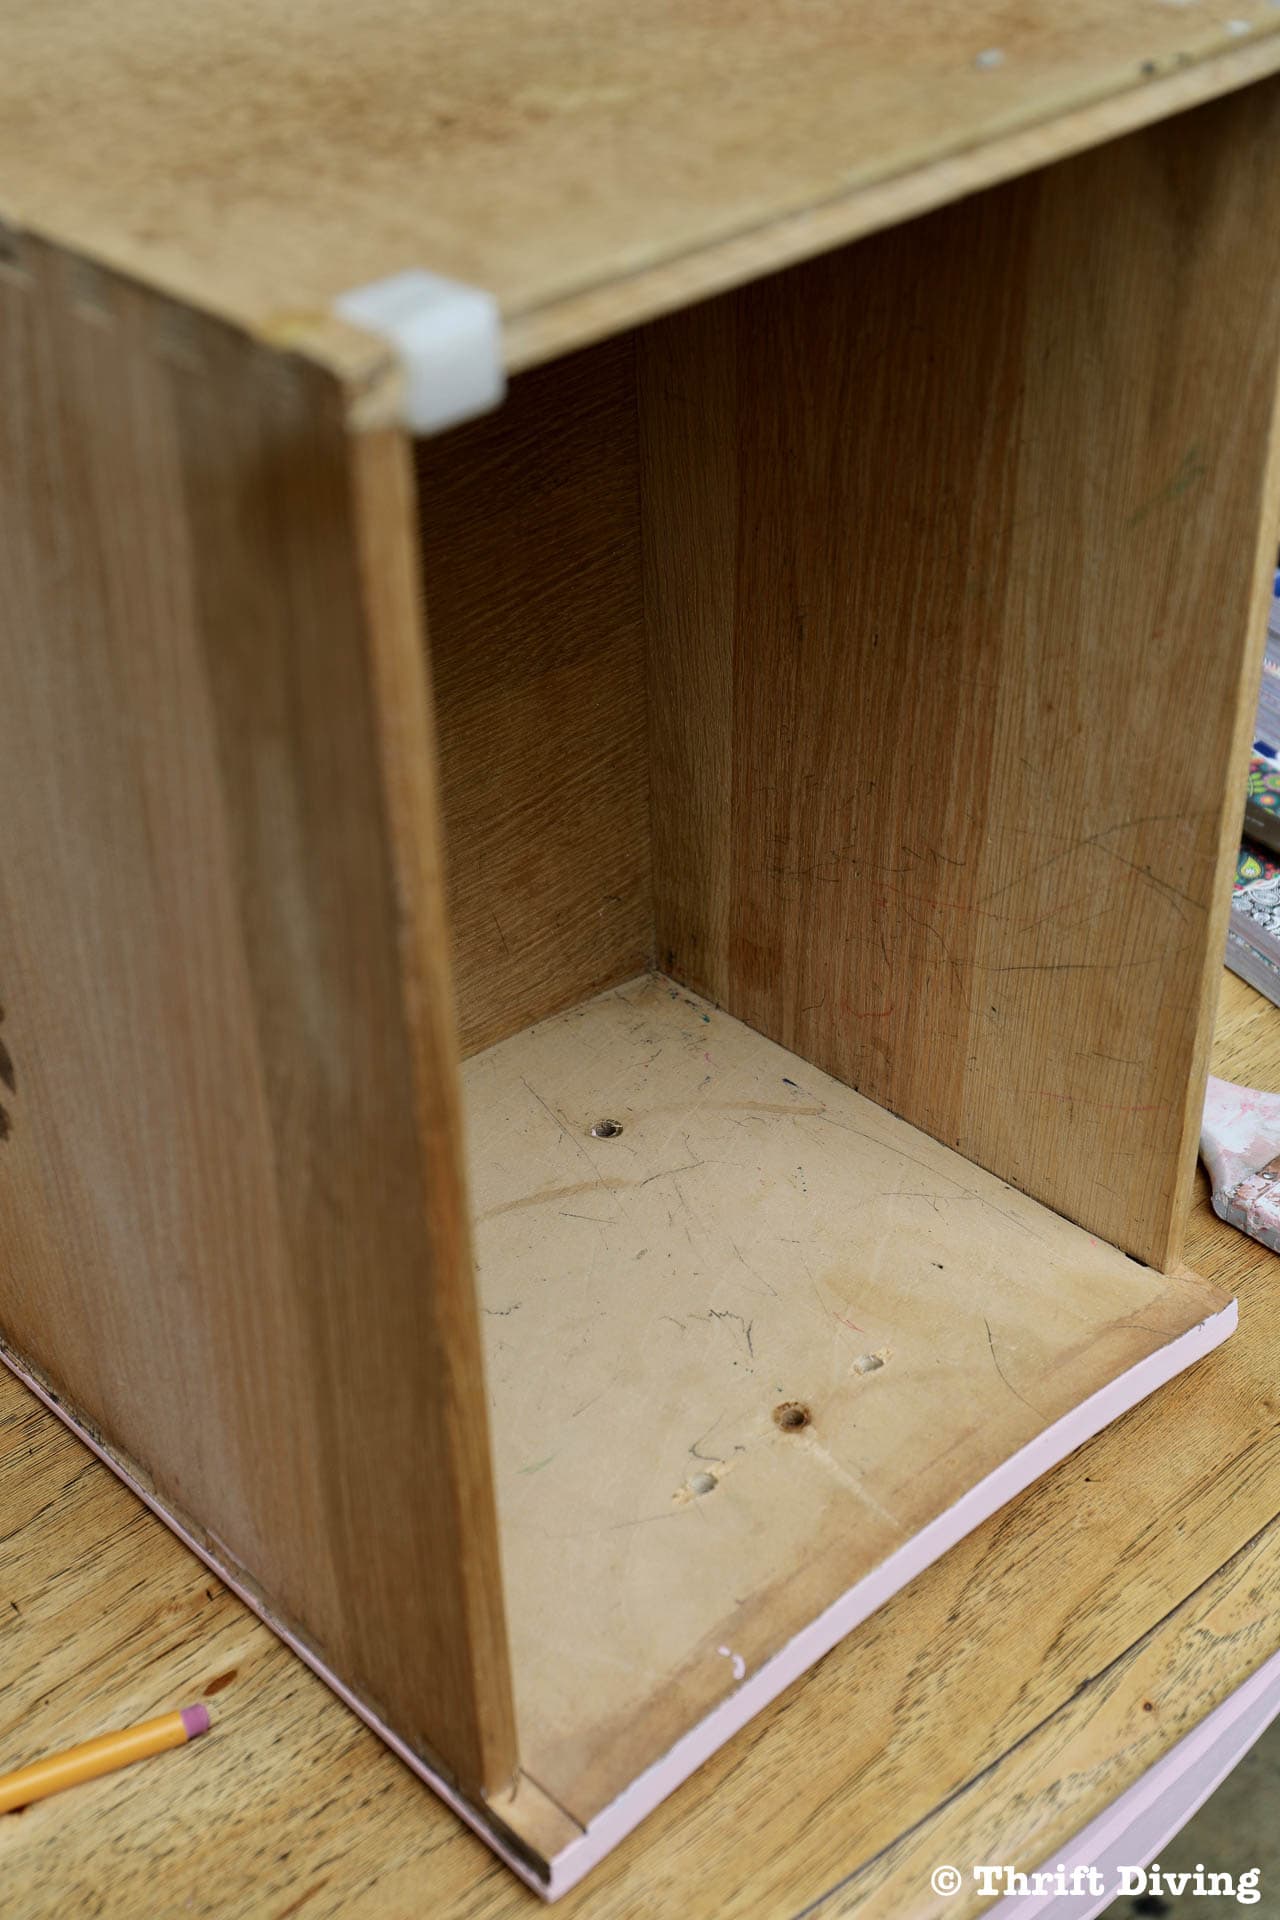
BEFORE
AFTER!

I loved the look of the patchwork scrapbook paper that I decided to use to line the inside of the French Provincial vanity, as well!
Who wouldn’t want to open this and see their favorite papers inside?! 🙂
BEFORE
AFTER

Check Out More Awesome Craft Projects With Scrapbook Paper!
- How to Make a Gift Box Out of Scrapbook Paper
- Ugly Lamp Makeover From the Thrift Store (See How I Covered the Shade With Pretty Paper!)
- Ugly Lamp Makeover From the Thrift Store
Enjoy this tutorial? Be sure to SAVE it!
![]()
So what do you think of my thrifted French Provincial vanity makeover with drawers lined in pretty scrapbook paper?!
Visit your local A.C. Moore or find them online for more product information and inspiration!


Download the 5 freebies!

Thrift Diving inspires women to decorate, improve, and maintain their home themselves...using paint, power tools, and thrift stores! Use these 5 printables, checklists, and ebooks to get started!


Glad to hear that you are finding swallowing easier now – a miserable thing to suffer with. I have a hard job finding my laparoscopy scars now (gynae stuff), they do fade gradually.
Love the finish on this vanity/dressing table – inside and out. Thanks for the tips on getting a clean edge on the paper! I once stripped 8 layers of paint off an old 6′ high cupboard only to find the lovely pine underneath had faded in patches where it had originally been left out in the sun with something in front of it…..so had to paint it all over again! Pink and gold are so classy 🙂 love that colour
Beautiful!💞 Sending you lots of love and prayers 💞🙏
I know it’s hard for you to take it easy Serena because you’re used to being so busy! You will be soon though if you take care of yourself! I’m amazed and enjoy the projects you take on and you do an incredible job of showing how you do it all on your blog. I’m Looking forward to hearing that you’re even better and getting back into things!
Glad to hear your surgery is behind you and you’re recovering. Prayers for you. 🙂
Missed the post about your surgery but sure glad to hear you are recovering as you should. Must take it easy, do as instructed about taking care of yourself. Believe me have had enuf surgeries to know what should and shouldn’t do. When you start feeling better is too easy to think, oh can do what I want, no way. Not worth undoing time spent recovering. No shopping or vacuuming. After I had my 2nd. knee replaced Doc told nurses to warn me about doing housework, no to any. After my right shoulder replaced had to take it easy, couldn’t even cut my own food, bathing was interesting.
Big problem, home health care didn’t send me for physical therapy soon enuf, shoulder locked up, don’t have much range of motion. P/T tried and tried to get shoulder to relax but never did. At least didn’t have to have rotator cuff replaced, that’s really painful.
Love that paper you used to line drawers. will need to buy online as no A.C.Moore here. Where we live is always very slow to get craft supplies, new stuff, if at all. In all the traveling all over U.S. in Mr. Furry’s truck only came across one A.C.Moores. Got to spend couple hours there then had to get on the road. Don’t remember what state it was in, was few years ago. I still miss going trucking, loved the traveling, seeing the country.
Enjoy rest of week, take good care of yourself.
Dear Serenia, hope this finds you feeling better,i’ve been thinking of you, so glad your surgery was successful! Please make sure you take the time to recuperate.I know from personal knowledge.I’ve not been able to create anything fun,i’m having trouble with my rotator cuff,so again my flowers are not planted and my pots are unpainted,and my dresser,my antique shell chairs for my patio,ect. ect. ect.—–take care now—“best made plans of mice and men” Love ya,Chris Hicks
Very happy to hear about your post-op improvement. Continued good wishes in moving through this.
You always seem to do and post things that I had previously wanted to do, but didn’t quite know how to proceed. Lining your drawers and sharing the how-to with us was JUST the thing I needed to learn. Thank you. Happy to hear that you are on your way back to your healthy self. And boy, do I LOVE myself some scrapbook paper! I’ll email you a photo of just how much I love it. 😀
I’ve been holding on to beautiful paper forever. Will finally get some use. To good Health
May you continue to recover and feel better better very soon.
Love the vanity. Pretty paper lined draws makes the vanity special.
Thank you for sharing.
Love it! It looks so quaint, a very personalised piece for any woman.