How to Make DIY Roller Shades for Your Windows!
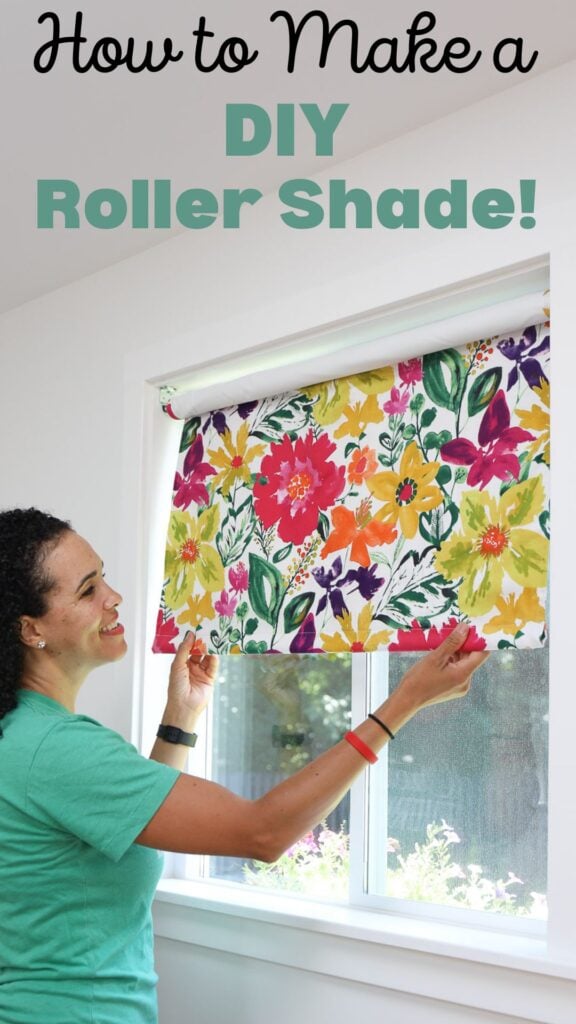
A DIY roller shade (specifically, fabric roller shades) is so much better than curtains for my 16′ x 26′ “she shed.” This space will be used for woodworking, painting furniture, and sitting down to write blog posts and edit YouTube videos.
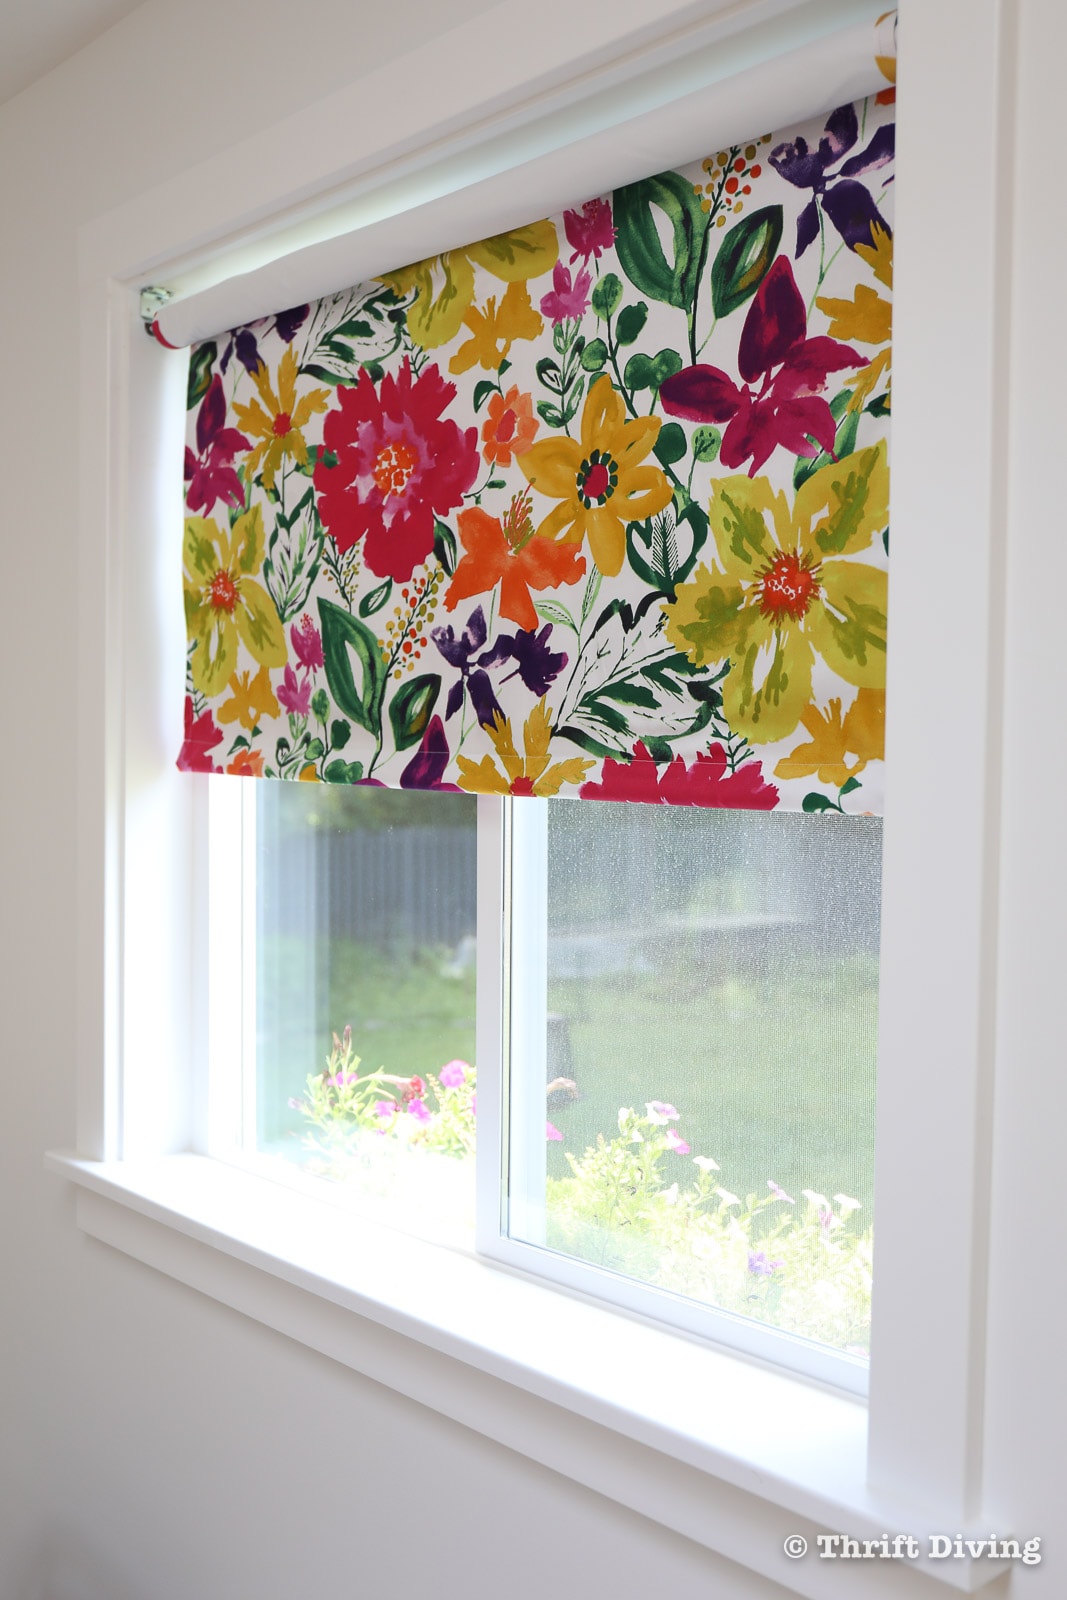
But since it will likely have “dirty” moments due to projects, I wanted a fabric DIY roller shade made for each window that can easily be drawn up and out of the way, to reduce dust collection on the fabric, and to prevent any accidental brush-ups against it, which could get ruined by paint. I also wanted the fabric to be sun-blocking.
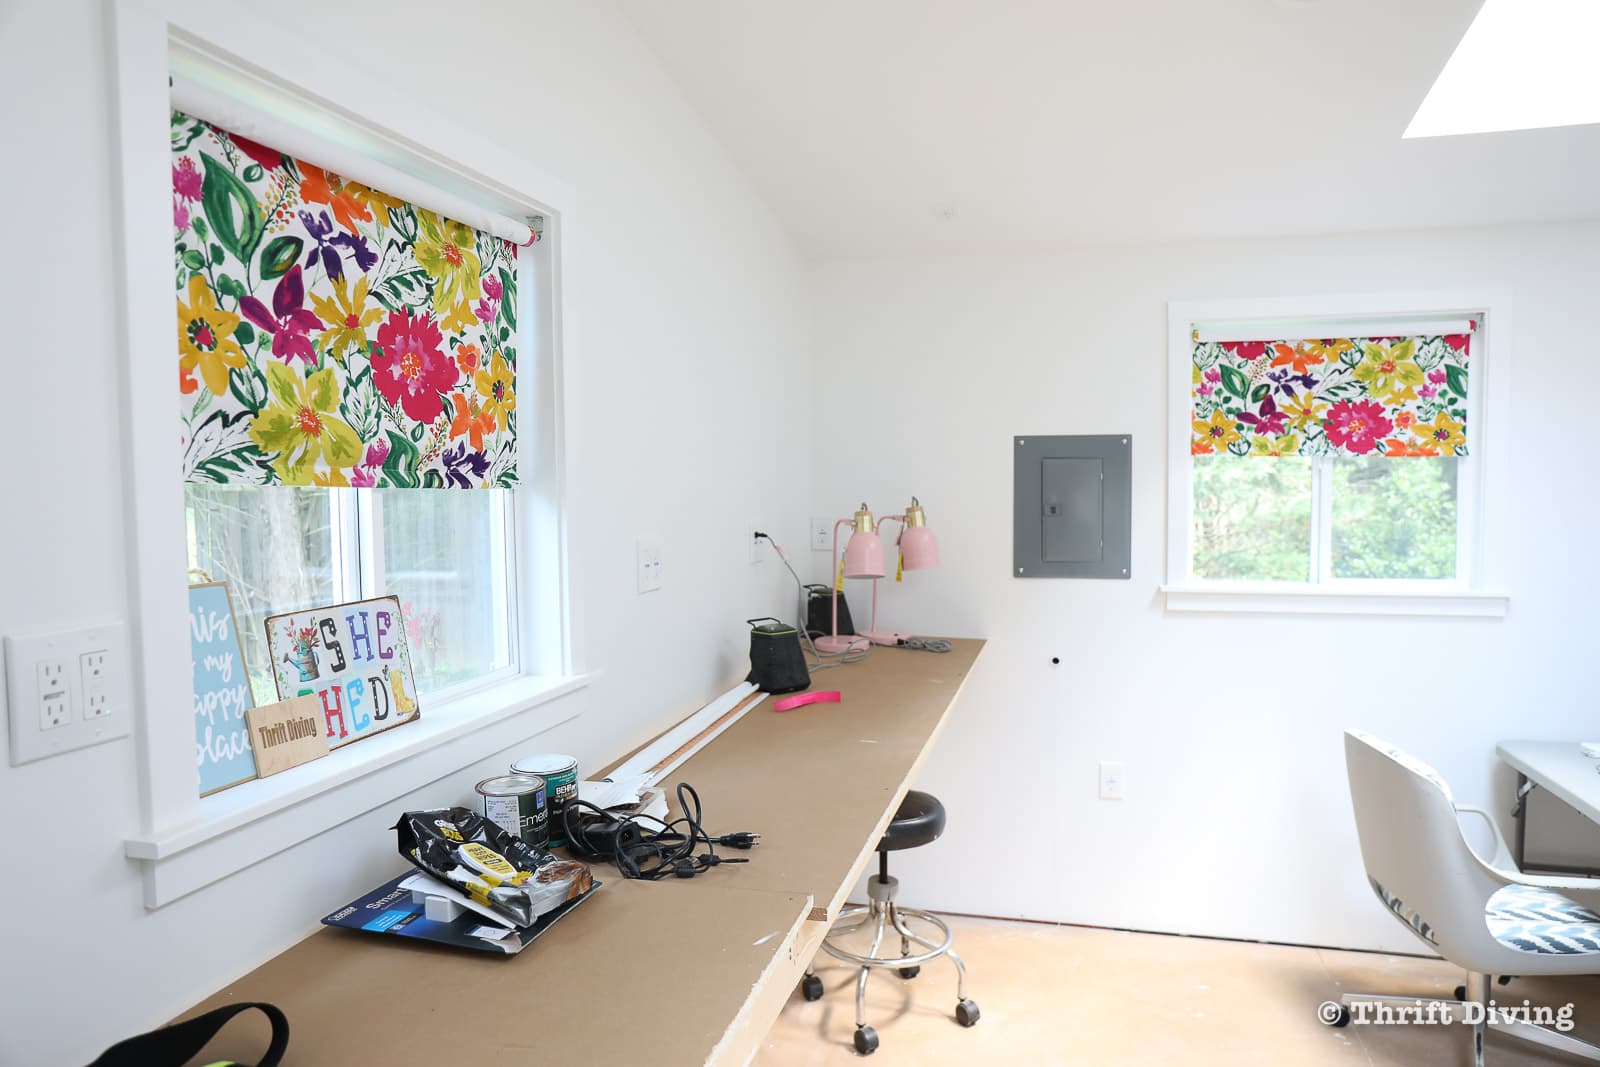
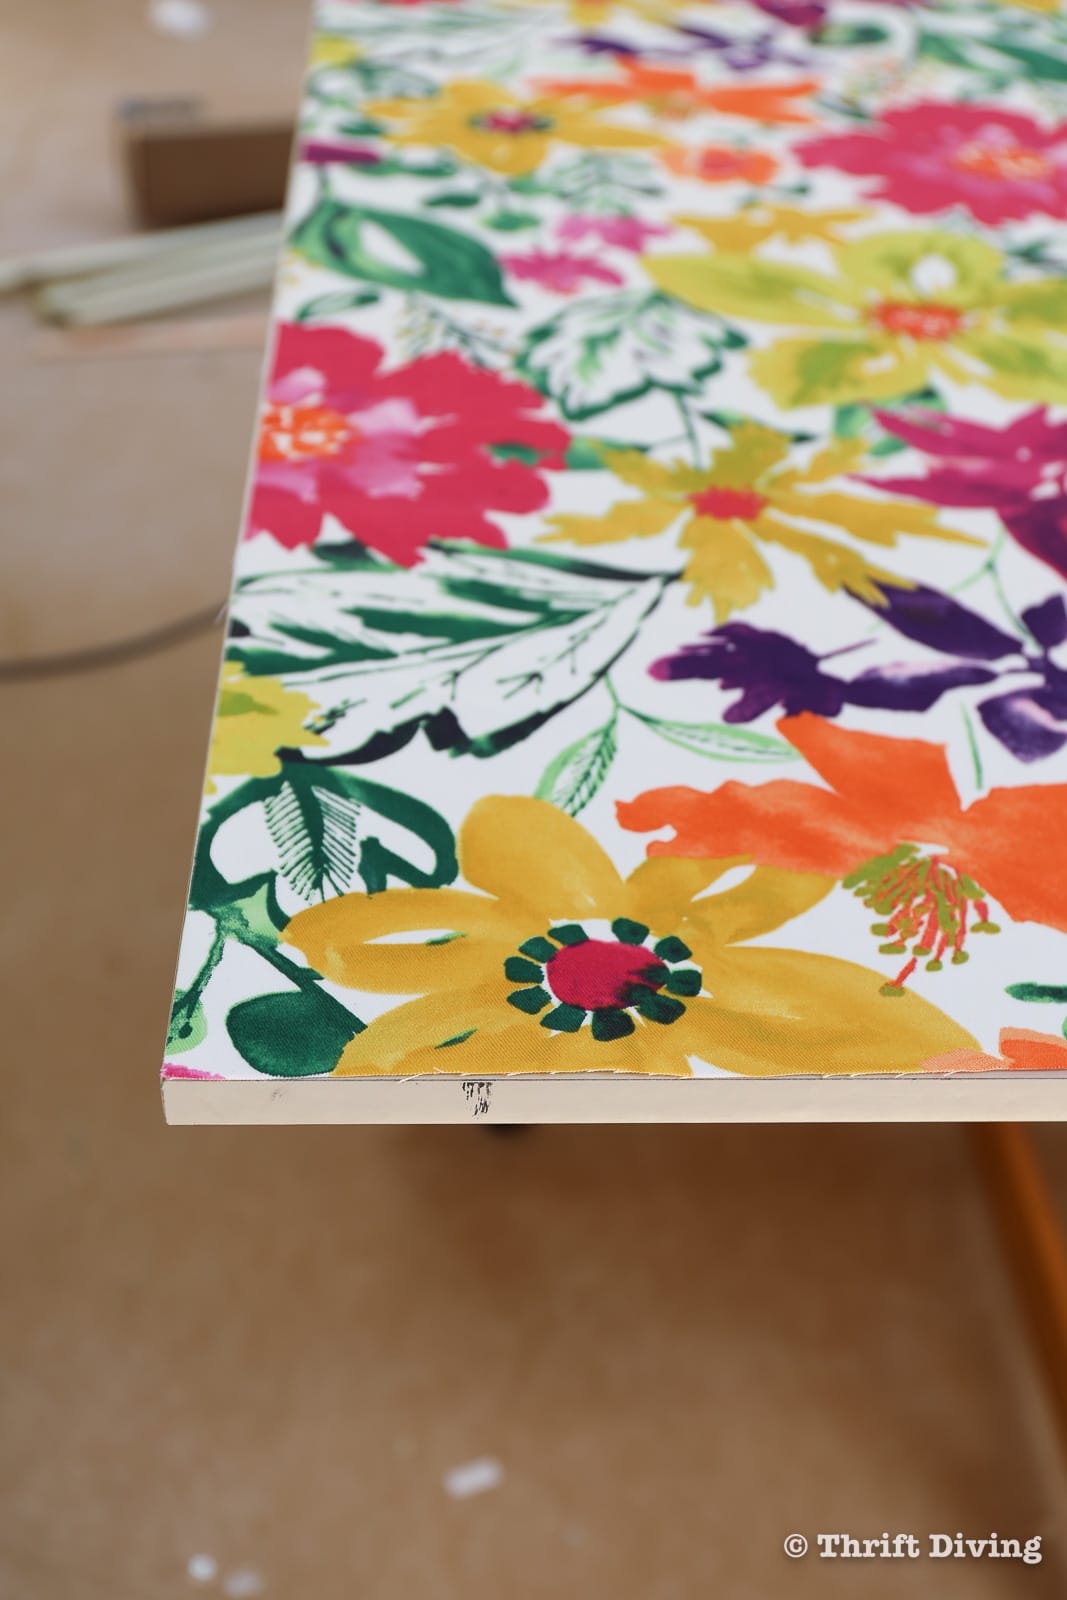
These pops of color, though….my goodness, it doesn’t get much better than this!! They’re perfect for the space!
Keep reading to learn how you can make your own easy fabric roller shades, too.
Love this project? Click here to save it on Pinterest!
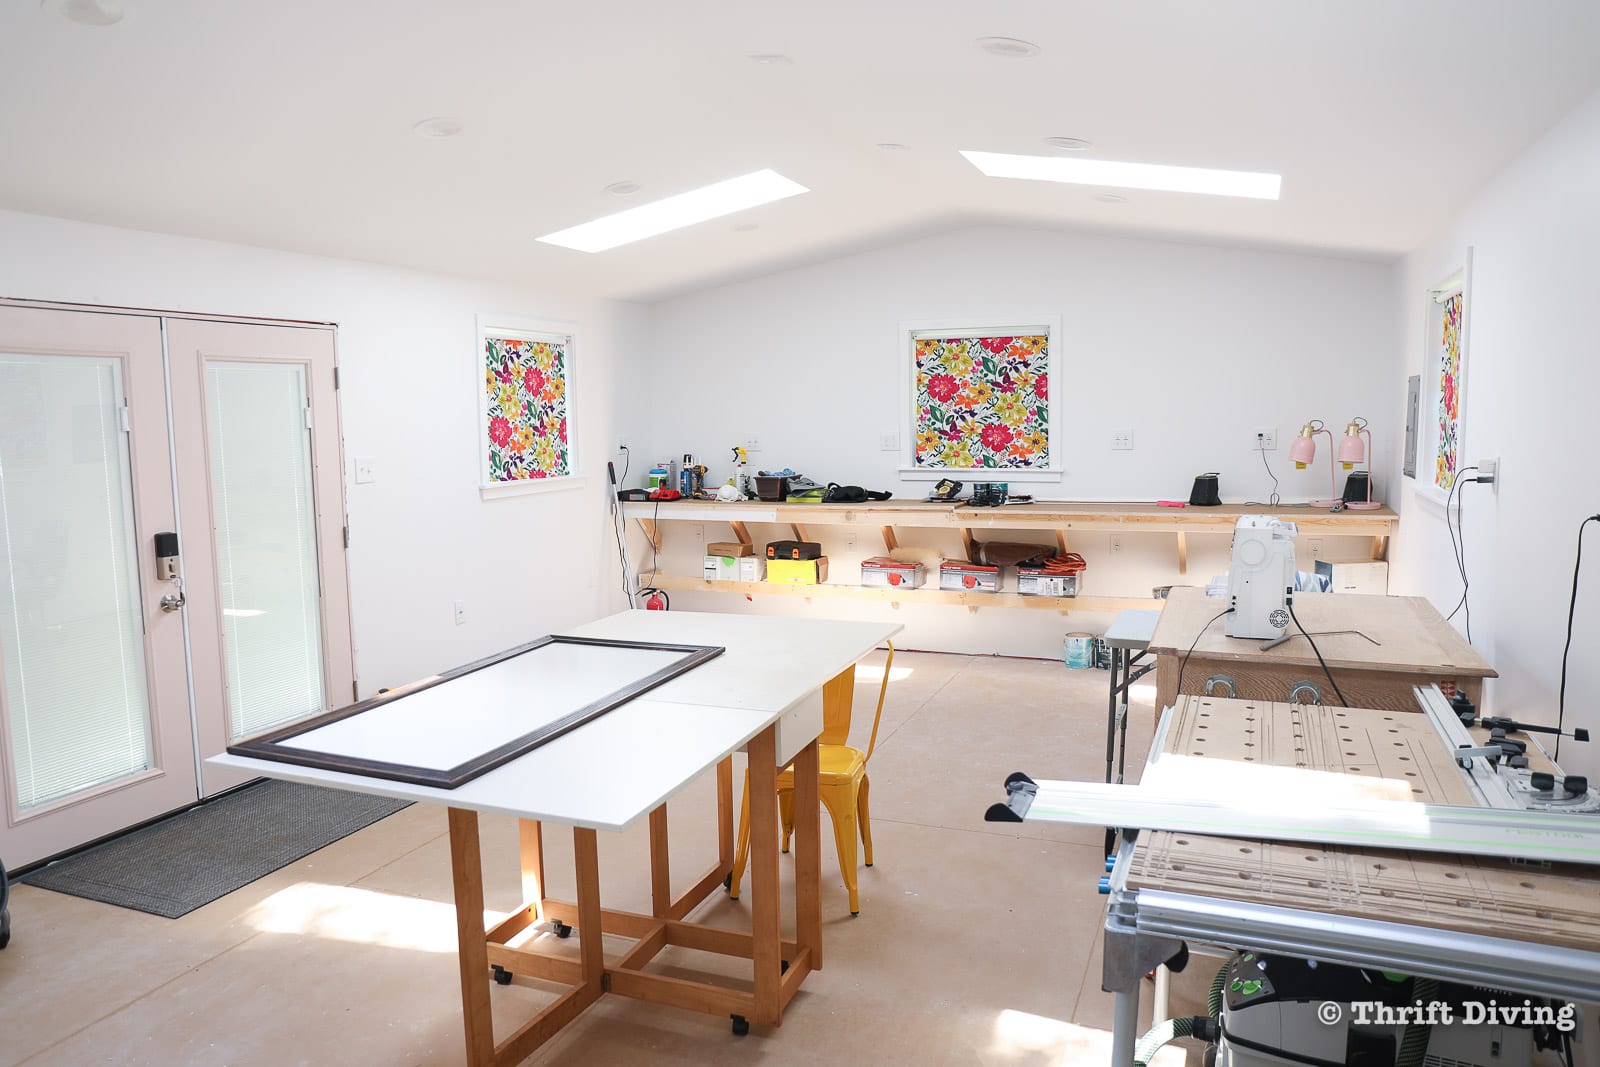
I want my “she shed” to be a gorgeous, creative, light-filled space to walk into that instantly puts a smile on my face. Isn’t that what I’ve been craving for all these years?? (Why yes, Serena, it definitely is a step-up from that dingy, cluttered garage you’ve been working in!)
If you remember, my “she shed” was installed around October 2021. The plan was to have a company build it (it was pre-fabricated), and I would do as much of the interior finishing myself (I installed the electrical wiring, insulation, and window trim).
But because there are six windows and 4 skylights, the interior of my shed gets blazing hot in the direct sunlight of the early and late afternoon!
While that’s great for fulfilling my “light and airy dream-come-true” for a creative space, it also means it’s “light-filled and hot as heck!”
I wanted to create a DIY roller shade lined with blackout fabric for each window to prevent heat from getting trapped inside of my “she shed.” Keep reading to see how I made these pretty roller blinds!
Watch “How to Make DIY Roller Shades”!
For all you visual folks, watch the step-by-step of this project in action on my YouTube channel!
Materials and Tools
- Pretty drapery fabric (sorry, I bought it local from my fabric store and can’t find it online anymore!)
- Black-out drapery lining (optional)
- Vinyl roller shades
- Roller shade hardware (doesn’t come with the roller shade, so you must buy it separately)
- Double-sided tape (my favorite brand)
- Spray adhesive (recommend using spray adhesive, for sure)
- Sewing machine (optional)
- Sewing thread (optional)
- Heat n Bond tape (optional, if you’re not using a sewing machine)
- Iron (optional)
- Tape measure
- Scissors or rotary cutter
- Framing square
How to Make Fabric DIY Roller Shades for a Window!
I know this is a lot of information, but don’t worry–it’s actually pretty thorough so that you know exactly how to make these fabric roller shades for your own windows in your home, shed, craft room, or office!
STEP 1: Measure Your Windows
To make a DIY roller shade, you’ll need a measuring tape to measure the height and width of your windows. Do you want to mount inside the frame of your window, or outside of your window? These measurements you get will determine the size of the adjustable roller blinds you’ll buy.
STEP 2: Install the Roller Shade Brackets
Keep in mind that roller shades do not come with brackets. I don’t know who in the heck decided this was a good idea. So you’ll want to order a pair of universal roller shade brackets separately on Amazon, or pick up the ones that I bought, available at Lowe’s.
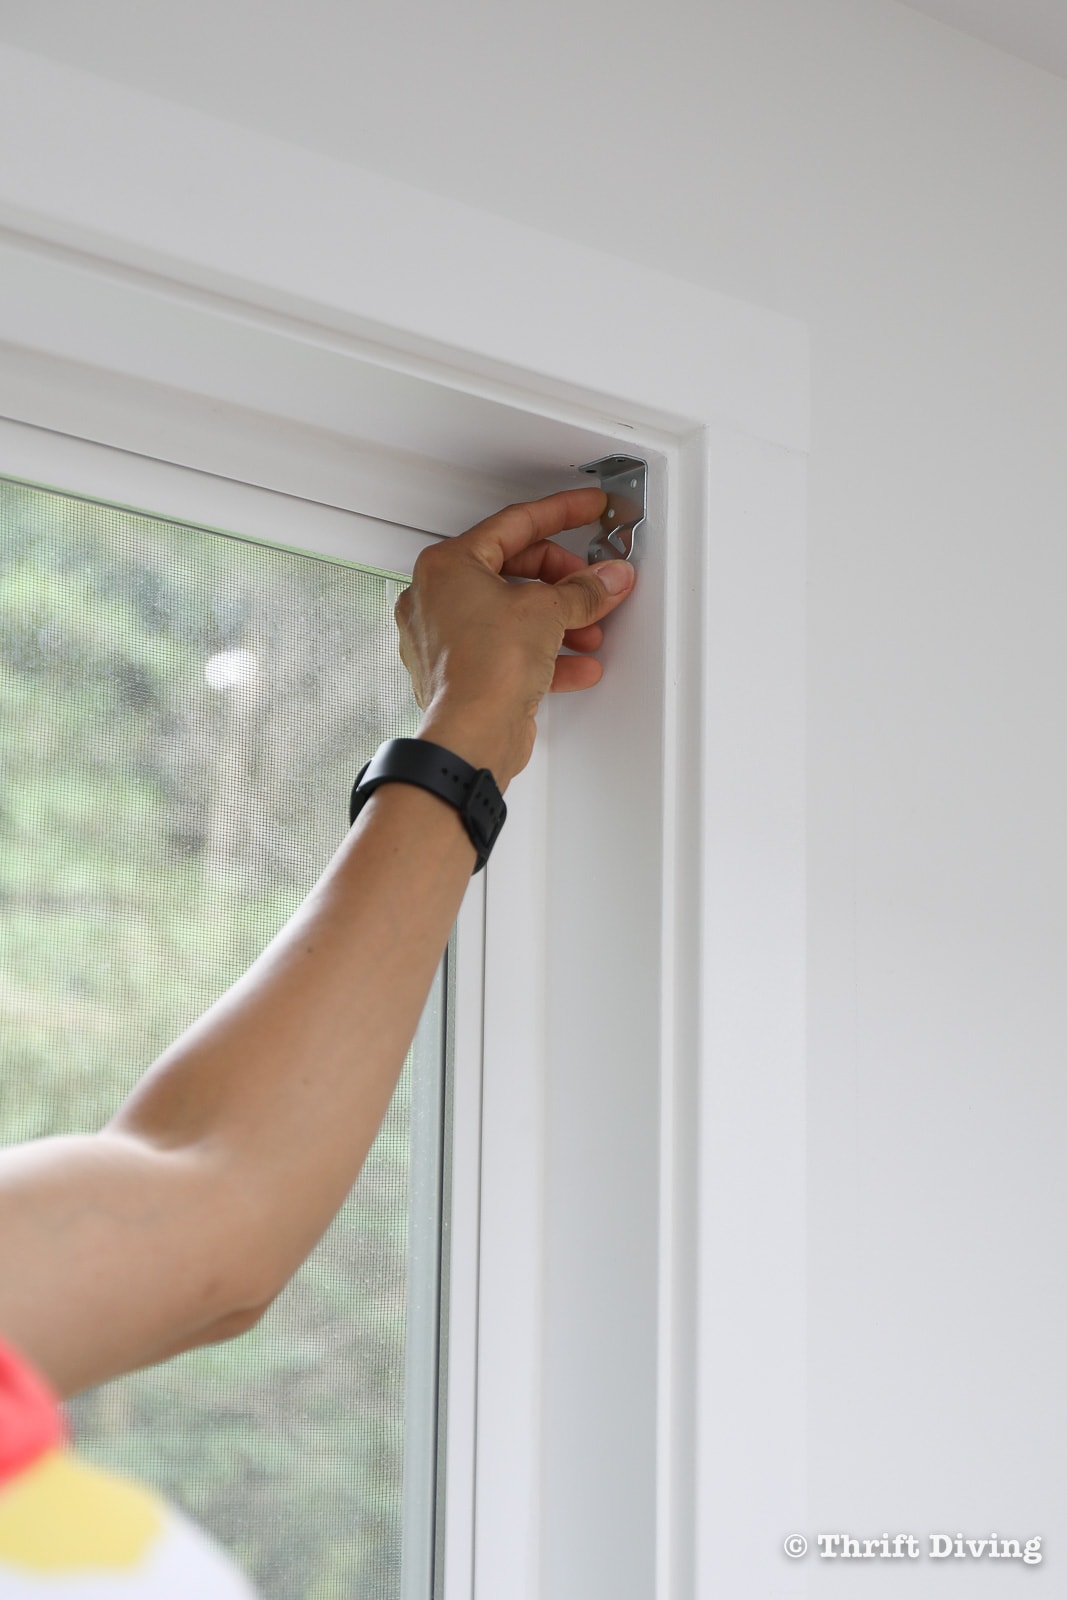
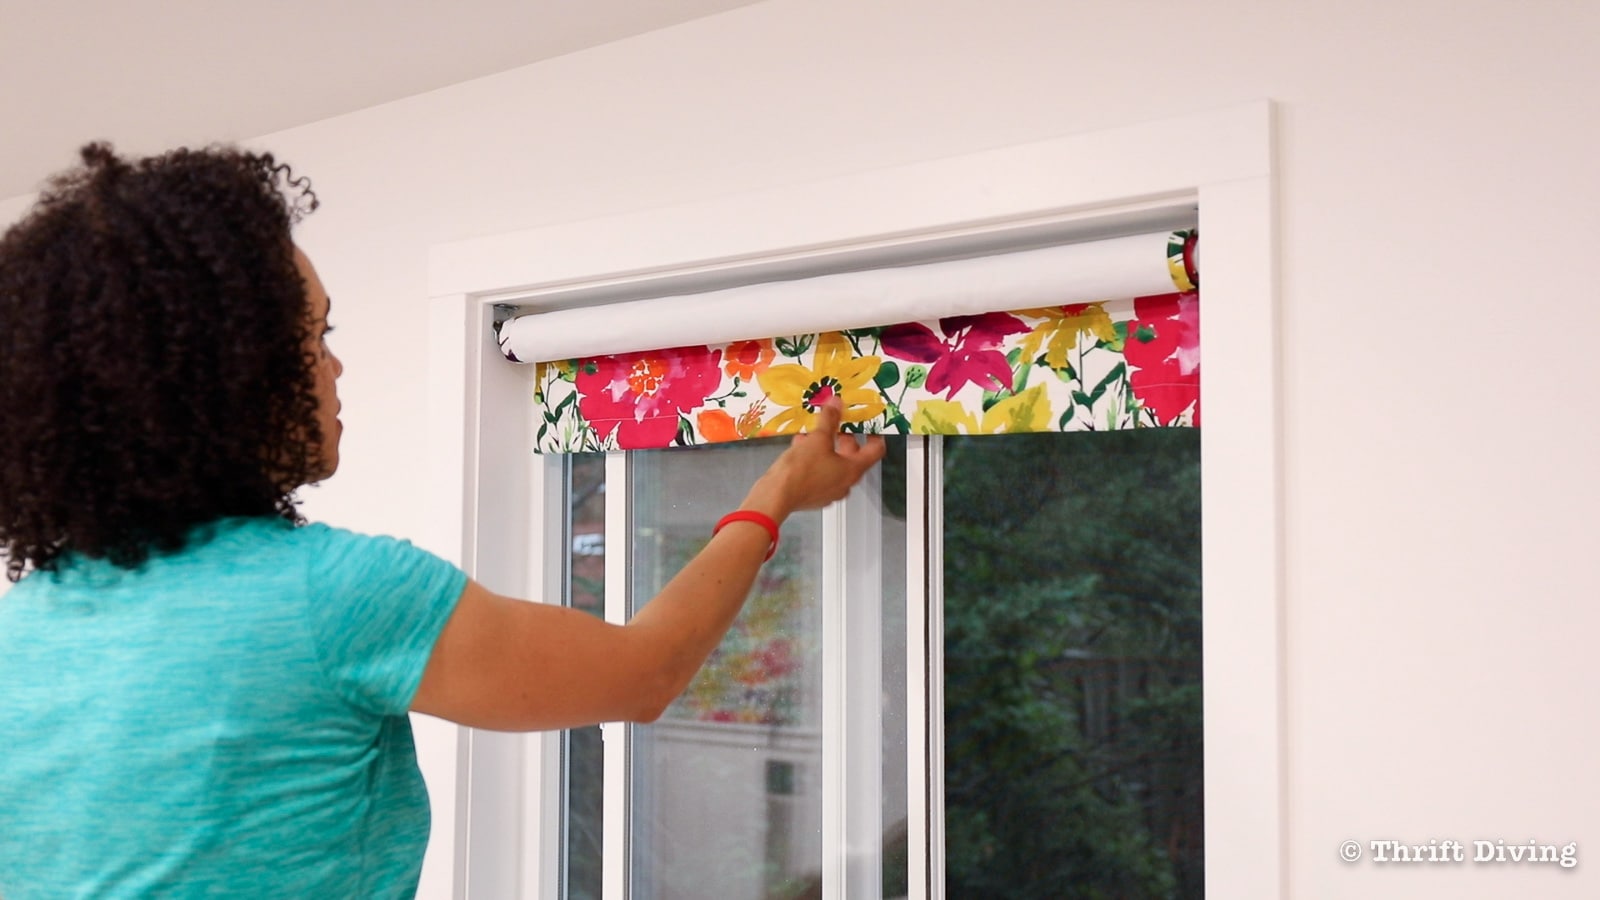
You’ll want to install the brackets in the window next. I did an inside mount, where the brackets were mounted inside of the window frame, as shown below. However, you can do an outside mount outside of the window frame instead if you want your roller shades to cover the entire window.
Inside mounted roller shades will usually have about a gap between the edge of the roller shade and the edge of the window. That’s because the brackets, for mounting purposes, are set off from the wall. That little bit of gap, including the gap between the edge of the fabric and the end of the rod, will create a gap along your window edges.
An outside mount is placed outside of your window, which allows for the roller shade to completely cover the entire window, preventing any light from escaping in via a gap along the sides.
To me, an inside mount was going to be more attractive, and because this is “just” a shed and workspace (and not a bedroom where total light blocking is usually preferred).
For you, decide if you can live with “light gaps” along the sides (for an inside mount) or if you need all of the light blocked (then go with an outside mount).
To mount the brackets for an inside mount, I placed the bracket about 1/2″ in from the edge…..marked the two screw holes….drilled a small pilot hole with a drill bit (optional)…and then screwed the two screws that come with the bracket to secure the bracket.
(An outside mount would be mounted to the outside of the window, but will be attached to the window casing or to the wall).

STEP 3: Insert the Rod into the Brackets, Then Measure the Rod
Each roller shade rod is adjustable, but some are easier to adjust than others. I used these rods from Wal-Mart, the Mainstays brand because they’re metal and simply adjust in the center like curtain rods (some models of roller shade rods are made of cardboard and require you to cut the tube. I didn’t want to have to do all that…).
Roller shades have two ends on them (see below):
- Flat metal bar, which sets the tension of the rod.
- Metal pointed pin
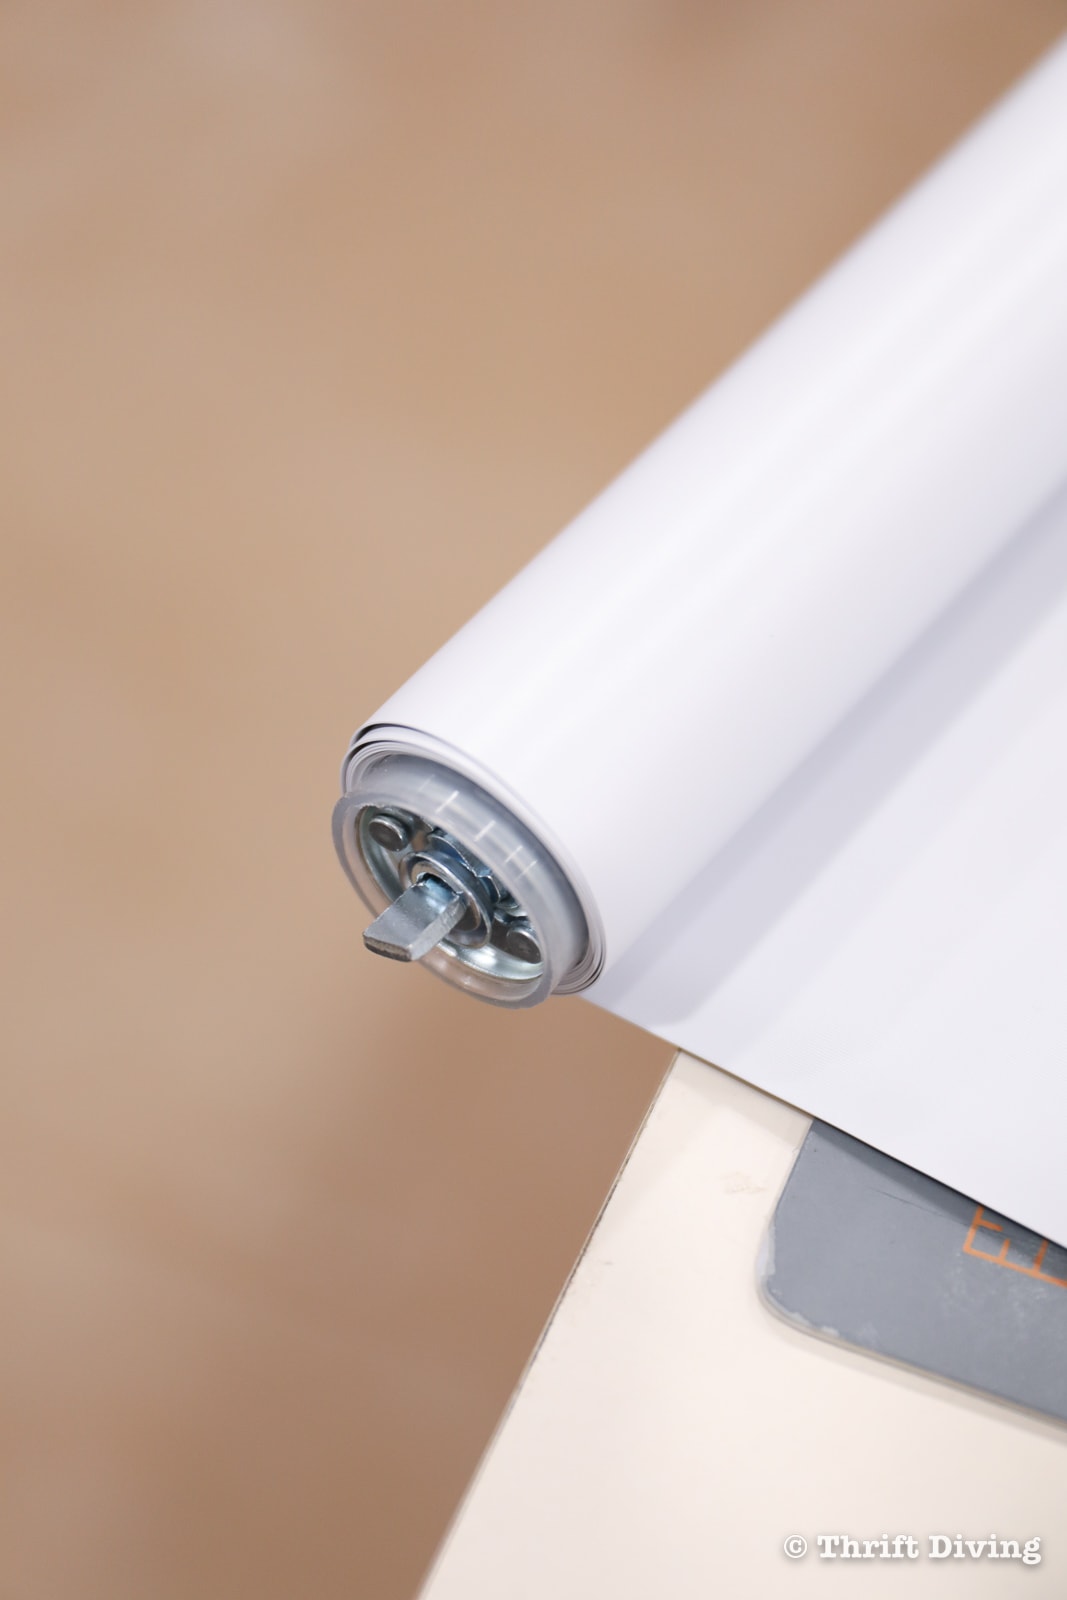

Before using the adjustable rod, release the tension in the roller shade rod. To release this tension, gently use your fingers to turn the flat tension rod in a count-clockwise direction. You’ll feel the tension release. Be careful here, because the tension can be tight and spin quickly. Wear safety glasses so that no small parts fly off into your eye.

To attach the rod to the brackets, adjust the rod in the center. Insert the pointed pin into the right bracket, and insert the flat metal tension bar into the other bracket. Make adjustments to the center of the rod so that it fits perfectly between the brackets.
Next, while the rod is in place, measure from one edge of the rod to the other edge. This measurement will be your finished roller shade measurement.
For my roller shades, the rod was 35″, which means my DIY roller shades would need to also be 35″, as well.
STEP 4: Cut Your Pretty Roller Shade Fabric
Now that you’ve got your finished DIY roller shade measurement, it’s time to figure out what your fabric needs to be cut, and to be sure the seams are included.
- Finished width + left seam + right seam = Raw width
- Finished height from the top of the rod + amount of fabric that will roll around the rod + bottom seam = Raw height
For my shades, 35″ finished width + 1″ for the left seam + 1″ for the right seam = 37″ width.
Finished DIY roller shade height of 36″ + 6″ to roll around the rod + 2.5″ for bottom seam = 44.5″ height
Getting your fabric DIY roller shades to evenly wrap around the adjustable rod, and go and up and down without being wonky and crooked, is the key to success here!
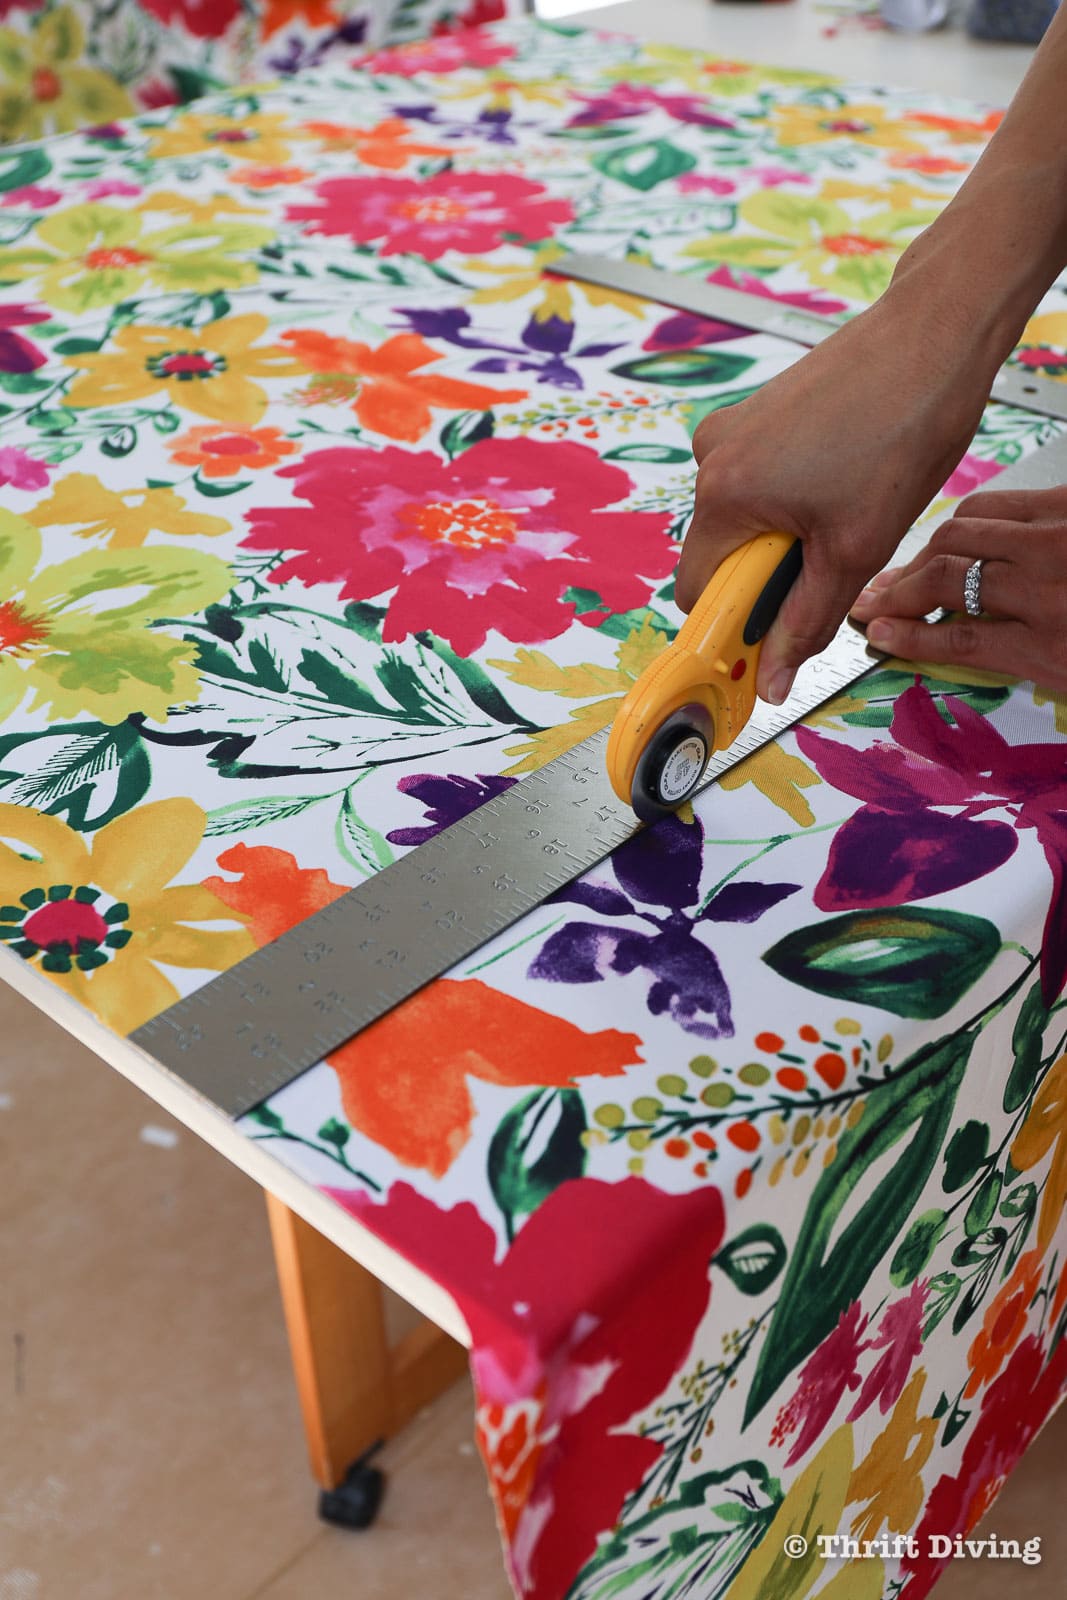
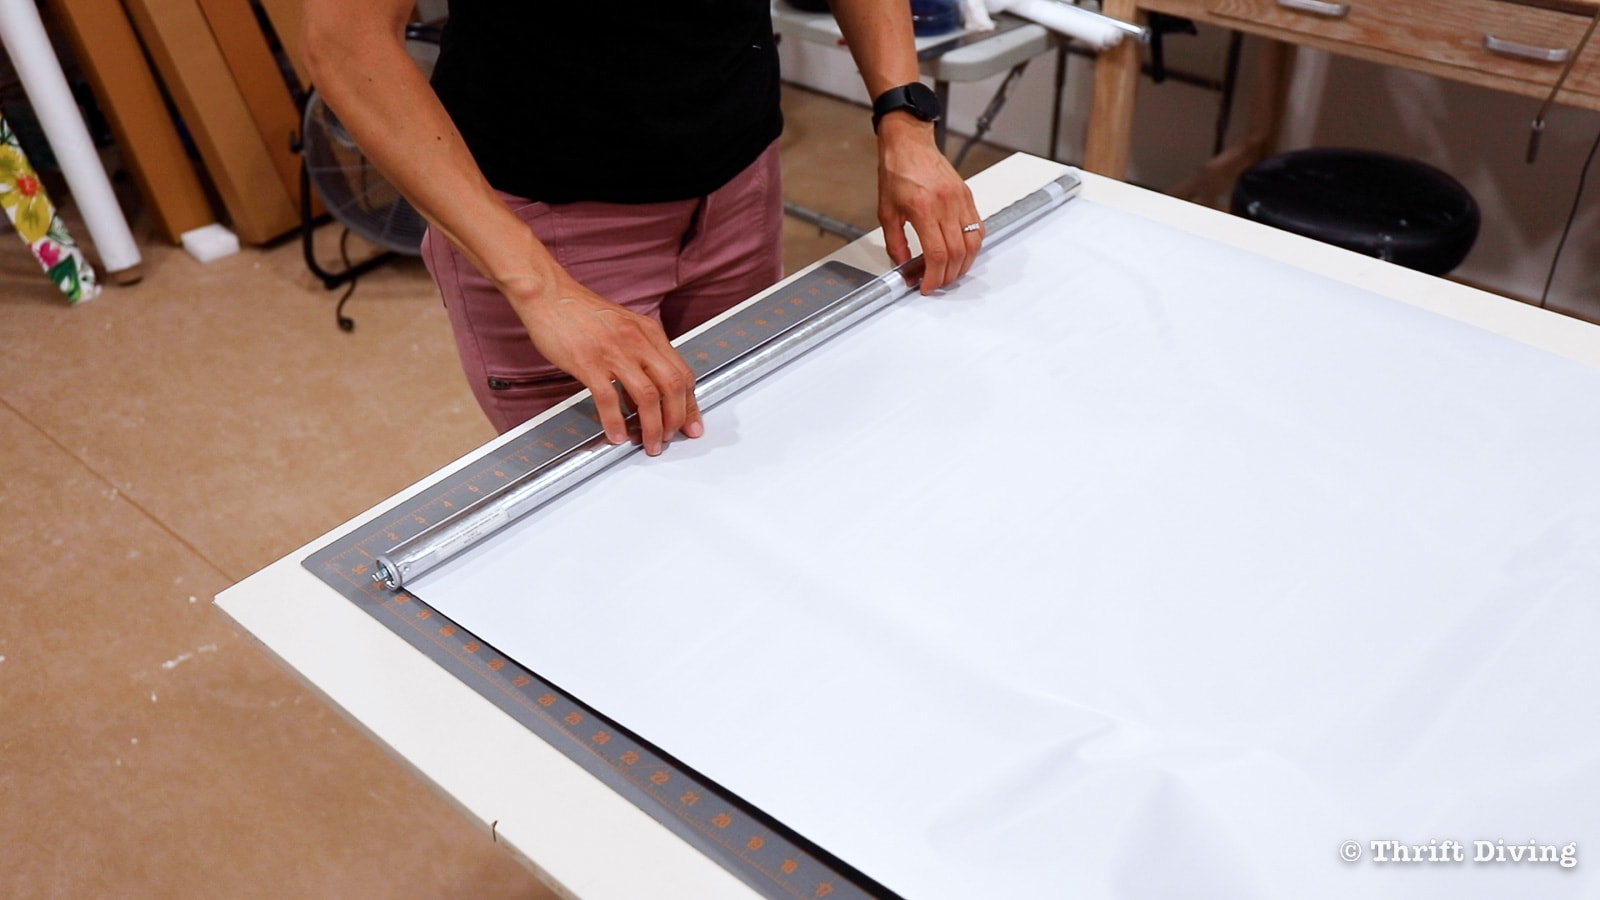
In order to do that, you absolutely must start with evenly straight fabric, which I found to be difficult to do without a large work table. In order to get straight edges, here’s what I did:
- Use a framing square which you can buy from the Home Depot for $10 and help to make sure you’ve got a square (unlike yard sticks which just help get a straight line but don’t actually help you to get a 90-degree angle).
- Cut off the selvage edge (manufactured edge) and line it up to the straight edge of a table.
- Use a framing square or 90-degree edge of a table to ensure that the fabric is trimmed evenly.
You can see below that my crafting table was super helpful, along with the framing square, in making sure that my DIY roller shade fabric was completely evenly cut at 90-degrees. This will ensure that the blinds will roll properly and evenly.
STEP 5: Create Your Side Hems
For the sides, fold in the sides 1″ and press with iron to create a fold. Use a small ironing board or a heat-resistant pad on your work table or craft desk to do this with your iron.

STEP 6: Cut Out Blackout Fabric
Your DIY roller shades don’t have to have blackout fabric, but if you’re trying to keep out sun and heat, you’ll want this added feature. I bought this affordable blackout fabric on Amazon for about $8.00 per yard and it feels like good quality, so it’s worth it to add.
(NOTE: I’ve gotten a lot of questions from people asking if they can just use the existing vinyl blackout that comes with the roller shade. The answer is yes, you can! You would need a good spray adhesive to attach the fabric to it. And you will need to think about how you’ll wrap the fabric around the edges of the vinyl so it creates a clean edge. But it can be done. Take your time and experiment!)
Also, unless you want your DIY roller shade fabric to show to the outside of your home (or in my case, from the outside of my “she shed”) then you’ll want to add a lining fabric. A white blackout fabric will act as the lining.
Cut the blackout fabric only to the finished width of your DIY roller shades (don’t include the seam allowances). In my case, my blackout fabric was 35″ wide and 42″ long. The reason I didn’t want the blackout fabric to be cut to include the seam allowance is because I don’t want the edges to be bulky, which could make rolling DIY roller shades difficult.

STEP 7: Attach Blackout Fabric to Pretty Fabric
Line up the top edge of the pretty fabric roller shade and the blackout fabric.
Use spray adhesive on the back of the pretty fabric to attach the “wrong” sides of the fabric together.
TIP: Don’t spray the entire roller shade fabric and then try to attach the blackout fabric to it because it gets difficult to properly attach it. Instead, only use spray adhesive in a small section, secure, and then add more adhesive as you work the blackout fabric onto the roller shade fabric.
Smooth it out as best as you can as you attach the two layers. It won’t be completely wrinkle-free, but try to avoid deep wrinkles that will make your DIY roller shade sloppy from the outside of your windows.

STEP 8: Fold and Secure the Side Seams
I used a sewing machine to create my DIY roller shades, but you don’t need a sewing machine to create these if you don’t have one. You can actually use Heat n’ Bond iron-on tape which will secure the seams and hem. Watch this video to learn how to apply Heat n’ Bond to create hems with just the tape and a hot iron.
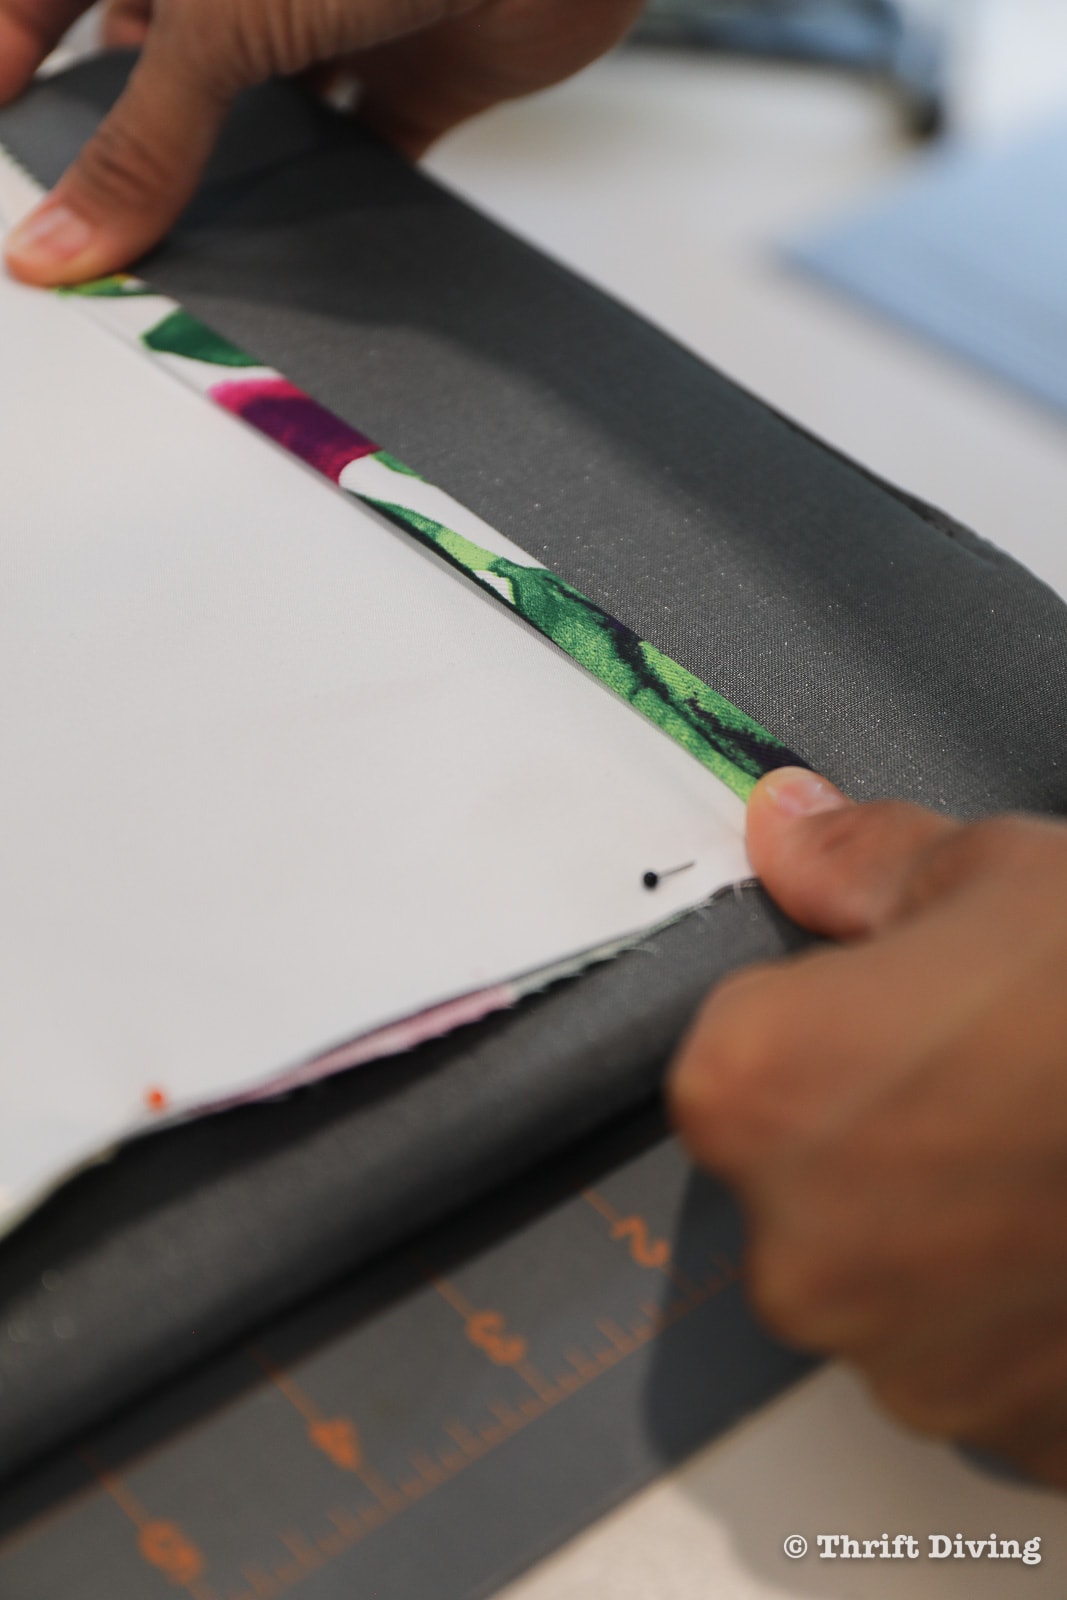
After the blackout fabric is secured, take the side seams and fold them in by 1/2″ and press with an iron.
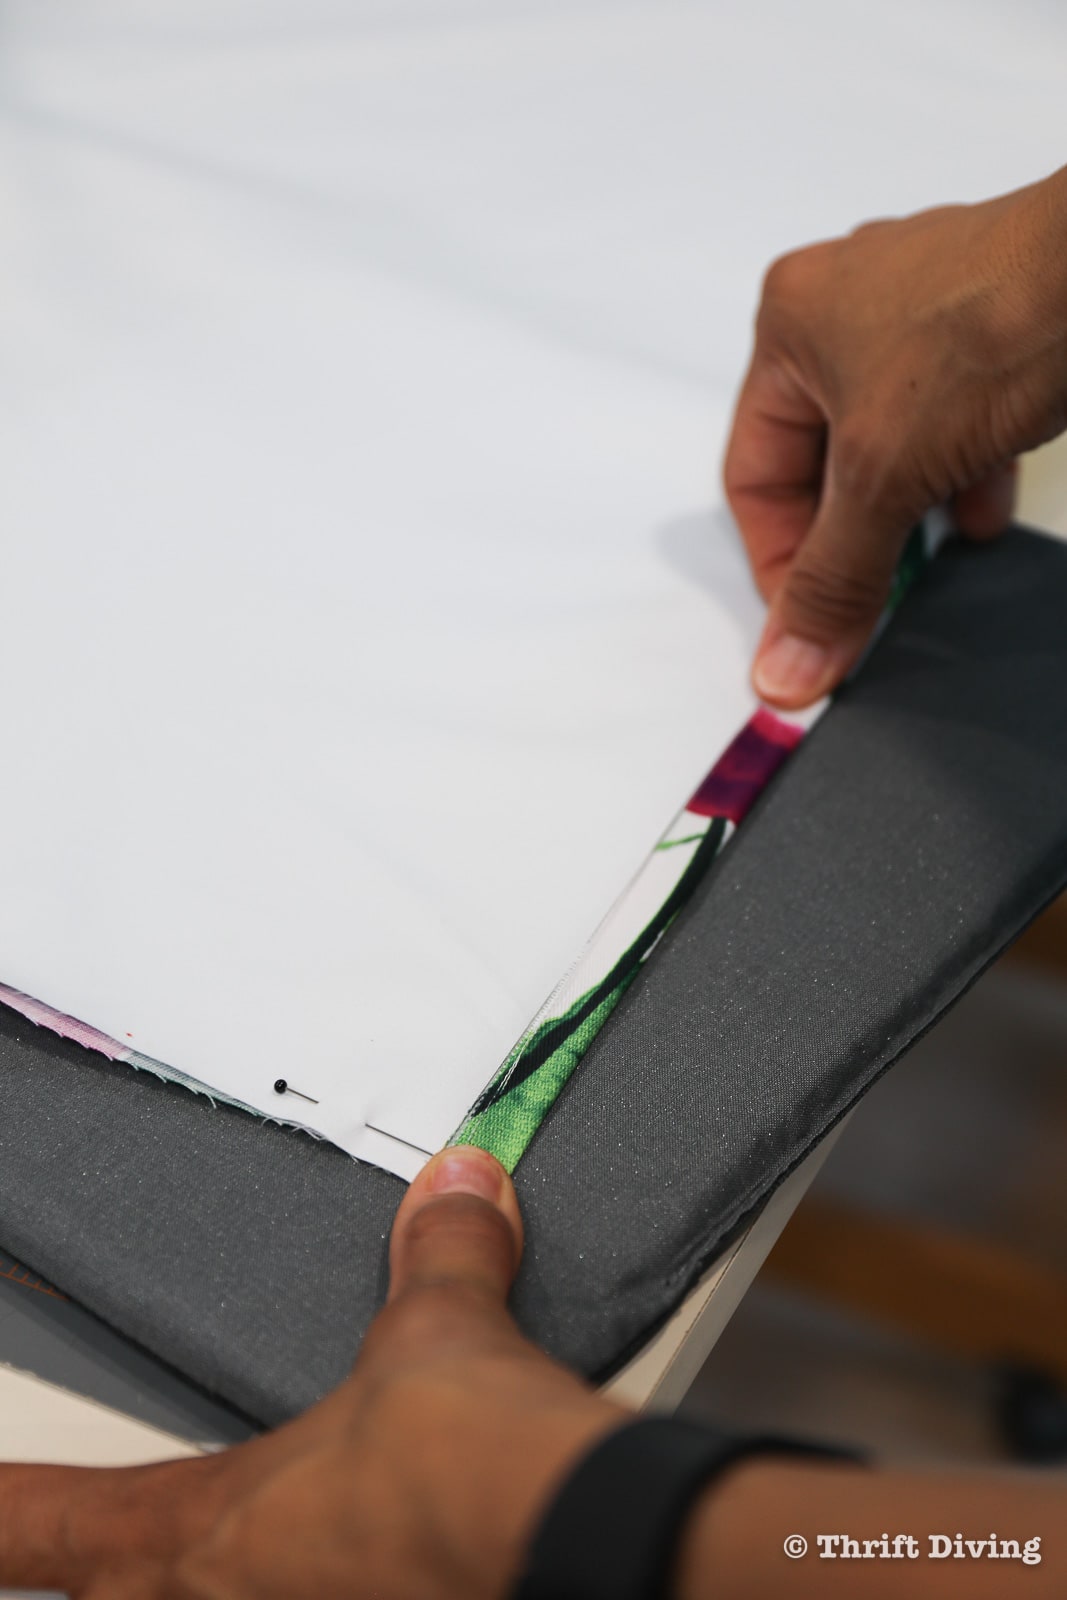
Next, fold the 1/2″ over again to cover the edge of the blackout fabric. You’ll want to make sure that you’re not folding the blackout fabric up into the seam, or else the sides could become too bulky. This 1/2″ seam should easily fall over the blackout fabric.
If you’re using Heat n’ Bond, you’ll want to use it now to secure these side seams. Otherwise, take it to the sewing machine and stitch along the edge from top to the bottom on both seams of the DIY roller shade.
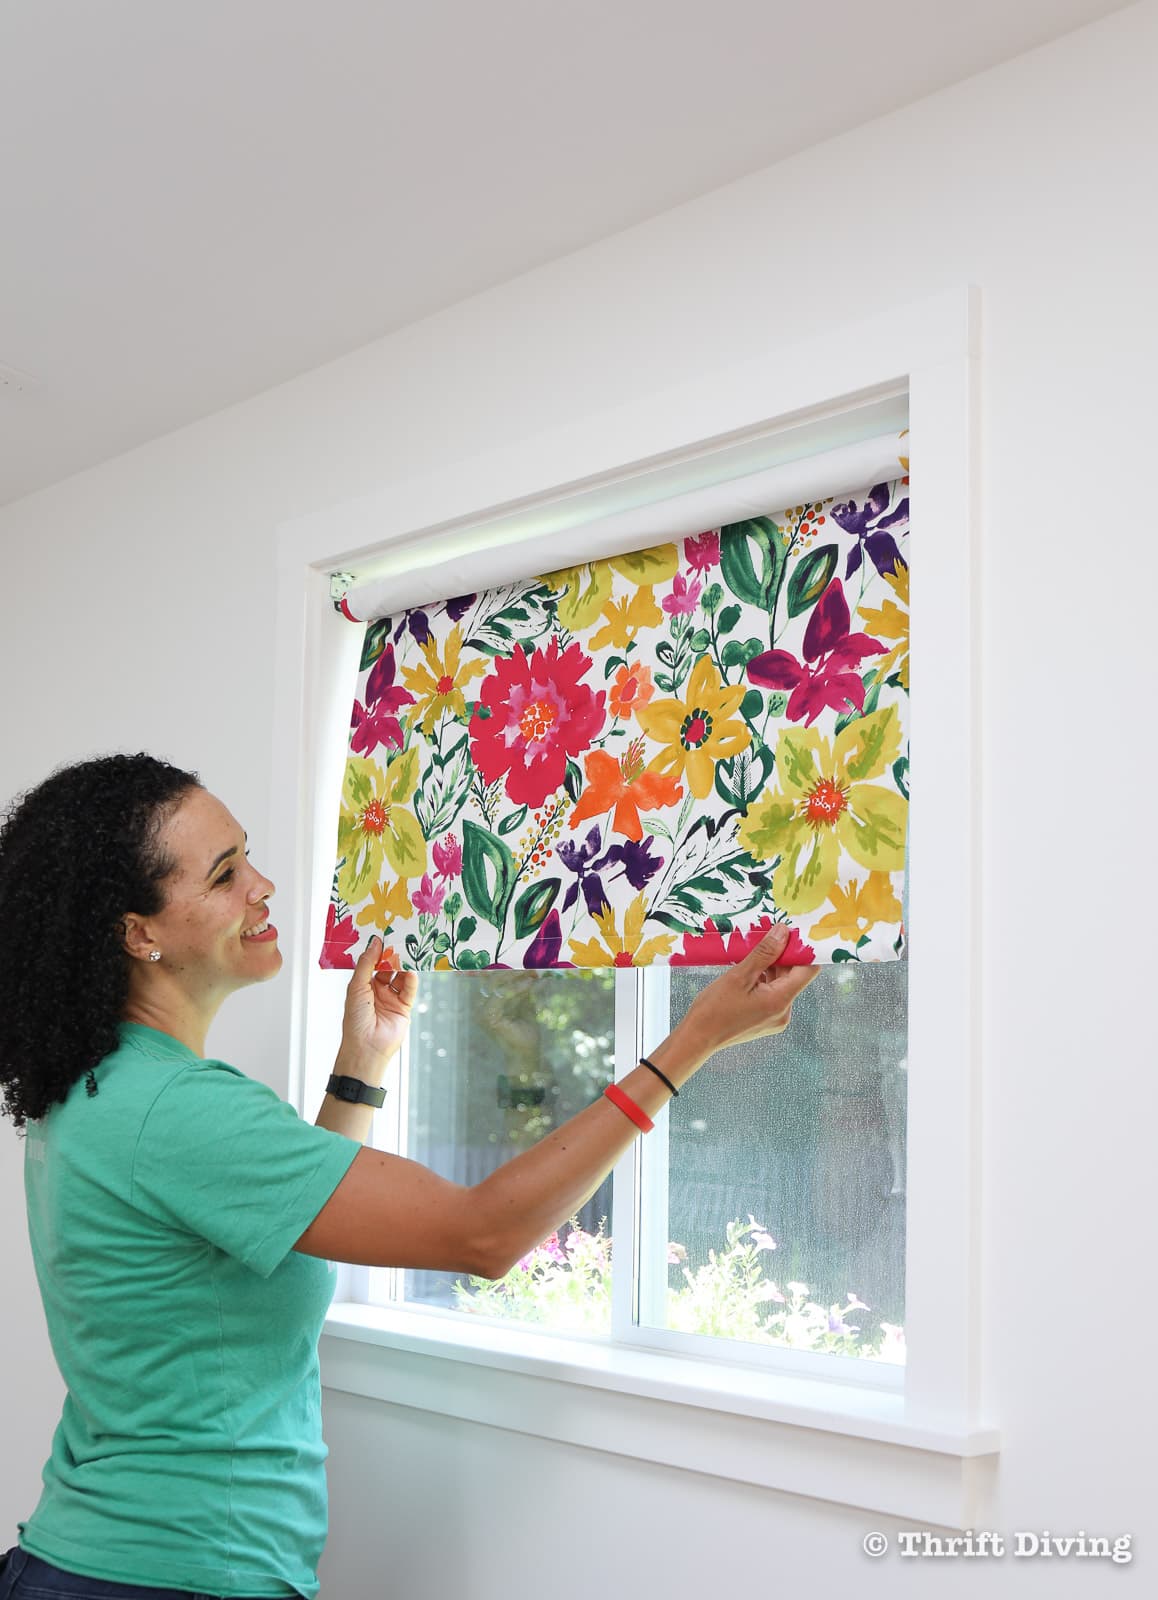
NOTE: You’ll want to sew the side seams first before doing the bottom hem. The reason why is because the bottom hem will also serve as a pocket for holding the rigid plastic rod that was kept from the bottom fold of the plastic roller shade. That plastic rod allows you to grab into something with structure to pull the blinds up and down.
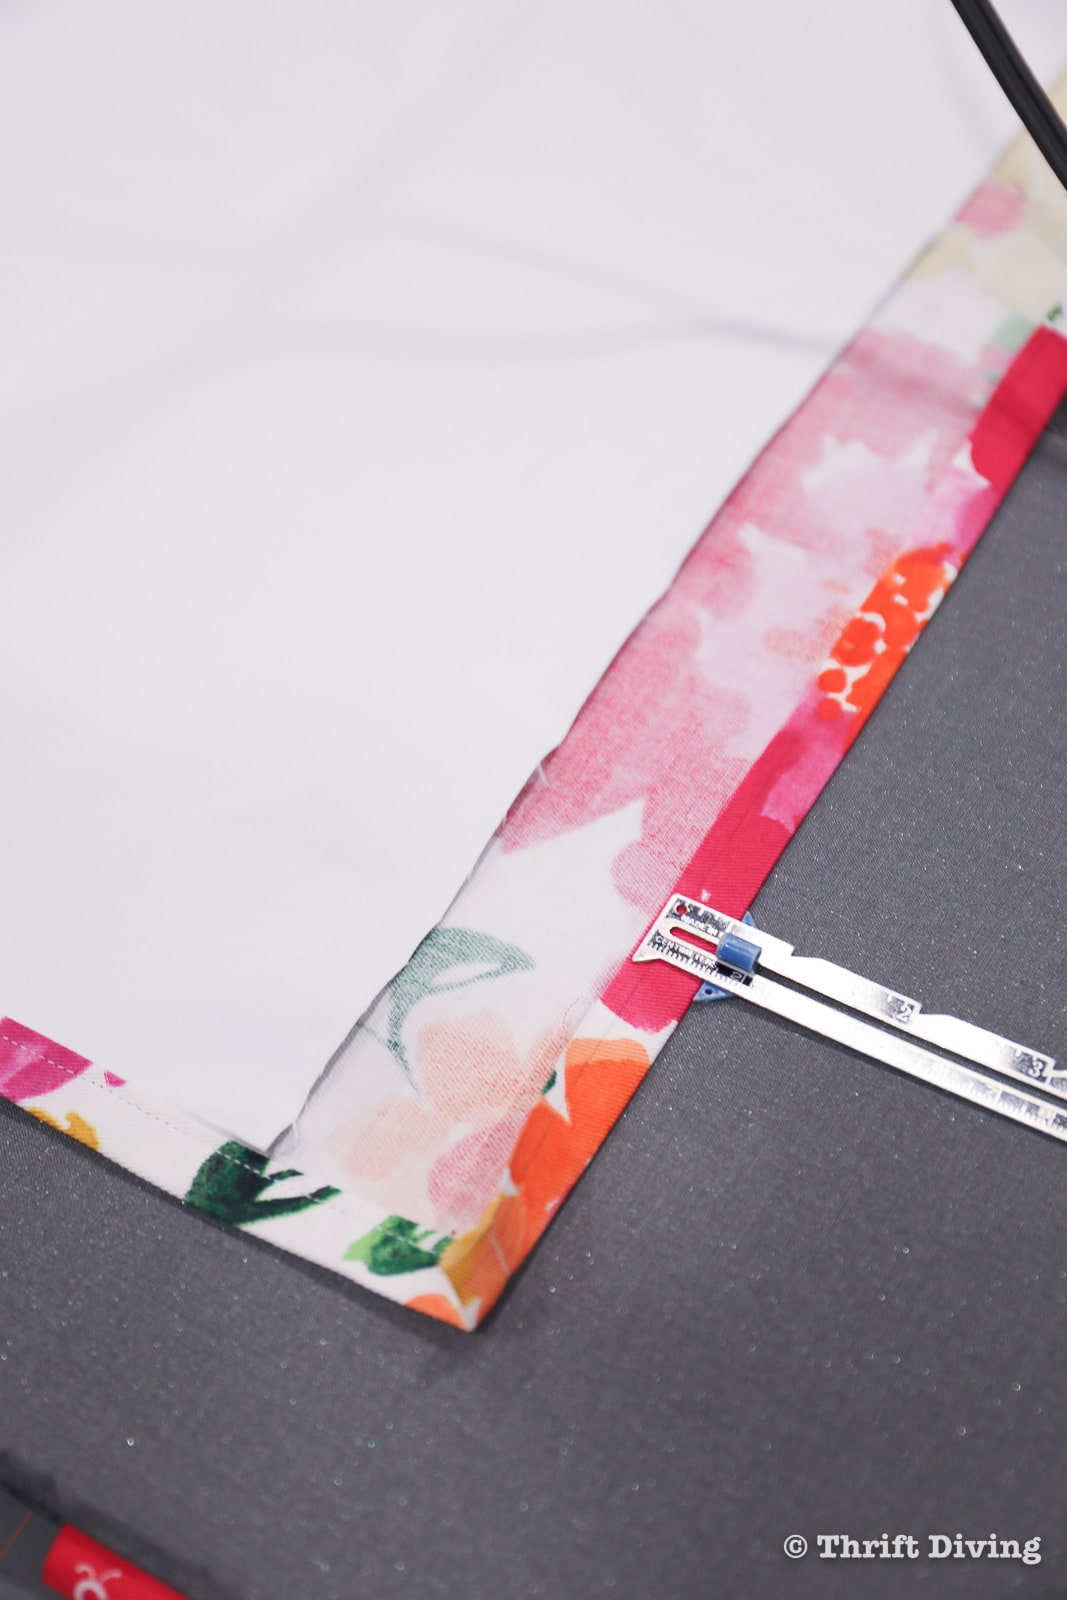
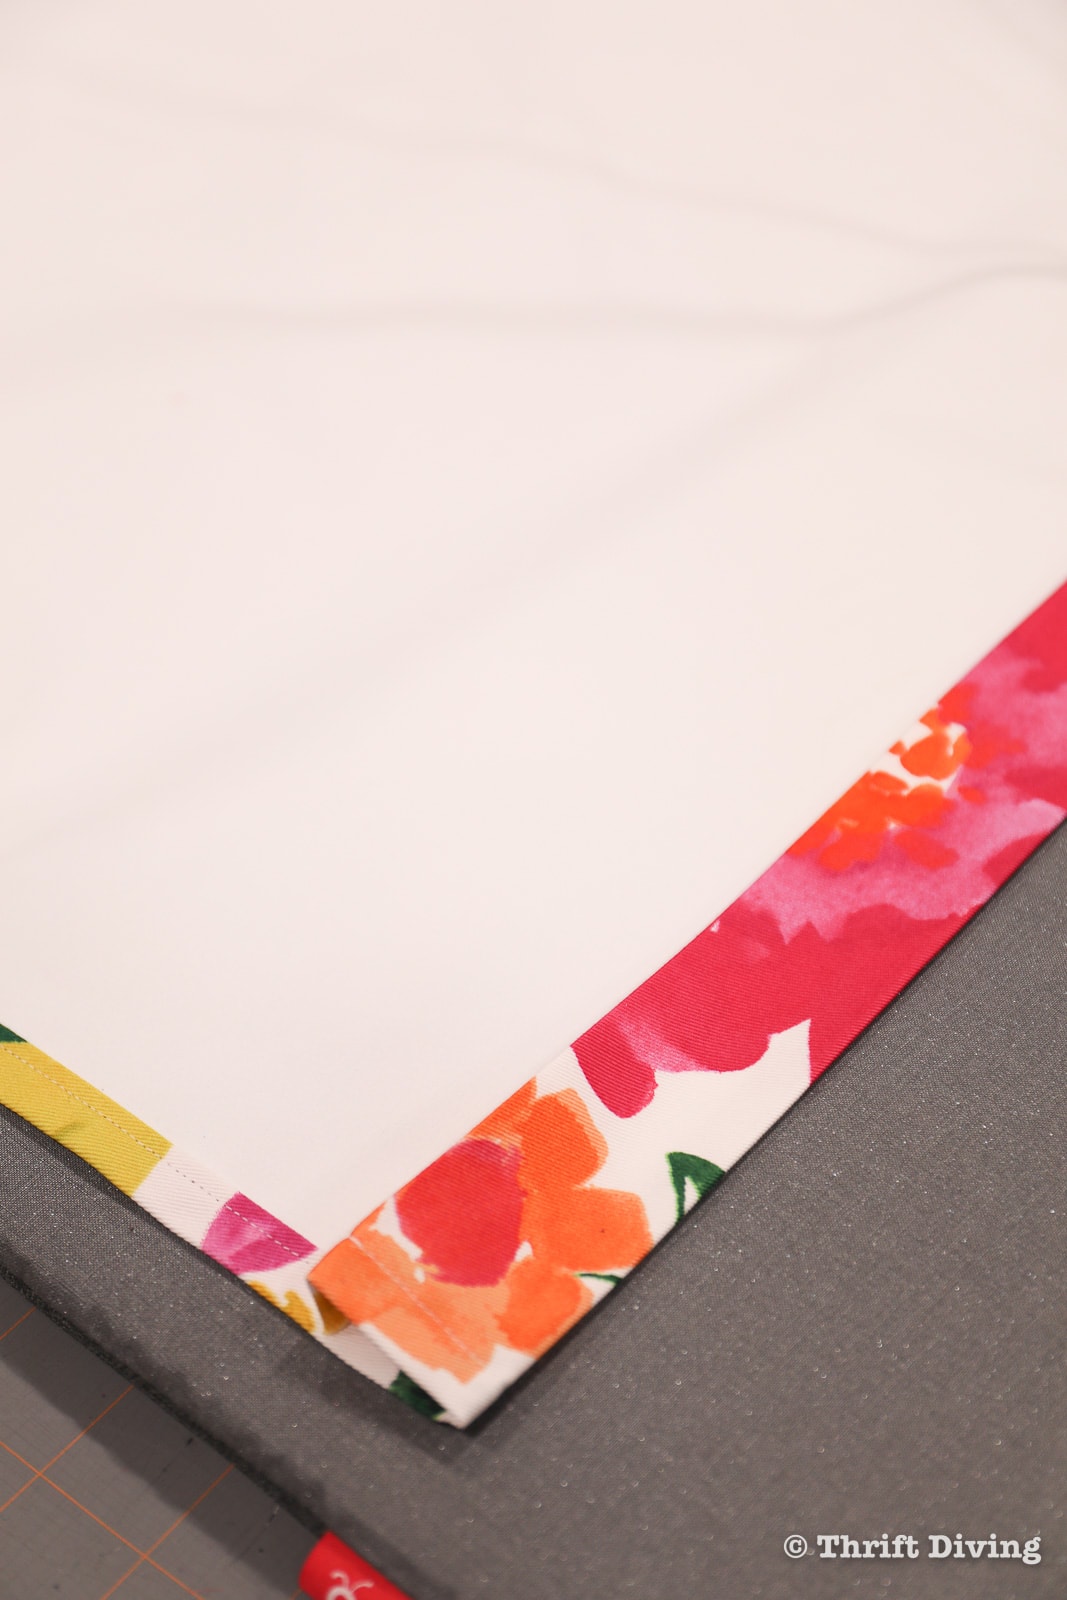
STEP 9: Fold and Sew the Bottom Hem and Pocket of the Fabric Roller Shade
Fold the bottom edge 1/2″ and press. Then fold the bottom seam up to the edge of the blackout fabric.

STEP 10: Remove the Old Vinyl
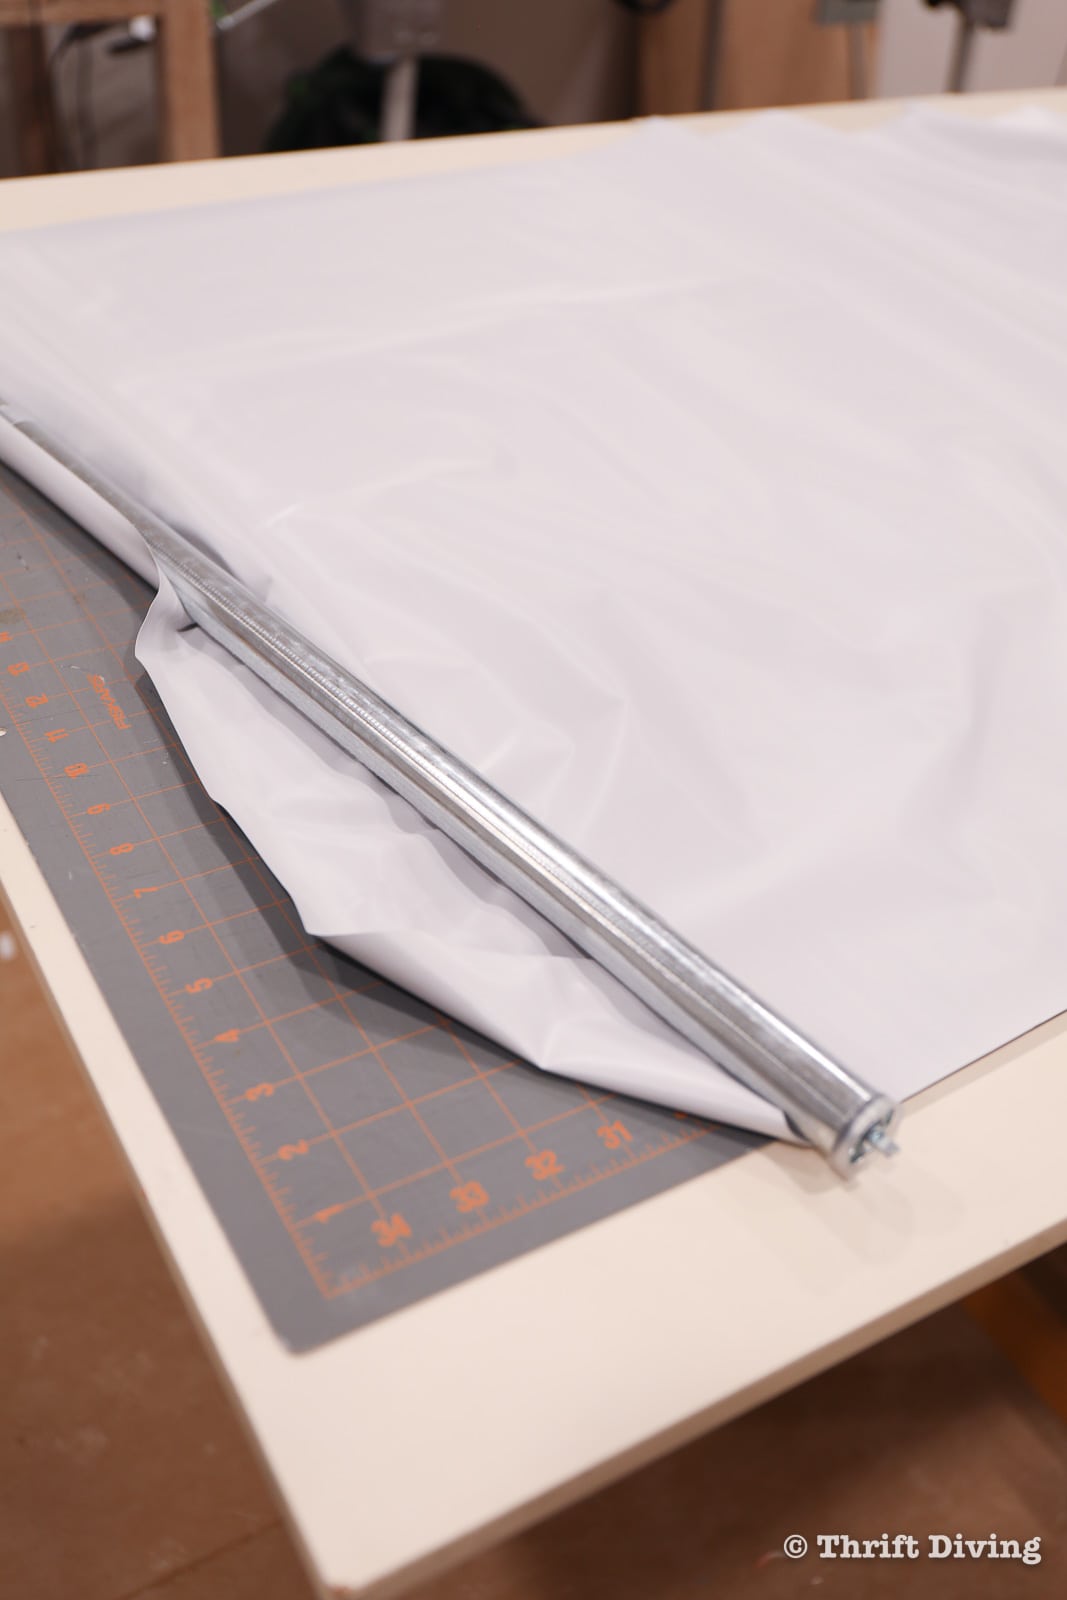
You may have already removed the old vinyl when you inserted the rod into the brackets in order to set the length of the rod and measure, in Step 1. (But as I mentioned above, you can use the existing vinyl and use spray adhesive to attach the new fabric). If you don’t want to use it, unroll the vinyl on the adjustable rod now, and save the rigid plastic inserted into the vinyl at the end of the vinyl shade.
STEP 11: Roll the Fabric Roller Shade onto the Adjustable Rod
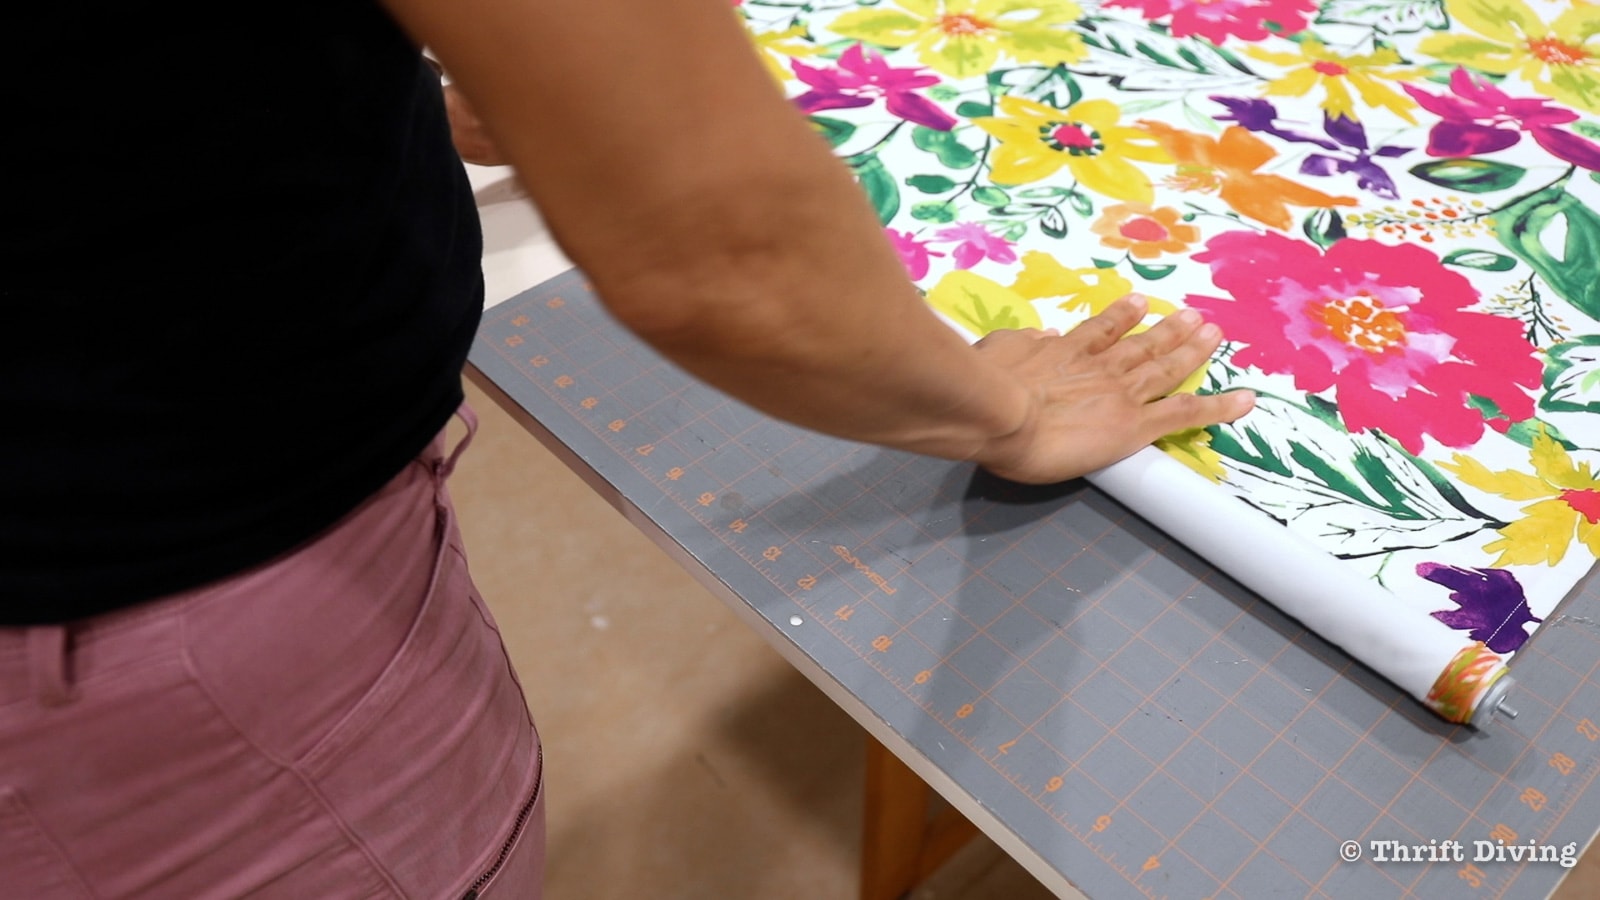
On the metal adjustable roller shade rod, you’ll see a groove in the rod that you can use as a reference point for evenly wrapping the roller shade fabric onto the rod.

But first, you’ll need to apply double-sided tape to the rod so the fabric roller shade can attach to the rod. You can use the groove to help line up the tape as a straight starting point.

What I also felt was helpful was to add a couple rows of double-sided tape to the rod instead of just one row. Then, using a mat with grids, I straightened up the fabric and the rod onto the grid, and then rolled the fabric onto the rod evenly.

Make sure the edge of the DIY roller shade is evenly rolling at the edges, without covering the metal parts that will be attached to the brackets. If you notice that the shade isn’t rolling evenly, unroll it and start trying to roll it again evenly.
NOTE: The direction that I am rolling my fabric shade, with the “right” side of the fabric facing UP on the table, will create a DIY roller shade that rolls “under” the rod in the window. You’ll be able to see the backside of the fabric window shade at the top. You can either leave this rod exposed or you can add a valance or cornice board to cover it up.
In my case, I don’t mind seeing the blackout fabric visible at the top.
If you want the DIY roller shade to roll “over” on the rod so that the backside isn’t visible, then when rolling the fabric onto the rod, turn the fabric over so the “right” side is facing DOWN on the table before rolling it onto the metal adjustable rod.

Insert the plastic rod from the vinyl shade and install it into the casing at the bottom hem of the DIY roller shade. Trim it a little shorter than the width of your shade.
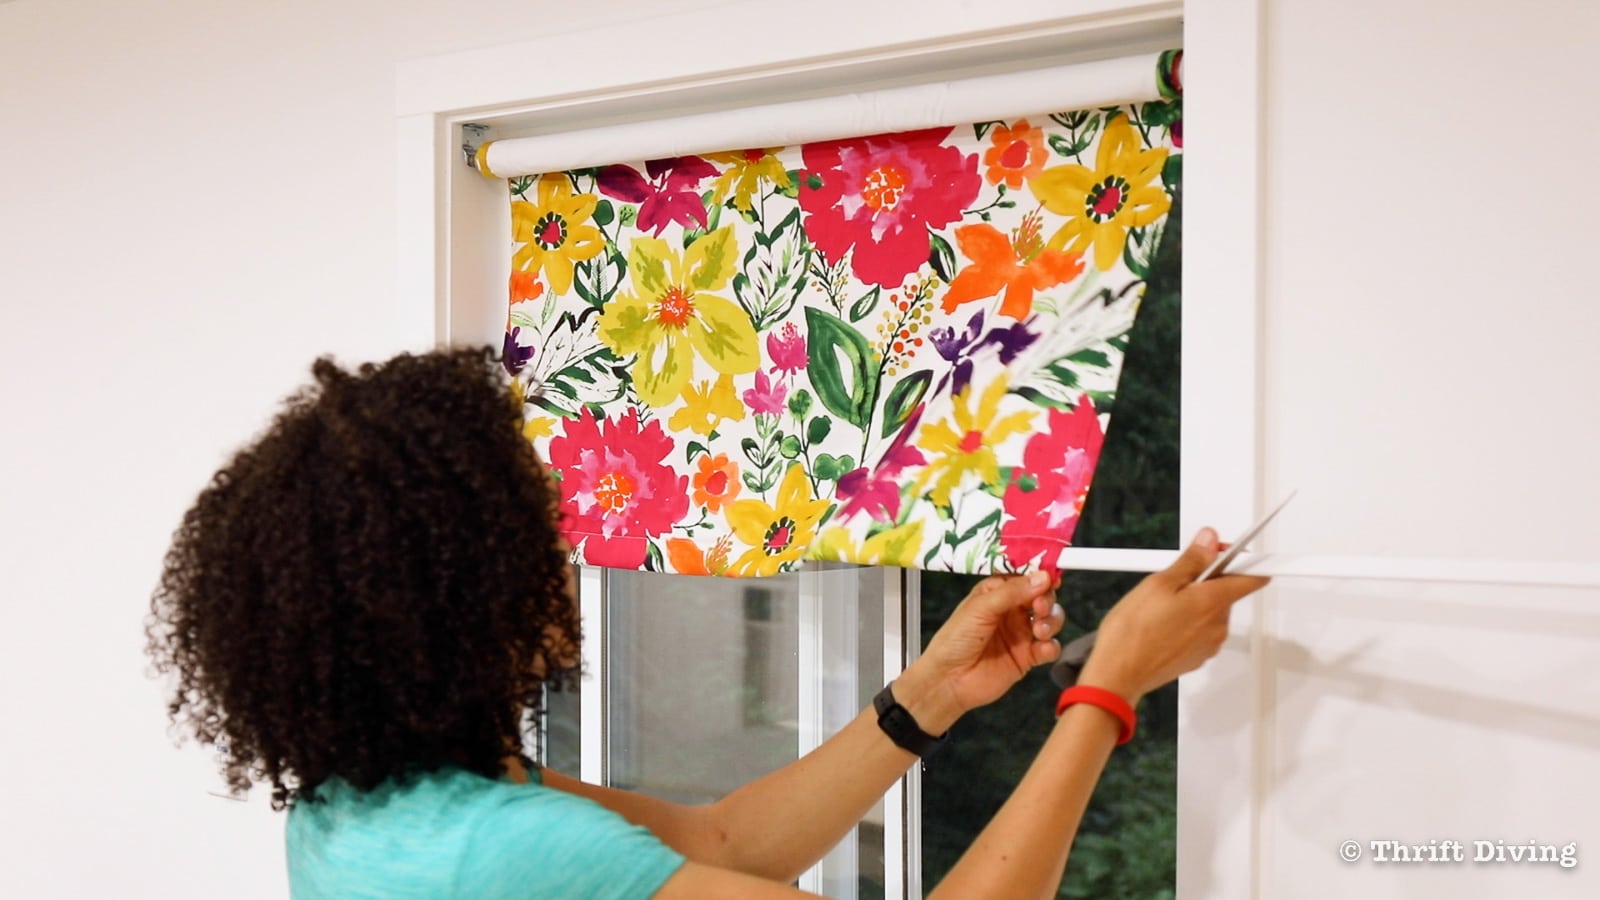
STEP 12: Set the Tension of the Roller Shade Rod
Remember in the earlier steps that we released the tension in the roller shade rod? Well, now we’re going to reset the tension.
If you have a roller shade or blind that won’t go up, it’s likely because the tension needs to be reset and readjusted. Turn the flat tension knob on the end of the roller shade counter clockwise to release the tension.
If you can’t turn it with your fingers because it’s too tight, use a pair of pliers and safety glasses to gently turn the flat metal tension counter clockwise. Be careful because it will spin quickly!
Here’s how to set the tension on your DIY roller shade:
- With the tension completely loose, completely roll up the DIY roller shade around the rod.
- Insert the shade and rod into the brackets.
- Pull down the DIY roller shade about 18″.
- Remove the rod and roll up the fabric to the top again.
- Pull down the shade again about 18″ and repeat the previous steps.
Once you’ve done this process about 2-3 times, you’ll notice the tension is tightening up on the rod. At this point, you should be able to pull it down and release it to go up.
(TIP: If you notice that the tension is too tight, then just release the tension and start again at the beginning of tightening the tension).
Keep in mind that we’re using cheap roller shades from Wal-Mart, and we’re adding extra weight (2 layers) of fabric to them. They’re not going to perfectly go up and down as expensive roller shades will, or roller shade rods that were designed to work with heavier weight.
However, if you make the tension tight enough to raise and lower, these DIY roller shades get the job done and for a lot less money than buying custom roller shades or blinds!
How Much Did My DIY Roller Shades Cost?
After adding in the cost of the fabric (I used about 8-9 yards for 6 windows in my “she shed”), the adjustable rod, the roller shade hardware, blackout fabric, and a few other materials, I spent about $33 per DIY roller shade.
That’s a pretty good deal! And I love the pop of color that the DIY roller shades add to my “she shed”! I am trying to add a bit of fun to this space so that it’s more than a workshop but a place of excitement and happiness. 🙂


You might also love these ideas for how to cover up your windows!
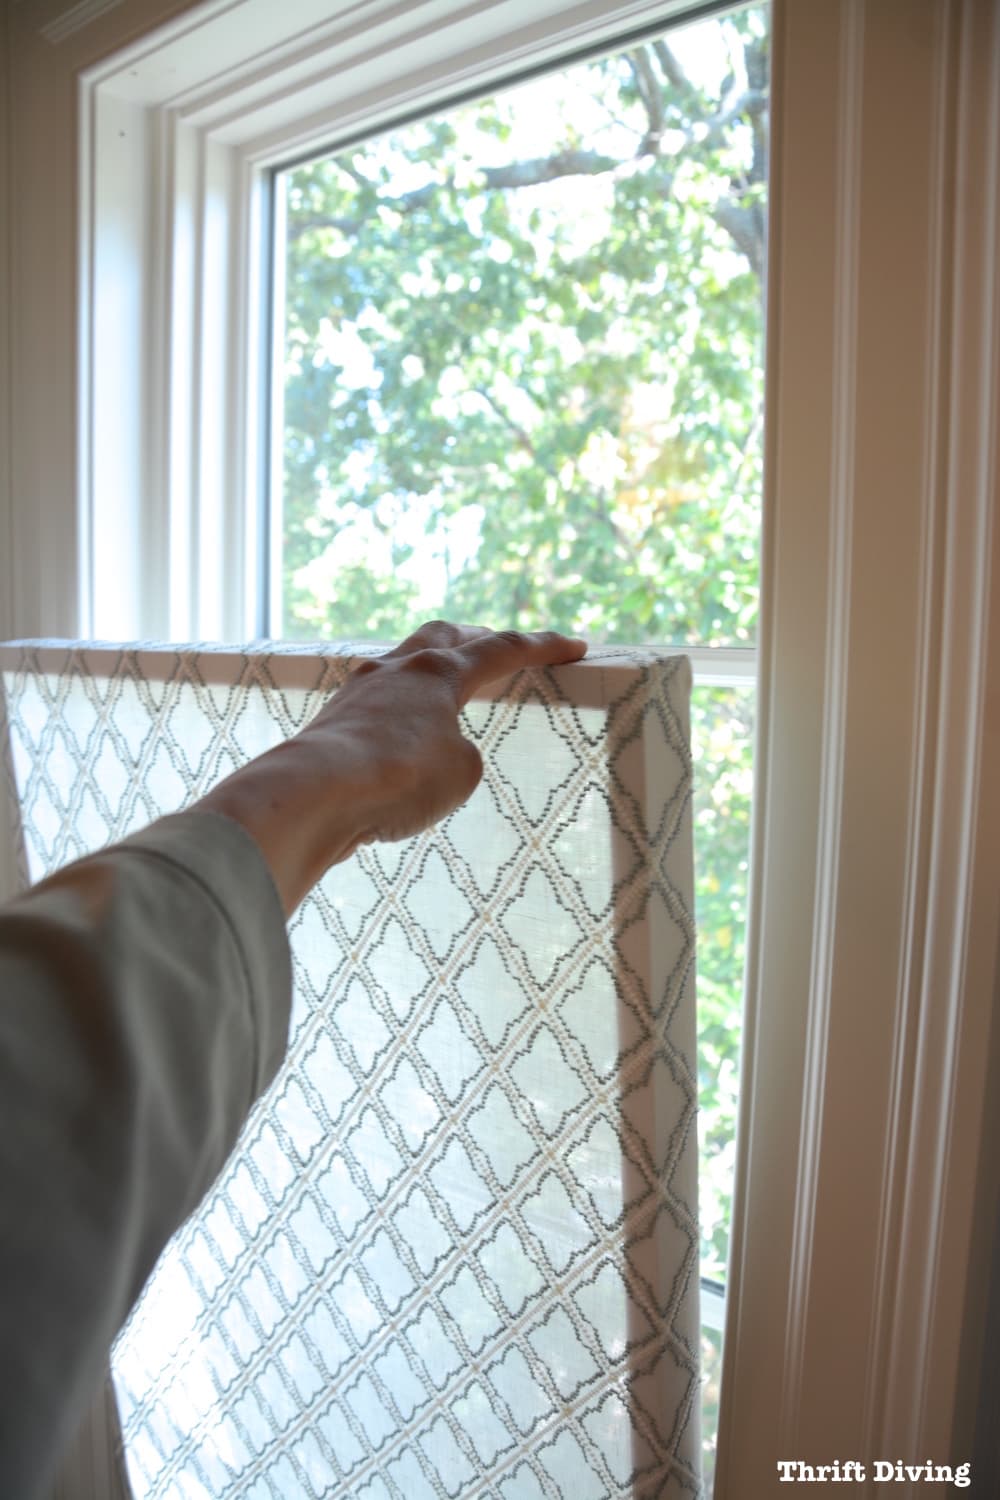
How to Make a DIY Window Privacy Screen
Learn how to make a DIY window privacy screen for your window–not curtain rod or blind needed! Get the tutorial here!
How to Sew Cute DIY Curtains!
Making your own curtains is super easy! Read this tutorial to learn how to sew your own.

Do you love this post? Click here to SAVE it on Pinterest!
![]()

These instructions may seem intimidating for making your own DIY roller shades, but if you take your time and follow it step by step, it’s possible to make your own affordable fabric roller shades for a unique style! Let me know down in the comments how this tutorial helped you! 🙂

Download the 5 freebies!

Thrift Diving inspires women to decorate, improve, and maintain their home themselves...using paint, power tools, and thrift stores! Use these 5 printables, checklists, and ebooks to get started!
Oh man, I tried doing this years and years ago, but the tutorial had you use spray adhesive to adhere the fabric to the vinyl liner. It never worked well! It was just too heavy or something – it always came down and never rolled back up. I’ve been nervous to try another one of these ever since, even though I have a dining room window that needs a roller shade. Since you just rolled the fabric onto it without using the vinyl, maybe it’ll work OK this time… Thank you!!
Would it be possible to adhere the pretty fabric to the other side of the blind so that when rolled up, the pretty fabric was showing on the roll instead of the white part?
Hi Brenda! Yep, you can do that! It would just be an “outer” roll instead of an “inner” roll like I did. 🙂 So that you don’t even see the roll at the top, it would just drape over the roller at the top. You wouldn’t see the roll, that is. Hope that makes sense! I can still do that with mine, but I would just have to change the direction of the roll.
Great video with easy to follow instructions. Do you think it’s possible to attach the blackout fabric to the fabric using the intertape around the edges rather than using the spray adhesive?
Love the video, very helpful. I’m going to give it a try.
I do have a random question- where did you find your work table? The one you’re cutting the fabric on in this video?
Thank you
Janet
Hi Janet! Not sure if I had responded to you already, but that worktable that I used, I found it at the thrift store for a measly $18!!! I couldn’t believe it. It’s not the most stable; there’s a little bit of wobble, but overall, it’s held up nicely and folds nicely to be pushed to the side when not in use. 🙂
could the fabric be glued to the shade?
Yes, you can definitely try that, as well! 🙂
Following your instructions, I made two shade covers this past week and I’m so pleased with the result. Thank you for these terrific instructions. I found your You Tube video first and then these, which were both super helpful. Thanks again – I have old windows, and I’ve tried multiple window covering solutions – this is really what I needed!
Hi Danda, yay!!! So glad that my instructions were able to help you!! 🙂 This makes my day!!!
Great tutorial, and what gorgeous fabric! Your shed looks fabulous, thanks for sharing!