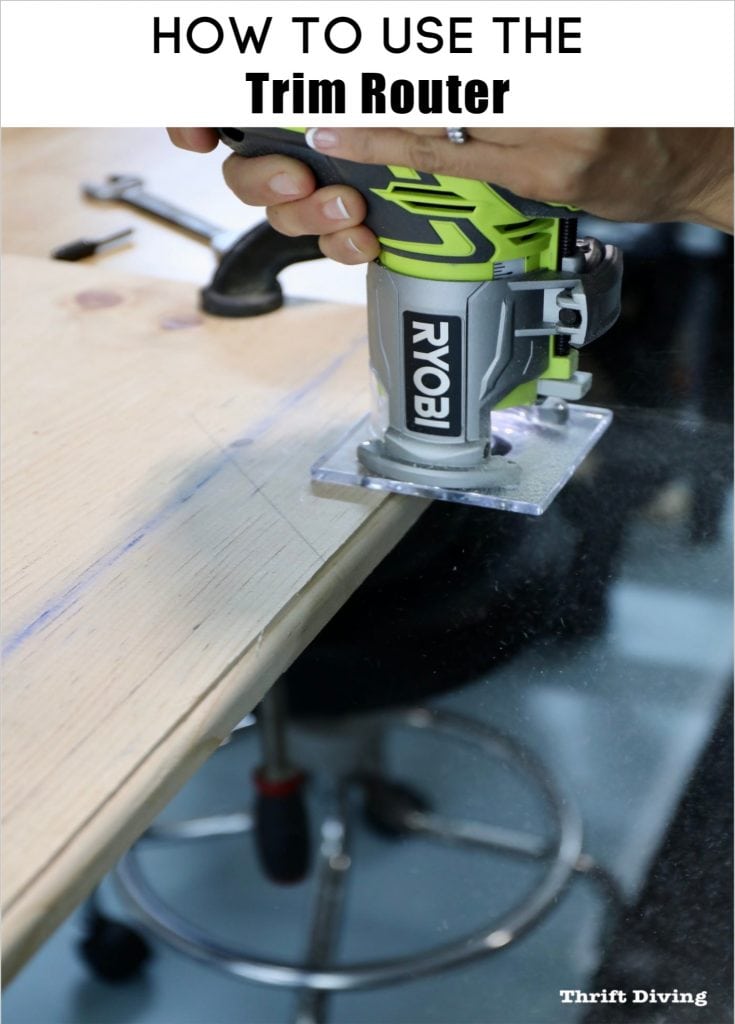
How to Use the RYOBI Trim Router for Decorative Edges, Grooves, and Dados
This tool review of the RYOBI trim router is brought to you by The Home Depot.
DIY newbies ask me all the time which tools they need to buy to get started with their DIY toolbox. I have say that people should buy a jigsaw, circular saw, nailer, orbital sander, and power drill. Those tools are sufficient to get you started with learning how to DIY and to use tools.
But there’s another tool that has been instrumental in allowing me to get creative and build projects that go beyond the basics and that tool is a router. Routers are great for a number of reasons, but the most popular reasons for using a router has been to add decorative edges to wood. Whether you want to add campforded edges to a bookshelf you’re building or you are creating a groove on the back of a drawer to slide the drawer bottom in, it serves a number of purposes that the other basic toolbox tools don’t allow.
But when I’ve needed to use my router table, it’s been a pain to lift it out of my storage shelf and set up on my work table. There have been times I have changed plans for a project because the thought of pulling out the router table has been annoying. Sometimes it’s easier to work around a tool instead of taking time to pull it out (or is that just me??).
So when RYOBI sent me their 18V trim router to test out, I was very curious how it would perform. Would the 18V battery have enough power to create a decorative edge to wood? I’m in the midst of building a new closet in my walk-in closet and there are definitely sections where I would need to create some grooves to attach back panels to the cubbies and to install some shelves on the units.
It was time to test whether the RYOBI trim router would be able to handle the job as I am moving forward with my closet makeover.

Materials Needed When Using the 18V RYOBI Cordless Trim Router
Before we can jump into how to actually use the trim router, you need to know which materials to buy. (Some of these links are affiliate links).
- RYOBI trim router
- 18V RYOBI battery
- Router bits (¼” size)
- 2 clamps
- Wet-dry vac
- Scrap piece of wood
- Dust mask

As I mentioned above, a trim router serves a lot of purposes, but all the types of cuts it can do are:
- Dado – Cut across the grain, not deep enough to cut all the way through.
- Groove – Cut along the grain of the board, not deep enough to go all the way through.
- Rabbet – Takes the edge off of a board; it can be along the edge or end grain.
- Plunge – Removing a section of wood; doesn’t start on the edge but can be in the interior sections of the board.
These vanity doors that I made a few years ago when I built my custom 60″ bathroom vanity were made with this router table. But it’s great to know that I can do similar decorative edges with just a battery-powered trim router!

When making drawers, the bottom is usually inserted into a 1/4″ groove cut into the sides and back, as you can see below. With a trim router, you can easily make these cuts so that making boxes is a piece of cake!
(To see how I made these boxes, check out this post on Build a DIY Bathroom Vanity – Part 4 – Making Drawers.).

How to Use a Trim Router
It’s not difficult to learn to use a trim router. We’ll go through each of the steps so you’ll feel comfortable using it in your own DIY projects. Let’s go through that now.
STEP 1: Select the Router Bit For the Job
There are so many router bits you can buy. I have a set that has about 10 router bits that can be used for edging, finishing, and __________. This trim router uses ¼” router bits, which is the diameter of the collet. Keep that in mind when shopping for router bits.

STEP 2: Loosen the Collet Bolt
The trim router comes with a wrench to be used for loosening the collet. I actually lost mine so I had to use a different wrench, which didn’t work as well. Use the wrench to loosen the collet.

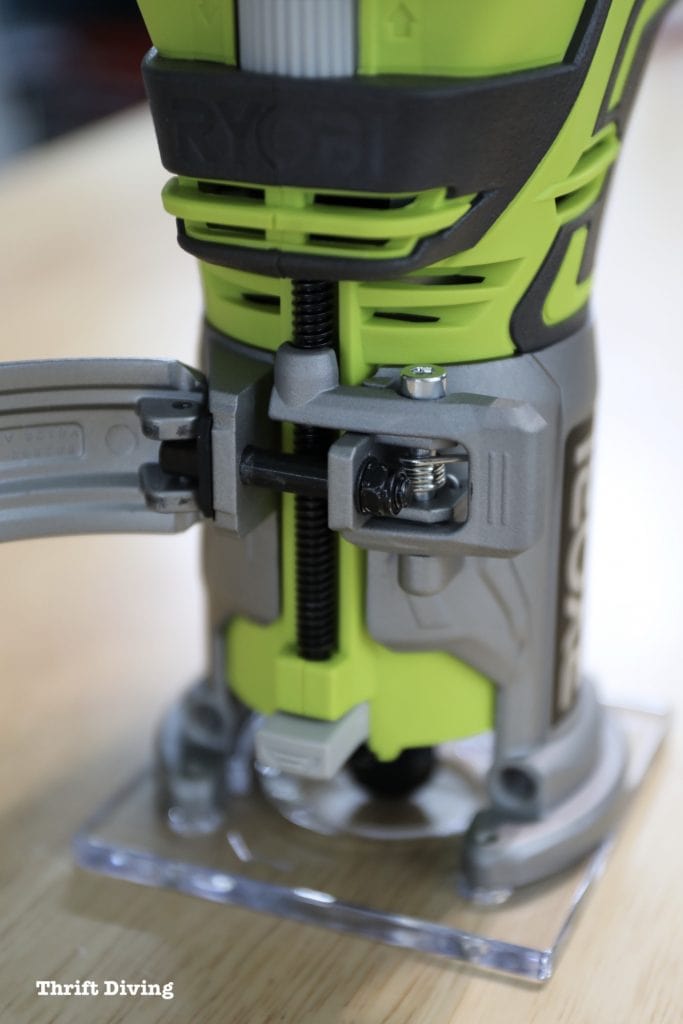
STEP 3: Insert the Router Bit, Then Pull It Out a Little Bit and Tighten
When inserting the router bit into the collet, you’ll want to insert it all the way and then pull it back out a little bit, about ¼”, and then tighten the collet nut. If you don’t pull it back out a bit before tightening it, it can bottom out when using it.
As you see below, when inserted properly, there will be a little bit of space remaining, extending from the collet. Leaving a bit of space from the collet is a must when changing your router bits.

STEP 4: Clamp Down Your Wood
You never want to try to route your wood without it clamped down to your workbench or table. I use a couple of heavy-duty C clamps. Make sure there is enough clearance for the trim router to pass over the wood without the clamps getting in the way. Wiggle it and make sure that it’s secure and won’t come loose while routing.
STEP 5: Determine Your Depth and Adjust
Depending on the depth of the router bit, you can get a different looking edge based on its depth. To adjust it, hold the edge of the router bit against the edge of the wood and determine the adjustment you’ll need to make. The RYOBI trim router has an easy way to make the adjustment. Just unlatch the front and depress the button to make a large adjustment. The dial on the front can then be turned to make minor adjustments to set the depth you need.
STEP 6: Set Up a Makeshift Fence for Straight Routing
Now that you’re ready to route the wood, you’ll want to create a makeshift fence for making smooth, straight cuts to your wood. You can use a piece of scrap wood secured with the clamps that are already holding down the wood you’ll be routing. Use a ruler to make sure that it’s straight and that your bit will be cutting in the right location. At this point, it’s best to do a test board to make sure that you know where you’ll be routing and to make any micro-adjustments.
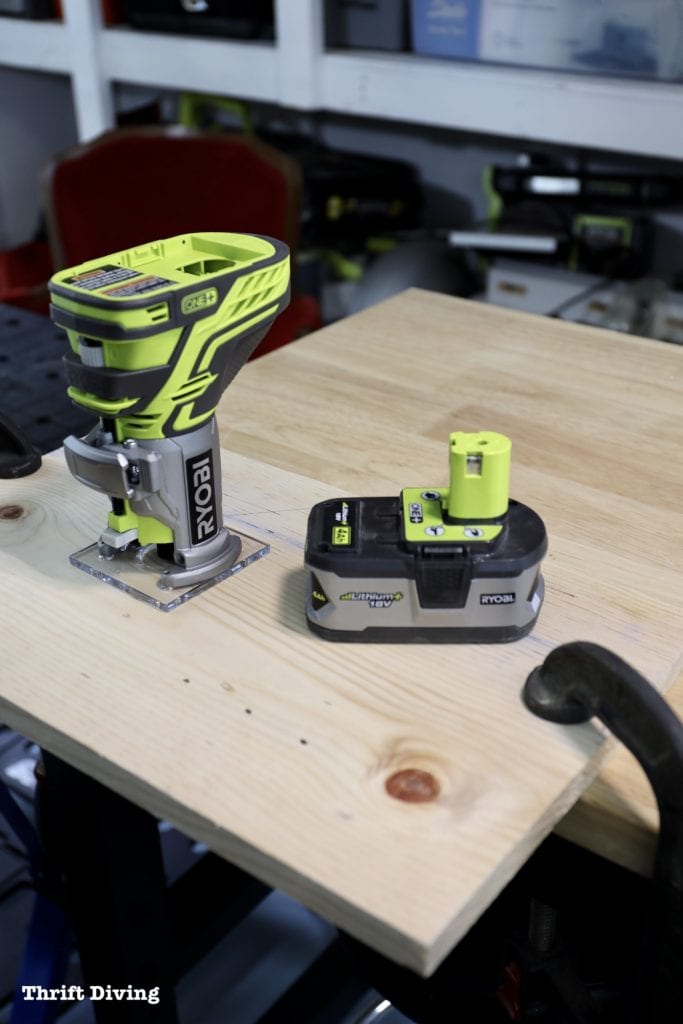
STEP 7: Insert the 18V Battery
The battery is the last thing you want to attach. All the prior adjustments should be made while the battery is out of the trim router. It simply snaps into place. The battery can be used with over 100+ RYOBI ONE+ tools. Buy two batteries so you’ll have enough power to keep going on your projects; however, one battery should have more than enough power to do the cuts you need to do for more projects.
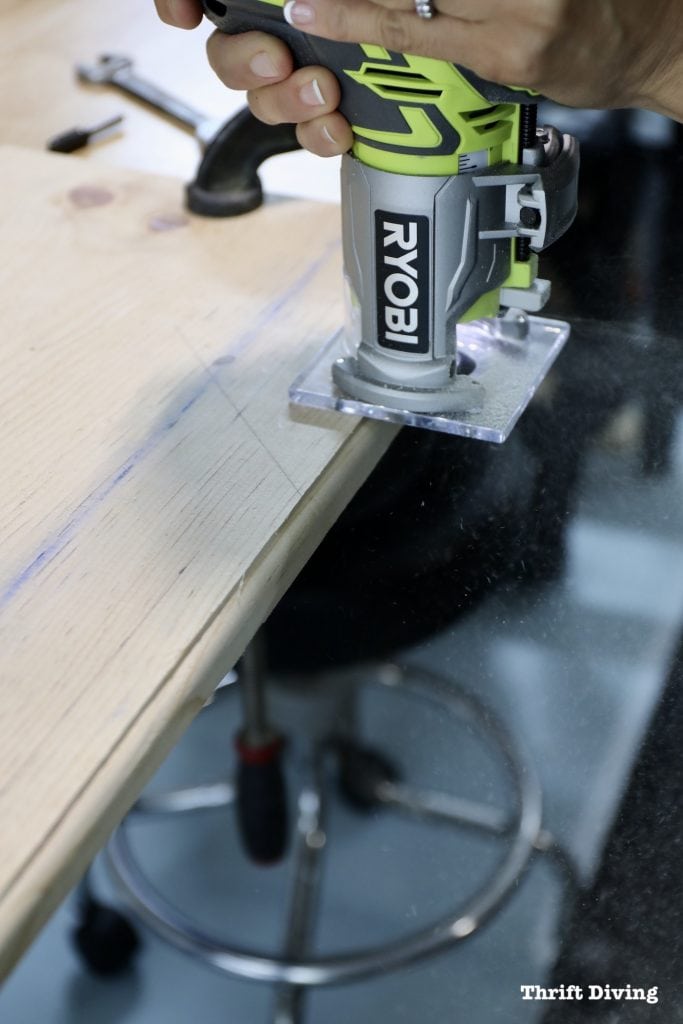
STEP 8: Start From Left to Right
On a traditional router table where the router is inserted from the bottom up, the router bit is moving at a counter-clockwise direction. This requires you to run your wooden workpiece across a router table from right to left. However, in a hand-held trim router such as this, used in a freestyle manner, the router bit is moving in a clockwise direction, which would require you to move the trim router from the left to the right. I had a hard time figuring out which way would be correct. It might be a good idea to attach a sticker on the trim router as a reminder of which direction to go (or use a marker to indicate the direction).
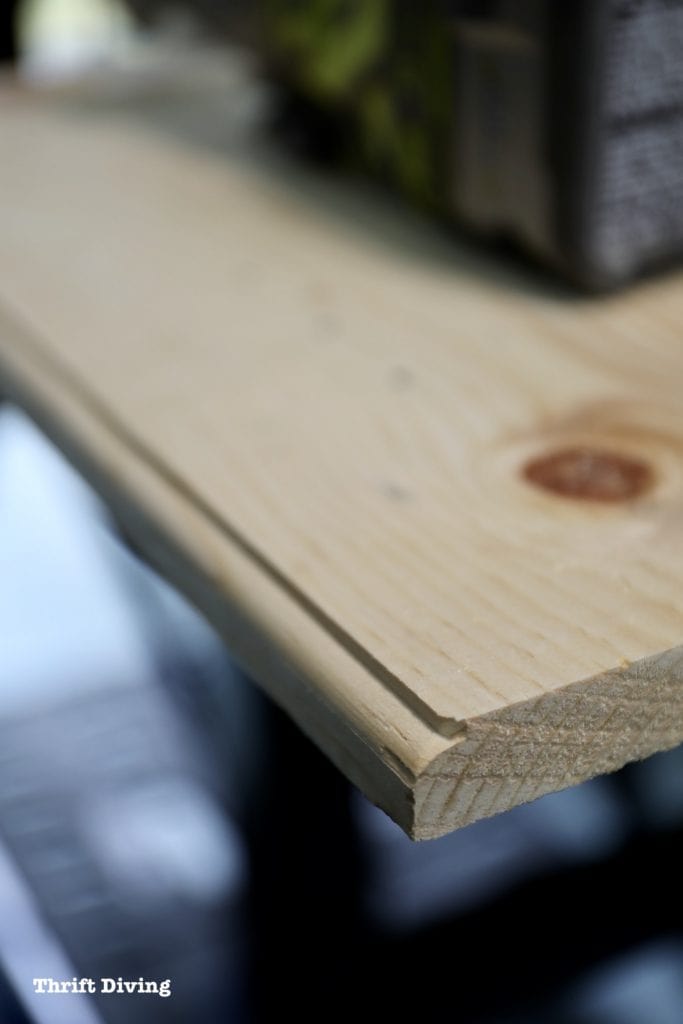
There are a bunch of decorative edges and cuts you can make, but here is just as sample cut I did with a piece of pine. I’m trying to perfect my routing skills, particularly at the beginning and end, which can get a little chippy as you see mine did. 🙂
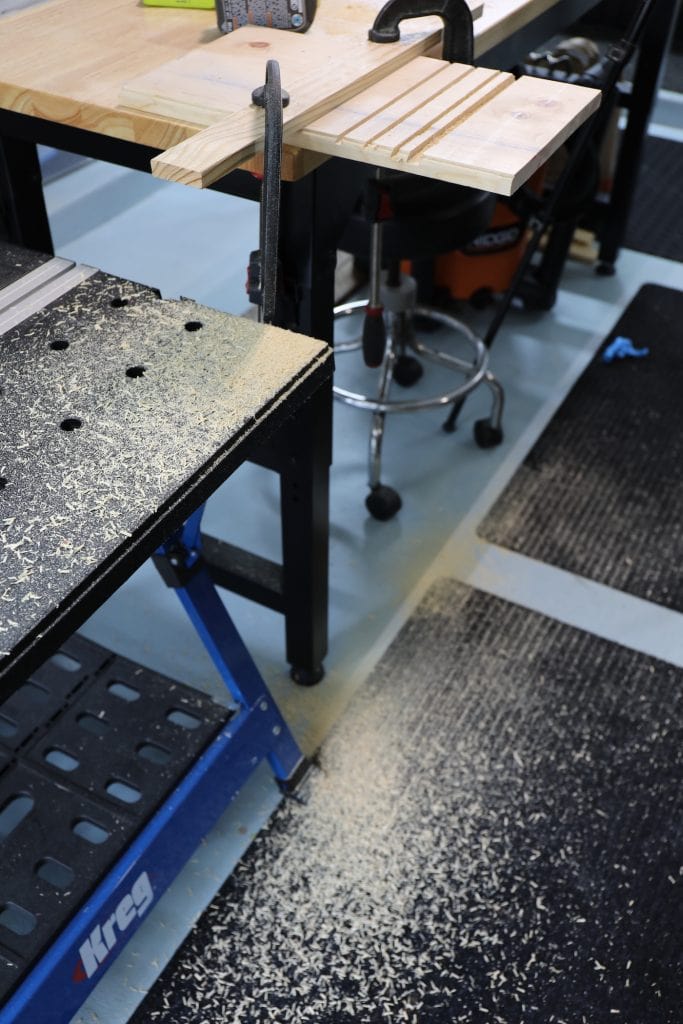
STEP 9: Vacuum Up the Dust
Routers create a lot of dust and debris! Router tables are great because you can attach a vacuum to suck up some of that dust while routing. A trim router, however, doesn’t have the ability to attach to a vacuum. Keep that in mind when routing. If you’ll be doing a lot of routing, be sure to keep the area well ventilated. Clean as you go so you don’t slip on the blanket of dust littering the floor. And don’t forget your dust mask!
Where to Buy the RYOBI Trim Router
If you’re ready to add this versatile, decorative tool to your DIY tool box, you can buy it for only $69 at The Home Depot. Be sure to pick up an 18V battery because the trim router isn’t sold with a battery. In fact, I always recommend you pick up two batteries and have one fully charged as a backup when you’re working.
Love this post? Click here to save it on Pinterest!
Have Fun With It!
DIY is supposed to be fun. It’s only fun with you have the right tools to get the job done. And with this RYOBI trim router, you can get pretty creative and resourceful with your edges and joinery. Being able to create grooves, rabbets, and dados easily will definitely take my DIY projects to the next level! Stay tuned to see how I use this trim router to help complete my DIY closet makeover. Also, let me know how you like the RYOBI trim router, as well!

Download the 5 freebies!

Thrift Diving inspires women to decorate, improve, and maintain their home themselves...using paint, power tools, and thrift stores! Use these 5 printables, checklists, and ebooks to get started!