How to Paint Kitchen Cabinets White: The Ultimate Step-by-Step Guide!
How to Paint Kitchen Cabinets White tutorial is sponsored by Beyond Paint.
Have you ever found pictures of what your house looked like when you first moved in? I’m talkin’ about the “before-before” pictures. You know the ones: where you gasp and scratch your head because you can’t believe it looked like that.
A home goes through so many transformations over the years. I don’t think you ever completely finish decorating it; it’s more like “continuously improving” your home instead: paint colors come and go out of trend; flooring gets ripped out and replaced; and kitchen cabinets are painted white after being dark and dreary.
It’s the evolution of a kitchen, from the 1970’s into 2023!
Click here to SAVE this post on Pinterest!
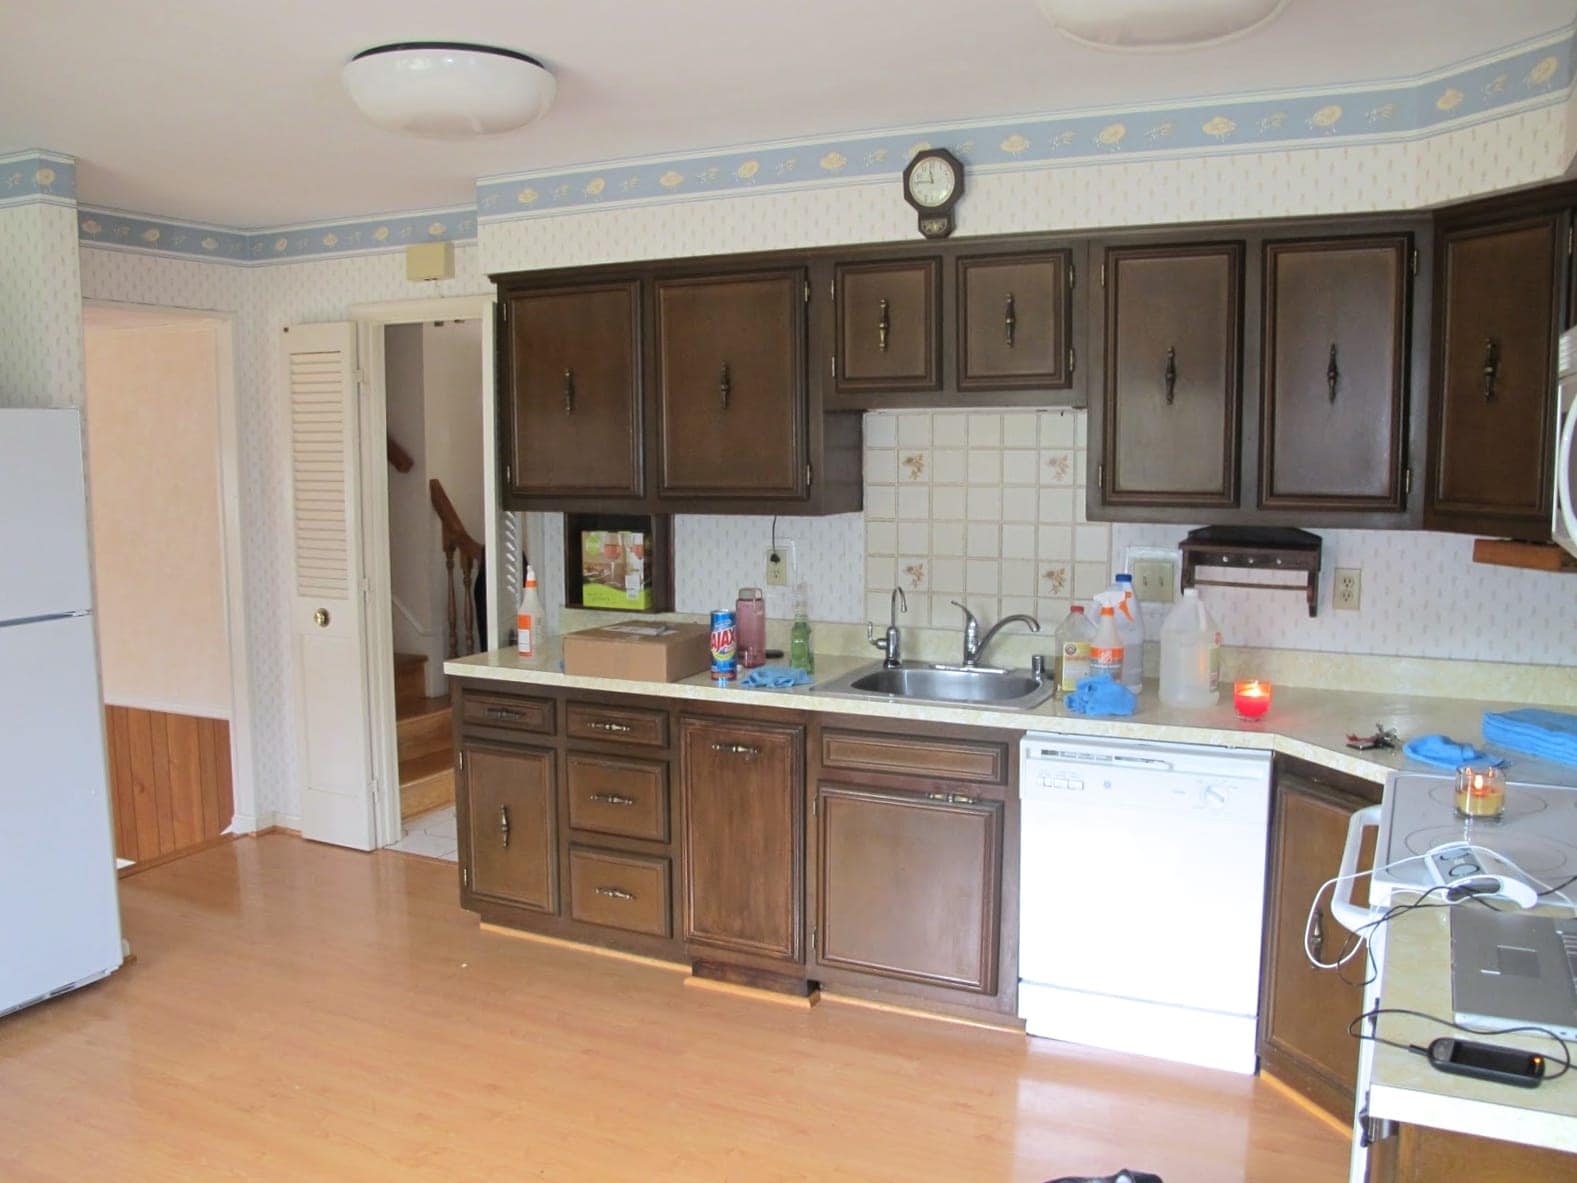
“BEFORE-Before”
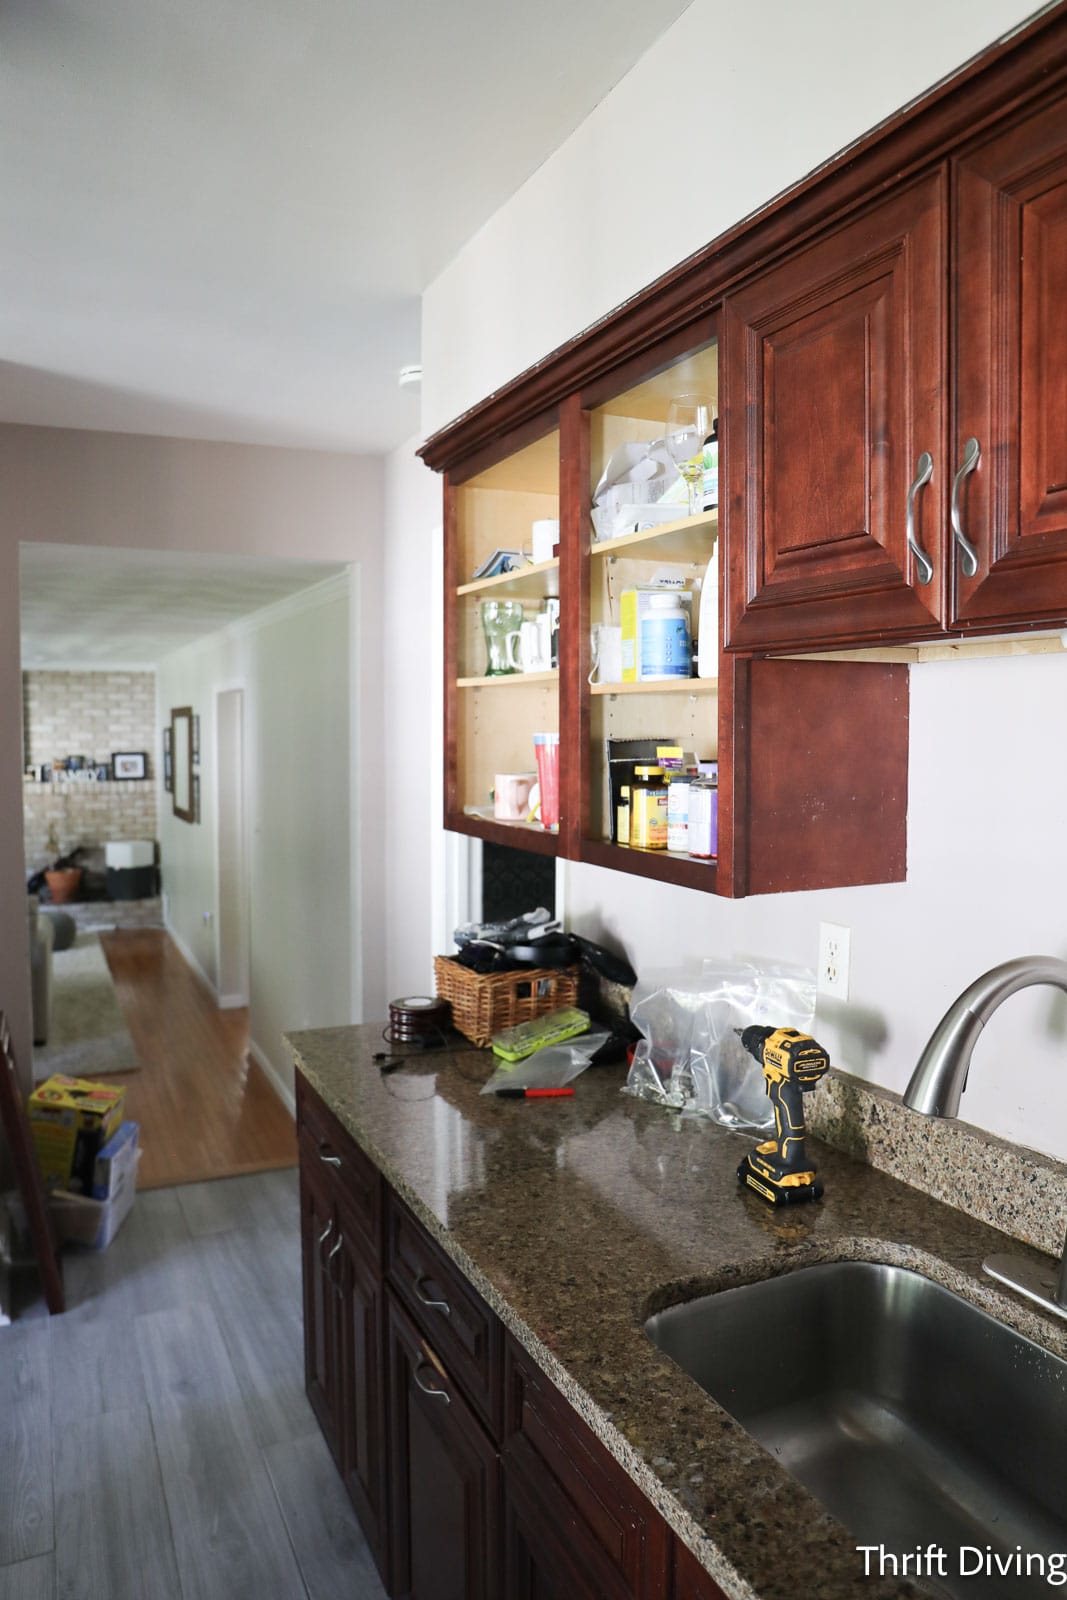
This was our “before-before” snapshot of the kitchen in our 1973 home that we bought in 2010. Clearly someone had tried to “update” this kitchen over the years with a…..ahem…..chic 1980’s baby blue wallpaper border, accentuated by shiny laminate flooring to compliment the turd-brown cabinets. These cabinets smelled so bad when I poked my nose inside of them, like something had crawled up inside of them and died.
I had every intention of painting these dark cabinets white after we moved in, but the bad stench forced me to insist that we get new cabinets installed; they weren’t worth painting (in my opinion). I couldn’t imagine putting dishes inside of them, much less food that we would eat!
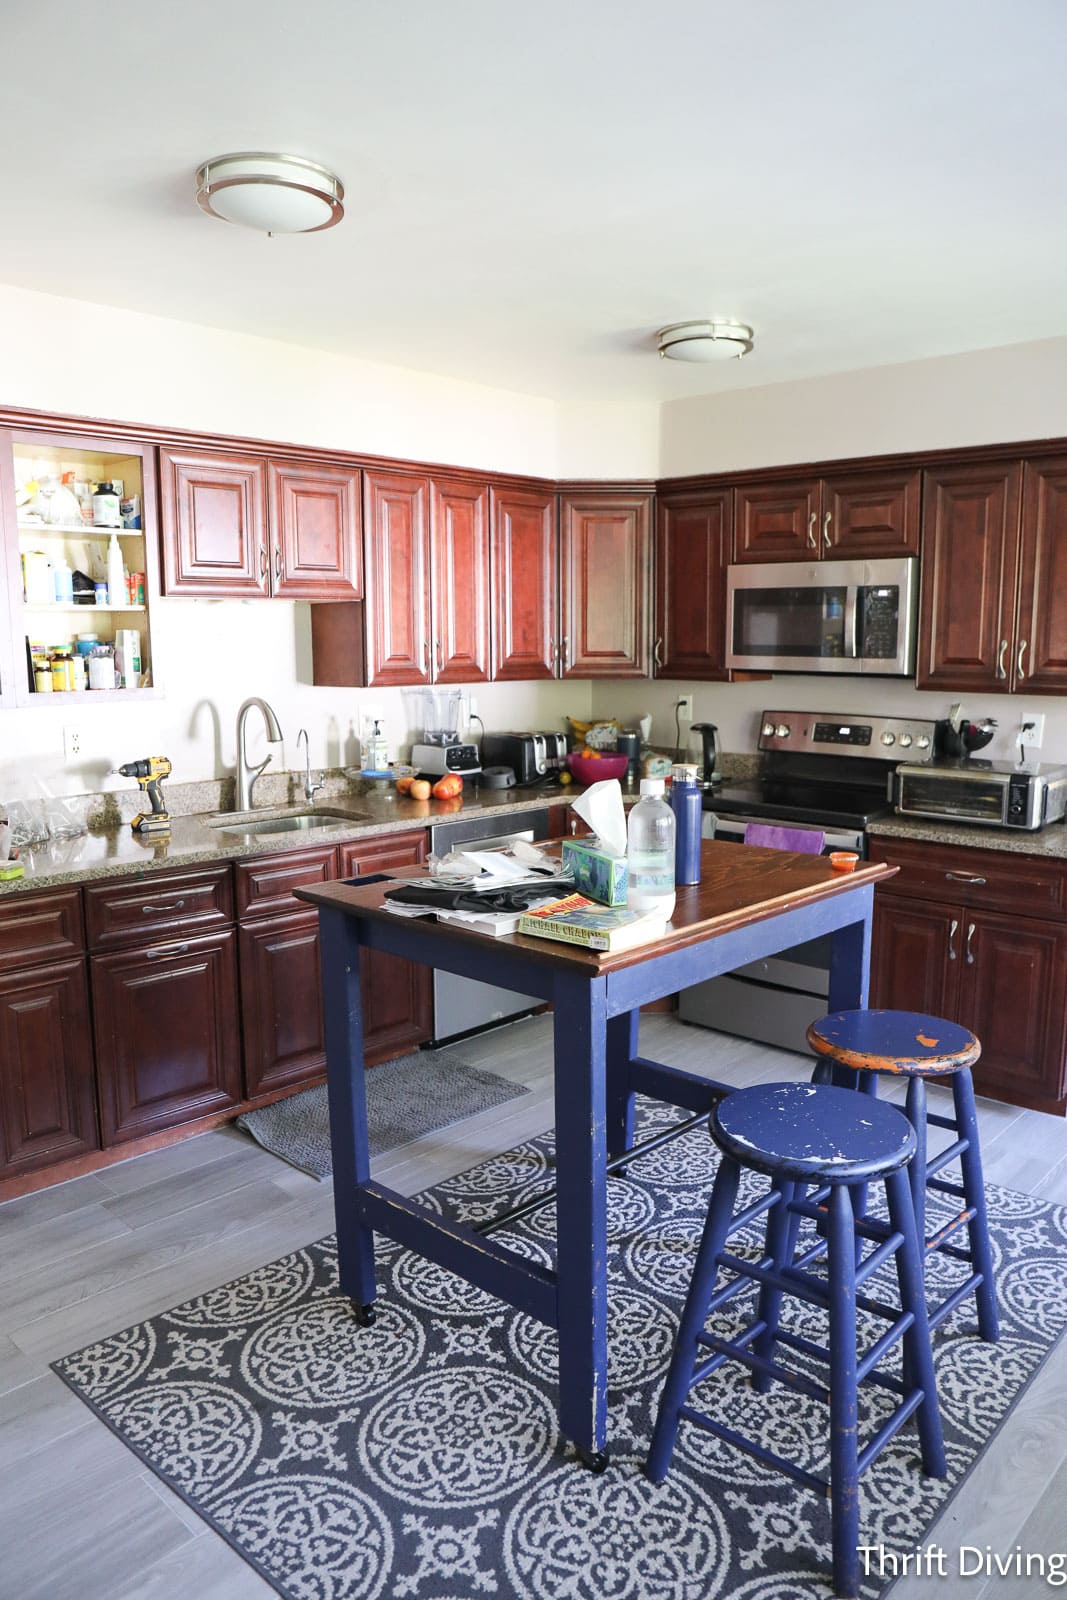
BEFORE – Dark Cabinets
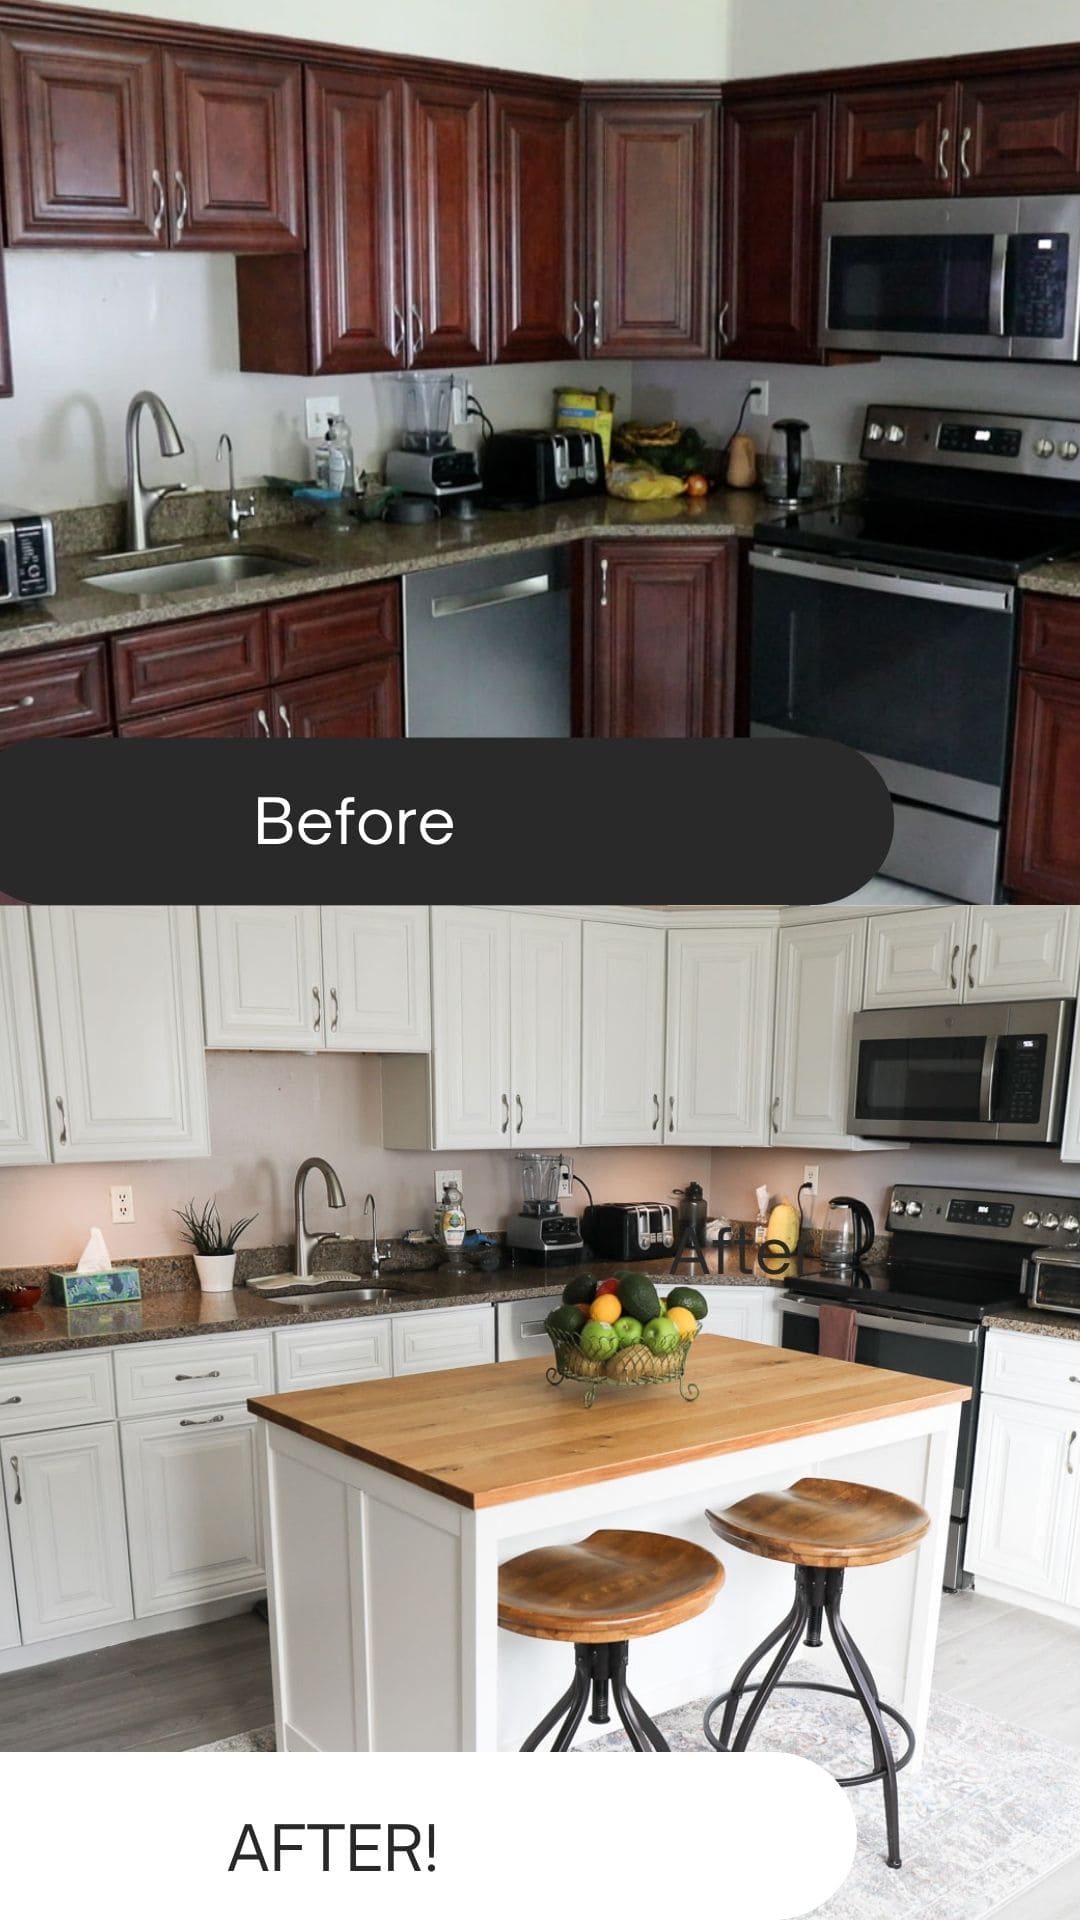
Our stinky, turd-brown kitchen cabinets were replaced with……drum-roll please….reddish-brown turd colored kitchen cabinets. Slightly better, yes, but still not the look I was going for. The cabinets were too dark, too traditional, but the price was affordable and just I grinned and bared it (for 13 years!).
These cabinets served their purpose: they didn’t smell offense, were the backdrop of the central heart of our home where warm, nourishing meals were prepared, where guests would gather anytime we had parties or get-togethers, and held up pretty nicely since they were installed in 2010. They were part of a love-hate relationship I had with my kitchen: I loved their resourcefulness, but I hated how dark they were. I wanted a lighter, brighter kitchen.
Years later we had a water leak that allowed us to get new flooring. I opted for gray tile. You can see the floor installation in this video here.
AFTER – White Kitchen Cabinets
Painting my kitchen cabinets white was something that I had wanted to do for the longest time! But getting my husband on board ewas difficult because he’d say: “Wood is nicer”…”We just bought the cabinets” …”What if they chip or peel?”…
But as of recent, though, hubby didn’t offer up any excuses for why I couldn’t paint the kitchen cabinets white! Not that I needed his “permission,” per se, but doing a project of this magnitude definitely requires everyone in the household to be on board.
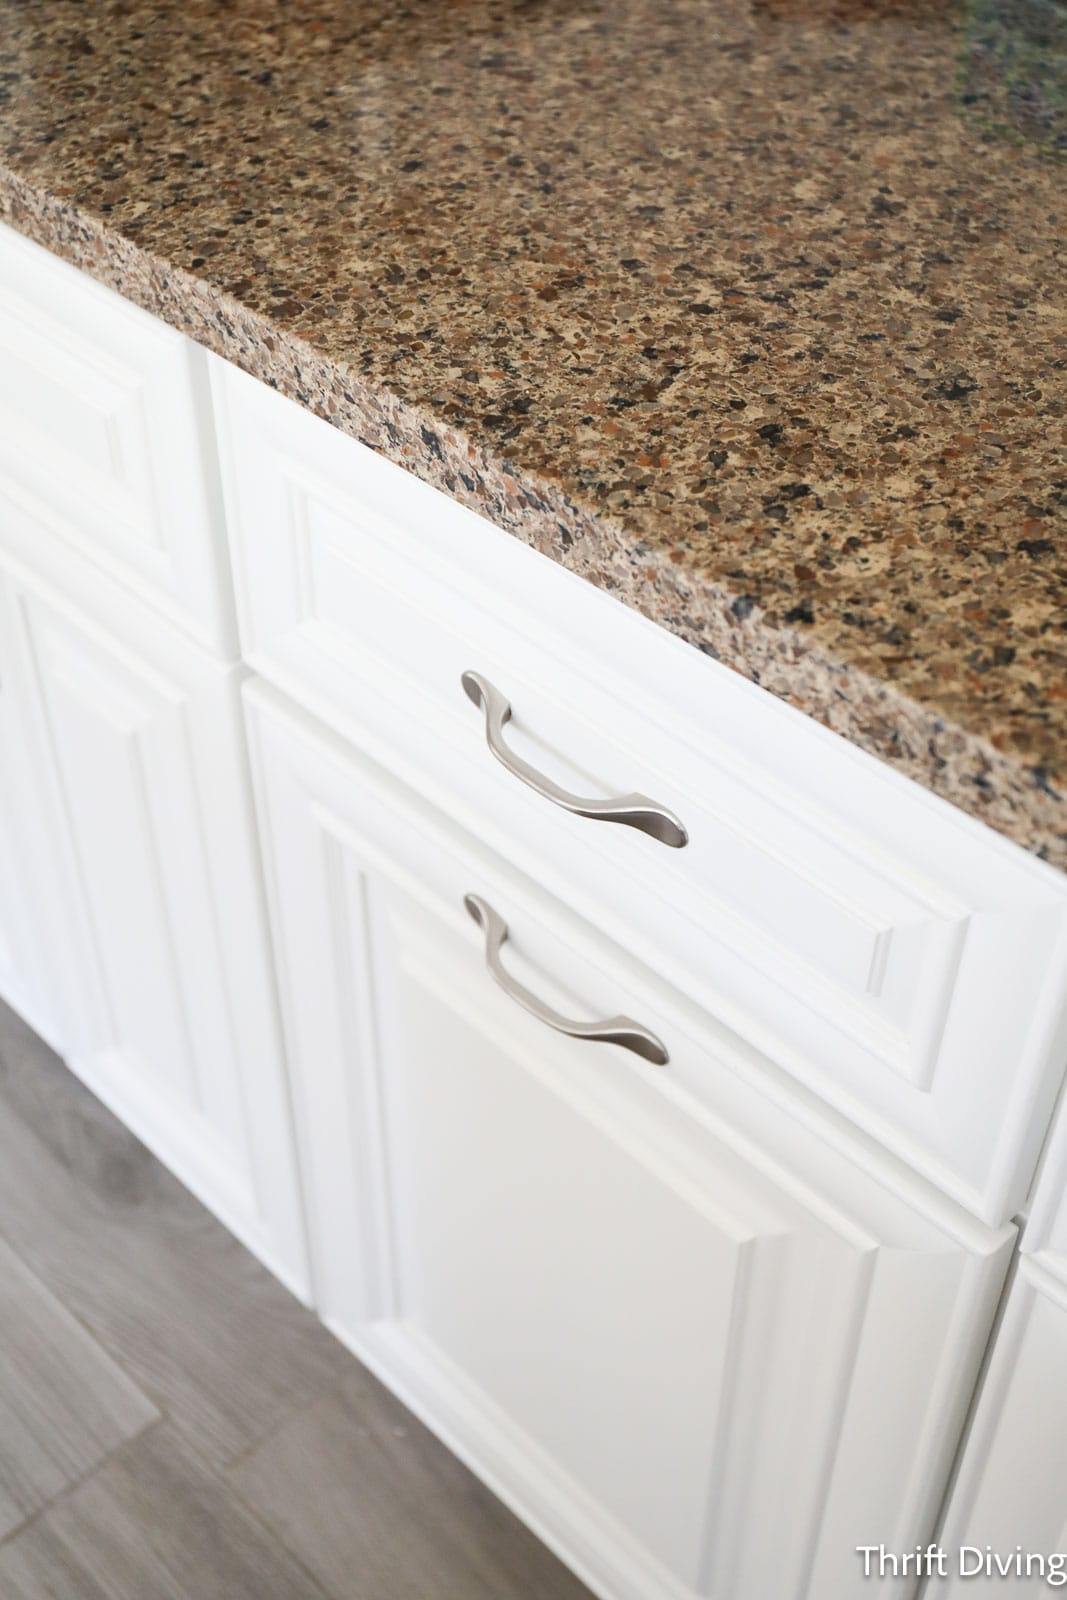
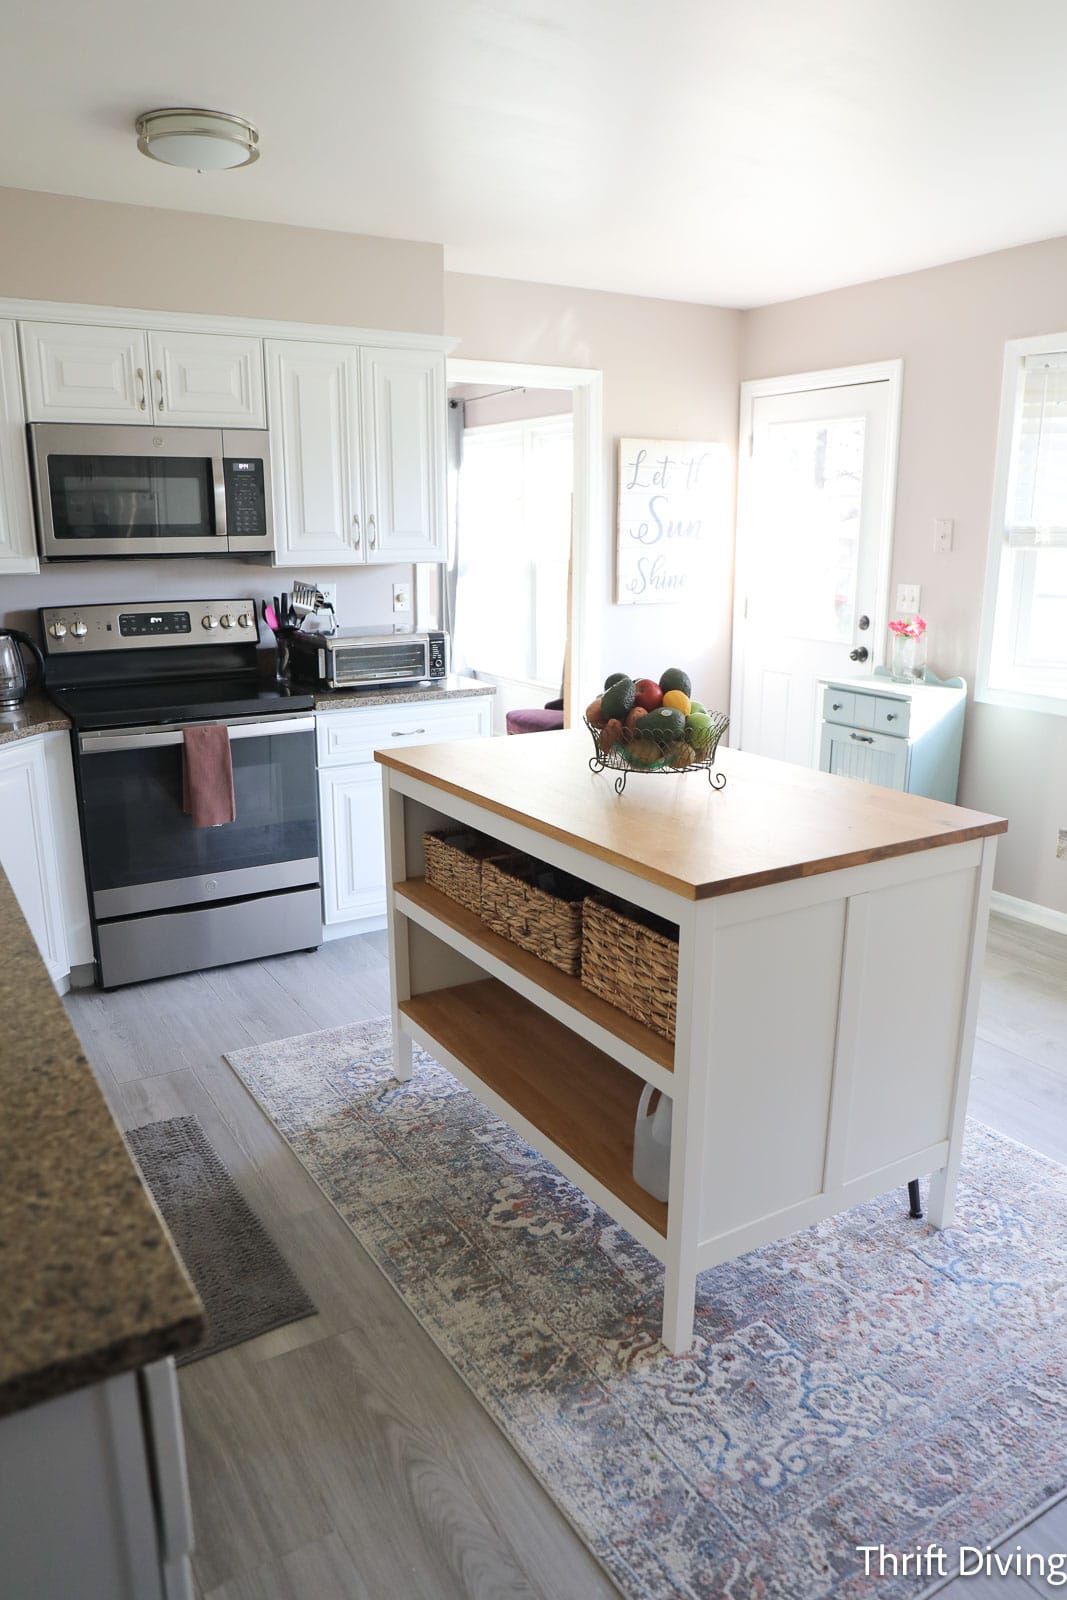
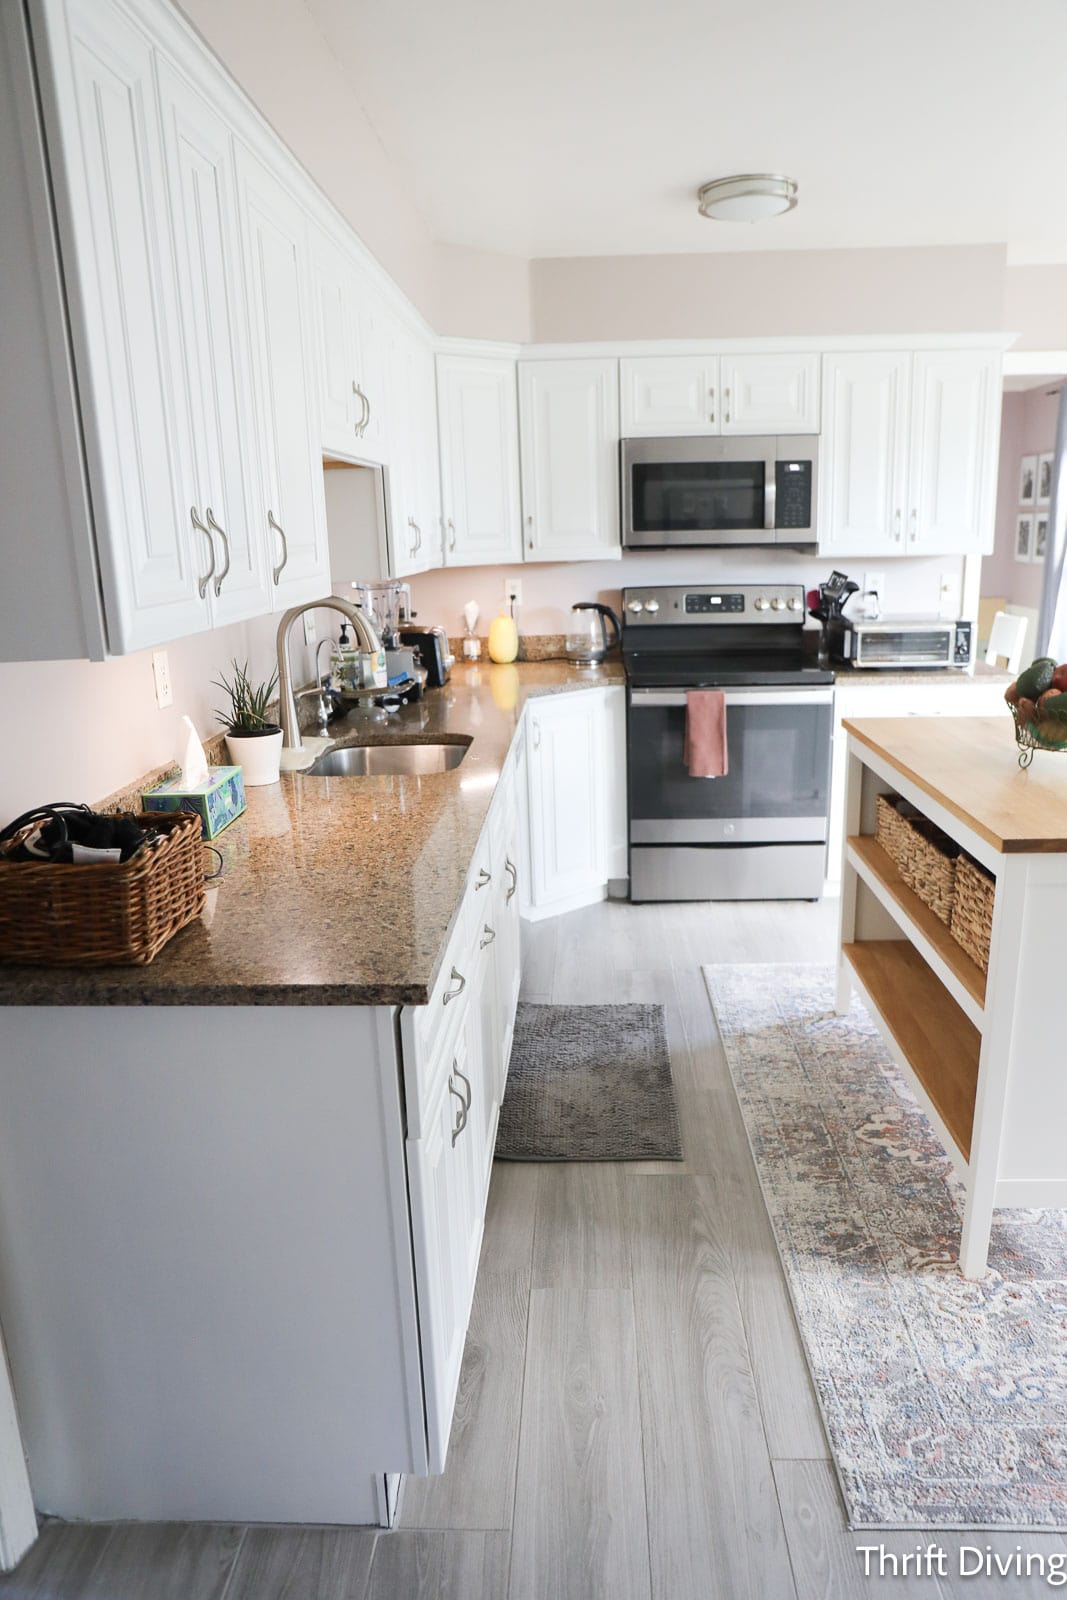
So I jumped in with two feet and now look how much lighter and brighter our kitchen is! I absolutely adore it! It’s (almost) everything I wanted (just because I’m not done yet; I still need to install backsplash!).
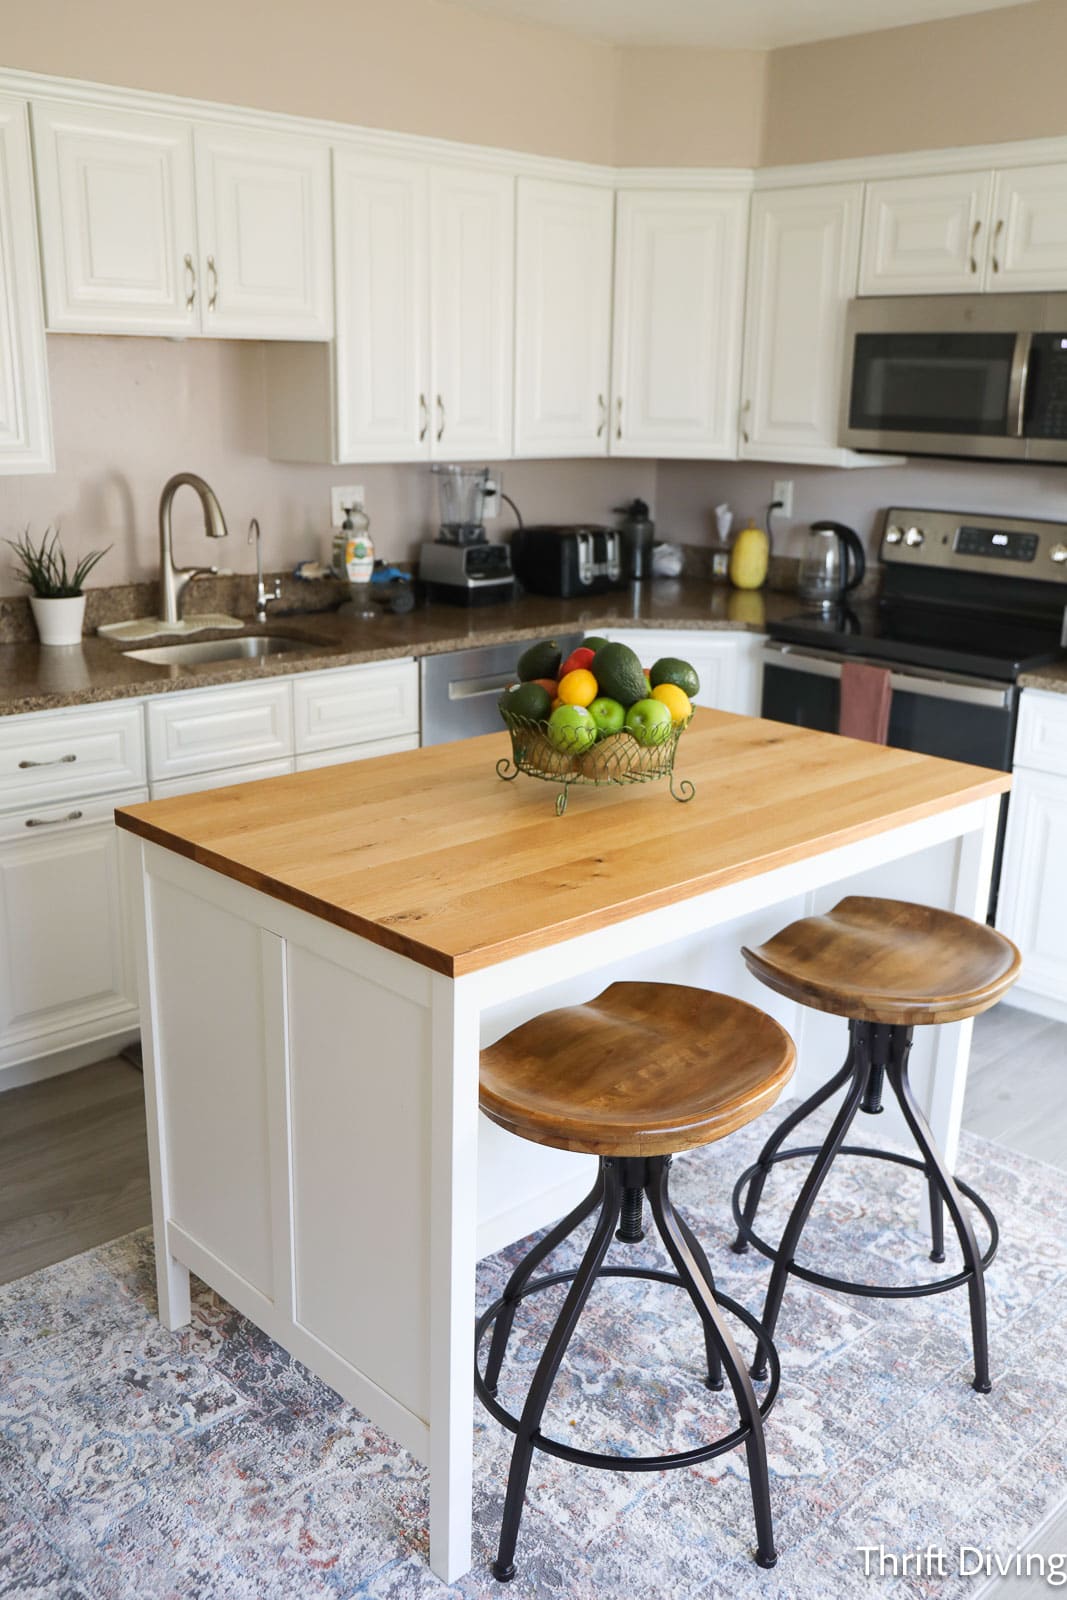
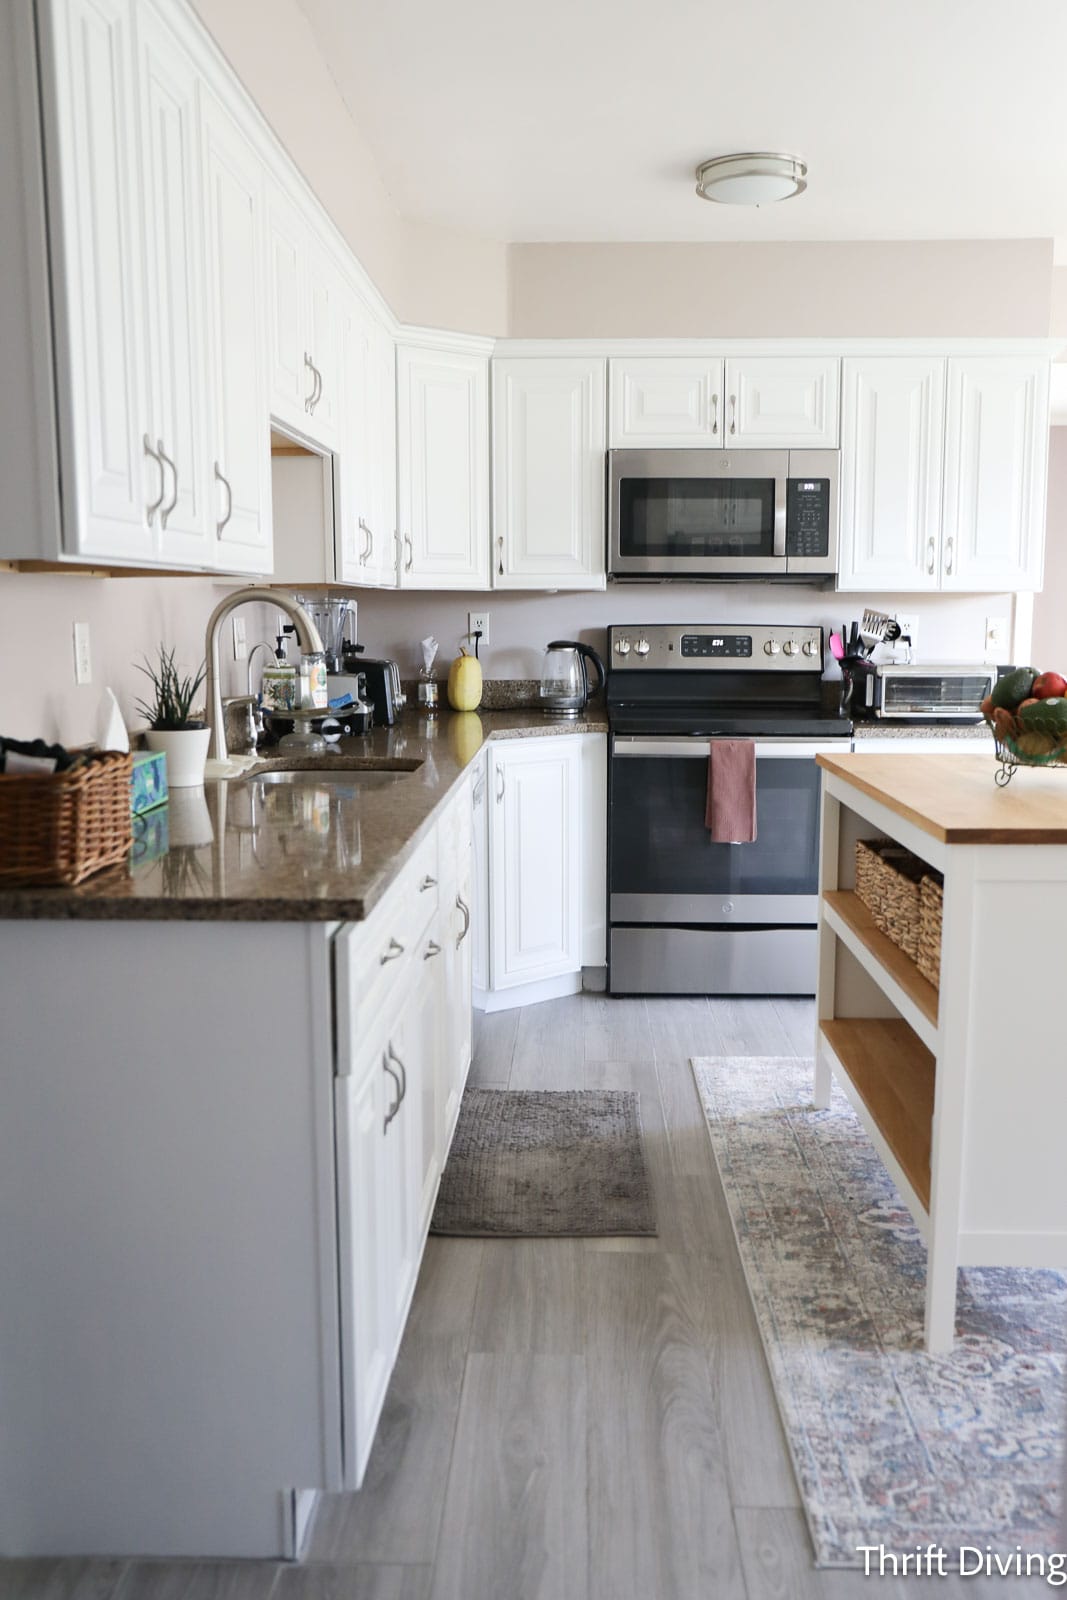
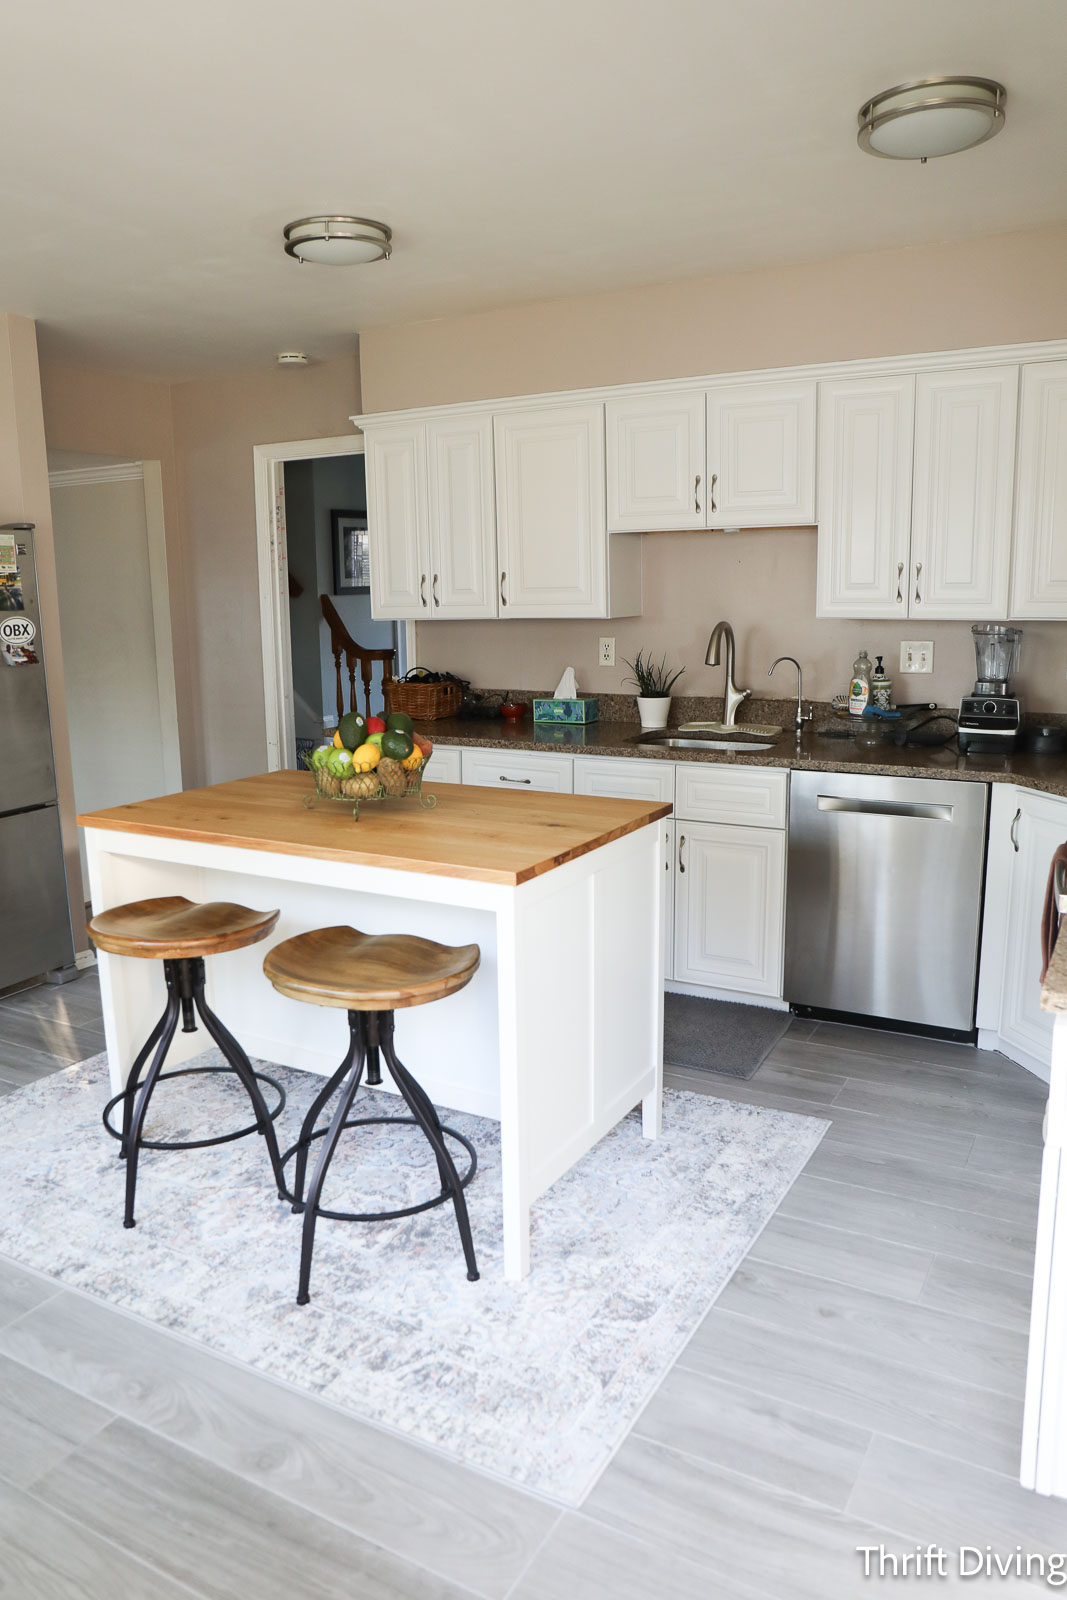
Painting the cabinets white was such a huge improvement! My kitchen feels light and airy and no longer a source of embarrassment that I would sometimes feel when having guests over. My kitchen now reflect more of my style of how I want my home to look and feel!
If you’ve been wanting to paint your kitchen cabinets white, too, and lighten up your home, this tutorial will hopefully cover everything to consider, along with the step-by-step instructions on helping you get the kitchen you’ve been wanting, too! Let’s jump in!
How to Paint Kitchen Cabinets White: Before and After!
Of course I filmed everything. 😉 That’s how we do here at Thrift Diving. If you’d like to watch this project in action, just click here to watch it on YouTube or watch below!
Tools & Materials to Paint Kitchen Cabinets White
- Beyond Paint (Bright White)
- Beyond Paint Multi-Purpose Sealer
- Extreme Bond Primer
- Small 4″ roller with 1/4″ nap
- Two extra 4″ roller covers with 1/4″ nap
- 2″ synthetic angled paint brush
- Paint Sprayer (optional)
- Wall Paint Color: Temperate Taupe by Sherwin Williams
- Power drill or screwdriver
- Painter’s tape
- Tarp or plastic sheathing
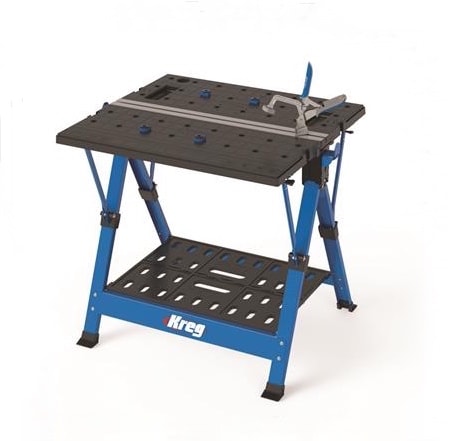
- Tables, chairs, workhorses, and other surfaces for laying out your cabinets to paint and dry.
- Small paint tray
- Steam cleaner
- Simple Green degreaser
- Fine 220-grit sandpaper
- Dust mask
- Caulking for molding and doors
- Caulk gun
- Baggies for holding hardware and screws
- Microfiber cleaning towels
- Knobs or cabinet pulls (optional if purchasing new ones)
- Wood filler (optional)
- Drill and drill bit if drilling for new cabinet knobs or pulls
- Screwdriver
Before You Get Started Painting
There are a few questions you need to consider before painting your kitchen cabinets white. We answer some of these questions throughout the post.
- Are white cabinets hard to keep clean? No, I think they’re easier to keep clean because you can see any food splashes and fingerprints, making clean-up happen more often than simply ignoring dirt on dark cabinets.
- Do you have the space available to paint all your cabinet doors? You’ll need space to leave 20-30 cabinets while they’re drying without being disturbed.
- How do you properly clean your cabinets to get the best results when painting them? A steam cleaner and Simple Green, or vinegar, work well.
- How much time does it take to paint the cabinets? Plan for a weekend, up to a week, depending on your time available, the size of your kitchen, and the number of coats you’ll need.
- How much will it cost to paint your kitchen cabinets? Typically $300 – $500.
- Will you need to prime before painting? If so, what kind of primer should you use? It’s best to prime, especially if your cabinets are dark and you’re painting them white. Use Extreme Bond Primer or use Beyond Paint, which has primer in it, but you may need many coats for completely coverage.
- Can you use a paint sprayer to prime or paint your cabinets? Yes. You may have to thin the primer or paint with water. It depends on your paint sprayer. Be cautious with adding too much water, which could compromise the bonding ability of primer and paint.
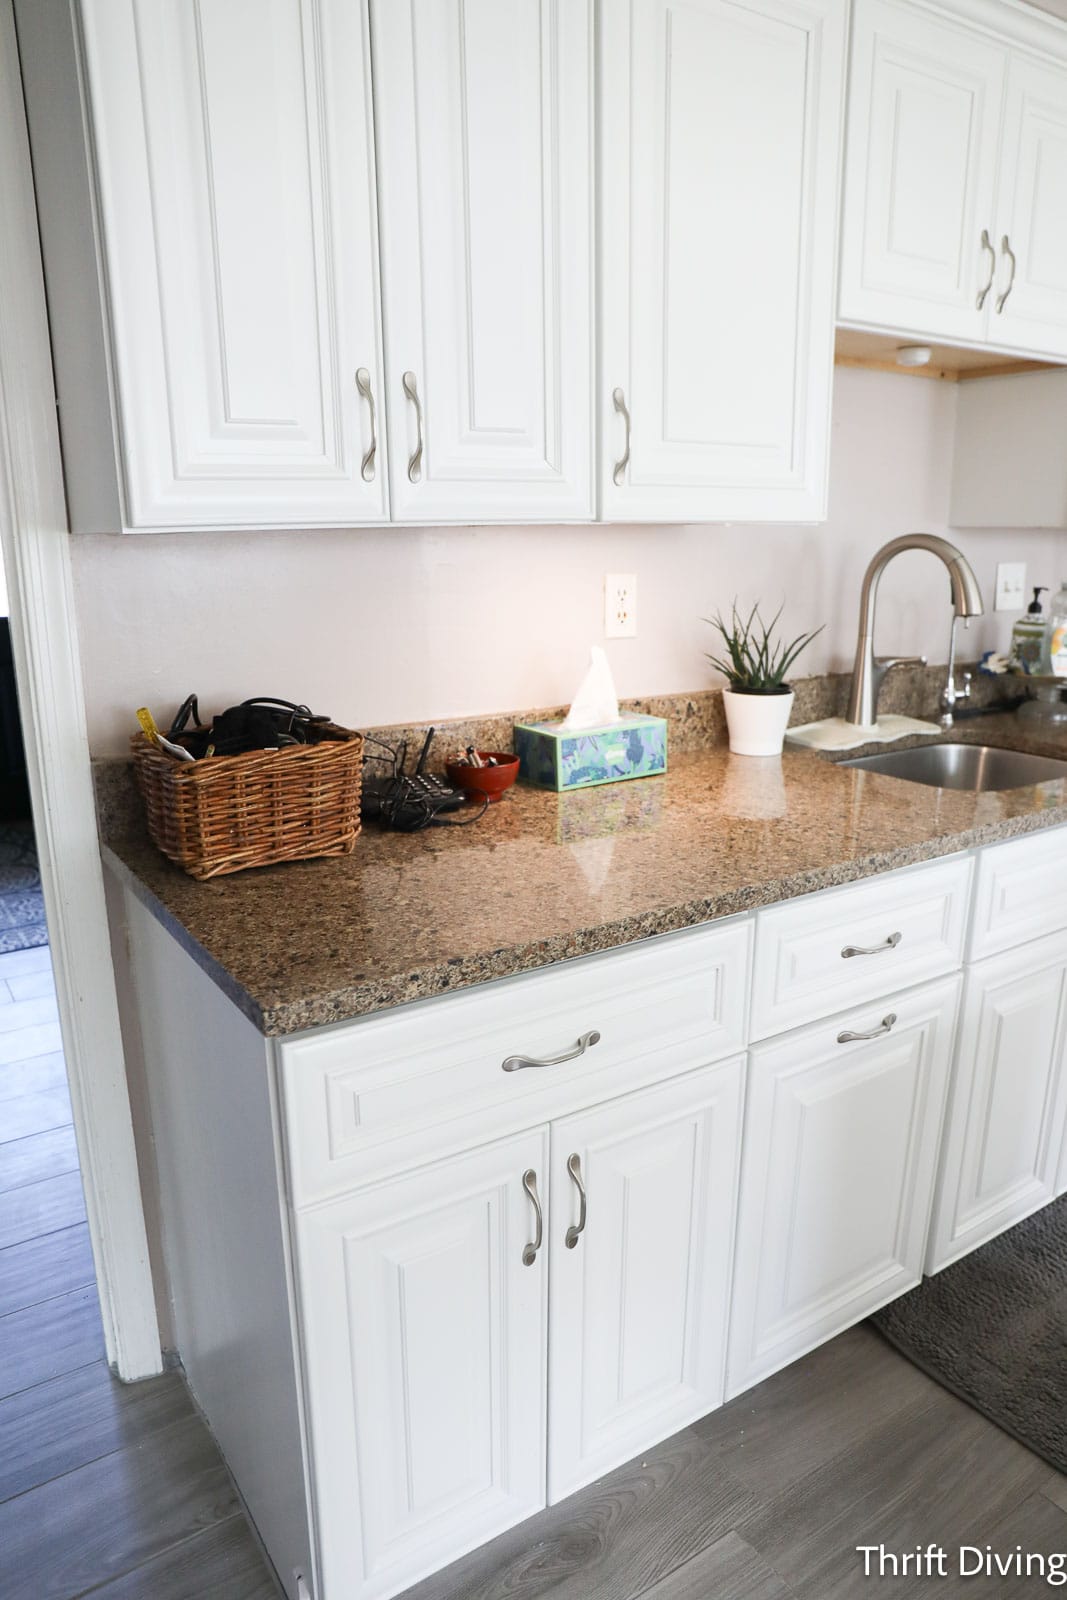
- Do you have to change your countertops when you paint your kitchen cabinets? No, but this is why I like white cabinets for kitchens because white compliments many existing kitchen countertops.
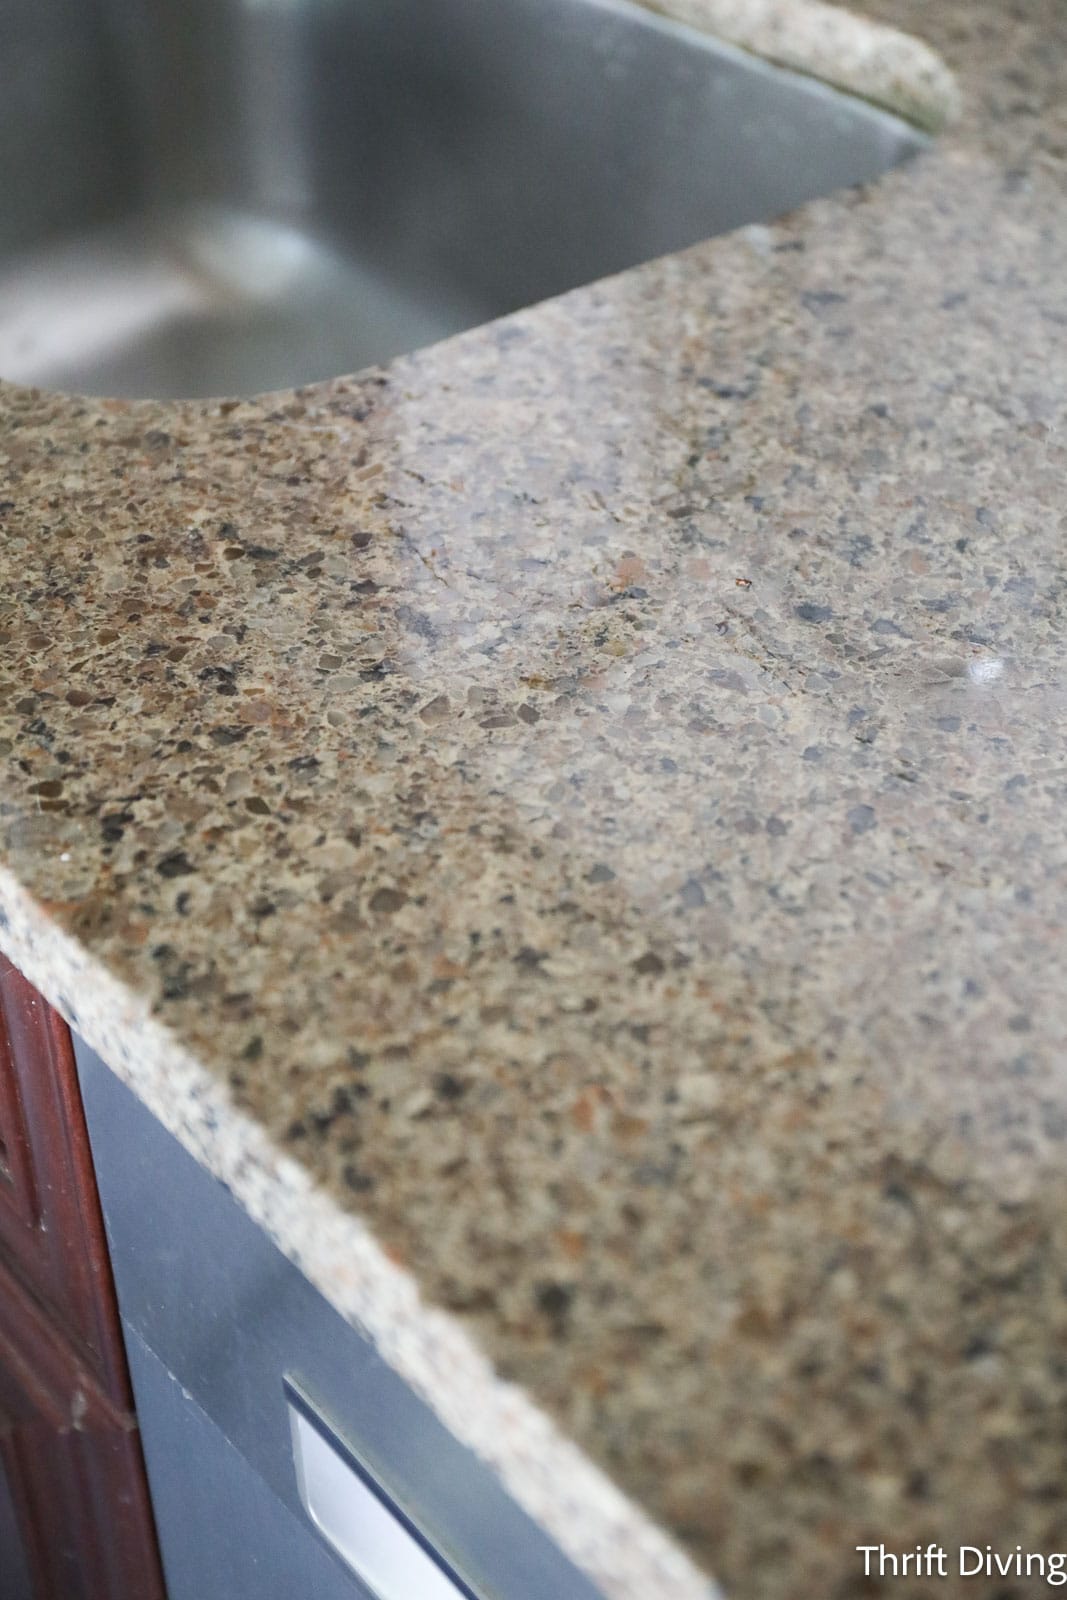
White was the best choice color for my kitchen cabinets because white goes with everything. We got the countertops at the same time as the dark kitchen cabinets in 2010. I was never a fan of the counters. The dark brownish color was bleh! But I knew by going with white paint for the cabinets, the countertop wouldn’t require replacing. If you’re concerned about having to spend a lot of money to transform your kitchen on a budget, going with white will allow all your other fixtures and features (such as countertops) to get more longevity since they’ll likely go well with white cabinets!
Okay, so let’s jump into the steps for painting your kitchen cabinets white!
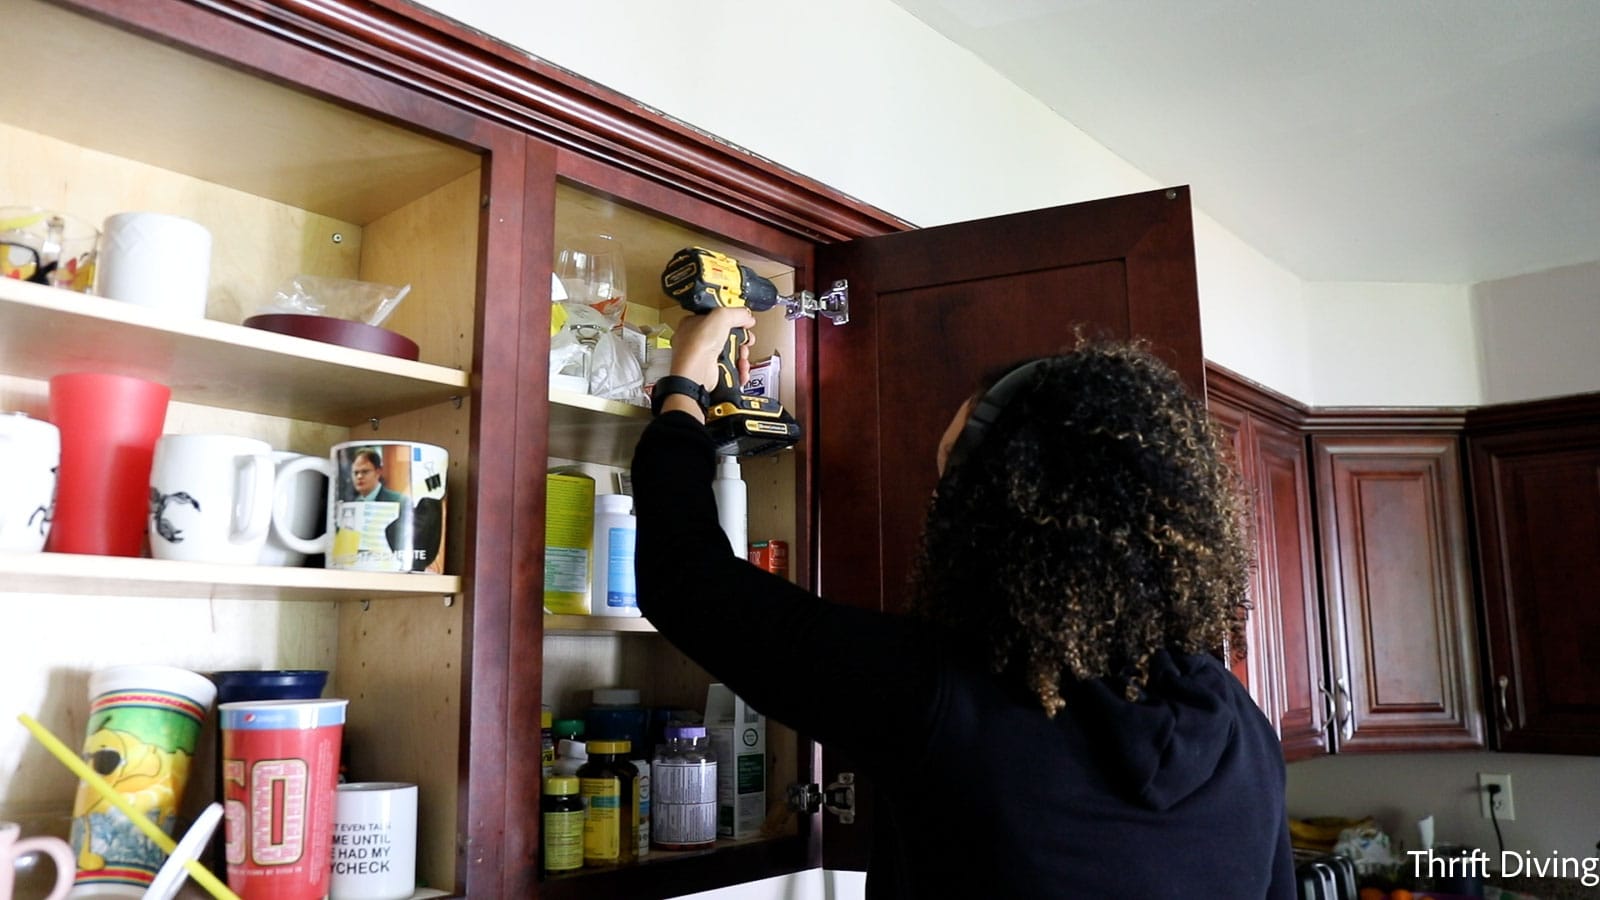
STEP 1: Yes, You Should Remove Kitchen Cabinet Doors Before Painting
Of course you can paint kitchen cabinets without removing the doors. And of course it would be easier. (And take up less space because you wouldn’t have cabinet doors lying all around your kitchen or garage while painting).
But are you going to get good results? No, you won’t.
I’ve painted bathroom vanity cabinets without removing the doors. If you apply Vasoline on the hinges or any other place where you’d like paint to not stick, it’s an easy way to prevent paint from drying on the hardware.
However, just because you can paint kitchen cabinets with the doors on, using Vasoline to prevent adhesion to the metal, doesn’t mean you should.
Painting kitchen cabinets while they’re still attached is lazy and you won’t get good results because:
- Gravity will cause more drips and streaks.
- Hardware can get messy
- You’ll miss spots (especially around hardware) that aren’t easy to paint when the doors are still hanging.
The amount of prep work you put into a project will dictate the outcome. So by taking that extra effort to unscrew the hinges and removing all the doors, you’ll get cleaner results and it will look like you cared and took great effort to make it look great!
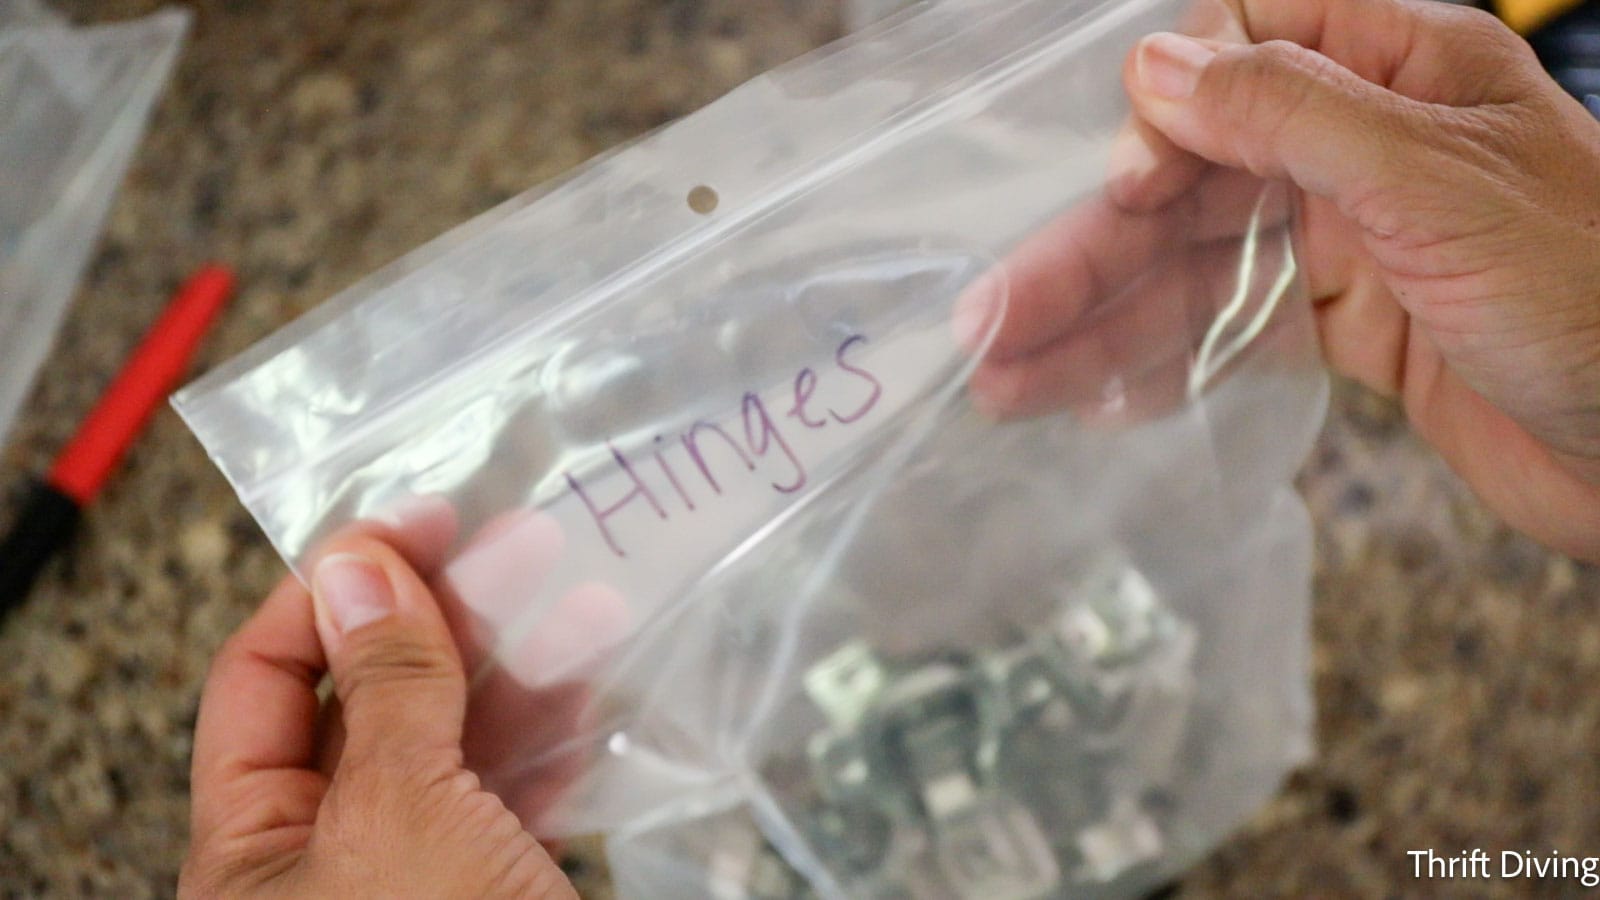
TIP: Keep all your hardware (i.e. hinges and knobs/pulls) in a plastic baggie so you don’t lose it!
TIP: Be sure to label or separate the cabinet doors so you know which ones go back where.
Where Can You Paint Your Kitchen Cabinets?
Okay, okay, so you’re convinced that you’re going to remove your kitchen cabinets before painting them. Great! But the next question is, where are you going to paint them?? You might have well over 20 cabinet doors. I have a whooping 26 cabinet doors!! That’s going to take a lot of space to spread out.
Some best space options to paint your cabinets include:
- Use large empty cardboard boxes to lay cabinet doors on, or other moveable surfaces. (Be careful not to let the wet side touch and stick to the cardboard).
- Dining room table
- Crafting table
- Coffee table
- Floor space
- Workhorses with plywood or rigid foam for easy-to-set-up work space.
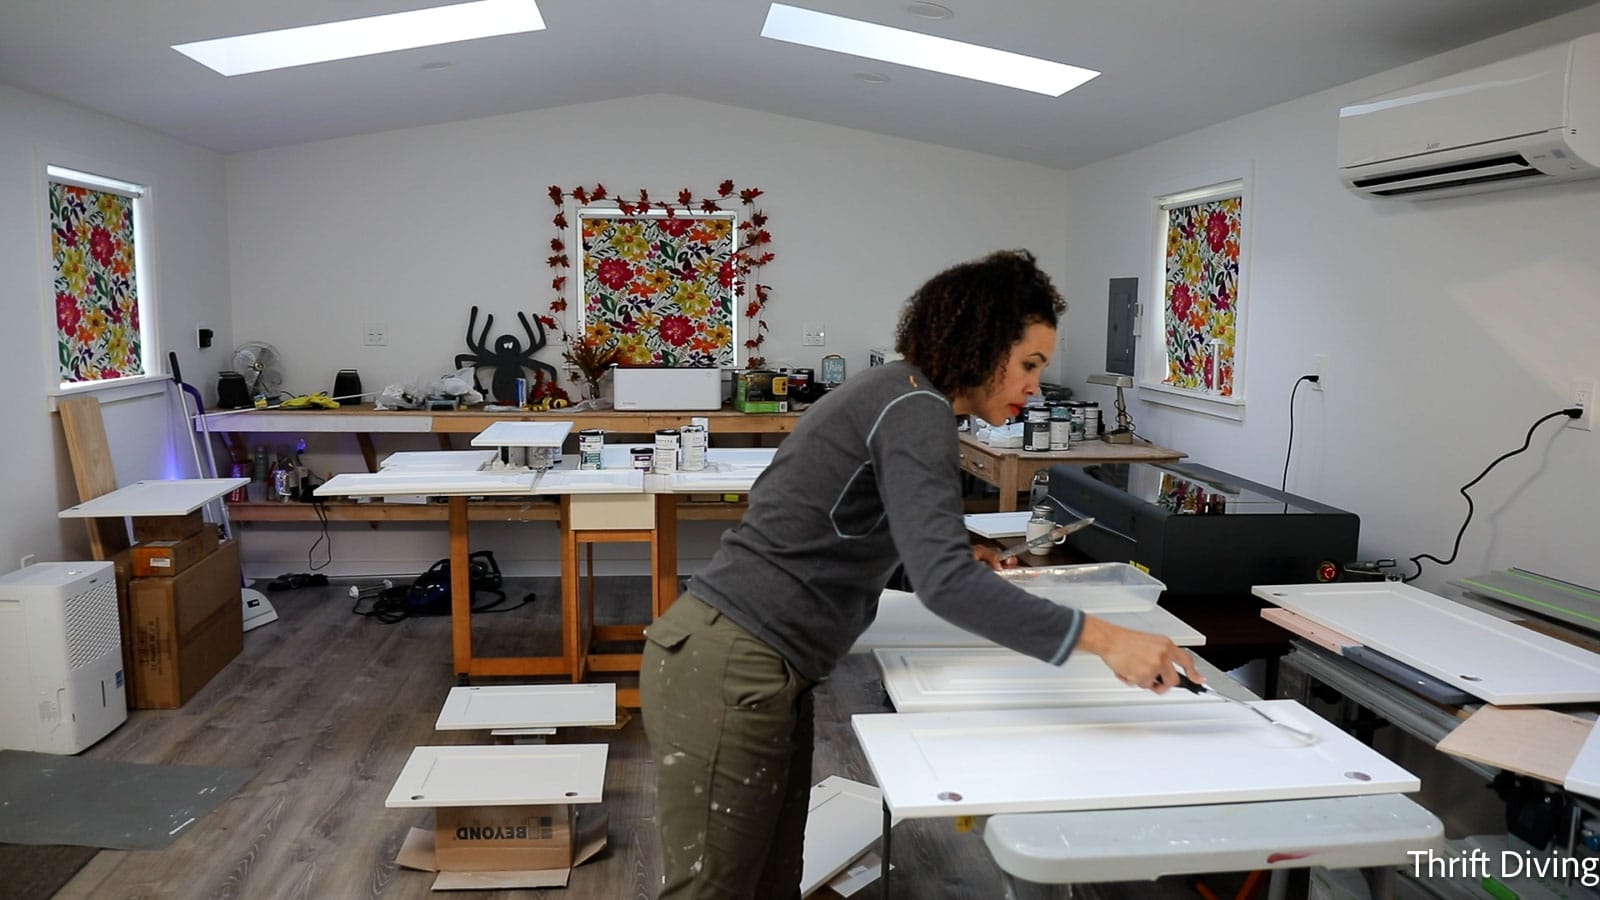
I recommend painting your kitchen cabinets indoors instead of outdoors, if possible (however, if you’re using a paint sprayer, you’ll likely be spraying them outdoors). Indoor cabinet painting (including in your garage) is best because:
- You can control the temperature and outdoor elements for best painting results (read the back of paint containers to see what the recommended temperature is for best results).
- There won’t be dust, debris, or leaves blowing or falling onto your cabinet doors.
- If you have a lot of cabinet doors to paint, they’ll need proper drying time (see the paint container for those times). You don’t want to leave cabinet doors outdoors to dry overnight.
Plus, considering that you’ll need multiple coats, this DIY project will take several days so you have’ll proper drying time in between coats of primer, paint, and sealer. You’ll need a space where you can leave the cabinet doors to dry and then come back to repeatedly.
If you have to paint outdoors, then use a spray tent to prevent blowing debris from messing up your paint finish.
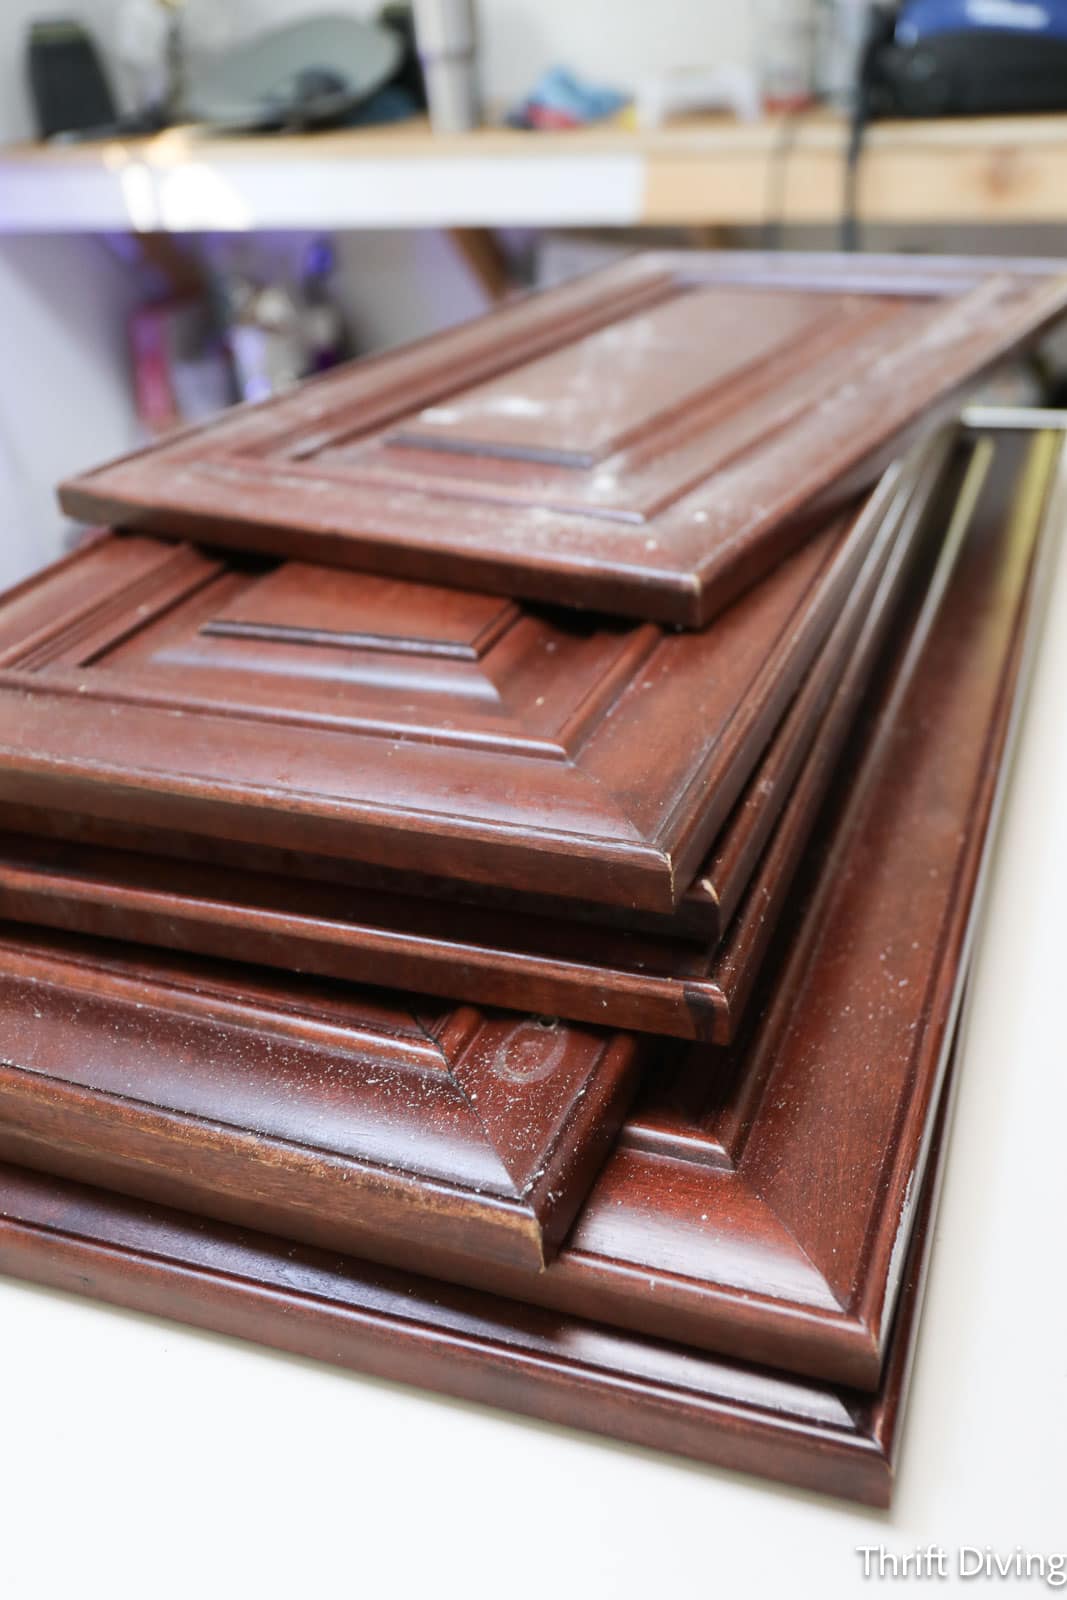
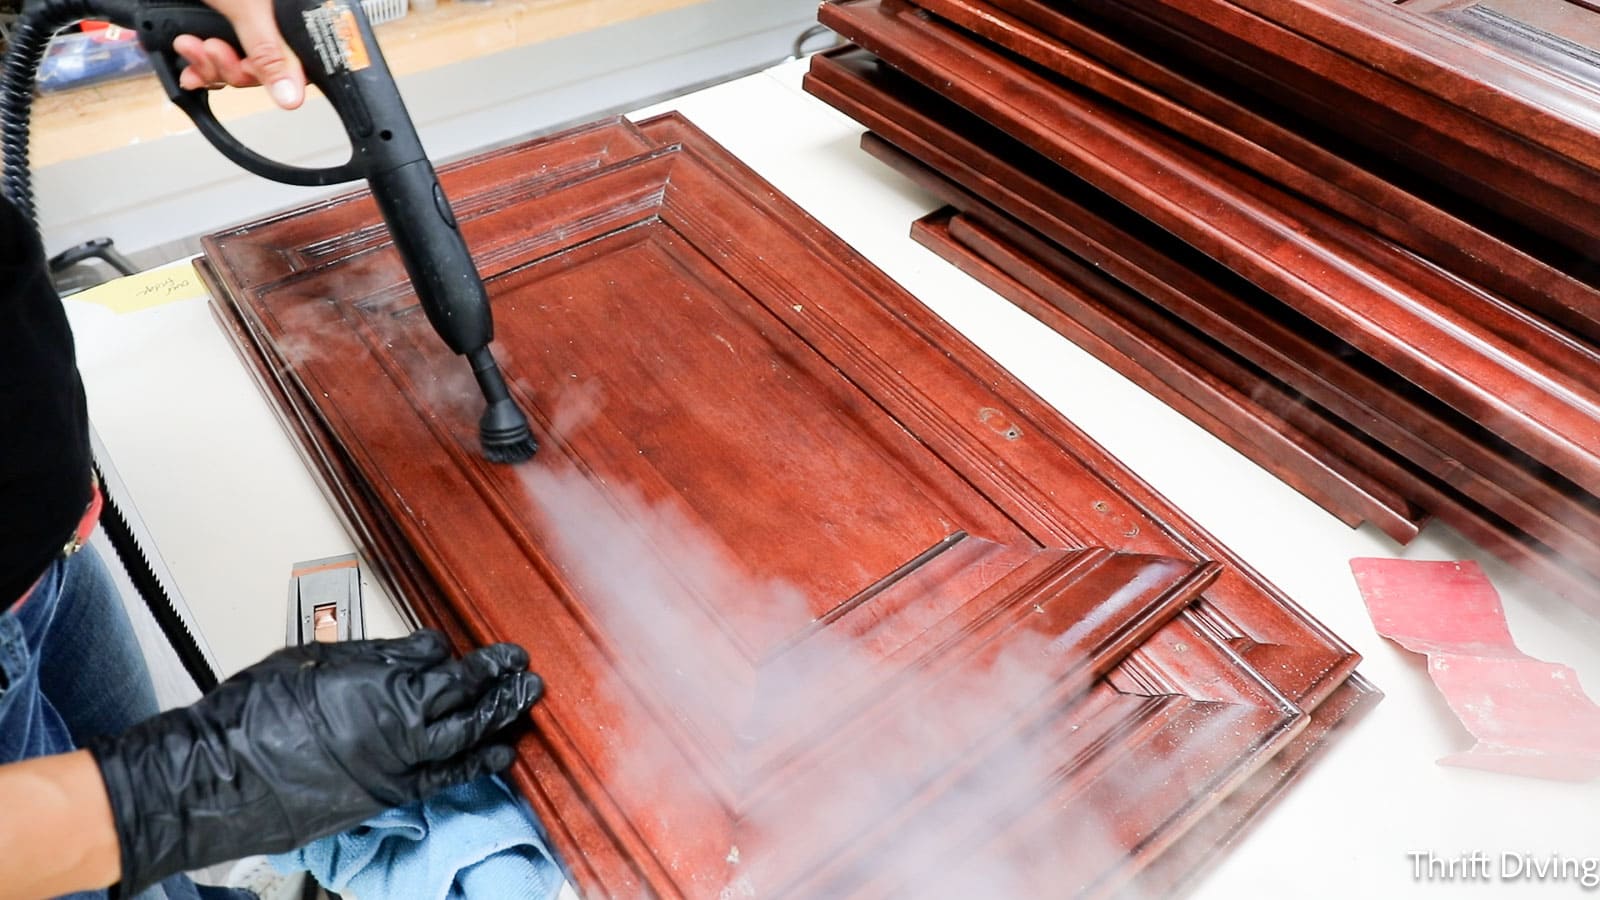
STEP 2: Steam Clean the Cabinet Doors & Boxes (Or Wipe Down with Simple Green)
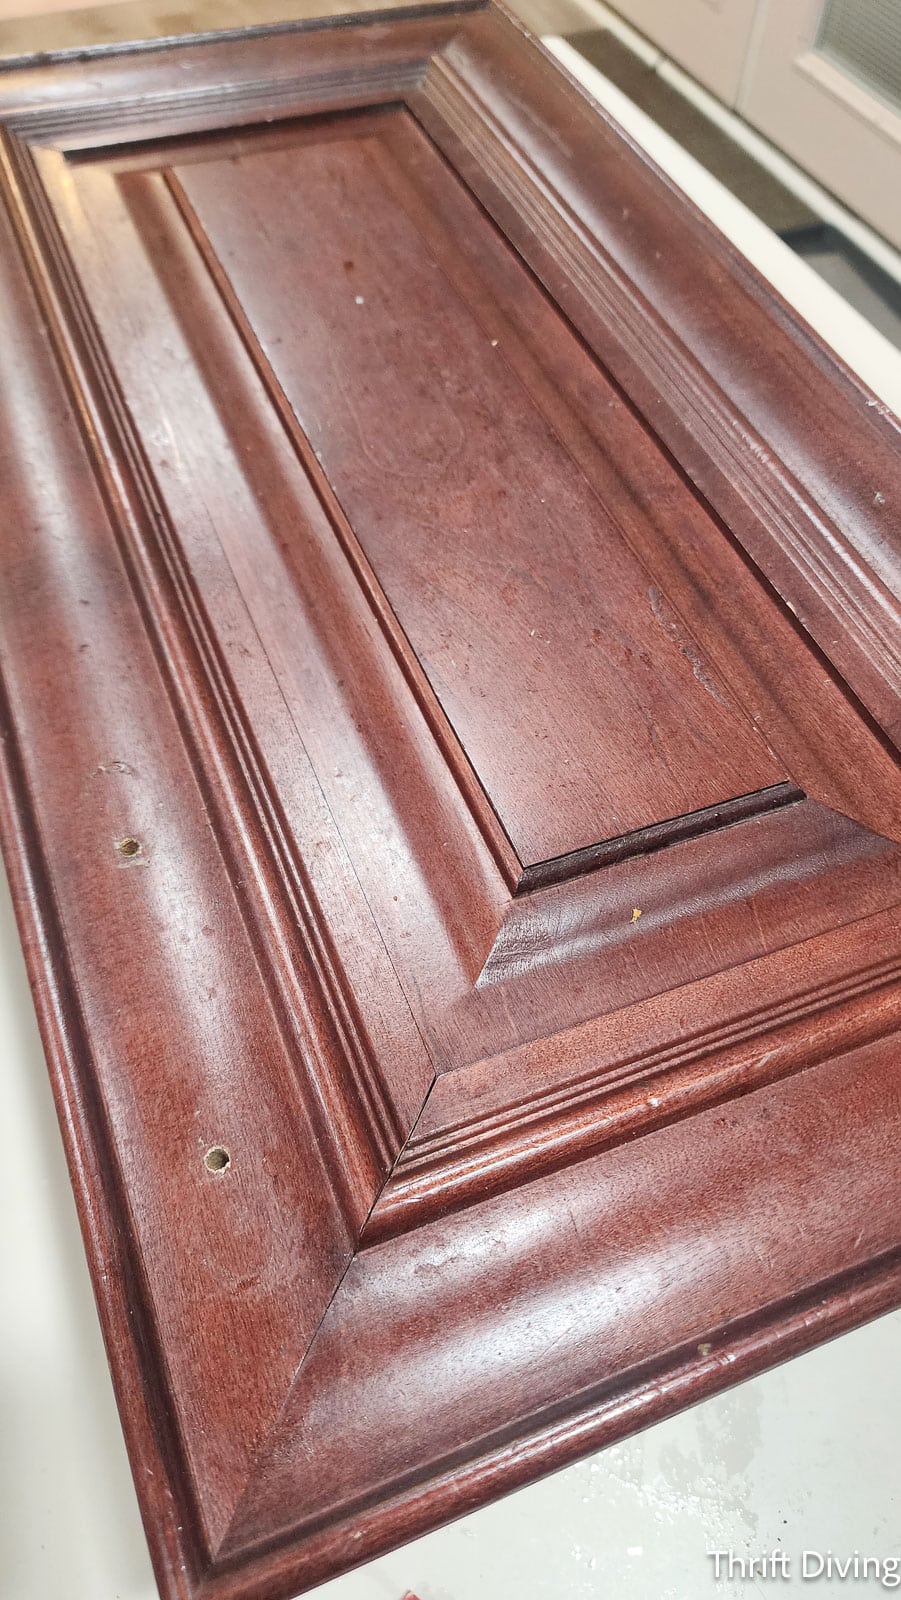
You never realize just how nasty kitchen cabinets are until you’ve removed them and see them up close! They’re covered in grease from your hands…grease from that fried chicken (or in my case, fried tofu, since I’m a vegetarian!)…or whatever other food you’ve prepared. If you have kids, the doors are likely even worse!
Take a look at how one of my kitchen cabinets looked prior to cleaning it. Ugh…. I guess I can admit that cleaning my cabinets wasn’t ever at the top of my chores list, eh? 😉 They’re disgusting. Now imaging just wiping a wet rag over these to “clean” them prior to painting them white. Nope. That’s not going to cut it. Literally. You need to cut through the grease.
A steam cleaner works really well, which I used. But I also did a final wipe with Simple Green, a cleaner and degreaser, using microfiber towels. The steam cleaner helped to break down the food particles and grease, and the Simple Green got any left over residual grease.
STEP 3: No, You Don’t Have to Sand Kitchen Cabinets Before Painting, But…
Sanding before painting is such a mess, honestly. The dust floats everywhere, you must wear a dust mask, and it adds an extra step to the process. However, whether you sand before painting depends on 4 conditions:
- The condition of your cabinets.
- The type of primer that you use.
- The paint you use (some brands of furniture paint don’t require sanding).
- How much wear and tear your kitchen cabinets will get.
- If you’re applying new handles or knobs that require wood filler, sanding, and drilling new holes.
What’s the Condition of Your Cabinets?
Your cabinet boxes and cabinet doors must be in good condition: they can’t be chipped or peeling or cracked, split wood. If they have any of these issues, use 150-grit sandpaper to sand smooth. My cabinets were in pretty good condition, despite being 13 years old.
What Brand of Primer are You Using?
I painted my cabinets with Extreme Bond Primer which claims that it sticks to many surfaces that won’t need to be sanded before primed. I needed to use primer because my kitchen cabinets were so dark. I wanted to cover up as much of the dark wood before using my final-finish cabinet paint. If I had used any other primer, I likely would have sanded first if it wasn’t a primer that’s labeled for extreme bonding.
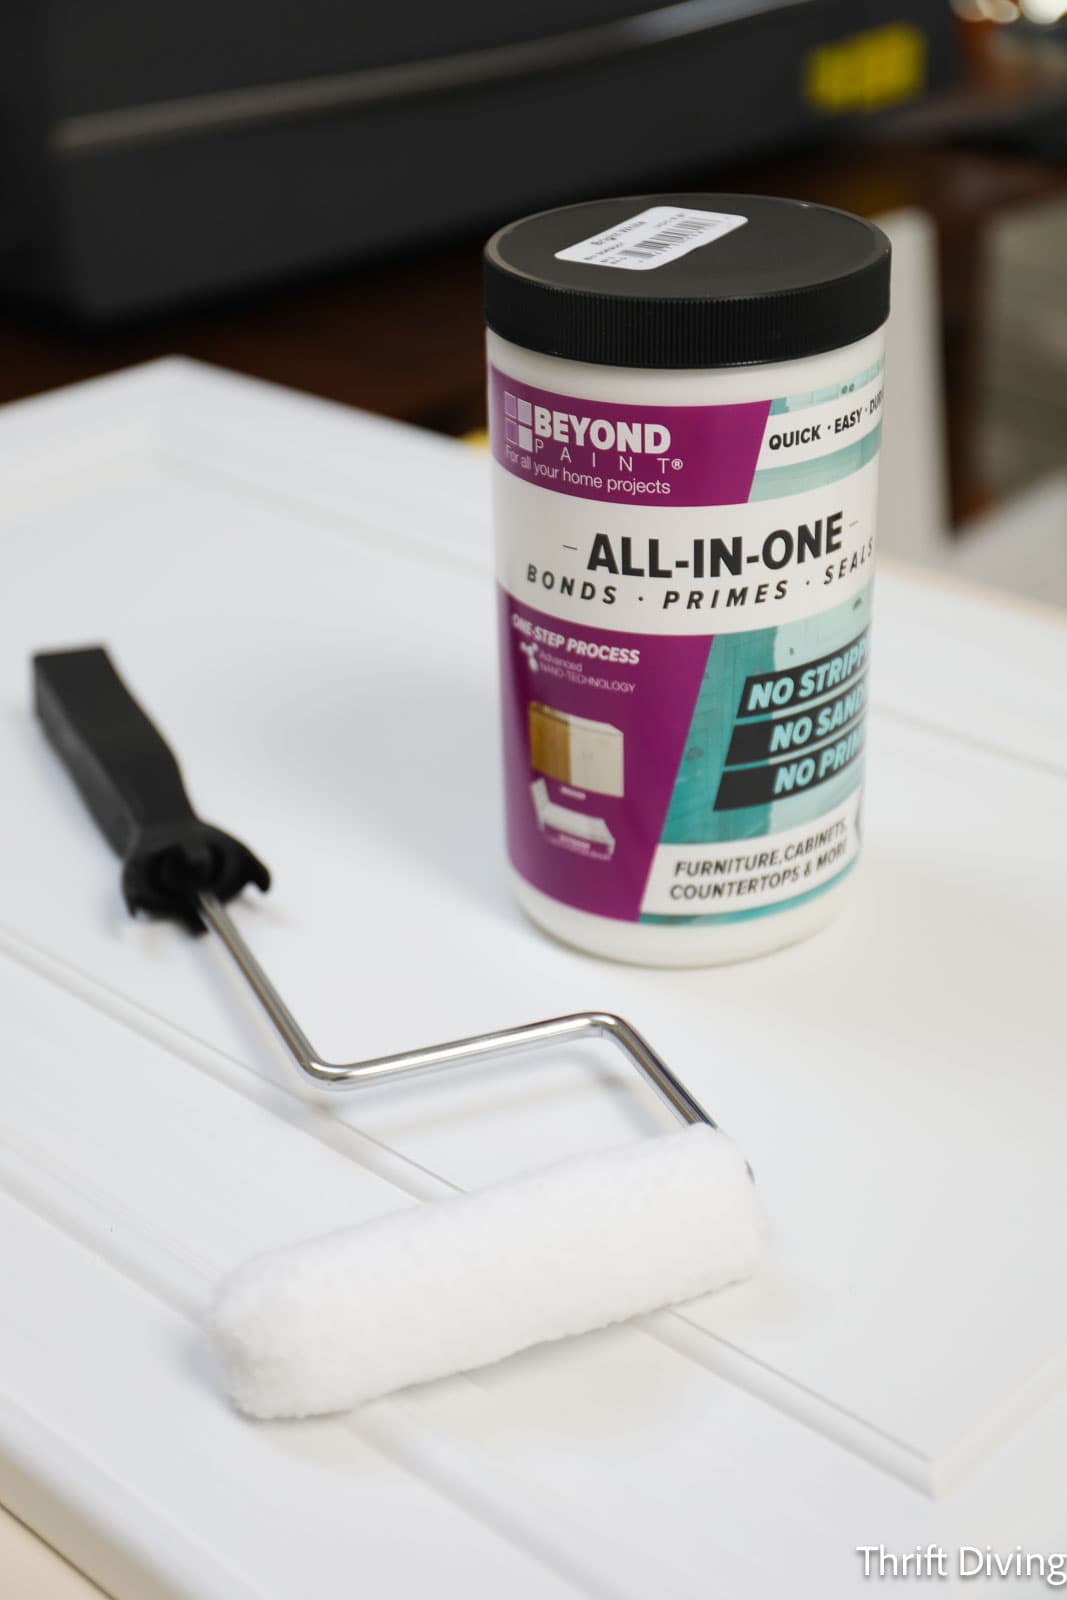
What Type of Paint are You Using?
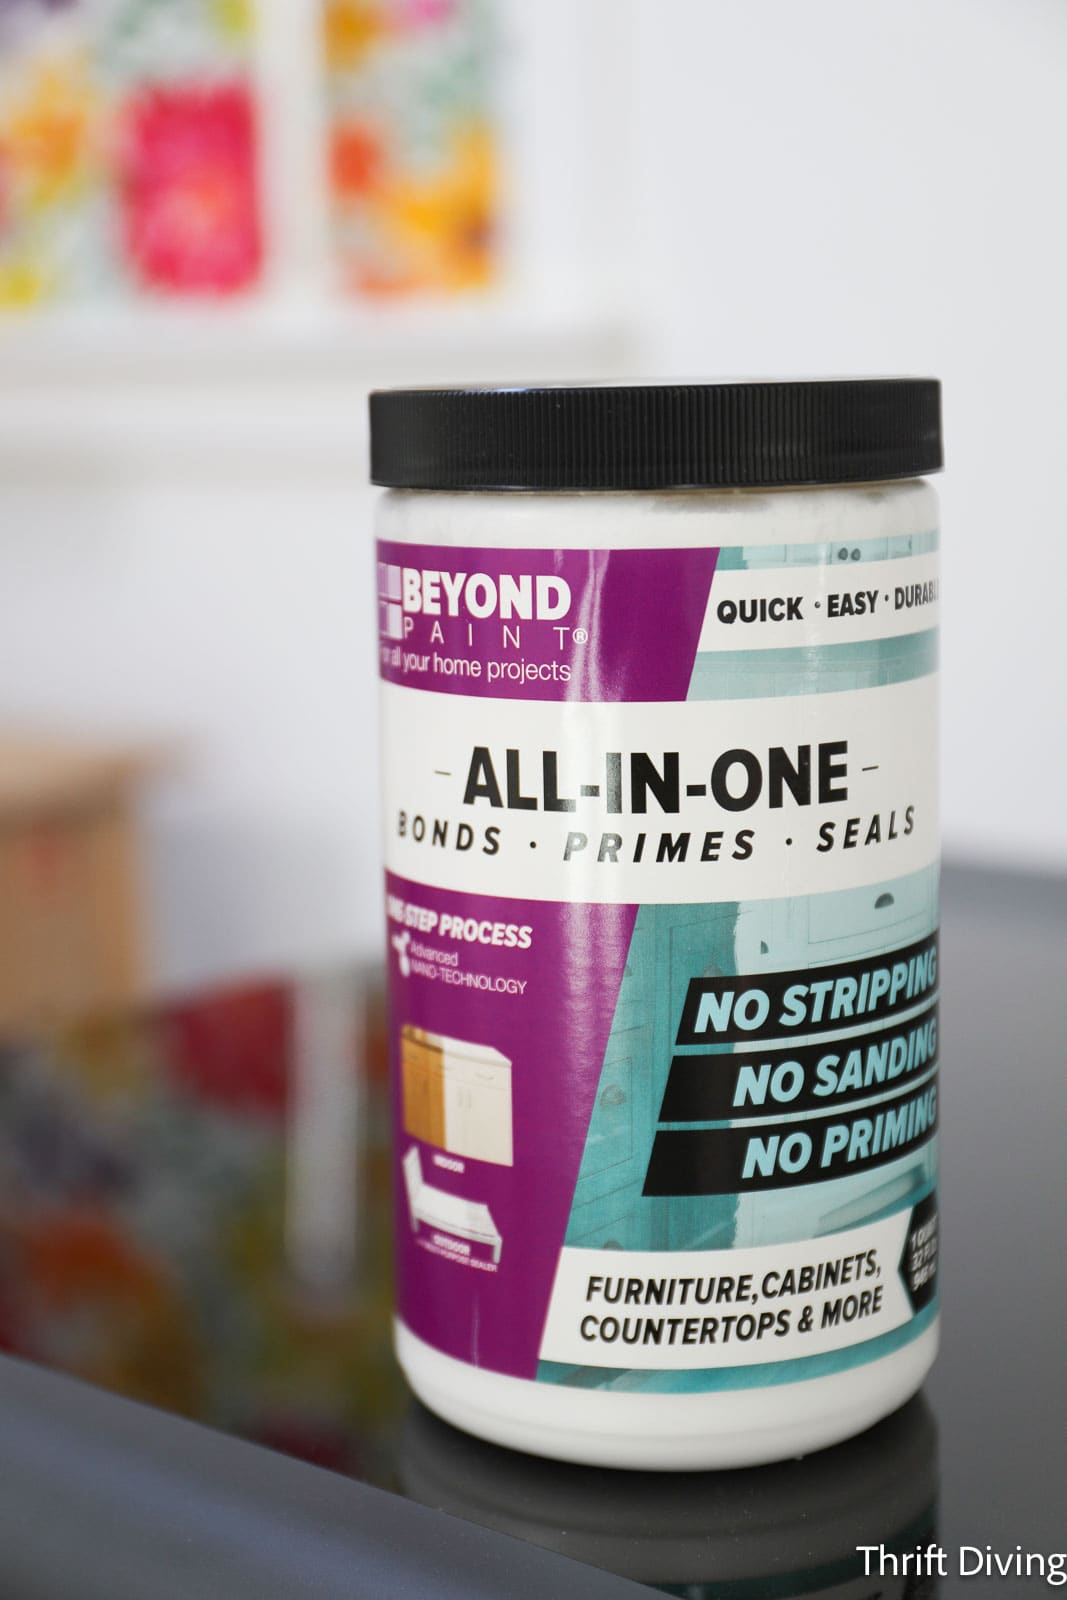
To paint my cabinets white, I’m using Beyond Paint’s Bright White All-in-One Paint, which bonds, primes and seals. It doesn’t require stripping, sanding, or priming. I’ve used Beyond Paint for so many projects around my home, including my thrifted china cabinet, my bedroom dresser, and even outdoors when I painted a garden bench. I didn’t sand or prime any of those projects and the paint held up exceptionally well!
How Much Wear and Tear Do Your Kitchen Cabinets Get?
Cabinets take a beating when you have a large family and/or kids! The more people, the more action your cabinet doors will get. In that case, sanding, priming, and painting is recommended. The cabinets will get a lot of “traffic” (i.e. wear and tear). Extra care to prevent scrapes and scratches is beneficial. But if your family is small, or if it’s just you enjoying your kitchen, or you have no kids, then skipping sanding, and maybe even priming (we’re talk about priming more in a moment), while using a good quality paint (such as Beyond Paint), is a great idea. You’ll save time and money by being able to skip some steps.
TIP: For more information, read my blog post on when I think you should sand and prime before painting and when you can skip it).
Are You Using New Handles or Knobs?
If the knobs you’re using are not the same style, you might have to fill the old handle or knob holes with wood filler, sand smooth once the filler dries, and then drill new holes that correspond to the new hardware. It helps to know ahead of time which knobs or pulls you’ll be using. To save costs, consider re-using the same knobs or handles. Use spray paint to change the color, or try Rub n’ Buff colorful wax.
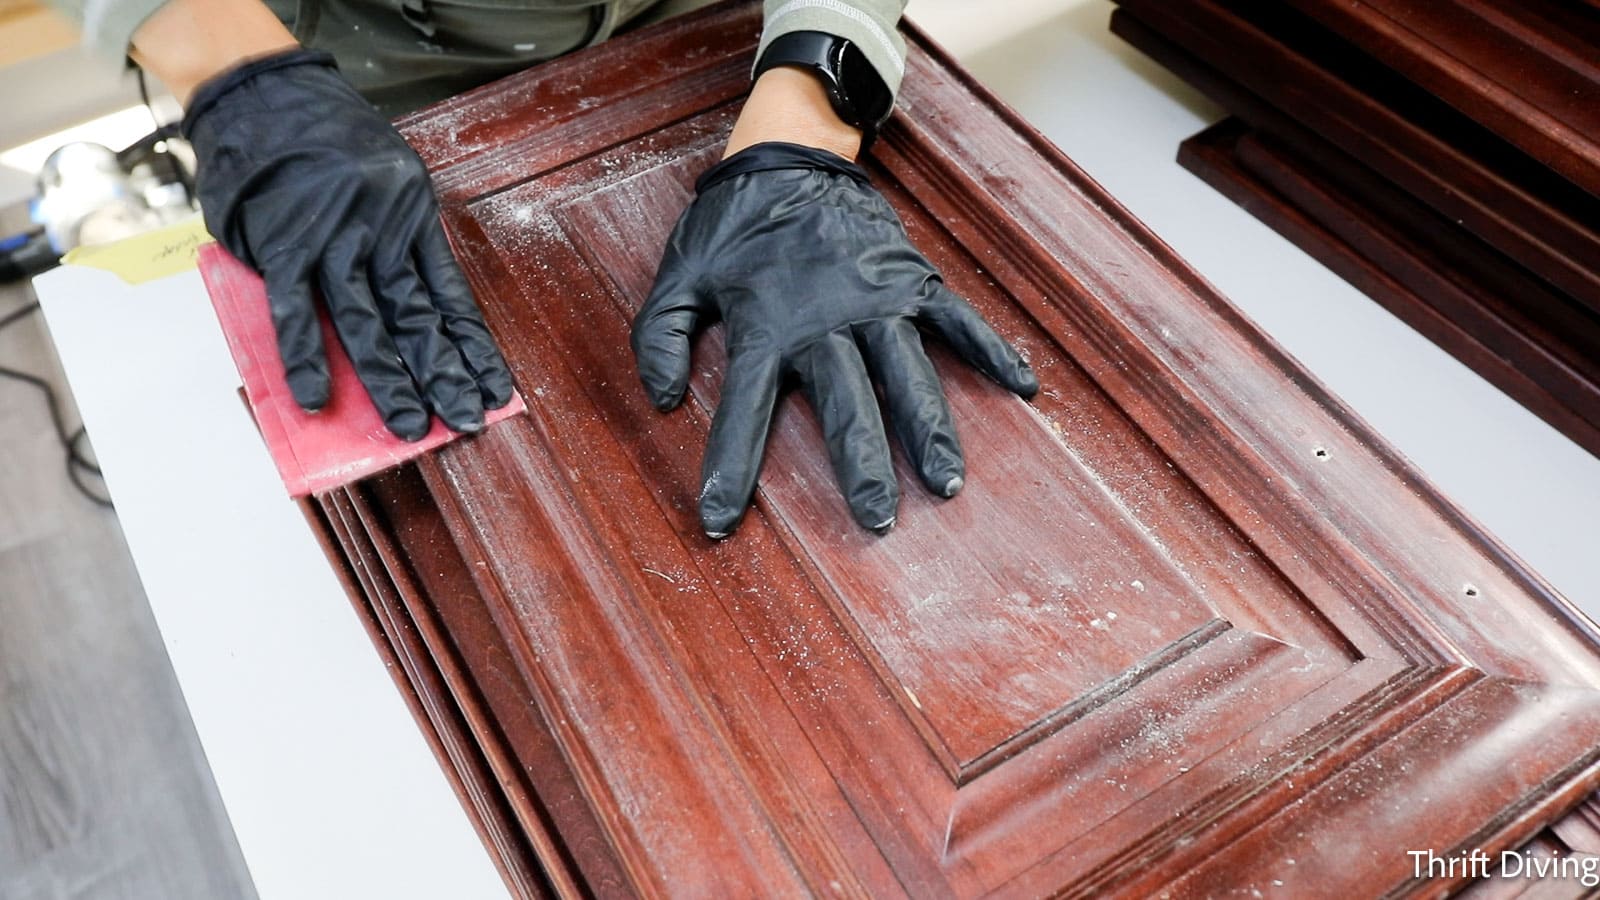
What Grit of Sandpaper to Use?
If you do need to sand, use 220-grit fine sandpaper. You just have to rough up the surface a bit for the primer and/or paint to adhere. (I forgot to put on a mask when I snapped this picture, but definitely remember to use a dust mask when sanding!)
Managing the Dust From Sanding Kitchen Cabinets
If you decide to sand your cabinets before painting, you’ll need to manage the dust. I had started sanding, but realized that the dust would be a problem. Removing all of the dishes and food in the cabinet was a pain in the neck. So I decided to skip sanding (and because I was using a great primer, I felt sanding wasn’t necessarily required). Here are some things to consider doing when sanding kitchen cabinets before painting:
- Remove all dishes and food from the cabinets.
- Place plastic over anything you’d like to protect from sanding dust.
- Cover vents or turn off the HVAC to prevent dust from entering and spreading through the system.
- Prevent the dust from floating outside the kitchen by taping plastic sheathing over doorways and openings into other rooms.
- Use a sander with a dust extractor and HEPA filter.
- Remember to use a dust mask (which I actually almost forgot to do!)
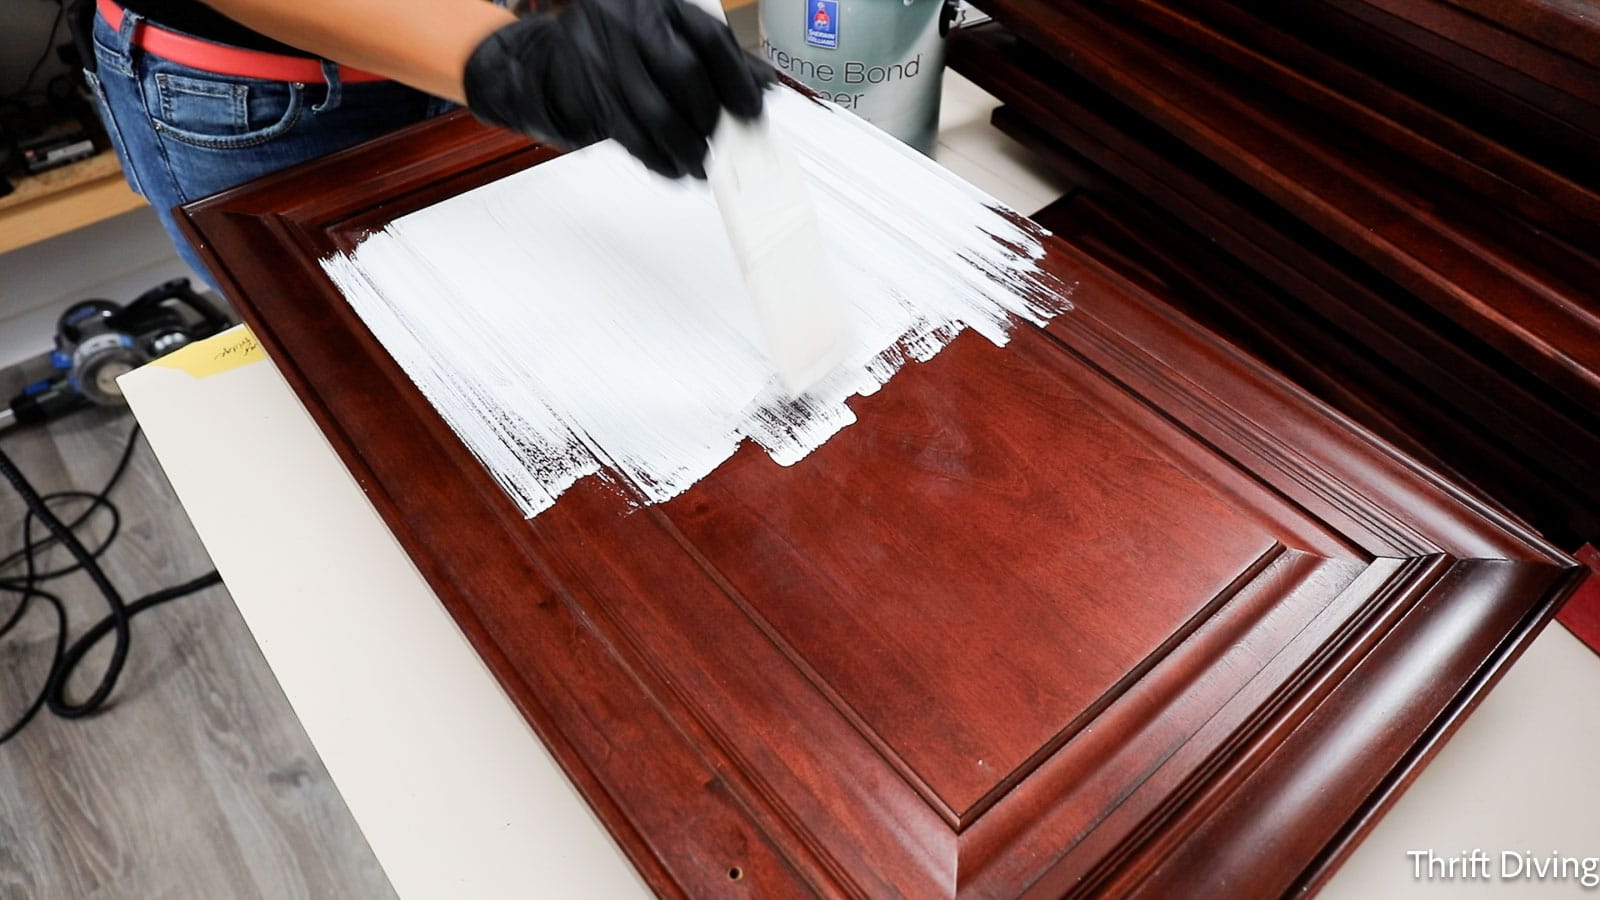
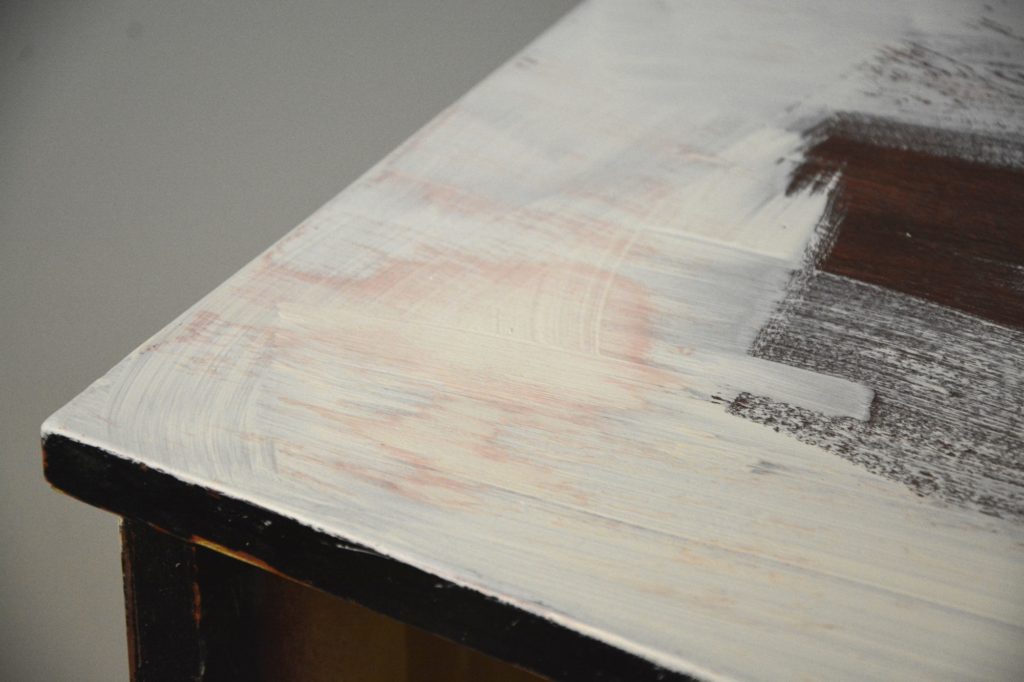
STEP 4: Prime, Prime, and Prime Again (If Your Cabinets are Dark Wood!)
I am sorry to be the one to tell you this. But if you are painting dark kitchen cabinets white, you will need to prime at least 2-3 times first. I know, I know! It’s frustrating to think that, because while you can paint without sanding or priming, dark wood requires more coats for better coverage. Going from dark wood to white is such a stark contract that it takes so many layers to block out the dark wood.
How Best to Apply Primer to Kitchen Cabinets?
In my experience, going from dark to white kitchen cabinets took 3 coats of primer. The reason why it took 3 coats is because when I applied the first coat with a 4″ roller with 1/4″ nap, the coat was very thin–so thin that the primer barely covered the dark wood. It caused me to have to add additional coats for coverage.
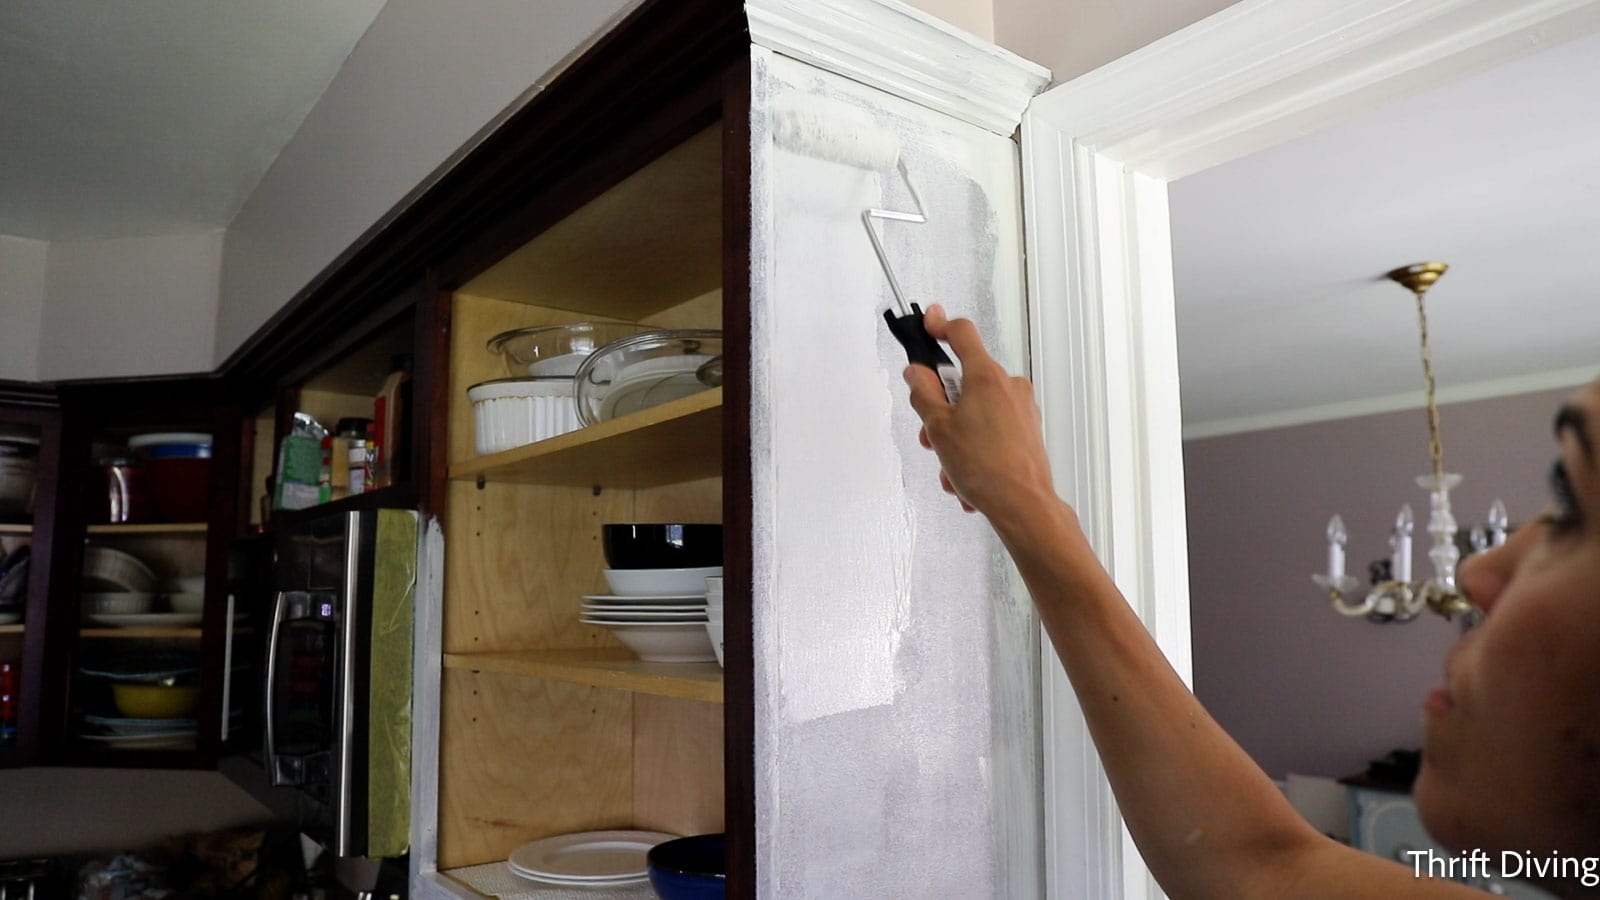
Therefore, for best results, use a paint brush for the first coat to provide slightly thicker coverage. You may only need a second coat, which can then be applied with a synthetic paint brush or with the 4″ shorter roller with 1/4″ nap. Apply the prime in the direction of the wood grain, being sure not to apply too thick of a coat, but thick enough for coverage.
When using only a roller, you can see below that the dark wood shows through much more, as seen on the frame of the cabinets.
Do Your Cabinets Have Tannins? If So, You MUST Prime First
Have you ever tried priming or painting wood and the color of the wood keeps soaking through, staining the primer or paint? If so, then the wood you’re painting has tannins.
Tannins, according to Sherwin Williams, are naturally occurring acid chemicals in tree sap and are most common in redwood, cedar, and mahogany, (like when I painted this mahogany mid-century modern dresser that kept bleeding through). Not matter how much furniture paint I put on, it kept bleeding through pink.
When you use water-based primers and paints, the tannins will keep bleeding through, no matter how many coats you use. You could slather on 20 coats, and the tannins would still bleed through your primer or paint.
The solution is to use a primer that has a stain blocker, like KILZ Oil-based Spray Primer. The KILZ oil-based primer in the can will work, as well.
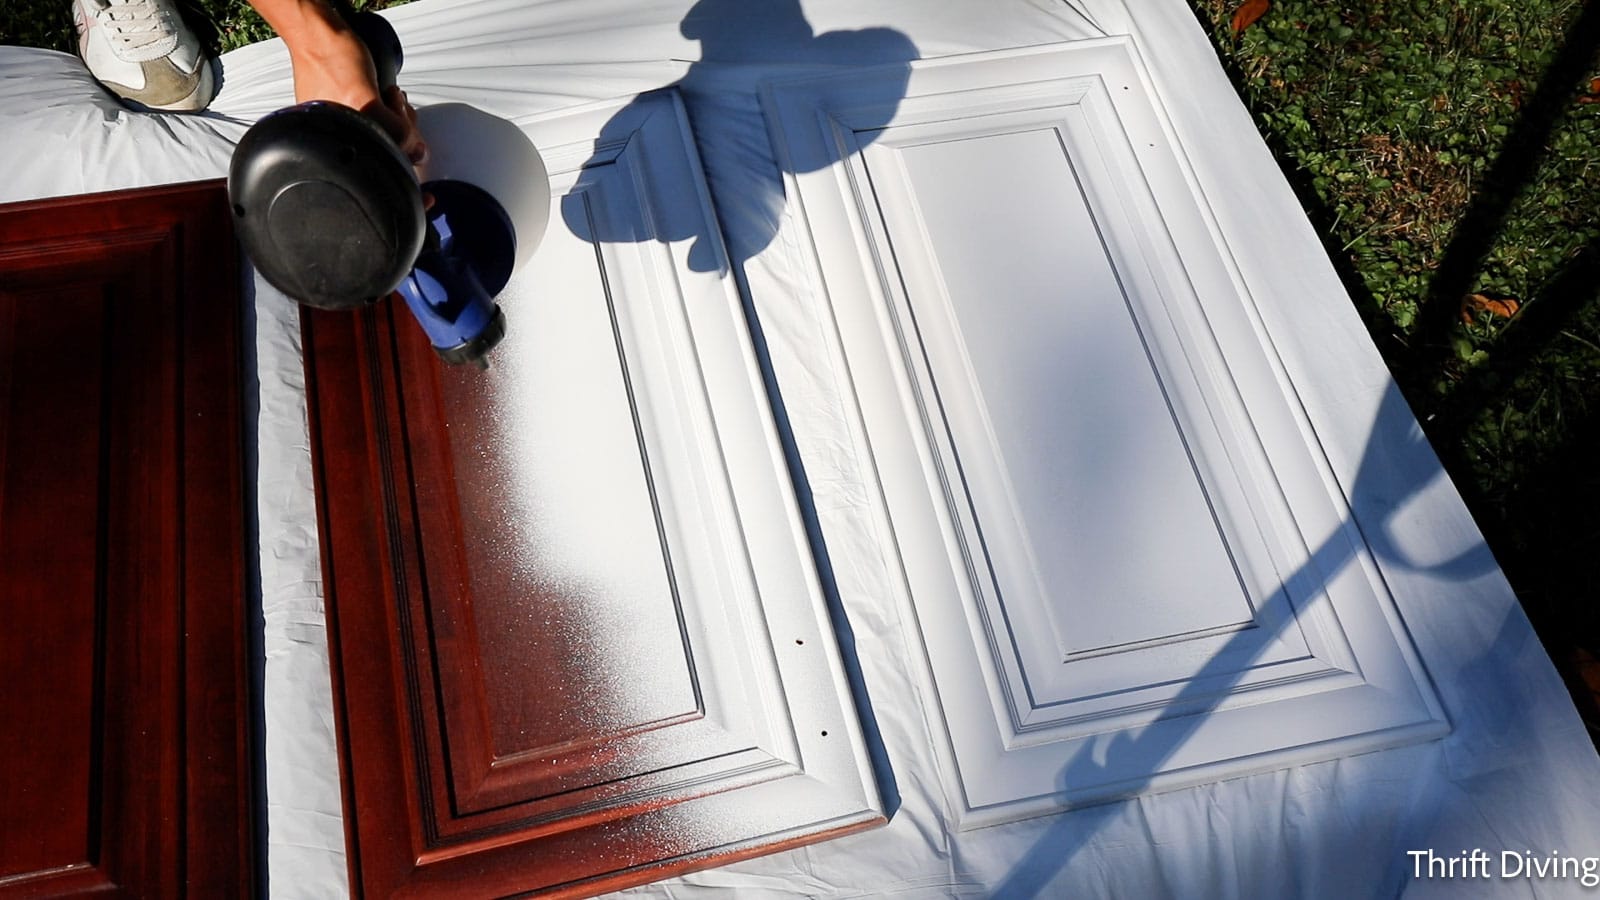
Can You Use a Paint Sprayer to Prime Kitchen Cabinets?
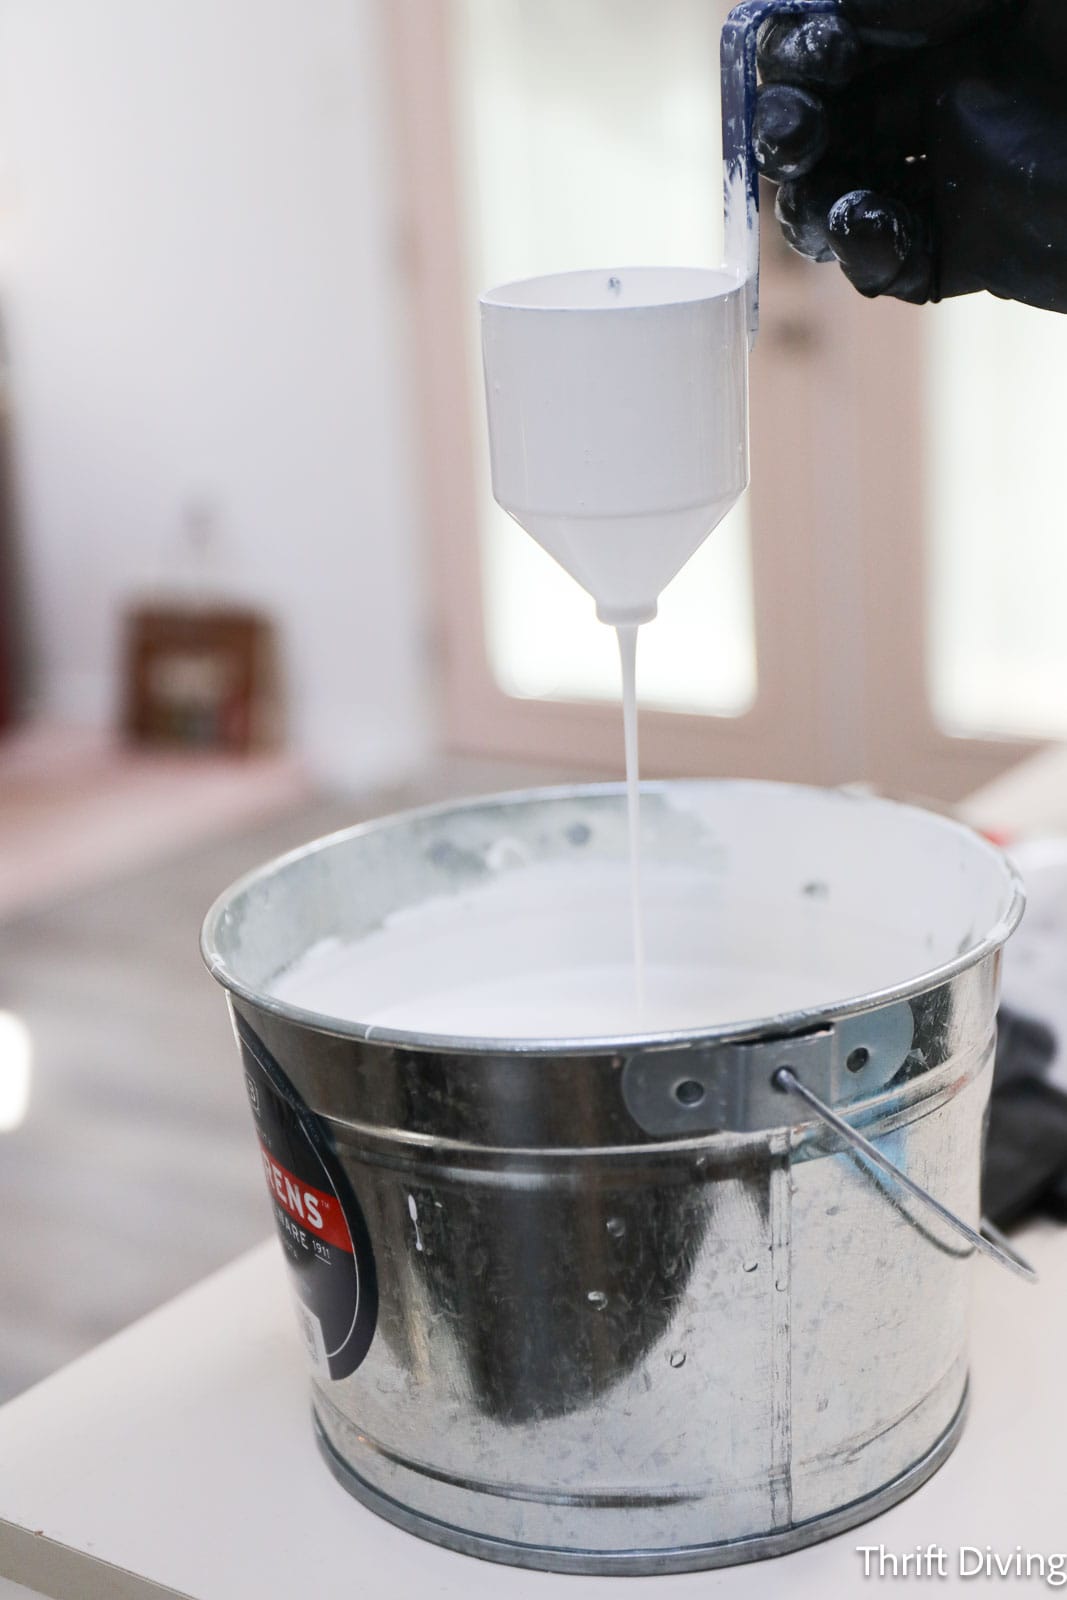
Yes, you can use a paint sprayer for priming kitchen cabinets! In fact, the benefit of doing so is that it goes way faster. When I saw the whole stack of 26 cabinets waiting for me, the thought of having to prime them with a paint brush and a roller felt like such a chore. Especially considering that I would have to add 2-3 coats. Watch this video on how to use a paint sprayer. The main thing to keep in mind is that you have to add water to the primer in order for the viscosity of the pain to be thin enough to flow through the cup that comes with the paint sprayer.
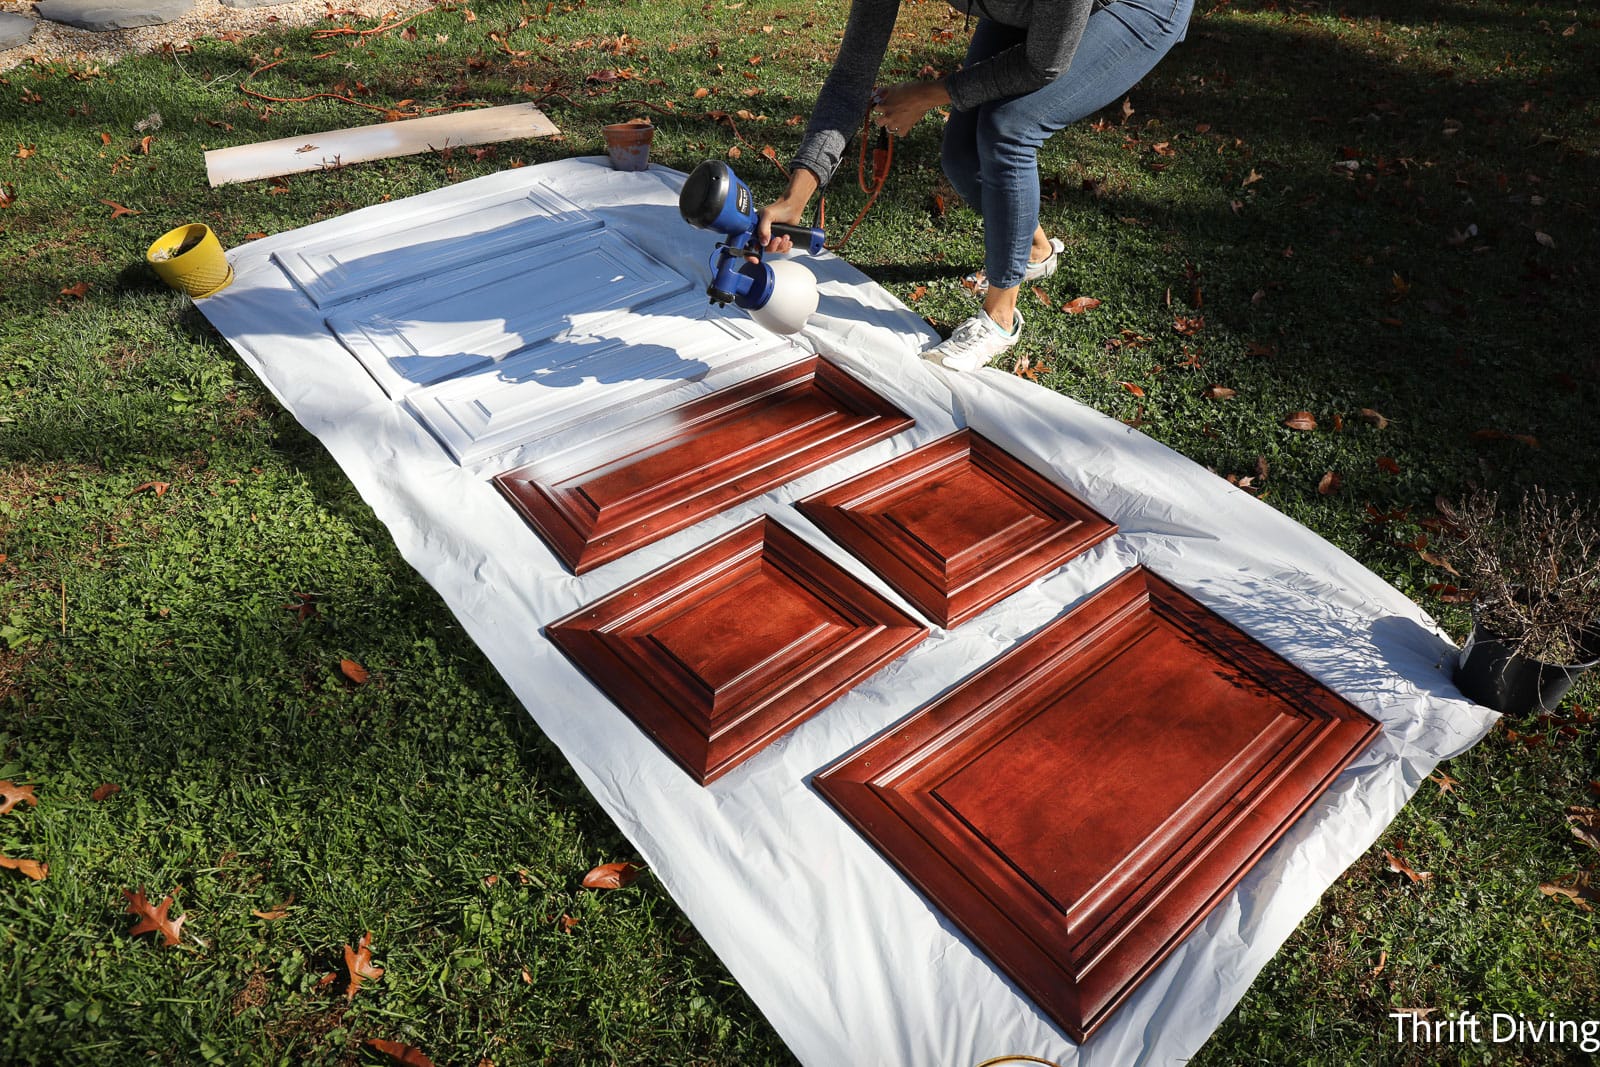

By the way, paint sprayers are great to keep on hand for big jobs like priming kitchen cabinets and painting large pieces of furniture (or furniture with lots of uneven edges, or has many surface areas, like chair legs).
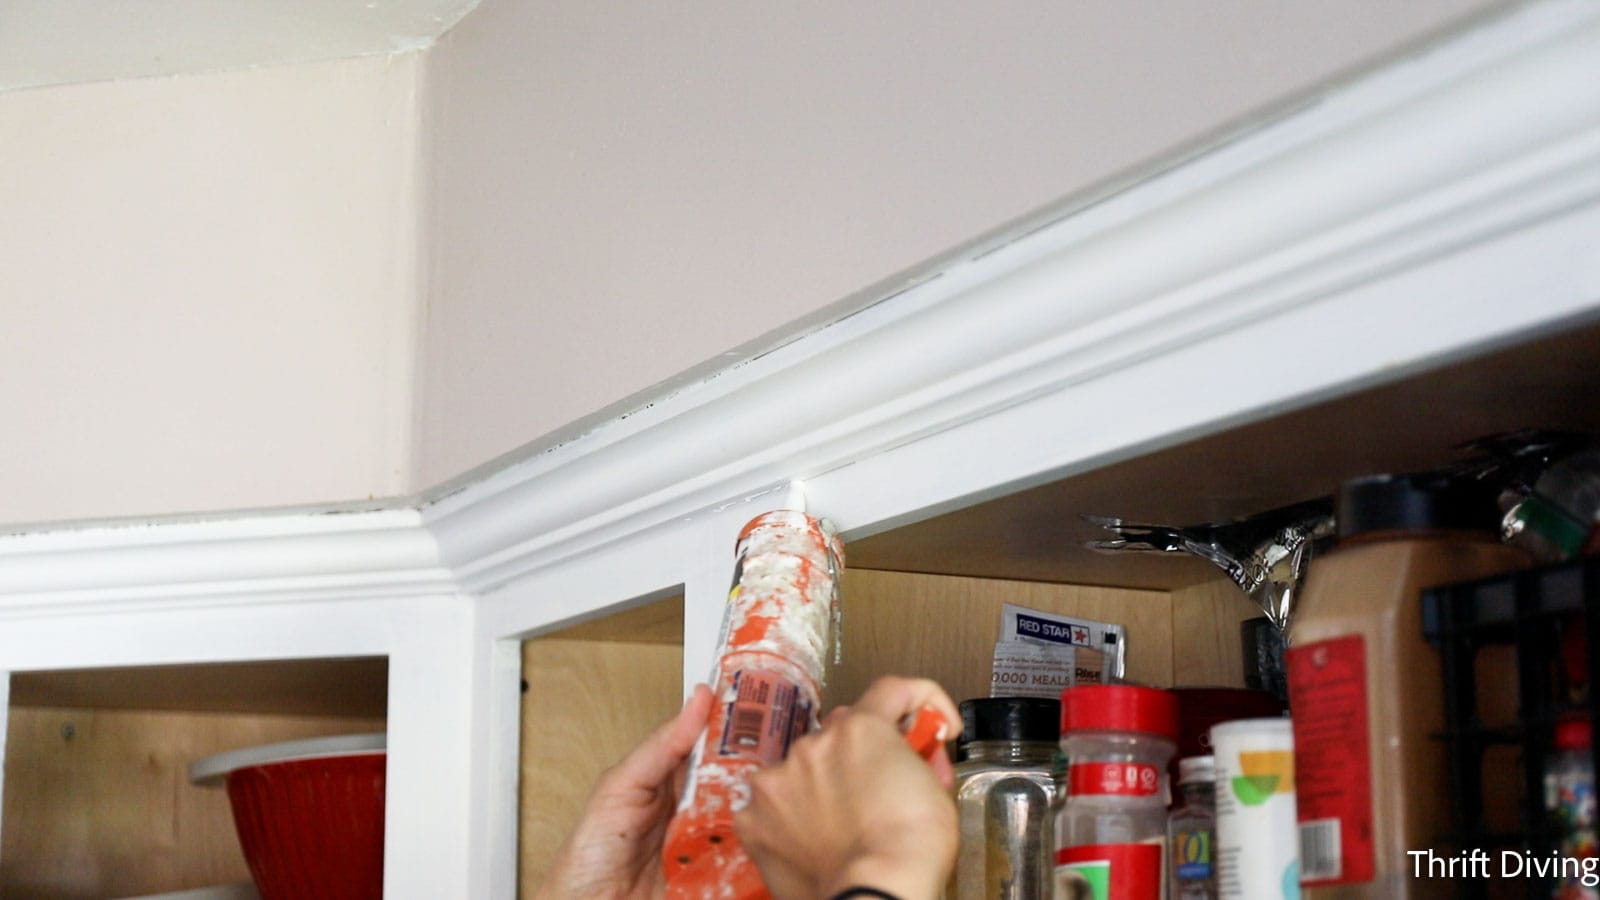
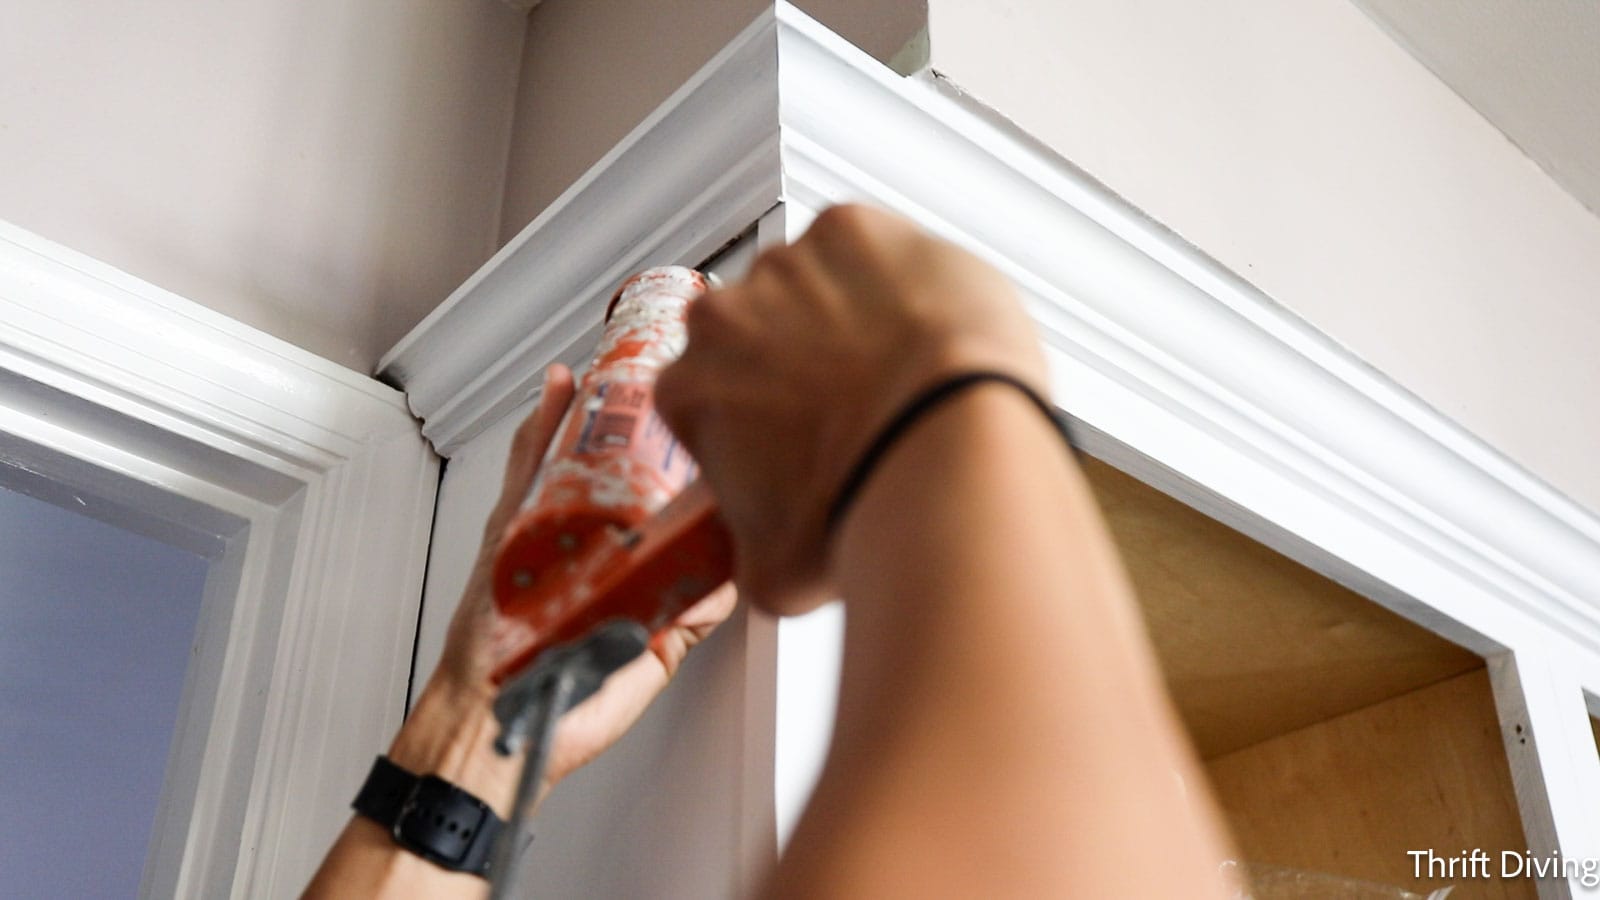
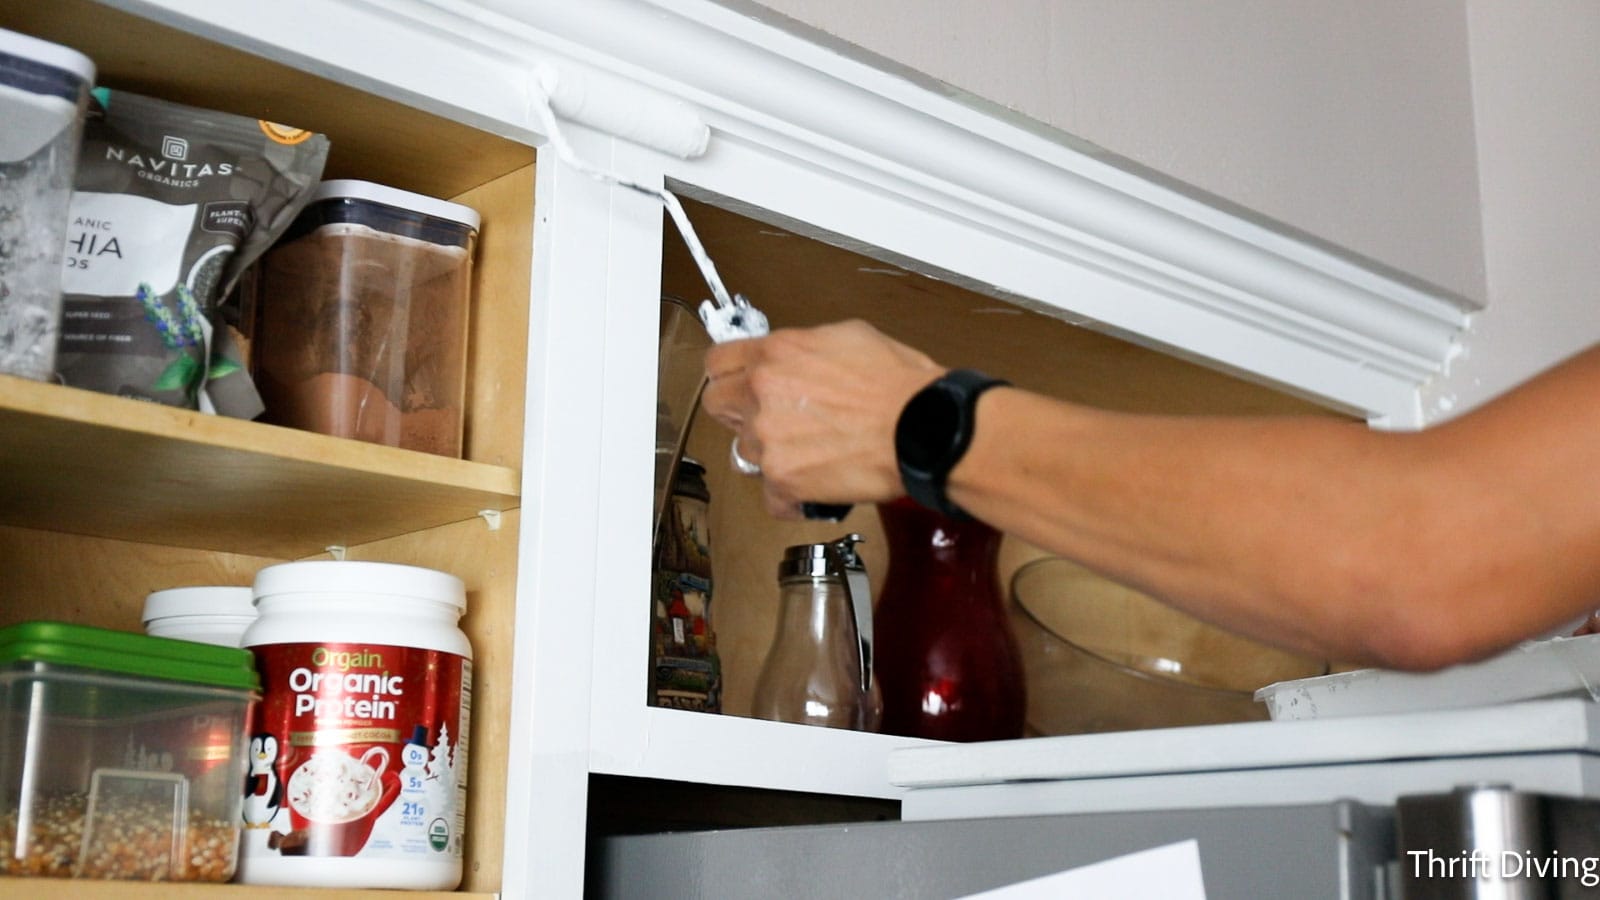
STEP 5: Fill Any Cracks or Gaps with Caulk
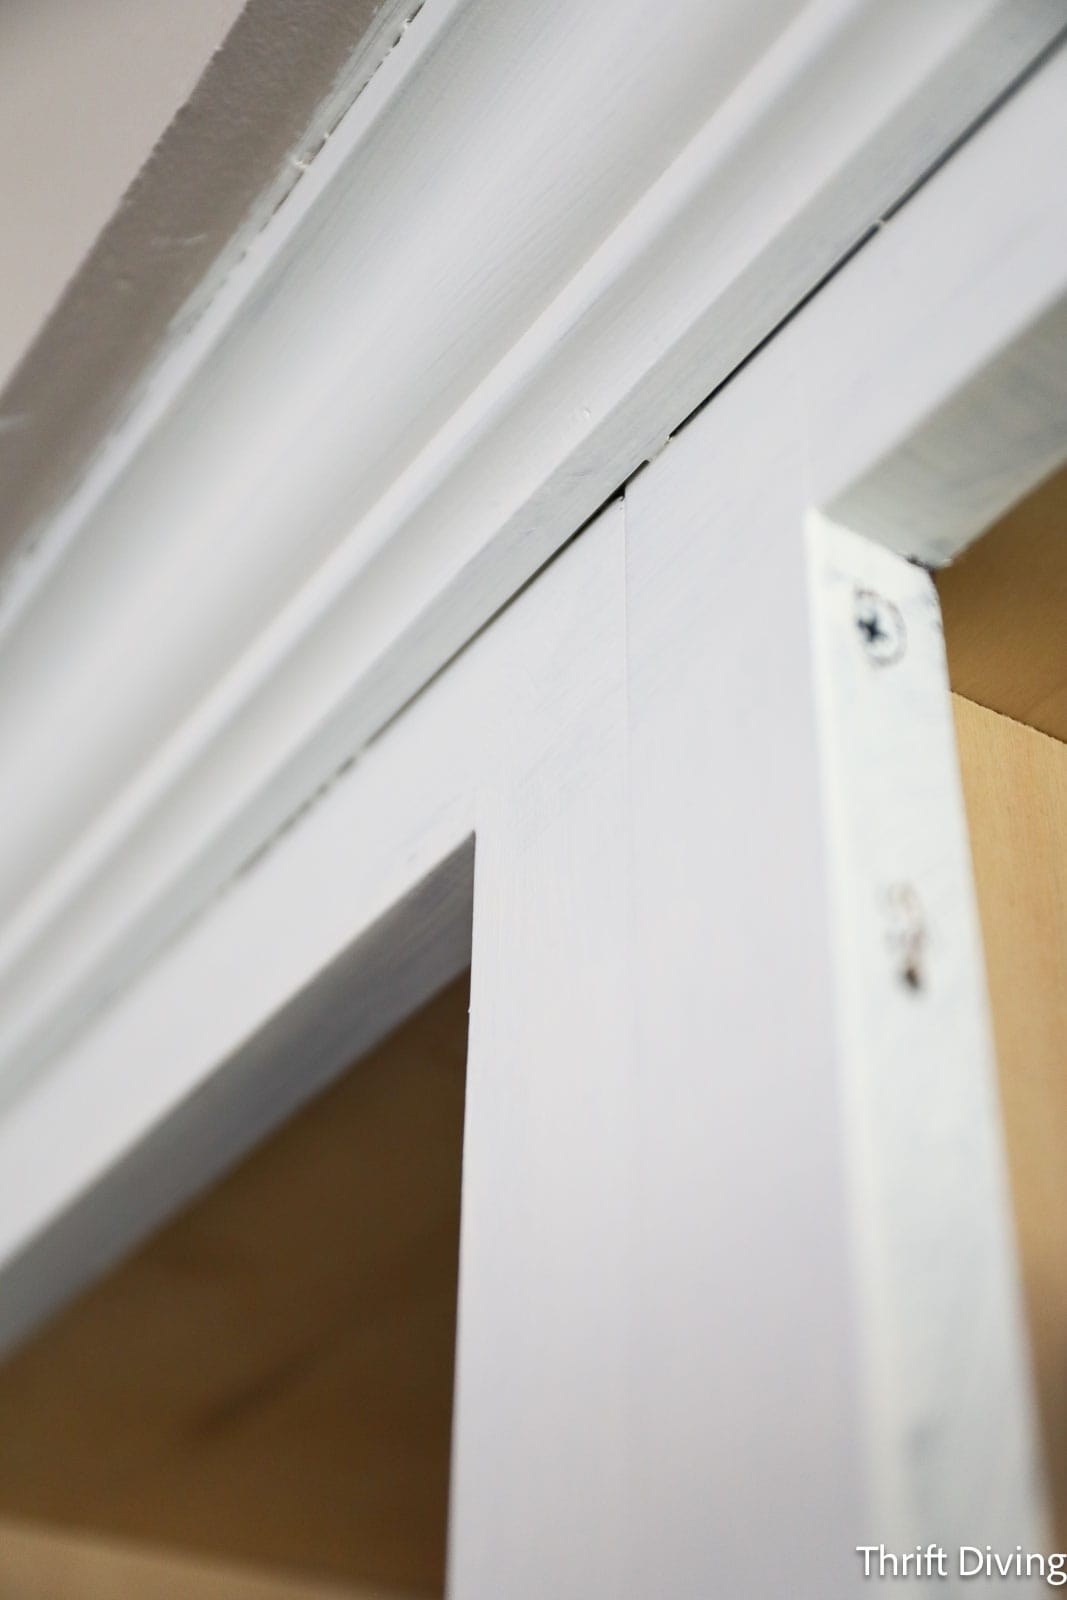
When painting kitchen cabinets white, there’s something you don’t realize prior to applying primer: the number of cracks and gaps in your cabinet boxes, trim, and cabinet doors! They’re not noticeable when they’re wood. But when applying primer, you’ll see them. Now is the best time to use a little bit of caulking designed for molding and trim to seal up those distracting gaps.
You can see how there were some deep gaps between my cabinet boxes and molding around the top. There were also small gaps on the cabinet door mitered edges. Those will have to be filled, too.
Only cut the tip of the caulk tube at a small angle so just a little bit is squeezed out at a time, while using a caulk gun. Apply the caulk along the gap, then use a wet finger to glide over the caulk, smoothing it out–just enough caulk to cover the gap without creating the mess.
The molding and trim caulk is paintable in about 30 minutes and can be covered up with the Beyond Paint Bright White.

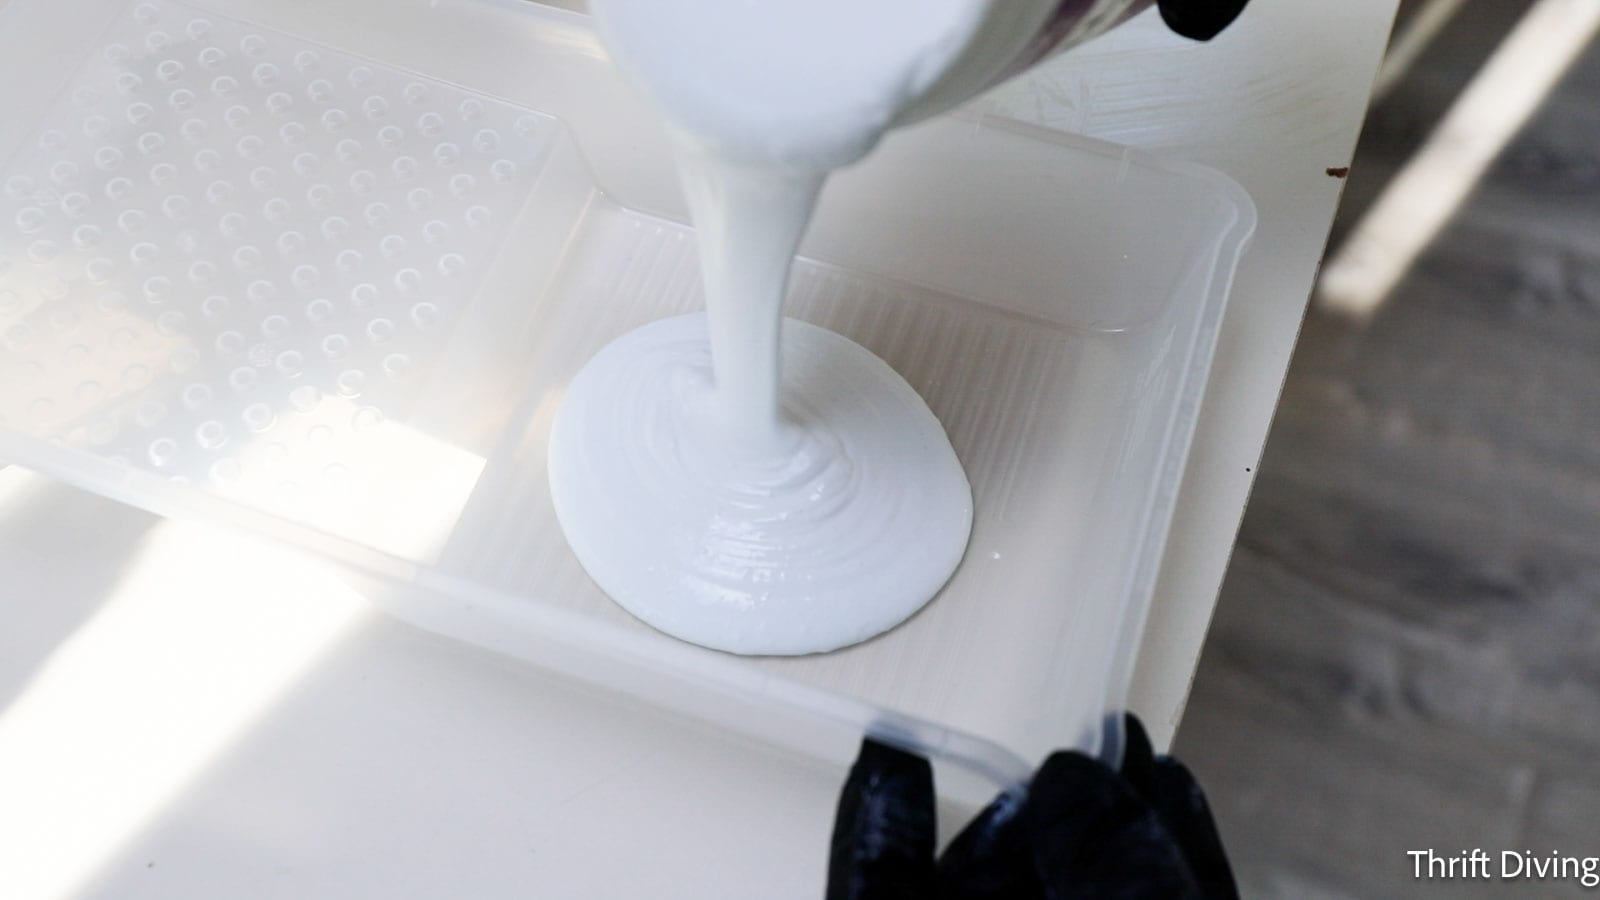
STEP 6: Add 2 Coats of Beyond Paint (Bright White) Cabinet Paint
As mentioned above, I’ve used Beyond Paint in many projects around my home (both indoors and outdoors). In fact, it’s the paint that I always recommend people to use when attempting their first painting project, because they can’t mess it up:
- It spreads easily so it’s got great coverage.
- Rollers are recommended for this paint because a roller eliminates brush strokes (rollers are super easy to use).
- It has a built-in sealer which provides shine and protection. (Chalk-based paints require a topcoat of wax, which needs to be reapplied every 6 months).
I knew that when I was ready to tackle my kitchen cabinets, Beyond Paint was the easiest option, along with the sheen and protection of their multi-purpose sealer for additional protection.
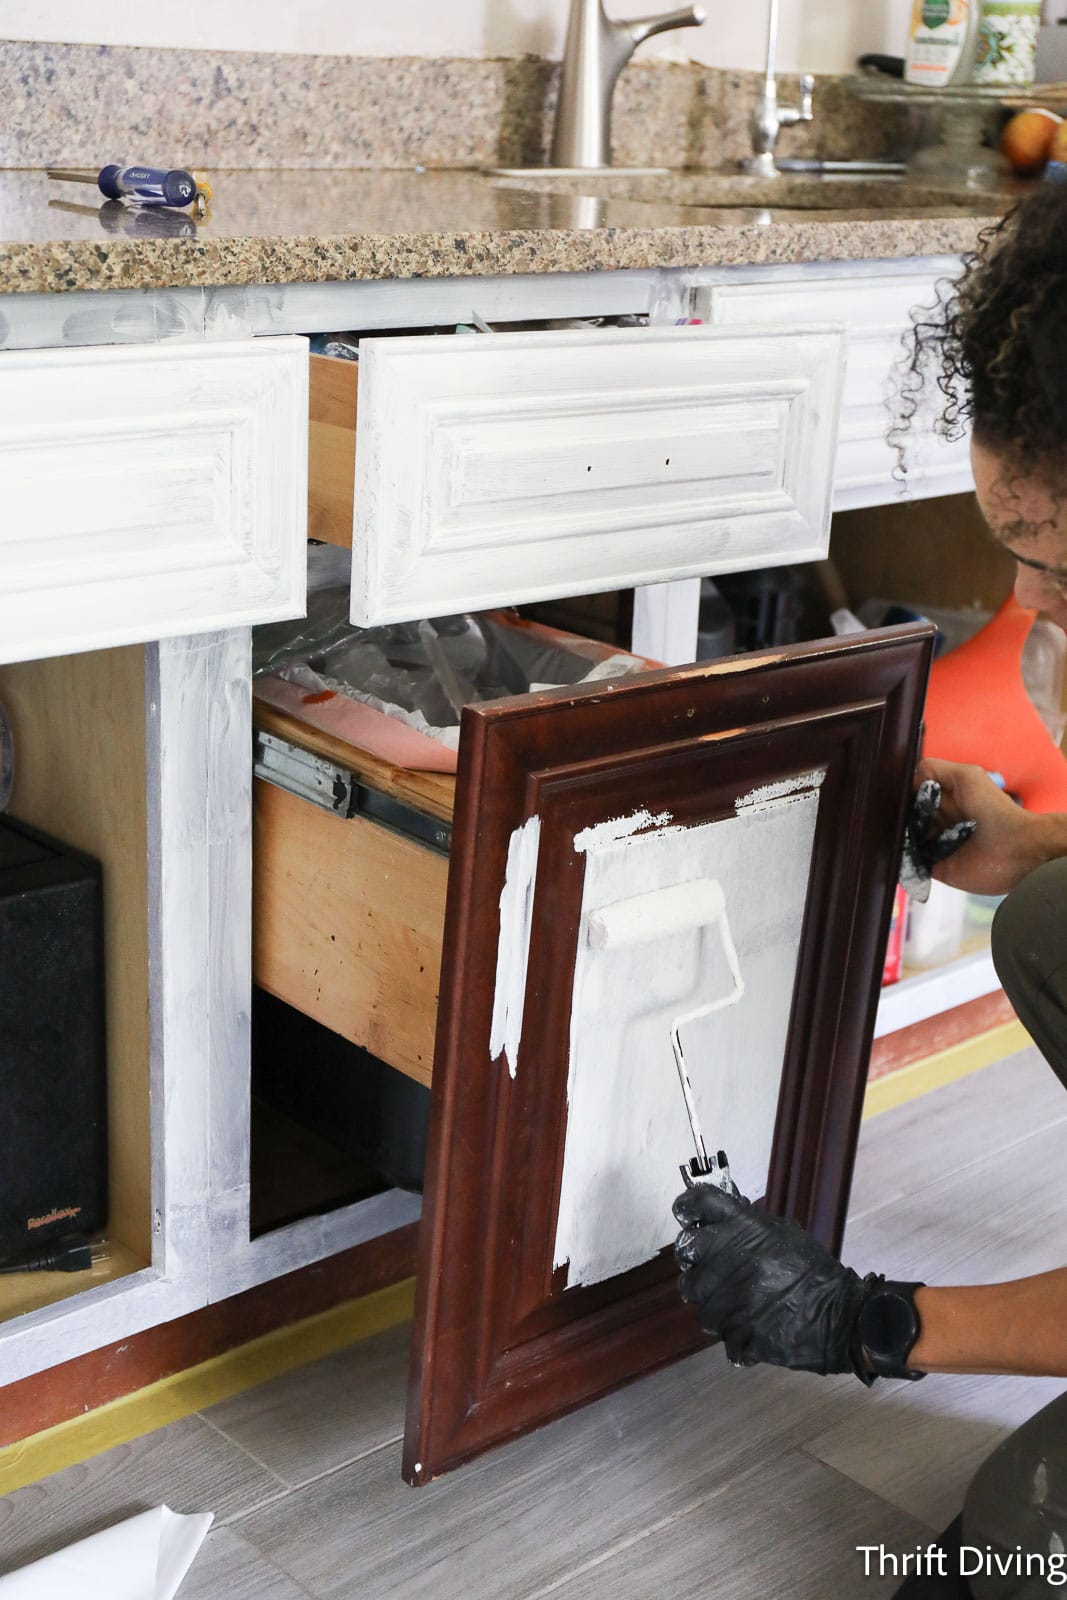
How to Apply Beyond Paint to Cabinet Doors (That Aren’t Flat!)
If you’ve got Shaker-style cabinet doors, which are flat with a raised flat panel, they’re super easy to paint! (The backside of my cabinet doors resemble Shaker-style). But the front have peaks and valleys, which makes it more challenging to get in there with a roller. Here’s how I approached applying two coats of paint to cleaned and primed cabinet doors:
TIP: Lie the cabinet door face down first because you’ll want to do two coats to the back-side first, then flip over when dry and do two coats of paint to the front.
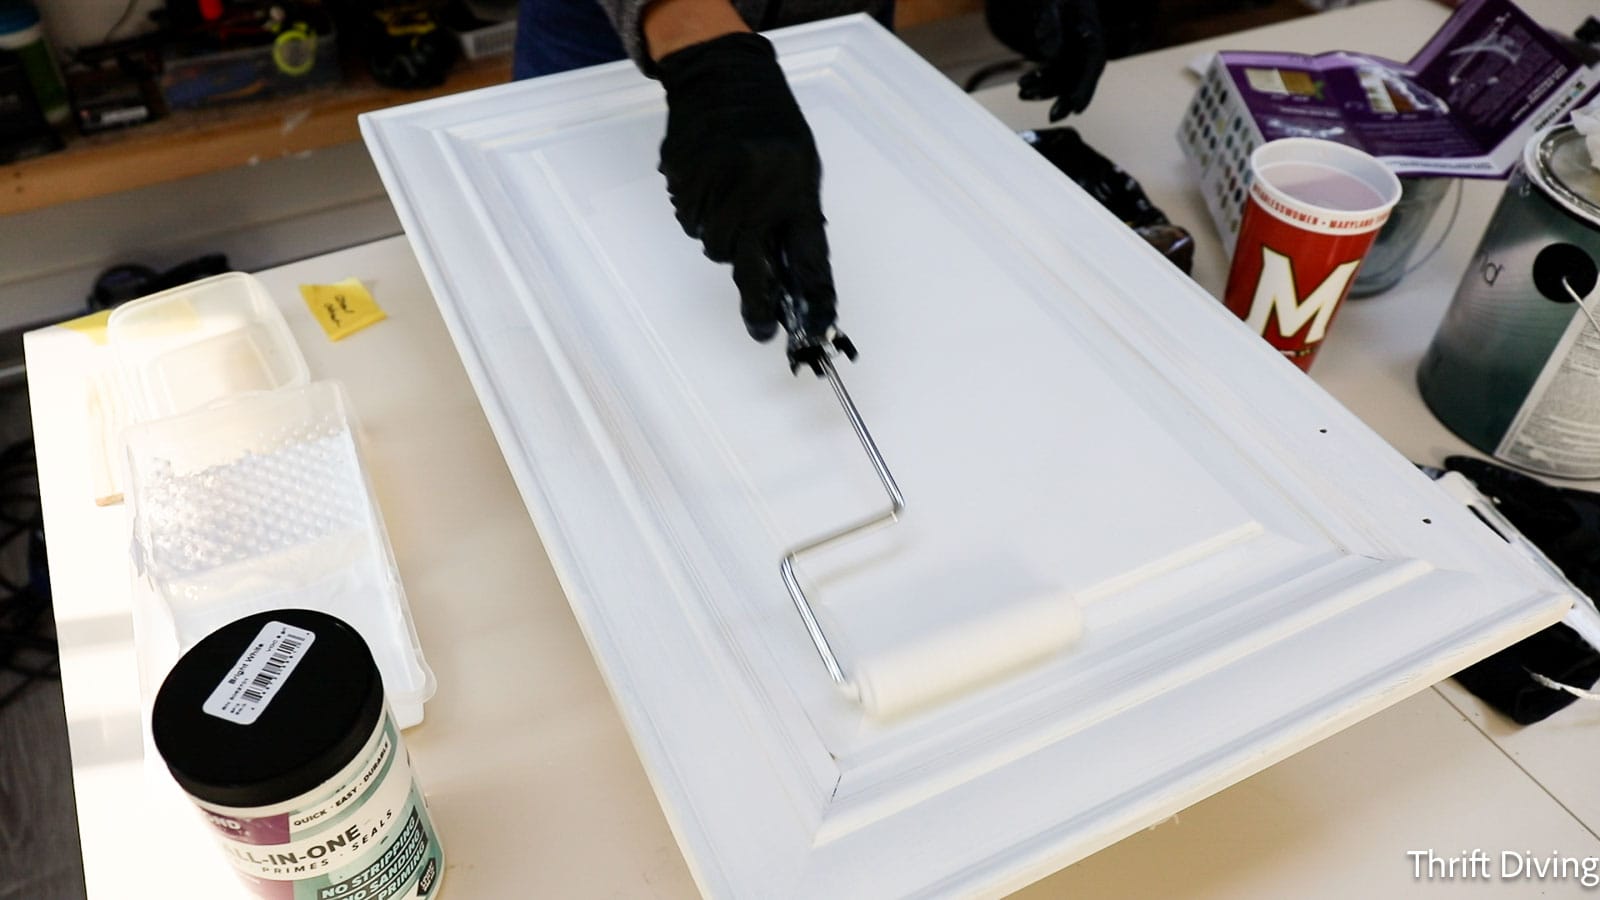
STEP 1: Use a synthetic paint brush to liberally apply a coat of paint to the entire cabinet door. Mush the paint into any cracks and crevices. Smooth out any excess paint with the paint brush. Make sure all surfaces have been covered, including the edges of the cabinet door.
STEP 2: Use a 4″ roller with 1/4″ nap to smooth out the texture. Start with the raised flat center panel, then roll the roller over the peaks and valleys, creating a uniform texture of the cabinet door paint. Carefully run the roller over the top and bottom edges of the door.
STEP 3: Make sure there are no cracks or gaps that haven’t already been caulked (see Step 5 above). If there are, let this coat of paint thoroughly dry 2-4 hours, then use the molding and trim caulk to fill any noticeable cracks or gaps in your cabinet door.
STEP 4: Apply a second coat at least 2 hours later (I waited until the next day, just to give the paint extra drying time).
The cabinet frames should be painted the same way: start with a brush for coverage, then smooth it out with a roller.
How Long Until Beyond Paint Fully Cures?
You’ll need 7 days for the paint to fully bond, and it could take up to 30 days for the paint to fully cure. Most people aren’t going to leave their cabinet doors sitting in a spare room (or the dining room!) to fully cure. 🙂 You’ll see below that I did hang them almost as soon as I was done then, while taking extra precaution.
STEP 7: Roll on 1-2 Coats of Sealer For Durability
Yes, painted kitchen cabinets are worth the effort. But only if they’re protected so that they can be durable and won’t chip over time. I’m using Beyond Paint’s Multi-Purpose Sealer (which can be used for interior projects and exterior projects for weatherproofing). It’s clear and watery and goes on cloudy, but dries clear, with a bit of sheen built in.
I had to let Bright White cabinet door paint dry for at least 24 hours before using the sealer, too.

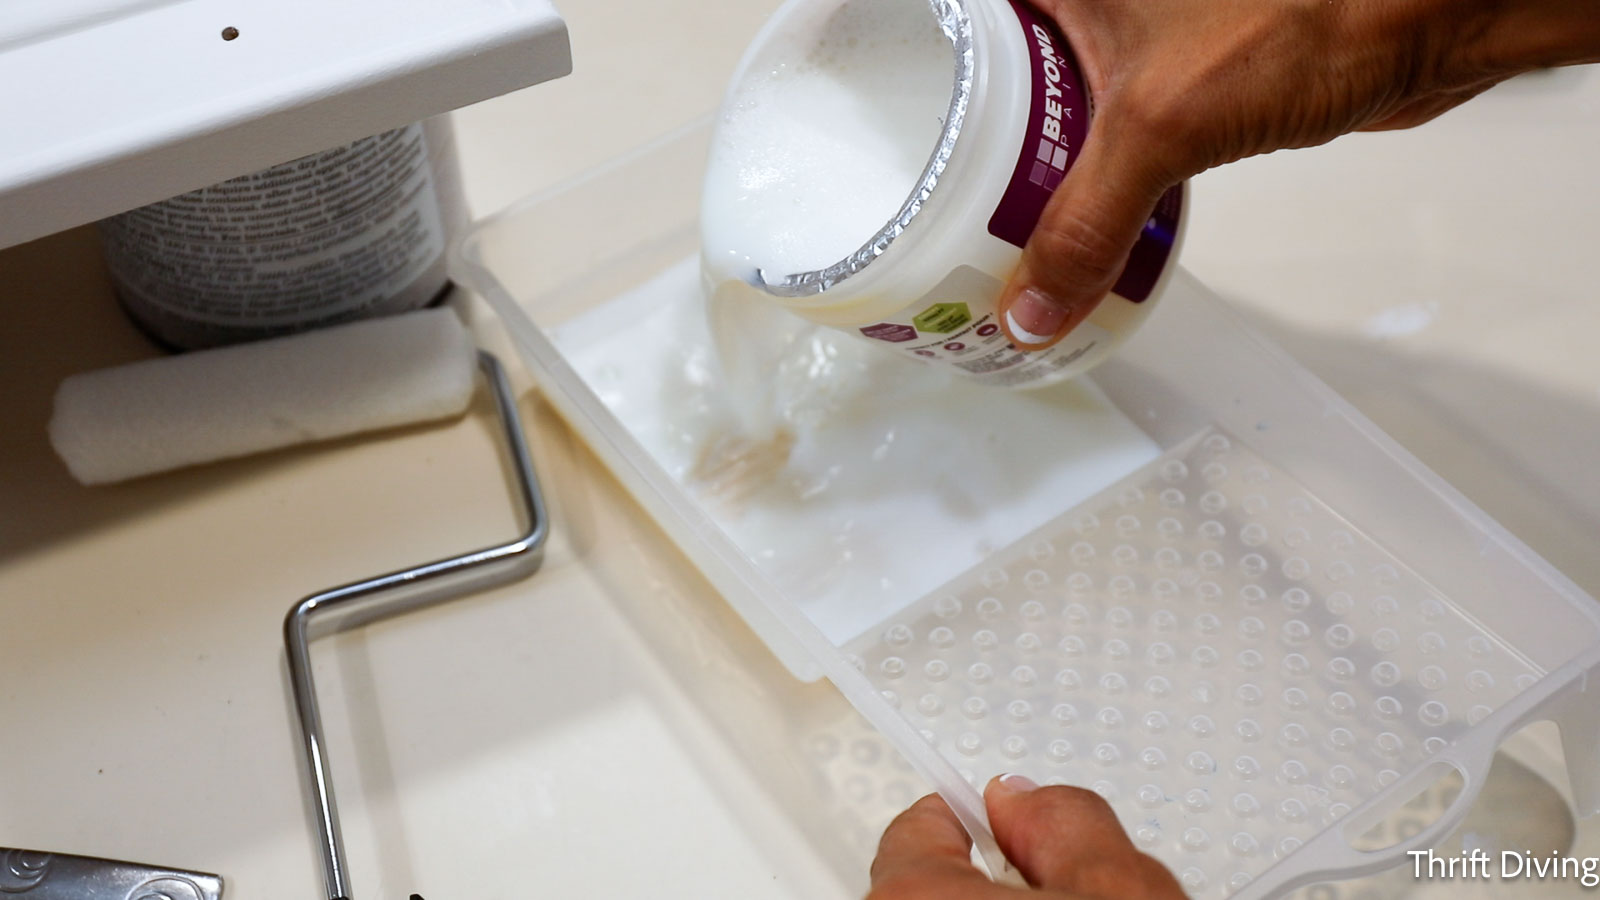
How to Apply the Sealer
I found that the best way to apply the sealer to kitchen cabinets is to use a synthetic paint brush wiped over the cabinet boxes and doors, and then using a 4″ roller to smooth out the sealer (it’s self-leveling, by the way, so that you’ll always get an even finish). Beyond Paint’s instructions recommend a 5/8″ roller, but the 1/4″ roller I used worked fine.
You need to apply sealer to the fronts and backs (and all the sides) of the cabinet door. I worked in batches: I started sealing the back of the cabinet doors, allowed that to fully dry, then turned them over and did the fronts.
Just make sure that you have ample lighting when applying the sealer so that you can see if you miss any spots. If you miss a spot, it’s easy to touch up your kitchen cabinets because touch-ups blend in nicely.
I only did one coat, but for two coats, wait 2-4 hours for the sealer to dry and apply a second coat.
TIP: The multi-purpose sealer will go on milky, but but dries clear.
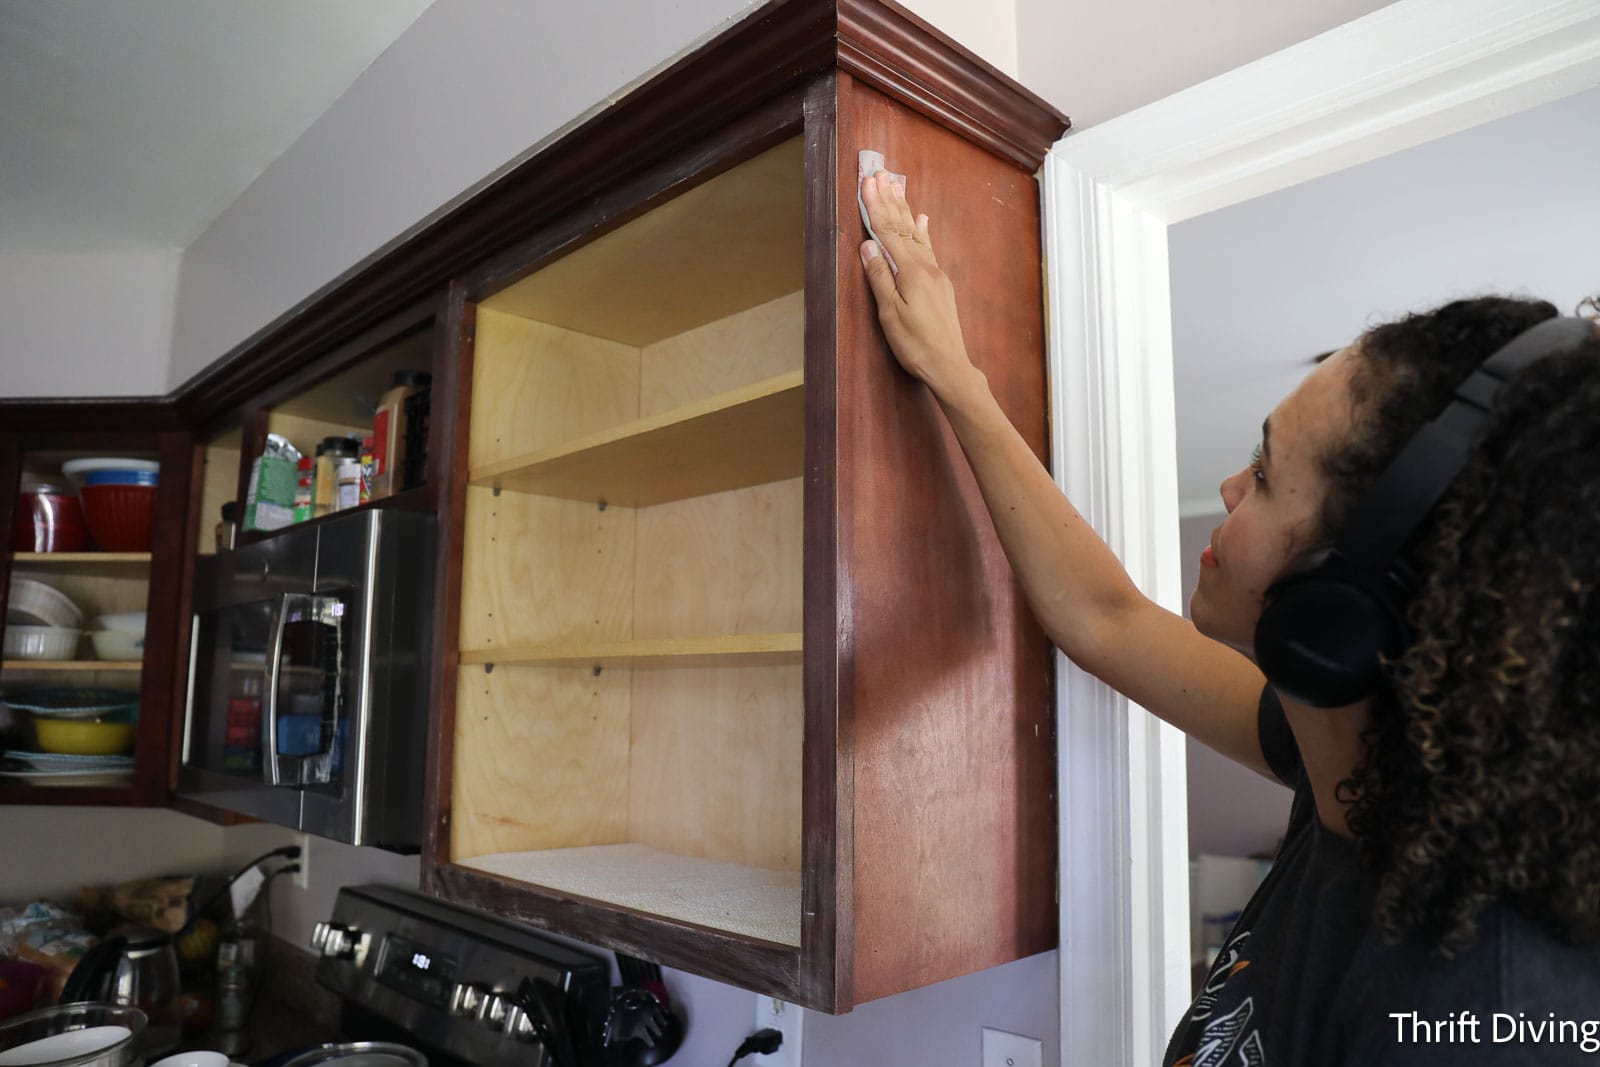
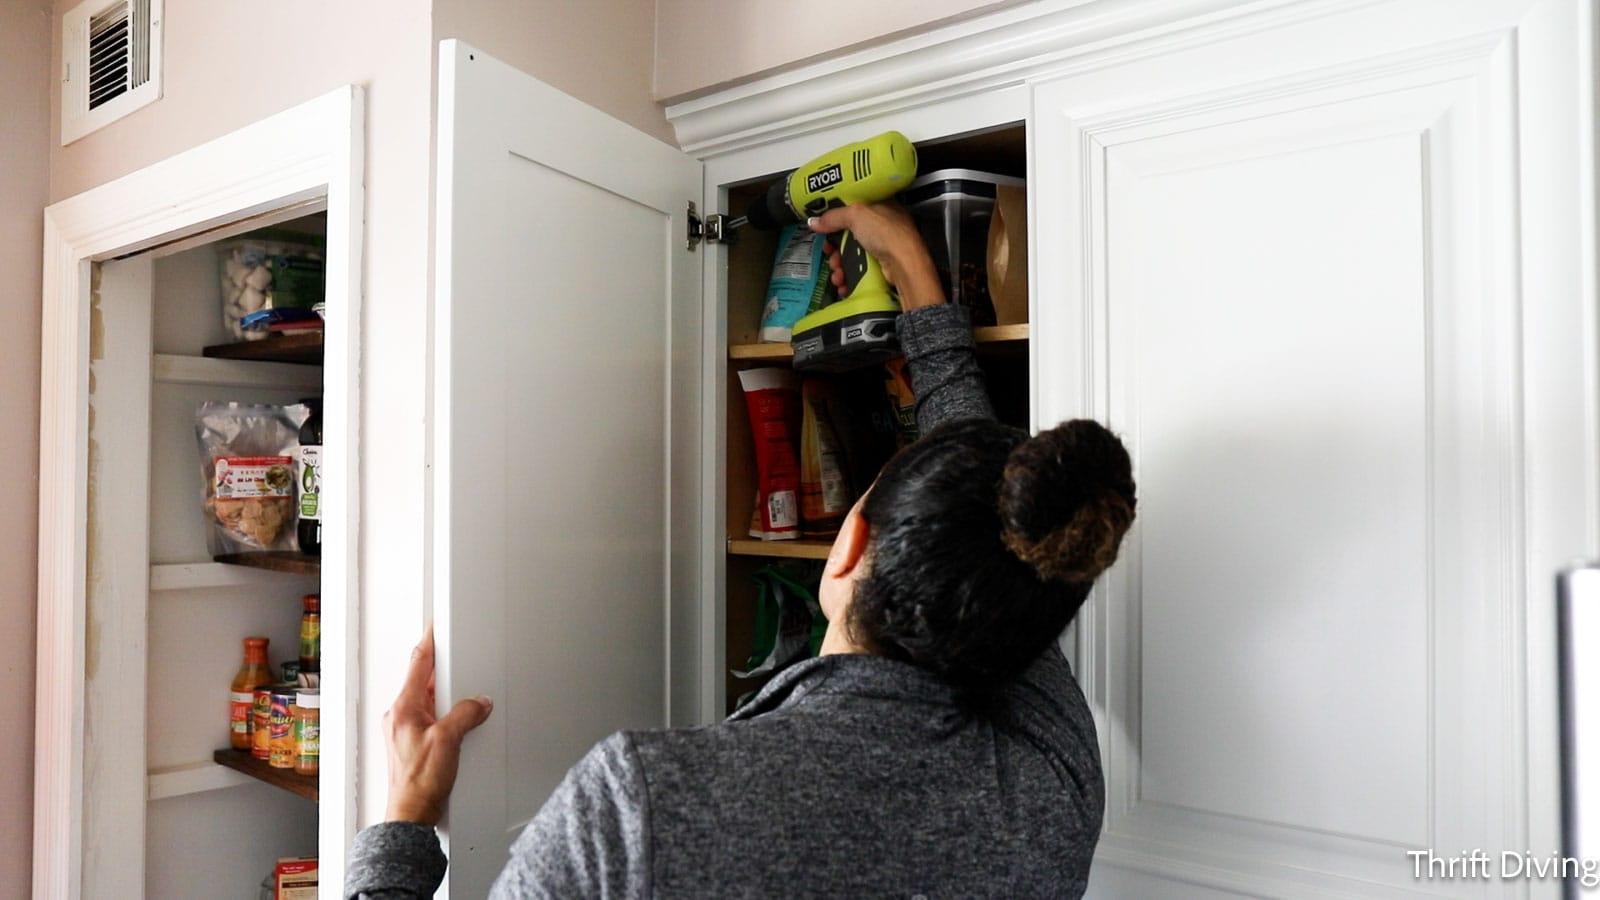
STEP 8: Re-attached Knobs (And Clean Up the Old Hardware)
You might be using new knobs or pulls, but the hinges will definitely be reused. Clean your hinges well before reattaching them back onto your painted white cabinets. Nothing says “sloppy” like beautiful fresh white painted cabinets, yet the hinges are still full of grease and gunk! 🙂
(By the way, see how much nicer the paint finish looks since hinges were removed and re-installed prior to painting?!).

STEP 9: Re-Hang Your Kitchen Cabinets
I made the mistake of forgetting which cabinet doors go with which cabinet boxes! But it make not really matter. I lost track of which cabinet door goes where. So when I re-hung the cabinets, I had to make adjustments to the hardware so that the cabinet doors were properly aligned. You’ll know your cabinet doors need the hardware adjusted if:
- Cabinet doors bang together when closed.
- There are uneven gaps between closed doors.
- Doors look crooked, unlevel when closed.
- Doors are pinching against other cabinet doors or cabinet boxes when opened and closed.
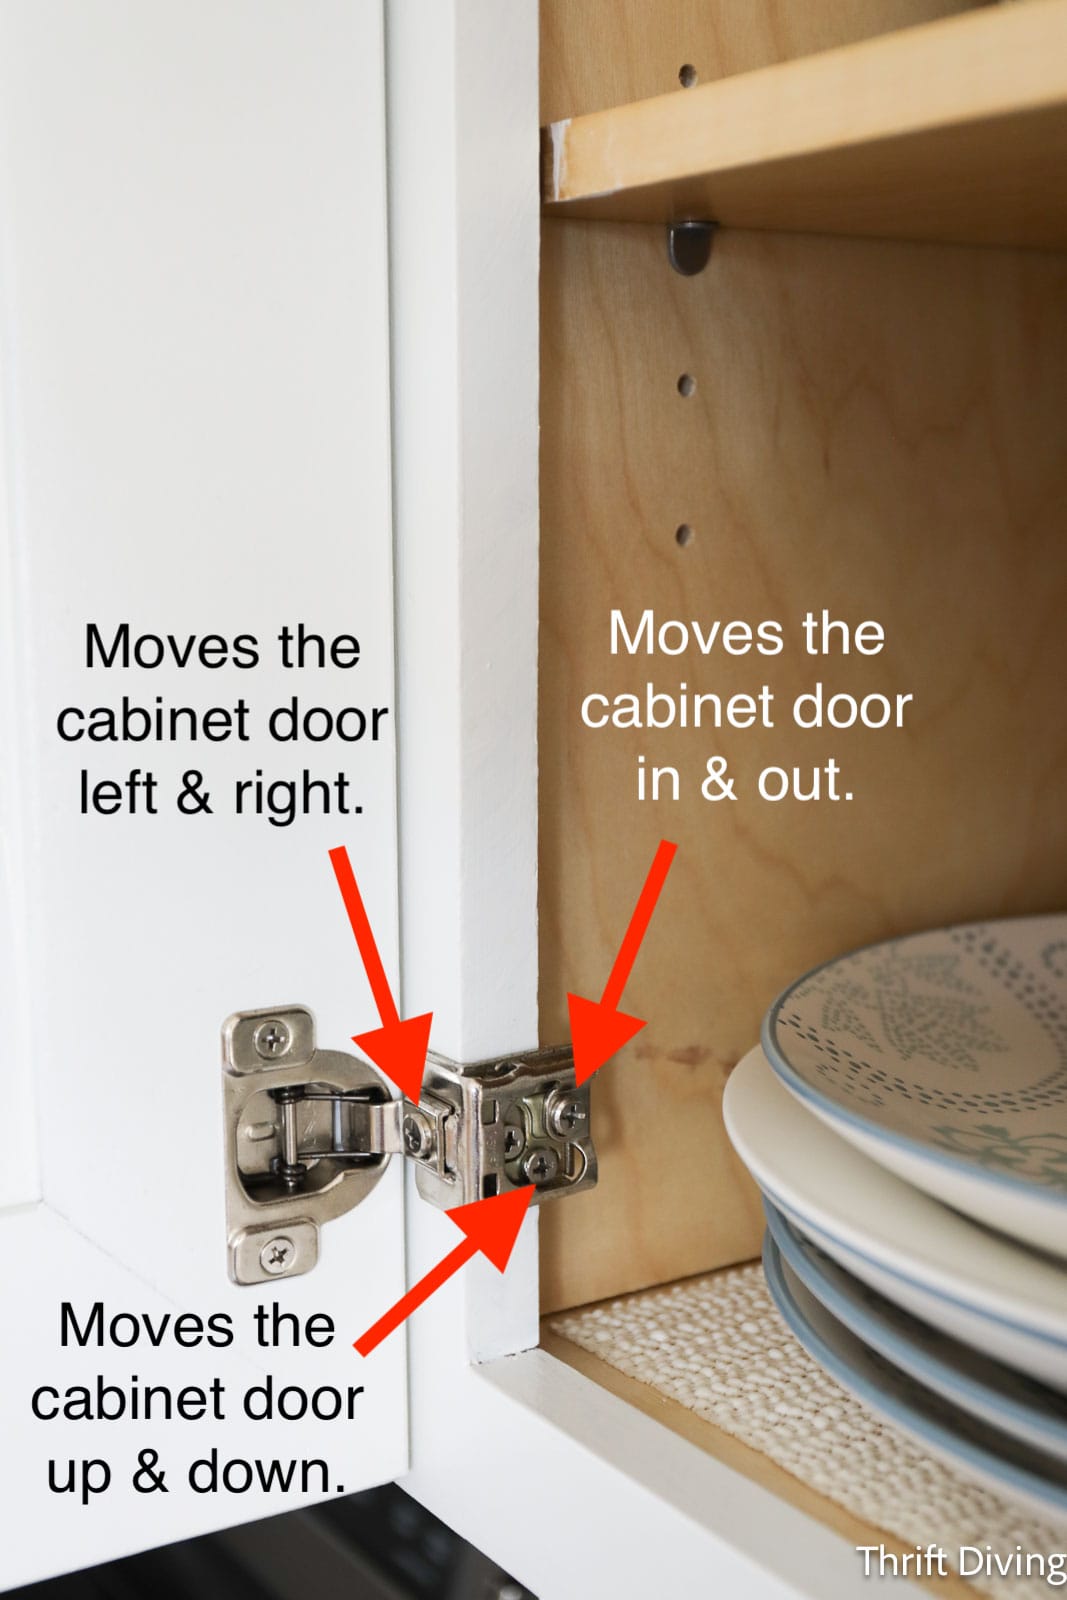
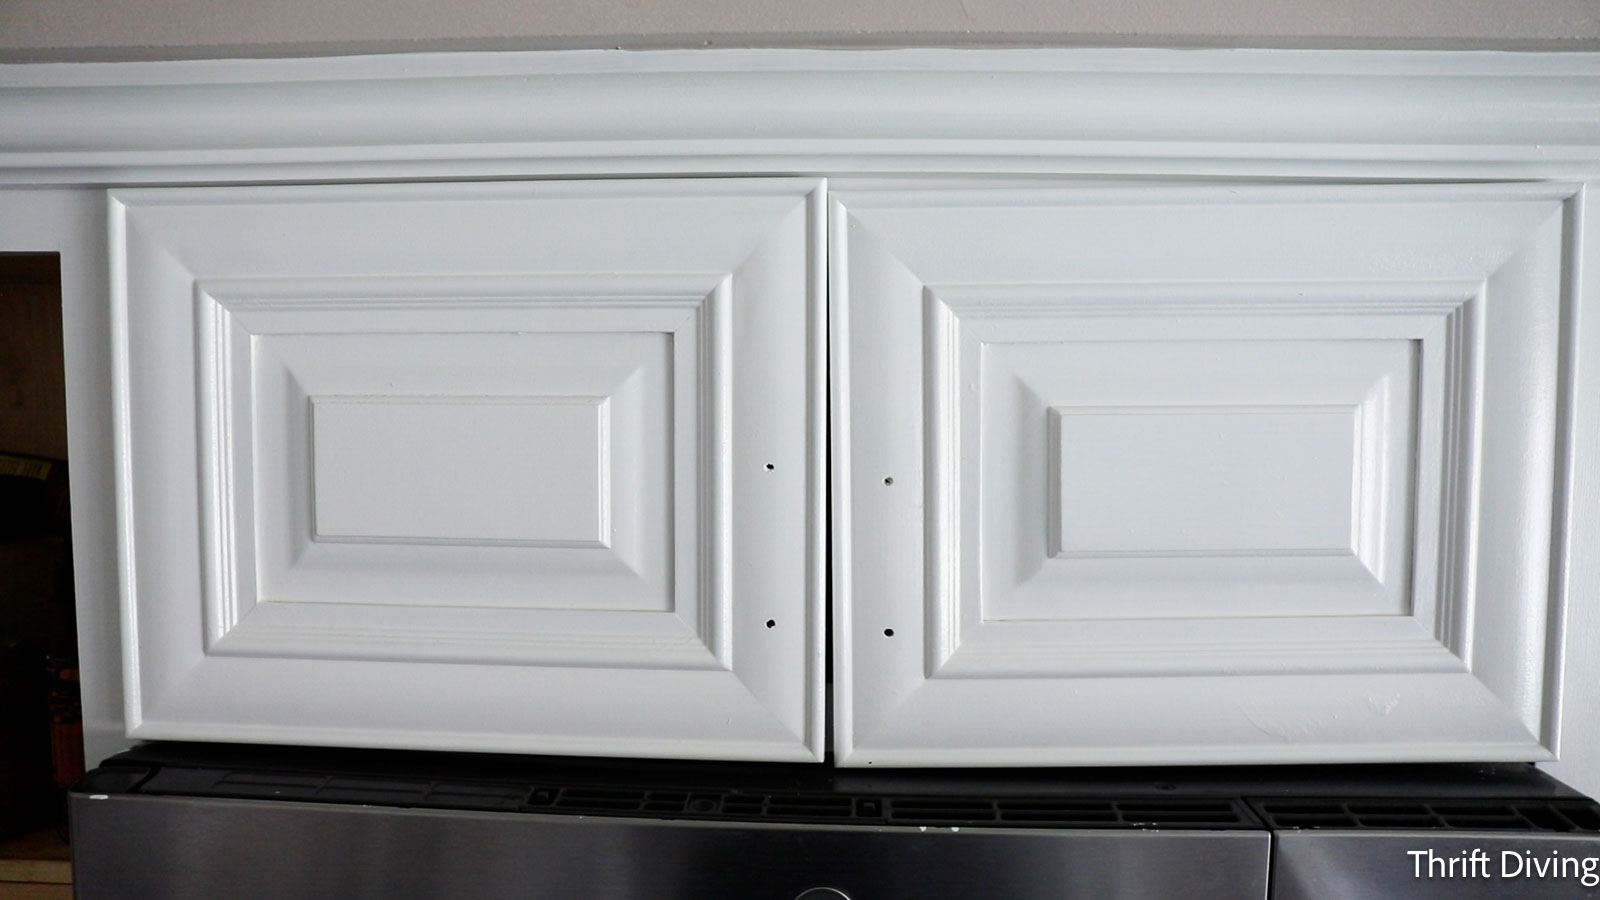
After re-hanging these cabinet doors over the stove, they needed a little adjusting to be straight again, without banging or scraping into each other.

How Much Did It Cost?
Painting your kitchen cabinets will cost about $350 – $500, depending on how much paint and supplies you need, based on: how many cabinets you have, how many coats you do, whether you already own some of the supplies (like gloves and rollers), etc. Don’t forget that you’ll probably want to paint your kitchen cabinets alongside other things you’re doing as part of a kitchen makeover.
- Paint (2 quarts) – $115 – Since Beyond Paint sponsored the paint for this project, I didn’t have to pay for that out of pocket.
- Multi-Purpose sealer – $60 – Also provided.
- Primer (1 gallon, with plenty left over) – $76
- Other painting accessories – $40
Paint Costs = $291
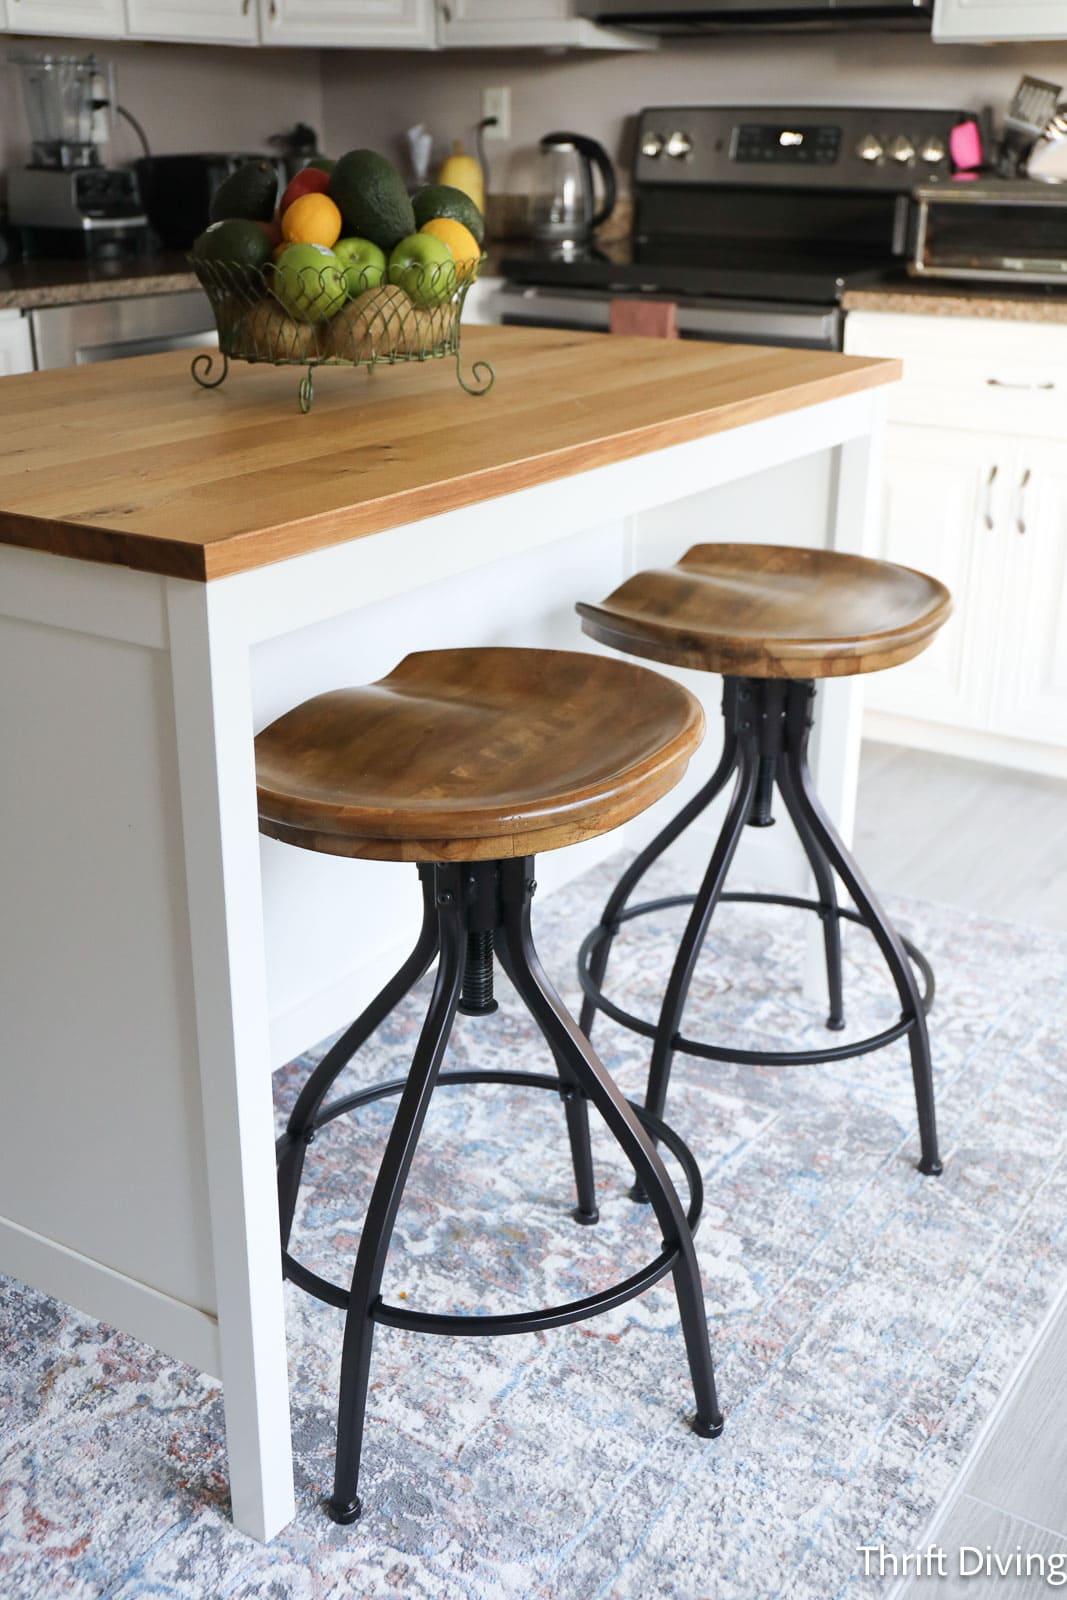
I bought a new kitchen island from IKEA, which was $400 (TORNVIKEN), so that added to my cost, plus the new rug from Home Goods for $100. The new barstools for the island were $50 each from Facebook Marketplace. And I still want to do a tiled backsplash later!
Extra Costs = $550

FAQ About Painting Kitchen Cabinets White
Are white cabinets hard to keep clean?
It doesn’t make sense that white gets dirtier. The real truth is that white can show dirt easier, which means, it’s easier for you to see the dirt, so you’re more likely to clean the dirt. 🙂 With my dark kitchen cabinets, I couldn’t see the grease and dirt build-up, so I rarely cleaned them, making them much dirtier than white cabinets would ever be. I actually prefer to see flecks of food on a white cabinet so that I know where I must wipe. Voila! Cleaner cabinets!
Are white painted kitchen cabinets durable?
Painted cabinets are only as durable as 1) the prep work you did before painting, and 2) the quality of the primer, paint, and top coat you used. Since I just painted my cabinets white, I can’t tell you how they look in 6 months (but I will!). I can tell you, though, that it always pays to take your time with a project like this and do all the prep work, and use quality products.
What’s the best paint for kitchen cabinets?
The best paint for kitchen cabinets is the same best paint for furniture: paint that is high quality and made for wood and not made for walls. Meaning, I don’t think latex paint that you’d get from the paint counter at a big box stores for your kitchen walls is the best paint for your kitchen cabinets (or furniture). Paint for cabinets and furniture is formulated to be more “hearty” and to stick to stained wood, laminate, bare wood, melamine cabinets, etc. Beyond Paint is specially formulated for these applications, as is all the other furniture paints I have used and liked.
Can I use any type of top coat on white cabinets?
Be very careful using any ‘ole top coat on white cabinets! The reason why is because white paint (and other light colors) tend to yellow when top coats are applied to them. Some people will tell you that water-based polyurethane top coats, (such as Polycrylic), won’t turn white paint a dingy yellow. They’ll say that only oil-based top coats will turn white and light-colored paint yellow, but that isn’t true. You should see for yourself. Watch this video and see how I used a water-based top coat over white paint and how it yellowed. My advice would be to find a brand of paint that has a top coat in their line of paints that is specifically formulated to work with their brand of paint, such Beyond Paint and their Beyond Paint’s Multi-Purpose Sealer. It doesn’t yellow their Bright White paint. My cabinets are still white. Check out my blog post on 10 Common Furniture Painting Mistakes and How to Fix Them for more info.
Can I use a paint sprayer to paint kitchen cabinets?
Yes! In fact, it makes it go so much quicker and you’ll get the smoothest results. However, most people don’t have a paint sprayer or feel comfortable using one (or don’t have the outdoor space or ideal weather or temperatures) to use a paint sprayer. Plus, using a paint sprayer means that you’ve got to add water to thin the paint to the proper viscosity to get an even flow from the sprayer. Check with the brand of paint you’re using to ensure that the paint can be thinned with water, or will the additional water cause the paint to not perform or be as durable as expected.
To use Beyond Paint in a paint sprayer, it’s recommended using an HVLP sprayer with the widest nozzle. If you struggle with getting the paint through the widest nozzle, it is acceptable to add a small amount of water to thin Beyond Paint. However, you should use these guidelines when adding water: Do not exceed a 5-6% volume of water which would equal to about up to 2 oz of water per 32 oz container (the equivalent of 1 quart of paint). Use distilled, deionized or reverse osmosis type water to eliminate hard water issues. If Beyond Paint is let down too much with water, the product resin solids (glue) is being diluted. You could get to a point where there is not enough “glue”/resin to hold the system as well as provide good abrasion resistance. If the Beyond Paint still doesn’t flow easily through the widest nozzle in the paint sprayer, you’ll either have to use a paint sprayer that’s capable of spraying a thicker paint, or you’ll have to simply use a roller. (FYI…A paint sprayer that can spray a thicker paint without thinning the paint may cost more money, and will require you to potentially order a larger volume of paint in order to completely finish an entire project.)
Should I paint my kitchen cabinets or replace them?
Replacing cabinets is always the superior choice when re-doing a kitchen, of course. But how many people can afford that?? It can be thousands of dollars to replace kitchen cabinets. And most times, the cabinet boxes are in good condition, you just want a new style or color (buying new cabinet doors or resurfacing cabinet doors is an option, too, but still more expensive than paint). Paint can’t change your style of cabinets, but it can change the color and overall appearance so that the style is less noticeable (for example, I didn’t like the traditional style of my dark cabinets, but with white paint, the traditional style bothers me less).
Should I use a roller or brush to paint my kitchen cabinets?
It depends on the brand of paint you’re using and the look you’re going for. A brush can create brush strokes. A roller creates a textured appearance. Sometimes you need both to complete a cabinet painting project because the brush can reach places a roller can’t. And a roller can smooth paint the way a paint brush can’t. Don’t be afraid to use both as needed.
How much time will it take me to paint kitchen cabinets?
It’s hard to say how much time it will take to paint your kitchen cabinets. I worked in stages; some days I did very little towards the project; others day I made more progress. Considering all of the prep work, priming, coats needed, top coats needed, give yourself anywhere from a weekend to a week. It depends on how quickly you want to get it done, how focused you are, and your deadline, including how many cabinets you have. Keep in mind, though, that projects always take 3x as longer as what you expect! Including multiple trips back and forth to get supplies. Don’t get discouraged! It happens to the best of us. 🙂
So…..is it worth painting kitchen cabinets?
Definitely! Even if you’re able to get 2-3 years out of your painted kitchen cabinets before doing a larger gut and remodel, it’s worth it! Your house should be your oasis–the place that you walk into and breath out a sigh of contentment and relief. If taking a weekend, or a week or two, to transform the heart of your home–the kitchen!–then it’s definitely worth the effort. 🙂
Love this project?? Click here to save it on Pinterest!
![]()

Download the 5 freebies!

Thrift Diving inspires women to decorate, improve, and maintain their home themselves...using paint, power tools, and thrift stores! Use these 5 printables, checklists, and ebooks to get started!
wow, looks amazing
Thank you so much, Judy! 🙂 Glad you like it!
Awesome job Serena! Your kitchen makeover looks great!! You’ve inspired me to Consider painting my cabinets as well. : ) I want to do a Total renovation of my Kitchen but won’t be able to afford that for a few years, so this would be an affordable way to spruce things up and get it a new look for now.
YAY! So glad to inspire you! Yeah, I mean, total gut jobs are ideal, but they’re soooo expensive. In the meantime, paint can totally transform a space while you save up for the total renovation! Let me know how it goes. Send pics when you’re done!
I can’t for the life if me understand why anyone would paint real wood cabinets rather than refinish them. If you don’t like the current color they can either be stained a different color or clear coated to show the natural wood grain, which is far niecer than any paint color. White kitchen cabinets look cheap and are thankfully now once again going out of style and favor. Remarkably, the “turd brown” is again becoming more “fashionable”, but has always been a classic and rich style.
Michael, these cabinets don’t even look to be solid wood, or even with enough of a veneer to strip and re-stain. And why would I do that? Not to mention that crevices that are nearly impossible to sand or strip. Also, painting cabinets is acceptable. Many men don’t understand the transformational power of paint. These are the same men that think brown wood paneling was a good option for homes. It’s okay to paint something. It’s not the end of the world. LOL. Once the painted look into desirable anymore, they can be removed and replaced with any other wood option if that’s what they want. As for looking cheap, I happen to like my cheap kitchen. 🙂 When I walk in, I feel happier, lighter, that the space is cleaner, and more open. If that’s the feeling that “cheap” white paint provides, I’m here for it. LOL
Looks fantastic, you go girl!!!!
Thank you so much, Wendy!
Absolutely beautif!
So glad you like it, Susan! 🙂 Thank you!
Looks absolutely lovely. As usual, I am amazed at how much you accomplish. I, too, have white cabinets, selected when I purchased my new home 6 years ago. I LOVE THEM and since my kithen occupies the center space of the first open floor plan, it needed to have an elegant, stylish look among the other rooms. White cabinets were and remain the ideal choice. And I agree they are so easy to keep clean because you can always “see” the dirt.
Bravo on another great project. Your functional she-shed has paid for itself in all the happy projects you dream up.
I think white cabinets look great! I don’t know how anyone can make a comment about them going “out of style” because it’s a classic look that will never go out of style, in my opinion. I find that as I get older, the whiter a space gets means it feels “cleaner” and less cluttered. More white space means more space to think!
Love the white kitchen cabinets. Mine are light hickory, but not white. Liked your You Tube on all the steps. Thank you for sharing!
Aww, thank you so much, Pam! I think anything light just makes a kitchen feel wonderfully happy!