How to Refresh Your Desk in 3 Hours or Less
LISTEN: How to Refresh Your Desk in 3 Hours or Less
Does this ever happen to you: one moment you’re folding laundry and the next moment, you find yourself jumping with two feet into a project that you had no intention of doing that day??
This happens to me allll the time!
Spontaneous DIY projects happen for two reasons:
- You get fed up of looking at something and feel an overwhelming urge to drop everything and just GET.IT.DONE!
- You know that if you don’t do it when the mood strikes, it will never get done.
This happened to me last weekend as I was doing my Saturday morning vacuuming in my office.
Every morsel of dust and dirt were sucked up.
Yet, I couldn’t stop fixating on my nasty, stained desk.
I had been meaning to do a “desk refresh” to spruce up my office, but the desire just wasn’t there until THAT.MOMENT!
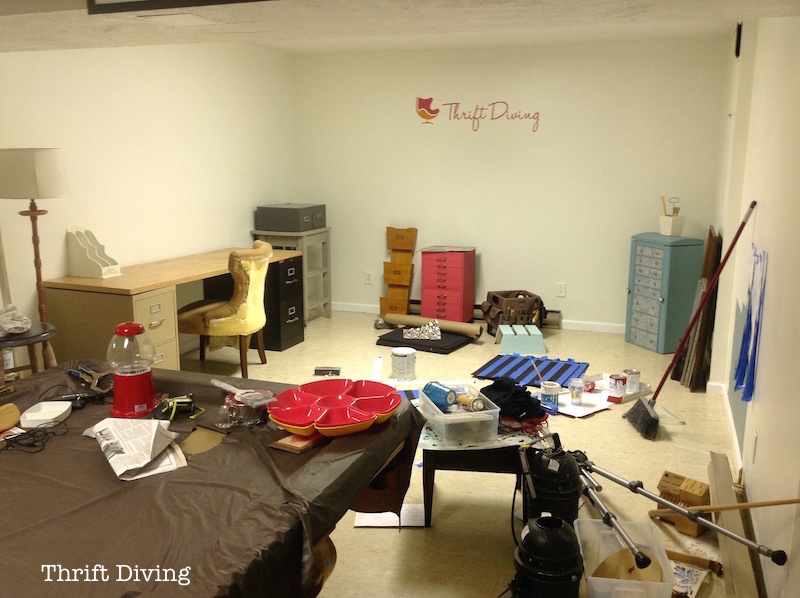
This office is the space I made over for our Junk-Free January Room Makeover Challenge (a challenge where my readers and I commit to transforming a room in only 30-days).
This is what it used to look like:
BEFORE
After my 30-day room makeover challenge, my office turned into a pretty, colorful little sweet spot in the basement, where I could write my blog posts! I absolutely loved it! I still do!
AFTER!
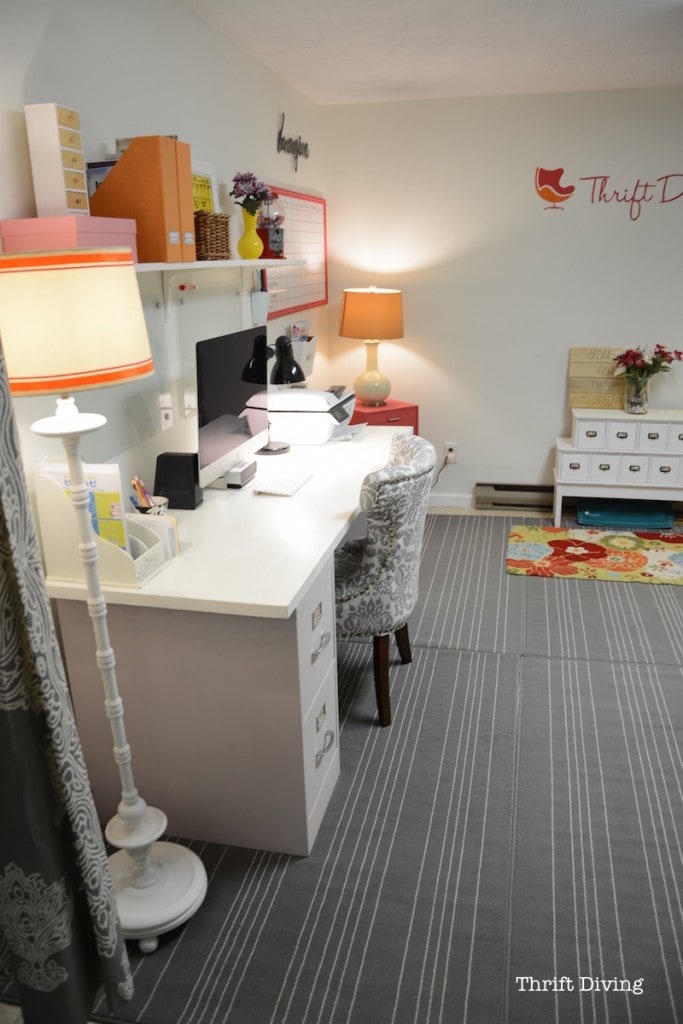
And for the most part, I was able to maintain the prettiness.
But after two years, the desk took a nasty beating.
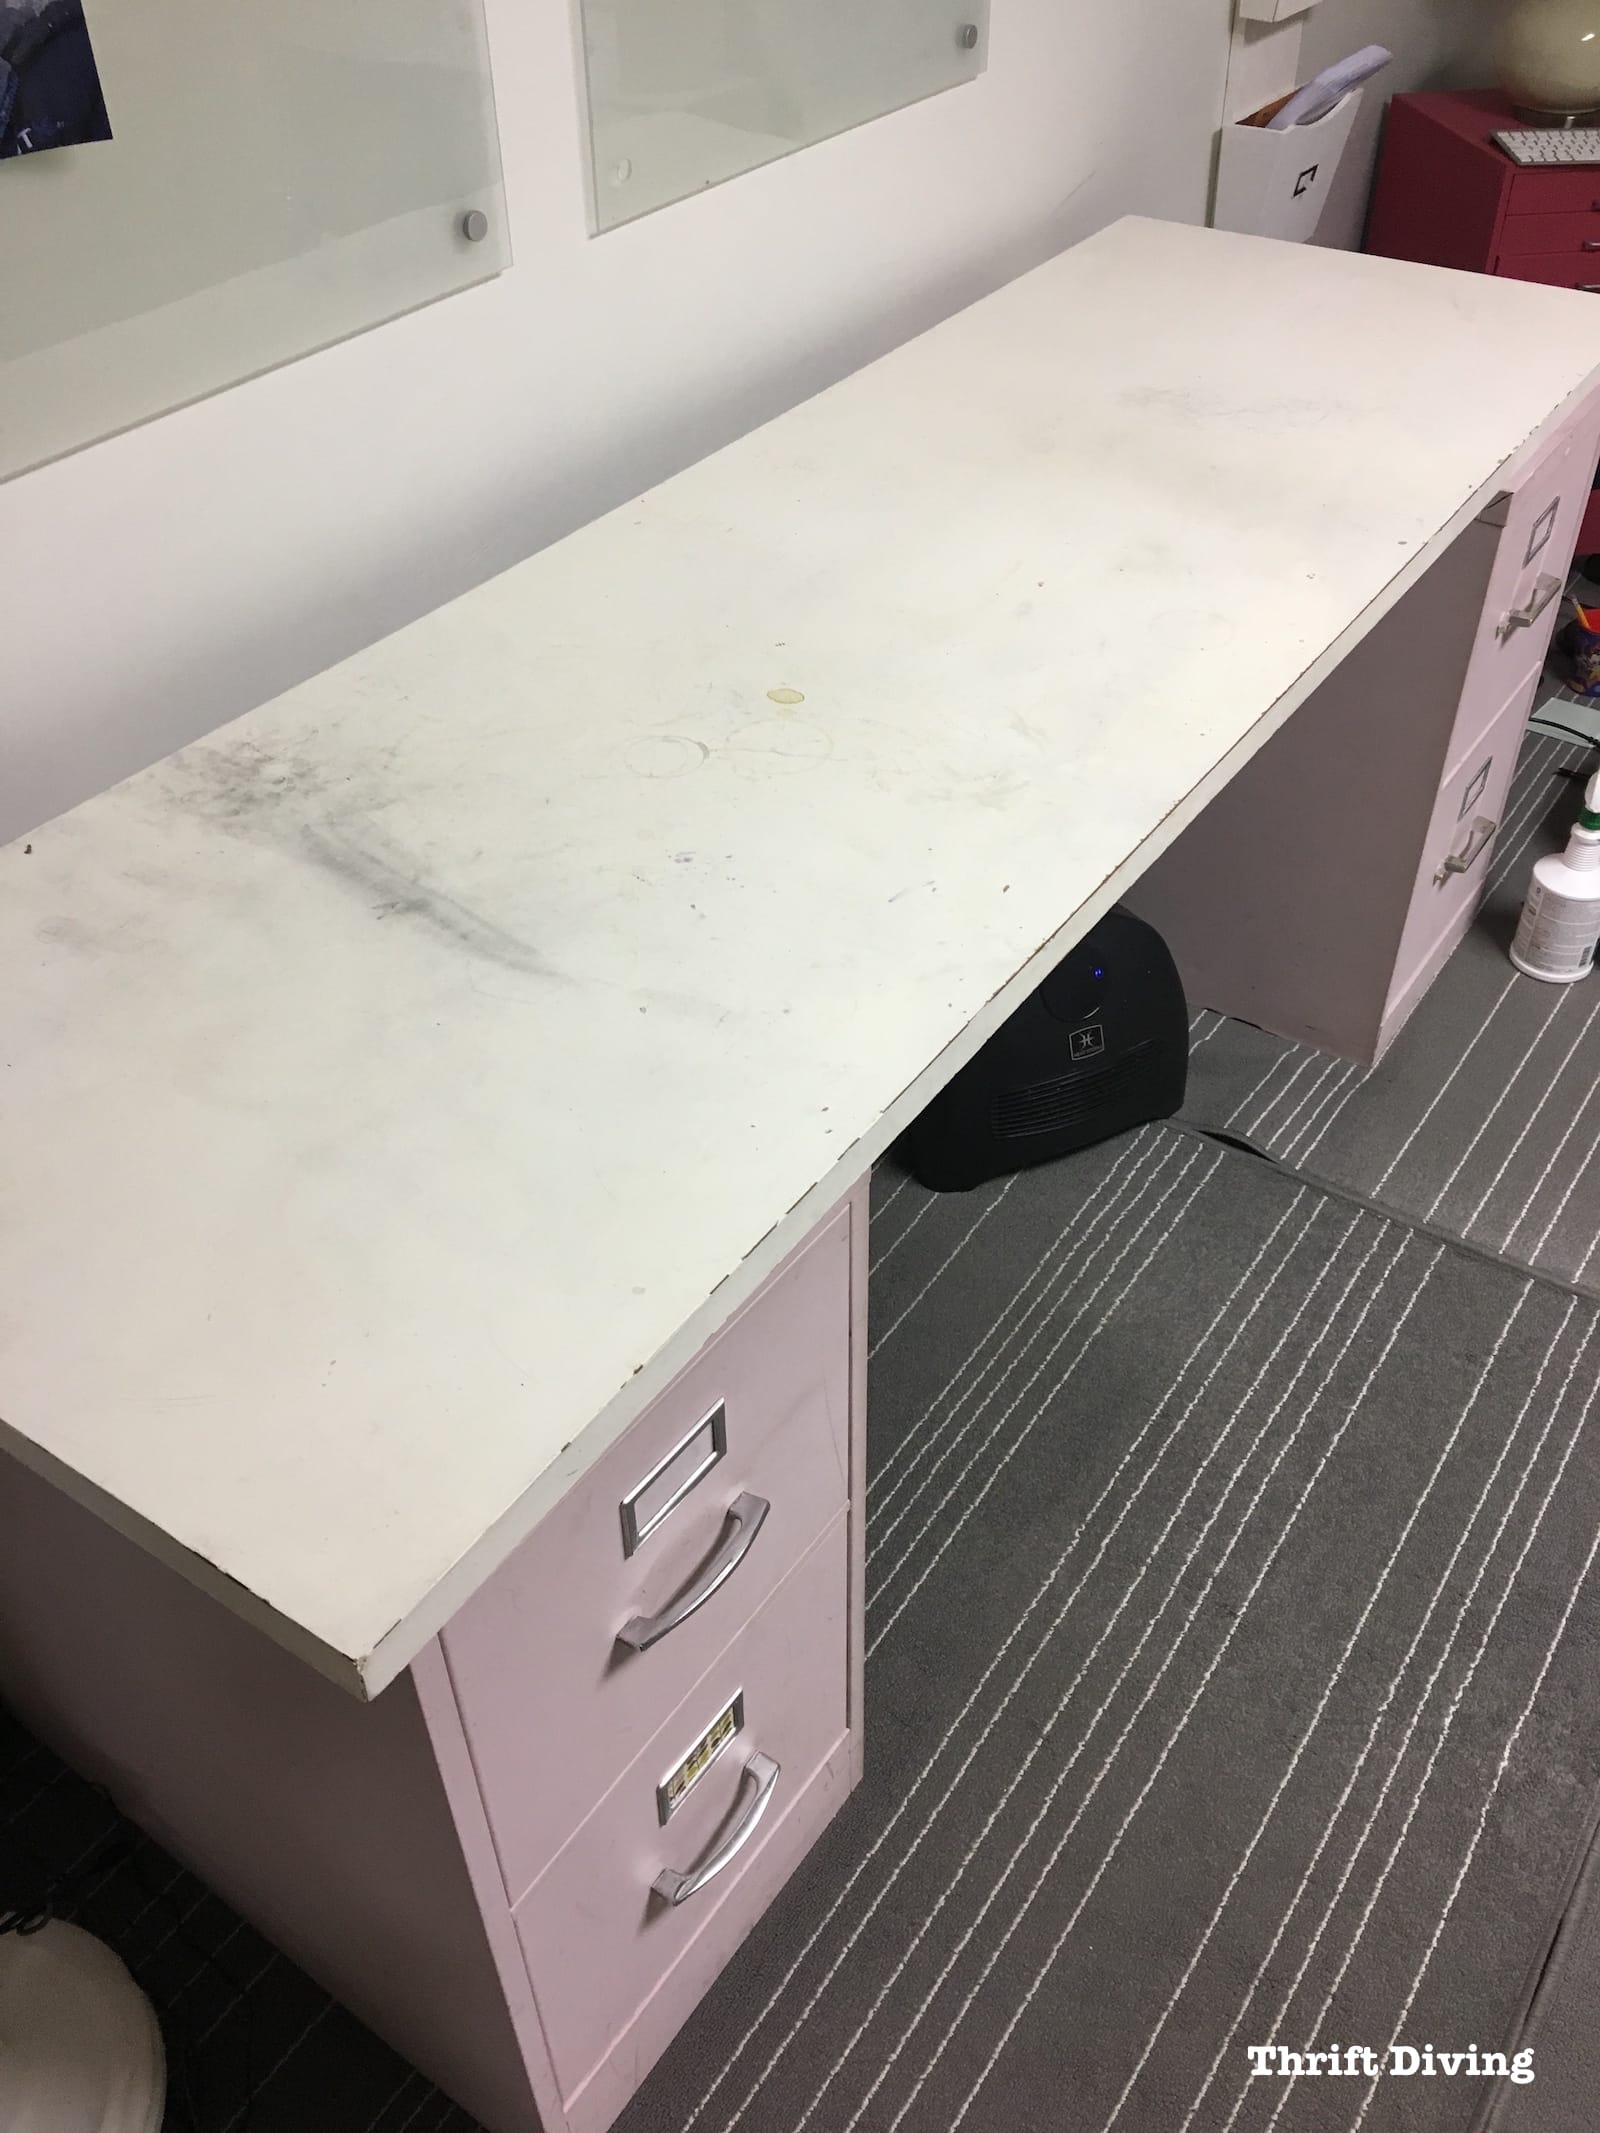
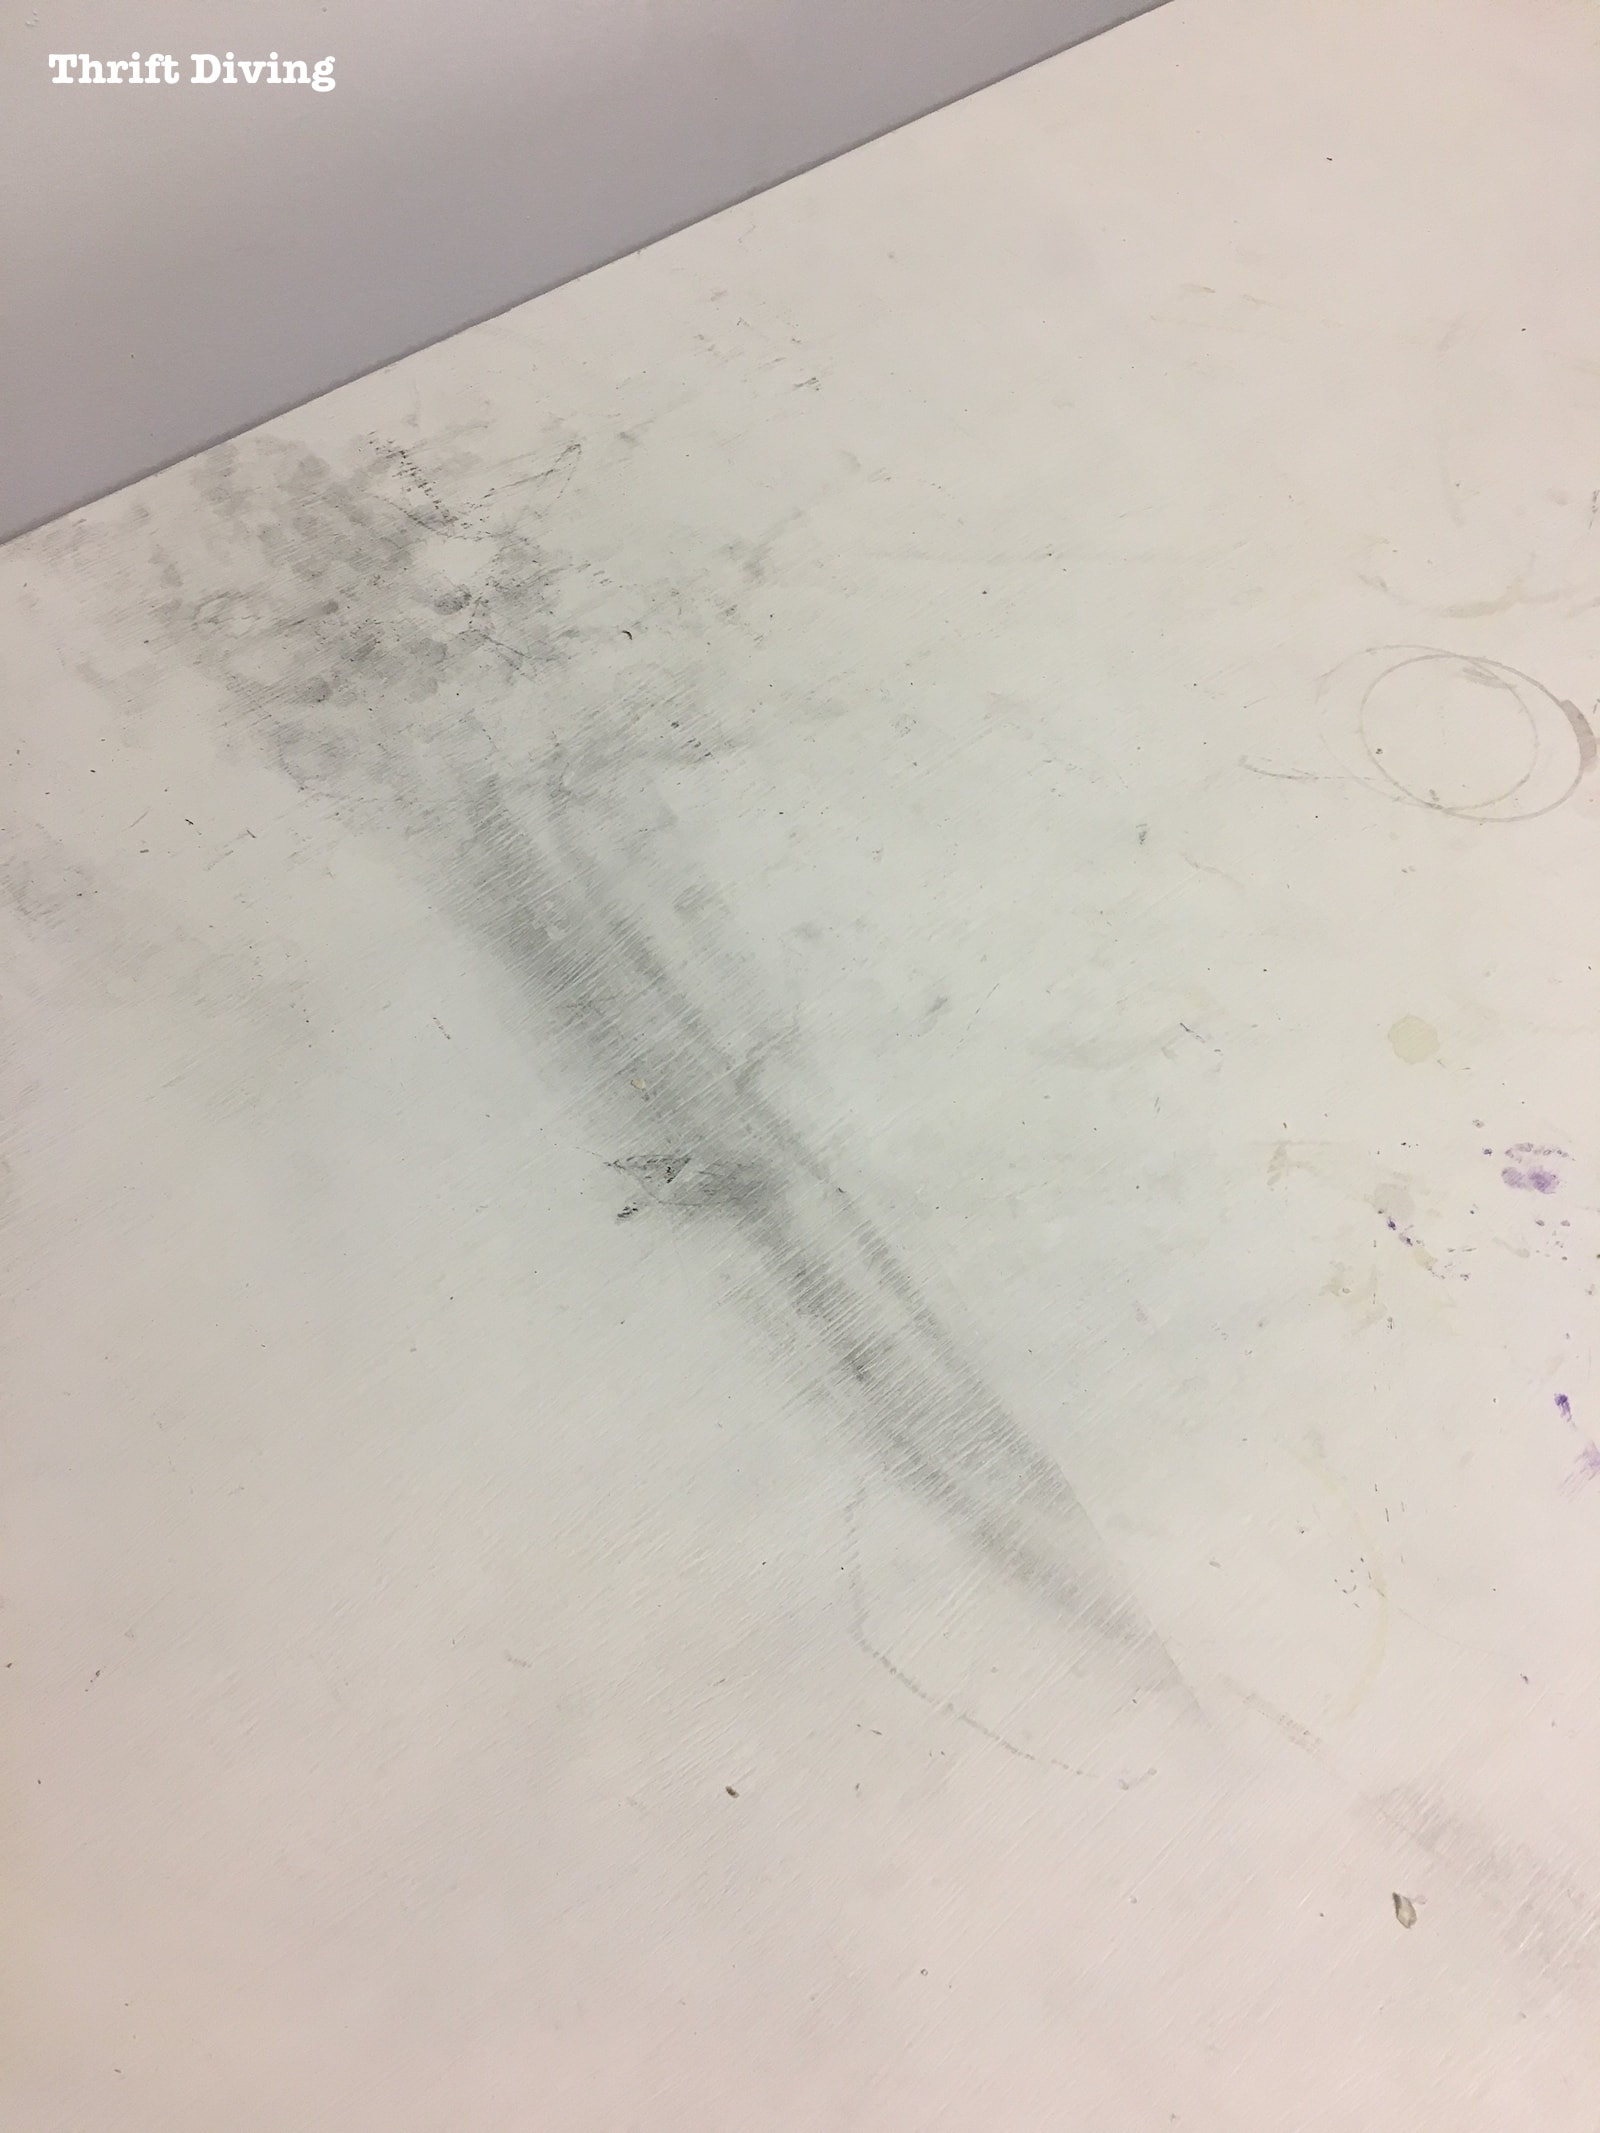
I had tea, coffee, and food stains… Lead pencil scuff marks that wouldn’t come out…
And the file cabinets were equally scuffed.
Suddenly, I found myself not being able to think clearly when sitting at that cluttered, disorganized, dirty desk.
Where was my pretty office?!
So that weekend, my DIY inattentiveness got the better of me and all routine cleaning chores went right out the window!
The only thing I could think was, “I must refresh my desk!”
But I didn’t want it to turn into a massive makeover. I wanted something short and sweet–something I could get done in an afternoon and still have time to get back to the other activities I was doing before I interrupted myself. 🙂
And I started to think about you guys: how many of you have desks that are cluttered, dirty, and disorganized, too??
Likely, many of you do.
That’s why I wanted to challenge you to spruce up your desk, too!
And the goal with this mini “desk fresh” is to get it done quickly so that you can get back to doing the other important things you’ve got going on in your life!
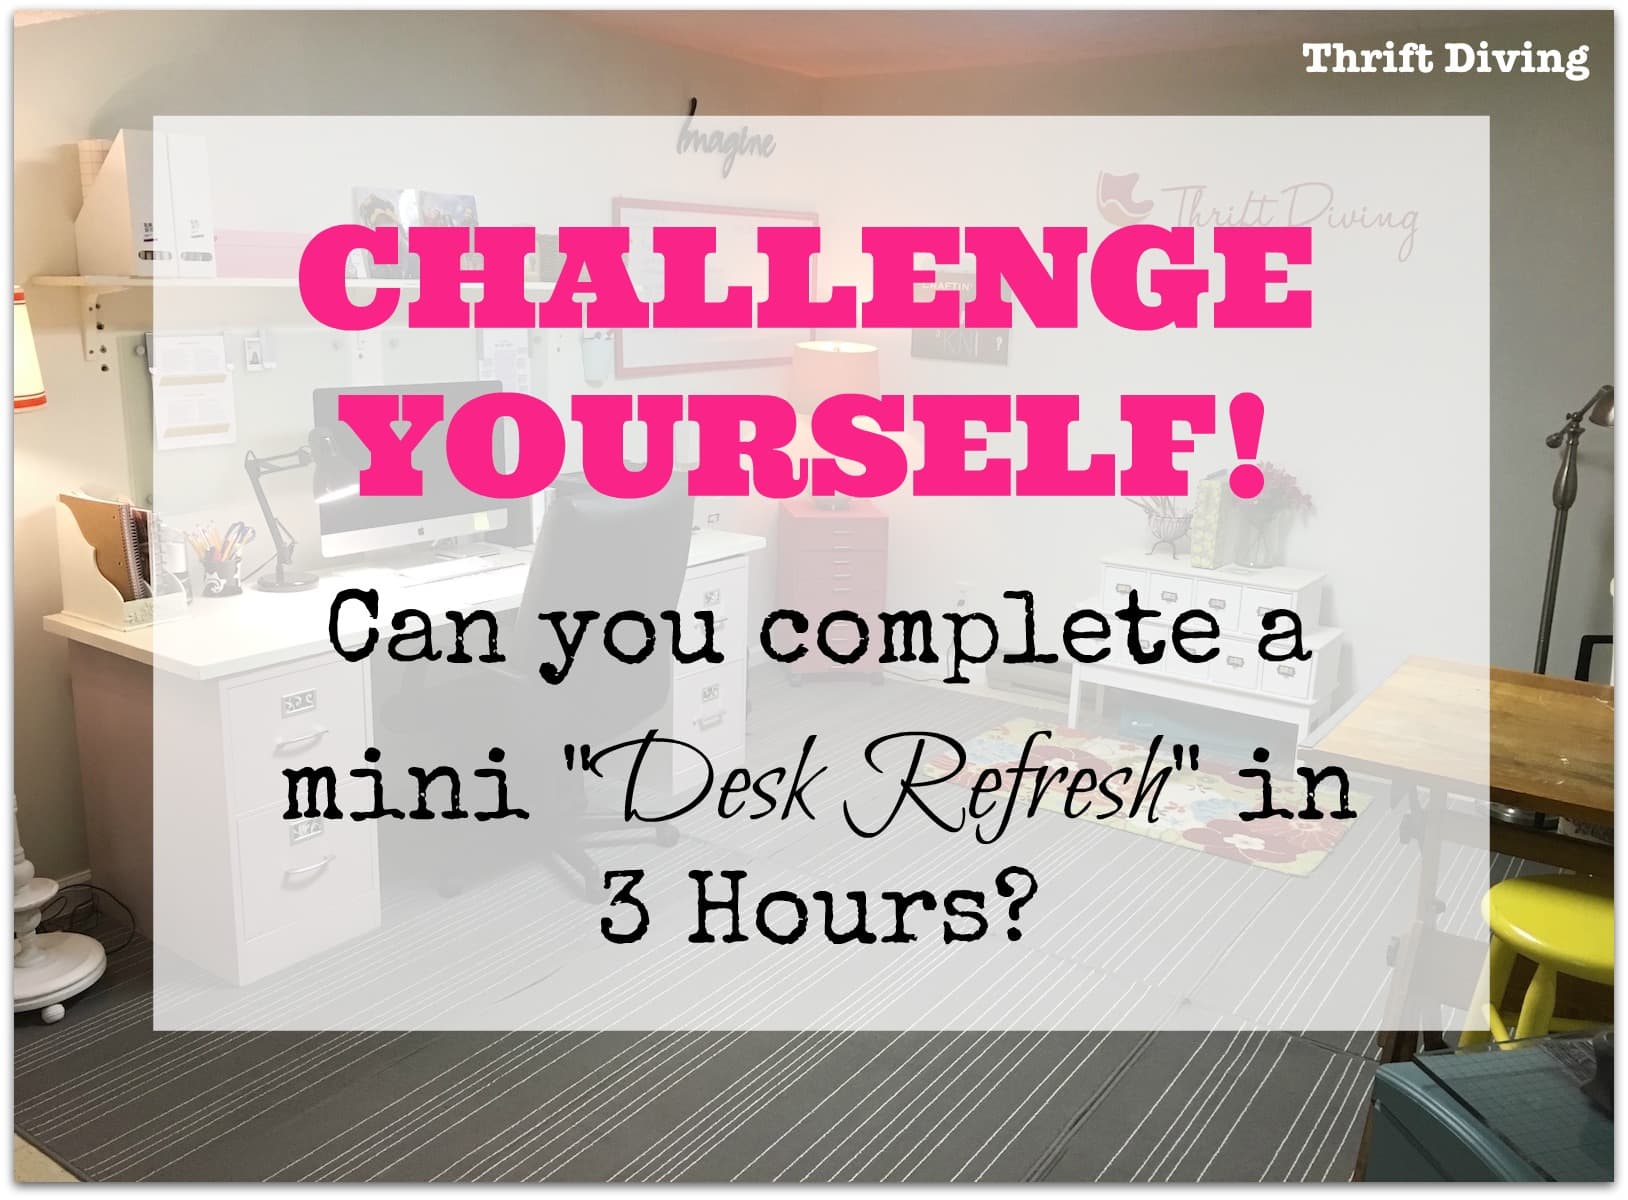
Desk Makeover Challenge: Refresh Your Desk in 3 Hours or Less
If you’re not sure where to start, these tips will help you help you spruce up your desk, too!
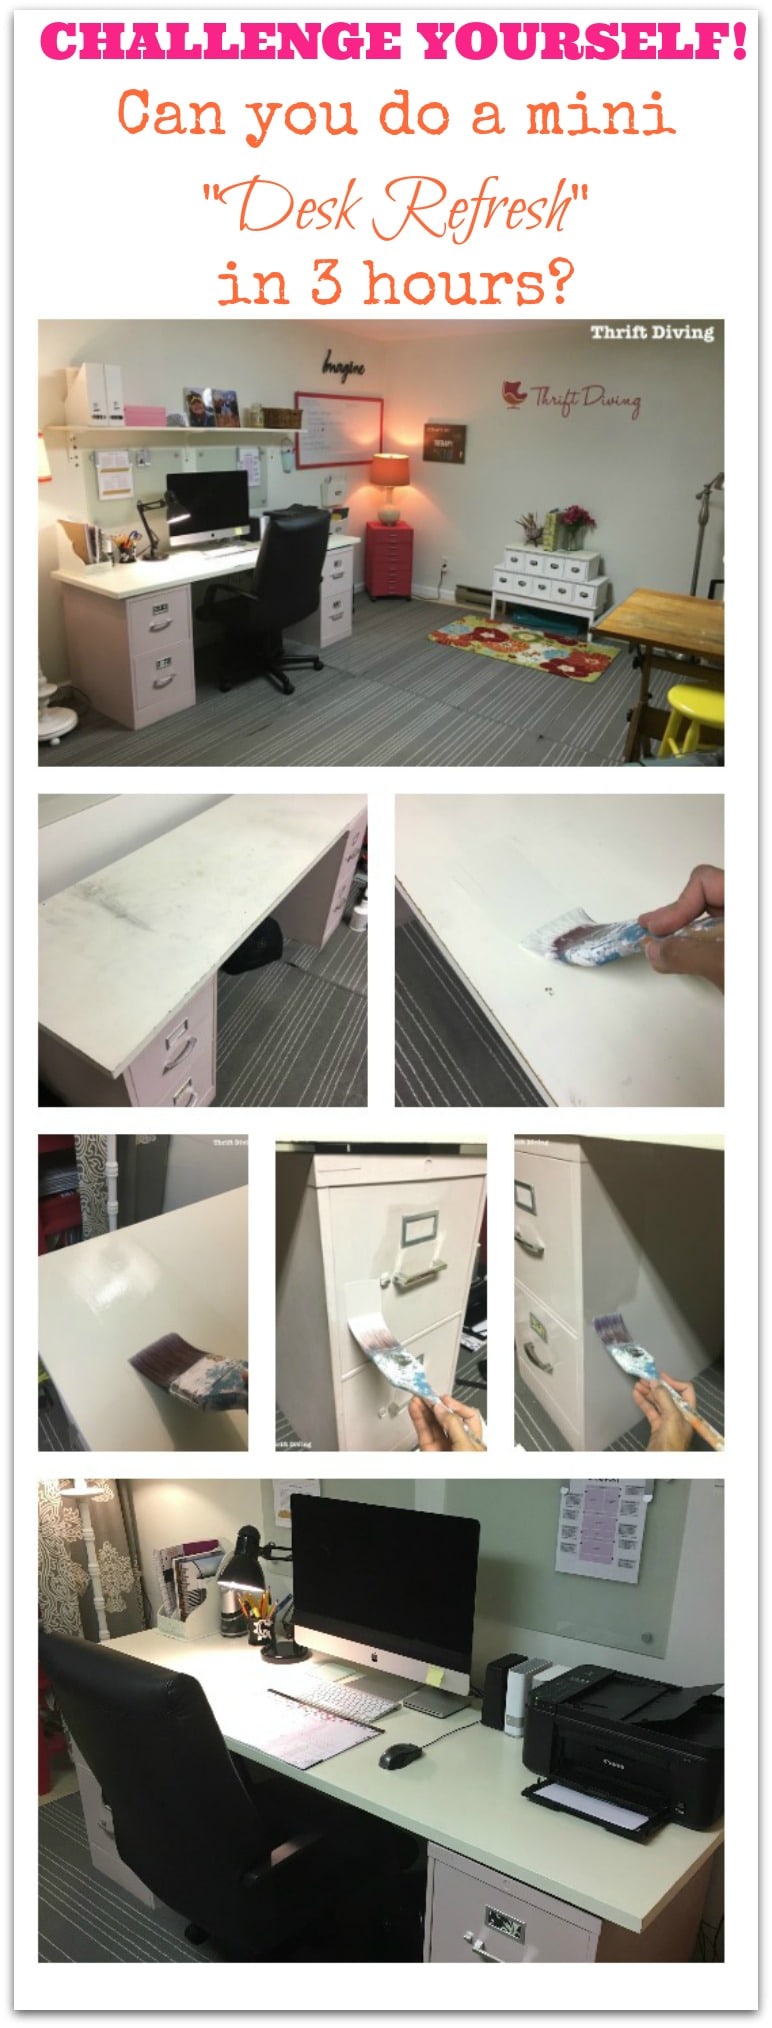
STEP 1: Clear absolutely everything off your desk!
Go ahead and toss everything on the floor or into a box or something.
Don’t even think of starting with one pile and working your way through everything on your desk.
You’ll never get anywhere doing that. And remember, you’re trying to do this quickly.
Just remove everything, even your computer.
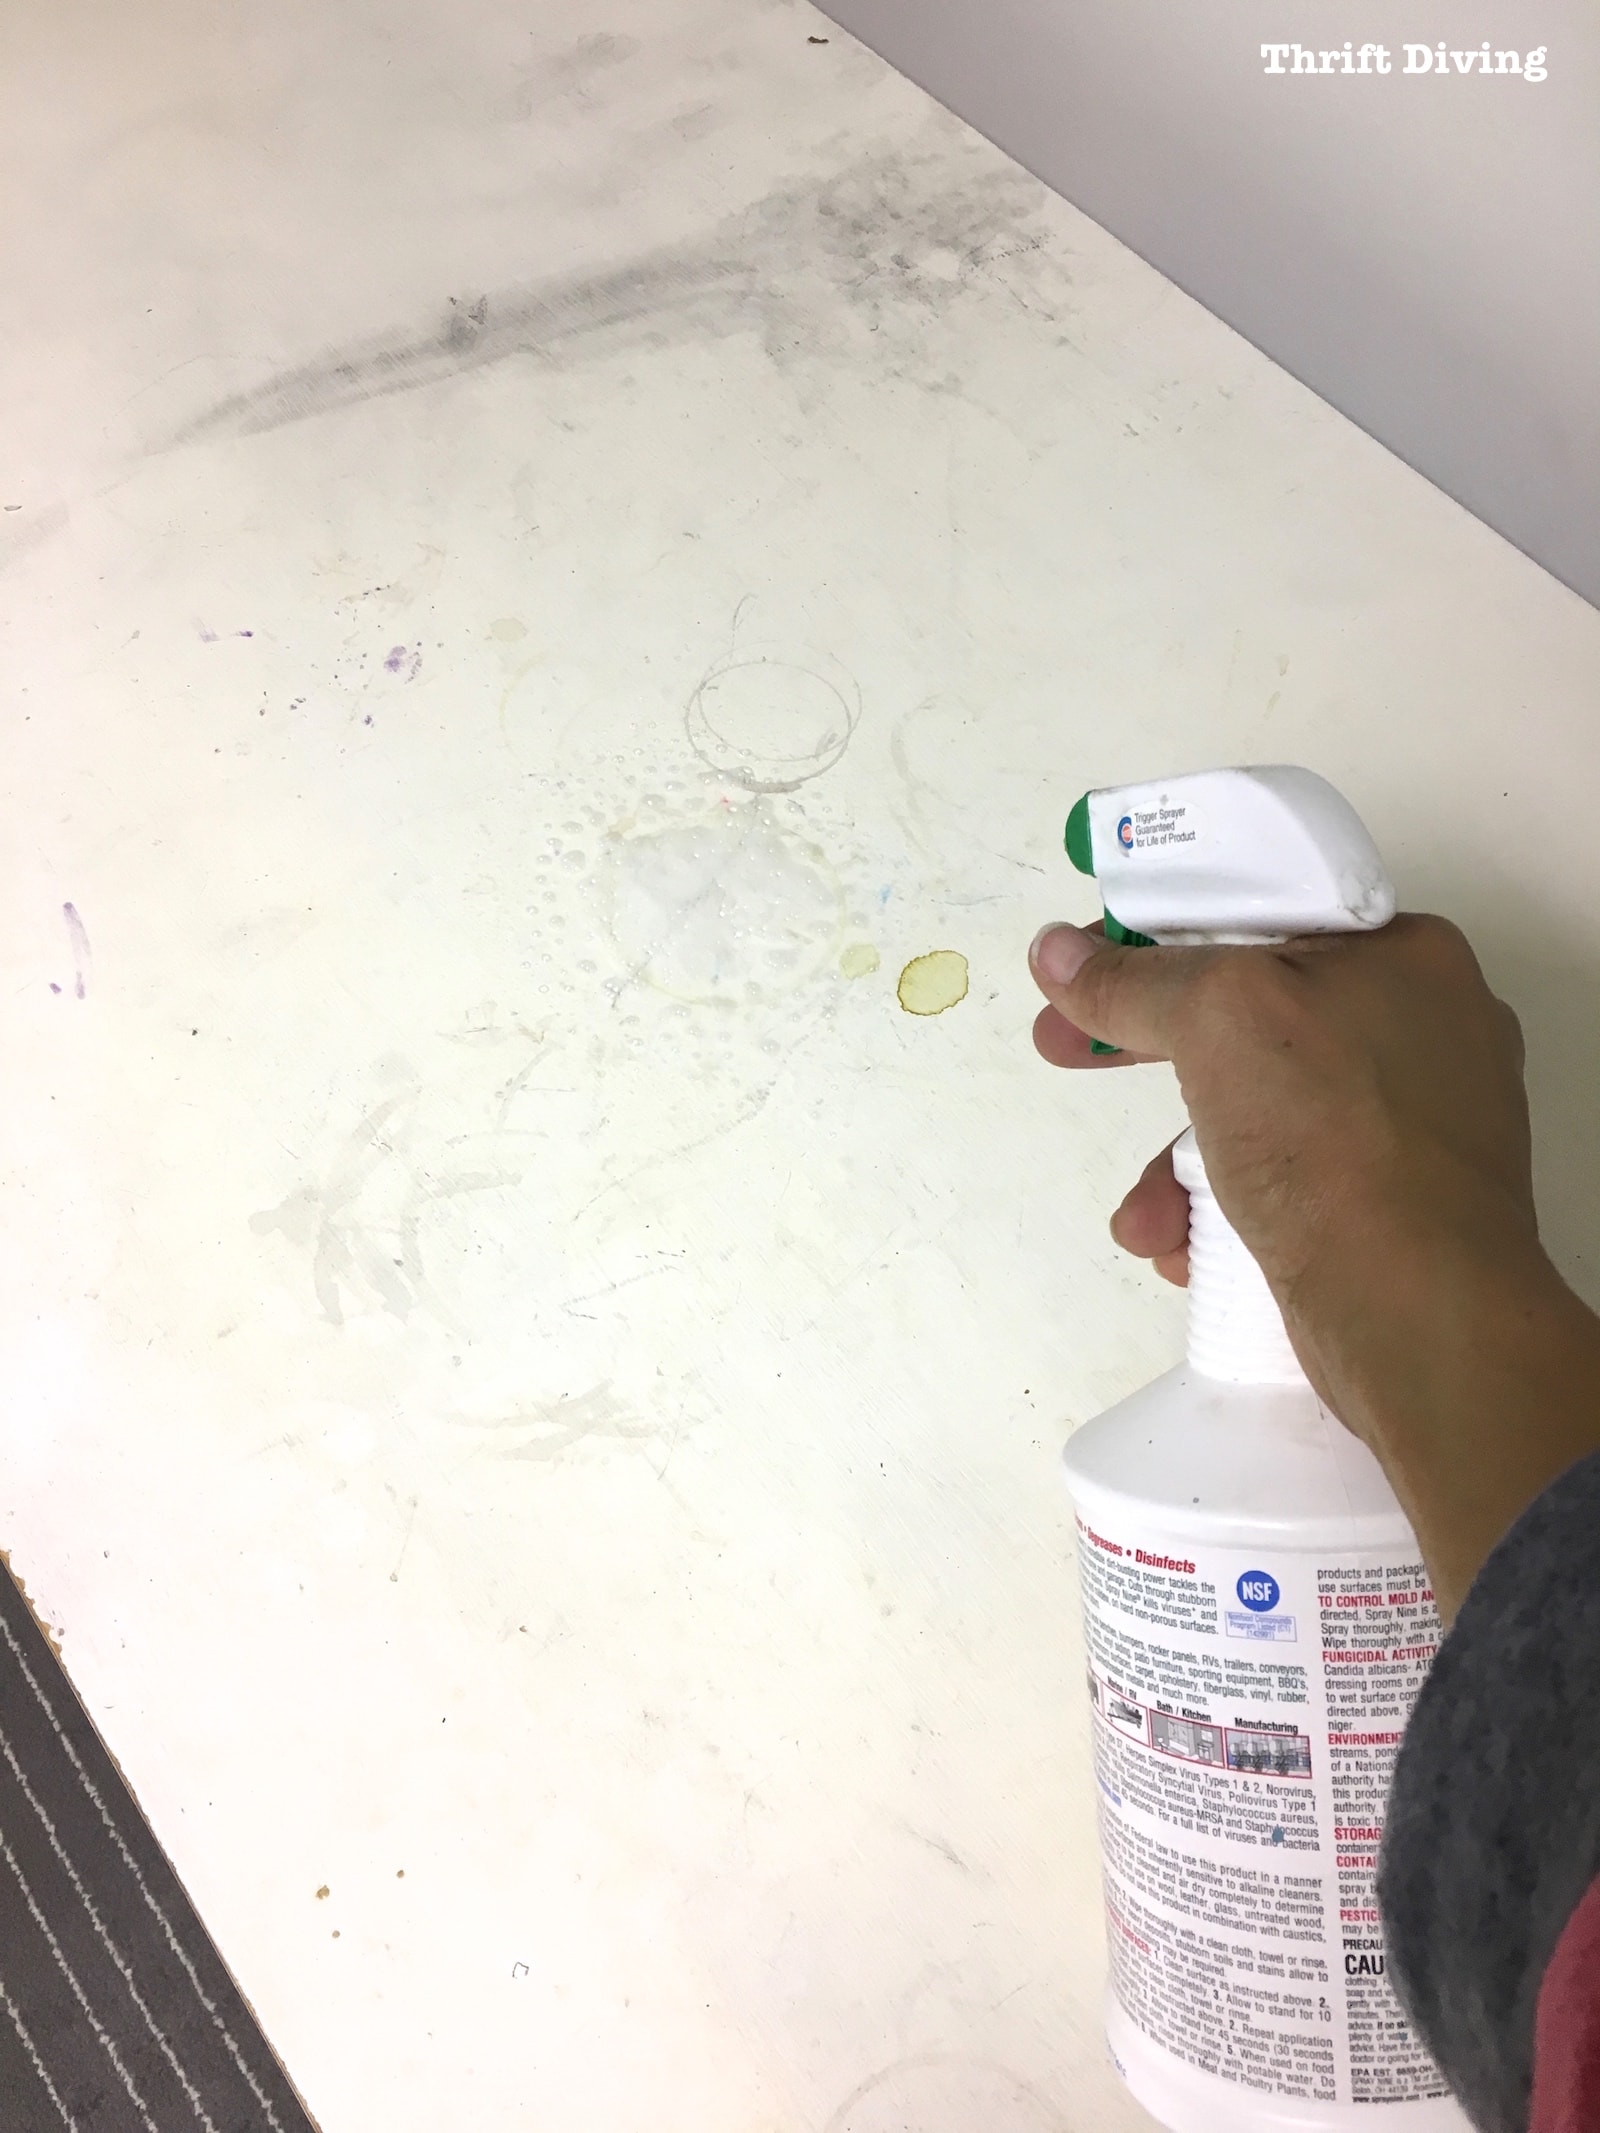
STEP 2: Scrub It Down
Hot, soapy water is always my “go-to” when I clean things. But I usually keep Spray Nine on-hand because it’s a great heavy-duty degreaser and cleaner.
If you’re painting your desk, use a degreaser like Spray Nine or Simple Green first, so that the surface is ready for paint. If you’re not planning to paint or re-paint, then just clean it off with soap and water, or use a wood cleaner for solid wood surfaces.
Read: What’s the Best Paint for Furniture? The PROs and CONs of Each.
STEP 3: Pick Your Paint
If you’re not painting your desk, you can skip this part and save yourself loads of time. 🙂
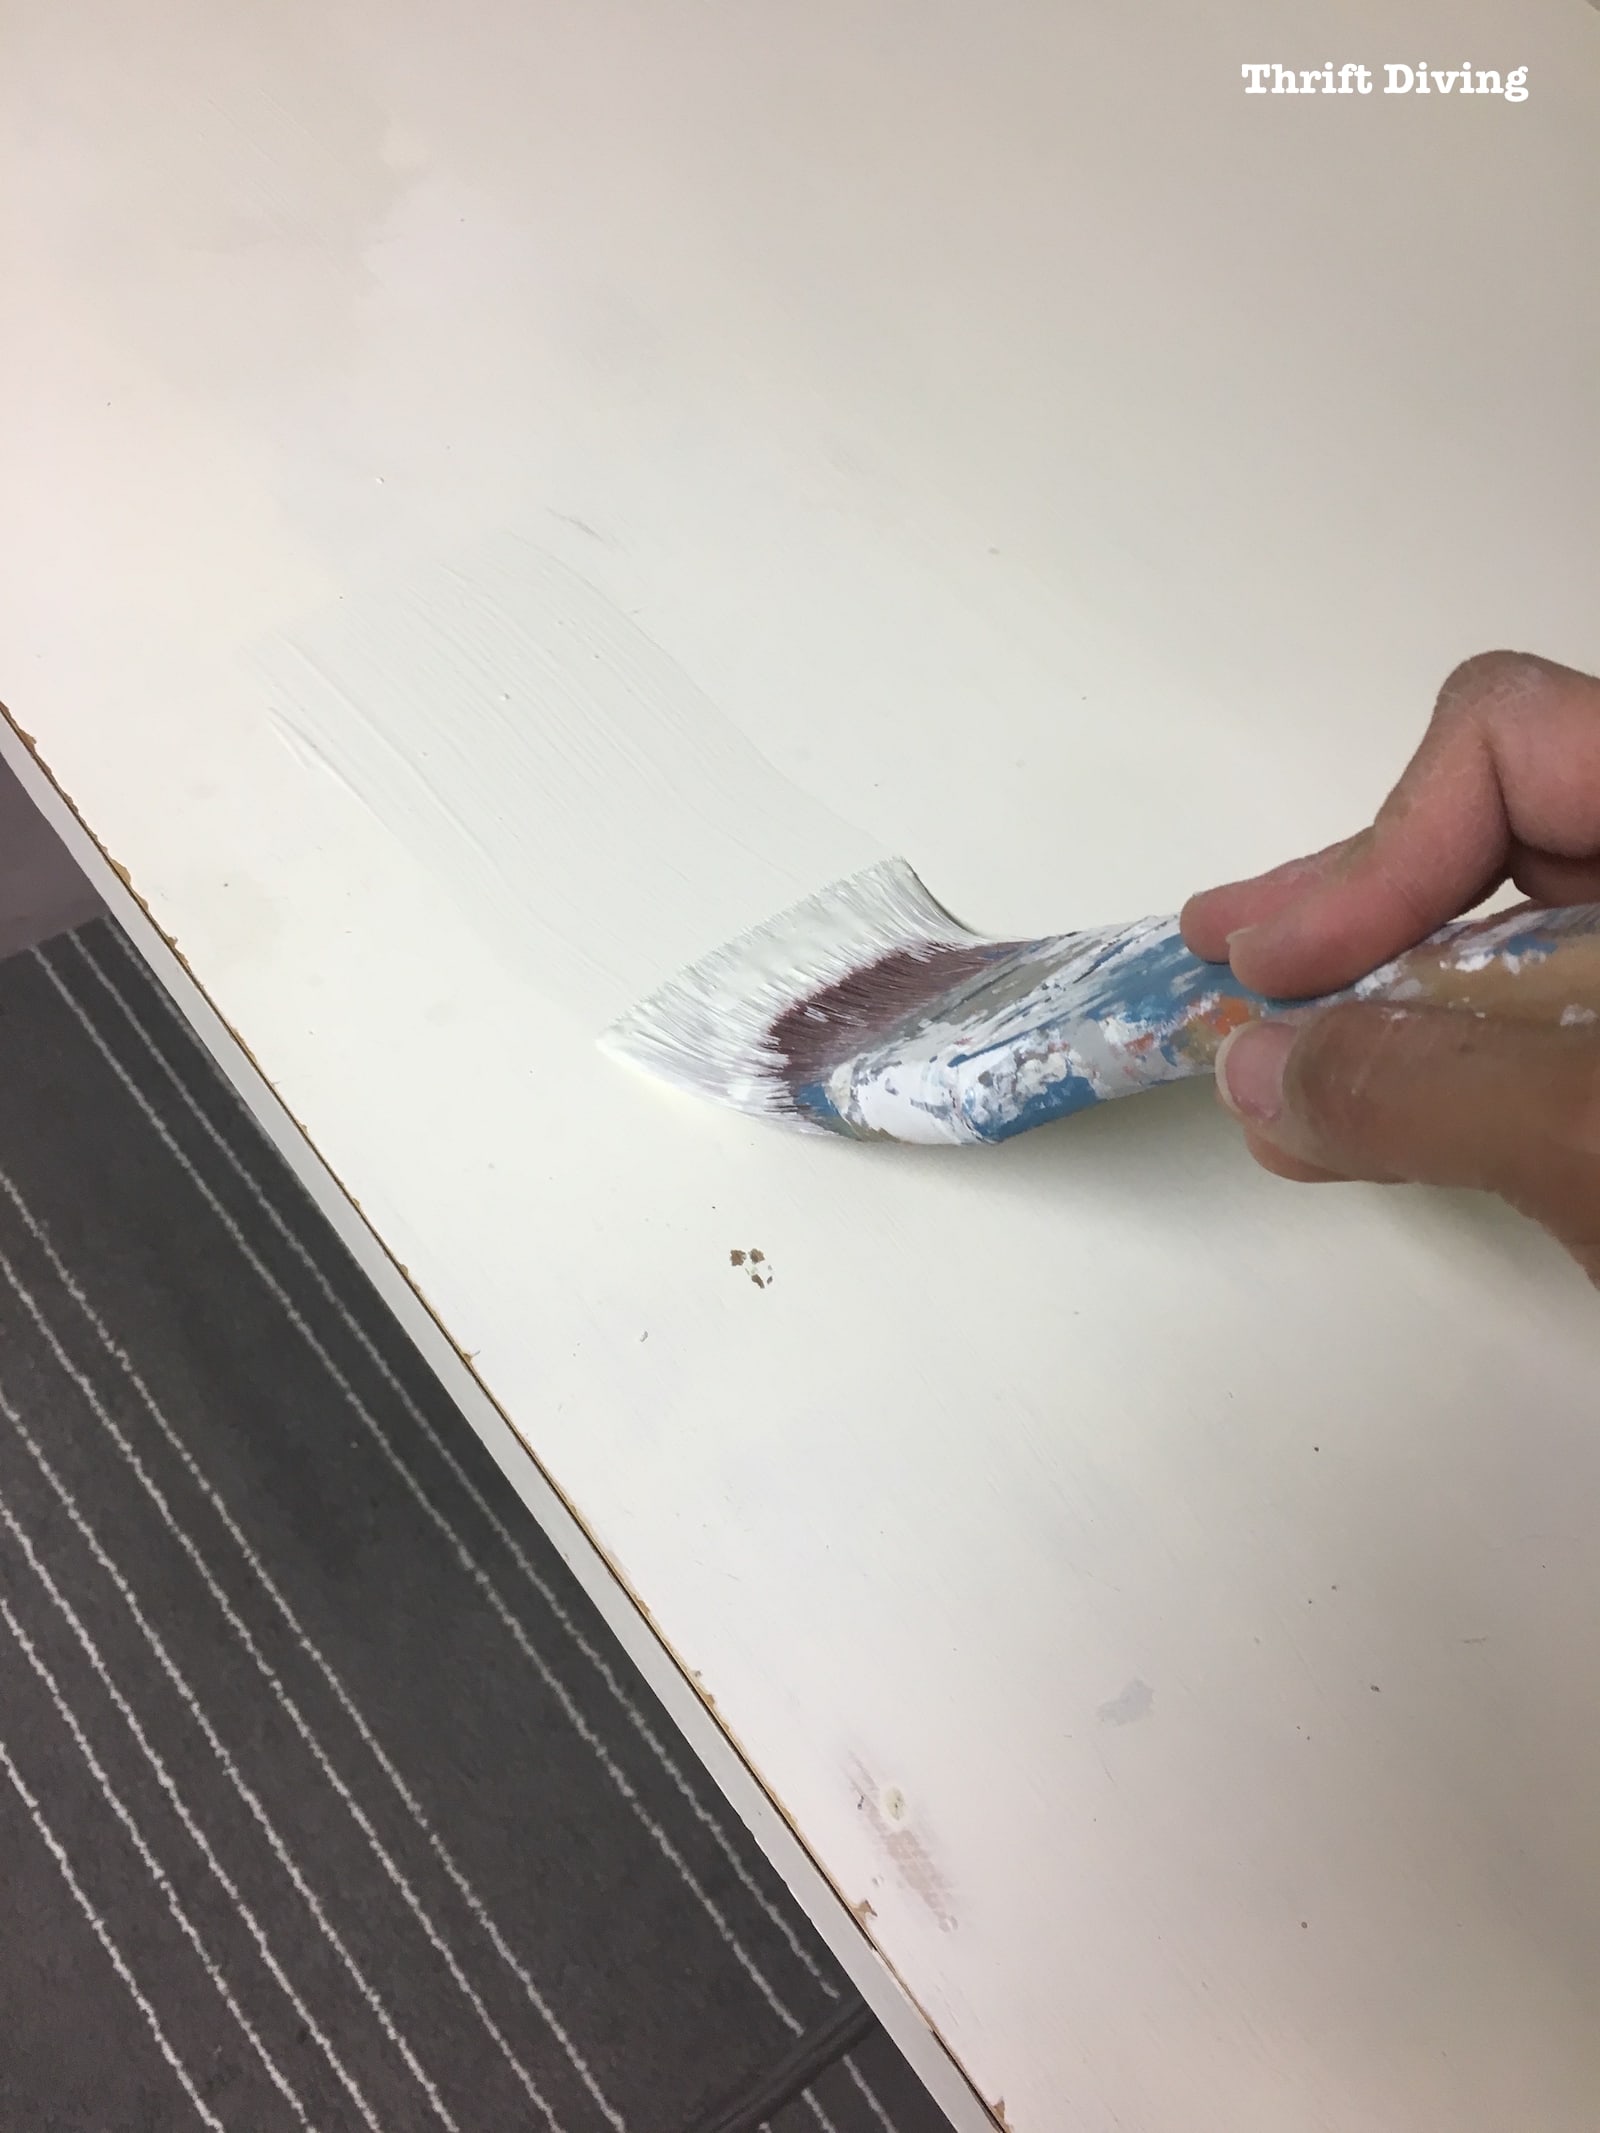
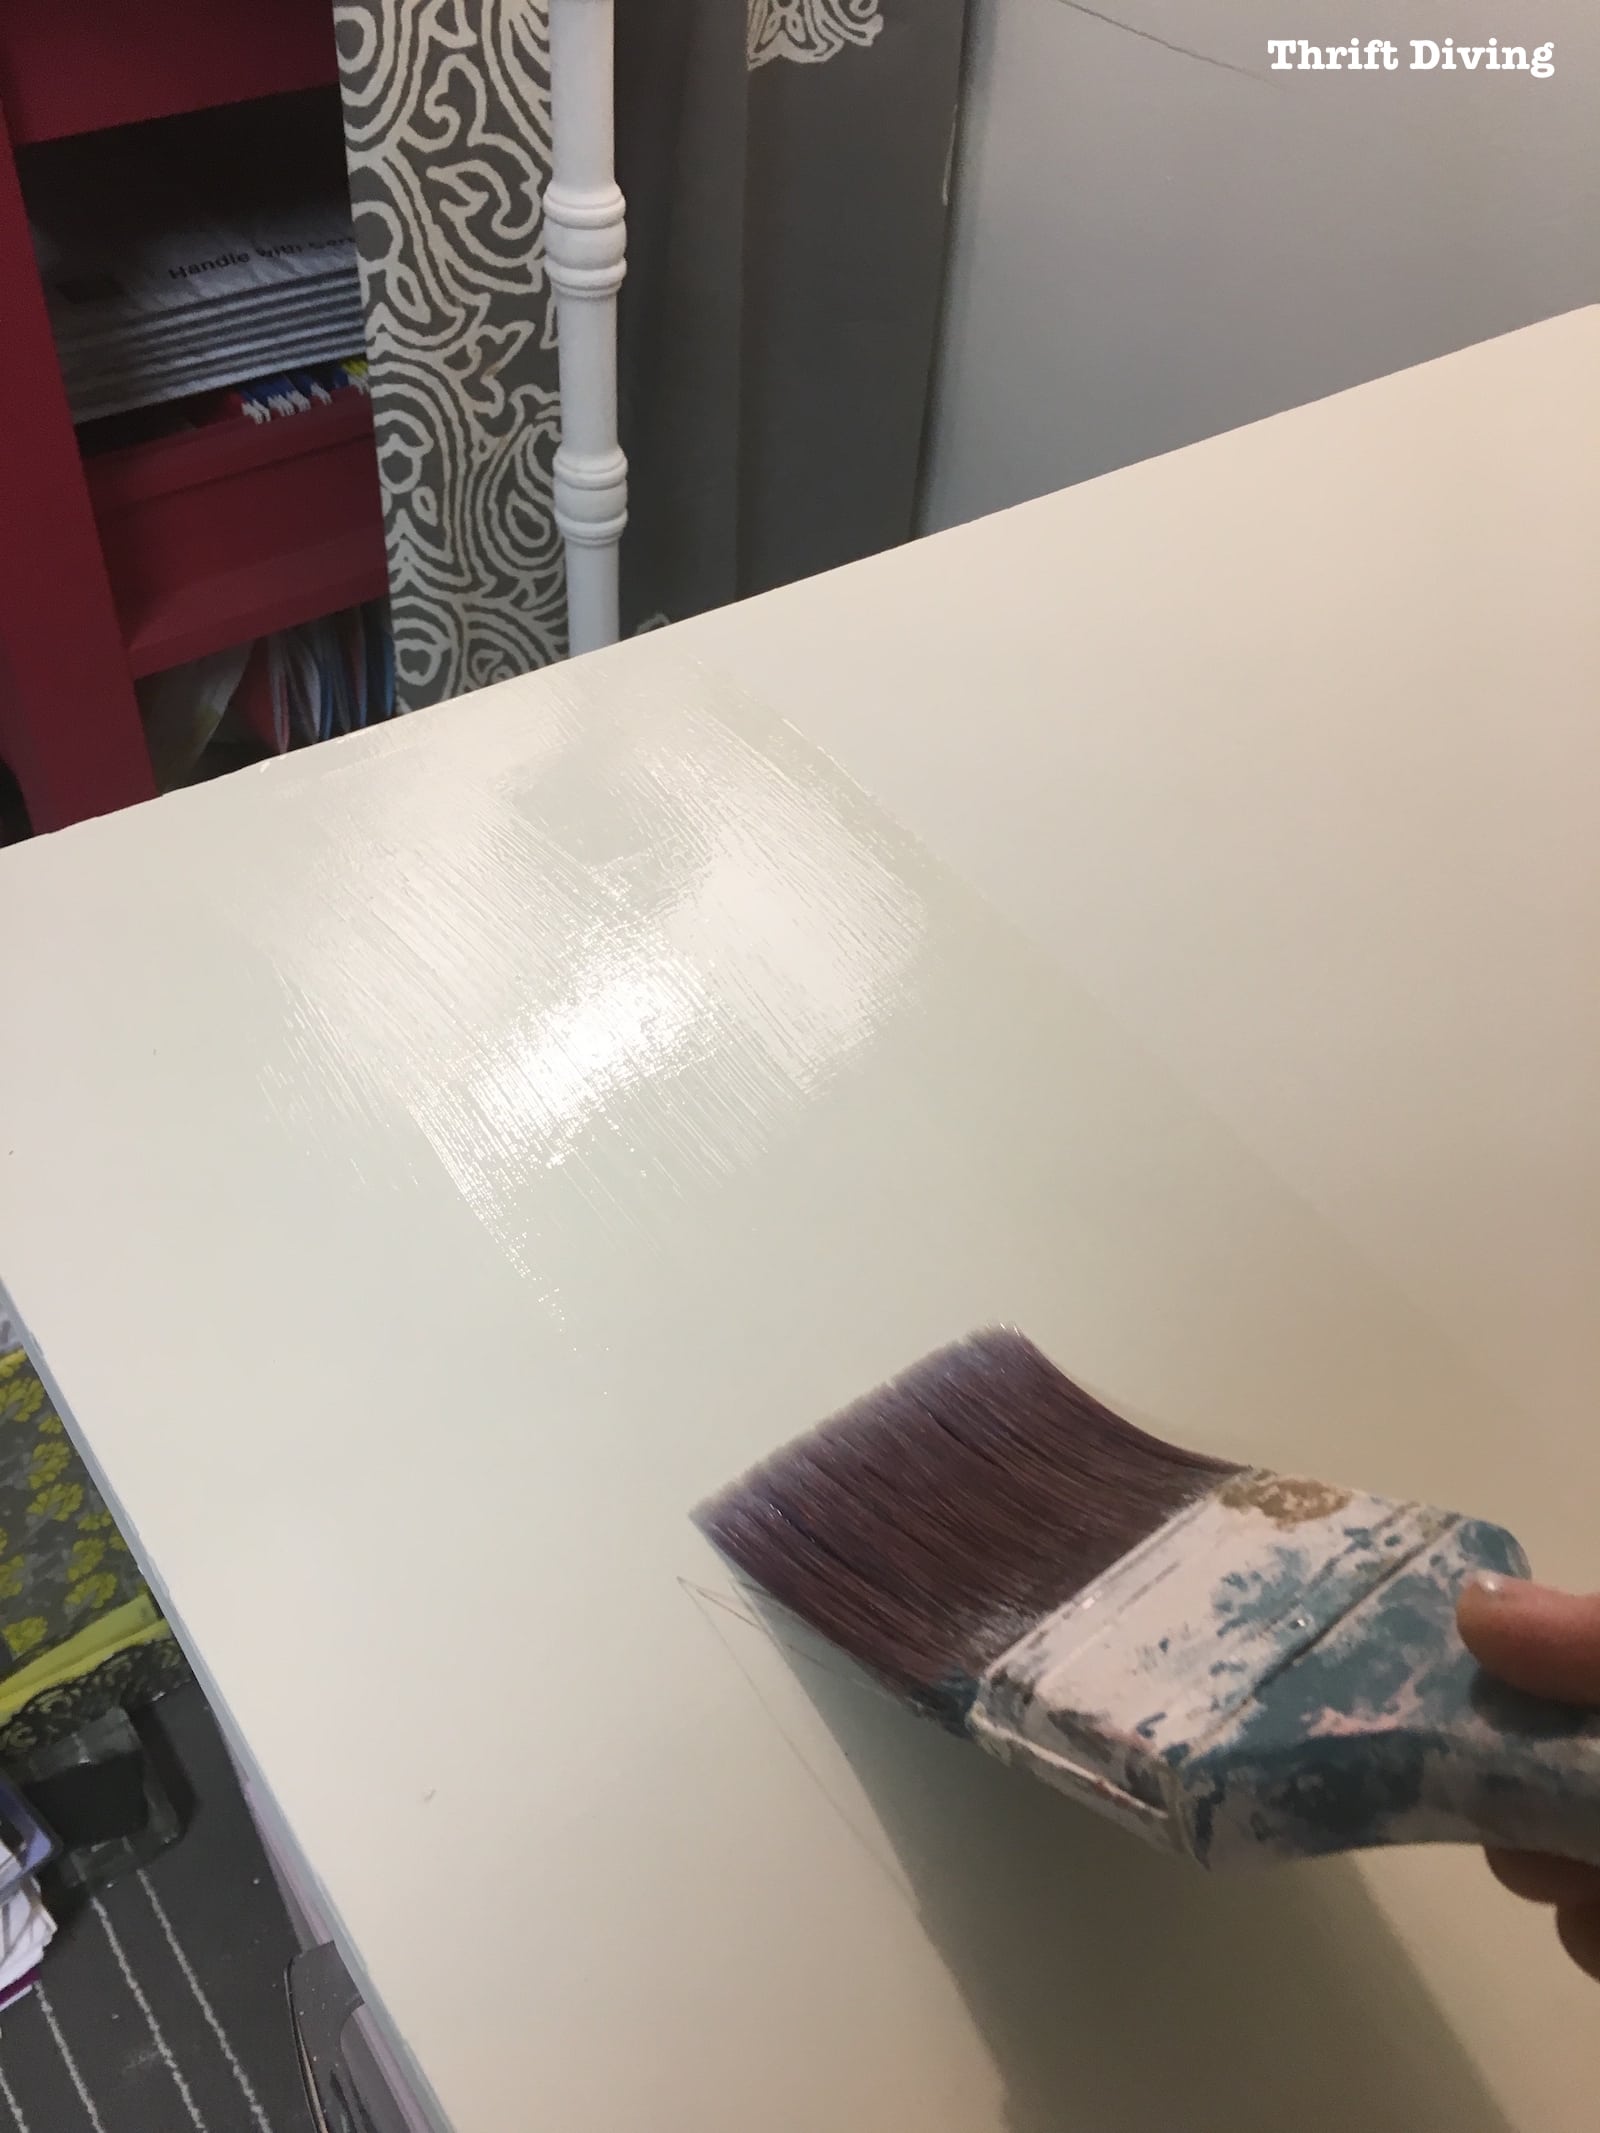
However, I was freshening up my desk with a couple new coats of paint.
I simply used off-white paint I had on hand (I had this old container of Annie Sloan Old White paint in the garage. Man, it was pretty beat up! LOL).
It looked like a pretty good match, so I went with it!

When I use paint brushes, my favorite are synthetic Purdy paint brushes because they give a smoother appearance than natural bristle brushes.
Starting at one end, I smoothed on a coat, making sure it was not too thick. Remember: the thicker the paint, the more time it takes to dry. Thin coats allow it to dry more quickly and achieve better results.
It’s always best to have two thin coats versus one super thick coat!
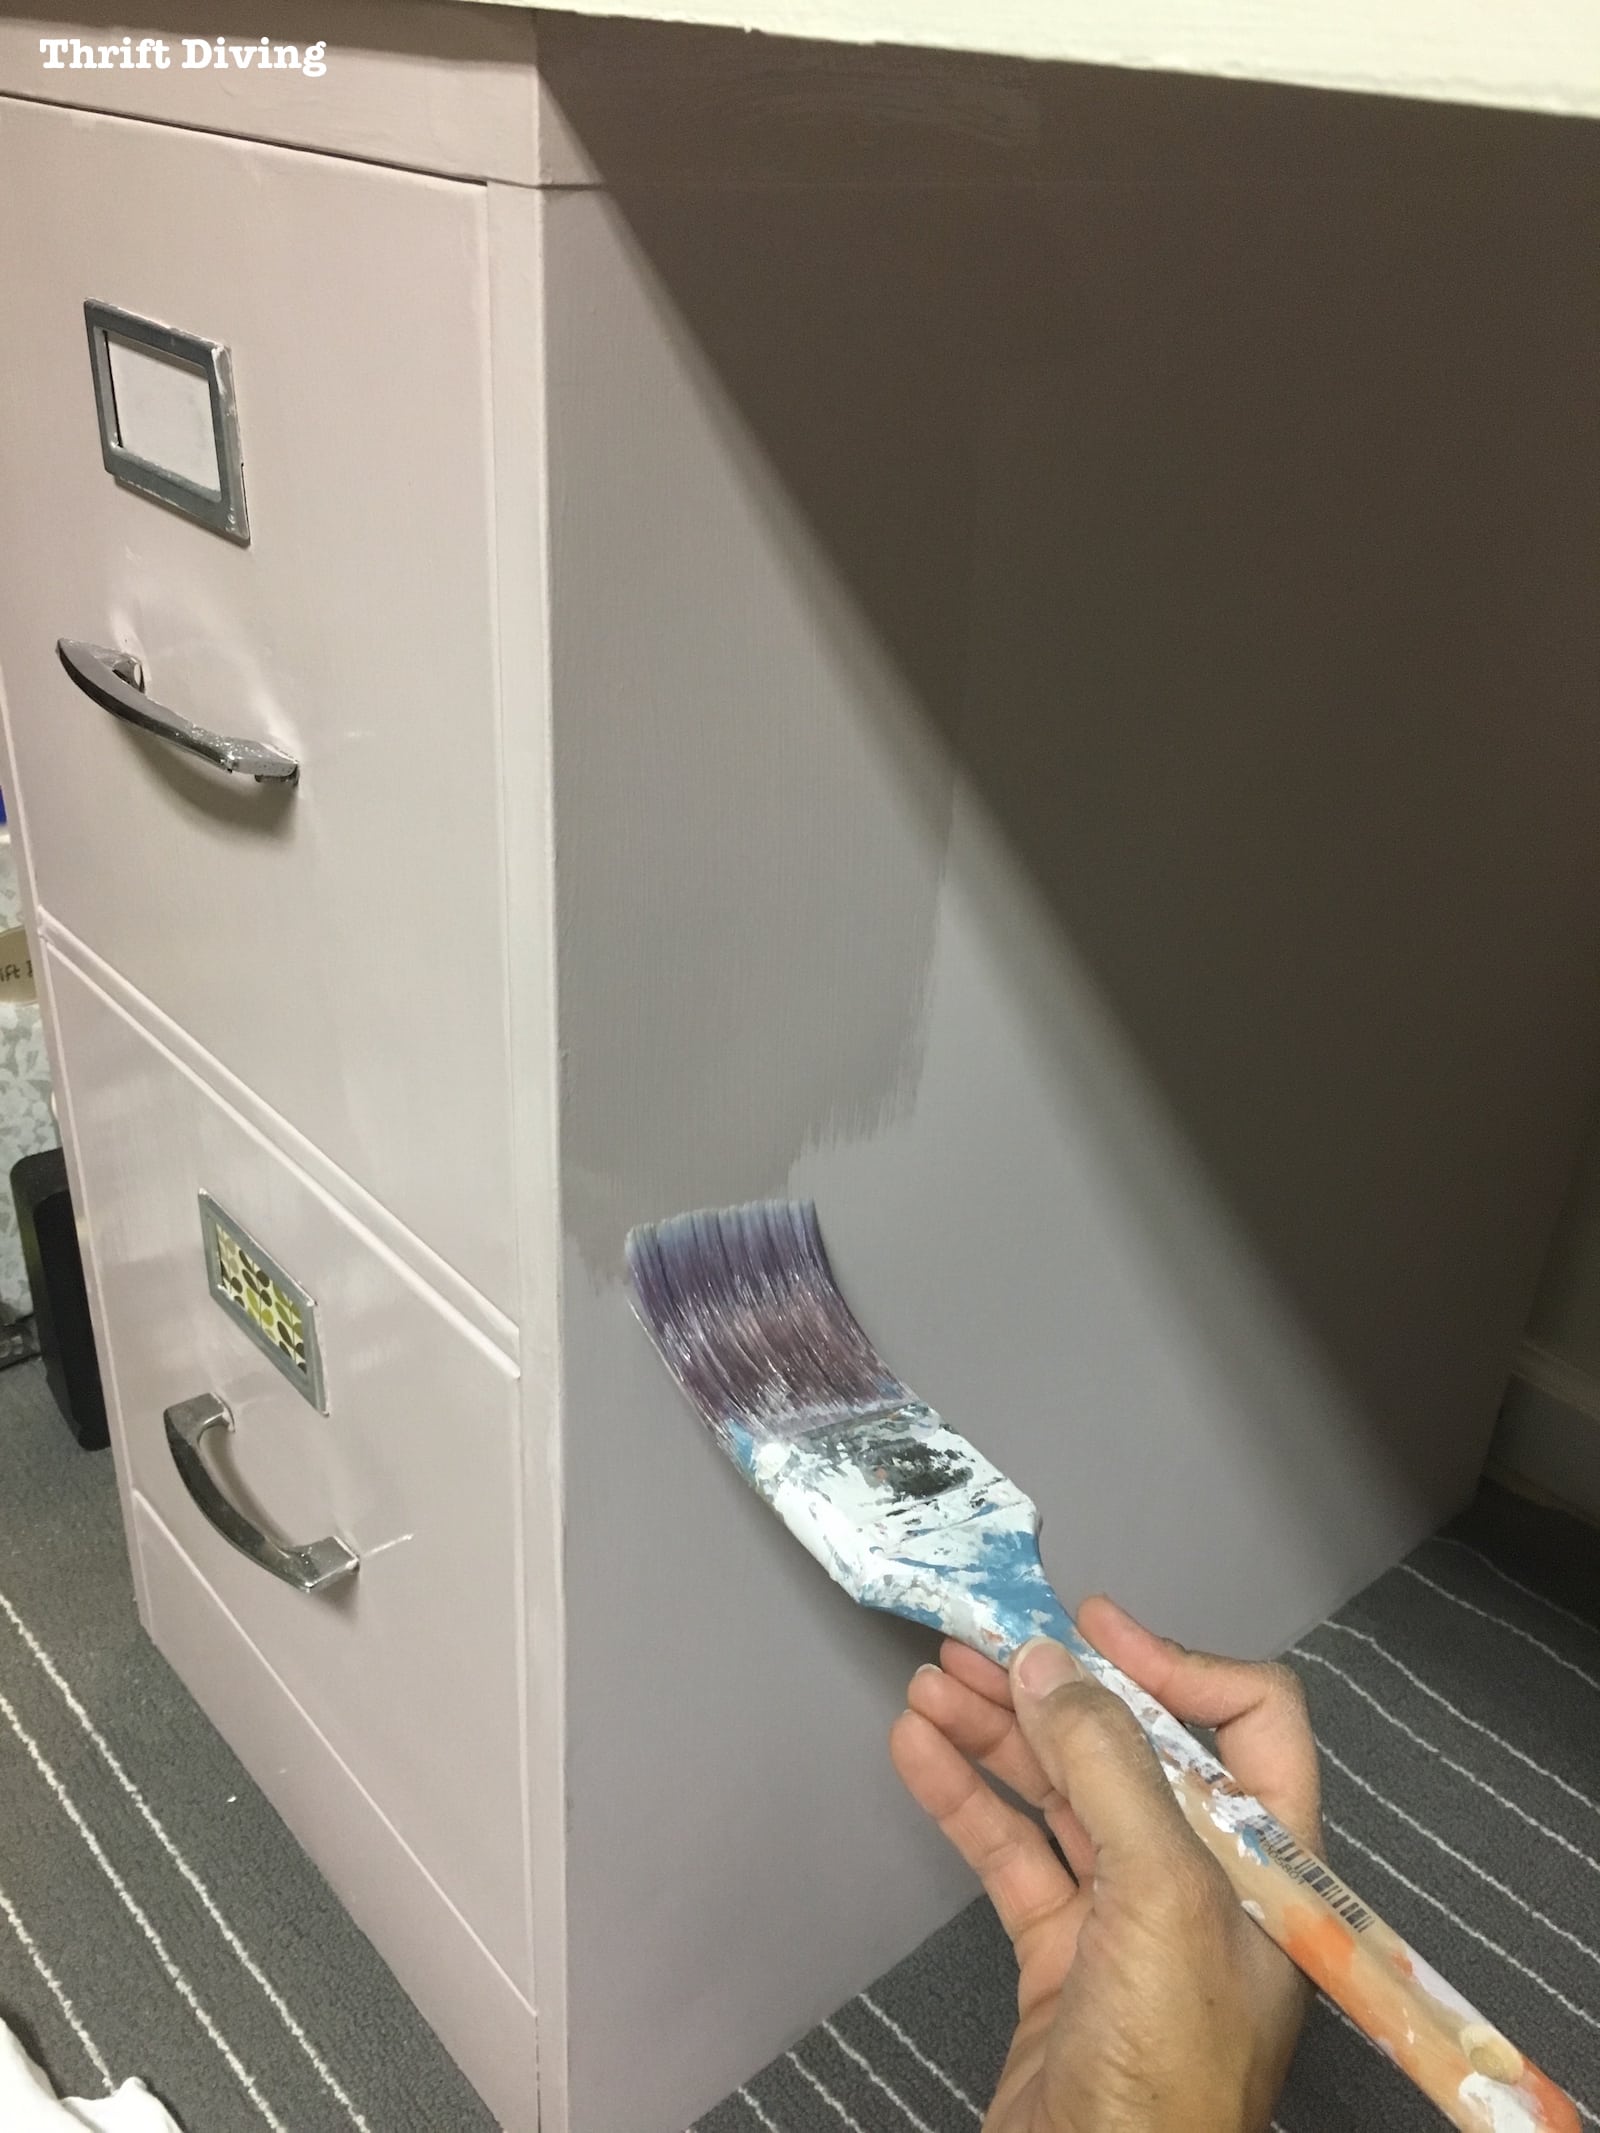
The file cabinets were in horrible condition, too!
When I painted them back in 2015, I had never waxed them or add any top coat, so they’d gotten pretty scruffed up over the past couple of years.
Thankfully, I had just enough chalked paint left over in the garage that I had originally used on them (which was a pretty, light pink, Annie Sloan Antoinette).

STEP 4: Sand and Reapply Another Coat
When I use chalked paint, I usually add two coats for better coverage, as I mentioned before.
To get super smooth results, it’s best to sand in the direction of the grain (or in the direction of your paint brush) in between those coats, maybe with 320-grit sandpaper. (TIP: Use a dust mask when sanding).
If you skip in-between sanding to save time, that’s fine. It won’t ruin your results. 🙂
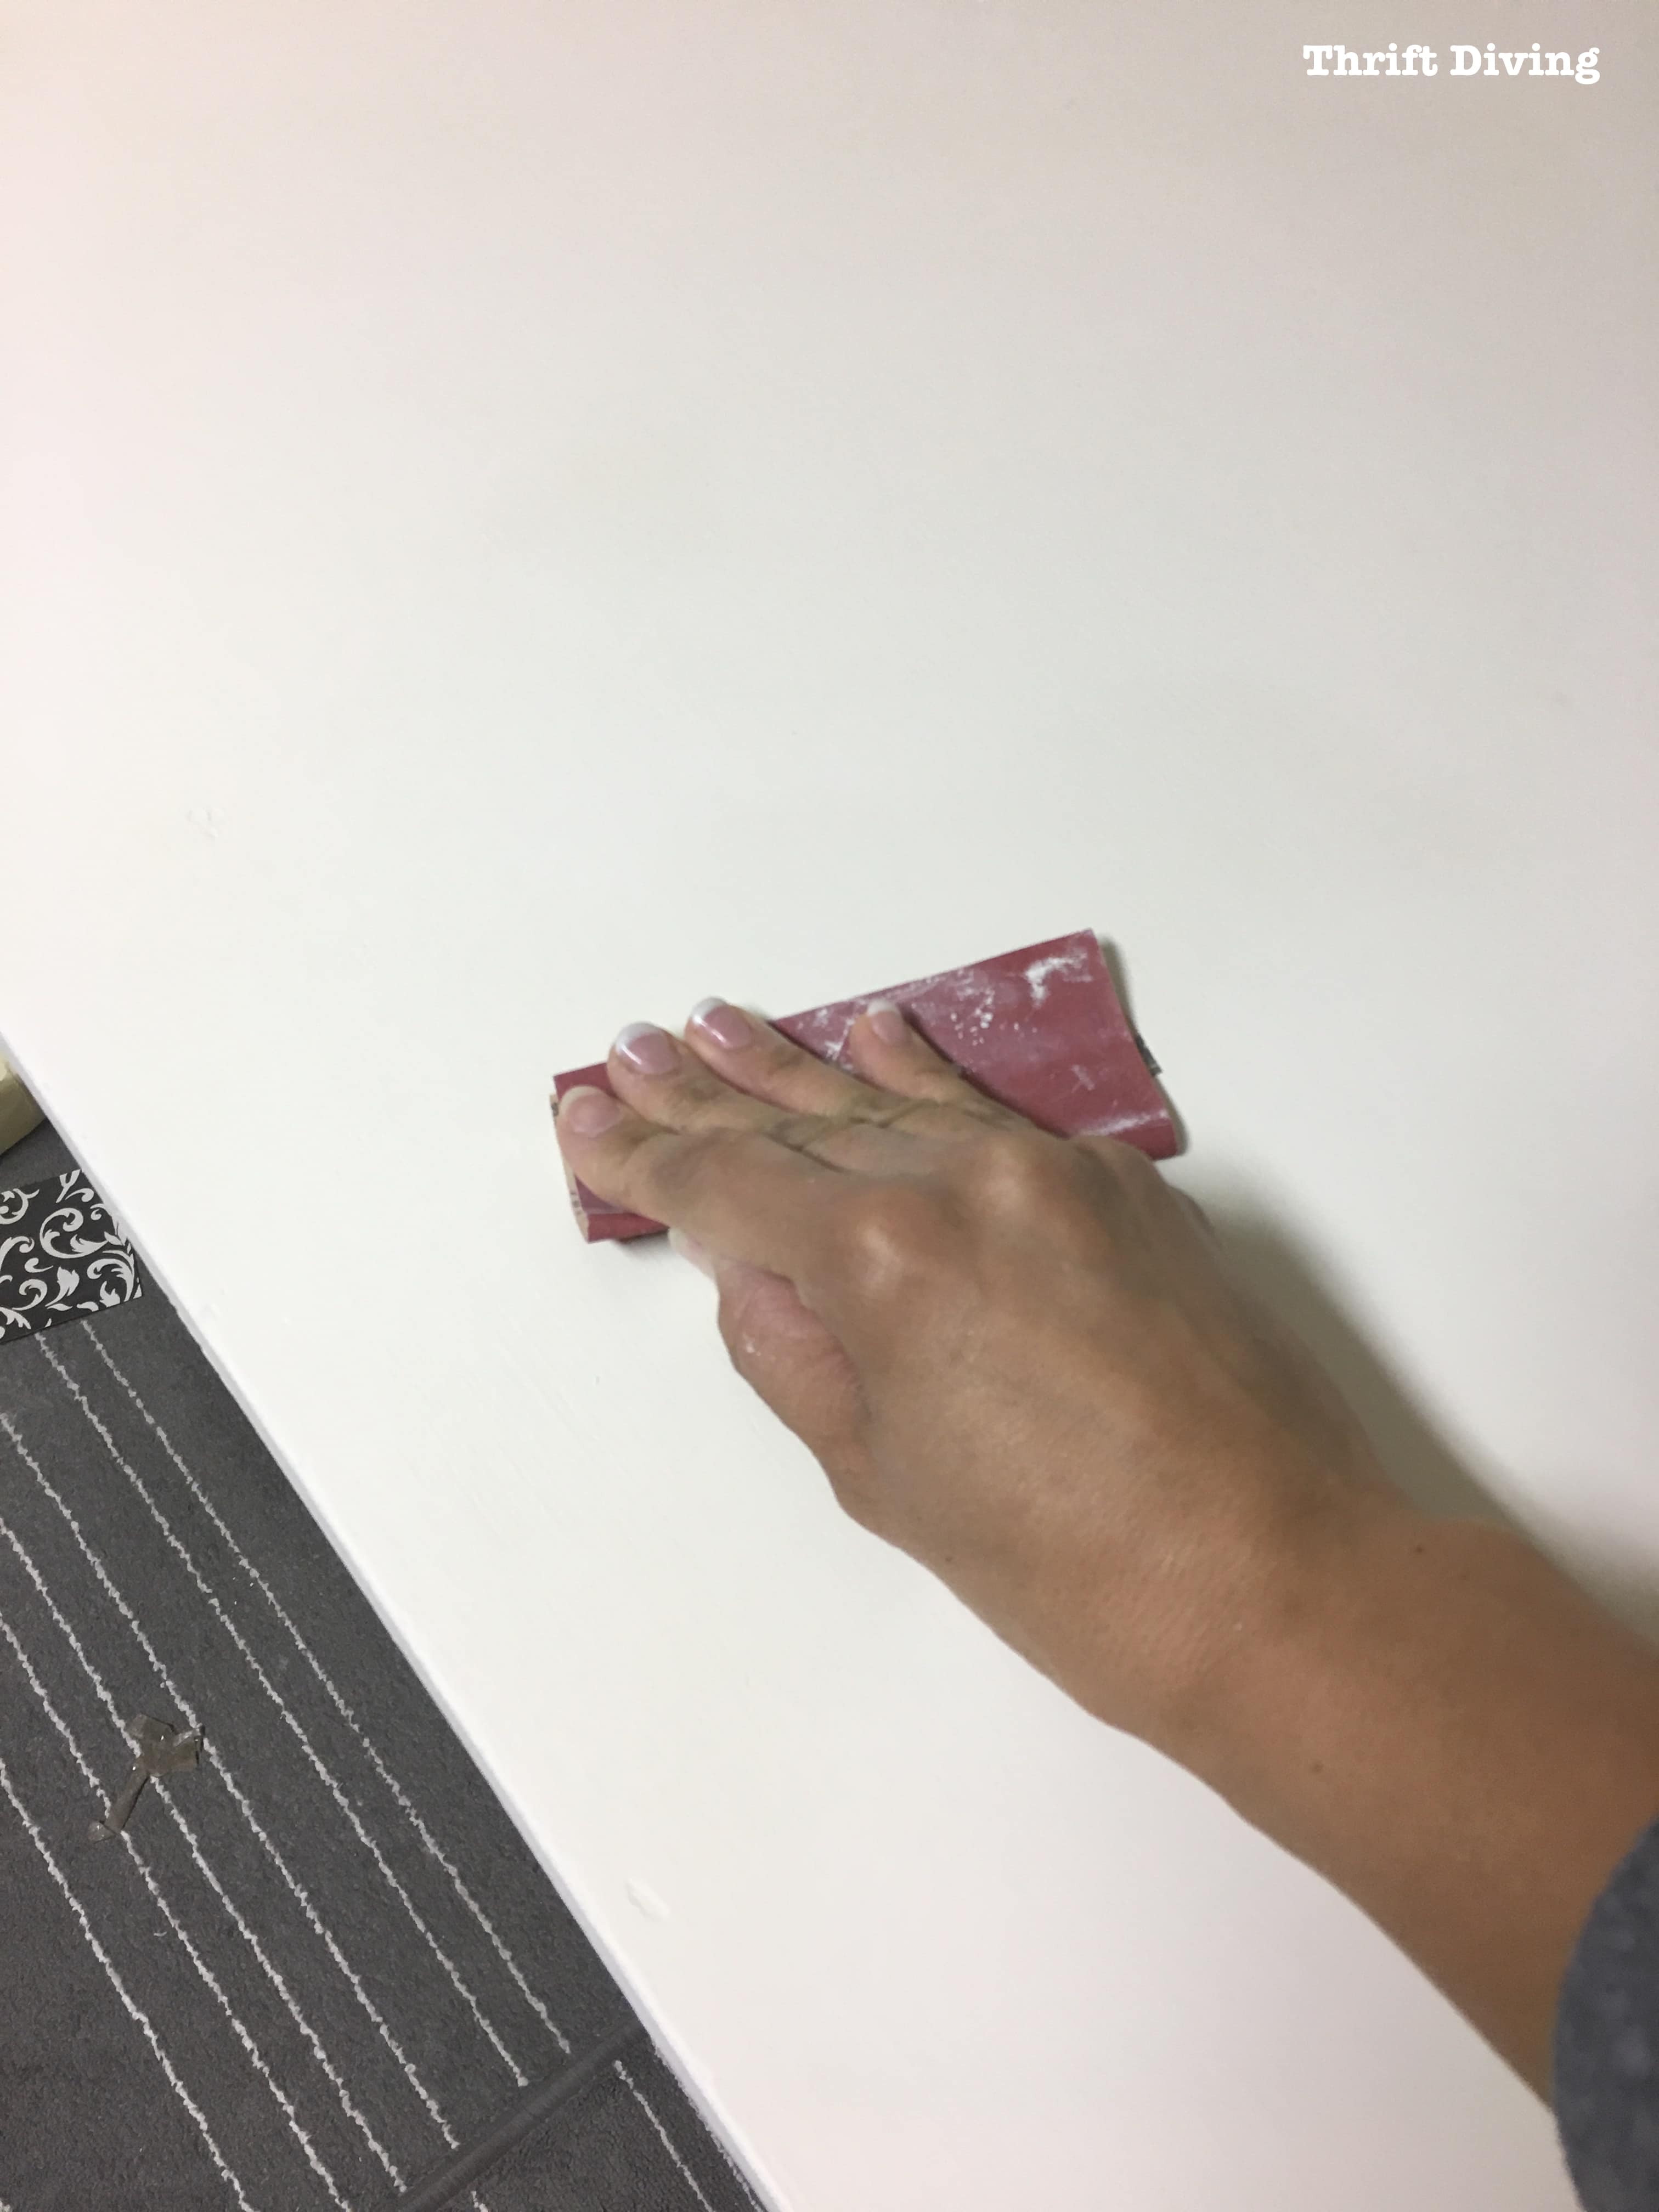
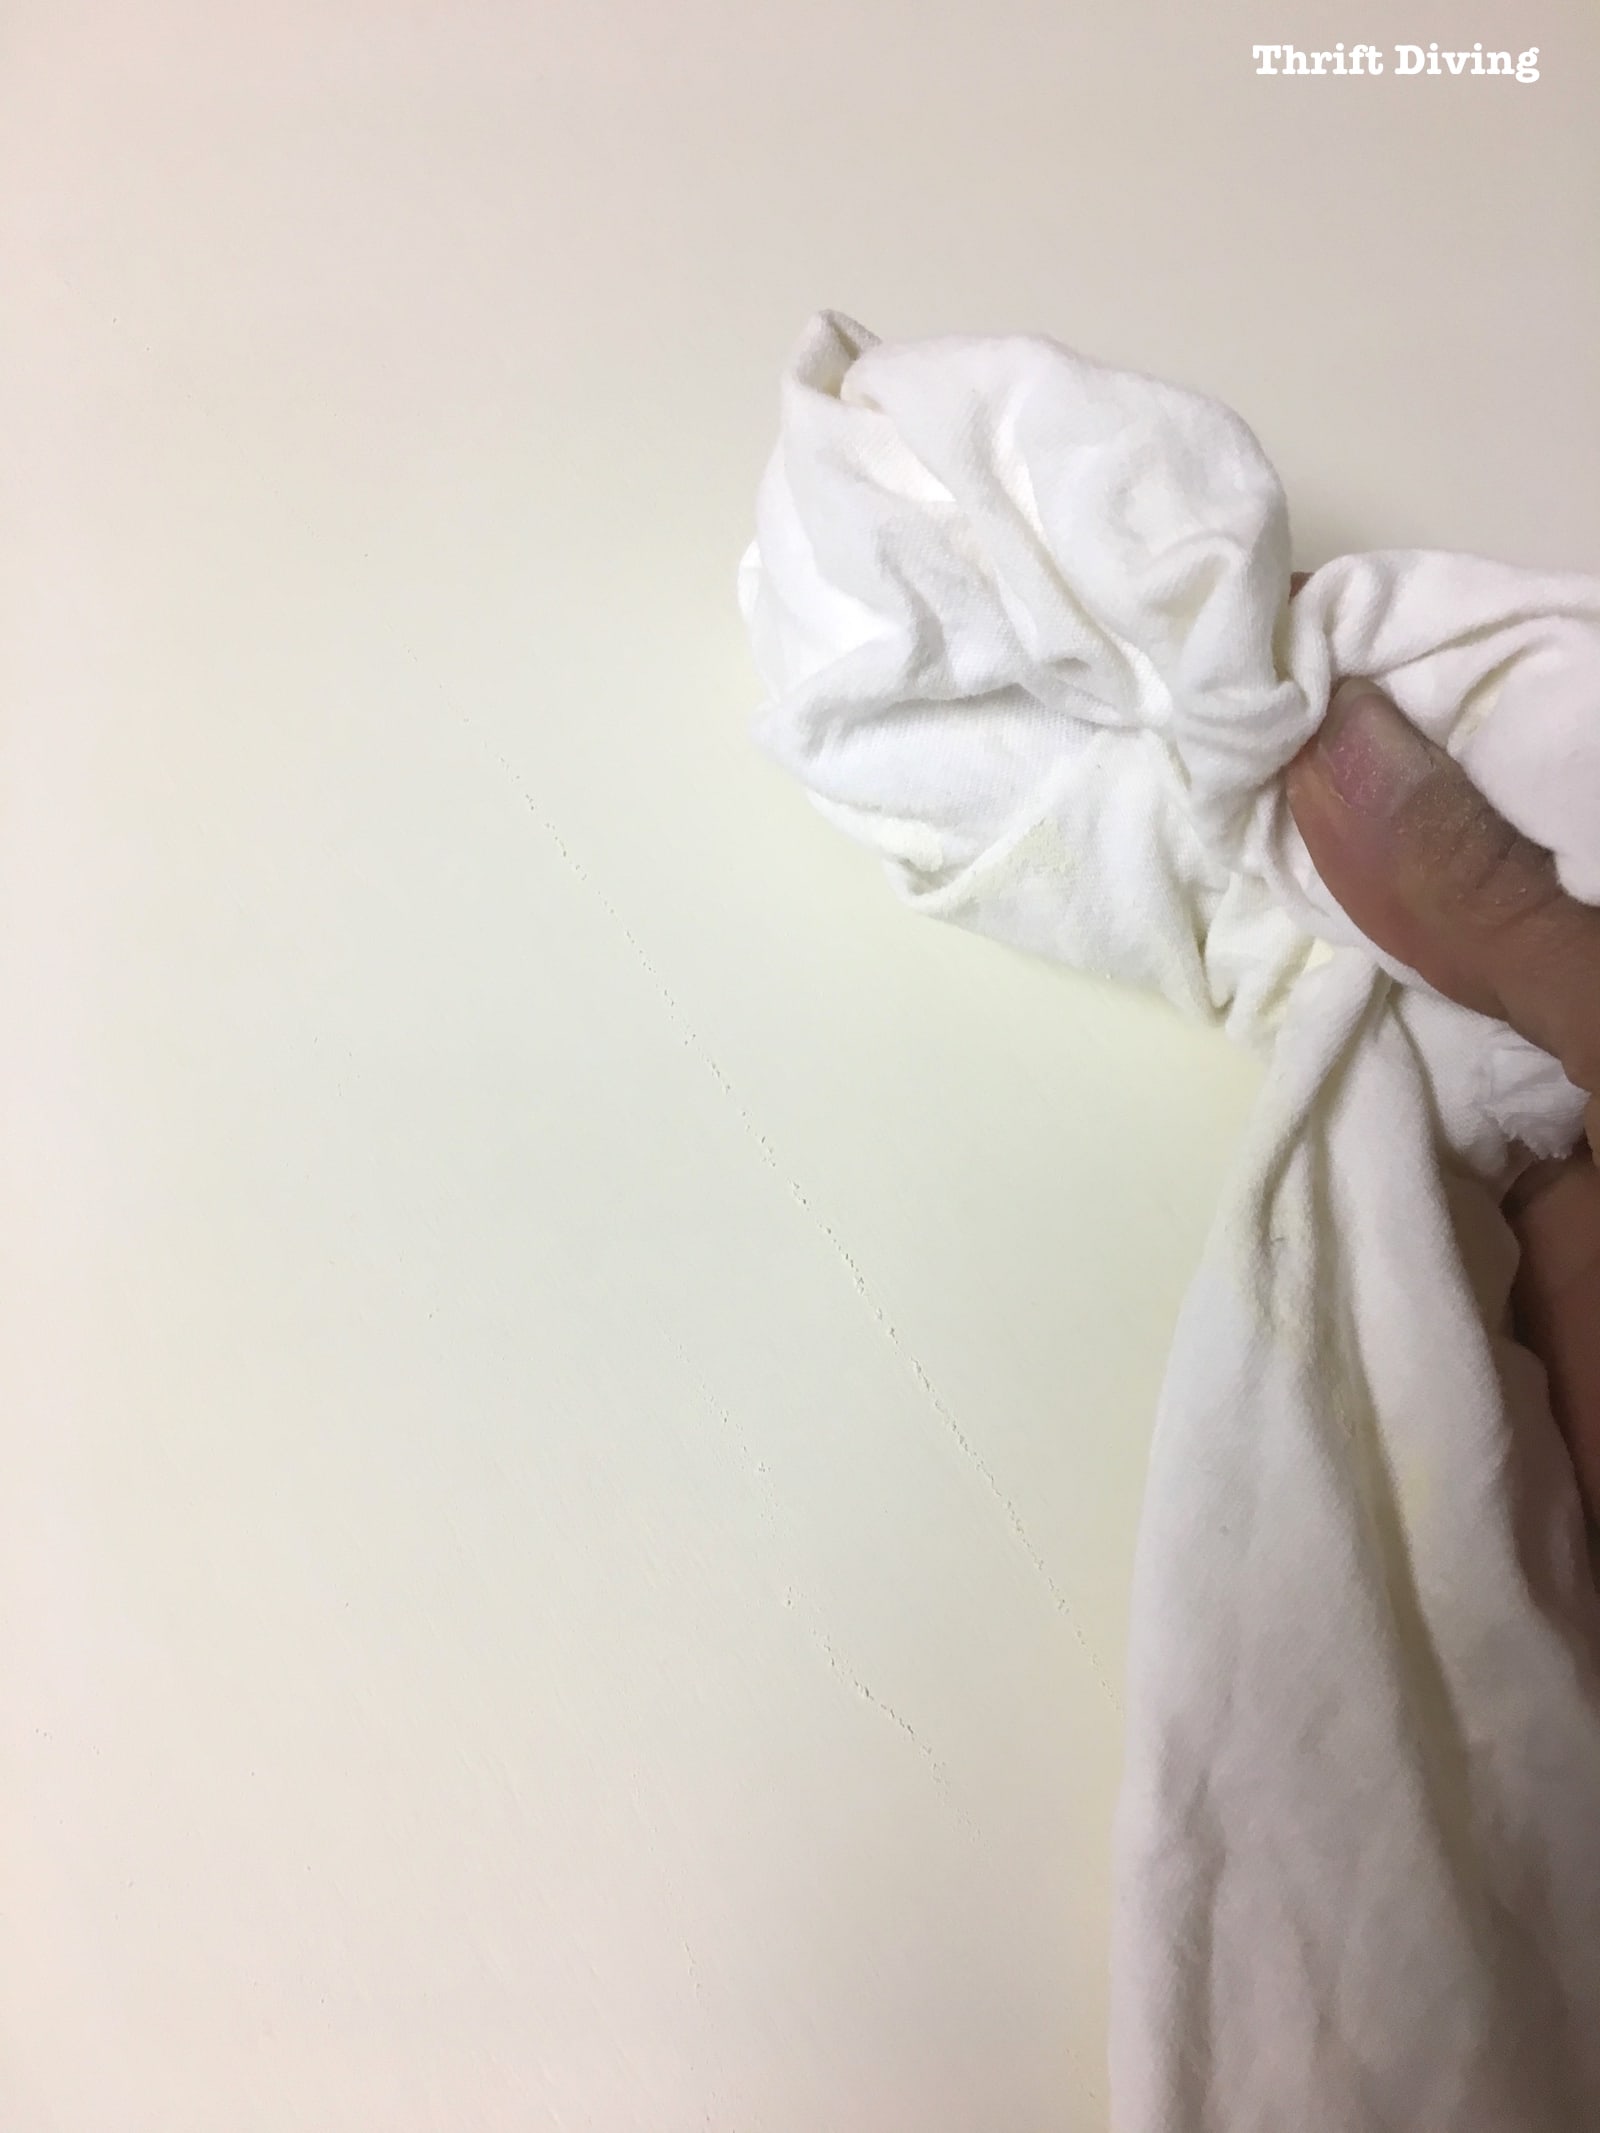
Just be sure to wipe up all the paint dust so it doesn’t get into your second coat.
I love using the lint-free “t-shirt” type rags that you can buy in 1-pound packs from home improvement stores.
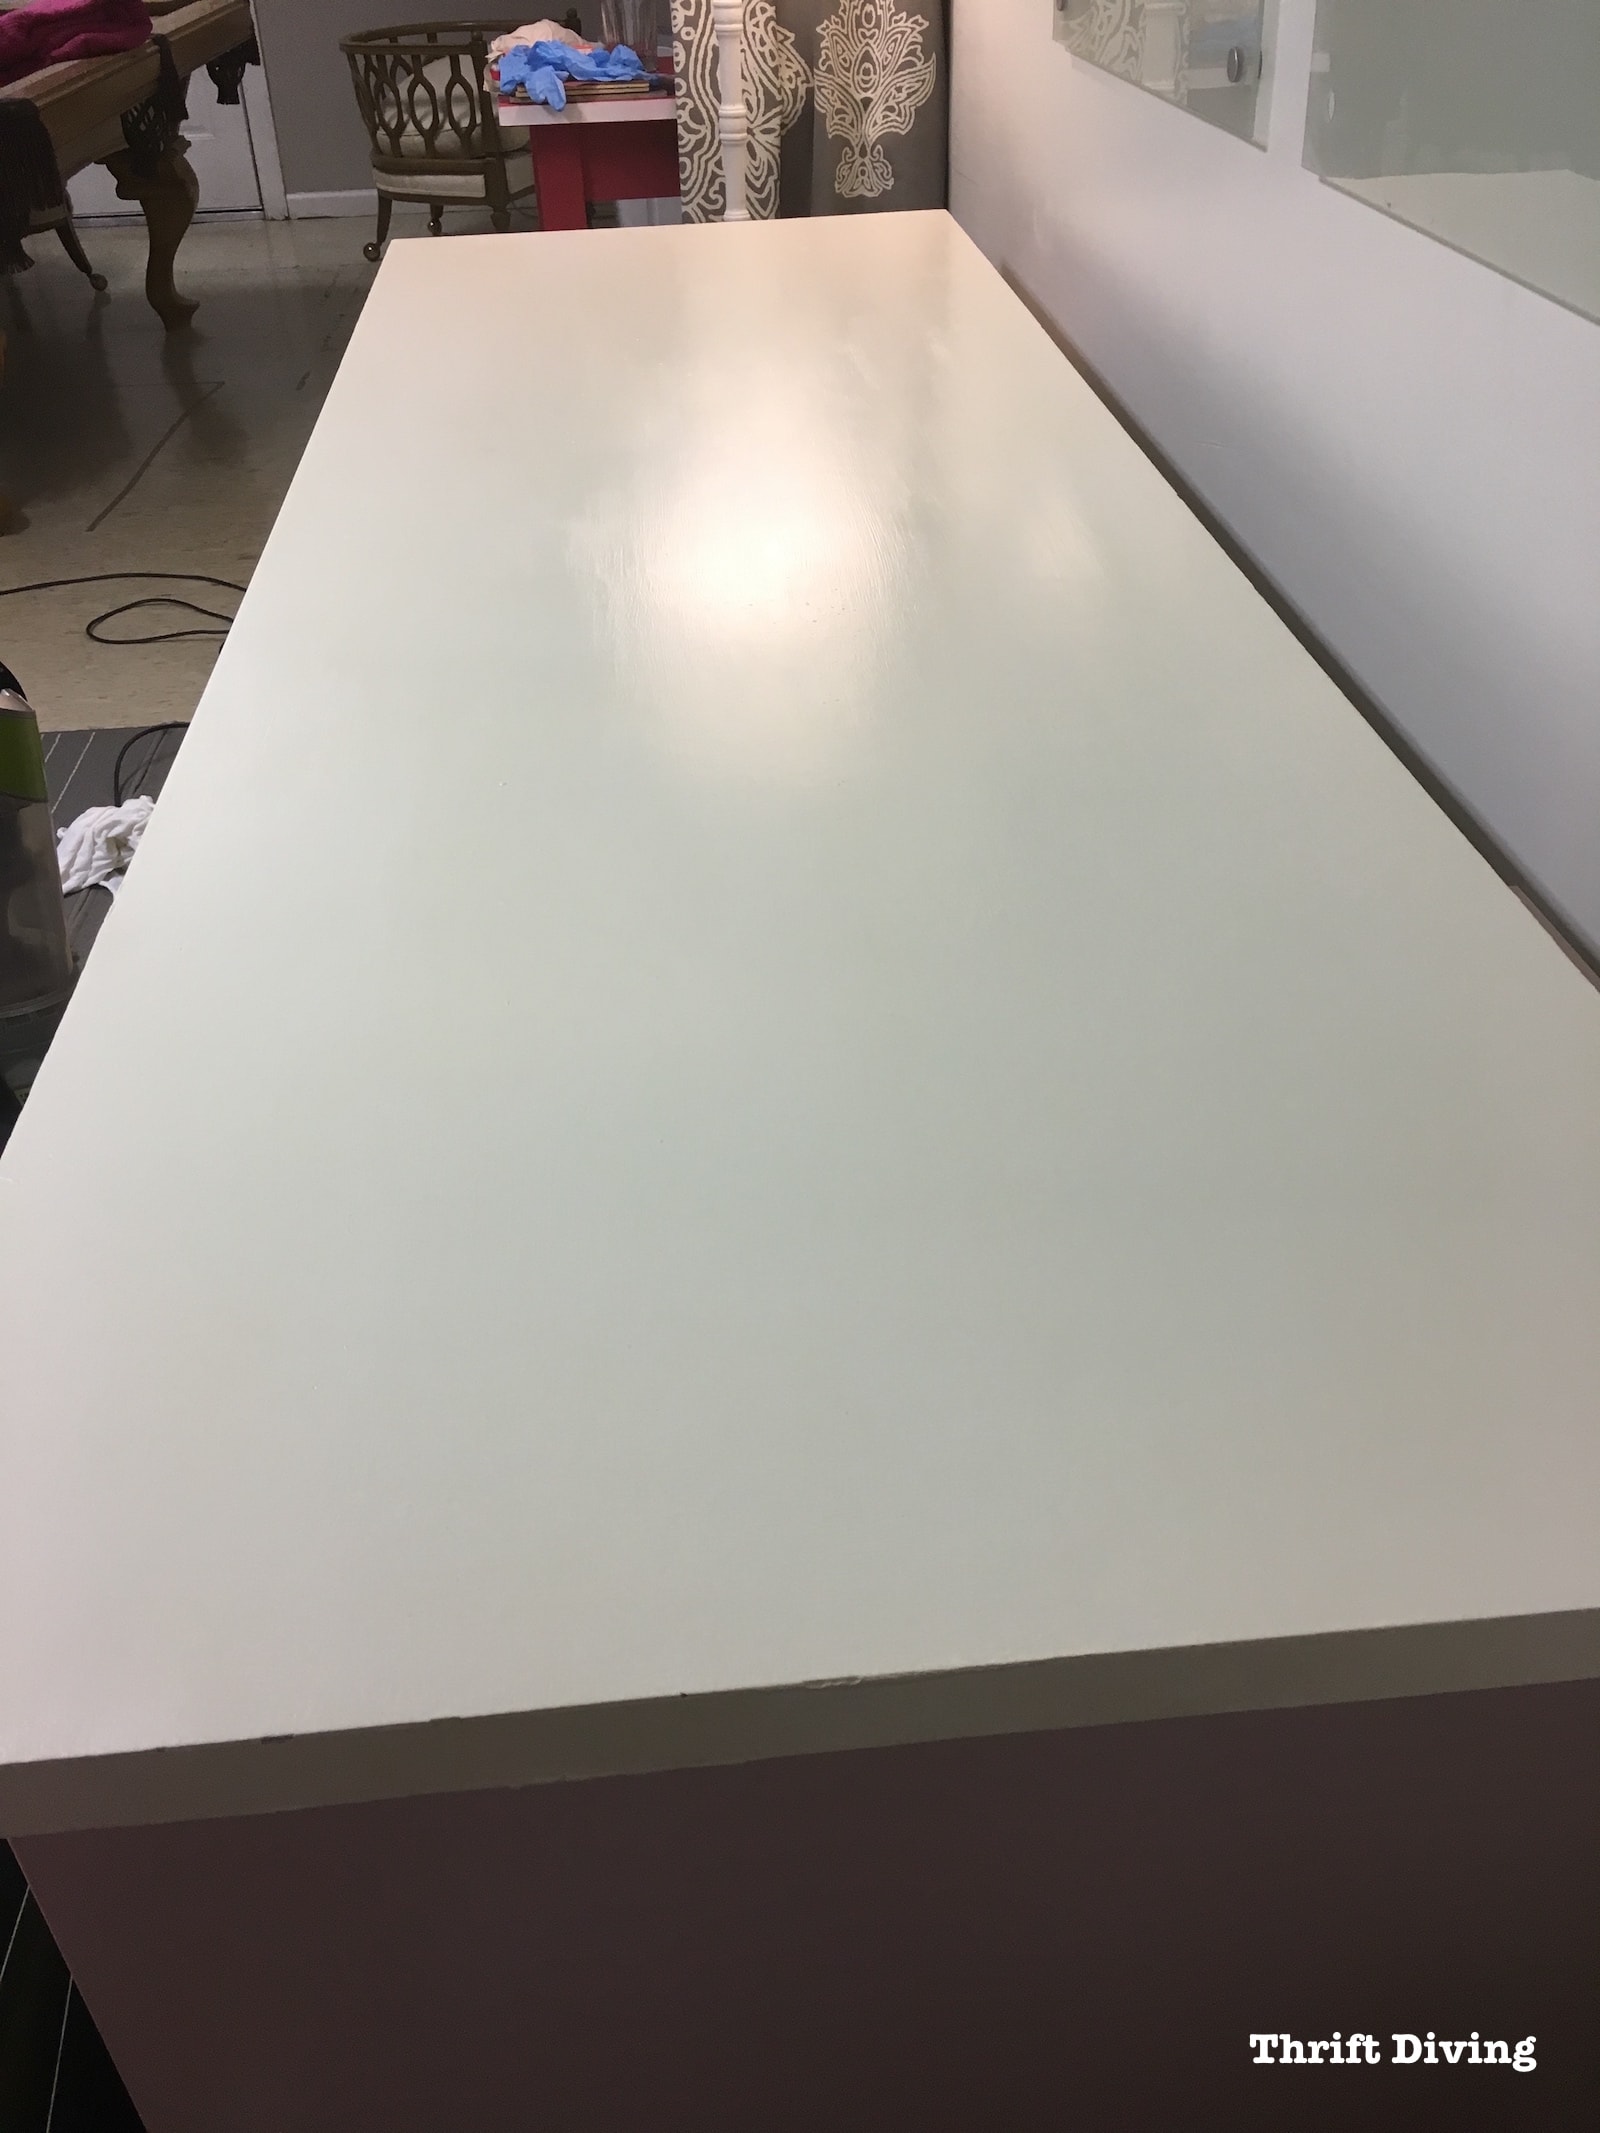
STEP 5: Add Several Coats of Top Coat
I’m sick of clear wax on painted furniture.
The reason why is because (at least, for me) it tends to be streaky. Plus, in 6 months, you’re supposed to reapply it.
Well, I’m a lazy DIYer: once I do a project, I ain’t comin’ back to add more wax. LOL
Heck–I may not even wax to begin with (which was the case with these file cabinets! HA!)
If you are waxing your desk, it will take less time. However, I used a water-based top coat, which takes a little more drying time in between coats.
I went to the woodworking store a couple weeks ago and they highly recommended General Finishes High Performance water-based top coat as a great general top coat.
If you check it out on Amazon, you see that it gets excellent ratings there, too.
They were right!
After using it, it’s become a favorite of mine because it makes things look silky smooth!
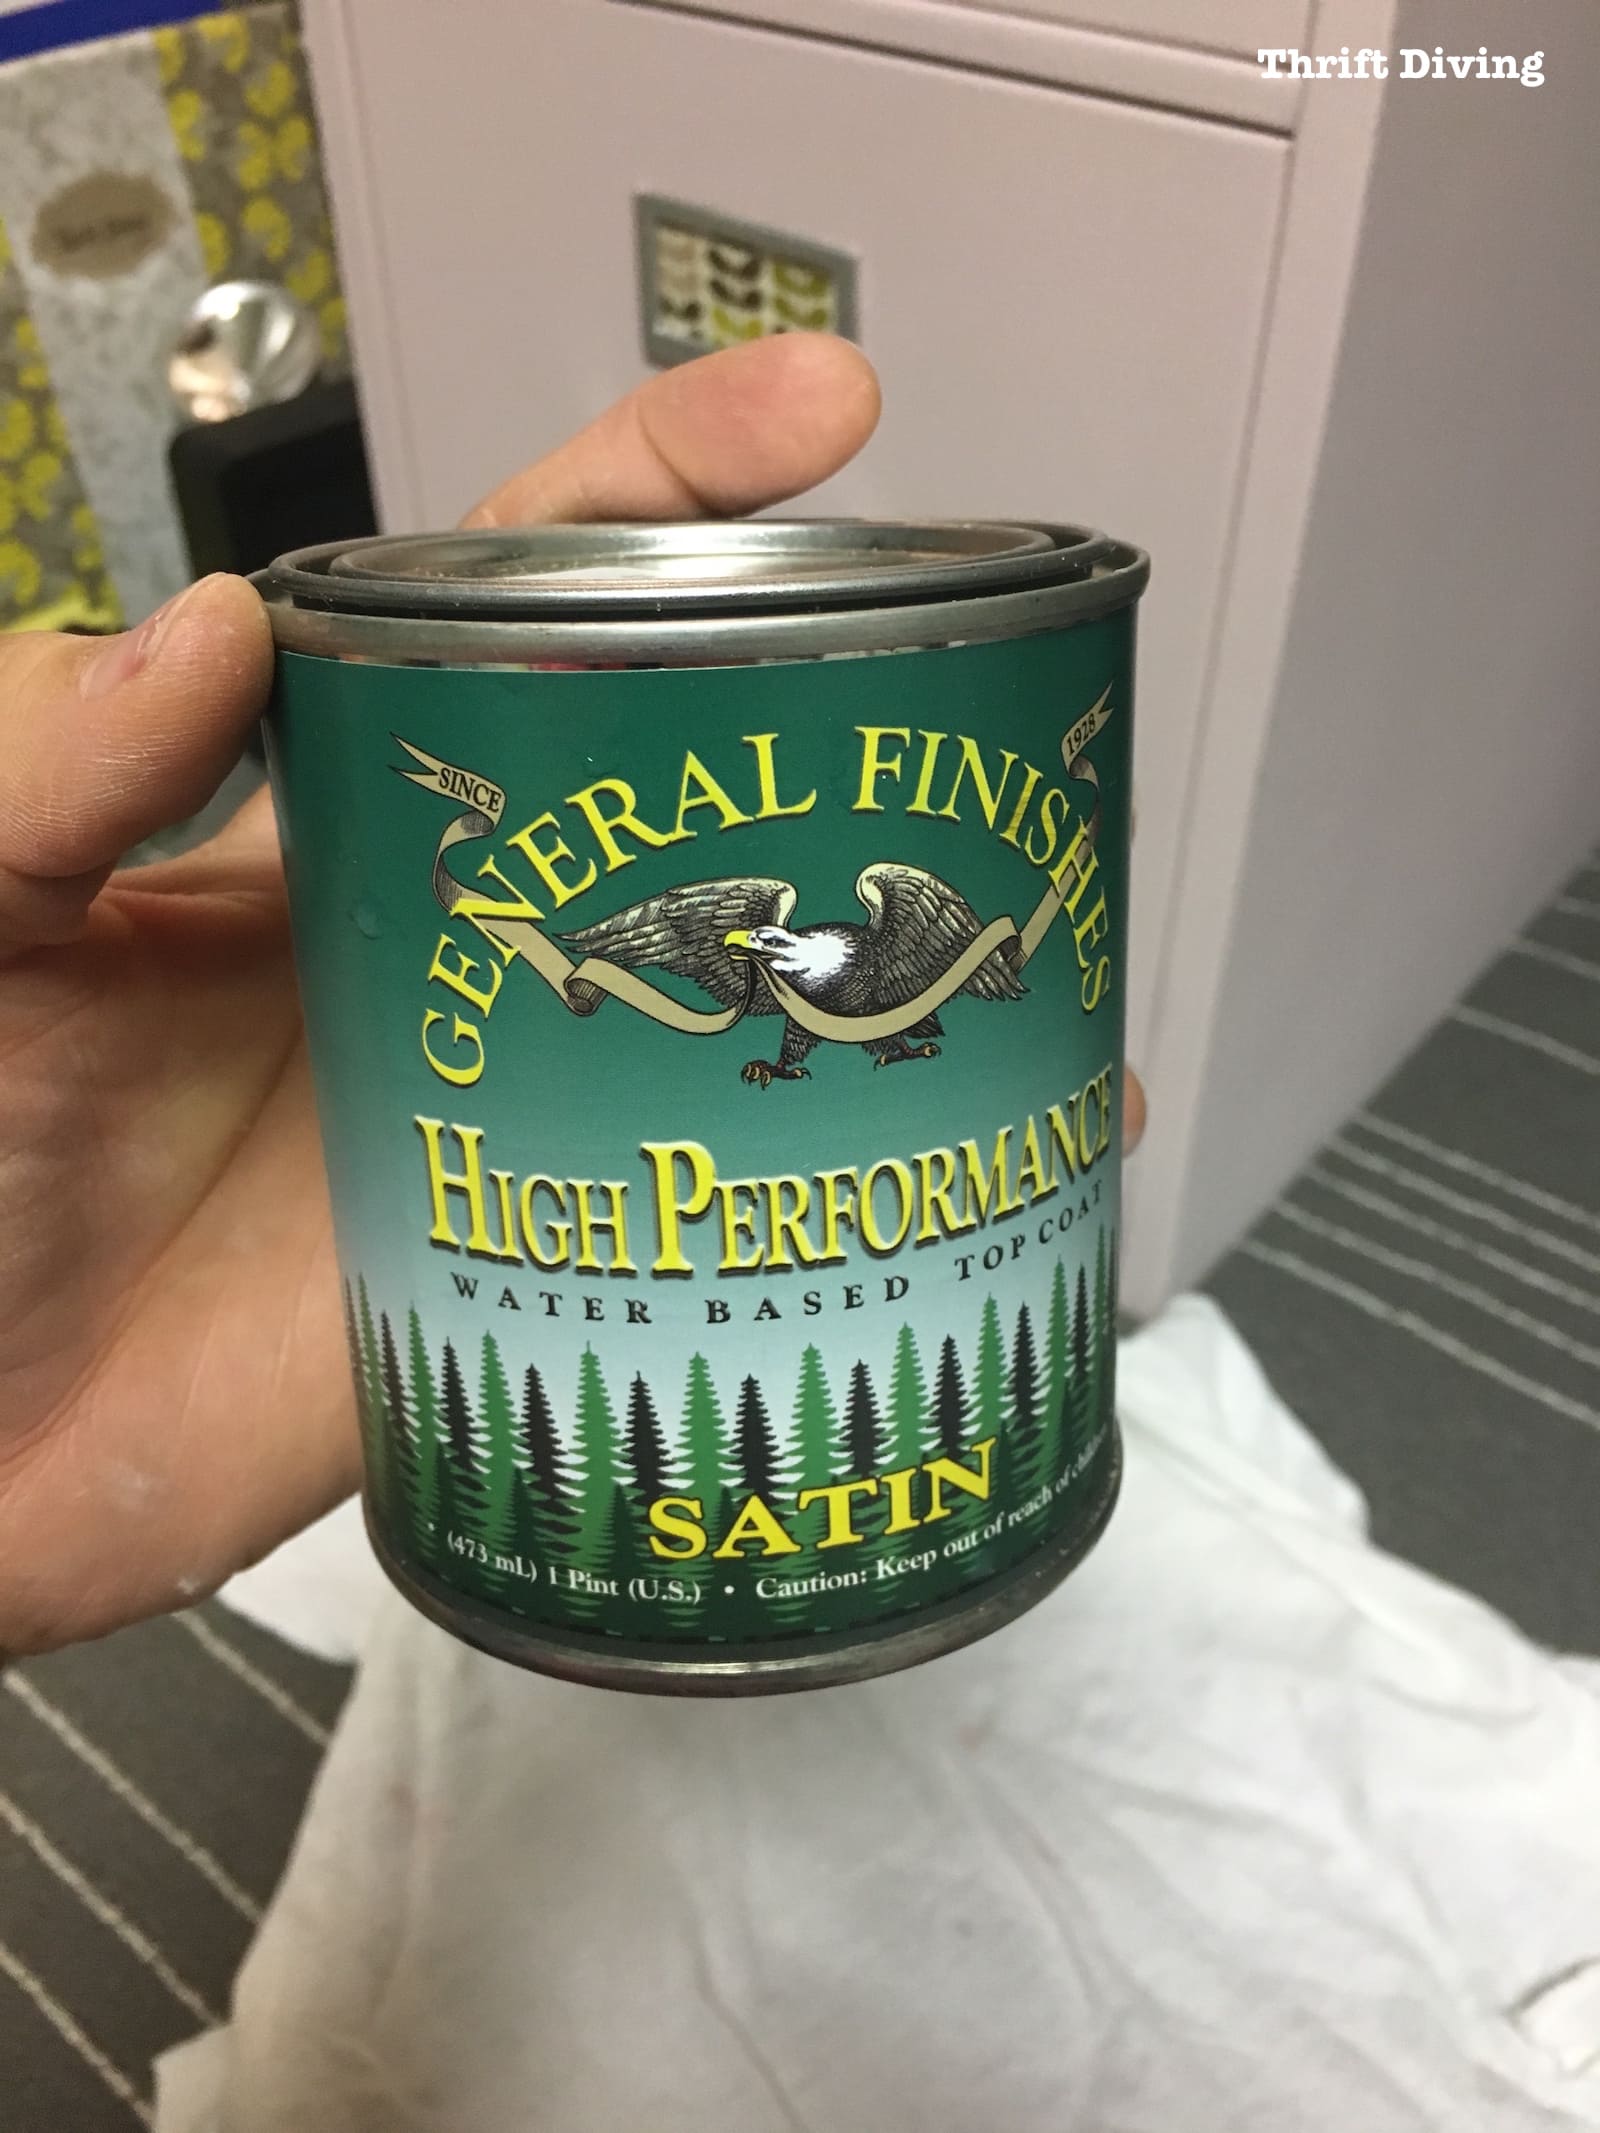
The instructions say to use either a foam brush or a paint pad applicator, which I didn’t have either.
So it was a paint brush for me (I used a synthetic Purdy brush).
I thought it worked just fine.
Trying not to over-saturate the desk, I added two light coats, working quickly because it dries fast. I tried overlapping the previous section on each pass and making long strokes to keep it consistent.
I had a little trouble with the first coat looking a little blotchy but the second coat I made sure to add a bit more to the brush, working faster, and doing reeeallly long strokes to even it out.
General Finishes recommends a minimum of three coats with about 2 hours drying time in between each coat and then sanding in between coats with 320- or 400-grit sandpaper to help smooth it out.
I didn’t follow those instructions, either. I didn’t bother to sand but probably should have.
Still, the results were good.
I loved the little bit of satin sheen it gave to the file cabinets!
(Keep in mind that if you are following the top coat recommendations, you’ll have to leave adequate drying time in between the coats, which would require more hours needed for this “mini desk refresh”).
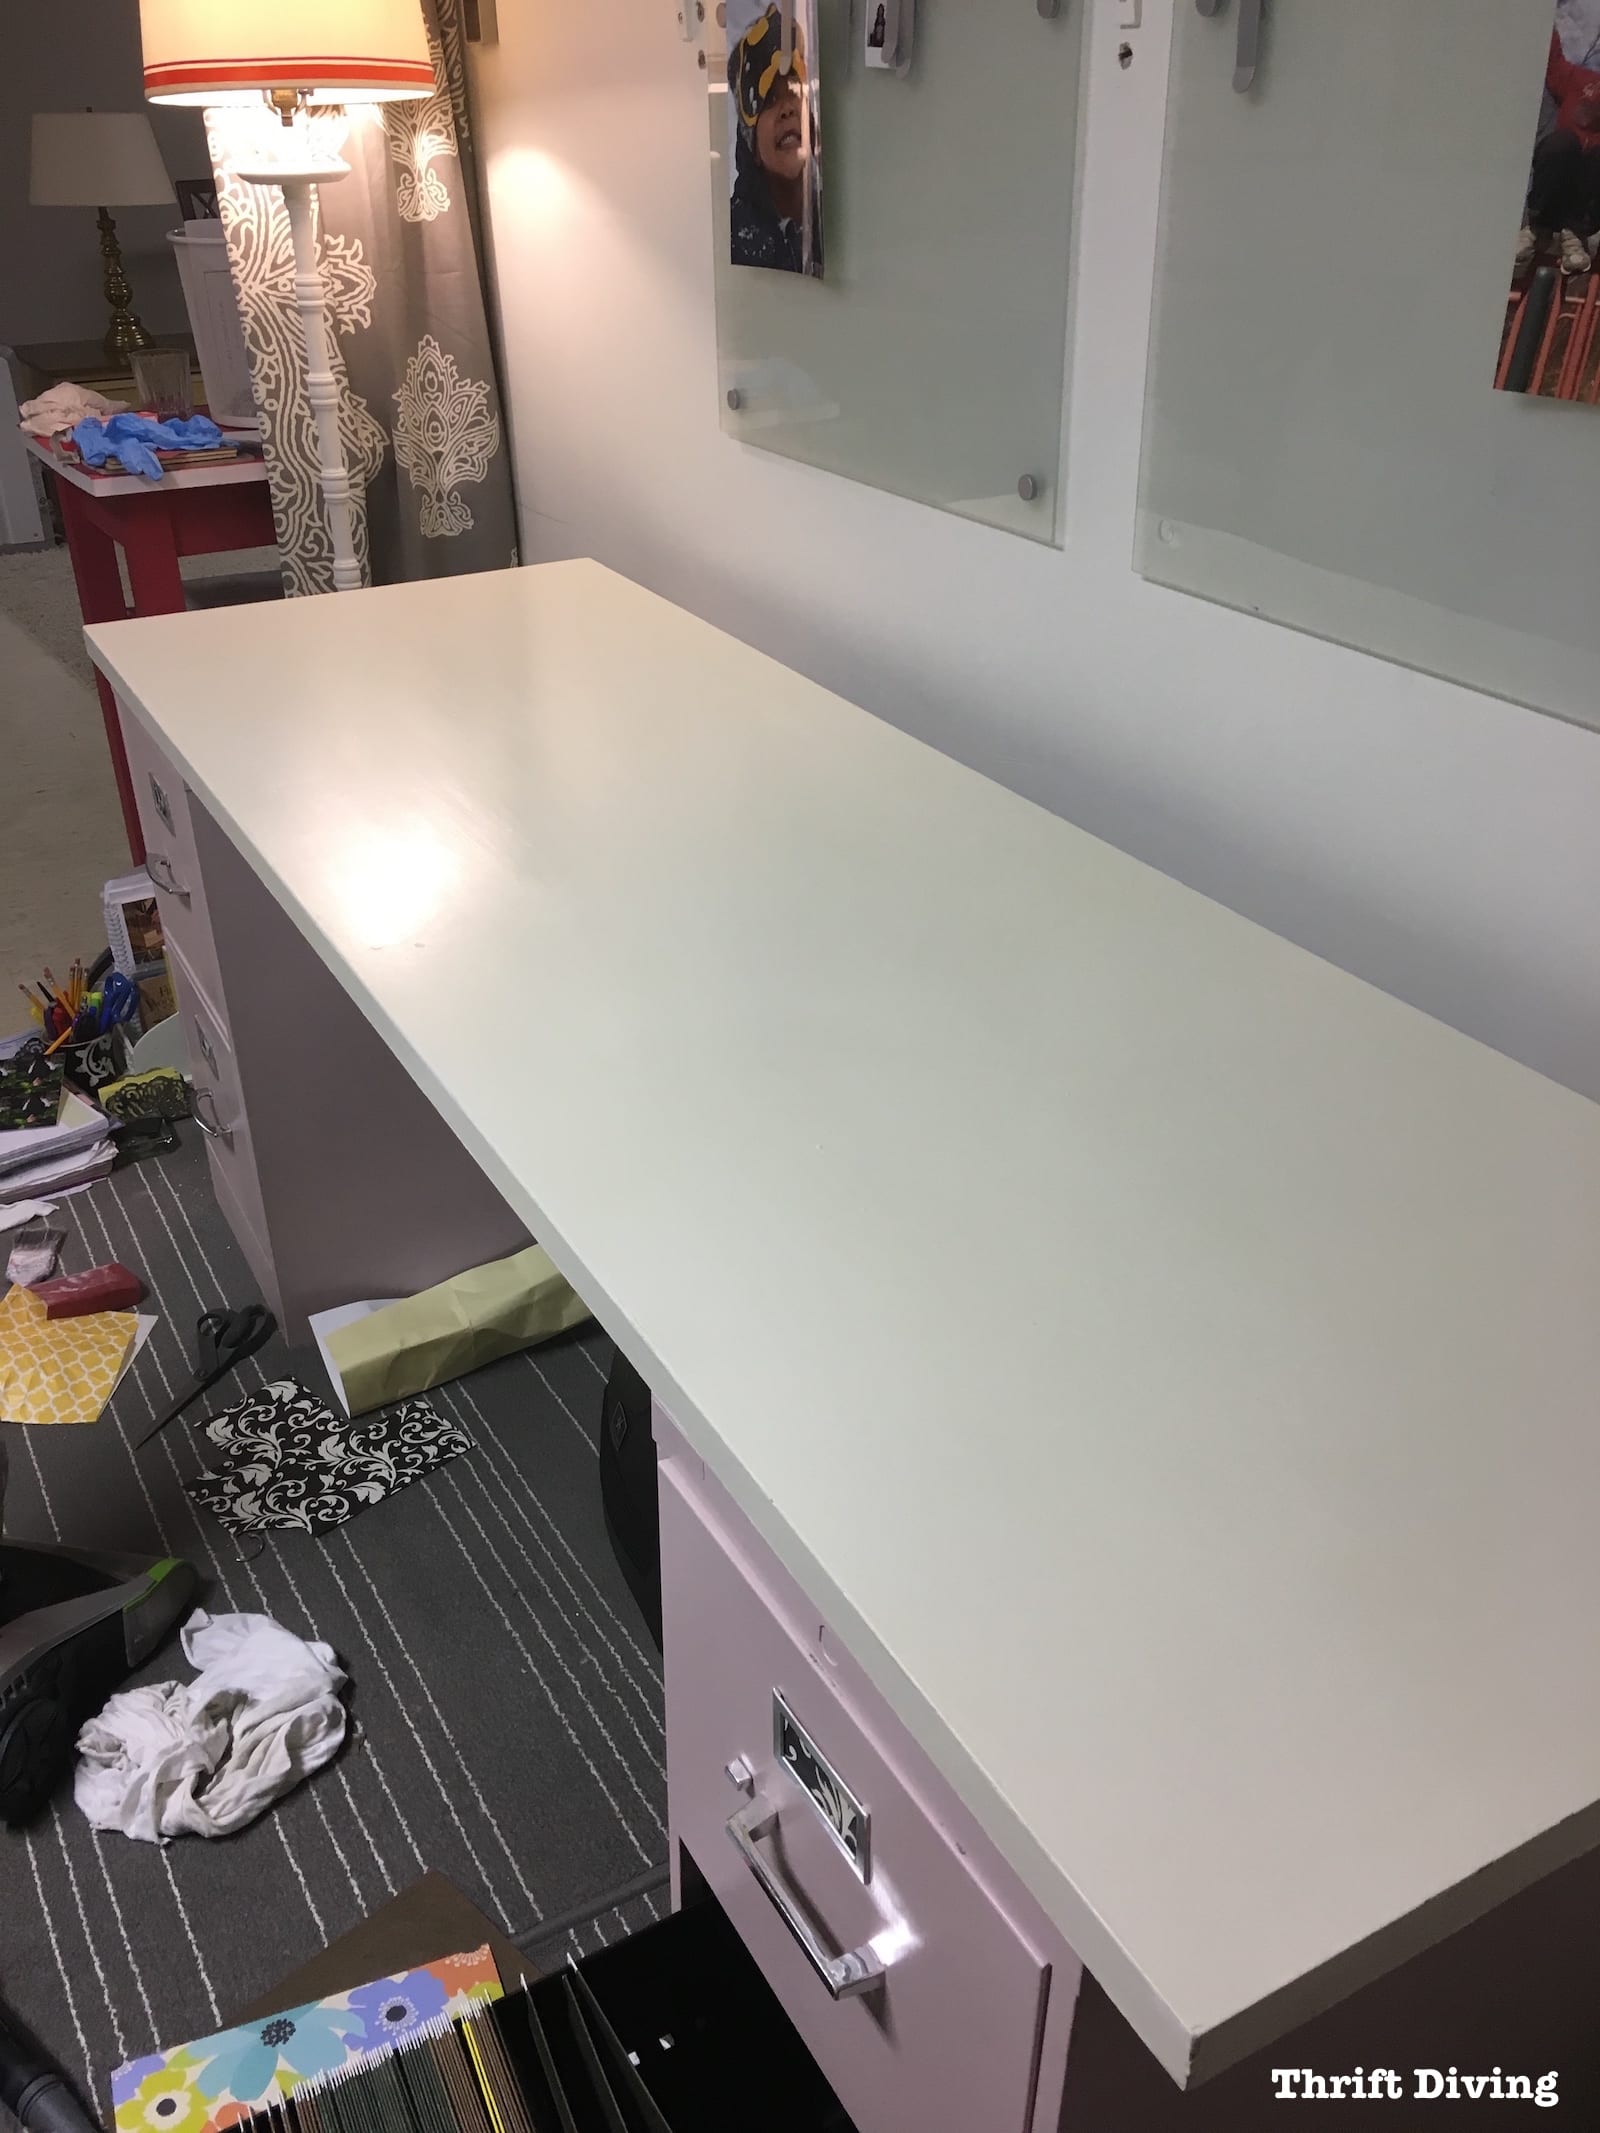
When all was said and done, the desktop and file cabinets looked great!
I absolute love the hint of shine!
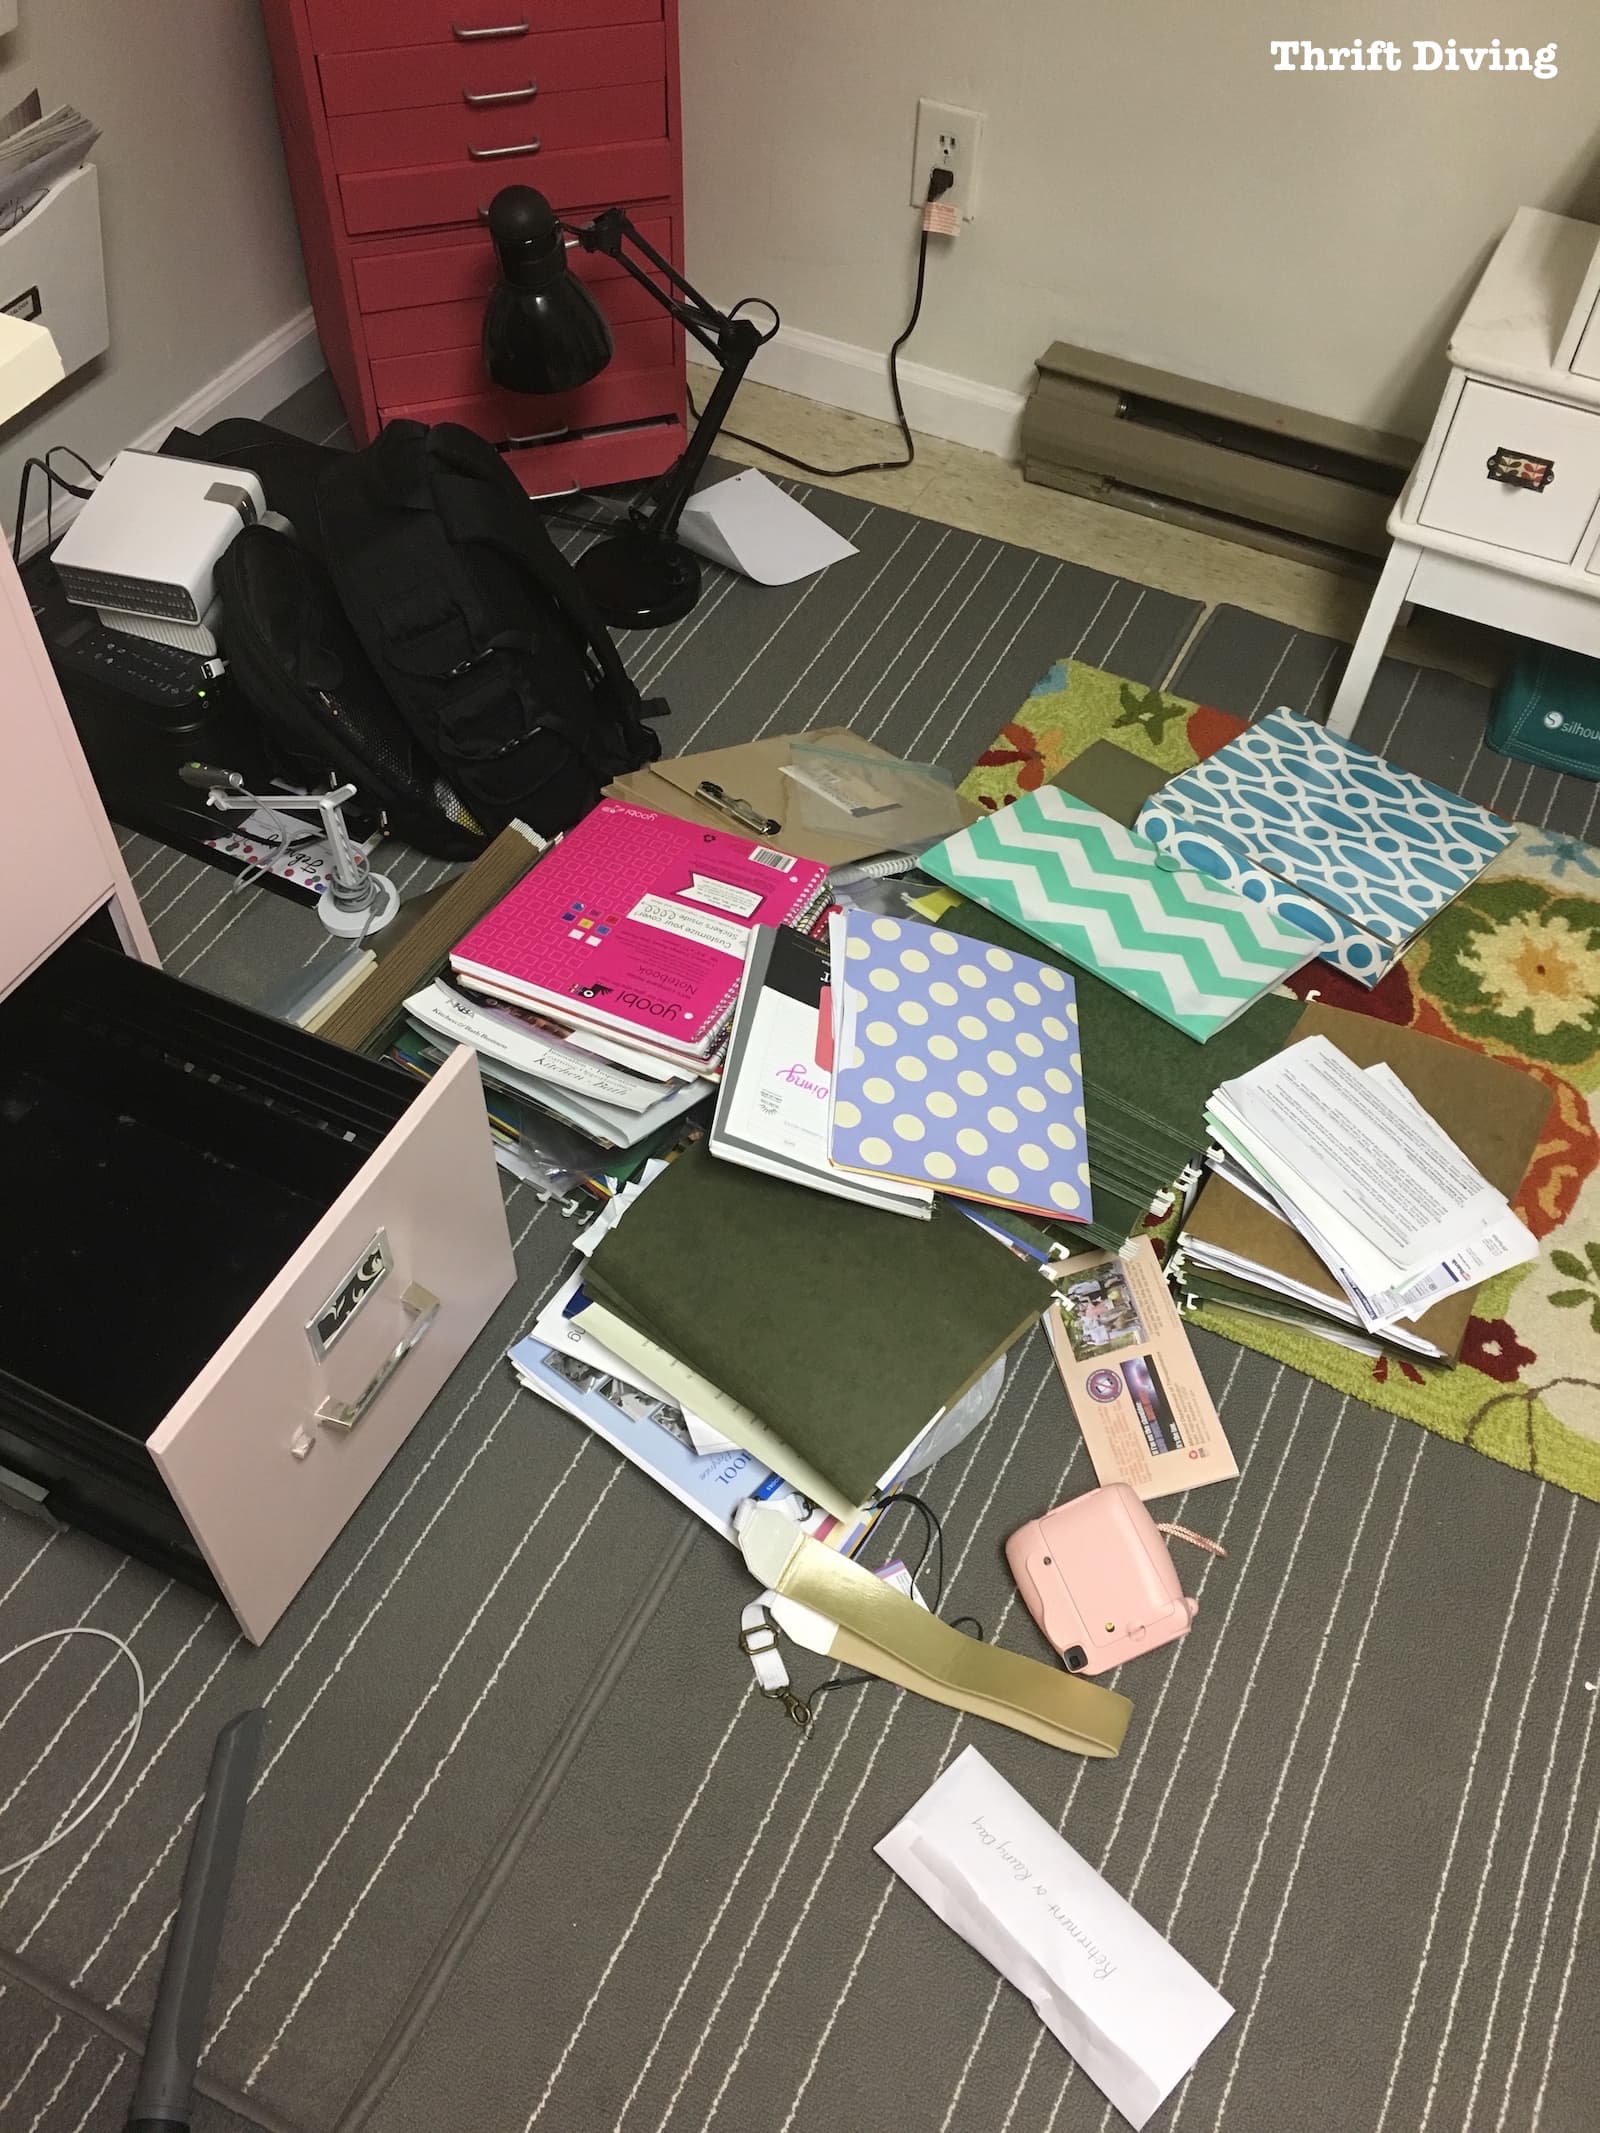
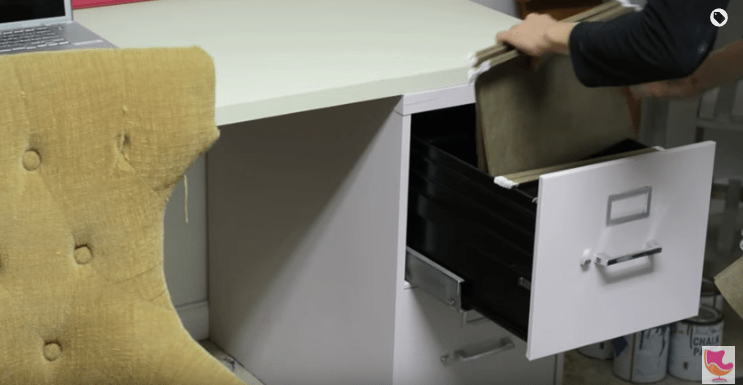
STEP 6: Purge Your Files!
This was a part of the desk refresh that I hadn’t planned to do.
But since everything was drying, instead of watching it dry, I decided to put that time to good use.
So I dumped everything out!
You might be surprised to know that I did a really crappy job of organizing my business files and receipts for 2016!
Tax time is right around the corner and I knew that if I was going to stand any chance of getting my taxes done on time, those file cabinets needed to look less like a bomb exploded in there. HA! 🙂
Here are some easy guidelines I made up on what to keep and what to toss into your recycling bin:
KEEP
- Business receipts or important receipts you’ll later need (unless you have a receipt scanning system in place)
- Check stubs that show proof of income
- Printed articles or resources that you don’t remember from where they were printed. Some ideas would be to put them in plastic covers in a 3-ring binder.
- Favorite artwork from the kids!
- Tax stuff (of course!) from the last 7 years.
GET RID OF
- Anything that can easily be downloaded online, like bank statements, old bills that have already been paid, etc.
- Old notebooks with notes that no one cares about (just be sure to leaf through them first so you don’t toss out anything important in the notebook)
- Business cards of people you’ll never reach out to (or take a picture of the card and digitally file it away).
- Product catalogs
- Product manuals (you can usually find these online)
- Magazines that you’ve already read but don’t plan to re-read or keep as resources. Try ripping out the articles that you really loved and putting those in a binder, but toss the rest of the magazine.
TIP: It’s helpful to have a paper shredder nearby when you’re doing this declutter! If you don’t have one, you can always invest in a pair of shredding scissors for under $12! You can order them on Amazon (affiliate link).

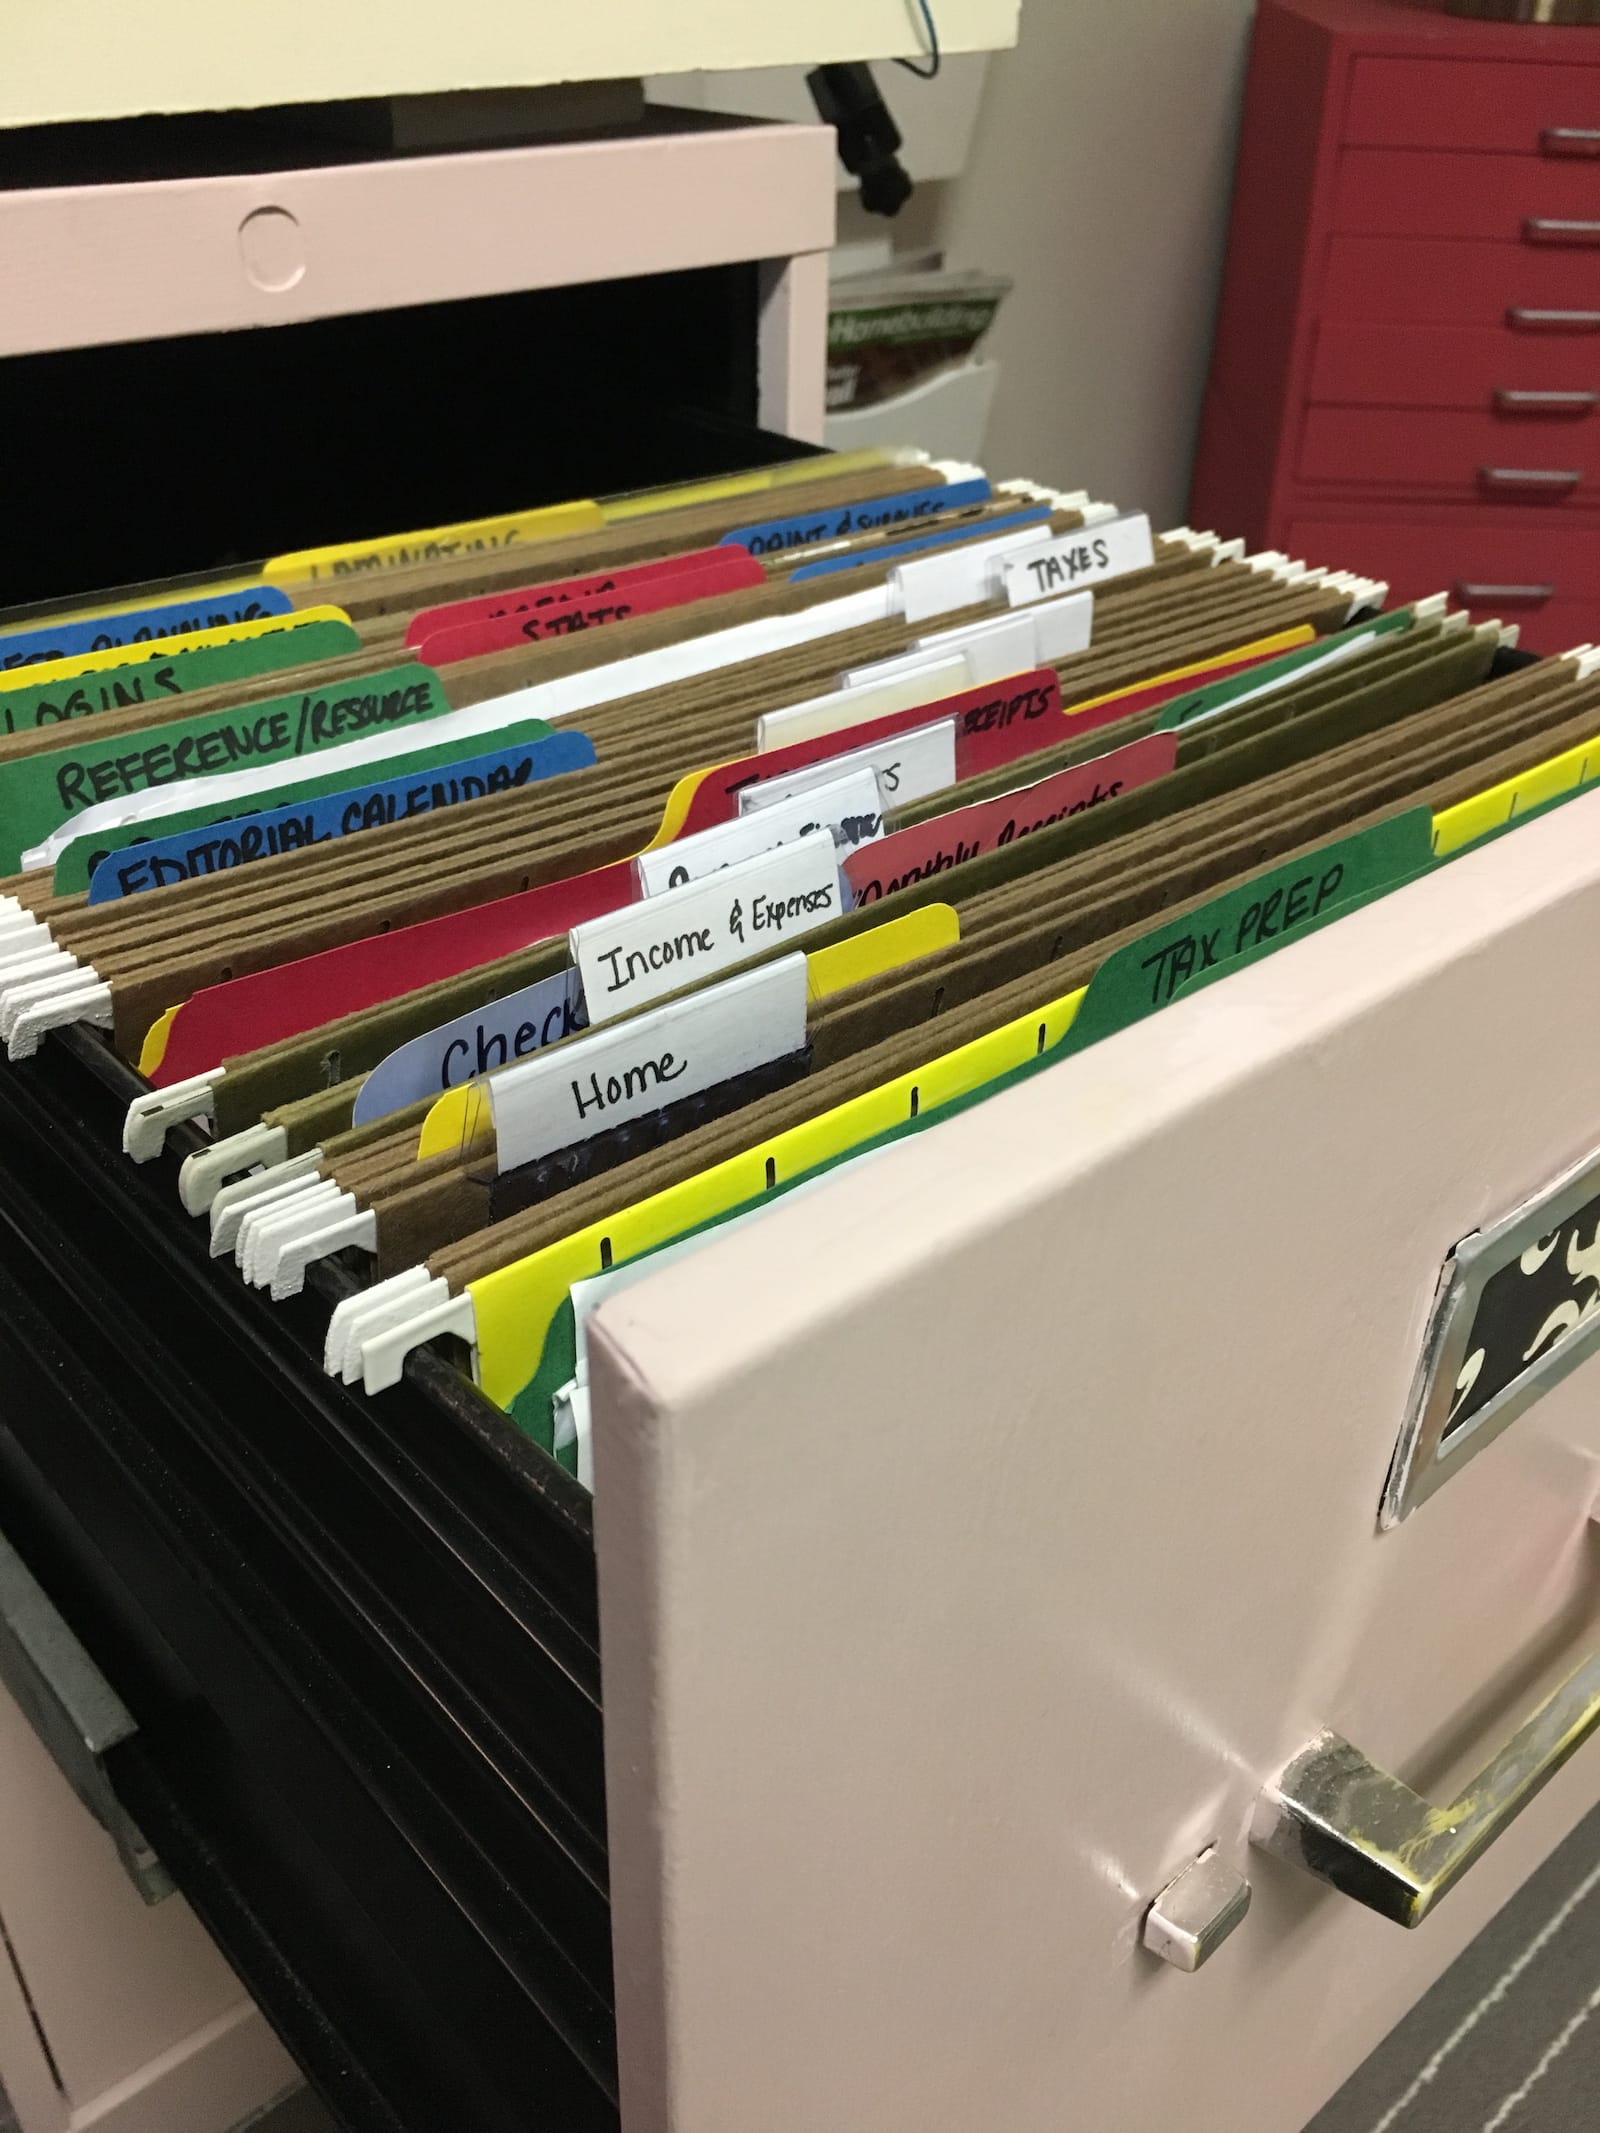
STEP 7: Create a System Where Everything Has a Place
File folders can get expensive!
Don’t forget to check the thrift store for stacks of them!
That’s where I found a bunch of file folders when I did my office makeover a couple of years ago.
During my “desk refresh” I created a folder for every major category of paper that will go into this file cabinet.
There should never be a check stub or a receipt sitting out, cluttering your desk! Trust me–that pile always grows!
Now, my drawers were two-recycling-bags lighter!
Whew!
I felt so much more clear-minded once it was done!
STEP 8: Only Put Back the Important Things
Once the desk was all dry after two coats of top coat, and everything was filed away, it was time to put things back into place.
It looked so fresh and clean!!
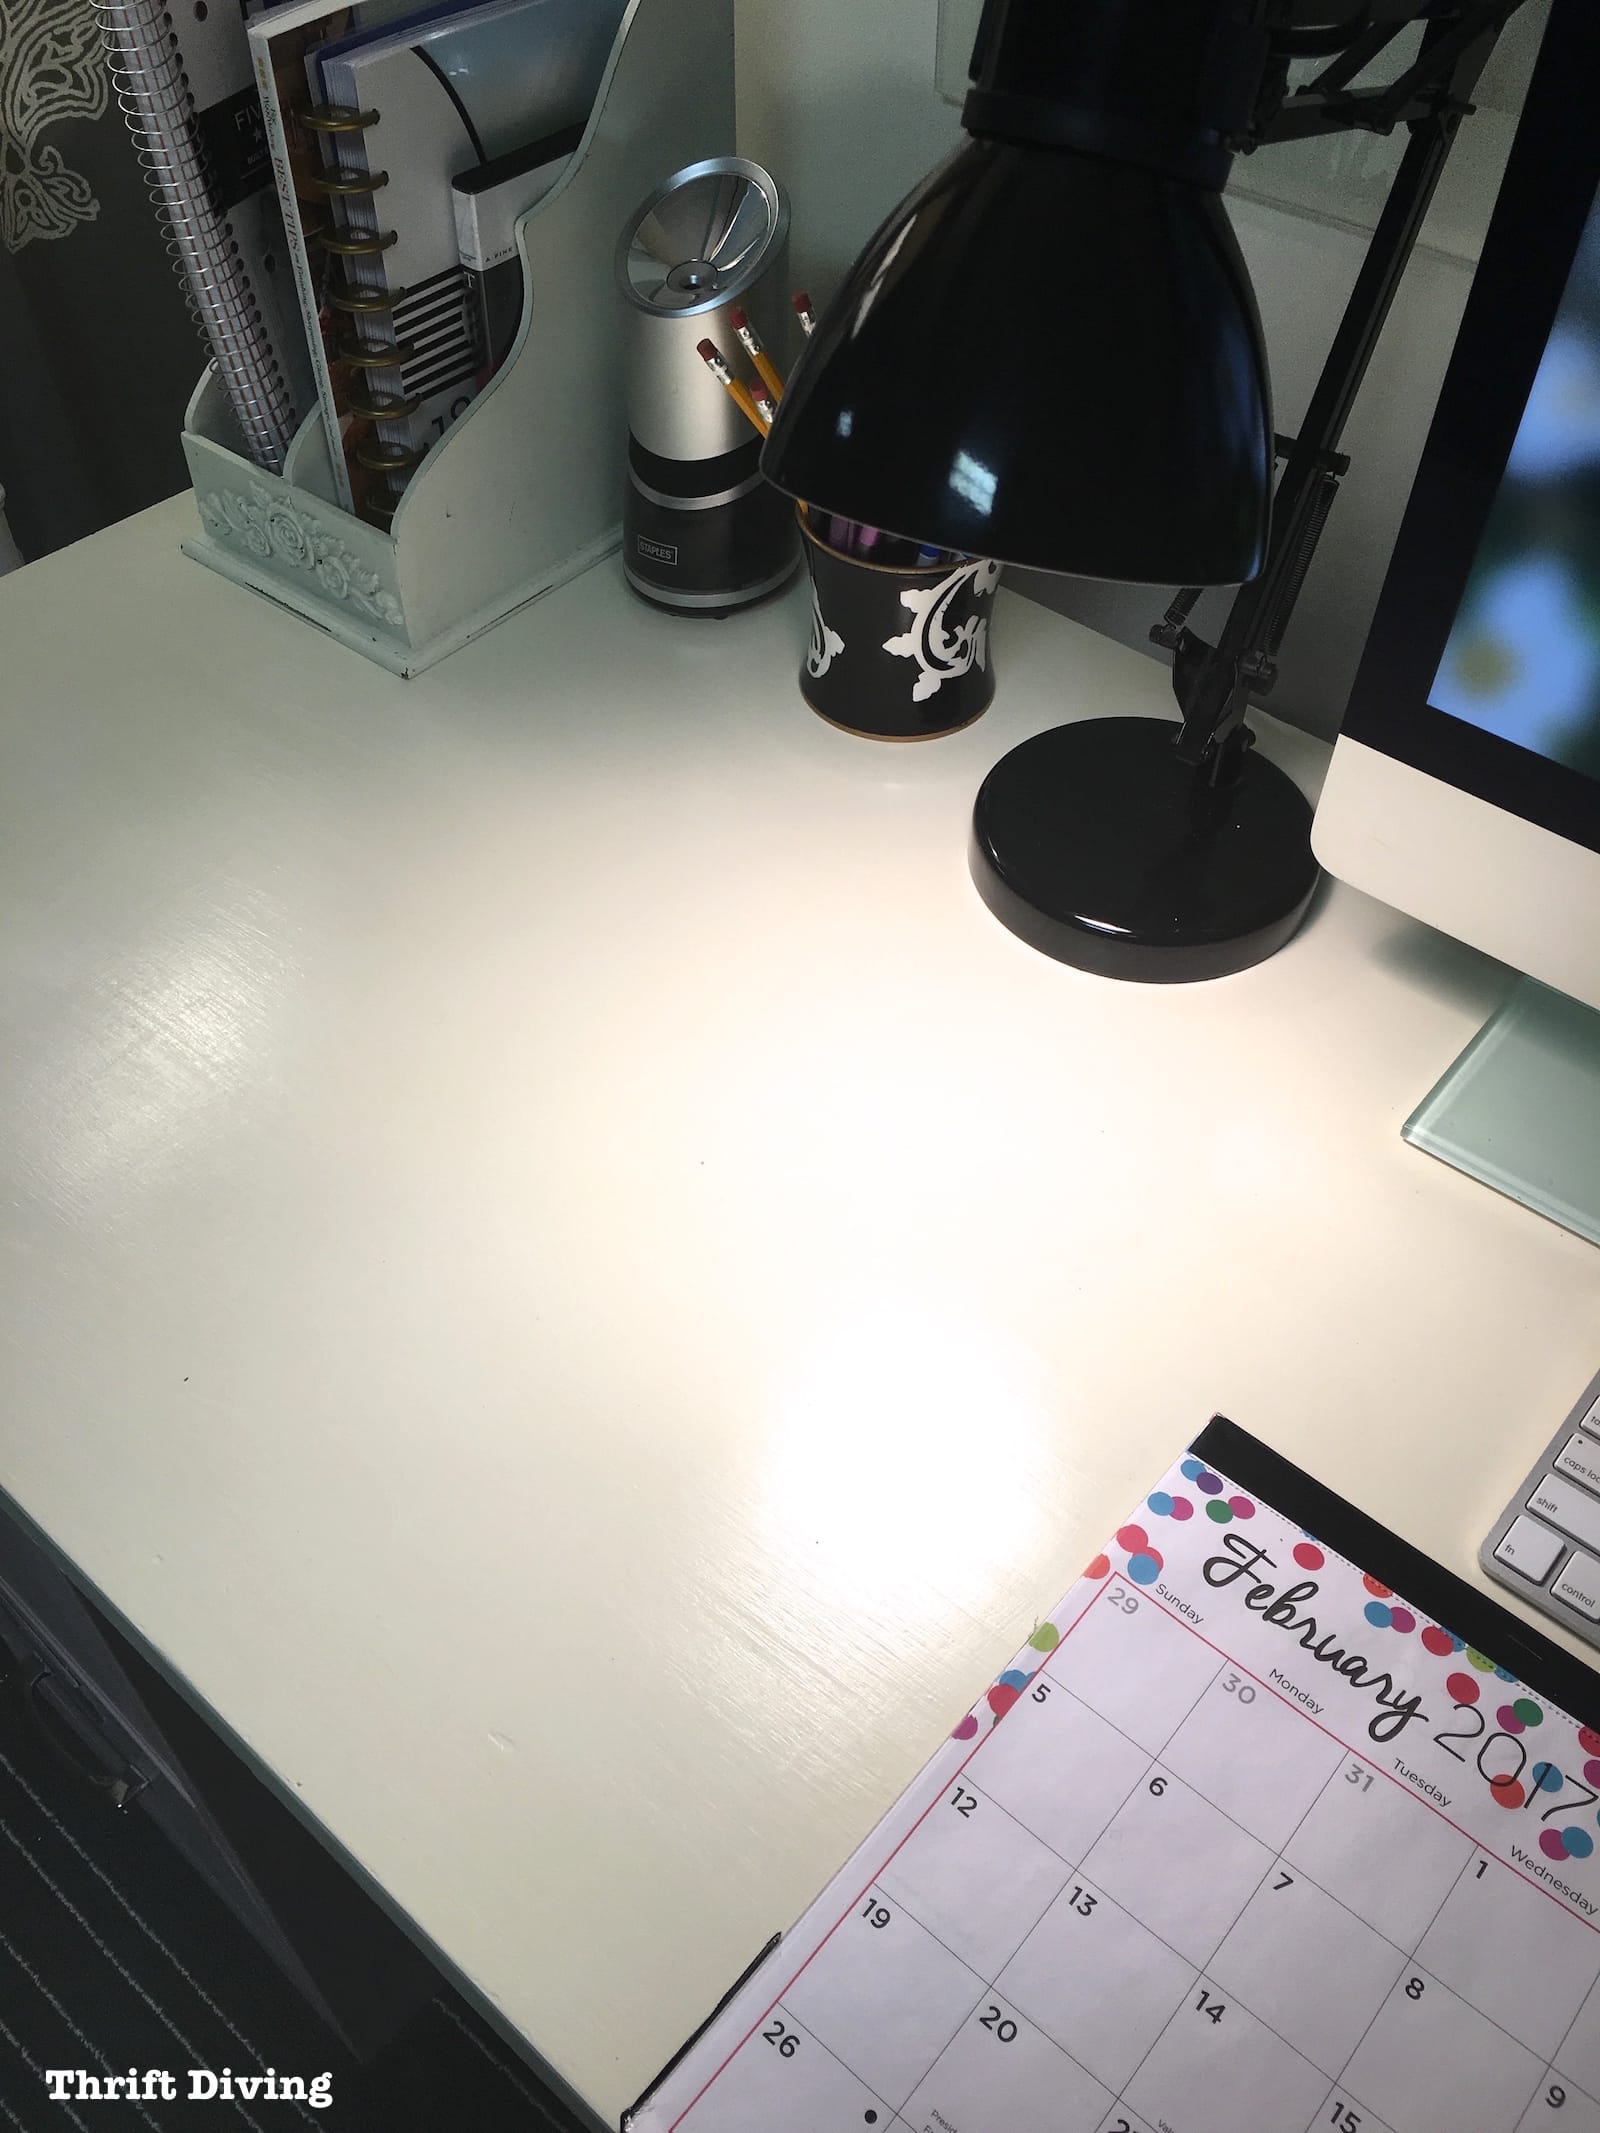
The things I added back here:
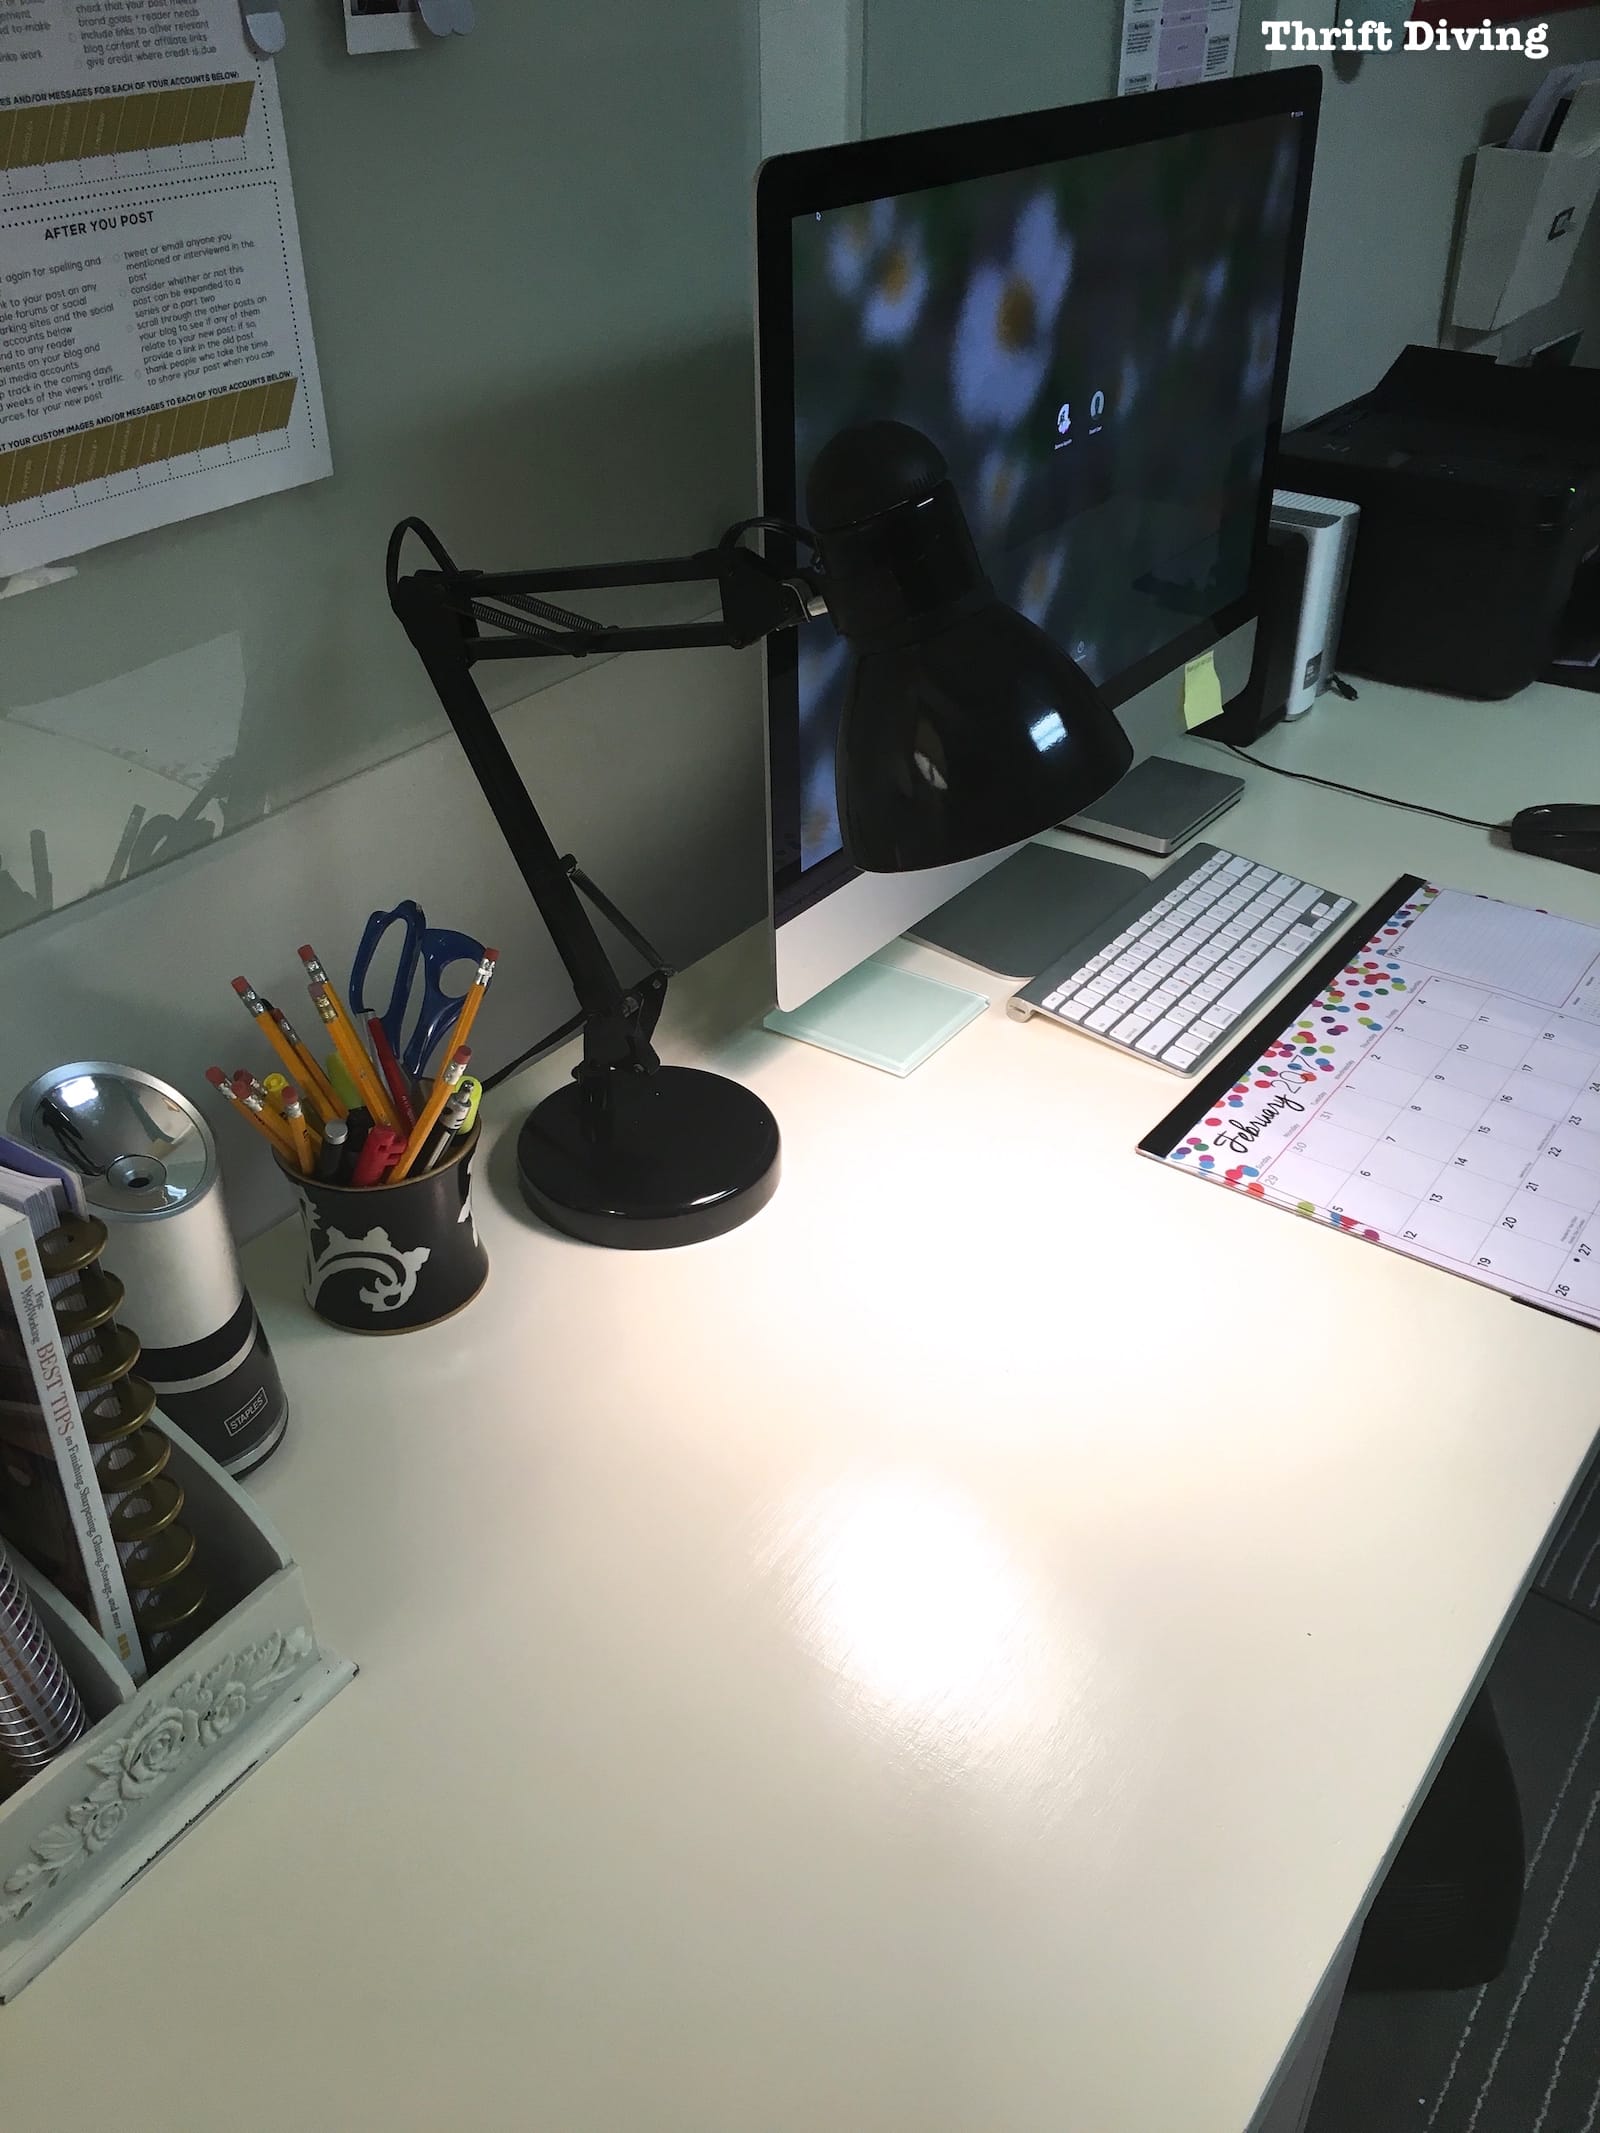
- A cheapie Dollar Store monthly calendar so I can write down and see important things coming up. It also helps to keep my arms and pencils off the desk, so hopefully, I can preserve the beautiful top!
- My little $7.00 thrifted desk lamp to keep the area well lit.
- A $2.00 thrifted magazine holder help to organize my thicker agenda book and notebooks.
- A $1.o0 thrifted pen cup.
Of course, I added my computer, external hard drives (I’ve got 3 of them!), a pencil sharpener, and my printer.
But all the clutter was gone!
How to Prevent Drink Stains on Your Desk
LOL, the best way is to not drink at your desk!
Come on…how realistic is that?? I do everything at my desk!
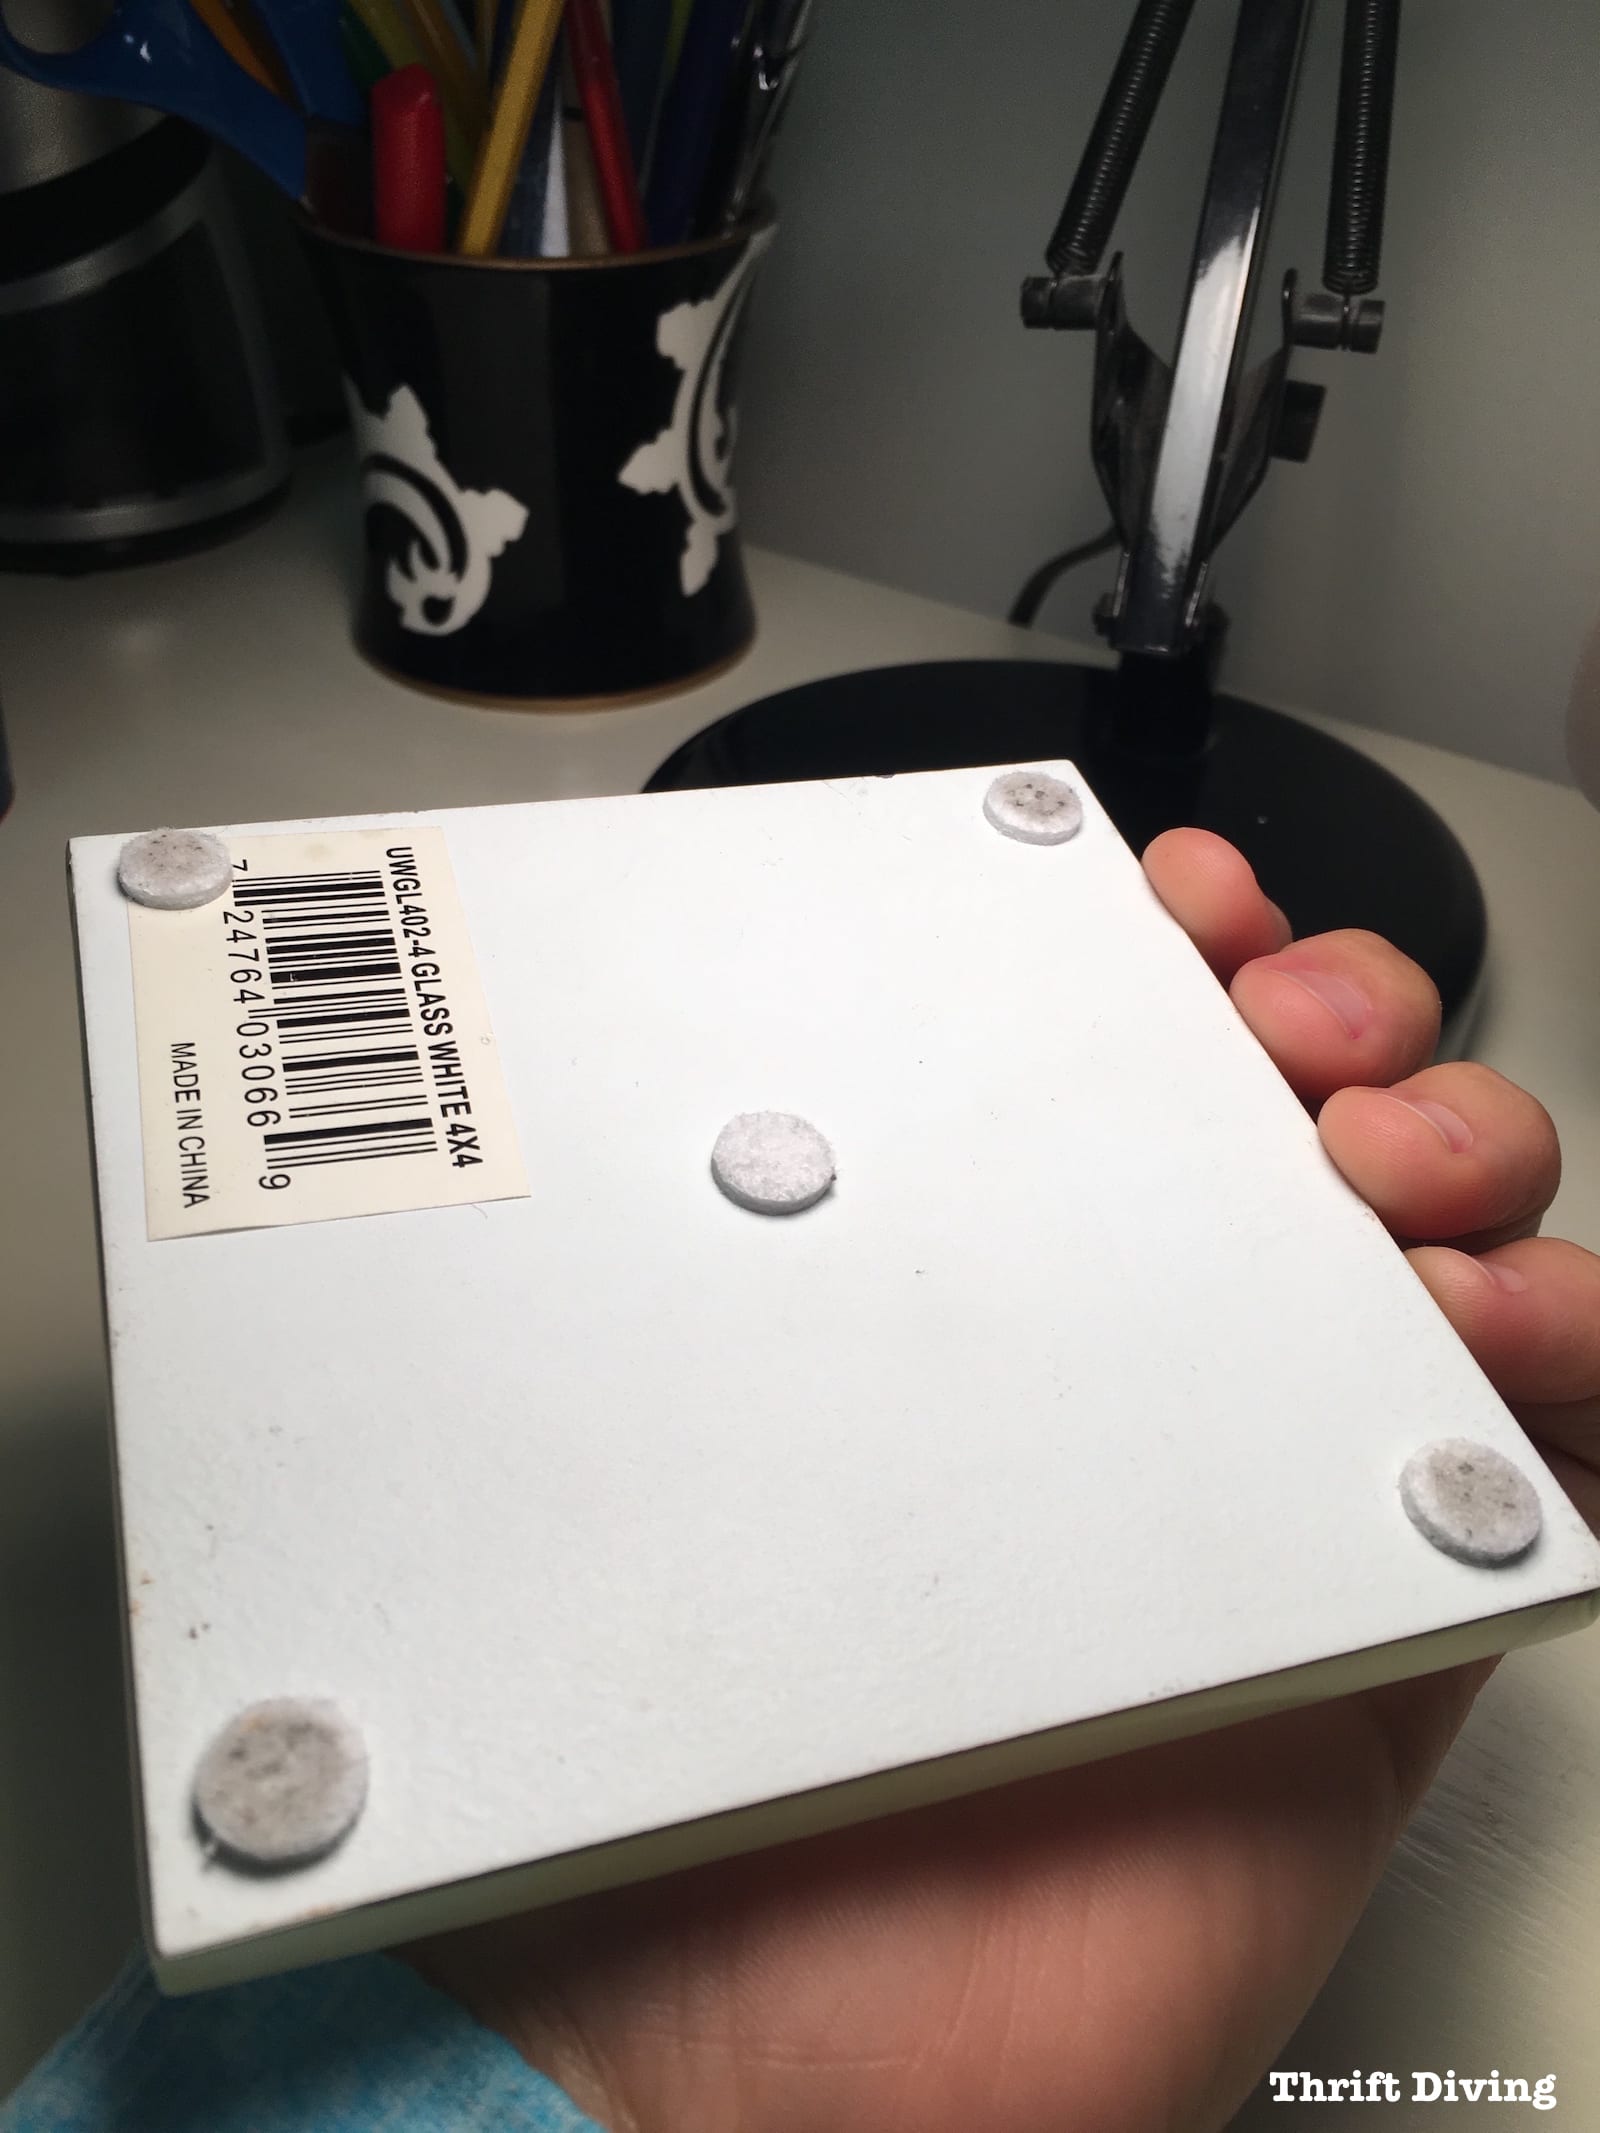
To make sure that I don’t ruin the desk with wine, tea, or coffee stains, I use a single glass tile as a DIY coaster.
I bought it from Home Depot for a few dollars and added some soft pads so it doesn’t scratch up the desk.
The rule now is that cups must be sat down on my pretty, glass “coaster.” I cannot sit anything on the desk that could ruin it!
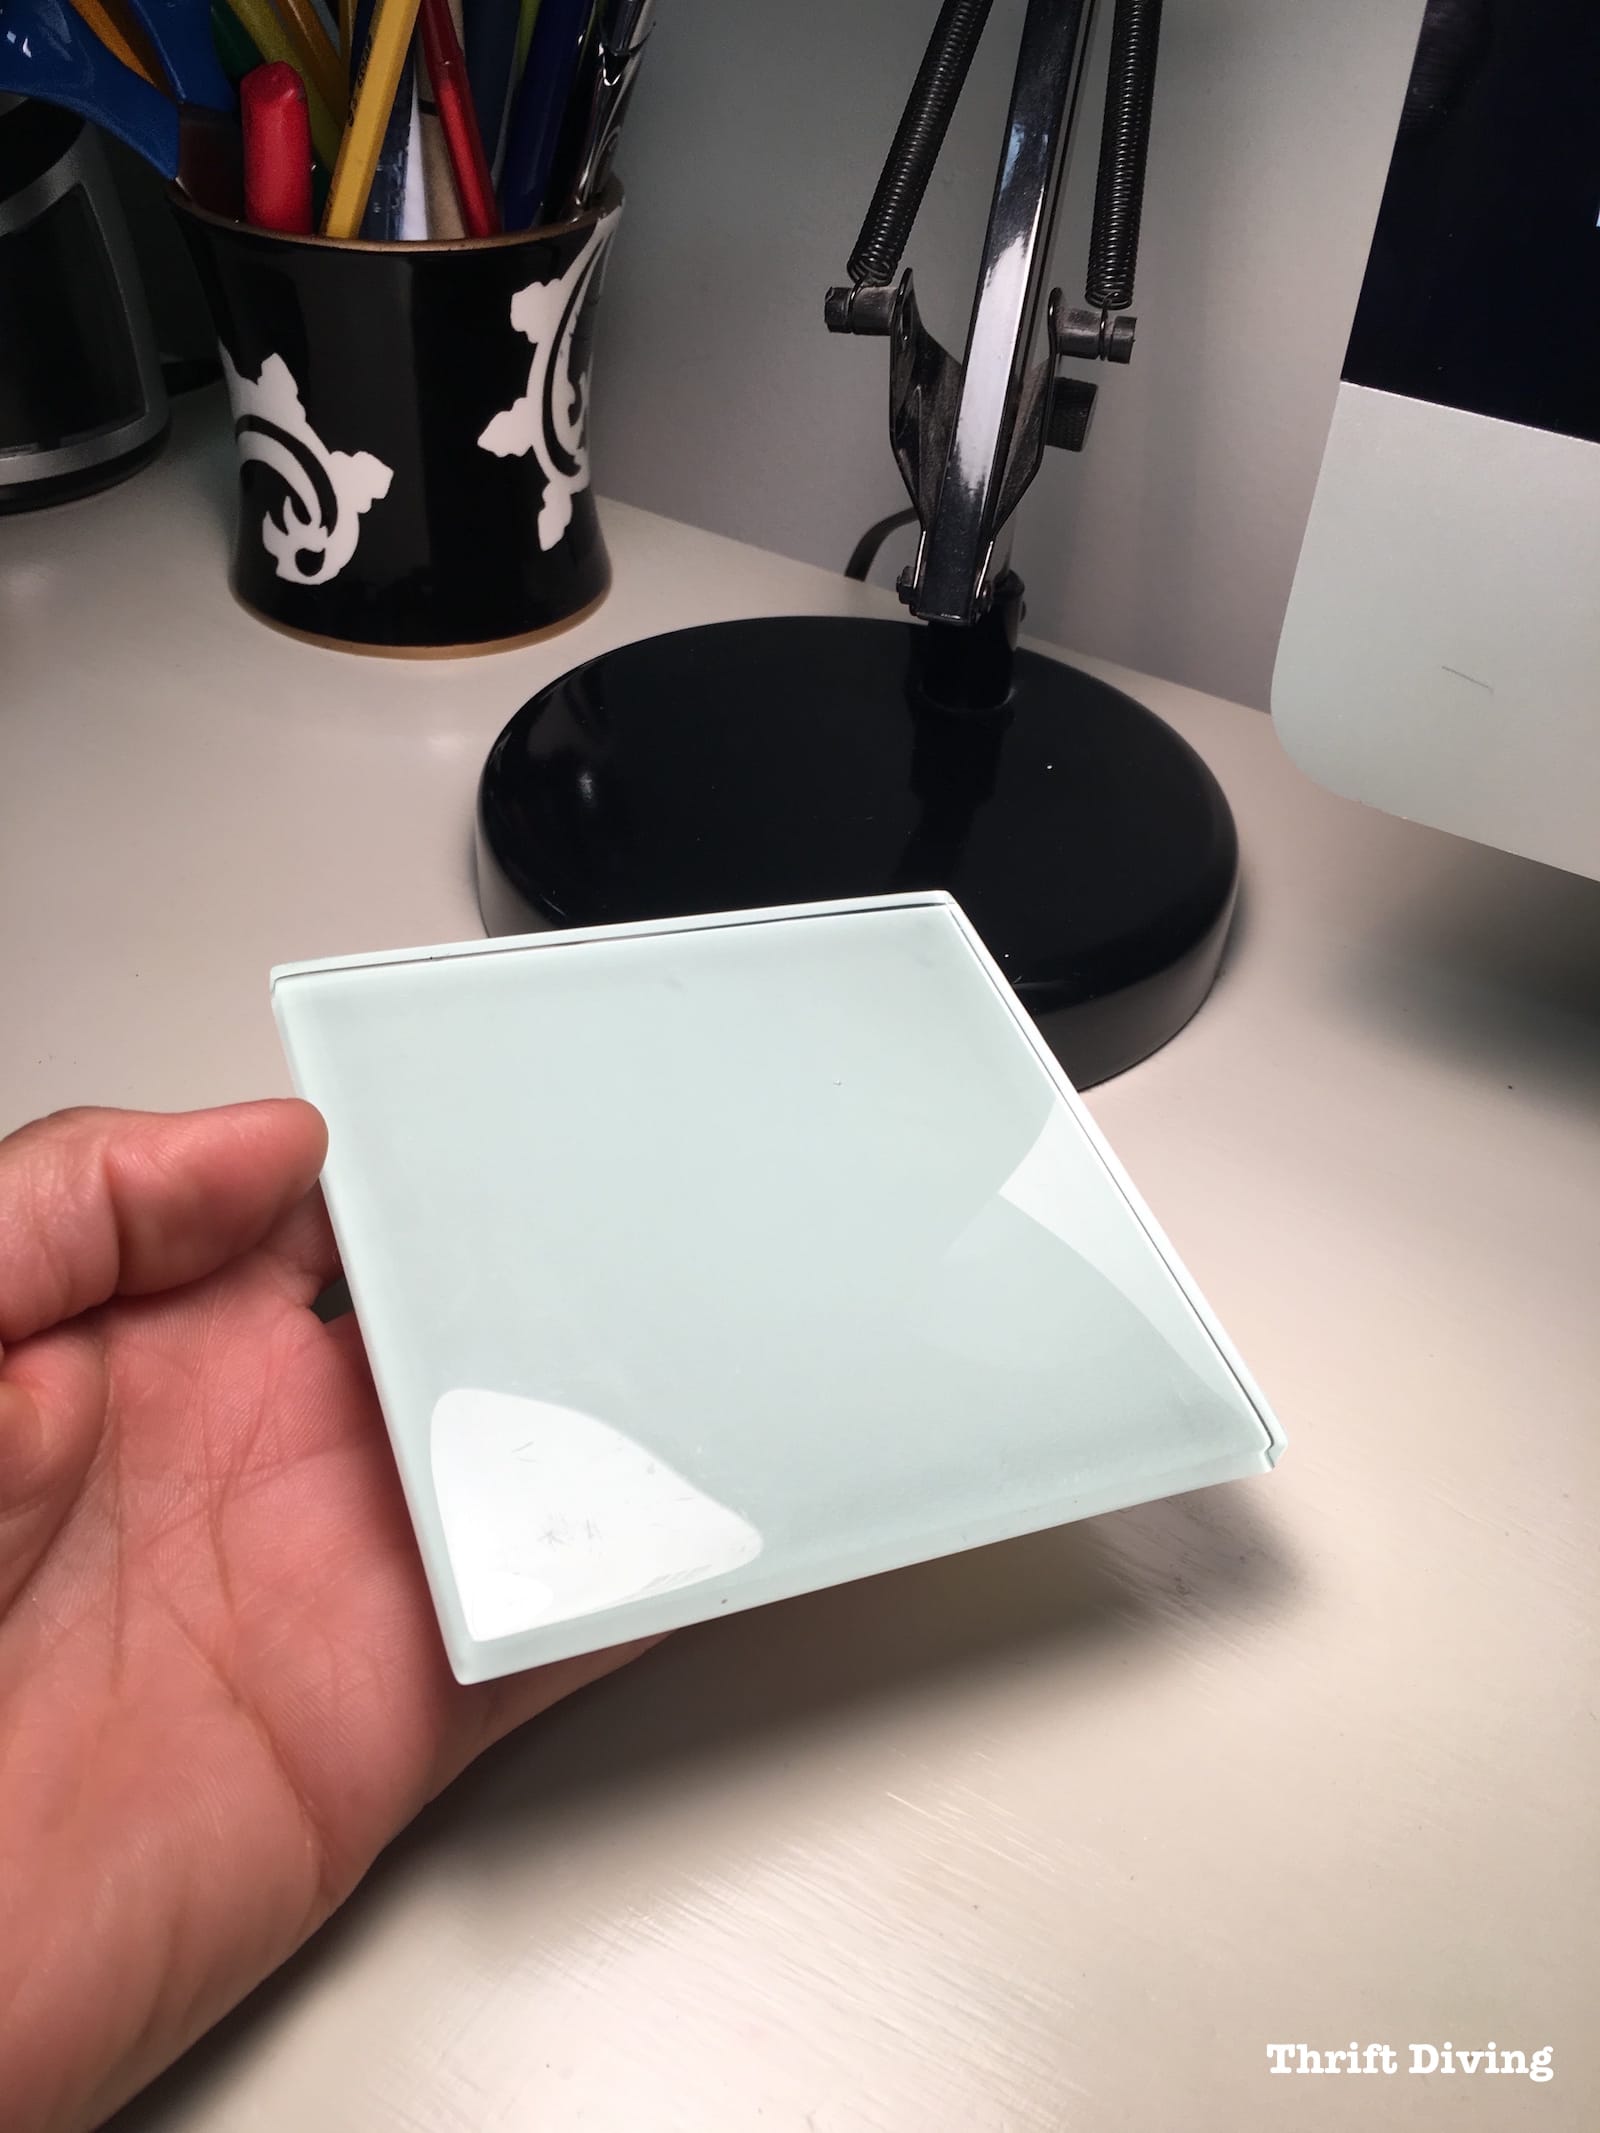
Such an ugly cup to show, but you get the point. 😉 I’m all out of yummy red wine. LOL

This is a huge difference from where this desk started back in 2015!
BEFORE
The top was only $1.76 from a salvage shop, and the file cabinets were $6.99 each!
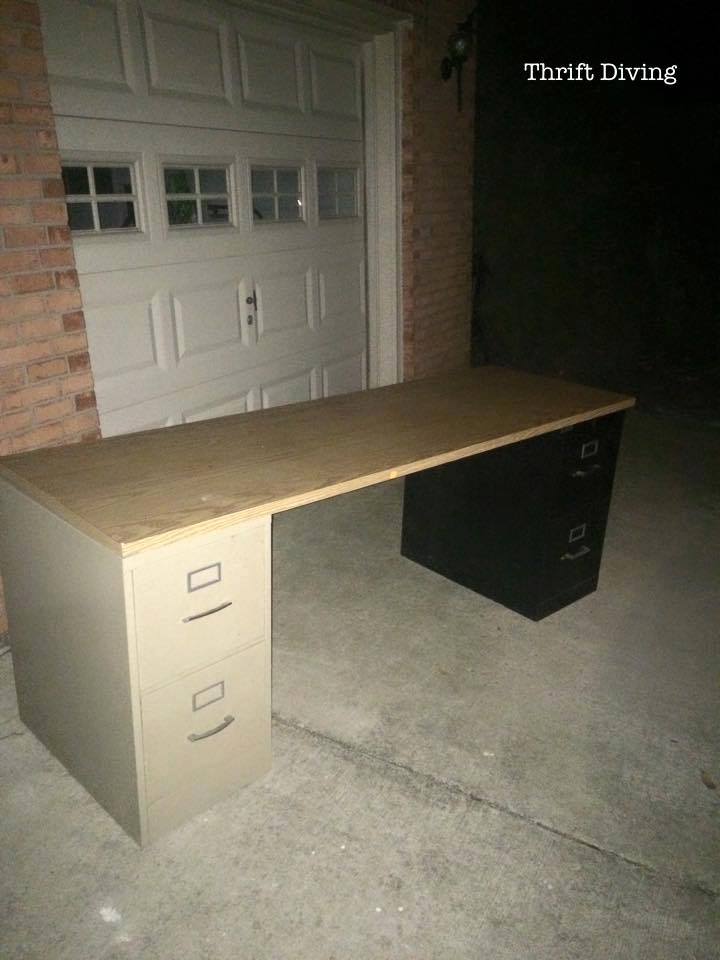
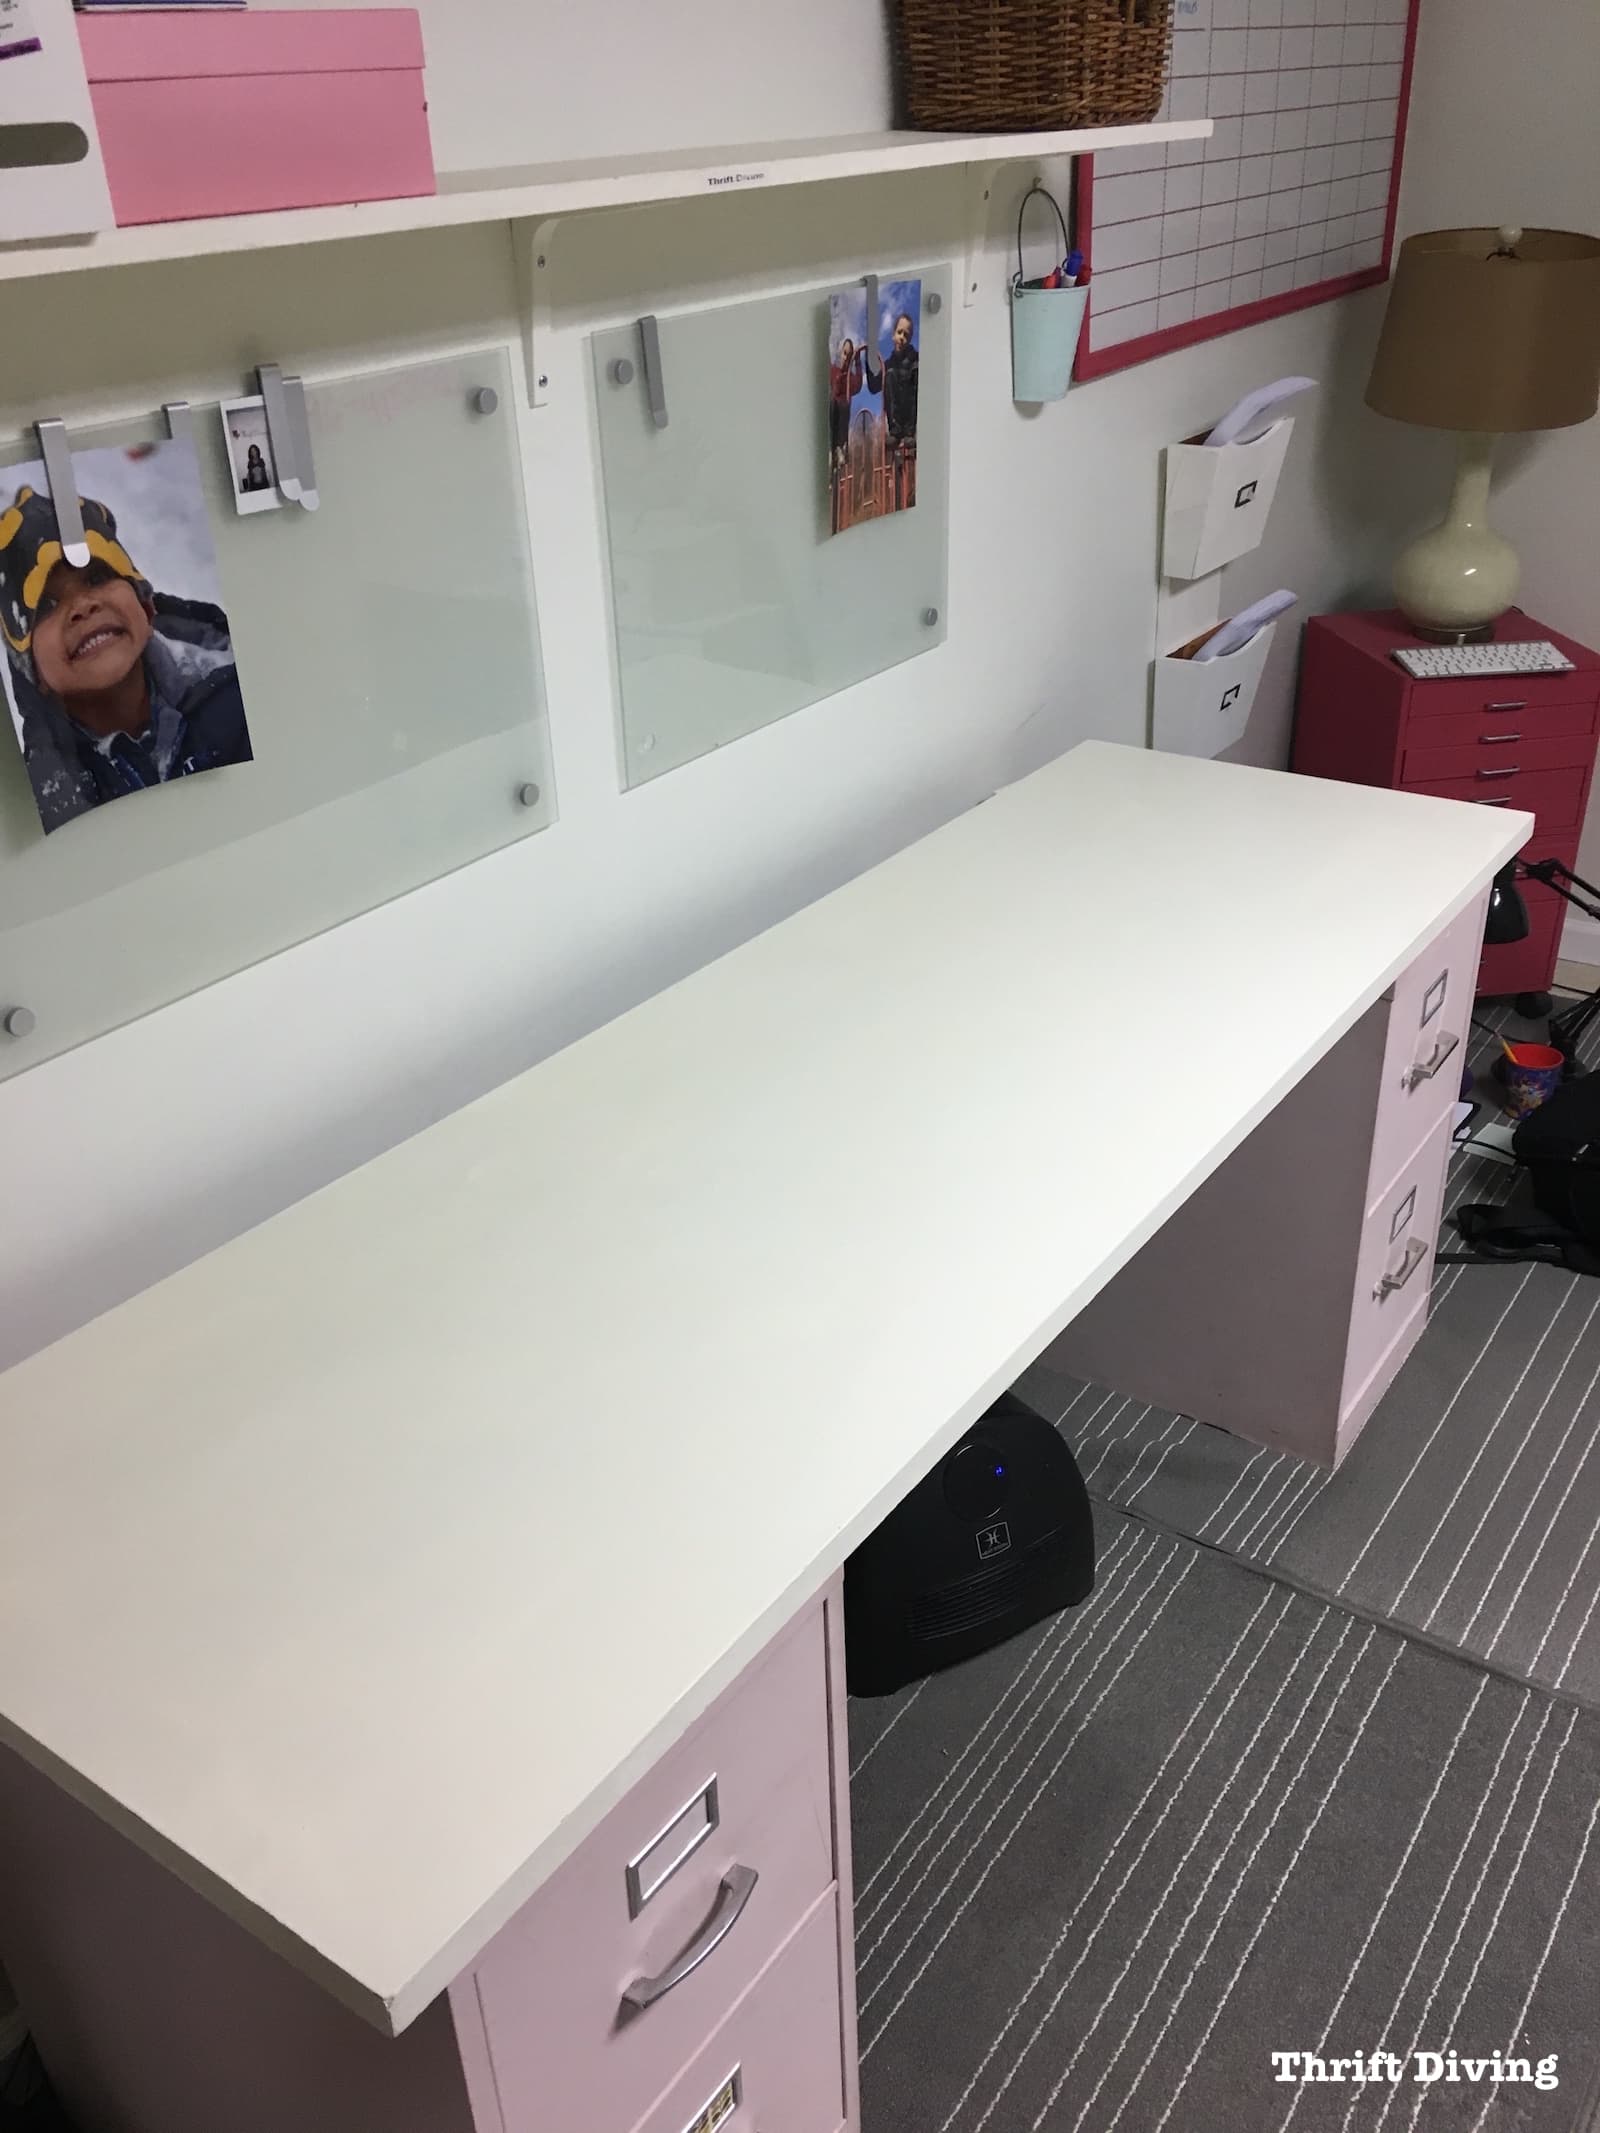
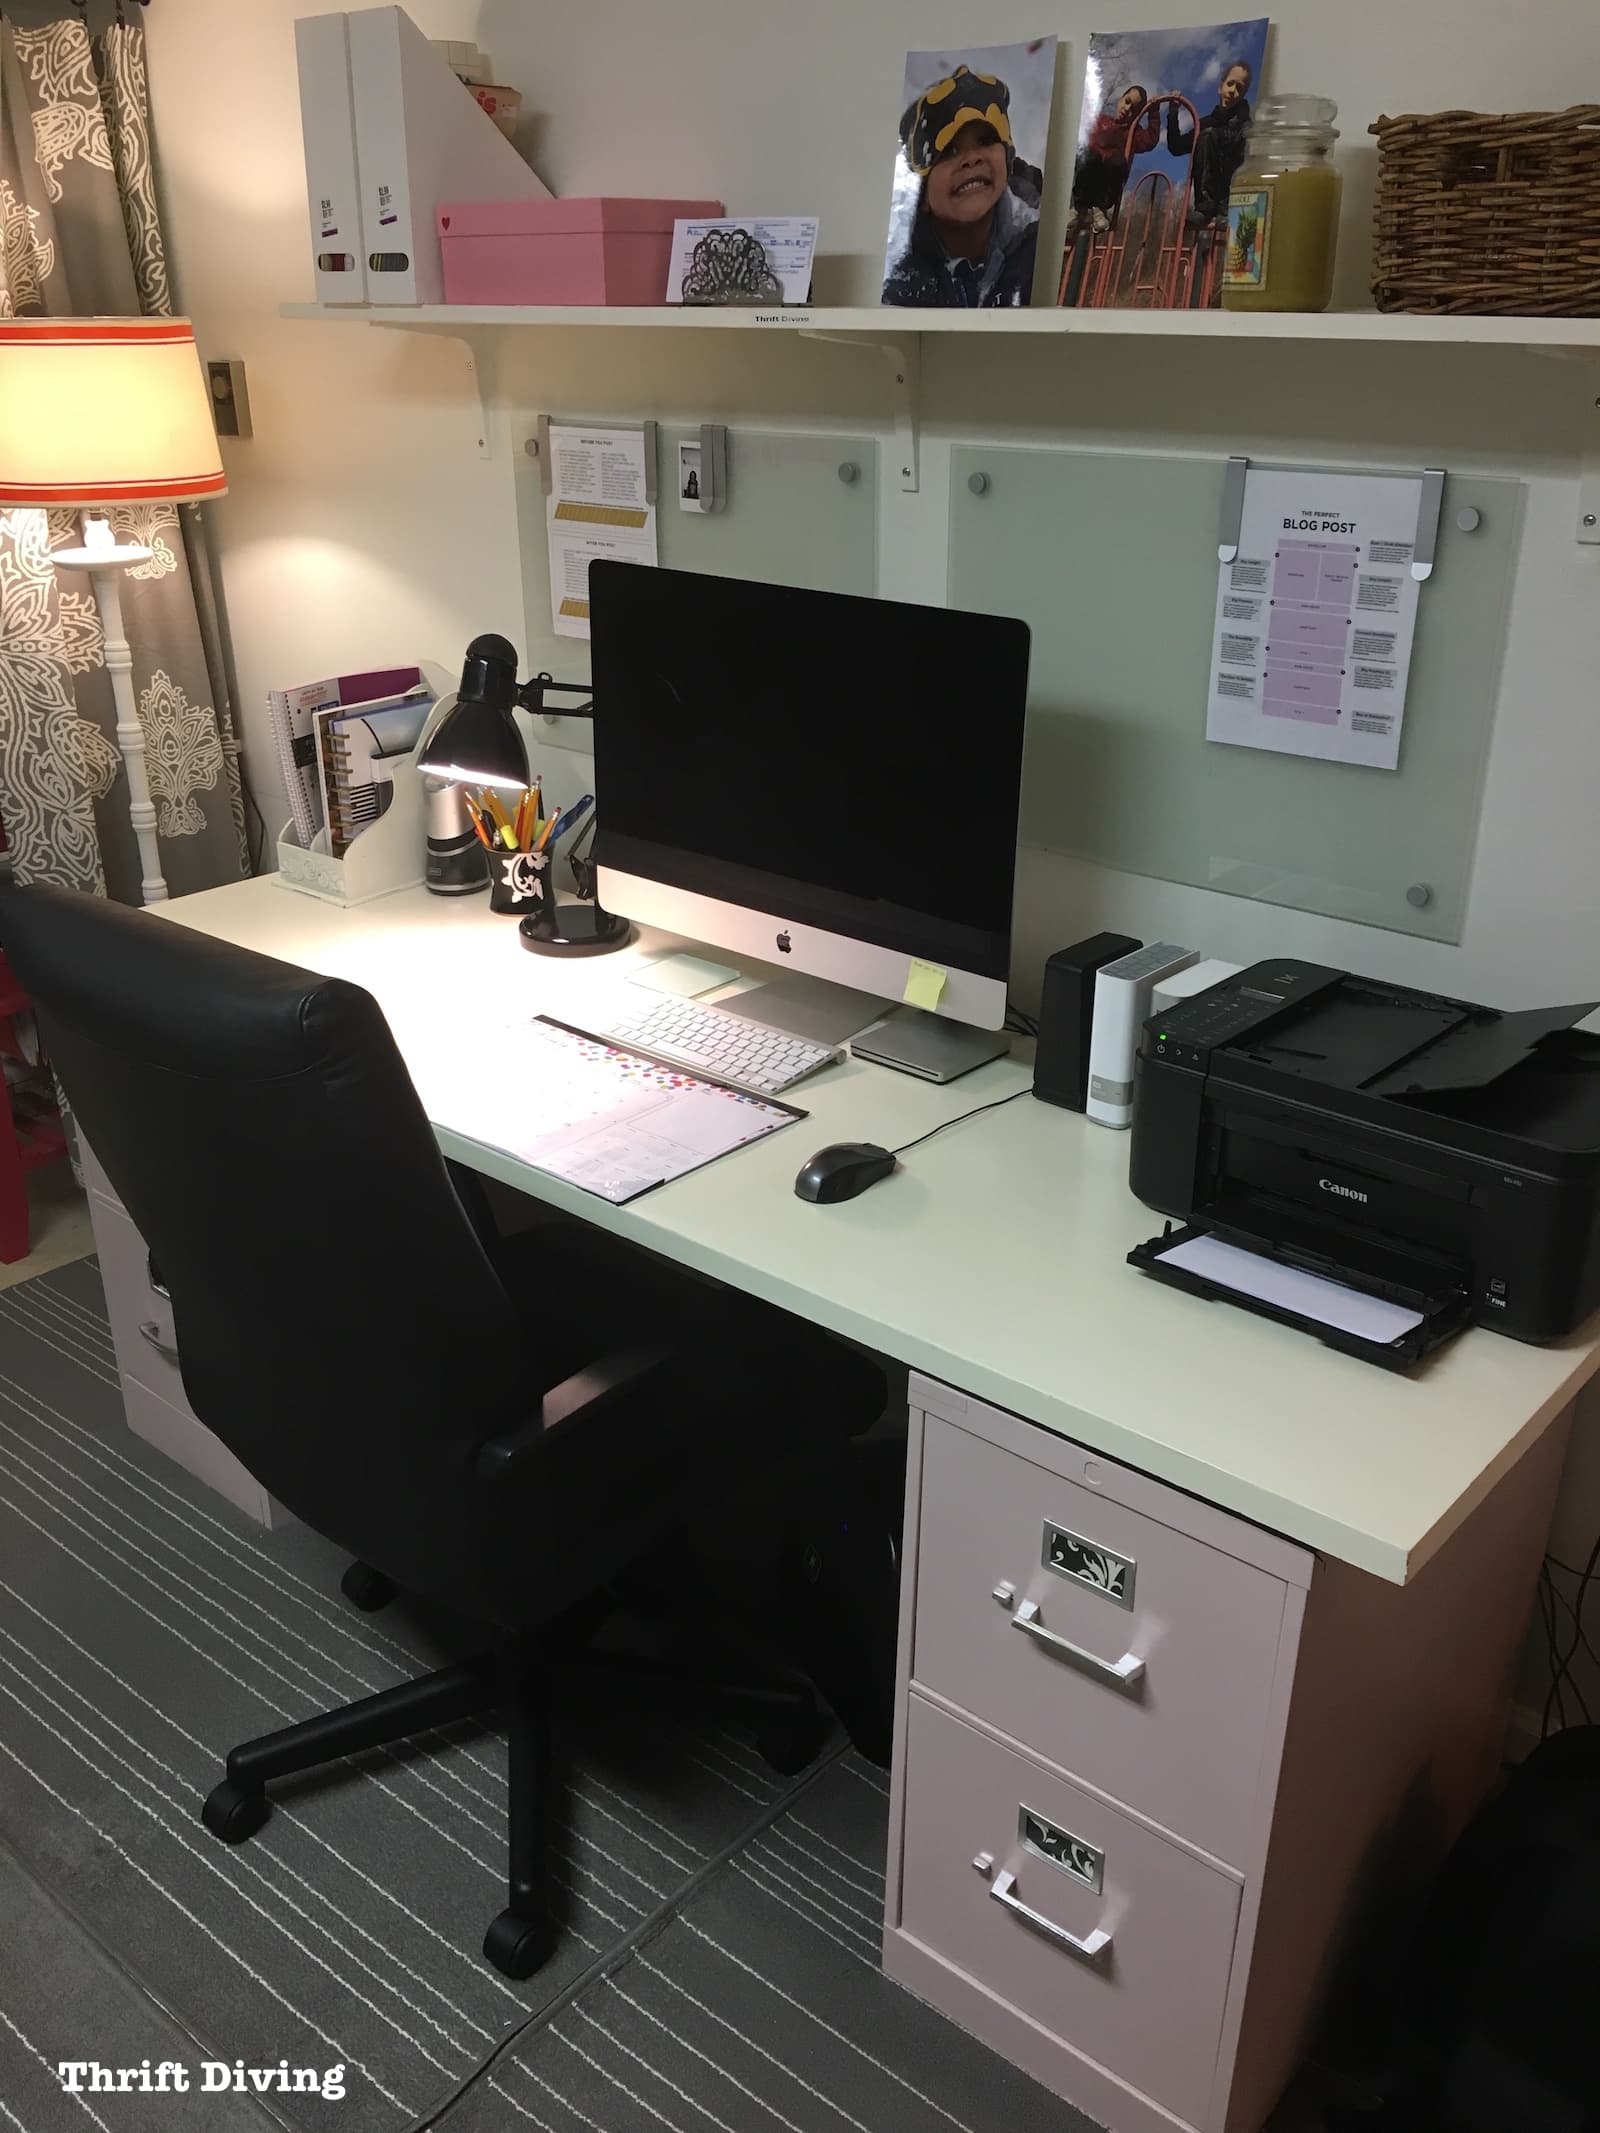
After I freshened it up last weekend, this is how great it looked once it was done and ready for the desk top items again! I’m still amazed that a great desk like this was only $15 to put together!
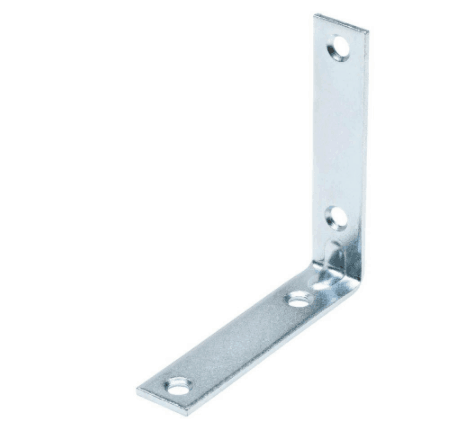
(FYI….the desk top is so heavy that I don’t have it tacked down to the file cabinets. It’s literally just sitting there. But because of its weight, it generally stays put. If you create a desk like this and your desk top is much lighter, you’ll have to consider using brackets or screwing the top down to the file cabinets. I would consider these L-shaped brackets:
Over time, furniture just gets dirty and stained if you don’t take care of it or if it gets a lot of use, a lot of heavy “traffic,” which was definitely my case!
BEFORE
But with a couple coats of paint and top coat, and a little bit of decluttering, it’s possible to have a place to sit and not feel so mentally cluttered! Finally, I feel like I can think and stay focused while I work!
AFTER!
A Few Tips For Maintaining a Nice Desk Area
- Do a mini “desk refresh” once a year.
- Minimize eating at your desk, or use a placemat.
- Keep wipes handy and clean often.
- Use a large desk calendar to protect the sensitive area where it’s likely to get worn by your arms.
- Use a mouse pad to prevent scratches (I still need to get one!).
- Maintain a filing system so that papers don’t get stored up on the surface.
- Every time you leave your desk area, make it a habit to clean up and straighten before you walk away.
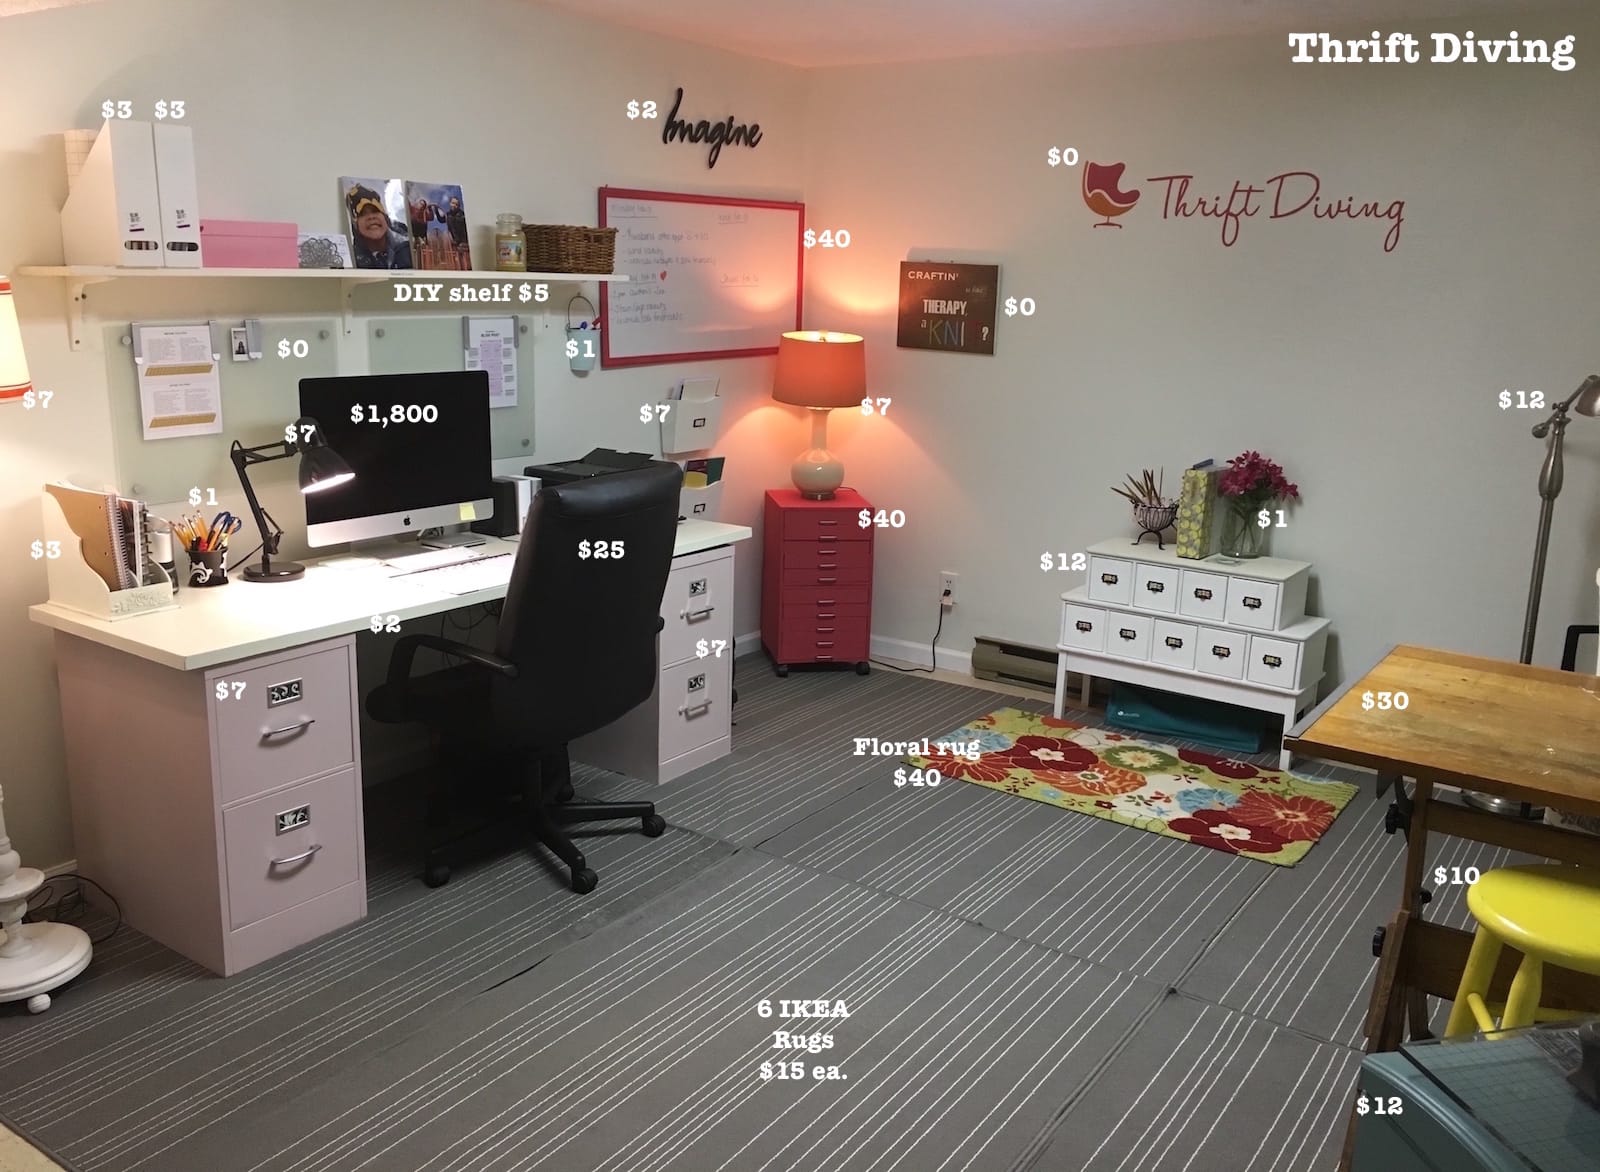
What Everything Cost in My Thrifted Office
And just for fun, I thought I’d break down my entire office so you can see what everything cost, along with links to relevant projects! 🙂
- DIY Card Catalog – $12. I found this at the thrift store and painted it white and added card catalog pulls.
- Pink storage cabinets under the lamp – $40 ($20 each). These easily go for much more brand new, so I was happy to have found them at $20 each and stacked them on top of one another.
- Huge DIY whiteboard – $40. Whiteboards can be expensive, but not when you make your own! Get instructions on how to make one without any power tools needed.
- Weave yarn into wood to make DIY wall art – $0. With just a piece of wood, a power drill, and some yarn, you can make wall art!
- DIY jewelry box turned into a craft organizer – $12. This is one of my favorite projects! Those tall jewelry armoires can easily be turned into a place to hold supplies!
I love working down here in the basement!
And now that it’s all clean and organized, I feel like I’ve got more breathing room and feel less anxious in my work space!

Now I’m Challenging YOU!

Are you tired of your desk area looking like a hot mess, too?
Then I’m challenging YOU to complete your own mini “desk refresh” in just a few hours!
Please don’t feel like you have to tackle the whole room!
Nope.
You’re only doing your desk! Max–it should take you about 3 hours or less (if it takes you a little longer, no problem, but this is definitely a 1-day challenge!)
You could easily tackle it on Saturday morning and still have the rest of your day free to do other things! 🙂
Here’s what I want you to do.
Challenge yourself to do your own “desk refresh” in the next 7 days, and then email me pictures of your desk’s BEFORE and AFTER pictures! It doesn’t have to be all fancy or anything–it just has to be clean and organized and a place without dirt and chaos!
If you accept the challenge, I’ll share your mini “desk refresh” in an upcoming post or in an upcoming email to readers!
Ready…..set……GO!


Download the 5 freebies!

Thrift Diving inspires women to decorate, improve, and maintain their home themselves...using paint, power tools, and thrift stores! Use these 5 printables, checklists, and ebooks to get started!

I remember when you finished your amazing office. It’s incredible. Our desks take a beating, don’t they? I tidy my desk and files on a regular basis, so I won’t be able to join your challenge this time. It’s a good one, though. I keep a folder for tax receipts year round, then pull it out in January and leave it on my desk till tax time. It makes it more convenient to add documents as they arrive in the mail. I like your colorful accessories. I used to buy those paper calendars when I worked in an office, but I tended to doodle on the calendar when I was on the phone so it took a beating.
I’ll look forward to seeing the desk tidy projects. Have a good week.
LOL, Alys, yes!! I forgot about that! You start doodling in the closed letters of the month, and then coloring the in the squares! 🙂 I don’t talk on the phone much anymore since I work from home, but I do remember the incessant doodling during conference calls! lol. Good for you for being so organized. It really makes like easier, doesn’t it? Thanks, Alys!
Serena – I am so jealous. Your room looks just fantastic. I will be moving in the near future so I’m pitching stuff like never before. I didn’t think I had the strength to do this but down-sizing can really get the mojo moving.Then when I get where I’m going I will unpack the boxes – place things where they will live initially/permanently – and then get rid of whatever is left. I’ve donated a lot to my church for the office and craft/quilting groups. Thank you for your inspiration too. I know I can do this!
Downsizing has got to be hard, Garnet! What is the size place that you’re moving from, and how big is the space you’re moving into? The beautiful part of it, though, is that you can only take the things that you really love. It helps to get rid of all the excess stuff just taking up space. Good luck on that move!
Serena – I’m going from 2500 sq ft to 1600 sq ft. Good news – I found a shop owner that will buy some of my vintage glassware, china and linens. I’m glad they are going to someone who appreciates them and will find a home for them. I don’t know if it’s fortunate or unfortunate but my new place will have a garage. I will really have to behave. Thanks again for a wonderful newsletter and all the inspiration.
LOL…..both fortunate and UNfortunate! It means you can store up things! LOL Just don’t get too crazy with it, or yours will start to look like mine. LOL. I’m glad you were able to find some place to sell your good stuff. Plus you will make a few bucks that you can invest into other things you might want for your new place. 🙂 Good luck with the move!
Serena…love the office face lift. Great job! You have a nice sized space for your office…lucky girl!
Becca in Tucson Az
Hey there, Becca! HA, I love that term “office face lift.” Yeah, it’s a pretty good size. I usually only sit at my desk, but I like that there is enough space for me to spread out if I need to. It’s an office I can grow in to, depending on the projects I have going on! 🙂
That’s what I plan to do with my desk (File cabinets and wood), when I get rid of this Walmart disaster I bought when we first moved in. But I really want to know is where you got that other piece that’s in the background – the one with all the drawers. I’m obsessed with little drawers. I was so upset when my school library threw out the old card catalog without telling anyone.
Hey, Llima! I got that little card catalog thingy at the thrift store for about….hmm…$12, I think?? It was a honey-colored wood with little knobs that needed changing. It was in pristine condition! It needs a good refreshing up, too, because the kids have used ink all over the top when they were smaller. So it could use a nice “face lift.” But I imagine it would be easy to build one of these, too! It looks rather simple! Maybe I should make a duplicate! LOL
Wow, I love this. And really, anything you do is so cool anyway…..inspiring me to get rid of some clutter in my office/craft room/storage catch all room! Ha ha Please keep ideas coming. Come do my house……ha ha
Hi, Hilary! Yes, inspiring you is my goal, girlfriend! Soooo….did you get rid of some of that clutter? Did you do your desk? 😉
Oo, boy. I need to tackle my desk! Well, it’s really a work table but it’s basically my desk. Yours looks great. I’m going to accept your challenge! How soon do you need the before and after pictures?
Hey, Cecilia! YAY! So glad you decided to work on this! You can just email me the BEFORE and AFTER pics by this Friday, March 3rd!
Love the AFTER. Actually my desk is the one thing I always keep organized.
I was happy about your comment regarding clear wax; I have never been a fan because I have also found it to be streaky.
I love use General Finishes top coats . I have used the High Performance and Flat Out Flat, The only time you will catch me using wax again is on a small piece of furniture. Also, I have been staying away from the clear wax on my pieces for sale. It dawnwd on mwe that customers would most likely not know to apply wax again at 6 months.
Awesome, DiB! So cool that you are able to keep your desk clean. What’s your secret? Please do share! And that’s an excellent point about using the top coats on pieces you sell, especially. No one would know how to apply the wax! BRILLANT that you realized that. And seriously, even for us, who wants to be waxing every 6 months? I can tell you that I hate going back to revisit pieces of furniture (which is why it took so long for me to refresh the desk). I bet your customers are very happy with their pieces!
What do you think about the General Finishes Flat Out Flat? I think I saw it at the Woodworking store but I have only tried the High Performance, which I really love.
Man oh man you dug in deep. That looks like a whole different room. What creativity! Where do you get the energy? The AFTER looks like a tranquil space where a lot of thinking goes on. I marvel at your projects and look forward to seeing them .
Hi, Sly! 🙂 Yeah, it changed so much after that 30-day challenge. But keeping the desk clean was such a challenge. But now….! It looks fresh and new again! Thanks for the compliments, Syl!
Haa! Great minds think alike, but all my great mind has gotten done is the thinkin’. all of the house needs that 3 hour span for cleaning, let alone the fixin’ up part. But I would like to get a project done, so I’m gonna see how far I can get tomorrow! Good luck, all!
Hey, Linda! Soooo….did you get your desk done? 😉 I know how you feel. This past weekend I spend at LEAST 2 hours vacuuming and was like, “I need to hire a flippin’ housekeeper!” LOL. Anyhow, I hope that you tackled your desk and made some progress! If so, email me BEFORE & AFTER pics!
Hi Serena. Funny, great minds think alike. I recently refreshed my desk as well. And I am in the process of deciding what to do about the entire room. It is organized but I need the space where I have a daybed and I am trying to decide what to do with it. But take a look at my desk refresh and let me know what you think. Great tutorial. Very detailed. I loved it. http://clearissacoward.com/desktop-project-about-paint/
Hey, Clearissa! I just left you a comment on your blog! I’m curious how the rest of your office looks. Is it small, or would you have enough space for a daybed? Are you hoping to use it for a guest bedroom, too? If so, I’m wondering if you could do a very nice blow-up mattress for when you have guests over….?