How to Make DIY Drawer Organizers Out of Scrapbook Paper
Drawer organizers are so expensive, aren’t they?? That’s why I love these DIY drawer organizers that I made out of scrapbook paper!
Watch: How to Make DIY Drawer Organizers Out of Scrapbook Paper
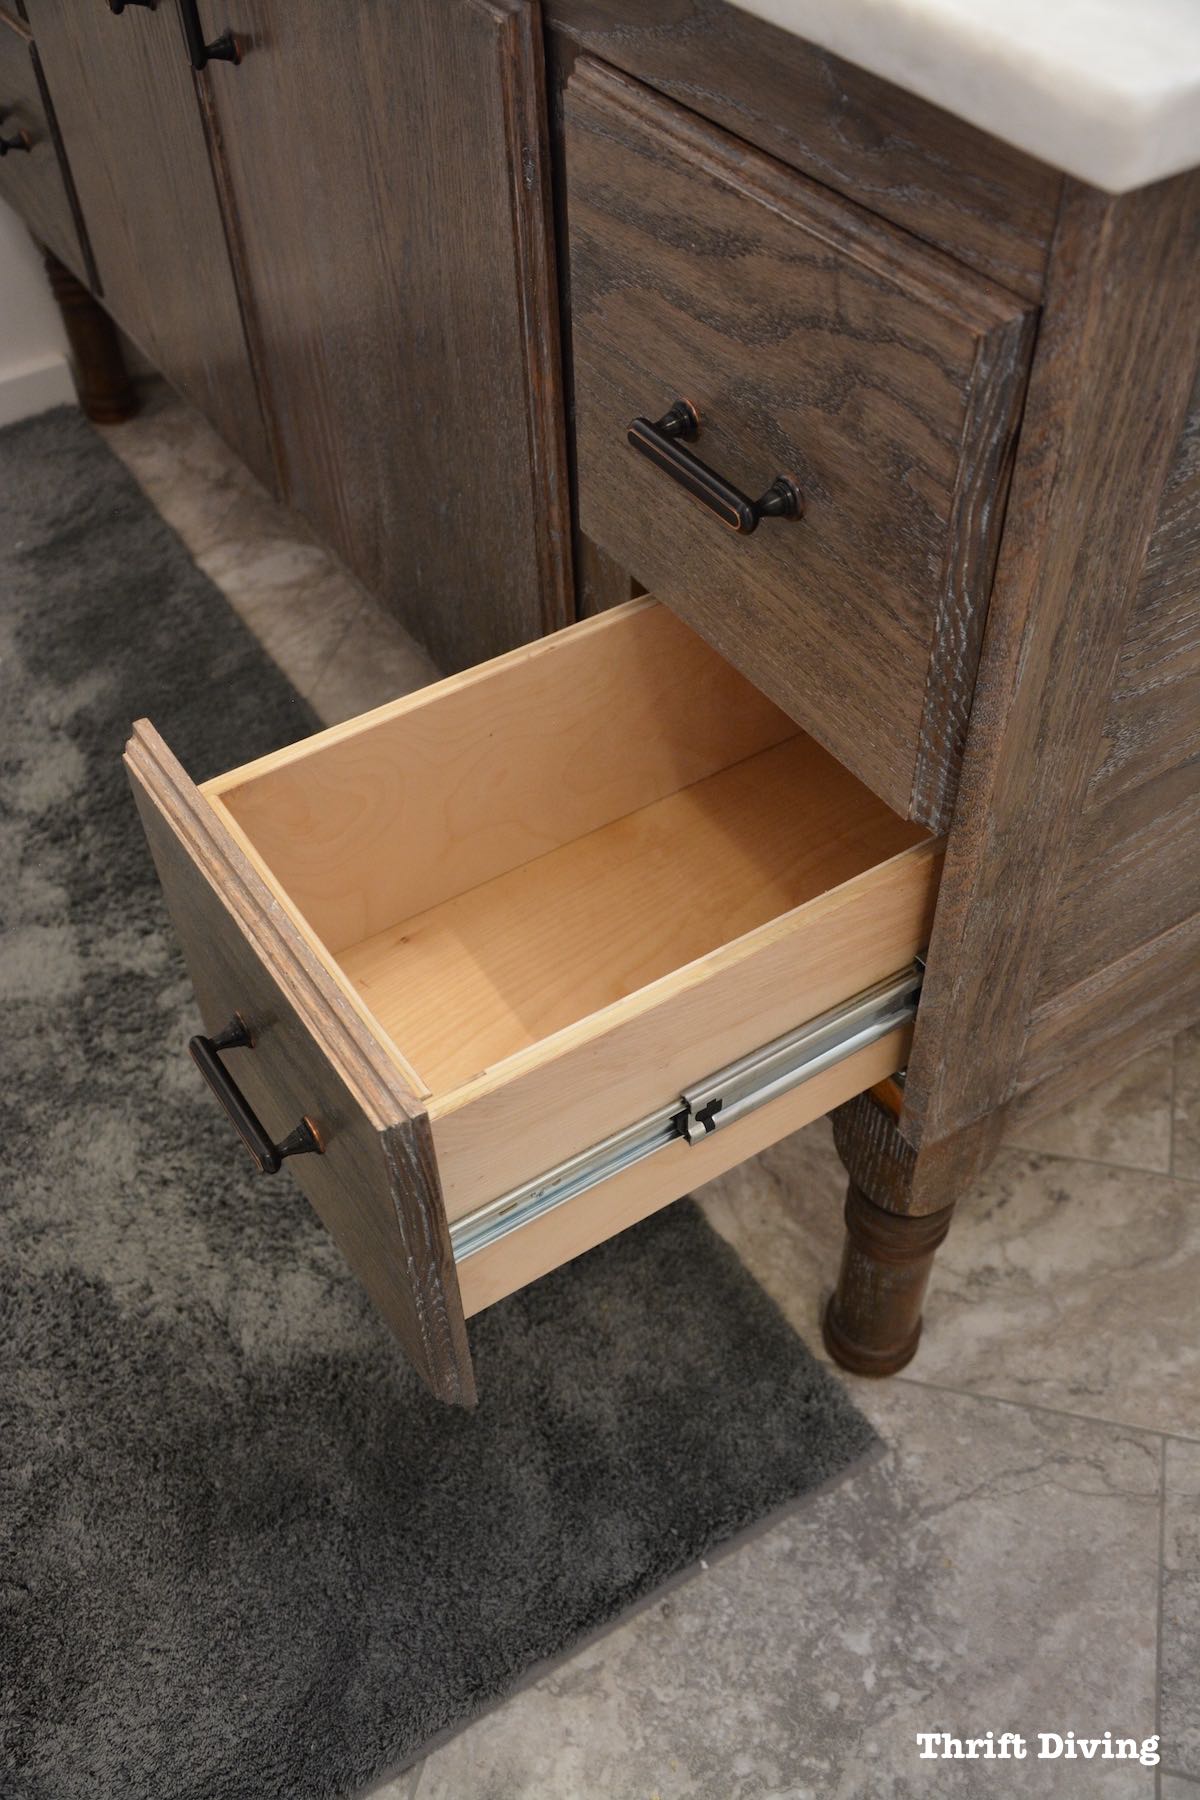
I built a DIY bathroom vanity from scratch.
(Surprisingly, it hasn’t fallen apart! YAY!)
And I know this is “mean,” but since I built the vanity, it’s mine. All that drawer space? Yep, that’s mine, too. Sorry, hubby!
It’s exciting that I finally have personal drawer space to fill with makeup, face cleaners, and personal women’s products–all the stuff my husband doesn’t care about and honestly, doesn’t need to see.

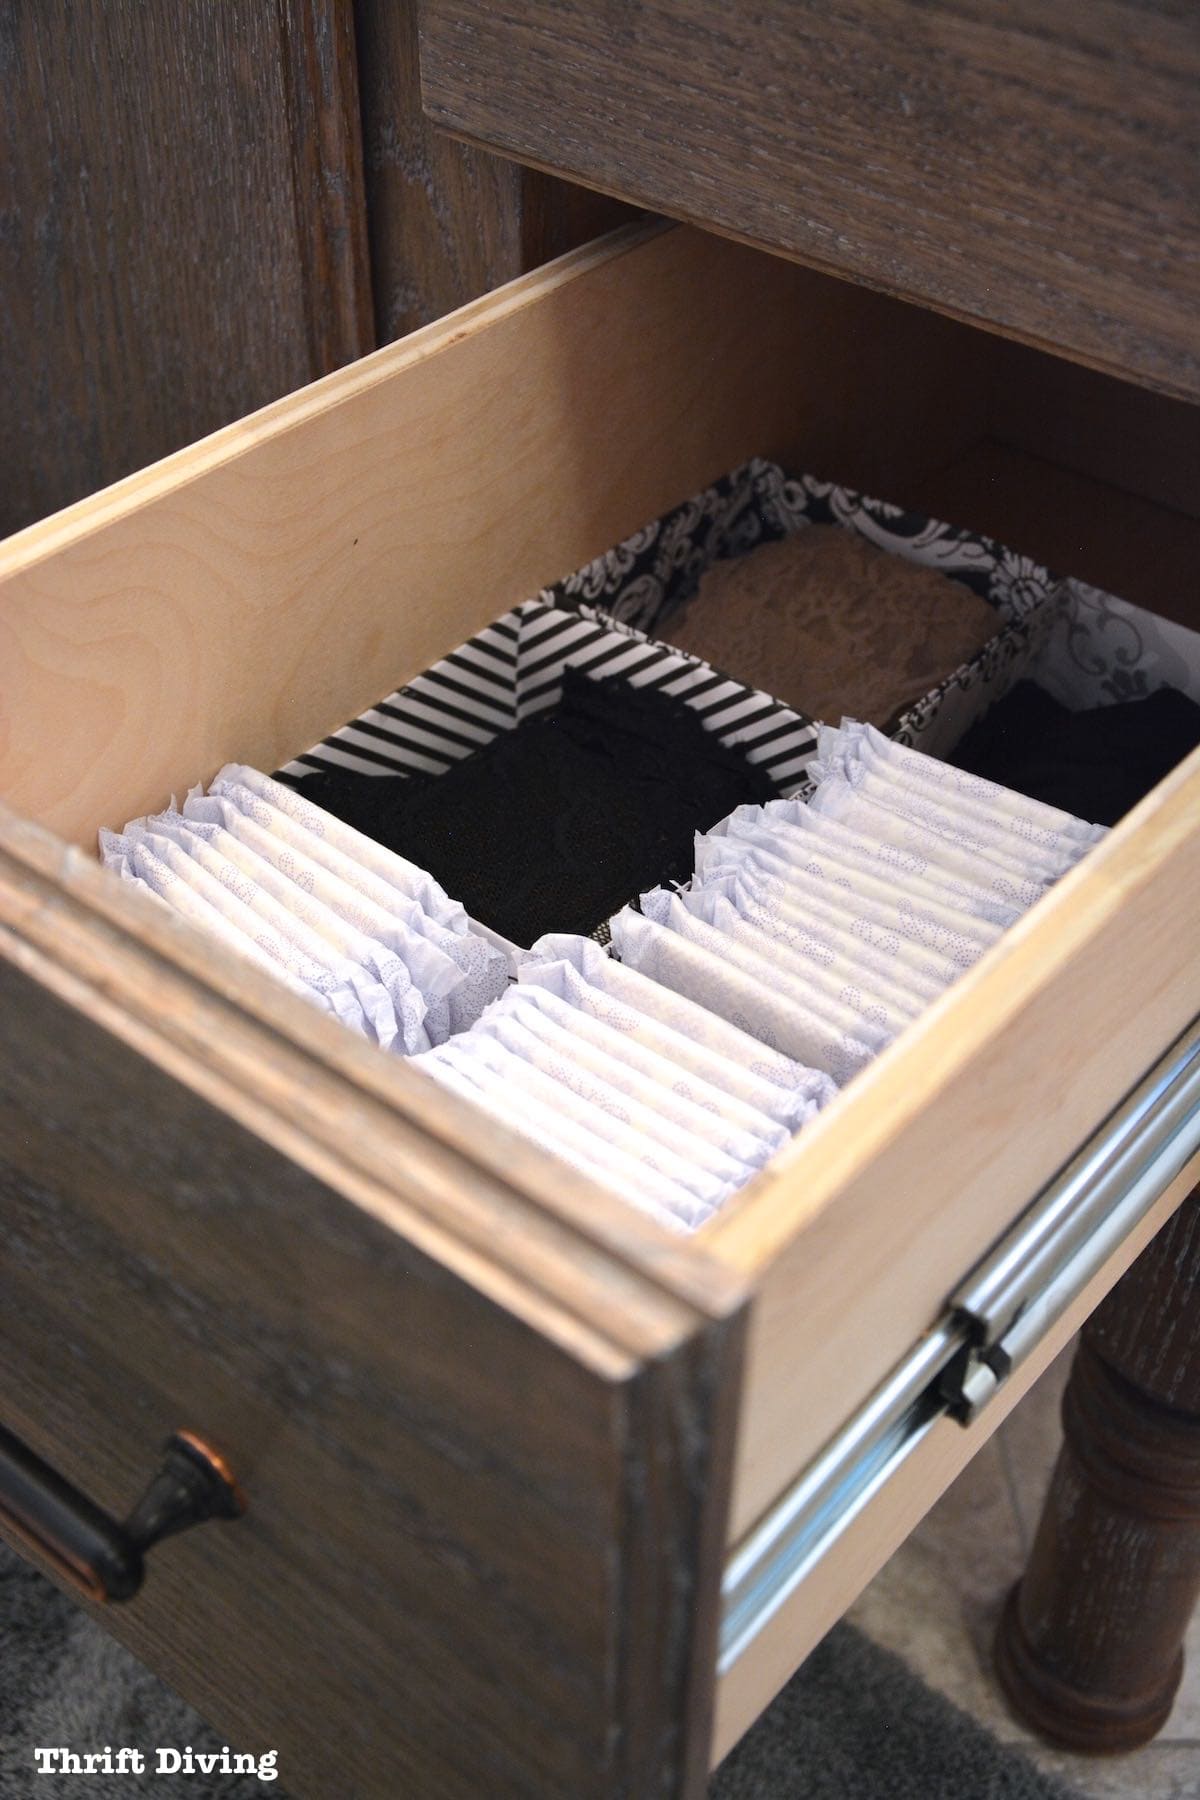
The drawers are pretty deep and actually pull all the way out, so I can store a lot of stuff here.
But drawer organizers are so expensive and hard to buy them in customizable sizes.
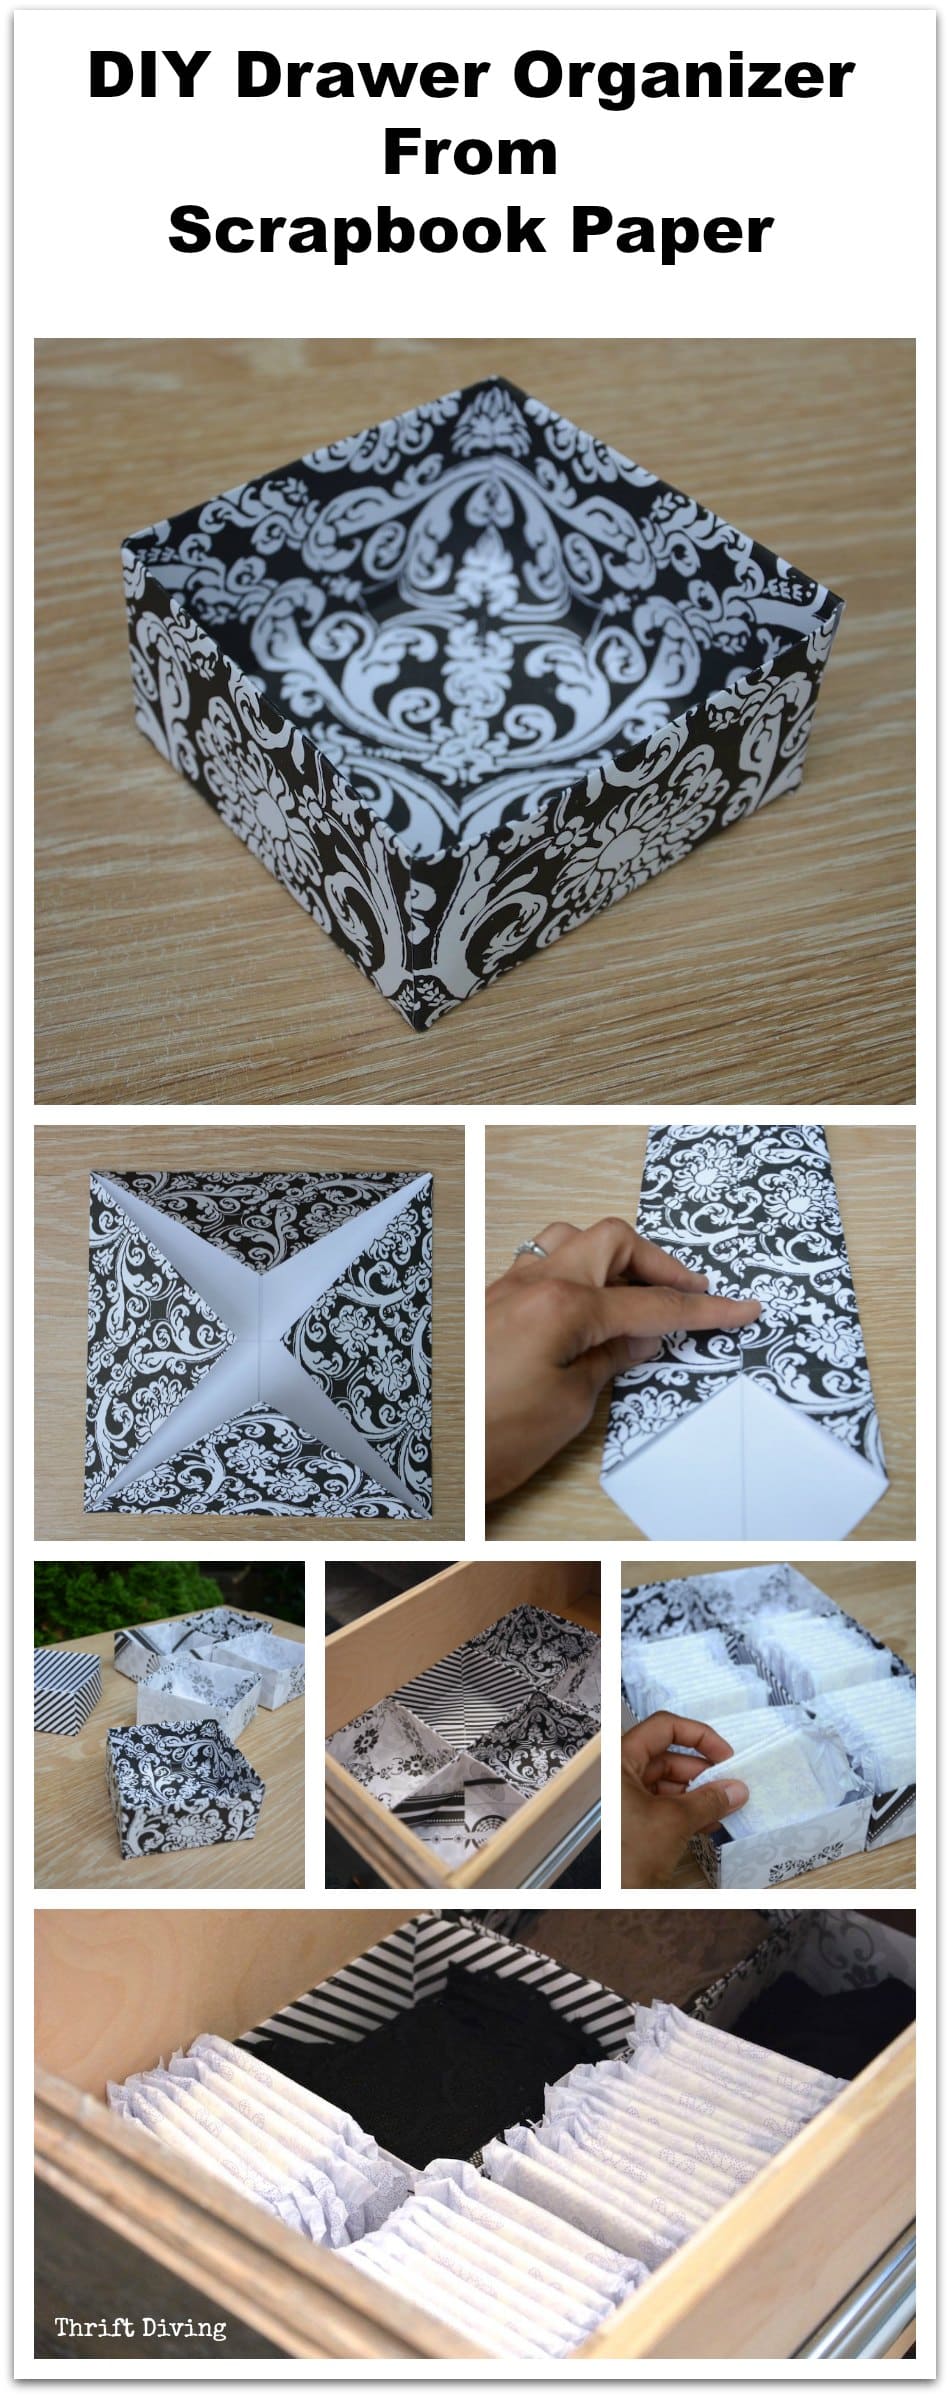
So I decided to make some DIY drawer organizers that only took about 30 minutes or less using pretty black-and-white scrapbooking paper.
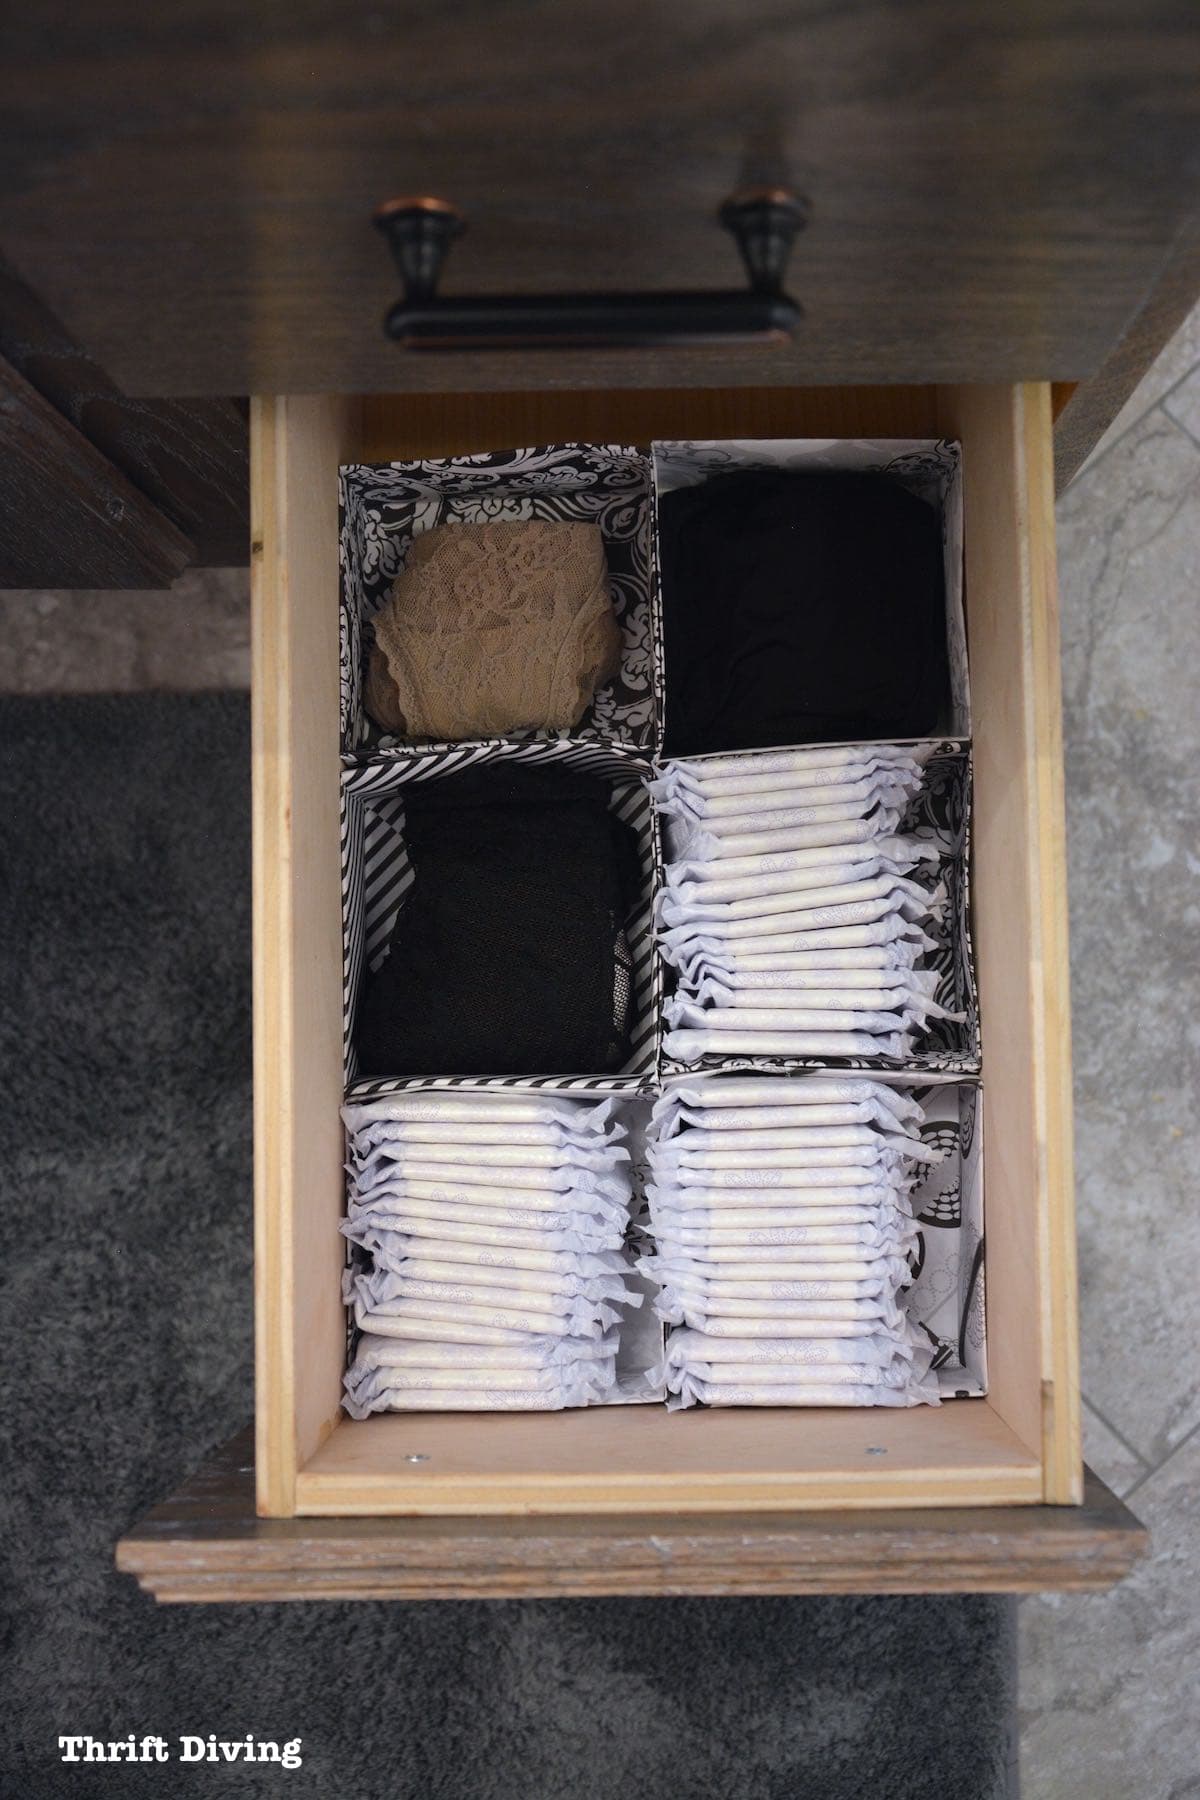
The top drawer is for makeup and cleaners and the bottom drawer is for women’s personal products.
How to Make a DIY Drawer Organizer Out of Scrapbook Paper
If you are a visual learner, remember you can always watch this DIY drawer organizer tutorial on my YouTube channel.
Materials Needed
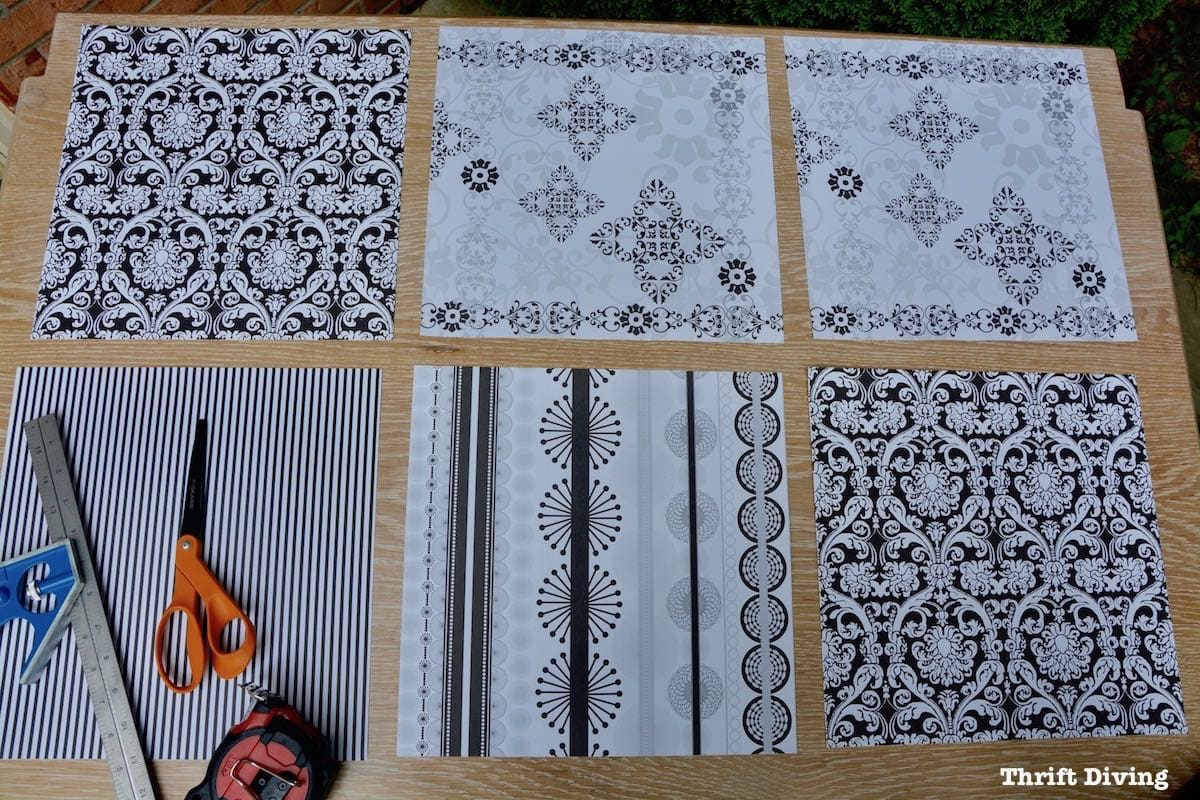
- 12 x 12 scrapbook paper
- Scissors
- Hot glue
- Pencil
- Ruler
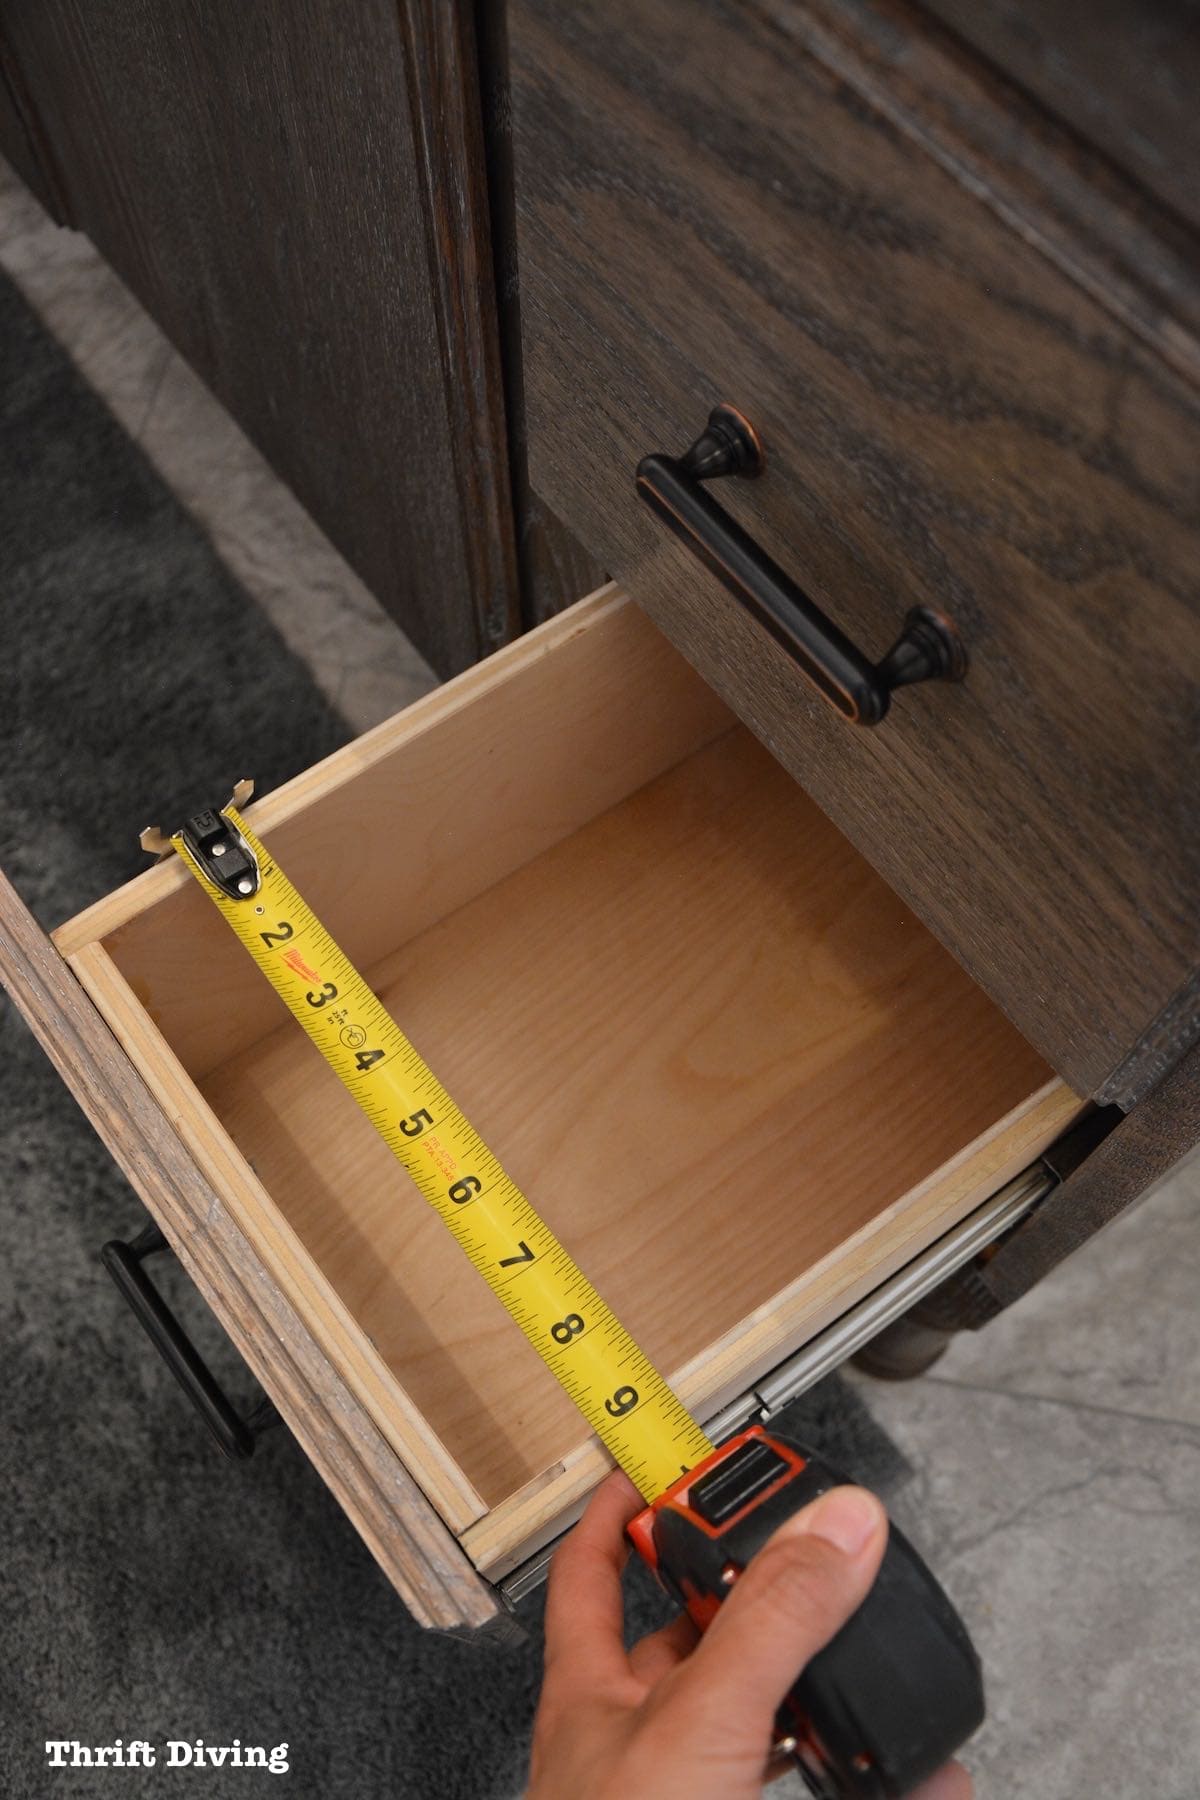
STEP 1: Determine the size of your drawer
Using 12 x 12 scrapbook paper will result in a single paper box that’s about 4.5″ x 4.5″ square. After measuring my drawer, I realized I had just enough space to get two of them to fit the width.
If you want smaller paper boxes, just trim an equal amount from the LEFT and BOTTOM of your 12 x 12 scrapbook paper. This will make the square a bit smaller.
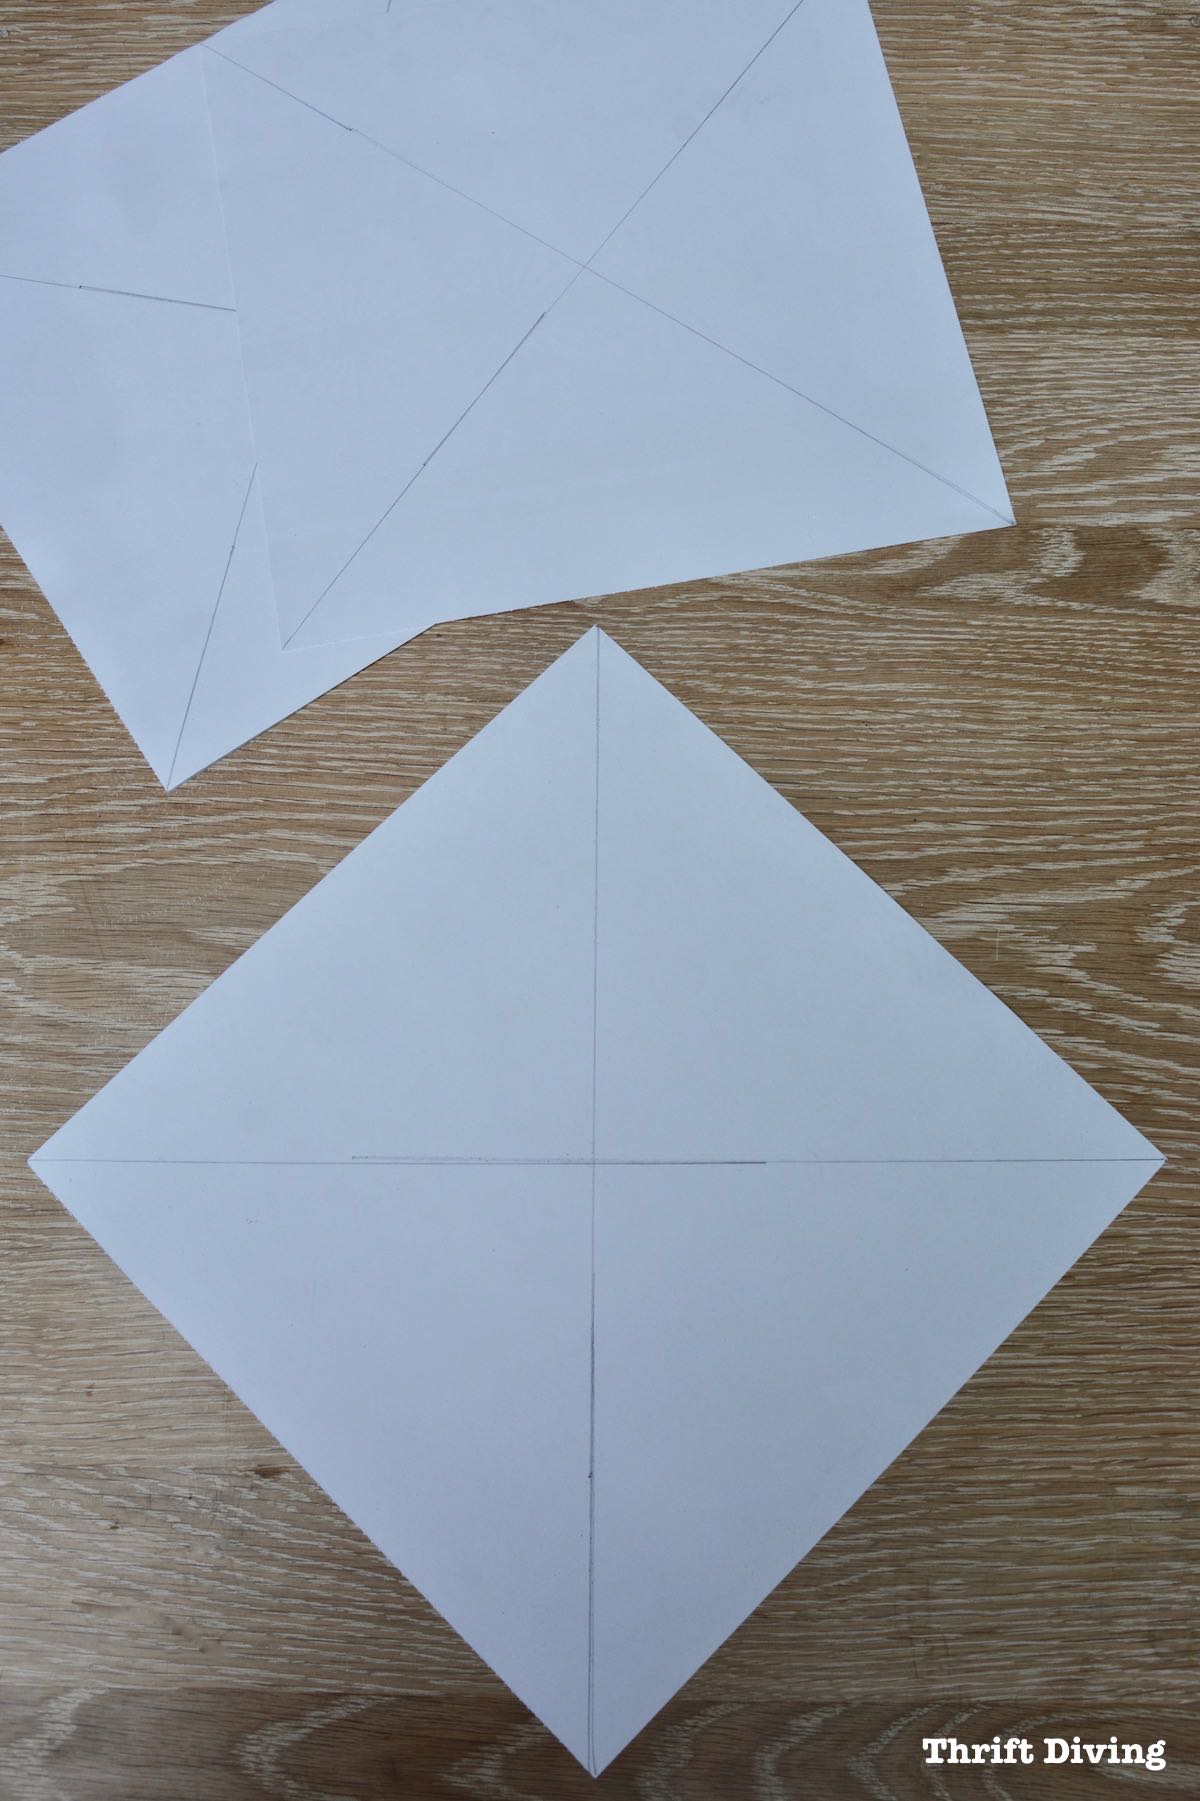
STEP 2: Draw an X on the diamond.
Rotate your paper to a diamond shape and then use your ruler and pencil to draw an X.
I did all 6 sheets of paper for my 6-drawer organizer at the same time.
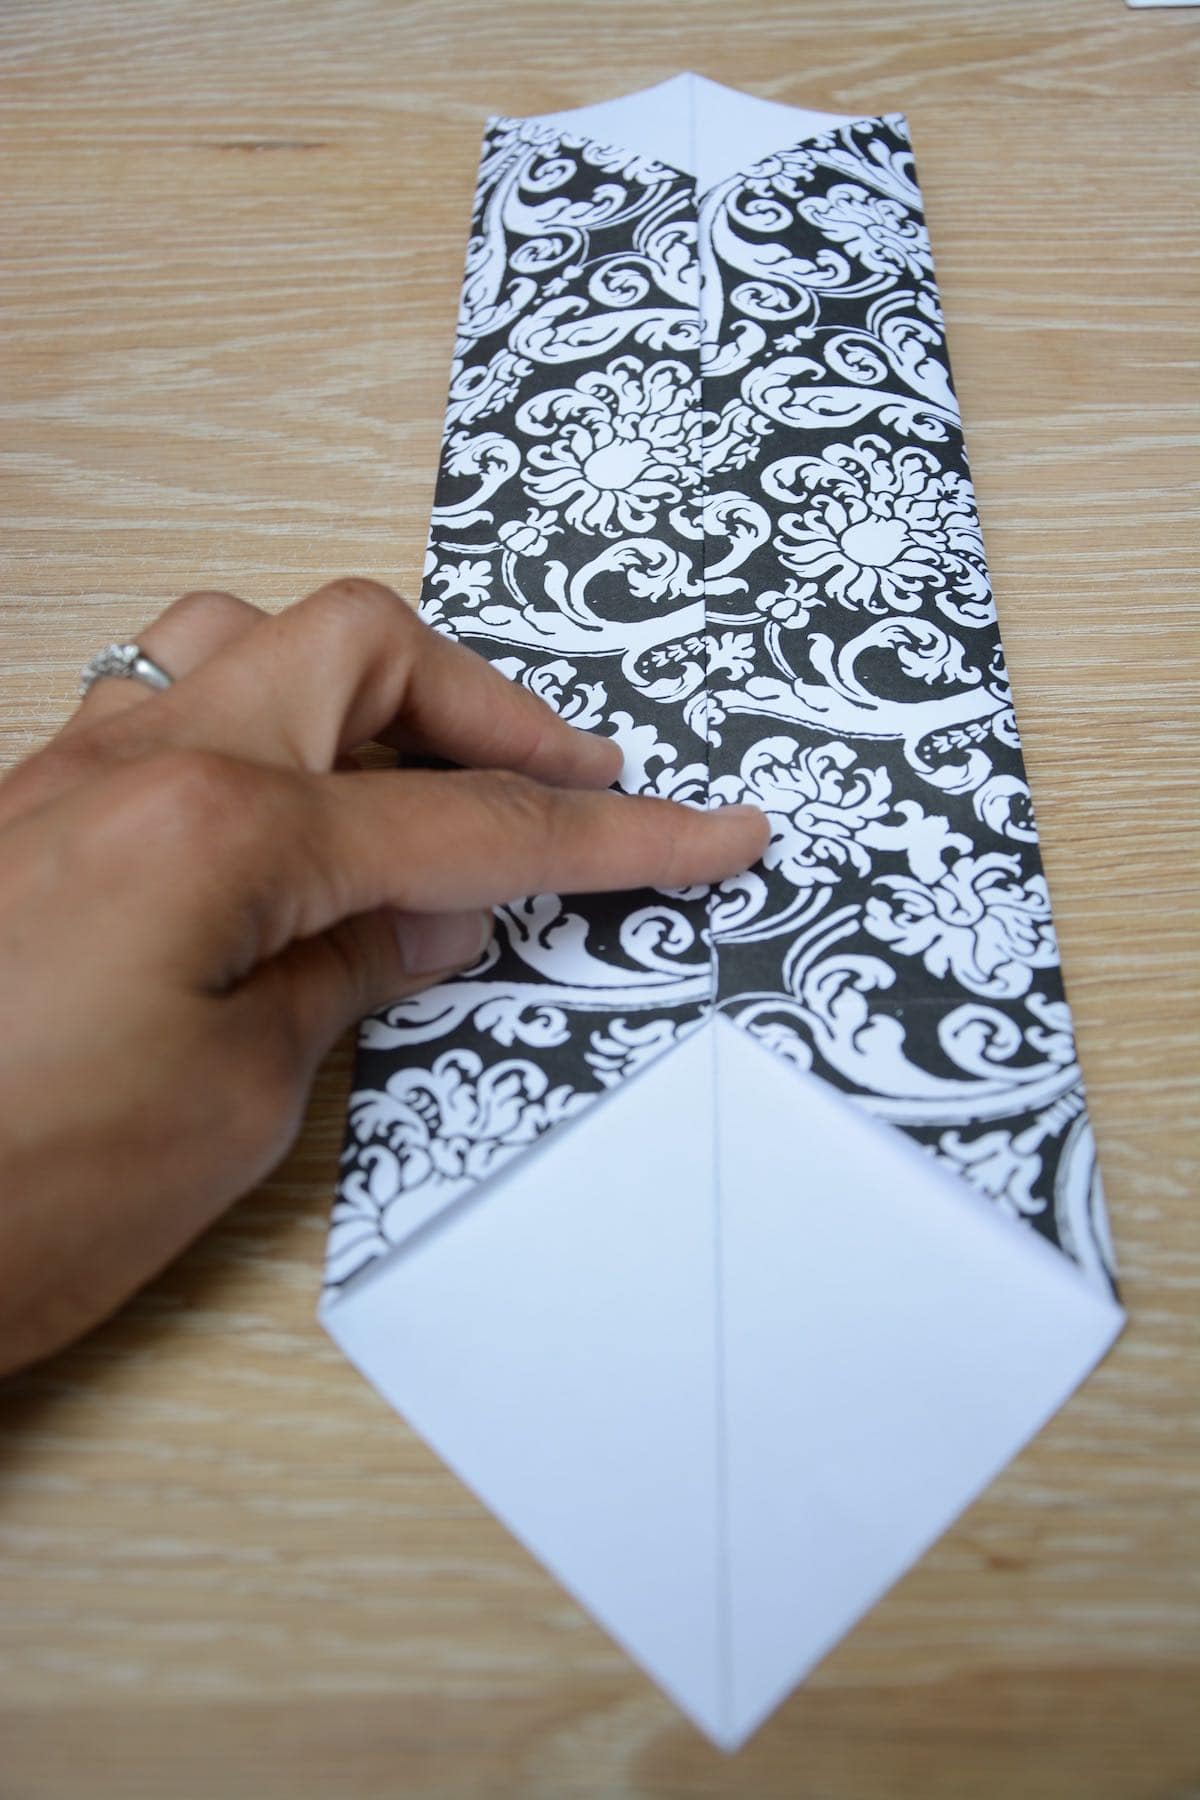
STEP 3: Turn in all the corners to meet in the middle.

Again, when you’re making multiple paper boxes, it makes sense to do the same step to all the sheets of scrapbook paper at the same time.
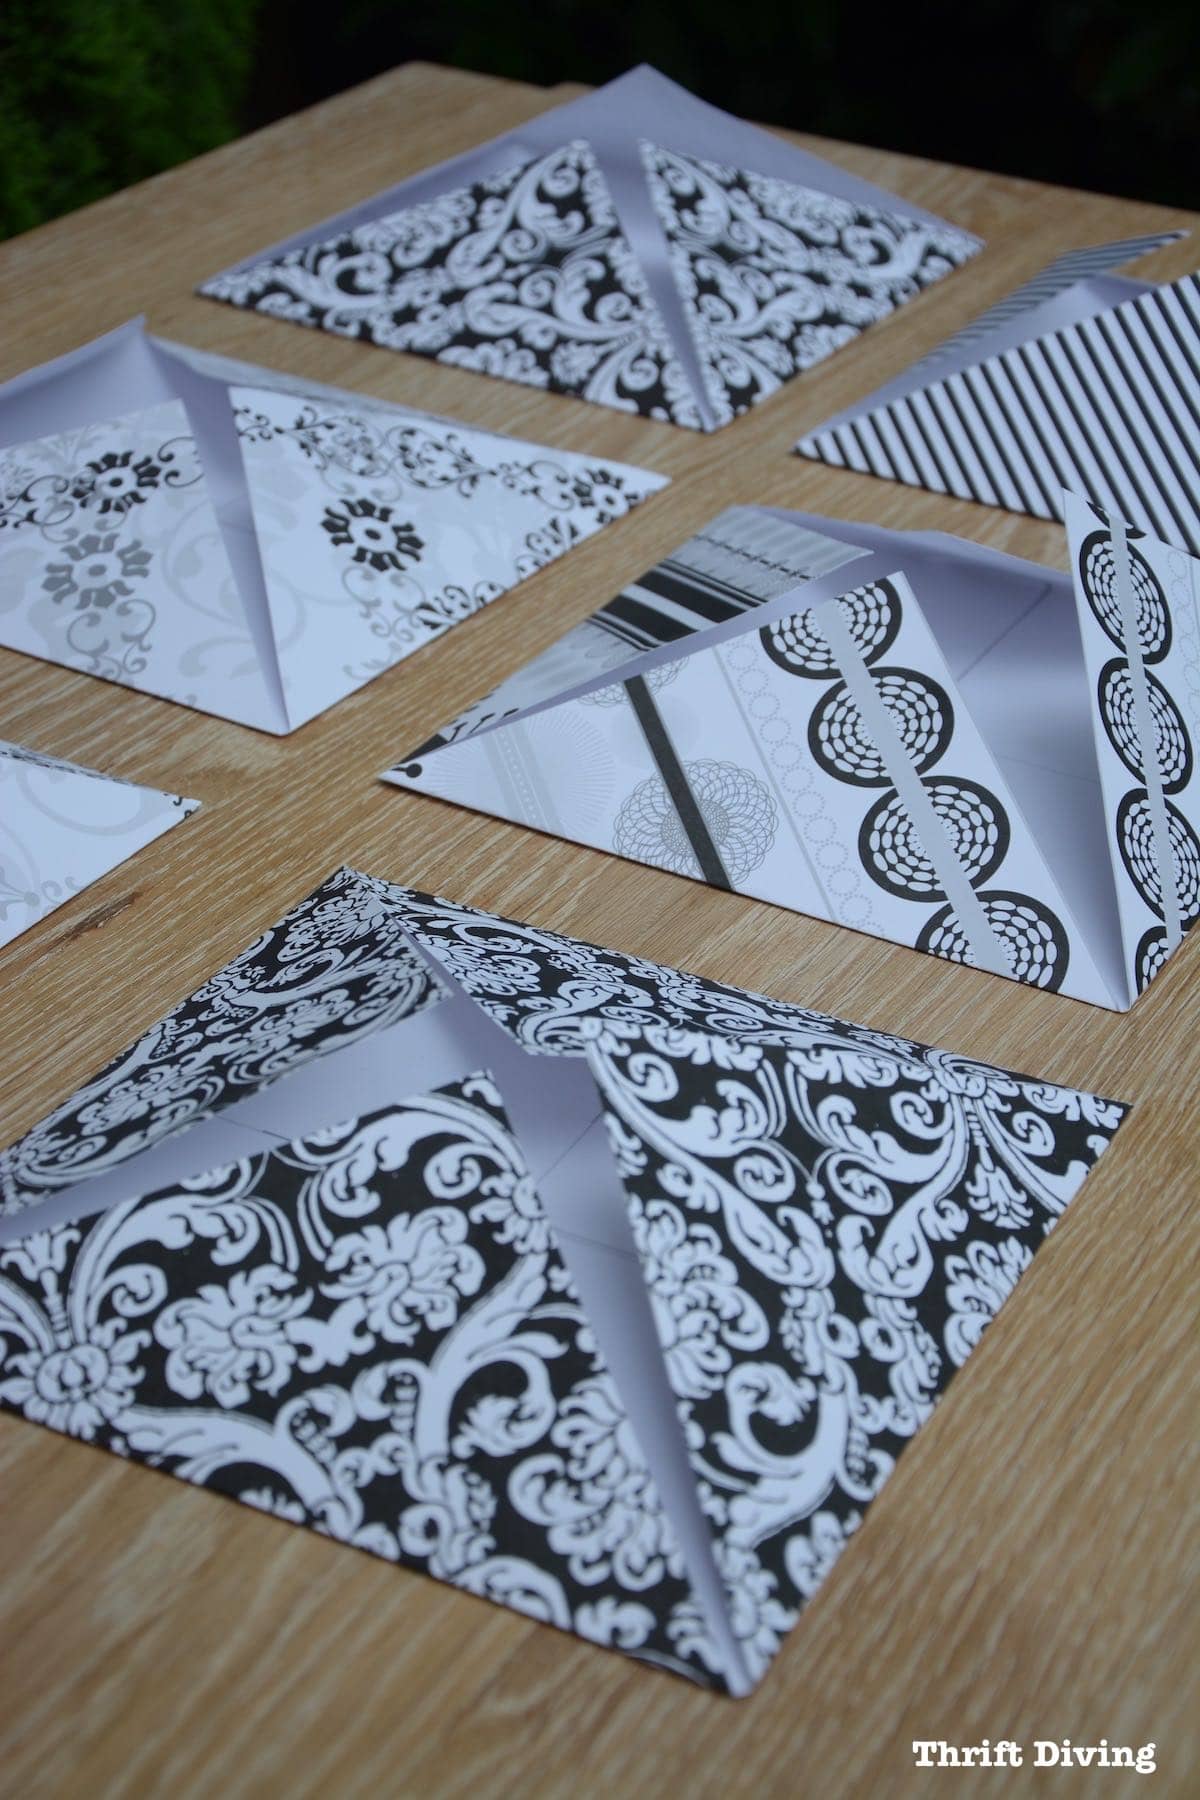
STEP 4: Open up the top and bottom corners.
Leave the left and right side folded in, but open the top and bottom corners.
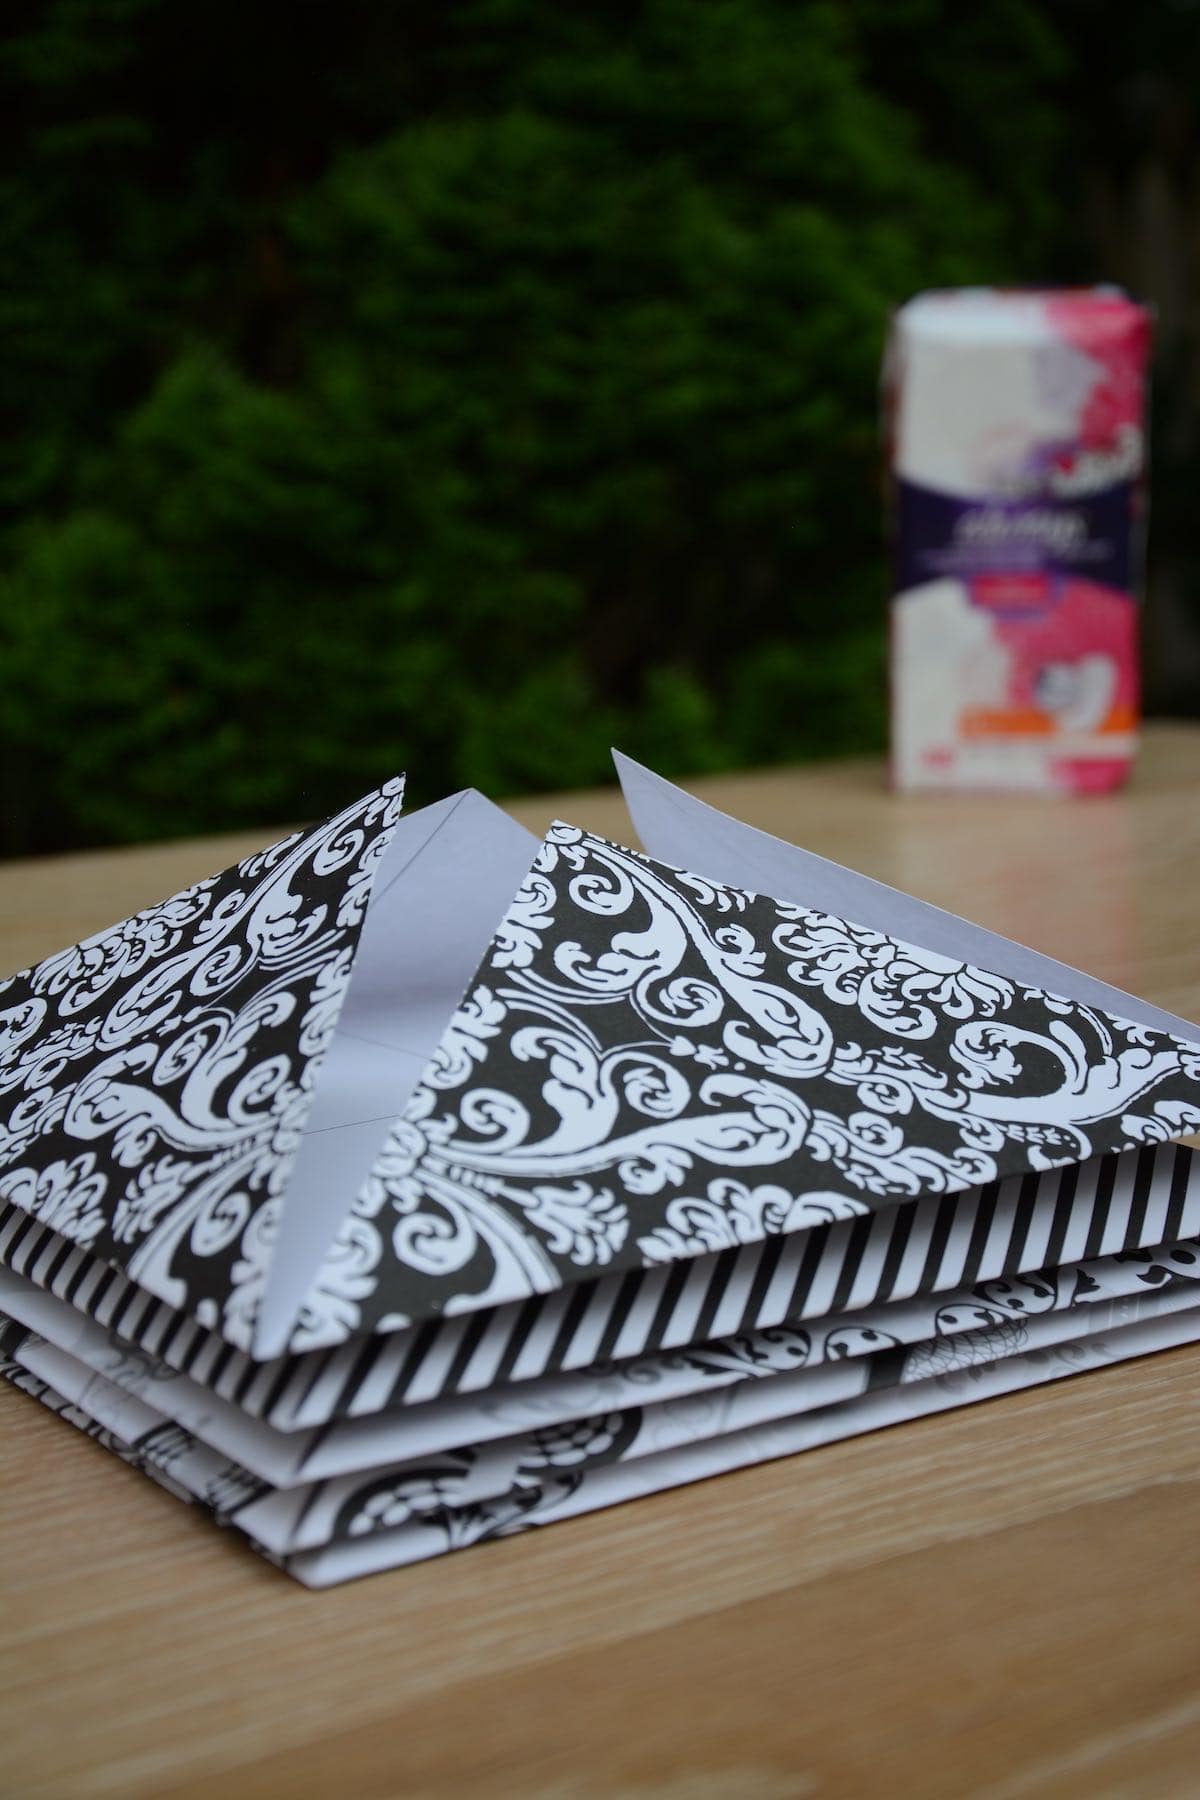
STEP 5: Fold in the sides.
Next, you’ll fold in the sides in on themselves, creasing it along the sides and center.
STEP 6: Open up the creases.
Open up the creases and secure the flaps in the center with a little hot glue. It’s just easier to fold if the flaps aren’t shifting around.
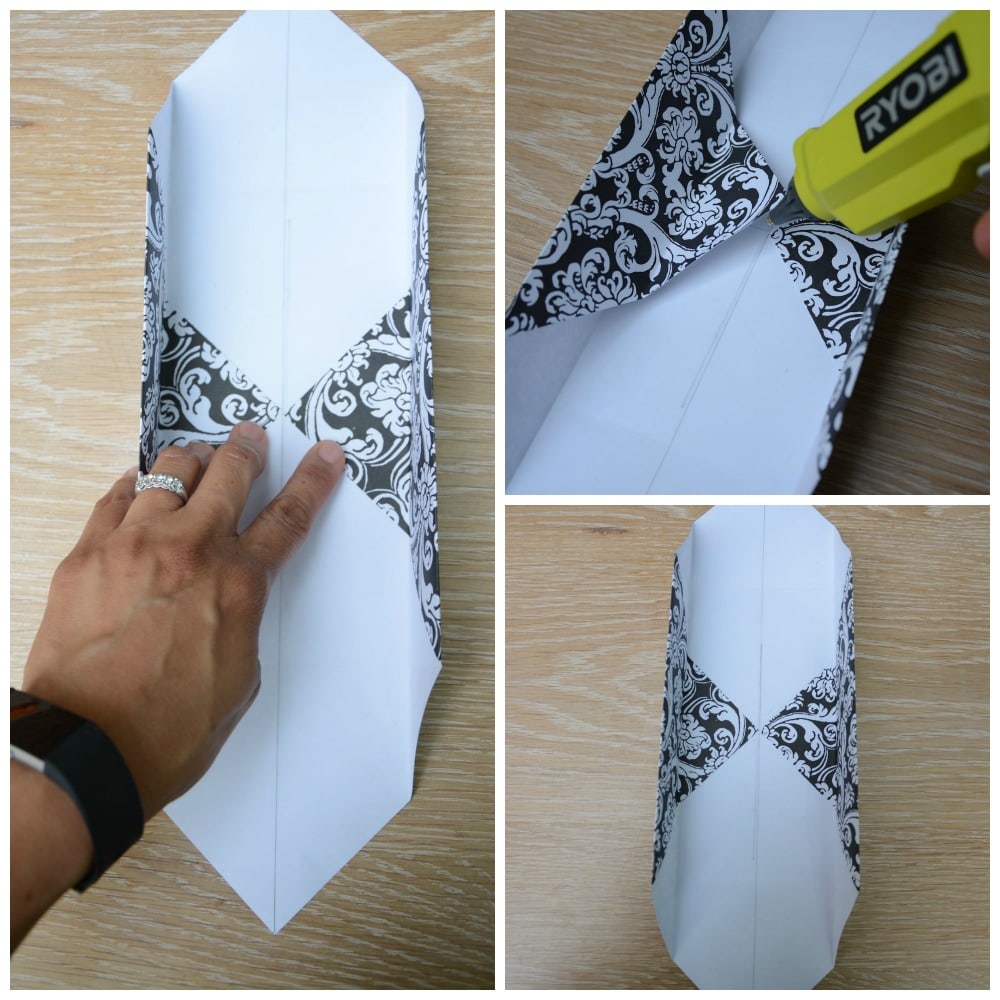
I like to hot glue the wings down so they don’t move but you don’t have to.
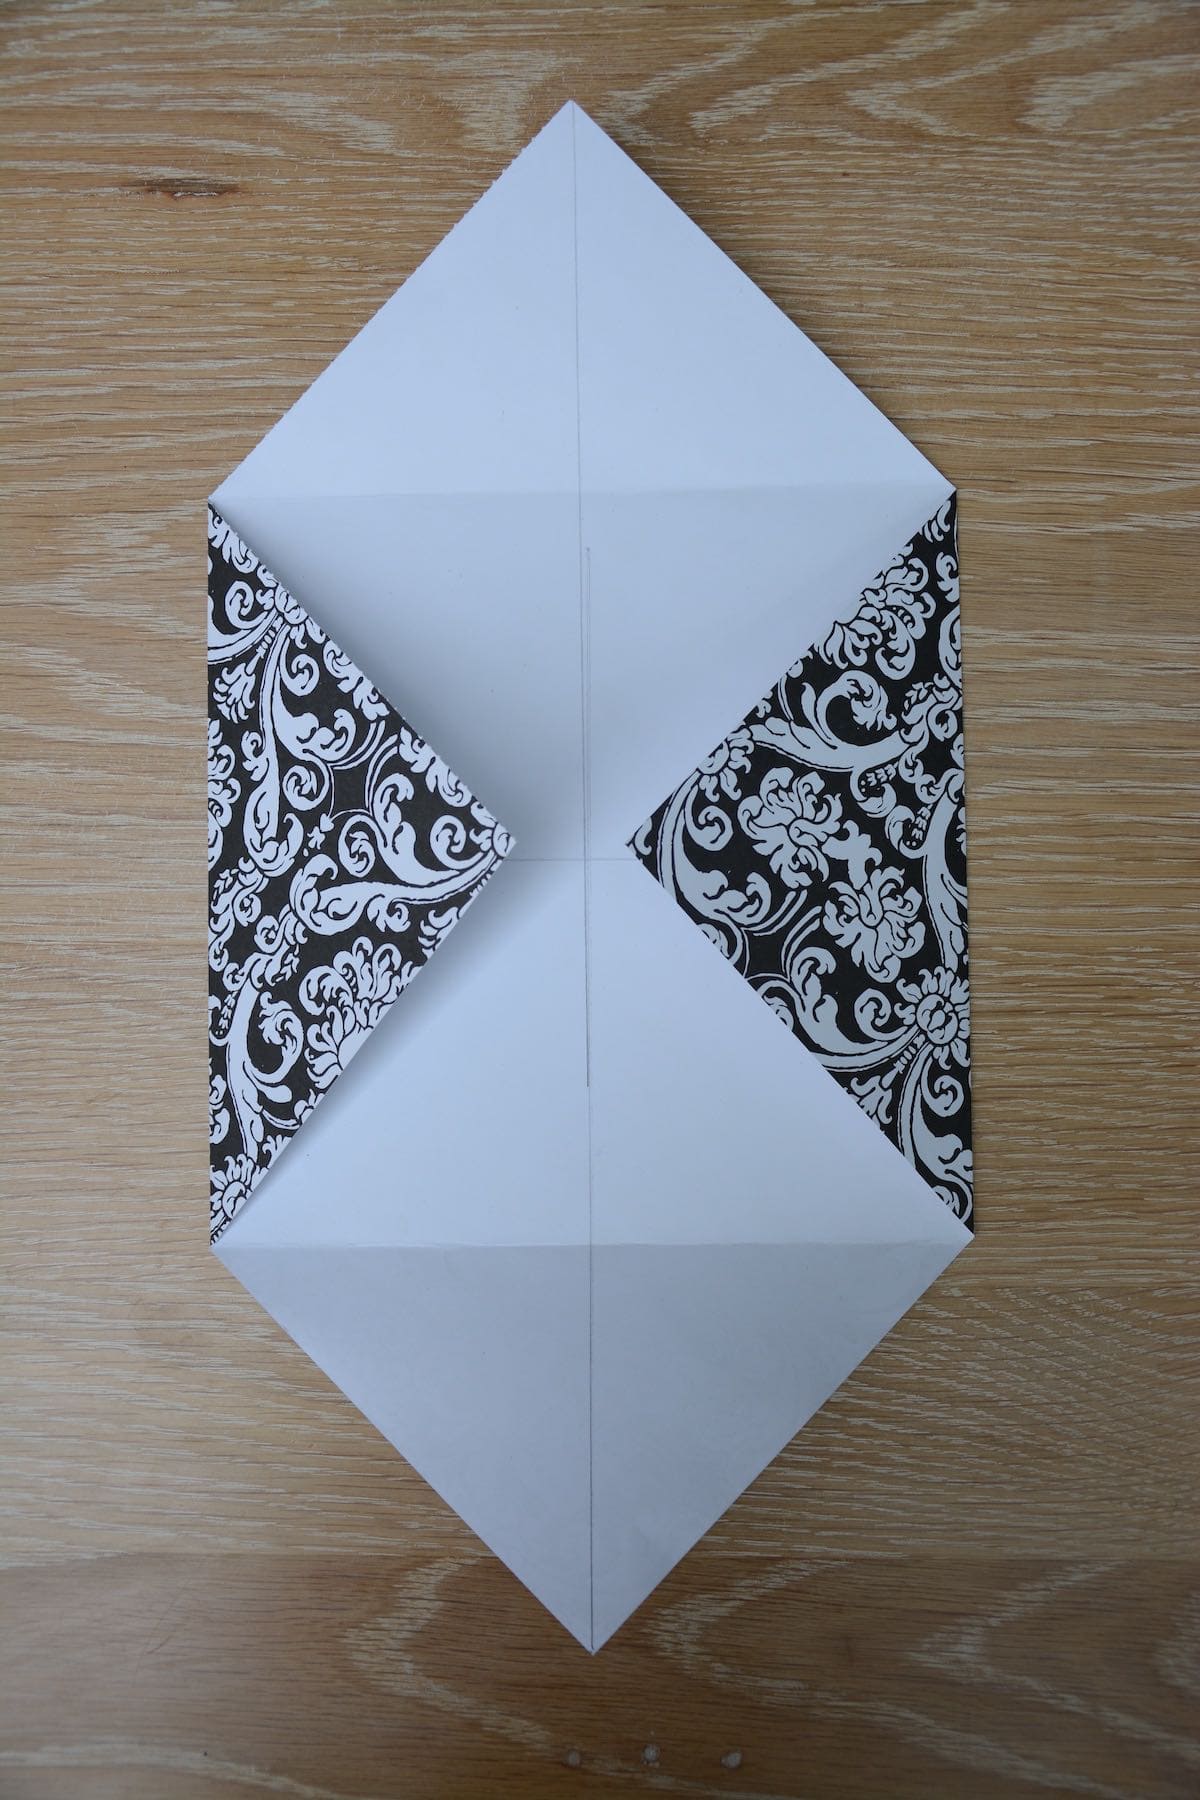
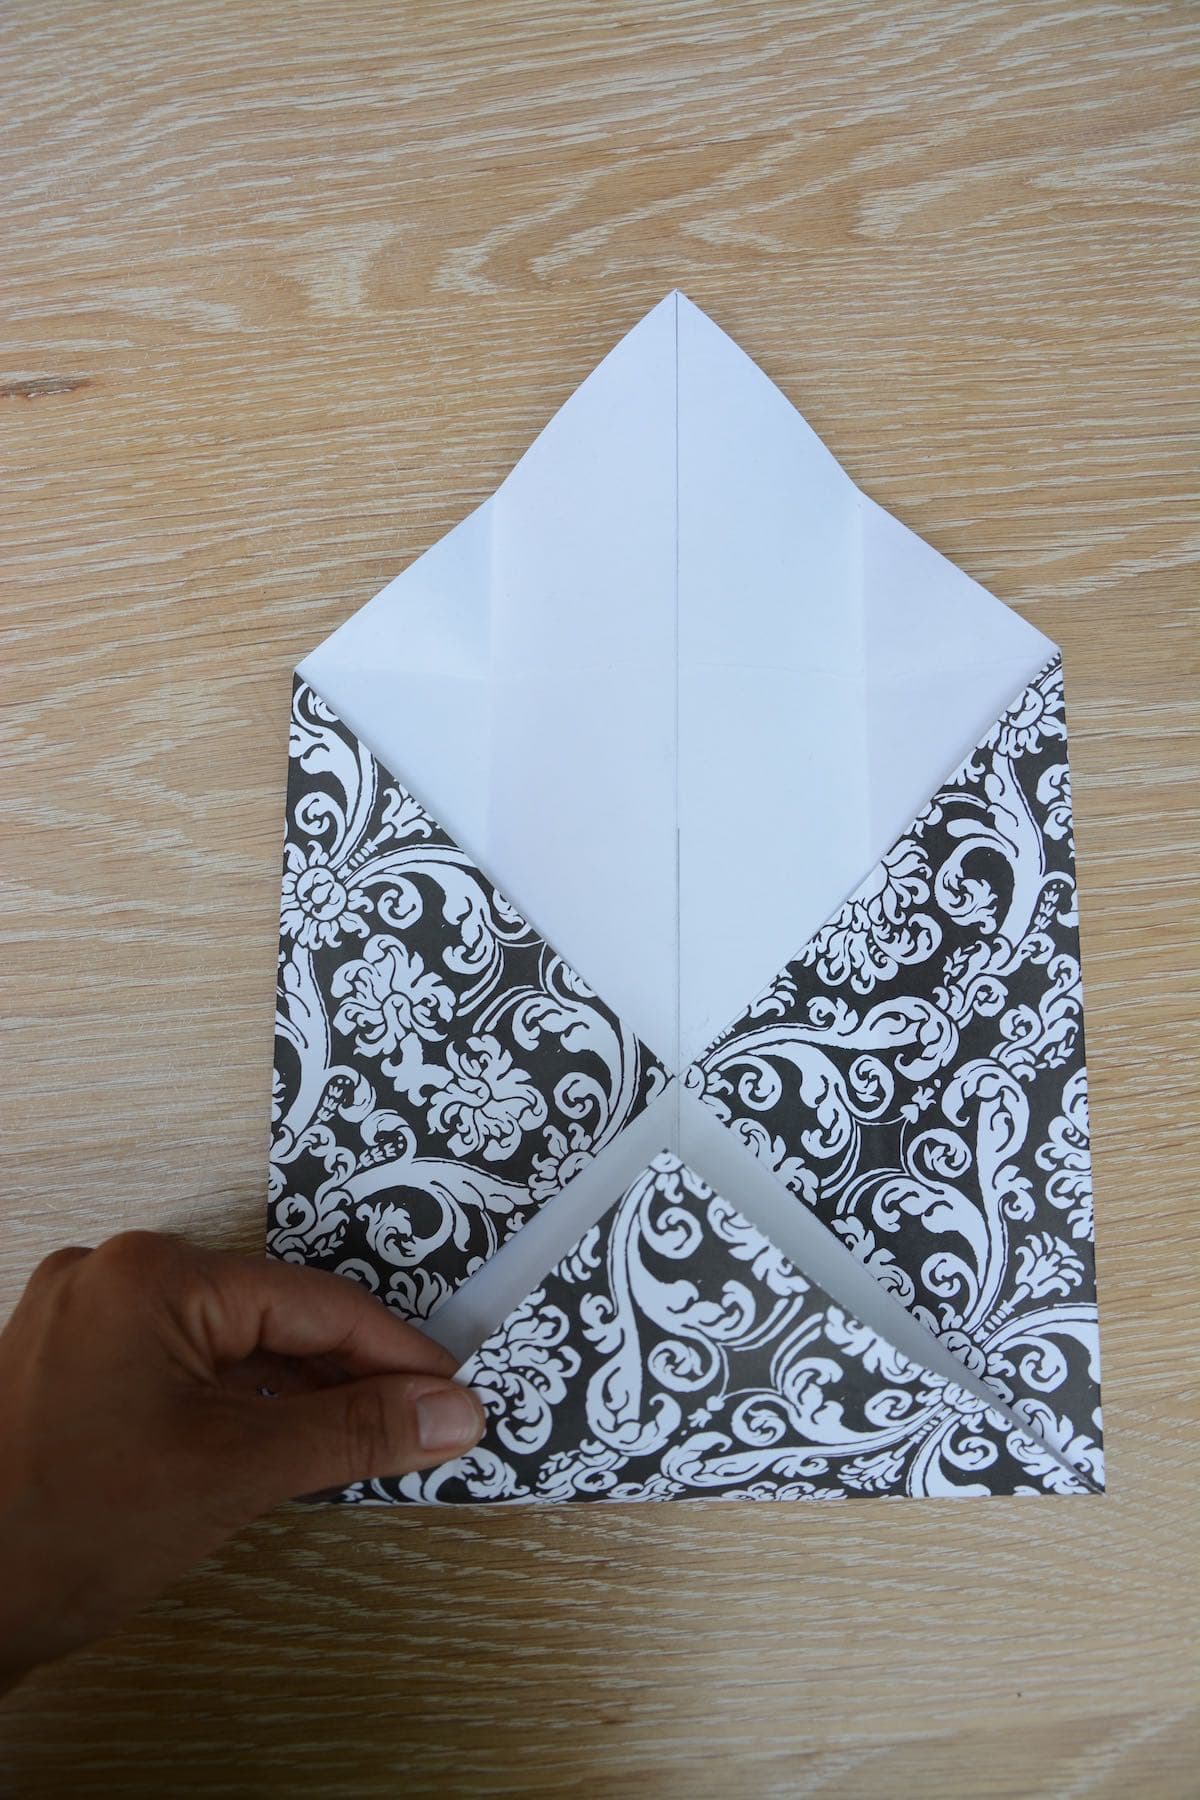
STEP 7: Fold the bottom corner to the center again.
Slightly open the creased sides and then fold the bottom corner to the center again.
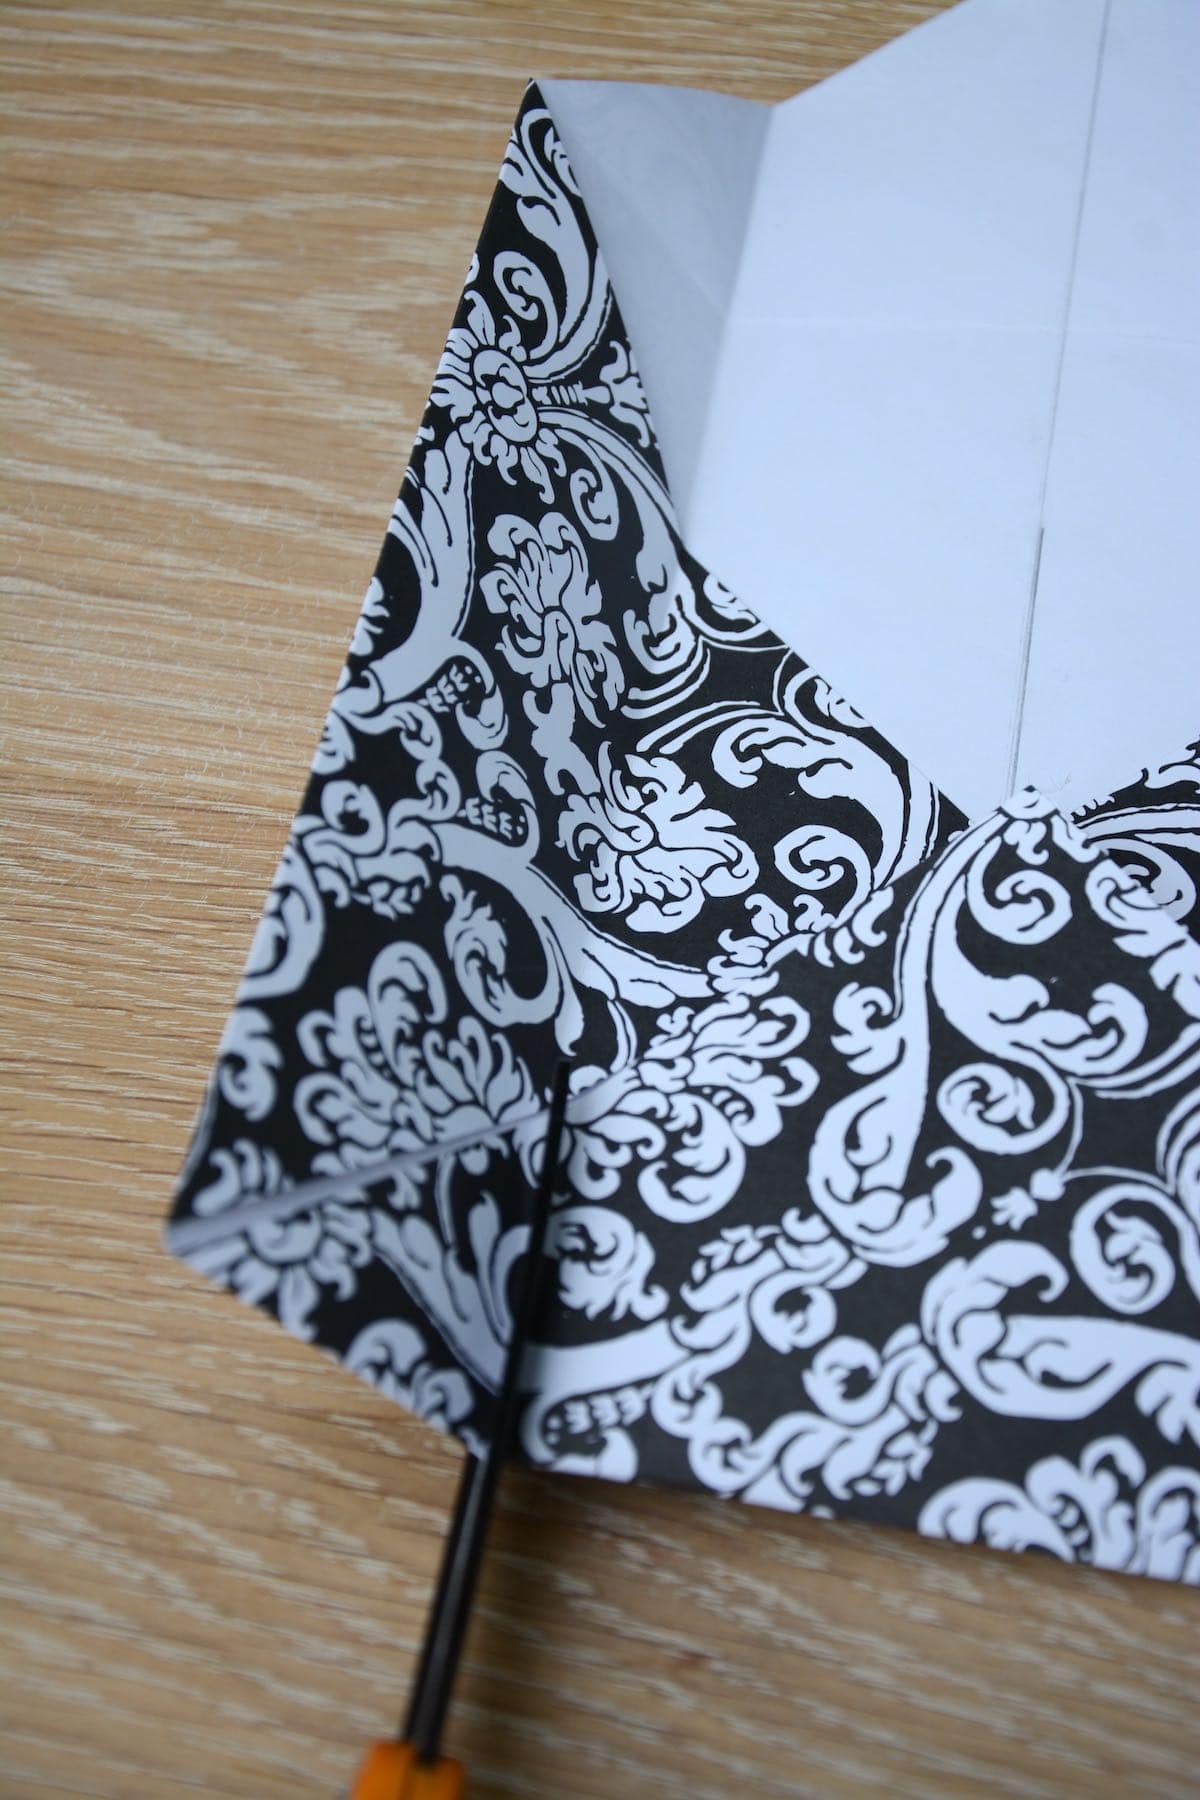
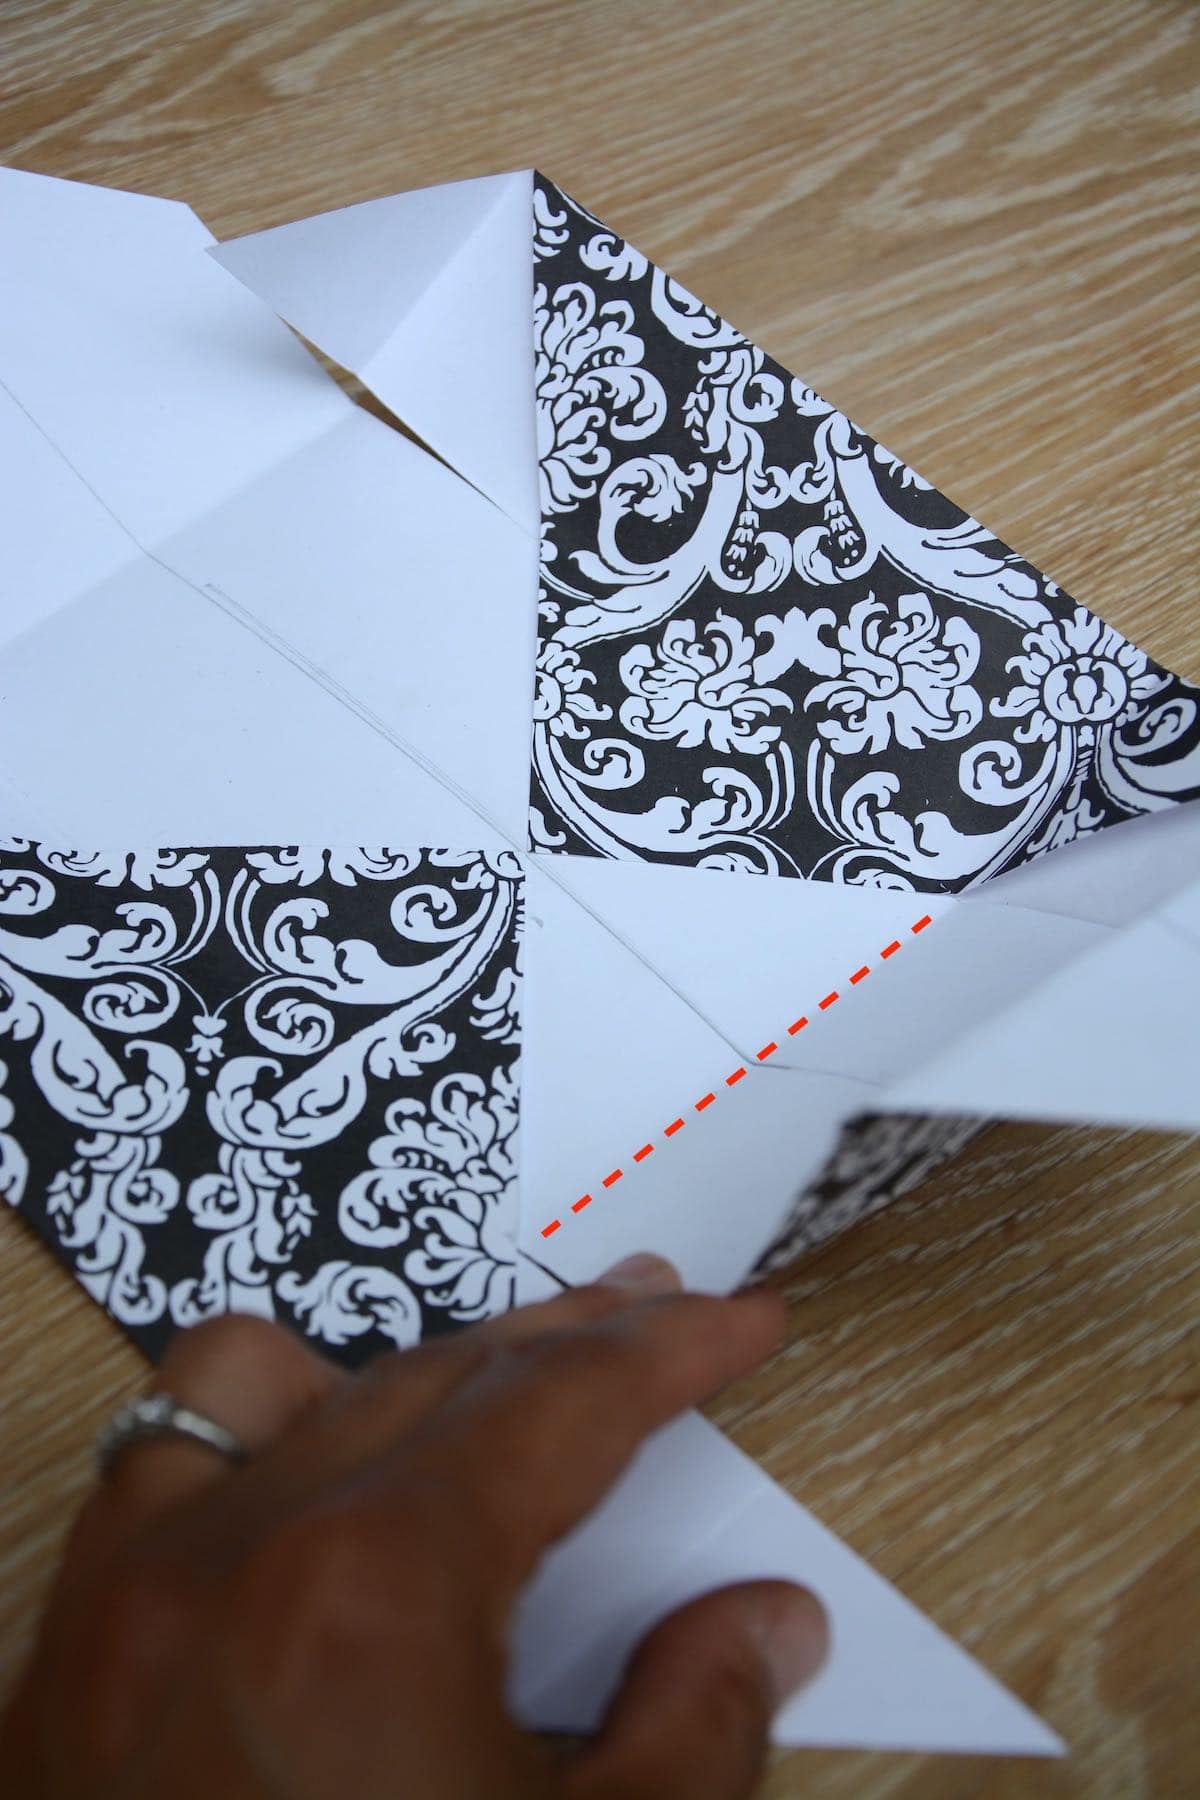
STEP 8: Use scissors to snip the crease up to the edge.
Only snip up to where the edge of the papers meet together.
Do this for all four creases (2 on each end).
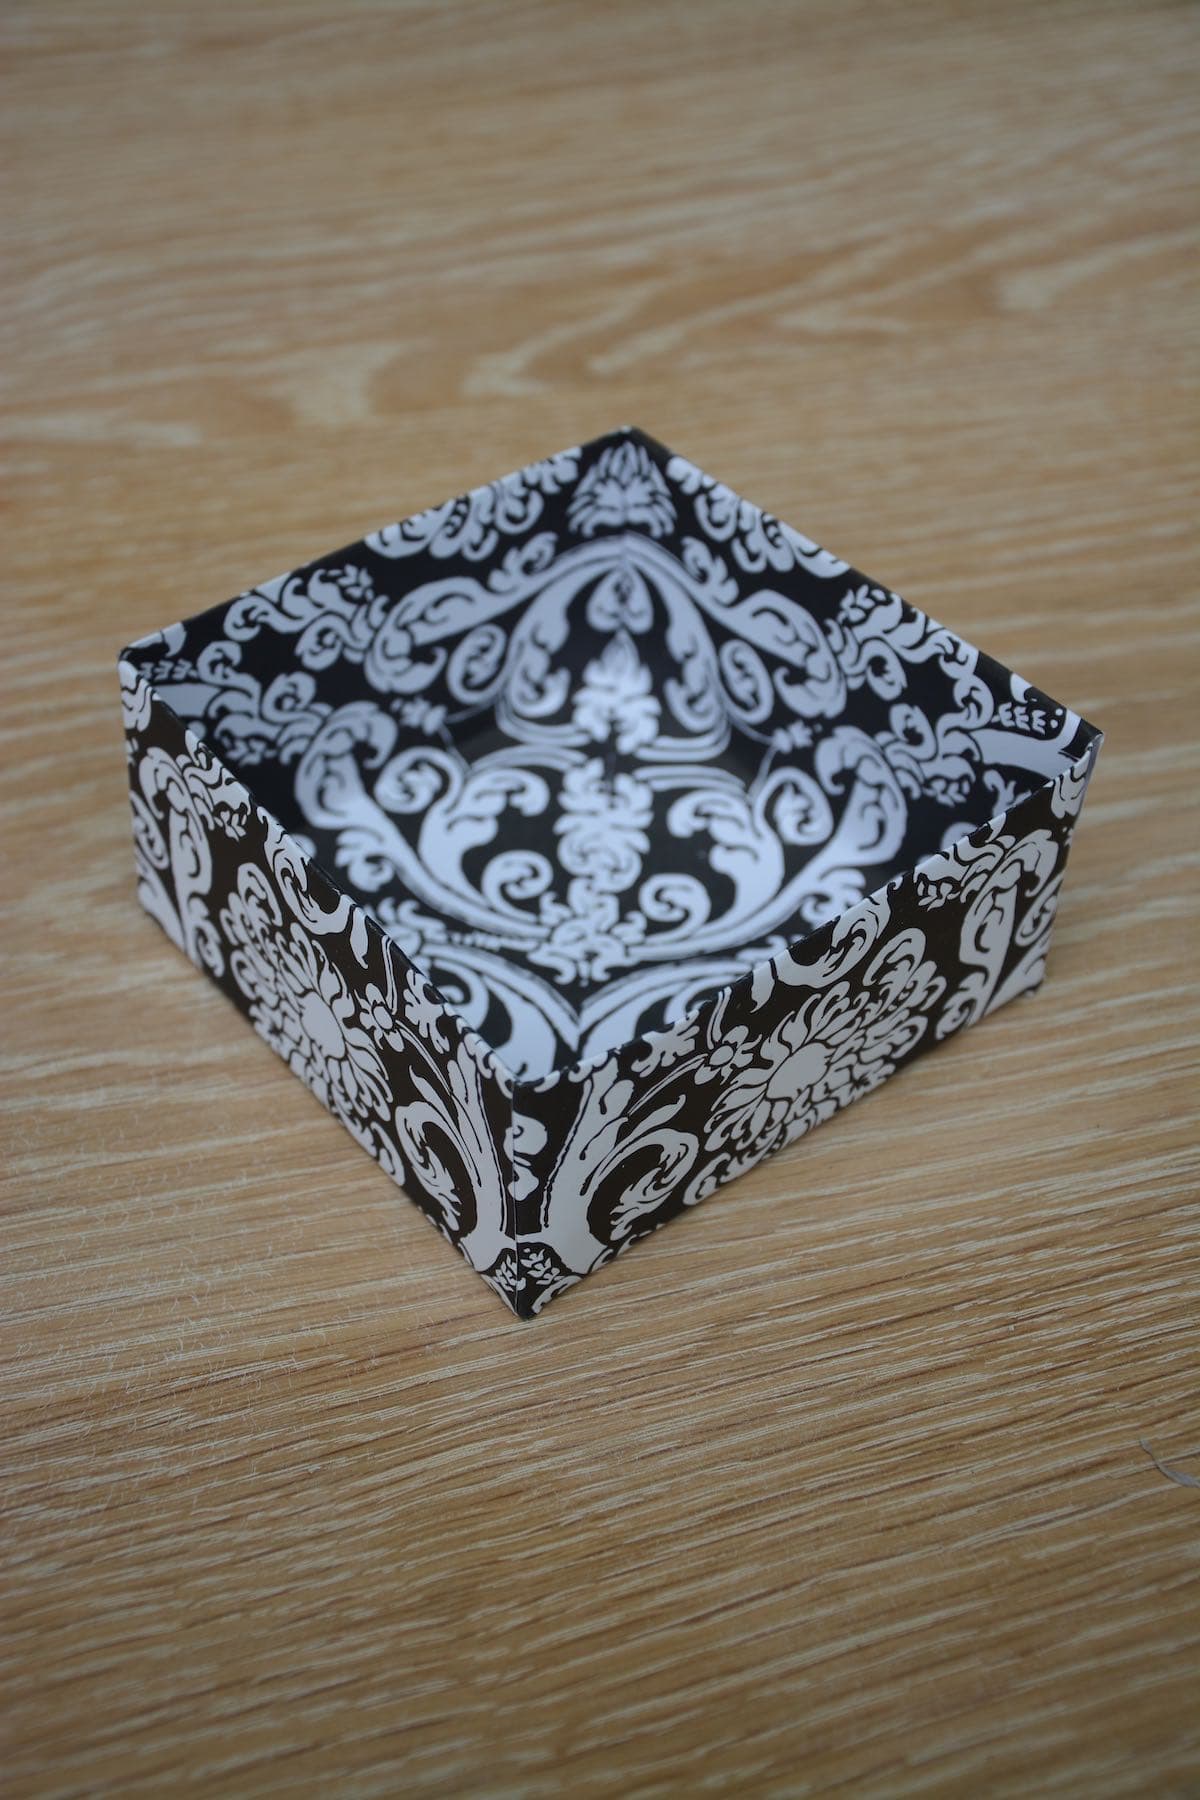
Once snipped and unfolded, it should look like this:

STEP 9: Make a small folder line.
Now that the pieces have been snipped, create a fold on the red dotted line for both sides.
STEP 10: Overlap the flaps to create the edge of the box.
Overlap the flaps to form the edge of the box, and then lift the piece up and over the flaps. Tuck it under and secure the flap with a little glue.
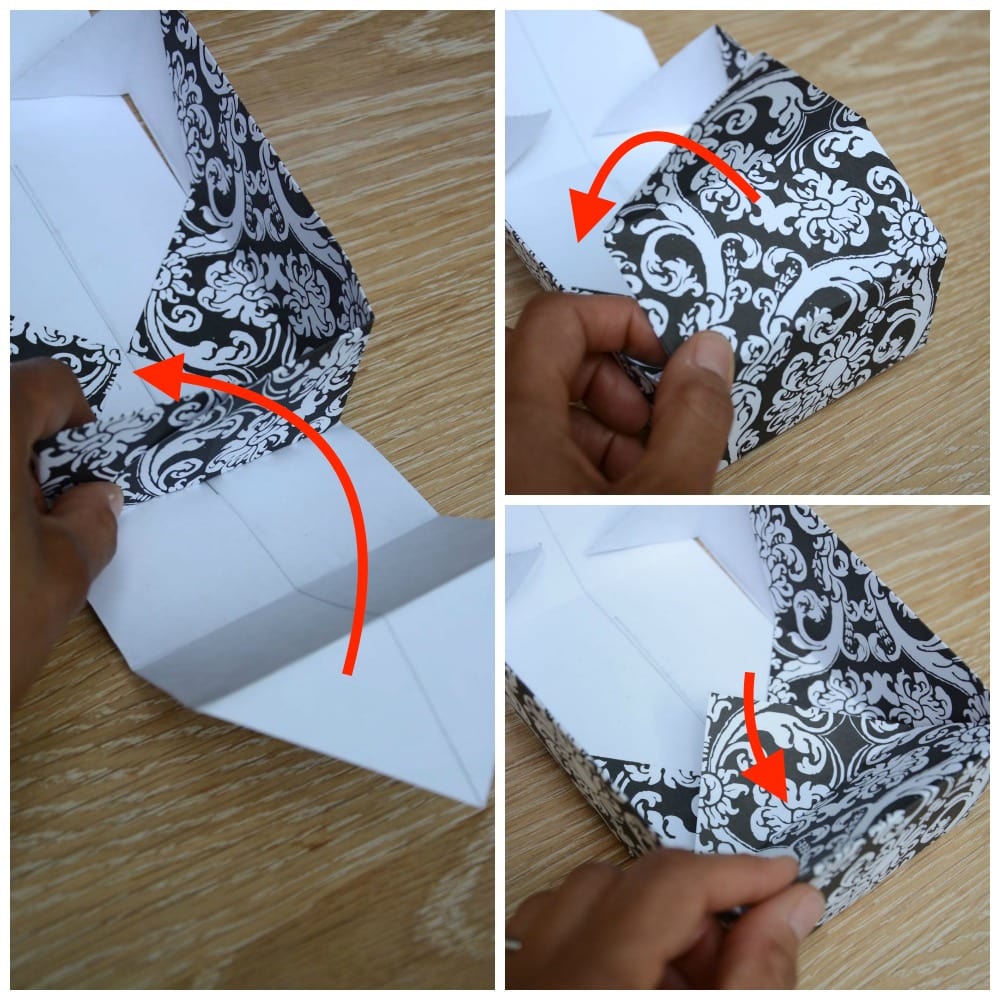
Once one side is folded and tucked under, rotate the box around and fold and tuck the other side, too.
You can also use a dab of hot glue to secure the flaps of the boxes on the inside.
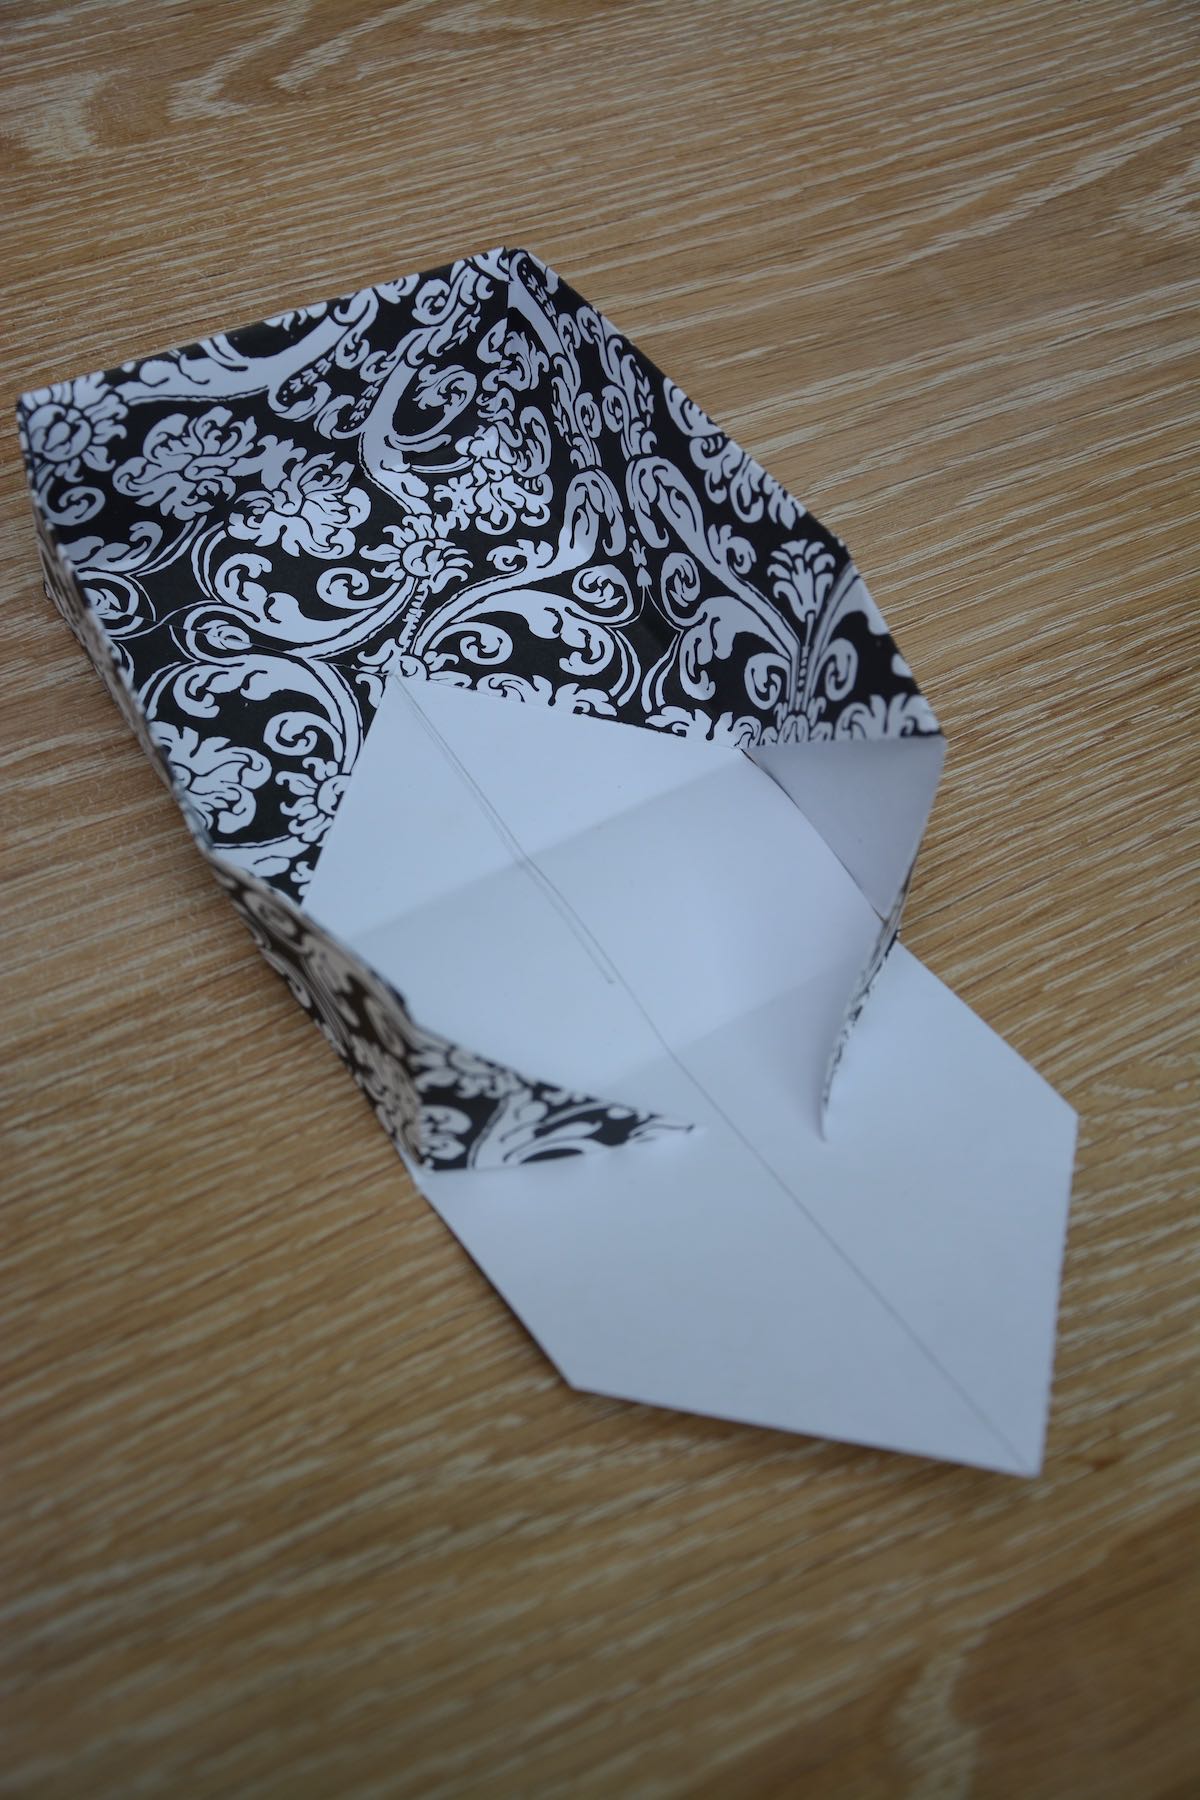
VOILA!
You’ve got a pretty little box!
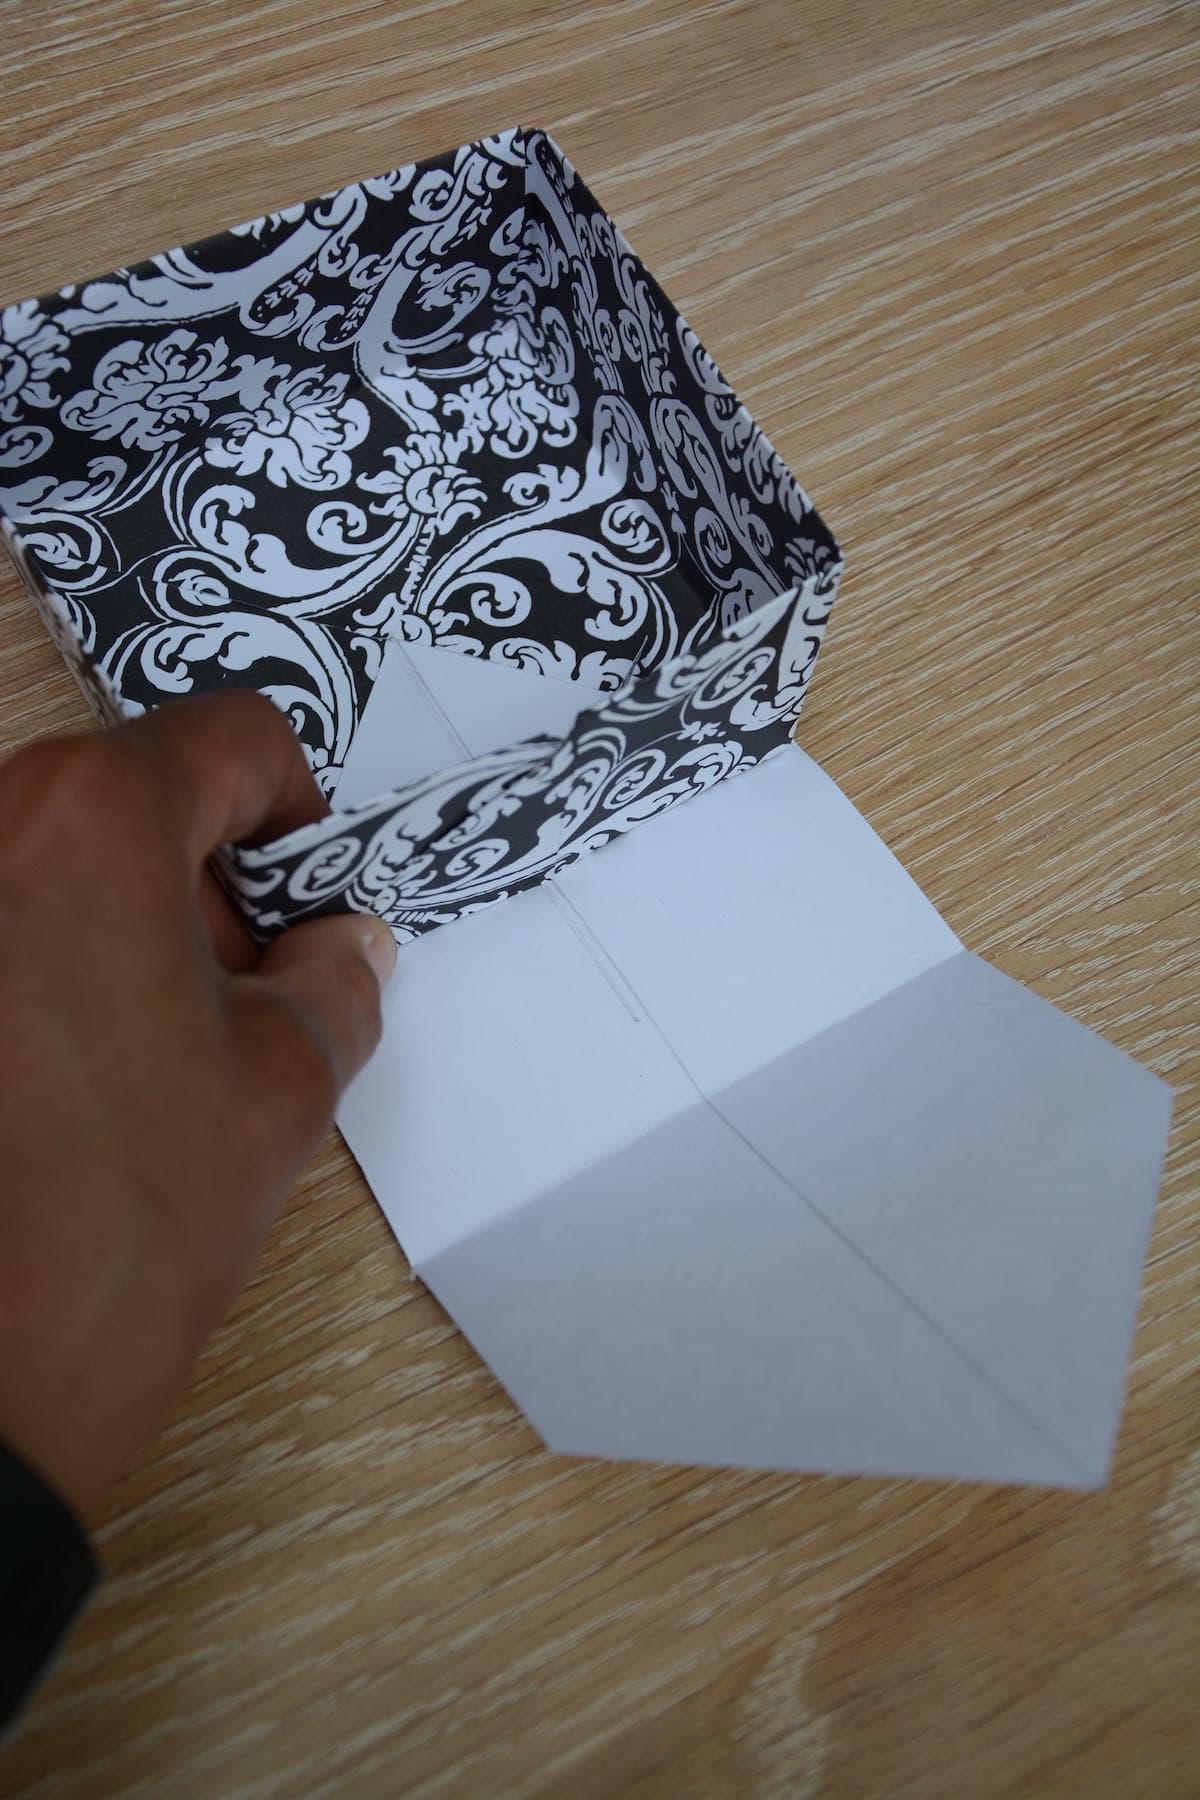
TIP: You can also use this tutorial for making DIY gift boxes from scrapbook paper! Check out my other tutorial on how to make the bottom of the box! 🙂
STEP 11: Now make more!
I was planning to do a 6-box drawer organizer so I folded 5 more boxes the same way.
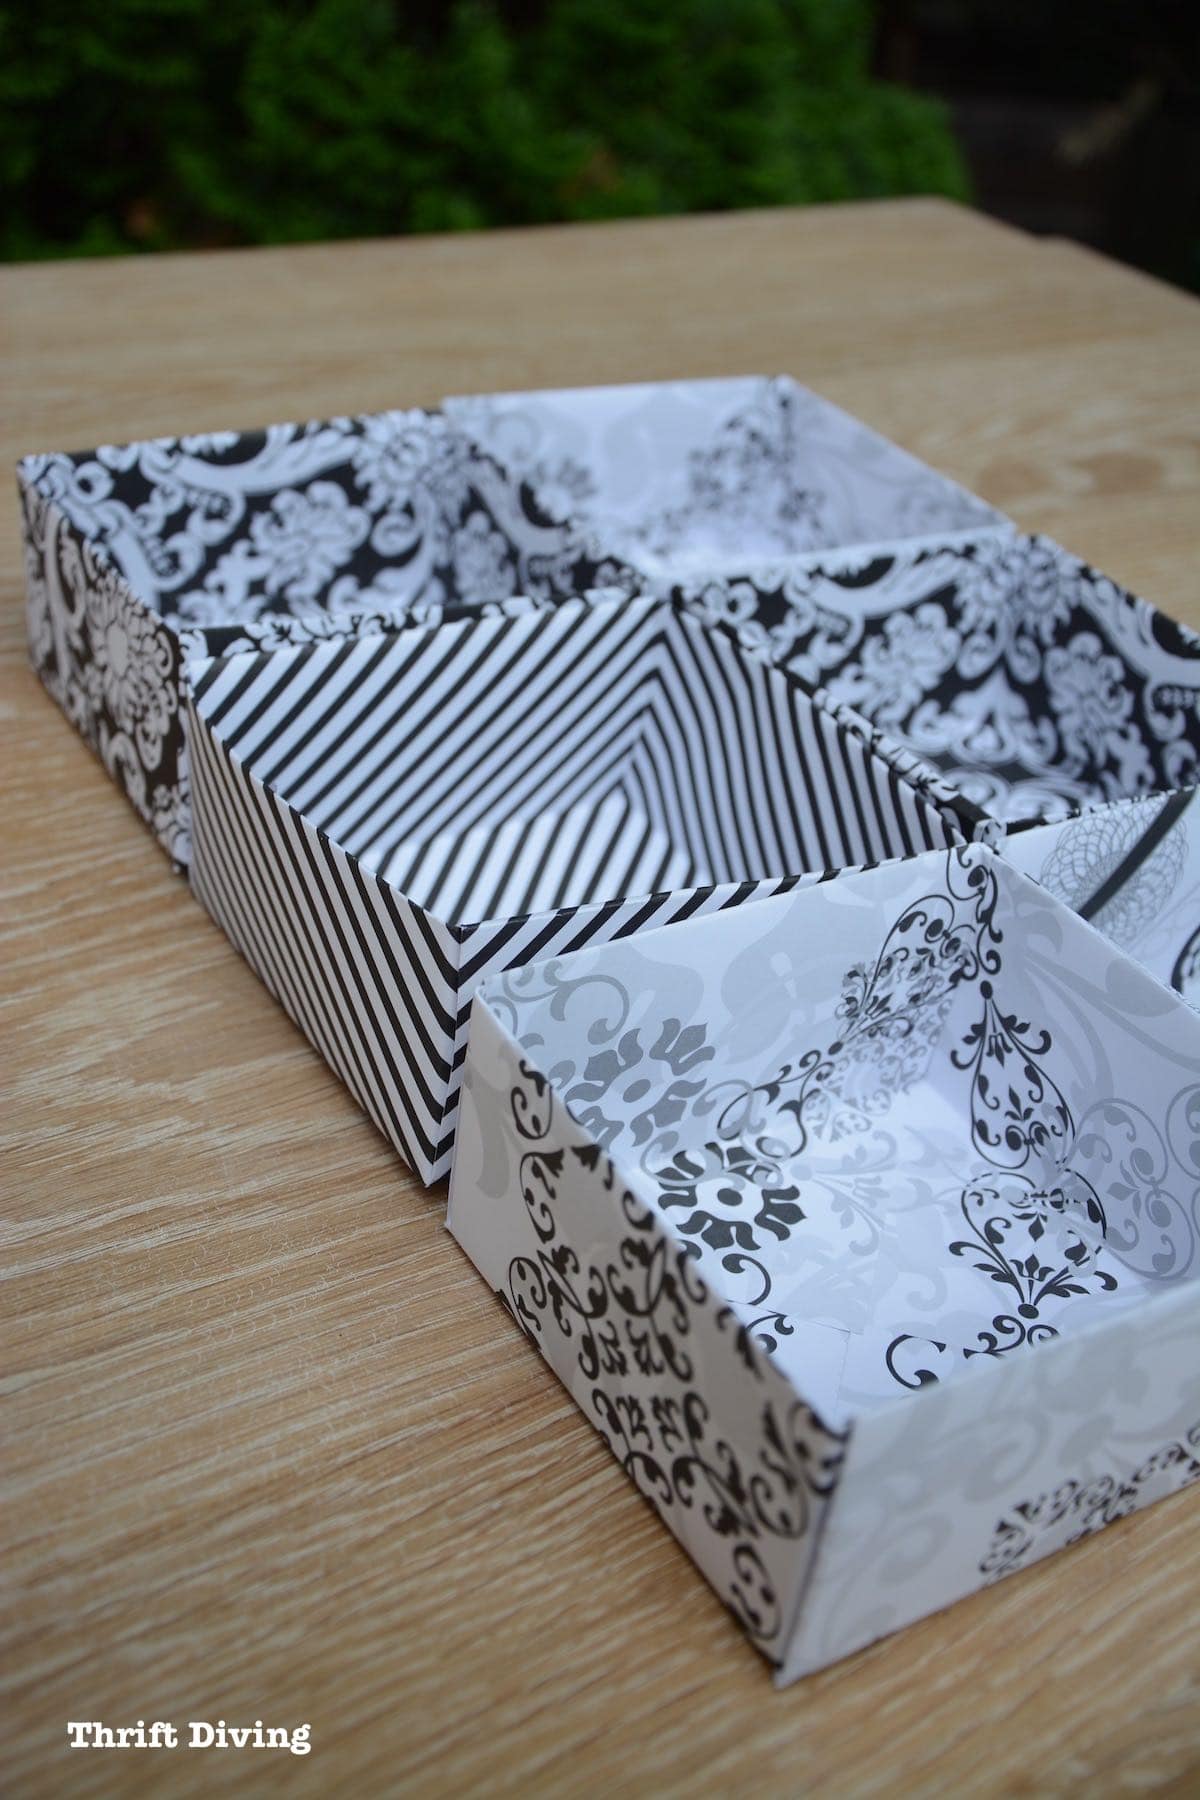
STEP 12: Hot glue the boxes together.
With hot glue on the sides, all the boxes stick together to create a drawer organizer!

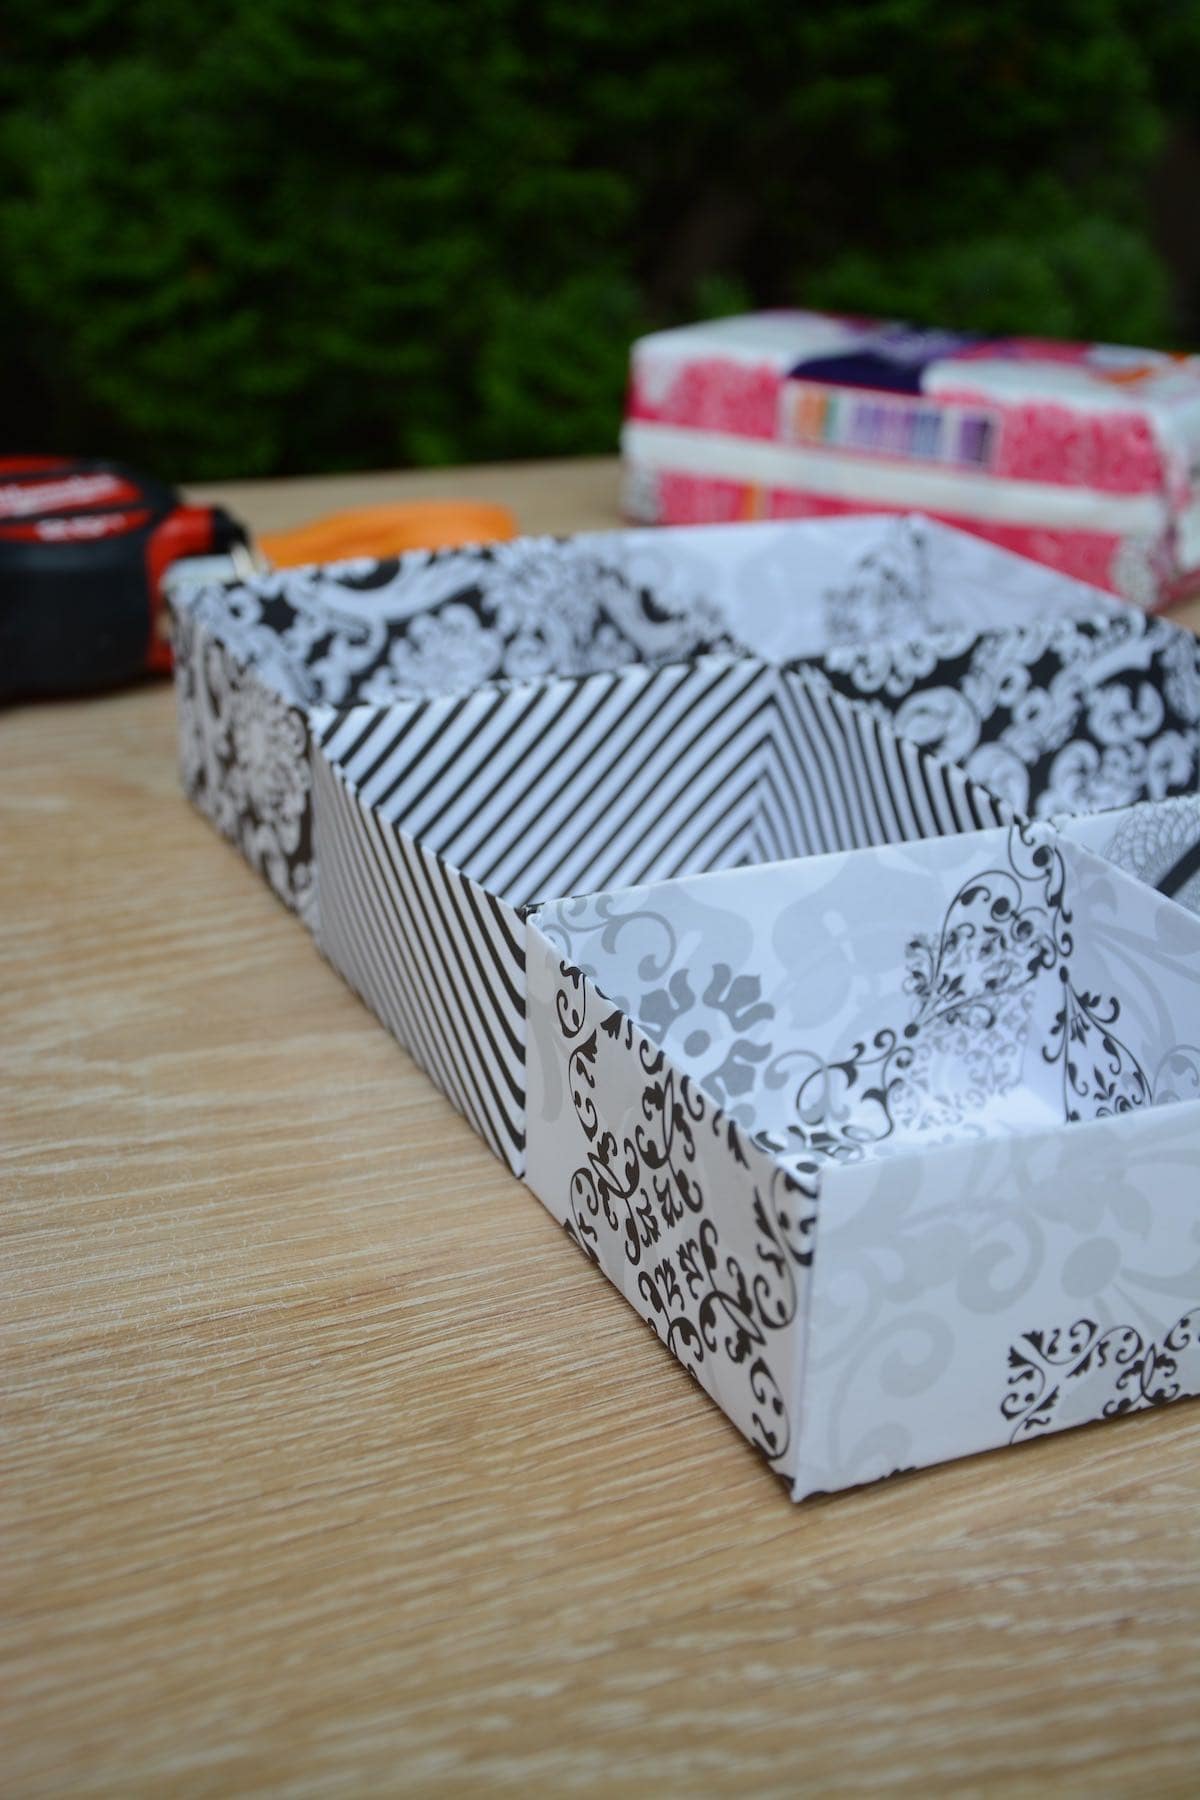
Once done, you can fill them with anything you want: panty liners, makeup, socks, and even make one for your junk drawer in your kitchen! 🙂

The DIY paper drawer organizer juuuusssst fit! I probably could have made it a little more narrow, but it still works well.
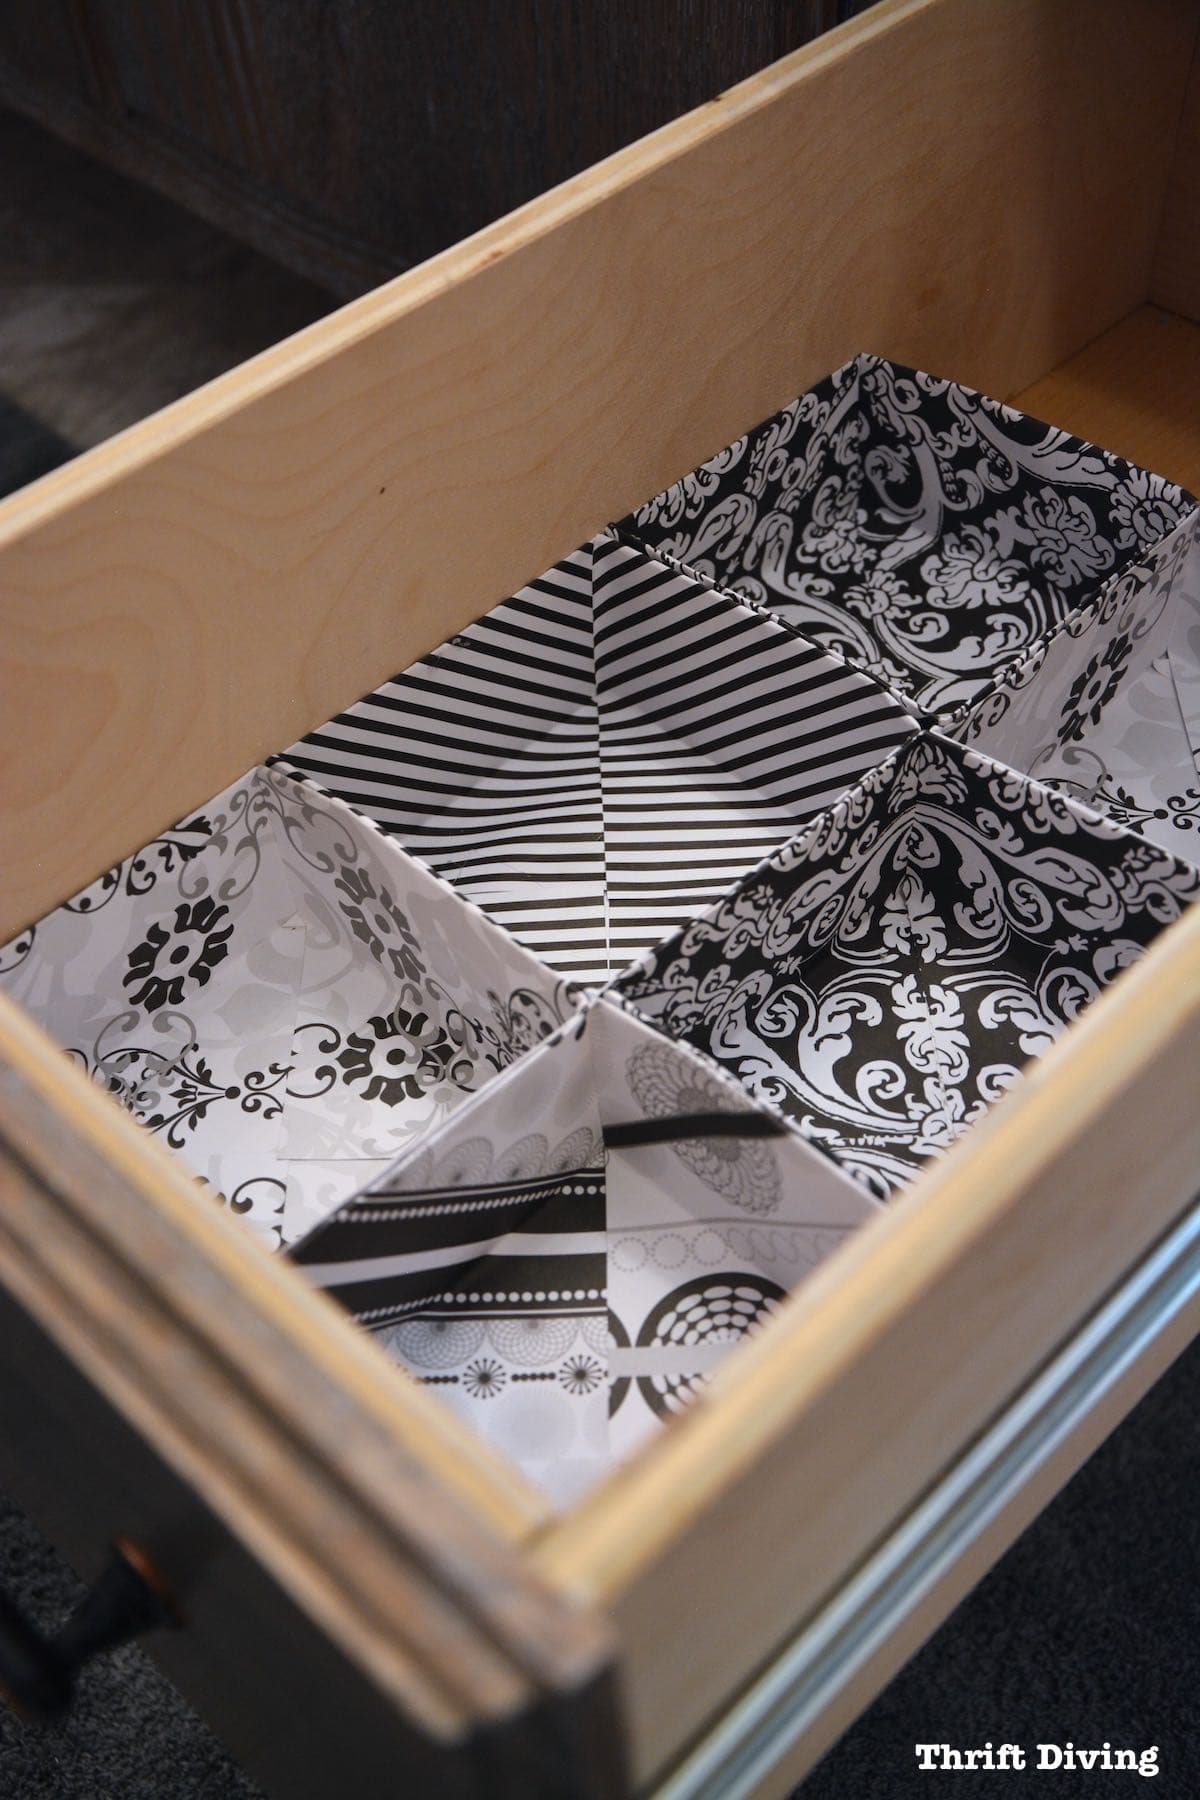
The boxes are just the right size for undies!
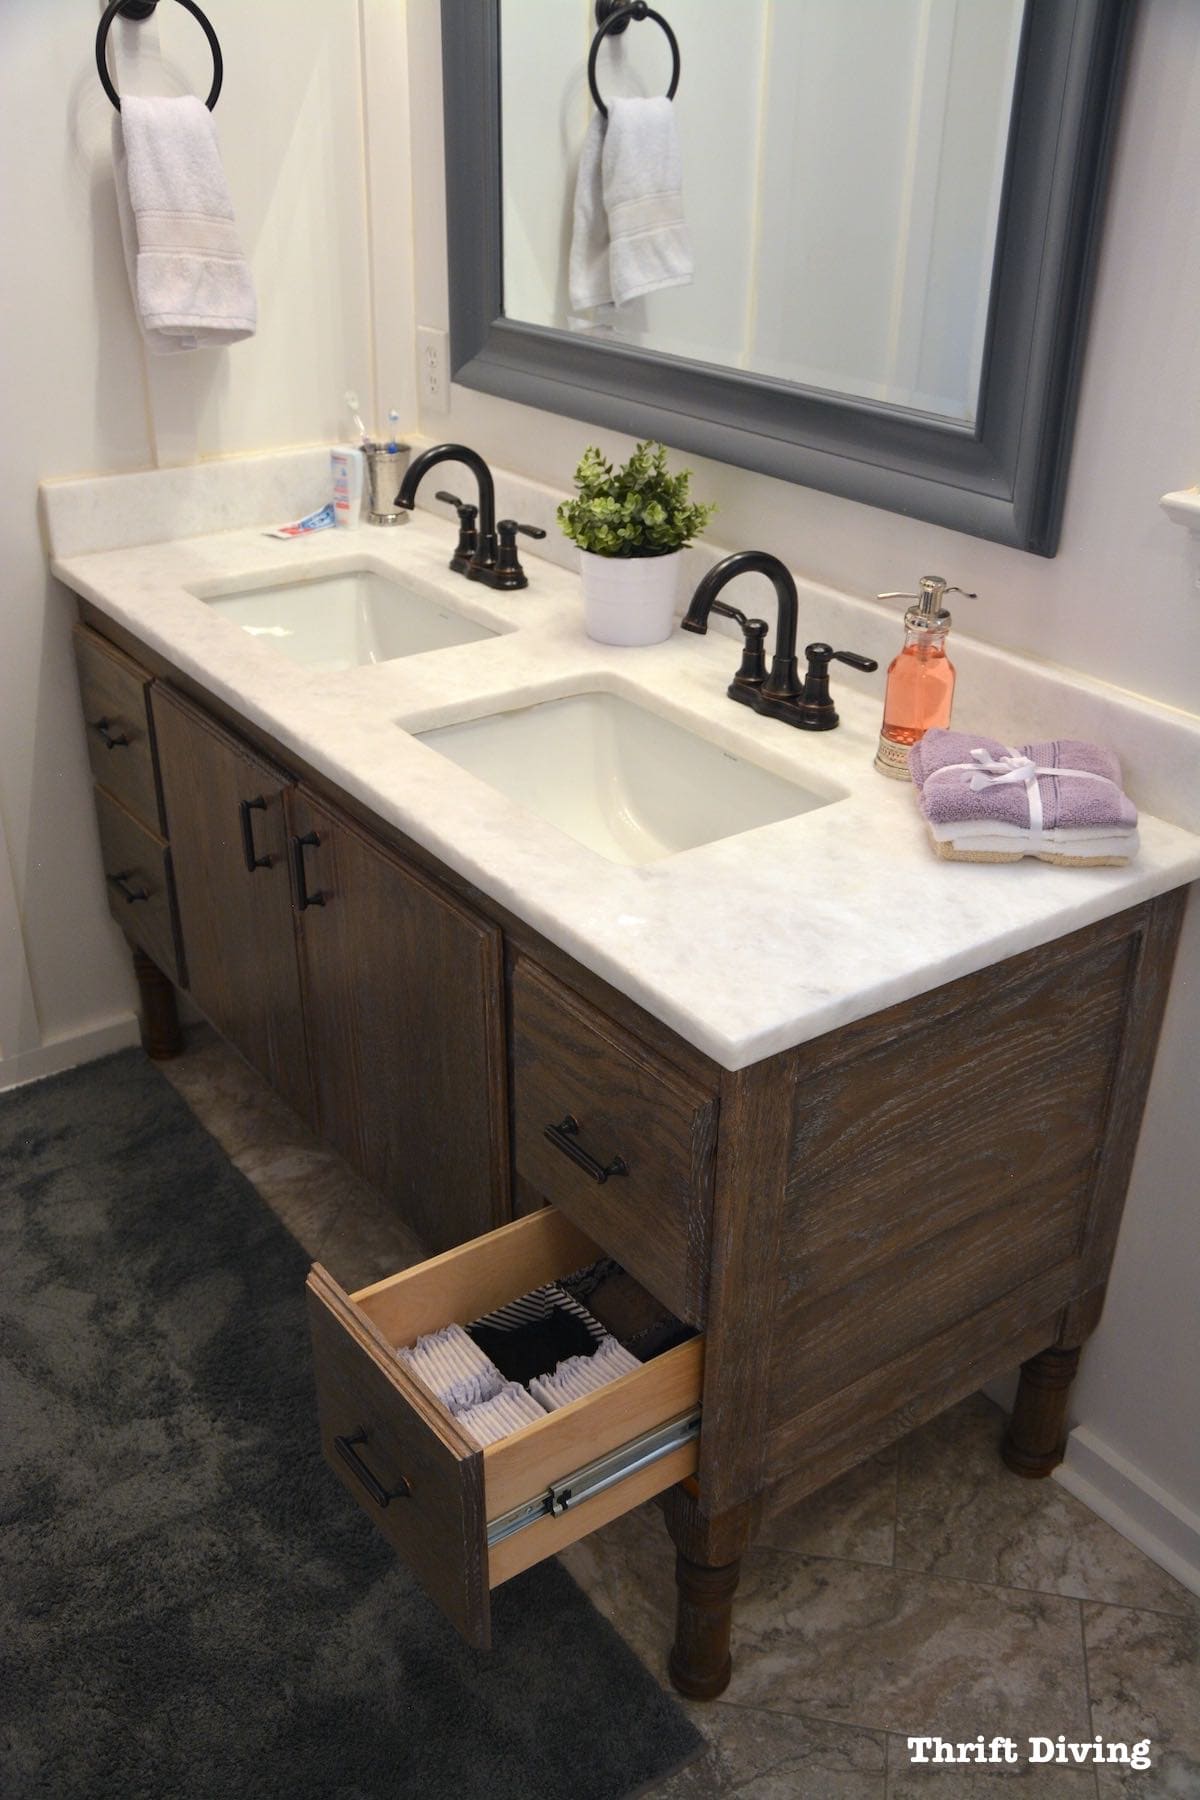
I absolutely love this vanity and the pockets of space I have for organizing life’s little necessities!
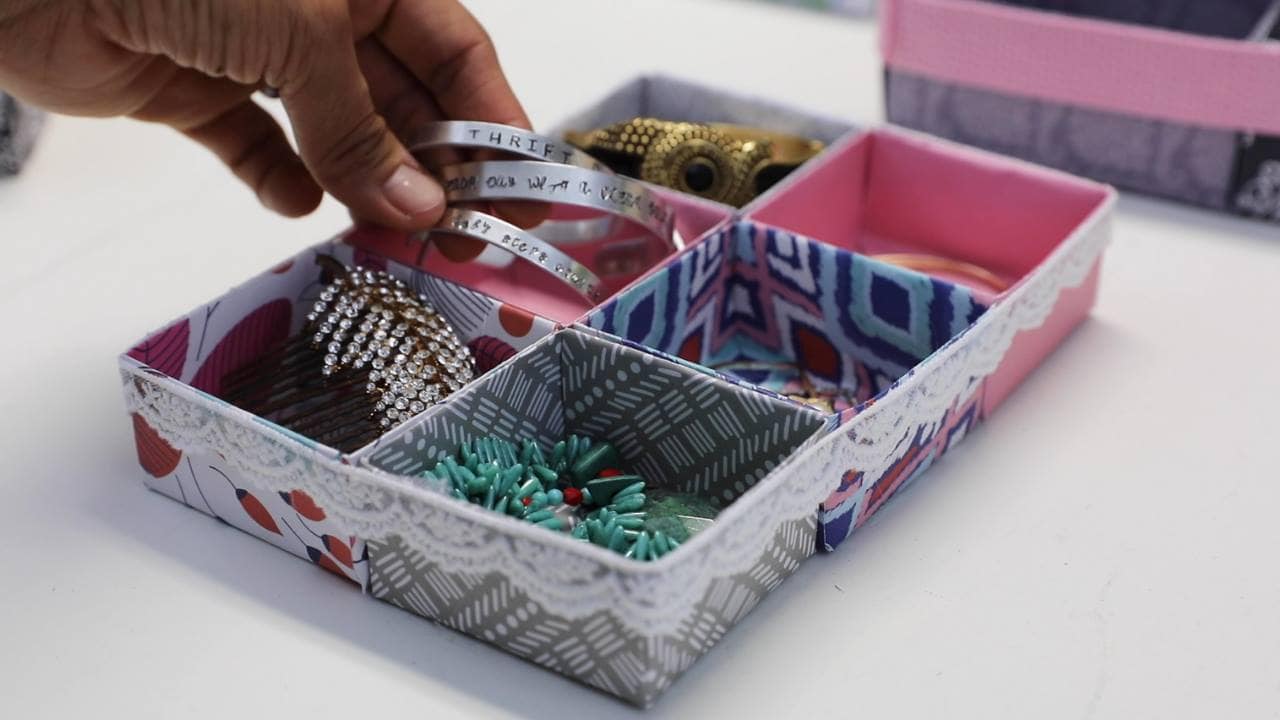
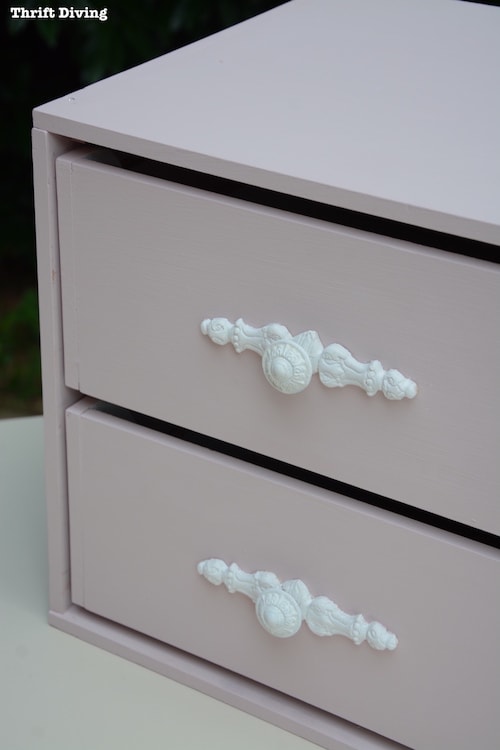
This one turned out so cute. I used 8×8 scrapbook paper instead of the 12×12 paper so it turned out a bit smaller. With a little pretty lace, it was perfect for holding my jewelry!
These drawer organizers are perfect for keeping all your personal items neatly organized and out of the way. And you can also use them for all the other spaces of your home:
- Sock drawers
- Junk drawers
- Office drawers

Download the 5 freebies!

Thrift Diving inspires women to decorate, improve, and maintain their home themselves...using paint, power tools, and thrift stores! Use these 5 printables, checklists, and ebooks to get started!

So pretty and cute and doable – great instructions. I’m on a making jag just lately and I have a pile of pretty paper I scored awhile back. This made me think, what the heck else am I saving it for?
Fabulous idea and great tutorial! So many options with scrapbook papers.
Great tutorial! The older we get the more likely we’ll need discreet. Thanks for sharing.
How about another for those ‘secretive’ men items.
HA! Maybe prostate-control boxers for men?? LOL!!!
this is very interesting idea for arranging drawers. I can see using different grades of paper, different sizes too.
Pretty way to keep the unmentionables.
Thanks, Syl! 🙂 And they’re great little organizers for junk drawers, too! I have made one for my underwear drawer…my middle son’s drawer…and my junk drawer. 🙂
Love it! I’m ALMOST inspired to do this for my top dresser drawer, which is full of everything from earrings, to old battery chargers, to keys I might need someday (but don’t actually know what they’re to!); in other words, it’s a junk drawer! And yes, those little bundles of joy do more than steal our hearts and make us crazy. They do leave other mementos behind. Aren’t they precious?
Yes, the junk drawer! I cleaned mine out maybe a year or so ago, and you wouldn’t believe how organized I got them with these little paper drawer organizers. I feel ya on the keys. I can NEVER throw keys away! Oh–I saw someone do a great project once where they framed the keys to their previous homes. I loved that idea!