How to Make a Hanging Fence Garden
Watch This Hanging Fence Garden Project in Action!
Let’s just be honest for a second: I suck at gardening.
I always marvel at how my kids have thrived because I can’t seem to keep anything alive!
My husband and I have always craved a garden, but the work and dedication to pull it off just wasn’t there.
That’s why container gardens have been so alluring.
I mean, how hard can it be? (asks the Black Thumb…cough, cough, ahem)
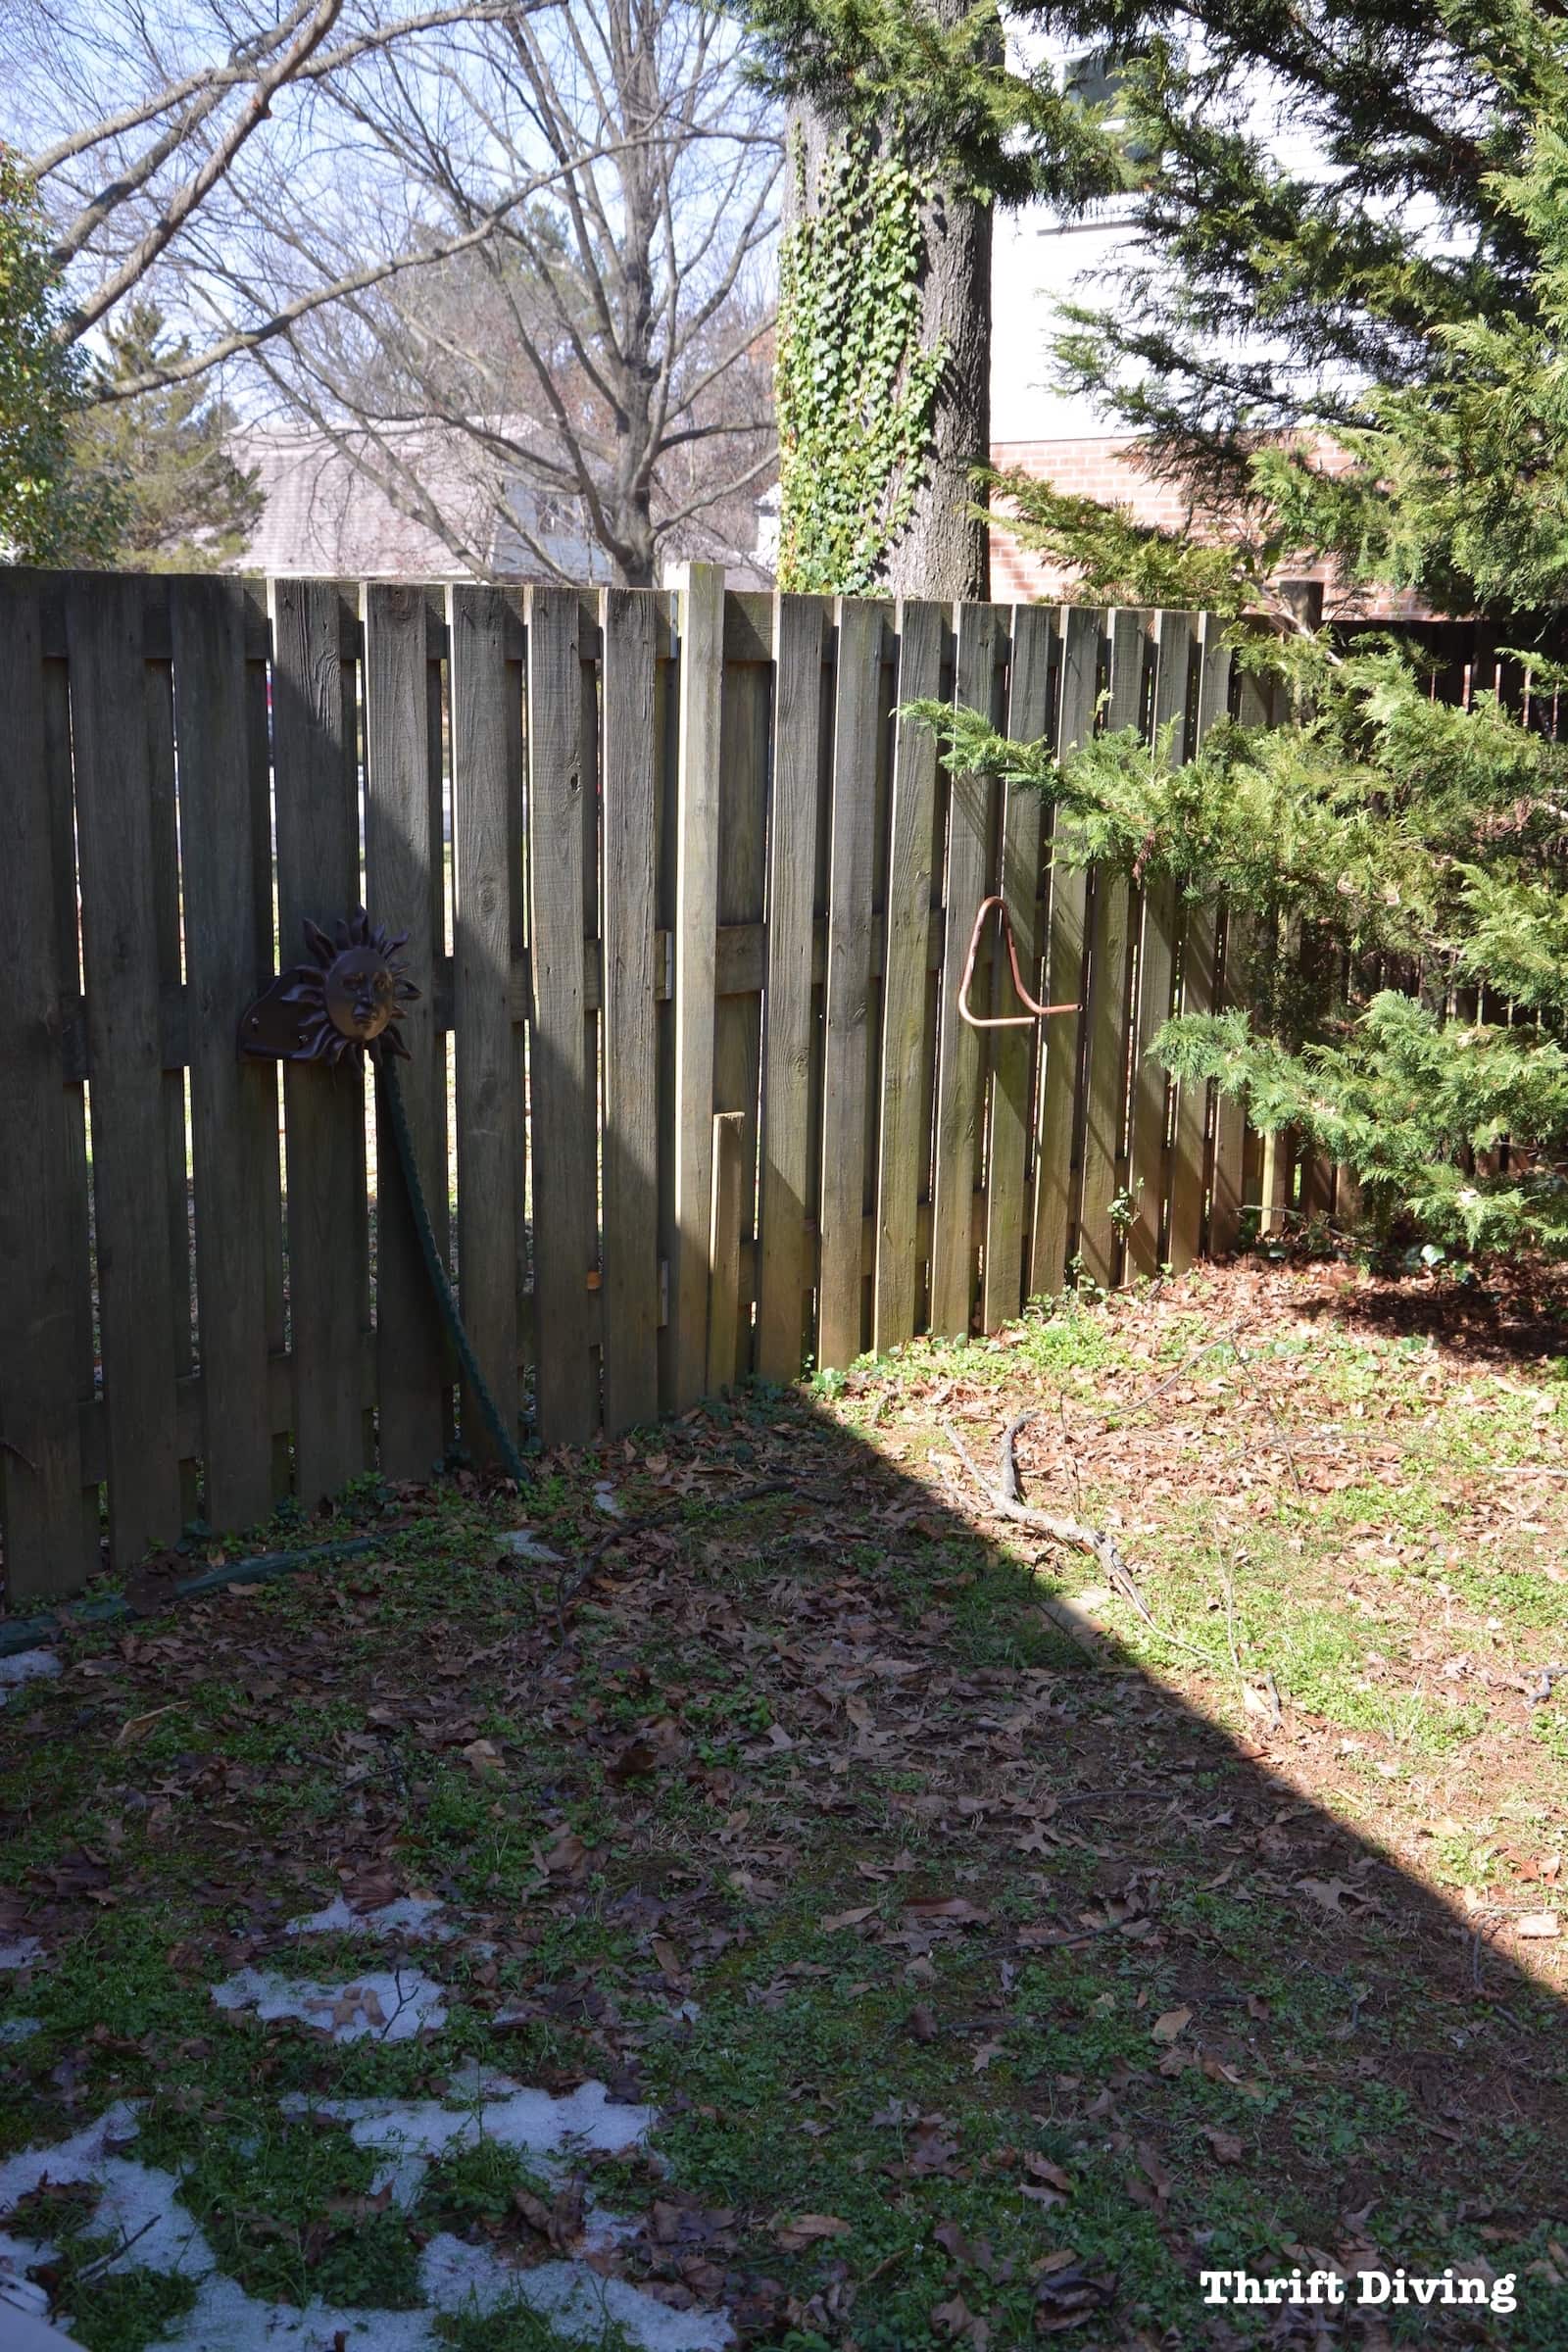
On the side of our house, we have this little section of land, with a dirty fence, that I decided I would paint for a pretty makeover, and then make some little cedar fence garden planters to hang on it!
BEFORE
This is what the area looked like before getting started.
It’s like No-Man’s Land at our house; it rarely gets any attention!
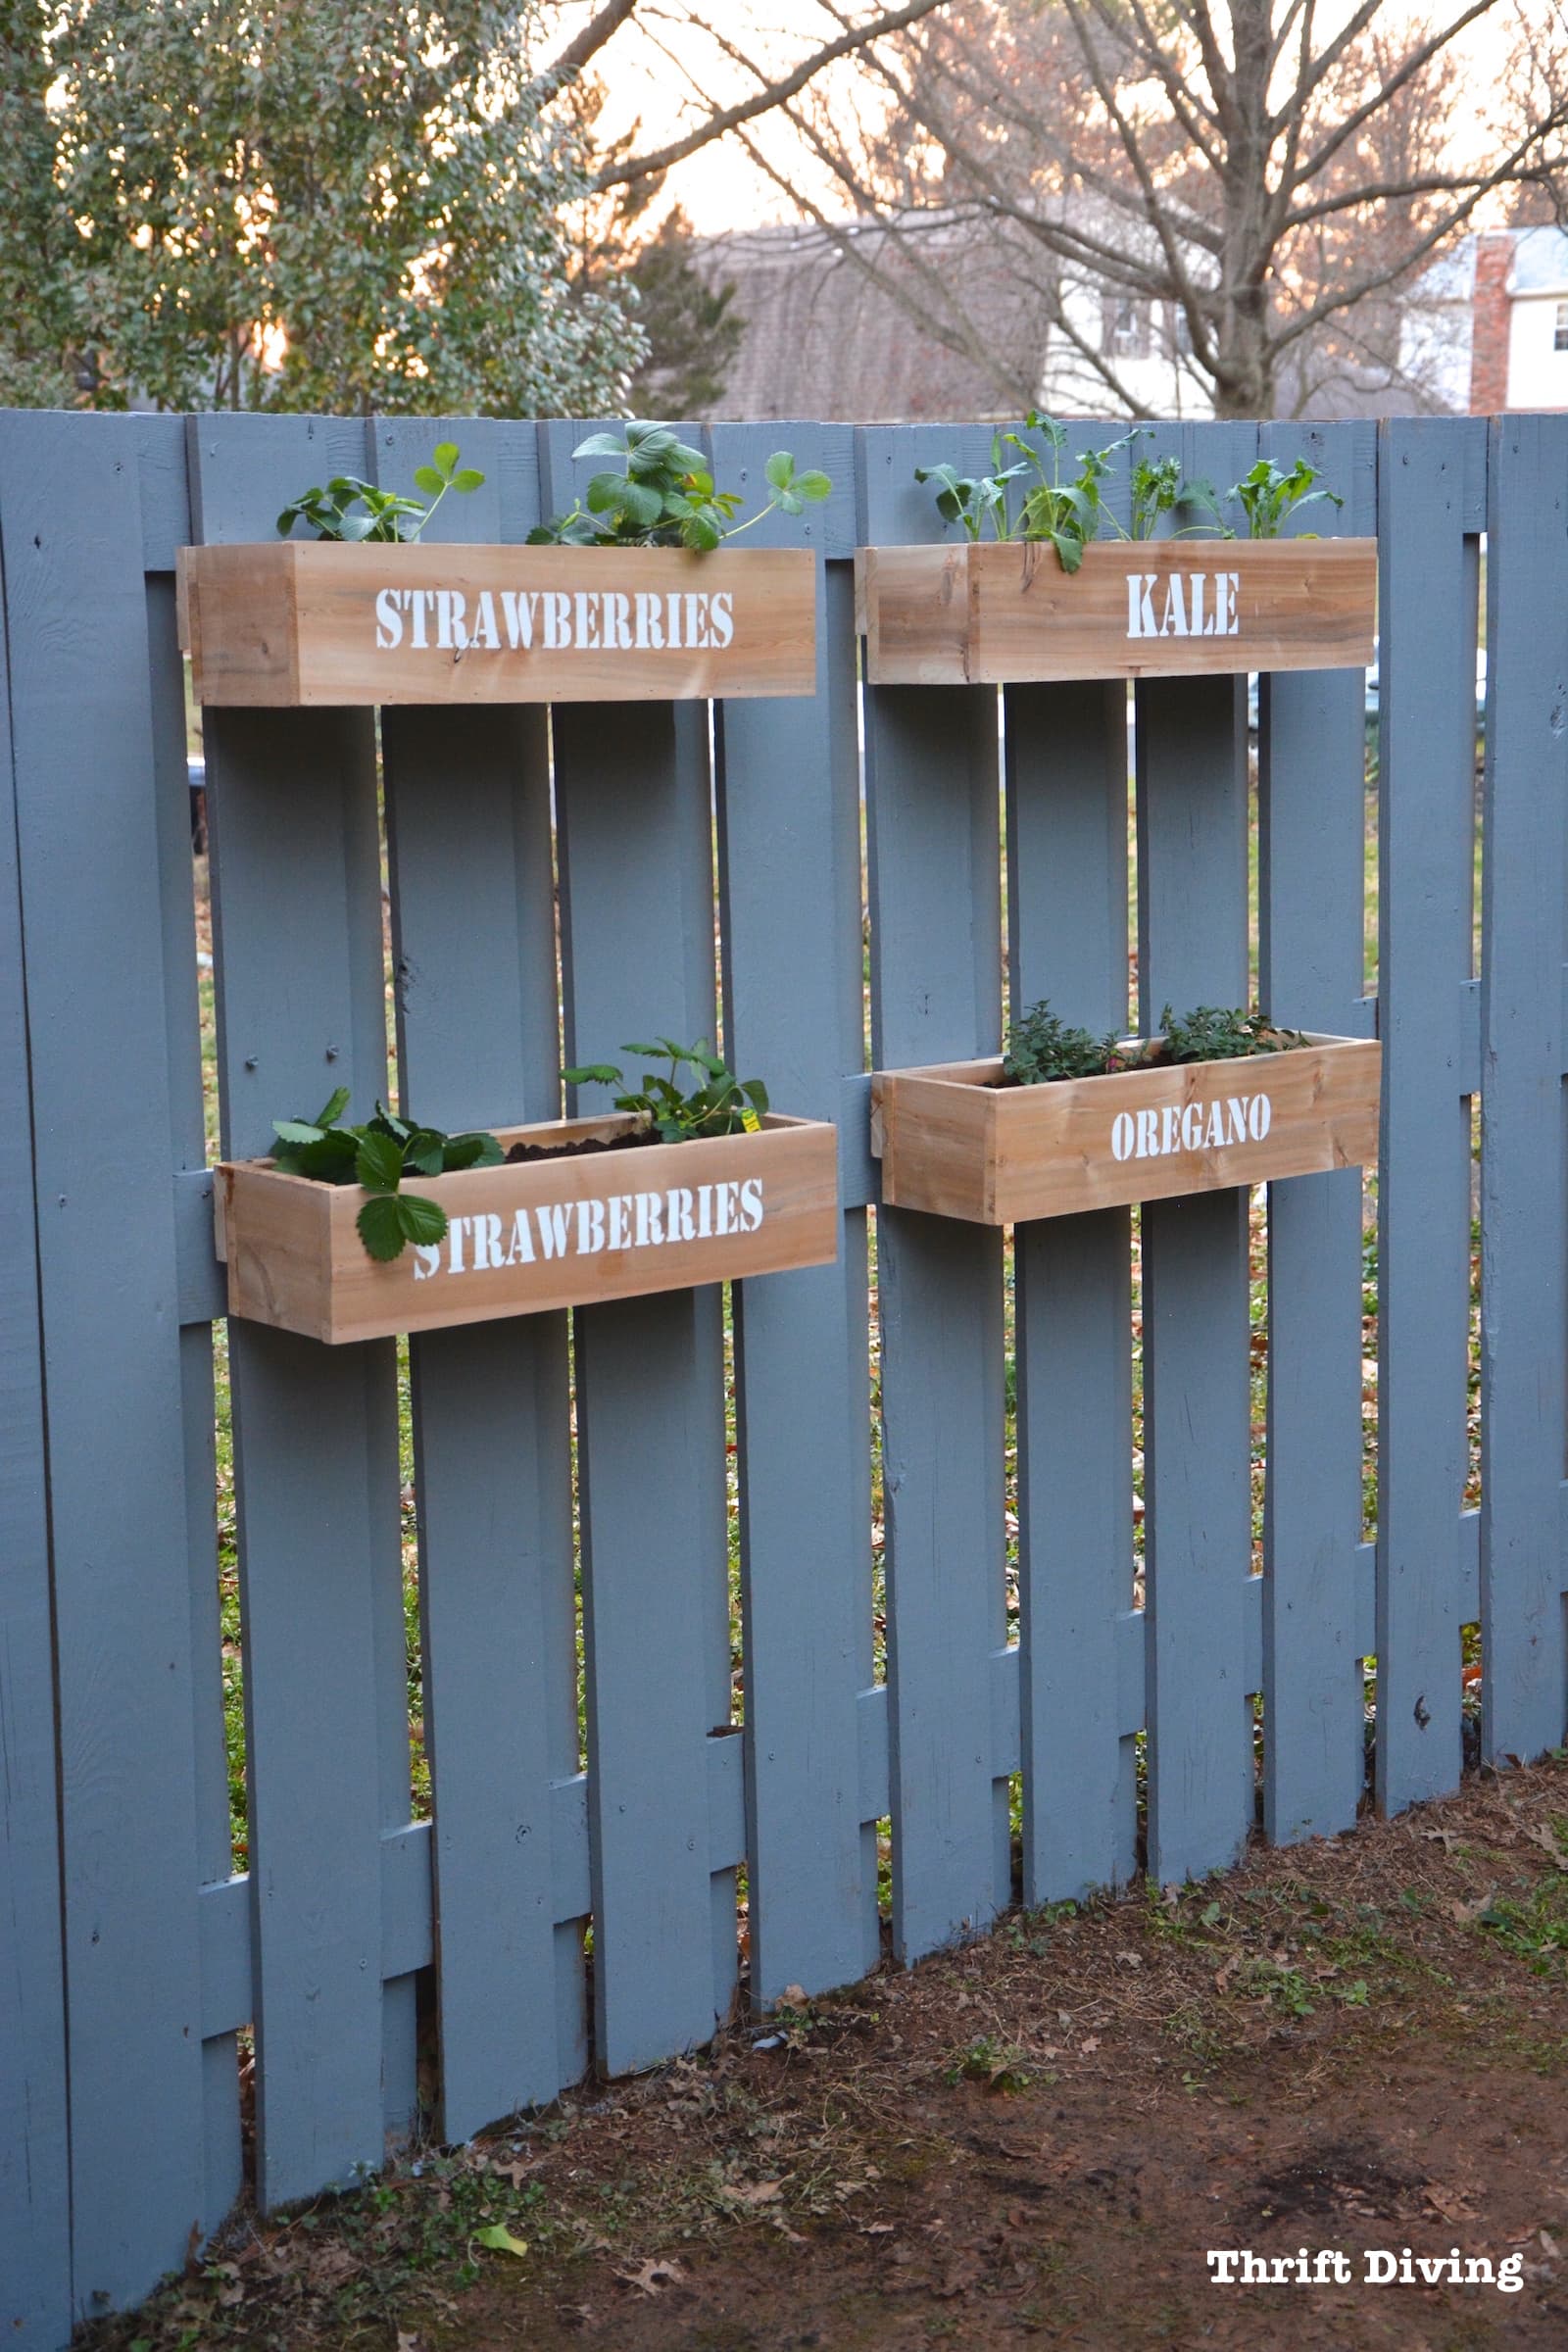
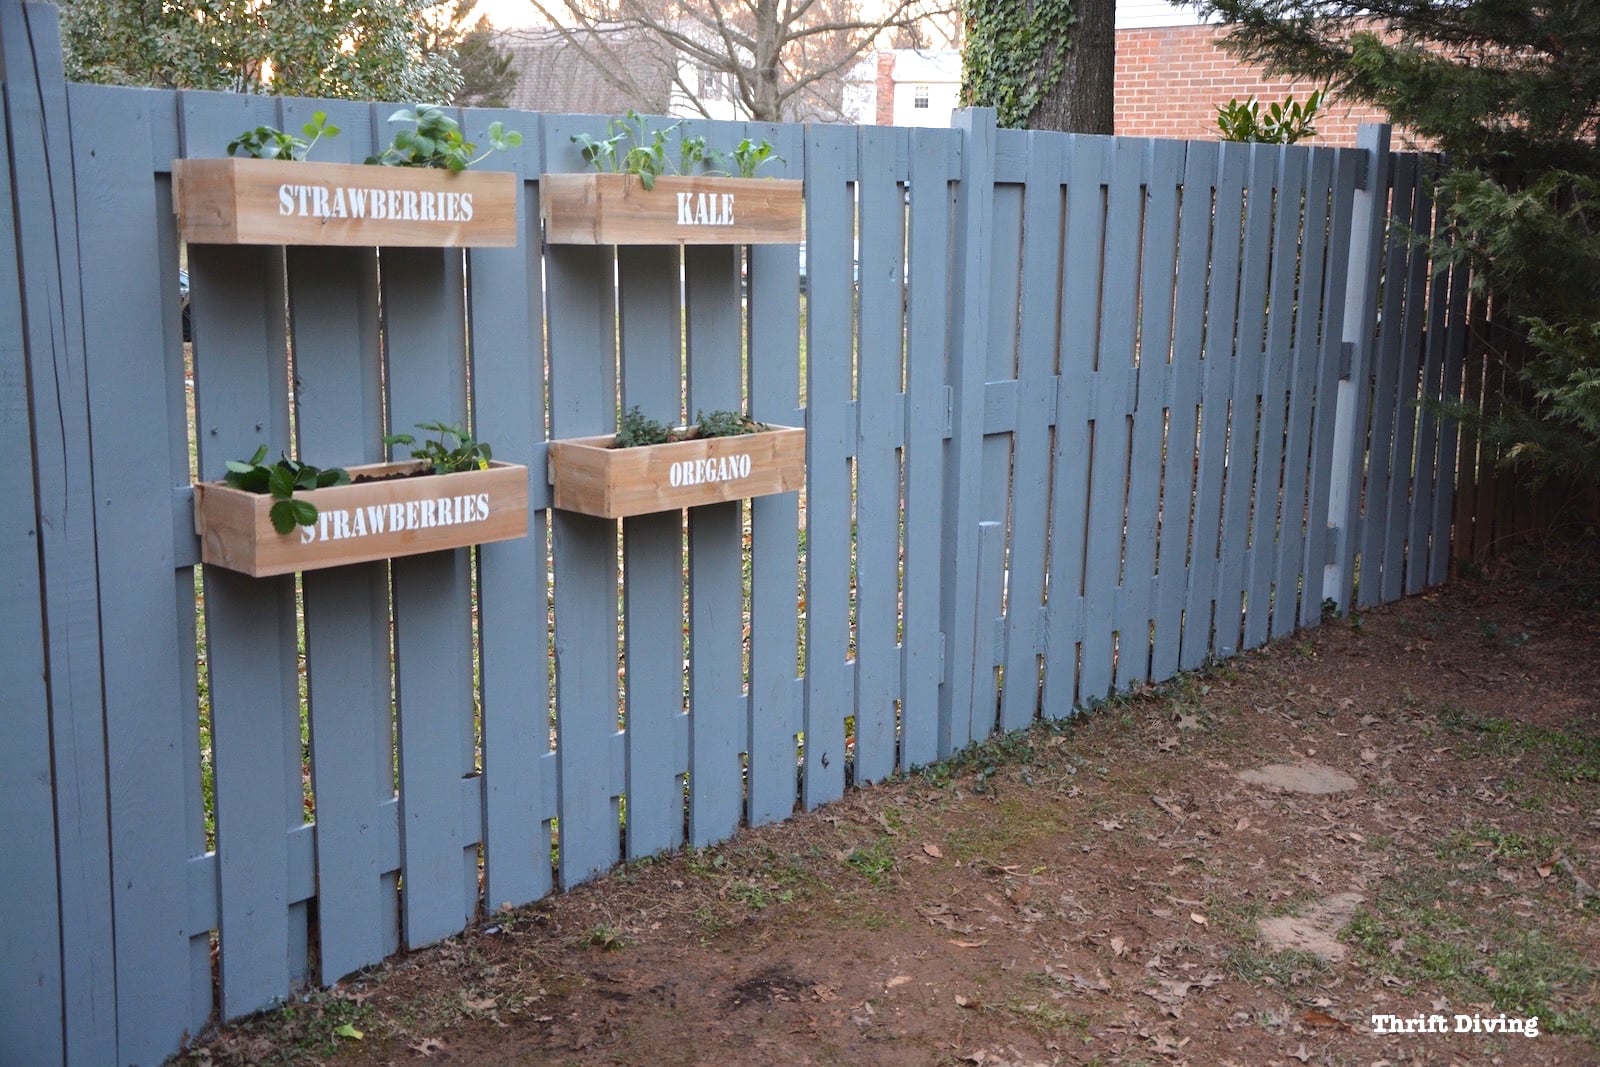
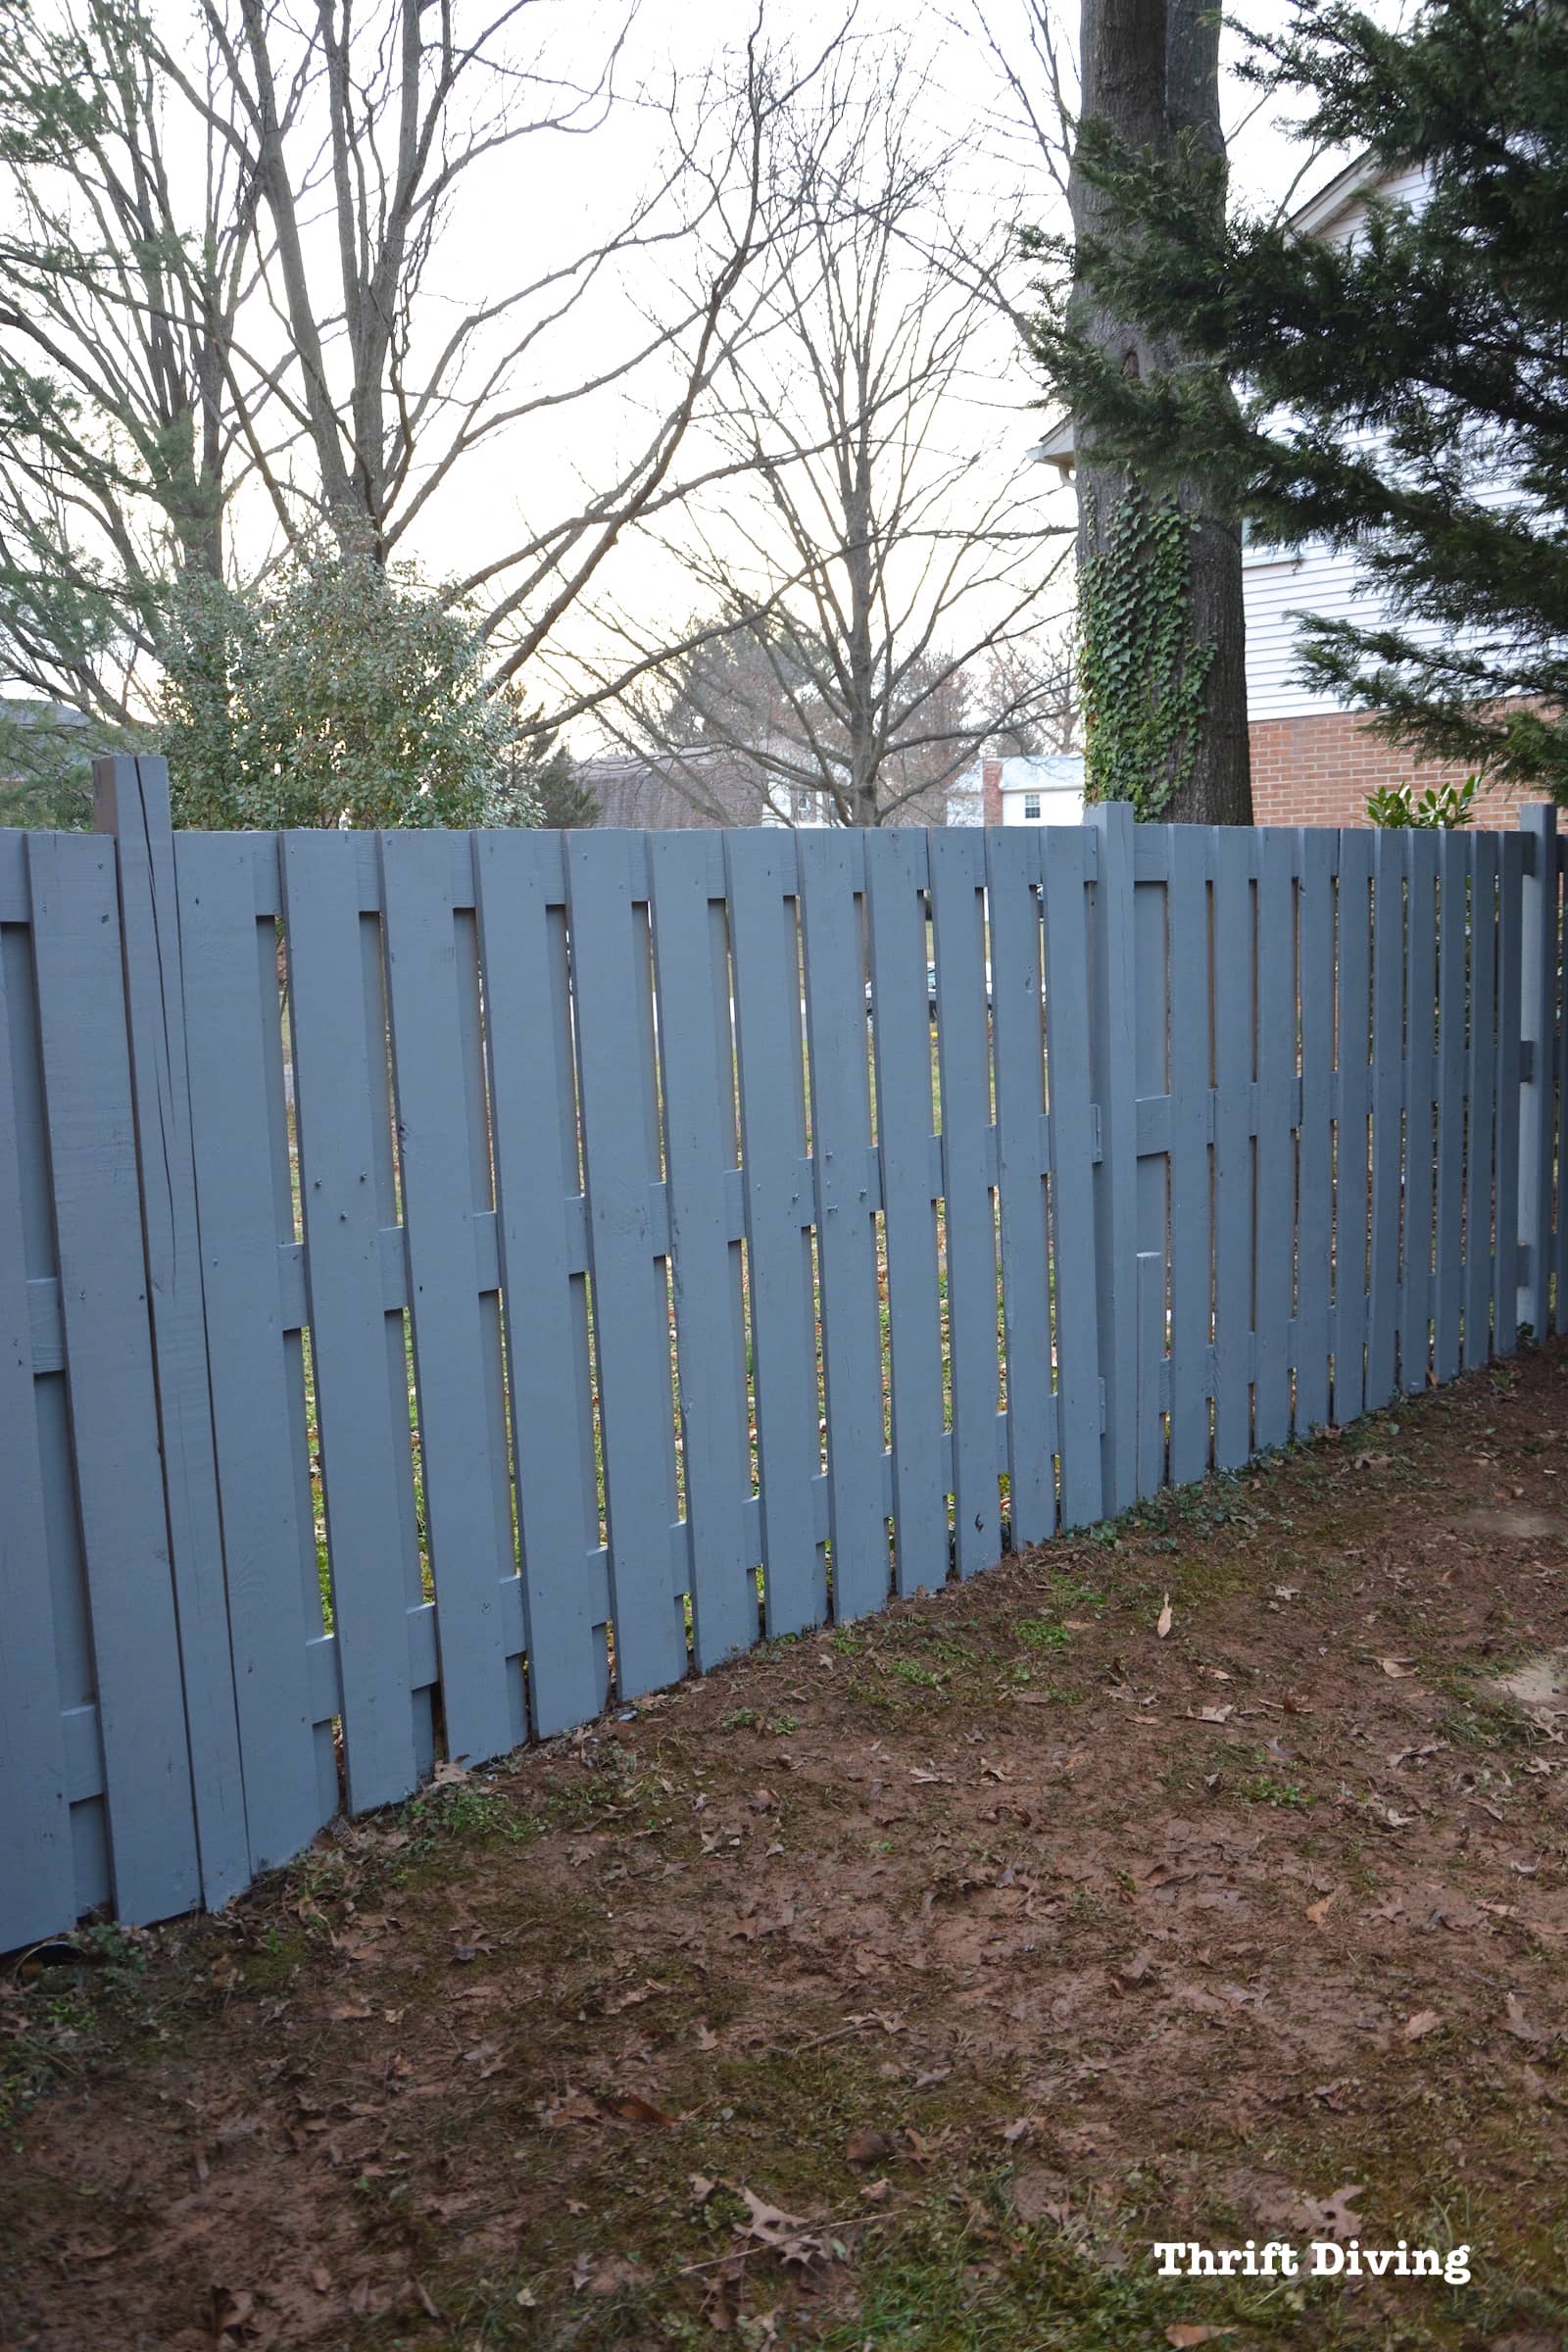
AFTER!
But after a couple days of dedication, it looks so fresh!
And look, ma! We have plants!
Materials Needed
To complete this project, you’ll need:
- KILZ OverArmor™ Wood and Concrete Resurfacer
- Paint roller
- Paint brush
- Paint tray
- Cedar (enough to make 4 planters: 4 boards @ 1″x6″x8′ and 2 boards @ 1″x4″x8′)
- Exterior screws (1 – 1/4″)
- Pressure washer
- Power drill with drill bits (3/8″ and 9/64″ drill bits)
- Jigsaw
- Circular saw (optional)
- Exterior wood glue
- Nailer (or hammer and nails)
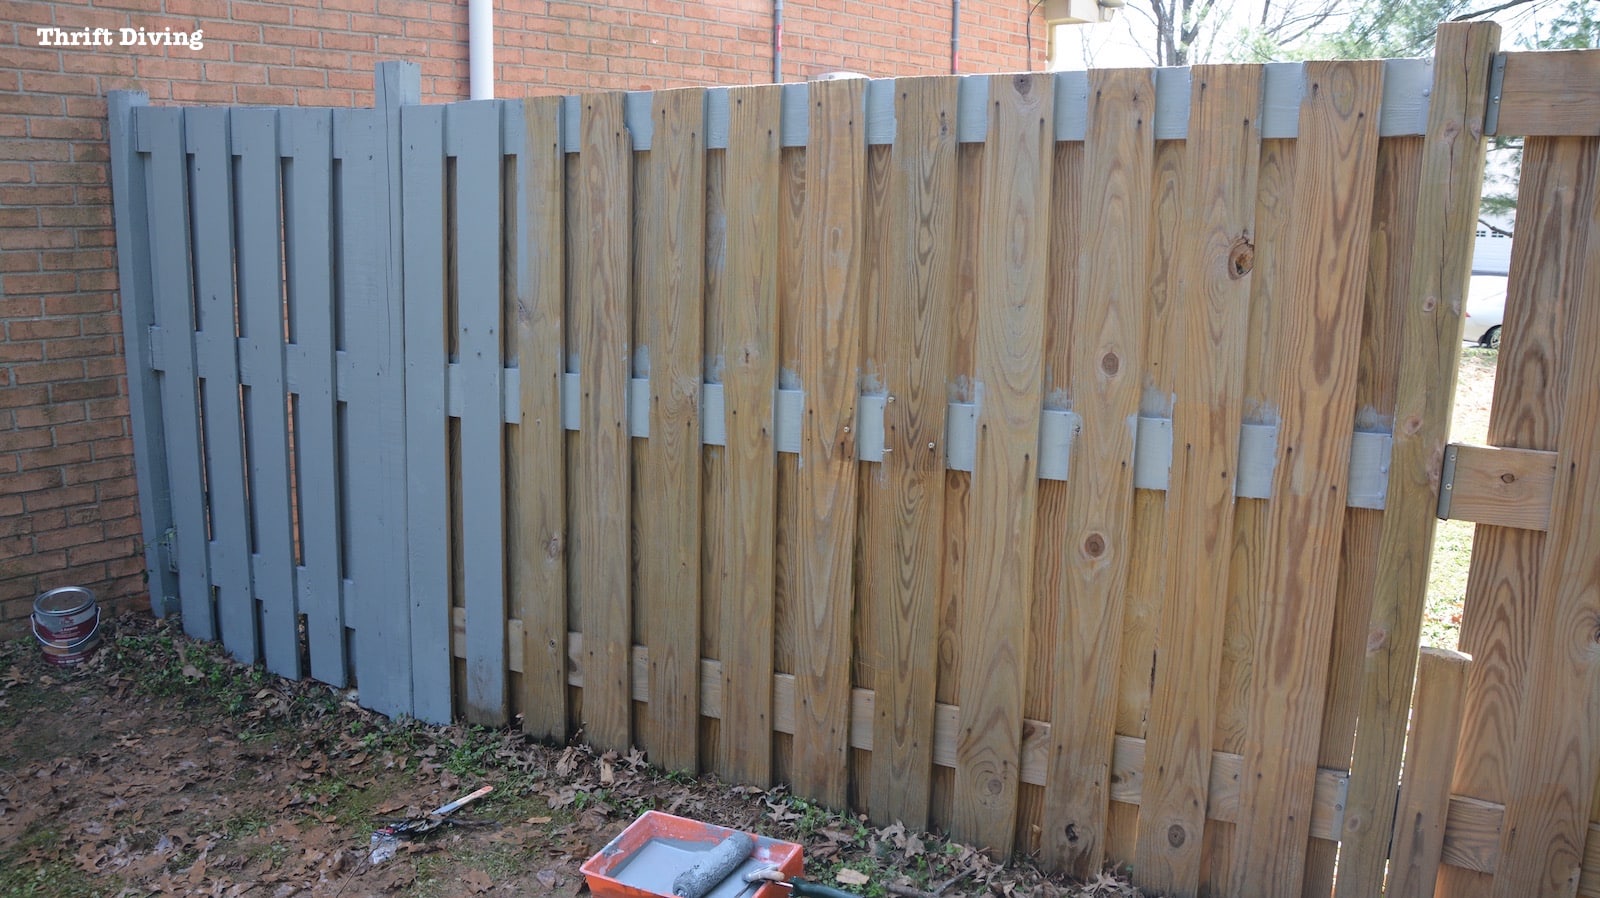
STEP 1: Get That Fence Super Clean!
I don’t know about you, but I find pressure washing to be addicting and very satisfying, yet super messy!
Fences are one of the most dramatic things to clean because over the years, they grow green and black gunk (or is it just my fence that grows that stuff??).
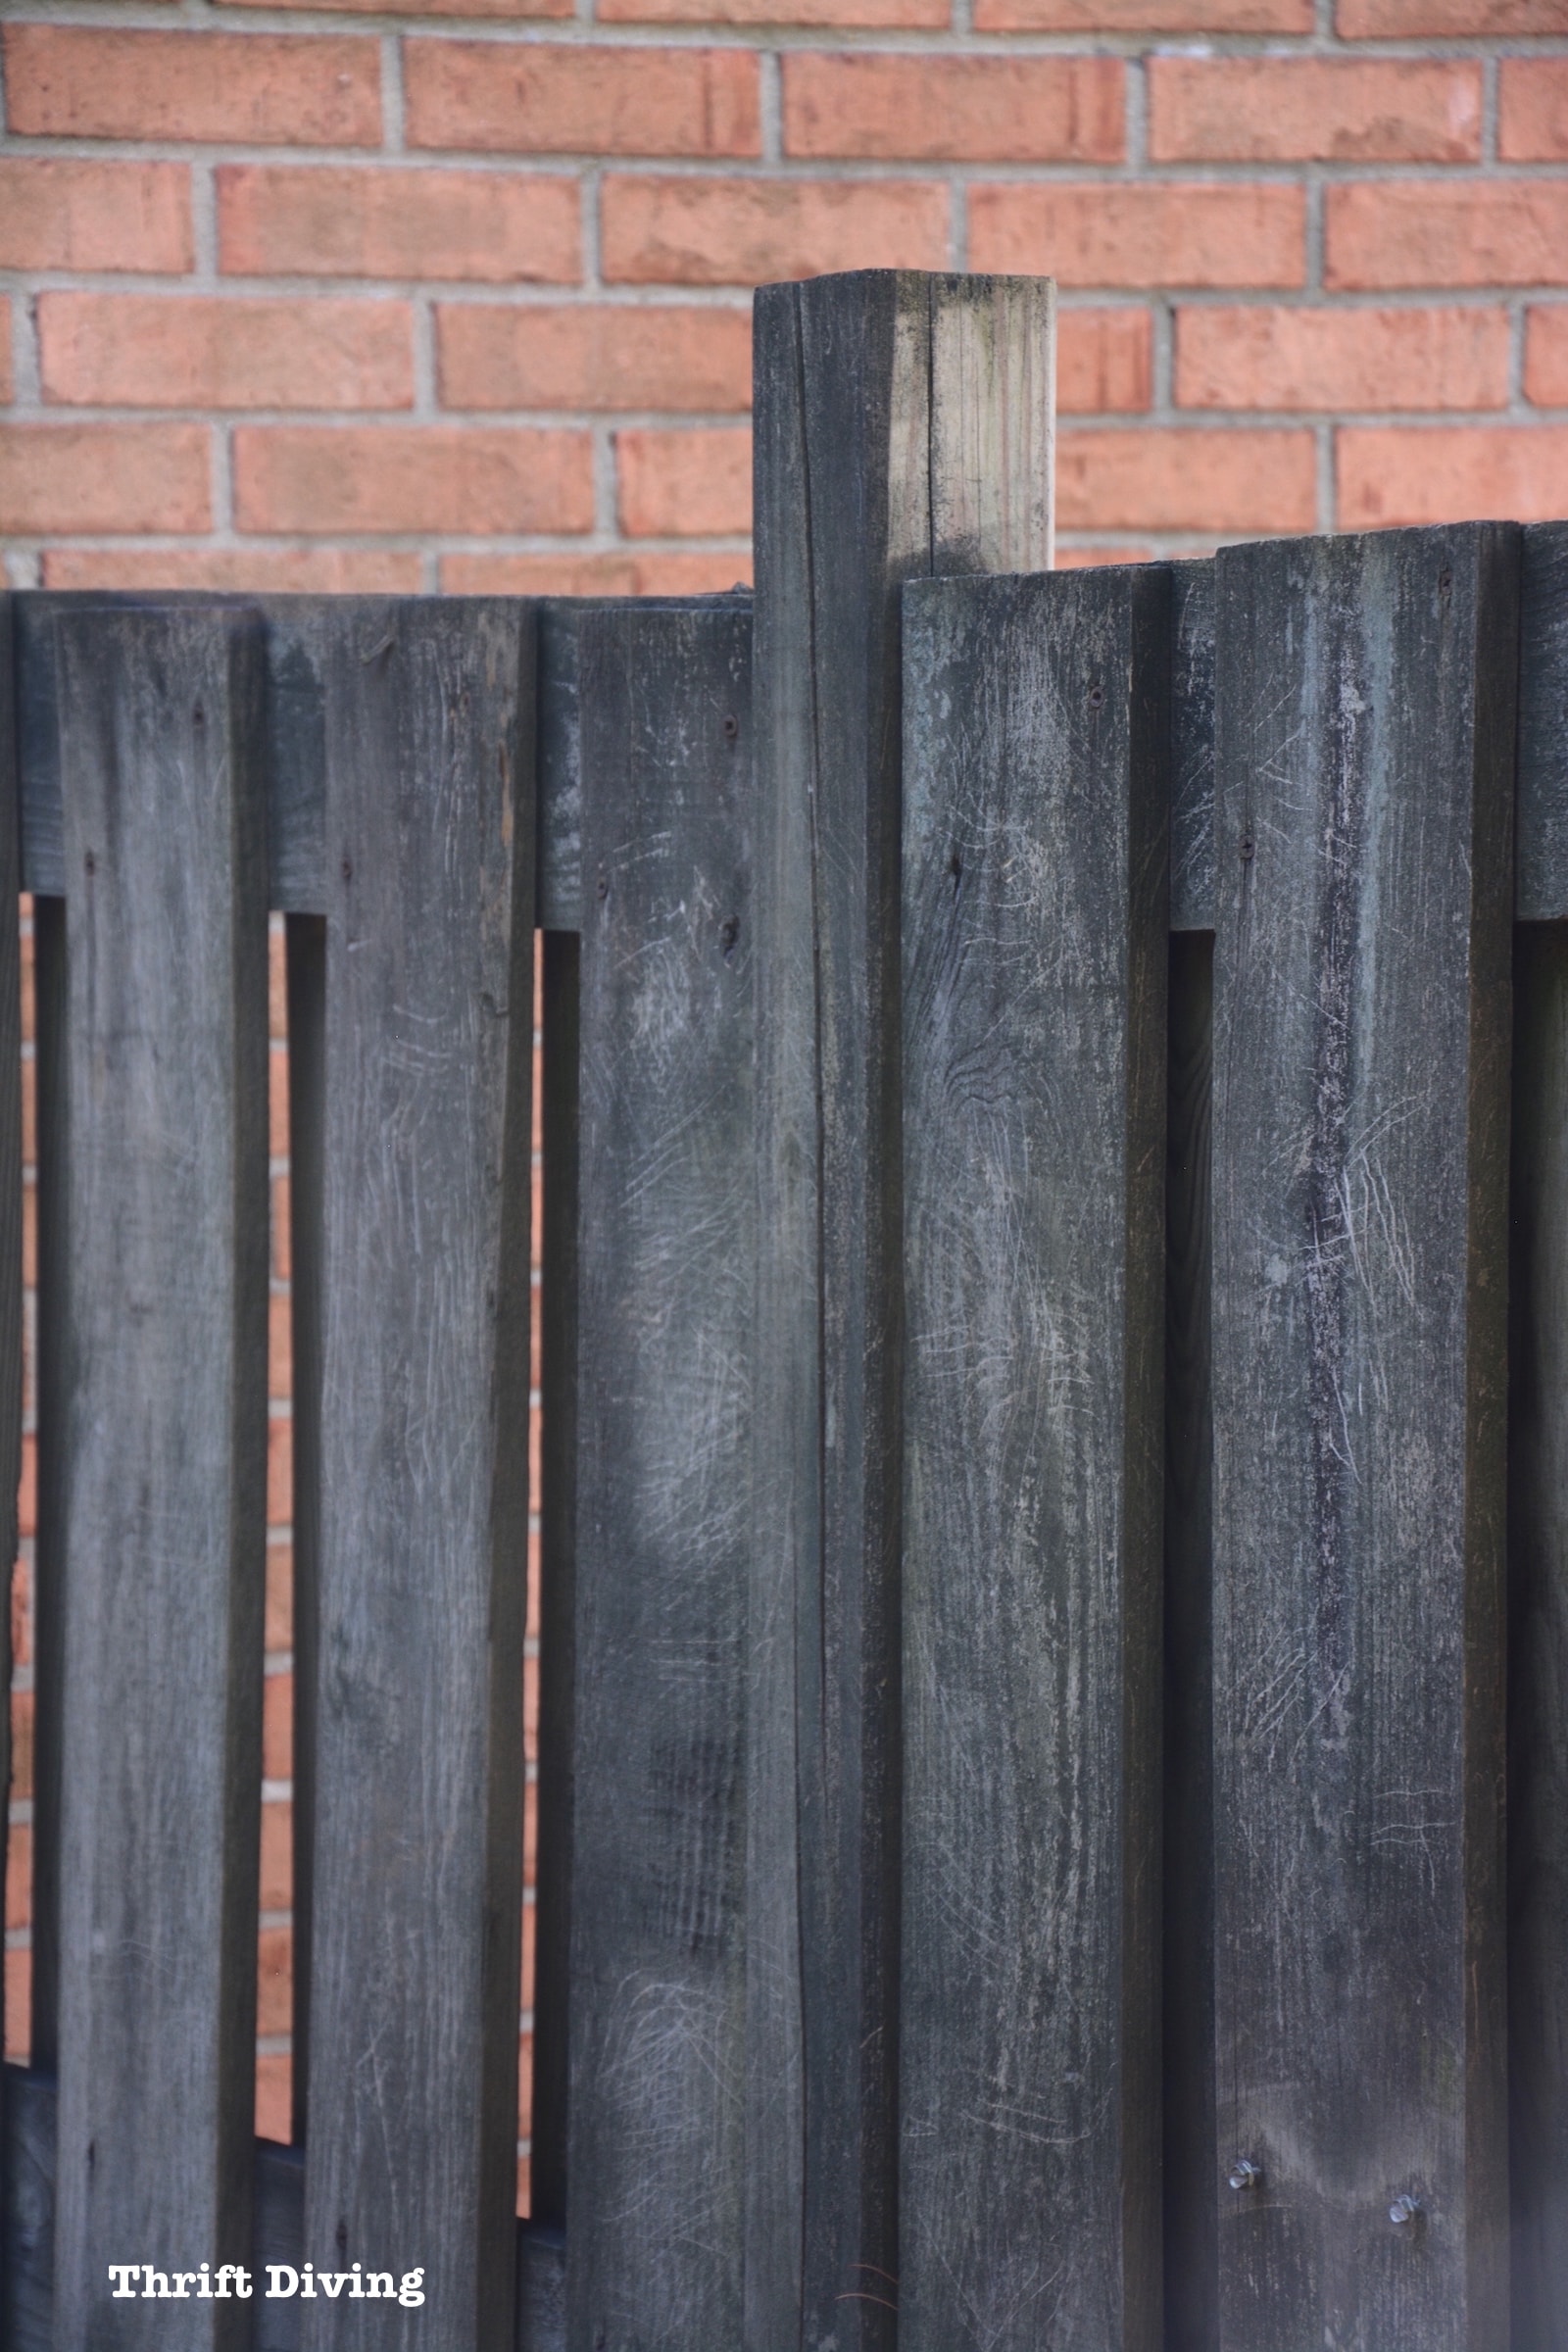
Before painting the fence to hold the hanging garden, it needed a good cleaning.
I pressure washed it and let it dry for 24 hours.
Isn’t it disgusting?!
You can not paint over something with that much gunk. So be sure to wash it well and let it dry.
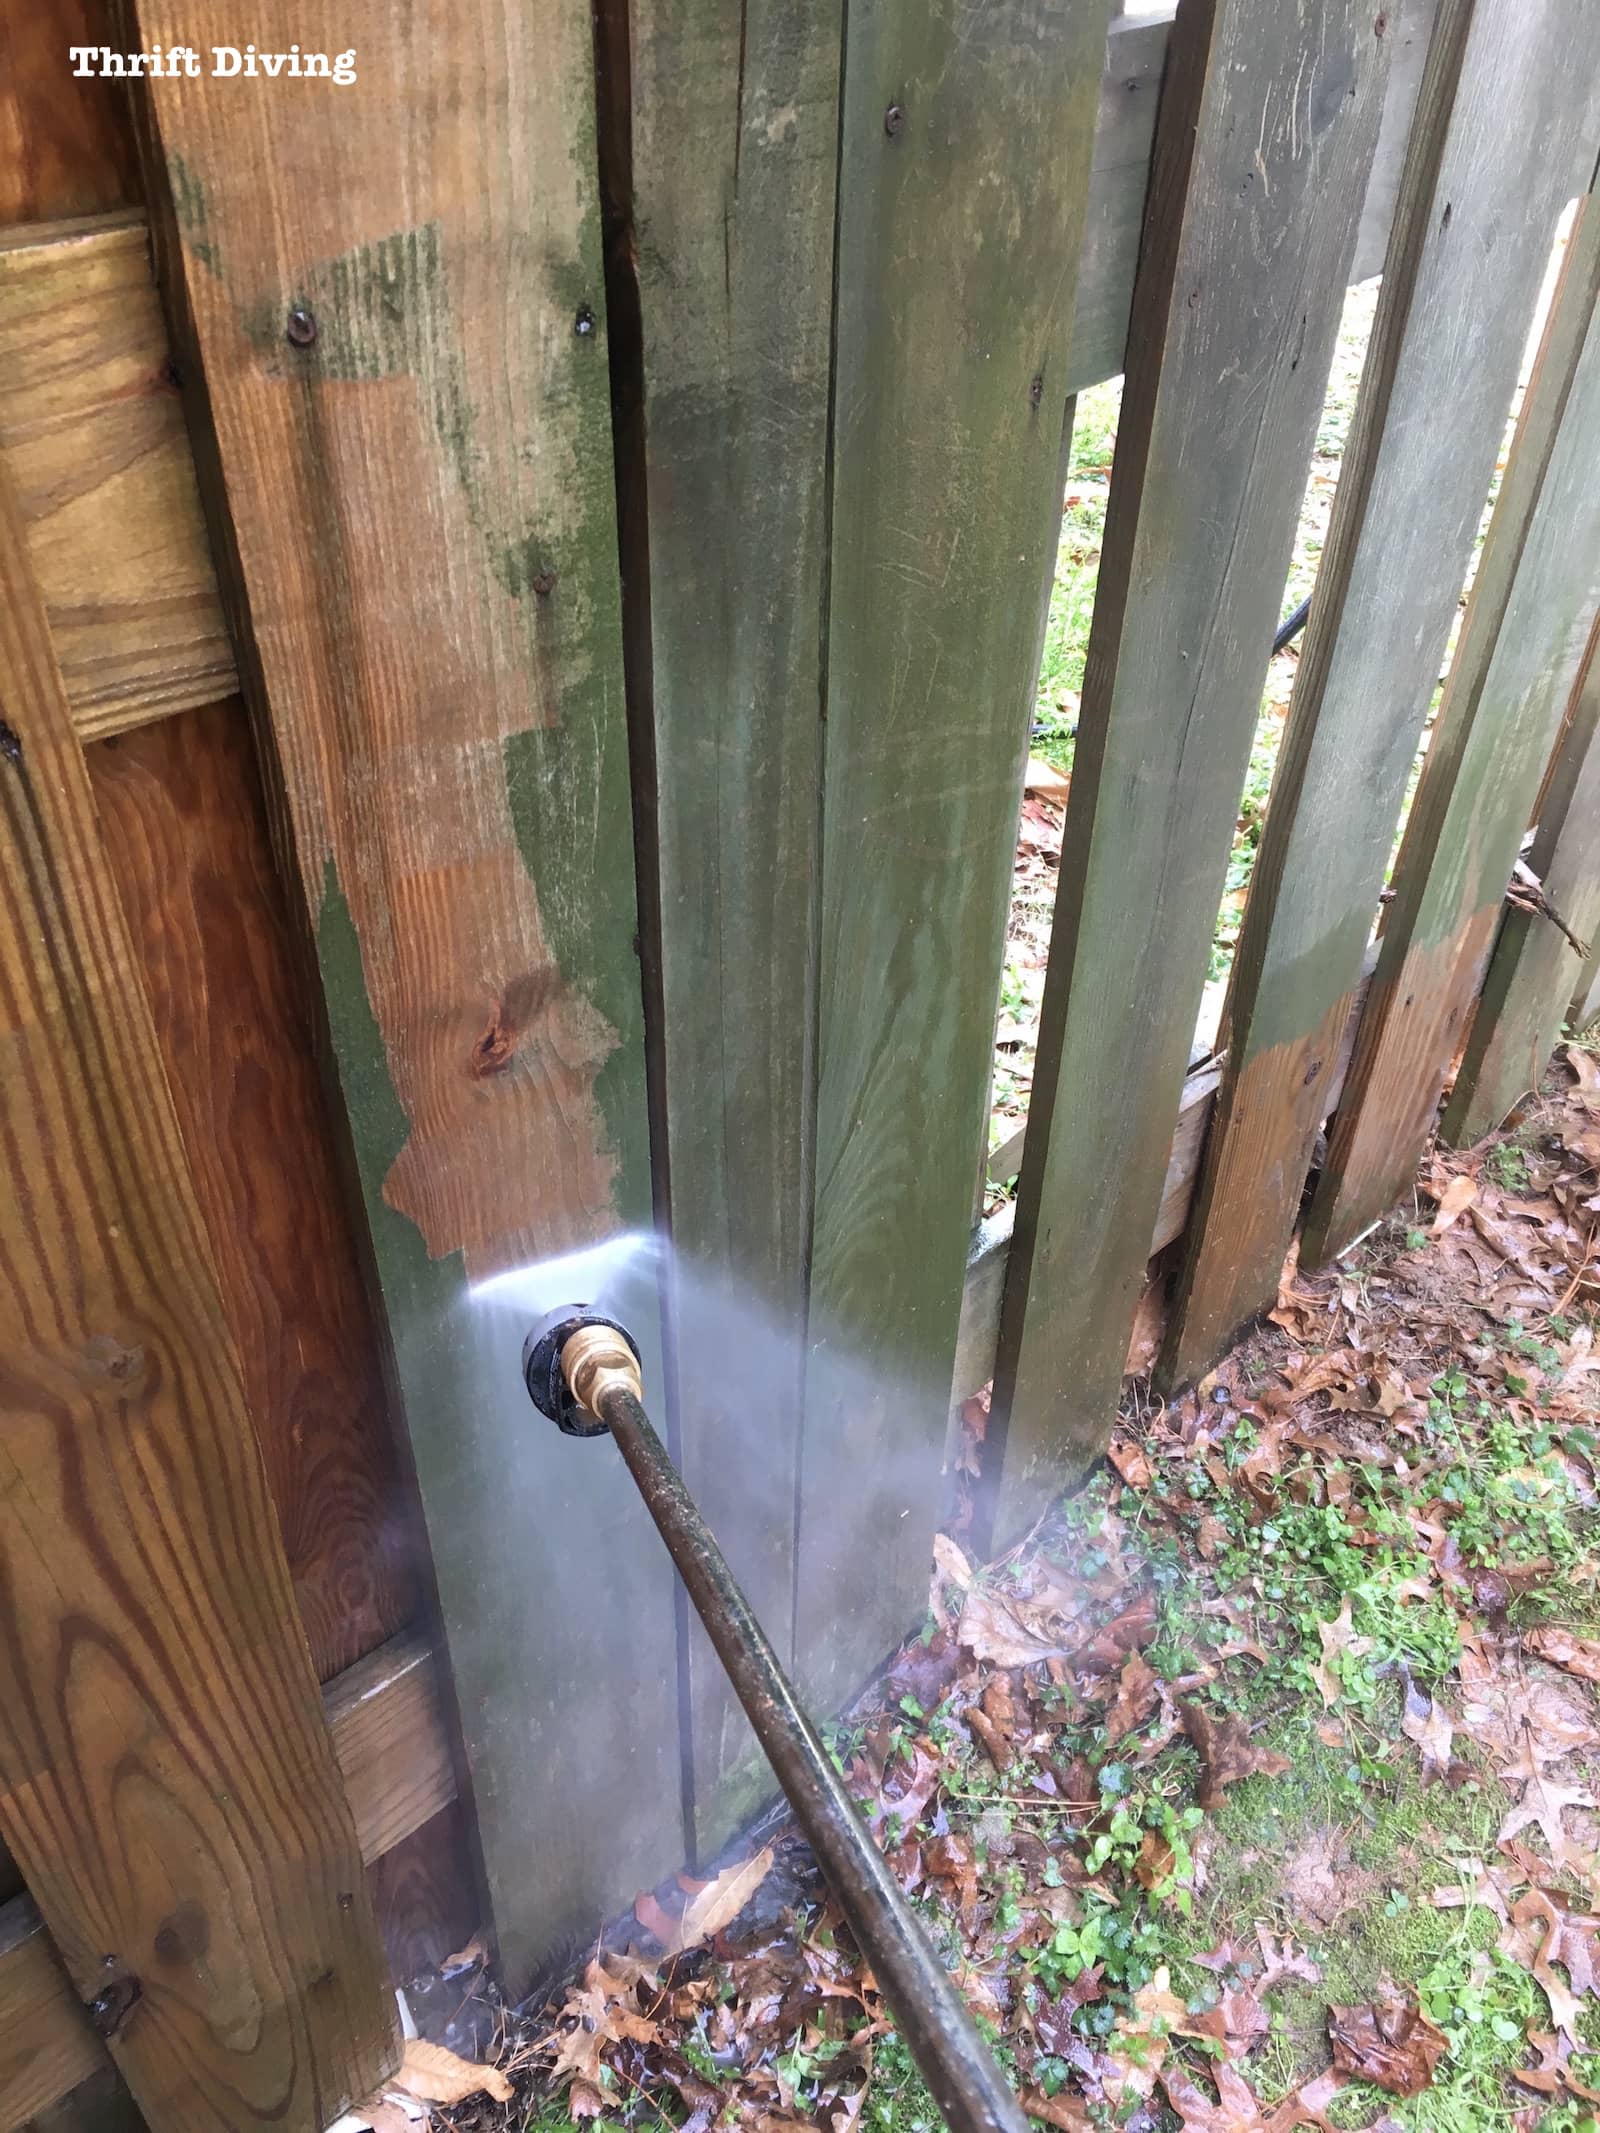
SAFETY TIP: Be sure to wear long sleeves and eye protection when pressure washing! 🙂
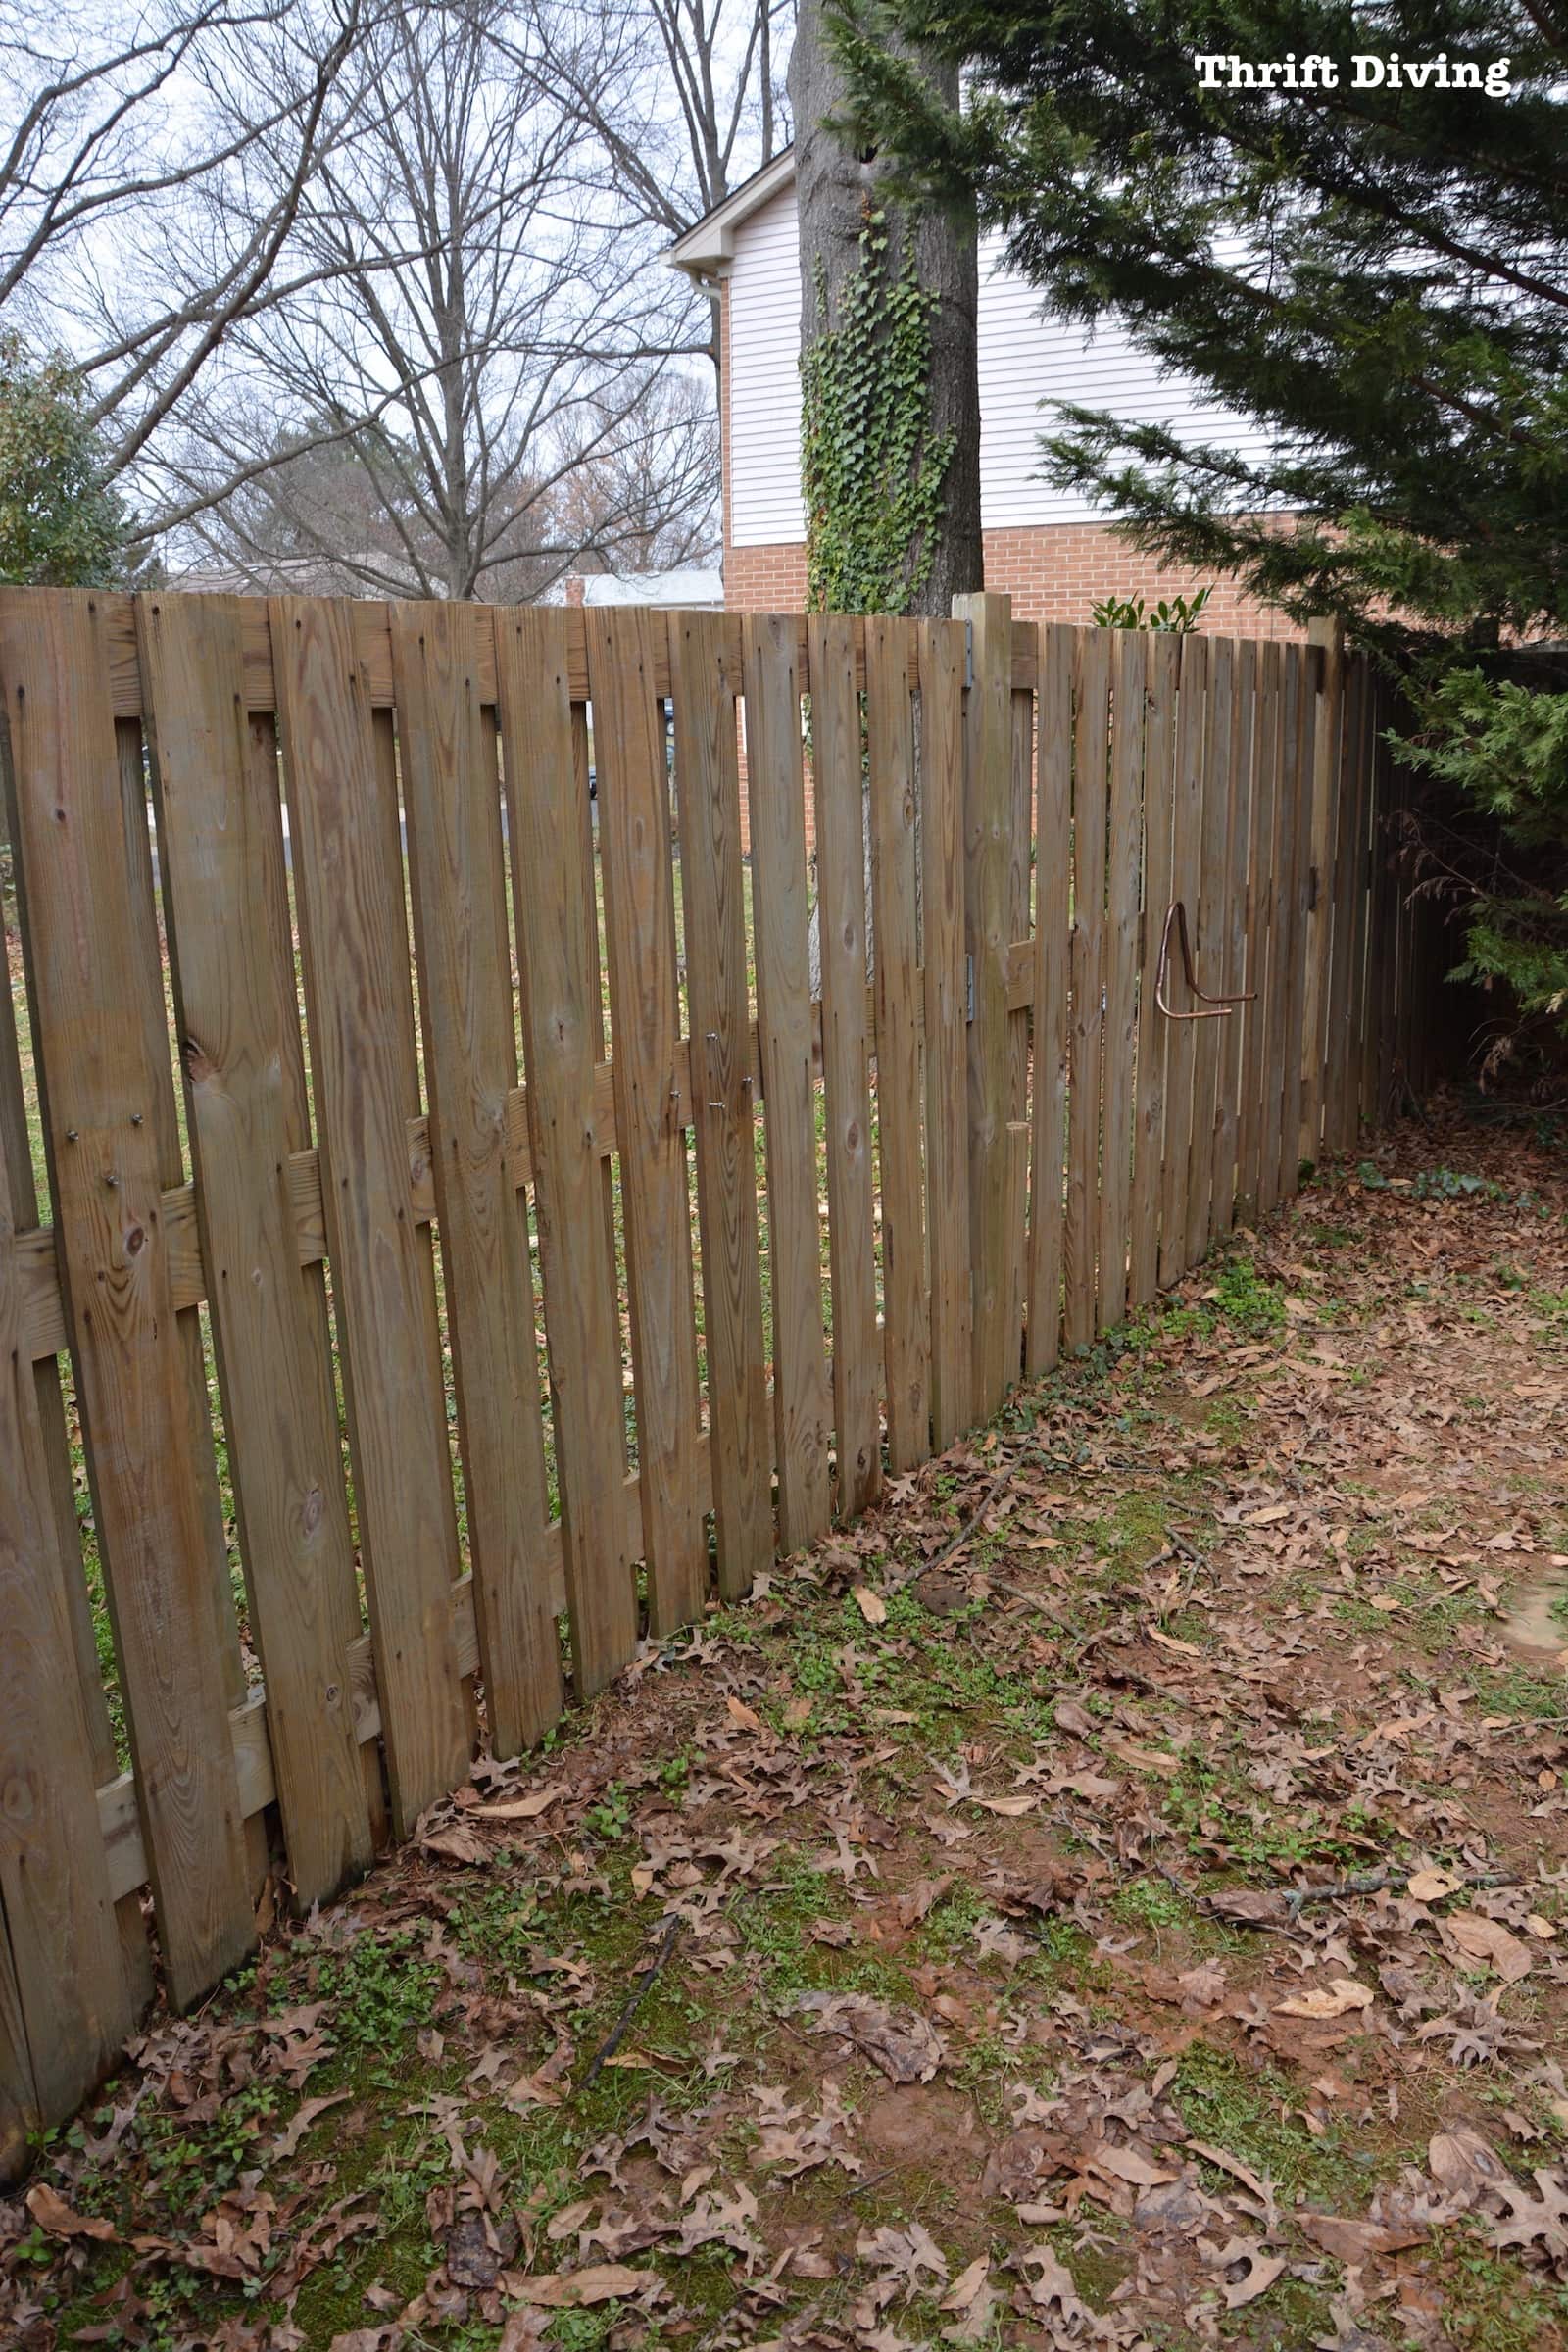
After drying for 24 hours, it looked fresh and ready for paint!
STEP 2: Break Out the KILZ OverArmor™
To paint my fence, I used KILZ OverArmor™ Wood and Concrete Resurfacer paint, which you can find at Walmart.
I was curious about this paint because this was my first time using it. I always love discovering new products!
It’s a resurfacer, which means it’s made to bridge gaps in wood and concrete up to 1/4″ wide.
Our fence is in pretty good condition, but I’m sure a coat of this stuff will protect it for years to come.
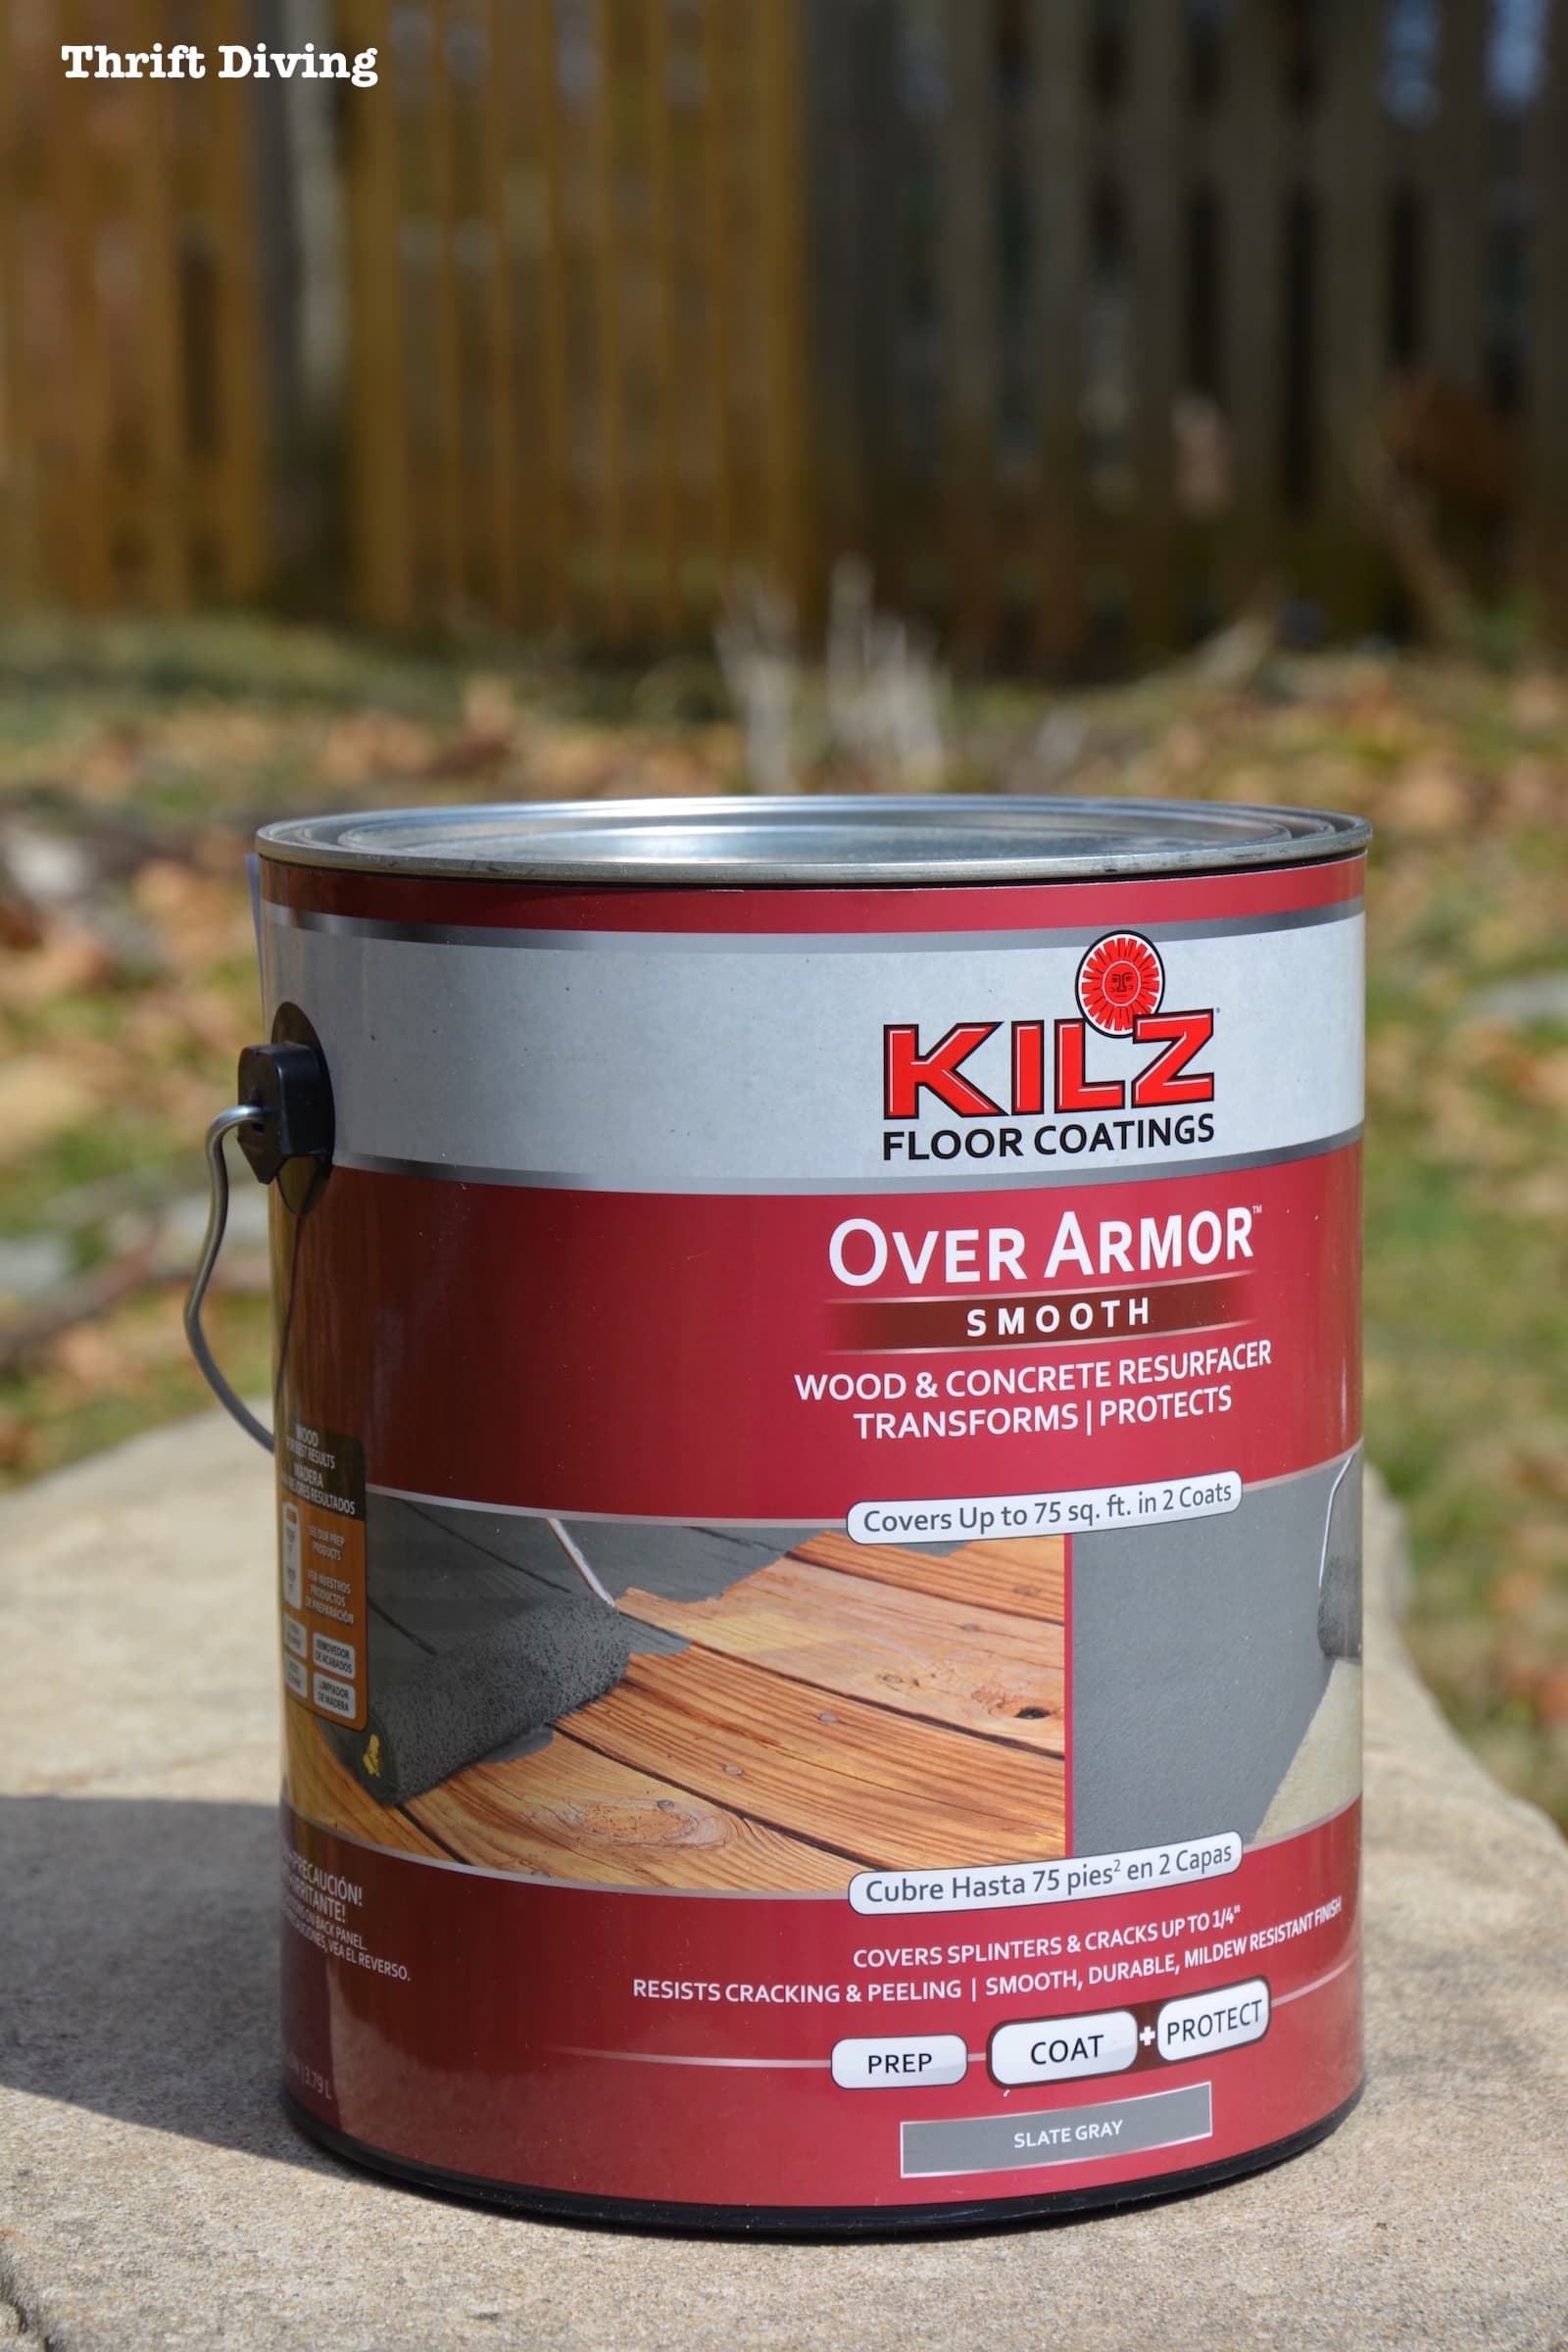
The first thing I noticed is the color. It’s technically Slate Gray but has a bluish undertone, which I loved!
The second thing I noticed is that this paint is thick!
Sort of reminded me of liquid cement. Then it started to resemble what it looks like when I dip my straw in a milkshake. LOL
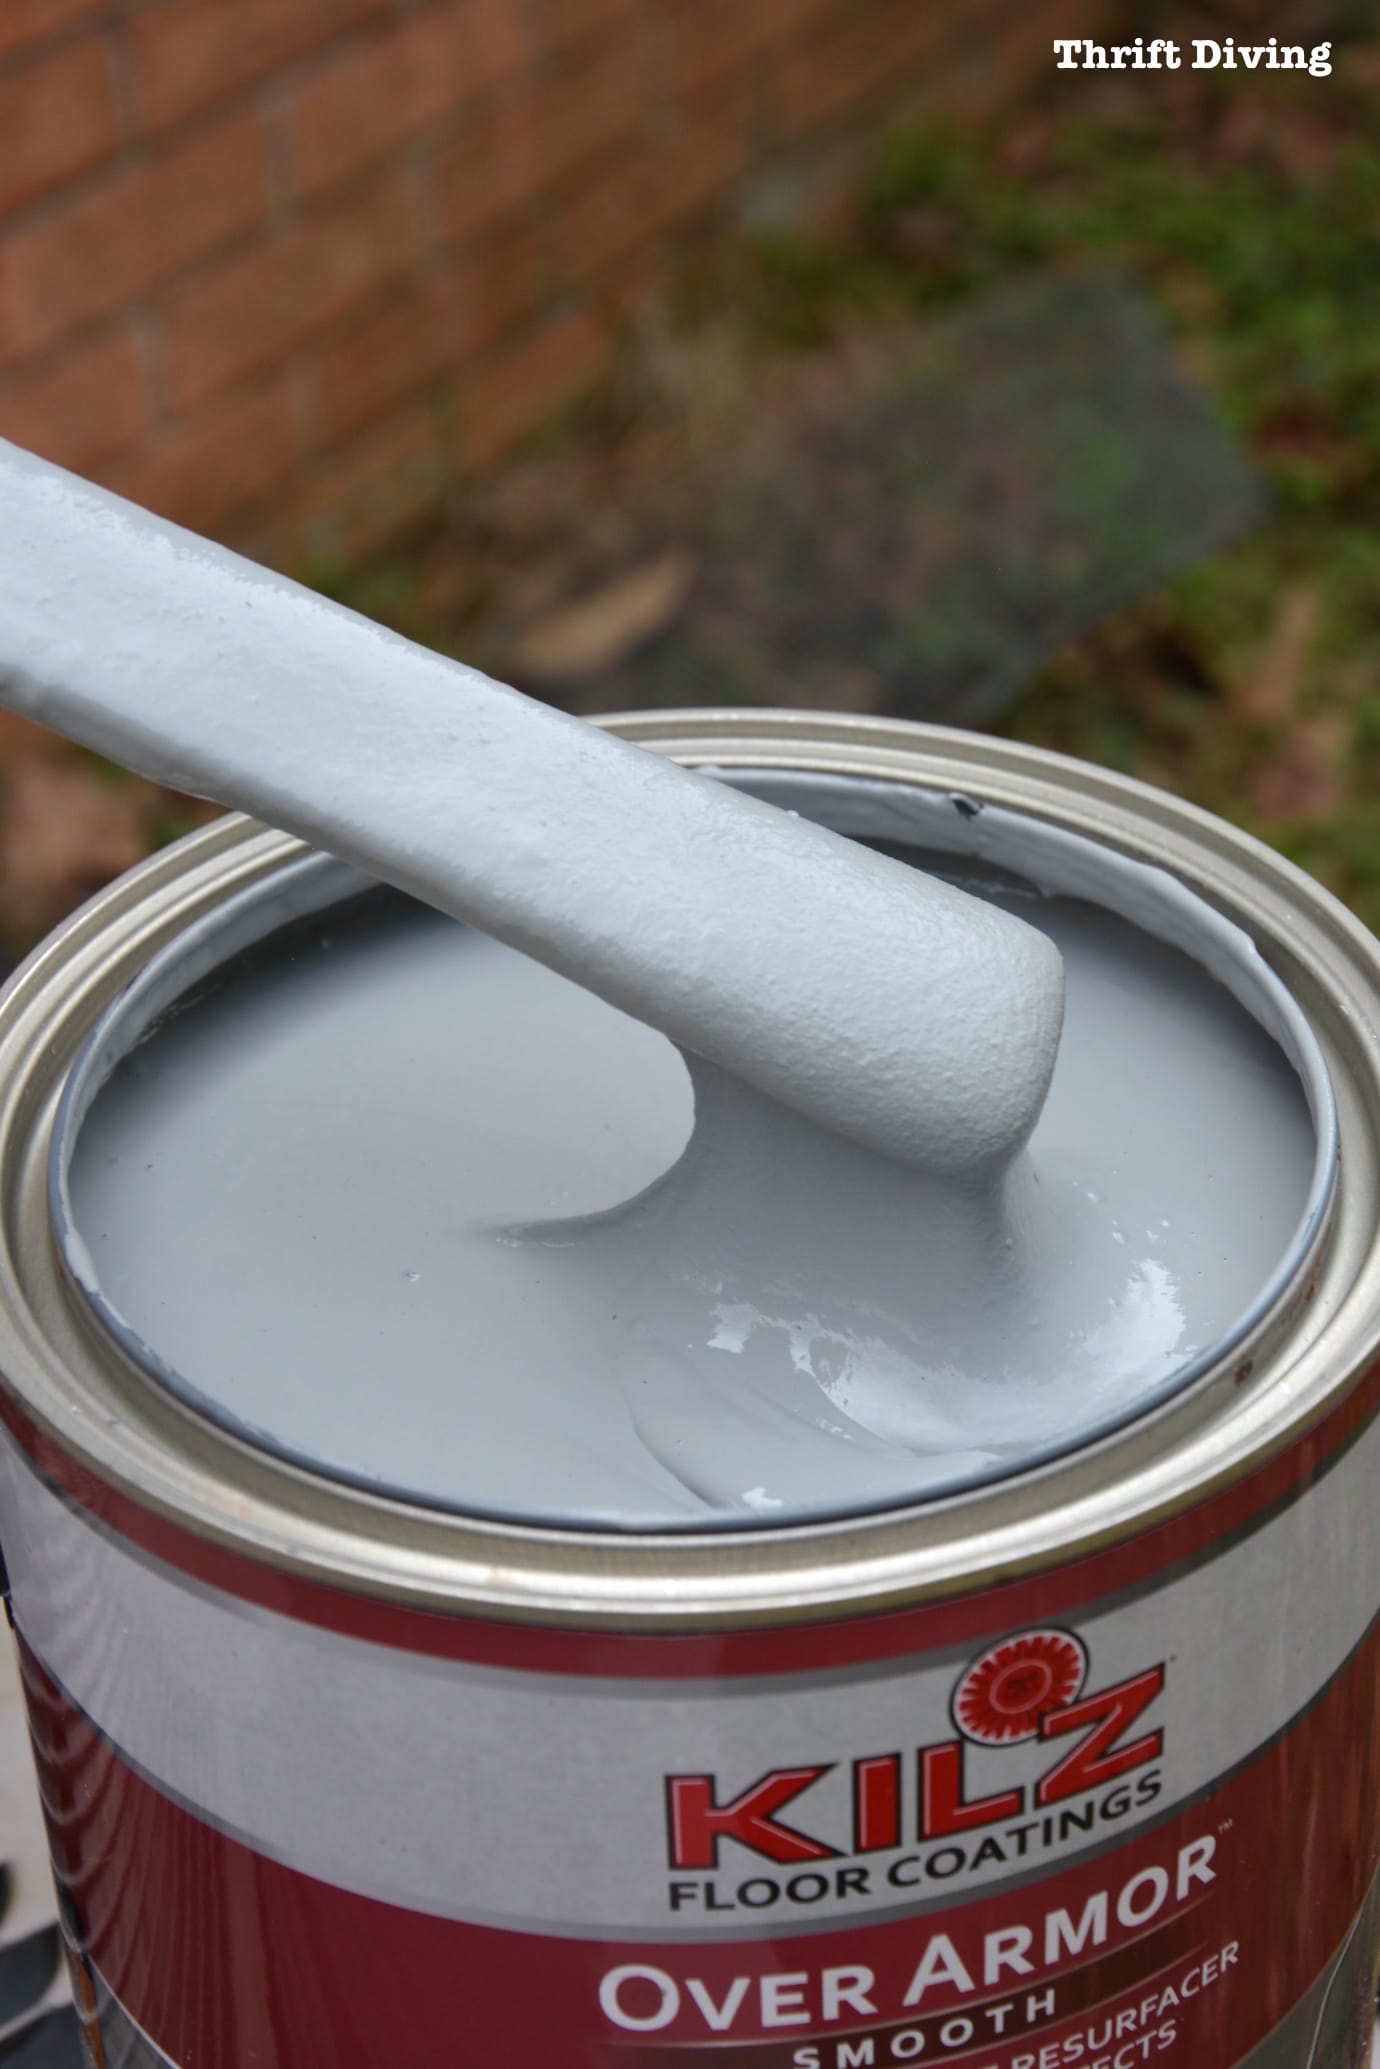
Since it’s a resurfacer, it has to be thick in order to fill small gaps and cracks.
Just be sure to stir it really well!
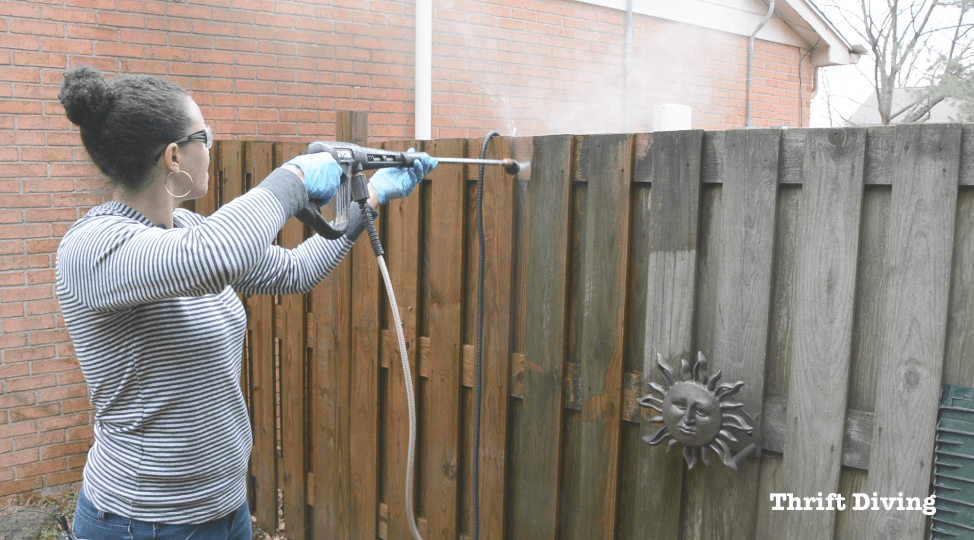
STEP 3: Get Rollin’
Unless you’re a professional with professional paint sprayering skills, KILZ OverArmor™ resurfacing paint is best applied with a roller and brush.
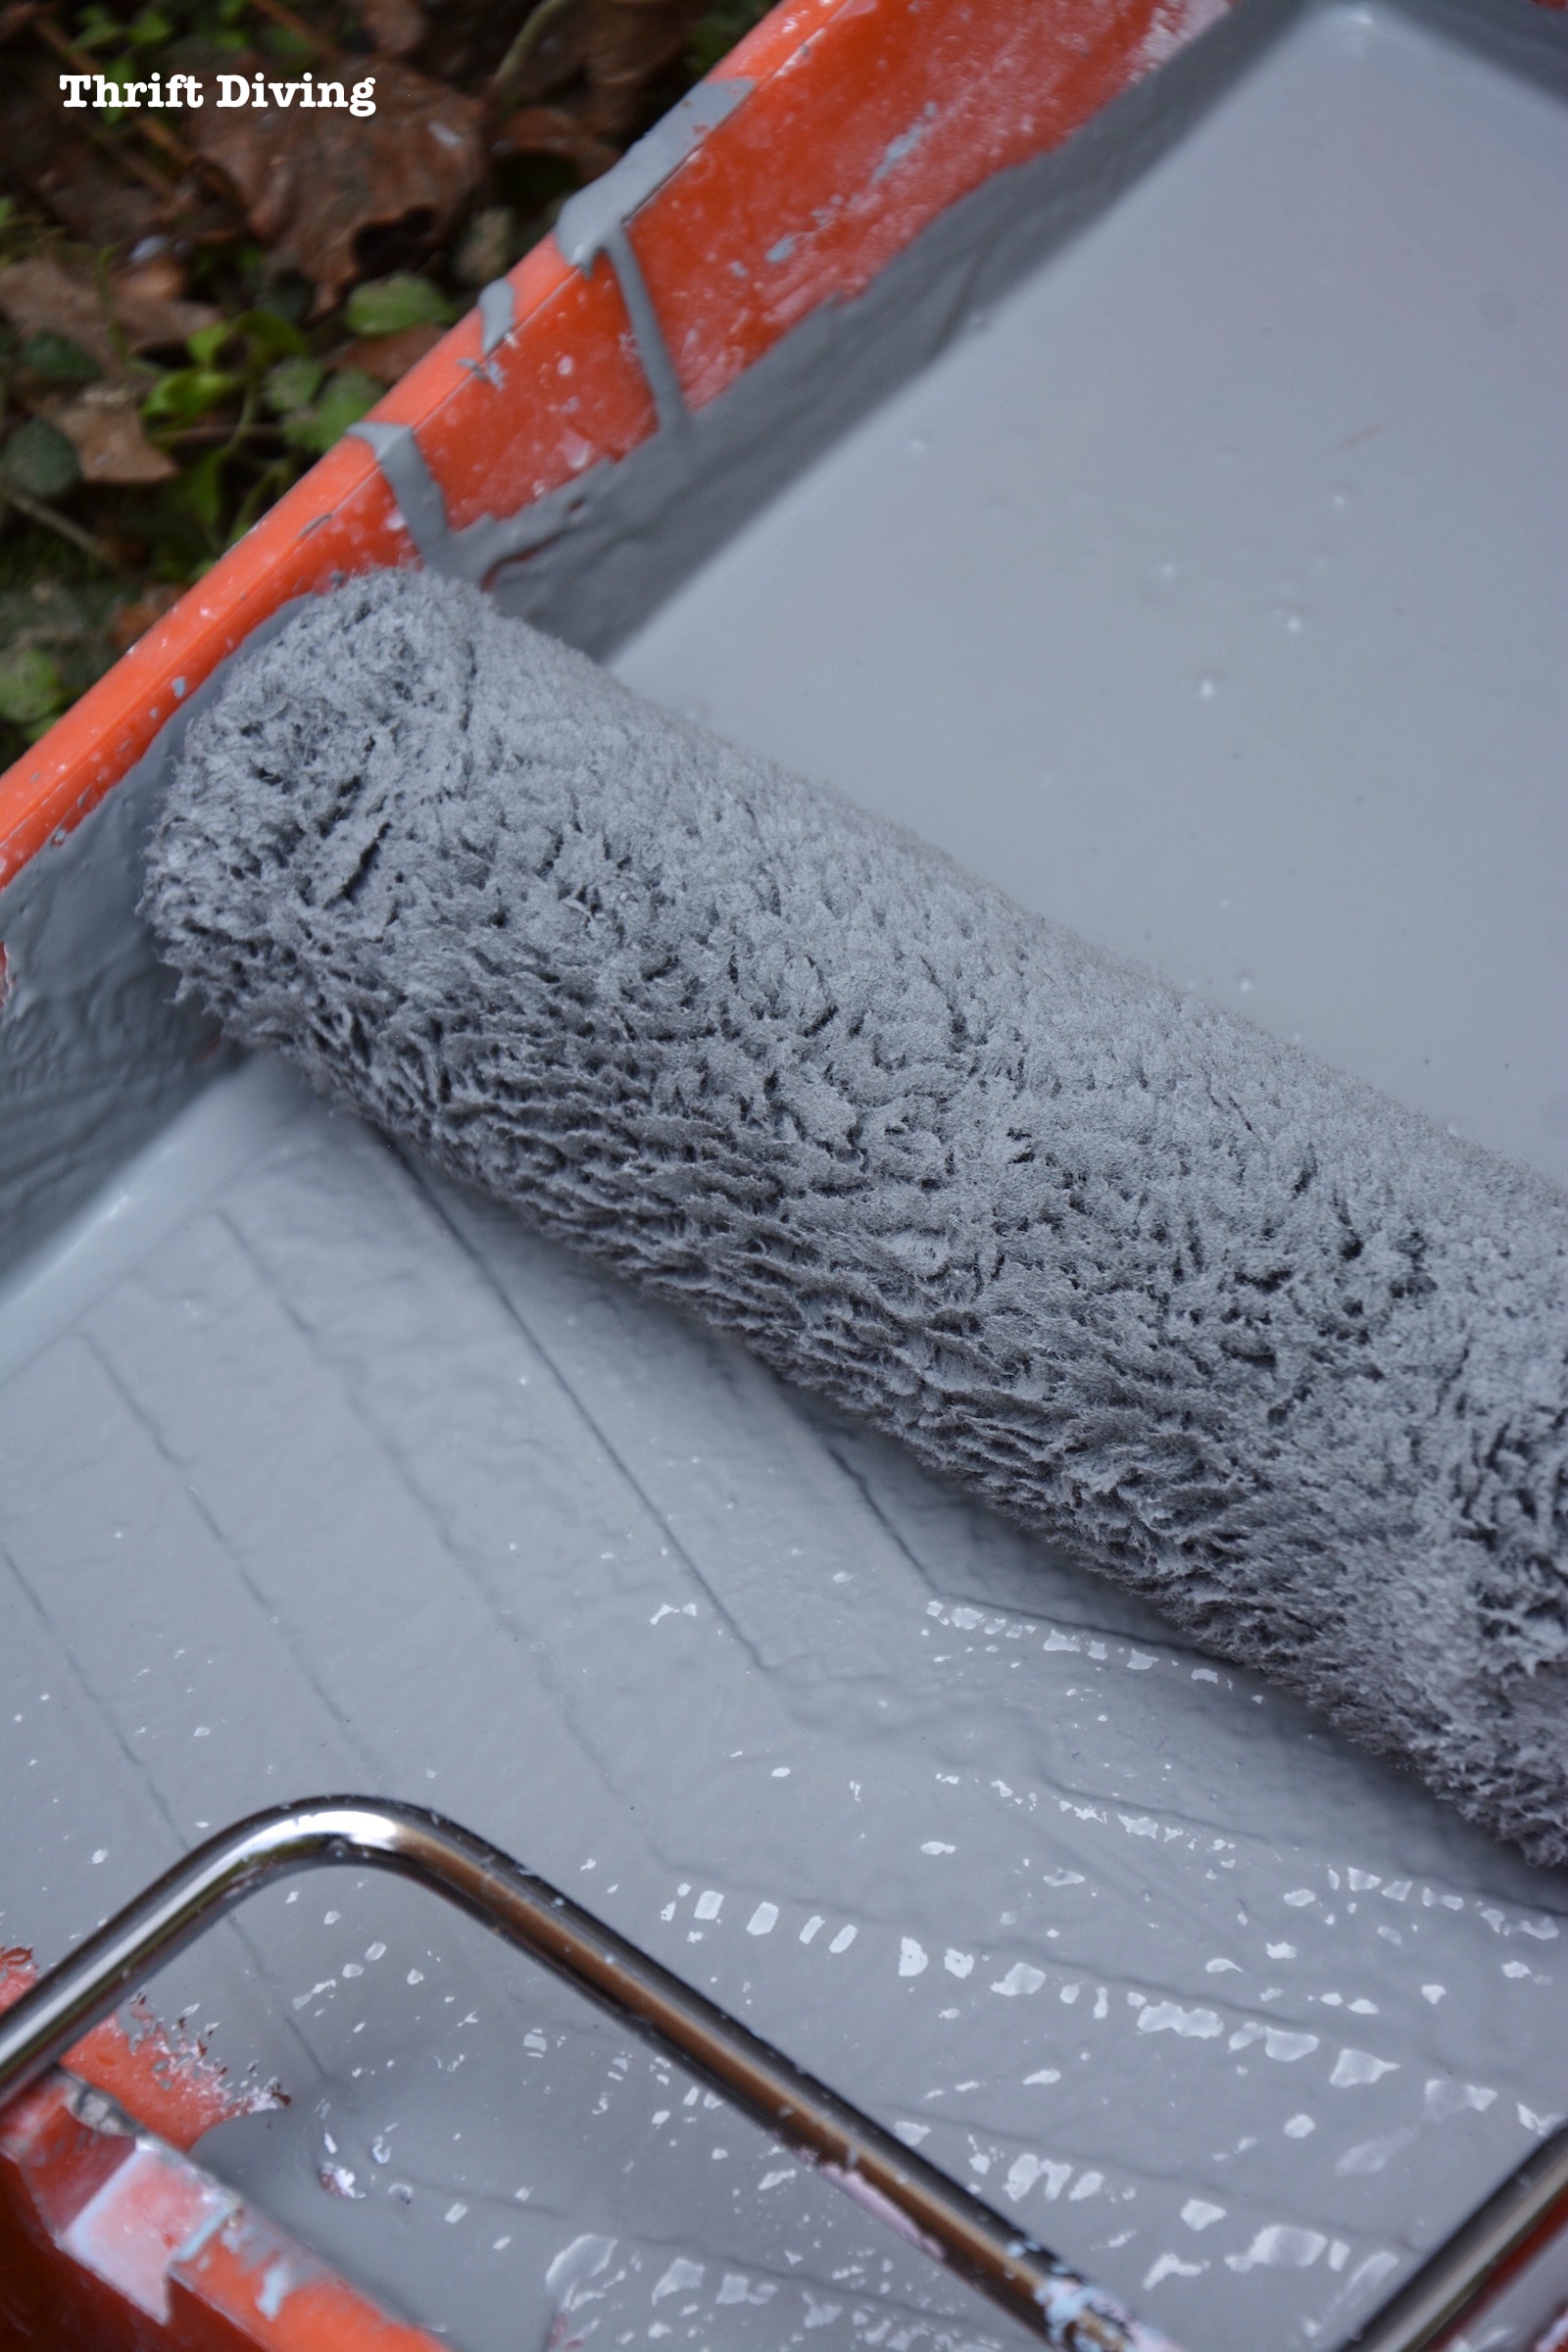
Thankfully, my fence isn’t too long, so it didn’t take too much time.
The most difficult part was trying to get in between the fence, to the boards on the back!
I had to do those with a paint brush (grrroooaann….).
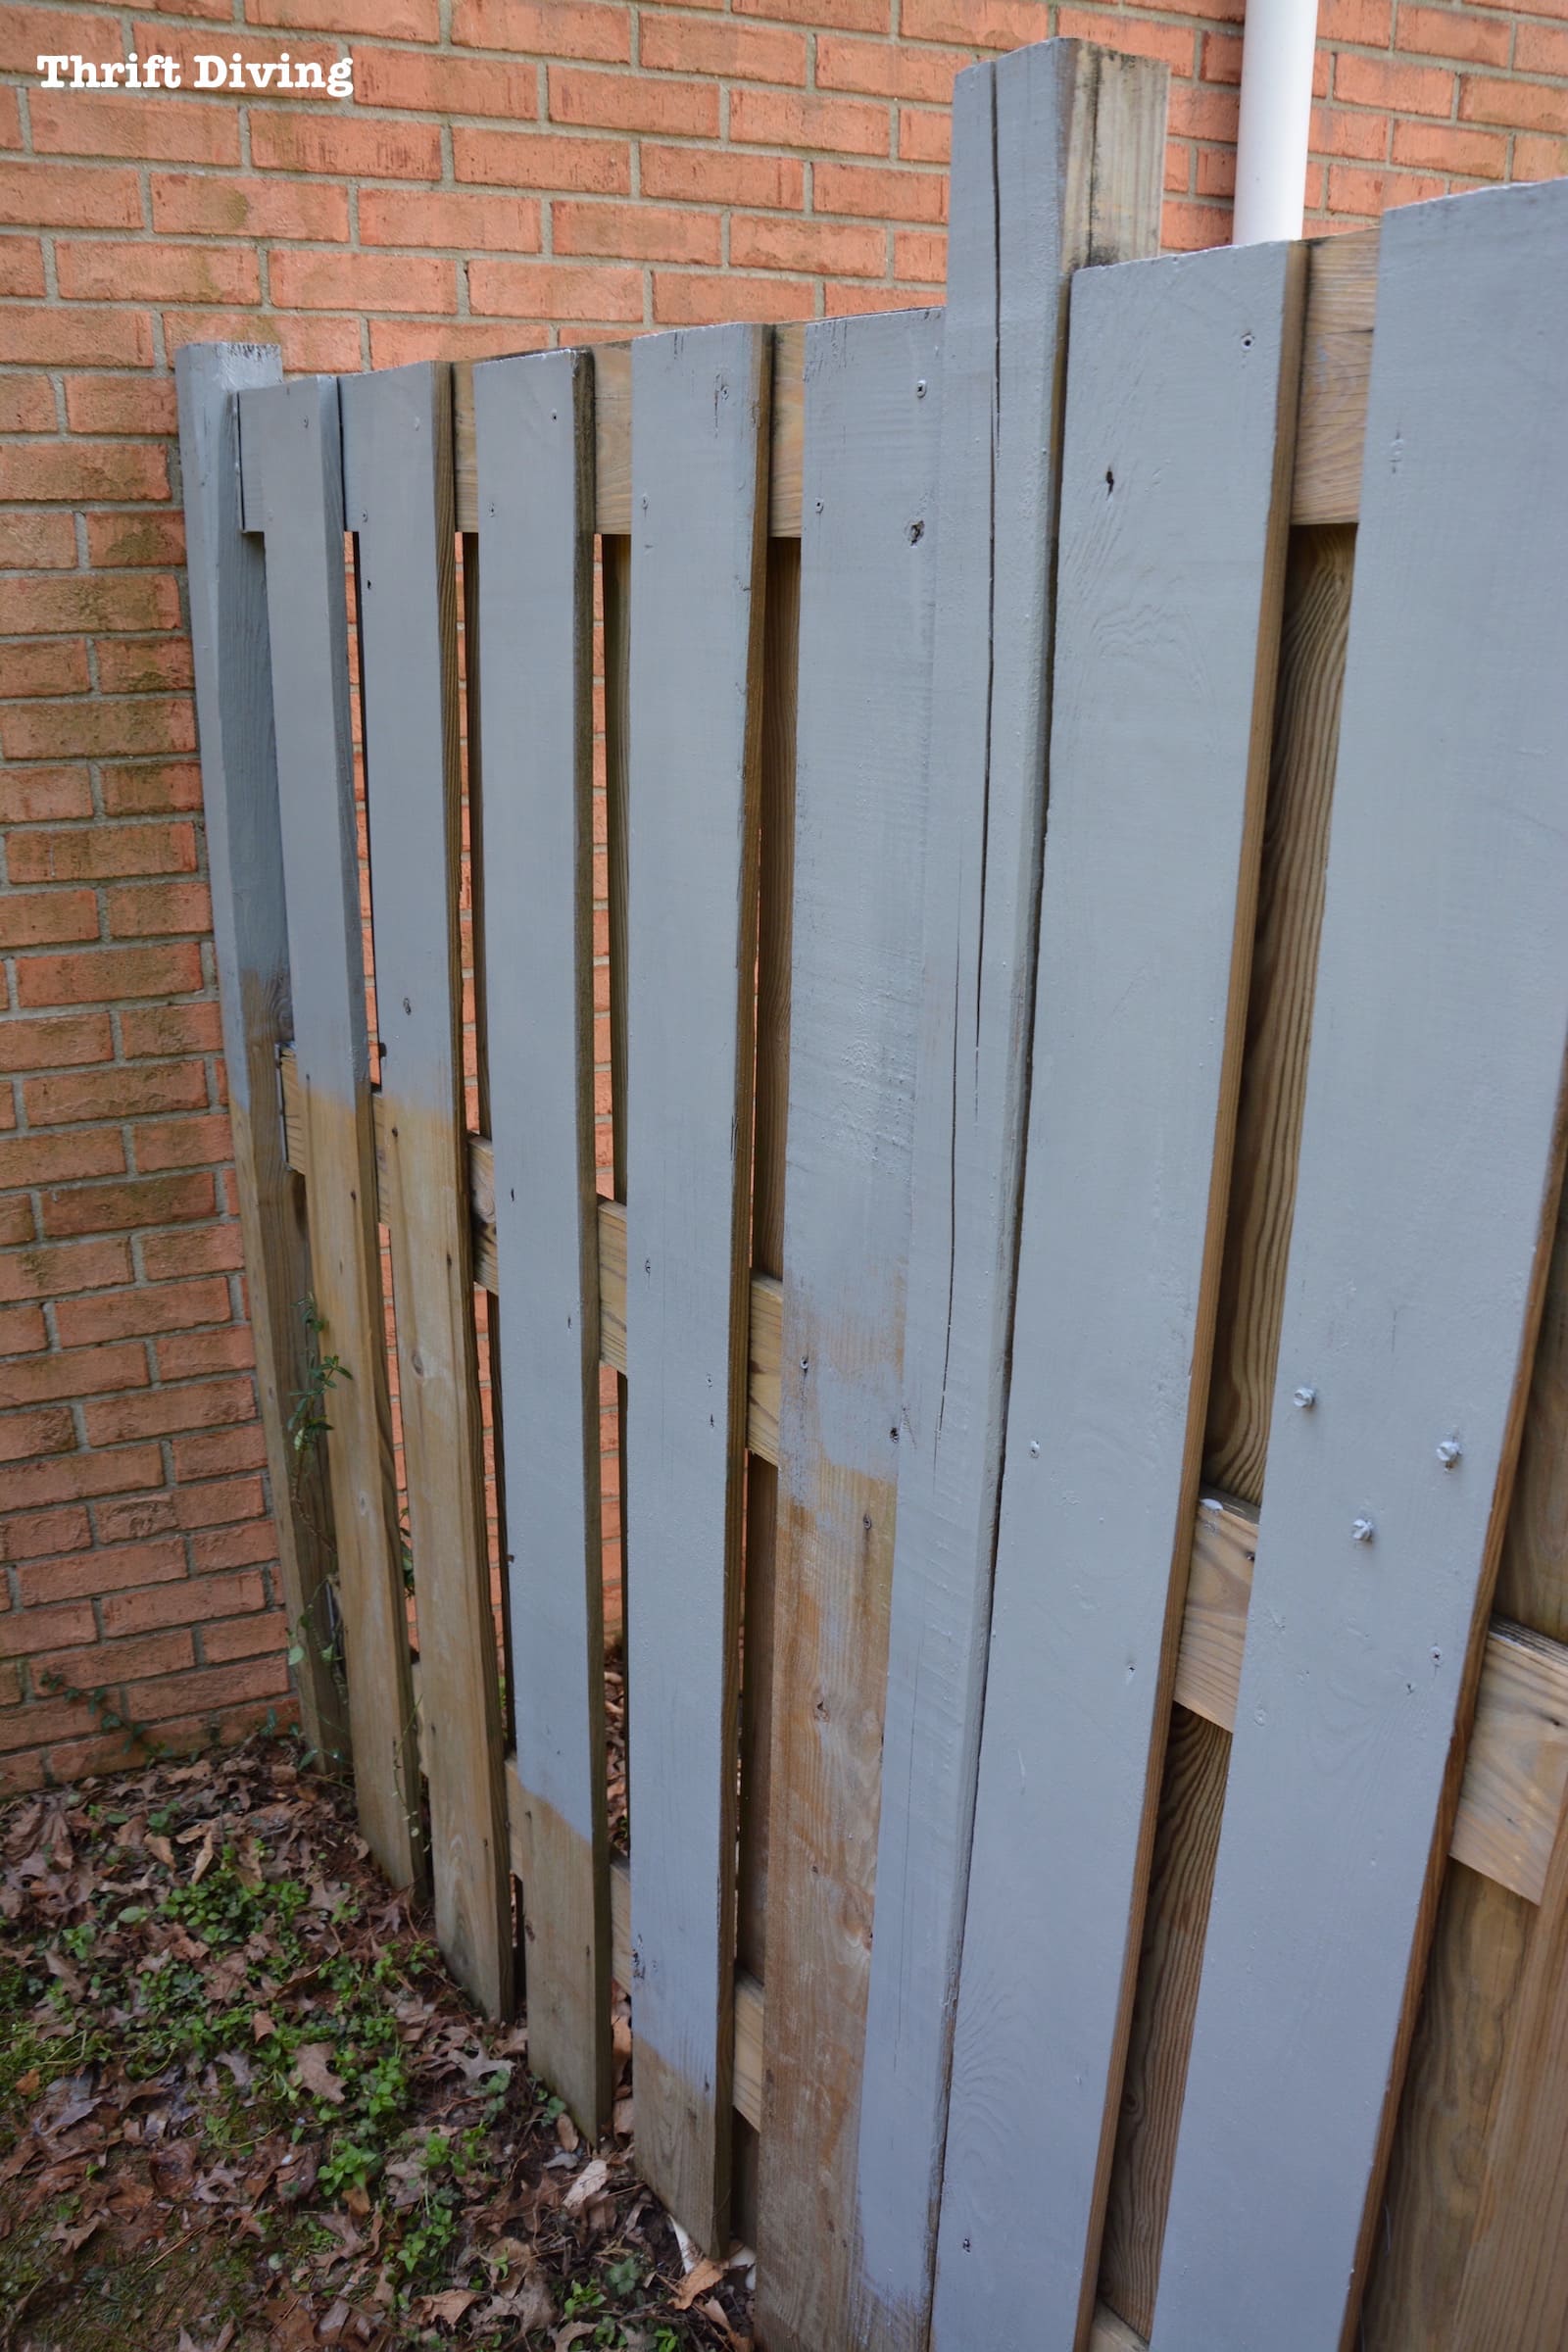
STEP 4: Add Two Coats
I didn’t have enough paint to do two coats right away. I’ll actually need to get more paint to put on a second coat. One can covers 75 sq. ft. Not sure of my fence size, but I did use one whole can for one coat.
Painting a fence is Snoozeville so I turned on some music and danced away as I painted the fence! I’m sure the neighbors could hear me belting out 90’s music. 😉
I tried to work in a pattern to get it done faster.
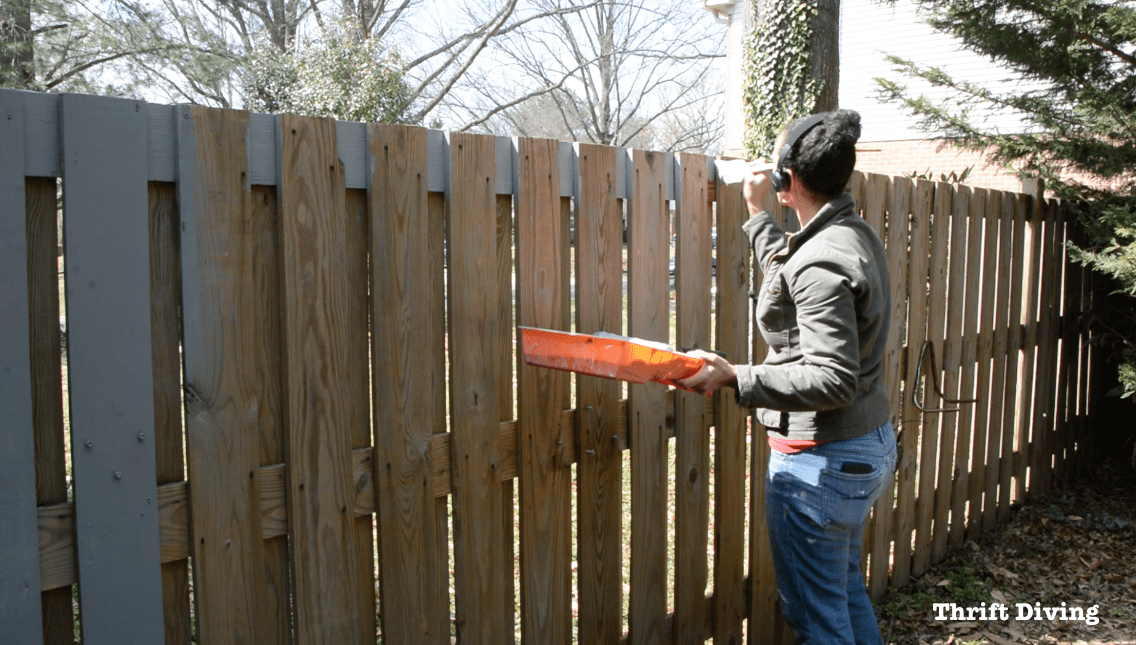
STEP 5: Let It Dry
I ran out of time so I let it dry overnight. The next day, I got started on my cute little cedar fence garden planters!
How to Make a Cedar Fence Garden – Fence Planters
Now that I had a beautiful fence, I couldn’t wait to see how the cedar planets would look on it!
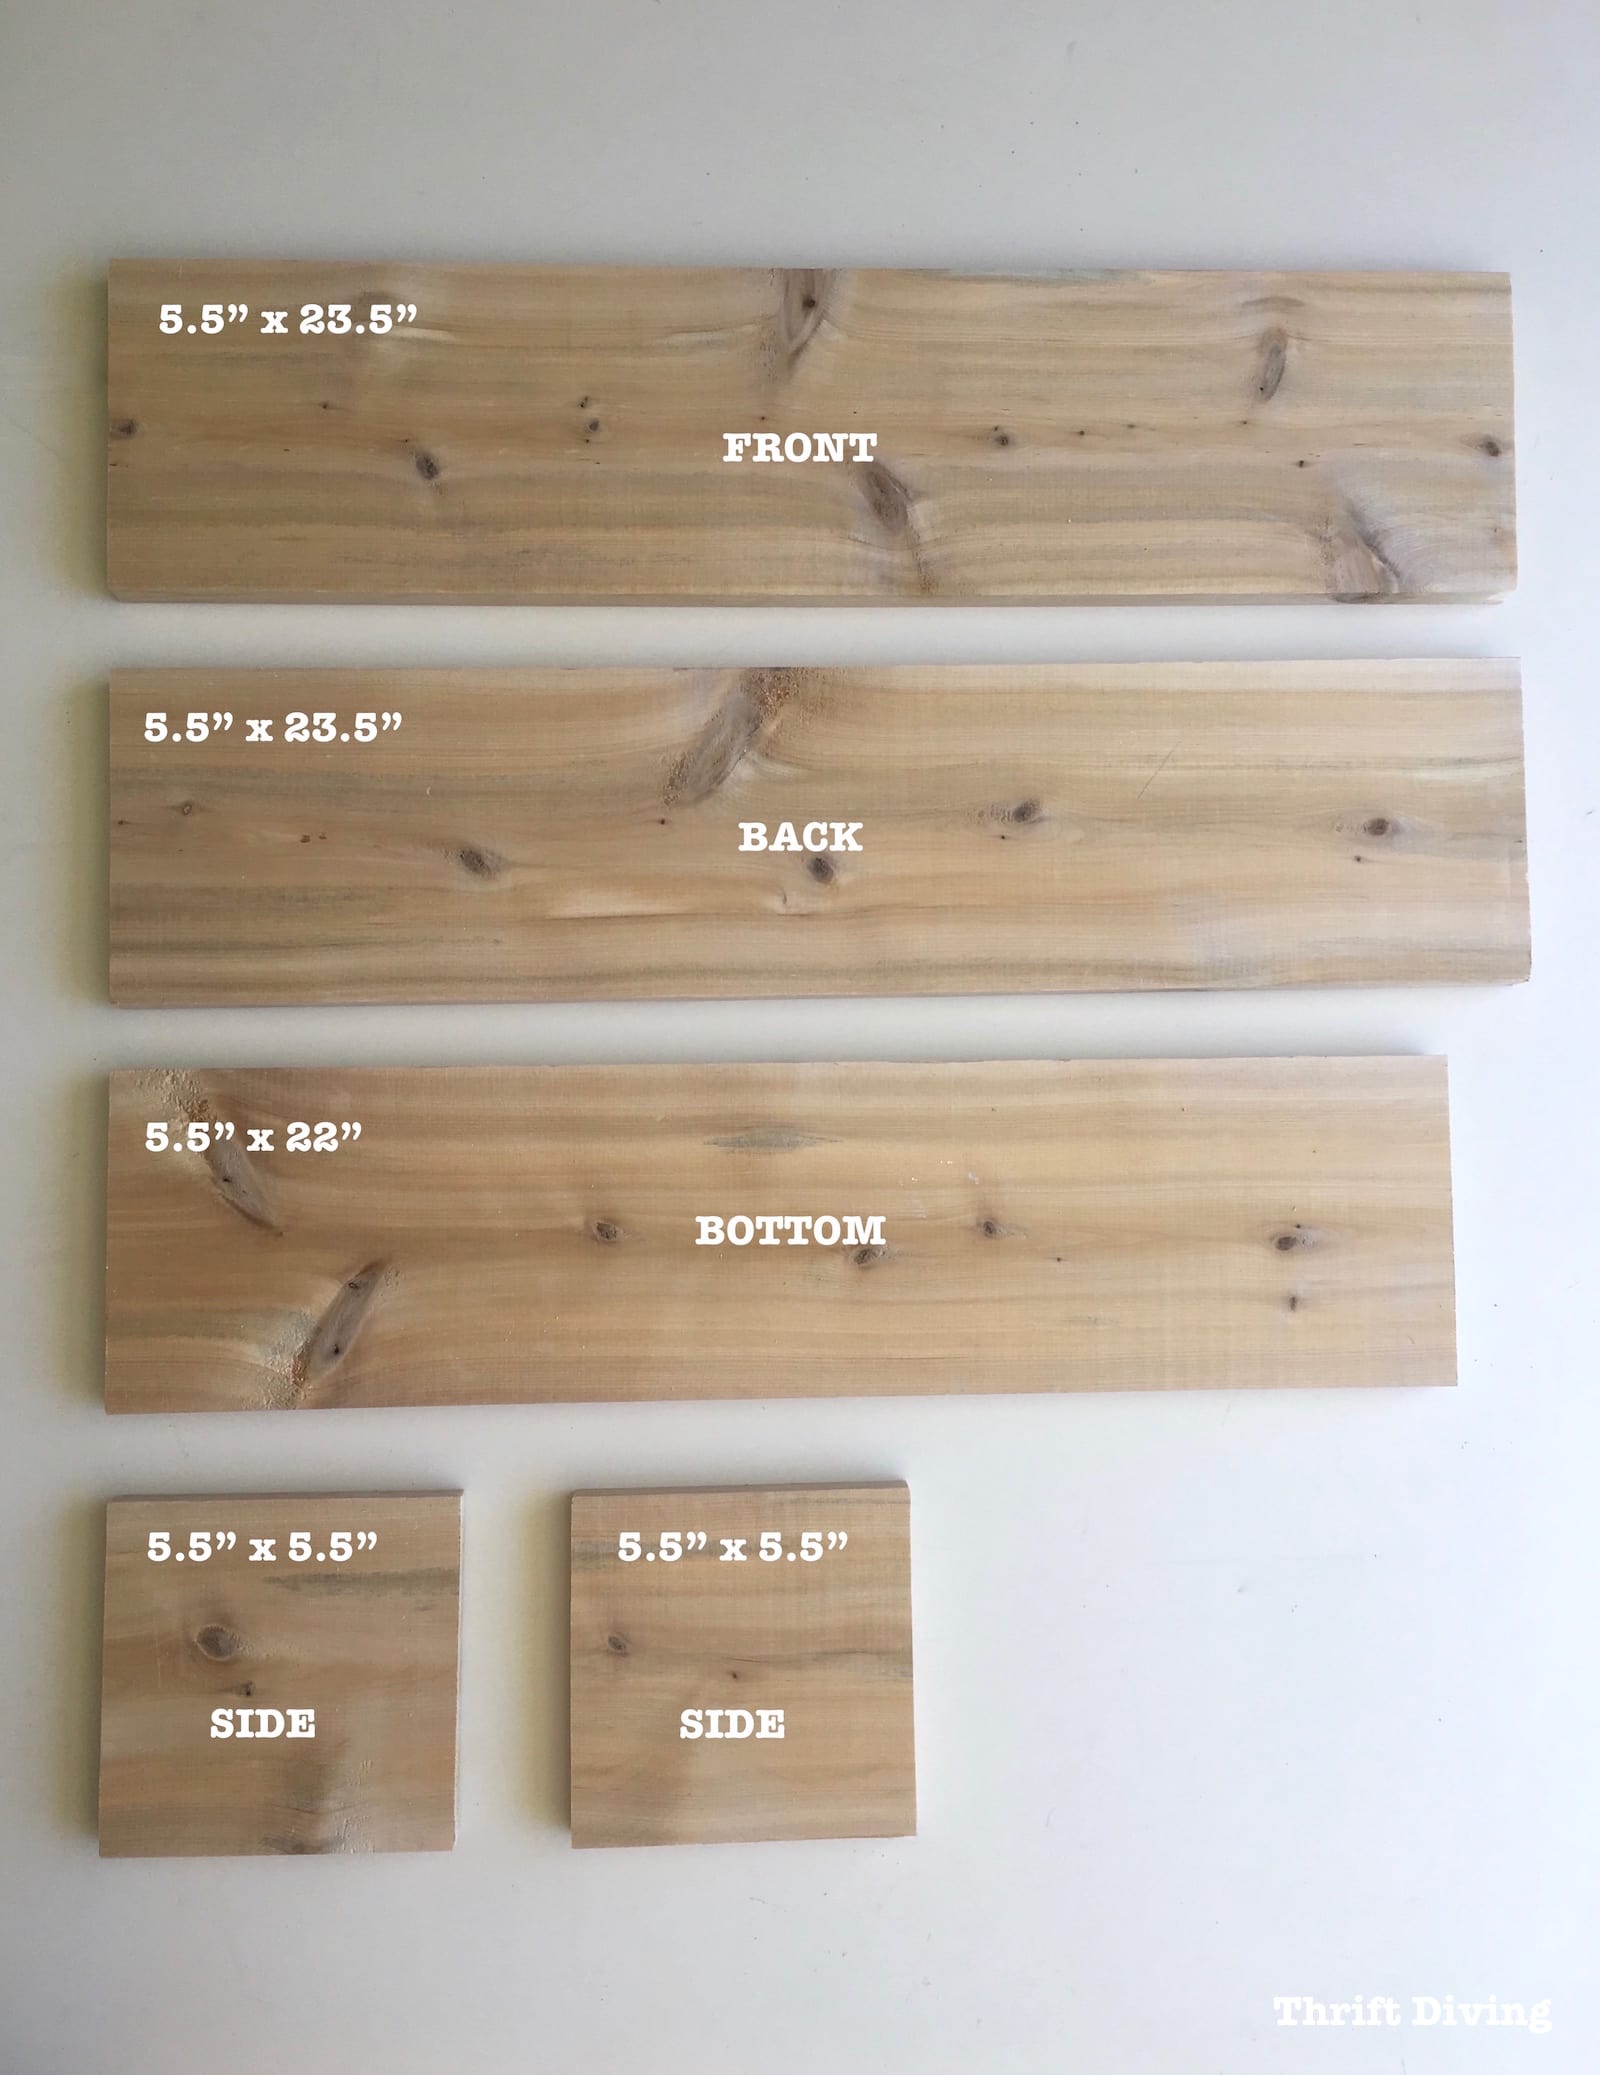
STEP 1: Cut Out Your Cedar Planter Pieces
These are the pieces you’ll need for your planters. I used 1″ x 6″ x 8′ boards.
You should be able to make 1 planter out of one 8-foot board.
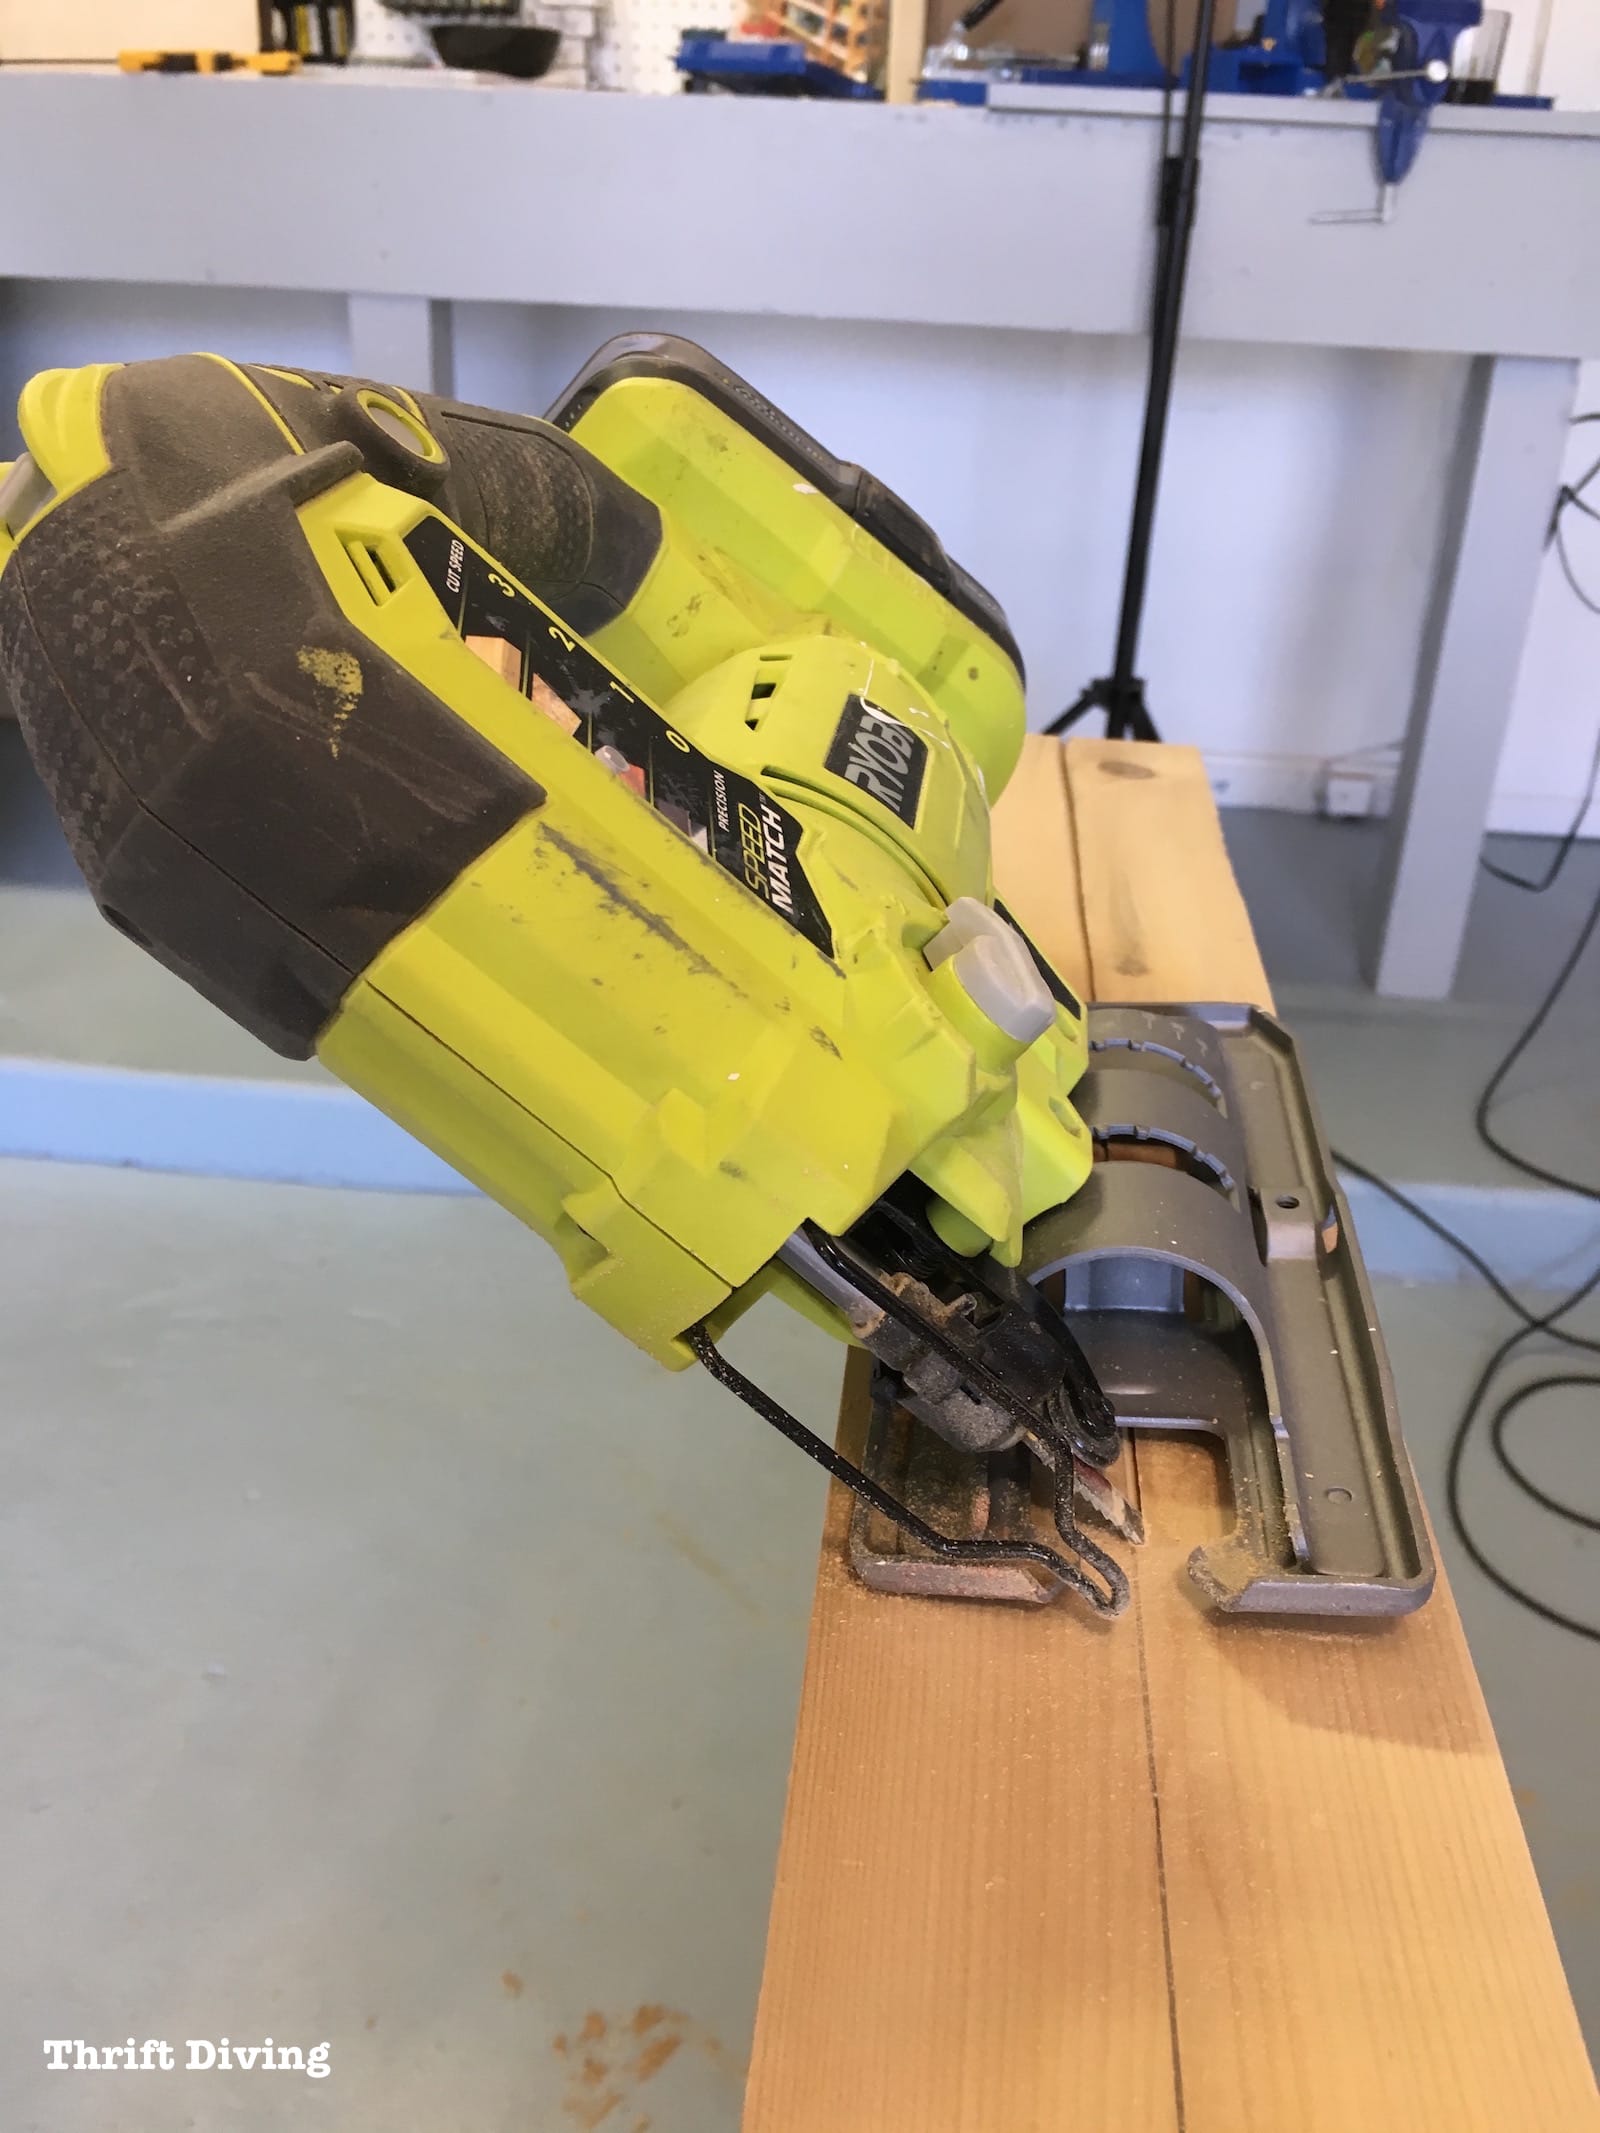
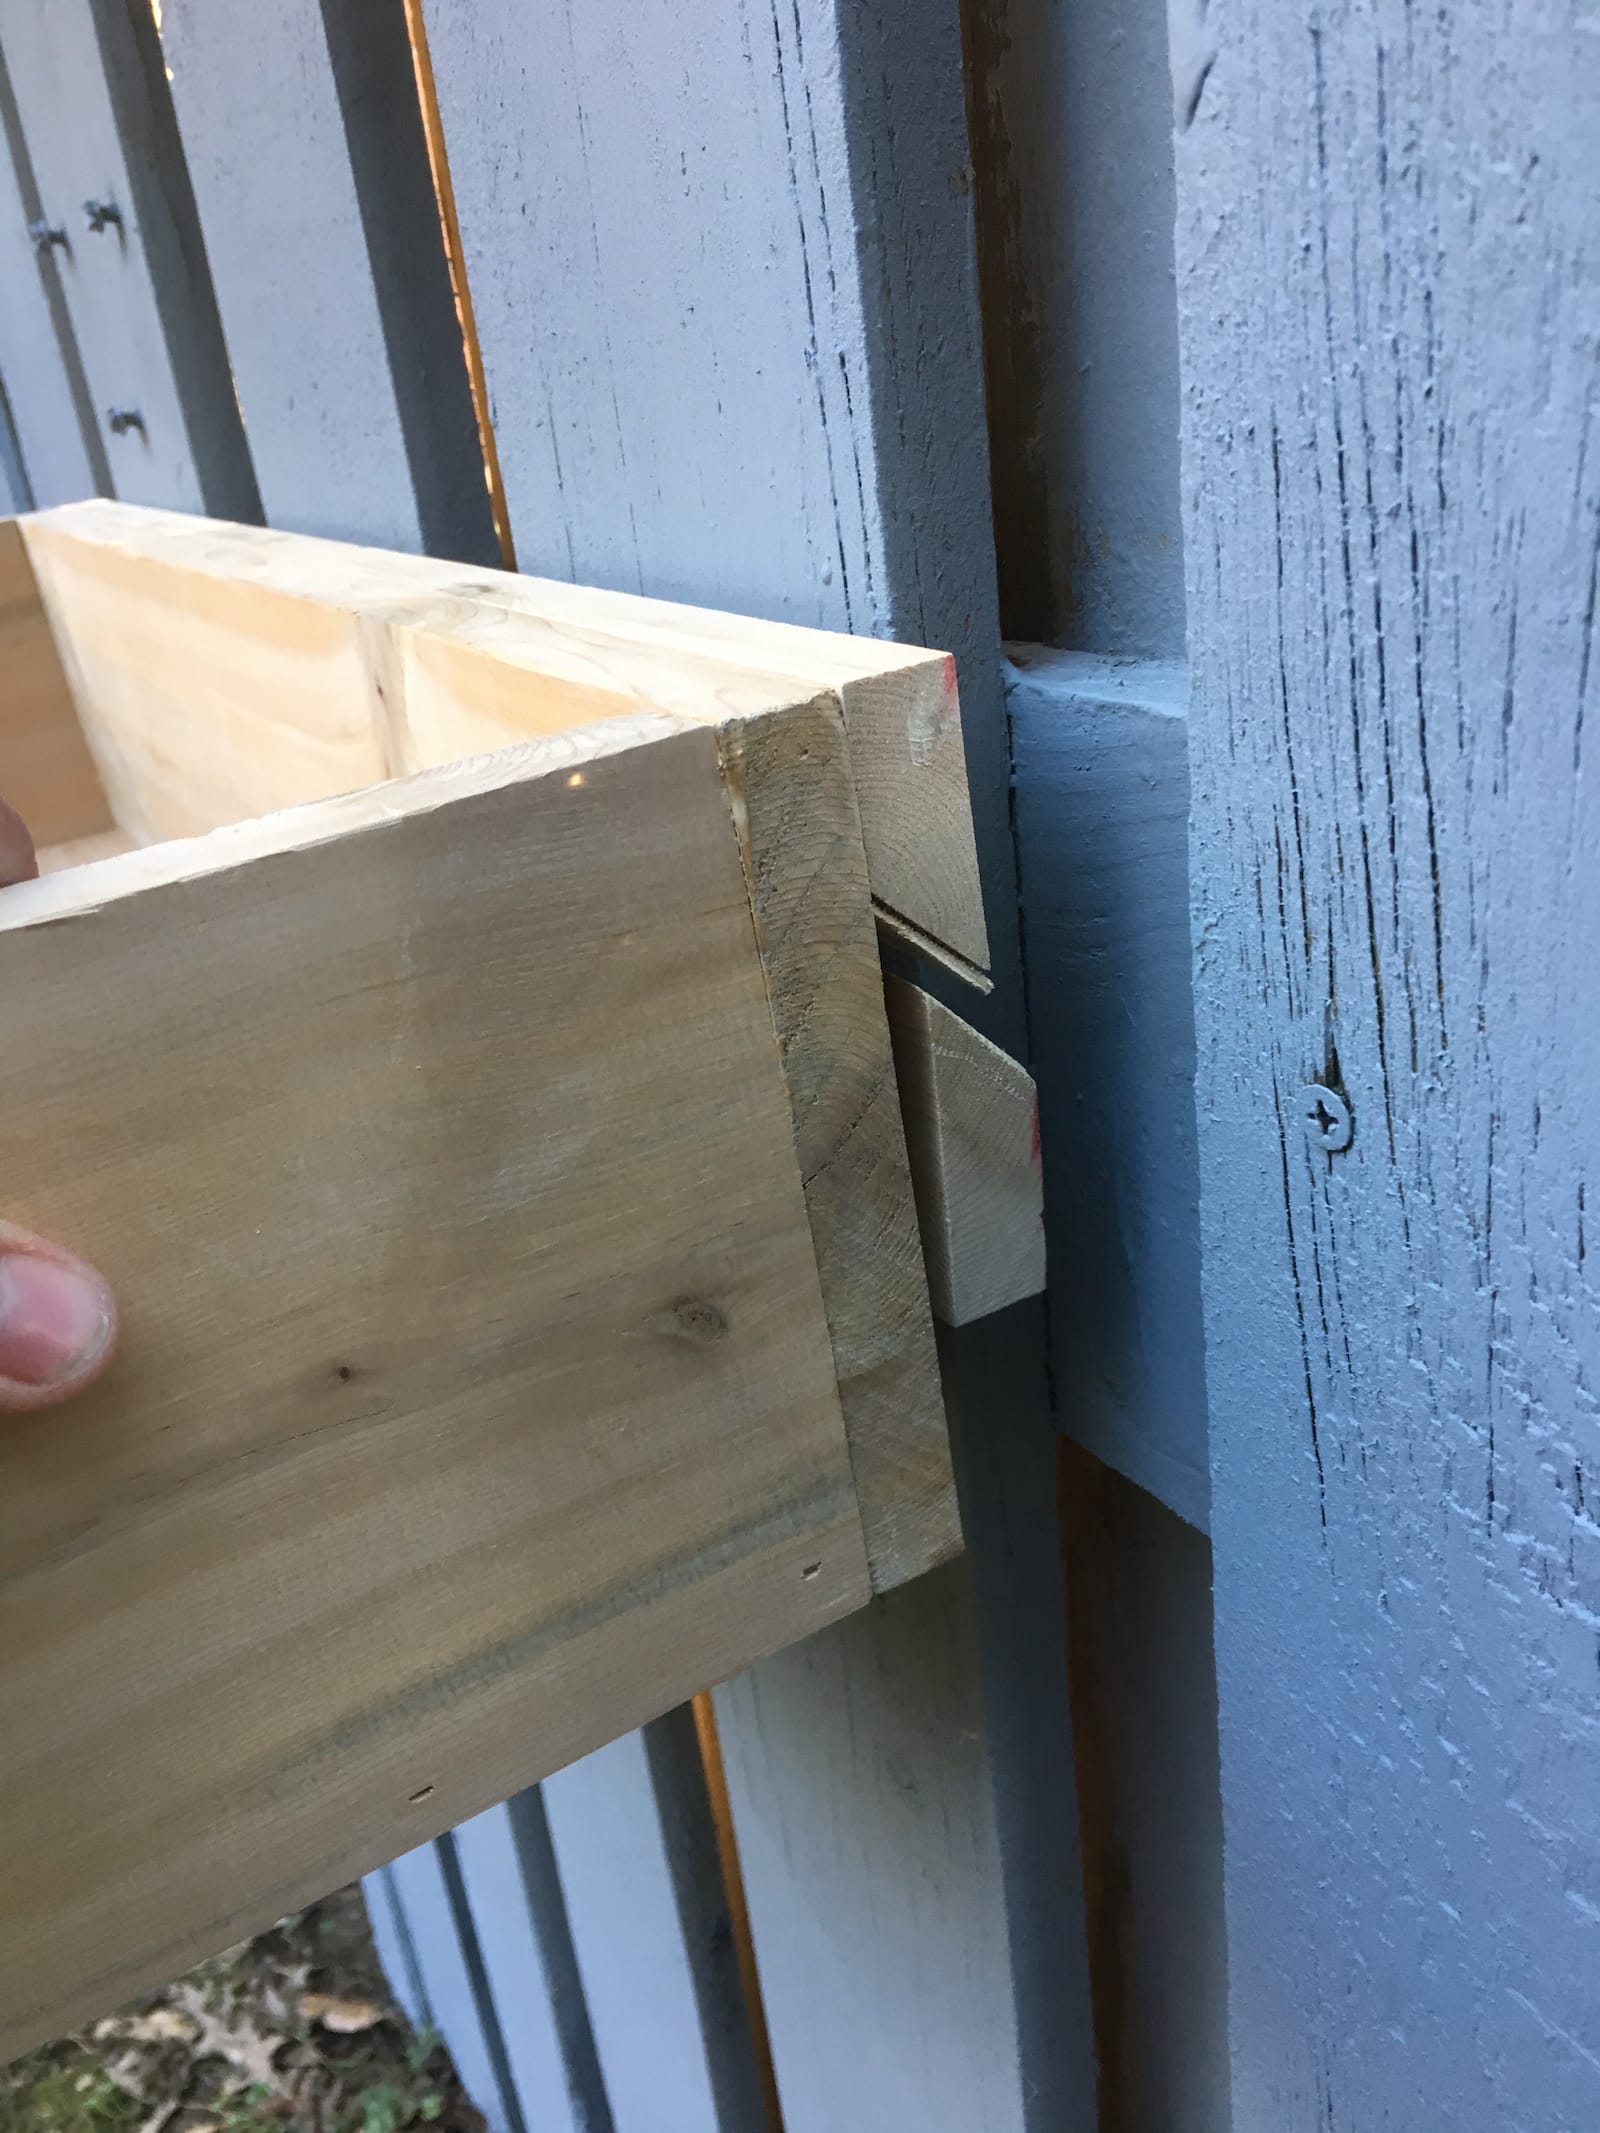
STEP 2: Make Some French Cleats
French cleats are super easy to make. This was actually my first time making them. I was surprised they turned out so well!
This is how we’re going to hang the cedar boxes from the newly painted fence.
But you’ll need an 8-foot 1″ x 4″ board, and you’ll slice it off-center, down the middle, using the jigsaw at a 45-degree angle.
Cut it 23.5″ as long as the back piece of the cedar planter.
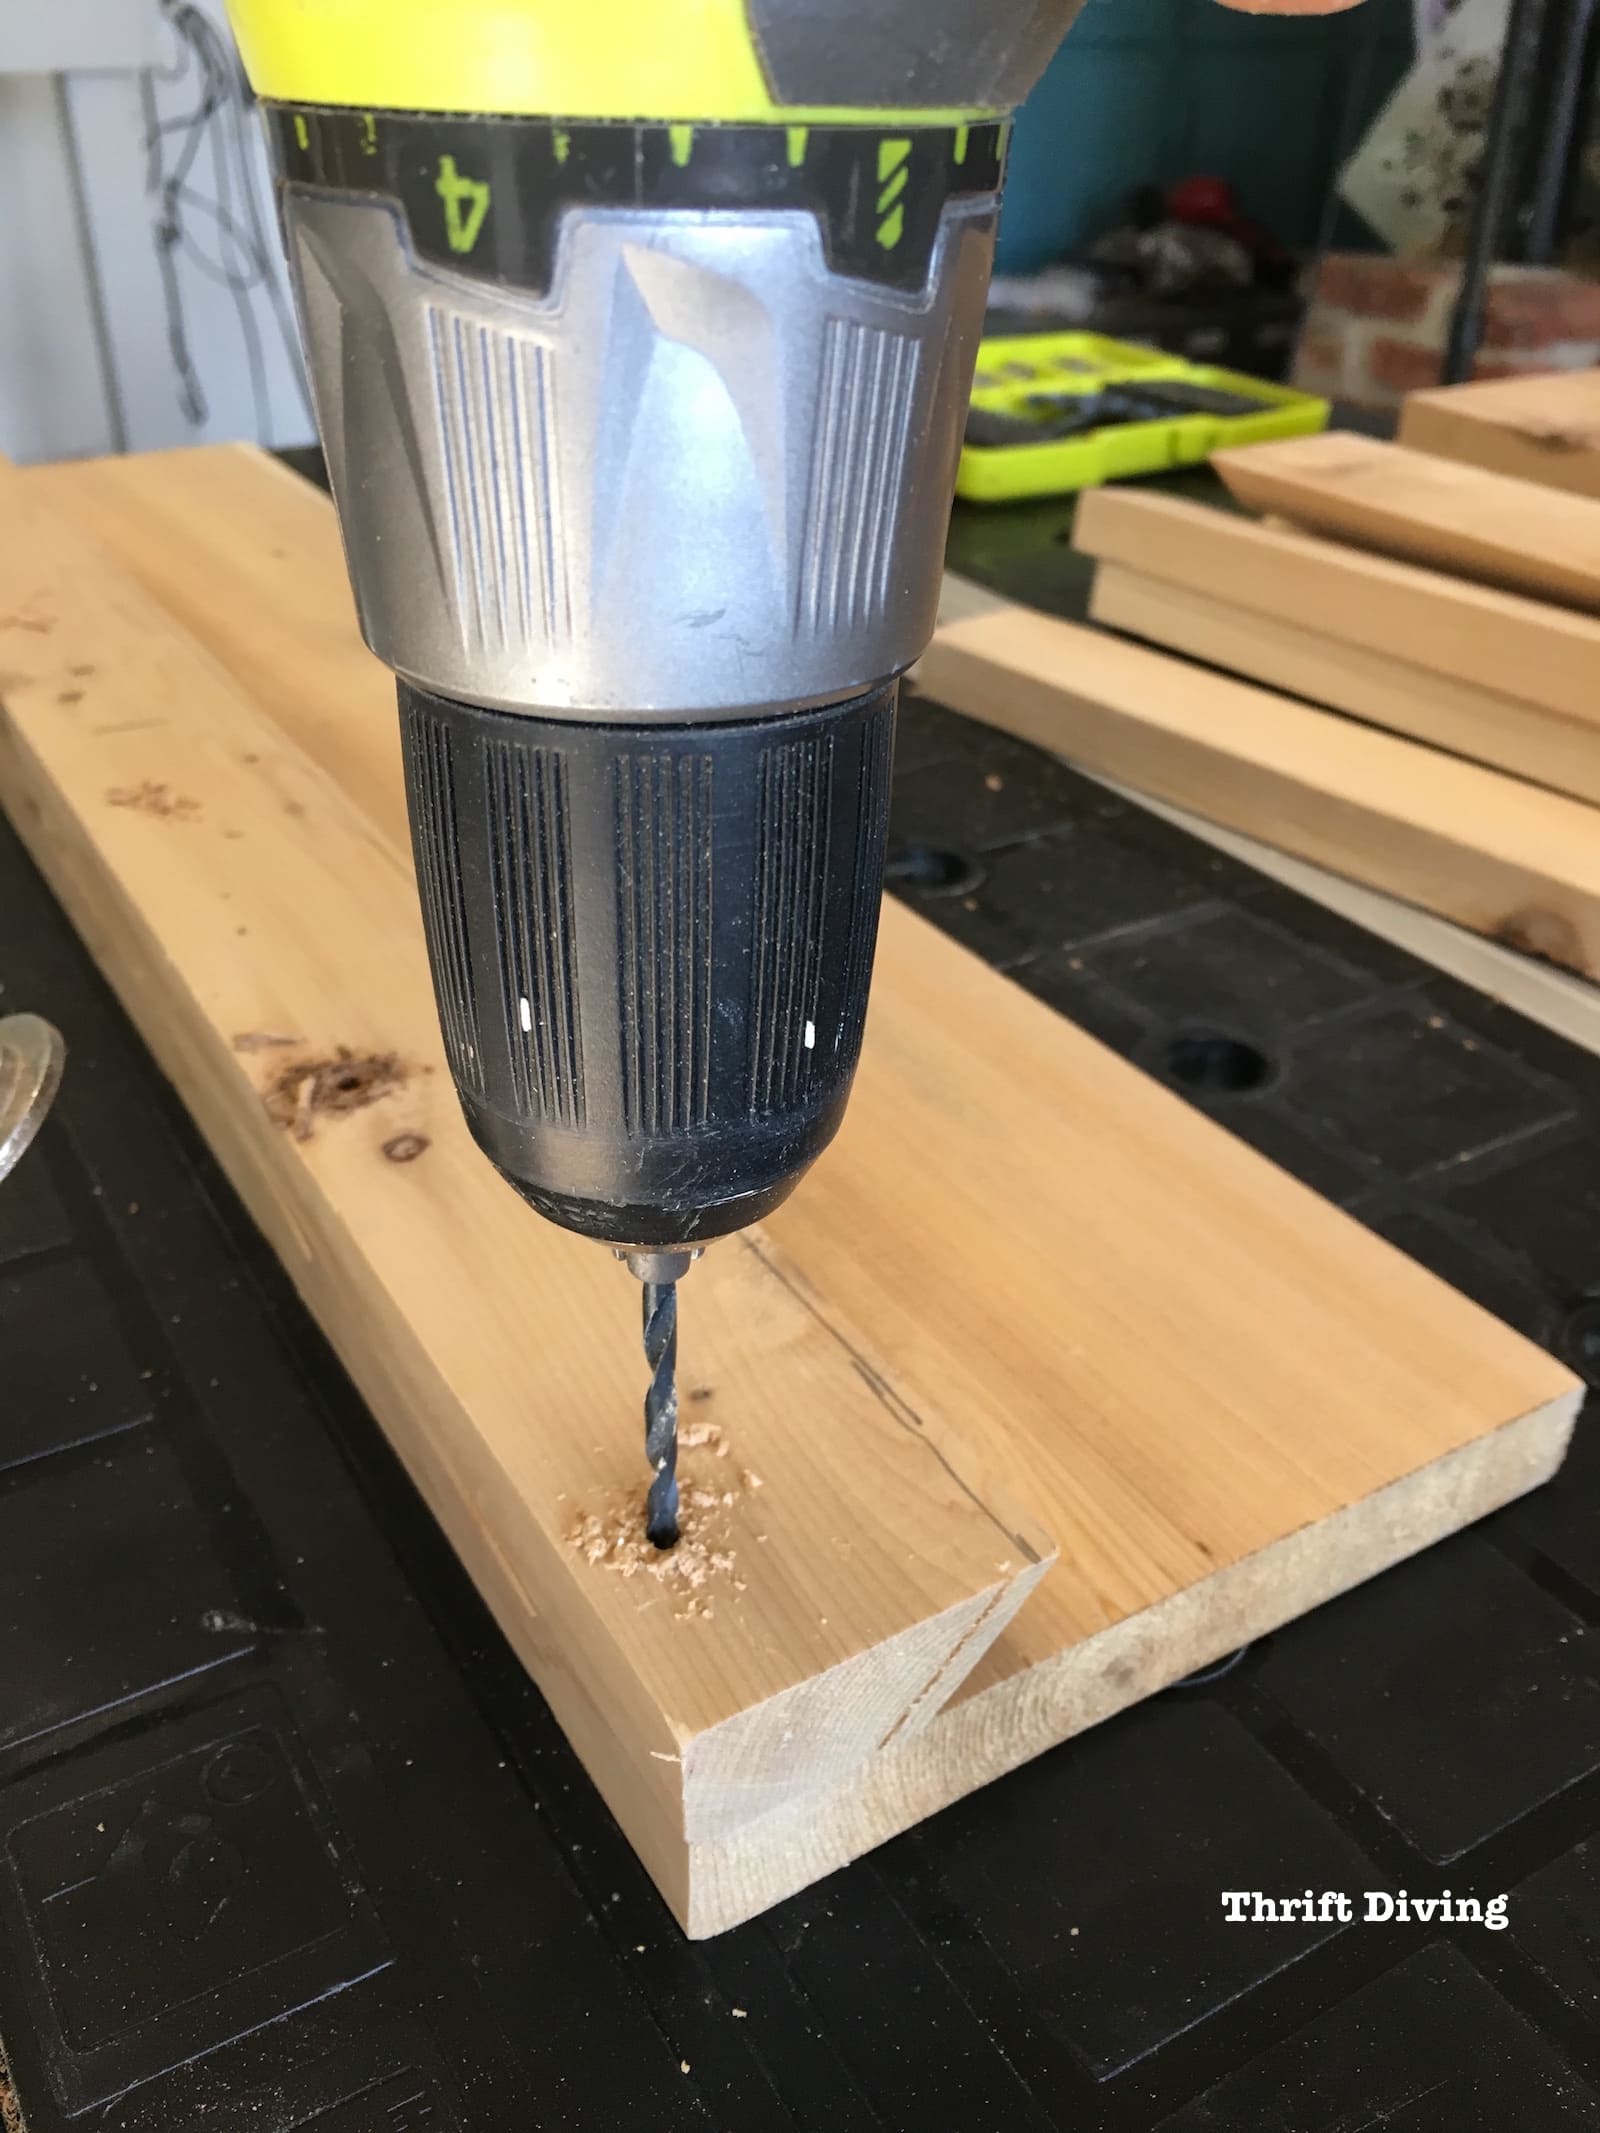
STEP 3: Drill Drainage Holes
These planters will need drainage holes.
I used a 3/8″ drill bit, making sure that I had a board underneath when drilling to prevent tear-out on the under side.

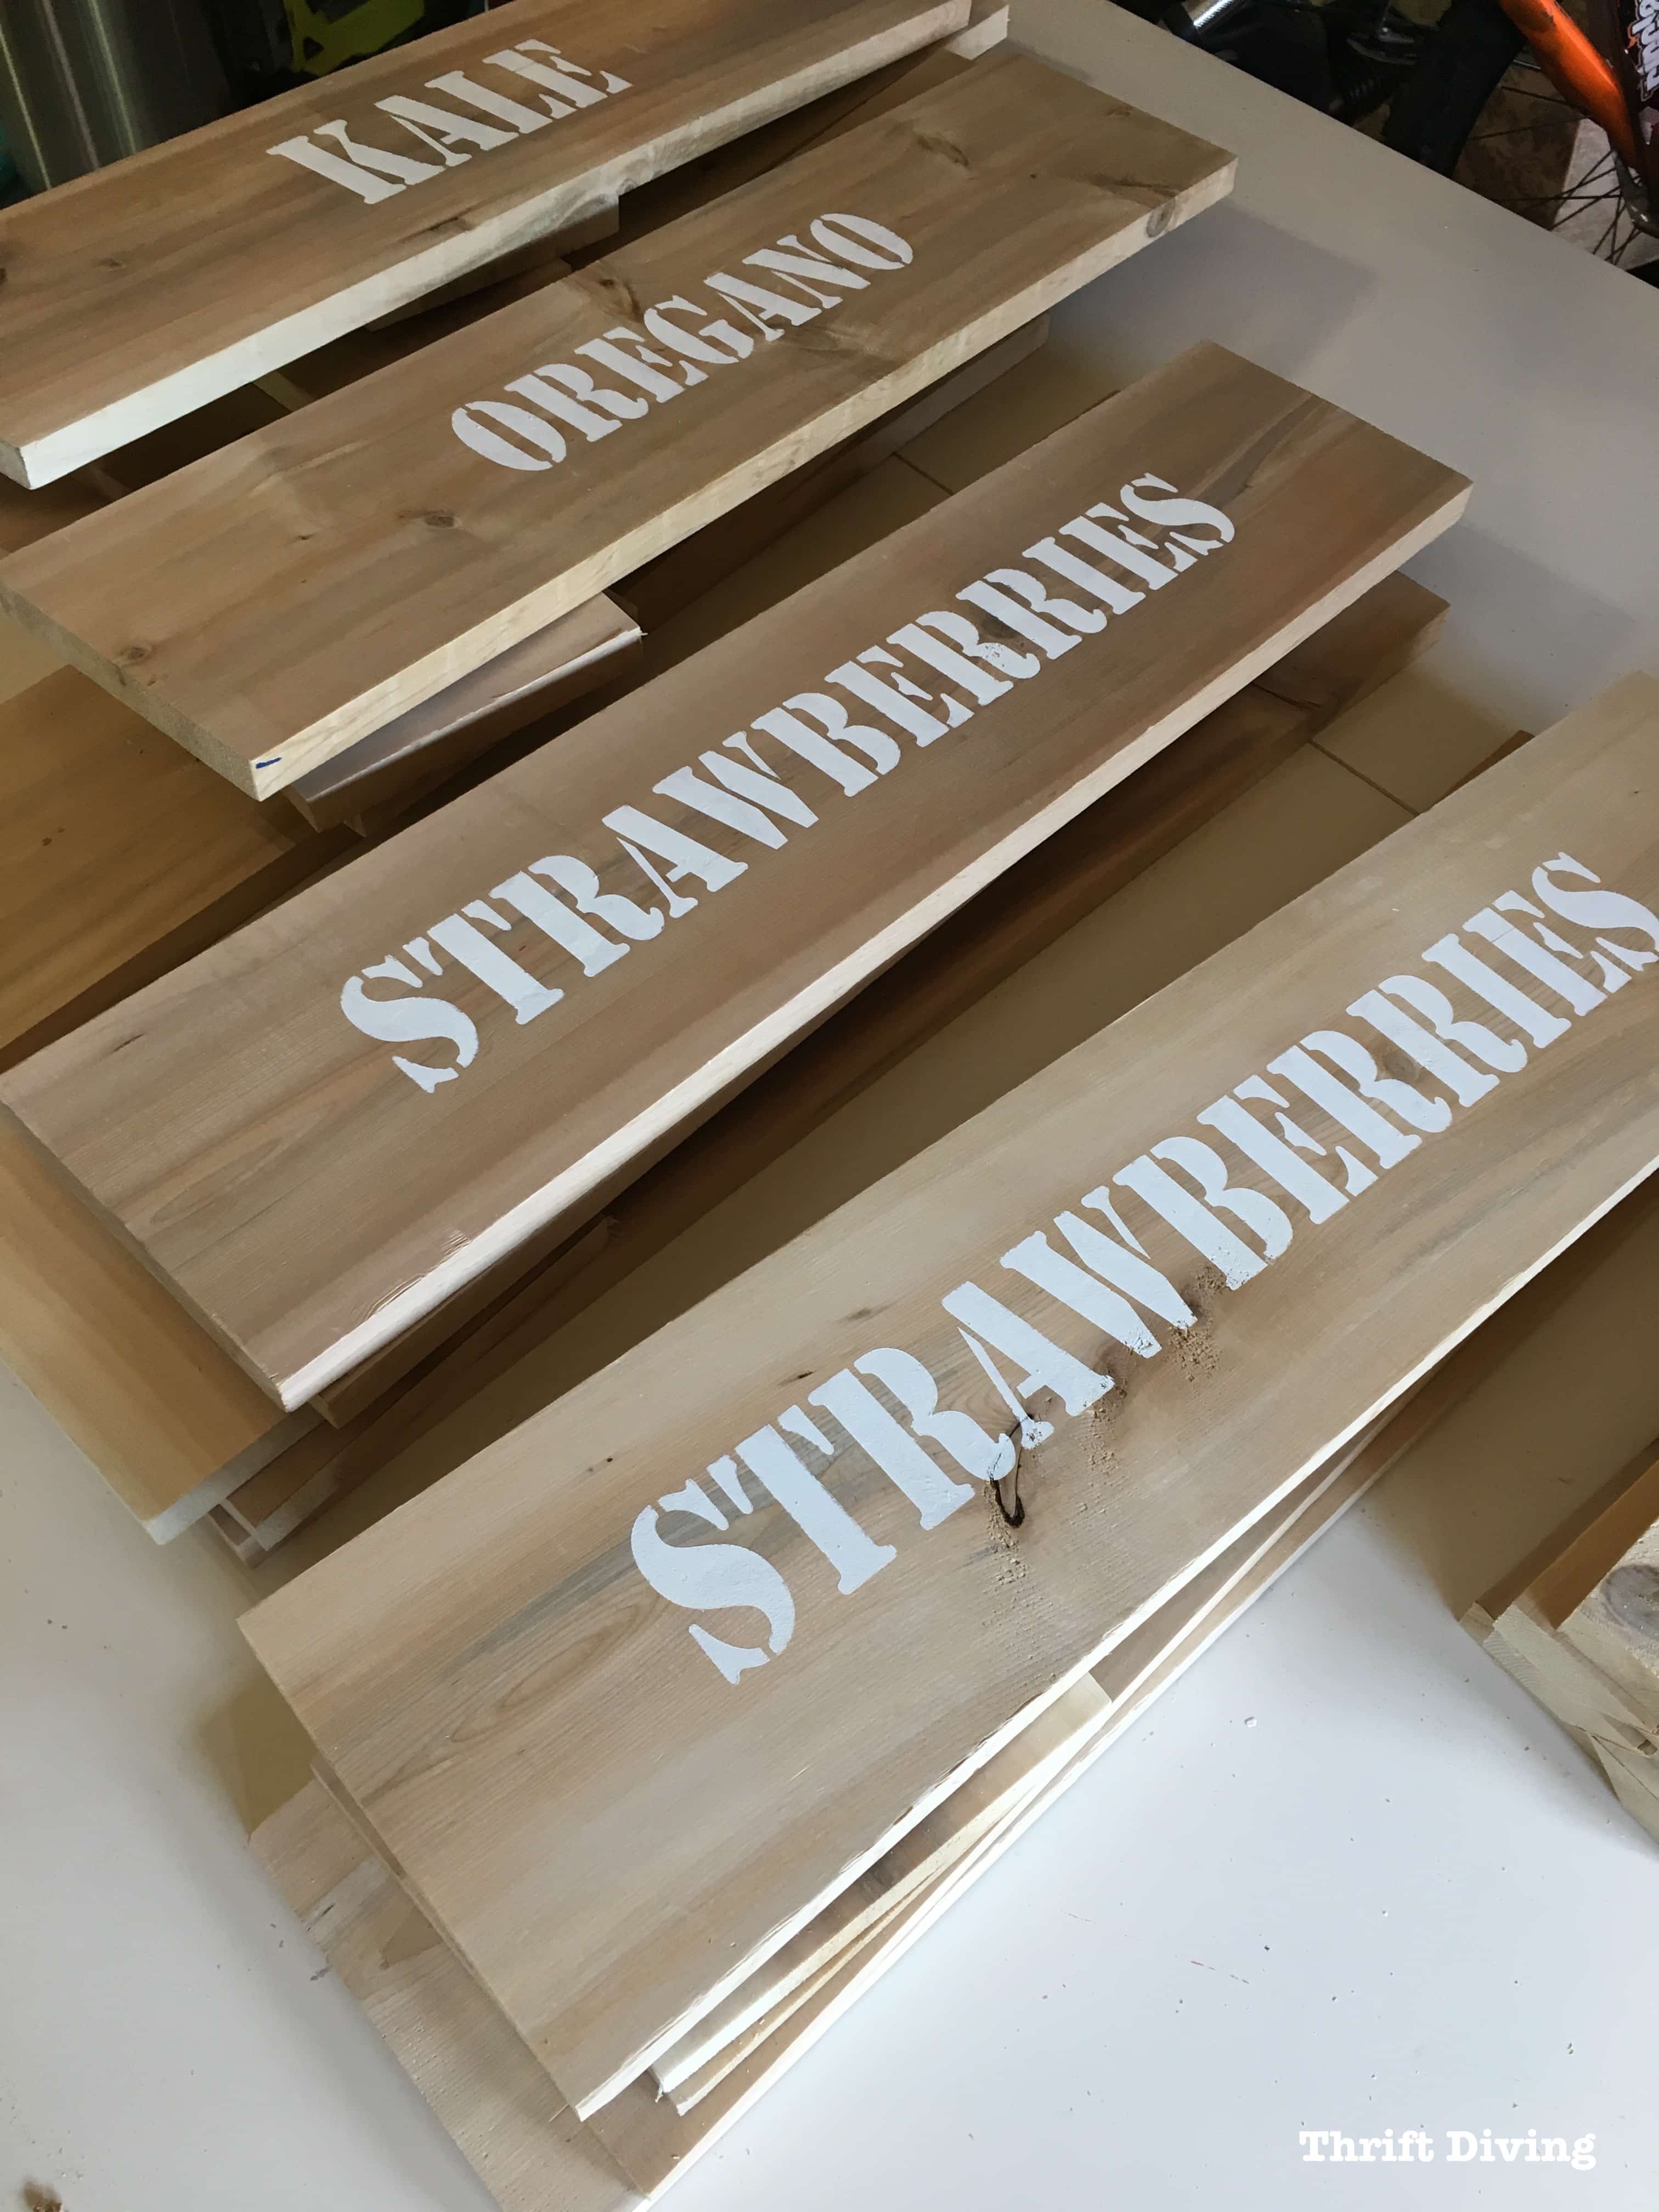
STEP 4: Stencil the Front
I wanted some cute stencils on the front, so I used my cutting machine to make stencils. I used some off-white chalked paint.
(RESOURCE: Check out this great post on How to Use Stencils: A Complete Guide).

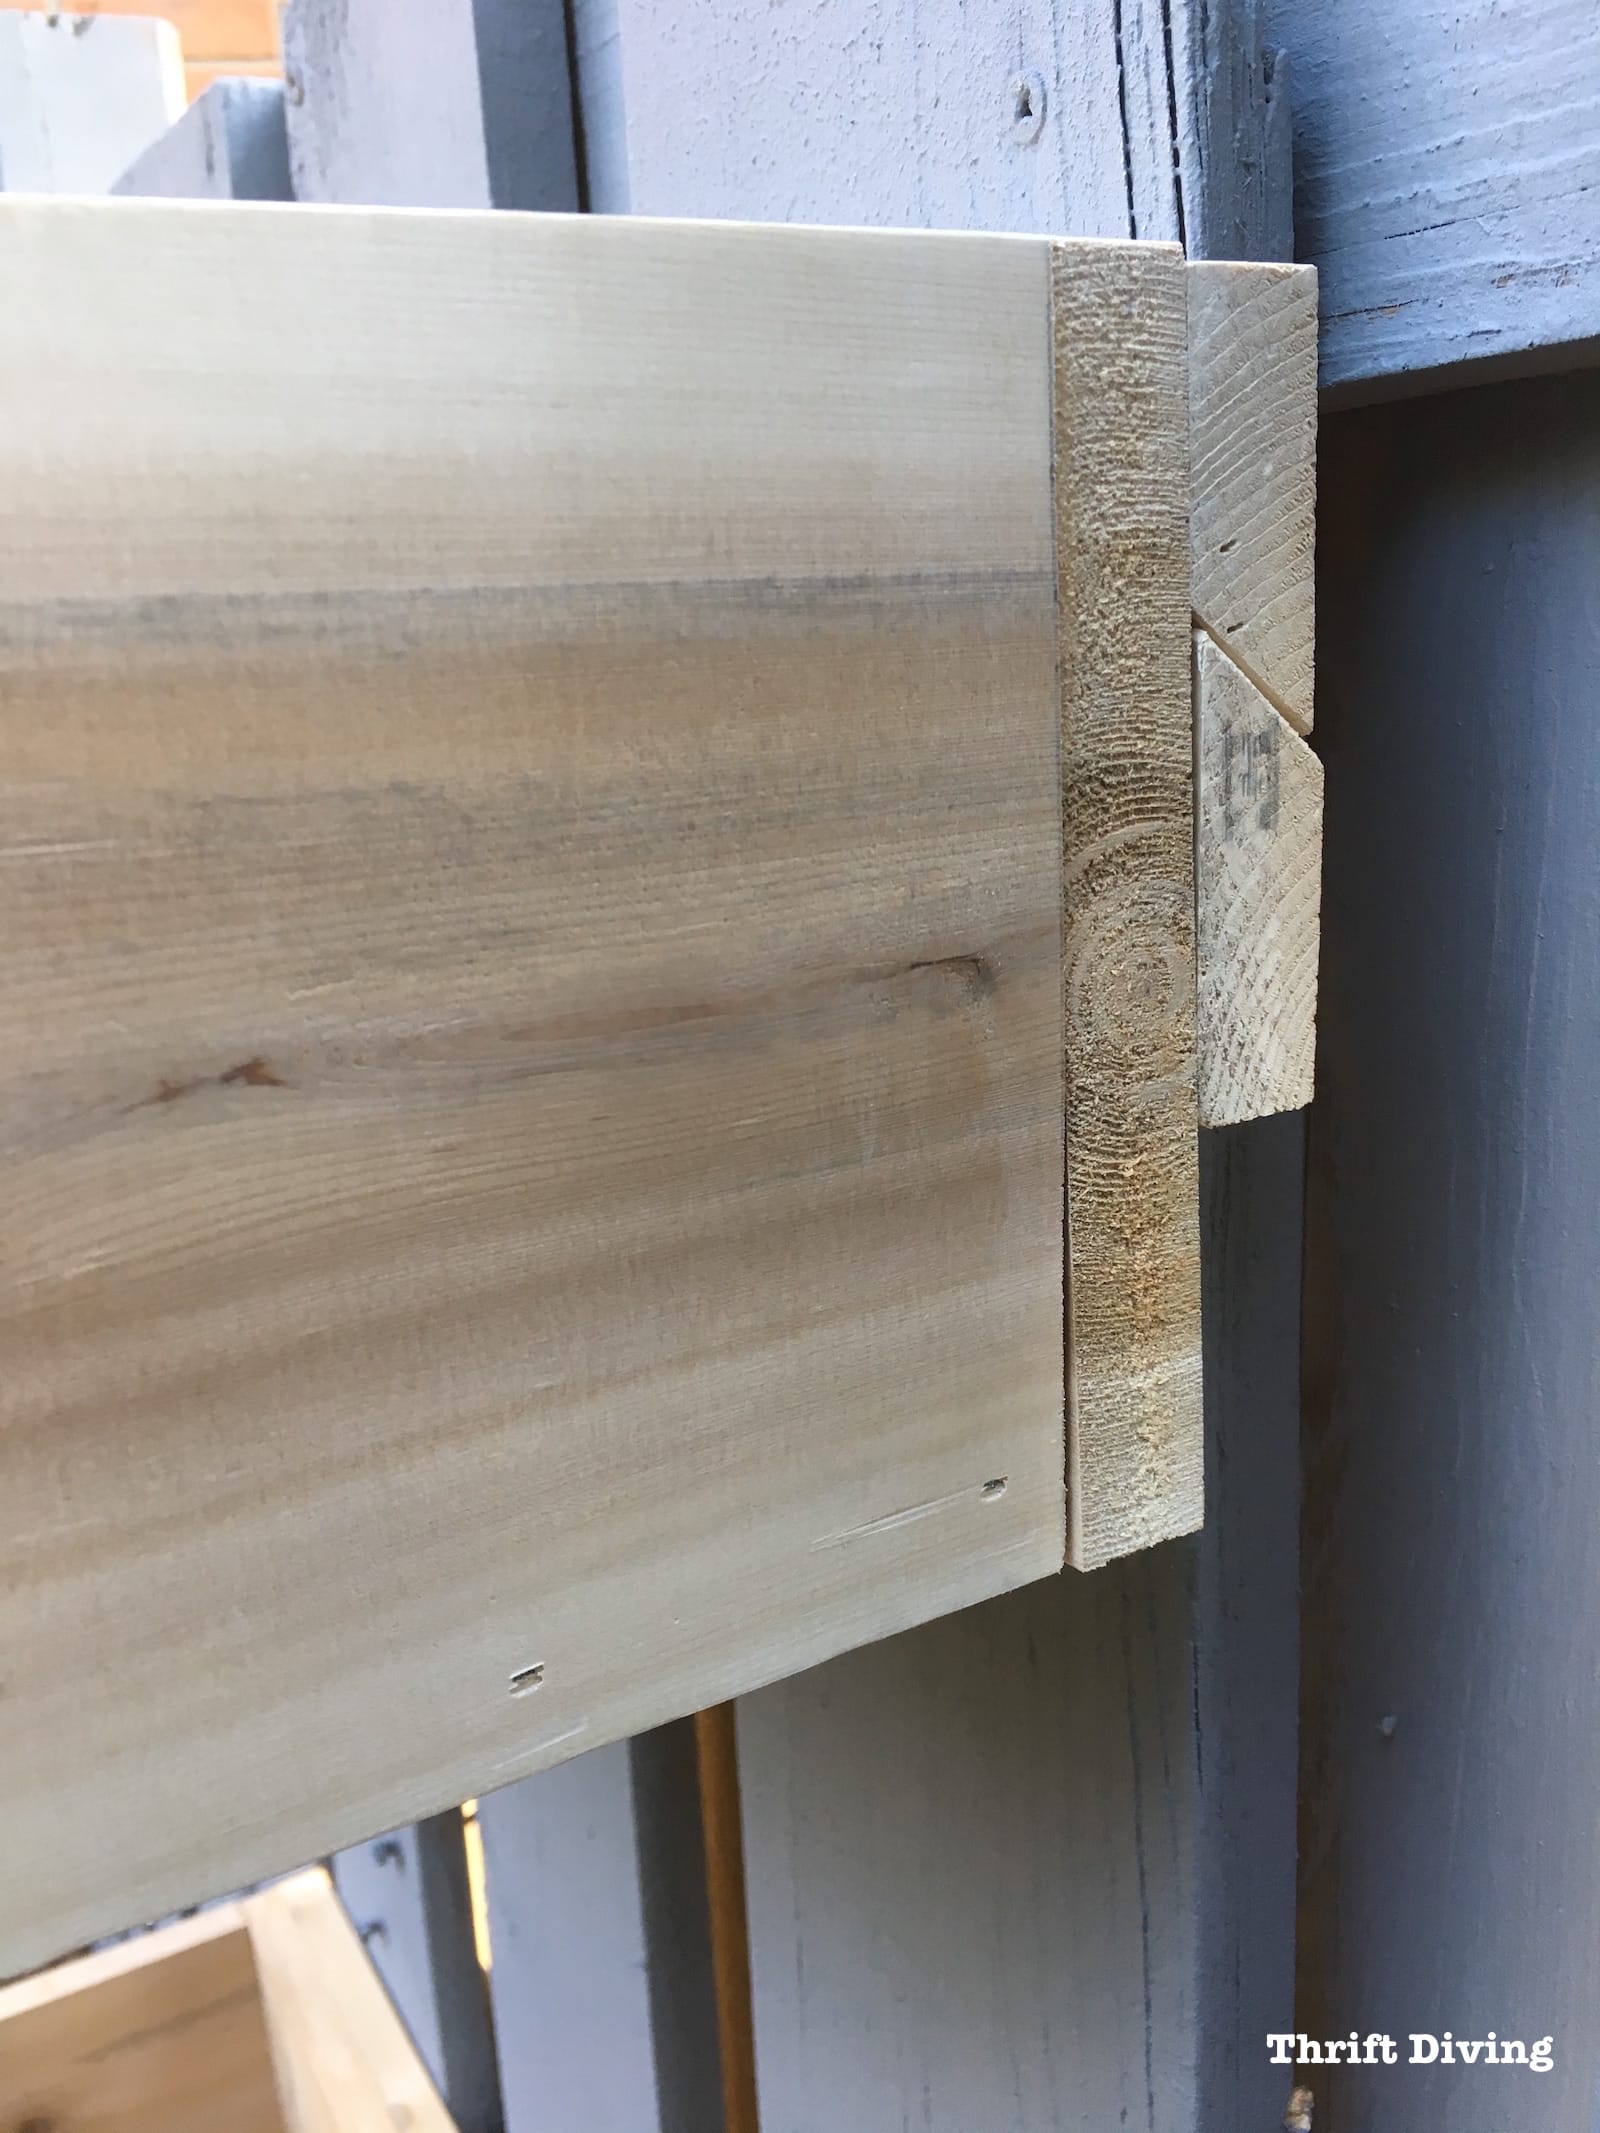
STEP 5: Attach the French Cleat to the French
Now that the stencils are dried, it’s time to attach the French cleat to the back piece of the cedar planter.
Here’s the thing: you must drill pilot holes!
Without pilot holes, your cedar will simply crack in half.
I drilled about 6-7 pilot holes with a 9/64″ drill bit all along the back, which worked fine.
Once the pilot holes were drilled, I could drive the 1-1/4″ exterior screws with no problem!
No cracking! 🙂

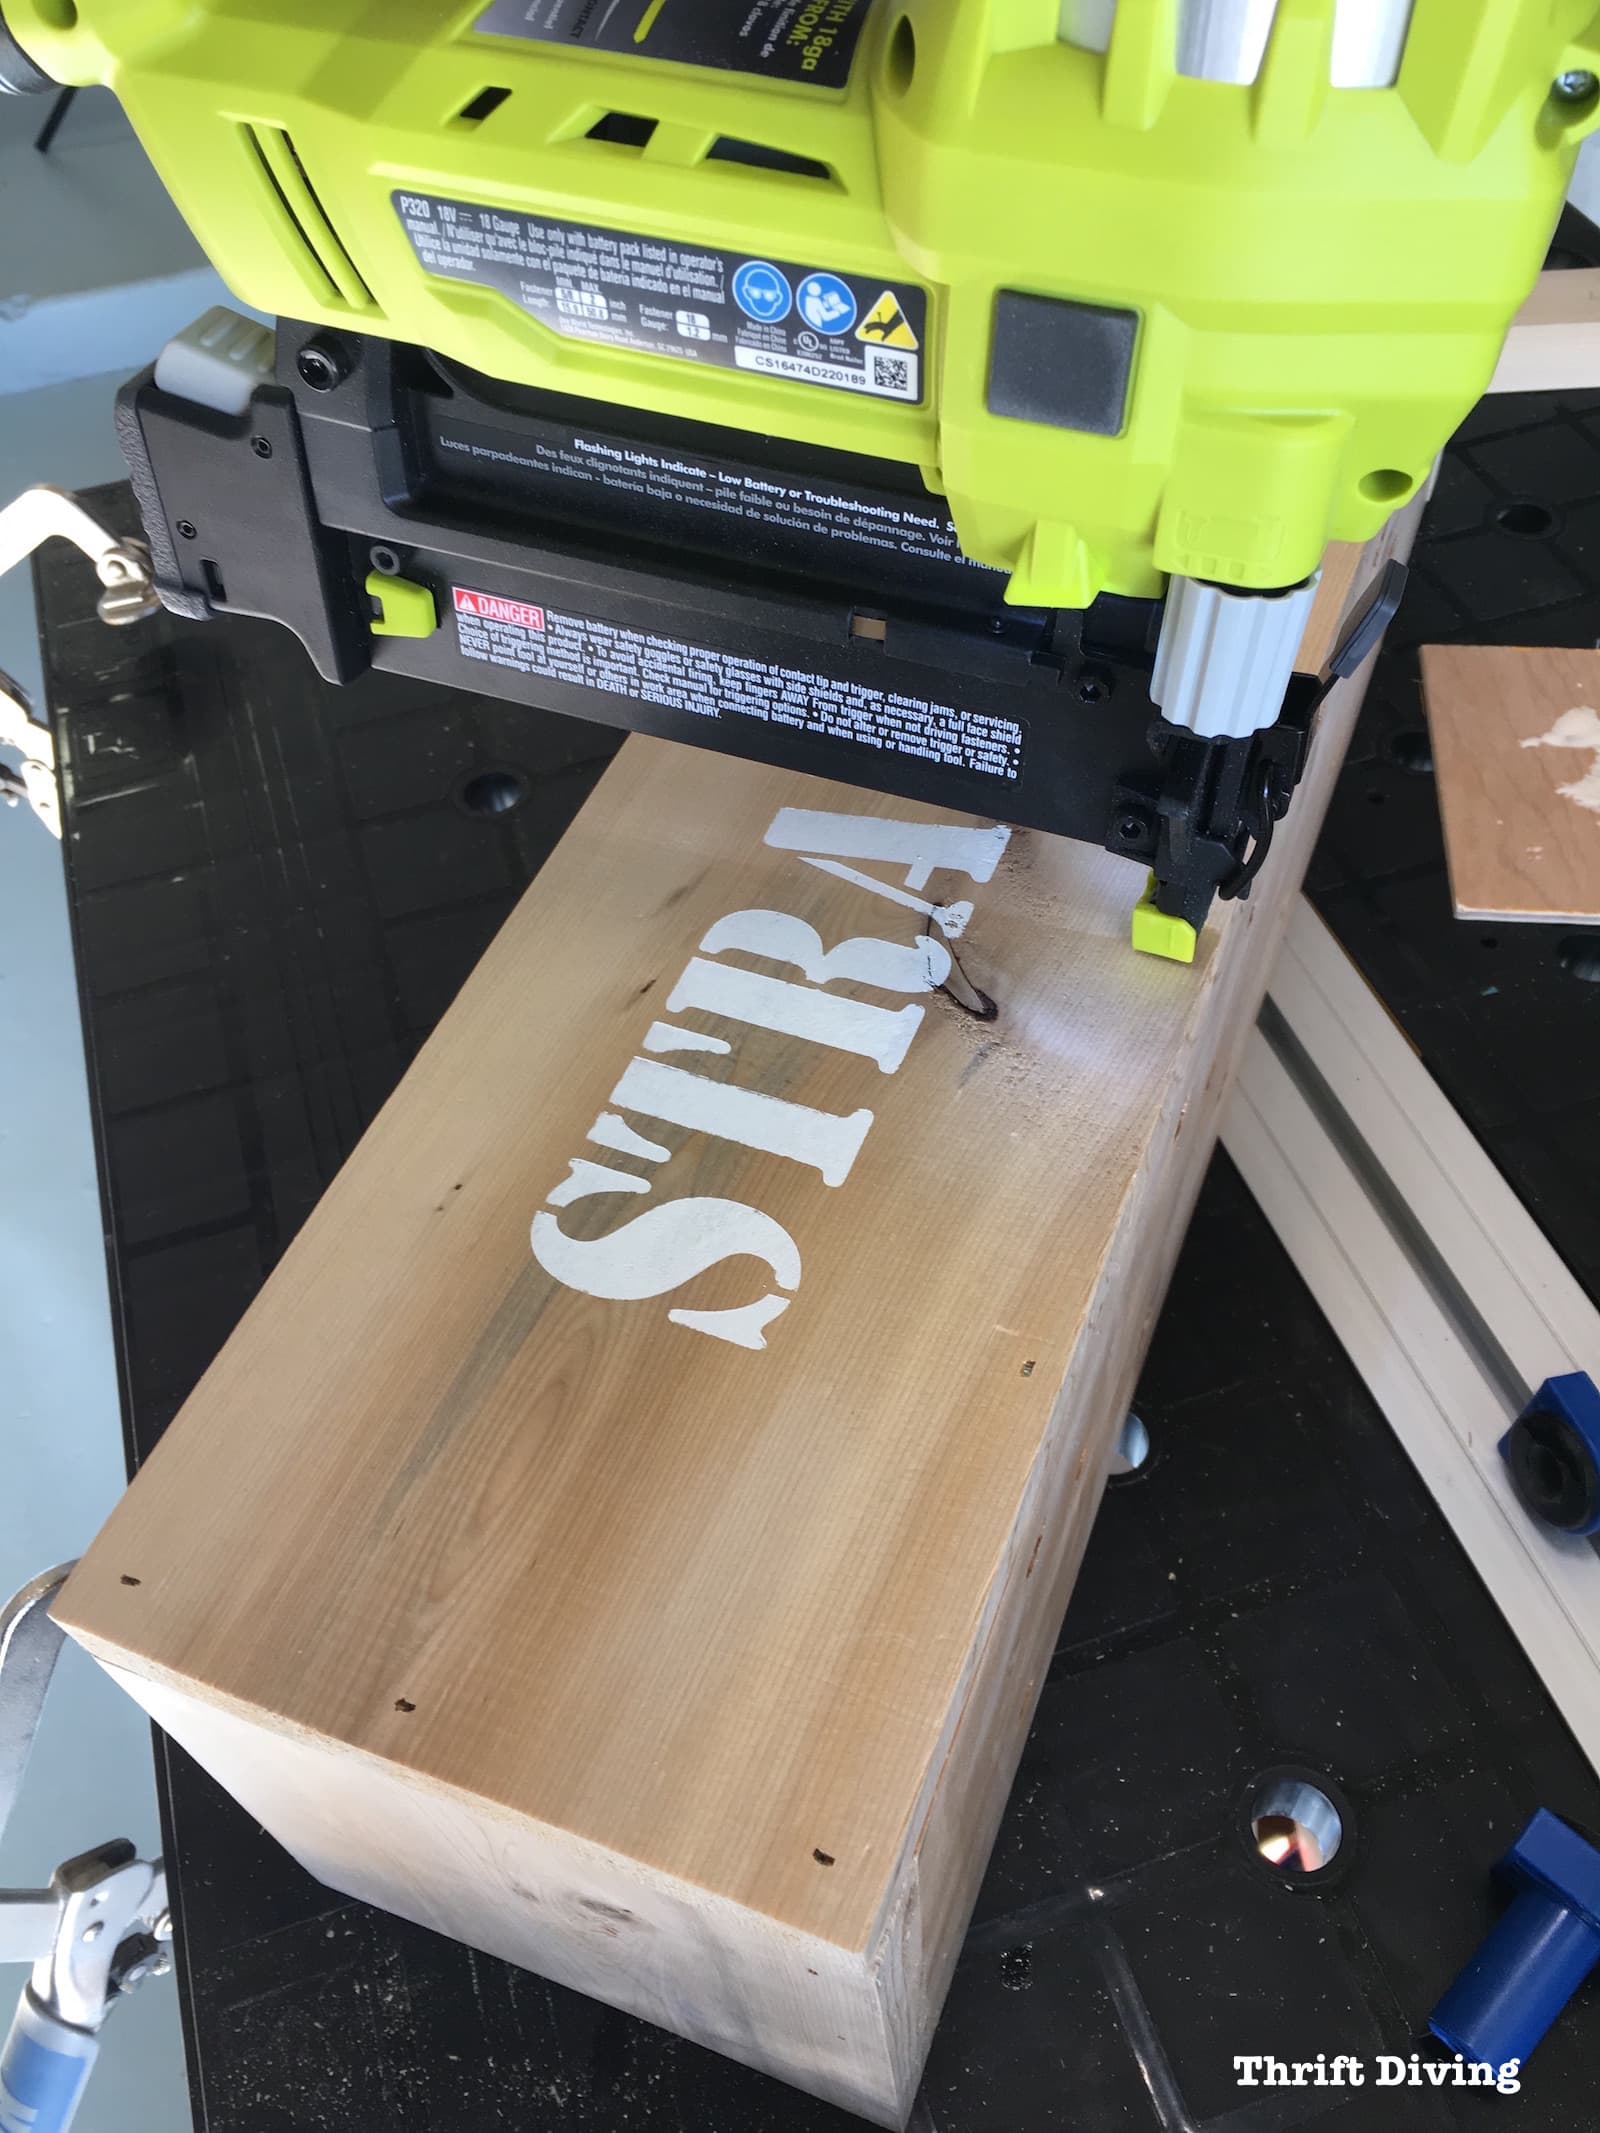
STEP 6: Glue and Nail It All Together
Finally, you can glue and nail the cedar planters together!
If you don’t have a nailer, don’t sweat it. Just glue and clamp your cedar boxes together using wood glue (make sure it’s a variety that says “Exterior” on it).
I used my nailer in addition to the glue because it’s faster.
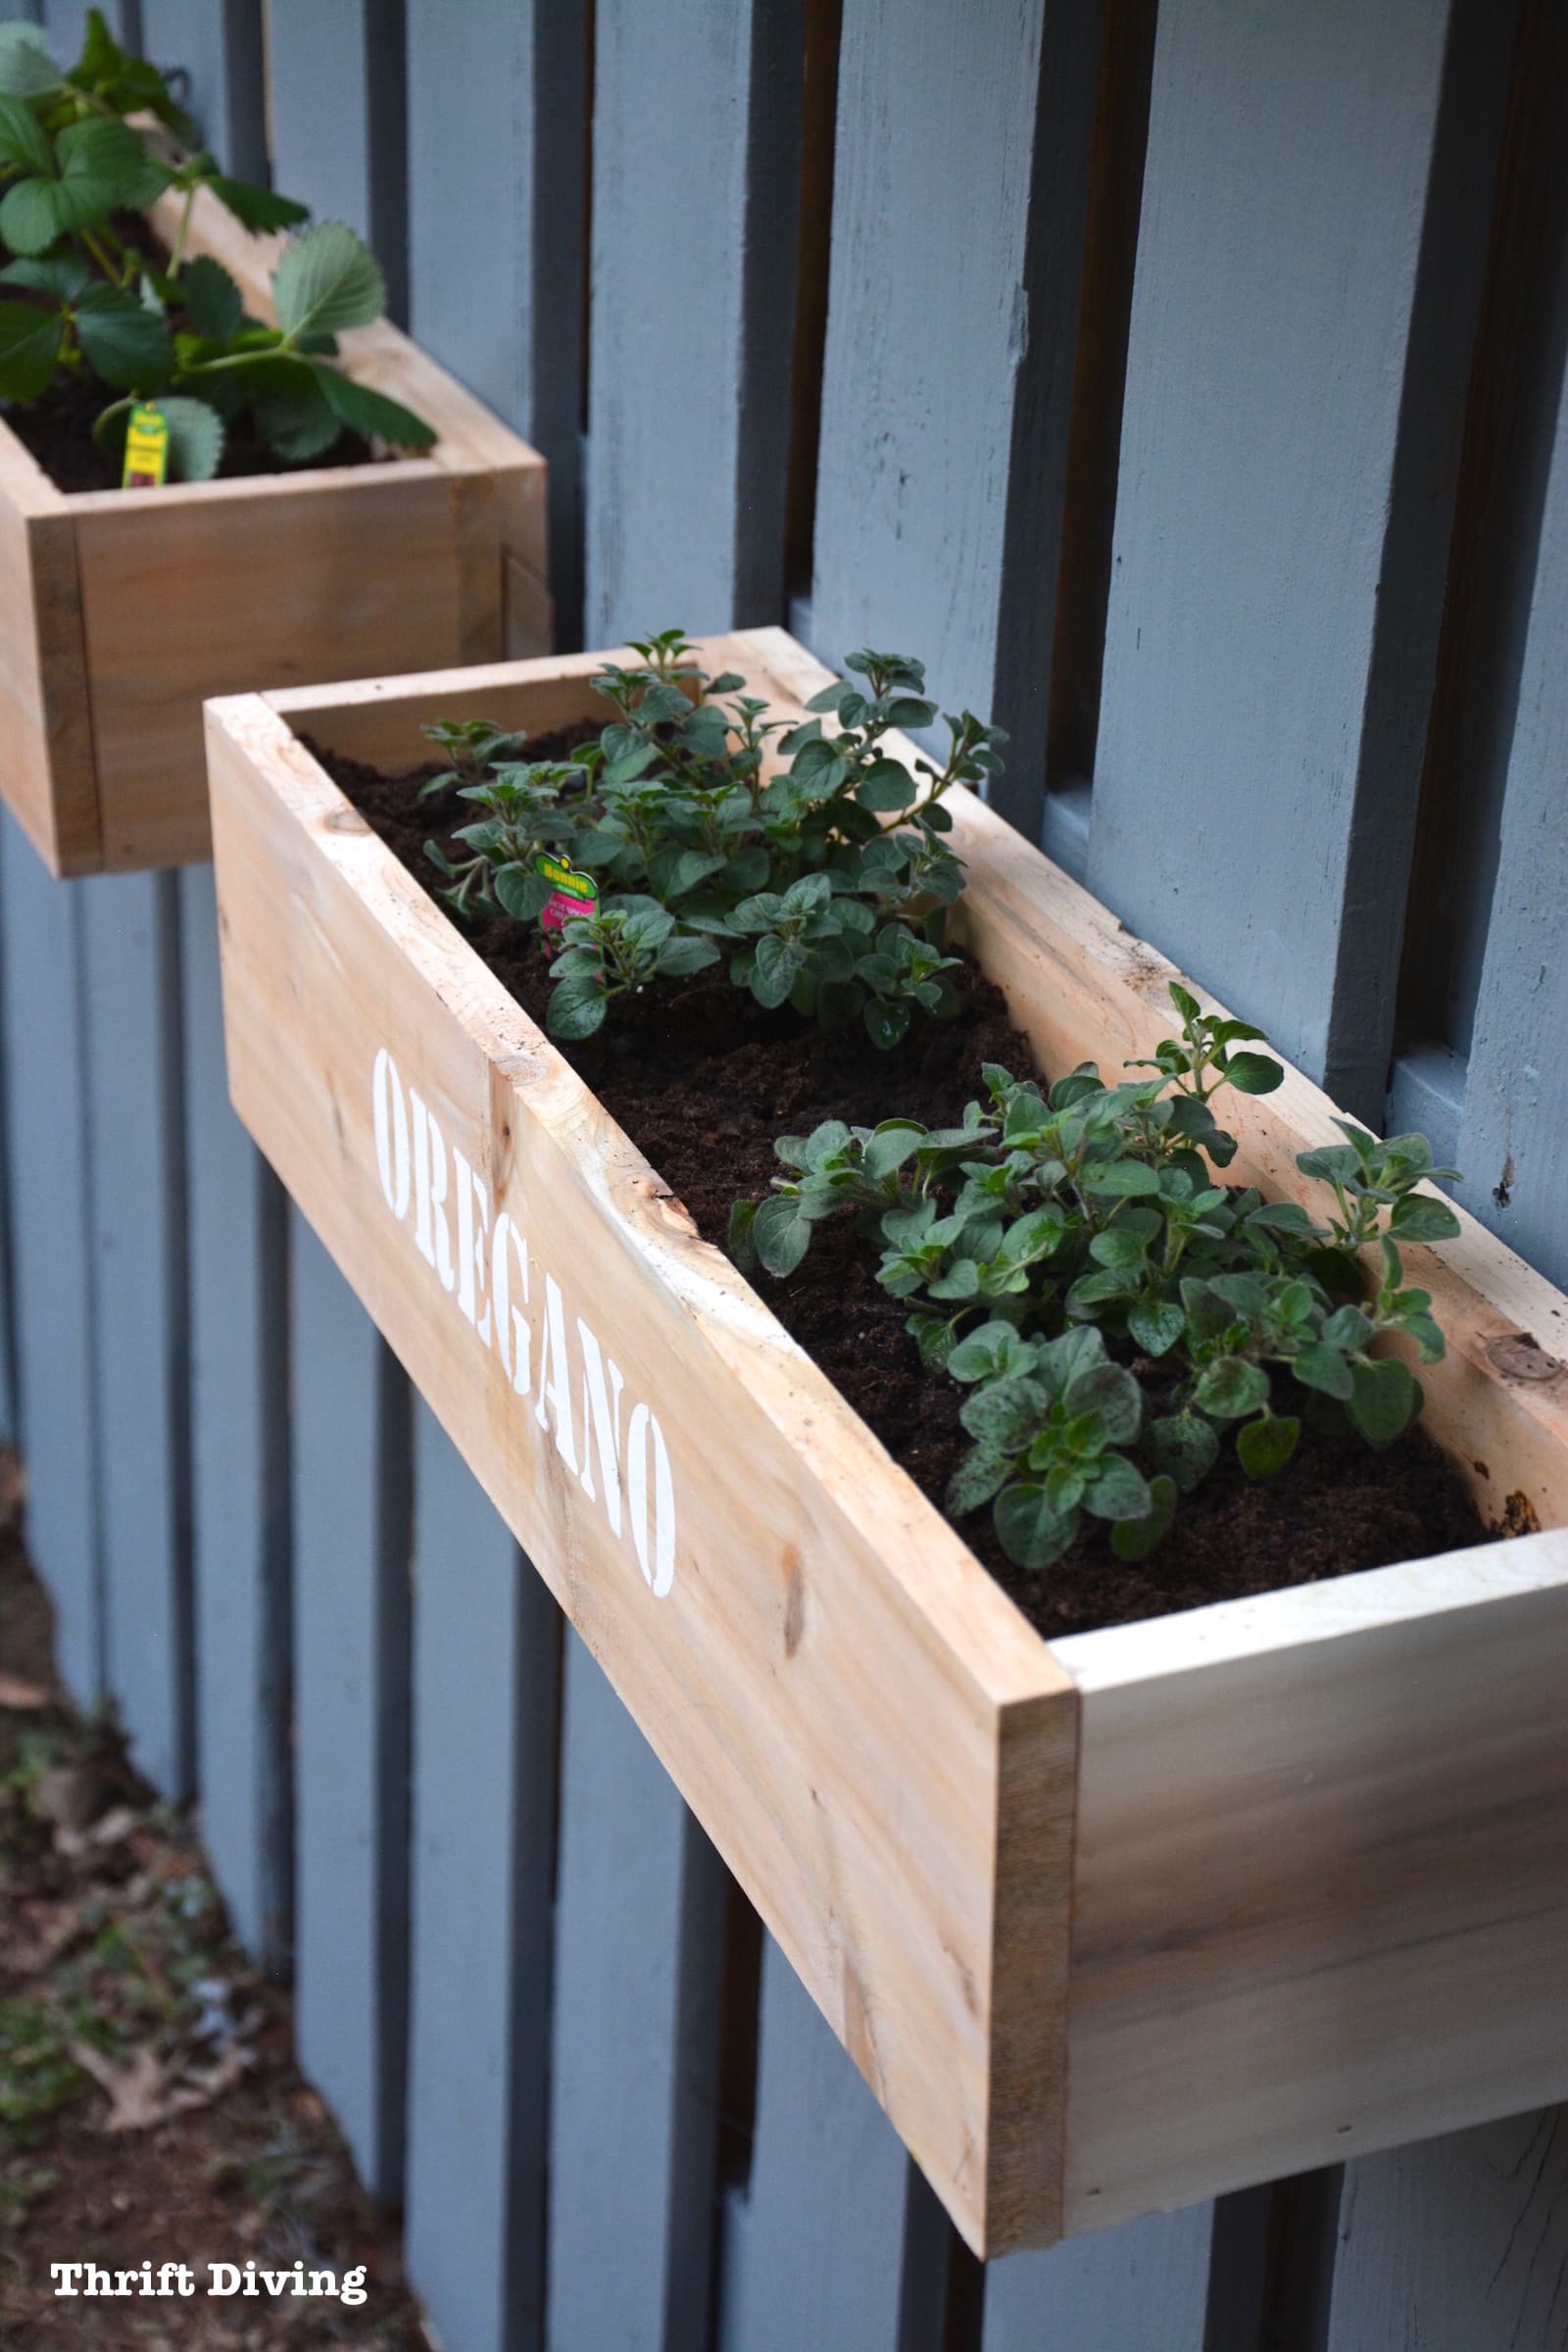
STEP 7: Screw the Cleats to the Newly Painted Fence!
Finally, we’re getting there!
Figure out where you want your cedar planters to hang. I wanted a row up high and a row below. But my advice would be to check the sun placement first.
Use a level and then drill pilot holes (so your cedar doesn’t crack).
Secure with exterior screws.
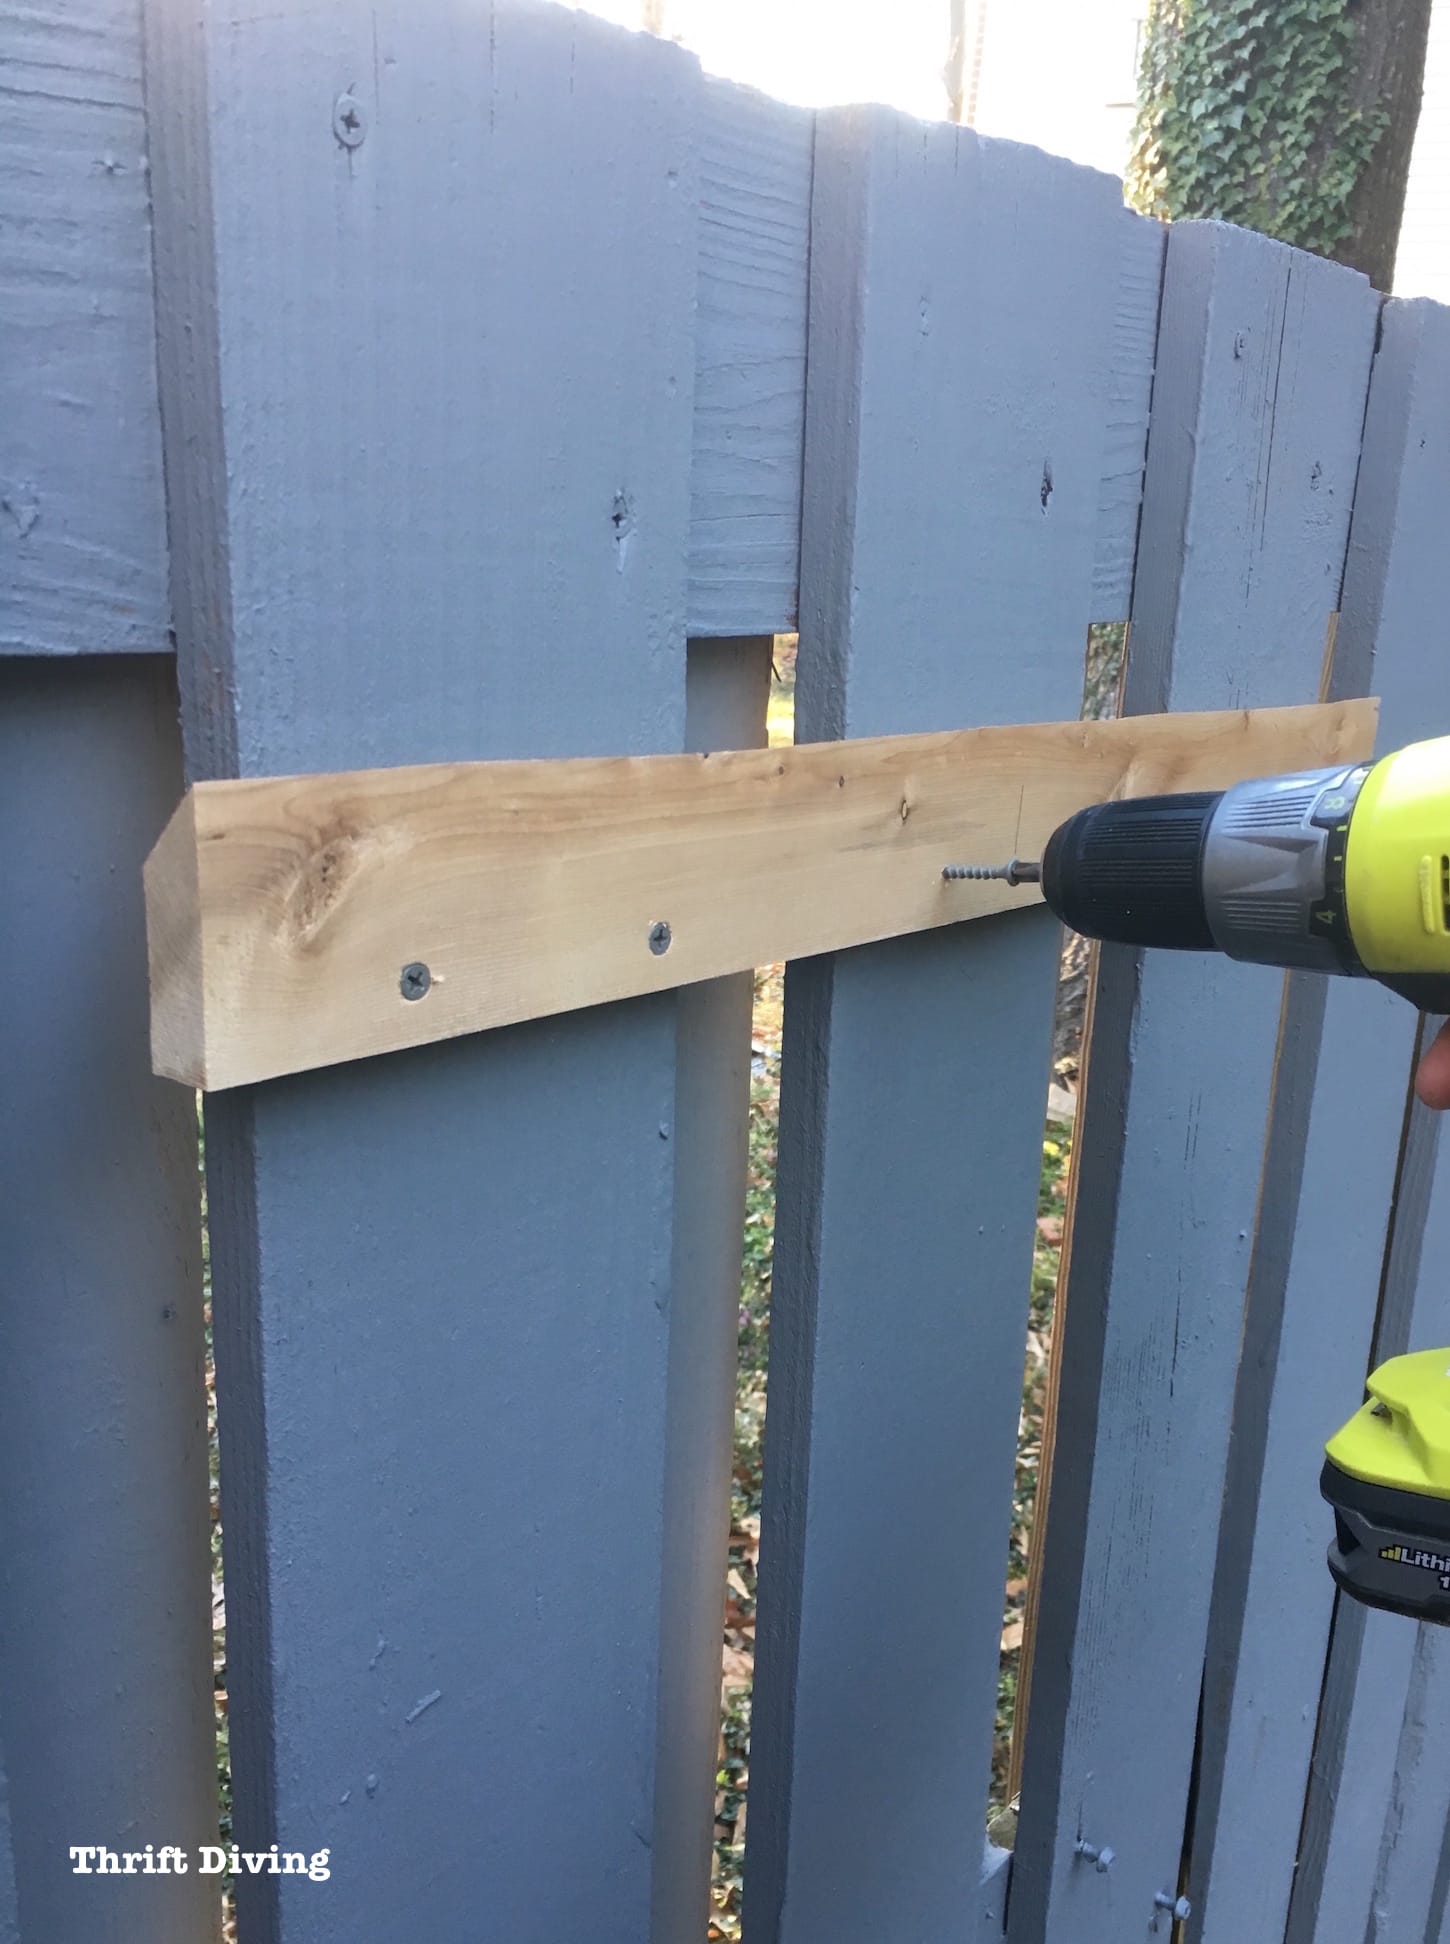
If done correctly, your garden fence planter should hang evenly and securely!
I think I am in love with French cleats now! So easy! And you can hang virtually anything this way!
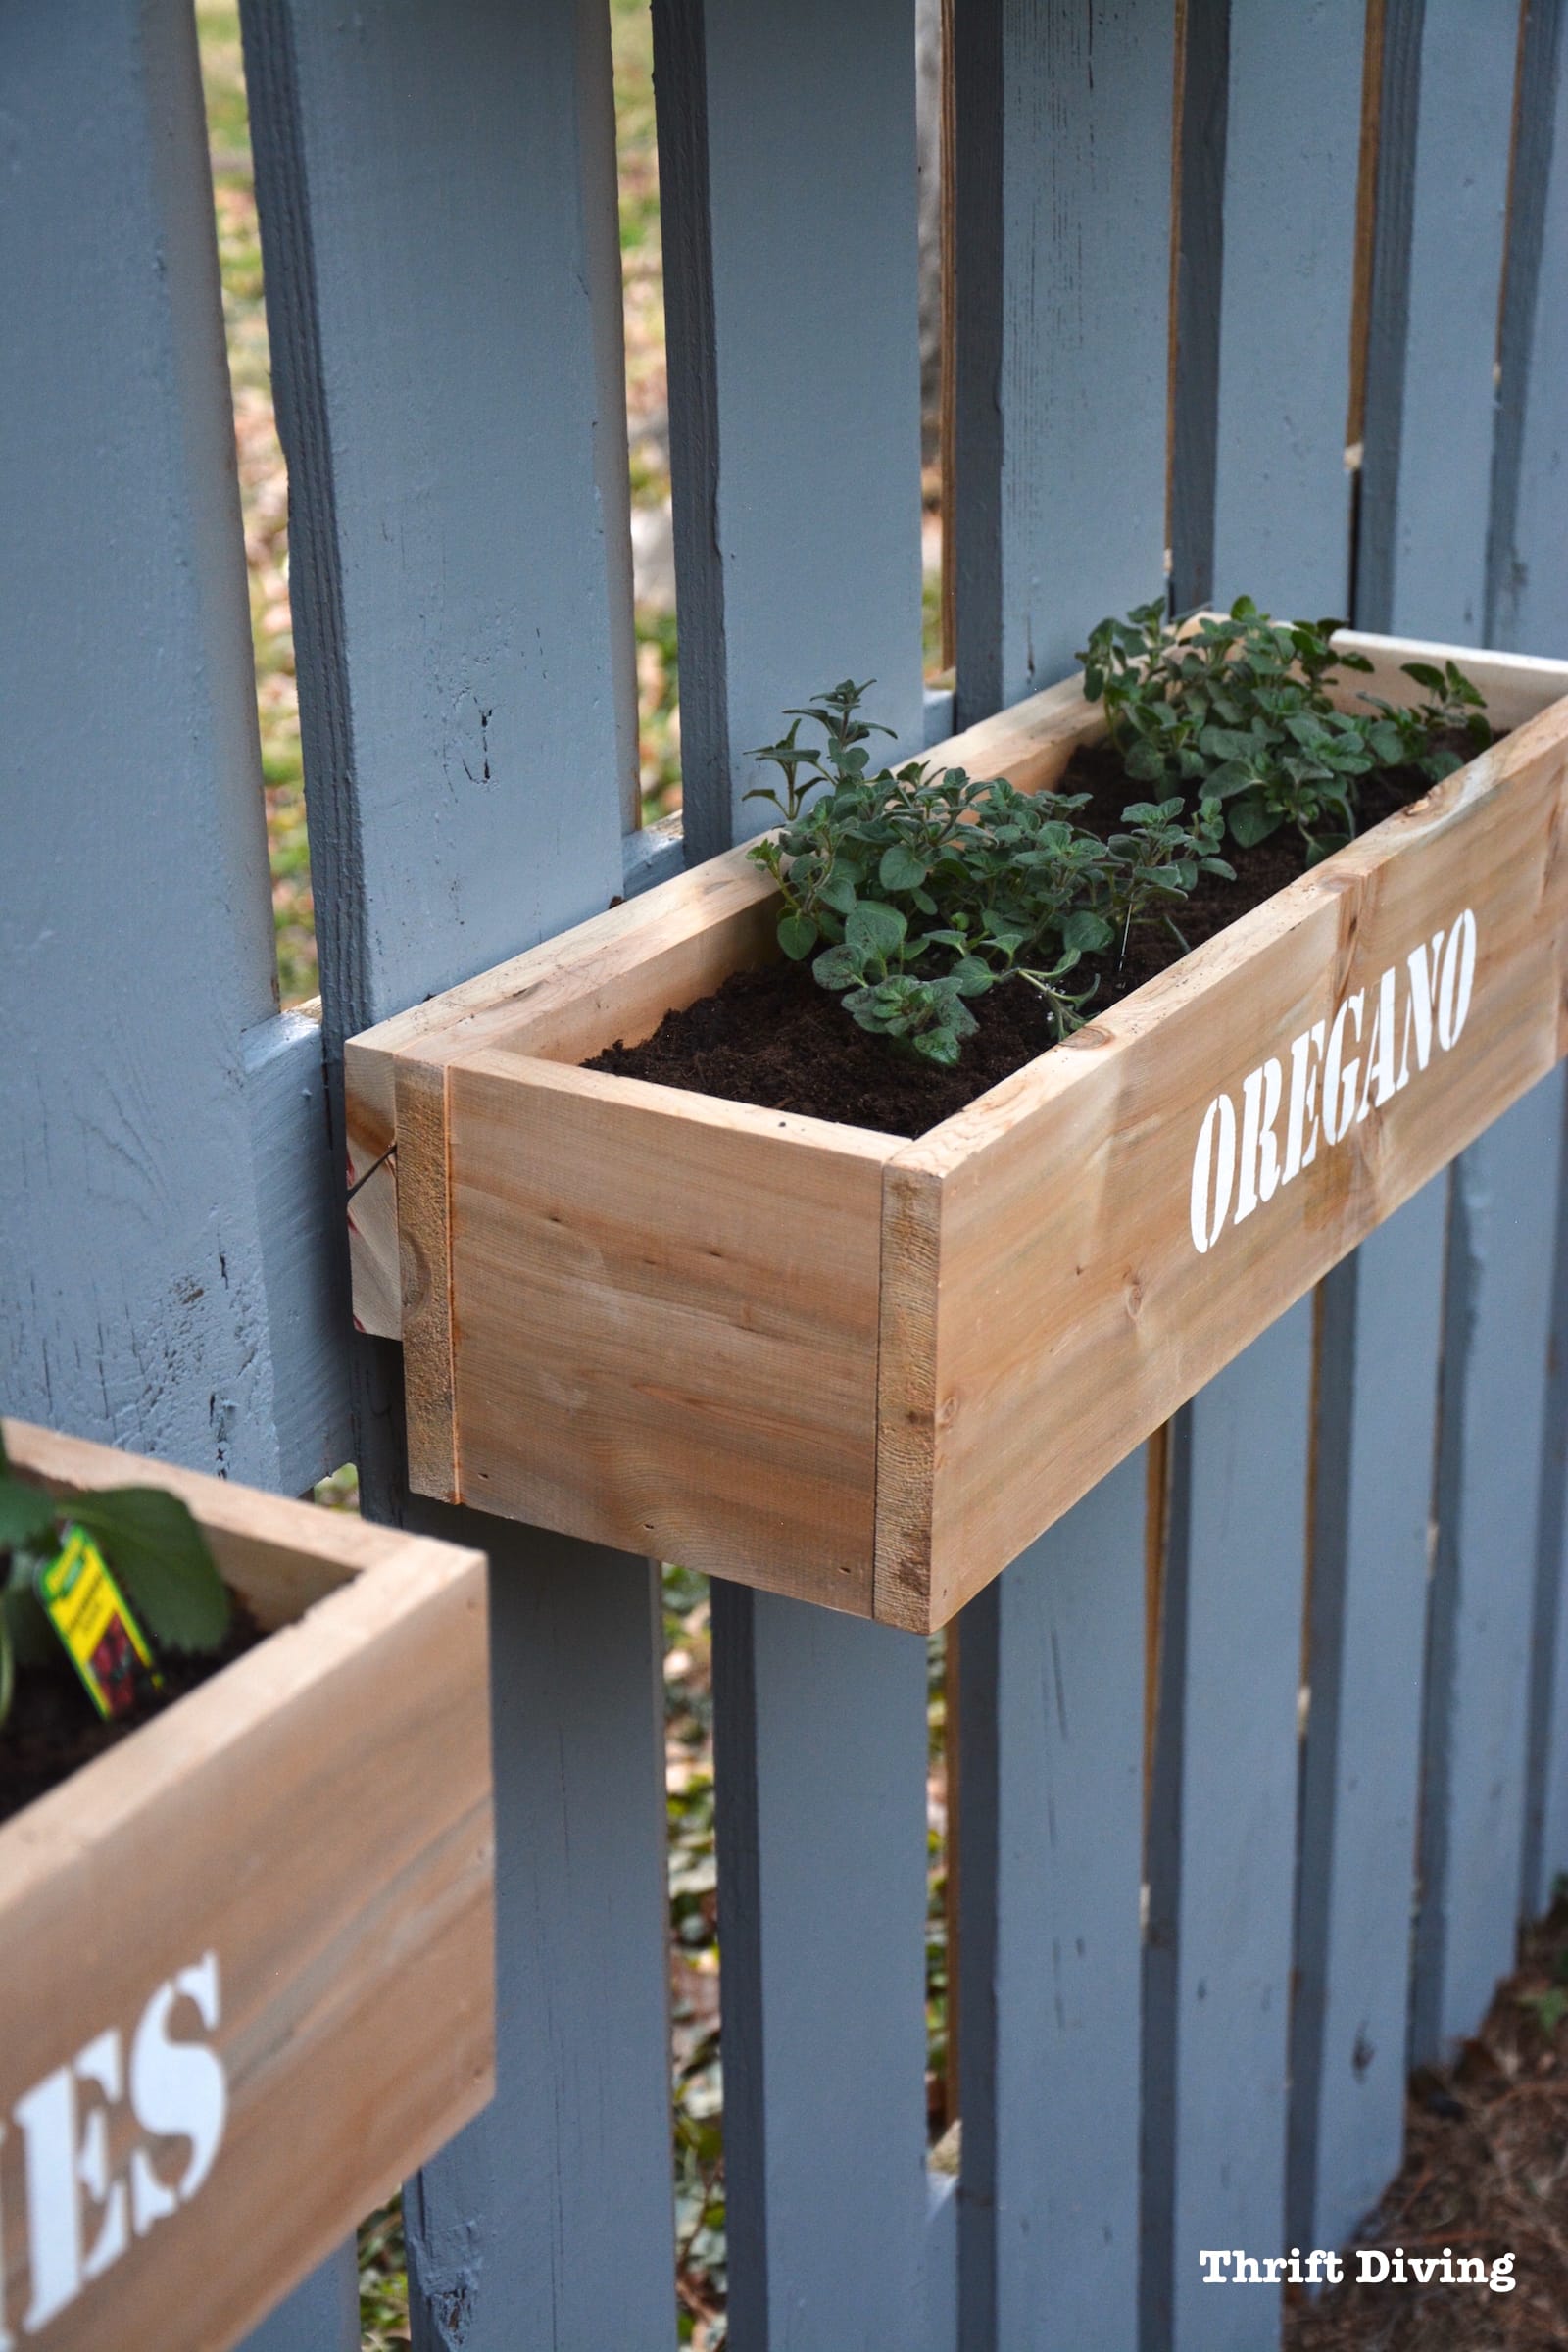
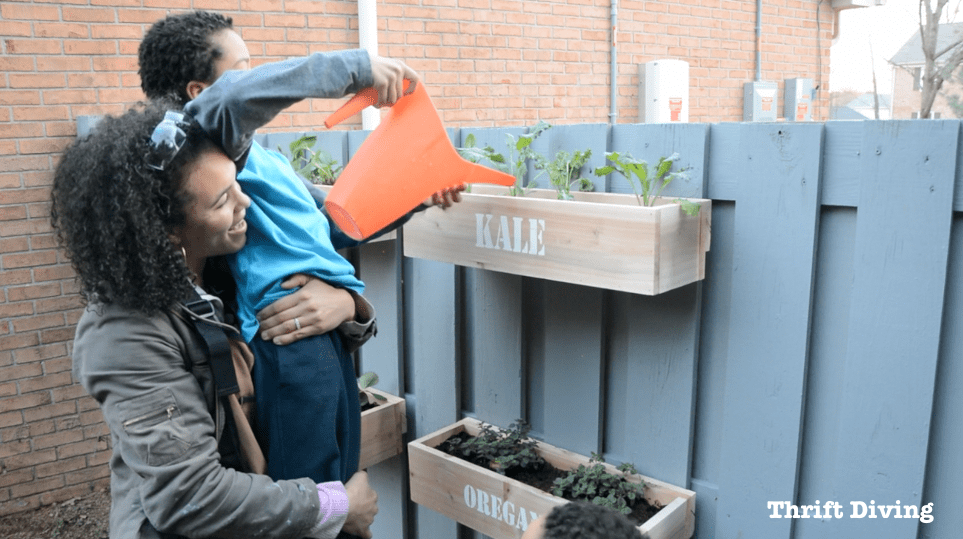
STEP 8: Add Fruits and Veggies!
Once the boxes are all in place where you want them to be, you can easily remove them to fill them up, or just fill them while they’re hanging!
STEP 9: Celebrate! And Pray They Don’t Die 😉
The kids weren’t interested in helping when I needed a third hand to pass me screws when I was drilling, but they sure did want to help water the plants when they were done. LOL
I absolutely love how it turned out!
And they were pretty impressed. I think I scored some Cool Mom points. 😉
This project absolutely couldn’t have been as successful with a dirty, boring fence!
I’m thankful for the KILZ OverArmor™ for making my fence a beautiful backdrop for what has become my very first garden!
I’ll likely have to move the bottom row up so that it receives more direct sun.
But for now, this looks great!
So what do you think?? Do you have an old fence that could use a makeover with KILZ OverArmor™ Wood and Concrete Resurfacer so you can make a pretty hanging garden fence, too?
Leave a comment below and let me know what you think!


Download the 5 freebies!

Thrift Diving inspires women to decorate, improve, and maintain their home themselves...using paint, power tools, and thrift stores! Use these 5 printables, checklists, and ebooks to get started!
Those planter boxes are great! And what a neat way to add something fun to a fence 🙂 Thank you for sharing at Merry Monday party; I’m going to feature your fence & planter boxes at next week’s party. We’d love to have you stop by and share another project or two!
Hey Serena, this is a great colour choice! And they really do look right at home. You have an artists touch!
Oh Serena, this turned out GREAT! We want to put up planters like this in our backyard. This project doesn’t look too hard to do. And we have to work on repainting as well! Thanks for the tips and idea!
Hey, Tatanisha! Yeah, girl, it’s super easy to make! And I’m surprised at the garden is actually GROWING! We have neighborhood cats, so I need to figure out how to keep them out of it! I wish I lived closer. I would make you guys some!
Love what you did. And hooray for becoming ‘farmer Brown’. ! We downsized 3 years ago and now just have a 6’x8′ garden. Tomatoes for canning, green peppers to cut and freeze, onions and beets because there is nothing to take care of until they are ready to dig up. I think if you put both strawberries on top for sun, the herbs will still grow under them. I’m not sure how your family is about you, but I’m very proud of you for everything you have accomplished almost by yourself. Hang in there.
Hey there, Diane! Ooh, sounds like you have a great garden! There’s something so rewarding about growing your own things! I’m shocked they haven’t died yet! How long until I can expect strawberries? Any idea? 🙂
In Ohio early June they are ready. Big and ripe juicy red strawberries!!! Yum.
Great job. I’m sure it’ll be a great growing lesson for your boys. I don’t have that kind of patience but I applaud you.
Thanks, Syl!! So far, so good–the plants haven’t died yet! 🙂
Wonderful! You really inspire me to try new things. Getting my garden ready, but it is too early to plant here in southwest Virginia. Thanks for mentioning making the boxes out of cedar.
No it’s not you, iPads don’t click.will read and enjoy all you post. Love all that you do!
Love this as always. Can’t click as I only have a iPad. No complaints, I love it, just can’t click but still would like to receive more of your work! Look forward to all you post Thank You.
Serena, that is as clever as a pocket on a shirt. I love it, especially the way the Kilz actually came out looking! Great color for that fence! This was one of the best posts yet! Very proud of you for doing such a big job as this! Maybe the kids will be more excited once the veggies come in!
Thanks, Linda! Since doing this post, I’ve noticed that the neighborhood cats have gotten into it a little. I’m finding cat hair in the dirt! UGH! I have to figure out how to add some netting on them to protect them. Wish me luck! 🙂 LOL
LOVE LOVE LOVE It!!! Looks amazing! If it were me I would have put strawberries in all of them. Love Strawberries.
Hey, Angel! YAY! I’m glad you like it! I’m just so excited to actually have a small garden! And it hasn’t died yet! LOL. I’m hoping that the containers are deep enough. Have you ever grown strawberries before? Any tips for success?