10 Tips to Remember When Staining a Deck
Staining a deck is not for the faint of heart. It’s a lot of work, but is a necessary evil in order to maintain your deck. While you’re here, check out other home maintenance and home improvement spring and summer posts, such as how to use a pressure washer, the awesome transformation of my patio makeover before and after, and how to create a stone walkway path.
Even as big of a yard as I have, I envy people with decks.
I’d much rather have a good-sized deck than a yard filled with bugs, weeds, and whatever else is hiding in that jungle we call a “yard.”
My friend, Jodi, wanted some help with staining her deck, and of course, like the awesome blogger friend I am, I offered to help, in exchange for being able to film and blog about it, of course… 😉

She’s working on her deck as part of my 6-Week June Room Challenge Makeover this month, so I was stoked to have a hand in helping her get it done!
(Meanwhile, my poor garage makeover is suffering…but that’s a whole ‘nutha topic….”
BEFORE

She’s lucky in that her deck was built just three years ago so it was in good condition. But it needed some “oomph.”
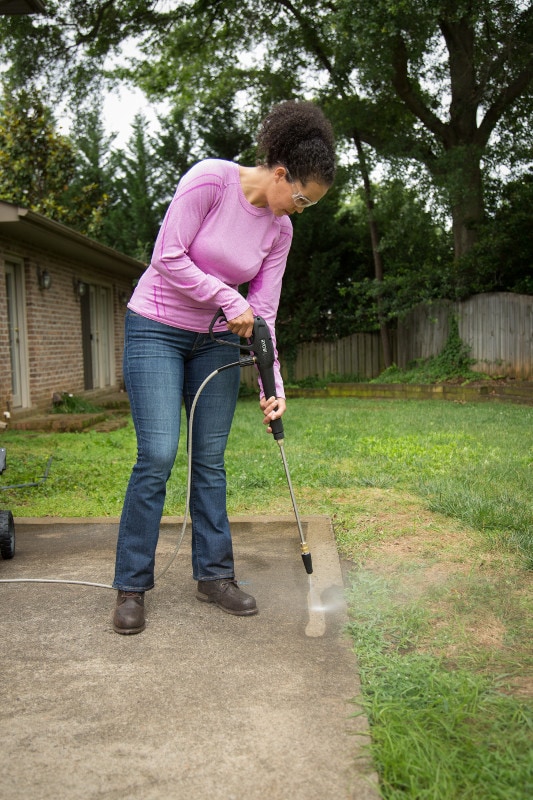
EDITED TO ADD: Be sure to pressure wash your deck before starting! If you need more information about pressure washing, check out this tutorial on how to deep clean your deck or patio.
BEFORE

AFTER!
By the time I left her house that Sunday afternoon, she still needed another coat on the parts of the deck flooring, but over, it looked 10 times better, didn’t it?!?

I Confess….
I had never in my life stained a deck. I’m a brand ambassador for HomeRight, and they’d challenged me to paint a deck and blog about it. Ummm….. I don’t even have a deck! Luckily, Jodi was in need of my help, and although she had never stained a deck either, we picked up a few DIY skillz.
And maybe you never have stained a deck, either! But because of our mistakes and “ah-ha!” moments, we learned a few things that I wanted to pass on to you in case you want to stain your deck, too!
You’re welcome :).
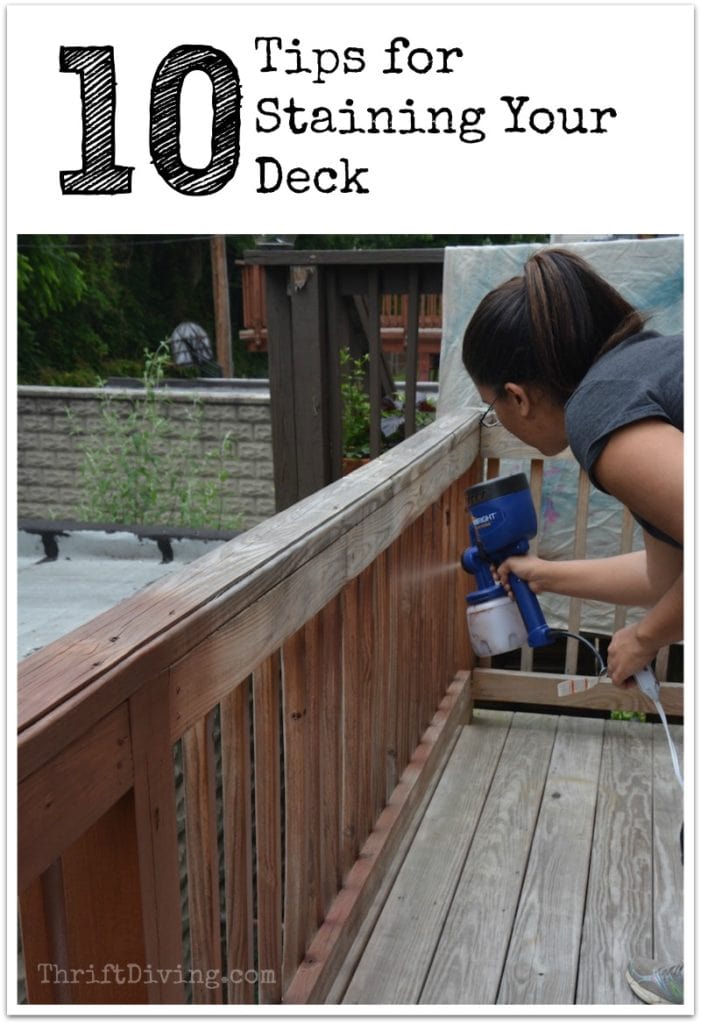
10 Tips for Staining a Deck
(I participant in the Amazon Services LLC Associates Program and other affiliate advertising programs designed to provide a means for me to earn fees by linking to Amazon.com and affiliated sites).
TIP 1: Clean your deck and do a test area first.
I’m not sure what Jodi used to clean her deck first, but just make sure you scrub it down or pressure wash it to remove dirt, oil, or anything else that can affect the stain adhering to your deck.
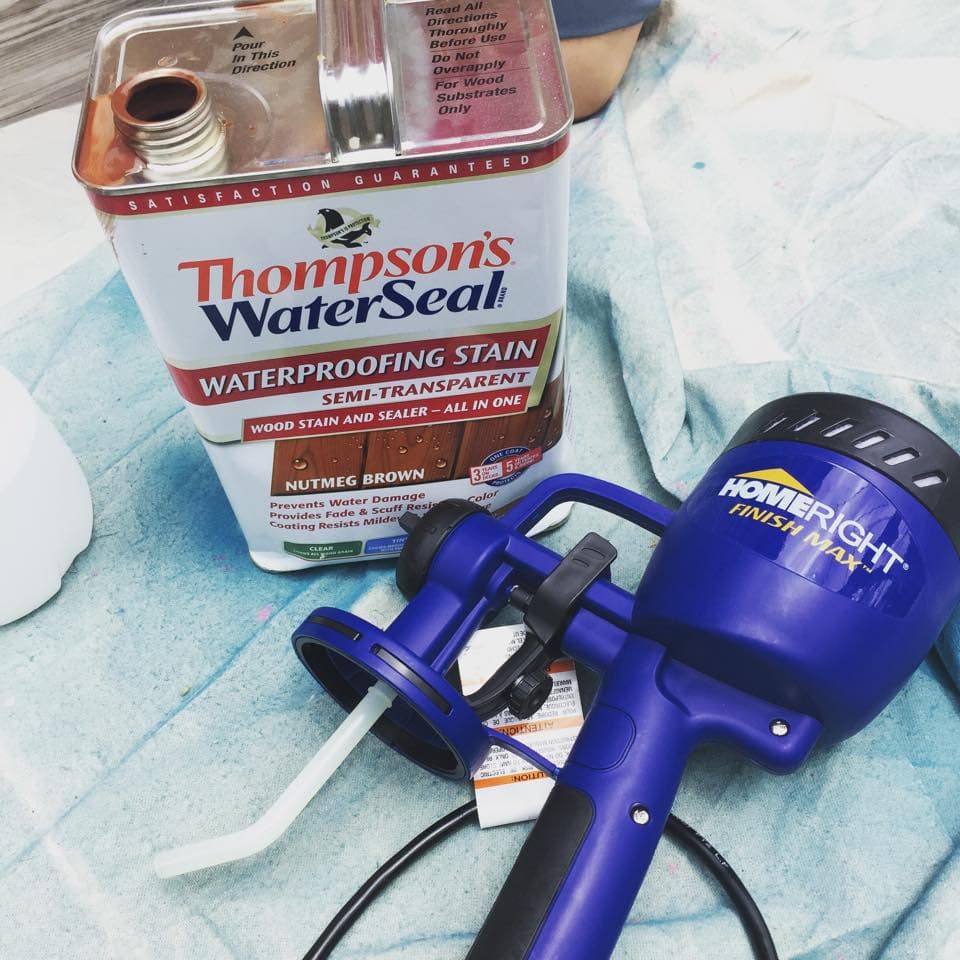
We did a small test area first to make sure we liked the color. We used Thompson’s Water Seat Nutmeg Brown. It was so rich! Loved it! I had gotten the stain for free at a blogging conference last year, so it didn’t cost us a dime :).

TIP 2: Use a paint sprayer.
Be sure to stir and strain your stain before using it!! I love the HomeRight Finish Max paint sprayer. Very easy to use…….if you use it correctly, though ;). The only problem we had is that we didn’t properly stir or strain the stain and ended up with a clog towards the end of finishing the railing.
I should have known better.
We couldn’t figure out how to dislodge it. Thankfully, we were already at the end of the spraying the railing. But it still sucked getting a clog. Next time we know, and you will know better, too! 🙂
Typically you have to thin paint before using it in the Finish Max, but you don’t have to thin stain–just make sure it’s clump-free.
TIP 3: Always do a test spray first.
Grab an old board and test out your spray pattern first to make sure that you’ve got the right amount of spray coming out. Too much and it will be drippy. Just adjust the small nozzle to change the flow and pattern.
P.S. Watch this video of me using a paint sprayer with paint on furniture.

TIP 4: Start with the railing first.
Logically, it just makes sense. You’ll be able to move freely on the deck flooring while staining the railing without worrying about stepping on any freshly painted deck flooring.

TIP 5: Keep the sprayer moving to avoid drips.
If you leave the sprayer in one place, it will cause an excess of stain, leading to drips. Keep the sprayer moving so that you get a nice, even finish.

TIP 6: Wear the appropriate clothes.
You’re going to be doing a bunch of leaning over and bending. Don’t have your backside hanging out (like I did!!!). Plus, wear clothes you don’t mind ruining. And not your jammies, ladies! 😉
(P.S. Don’t think I’m including a picture of my backside, ‘kay??) 😉
TIP 7: Keep little ones out of the way!
If you’ve got little ones or grandkids, be careful! My youngest son walked right over and put his arms up on the wet railing. YIKES! It would have been nice to do this project without little kids around. Do it while they’re at school or daycare, if possible! We did it on a weekend because it just worked well for our schedules. One thing I’ve learned is that you gotta DIY when you can, not when everything is perfect.

TIP 8: Try a StainStick for the flooring.
Tools can make the job easier. This was my first time using the HomeRight StainStick with the gap wheel. Just my luck, I got a bum one, and it leaked when I first tried it!


The good news is that Jodi’s StainStick worked just fine, which did allow us to both work at the same time and move quickly in getting the deck flooring done. I used mine, too, even though it was broken, and I was still able to get a good finish.
I checked with HomeRight and found out that there was a manufacturing problem in some of the StainSticks with the gap wheel, but that the problem has been corrected. I guess that’s how life goes with DIY, huh? Nothing is perfect.
You might have a preference for one or the other (Finish Max vs. StainStick), so try them both to see which one you like best. Jodi and I liked the Finish Max better.
TIP 9: Be careful not to step on freshly stained stain.
Seems like a no-brainer, but just work your way from the outside corner back into a doorway so you can easily exit. Resist the tip-toe to “just fix thiiiiis area riiiiggghht over there.” You’ll ruin what you’ve already done!


TIP 10: Apply 2 coats for better coverage.

I always do 2 coats of everything, even deck stain. Here’s what the deck railing looked like with two coats of stain–nice and rich!
BEFORE

Railing AFTER


I didn’t have time to stay and help her with the second coat on the deck flooring.
By the time I left Jodi’s house, we had one coat on the deck flooring, and she needed to add one more coat, which she did on her own.
Here’s a reminder of what it looked like BEFORE:
And what it looked like as I was leaving, AFTER, with one coat on the flooring. It looks sooo much better already!

Watch the Video!
See Jodi and me in action staining her deck!
Have you ever stained a deck?? What are some of your favorite tips and tools for staining your deck easily and quickly?

Download the 5 freebies!

Thrift Diving inspires women to decorate, improve, and maintain their home themselves...using paint, power tools, and thrift stores! Use these 5 printables, checklists, and ebooks to get started!


What color is the stain you used? It’s a really nice color
The color is Nutmeg Brown. 🙂
Excellent work with the staining project! The pictures and video were a good addition to give readers a visual idea on how to stain because it can be a tricky process! A great way to brighten your stained deck is to reseal it. There is actually a special kind of sealant made specifically for brightening wood. It has the ability to restore your patio or deck to almost its natural color. It can really breathe new life into a dreary back yard. Bonus: the brand I’m familiar with has a 25-year warranty, while most sealants only last for a couple of years!
Informative post!! This blog is very much helpful. I got much information from this post about deck staining . Great efforts. Thanks for sharing this.
Thanks!
Hi, Serena and Jodi
Great job! Sure made a difference and now looks lovely. And a good tip about straining the stain first!
Looks like this deck is off the ground a bit. How do you handle the outer side of the railing? Lean over and spray? ?? And does the underside matter if you can see it from below? Would you try spraying in that case? Just wondering, mostly because of safety issues. Thanks,
Hey Teckla! We actually just used the StainStick to reach over and swipe the stain down the sides. Jodi did a few like that. But I believe she’s going to get someone to come and help her spray the outside. It’s not a super high deck, so a small ladder will work! 🙂 Sorry, I should have mentioned that in the post! LOL
I’m so excited to put the finishing touches!! Having good tools and a good stain is so helpful!
Yeah, girl, it’s turning out so nice! I’m so happy we got that stain at the Haven conference! I still have two containers. I’m thinking it will look great on some new patio furniture that I may attempt to build!