BEFORE & AFTER: My Family Room Refresh Makeover!
This post is sponsored by Wagner Spray Tech.
Antiques are at least 100 years old. They’re revered, reupholster, and ogled over.
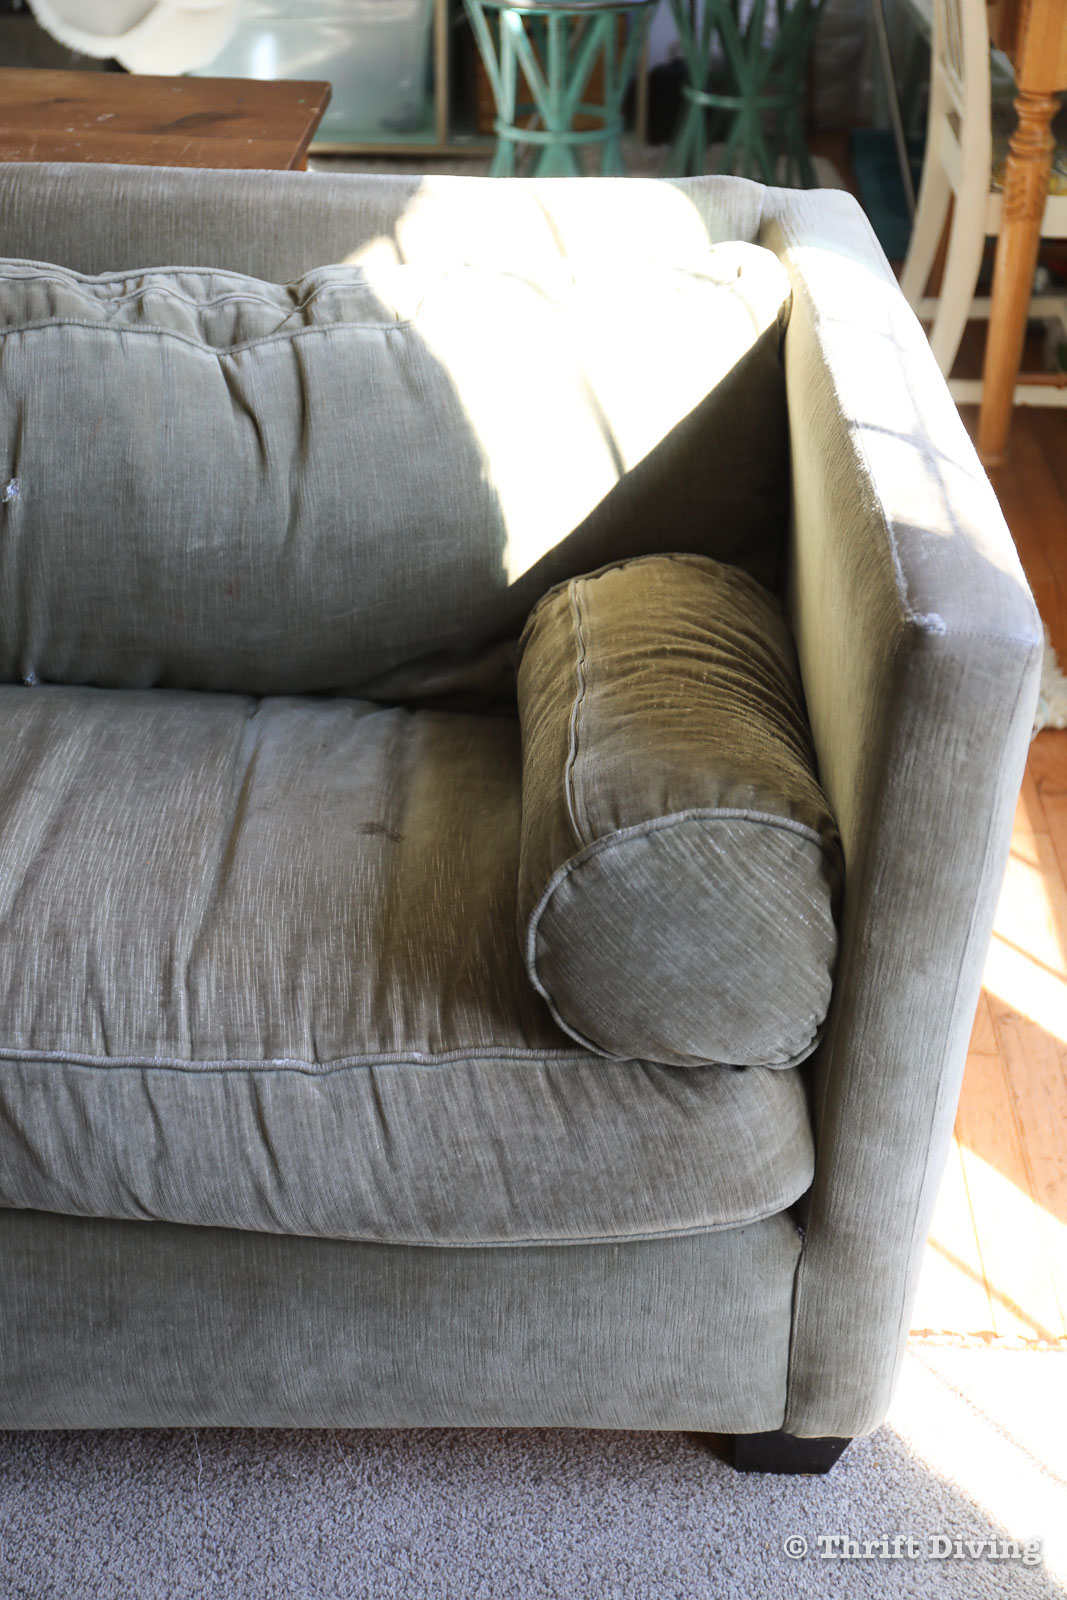
Yet, when I’d tell people that our sofa was 18 years old, their eyes widened in disbelief that in 18 years, we’ve not once upgraded the place where we parked our butts each night.
As if our sofa was from the Stone Age and we hadn’t yet gotten the notice that sofas now have cushions.
I can’t criticize, though, because I have reacted the same way when telling the story of how we bought this first set of furniture in 2002 when we bought our condo. I would tell the story to anyone who listened about how this sofa and chair set was the first (and only) furniture we had ever bought brand new; that we held on to it for years and years, but unlike an antique, it was no longer valuable.
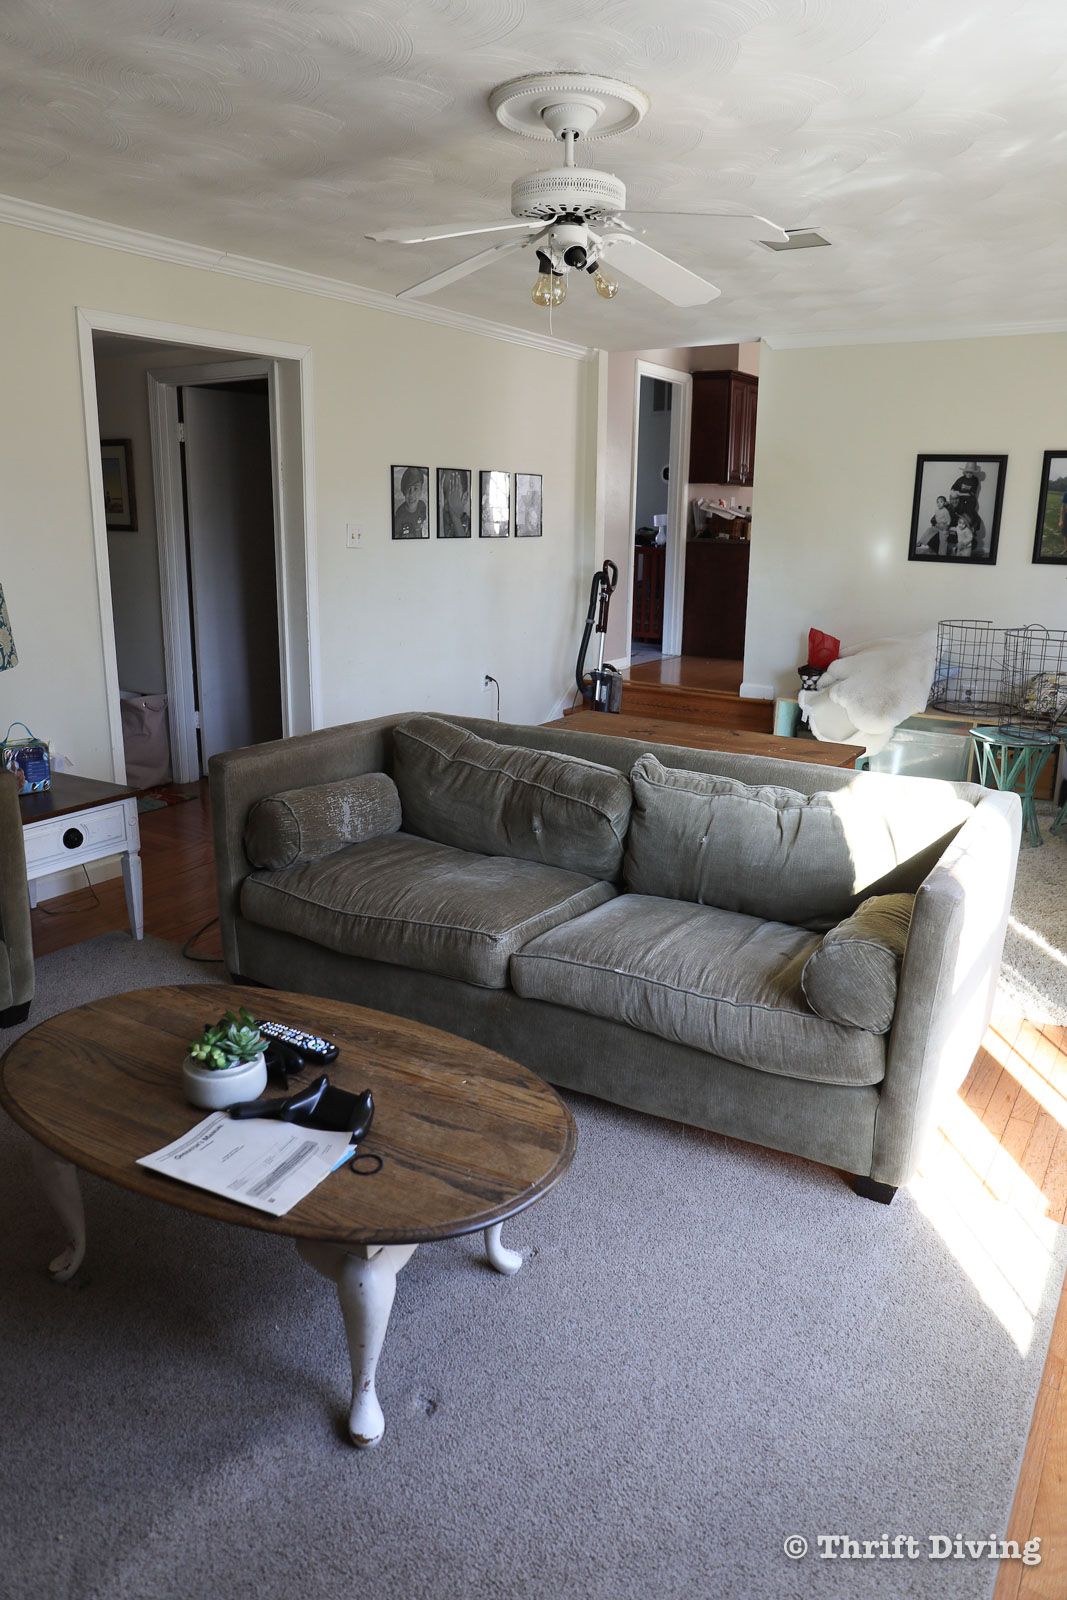
BEFORE
In fact, it became an eye sore.
But eye sores aren’t a problem here at Thrift Diving, because we know that with a little bit of fabric, we could have reupholstered this bad boy into a lovely little sofa again.
The real problem, though, is that the sofa no longer met my family’s needs. With those three boys growing up into big men with gangly arms and legs (who are quickly beginning to over-take me in height, might I add….), we needed more space for everyone to have a place on the sofa.
We needed legs to be able to comfortably stretch out. We needed a space that felt welcoming, bright, and airy, since every day this is where we all spent our time.
This room need a facelift!
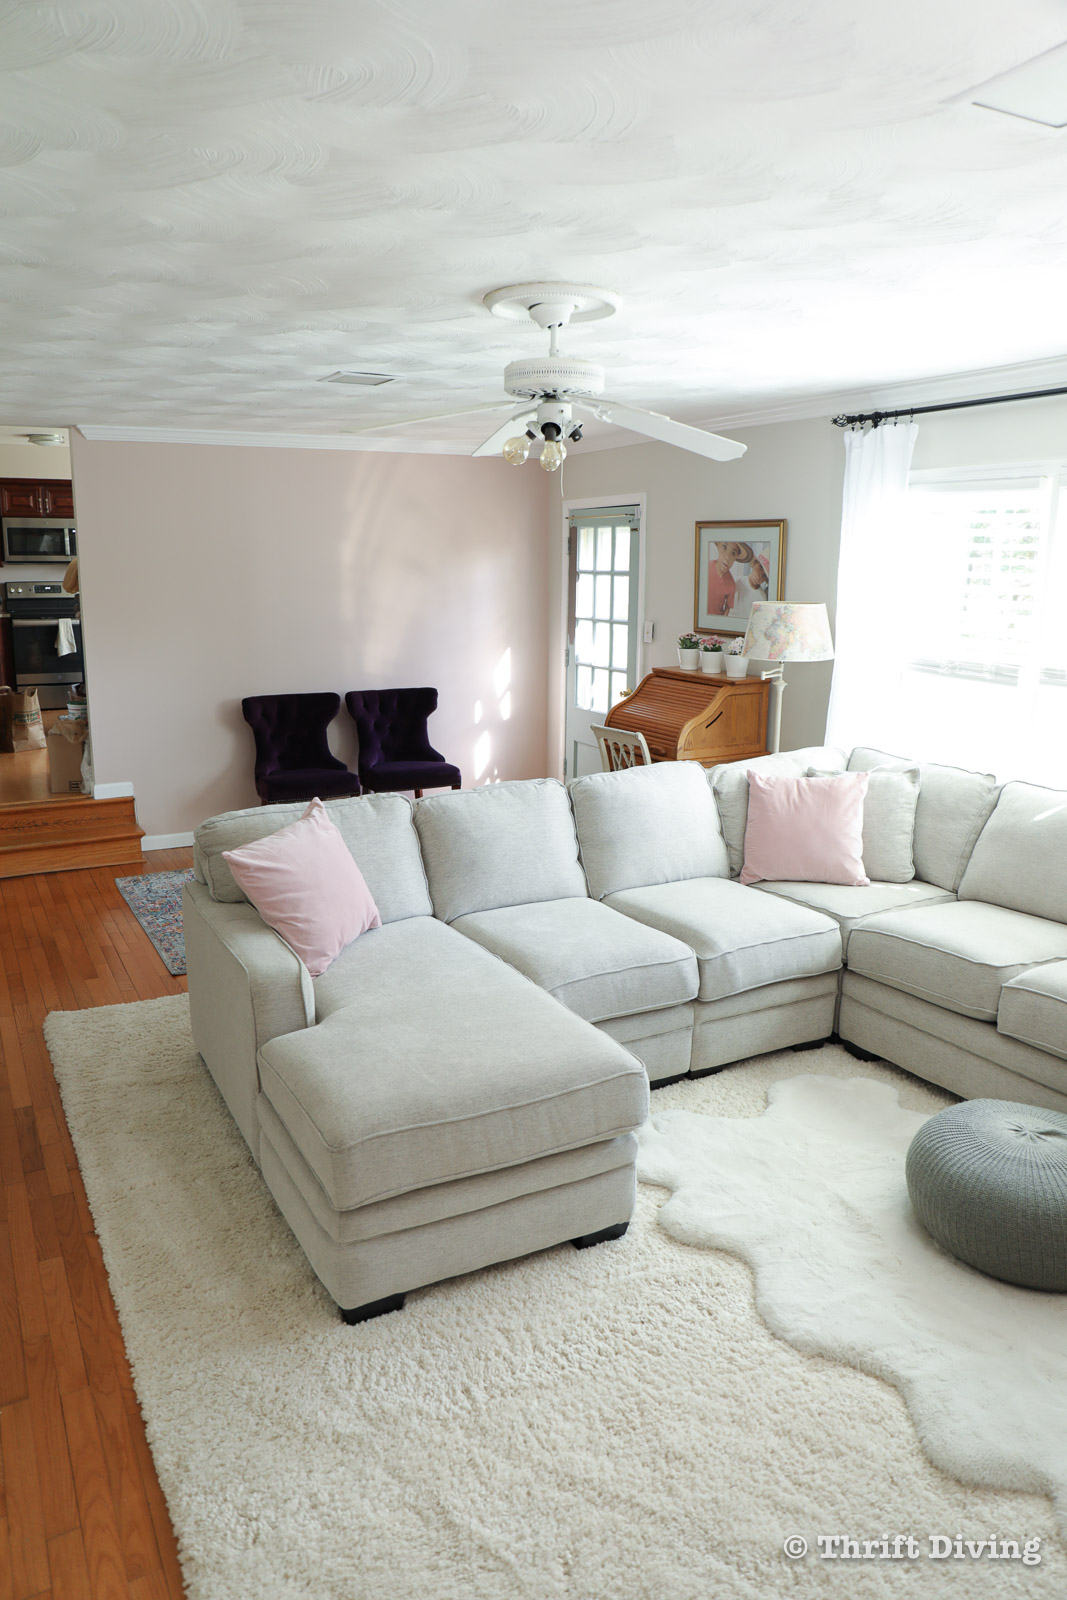
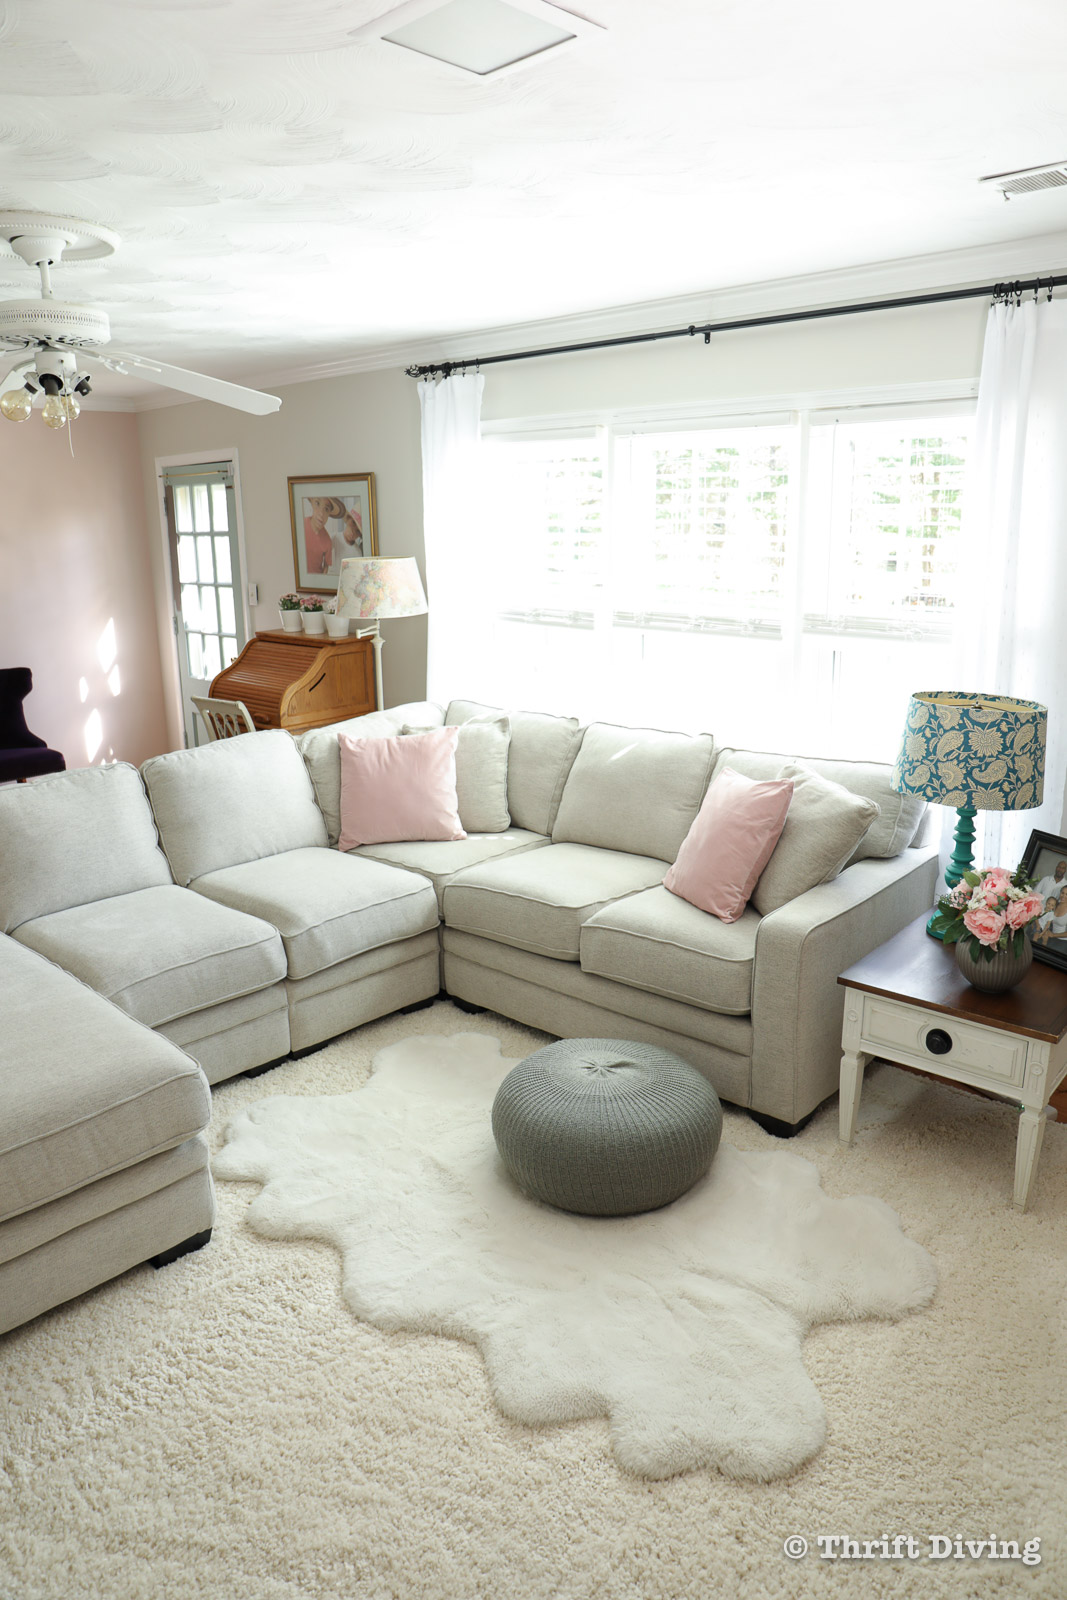
AFTER!
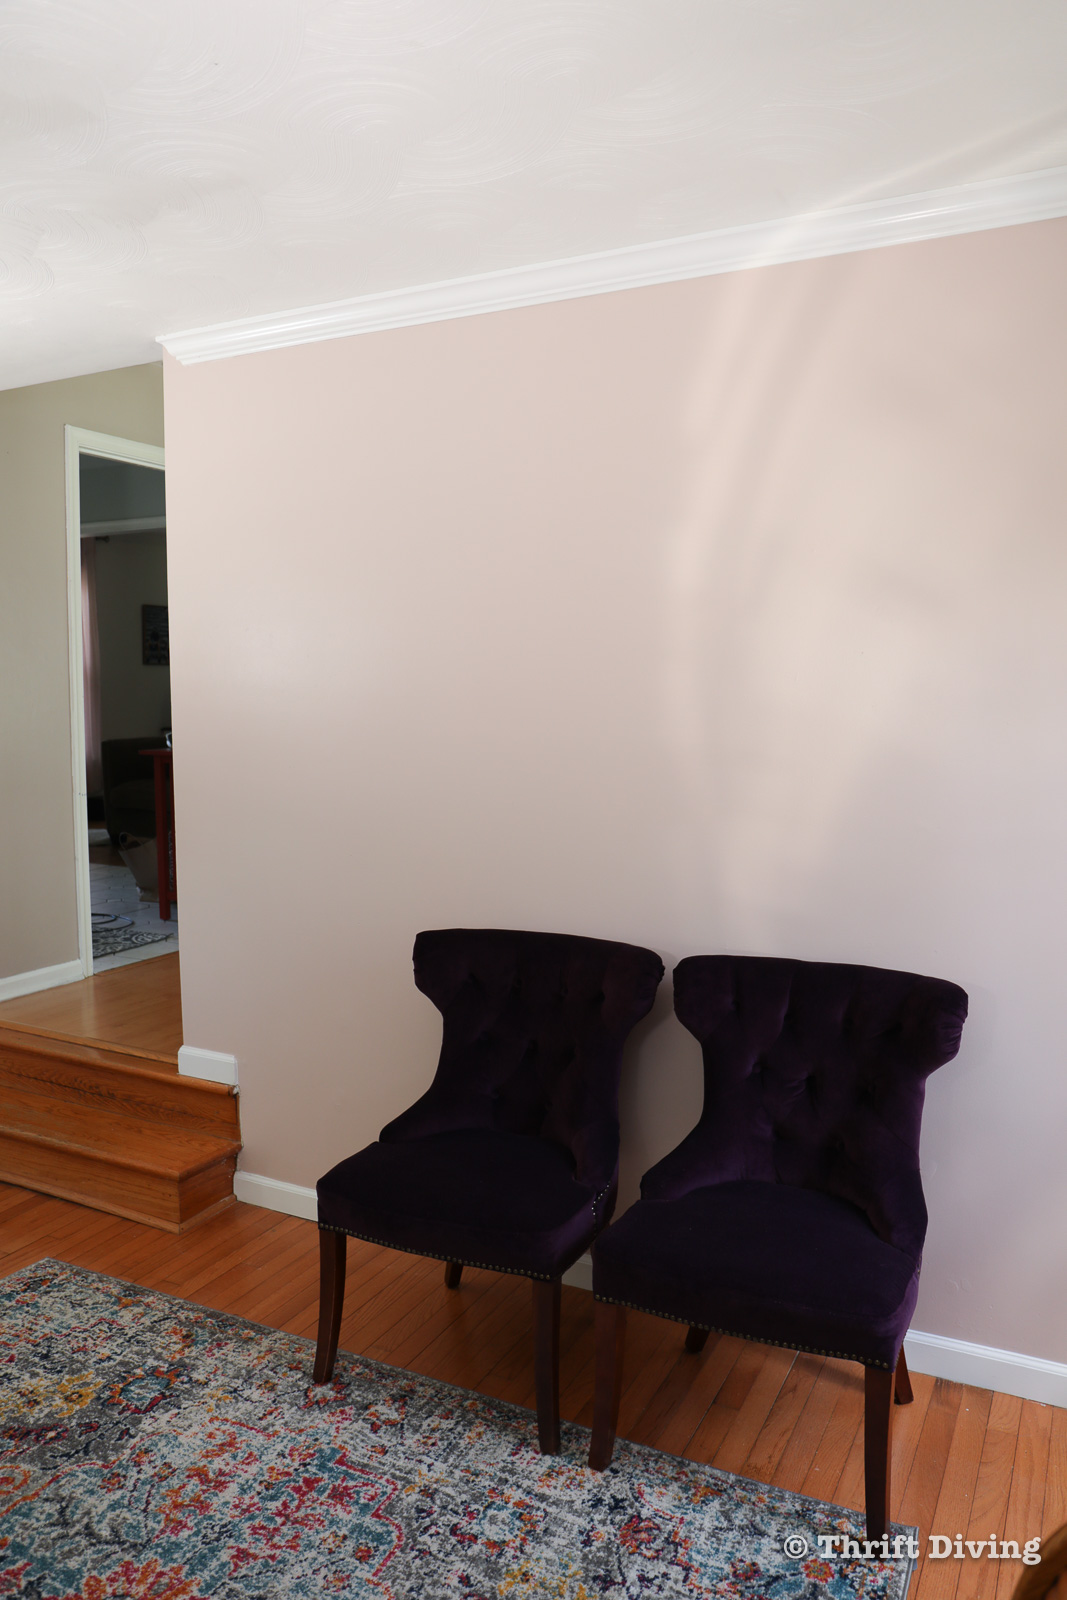
And while I’m not done (I still have the back of the family room to finish up), I am completely enamored with how a new sofa, some fresh paint (yes, that’s a pink accent wall!), and a few touches around the room really made this room feel fresh again!
Click HERE to save this on Pinterest!
Watch This Makeover!
You can see the entire transformation on my YouTube channel!
But here’s what I used!
Materials Needed
- Wagner Sidekick
- Angled synthetic paint brush.
- Eggshell or satin finish paint for walls (wipe-ability, if you have kids!).
- Semi-gloss finish for trim.
- Ceiling paint.
- Paint roller extension stick (optional, if you have tall ceilings or walls)
- Painter’s tape.
- Spackling to fill nail holes and indentations.
- Putty knife.
- Fine sandpaper.
- Dust mask.
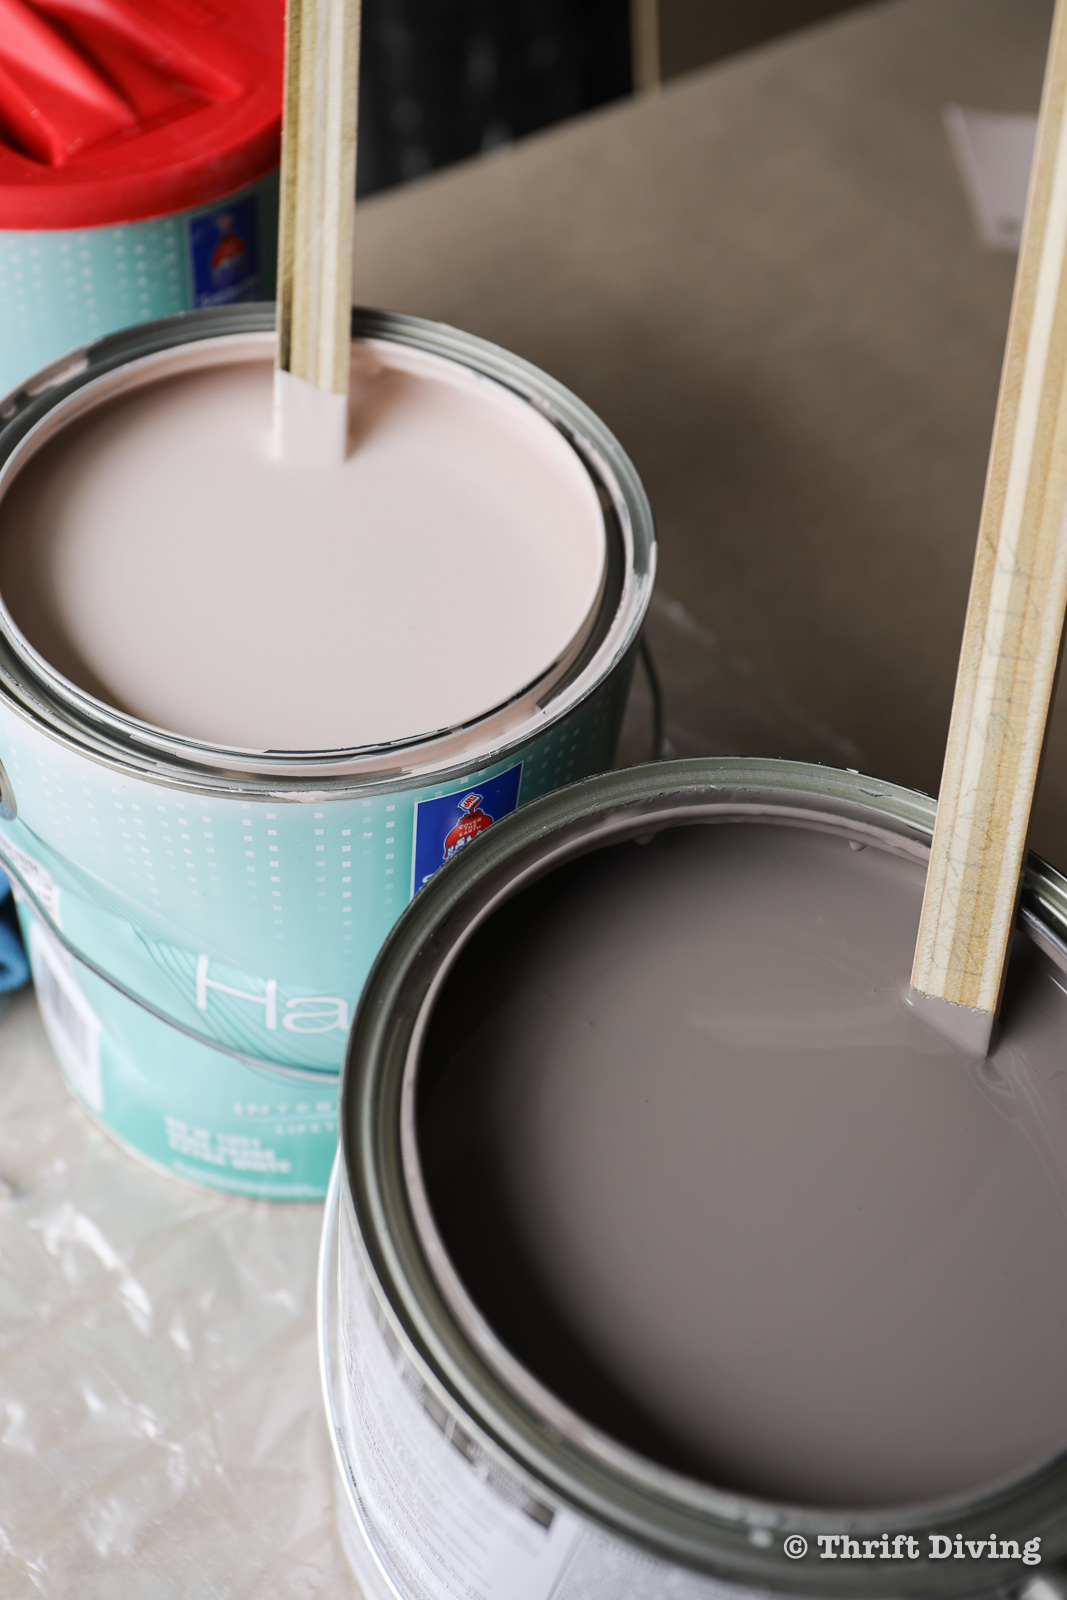
- Paint stirs.
- Plastic sheeting to protect floors and furniture.
Prepping the Walls
Before painting any walls, you should follow this similar process that I used:
- Wipe the walls down with vinegar and water, or with Simple Green, then wipe with warm water and allow to dry before painting.
- Tape off along the floor, edges of windows (if you don’t have a steady hand for painting with a paint brush).
- Remove any nails, fill holes with spackling and a putty knife, and sand flat and smooth when spackling is dry. Wear a mask!
- Use a paint brush and paint along the edges of the trim and molding.
Painting the Walls
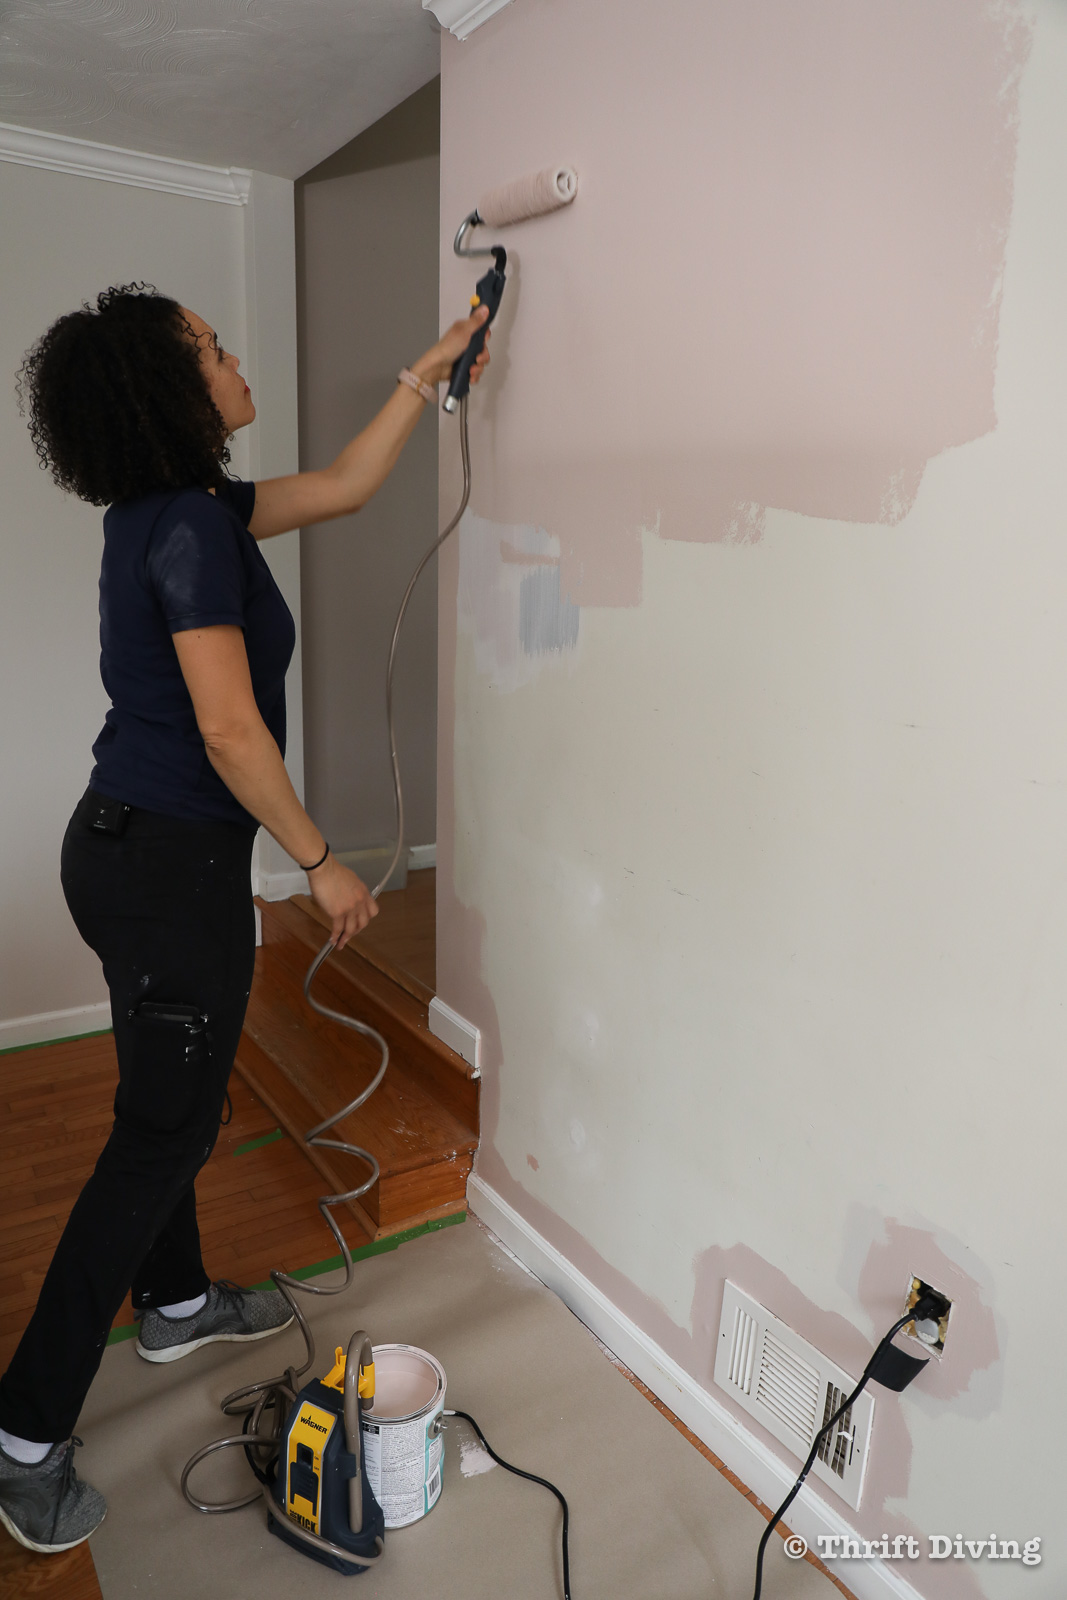
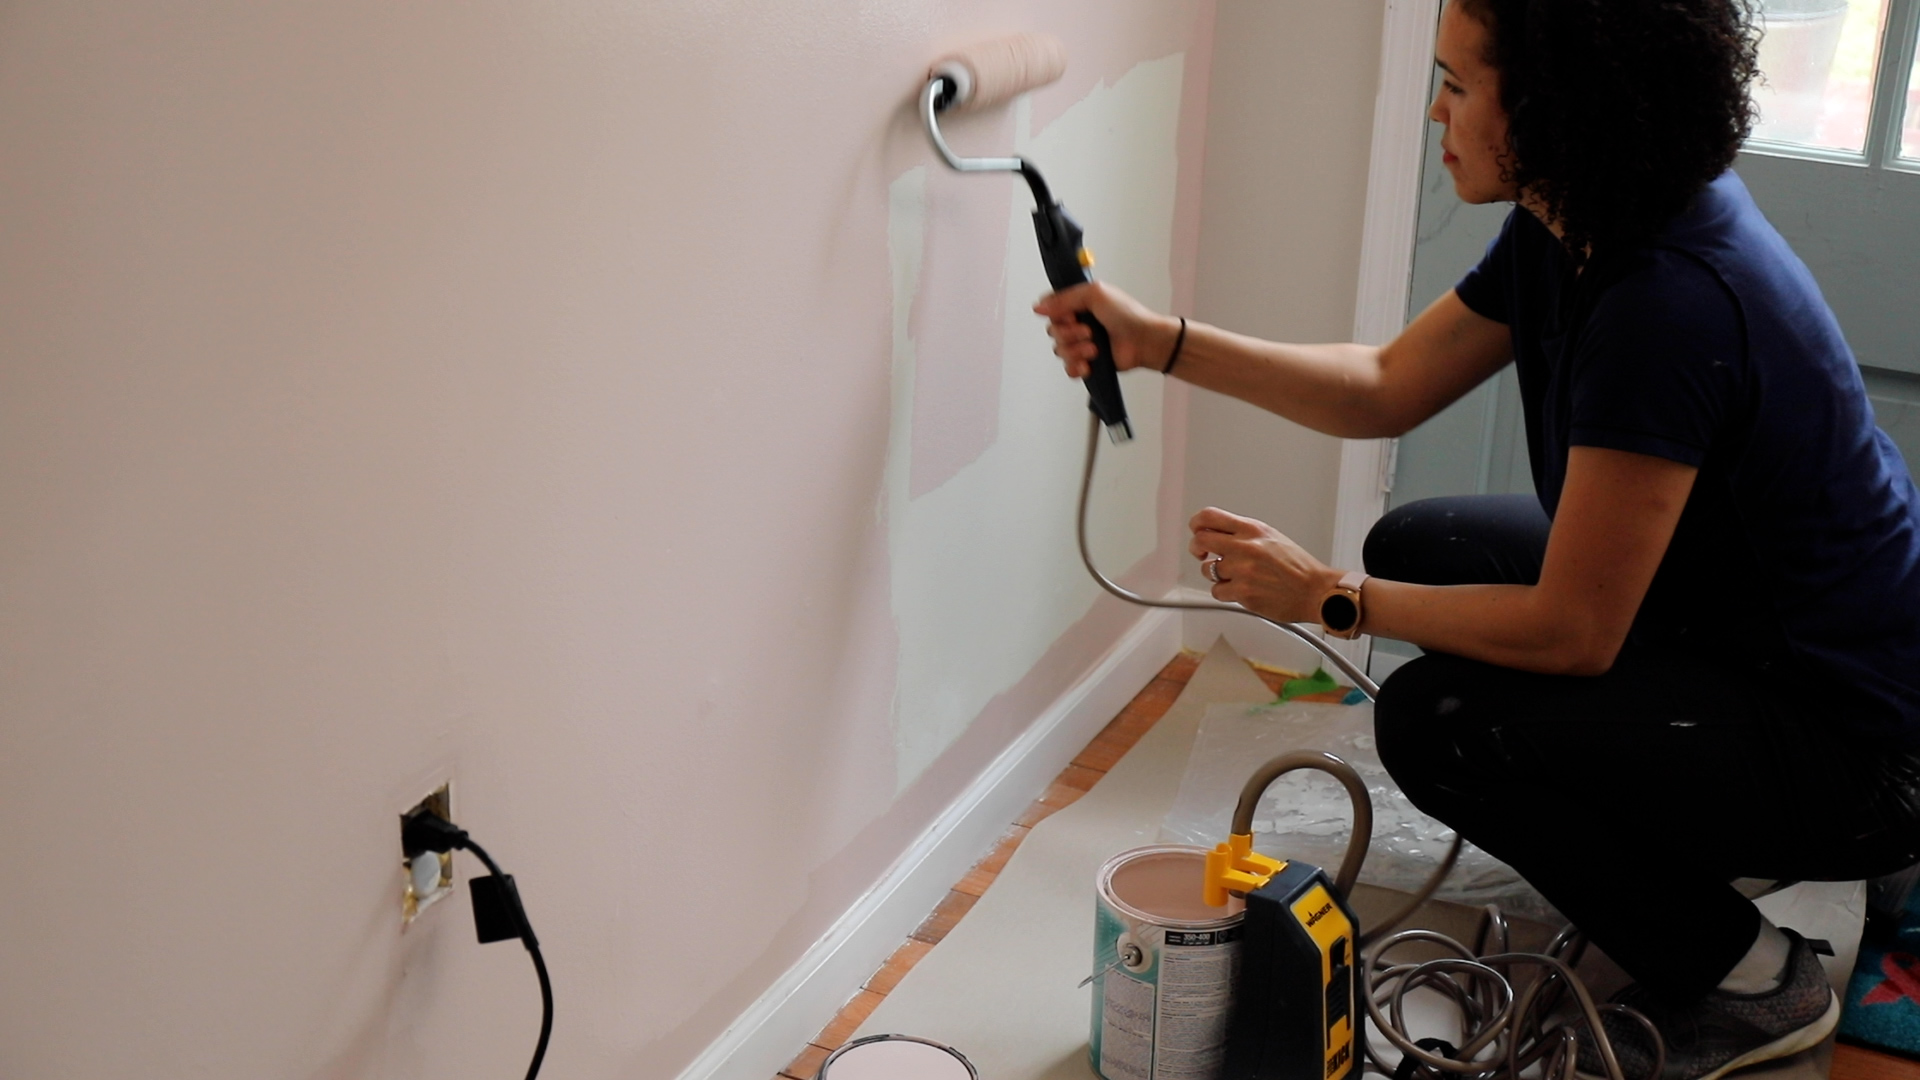
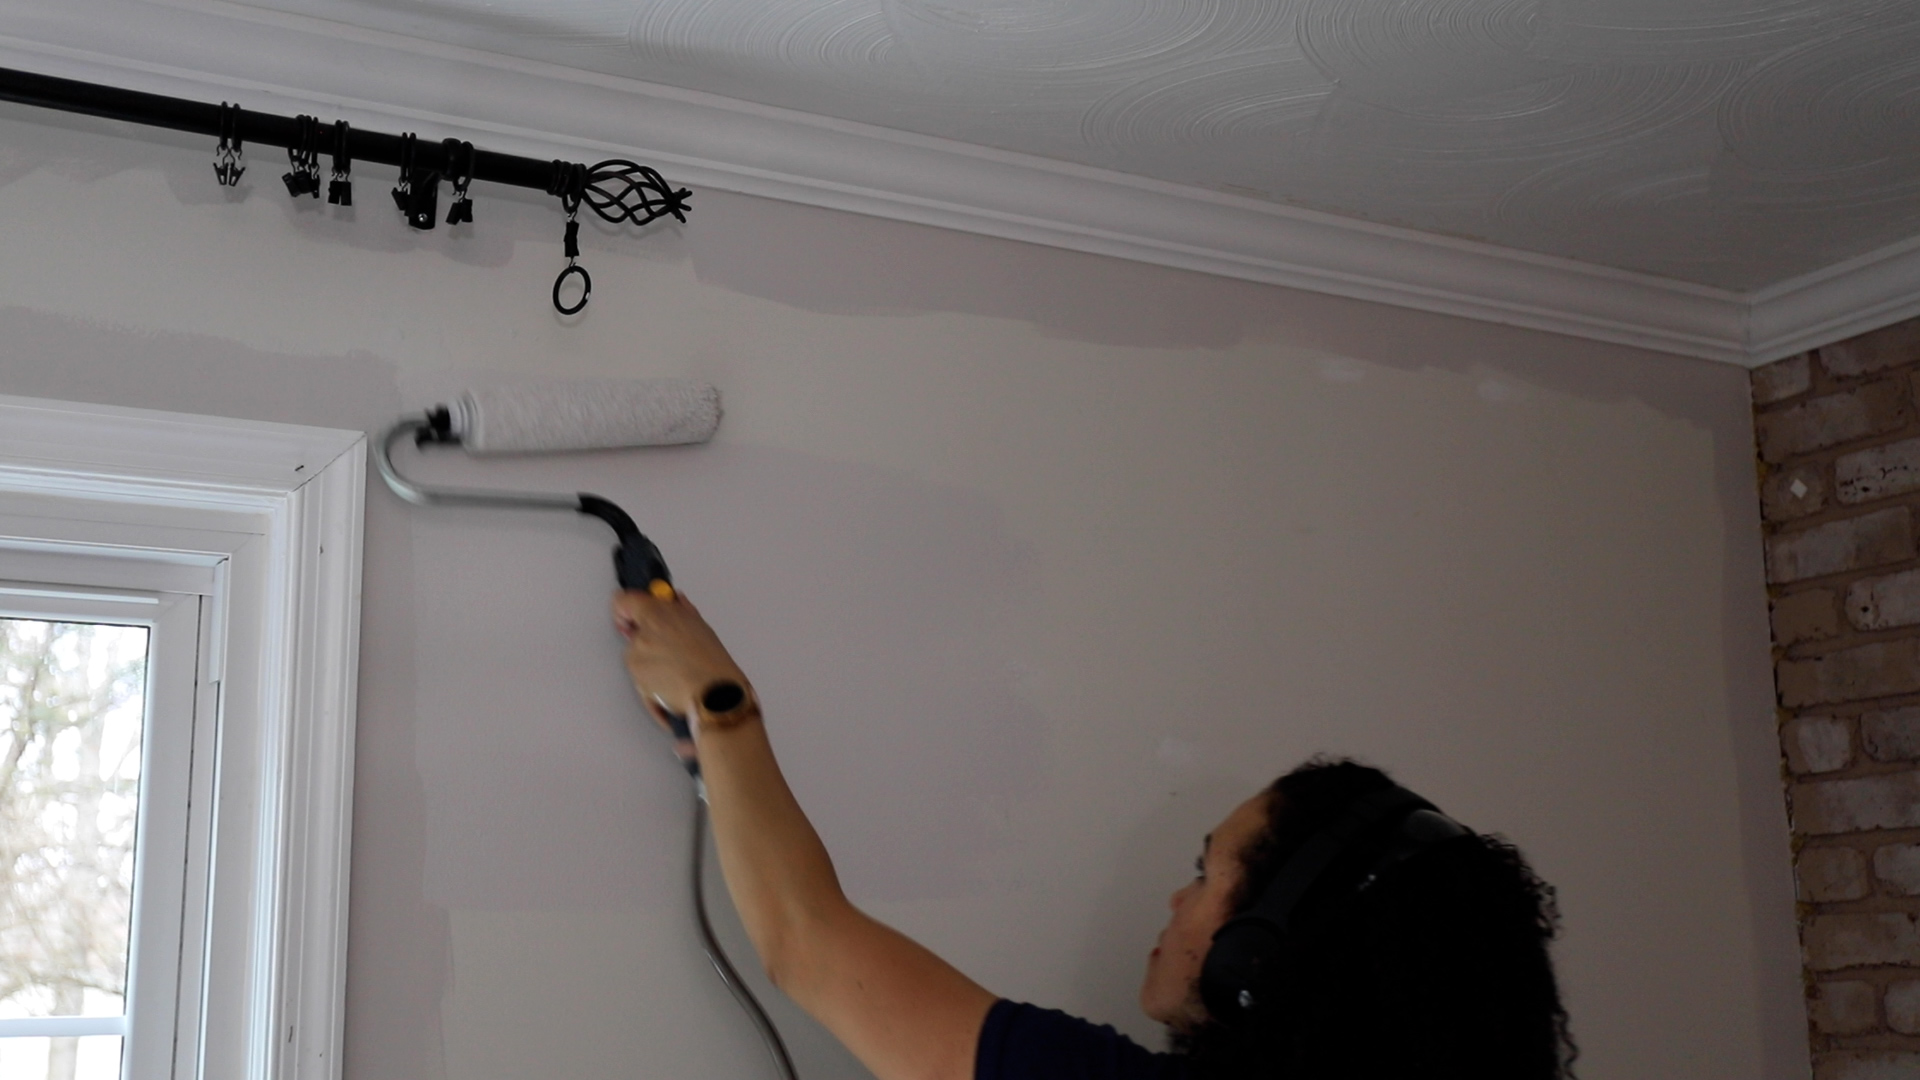
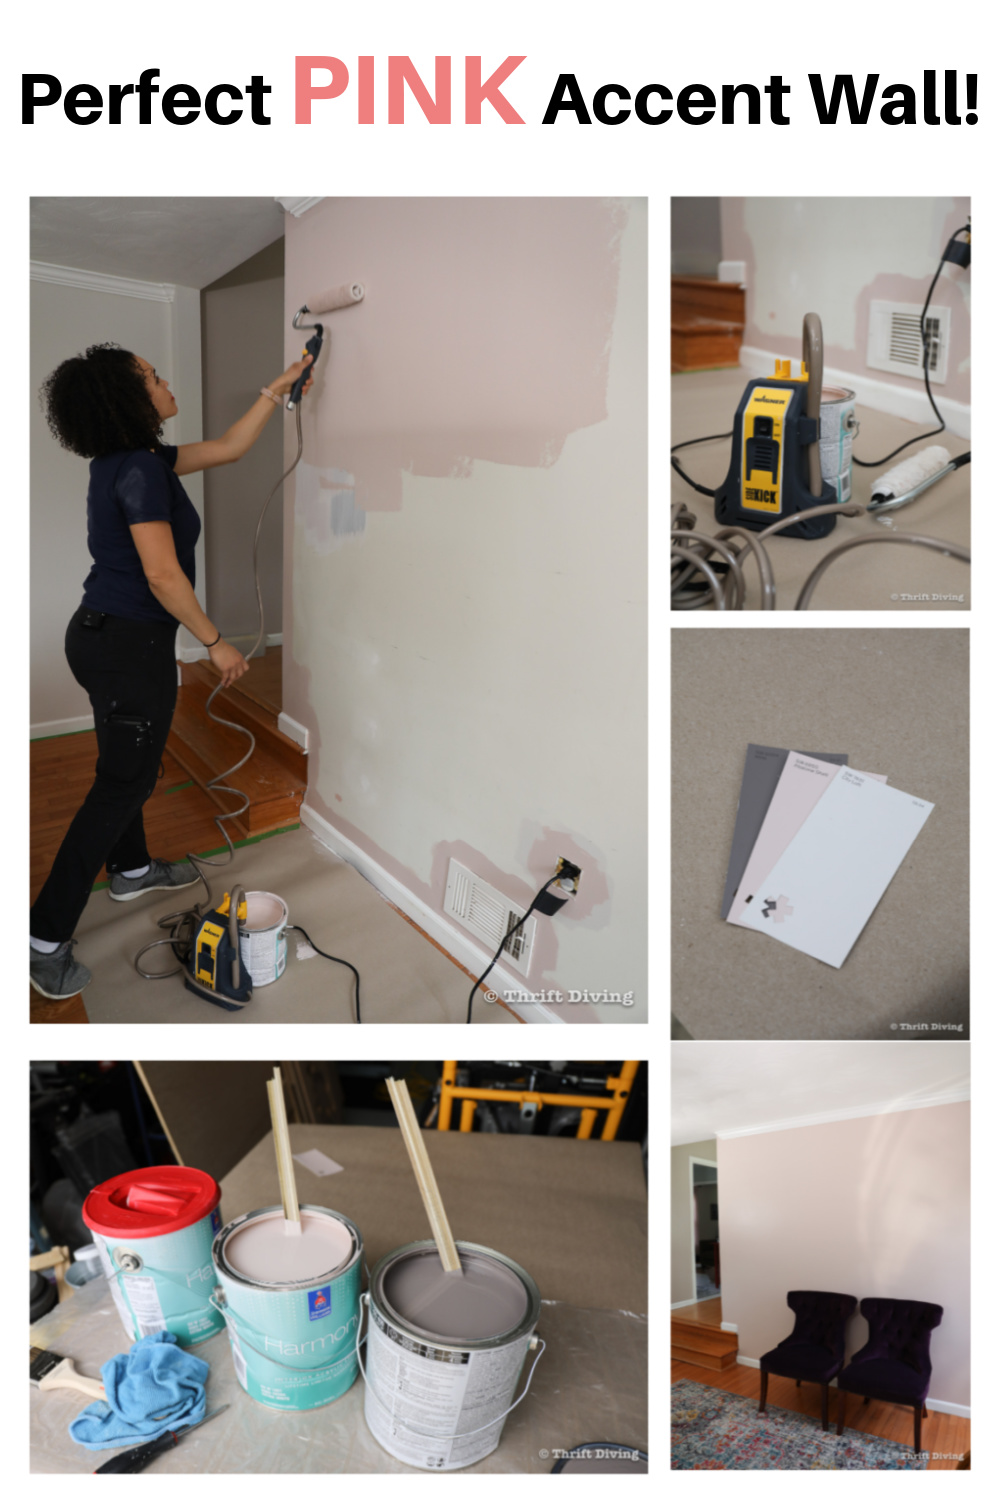
Wagner, one of my long-term partners, reached out to me to try the Wagner Sidekick for painting the walls. I was super stoked to try it! Since moving into this house, I have tried my share of painting tools, and I have to say, this one is my favorite! It basically eliminates the need to use a paint tray to constantly re-load the roller with paint!

How to paint was the easy part.
Which colors to paint was the hard part! (If you have trouble picking paint colors, too, try reading this blog post with some of the prettiest colors I have used in my house!).
I had my mind set on a light and airy family room, filled with soft pink accents. I know, I know–very feminine and unflattering, in some people’s opinions, but as I’ve gotten older, despite being a hard-core “tom girl” there’s a part of me that absolutely adores pink and softness and light and airy.
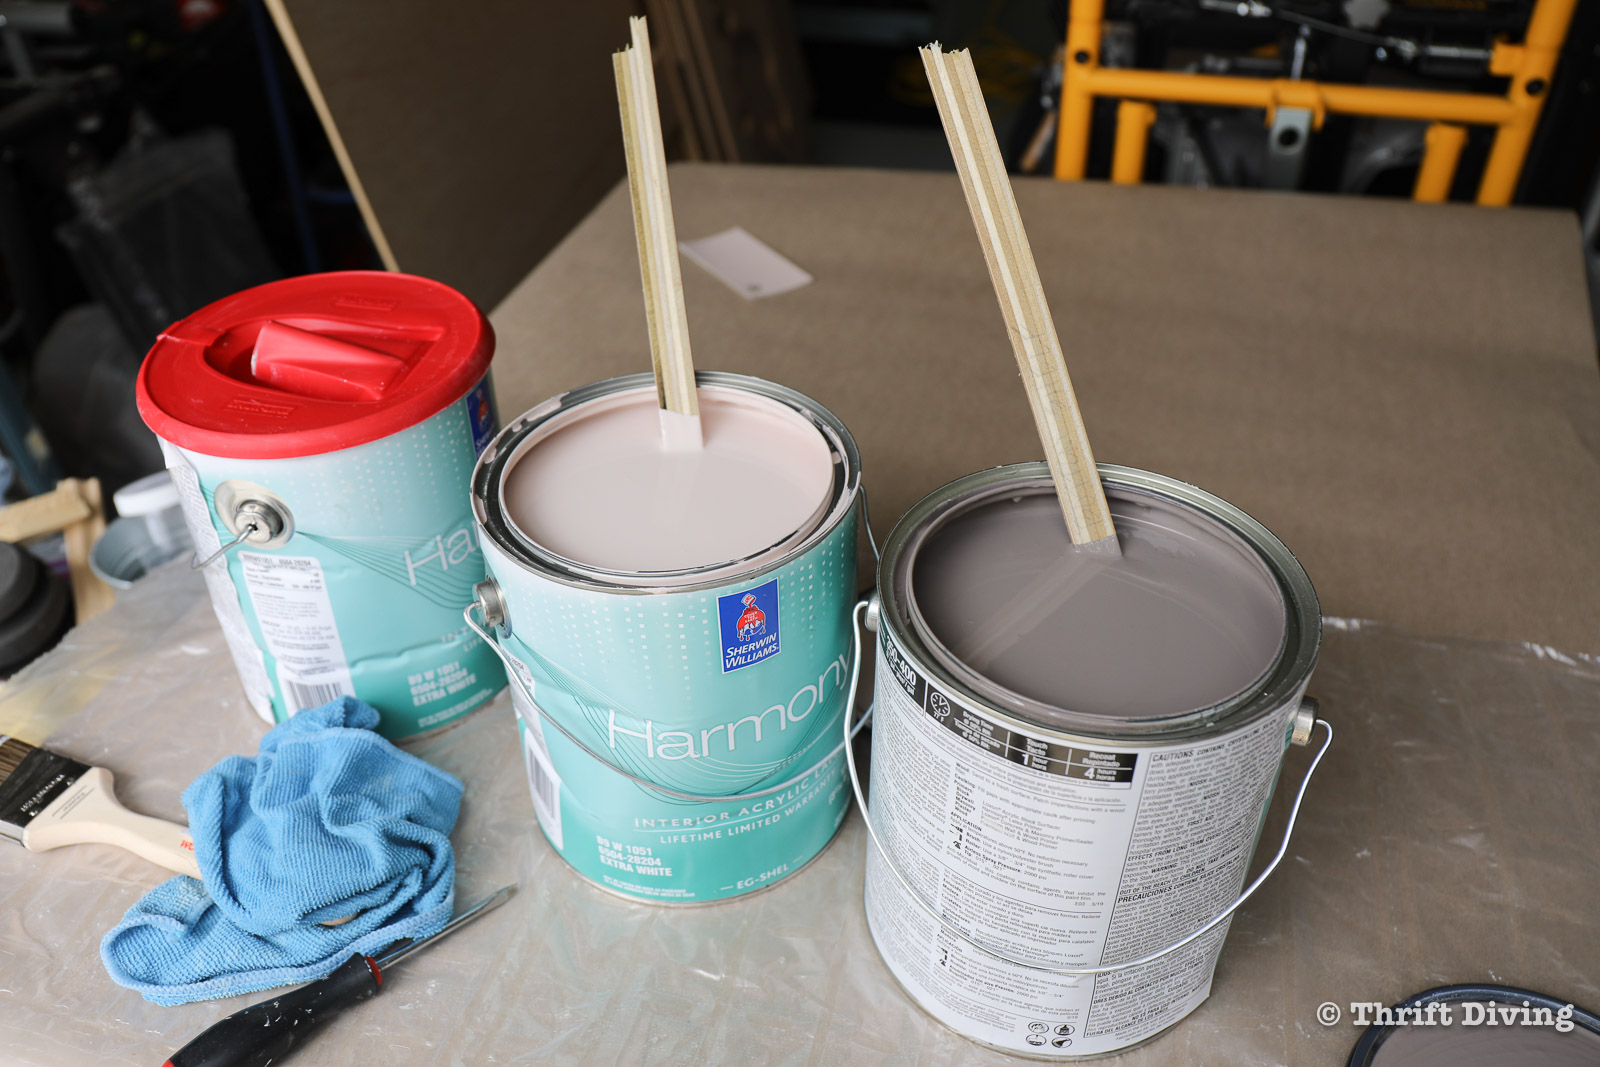
I ended up going with these calming and soothing, yet stylish and modern: Sherwin Williams Mink, Abalone Shell, and City Loft.
No matter what anyone said, I was getting my pink accent wall!
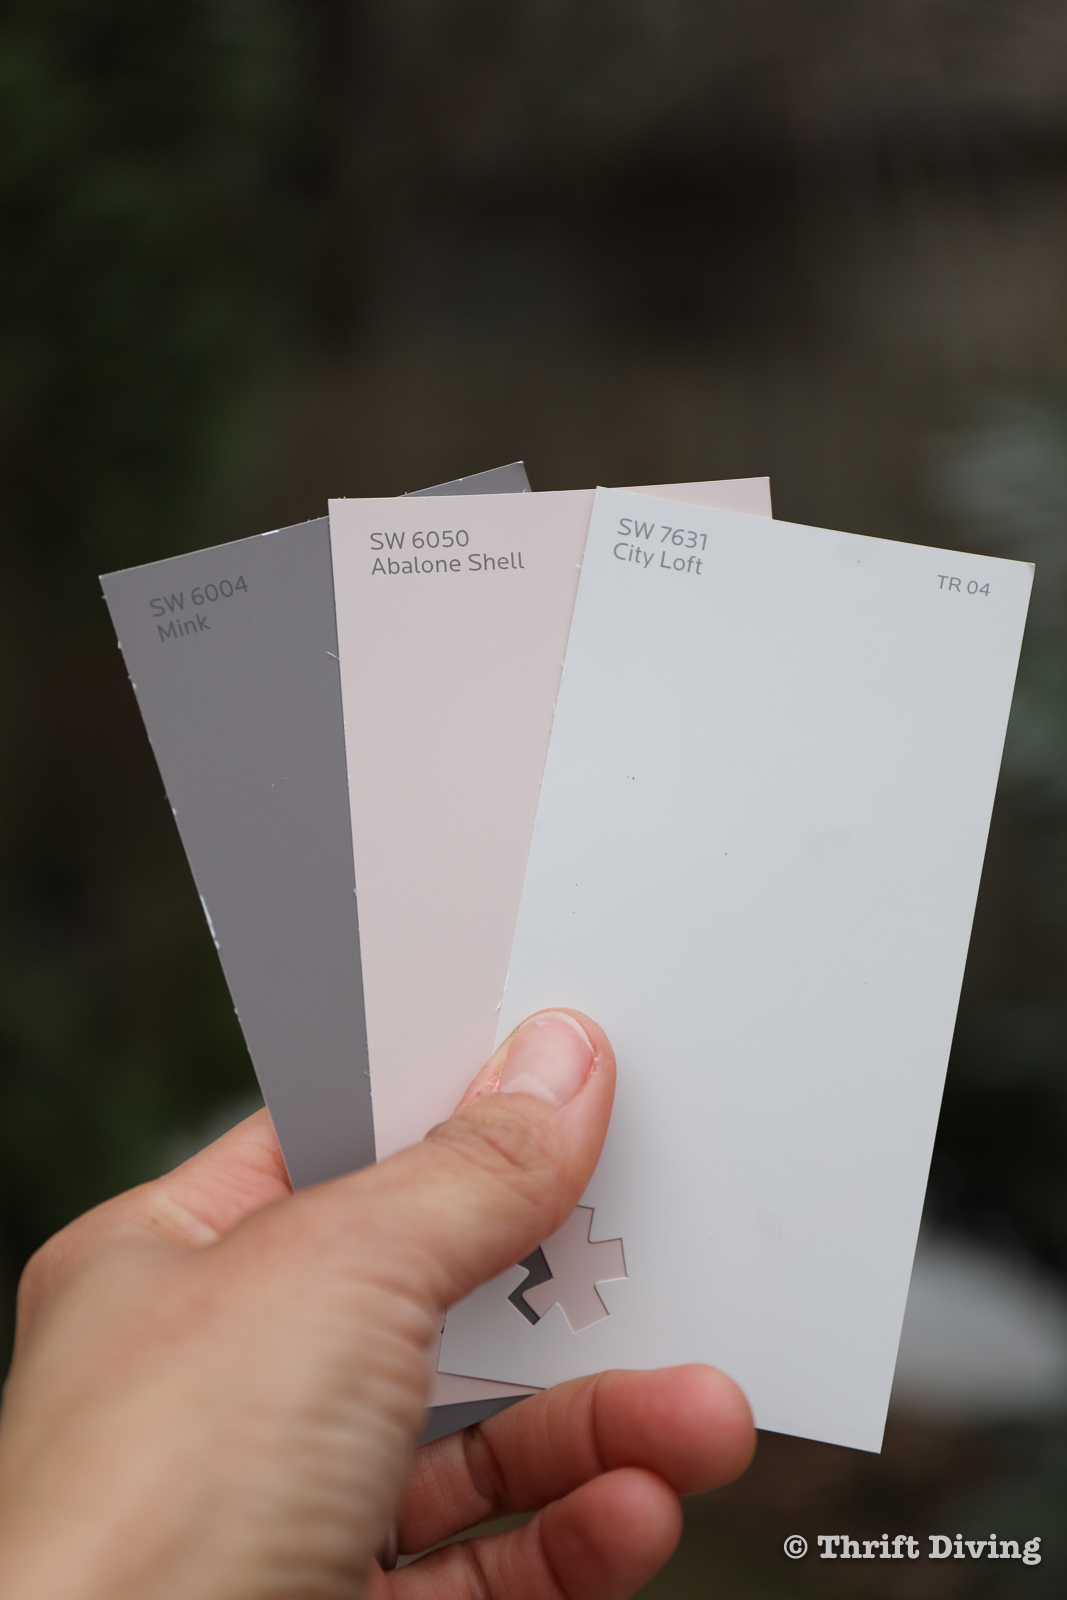
It’s not “in-your-face”pink, but rather, a soft pink with just the right of femininity for a woman like me living in a house full of men. 😉 The Mink color is perfect as an accent around the room.
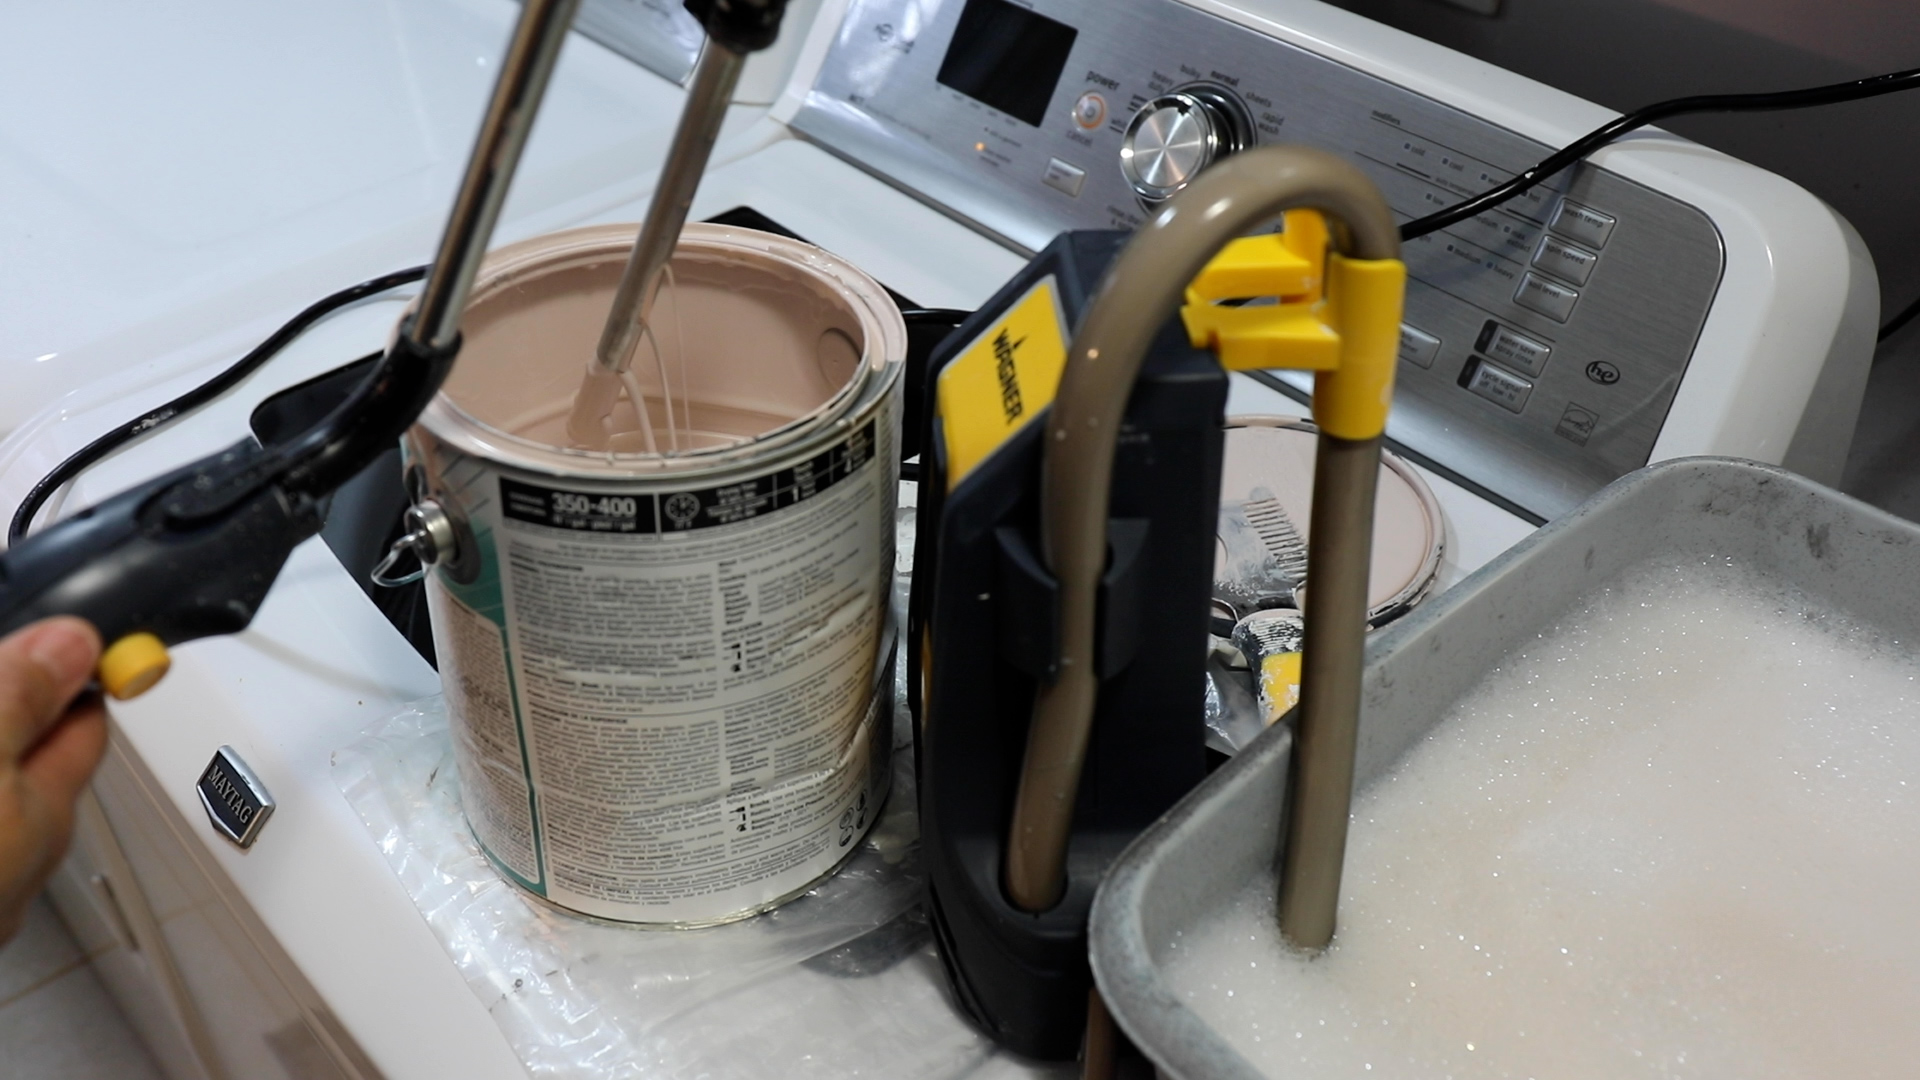
The Sidekick was an awesome tool for getting the painting done! All I had to do, right out of the box, was to insert the tube into the 1 -gallon bucket (it will accommodate a 5-gallon bucket of paint, too), turn it on, and the paint was sucked up right into the tube, and soaked into the roller, eliminating the need to stop and re-load a messy roller (which tends to drip paint splatters everywhere).
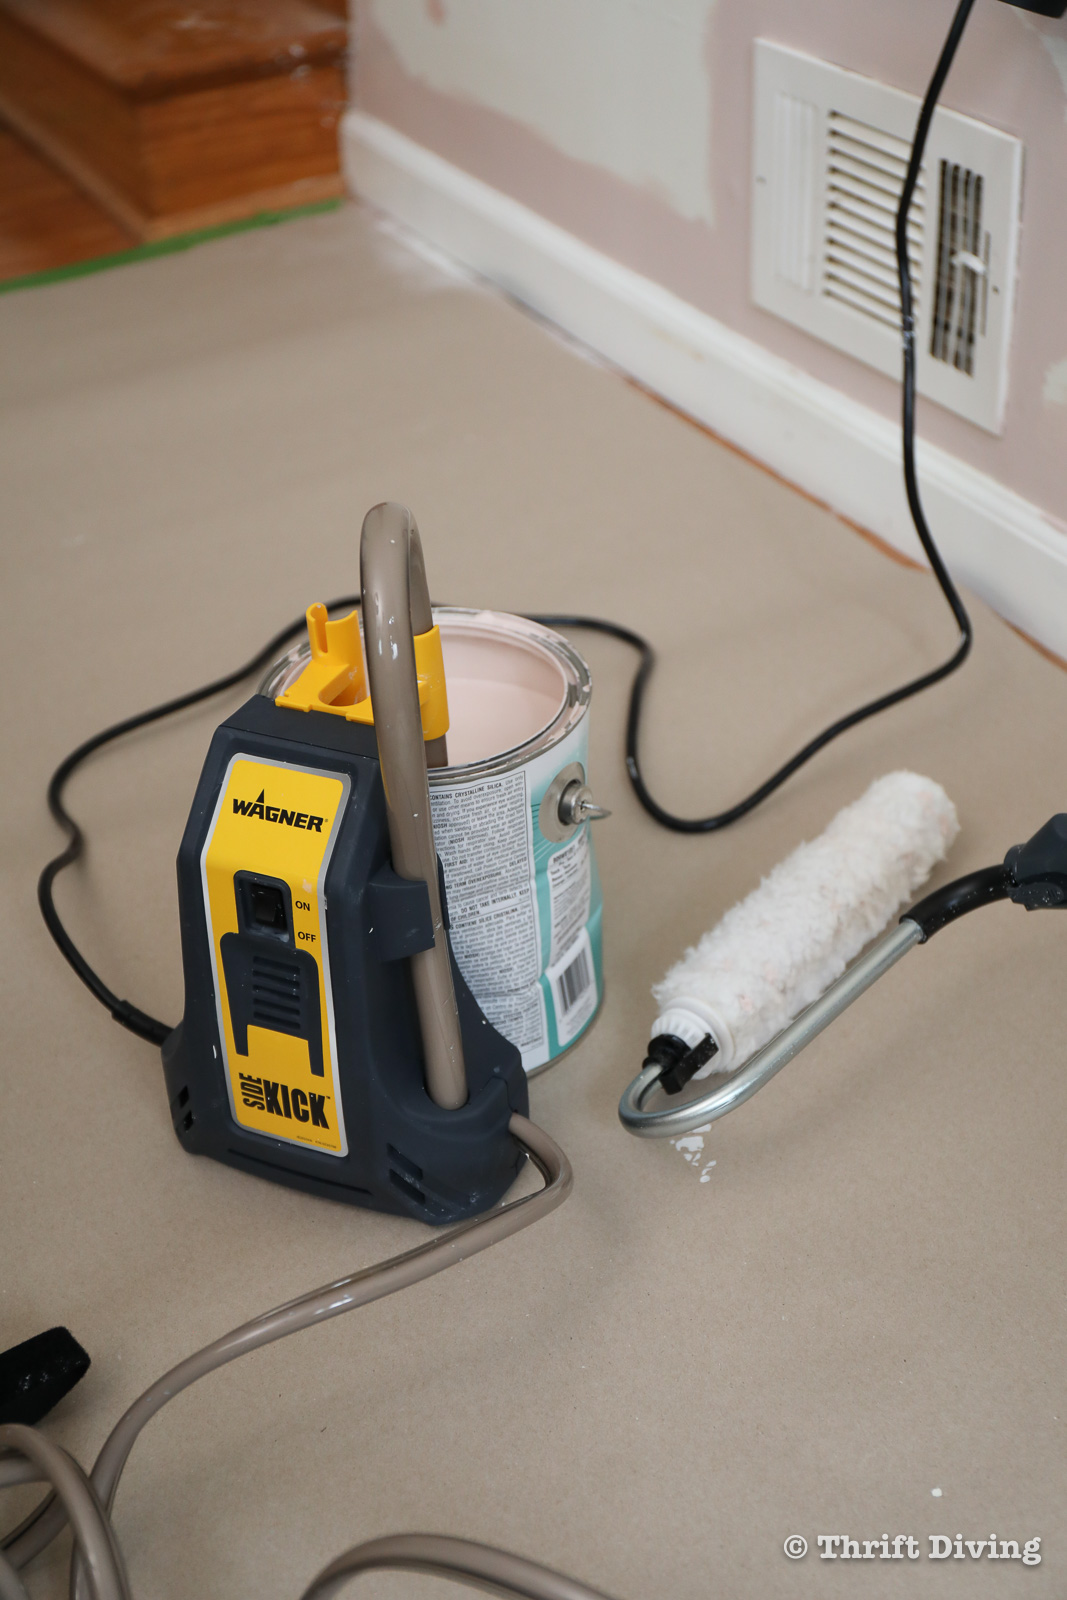
With the Sidekick, all I had to do was push the yellow button on the handle to turn on the pumping action, and I would get just the right amount of paint I needed, then I turned it off and kept rolling, uninterrupted. 🙂
Thankfully, my ceilings are normal 8′ ft ceilings. But in homes with vaulted ceilings, or when painting in stairwells, stopping to reload isn’t convenient (and can be downright unsafe, since most likely, you’d be on a ladder or platform).
But with the push of a button, no matter where you’re painting, you can keep going. I really loved that!
And one thing I noticed is that I didn’t have of my usual paint drips on the floor from paint leaking off the end of the dipped roller. That was very impressive!
(Any by the way….isn’t this color sooooo pretty?!?!)
The main walls weren’t very different in color, but the City Loft paint color had a more modern feel to it, with slight lavender undertones. It was so pretty!
When I was done painting, clean-up took about 20 minutes, which wasn’t too bad. The steps to cleaning the Sidekick include:
- Shut off the Sidekick.
- Remove excess paint in the roller with a roller cover cleaner.
- Insert the tube into hot soapy water, turn on the unit, and clear out the water that’s remaining in the tube, back into the paint bucket.
- Once excess paint in the tube has been cleared, add the metal part of the roller (don’t put the whole handle in water) and let the water cycle through the roller and the unit. Change the water as needed. This will take about 10-15 minutes.
- Disassemble the roller and thoroughly wash it to reuse later.
- Wipe down the Sidekick and store it for next time!
You can see me clean my Sidekick unit on my YouTube channel.
Making Repairs
Now that the painting was done, I had some other things to do in my family room. We had a leak in the fireplace a few years ago that caused some of the hardwood flooring to buckle. No amount of banging and prodding could make those things go back into position!
Thankfully, I had found some spare flooring (!!!) in the garage from the previous homeowners, and I was able to replace some of the boards, using construction adhesive to hold them in place, with 45-pound weights to keep pressure on them until the boards dried!
BEFORE
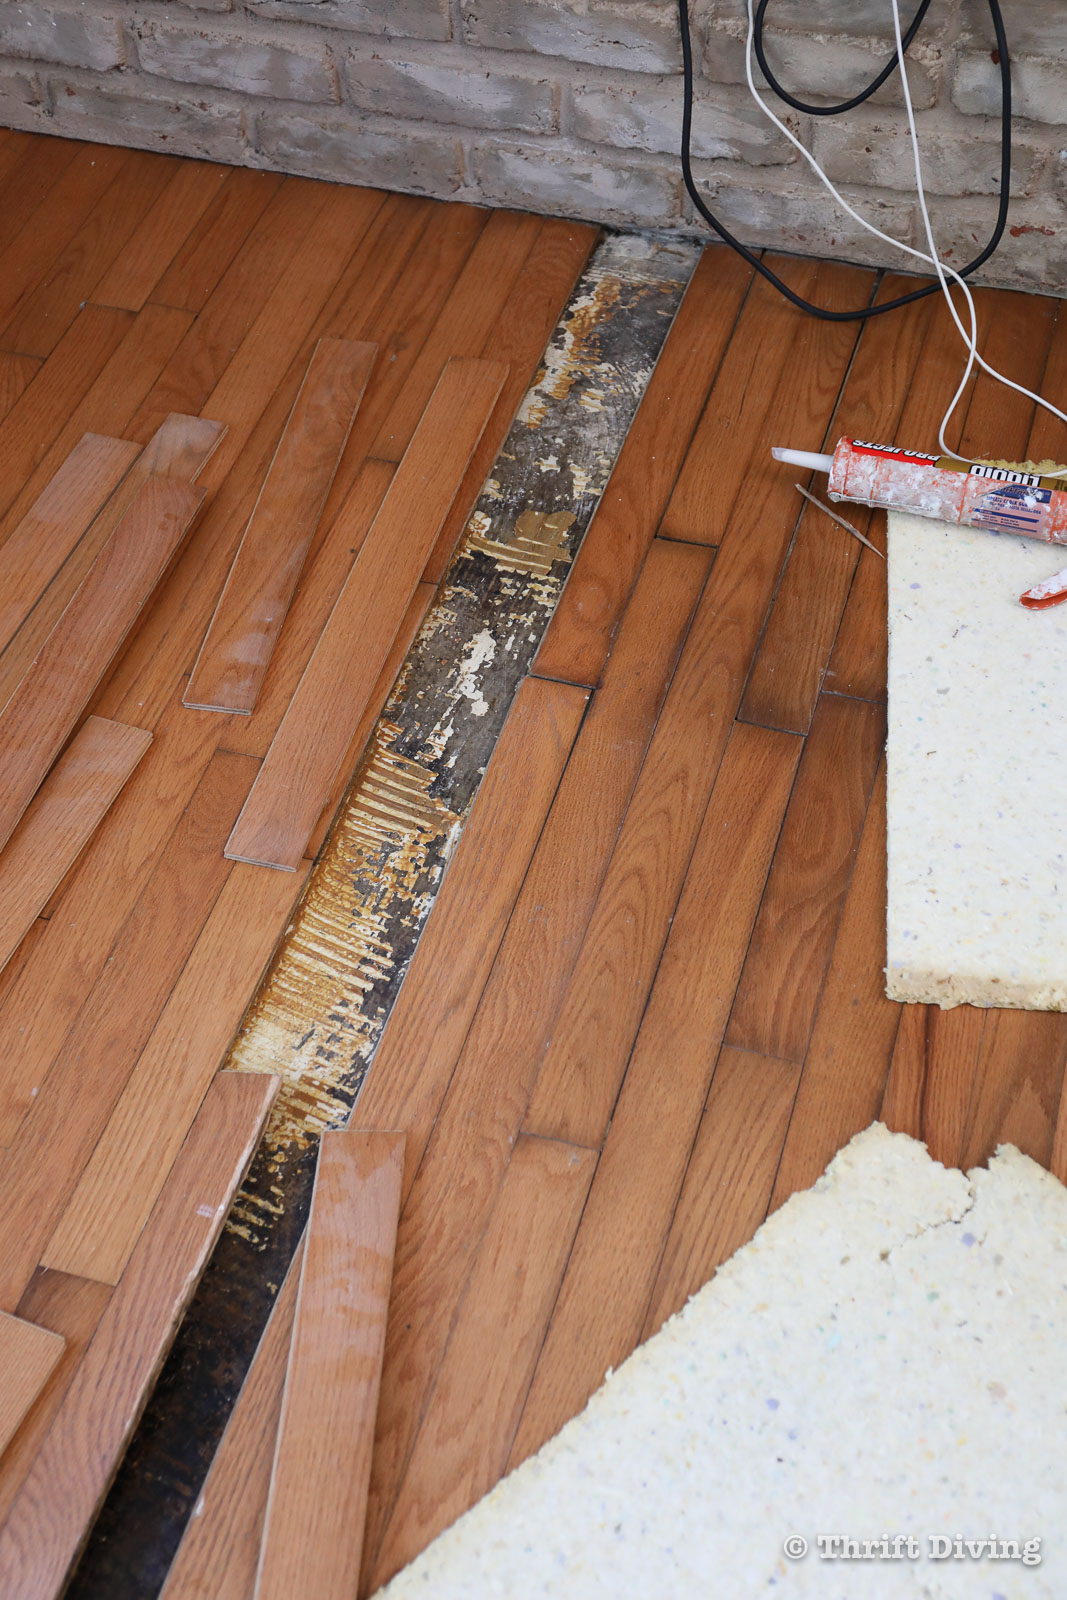
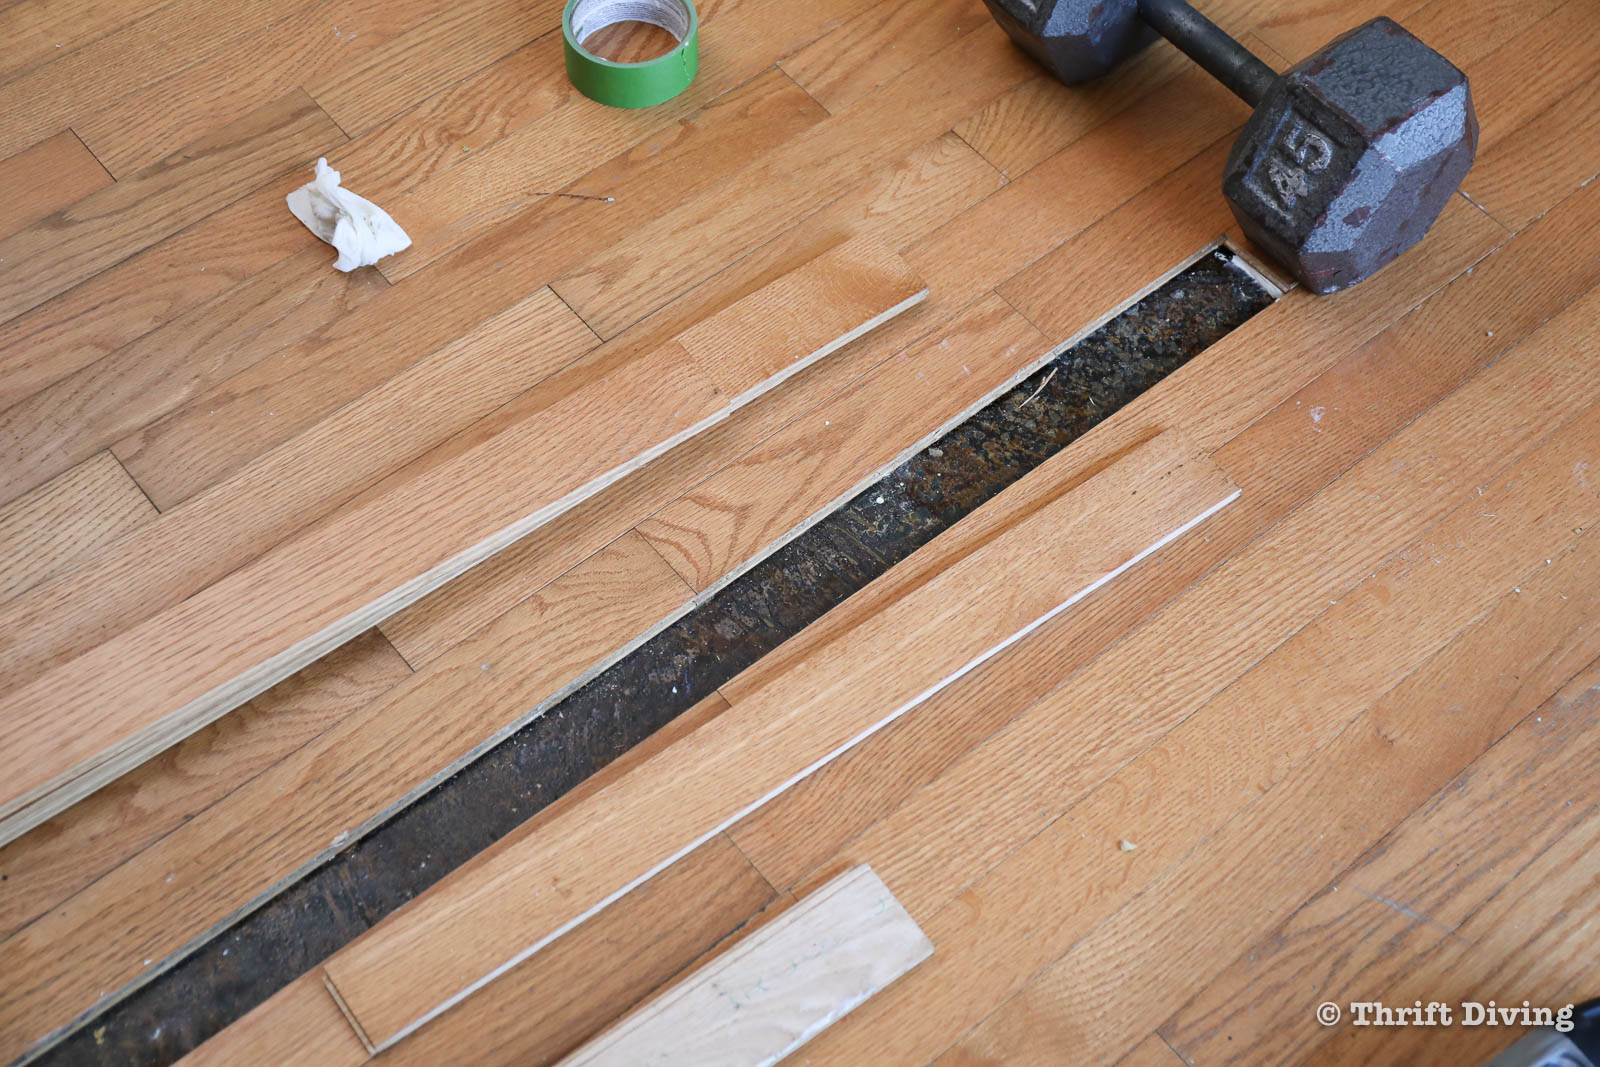
While you can see that some of the floor boards were definitely damaged from the water, the fact that they weren’t buckling under our toes was good enough for me!!! 🙂 Pretty good patch job for someone who has never had to do that before. 🙂

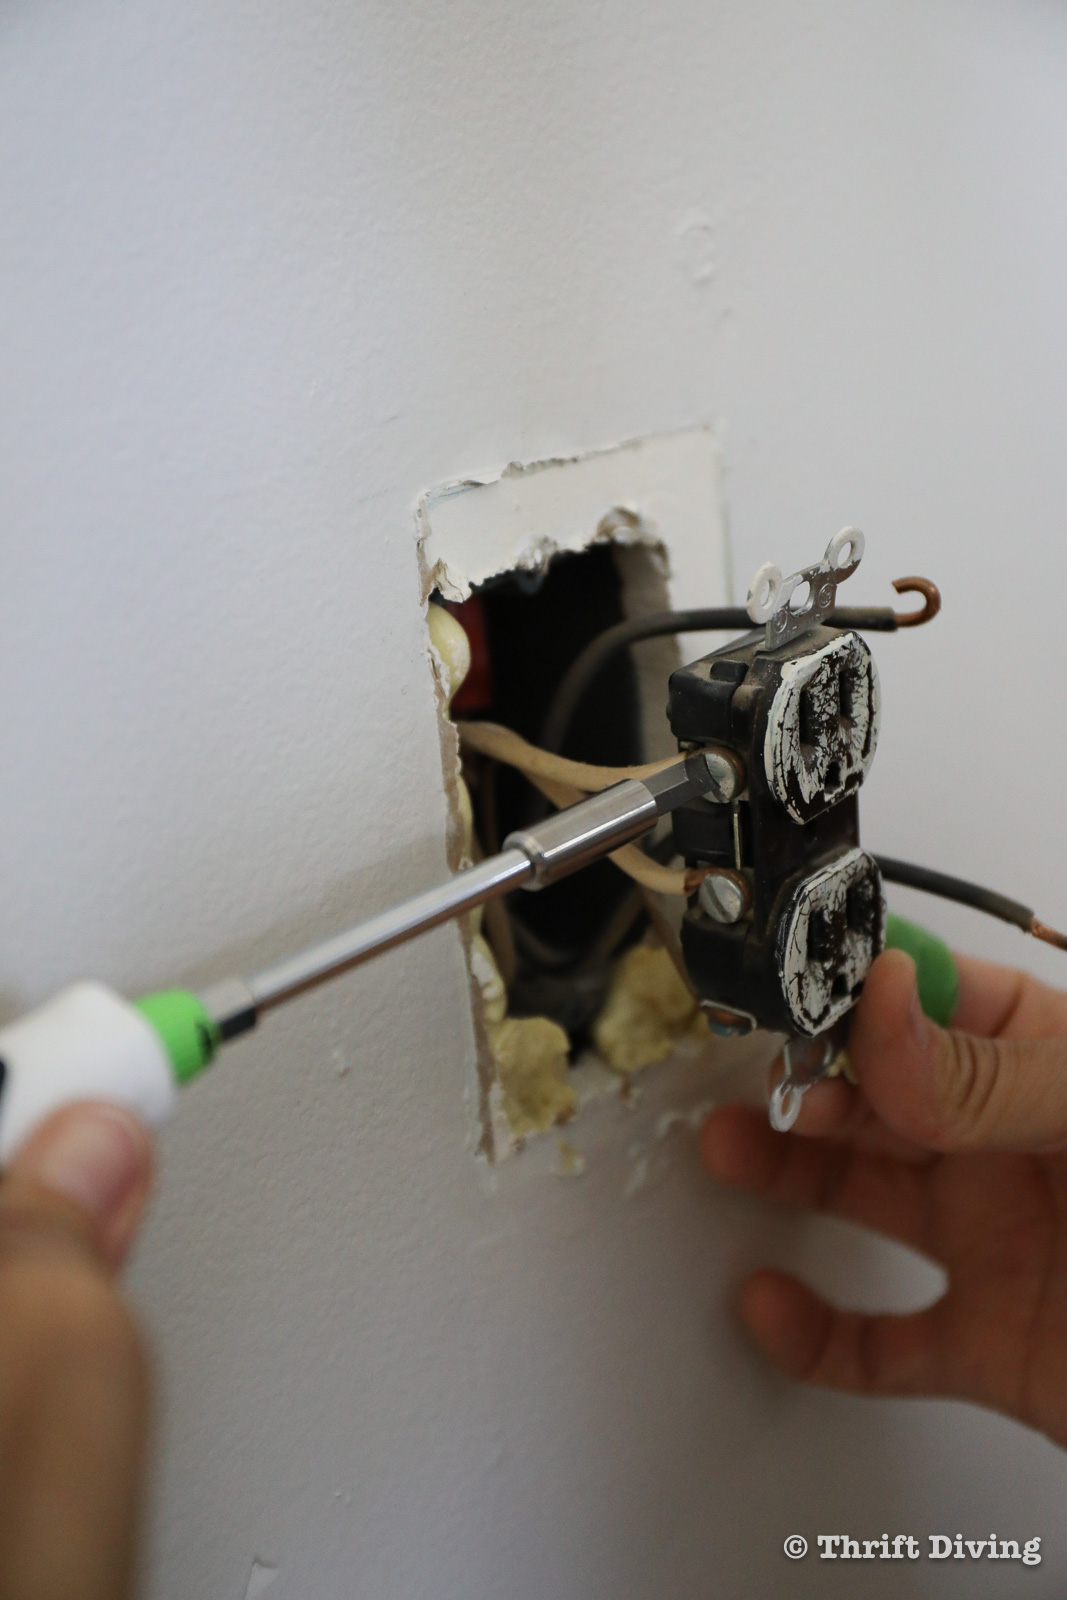
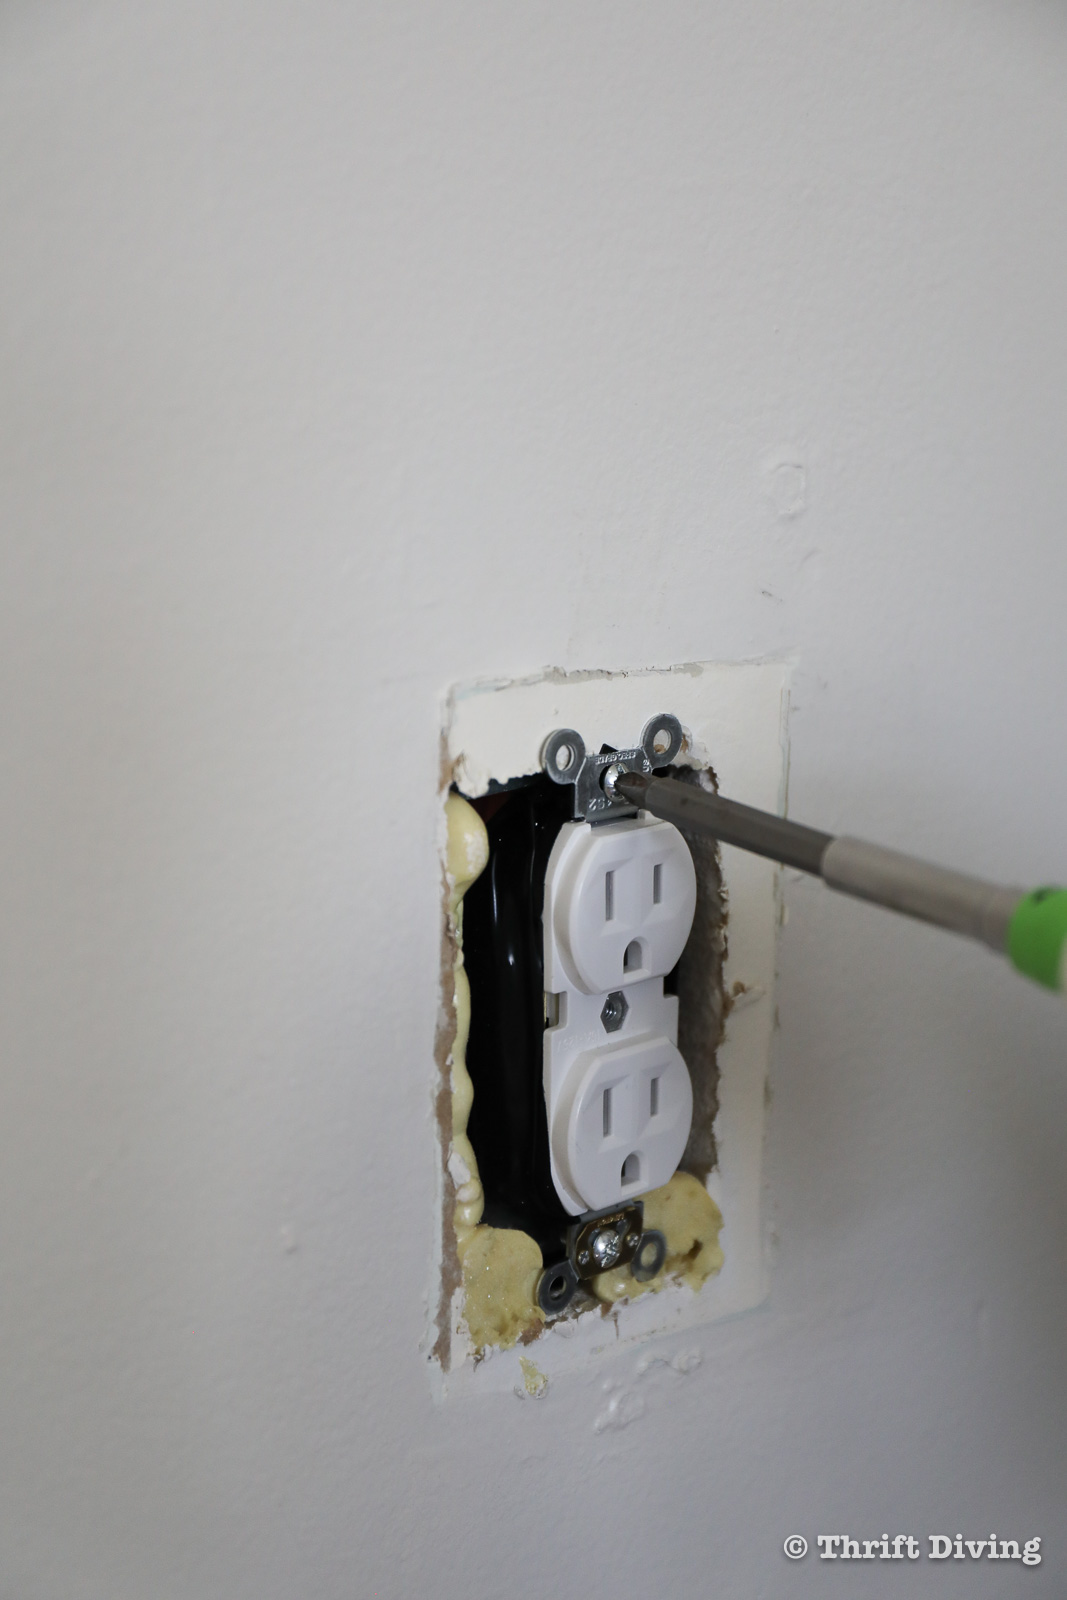
I also had some receptacles that needed to be replaced. I remember when the thought of electrical would terrify me! Now, however, after taking a couple of residential electrical wiring classes, was a piece of cake to remove and replace the loose outlets with new ones!
There are still some projects I need to get done in my family room to “officially” be done!

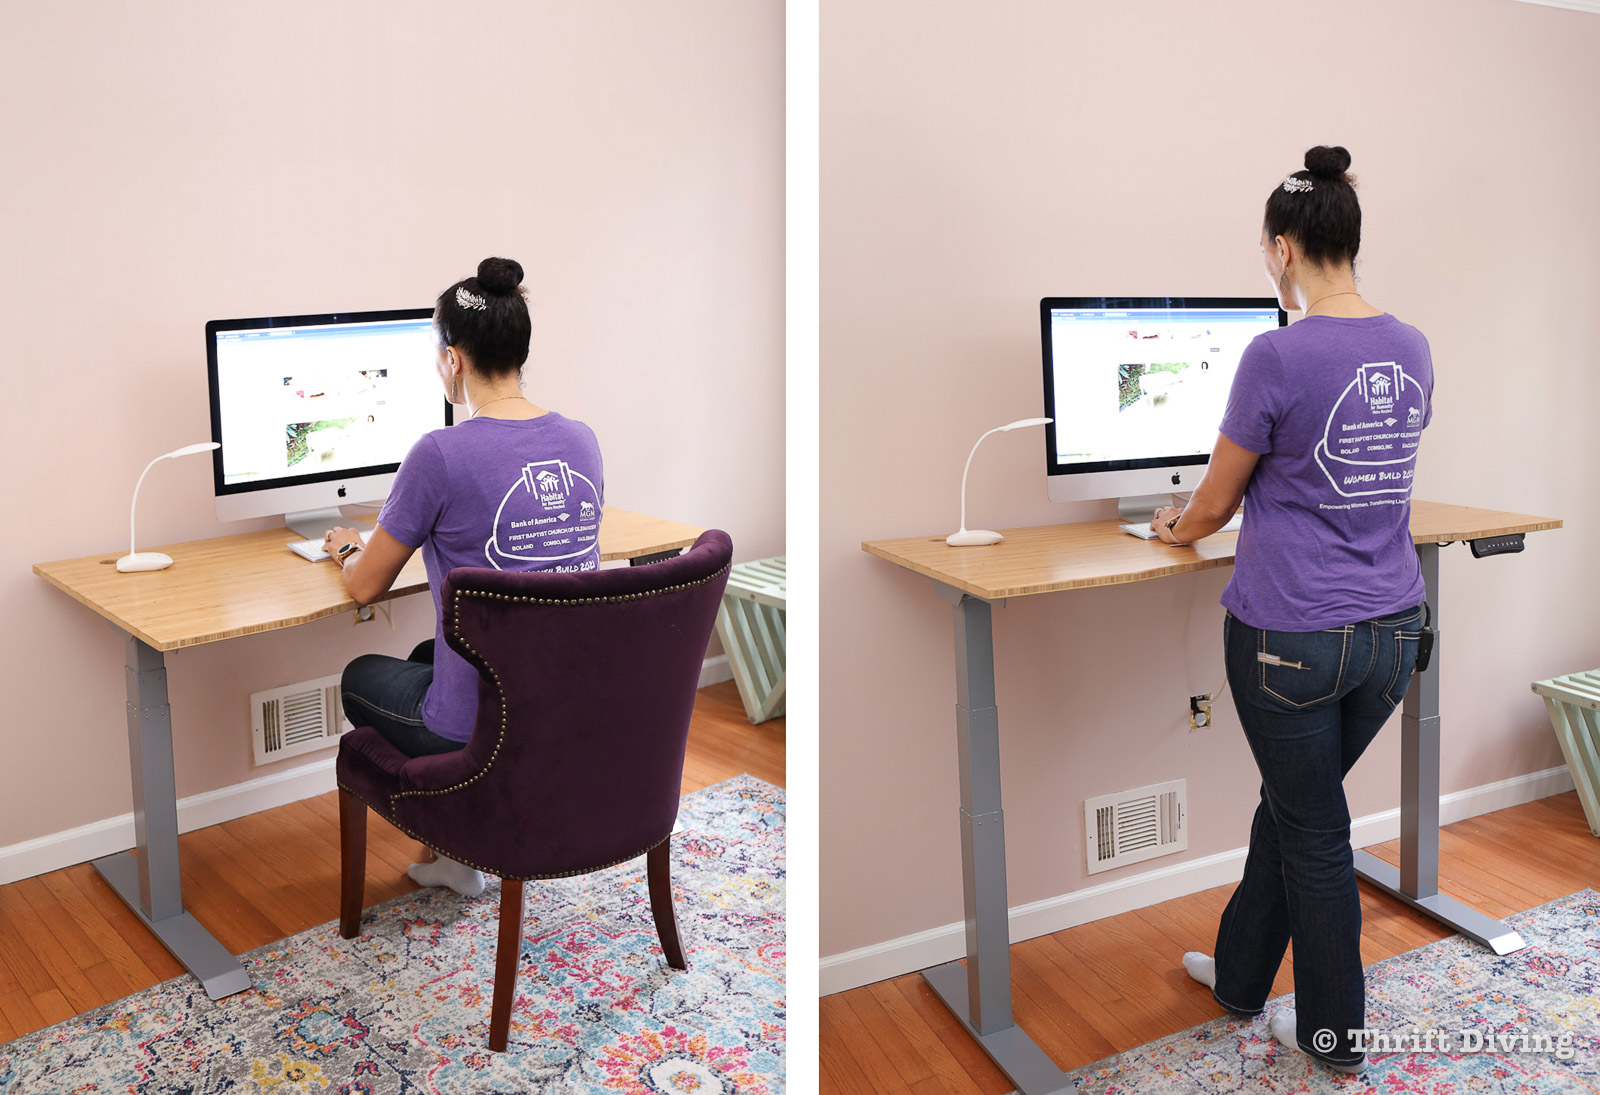
UPDATE: The standing desk I was waiting on from FlexiSpot finally arrived! The awesome folks at FlexiSpot sent me the Kana Bamboo Standing Desk, which is fully adjustable from a standing to a sitting height. I absolutely love this desk!
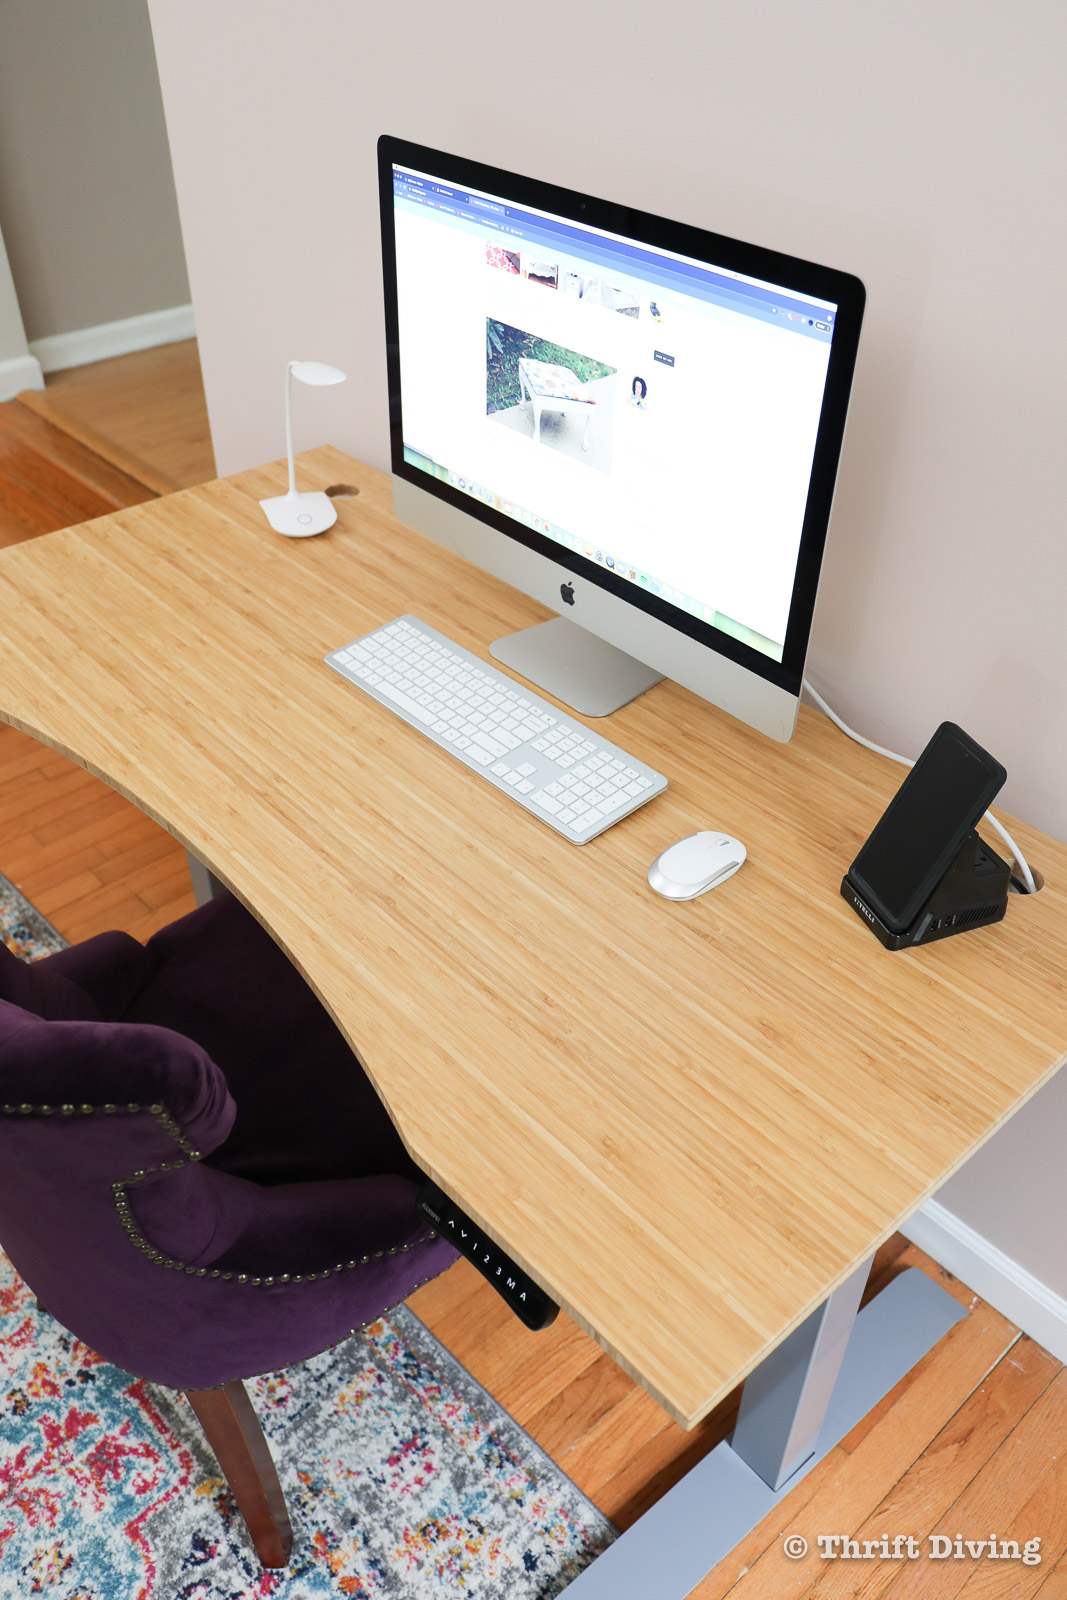
What I’ve noticed over the years is that our family tends to hide out in their own areas on their electronics: me in the basement working, hubby in his office working, the kids in the COVID at-home schooling areas, that it’s not often that we gather in this room together. My goal with this part of the room was to put a desk with a computer for everyone to use so that we’re more likely to be together.
What I love about this desk, now that we’ve had a chance to use it for over a month, is that:
- The bamboo top feels soooo smooth! It’s huge bonus points that it’s made from a renewal source!
- We can sit down or stand up to use the computer so that we’re limiting the amount of sitting time.
- The desk has a keypad to program 3 preferred heights. Push a button and it will memorize your favorite heights or the preferred heights of difference people in your family (or office). Very convenient when sharing a desk with a few people!
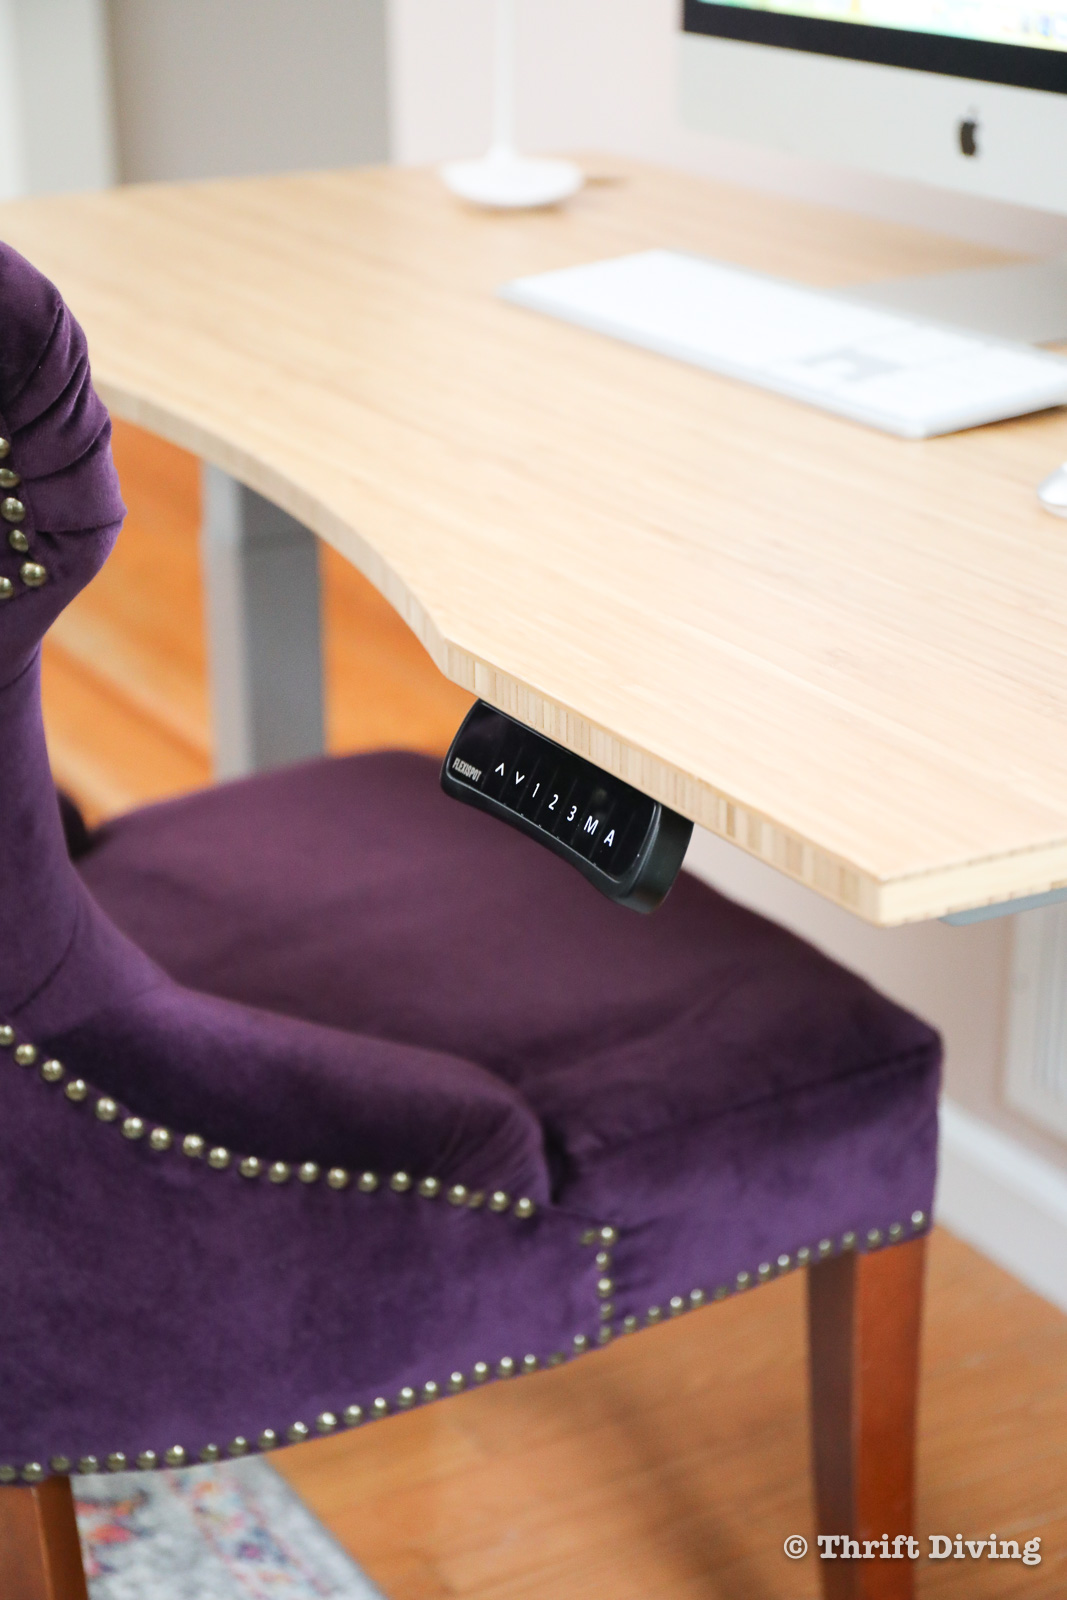
- It has a reminder feature!! OMG, this was the coolest feature! On the keypad, you can set a reminder that will buzz when the timer runs out so that you can remember to stretch, change positions, or just step away to take a break. Love that!
For more info about the Kana Bamboo Standing Desk, or to get an amazing discount for FlexiSpot Day (May 24 – 30, 2021), visit FlexiSpot now for your own standing desk!
I still haven’t have time to hang pictures or do the collage over the desk, as I had planned. I’ve been working on my closet makeover and I just haven’t been able to get back to finishing those small tasks in the family room (including building a coffee table!).

It’s always sad getting rid of old furniture, especially when it’s been with you through your marriage….the birth of your three children…and let’s be honest, we might have even conceived them there. HA!
But after 18 years, and without “antique” status, it was time for this old furniture to go to a home where someone with a smaller family and more time on their hands could breathe new life into this old thing.
Meanwhile, I will be cozied up on my new sofa, feet propped up, in the corner where it’s most comfy, for the next 18 years. More, if my children and (future) grandchildren don’t destroy this sofa. 😉

Have you done a family room refresh lately? What colors did you pick? Leave a comment below and let’s chat about it!

Love this post? Click here to SAVE it on Pinterest!
![]()
Download the 5 freebies!

Thrift Diving inspires women to decorate, improve, and maintain their home themselves...using paint, power tools, and thrift stores! Use these 5 printables, checklists, and ebooks to get started!

Looks just beautiful and adds the extra seating you needed in the space. I love the color choices on the walls and furnishings. Another WIN!
Wow, your family room looks fabulous! I color the colors and the accent wall is so subtle. I’ve got to figure out new colors for our house. I’m thinking about checking out that Wagner sidekick to make painting our vaulted ceiling much easier.
Thanks so much for all your How-Tos, blogs, videos, etc., you’re amazing and inspirational!
Pink accent wall was an inspired choice, and your results are breathtaking! I always know your projects are going to turn out beautifully.
Now what I REALLY want to know is what magic you perform to keep a white couch and white rugs looking pristine in your houseful of men. I would pay money for that DIY tip! 😀
HAHAHA!! Well, to keep the sofa white and clean, it’s called “threatening the children” with something like, “You BETTER not eat in the family room!” “You BETTER not flip around on my sofa!” LOL. Now that they’re older (15, 11, and 9), they’re less likely to destroy the furniture, and I remind them often that I paid a lot for my sofa. (Yes, I call it “mine” so they know that they don’t own it and it’s not theirs to mess up). LOL. So glad you like the family room!!
This is a completely fresh new look..i love the pink accent wall.. it’s soft yet gives the pop of color. Great choice on the new sofa.. I’m in the process of painting my dining, and will be thrilled when it’s over (i hate painting lol)
Aww, thank you, Jamala! 🙂 Girl, I know….painting is never really fun because of the potential mess and the tedious taping off and such. Good luck on your project. I know it will look fabulous when you’re done! 🙂
Love the new look Serena. You are an inspiration to me to try some things myself. Thanks
You are brave to have white rugs. Your room is beautiful. Everything looks clean and fresh.
Hi Serena! Love this room! You have inspired me! Where did you find this sectional? I’ve been searching for “The one” for years!
Happy Easter! Alison
Hi Serena. Your room looks cozy. Love your new sofa. You have now become an electrician…..omg. I am terrified of changing out an electrical anything. Except a light bulb.
Have a great weekend.