DIY Painted Mirror and Wooden Notebook Using Metallic Paint
This DIY painted mirror and DIY wooden notebook crafts are brought to you by BeyondPaint.com, but all opinions are my own.
I’ve been doing a lot of traveling lately, too, so it felt nice to have simple projects that can get done in about 1 hour or so.
I’ve been working with Beyond Paint for several years now, using their paint in various furniture makeover projects, and I’ve come to love it because it’s got what I call “spreadability.” I find it to be one of the easiest and quickest paints to use.
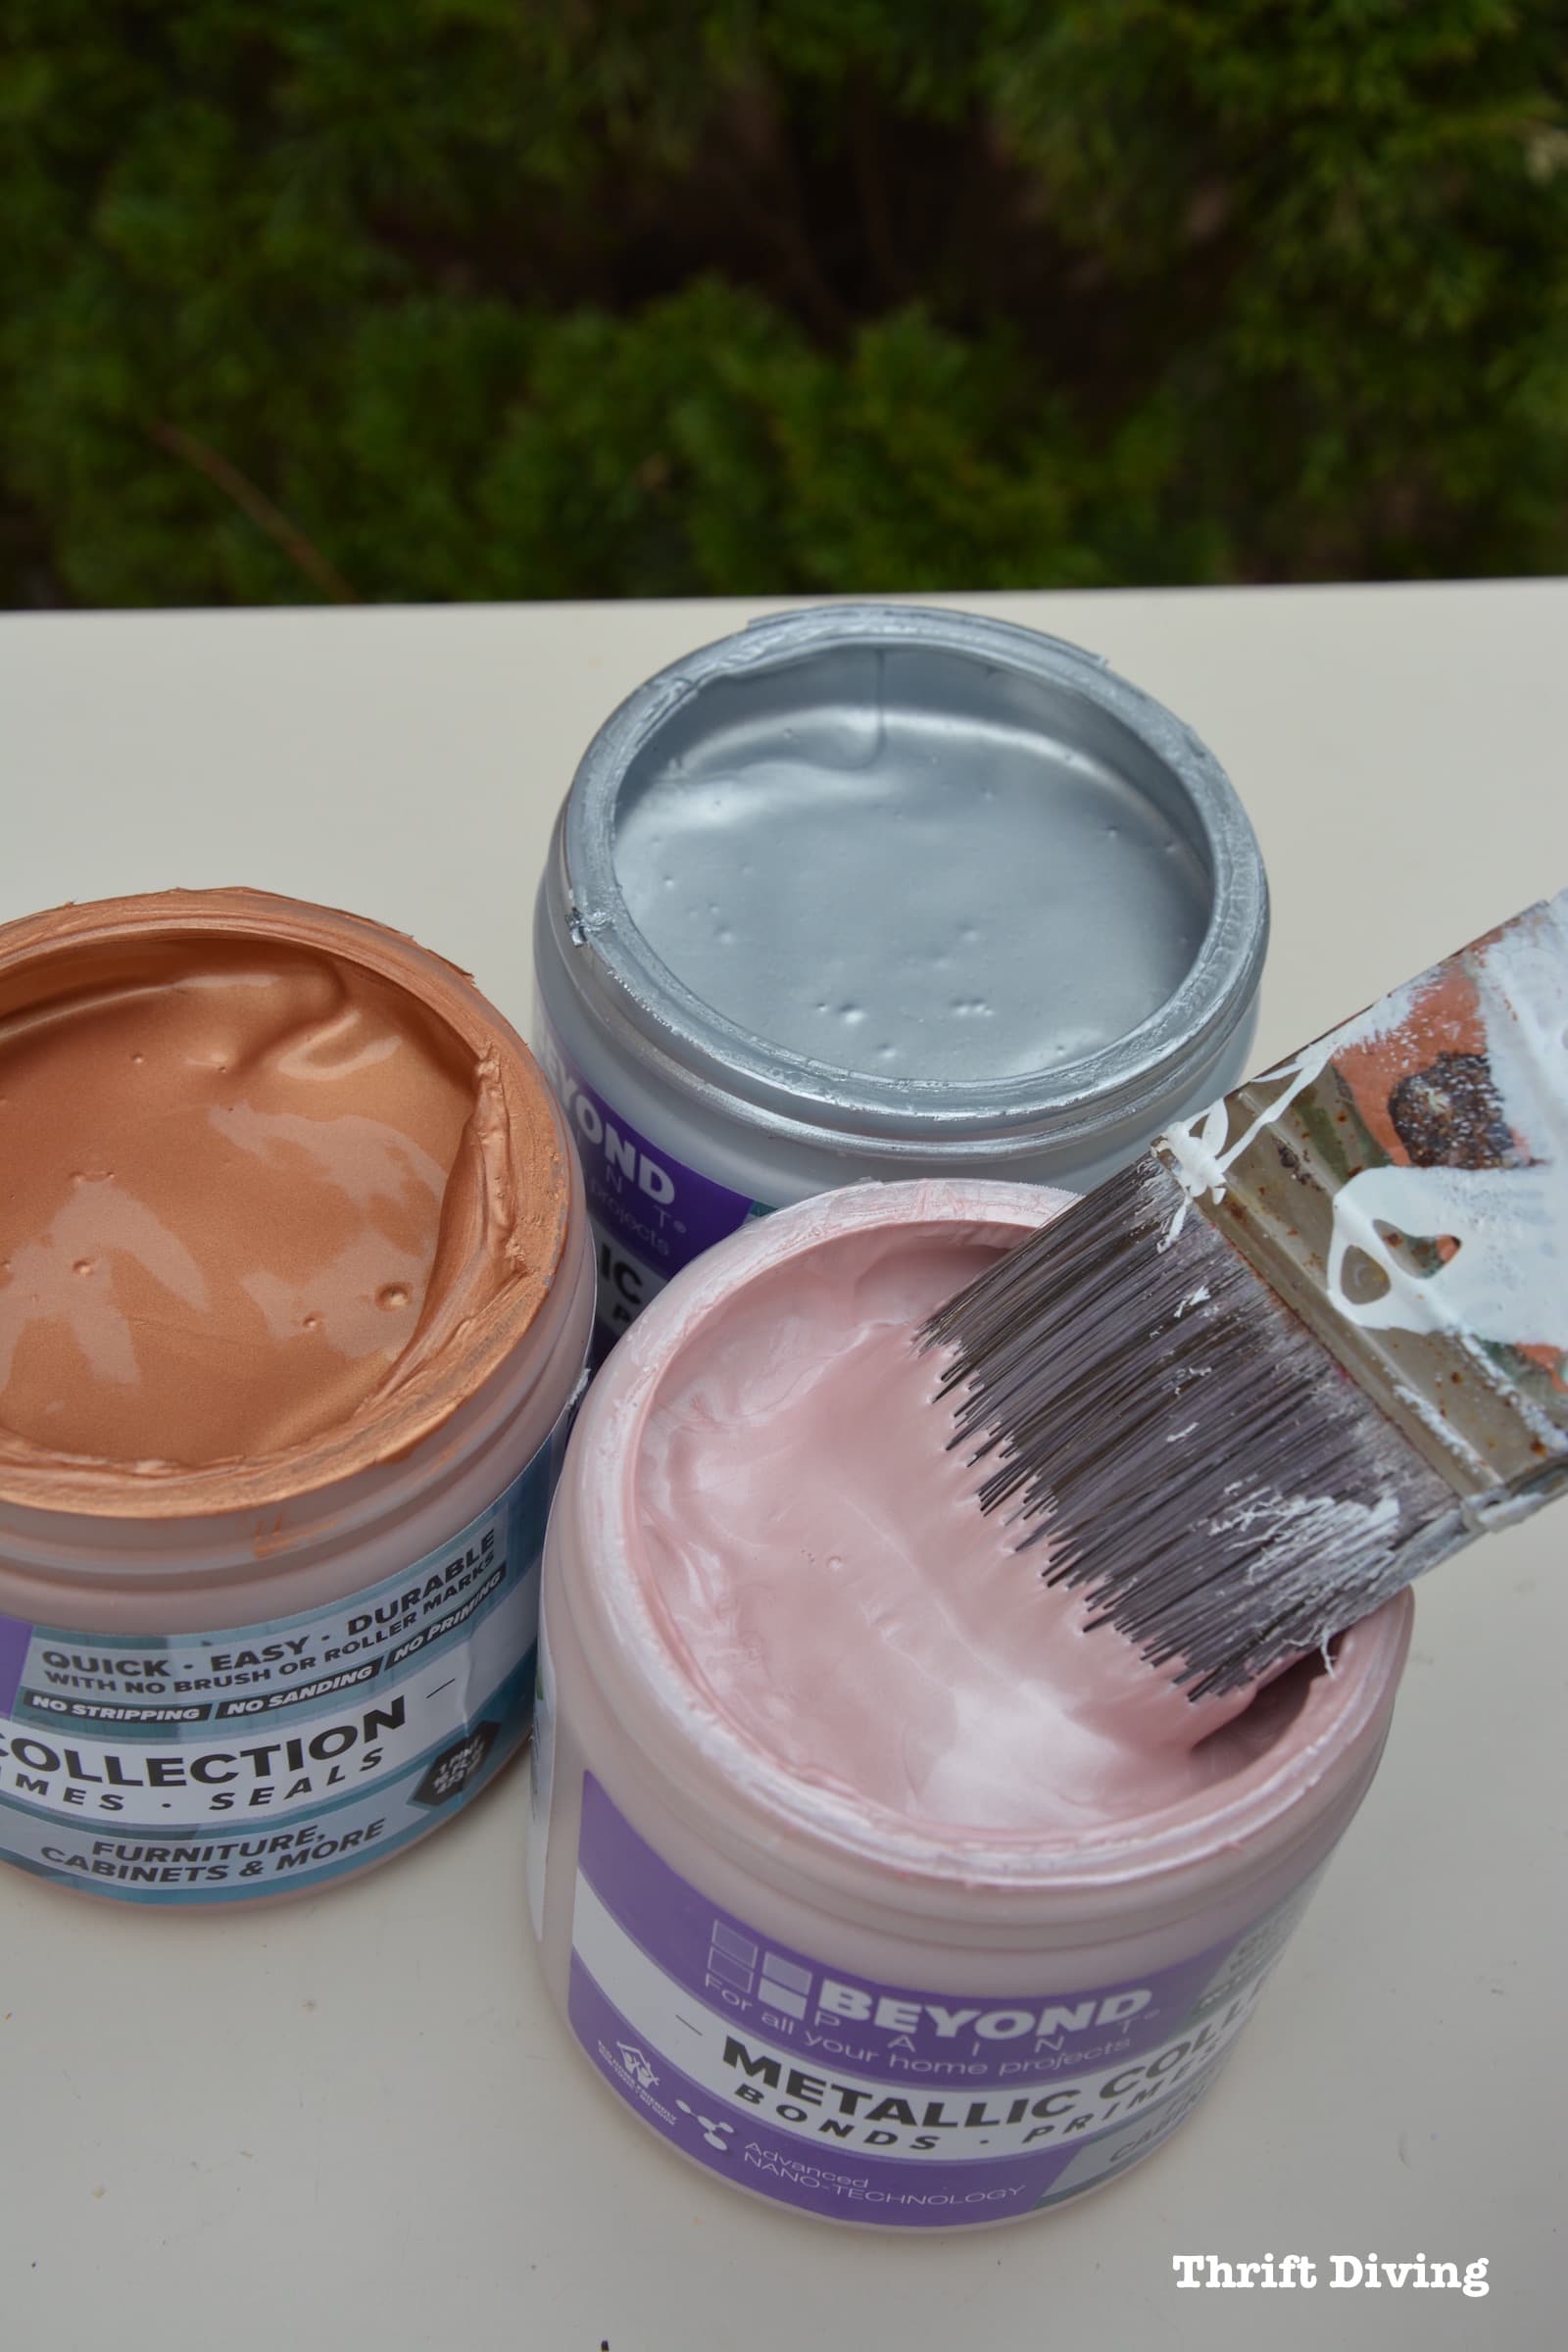
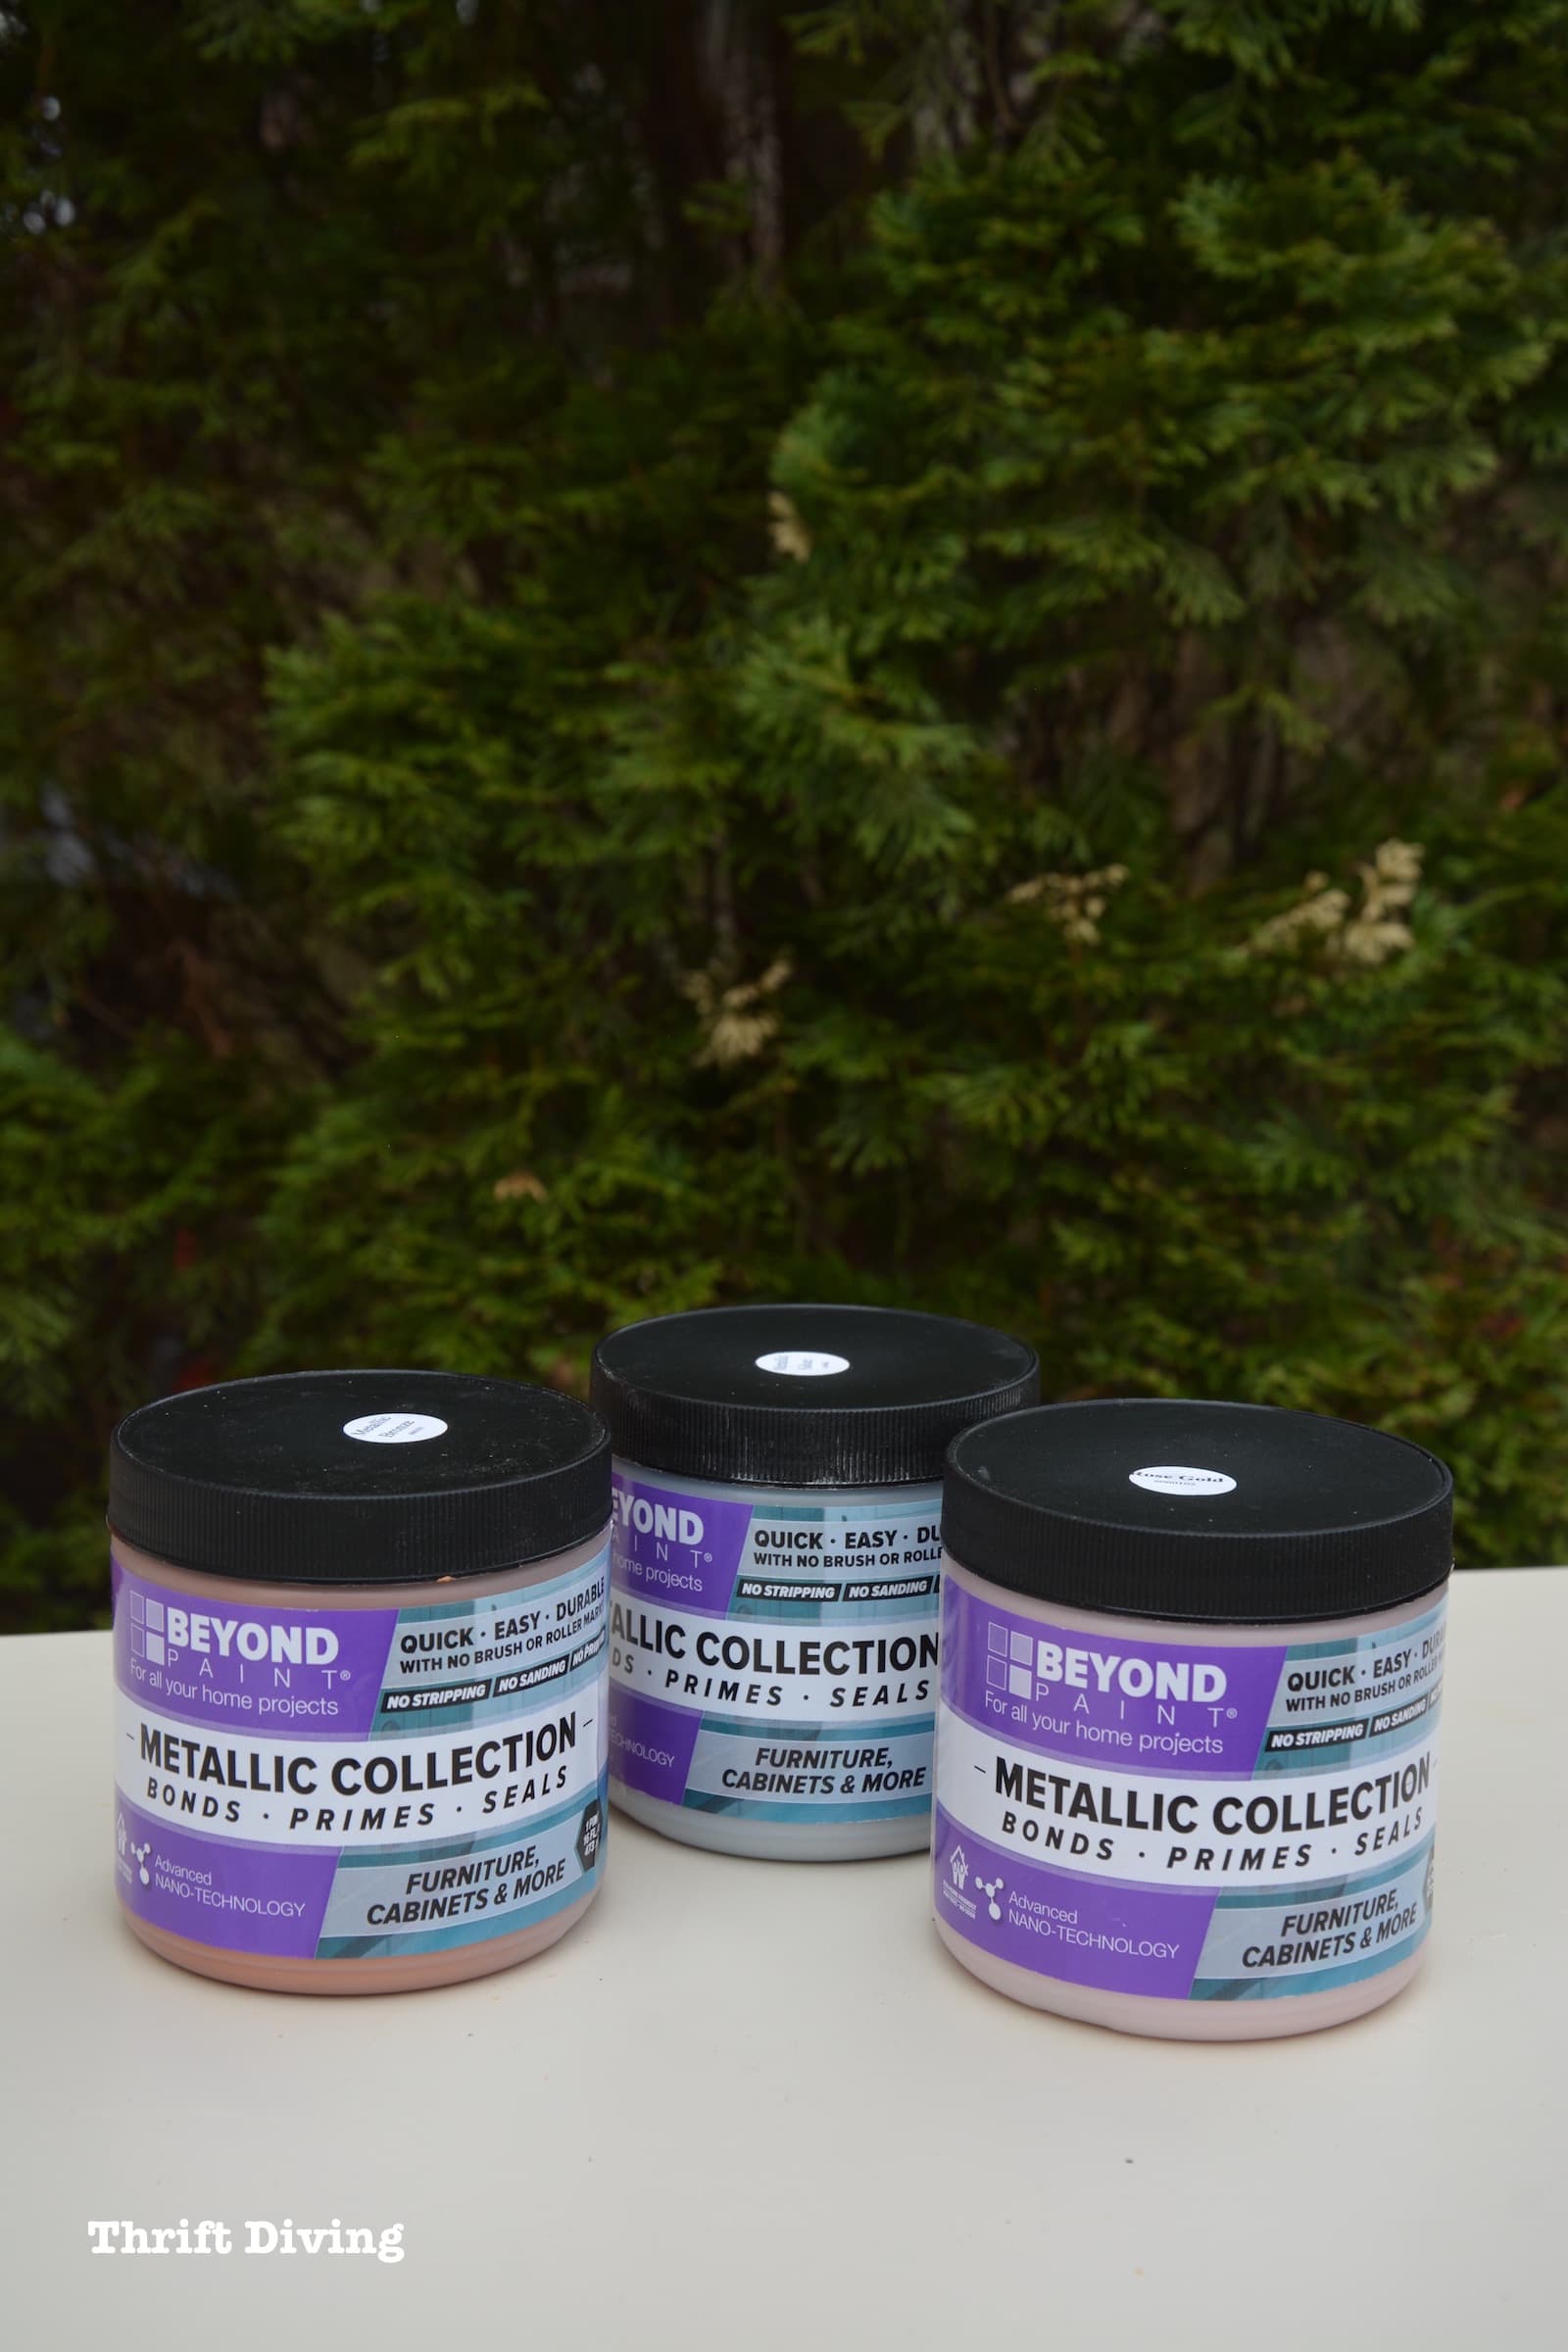
Recently, they sent me their new Metallic Collection paints (Metallic Silver, Metallic Bronze, and Rose Gold) to try out, and let me tell you–I squealed when I opened them! I kid you not. I got so excited I emailed the company and was like, “OMG, I am dying over the Rose Gold!”
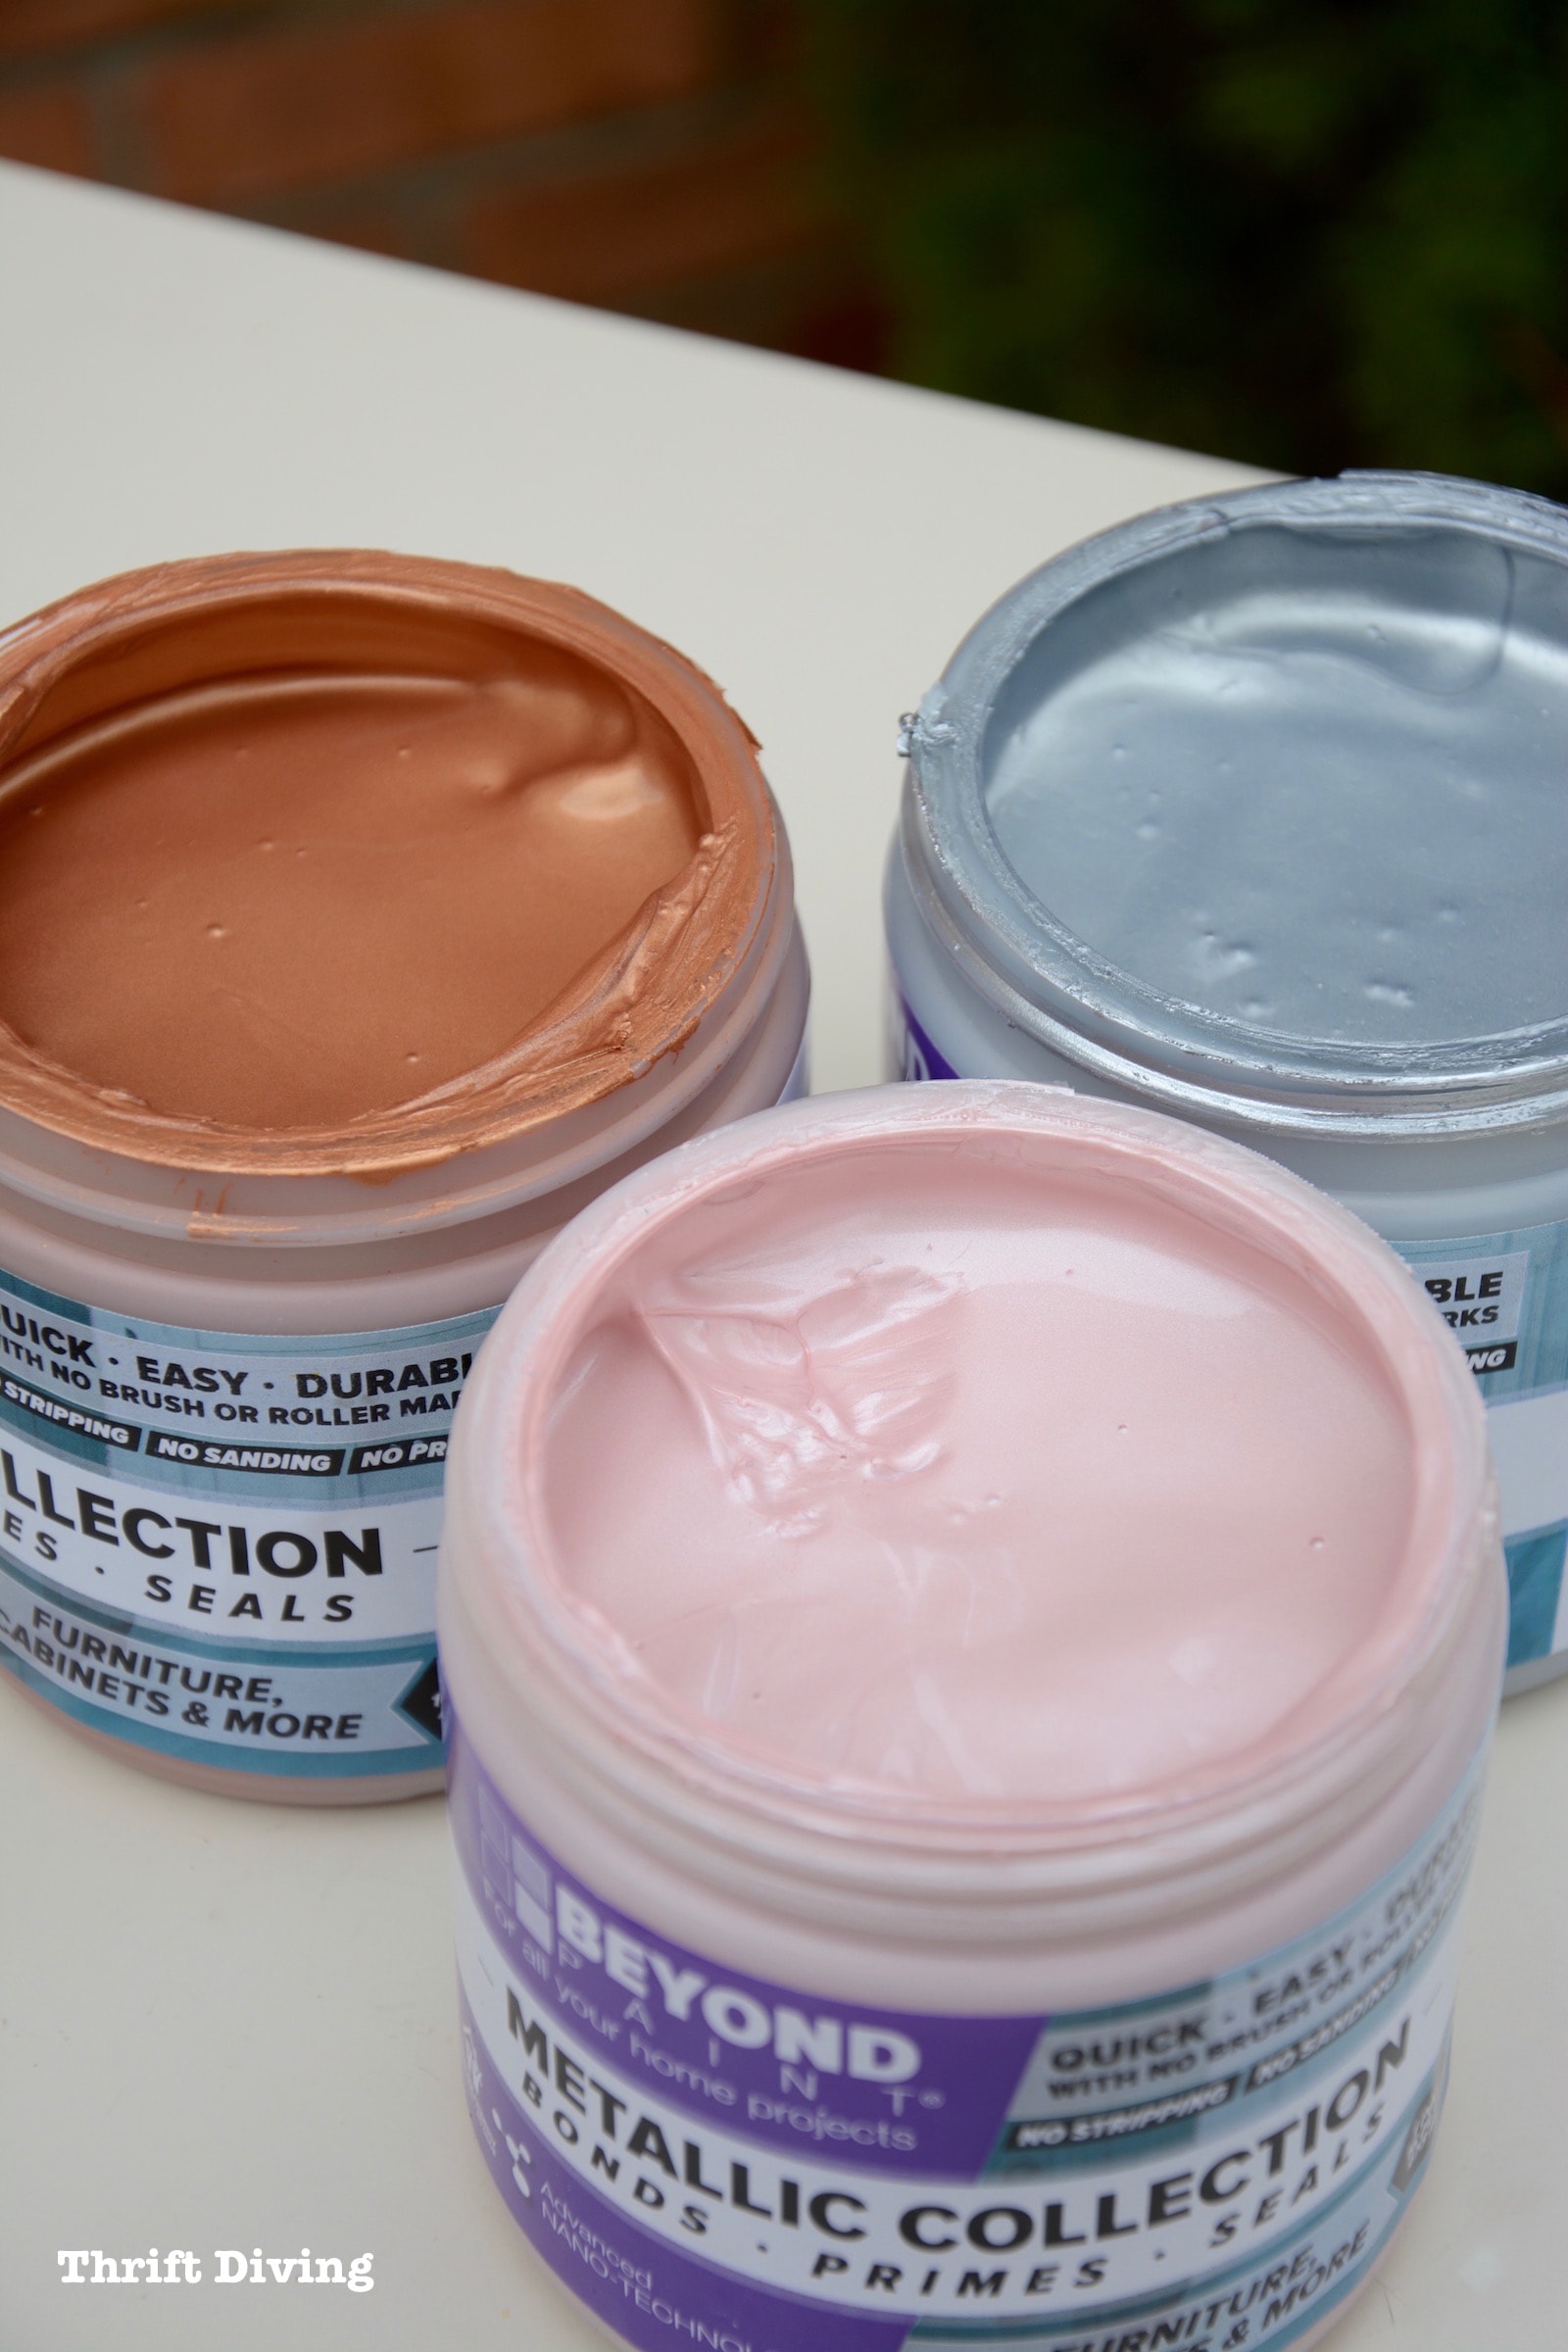
I’m not a heavy metallics kind of girl. In fact, I don’t think I had ever painted anything metallic. But this Rose Gold was phenomenal. It looked exactly like my Rose Gold iPhone! 😉
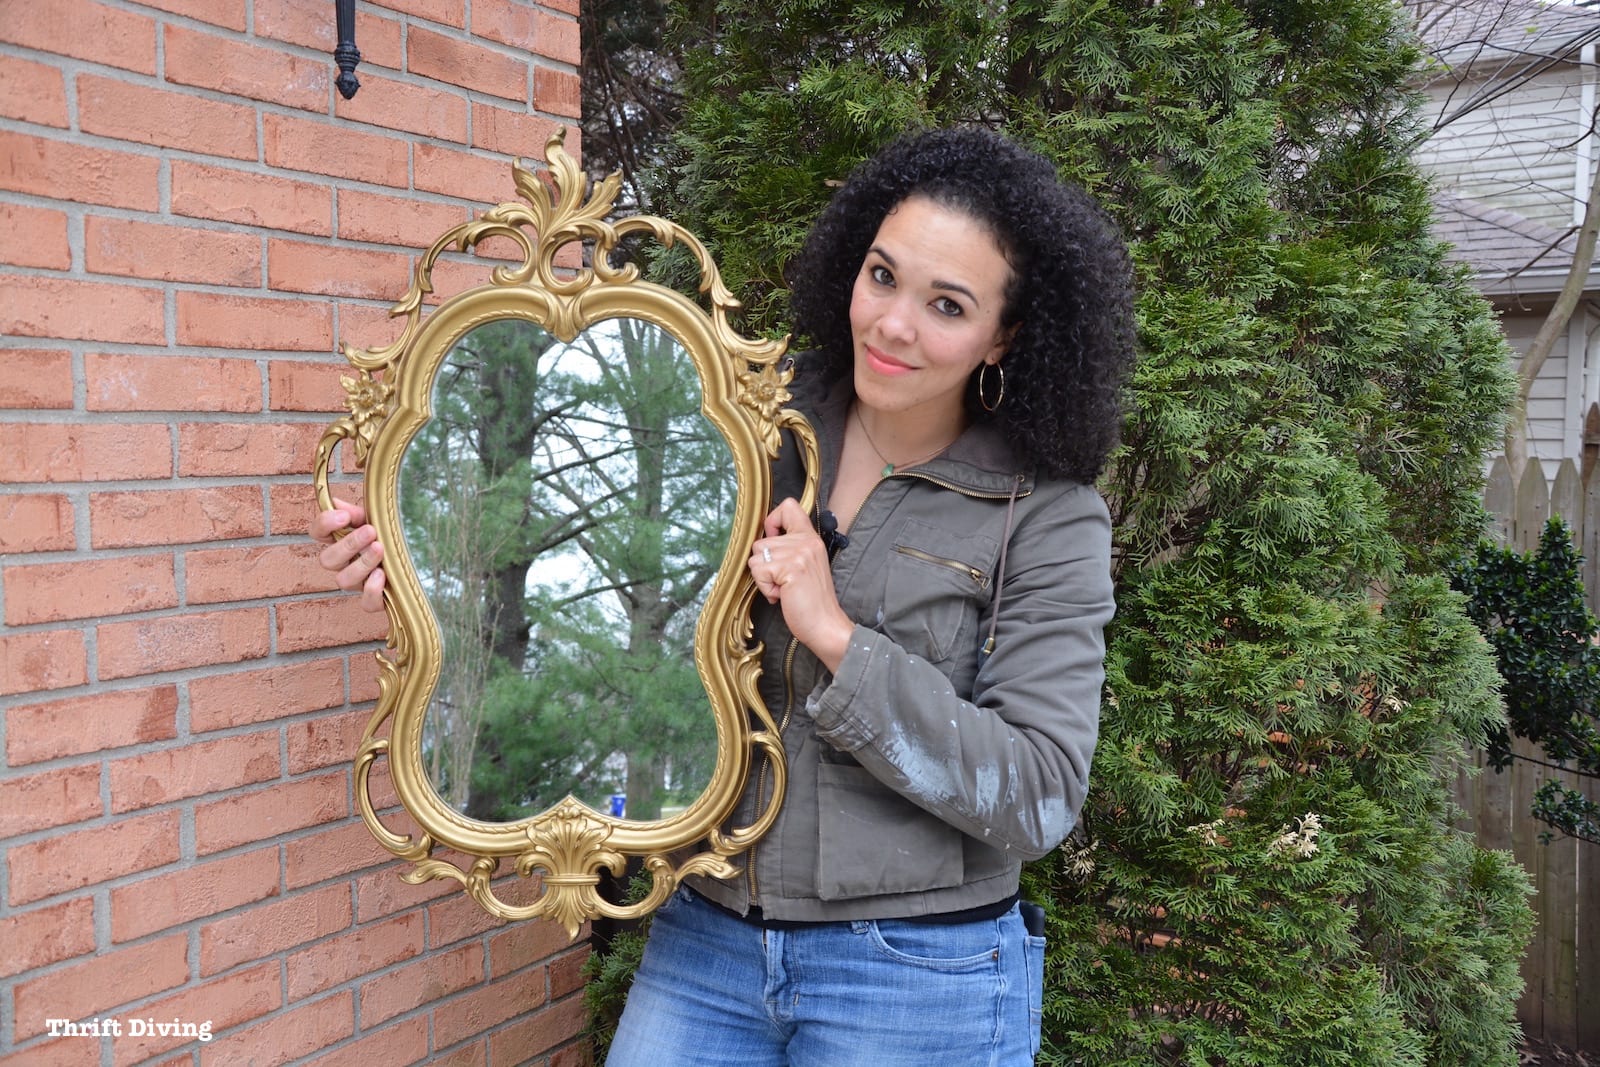
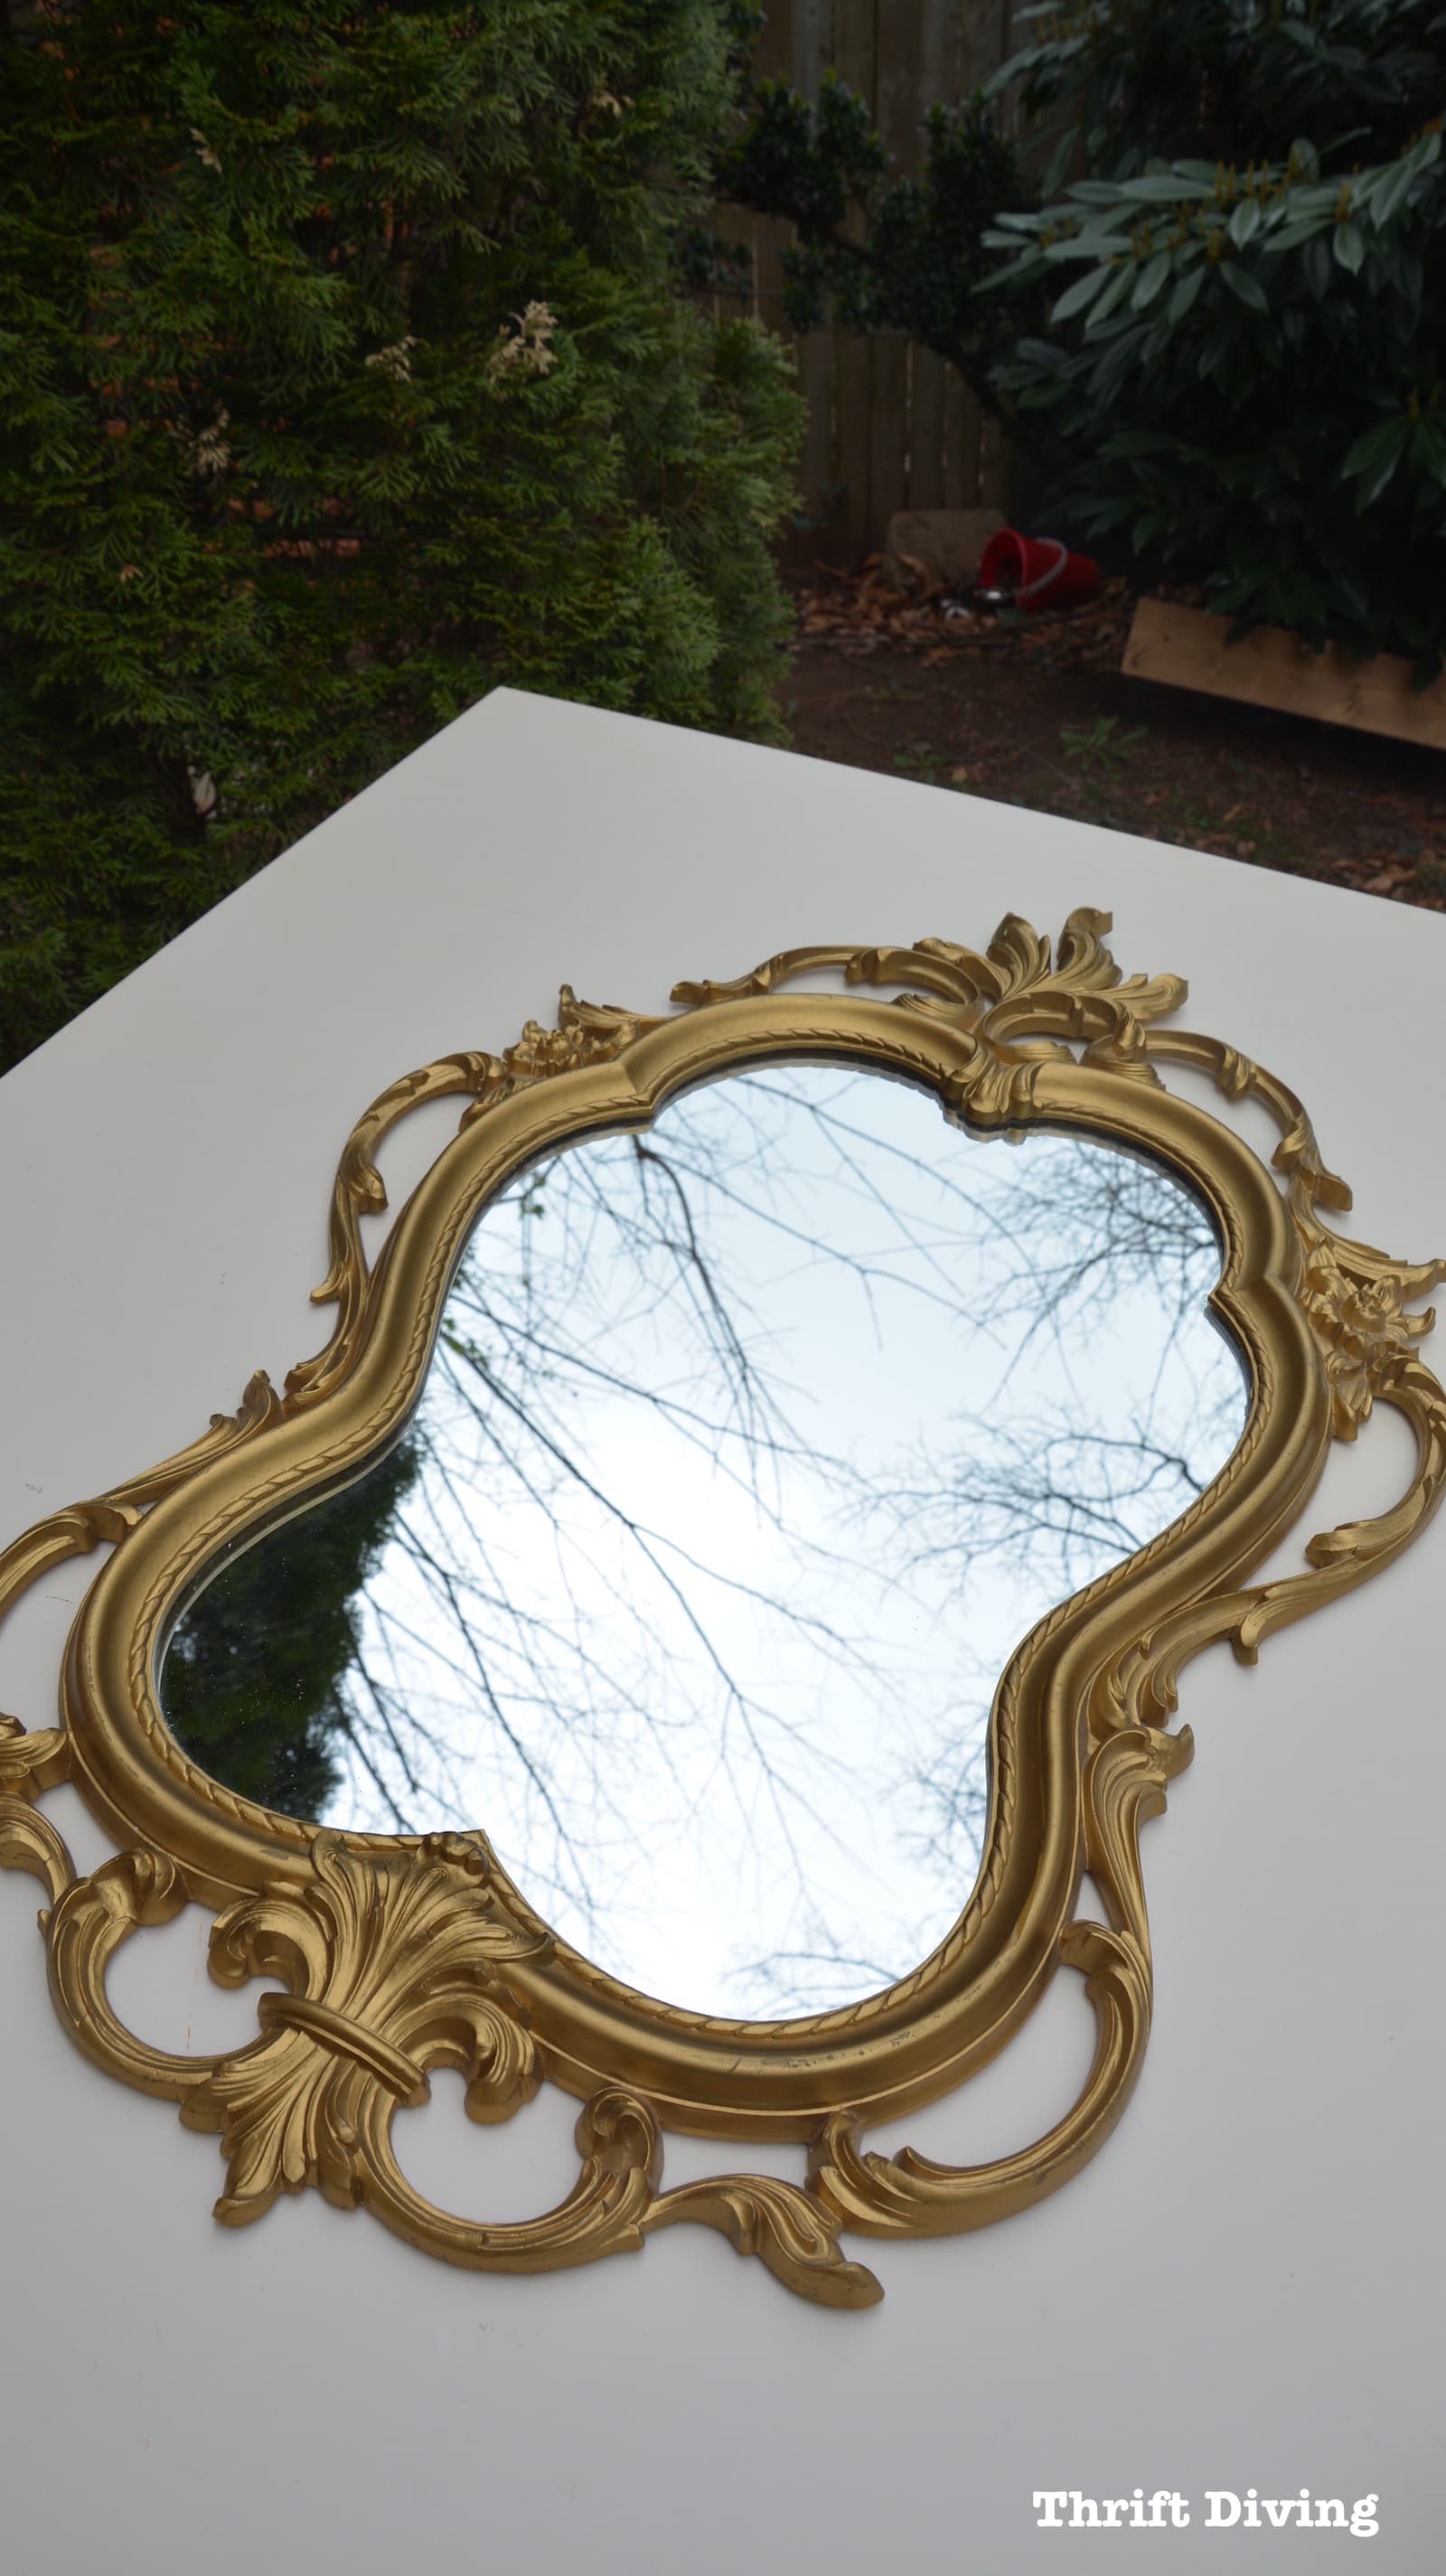
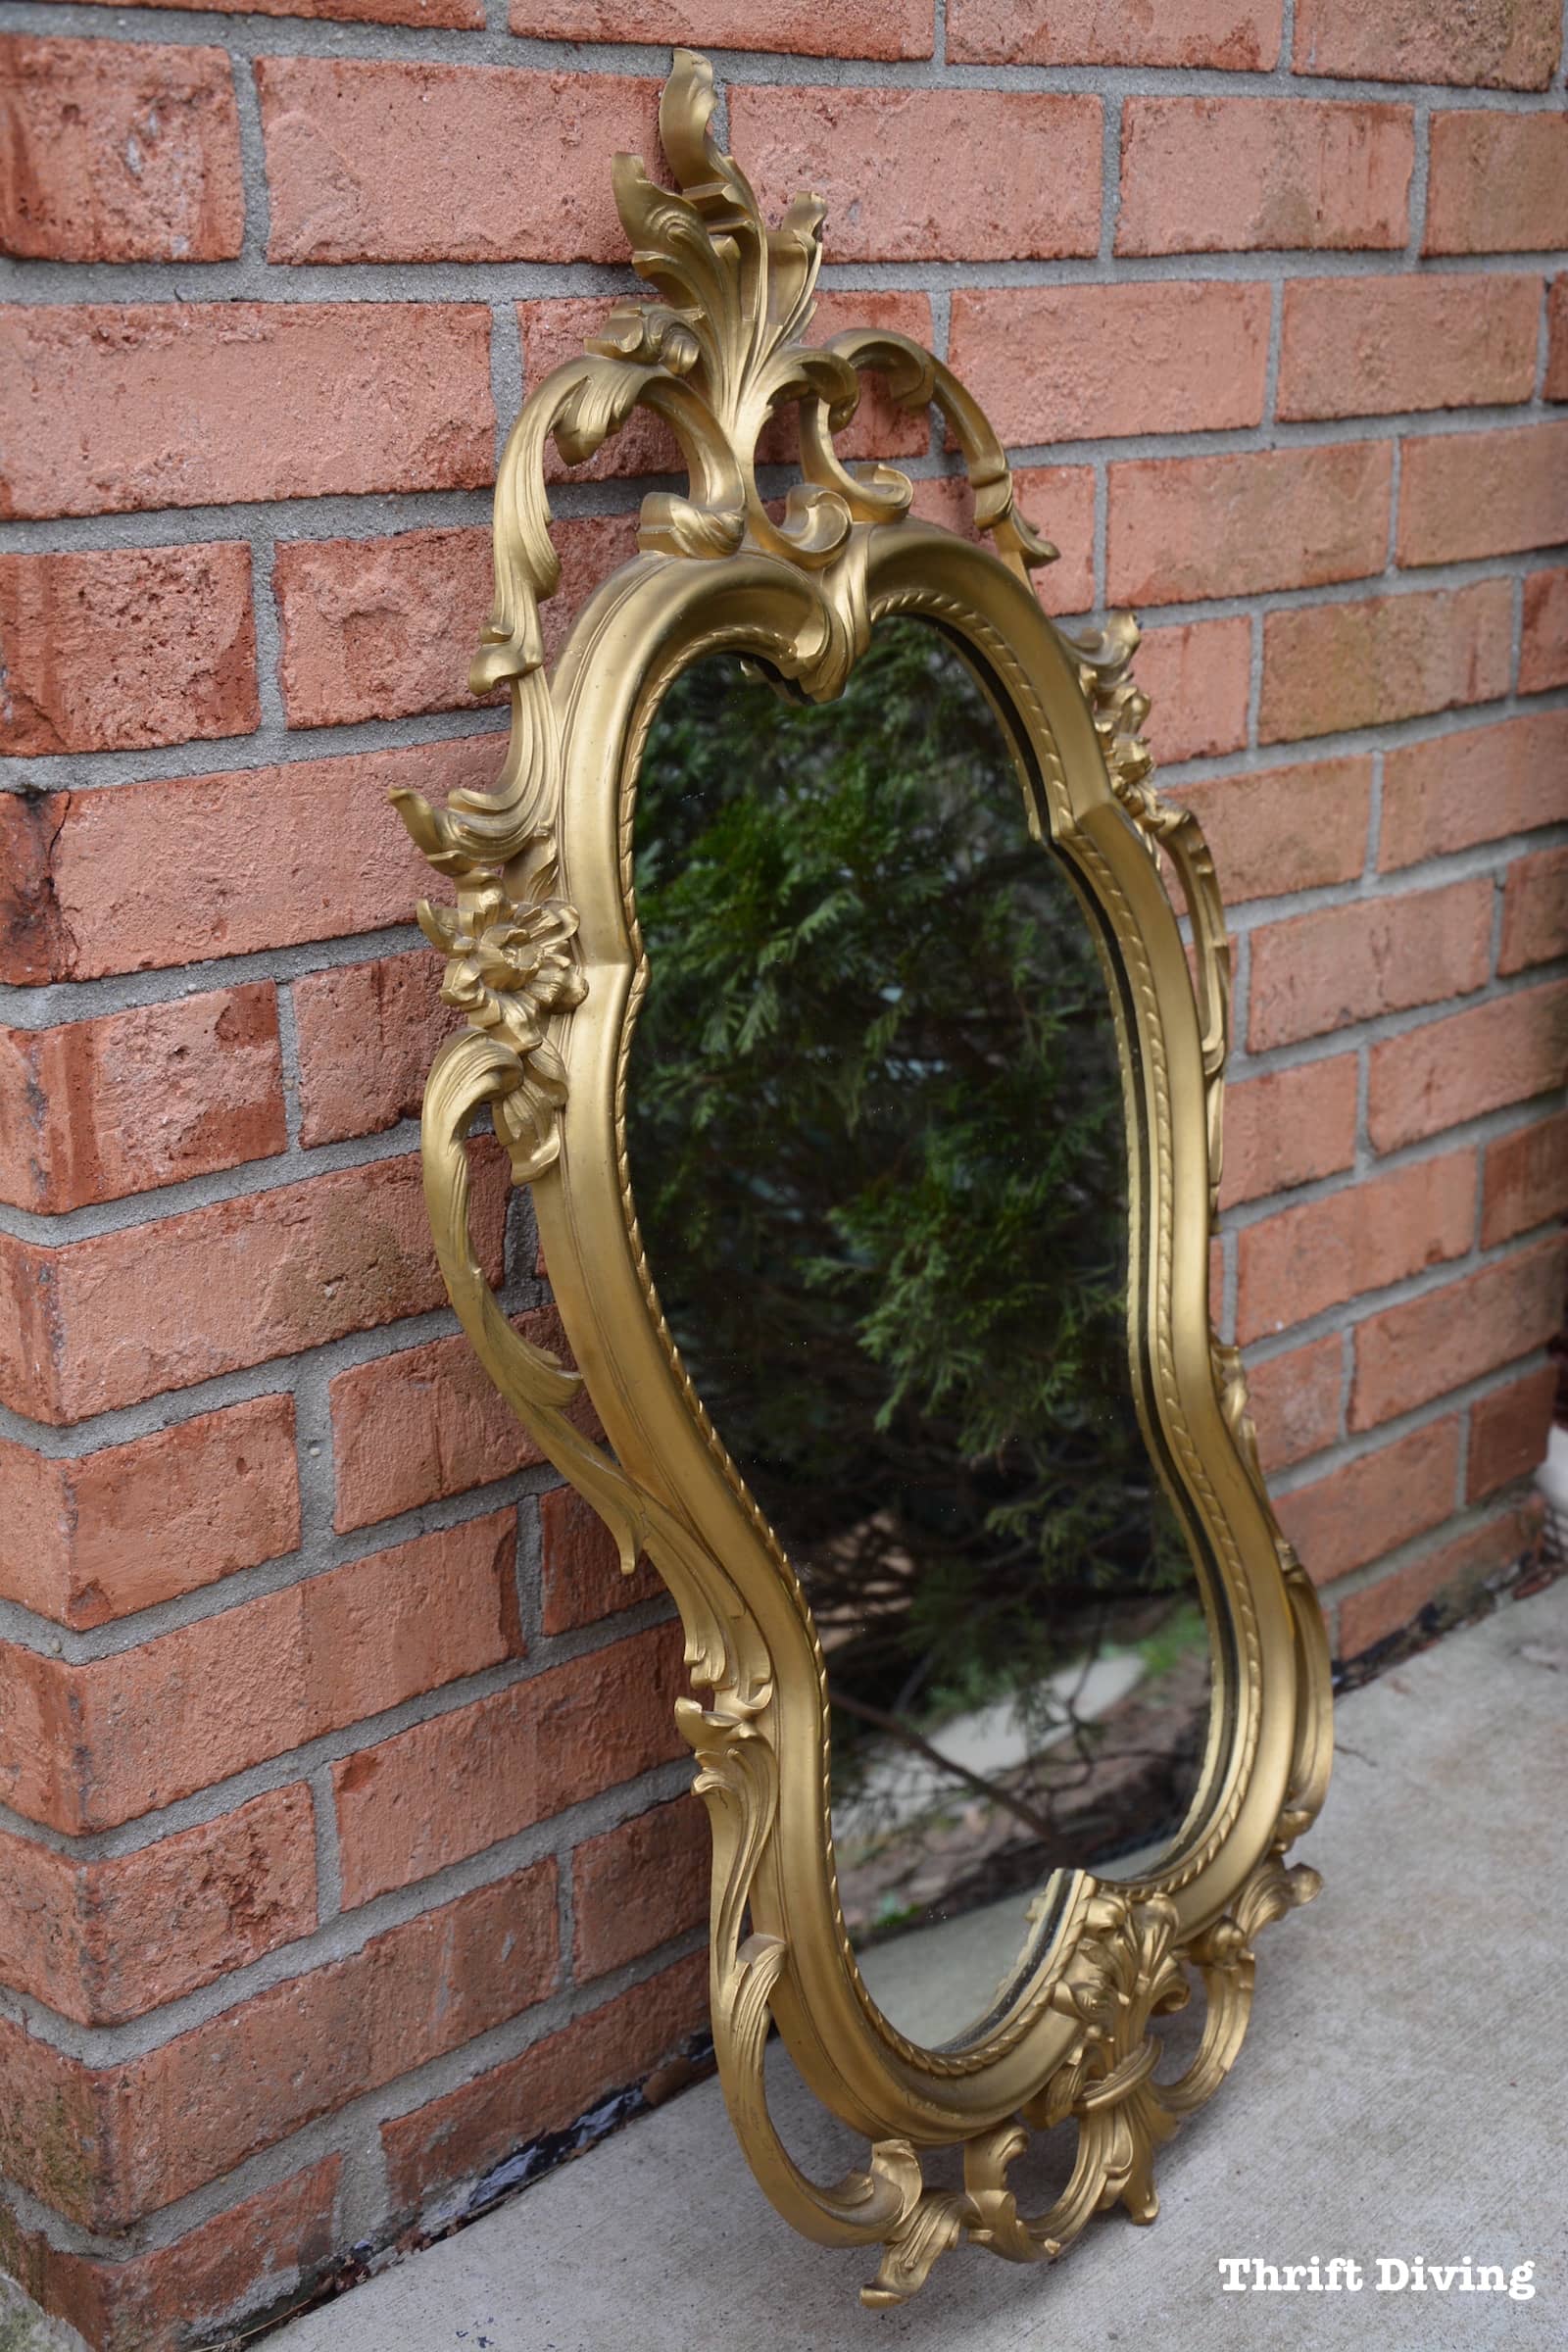
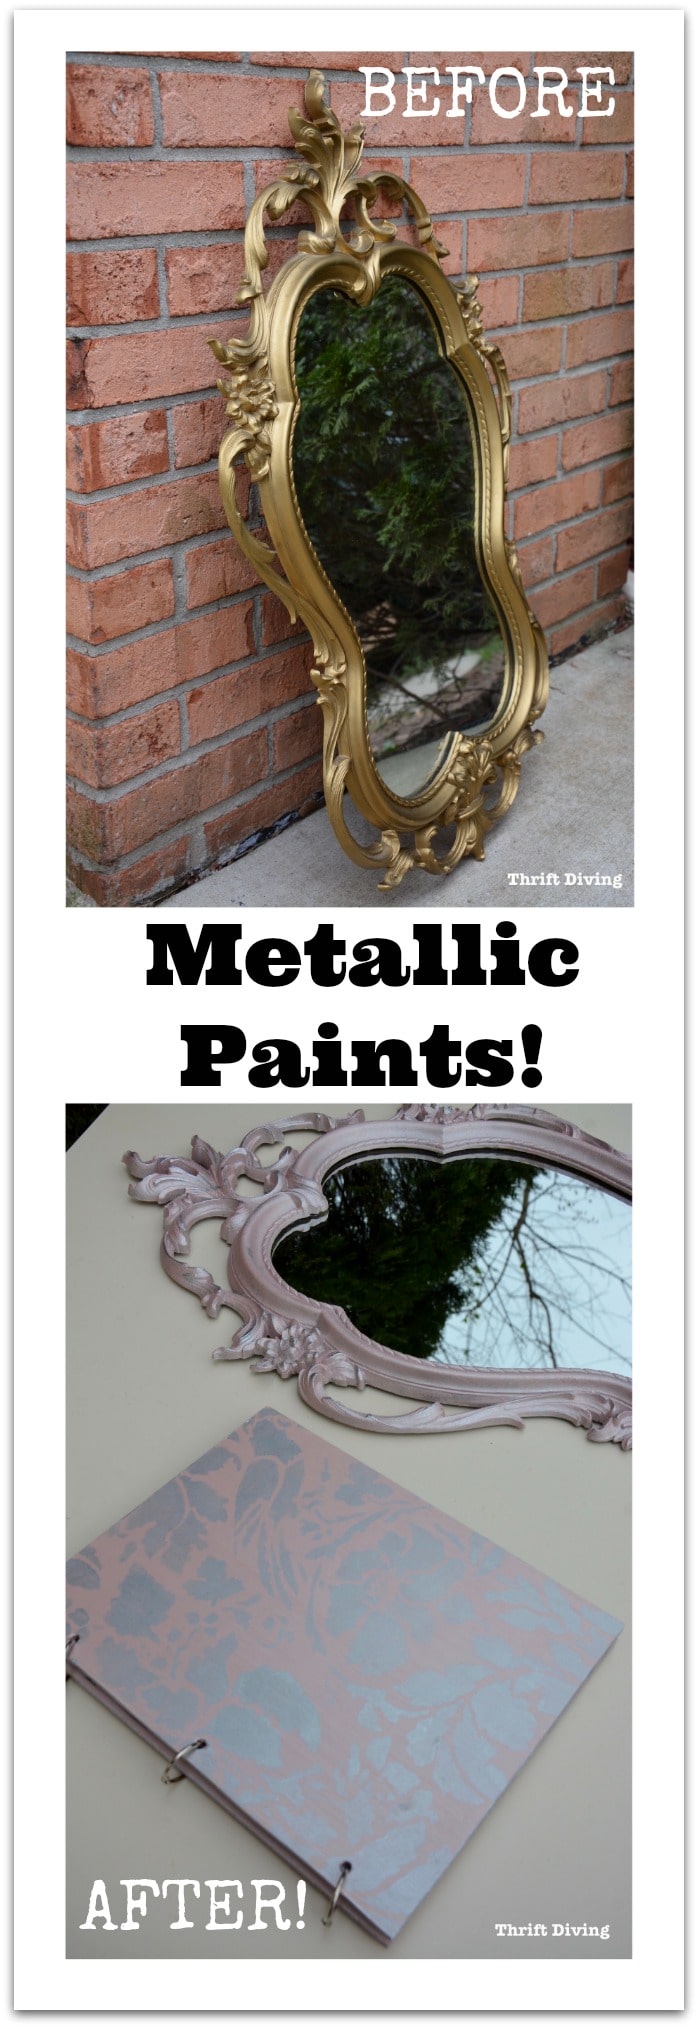
I had this really cute mirror in my garage for about 2 years now. I found it at the thrift store but didn’t know where to put it or what color I really wanted to paint it.
Black was too harsh for such a pretty mirror.
White was too….bleh.
And I don’t do a lot of POPS of color, so I didn’t want that.
But metallic Rose Gold??
My gut screamed “Yes!”
And you can see why!
BEFORE
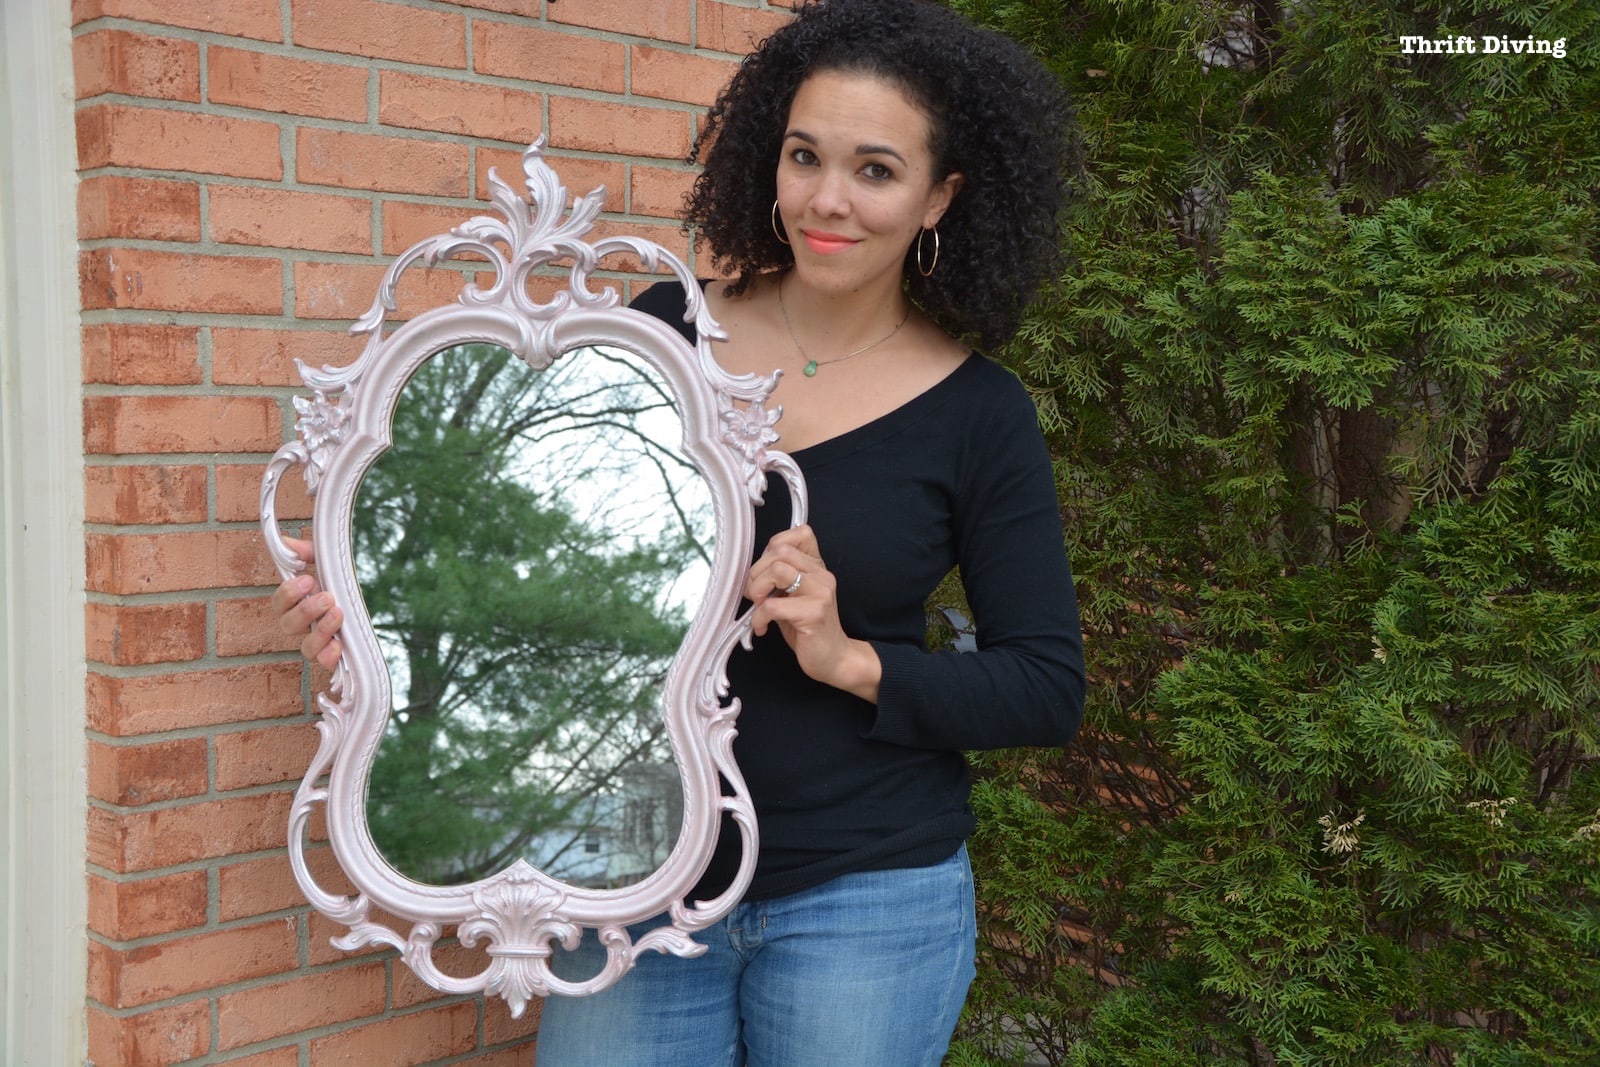
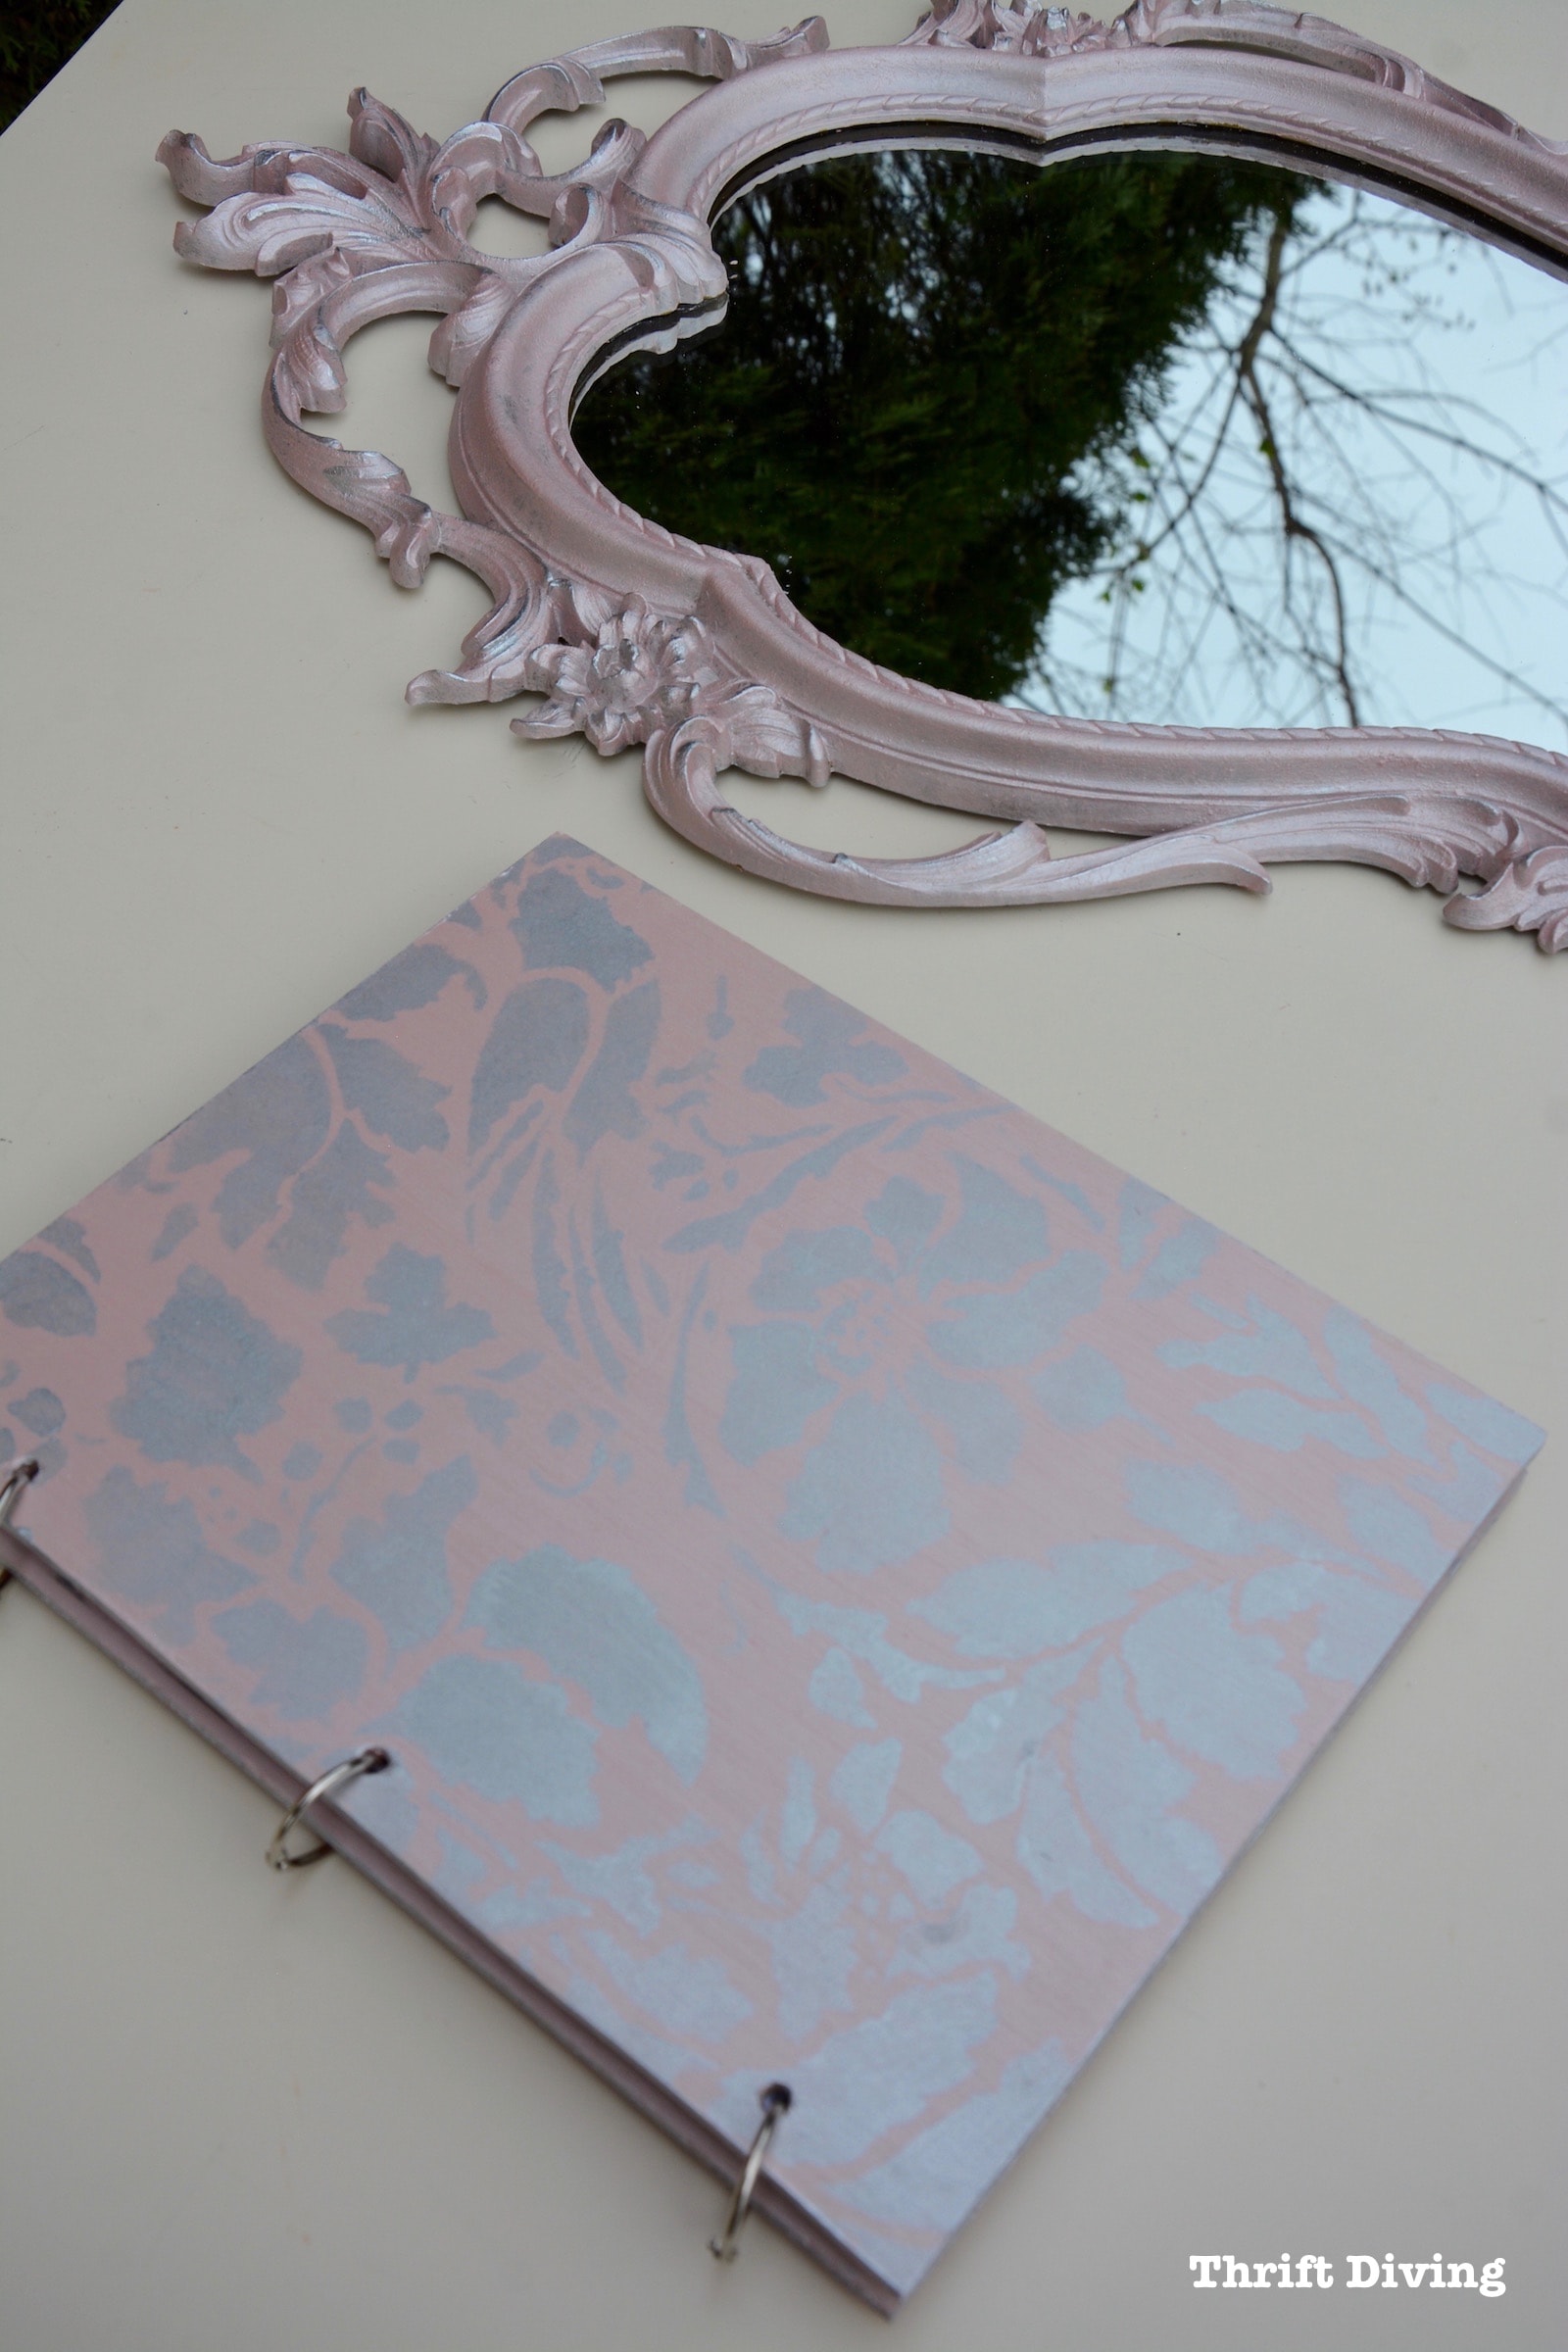
AFTER!
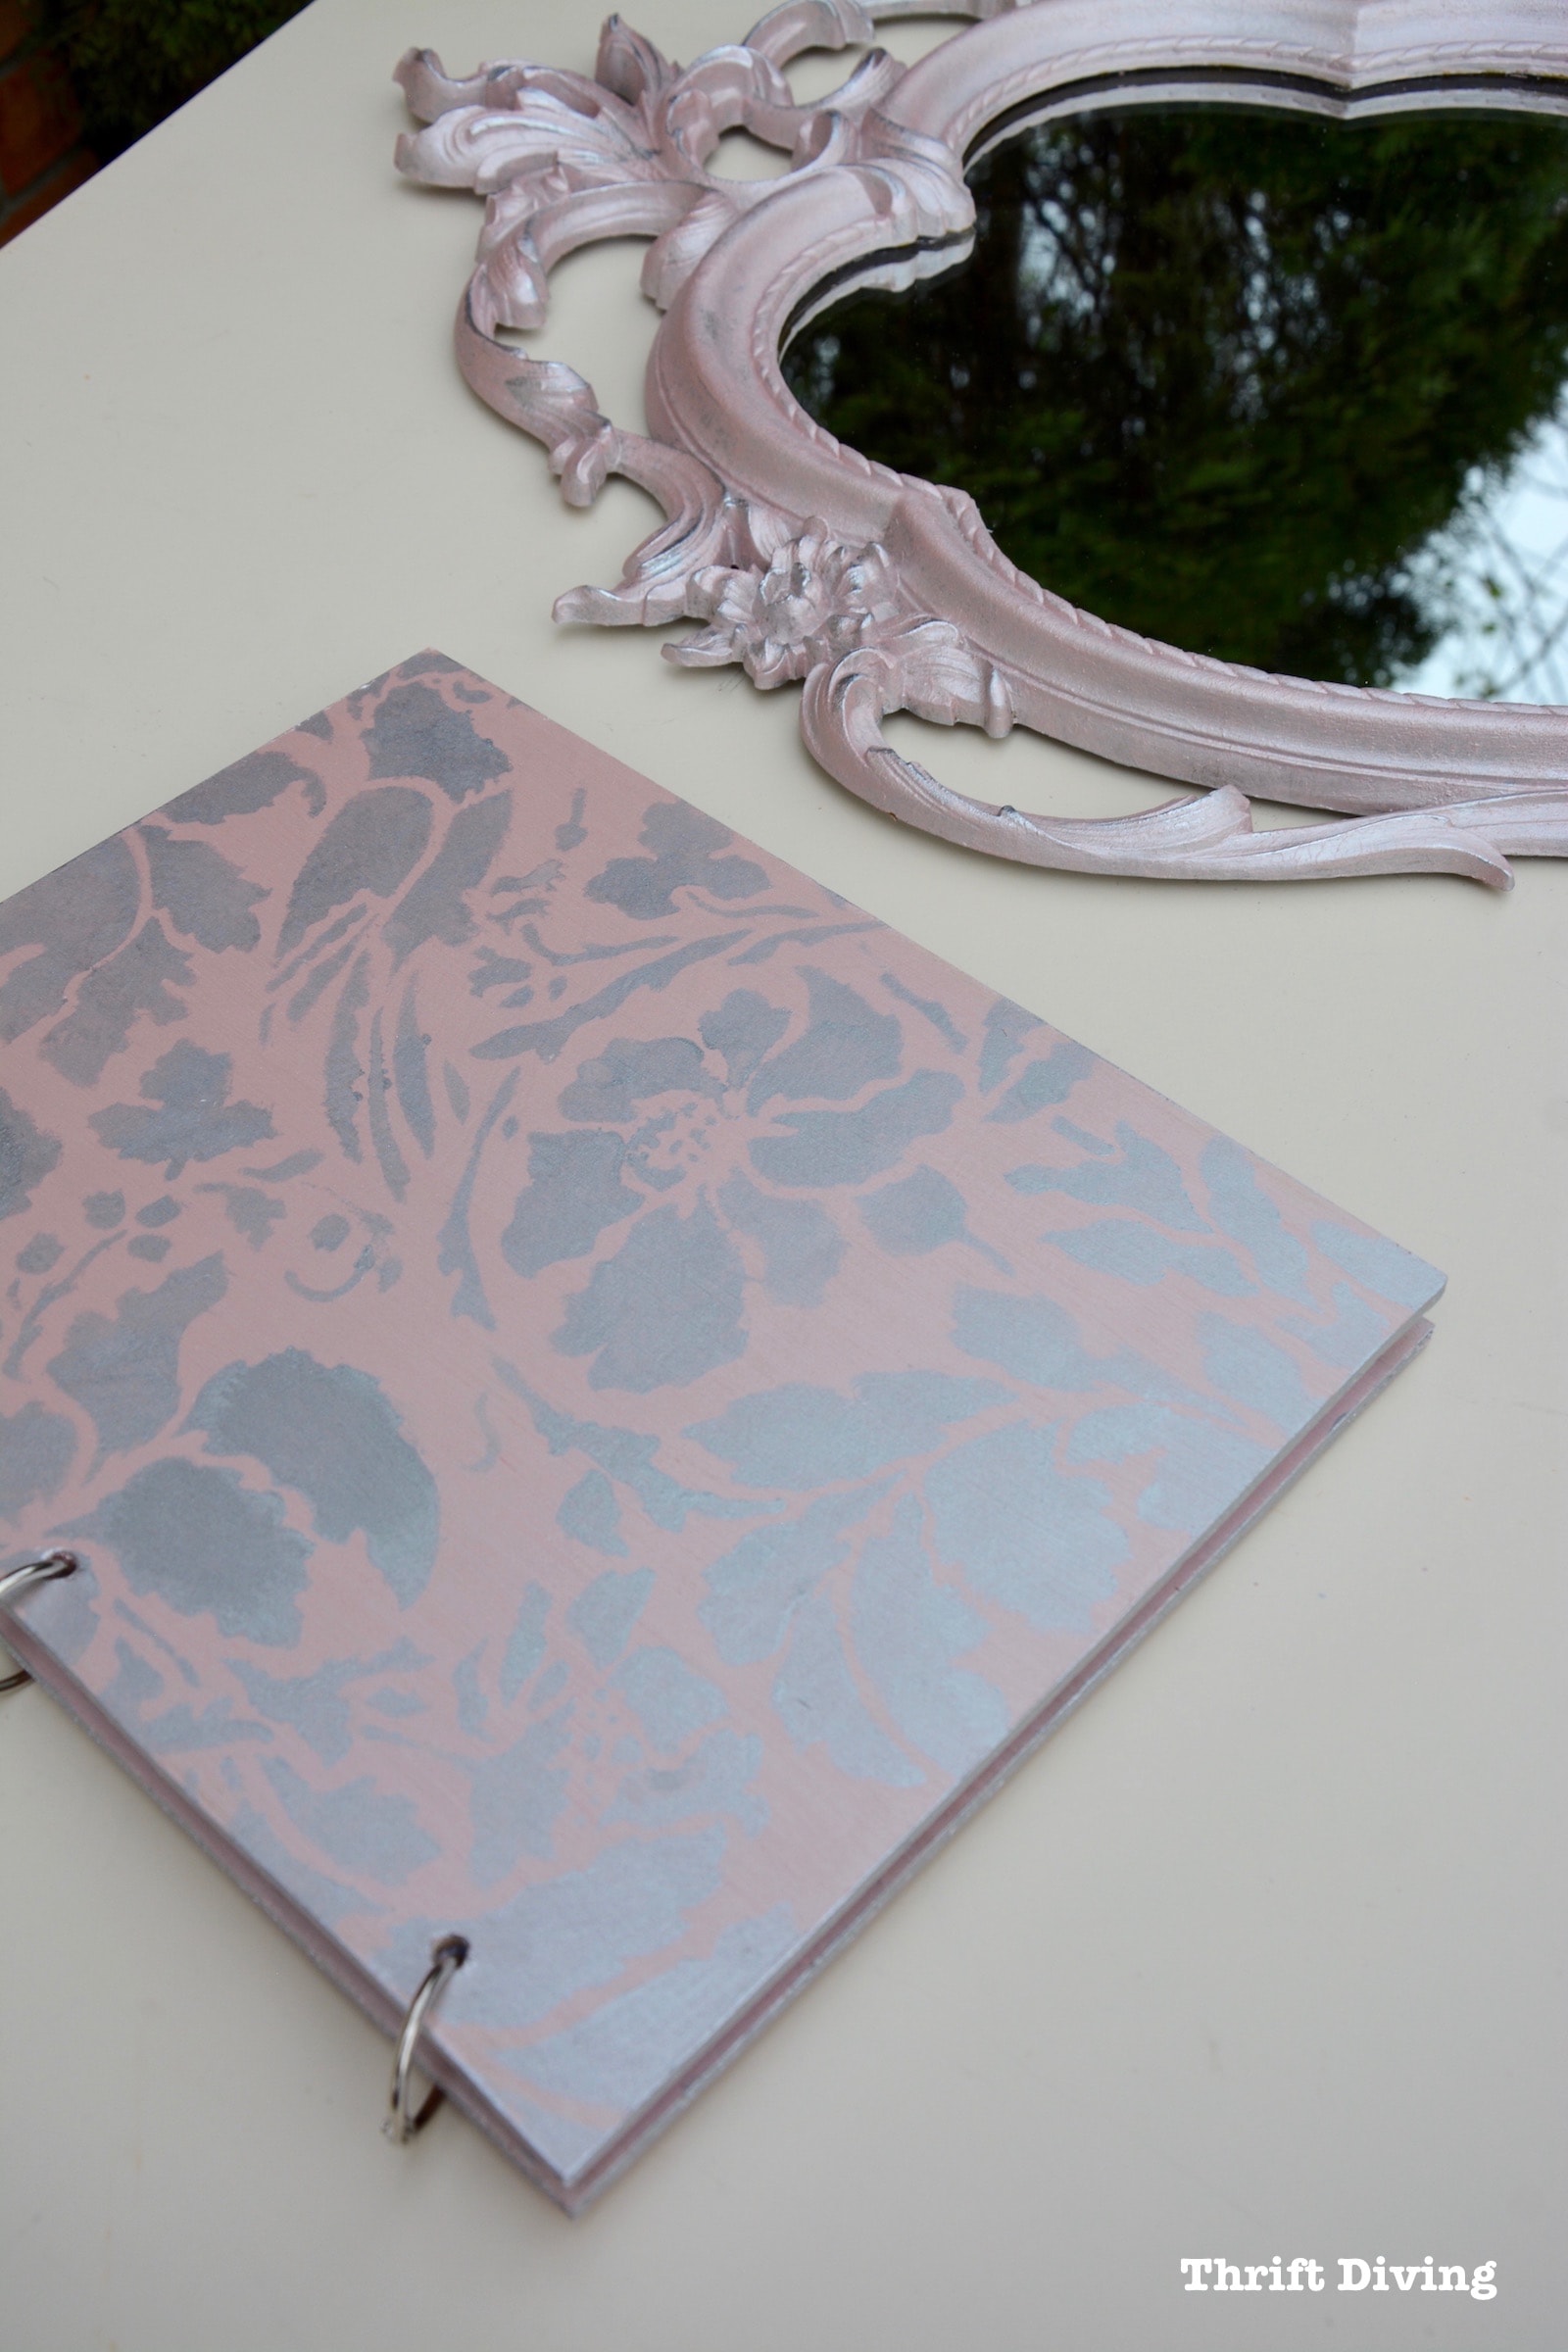
My first thought was that I wanted to layer the paints and see how the Rose Gold would look with the Metallic Silver.
So I decided to paint not only the mirror but I cut out a DIY wooden notebook (you can find the complete tutorial here) to see how it would look with a pretty stencil combination of the two colors.
OMG….love, love, love!
Normally, the Beyond Paints come in quart containers. But these ones are smaller half-sizes.
You would have enough paint to do small pieces of furniture, like nightstands. But you’d need two containers to do larger pieces of furniture.
Their small container size, though, makes them perfect for these types of crafts and smaller projects, too.
Ahhhh…..that shimmery Rose Gold!
(…Did I mention that I’m in love with Rose Gold…??) 😉

Materials
So to do these two projects, here are the things I needed:
- Metallic Collection paint by Beyond Paint
- Paint brush(s)
- Small roller
- Paint tray
- Painter’s tape
- Pretty stencil (click here for the affiliate link to this favorite stencil of mine)
- Razor blade scraper
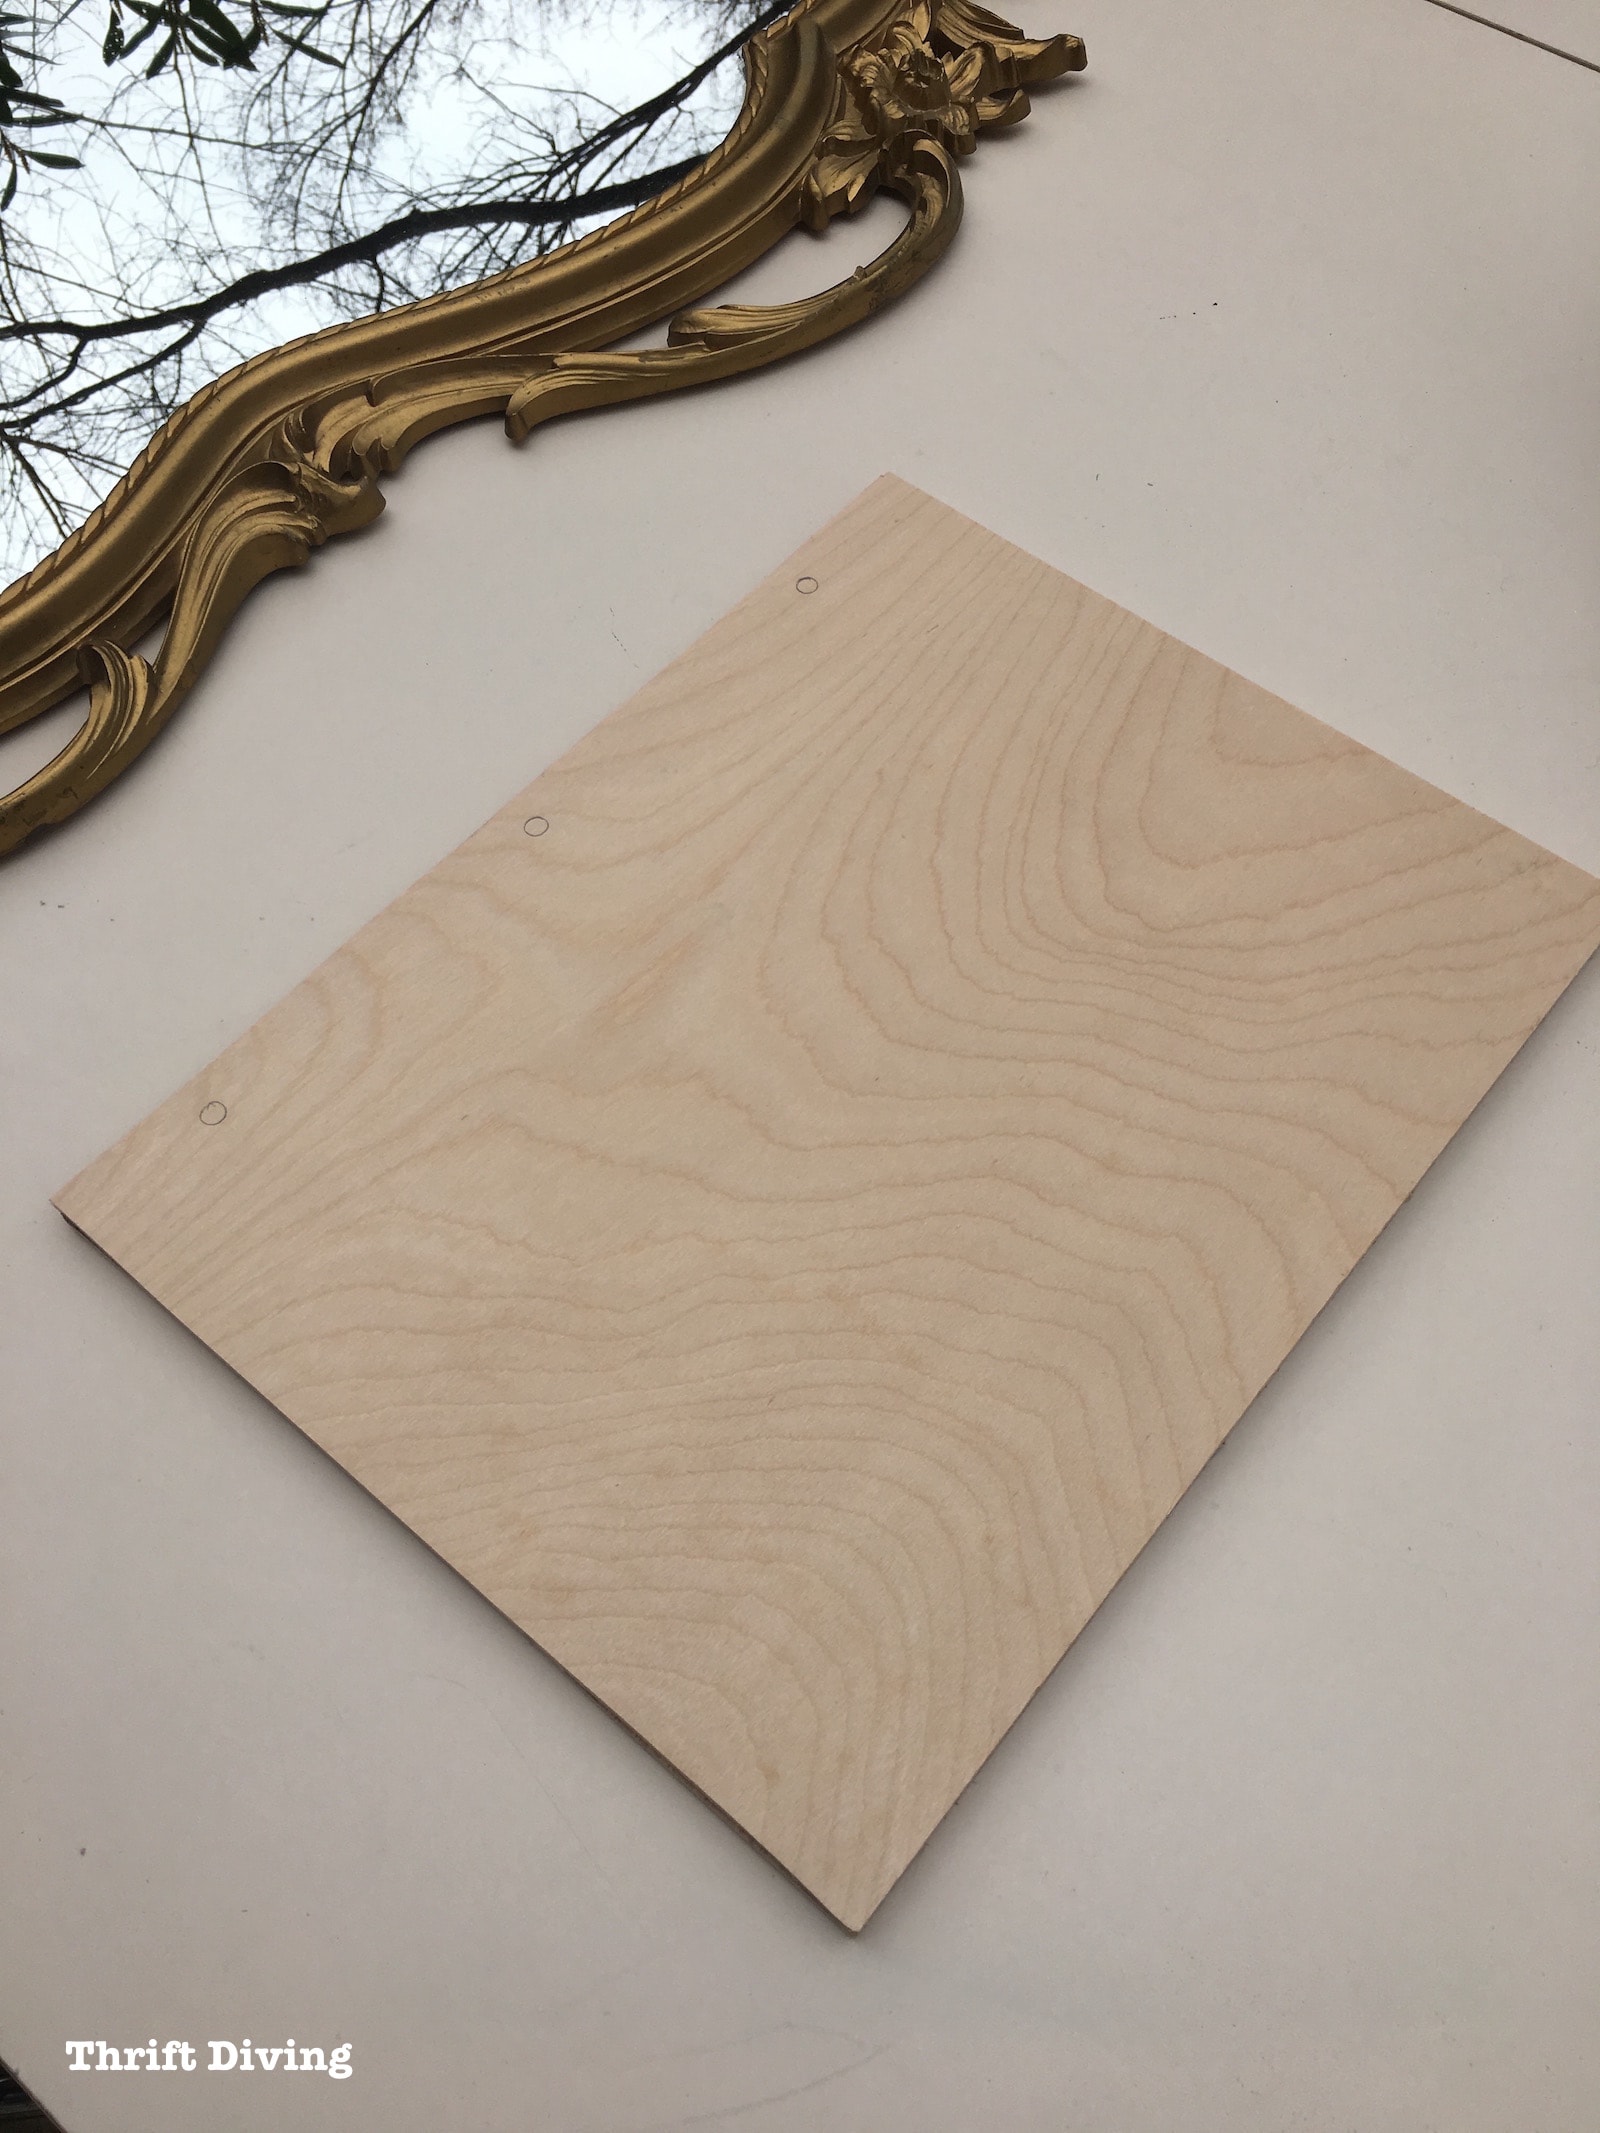
- 1/4″ plywood
- Jigsaw and power drill with drilling bit for the notebook holes.
- Binder rings to hold wooden notebook together.
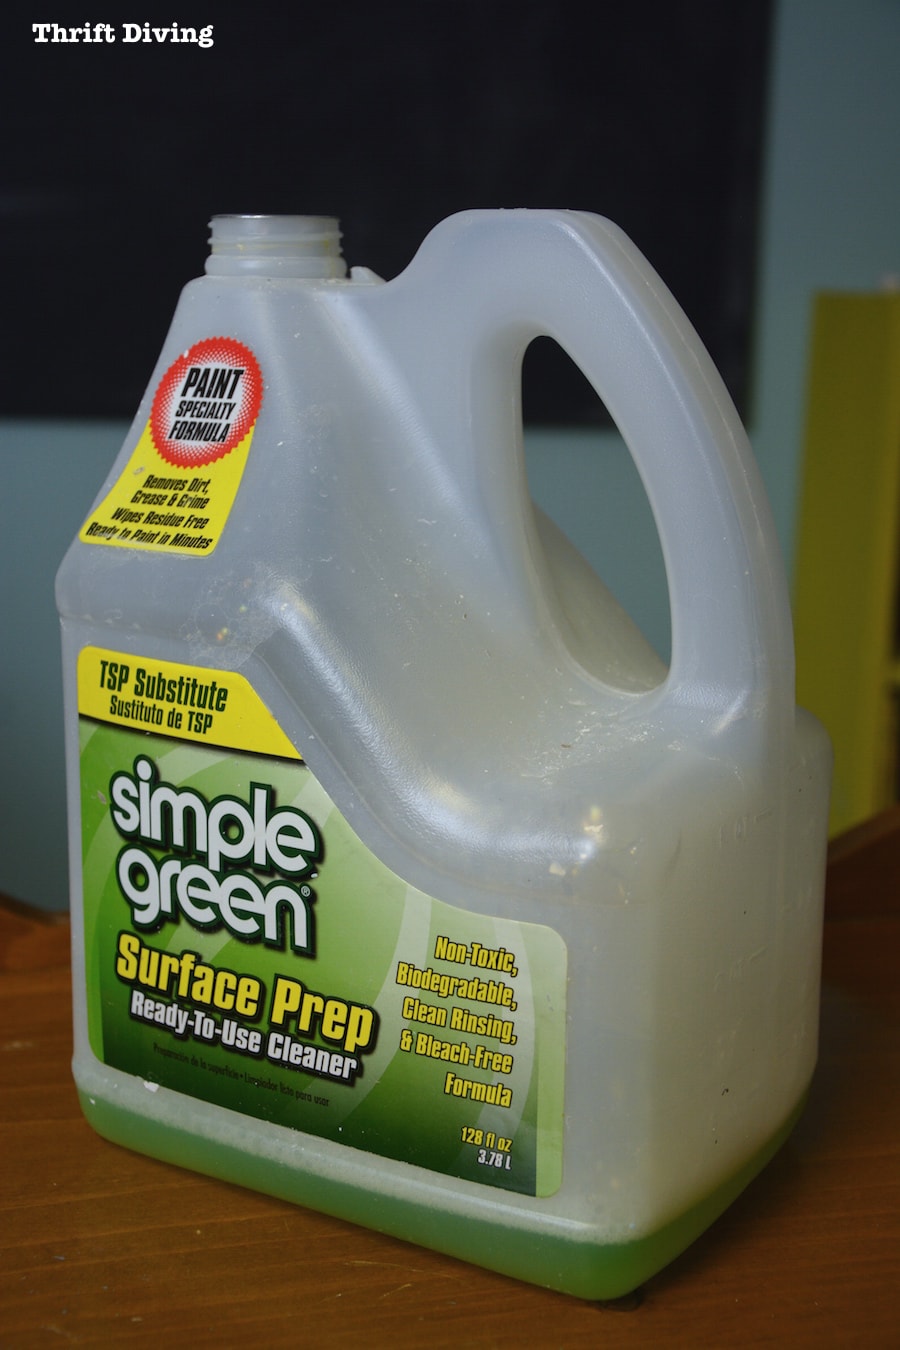
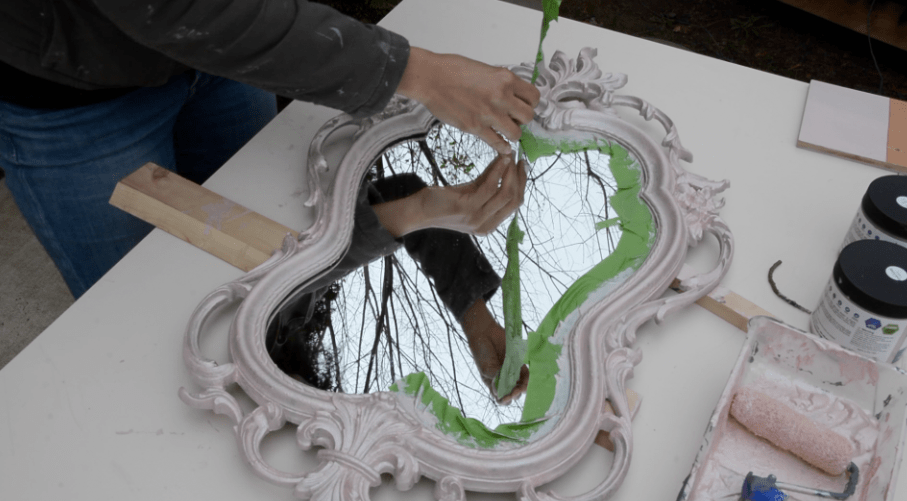
STEP 1: Clean Up and Tape
Beyond Paint sticks to virtually anything, including wood, metal, previously painted surfaces, masonry, and you can even use it outside.
But before you can use it on any of these surfaces, you should clean the surface first. I always recommend using Simple Green as a degreaser.
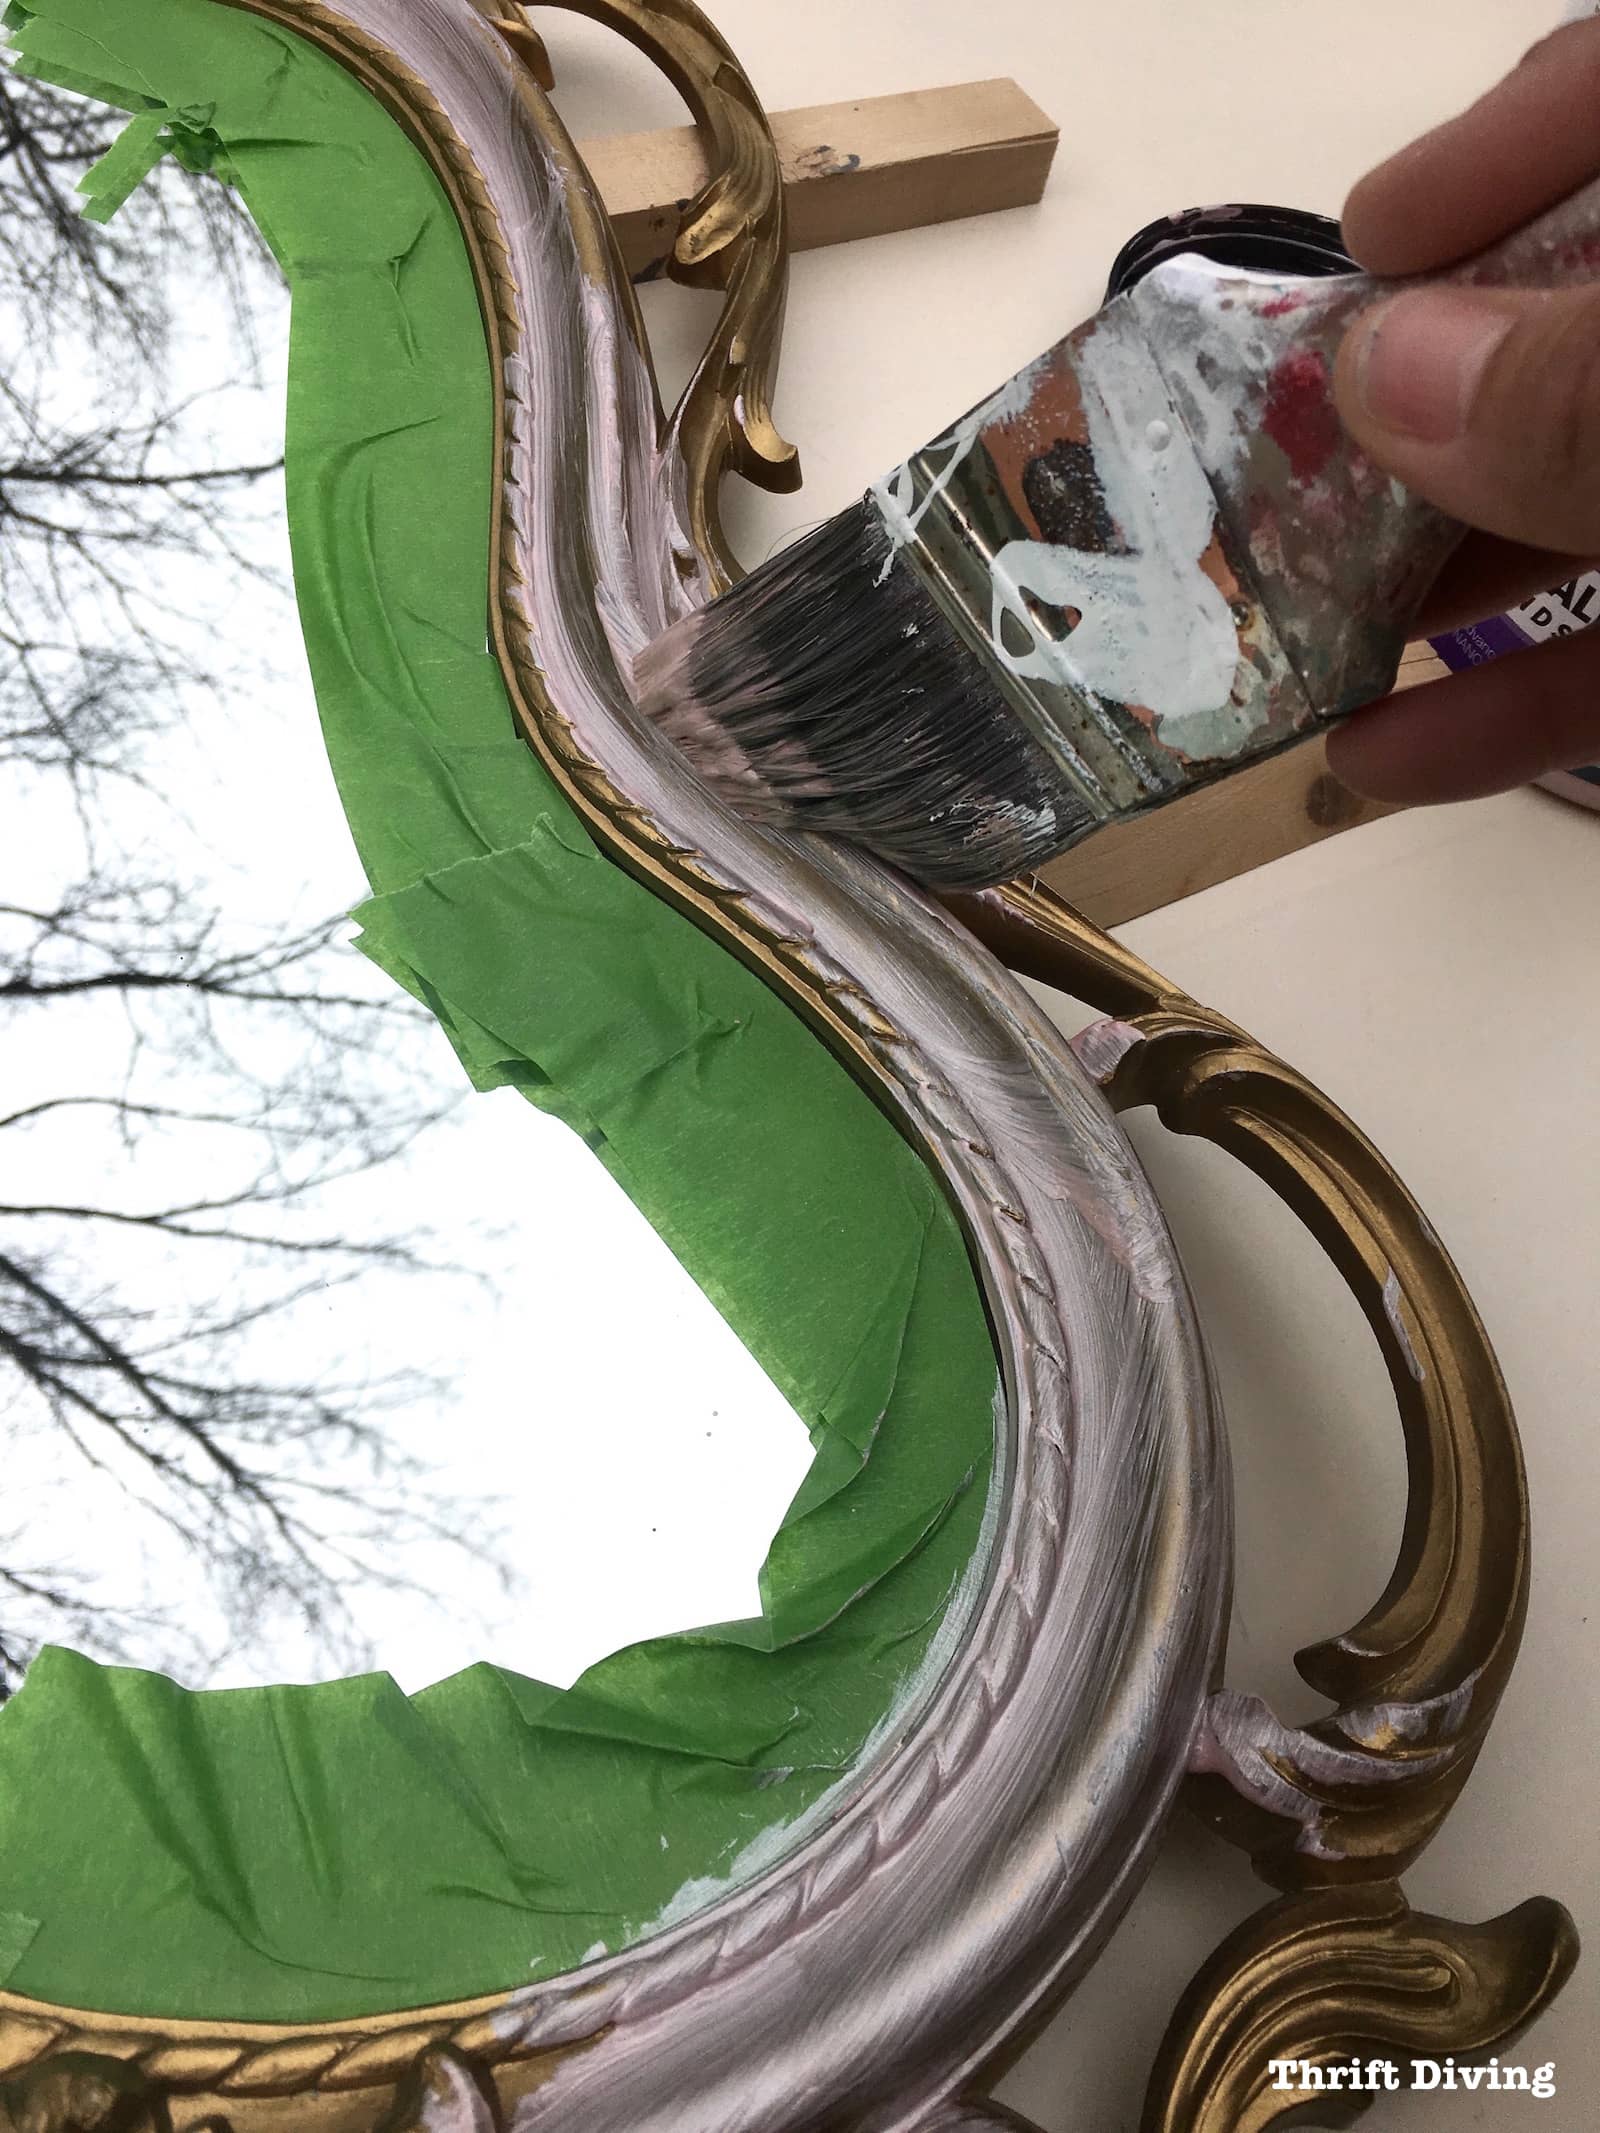
STEP 2: Grab a Brush or a Roller
The Beyond Paint folks recommend using a roller with its paint to prevent brush strokes or roller marks. I started with the brush but realized that the roller worked better at applying the paint to the mirror.
If your projects are in good condition, there isn’t any sanding or priming needed. Just open the jar, pour into a tray, and start painting!
You’ll notice the first coat looks a bit blotchy. That’s normal with most furniture paints. It will need two coats, so don’t worry. Just keep painting!
STEP 3: Smush the Paint Into Cracks
Eventually, you’ll come to areas where you’ll need to get the paint into the little cracks and crevices. Simply take a brush and smush it in there.
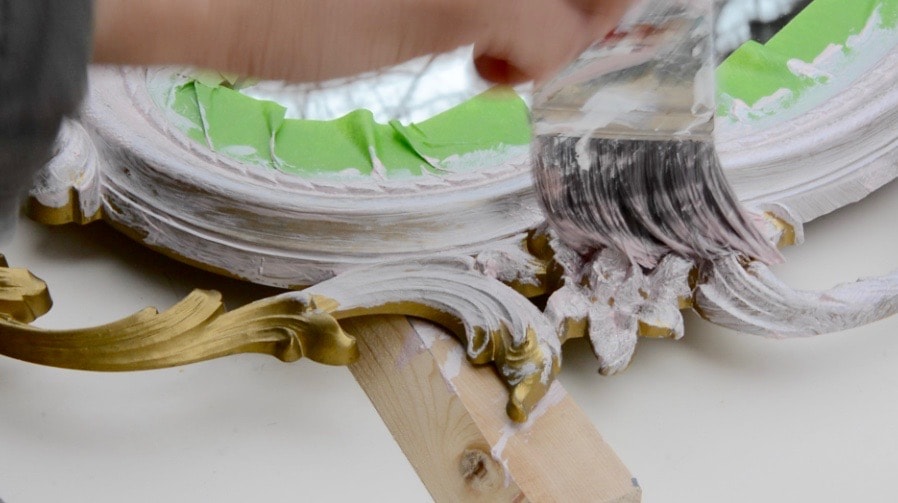
STEP 4: Let It Dry, Then Add Another Coat
You’ll definitely need two coats, so let it dry thoroughly before applying the second coat.
This was a good time for me to work on the DIY wooden journal (see below).
STEP 5: Remove the Tape
I generally don’t wait for paint to dry before removing painter’s tape. I find it’s easy to remove when paint is still slightly damp.
That’s what I did in this case, too.
When the paint dries, however, it’s easier to go over the mirror with a small razor blade scraper to remove the paint.
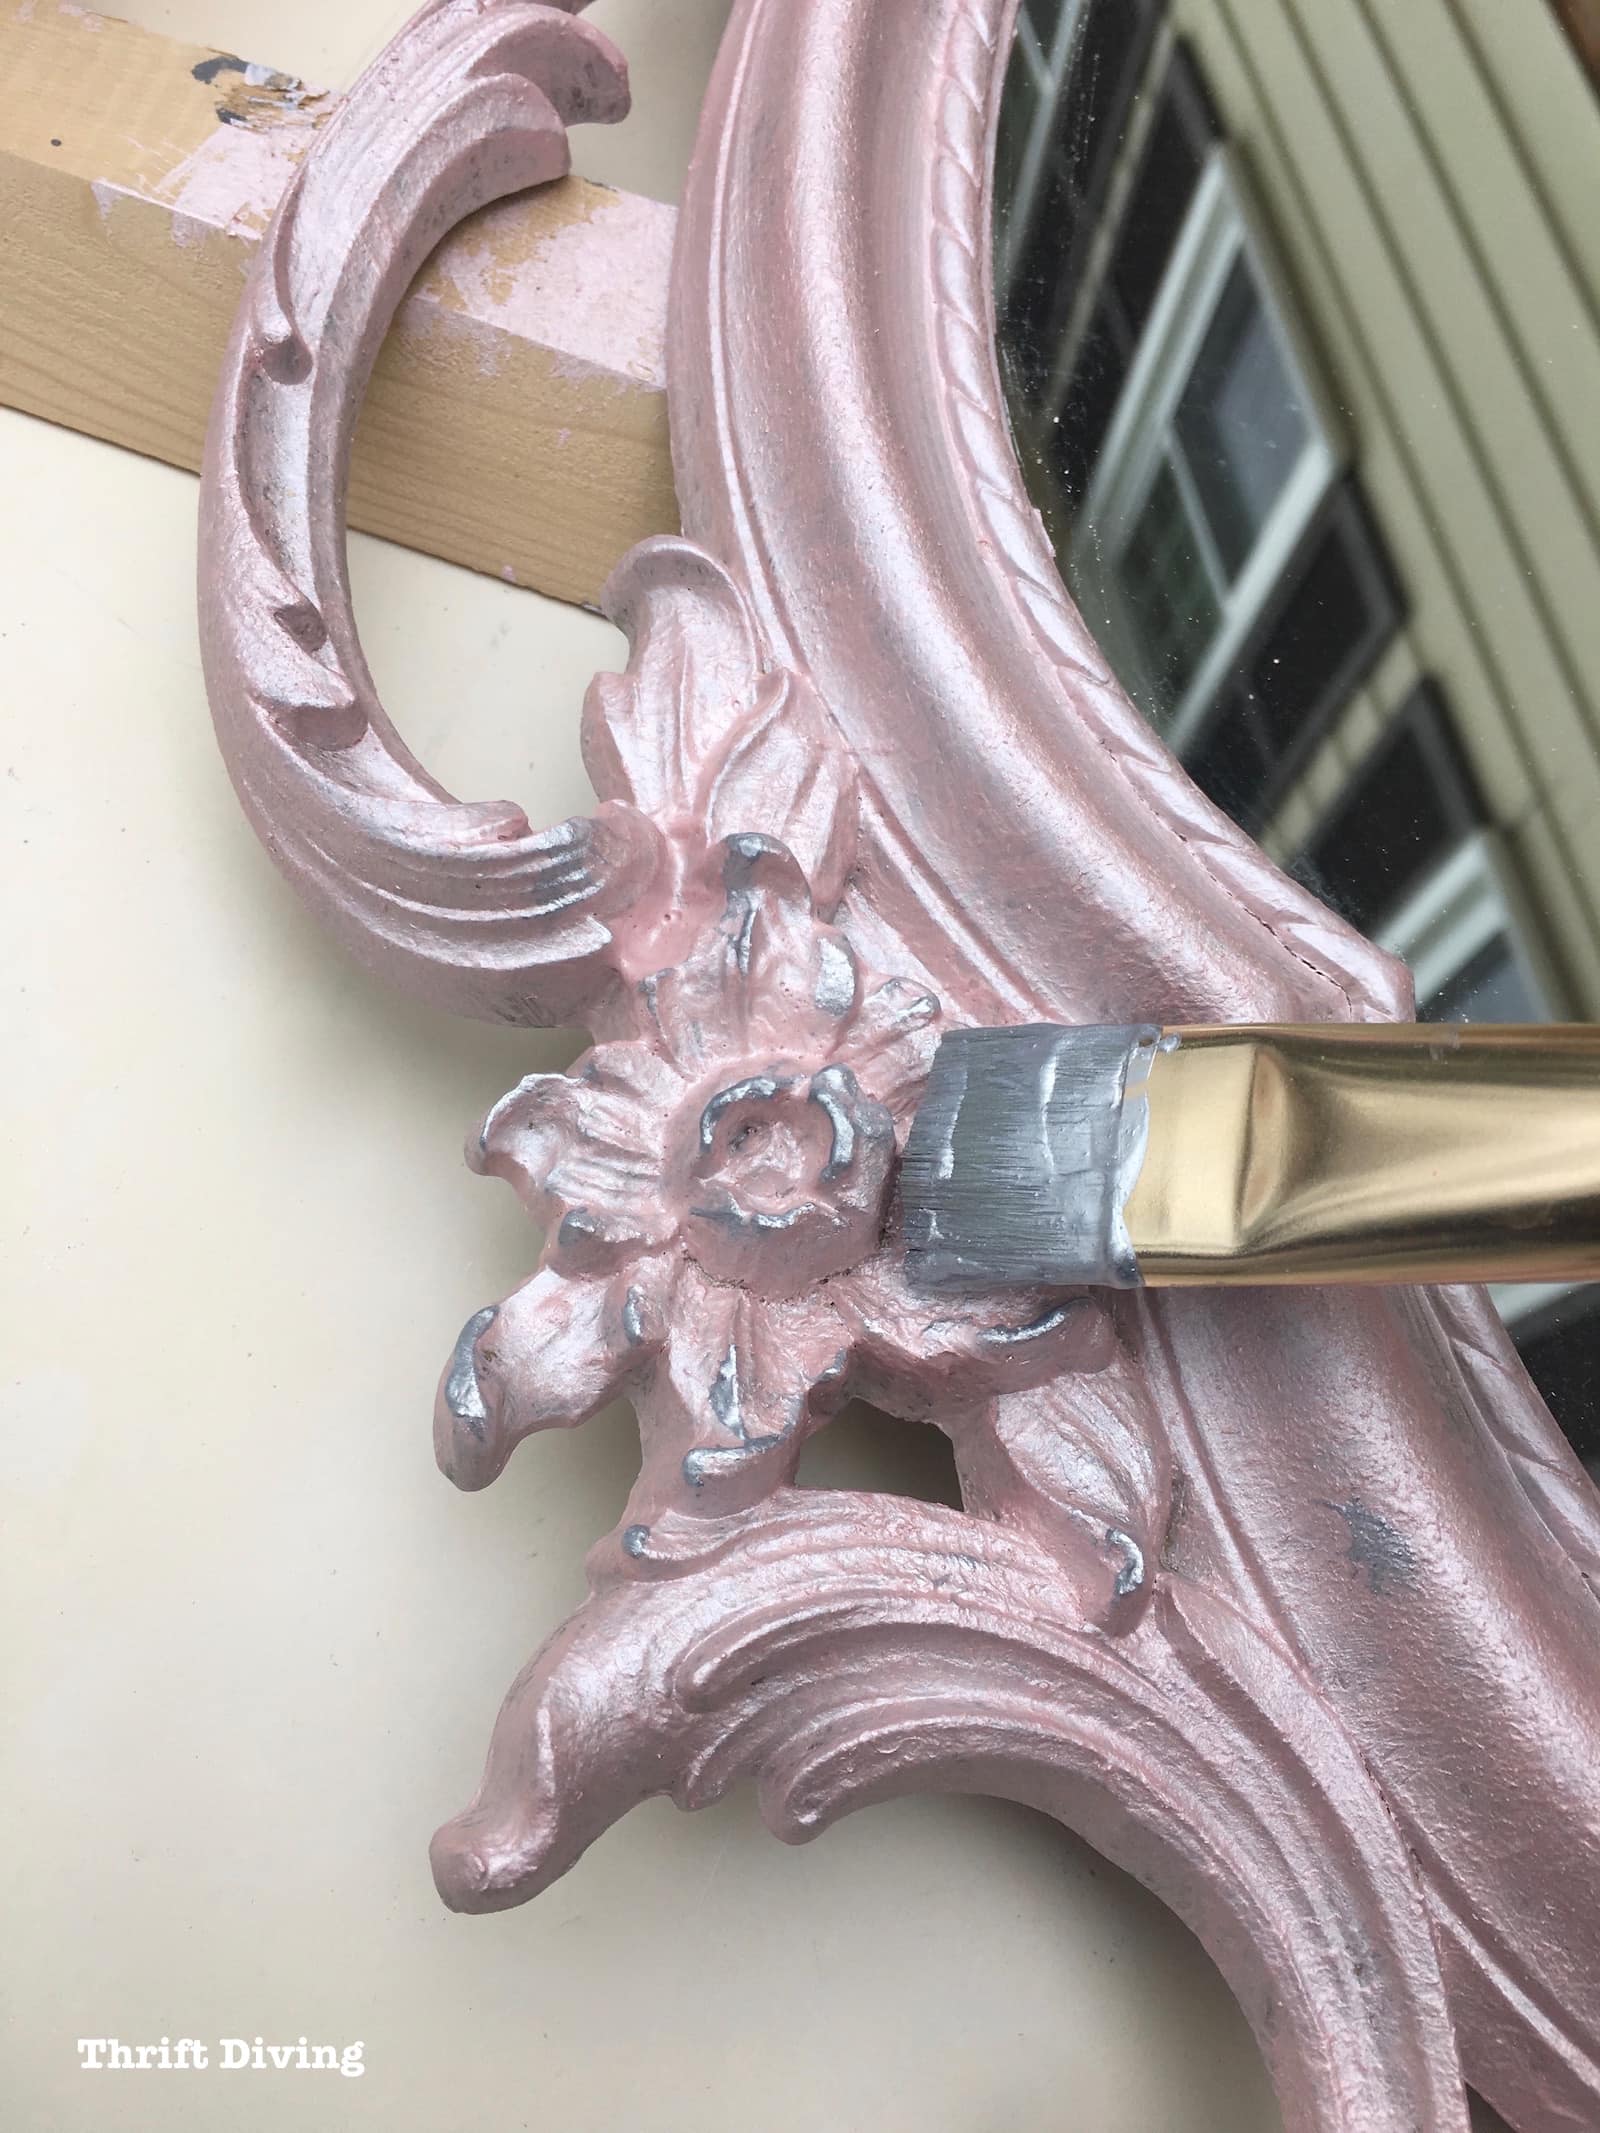
STEP 6: Add Embellishments
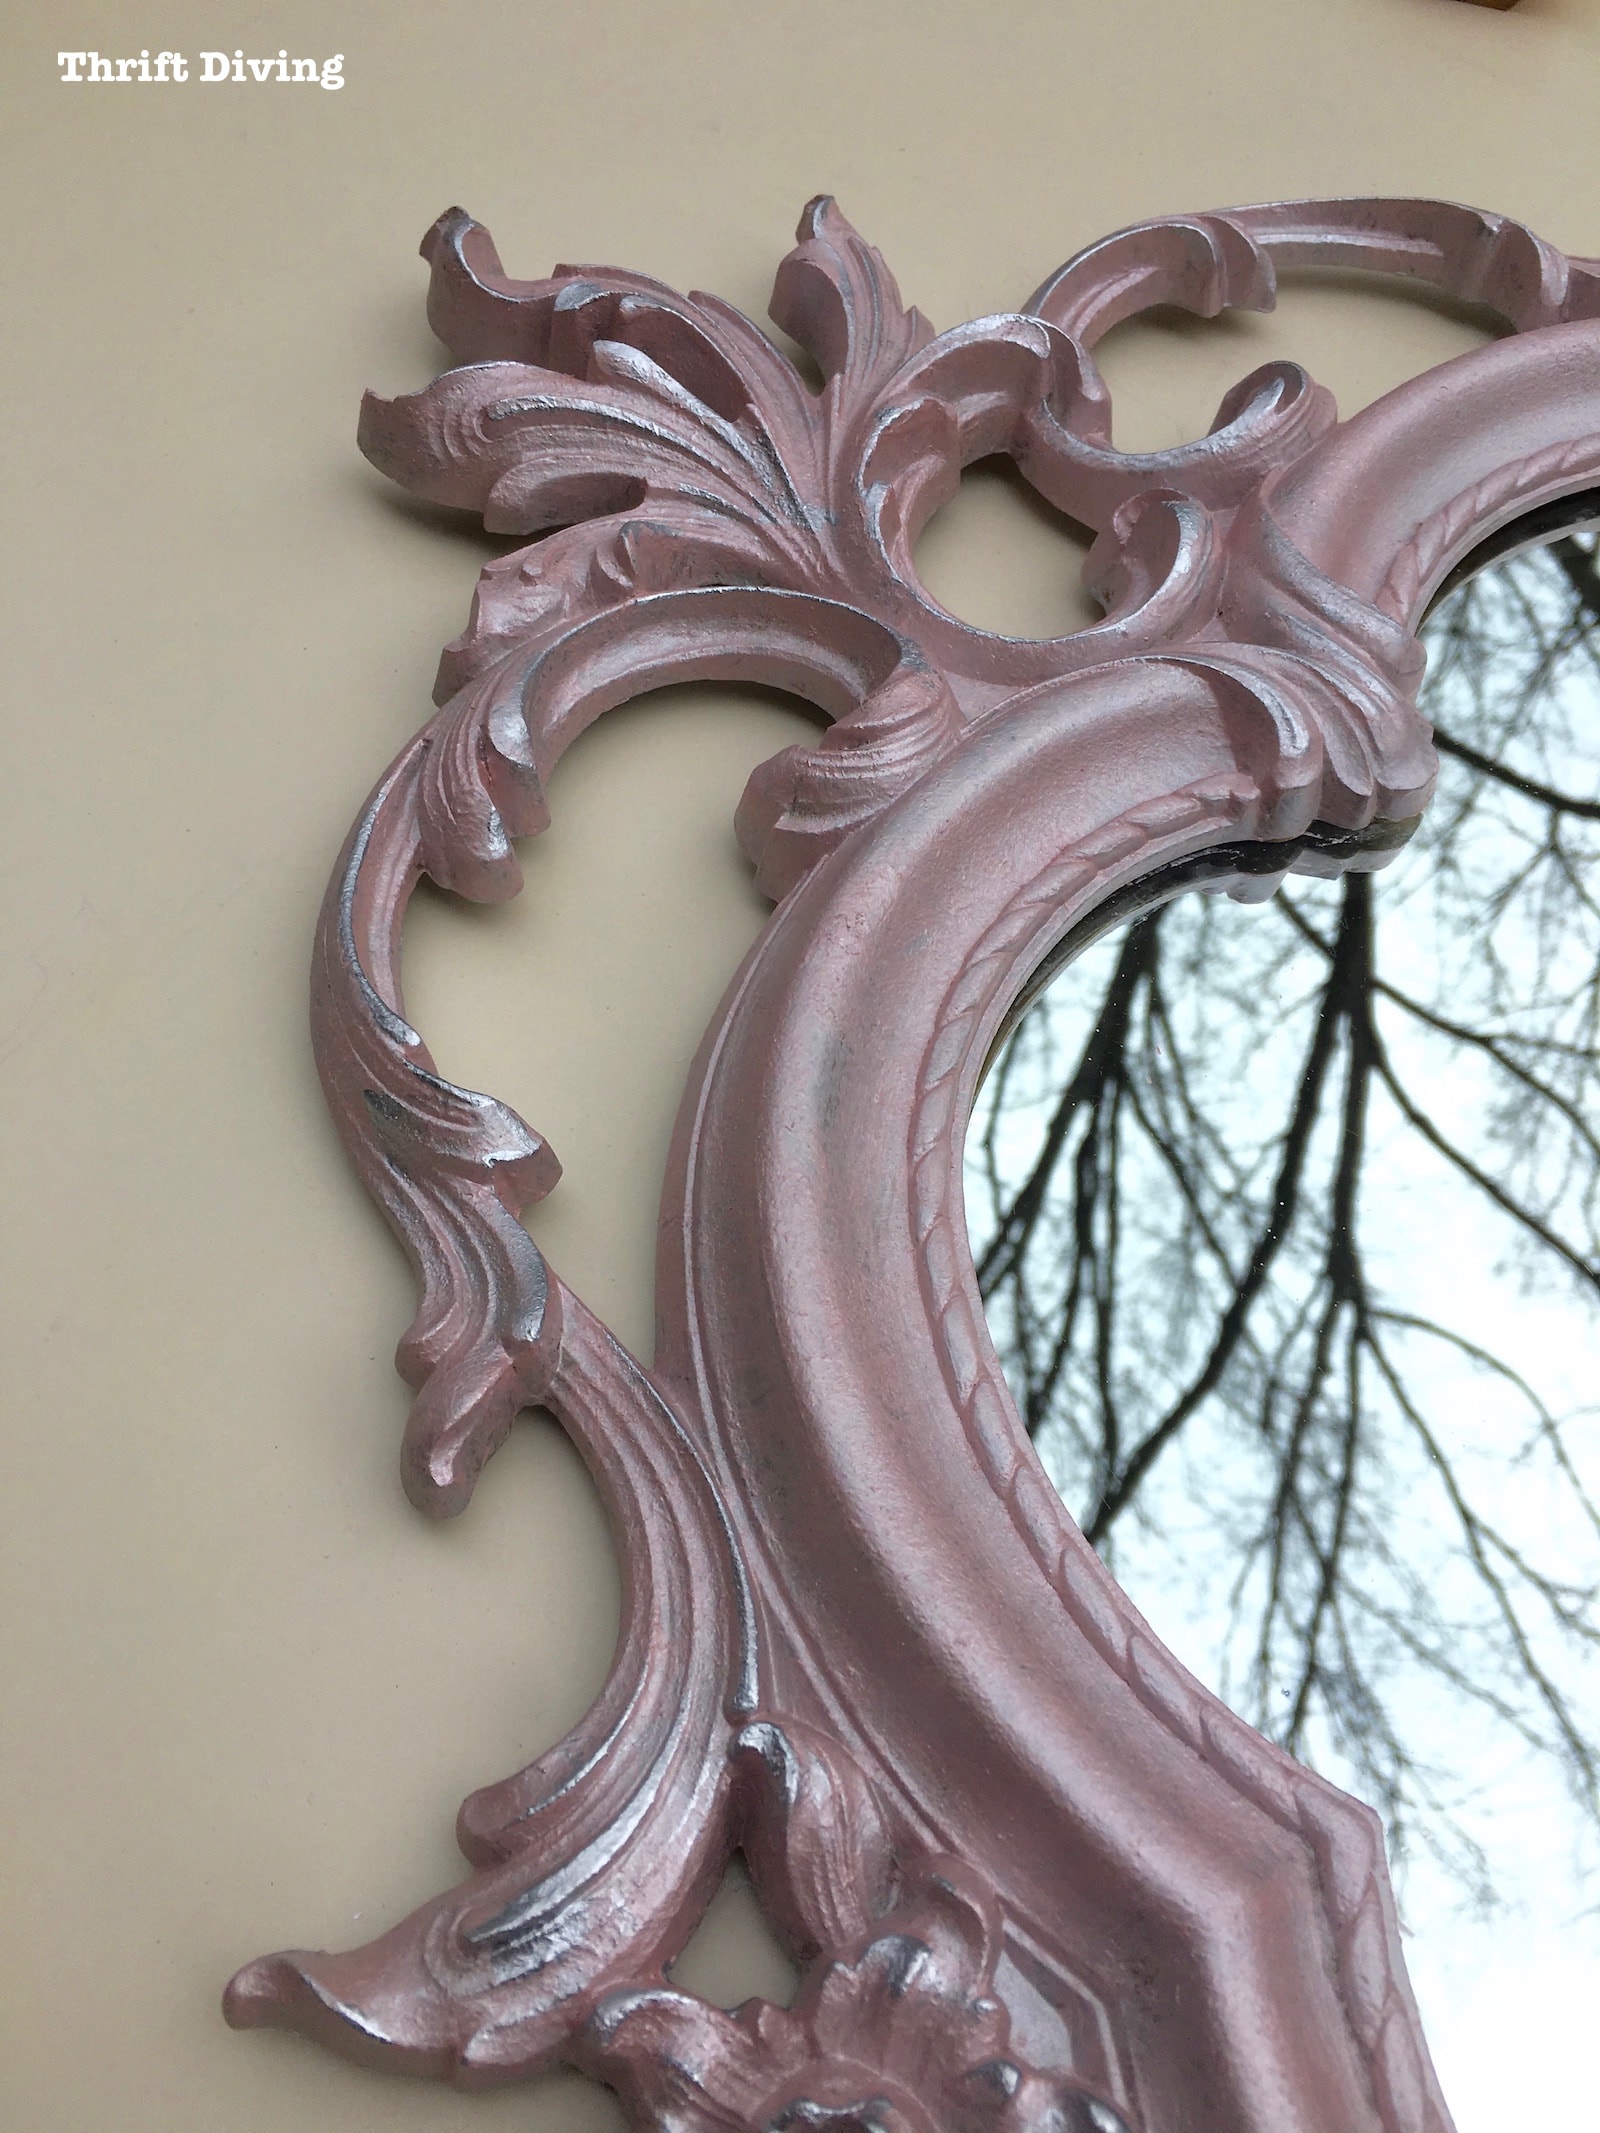
I actually didn’t think to do this until afterward, but I realized how beautiful the Rose Gold looked with the Metallic Silver.
I decided to take a paint brush and create a highlighting around the edges with the Metallic Silver.
It looked really good!
I like how in this picture you can see more of the pretty pinkish color! Some of the other pics look washed out.
I slapped on a quick coat of Metallic Silver on the back.
I wasn’t going to paint the back, because who’s gonna see it, right? But it’s a shame to make something so pretty, then to turn it around and see an ugly back. LOL
It didn’t take but a couple minutes to brush on a quick coat.
I just had to be careful that the silver didn’t drip down the sides onto the Rose Gold.

Afterward, I left it fully dry.
How to Stencil the Wooden Journal
If you remember, I made a wooden journal last year, but it was stained and, while lovely, a little boring. LOL
I much prefer the painted ones because you can get so much more creative with it! (I gave my mom, niece, and nephew wooden journals for Christmas last year and they loved them!).
So click over to that post for instructions on cutting out the 1/4″ birch plywood with a jigsaw and drilling the holes for the binder rings.
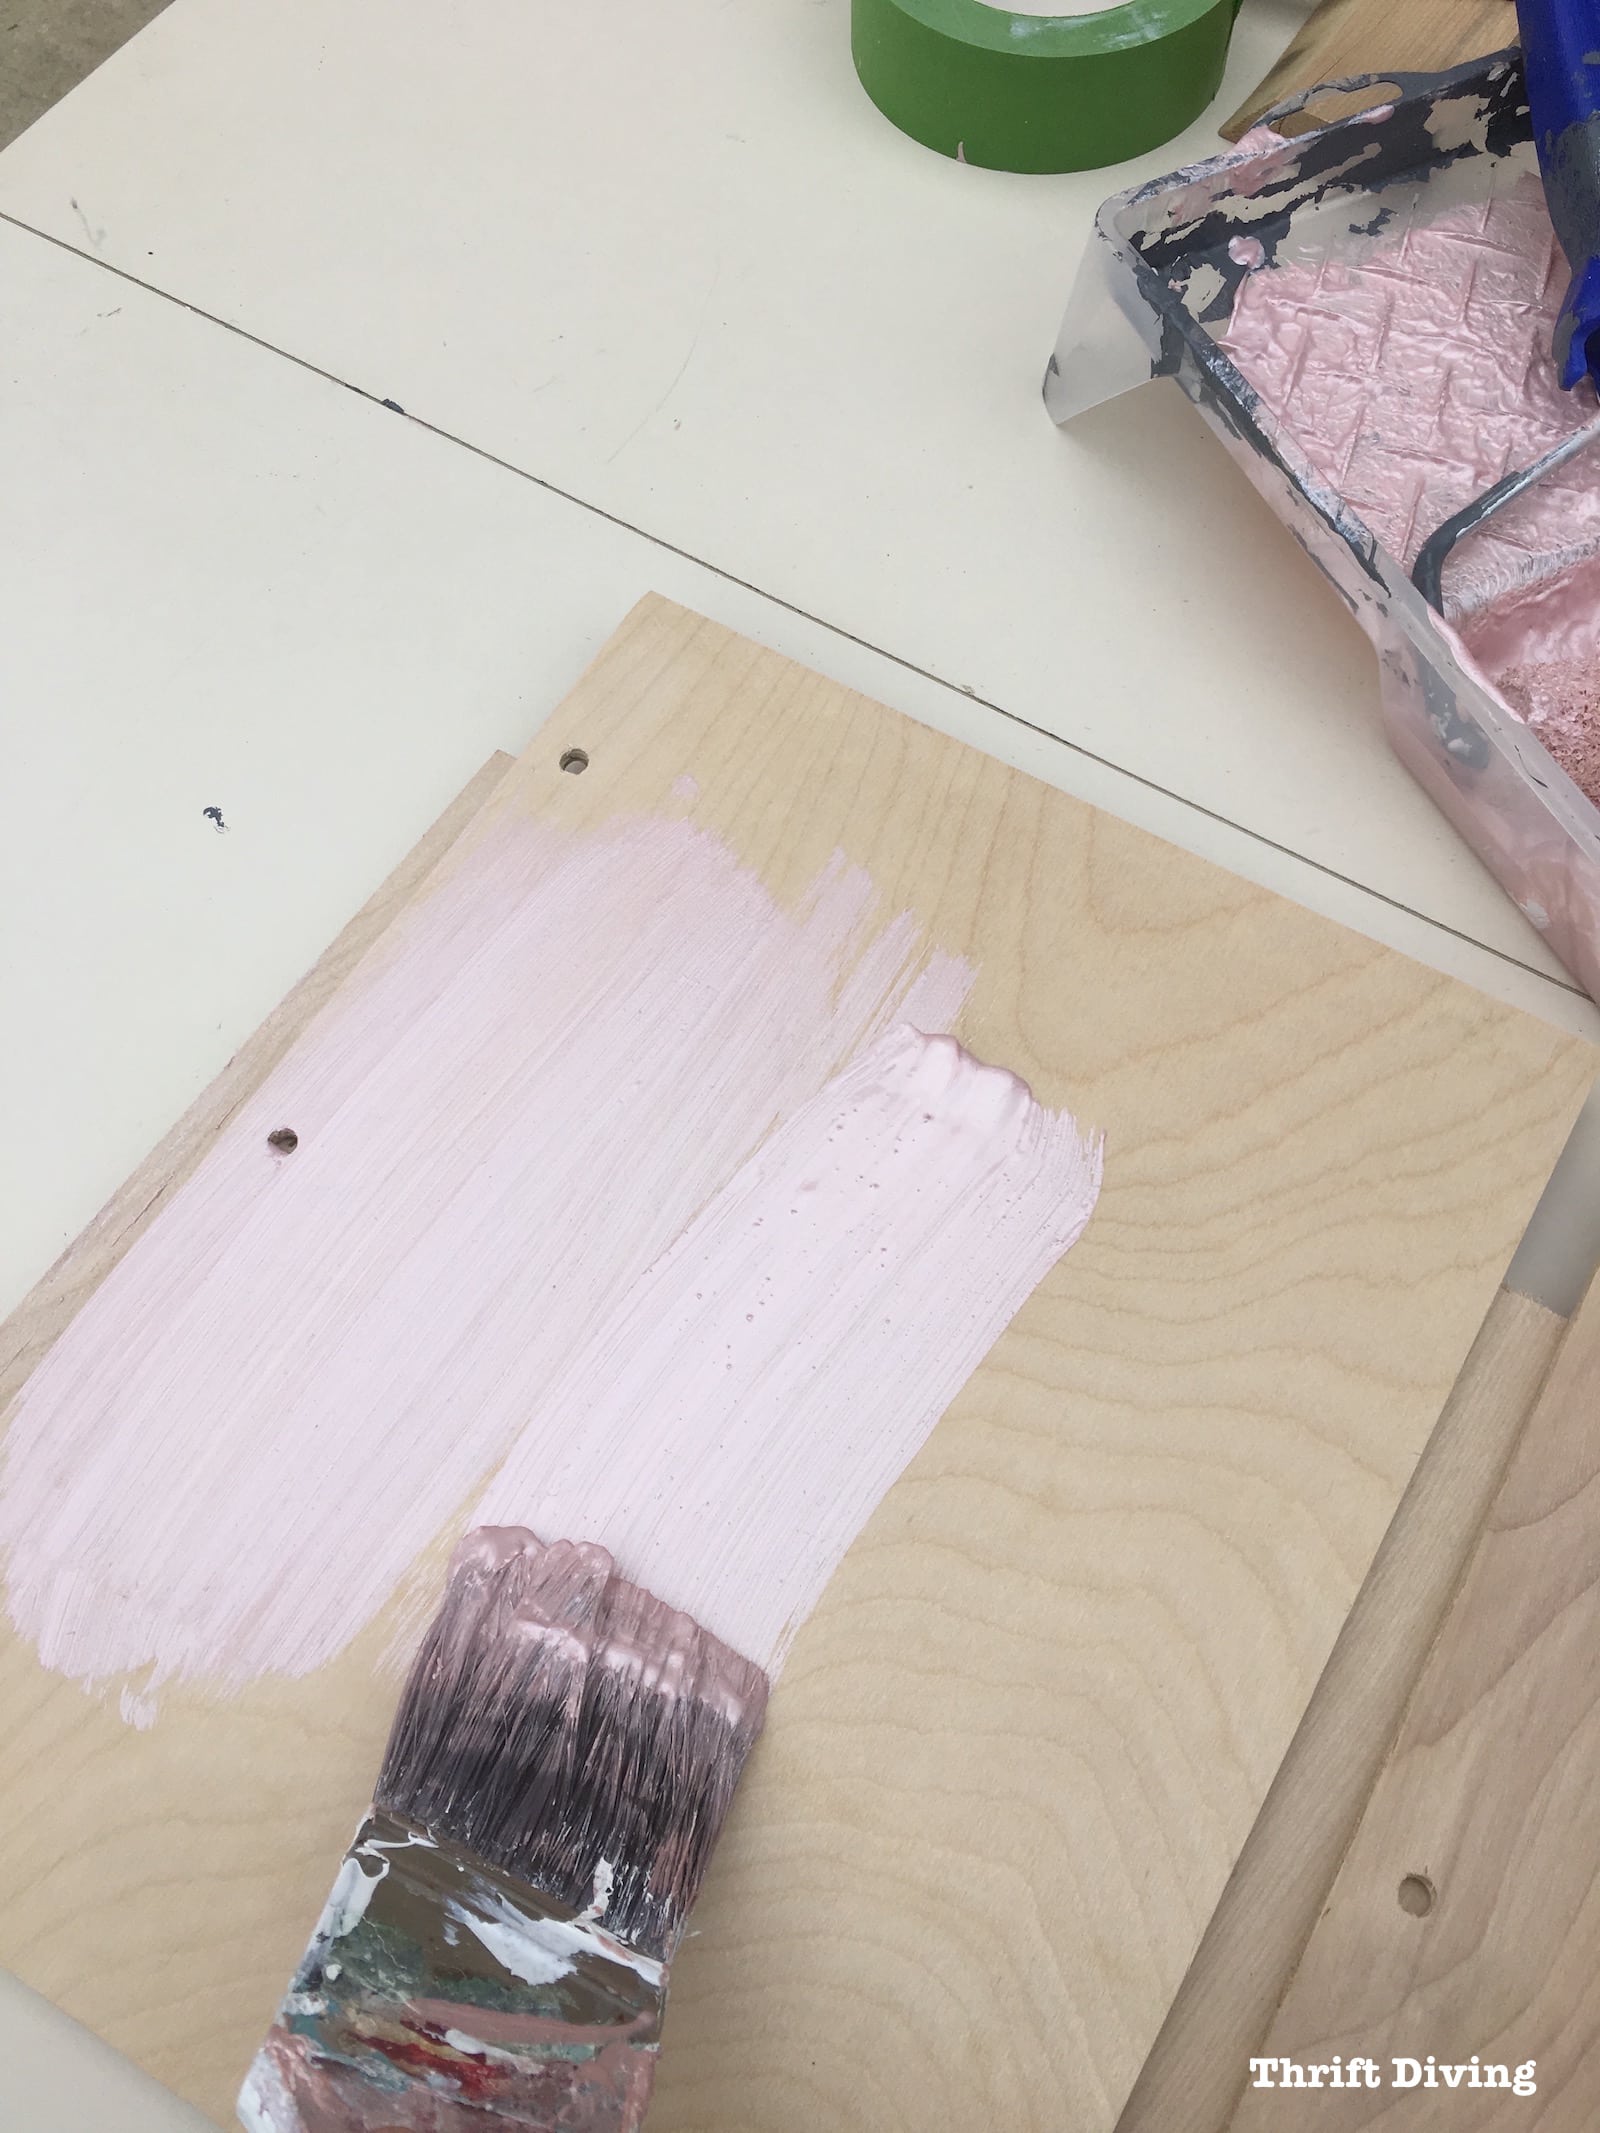
STEP 1: Paint Two Coats of Rose Gold
I just used a brush, but you can use a roller if you’d like.
The paint looked smoother with a brush. I found that the metallic over-emphasized the texture when using a roller. I wanted a little texture, but not as much as there would have been with a roller.
So the brush worked best on the DIY wooden journal.
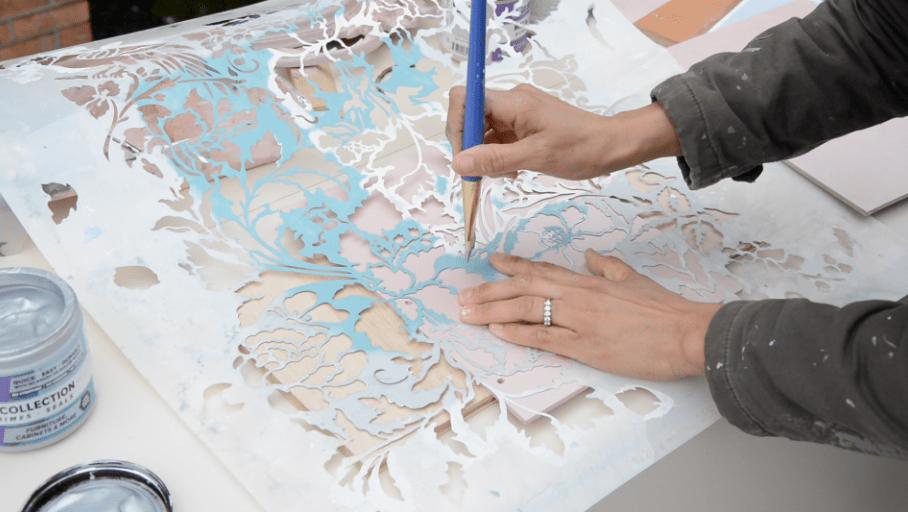
STEP 2: Stencil on the Front
I have used my favorite stencil in soooo many projects, I think I’ve lost count! That’s because it’s beautiful and makes any painted project that much better! (Click here for more information about this floral stencil).
It’s best to use a stenciling brush or a foam brush for stenciling, but I didn’t have either, so I used a regular brush with the Metallic Silver paint.
RESOURCE: Click here to read my post How to Use Stencils: A Complete Guide.
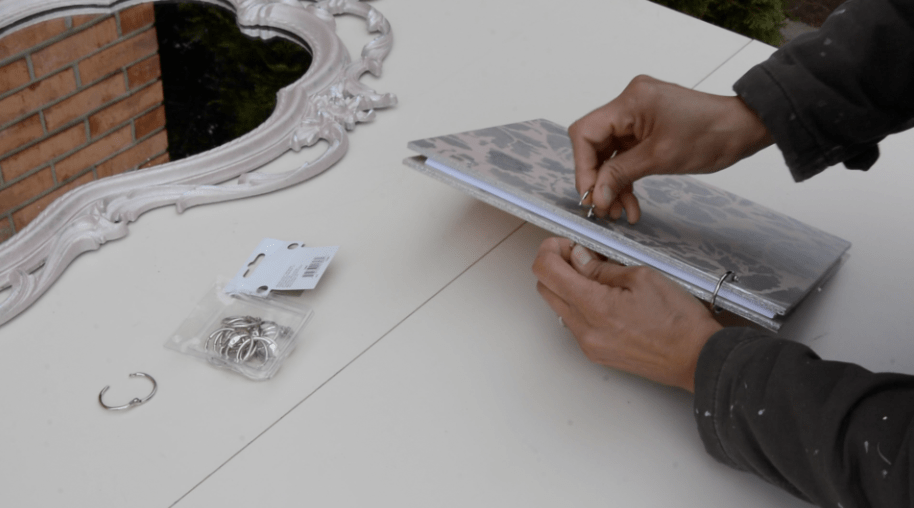
STEP 3: Add the Paper and Binder Rings
I used a 3-hole punch to add some blank computer printer paper to the wooden journal, along with some of my project plans that I have laminated.
Sometimes I forget exactly how I did a project or my notes on each project, so I wanted to create this cool wooden journal to keep track of it all!
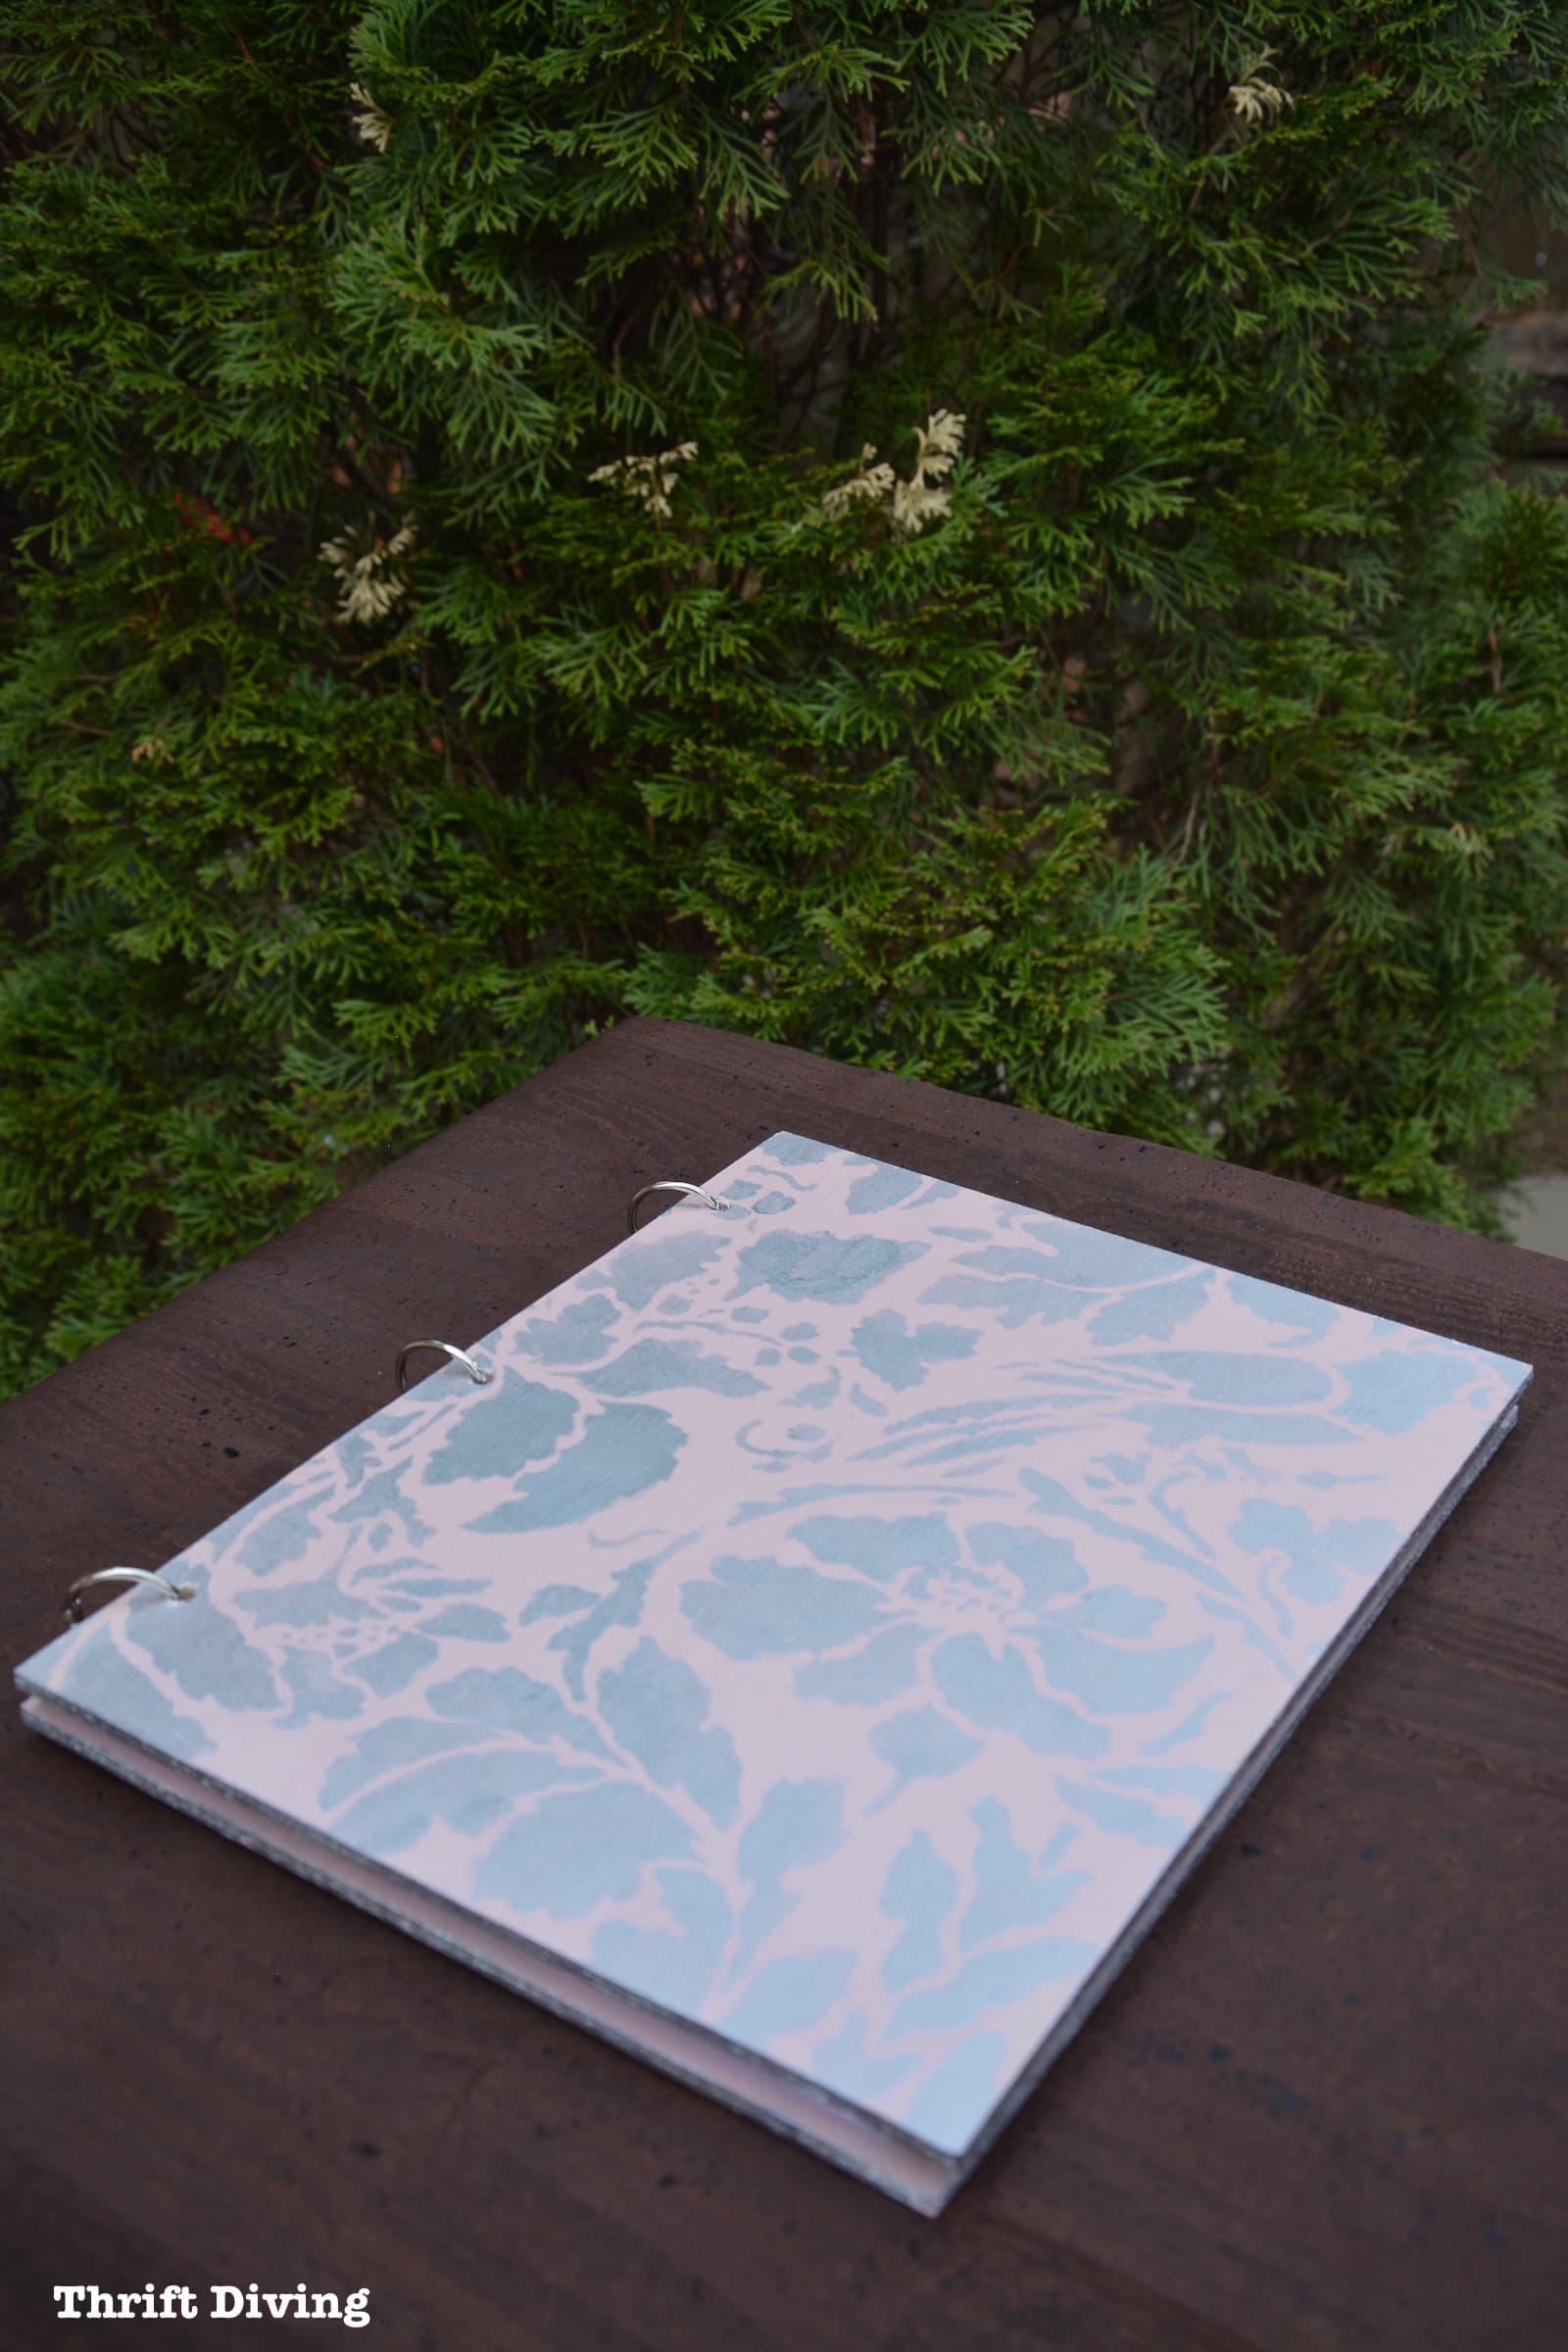
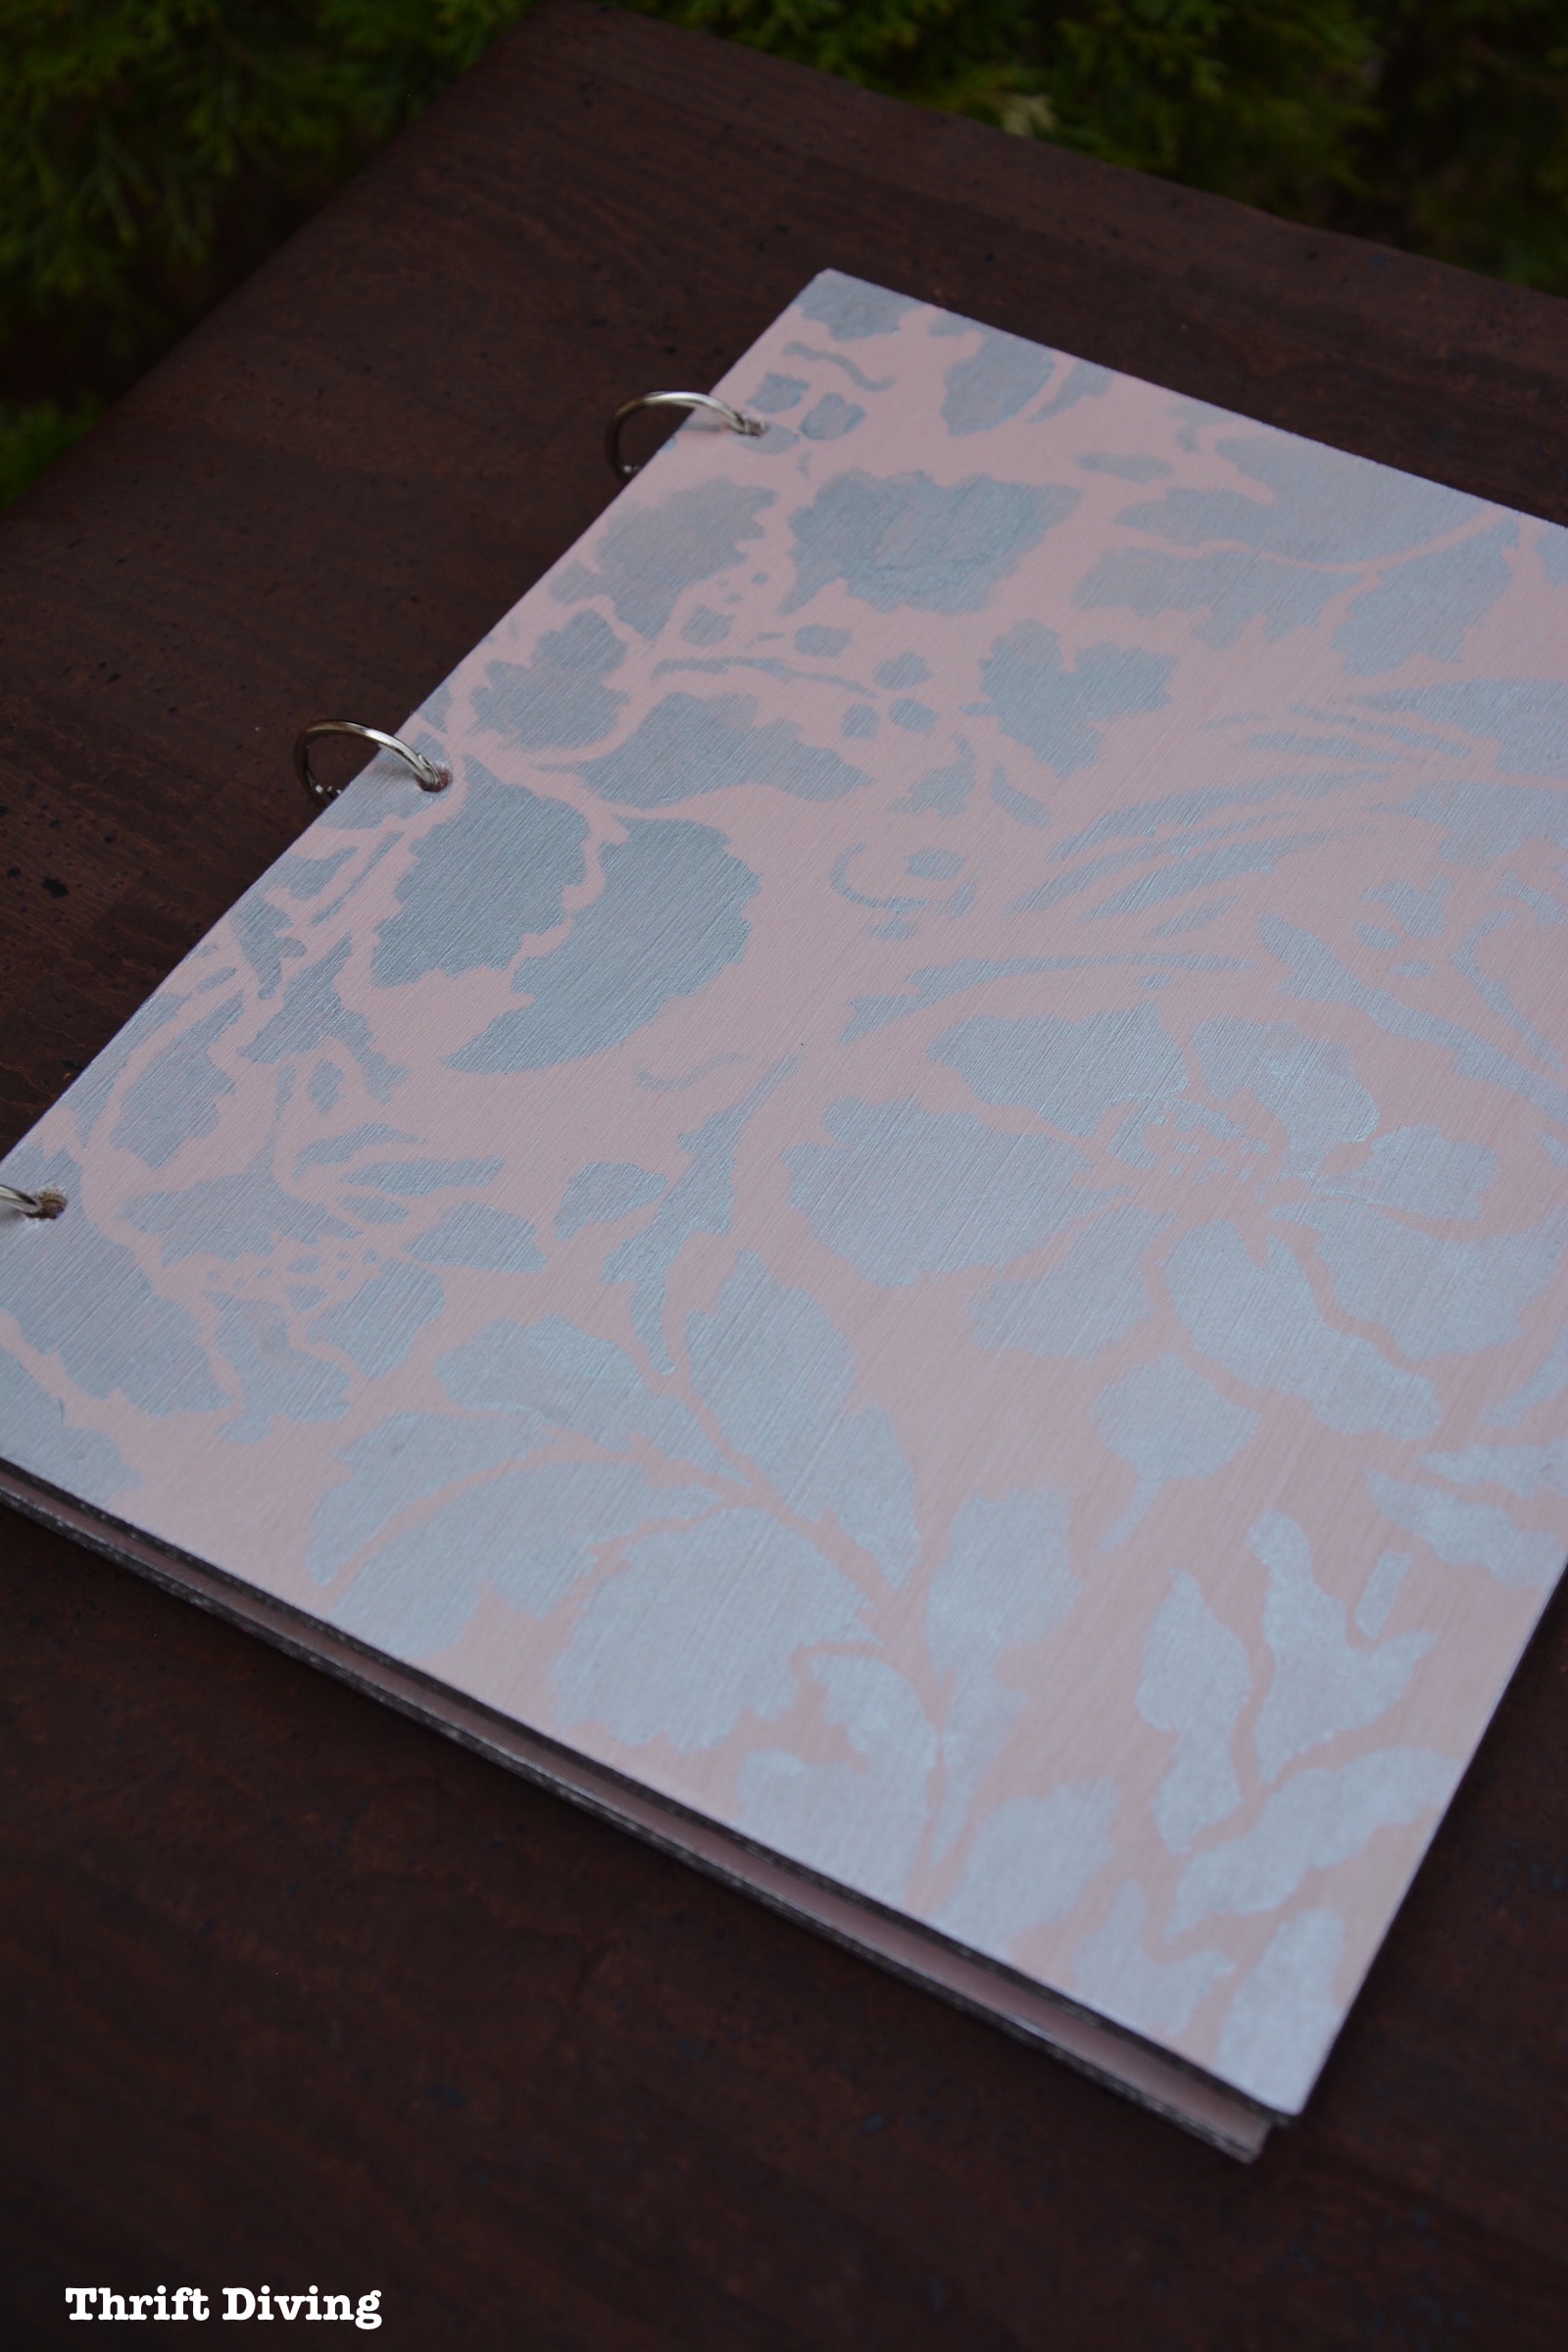
STEP 4: Add a Top Coat, If Necessary
Beyond Paint paints are self-sealing and you don’t need a top coat in most cases. However, they do offer a sealer if you want to use it.
I skipped the sealer and just left the wooden journal with the stenciled top.
It turned out so cute!
The shimmery Metallic Silver was the perfect complimentary touch!
Let’s have another look at these fun, easy projects:
BEFORE
AFTER!

I’ve got this mirror hanging in my foyer!
I would have taken a wider angle shot, but you seriously don’t want to see the rest of my foyer! LOL. It’s a mess!
BEFORE
AFTER!

I think Rose Gold and Metallic Silver are my new favorite paint color combinations. 🙂
Do you love this post? Click here to PIN IT!
![]()
So do you love metallic paints? And if so, how do you use them in your crafting? Leave a comment below and let’s chat about it!
Be sure to head over to Beyond Paint to check out this fun new Metallic Collection!


Download the 5 freebies!

Thrift Diving inspires women to decorate, improve, and maintain their home themselves...using paint, power tools, and thrift stores! Use these 5 printables, checklists, and ebooks to get started!
Wow, these turned out great! I like to do uncomplicated projects for a quick diy success, especially when all my other projects seem to be getting no where.
The rose is a lovely whipped color, but I wouldn’t have named it rose gold. It has definitely a silver undertone. I was expecting a rose gold that was more gold. But regardless, it’s beautiful!
I had to laugh when I saw that artistic direction , “smush it .” Where do you plan to hang your mirror. It would look great in a foyer or hallway. It’ll be there if you want to check your appearance before answering the door .
Thanks for the tip about Beyond Paint. Definitely one I’ll try in the near future. Both projects turned out great.
On a technical note, it looks like a wireless microphone, could you please share the brand and if you are happy with the product? The sounds was good from a listener perspective. Thanks!
OMG That Mirror belongs in Cinderella’s Room! LOVE!
So love your work. Enjoy reading everything you post!
What a couple of fun projects, Serena. I love the journal cover. What a clever idea. You look smashing in the mirror. I know who’s the fairest in the land. I’m glad you had fun with these two smaller projects. That bathroom redo was *major*. Happy weekend.
So pretty!
Another Love It!!! I recently tried a Rose Gold and had given up hope since it was purple so now I am going to give it another try!!!
Lovely!I think you were right when you did the highlights in the silver color!
I see that the paints say you can paint cabinets with ‘beyond paint’ as well, so i’m gonna go right now and check them out! My cabinets are looking mighty poorly. Let’s see if they have any colors that I could use!
Good work!
You are SO right! The rose gold is absolutely dreamy!! Like you, I have always avoided metallics when doing projects; I find most metallic paints end up giving a rather cheap look to whatever they’ve been used on. This rose gold is entirely different than ANY I’ve ever seen. You did a beautiful job on your mirror and the silver highlighting was the perfect touch. I’m on the hunt for something that rose gold paint will make look beautiful. Thank you for sharing your gorgeous mirror.