How to Make a DIY Lazy Susan
There are several things I know for sure: 1) Men stink more than women, 2) Women rule the bathroom and bathroom storage, and 3) Men stink more than women. Or did I already say that….?
Well, it’s true.
And it’s also equally true that I have a majority of the good-smelling products overflowing in the bathroom storage–so much so, that we tend to crowd out space for the very stuff that men need! men their essentials. But it’s the men that need them most, right?
That’s definitely the story in our house!! My husband is always working out in the morning and coming back from his walks smelling funkalicious. Exercise does a body good, but it also makes for a stinky body! 😉
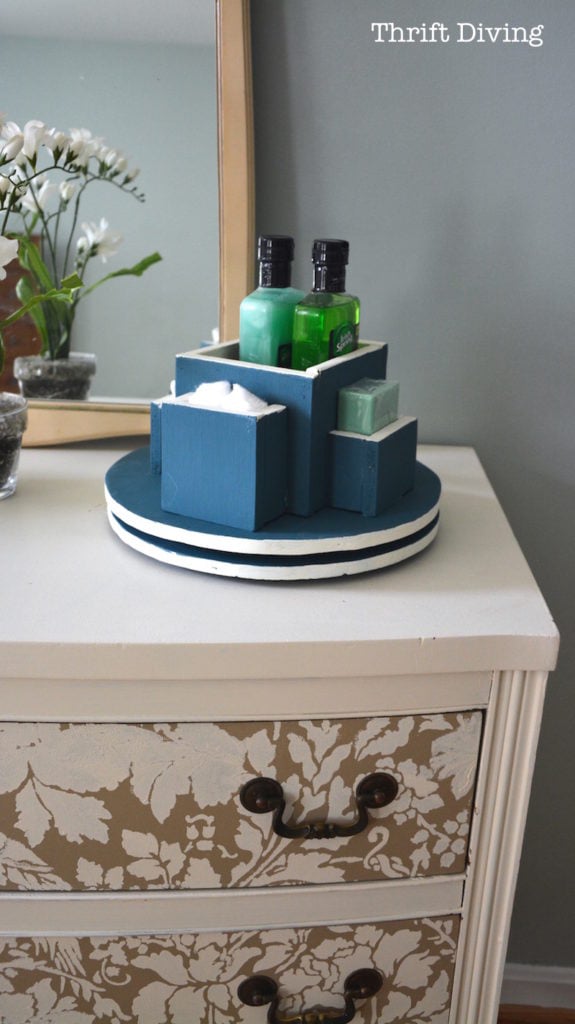
So I decided to make a little lazy susan for my husband, a place where he can all his bathroom essentials in one place for when he gets back from his walks and is ready to show, he can easy grab any fresh supplies he need. No more excuses for B.O.!
How to Make a DIY Bathroom Lazy Susan
To make a DIY bathroom lazy susan, you’ll need the following materials:
- Scrap piece of wood about 2×2
- A jigsaw
- Nail gun or hammer and nails
- Screw driver and bits
- Wood glue
- Paint & brush
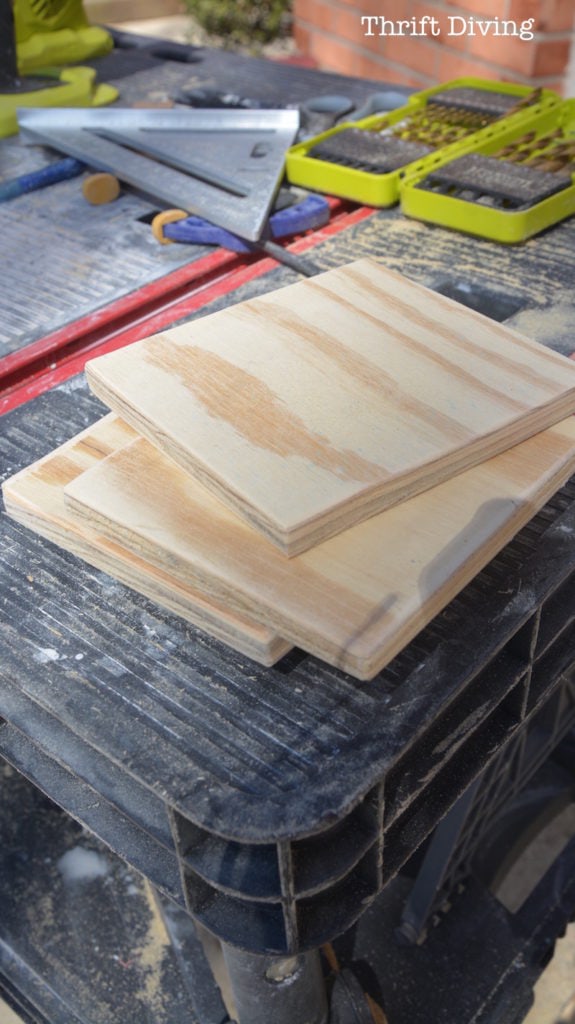
STEP 1: Grab some scrap wood.
I had this 1/2″ thick piece of plywood in my garage.
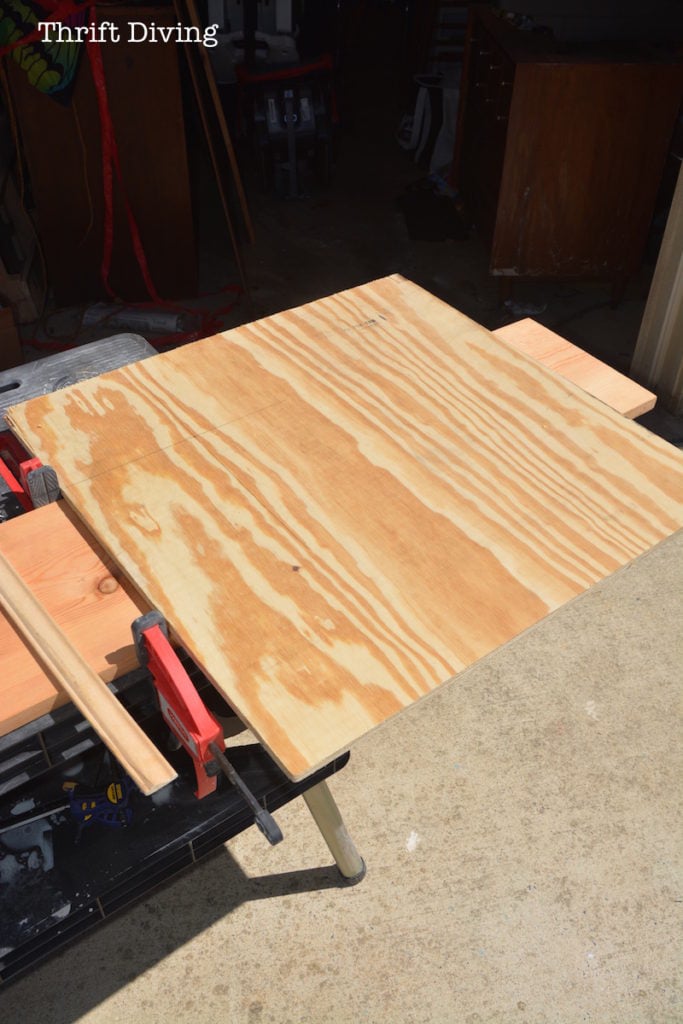
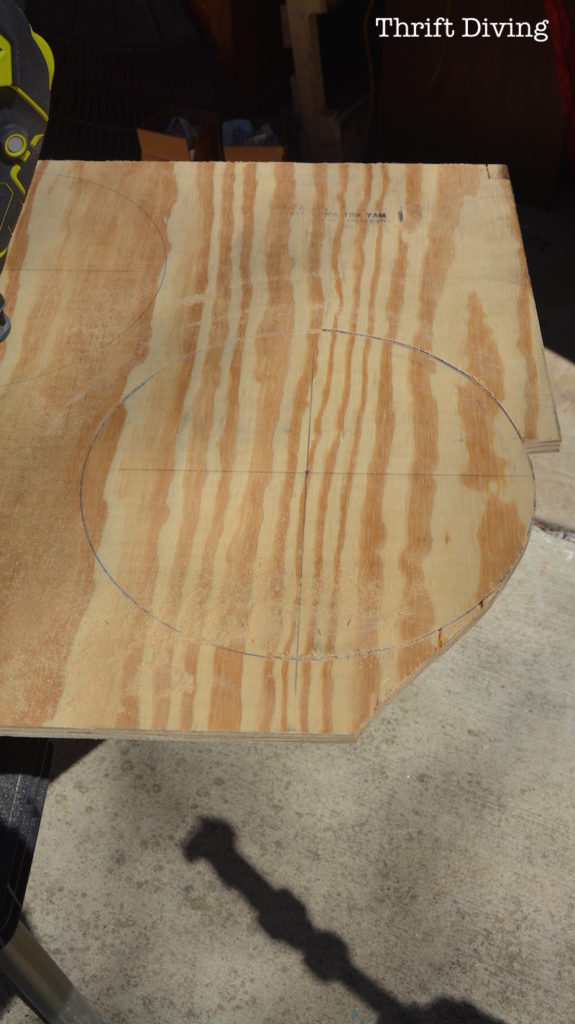
STEP 2: Cut out your pieces.
It was big enough for two circles about 12″ inch each.
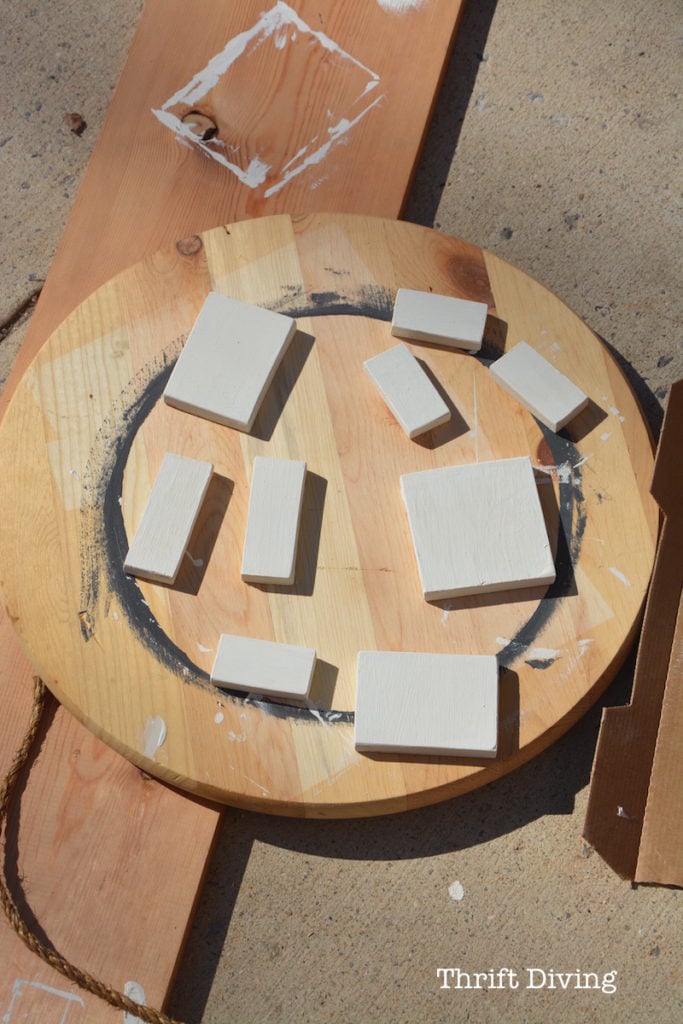
Using my jigsaw:
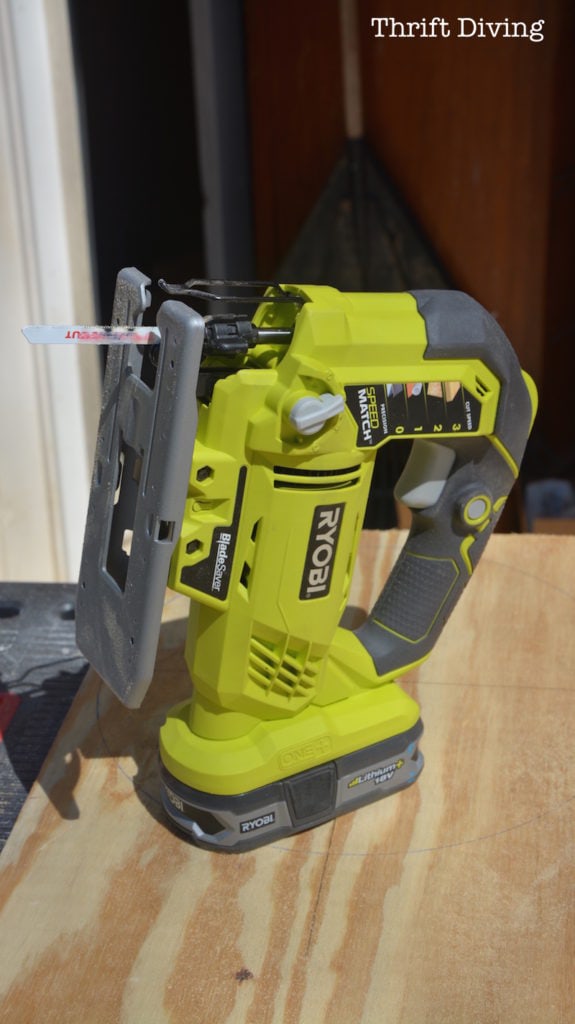
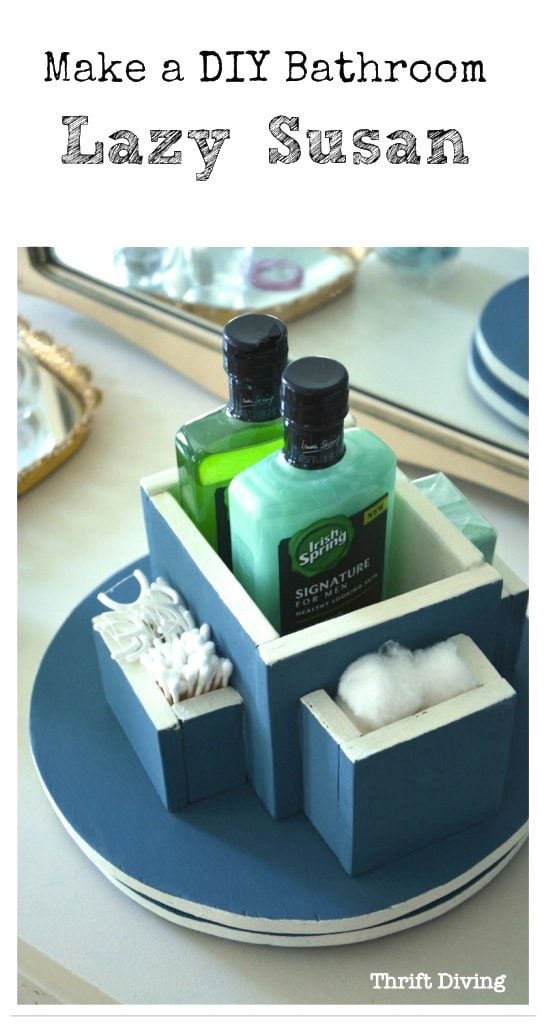
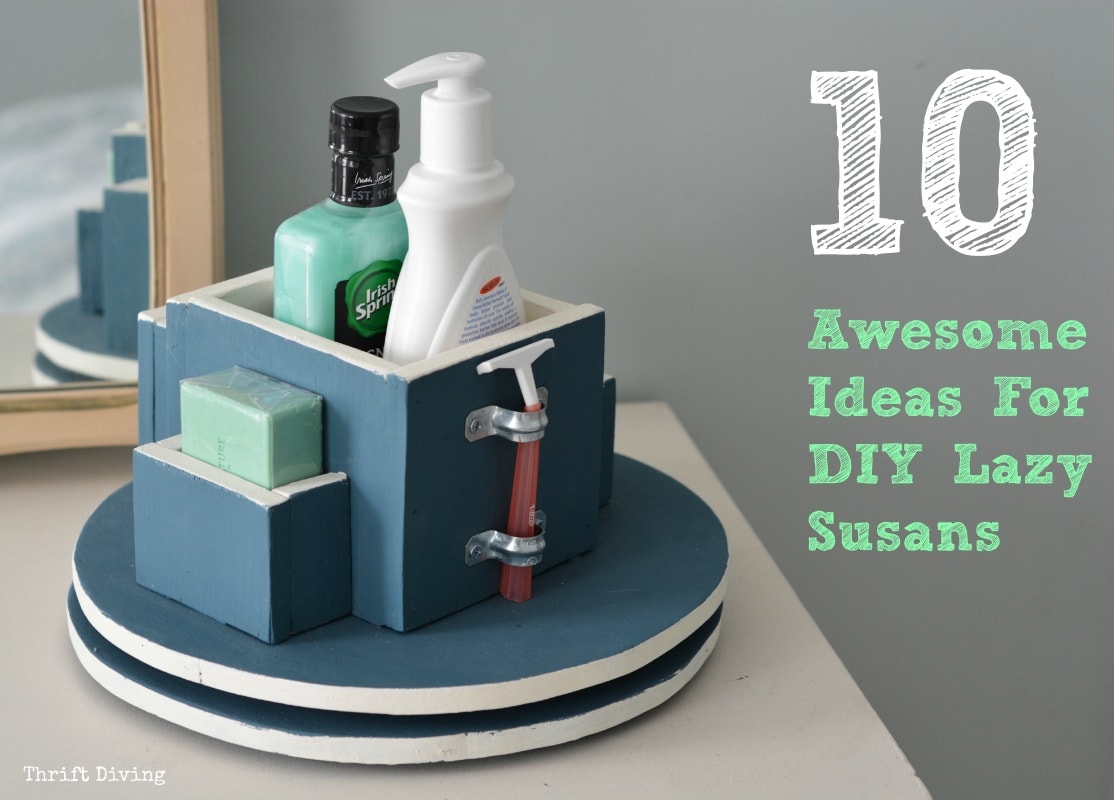
I cut the circles and lots of little pieces to make up some compartments to hold the shower gels, soaps, and cotton swabs. You can make these small pieces of the compartments any size you wish to fit your man’s favorite bath items.
I also painted them white so the inside of the lazy susan compartments would be white.
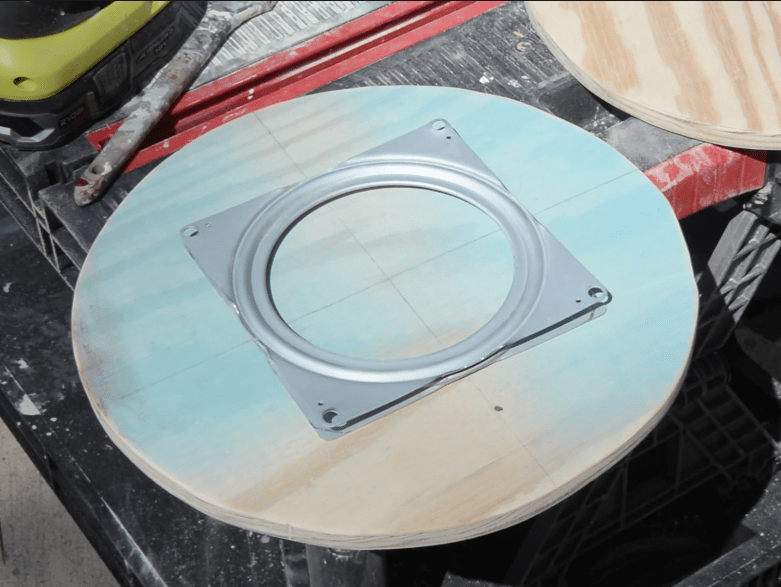
STEP 3: Make your lazy susan.
Paint the pieces of the lazy susan first. Then, using the two circles that you cut out, create the lazy susan. I had found these instructions on YouTube that were super helpful. It takes some practice getting the lazy susan turntable into place, but once you do it the first time, it’s easier to understand.
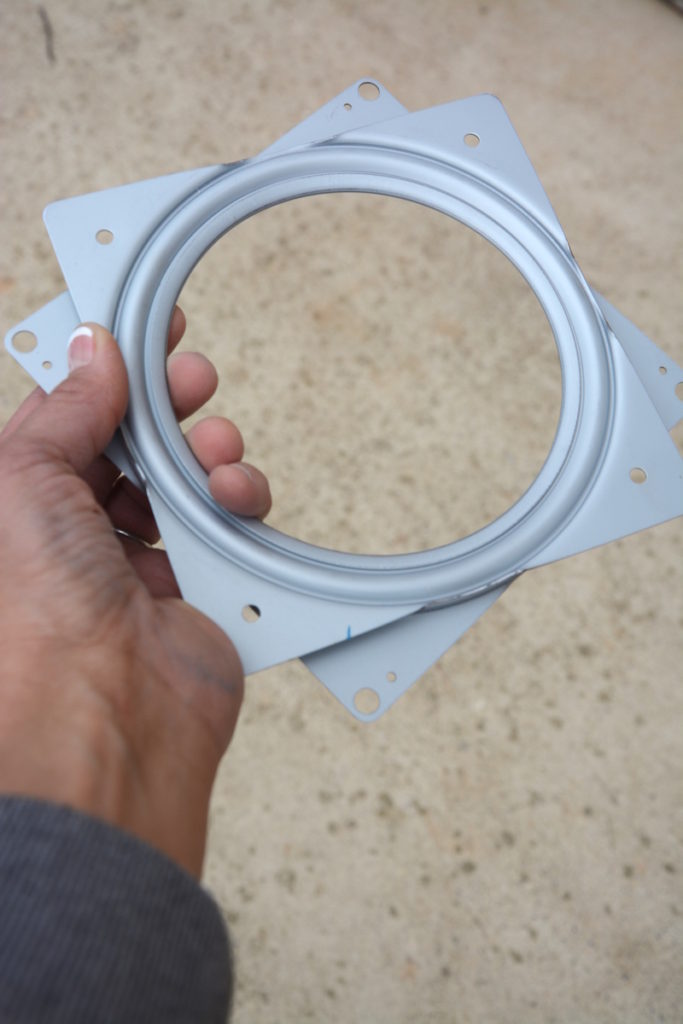
Following the directions in the video link above, sandwich the lazy susan turntable in between the two round circles of wood.
STEP 4: Test a fit.
See how some of your body wash and soap fits into your little compartments.

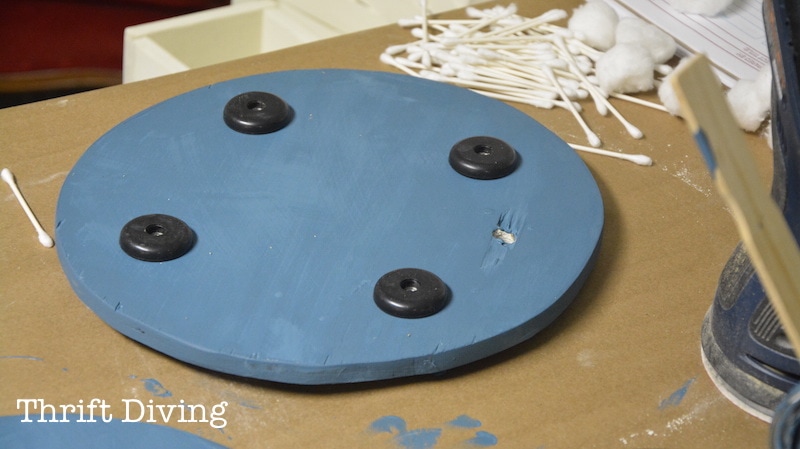
STEP 5: Add feet the bottom.
These rubber feet will keep the bottom in place. I picked them up from my local hardware store.
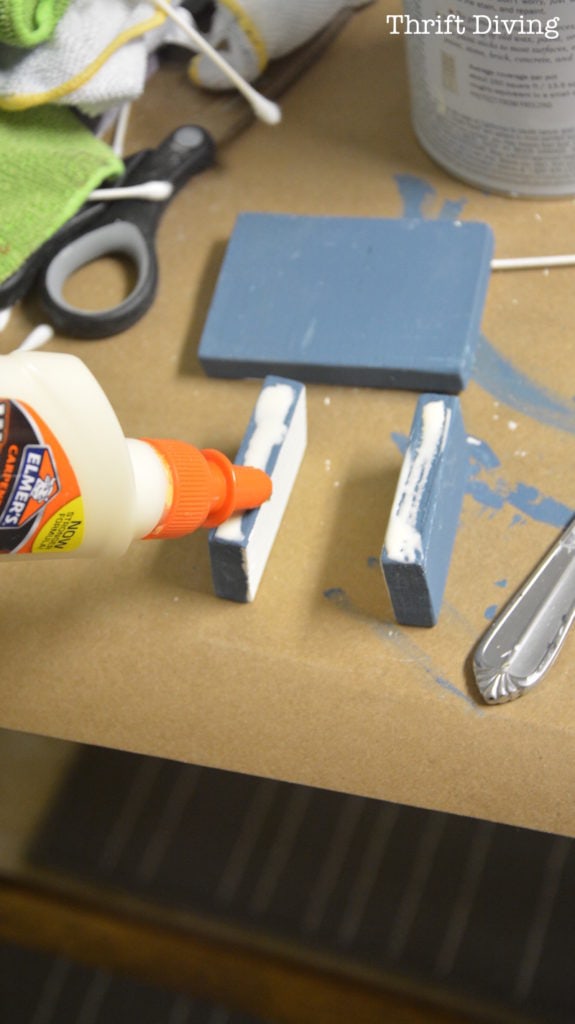
STEP 5: Construct the little compartments together with wood glue.
After gluing, I also used a brad nailer to reinforce the joints (not shown).
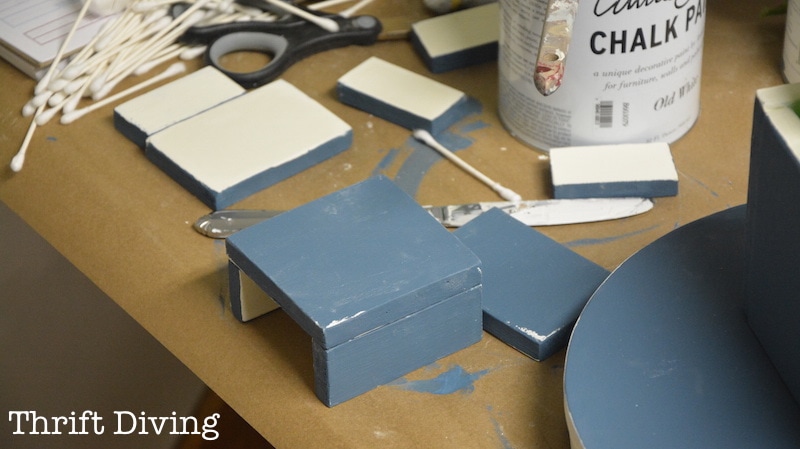
STEP 6: Glue on the compartments.
Once all the compartments are constructed, I used wood glue to adhere them to the center part. Give it a final coat of paint or touch-ups. Voila!
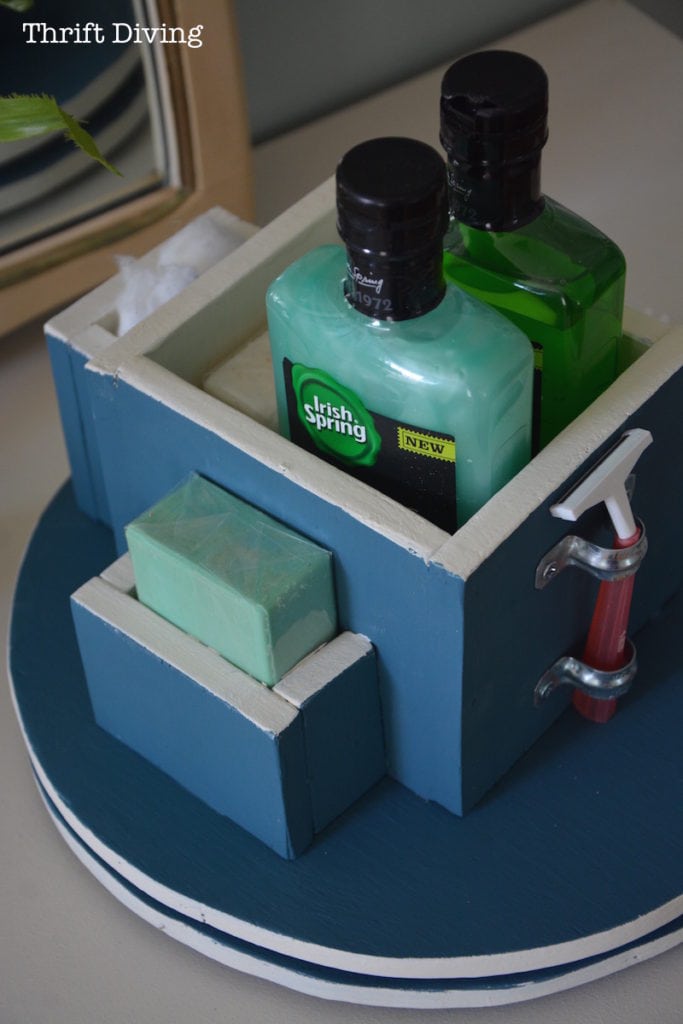
For now my husband’s new lazy susan bathroom organizer is resting on my dresser until I can get around to cleaning our bathroom closet (read: throwing away half of my junk!). I think it looks quite good on my dresser. I’ll have to make one for myself next time!
For All You Visual Learners…
Another Project You May Like
Need a place to hang your tablet on the wall? Get the instructions on how to make a DIY tablet holder.

So how do you beat the stink of your males in YOUR house? And do you think you’d love to make a DIY lazy susan organizer for your bathroom?
Leave a comment and jump into the discussion!

Download the 5 freebies!

Thrift Diving inspires women to decorate, improve, and maintain their home themselves...using paint, power tools, and thrift stores! Use these 5 printables, checklists, and ebooks to get started!


Looks like it’s time for me to get over my phobia of power tools. Great project!
Thanks!
This is such a fantastic idea! I love how perfectly everything fits inside the compartments, and how simple it looks to put together! You’re a magician! #client