How to Winterize Your House With 5 Easy Tips
This post is sponsored by Troy-Bilt. All opinions belong to Thrift Diving.
There’s something magical about the winter, isn’t there? I grew up loving the winter because of snow days, hot cocoa, and snowball fights with the neighborhood kids. But as I transitioned into adulthood, winter became a headache of commuting to work in rush hour traffic on icy, over-crowded roadways…snow days where you’re hoping you can find a last-minute sitter for the kids…and the threat of busted frozen pipes. Winter had become quite a drudge.
Winter was also a nervous time because things could go wrong at home: frozen pipes, storm damage, and being unprepared to dig out during snow storms. Over the years, though, as we’ve settled into our home and learned how to navigate single-family homeownership (versus condo-ownership that had very little maintenance responsibilities), I have once again started looking forward to winter. I work from home, so the slippery commutes are gone. The kids are older, so even if there is a snow delay or a cancellation, if they needed to be home alone for a bit, they can be (without the threat of Child Protective Services being called). And no longer do I become overwhelmed by the threat of, “What if something goes wrong with my house this winter?!”
Winter feels magical again because I know how to prepare for winter. I can look forward to the gentle quietness of a foot of snow blanketing the neighborhood, silencing the world, because I’ve got the tools to dig us out (see below).
The toastiness of the season can be enjoyed because I’ve learned how to bleed the outdoor pipes when the temps begin to dip low, reducing our chances of pipes bursting.
I also don’t worry about soaring energy costs in the winter and can enjoy a toasty home because over the years I have learned how to winterize my house to reduce cold air drafts from windows, doors, and fireplaces.
Winter gets a bad reputation because of the bitter cold, threatening snowstorms, plumbing issues, risks of trees falling in ice storms, and more. But with preparation, winterization, and the right tools to handle the snow, winter can be as magical as it was when you were a kid, too.
Let’s jump into some of these winterizing tips on making sure you’re ready to tackle the cold, ice, and snow so that you can focus on what makes winter amazing: cuddling up with your family, hot chocolate, holiday movies, and furry socks. Because you know furry socks are the best.
Winterizing Your House for the Snow, Ice, and Cold!
Here are the 5 things that will help you take care of the important things around the home so that you can focus on the things that really matter this winter: family and coziness!
TIP #1: Buy the Best Snow Blower You Can Afford
In years past, we owned another brand of snowblower and it couldn’t chew through the occasional mid-winter foot of snow that we get here in Maryland. One season, I embarrassed myself when a neighbor laughed at me for using a battery-powered blower during a huge storm. He was gracious enough to come with his heavy-duty blower and clear a path for us to move our cars out.
I’ll never forget how unprepared I felt that winter. (If it weren’t for that neighbor, I might even be still shoveling out, 3 years later. HA!). I didn’t ever want to feel that helpless again, should we be hit with another large snowstorm.
This winter, I am prepared.
Over the past several months, I have been introduced to the Troy-Bilt family of tools and I can’t tell you enough how solid their products have been! From using their Colt tiller for putting in a blueberry garden over the summer to using their Leaf Vacuum to clean up the massive leaves dumped in my yard this fall, their tools perform well every single time.
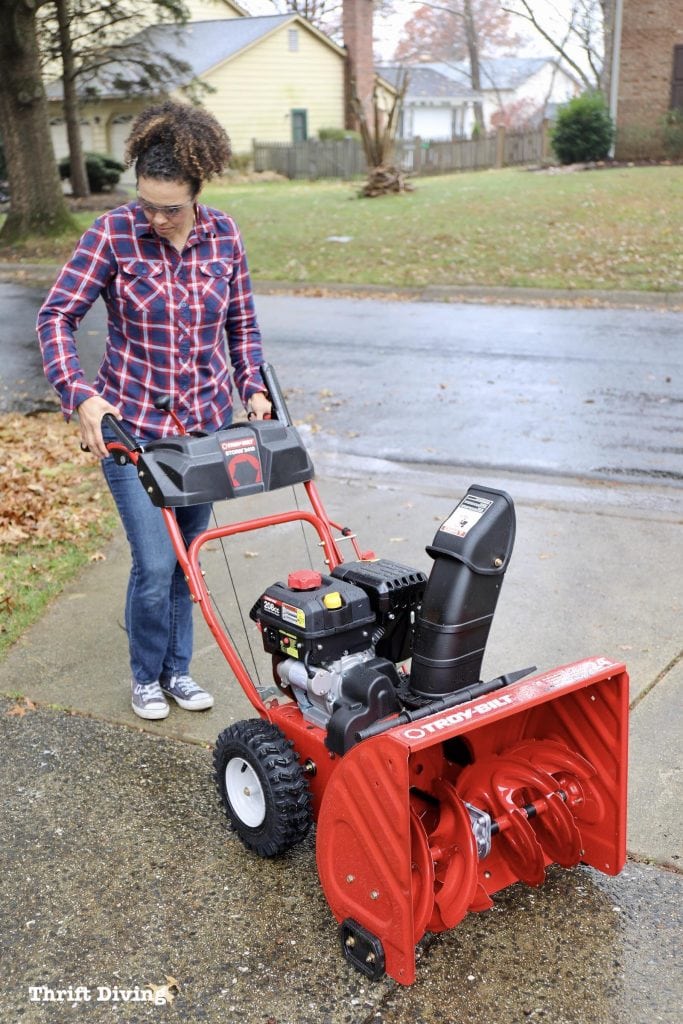
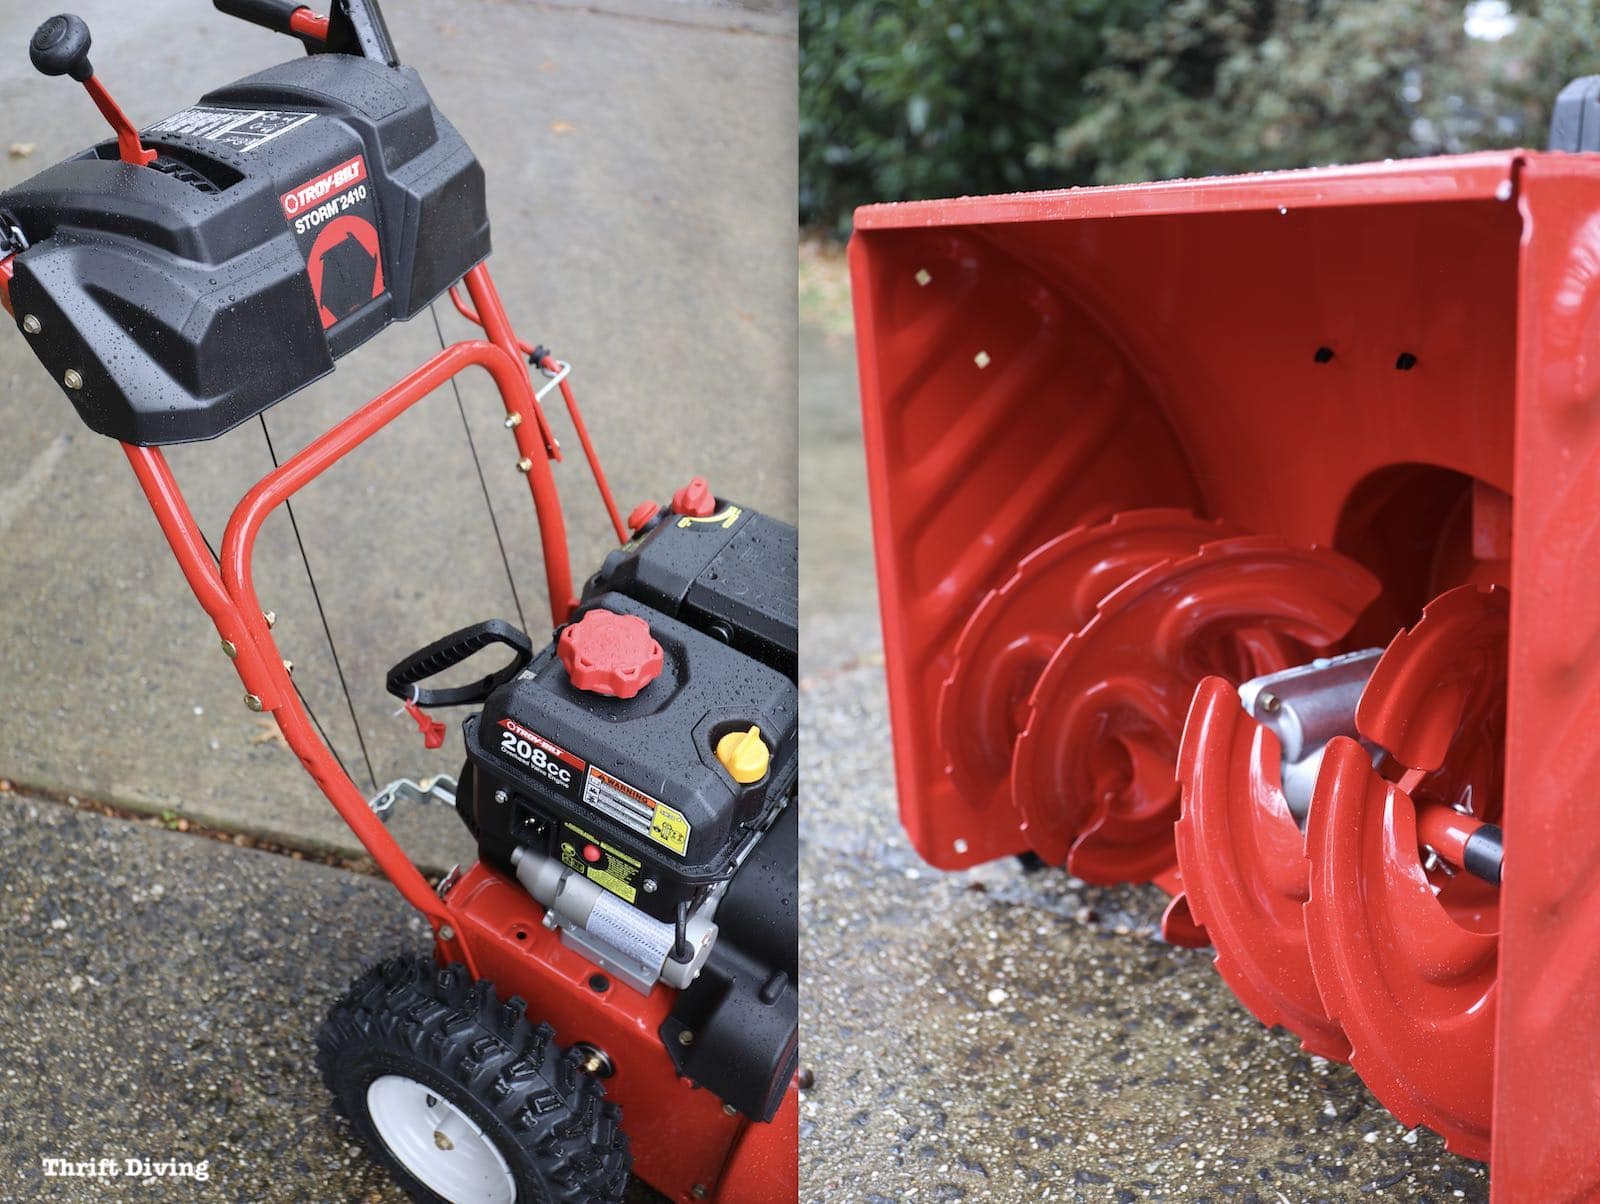
This winter will be no exception because my driveway is ready for any blanket of snow! This is the Troy-Bilt Storm™ 2410 Snow Blower.
Unboxing the snowblower got me thinking about how much snow blower one really needs? You might be asking yourself the same questions:
- Do I buy gasoline or battery-powered?
- How much snow can it handle?
- What does Single-Stage, Two-Stage, and Three-Stage mean?
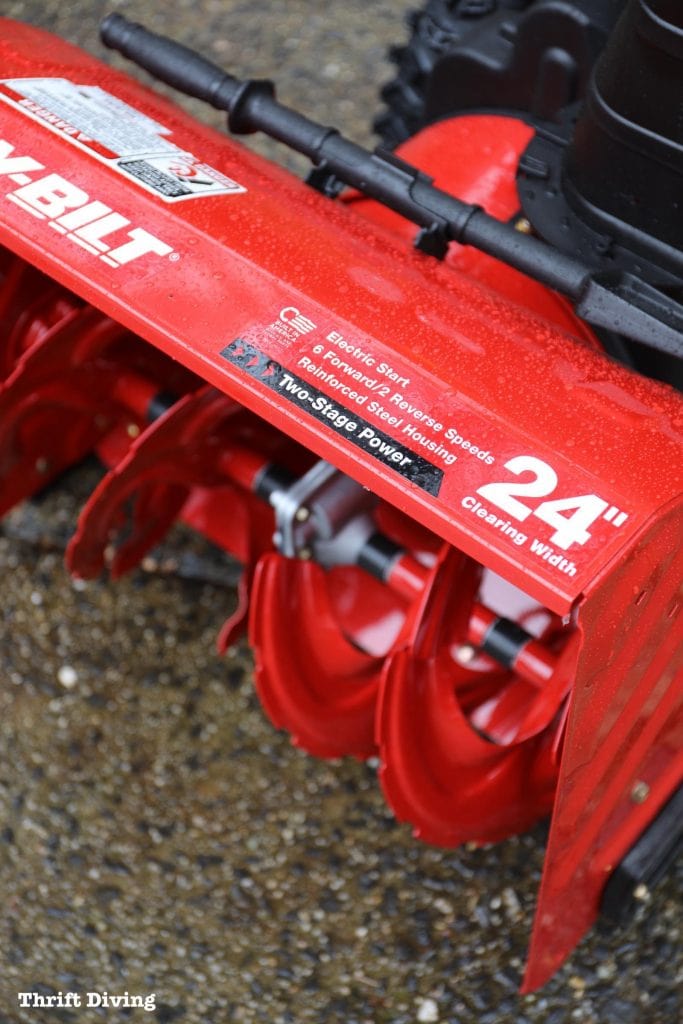
Troy-Bilt has an in-depth snow blower buying guide on their site to walk you through how to choose a snow blower. But my opinion is whether you think you need a snow blower for light, powdery snow (3″ to 9″ of snow for a single-stage), or a two-stage for deep, heavy snow, or a super-powerful quick three-stage snow blower, my advice is to always buy more power than you think you will need.
Here in Maryland we rarely get 1 foot of snow, so I could do well with a single-stage snow blower. But occasionally, that unexpected 12″+ will fall, and I want to be able to quickly and efficiently move it out. This two-stage Storm 2410 Snow Blower will be able to chew through up to 21″ of snow easily. That is, after a few hot cups of cocoa and being stranded inside for a day binging on a good series…Just sayin’…

And while we’re on the topic of battery versus gas-powered… I have to admit that I’ve come to appreciate a good gas-powered lawn tool. I can’t tell you how many times I have been in the middle of my lawn job only to lose battery power and not have a back-up battery charged.
Of course, with gas, you can always run out of that, too. But once I have a full tank, I am confident I can finish the job before the gas runs out. With a snow blower, you need power, and you don’t want to run out of power before the driveway and walkway are cleaned up.
TIP #2: Remove Your Outdoor Hose and Drain Outdoor Pipes
Just the other day hubby reminded me that we needed to do this. It’s easy to forget to do because you likely haven’t been out in the yard much in the fall, other than to clean up leaves, am I right?
But according this site, damage from frozen and broken water pipes ranks second in home damage, only behind hurricanes. That is surprising! They report that an average of 250,000 homes each year have damage to their homes due to frozen and broken pipes. That’s a whopping amount of $400 – $500 million each year!
Last winter I wrote a post on how to prevent frozen pipes. It’s a great article to read with tips from a local contractor. Many newer homes have hose bibbs (those outdoor faucets) that prevent freezing. However, you will need to remove any hose attached and put it away until spring.

To drain your outdoor pipes:
- Remove the hose.
- Turn off your water main.
- Open the hose bibbs (i.e. faucets) on the outside of your home and let them drain thoroughly.
- Close the hose bibbs.
- Turn the water main back on.
TIP #3: Cut Any Tree or Limbs That Can Fall in an Ice or Snow Storm
Trees are great. They’re wonderful! They provide fresh oxygen and we need trees to suck up the carbon dioxide that we’re spewing into the environment. To think of cutting a tree or a limb never feels right. Unless that tree or limb could cause thousands of dollars in damage to your home in the event of a snow or ice storm!
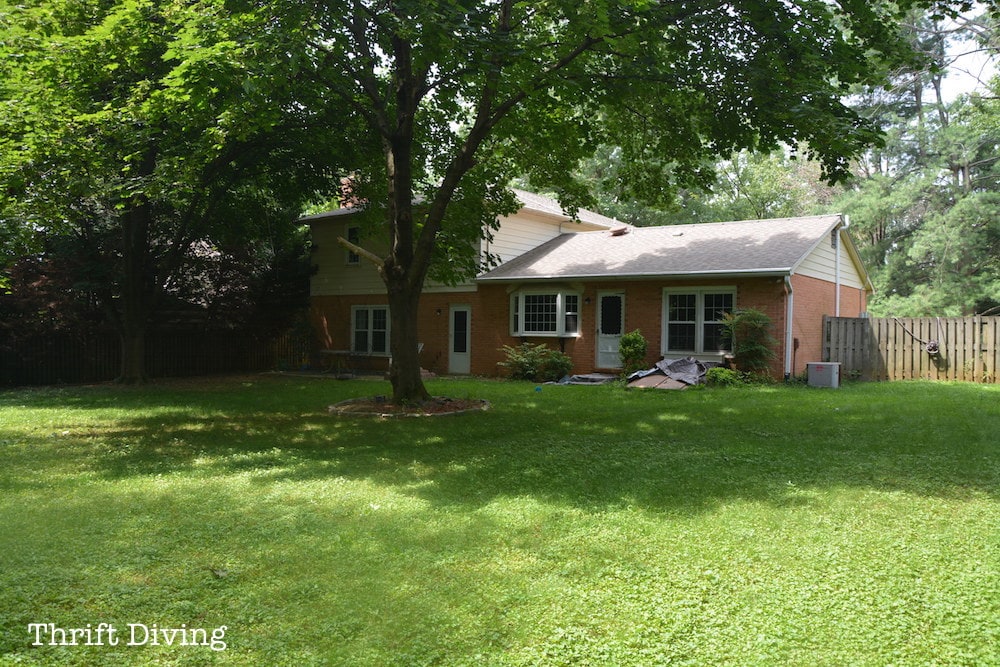
When we first moved in, my house used to be surrounded by trees that were invading my home’s “personal space” (see below). The limbs practically rested themselves along the roofline and siding, as if they were tentacles. While it looks pretty and shaded, those branches could become lethal when weighed down with ice.
Do a sweep of your property and ask:
- Are there any trees too close to the house?
- Do any of the trees look weak, dead, or dying and could become fragile when pounds of pressure from ice or snow is added?
- Are any branches hanging over my roof or gutters and, if it falls, could damage the roof or pull off a gutter?
TIP #4: Check All Your Windows and Doors (and Fireplace!)
Did you know that the biggest source of heat loss is through doors and windows? It makes sense since these are the biggest entries and exits to the home. But when the weather drops, you’ve got to make it a point to seal up those cracks and leaks. There are a few ways to you test for leaks and to seal them up.
How to Test Your Home for Air Leaks
The first place to start is your heating company. Here in Maryland, Baltimore Gas and Electric (BGE) will do a free energy audit for your home. You can pay for the more extensive test, which could be worth it. Call your energy company and see if they offer energy audits.
There is also a test called a blower door test which depressurizes a home and can identify the sources of all the leaks. I’m not sure how much that costs, but it is likely much more expensive than simple things you can do yourself to test for leaks.
To identify leaks yourself, you can walk throughout your home and use a candle to identify air leaks around doors, windows, electrical outlets, etc. If the candle flame is moving, it could indicate a leak. Just make sure the airflow isn’t due to an air vent nearby.
To correct some of these leaks, try the following fixes:
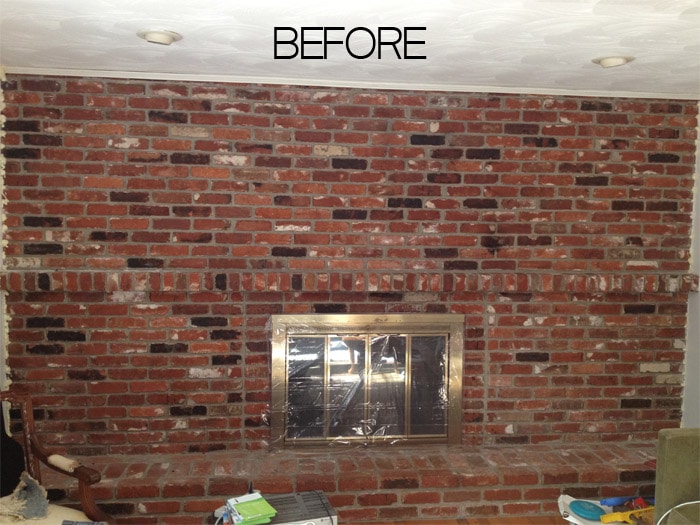
- Add plastic film to drafty windows and fireplaces. See below an old picture of my fireplace, in which we used plastic over the fireplace to keep the drafts out. Use these window insulation kits.
- Add socket sealers around drafty electrical sockets.
- Add a draft stopper or weather stripping around bottoms of doors.
- If it’s in the budget, replace the most drafty of windows!
- Caulk around any areas where the caulk is old, rotten, or missing.
- Add additional insulation to your attic, which can keep the house warm and toasty. Machines can be rented from home improvement stores and insulation can easily be blown into the attic.
TIP #5: Clean Your Gutters
I’ve always been crazy enough to do much of my home maintenance myself. I’ve learned over the years and it has become less intimidating (although, standing on ladders is never something I have enjoyed because of how risky a fall might be). But I’ve been known to clean a gutter or two.
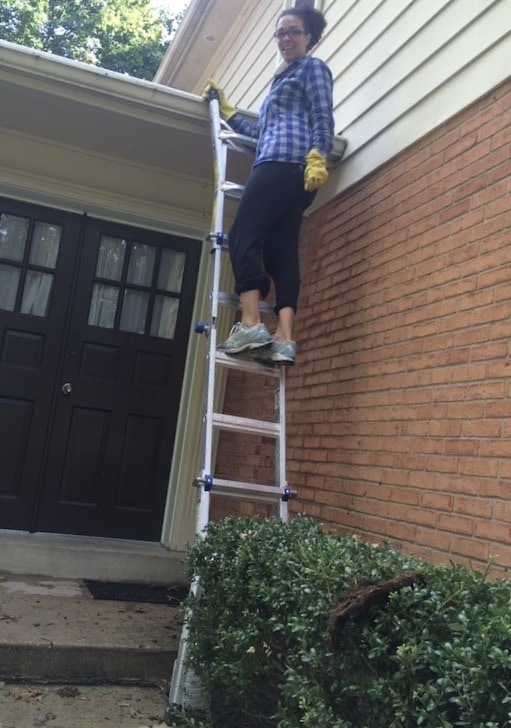
Whether you can do it yourself or you hire someone, gutters are so important to winterizing your home! When it rains and snows, it has to go somewhere. If your gutters are functioning properly, it should go down your downspouts and away from the house.
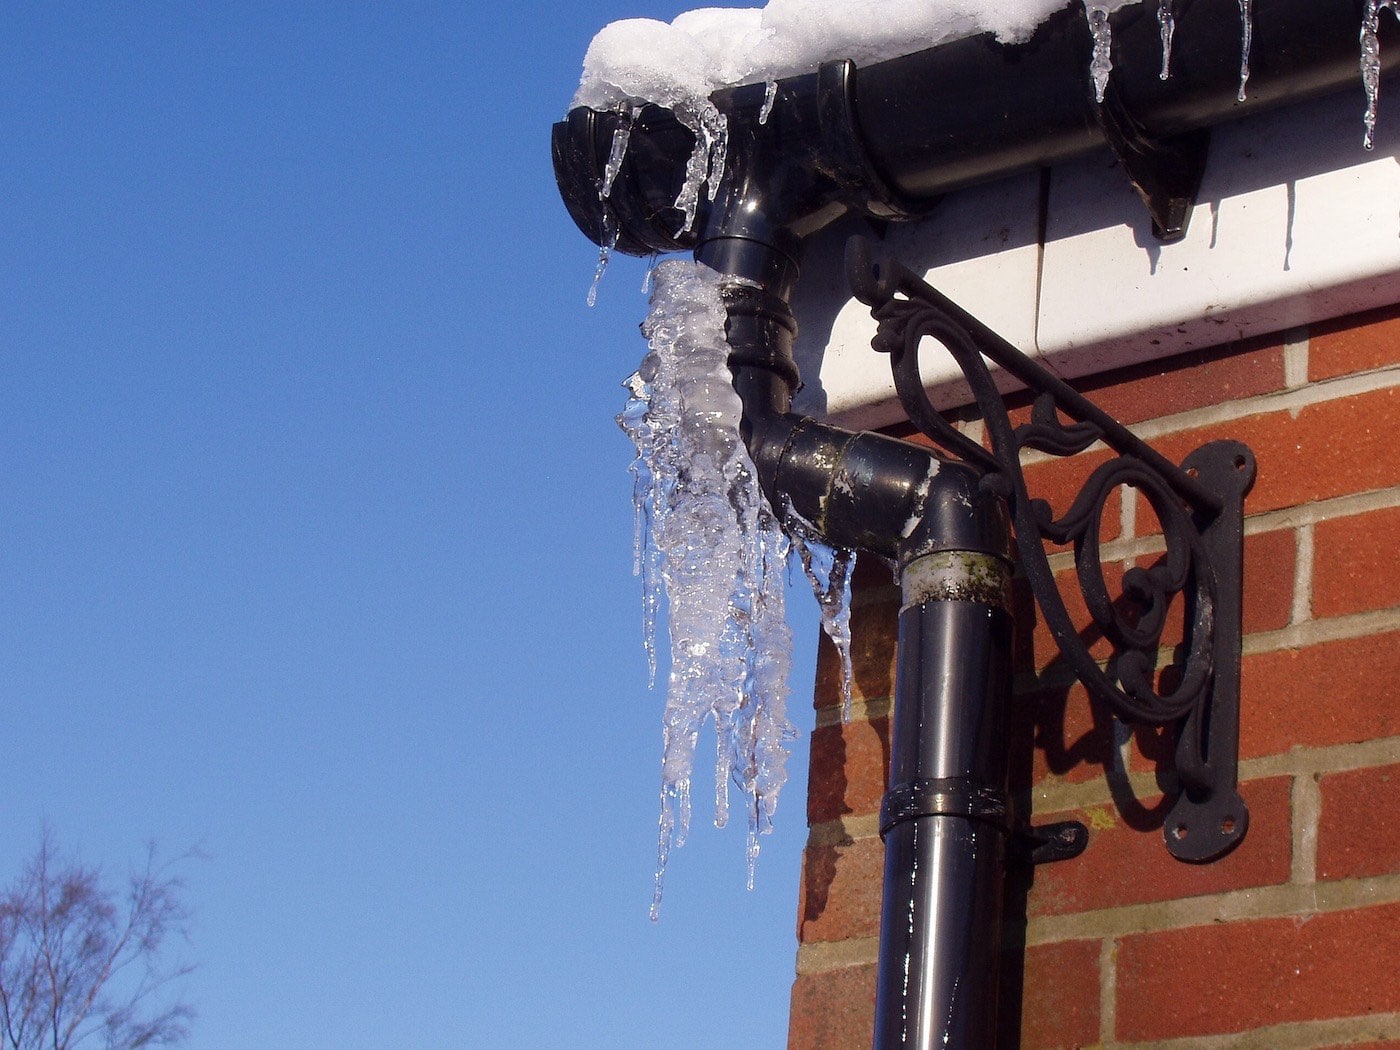
But if your house is like mine, leaves can get caught up in the gutter in the fall and create a dam in your gutters, causing rain and melting snow to later freeze up and get trapped.
Heavy ice can pull gutters away from the home. And let me tell you–you don’t want damaged gutters. Not only can missing gutters cause damage to your home and flooding in your basement (since the water isn’t being carried away), but it can also cost hundreds or thousands of dollars to replace. When gutters fall away, they’re not simply falling off. They’re twisting up and making it impossible to reattached. A gutter installation company will have to make a new one. Depending on the length of your home, that could get expensive.
Clean out the gutters and don’t allow standing water to freeze in them.
Let’s Make Winter Magical Again
Let’s face it–a lot can go wrong in the winter. It can be a headache. But if we’re prepared, have the right tools, and know what to do to prevent bigger problems, winter can be magical again!
Instead of winter being a season that we despise, we can bring a bit of winter cheer back into our lives with an afternoon of trekking through the snow to go sledding with the kids…sip hot sugary drinks…and and cozy up watching holiday movies without worrying about damage to our house, or how we’re going to dig out when Mother Nature decides to dump a foot of snow.
So are you looking forward to the winter? How are you preparing your home for the winter? Leave a comment below and let’s chat about it! And be sure to check out the Troy-Bilt Storm™ 2410 Snow Blower to help you prepare for winter!

Download the 5 freebies!

Thrift Diving inspires women to decorate, improve, and maintain their home themselves...using paint, power tools, and thrift stores! Use these 5 printables, checklists, and ebooks to get started!


Thanks for sharing such valuable tips! As for insulation, also remember to insulate your water heater and pipes, which is especially crucial for areas with cold winters. Insulation reduces the rate at which the water in the tank loses heat to the surrounding environment. On average, insulating a water heater can save anywhere from 4% to 9% on water heating costs.
Test your furnace to make sure it is working properly. Change filter, check smoke detectors.