Everything You Wanted to Know About Sawhorses: A Guide
(I participant in the Amazon Services LLC Associates Program and other affiliate advertising programs designed to provide a means for me to earn fees by linking to Amazon.com and affiliated sites).
One of the hardest things about DIY is not just about finding the time to DIY, but finding the space to do it, right?! That’s why I love having easily adjustable sawhorses (I picked these up from The Home Depot). If you’re doing projects around the house, like I do, whether you’re working indoors or outdoors, sawhorses are a DIY’ers best friend.
Let’s jump into sawhorses!
What is a Sawhorse?
Let’s first talk about what a sawhorse is. A sawhorse is a sturdy frame support made of plastic, wood, or metal that helps to support a piece of material that is being cut either with a circular saw, hand saw, jigsaw, or some other tool, or simply helps to create a sturdy work surface for your materials. They’re often used by carpenters when building, but you’ll find my homeowners using them as well for projects around the house. A sawhorse can also become a steady work surface for a large piece of plywood.
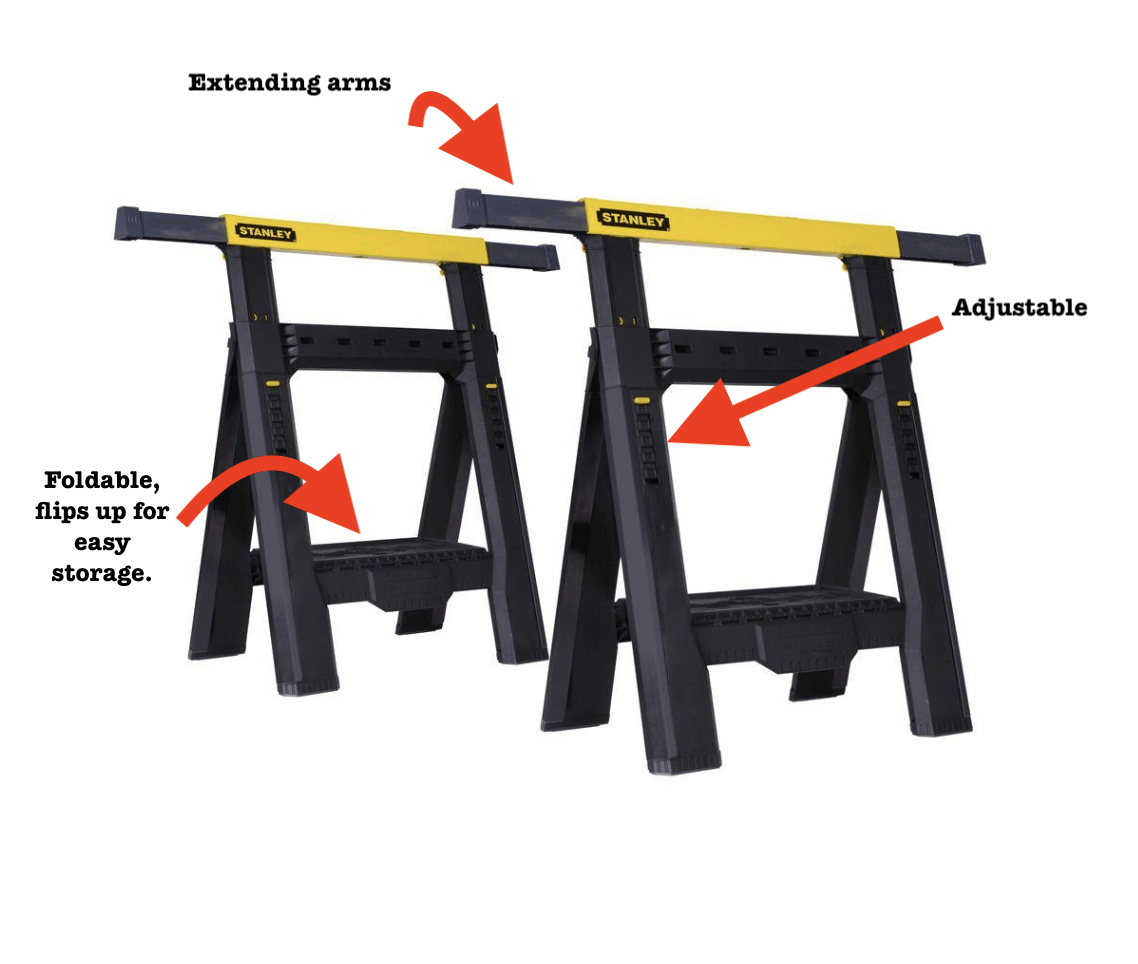
The plastic sawhorses are adjustable so no matter what your height, you’ll have a comfortable work height (unless you’re Shaquille O’Neal….now that’s a different story….).
What I like about the plastic sawhorses is that they fold when the shelf flips up, so they store easy and flat. They’re pretty light-weight, too. (You can make your own wooden sawhorses that fold flat, as well, like these plans at The Family Handyman, towards the bottom of the page).
Why Use a Sawhorse?
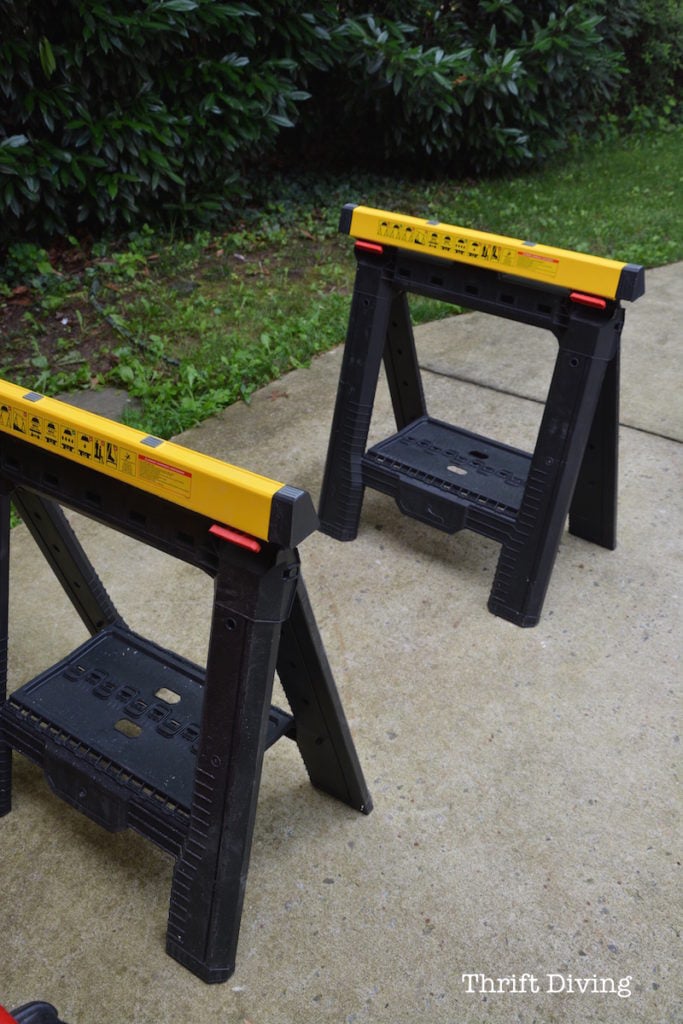
Not everyone is blessed with space for tables and workbenches for cutting and working on projects. As I mentioned before, a sawhorse can easily support a piece of plywood or other rigid structure when working on projects and when you need a secure place to cut. Many of my blog readers complain about not having any space to DIY or work on projects, so I usually recommend getting a couple of foldable, adjustable sawhorses that can be put away when not in use. Not only are they strong (these Stanley sawhorses can support a 1,000 lb capacity), but they’re easy to slide under a bed (if you need workspace inside) or can be tucked along a wall and out of the way (or stored in a closet).
How to Use a Sawhorse
You’ll want to make sure that the sawhorses are parallel and not too far away from each other, but not too close, either. It needs to steady support whatever materials you’ll be sitting on top of them. You’ll also want to make sure they’re on steady grown and not wobbly.
Depending on what you’re supporting, the sawhorses should be supporting the ends, but not too close to the ends where the materials on top could topple off.
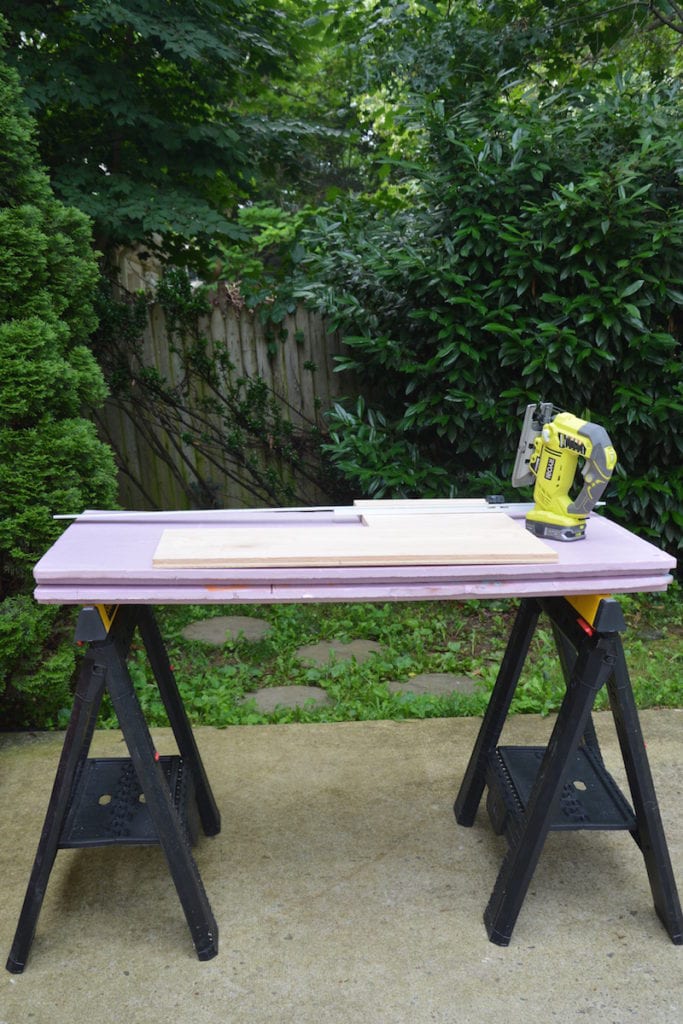
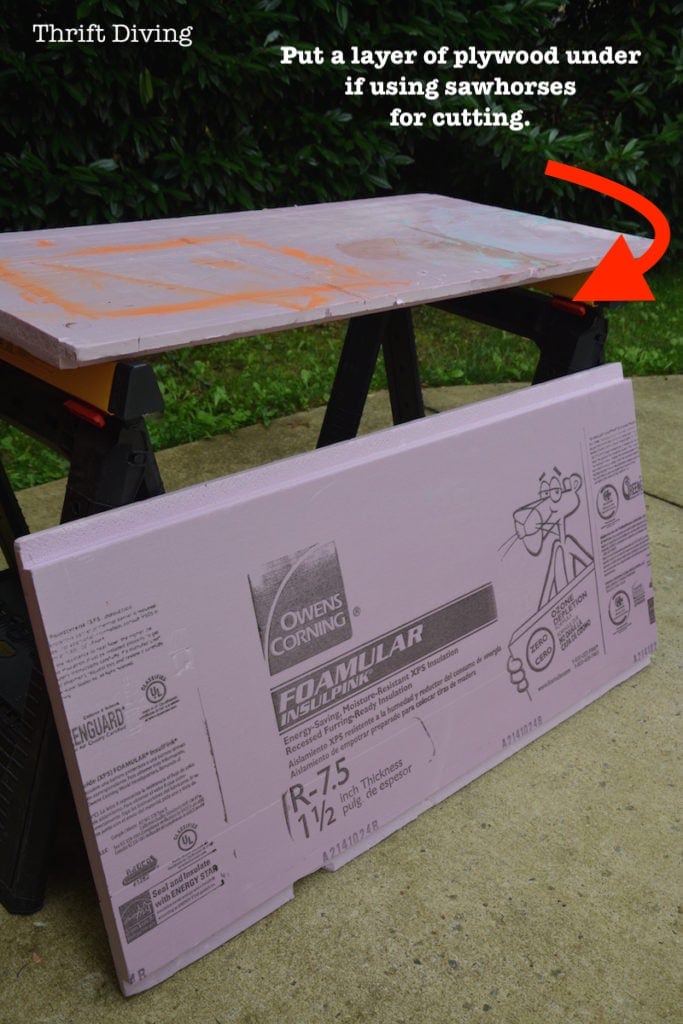
In this picture below, I am using some rigid insulation foam on top, which I have used often times as a cutting surface when making cuts with my circular saw.
In this case, you can also use a third sawhorse to help support the center when using materials that aren’t as solid as plywood.
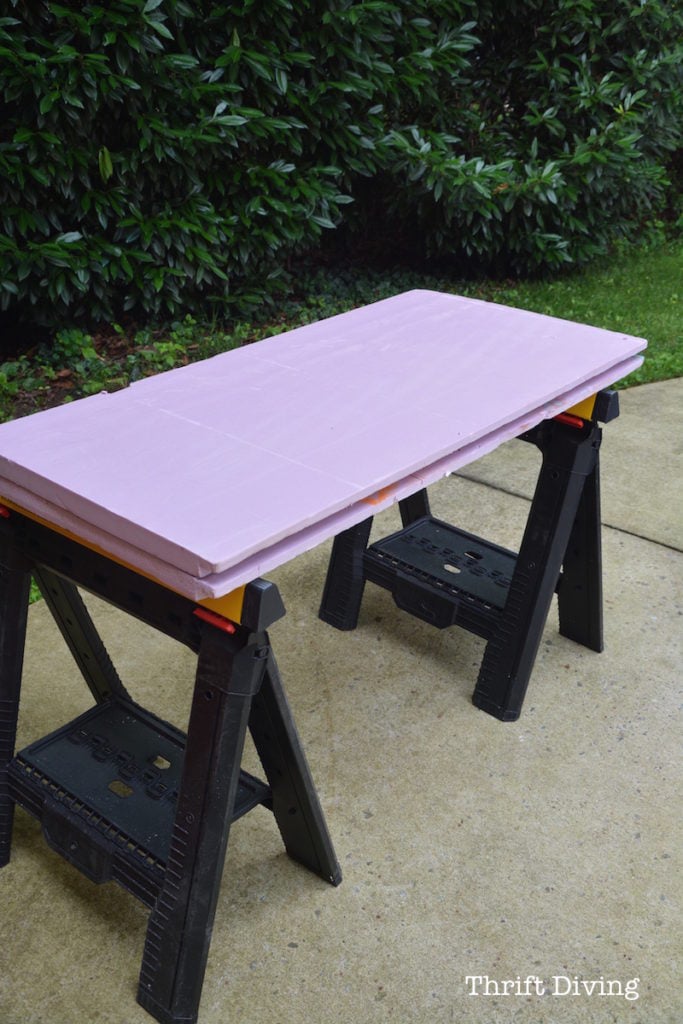
The rigid foam I use (Foamular foam 2″ thick) can be found at most home improvement centers. If you’re going to use this foam on top of your sawhorses, be sure to get the 2″ thick foam. It will cost about $20 for one sheet like this. I bought two because I wasn’t sure how much I needed. But I like the support the extra one provides.

You could get a sheet of plywood if you want, but if you’ve ever moved a sheet of plywood, you’ll know how heavy it is for one person to move. I like how manoeuvrable this is. You could also get a sheet of plywood cut down to a manageable size that you can easily lift on and off the sawhorses in order to have an even steadier workstation. 🙂 But I have found that with just a couple pieces of this thick foam, I am able to do small woodworking and crafts very easily.

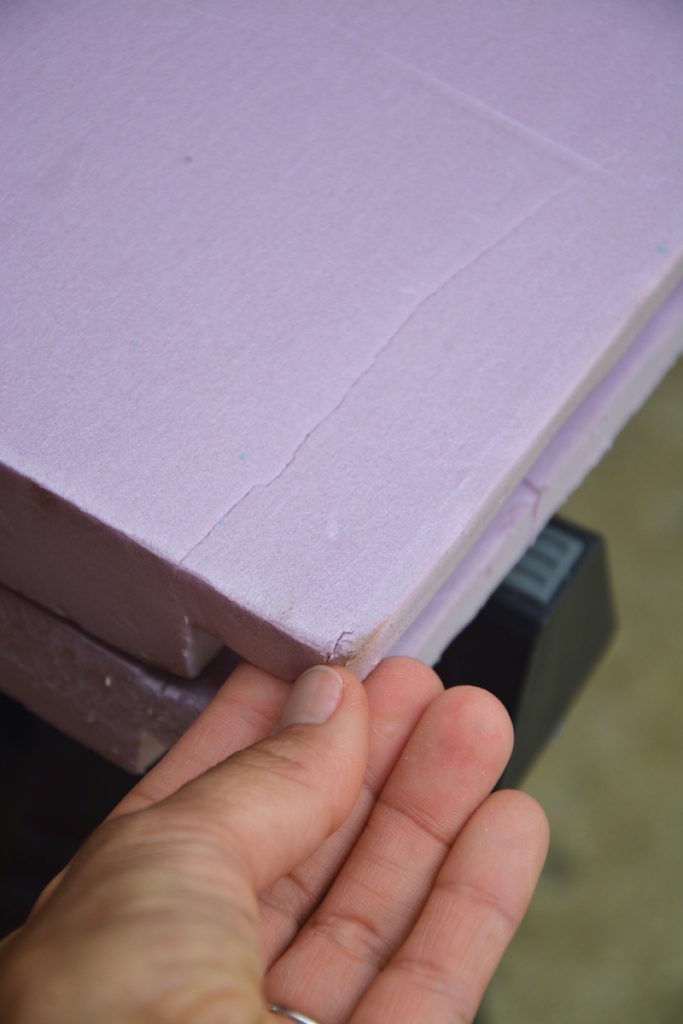
There’s a little sag in the middle, but it’s still pretty solid, so I don’t mind for light crafts or projects. If you use plywood as the base of your sawhorses, you won’t get the sag.
And the great thing about sawhorses is that they’re stackable, both the plastic and wood sawhorses, so if you can’t or don’t want to fold them flat and store them again, you can easily just stack them in a corner on top of each other. Since the foam is lightweight, setting up this structure is simple and takes just minutes.
Multi-Function Work Tables and Sawhorses
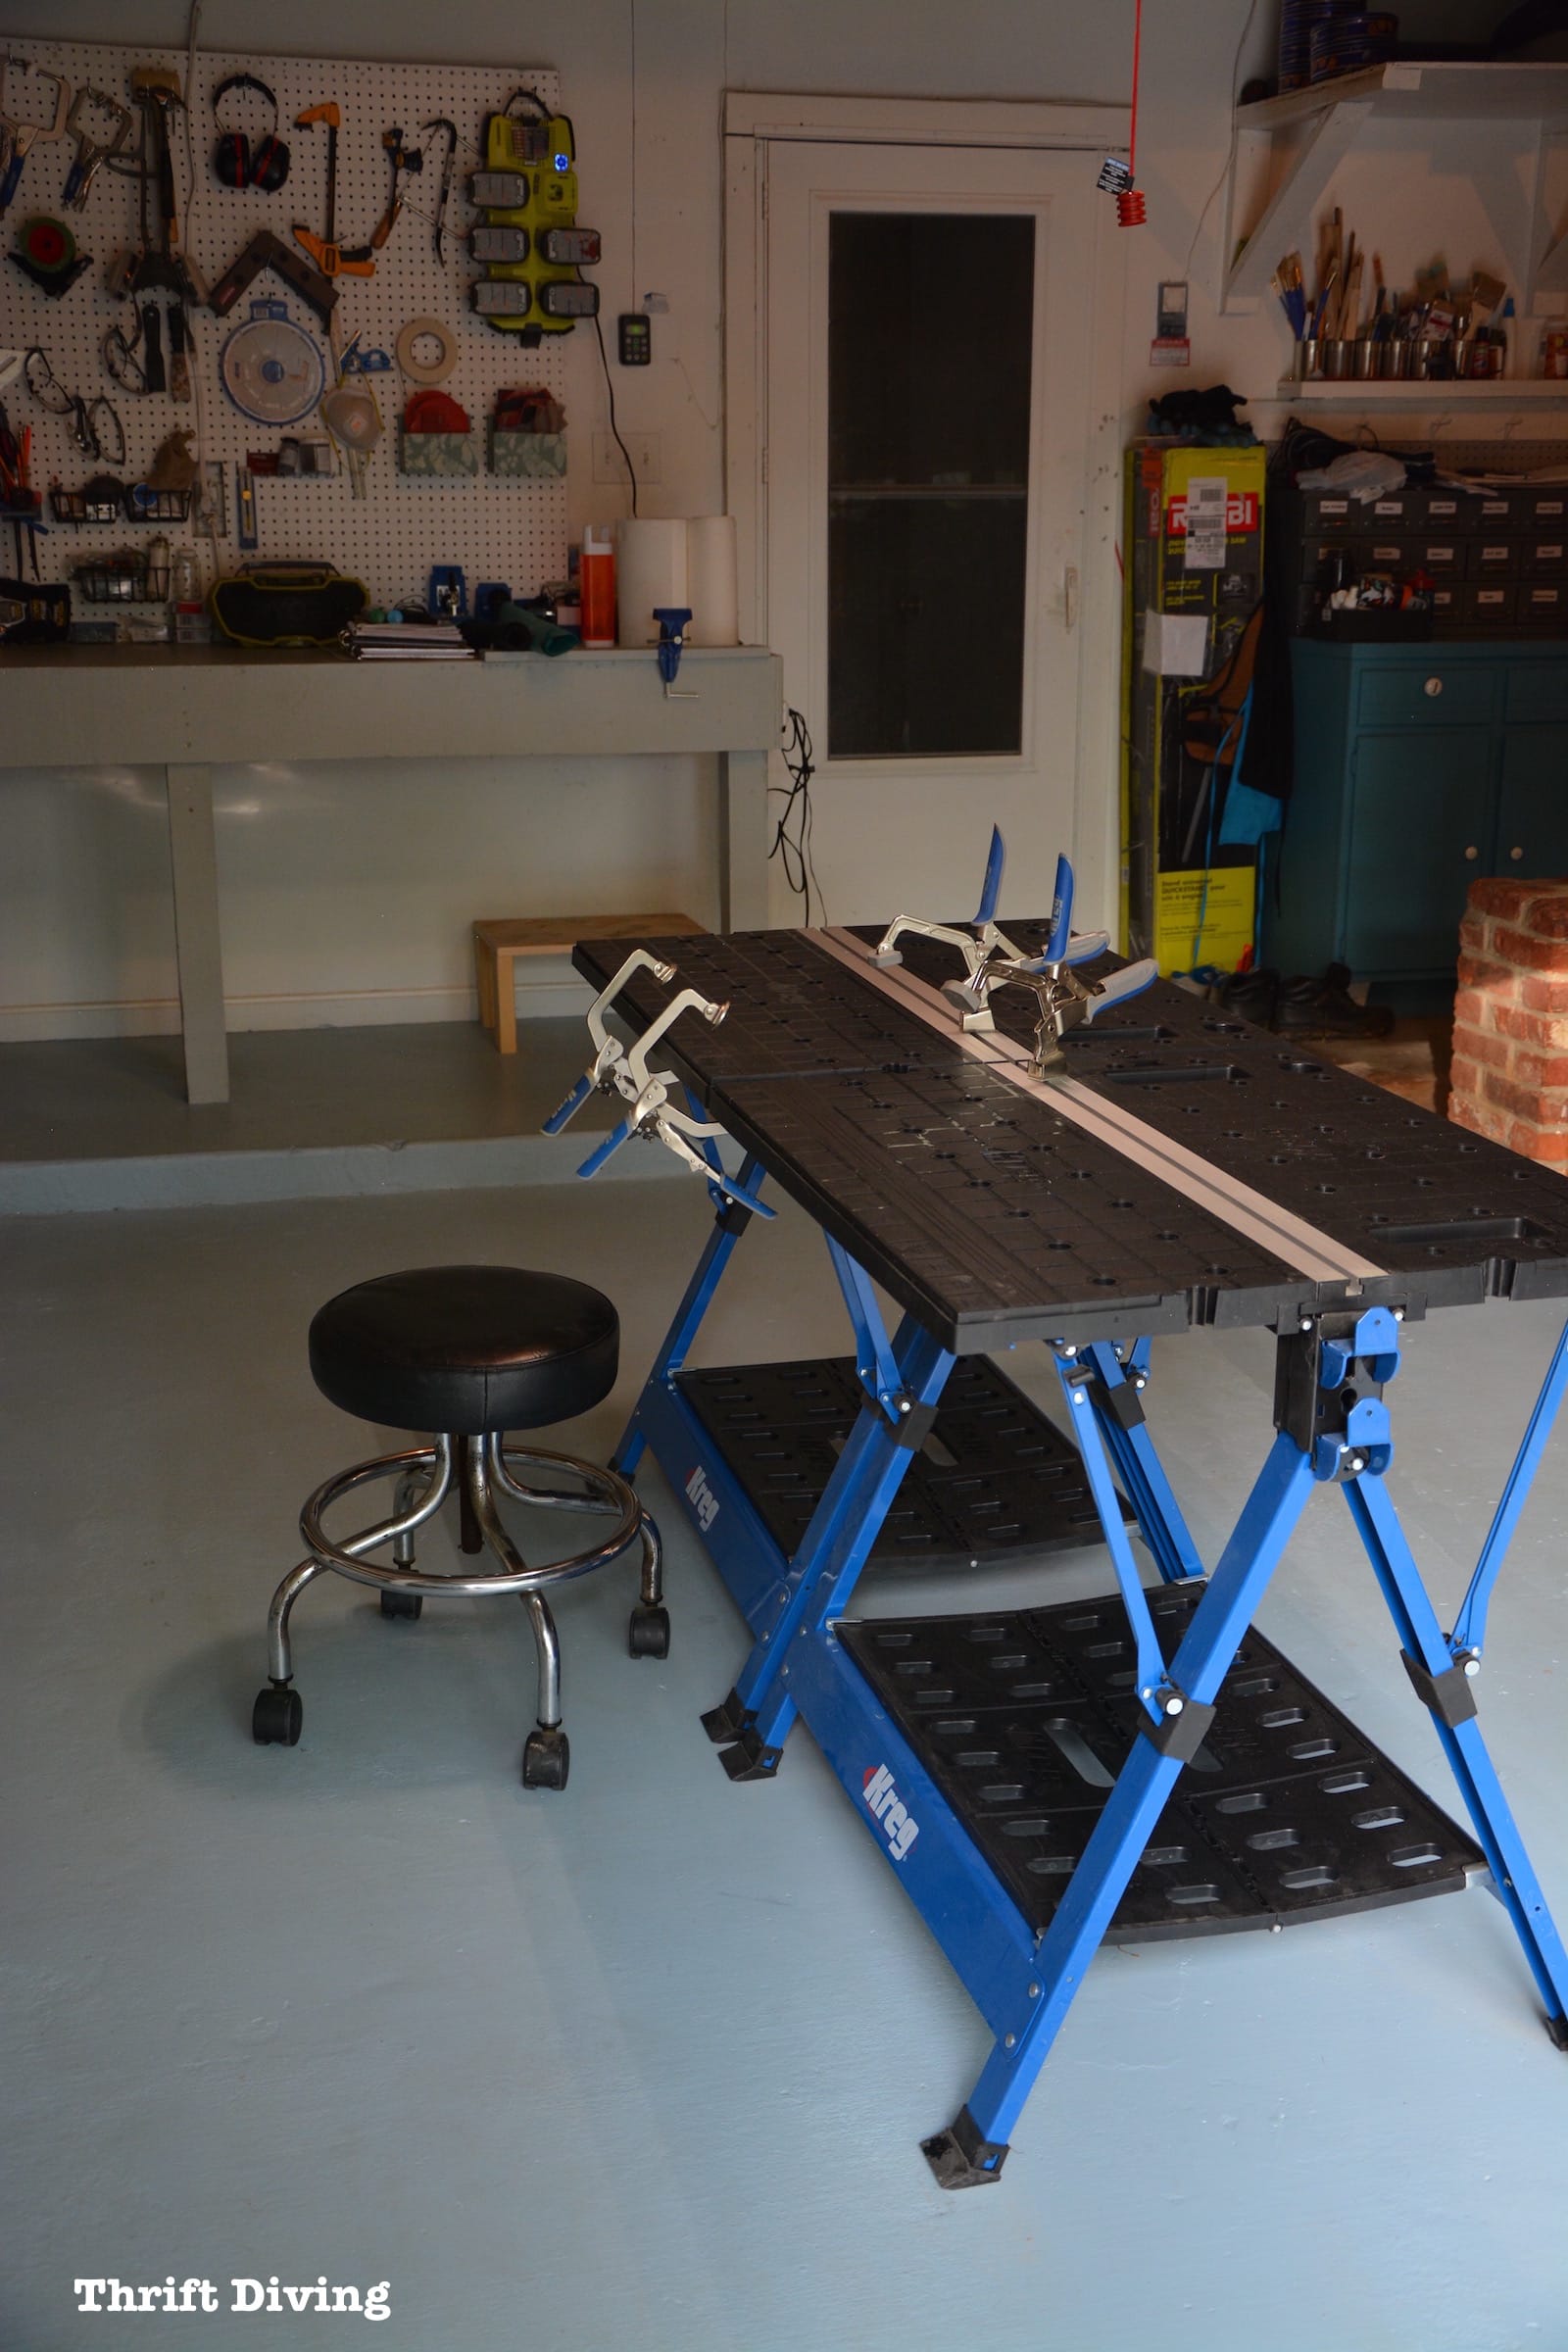
I don’t know how new a “breed” these multi-function work tables and sawhorses are, but they first gained my attention when the Kreg Mobile Project Center was released.
I snagged me a couple of those babies and set them up in my garage. What drew me to them is how many configurations can be done with them, including turning them into sawhorses and supporting pieces of plywood on top when you wanted to expand your work table area.
You’ll have to do your research to find whether something like this would be a good alternative for traditional sawhorses. From my time using the mobile project center, I treat this area as more stationary and haven’t ever broken then down to be used as sawhorses. For me, the traditional sawhorses are more manueverable and takes only seconds for me to set up. Setting up this mobile project center work top into sawhorses would likely be too much trouble.
But I just wanted to share that buying a multi-function work table like this is an option for getting a table and sawhorse in one.
Where to Buy a Sawhorse
The ones that I own are by Stanley from the Home Depot and they were only about $59 for a set of two. You can buy a 2-set of Stanley sawhorses on Amazon, but they’re at least $12 more.
- Home Depot Stanley Sawhorses
- Kreg Mobile Project Center (has the ability to be a table and a sawhorse with a few minor adjustments)
- WORX Pegasus Multi-Function Work Table and Sawhorse
How to Build Your Own Sawhorse
I have never built my own sawhorses. And considering how much I love the plastic adjustable ones, I probably never will. LOL. But the wood ones look great and seem very solidly built and can even be passed down from generation to generation. How cool would that be to pass down my handmade sawhorses to my sons? 🙂 So you might see them here one day.
One woman I love to follow on YouTube is Leah from See Jane Drill. She has a pretty easy tutorial on how to build your own sawhorses. If I ever decide to make my own, this is the tutorial I would following, using simple instructions and 2×4 planks of wood.
You can also check out this excellent tutorial on how to build a sawhorse from The Family Handyman. I especially like the lower ones so that you can use your knee to support pieces of materials that are being cut.
Making Cuts With a Circular Saw
You can easily use sawhorses to make quick cuts on pieces of 2″x4″ wood, but sometimes you need to cut larger pieces of wood.
Often times you’ll find me on the ground ripping or crosscutting larger pieces of wood. The rigid foam on the ground works wonders to help evenly support the boards being cut.
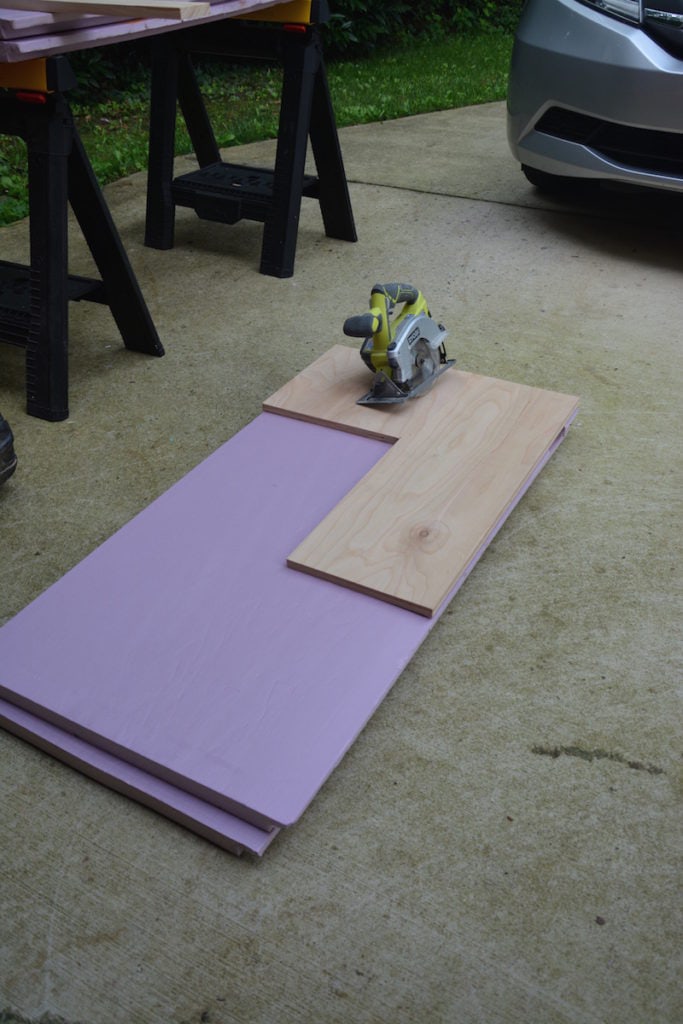
The depth of the blade is adjusted on the circular saw to go just deep enough to cut through the wood and to knick the foam, but it’s not deep enough to go all the way through the foam. The depth of the blade should be no more than 1/8″ to 1/4″ below the bottom of the wood.

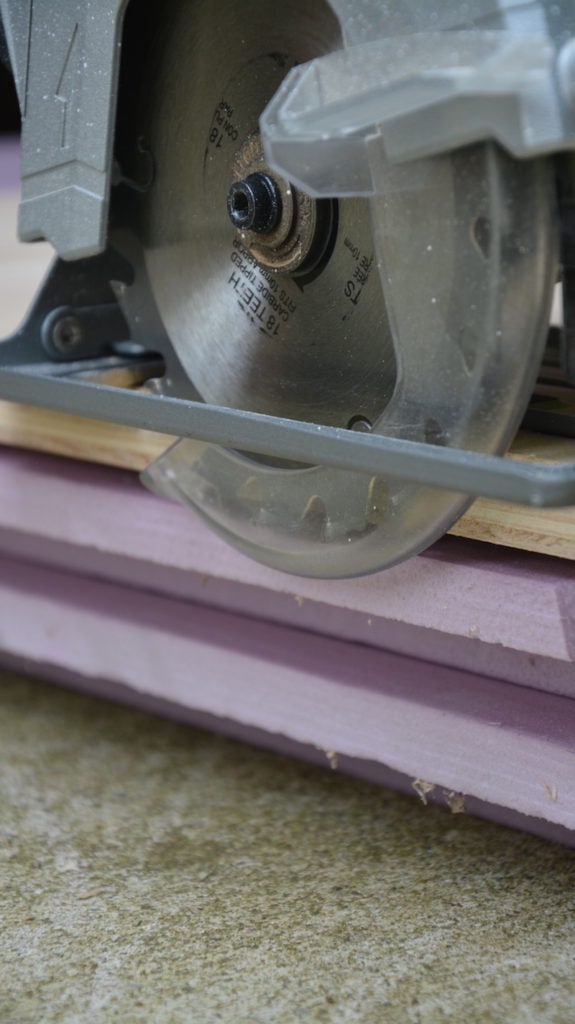
The rigid sacrificial foam will start to look cut up like this, but it’s supposed to get jacked up. Paint…… cuts……The works. It will actually hold up a long time.
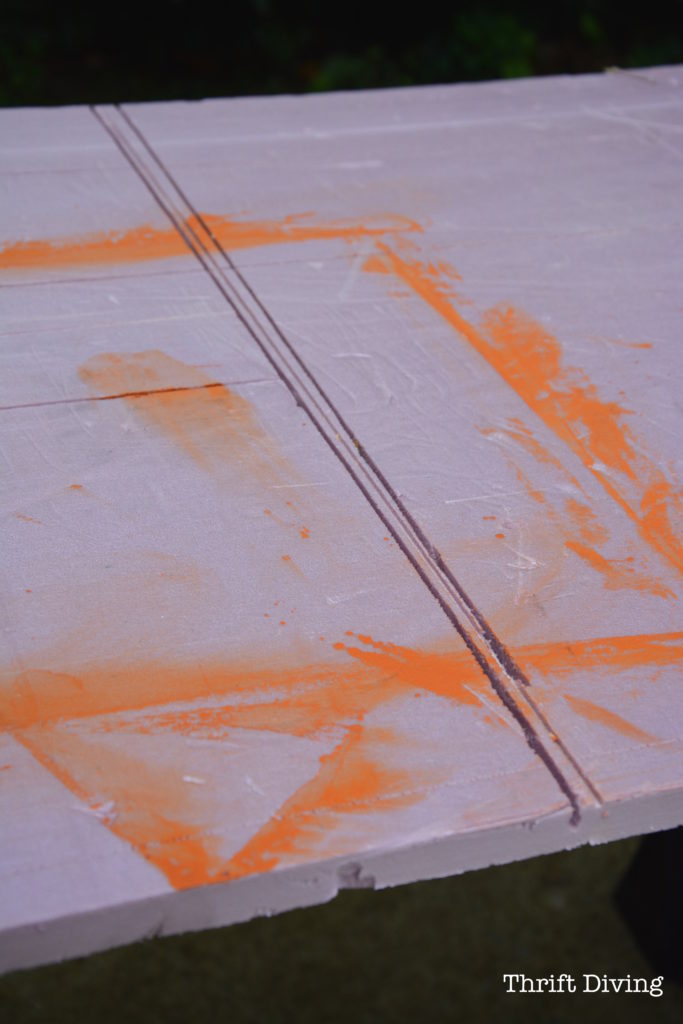
If you’re going to use the foam as a sacrificial layer, be sure to put a layer of plywood under first before using your circular saw to cut wood on your sawhorses.
No fancy workshop needed. 🙂
When you’re all done DIY’ing, whether it’s painting crafts, cutting wood, whatever, adjustable sawhorses break down in minutes and can be stored away easily in tight spaces (or even under a bed). Simple, right? Now you have no excuse for not DIY’ing, even without a ton of space or fancy workshop gear!
Are you diggin’ this tip? Go ahead and PIN it!
![]()
So when do you plan to buy sawhorses or make some DIY sawhorses? Leave a comment below and share your own thoughts about sawhorses!

Download the 5 freebies!

Thrift Diving inspires women to decorate, improve, and maintain their home themselves...using paint, power tools, and thrift stores! Use these 5 printables, checklists, and ebooks to get started!


Love this. I guess I thought you were using the garage!! Oops. After the fall challenge?!! But this helps me to see how it’s possible with this set up.
Hey, Gwen! No, it got junked up again! LOL. I have my miter saw in there on a little portable table so I’ll use it to cut wood there. But I usually bring the workhorses out and set up right in the driveway, outside fo the garage. I’m still working on the garage. Was supposed to be my Summer Makeover Challenge, but I’ve been too busy to focus on it as much as I’d like to!
I just love your down-home style of “talking” to us and explaining things so simply that even I get it! It’s just like visiting with a “bestie”! Thank you!
Sue, that’s awesome! I definitely think of you guys as friends, for sure!
what an excellent idea! i painted tables on the ground with a tarp. had to keep moving it around. this would be so much easier and at eye level. love that part!
Definitely! Small pieces of furniture you can totally do this. Large pieces (not SUPER large), I would get a piece of plywood instead. And it breaks down easily and you can store it somewhere without a lot of space!
I’m right there with you, Serena! I live in a town home community; my back yard is postage-stamp sized, and if I’m sanding furniture, I often take it out to the front yard. Now, I’m off to Home Depot to buy those adjustable saw horses—thanks for the great idea! 🙂
YAY, Gracie! Glad I could help! It’s just easier doing it outside, right?!
Although I kind of have work spaces already, I was interested in your work space, and it totally gave me an idea for a headboard! I think this foam insulation board will be lightweight enough to work in upstairs room that gets rearranged a lot. Thanks. Love your posts! Always something fun.
Yep, it’s definitely lightweight! The workhorses fold up so nicely. And the foam–you could lift that with a finger!
Grrrreat Idea, Serena! Foam insulation is my best friend! Here in HOT West Texas, I cut pieces to fit inside my windows to keep out the heat…..and i the winter, it keeps the house warmer! I covered with neutral wallpaper, or paint. Easy to remove them part of the day I am also using foam for light weight shelving! Using two !” ‘lath’ type wood pieces glued to the underside length for more strength. Lace will cover the edge of the shelving….Viola! Inexpensive shelving for light weight crafting supplies in pretty boxes!!!
Whoa, now THOSE are great ideas! I should try to use that idea for my garage. It gets sooo hot in the summer, and I could probably keep out some of that heat by adding some foam to the window in there. Shelving!! Who whuuda though?! 🙂 Love that!
Thank you. Love this idea. I’ve been halfheartedly trying to reorganize the 40-year-old work bench in the garage but it isn’t efficient. Haven’t yet arranged even sensible storage for the tools. But this I can put in the middle of the garage! I can get started on my projects BEFORE I have to organize things. I’m really happy!
Yes, right in the middle of your garage, and then put it away when you don’t need it!
This is Awesome! Thank you Serena!! We are currently in the middle of remodeling our basement after a flood and as you say, space is an issue. This ‘hack’ is SO Clever!! Love your blog. Keep up the great work!
Hey, Brook! Sorry to hear about that flood in your basement! We get water in our basement, although not a ton, but I feel your pain! Glad the tip is helpful for you! I didn’t invent it myself, but it’s something I found buried on the internet, I started doing it a while ago and thought it would be helpful for others that need a functional workspace without all the frills! 🙂 Hope your basement remodel goes well! 🙂
This is a great idea. All this could slide under the bed if no other space is available for storage.
Bonus I can sell my wife on buying those awesome saw horses saying we both can use them. Get rid of those horrible old huge wooden saw horses that take up so much room. Hehehe
Oh, yeah, you could upcycle the wood ones into something cool, but get the lightweight ones that fold up nicely for your workspace! Hope you can convince her! 😉
Great idea – I already have the ingredients, just have to use them. Thanks….
Woo hoo! Let me know how it works for you! 🙂