Reduce, Reuse, Recycle: A Painted Lamp Makeover!
I hate to admit it……..but I’ve been wasting money on my electricity bill over the last year.
I know, you’re shocked, right?
Me…..the so-called Miss Thrift Diving Queen, has failed to notice when her electricity bill is sky high! Shocking!
I am on “budget billing.” In other words, I pay our AVERAGE monthly bill each month instead of the ACTUAL usage. It’s supposed to eliminate any surprise billings each month. But it’s easy to get disillusioned about energy consumption when we’re “only” paying the AVERAGE. What about those high months??
But imagine my shock when our actual usage one warm month was nearly $500?! YIKES!
I knew it was time to replace the bulbs with energy efficient ones…..any why not just do a lamp makeover while I’m at it? 🙂

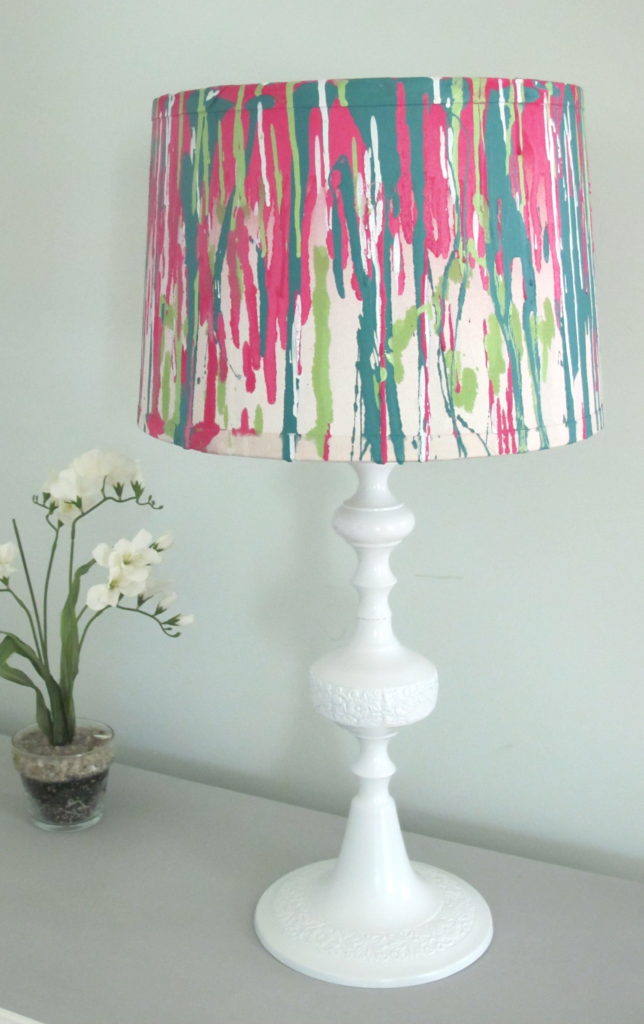
Painted Lamp Shade Makeover!
One of my favorite types of projects are lamp makeovers. It’s so easy to reuse things to make lamps. Wiring them is a piece of cake! All you need to do is order this lamp kit![]() from Amazon. It’s only about $10 and can make any lamp.
from Amazon. It’s only about $10 and can make any lamp.
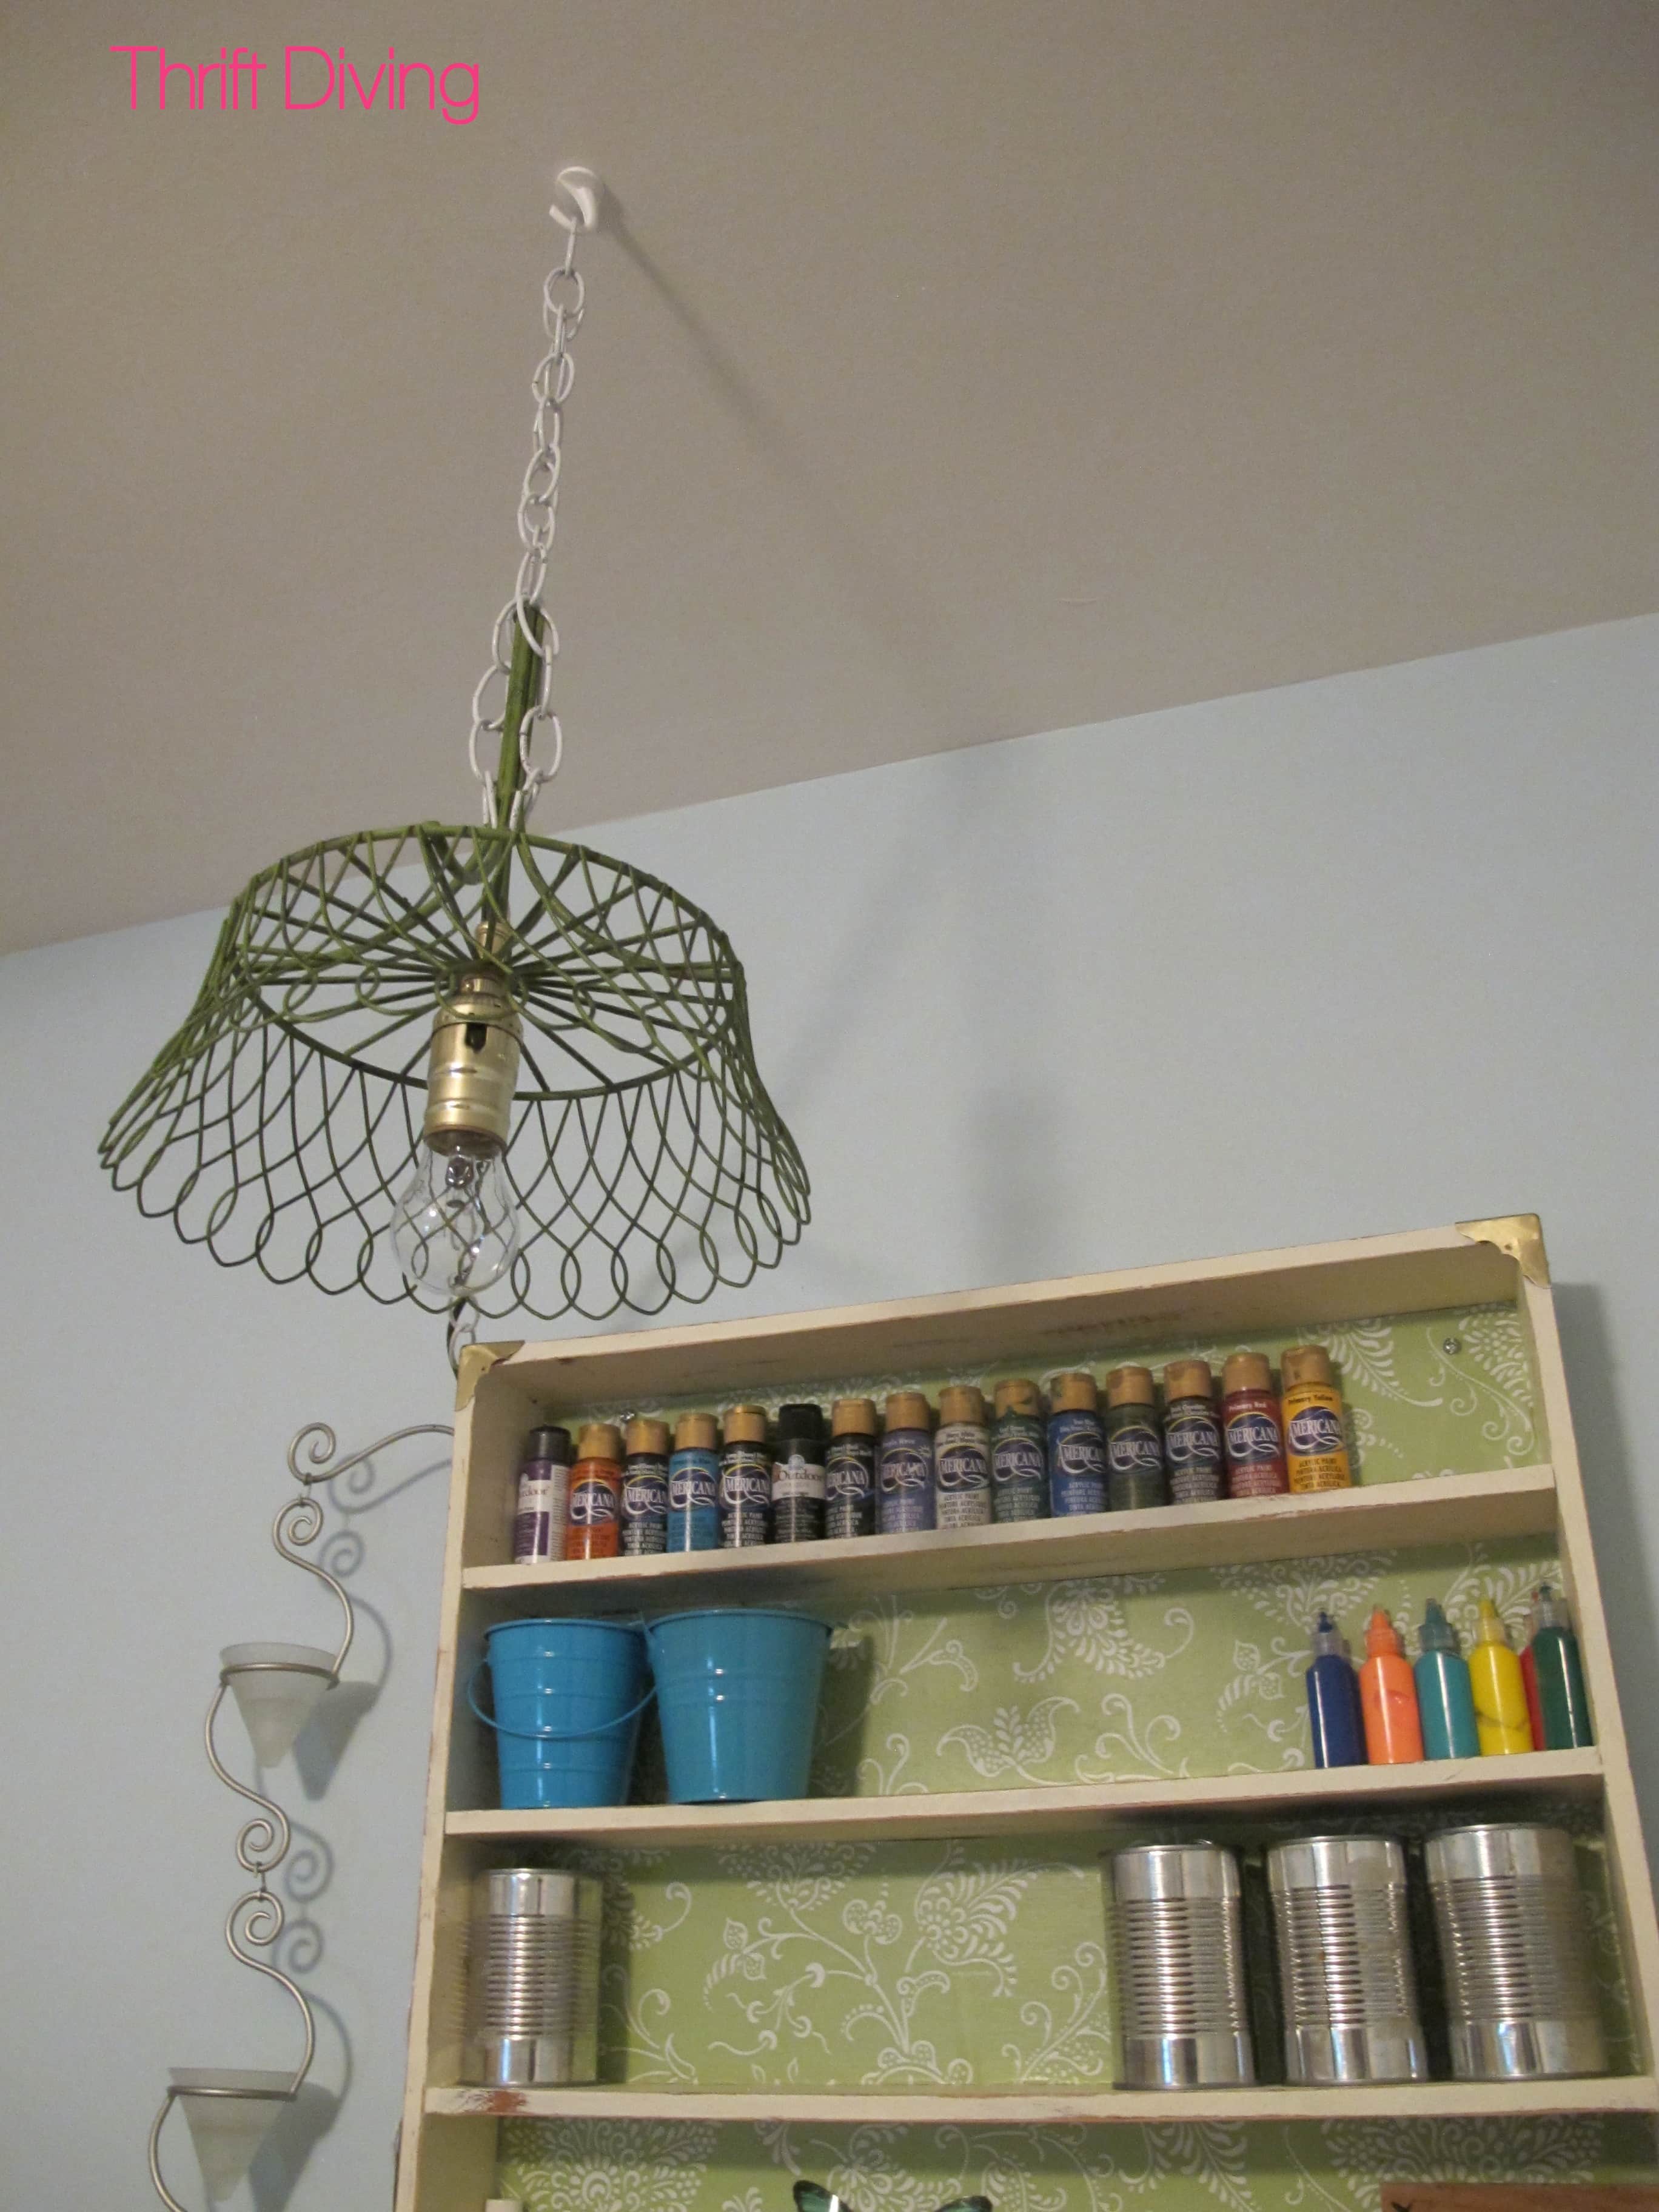
In fact, recently I did a post on how to make your own DIY pendant lamp (which includes a wiring tutorial) that I made from an old broken fruit basket from my kitchen. It’s hanging in my craft room, and I love it!
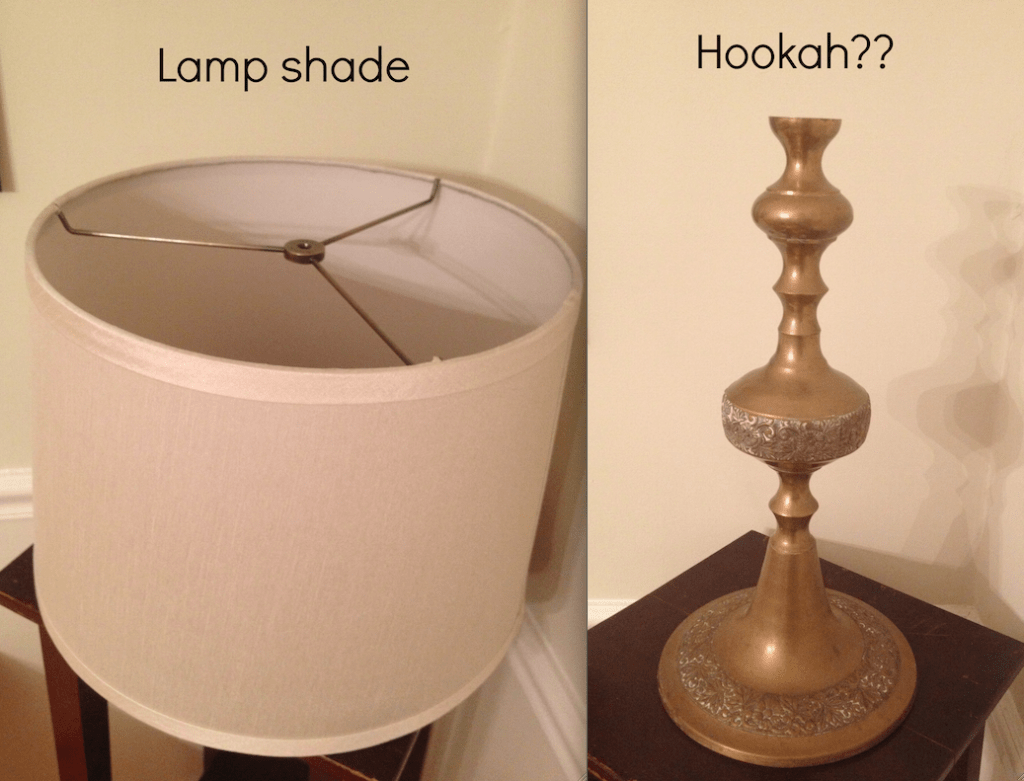
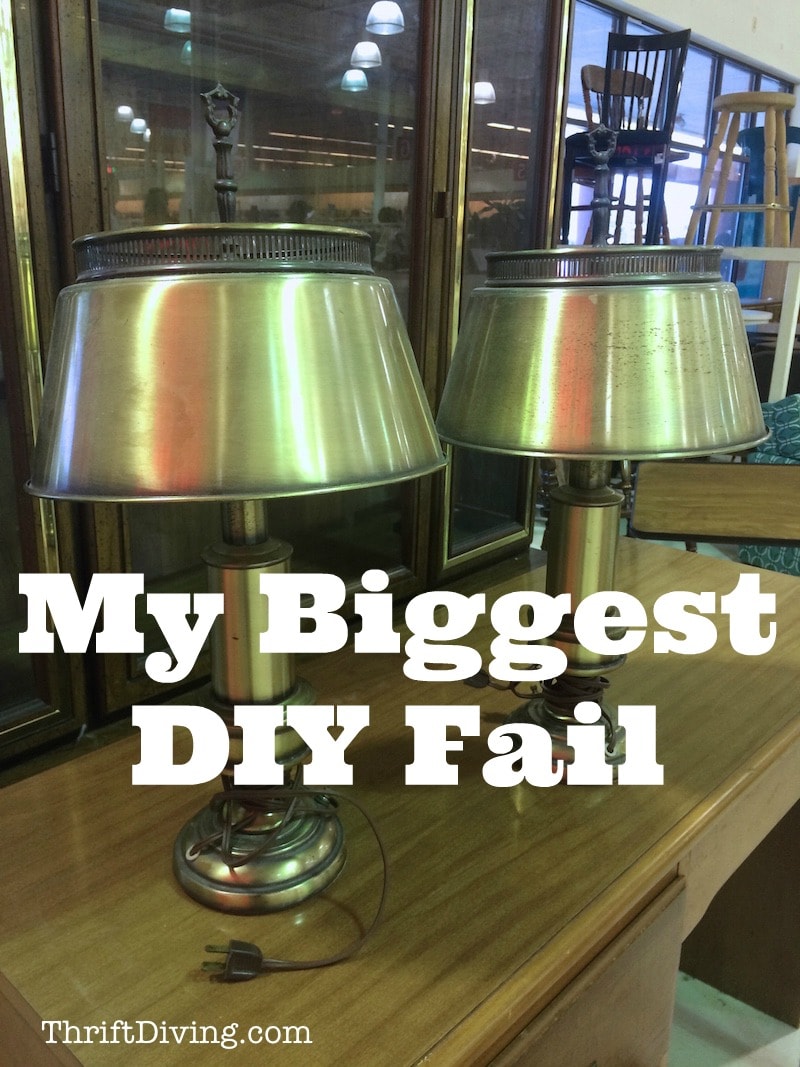
Anyhow…I found these 2……..hookahs??………at the thrift store for $5.00 each on a 50% off holiday sale. I thought they were candle holders until I realized they were hollow inside, with openings at the top and bottom, and would make the perfect lamps!
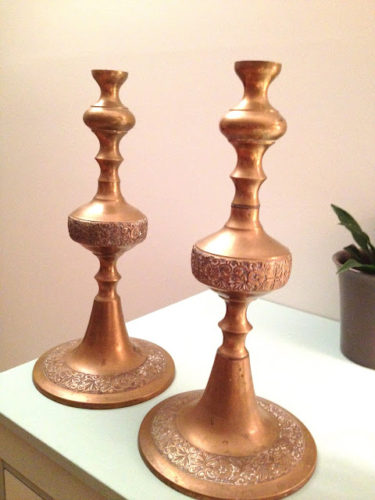
I bought a cheap lamp shade for $11. My thrift store usually doesn’t have drum lamp shades. (Oooh, but the last lamp makeover I did, I struck gold when I found these awesome thrift store lampshades for $2.00 each!)
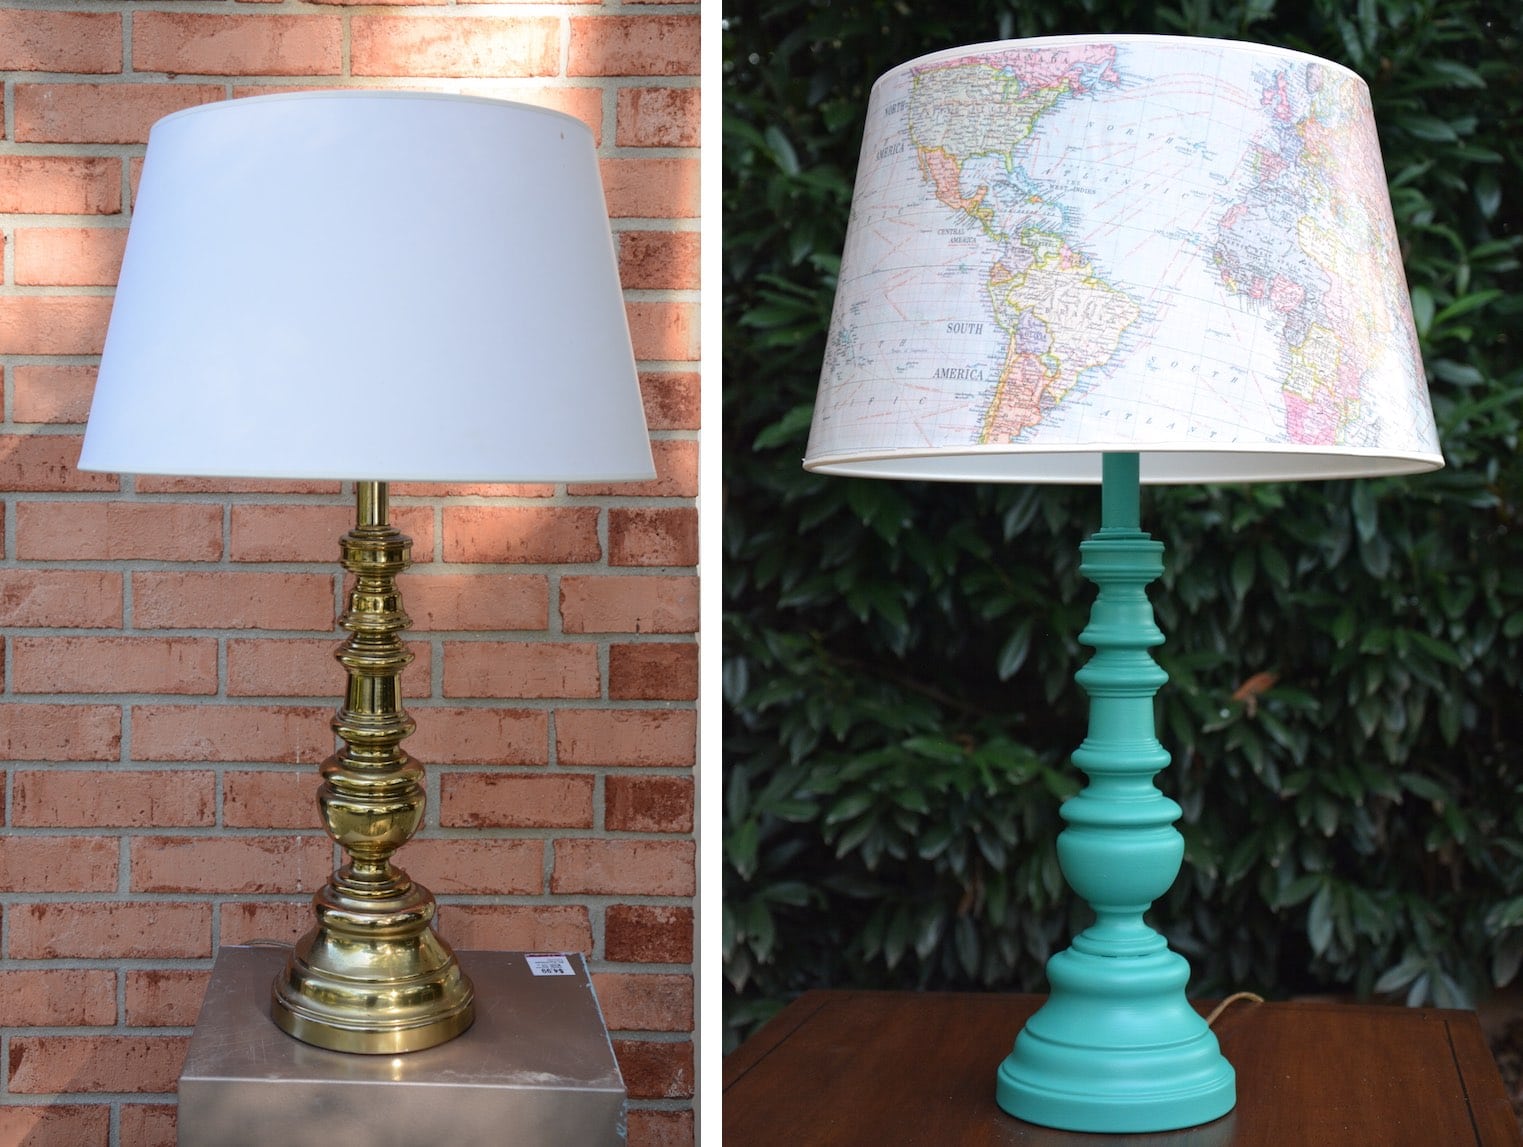
BEFORE
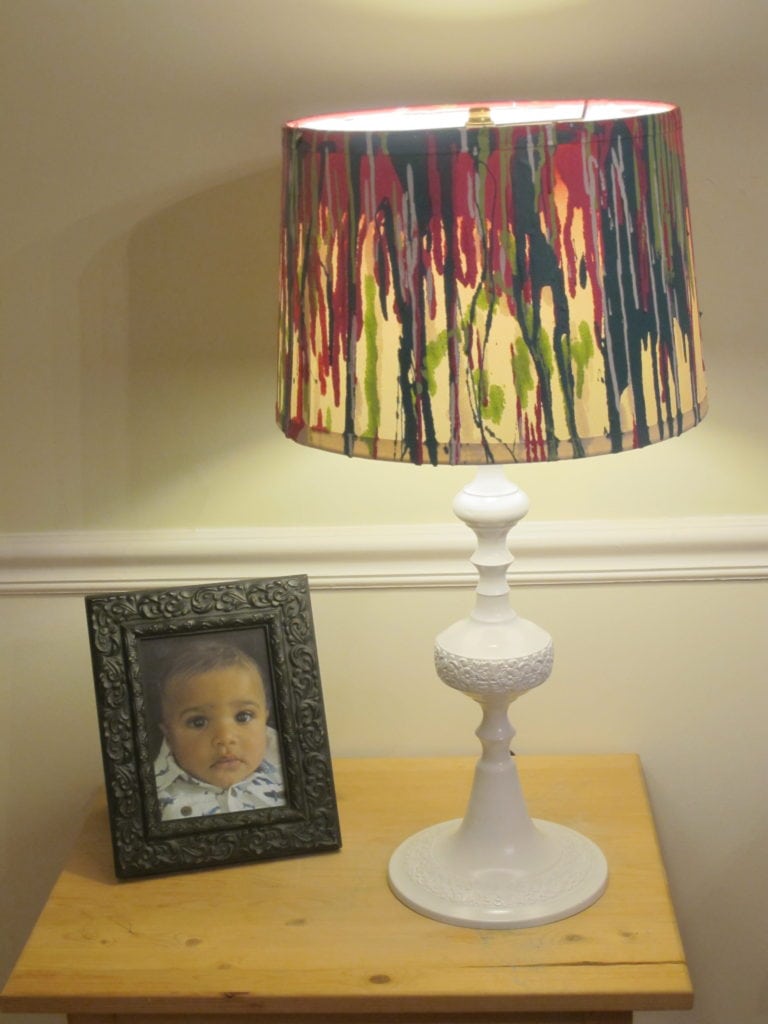
And after a little bit of drippy-drippy spray paint and total random creativeness, here’s the AFTER!
AFTER!
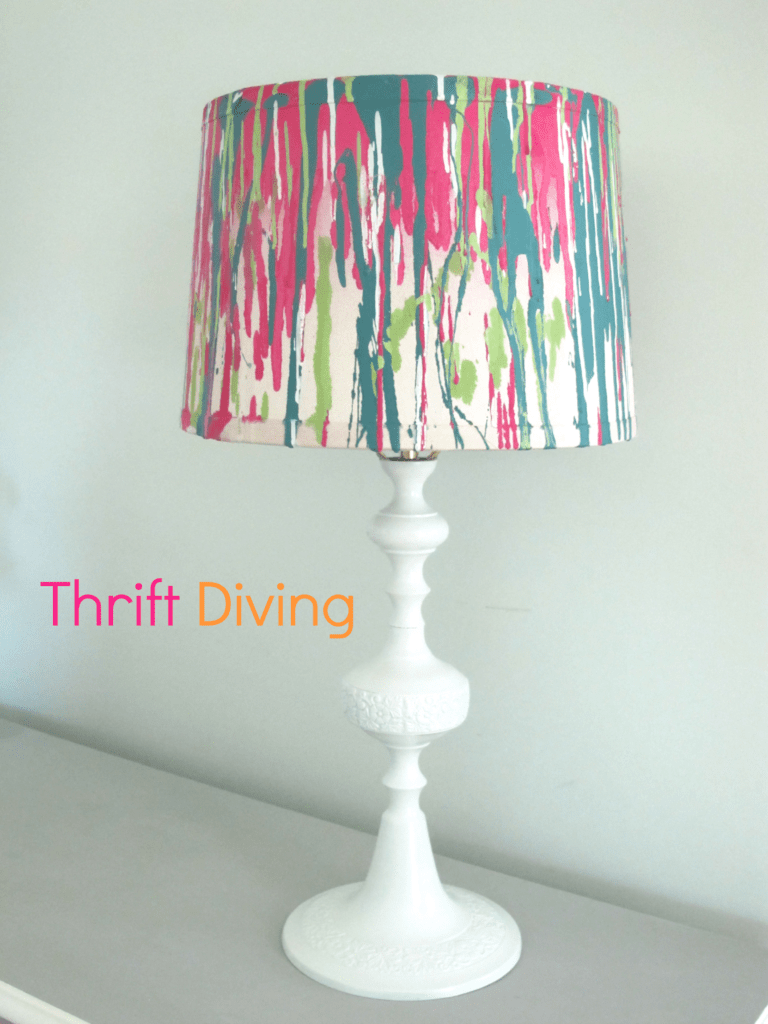
How I Created This Shade
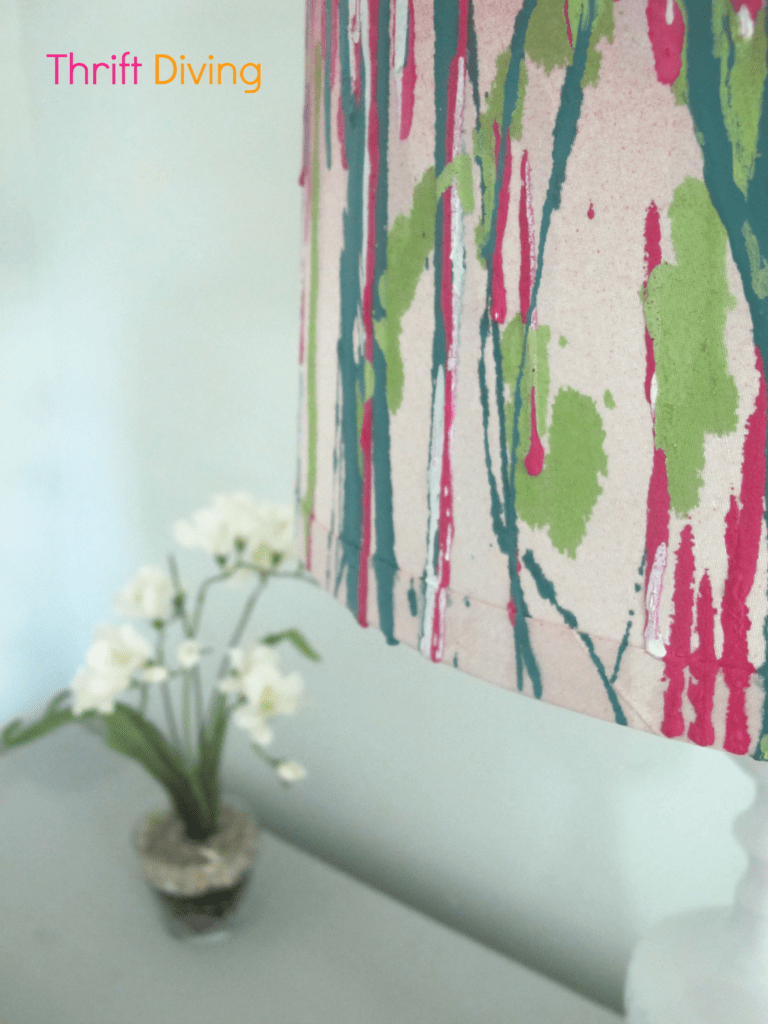
All I did was let paint run down the rims of the lamp shade. I took spray paint that I had on hand and sprayed some into a cup and just let it collect. Then I let it run down the edge, layering the paint with pink, turquoise, white, and apple green. 🙂 At times, like this the green, I just let it drop and splatter, randomly. I love the green the most!
This was such a fun project! It’s like being able to make a mess and the messier, the better 🙂
I used spray primer on the hookah/lamp prior to spraying it with white semi-gloss.
To get the globs of paint on the lamp shade, I folded a piece of paper in half, and then took a can of spray paint and sprayed a huge puddle of it the crack of the piece of paper. Then, I dribbled the puddle of paint over the edge of the paper and let it run down the side fo the lamp shade in random patterns.
I used one of my new GE light bulbs in the new lamp, so now, there’s no more wasted electricity!!!
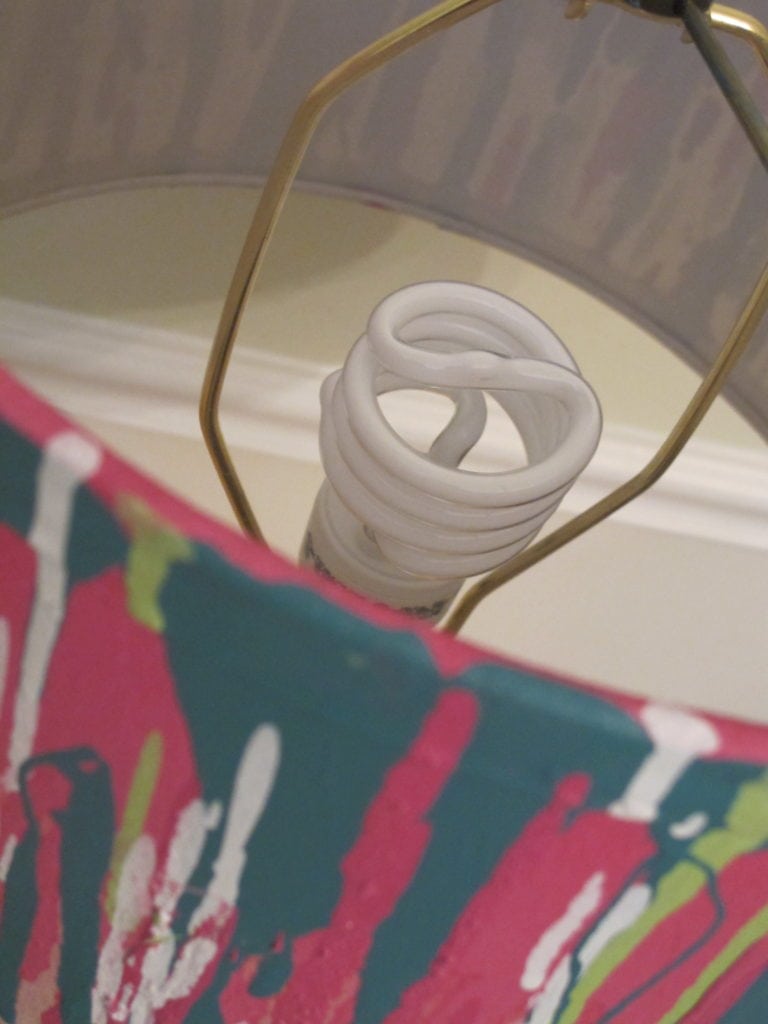
And don’t you just love how cozy lamps look at night? This lamp looks very cool when turned on! Even my kids thought it was neat, and they are quick to tell you something doesn’t look good! LOL. Oh, and be careful when you’re painting a lamp shade, because the paint will make it very opaque. But the awesome part is that you can make any design with paint and it will be even more striking at night between the translucent shade and the opaque paint. Be creative!
Also, because I am a night-owl, I tend to burn the midnight oil well into the wee hours of morning. So I need energy-efficient bulbs that will keep costs low while burning all night 🙂
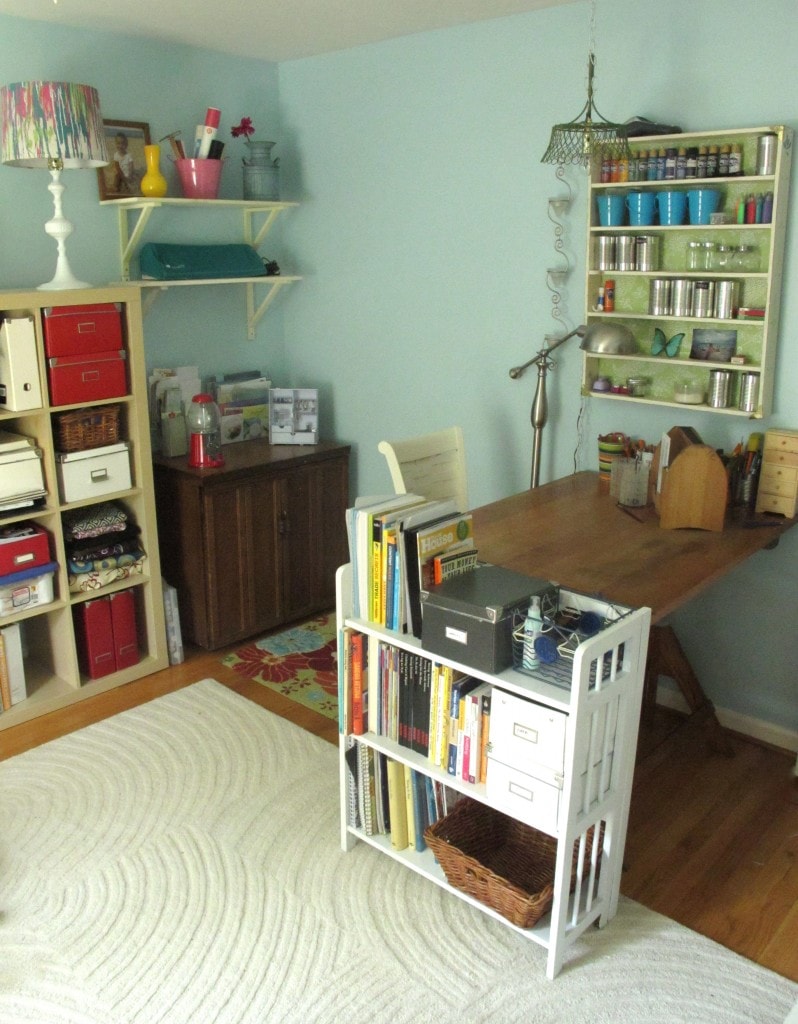
So I plan to put my DIY painted lamp shade in my craft room; just not sure yet. In the meantime, it’s sitting on top of my hand-me-down Ikea Expedit bookcase, out of the hands of a little toddler who will destroy it if you let him get his hands on it……;)
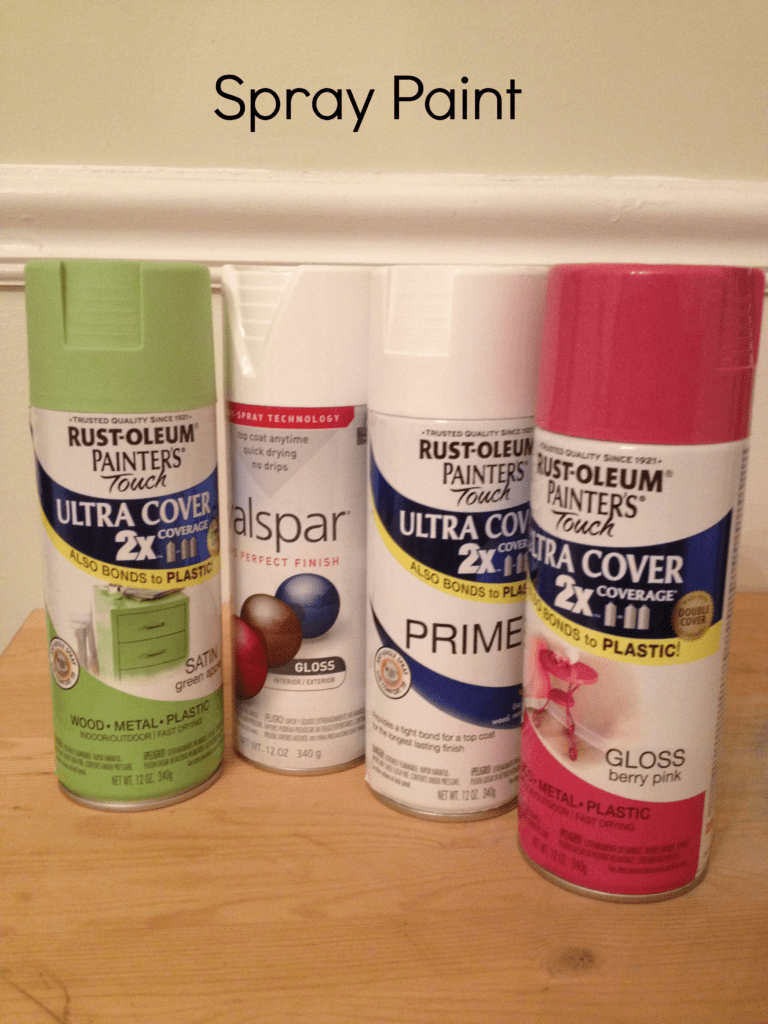
SUPPLIES
- Lamp Kit
 from Amazon.com = $10
 - Lamp shade from Walmart = $10
- Lamp base from the thrift store = $5
- Rust-Oleum Primer (already had on hand) = very minimal
- Rust-oleum Green Apple spray paint (already had on hand) = very minimal
- Rust-Oleum Painter’s Touch Berry Pink spray paint (already had on hand) = very minimal
TOTAL COST: About $24!
TOTAL TIME: About 1 hour, minus drying time in between.
So how do YOU reduce, reuse, and recycle?
Have you noticed you’ve been wasteful and are cutting back, too? In what other ways do you reduce, reuse, or recycle?

Download the 5 freebies!

Thrift Diving inspires women to decorate, improve, and maintain their home themselves...using paint, power tools, and thrift stores! Use these 5 printables, checklists, and ebooks to get started!

Beautiful, Serena!!
I’d LOVE to see a video of this makeover!!!