BEFORE & AFTER: Office Makeover for My Husband!
This office makeover is sponsored by Wagner.
This office makeover was the toughest room makeover I have ever done.
Room makeovers are never easy. There are a lot of decisions to be made, from which paint color to choose, which furniture to buy or projects to make, to the arrangement of the furniture and decor.
But it’s even harder when it’s a room makeover for someone else.
Specifically, when it’s a room makeover for your husband.
This isn’t a male-bashing rant, I promise. It’s just that….well, men tend to:
- Hate change.
- Love wood paneling (what’s up with that??).
- Don’t love and respect a good upcycle like we creative women do.
- Don’t like anyone to touch their stuff to declutter it.
Trying to do a room makeover for my husband when he’s all these things was tough.
It started out with, “No, don’t touch my office” and then morphed into “Well, when you’re done, can you at least put everything back?” to “I want to keep my old desk. What’s wrong with my old desk?! It’s perfect.”
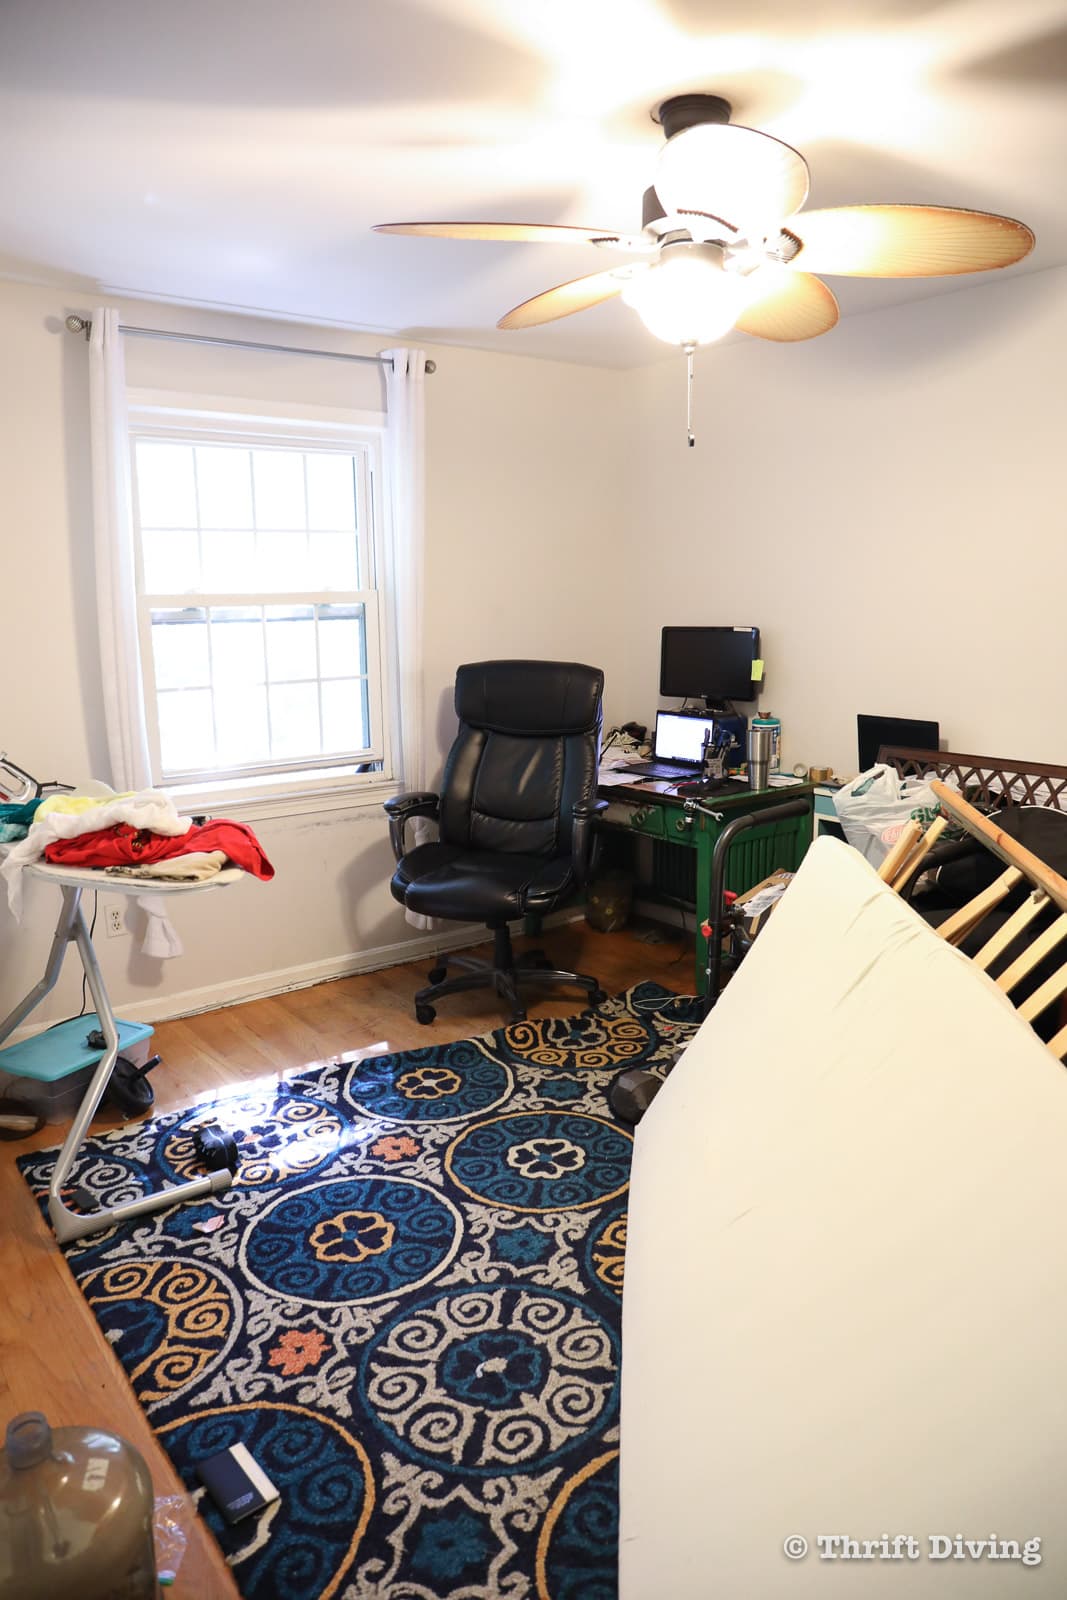
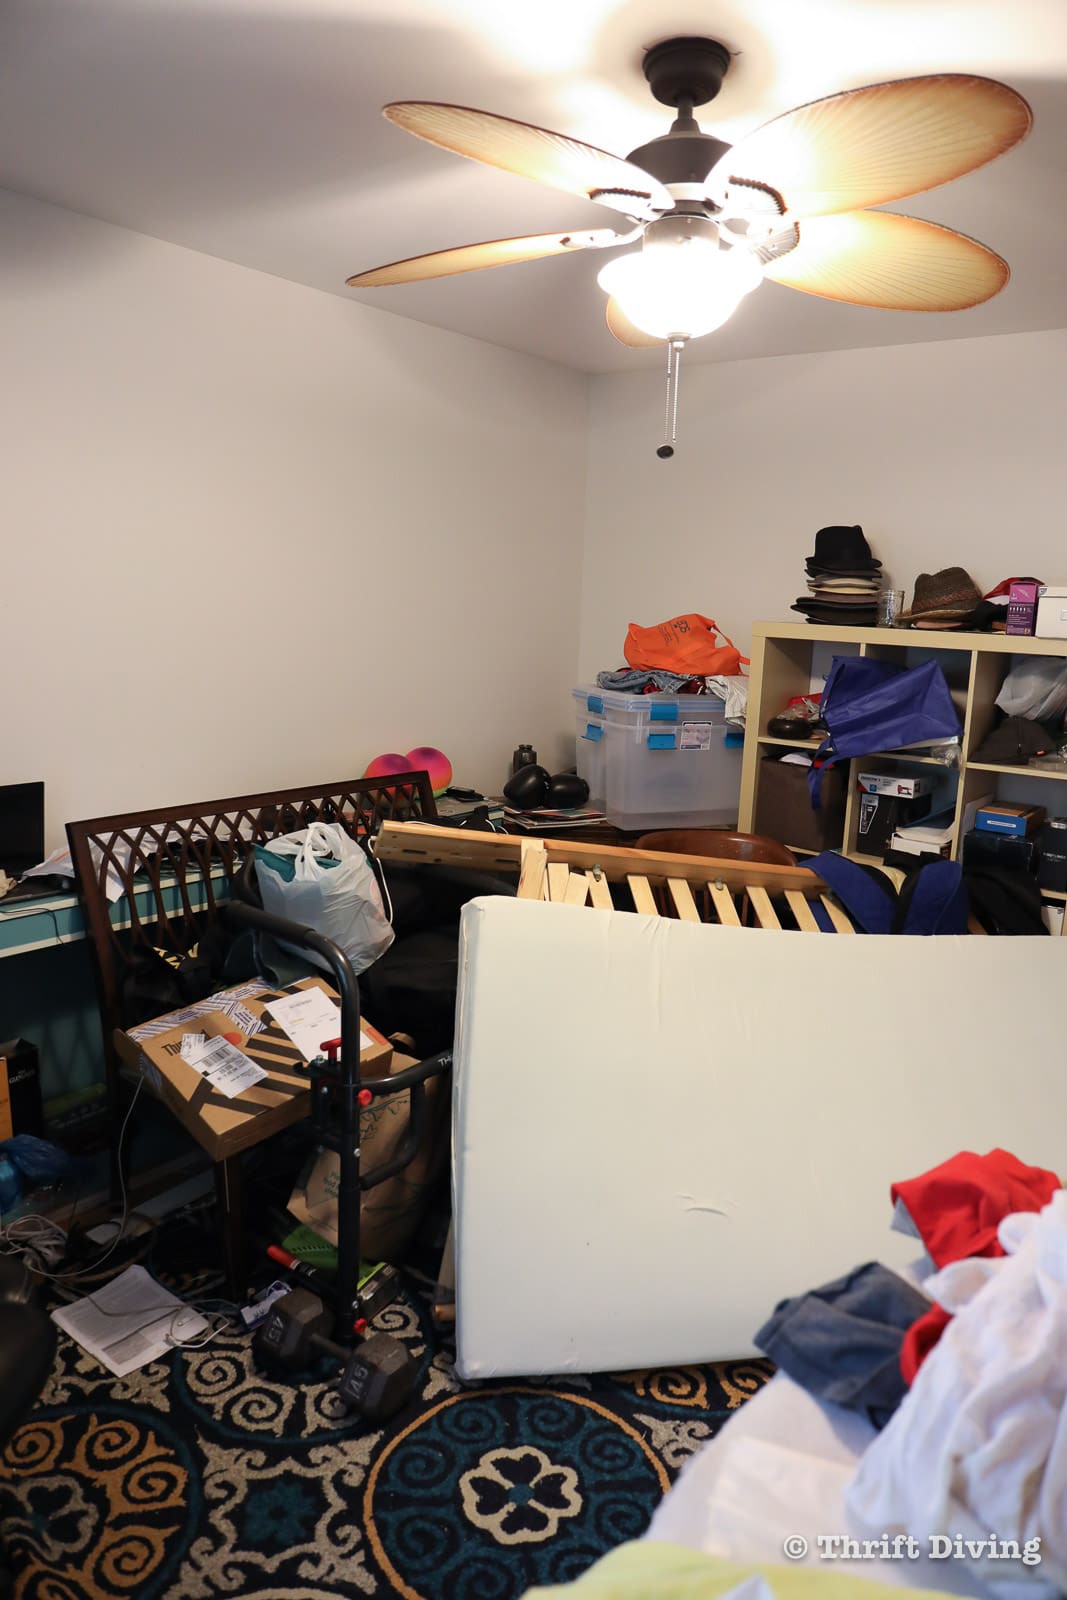
This is what the room looked like before we got started. It had become a catch-all for everything in the upstairs area that needed to get donated or moved to other parts of the house.
Click here to save this office makeover on Pinterest.
BEFORE
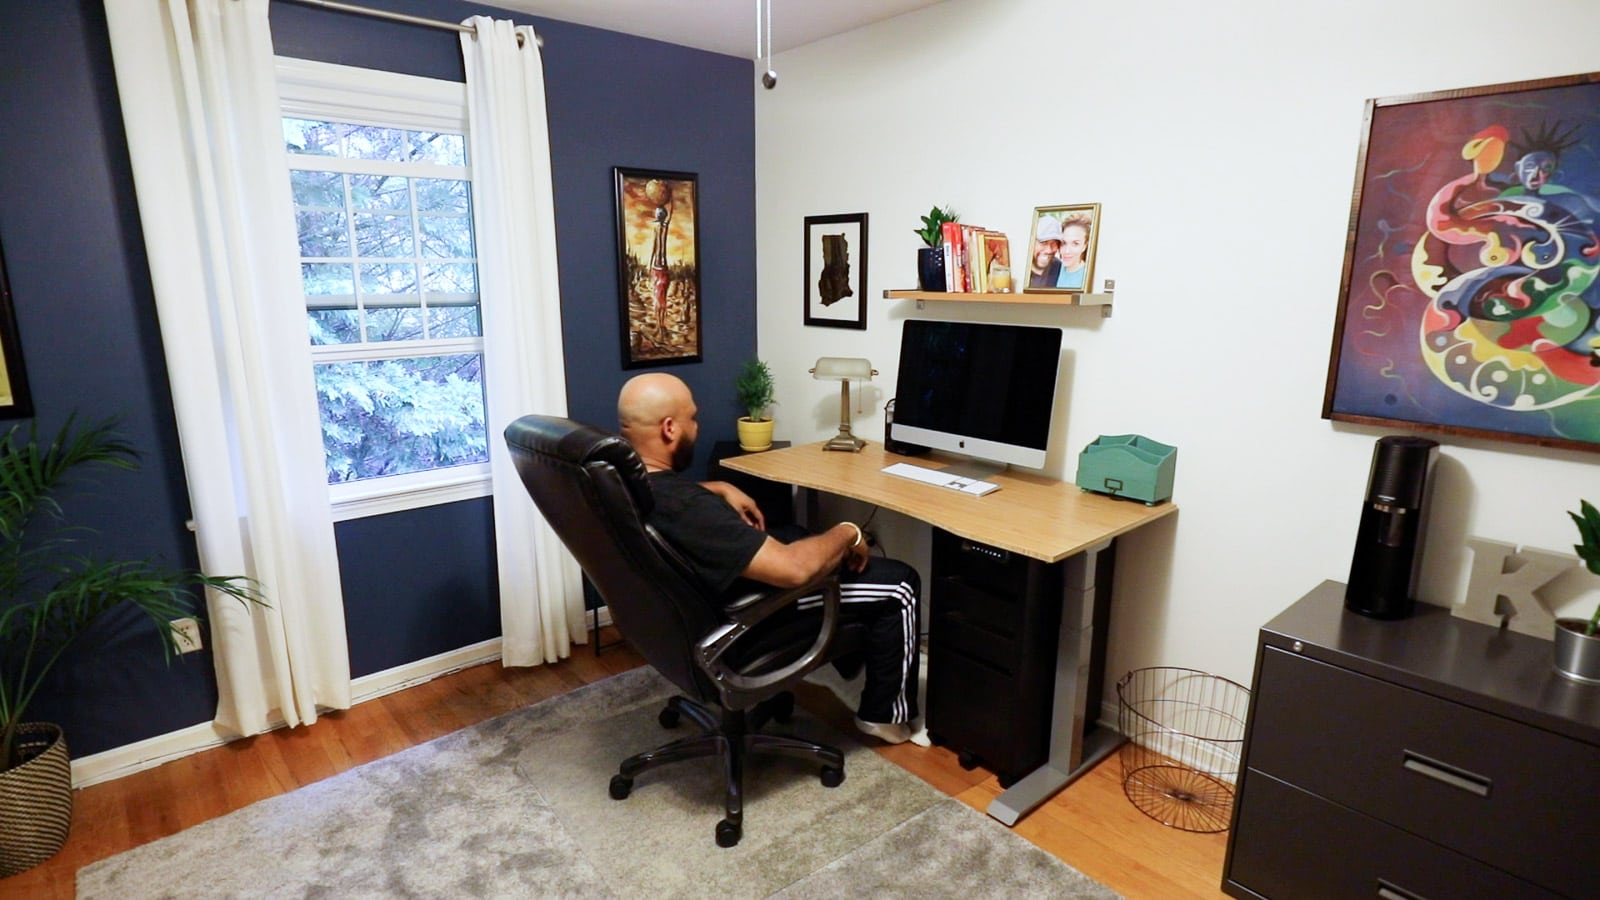
But thankfully, by the end of the office makeover, the words coming out of his mouth were, “I like it” and “I don’t want to move back into the office yet; I’m afraid I’ll mess it up.”
That sounds like an admission that the “AFTER” is a huge improvement over the “BEFORE”! (I’ll take it).
Because when I was done with it–WOW!–this looked like the perfect office that’s a reflection of who my husband is!
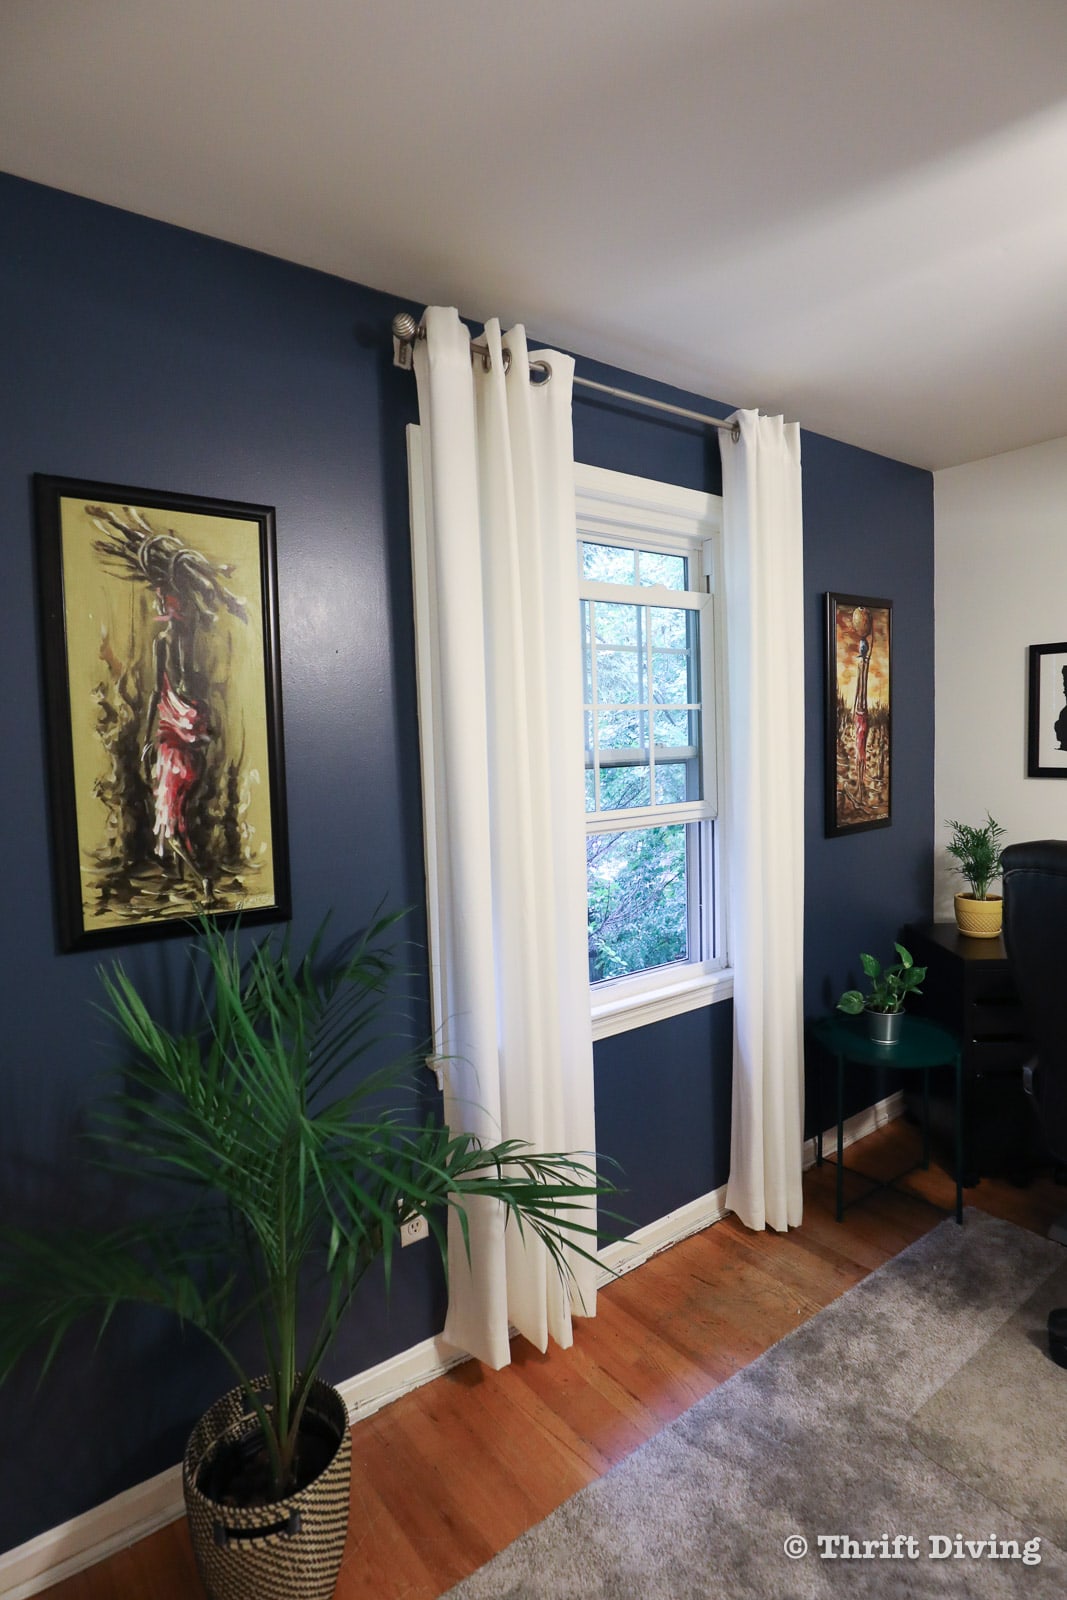
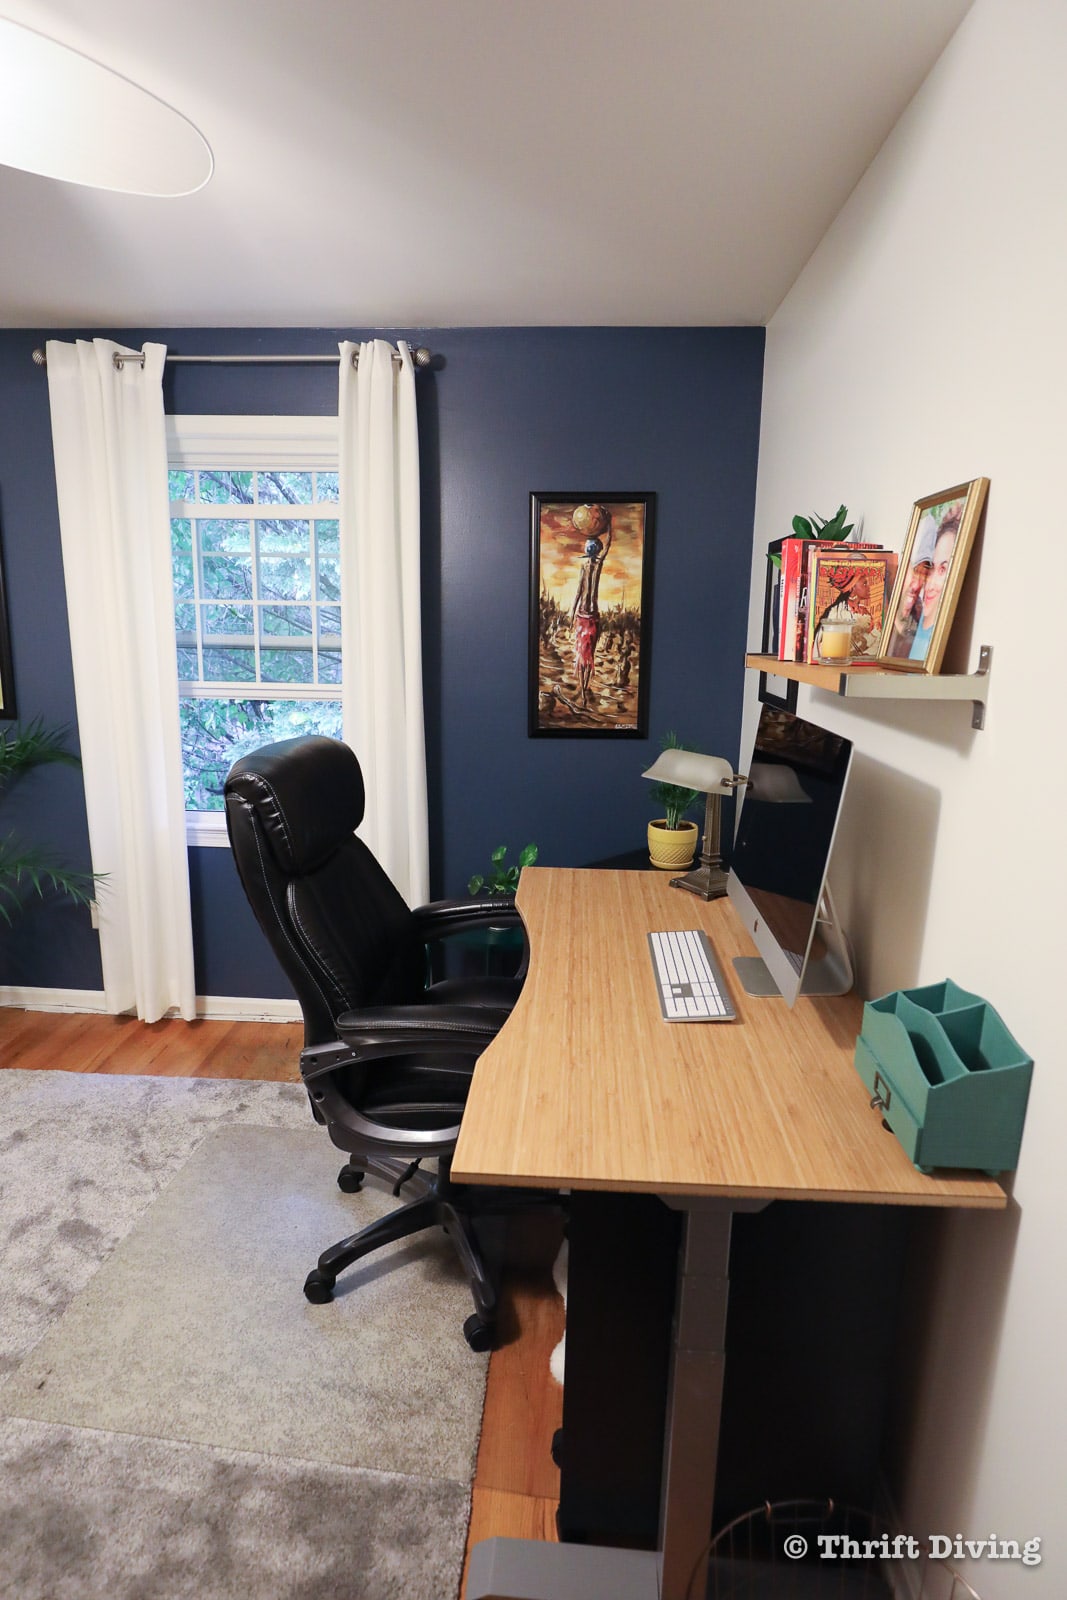
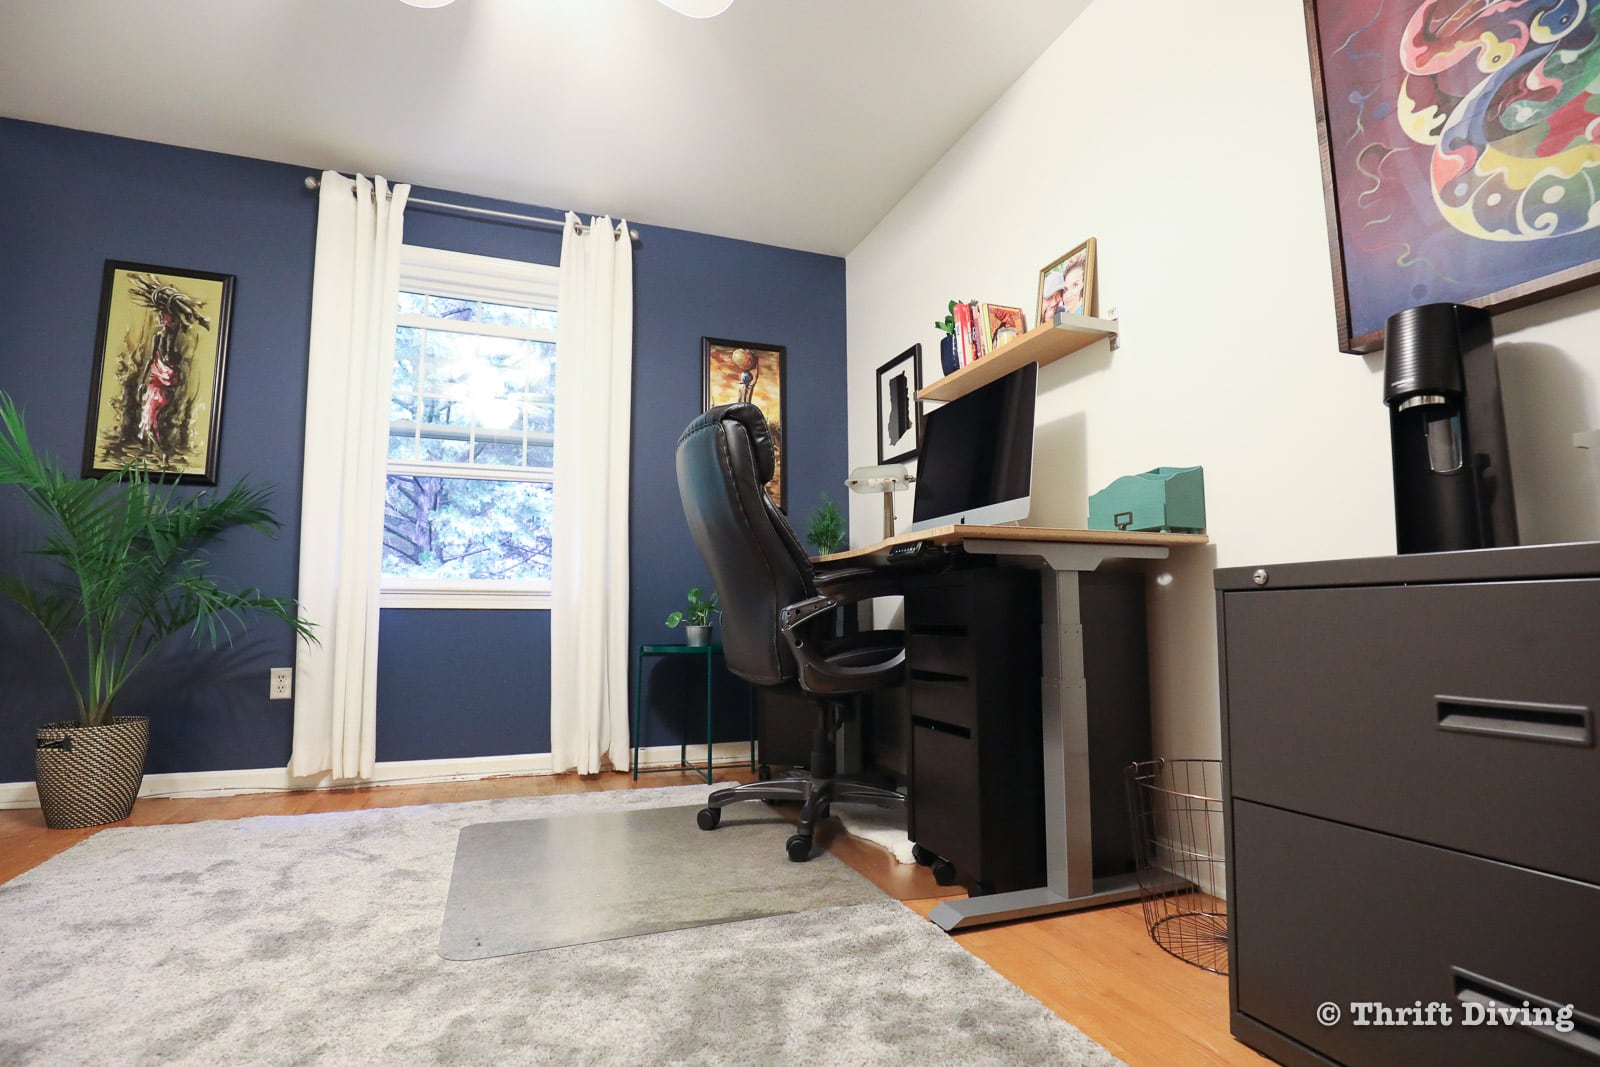
AFTER!

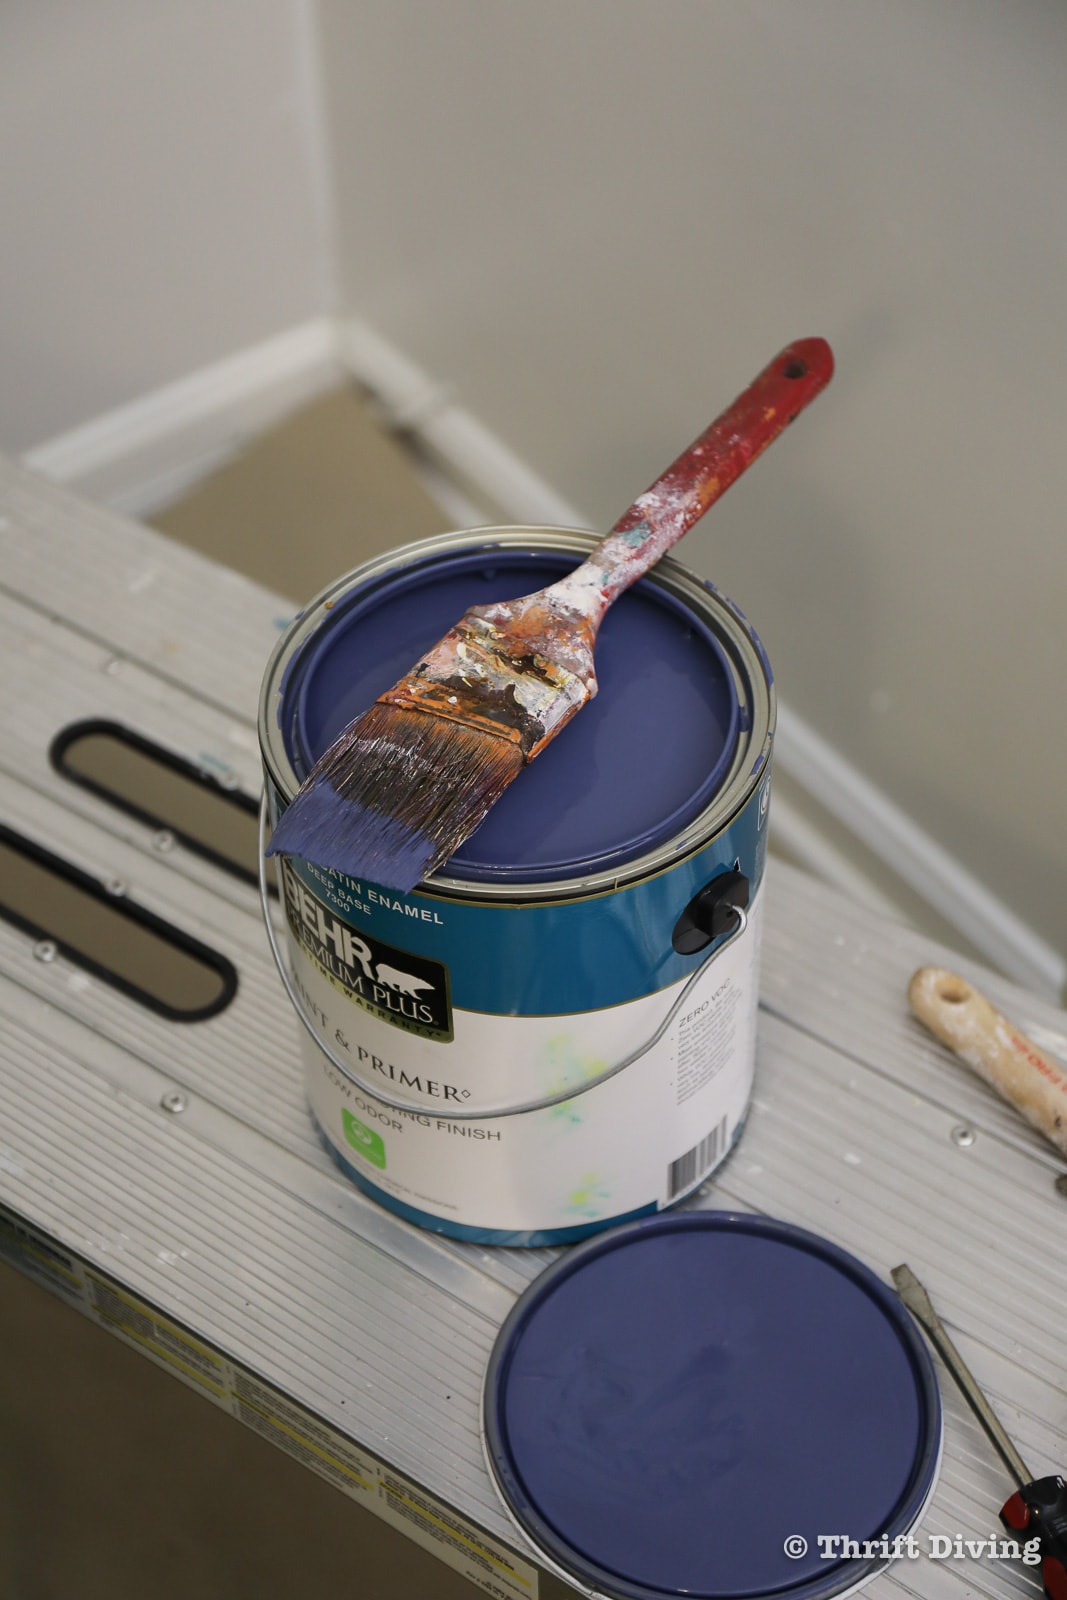
For this office makeover, I teamed up with one of my favorite sponsors, Wagner, to transform this office space, using their Smart Sidekick Roller to create that gorgeous accent wall using Behr English Channel paint color!
Let’s walk through all the features that really pull this office makeover together!

Watch This Makeover in Action!
If you love to watch instead of read, you can see this office makeover in action on my YouTube channel! Just click to watch! 🙂
BEFORE & AFTER: Office Makeover with a Blue Accent Wall!
My husband’s office is situated on the side of the house that literally gets no sun. The neighbors owns what feels like a nature’s preserve, surrounded by trees. And of course, those trees outside hubby’s office window, filter out much of the little bit of sunlight that gets through.
The office often feels dark and dreary.
Hubby doesn’t seem to mind. While he can be picky when I start poking around in his office with hints of a makeover, in general, he’s not a picky guy. He would work in the office without complaints of the clutter, without complaints of lack of sunlight.
For the walls, I wanted to bright then up with a fresh white.
I’ve been using the Wagner Smart Sidekick Roller for my last 3 room refreshes (my Family Room Refresh, my sons’ room makeover with a black accent wall, and now this room).
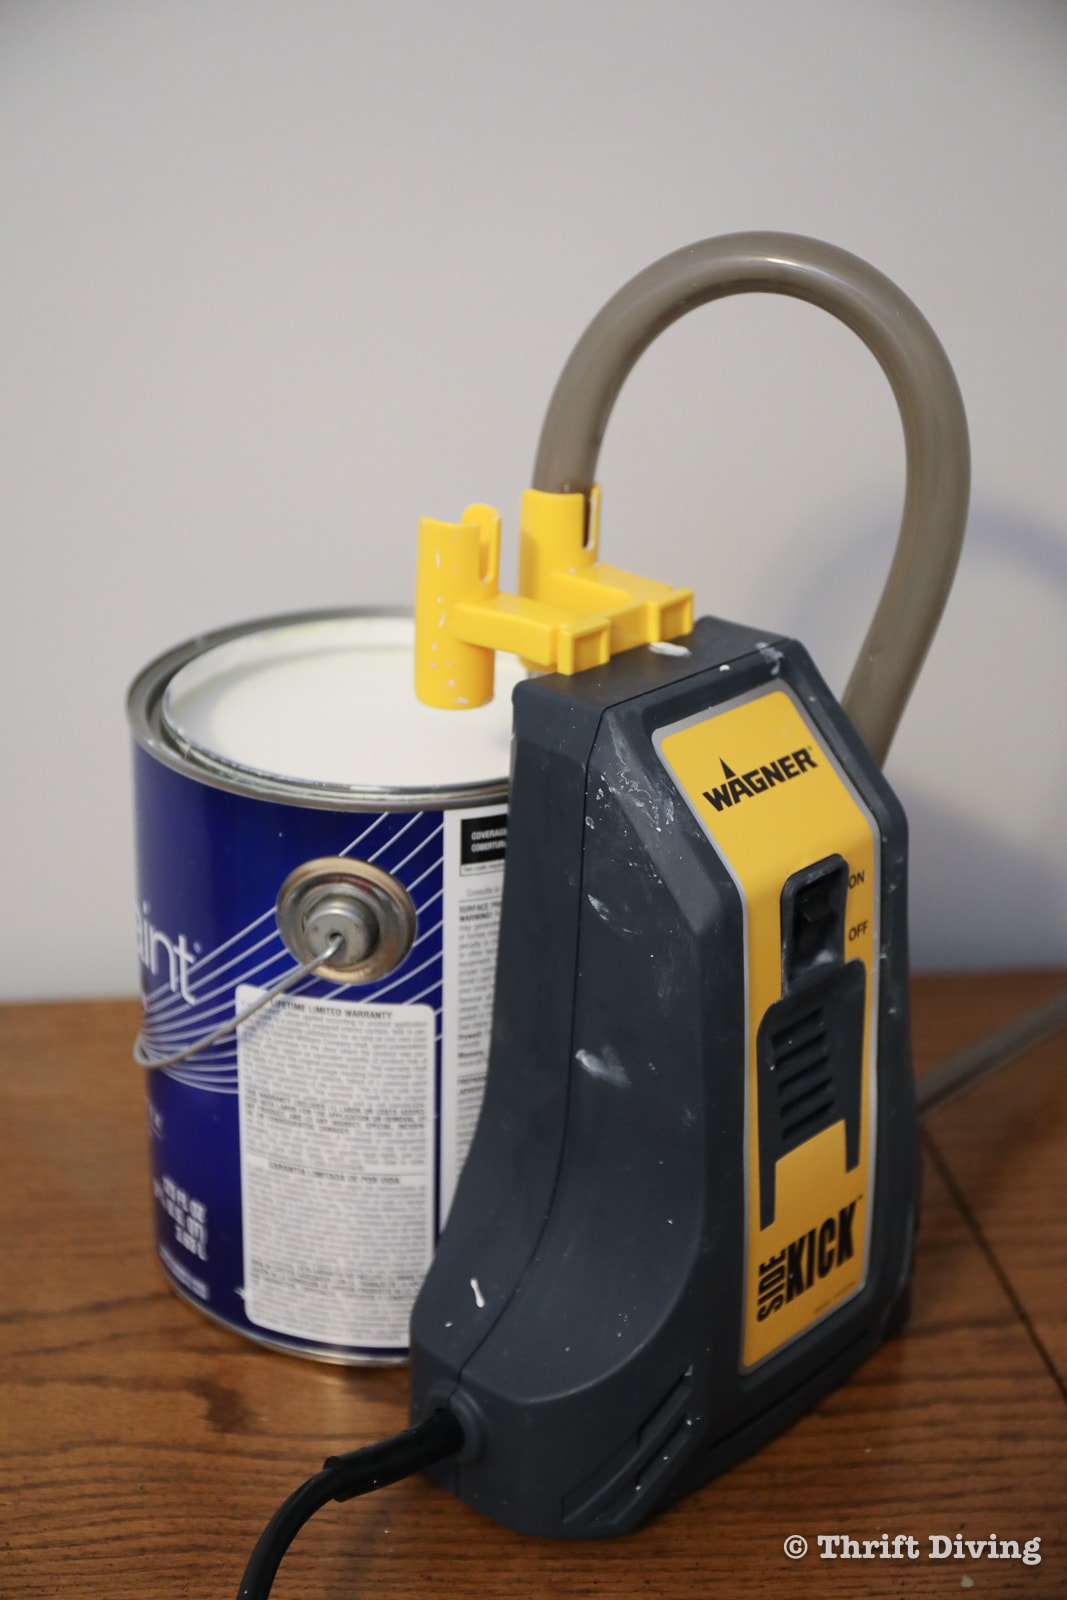
I love using the Sidekick roller because its hose sucks up the paint directly from the paint can (you can use either a 1-gallon or 5-gallon bucket). The direct feed keeps the paint flowing through the tube to the roller so you never have to stop and reload while in the middle of painting a wall.
Imagine being on a ladder in a stair well or a room with huge ceilings. Nothing is more frustrating and dangerous to climb up and down a step ladder to reload. With the Smart Sidekick you never have to get down to reload, until your paint can is empty. 🙂
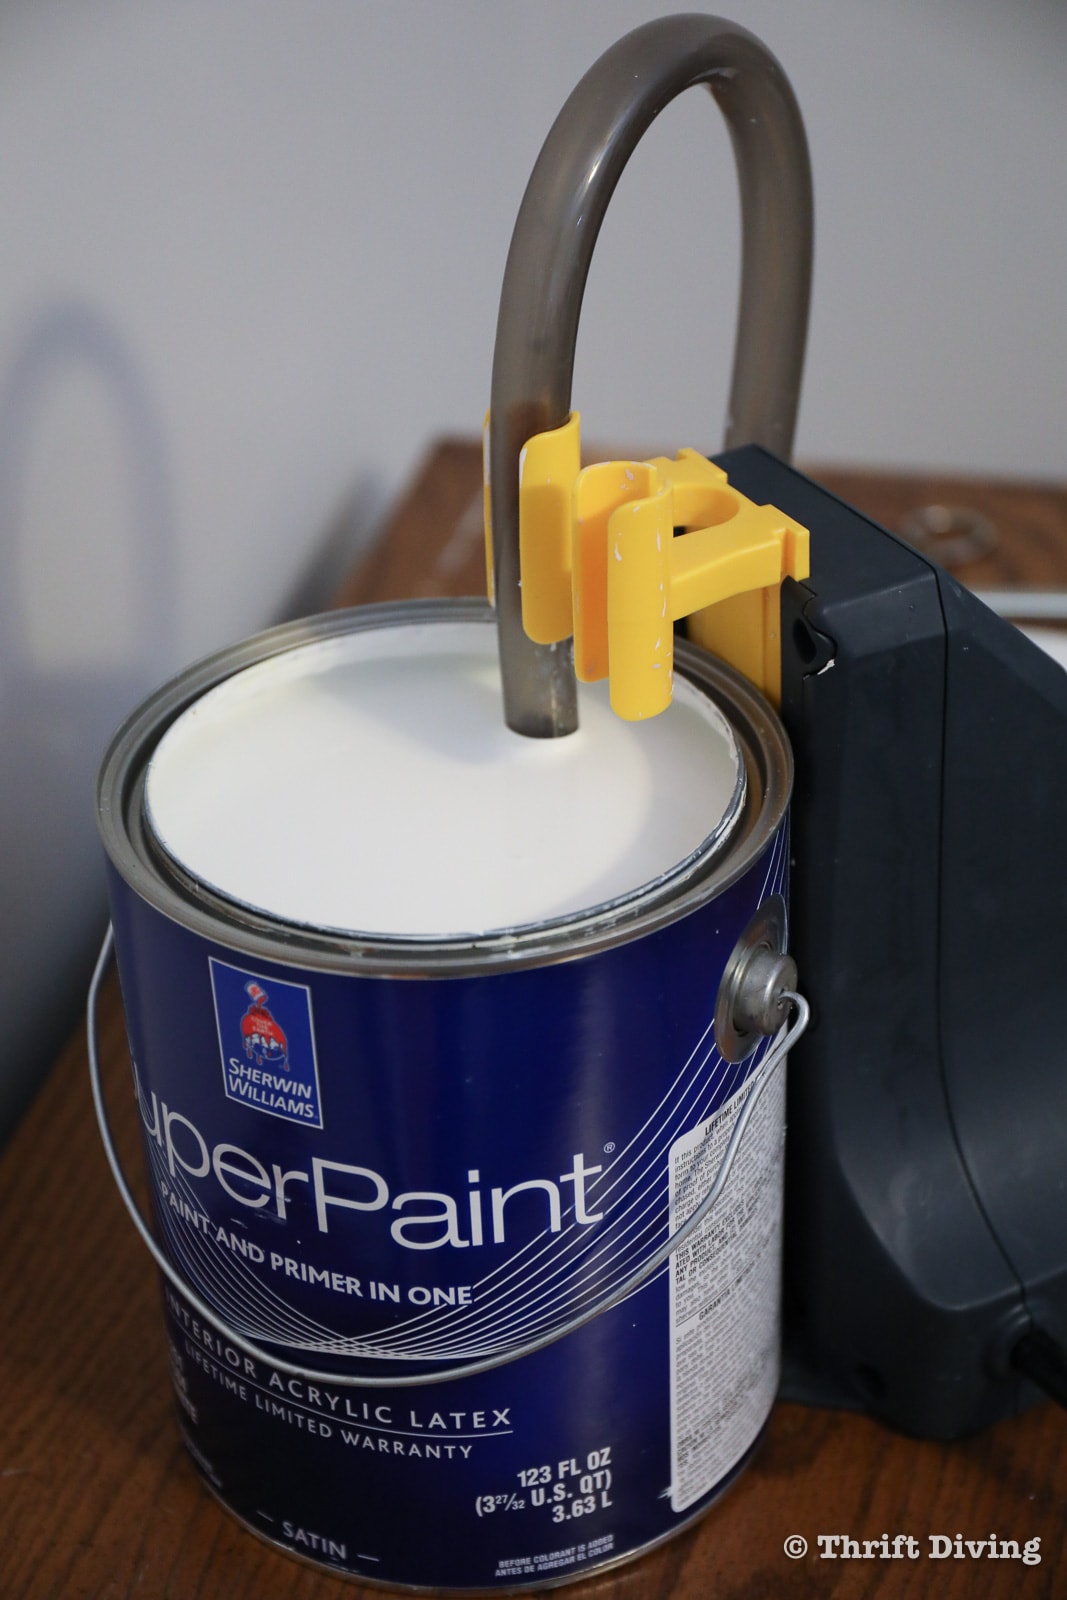
Most spills and splatters happen when reloading the paint roller, too. But with the Sidekick, the continuous flow of paint (at the push of a button) eliminates the paint from splattering or dripping everywhere.
I still like to use butcher paper when I’m painting, but you’ll notice that it’s very clean, without spills or drips. (By the way, clean-up of the Sidekick takes me about 15-20 minutes, which you can see how to clean it up on this video of my living room refresh makeover).
You’ll also notice that the white paint is brighter than the slightly tan color that was previously on the walls. 🙂

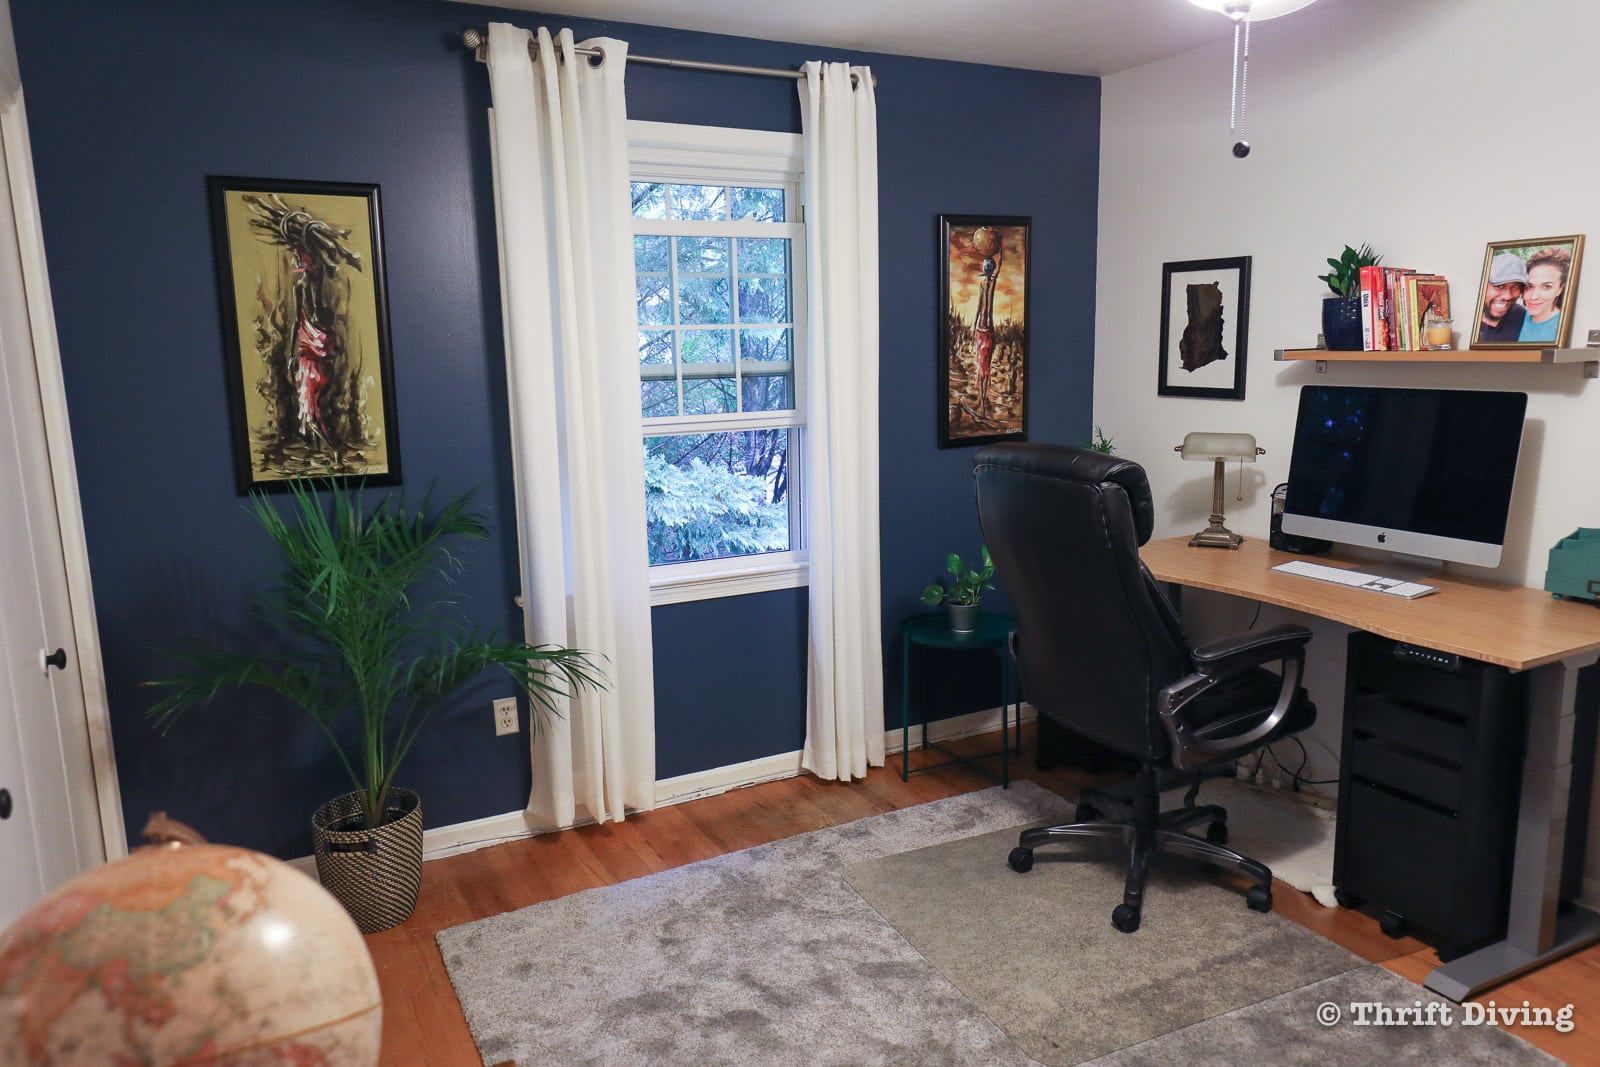
Yet, for the wall that contains the window, I wanted to bring in some color that would add some dimension to the room. Since his office doesn’t get a lot of sunlight, doing a deep blue all over would have been atrocious and made the room feel like a dark cave.
I went with a gorgeous blue. With just one blue accent wall in the office space, the light reflecting off of the brighter white walls wouldn’t make the room feel any darker than it already is due to lack of sunlight.
This is why I love accent walls! When you can’t truly commit to a darker color, you can dip your toe in a bold color by doing just one wall. 🙂
For this blue accent wall, I’m using Behr English Channel, which is sooo pretty.
Tidying Up the Desk Area
My husband’s desk was a $20 thrifted find years ago that I had painted a brilliant green with gold accents. It looked amazing….years ago when it was freshly painted. But through years of use, day in and day out, not only did the paint wear away, but so did the primer and the stain and finish underneath of the primer!
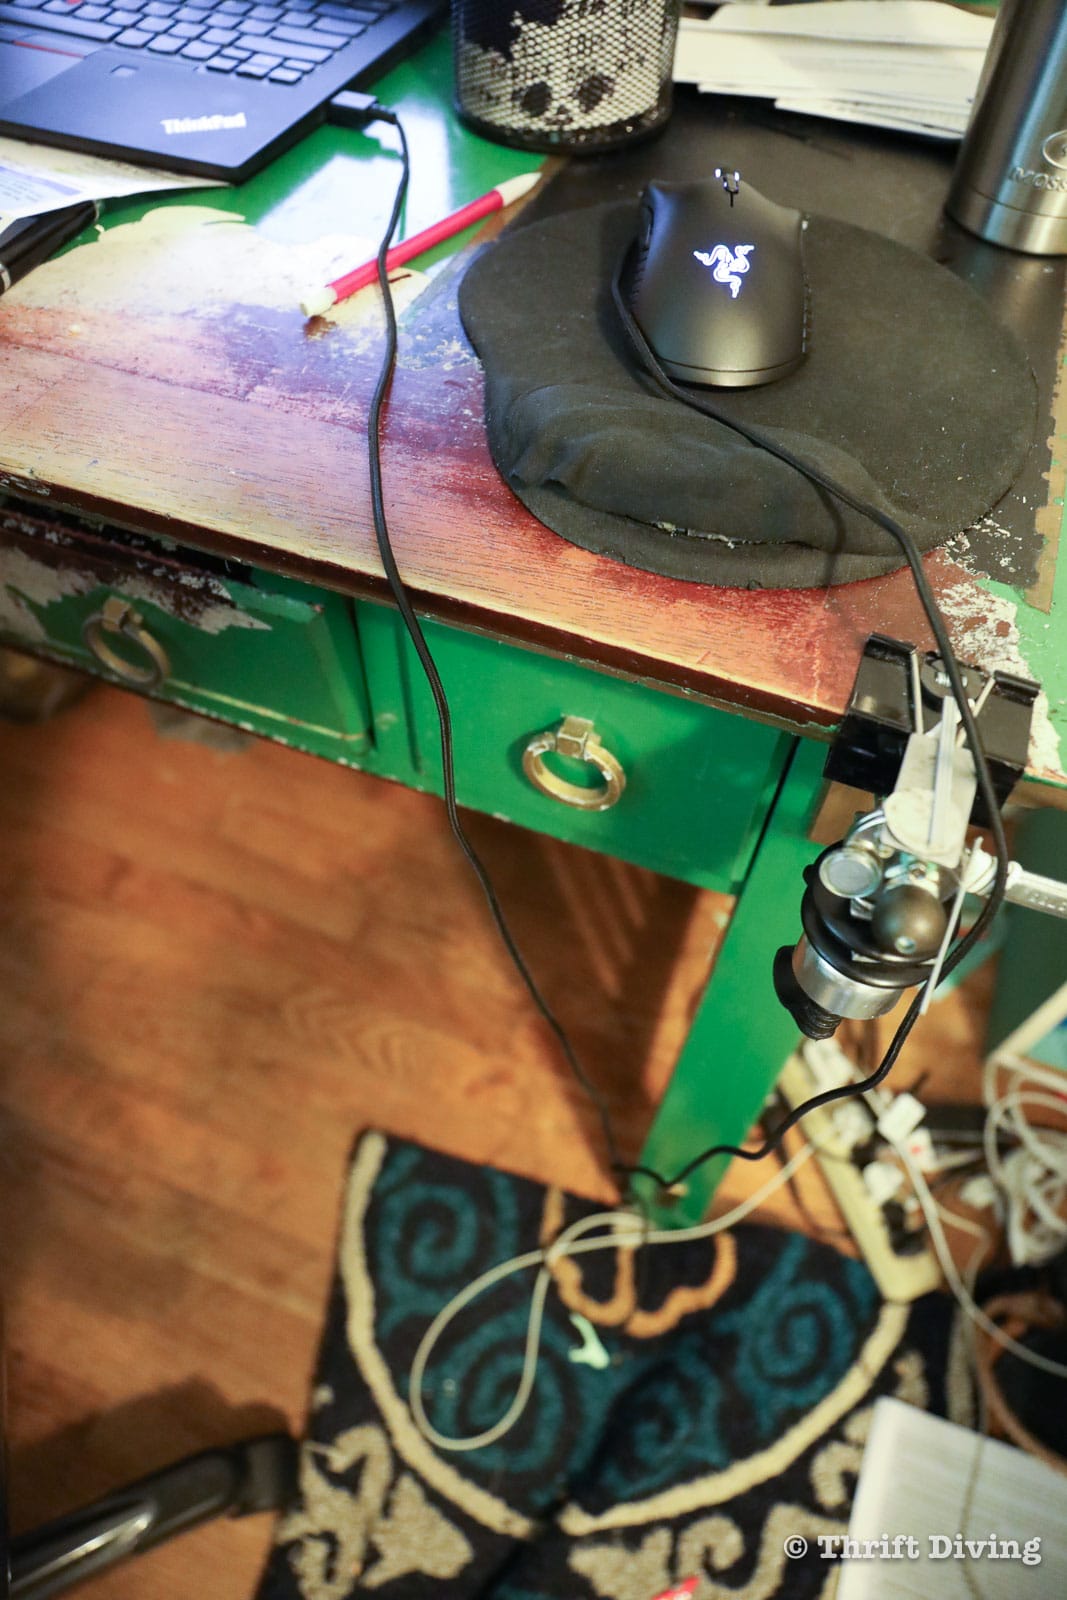
His arms had worn away the finishes little by little, and the desk that remained was badly in need of a new paint job. But it wasn’t just the paint that was wrong. The desk was too short for his big “Executive” style office chair. The arms didn’t even fit underneath. This left him hunched over the desk for hours!
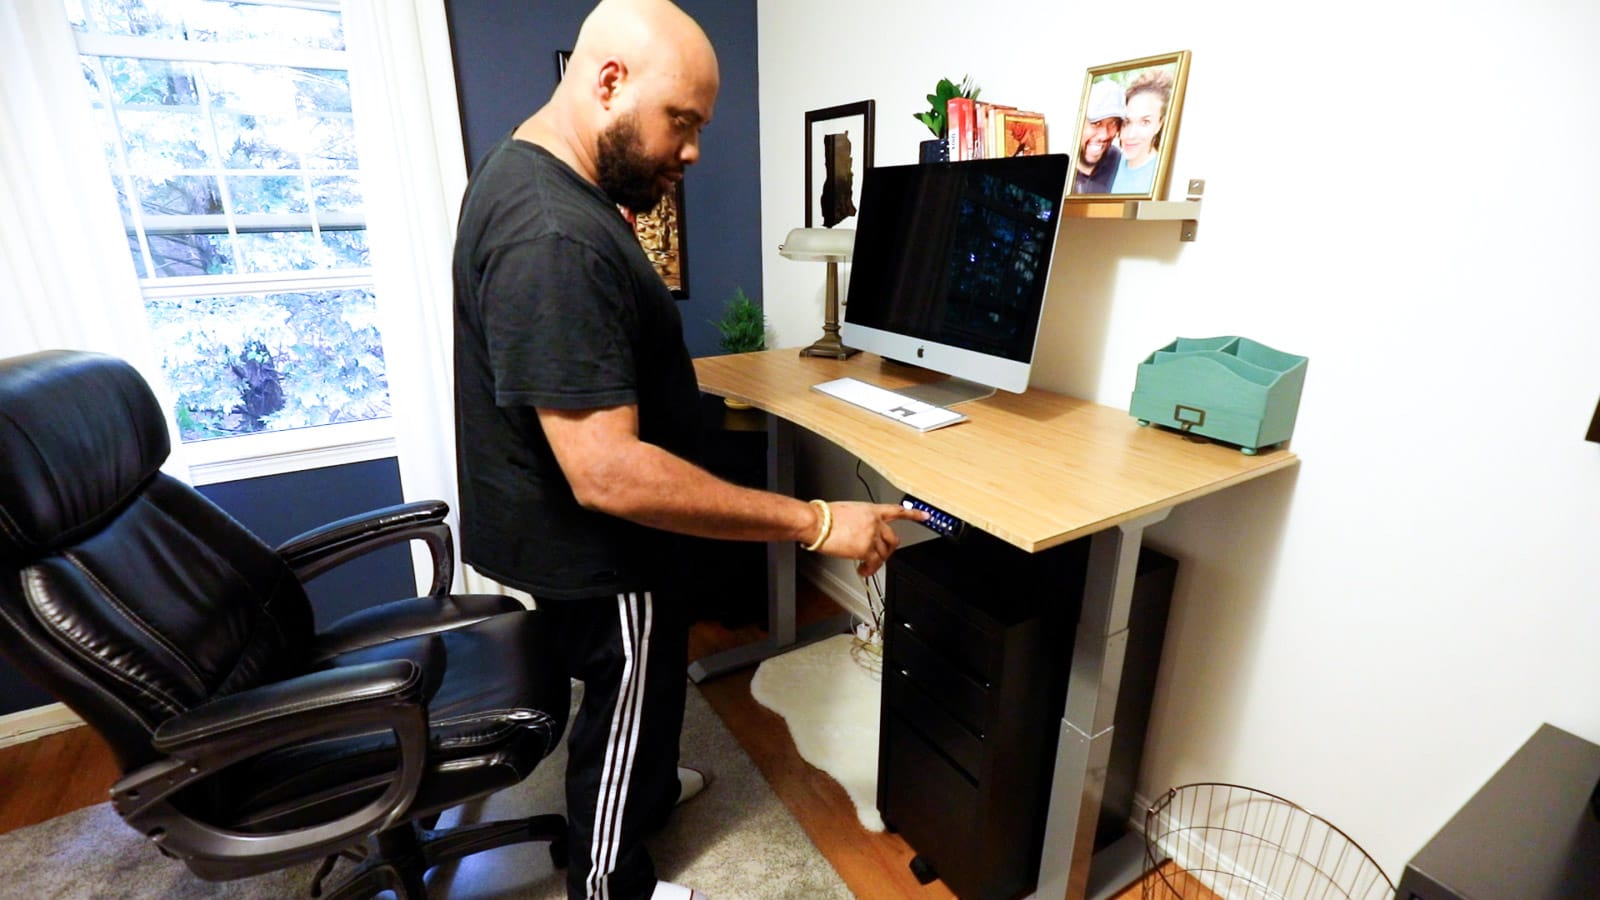
I had an adjustable standing desk that I had put in the family room, so I brought that desk upstairs, which would give him the option to sit or stand. I also like that it can be adjusted to be a little higher so that his huge Executive chair can after fit underneath. No more hunching over!
AFTER!
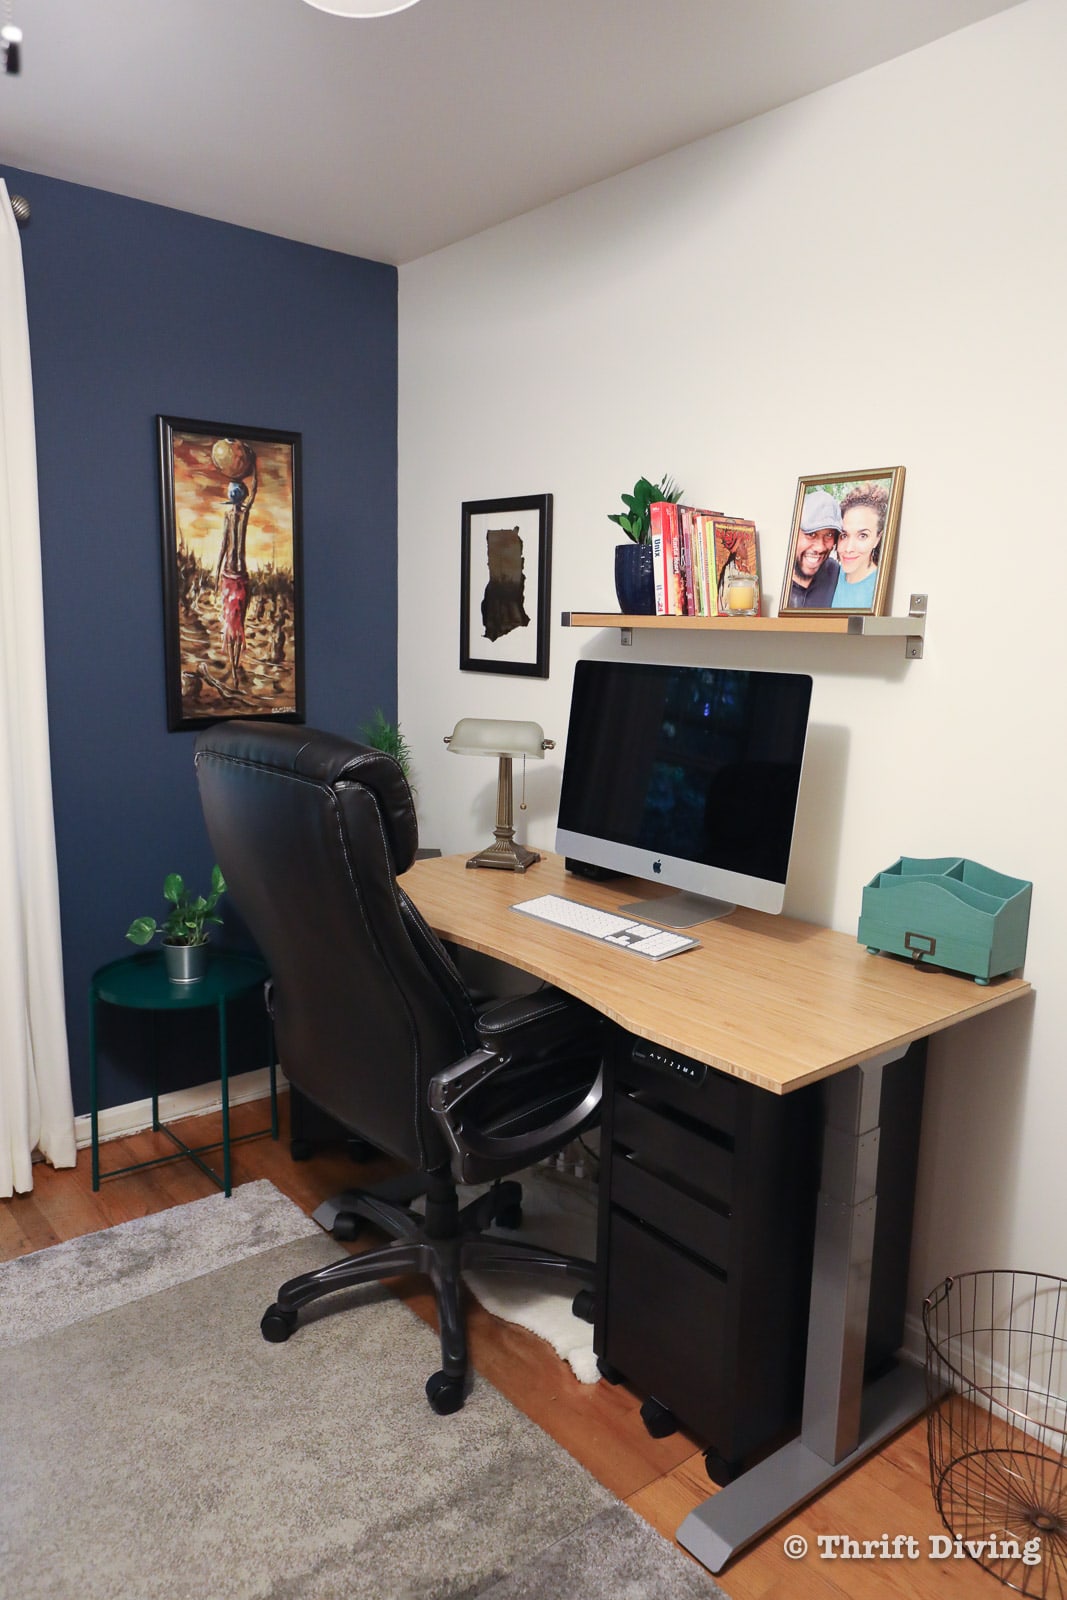
Now he’s got the option to sit or stand, too, with the touch of a button. 🙂
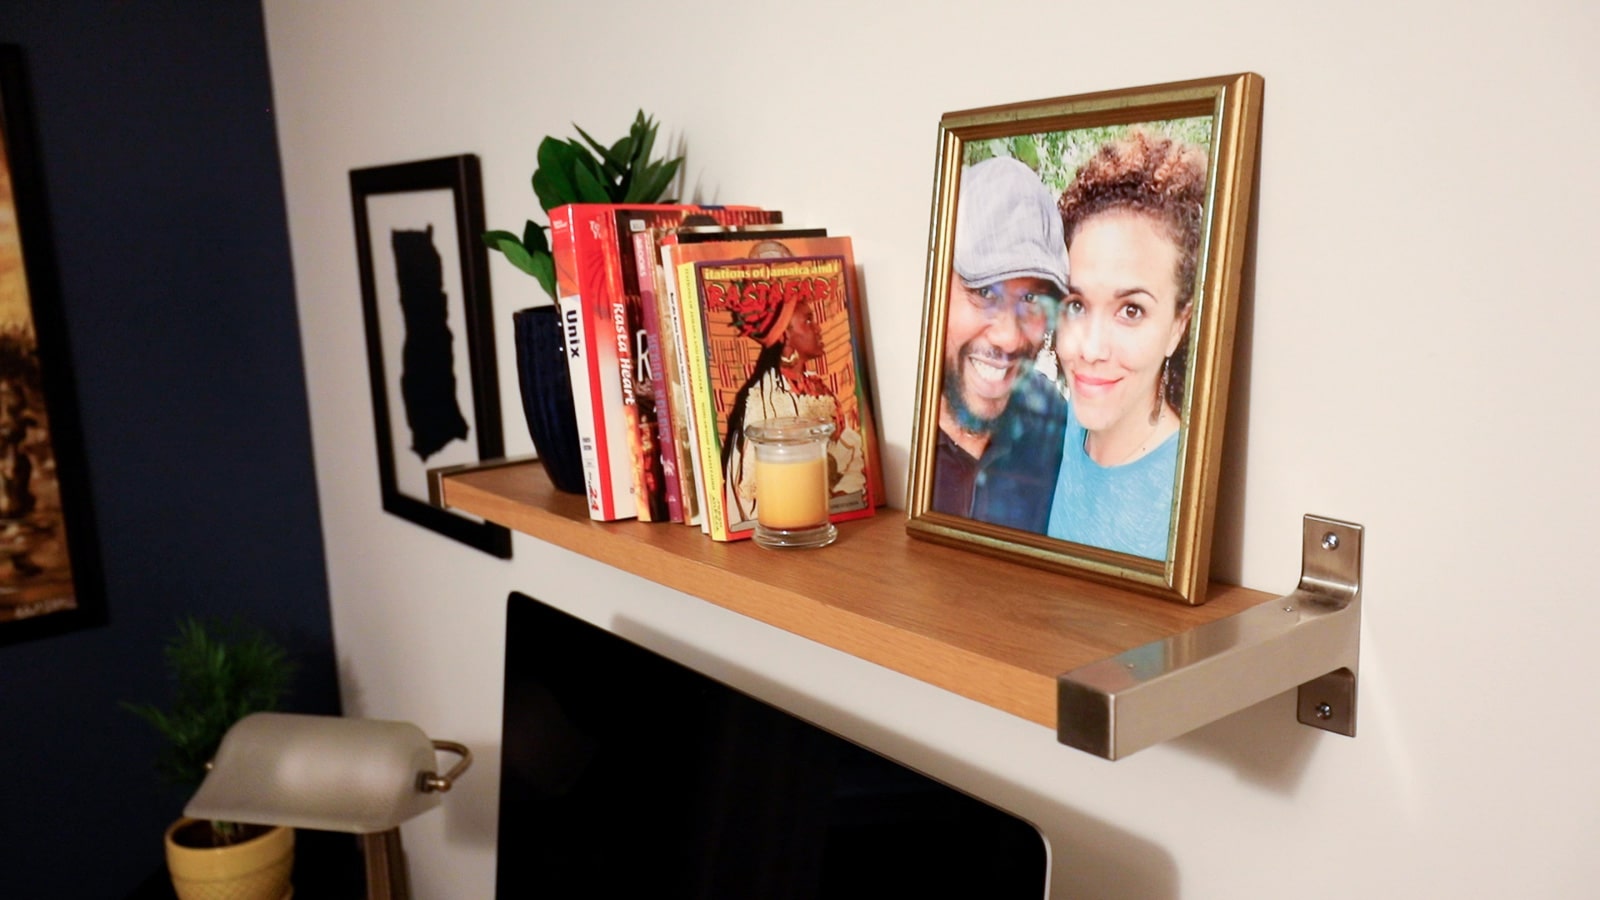
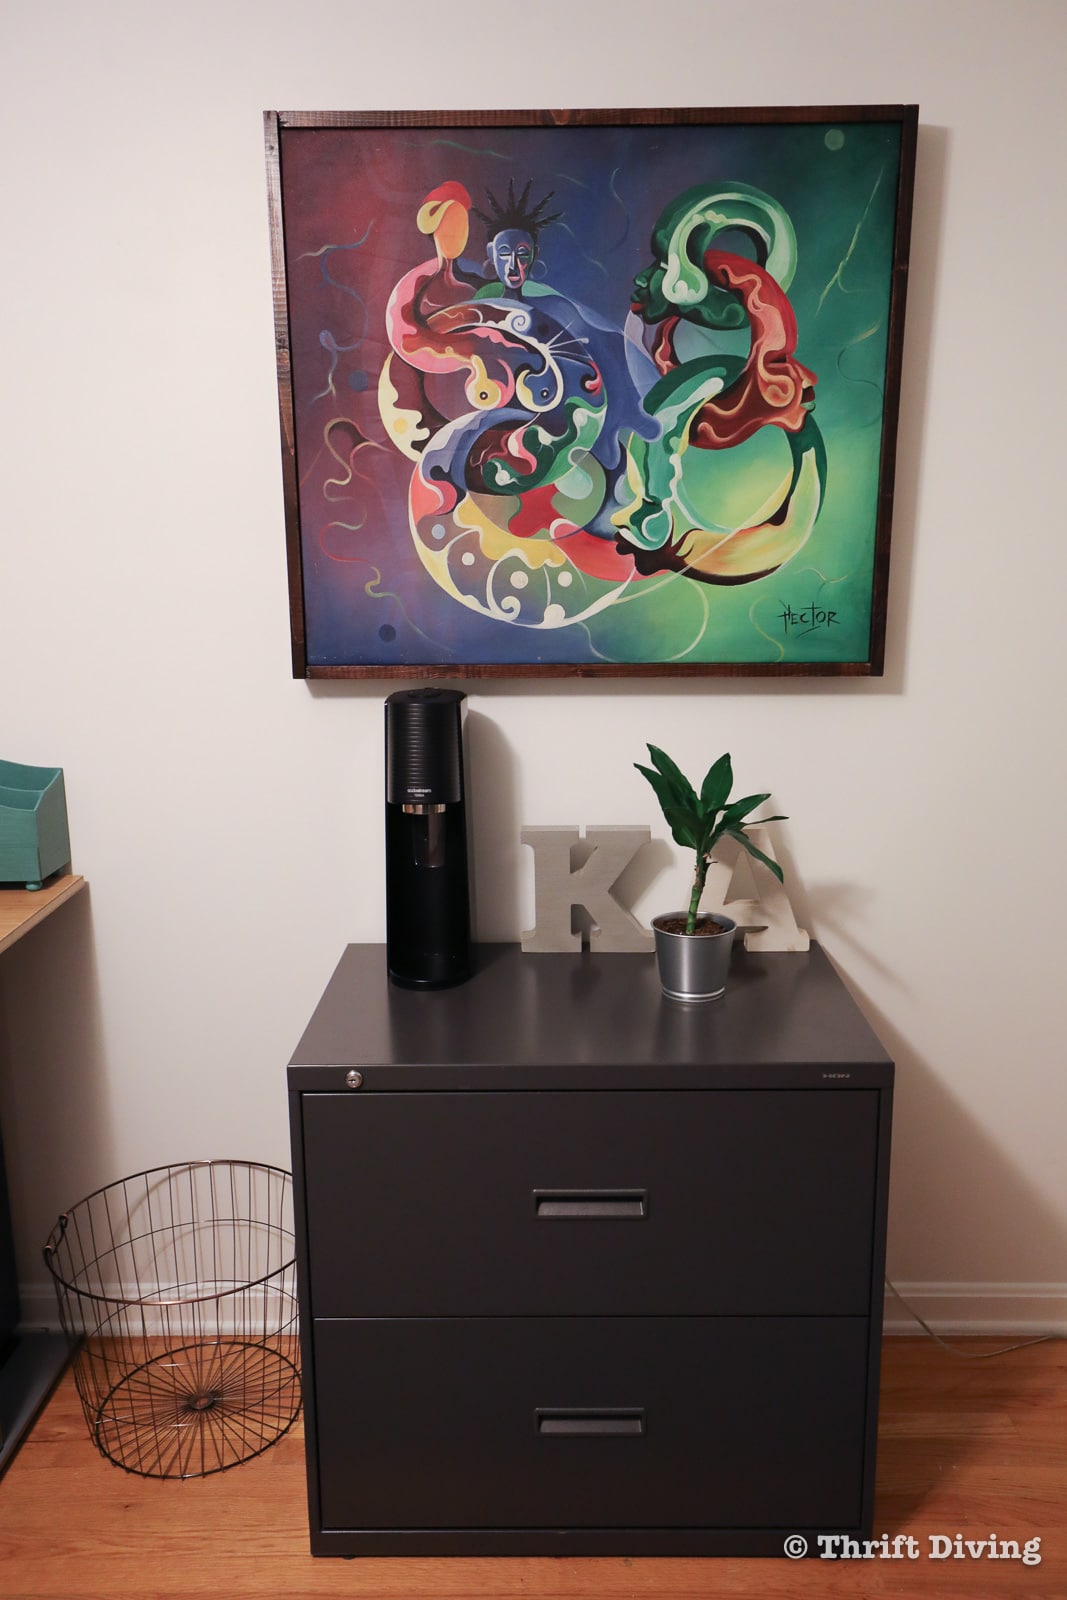
Over top of the desk, I had found an IKEA shelf from the thrift store for $7.00, which it typically would cost about $27 brand new. I wanted the shelf, along with the thrifted picture frame, to help break up the wall a bit and give hubby a place to display a plant (bought from IKEA). The planter is from the thrift store, and I painted it with some dark blue spray paint to bring in some of the blue accent wall.
Because the standing desk doesn’t have drawers (and hubby liked the drawers on his old busted up desk), I went to IKEA and found two small office cabinets with additional storage. They were $79 each.
How to Make a DIY Frame for a Painting
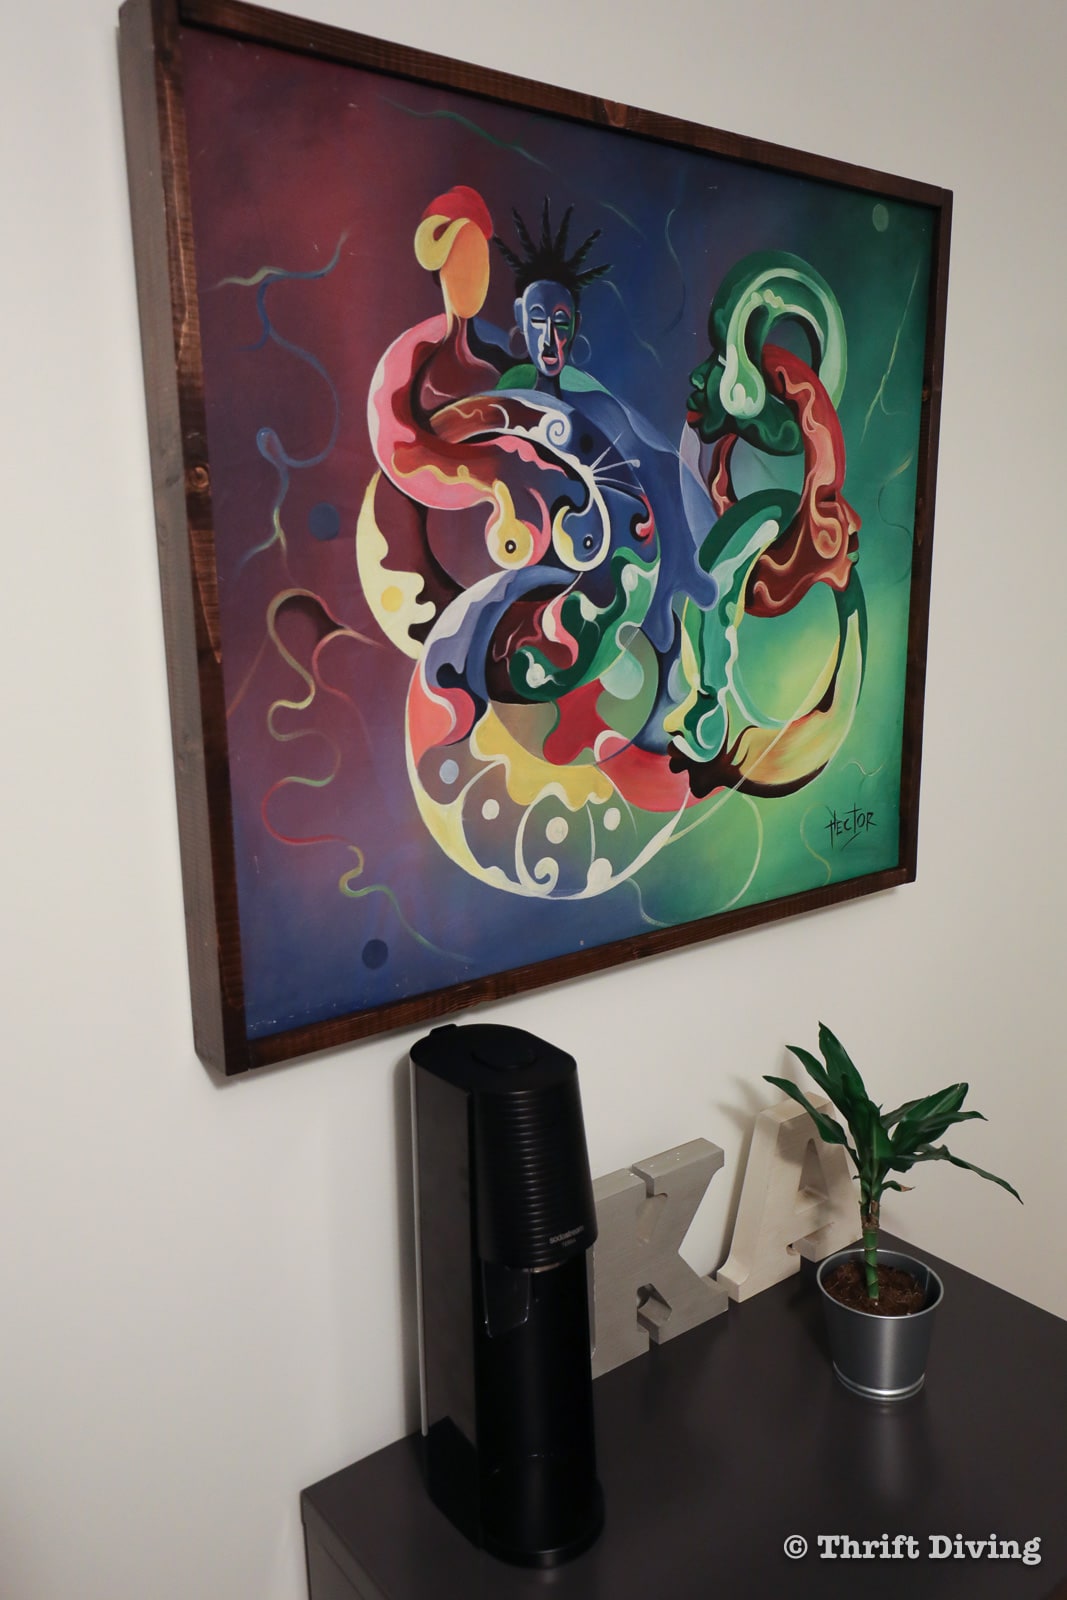
I have been notorious for leaving the walls bare in my house, not adding enough personalization to them. So for hubby’s office, which had no artwork, I wanted to bring in some pieces that would be a reflection of who he is, and to pull the color scheme together through the artwork.
My husband is from Ghana, West Africa. We had some art pieces from Ghana that were never framed because it’s soooo expensive to get art professionally framed! As a result, it literally sat in the closet for years (10 years…??!), folded up.
For his room, I wanted to create my own frame.
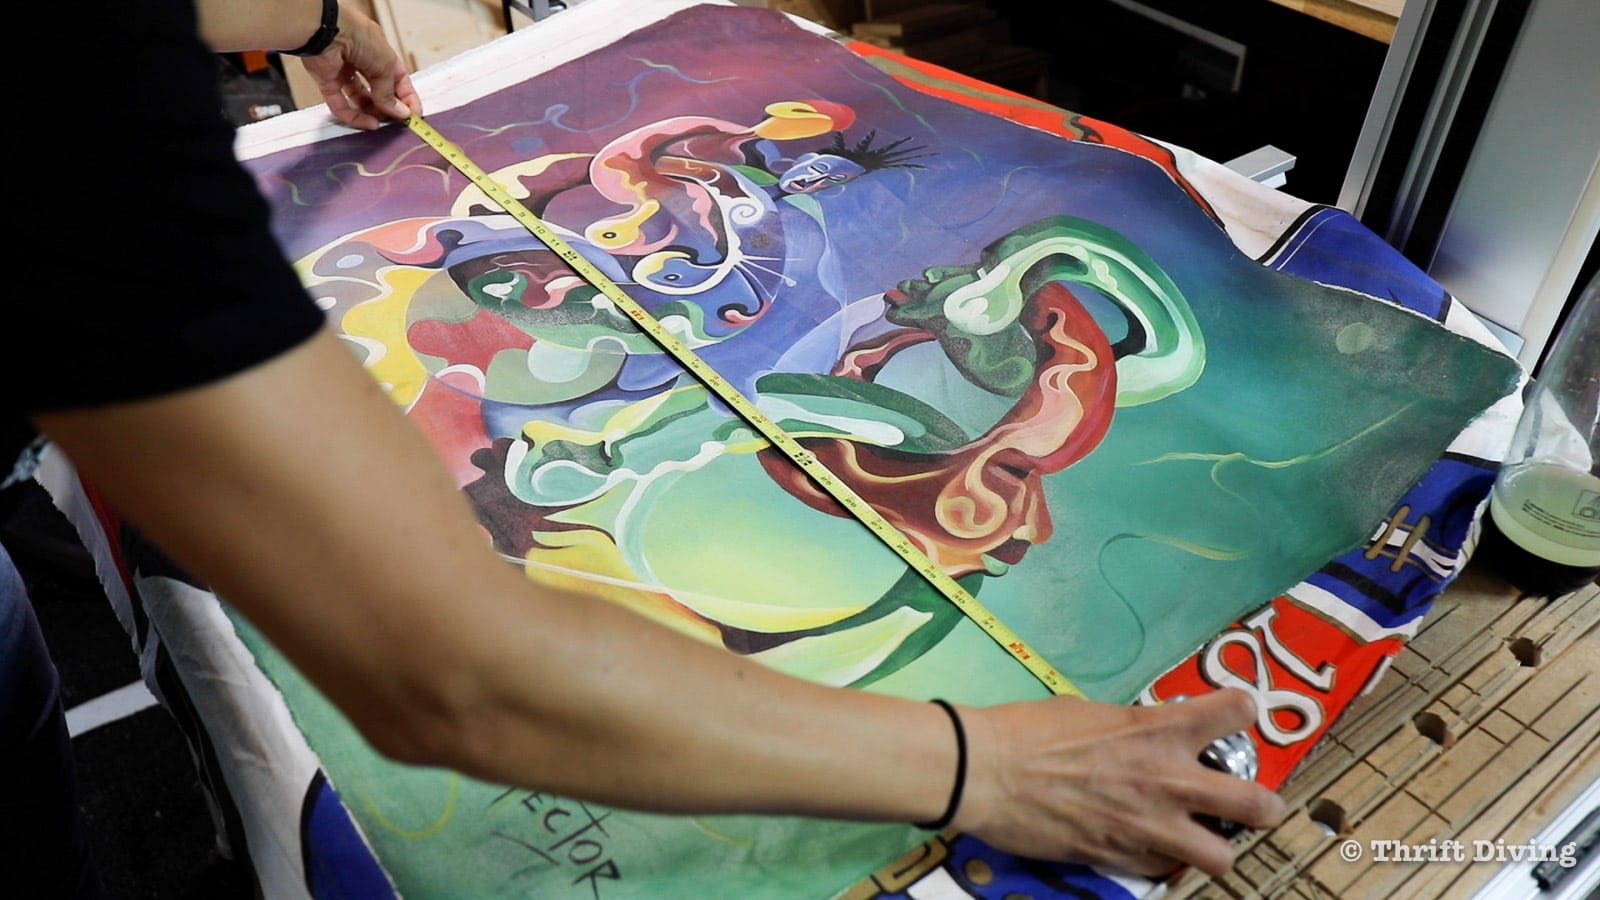
Here’s how I made the DIY frame for the painting:
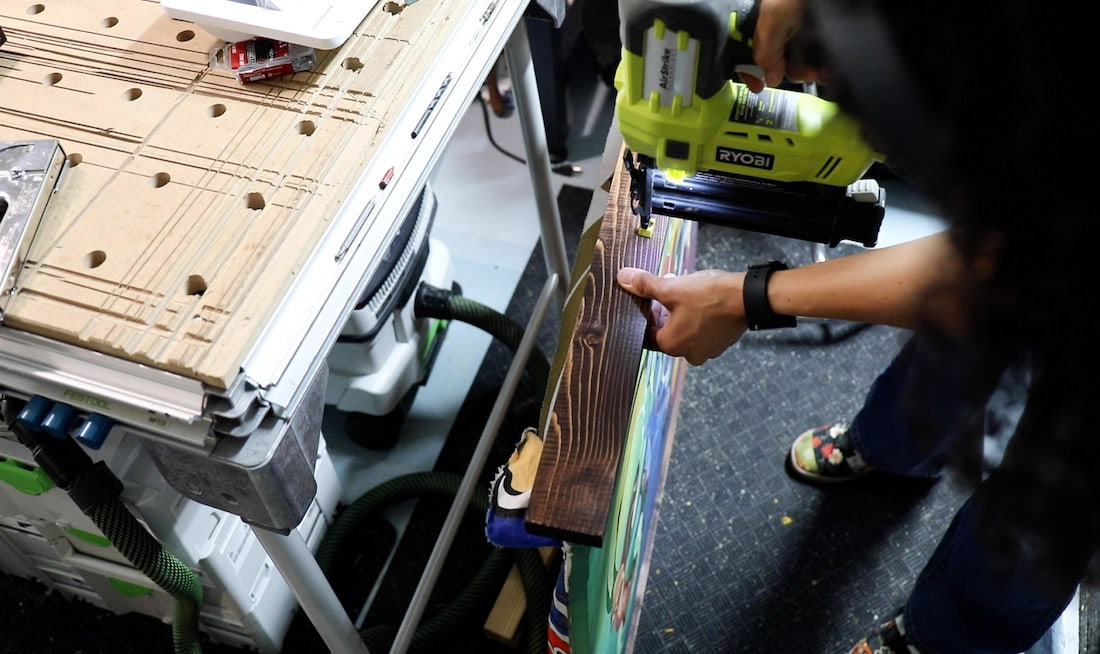
- Cut some 1″x3″ boards a little smaller than the size of the artwork and, then created a rectangular frame. To do this, I used my Festool Domino to join them, but you can easily use a Kreg Pocket Hole jig, which is more affordable and is easy to use.
- Next, I secured the piece of art to the frame by stapling the center of the artwork to the center of the frame.
- Staple the other side of the artwork to the frame, pulling as tight as possible at the middle.
- Pull tightly to the corners and secure, working out as many wrinkles as possible, stapling at the corners. (This is generally how upholstery is done, too: start in the middle and work your way to the corners).
- Keep pulling and stapling, until the piece of art was attached.
- Next, cut pieces of 1″x3″ pine to create a frame around the stapled artwork.
- Apply two coats of stain, letting them dry in between coats, then add 1 coat of topcoat after second stain is dry.
- Leave about 1/4″ overhang around the painting and use a brad nailer to secure the pieces of stained wood around the artwork, framing out the painting.
You can see this DIY framed painting in the YouTube video that goes with this blog post on my YouTube channel.
While it wasn’t perfect, it was a pretty good DIY option for some artwork that hadn’t seen the light of day in 10 years!
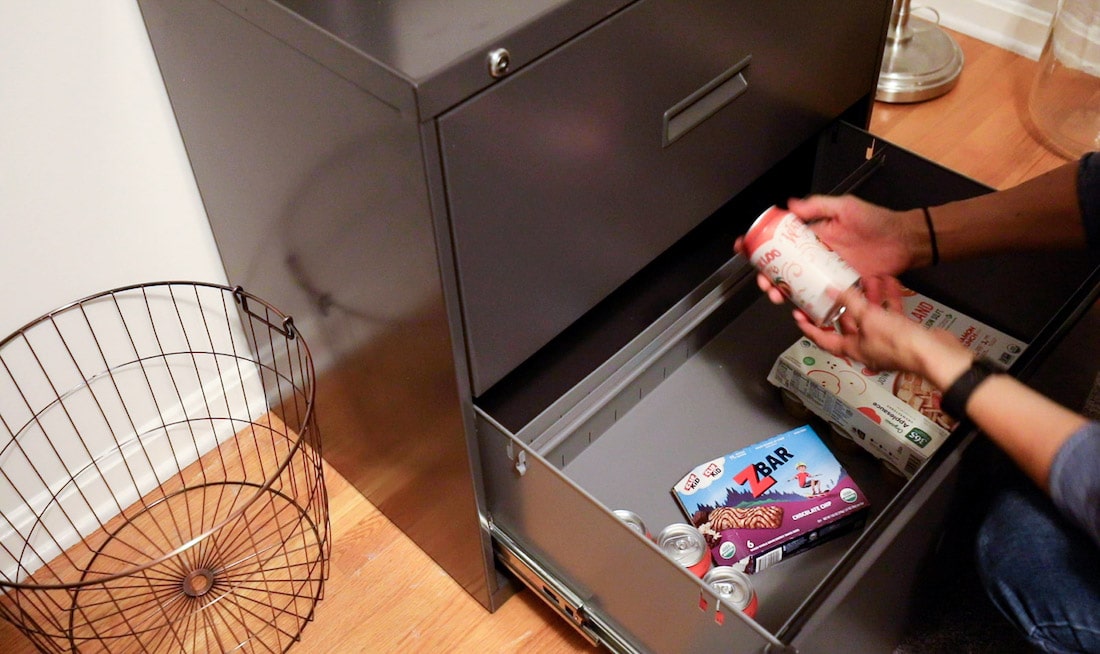
The $25 File Cabinet Steal!
Which leads me to my next amazing part of this office makeover!
The $25 HON file cabinet!!!
I love me a good thrift store steal! It’s like whatever your little heart desires at the thrift store, the “thrifted universe” conspires to deliver it to your favorite thrift store. At least, that’s how it always is for me!
You see, I have been on the hunt for a good file cabinet for hubby’s office. It’s not that he’s got lots of files, but rather, we have three Greedy Gus.
Our three boys will us out of house and home if we let them. I don’t buy too many junky snacks, but if it’s a snack that they love, they will house the entire package. As a result, we often have to hide away some of the snacks and dole them out ourselves. I wanted a cabinet that could lock, that has lots of space. Buying one brand new (even from IKEA) would have been a good $200, and I wasn’t willing to pay that amount of money.
So of course, on the day I hit the thrift store, what do I see but the perfect condition HON file cabinet!
It just needed a good wipe-down!
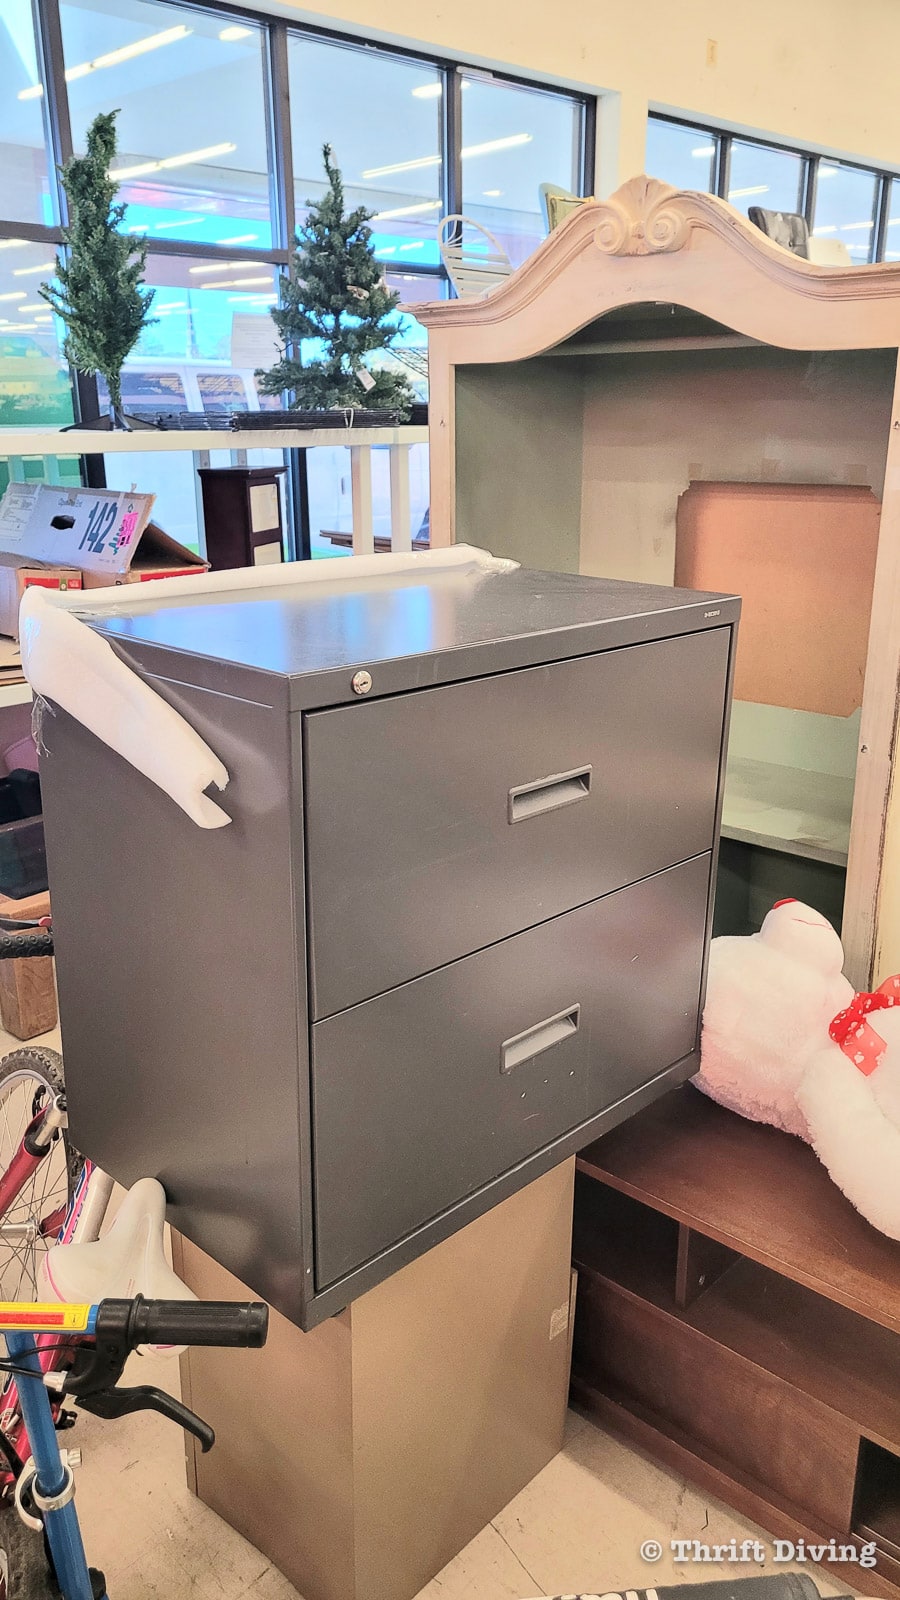
It didn’t have a key, but that’s okay, because I learned that if you look on the lock, all HON cabinets have a replacement key lock code written on the lock. I went to Amazon and ordered a replacement key, and it works! Now we can hide all the snacks and “good” cereals that the kids would crush if given the opportunity. LOL
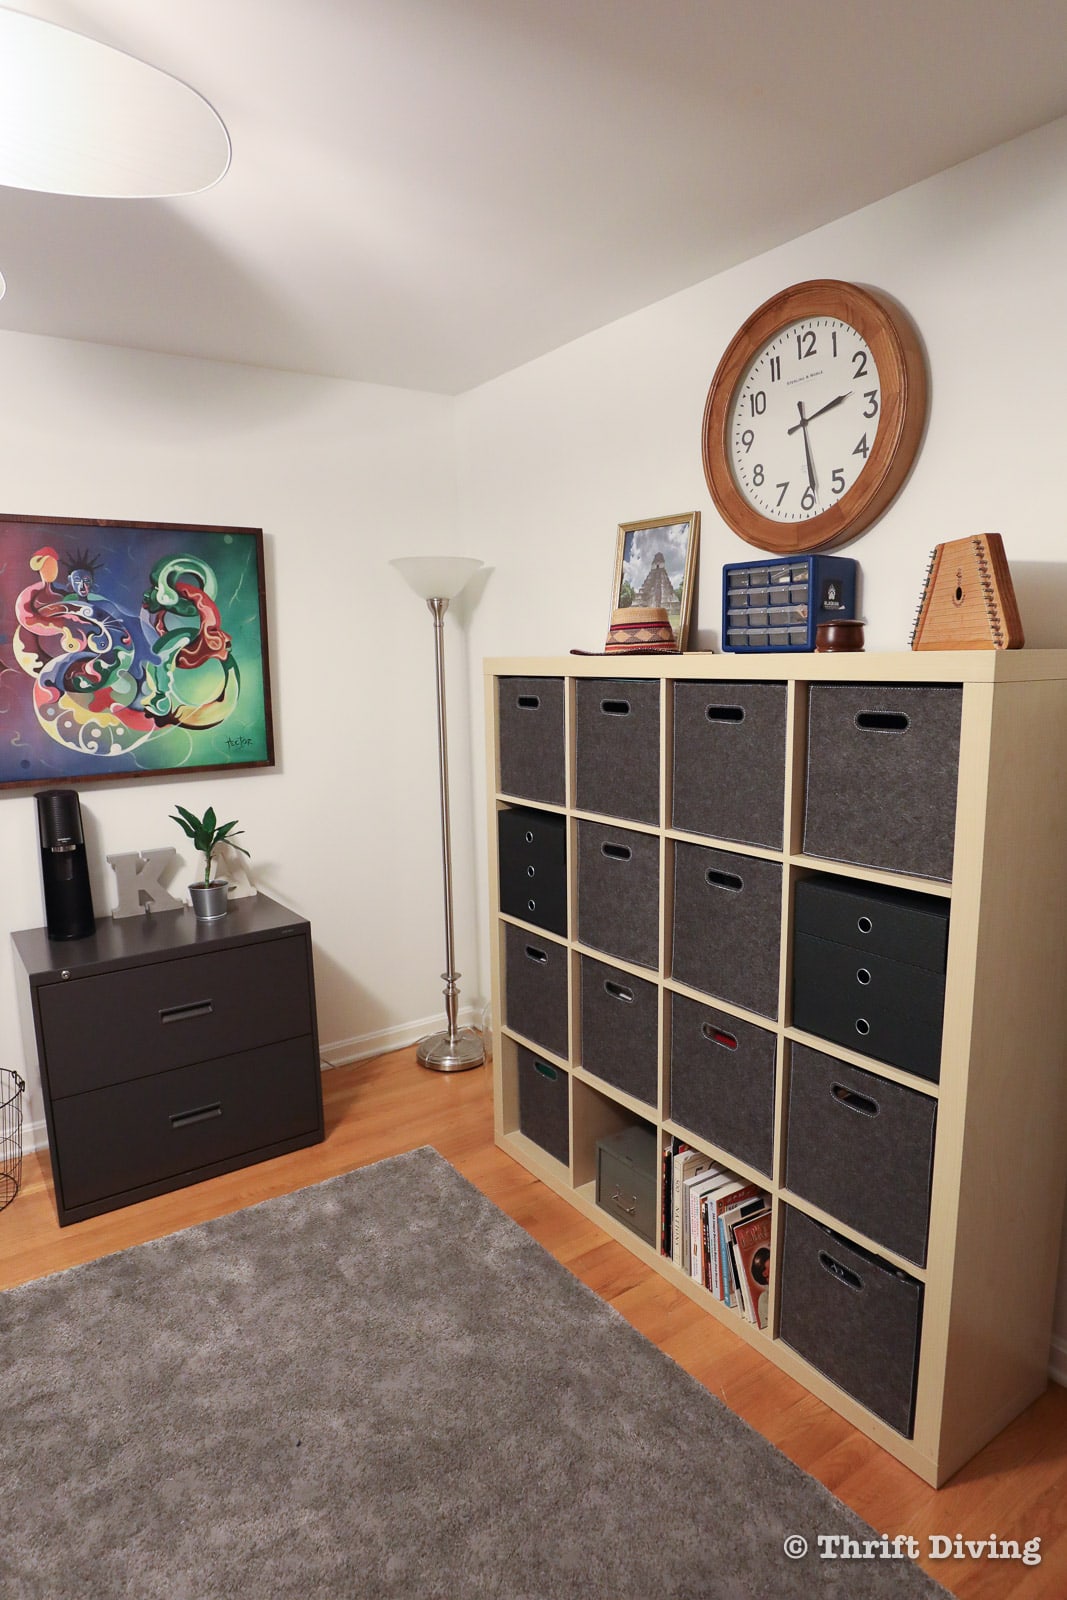
Organizing the Shelving Unit
The worst part of my husband’s office was the old IKEA shelving unit that I bought from an old coworker about 10 years ago. It was full of my husband’s doodads and there was no way to make this area neat and tidy by simply cleaning it up. Plus, he didn’t want me to even touch anything in this area, because he “knew where everything was.”
Everything needed to be hidden behind organizers!
I went to IKEA to look for some that would perfectly fit and found these gray felt ones, and the cardboard drawers, to hold all of his stuff. They were about $10 each for the felt ones, which was expensive, considering I bought 12!
The giant clock was a $10 Goodwill find!
BEFORE
AFTER!
I made a few other changes to the room, too:
- Bought a neutral rug from IKEA: $179
- Made some artwork with my Cricut machine.
- Changed the curtains, which I already had on hand. The old ones were dirty.
- Added spray painted knobs to the closet doors (the knobs had been missing).
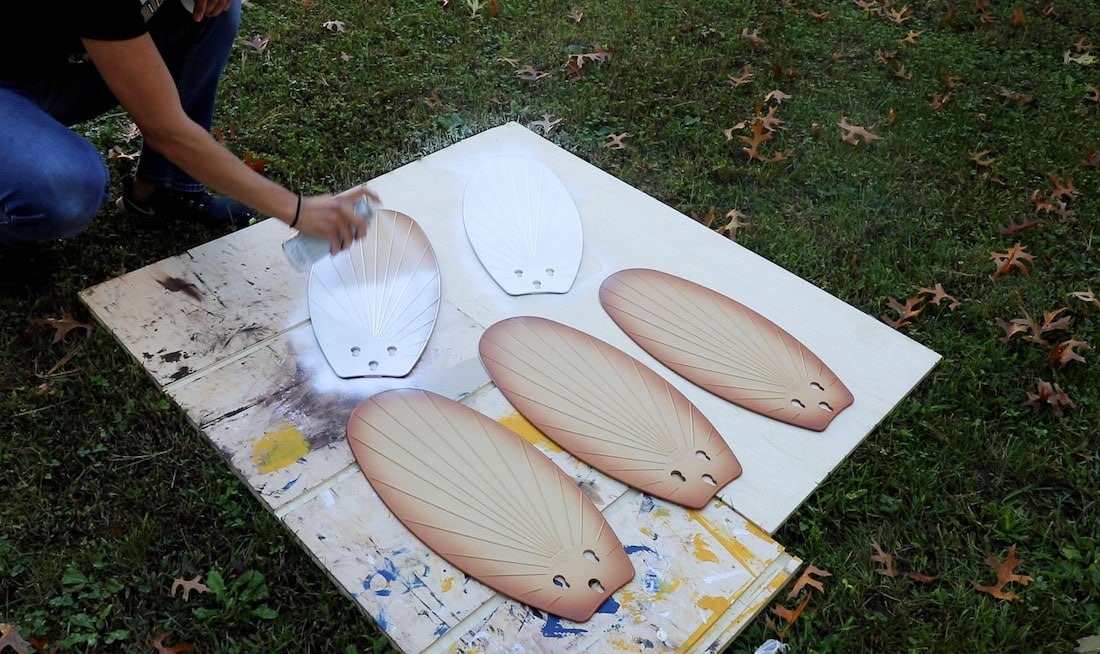
- Painted the ceiling fan blades a bright white.
A Fresh New Office with Personality!
What I love best about this office makeover is that I was able to infuse my husband’s personality into the room. I realized that that is what’s key when doing a room makeover for someone else: the makeover can’t be all about you.
It has to be about the person who’s using the room.
From the deep blue accent wall (his favorite color)…..to the colorful paintings from Ghana…..to the silhouette of his home country of Ghana……to the affirmation that he used to tell himself that I turned into wall art…… to the plants that I know he would treasure because he loves nature….
All of these things are personal to him.
It still feels like his office. His room.
Which is why I think, in the end, he was able to embrace the room instead of continuing to feel like his space was being “violated.” (Not his word–my word, LOL).
Do you love this office makeover? Click here to save it on Pinterest!
![]()

I absolutely love how easy it was to paint the walls using the Wagner Smart Sidekick Roller, and I’m thankful to them for sponsoring this project! To learn more about this tool and many more, go to Wagner Spray Tech for more info.
And be sure to subscribe to my blog so you don’t miss the next project!

Download the 5 freebies!

Thrift Diving inspires women to decorate, improve, and maintain their home themselves...using paint, power tools, and thrift stores! Use these 5 printables, checklists, and ebooks to get started!


Love the makeover, especially the accent wall and art work. After seeing your organization of that IKEA cabinet, I regret passing one up on FB Marketplace. I am going to find myself one.
Good luck on finding one! Ikea is really a great product for inexpensive decor! 🙂 Thanks for commenting, Saja!
Quite a refreshing! Truly a beautiful and organized space! I would think it improves productivity! Best of all you expressed your love to your husband by creating his own “special space” suited to his needs and style. What an inviting place to work in:)
Thank you, Cindy! I have taken over nearly the entire house! LOL. So it makes me happy that he has a clean, organized space of his own. 🙂 So glad you like it!
Thank you for keeping your blog so raw and real. Most blogs these days are perfect, Pinterest worthy homes that is unattainable for many. Your home is beautiful and inspires me to work on mine because I had given up when I realized my house will never look like those Pinterest homes. Your home is beautiful and refreshing, thank you so much for respiring me!
Awww, Bianca, I soooo feel your sentiment! That is one reason why I despise going to Pinterest because on Pinterest, everything is perfect, and that is an adjective I can not achieve! I feel like the homes on Pinterest are all beautiful, bright, sparkling places freshly designed, and that’s just not me. I can make something ugly look pretty, but it isn’t magazine-cover worthy! It’s “real-life-feels-pretty-good!” worthy! Thank you for allowing my projects to inspire you in a way that feel achievable!
Oh Serena! I love everything about this room. The art is gorgeous! I’m so glad you pulled it out and made a frame, and the fact that it’s YOUR frame makes it even more special. Nicely done. I love that blue accent wall contrasting with the white drapes and trim. One of my favorite things about your makeovers is the combination of old and new, found and made, and the way you share new and useful products as well.
As for the sit/stand desk, we invested in a used one for my husband after months of him working from home. They’re amazing. He uses it both ways which is really helpful on his back. I’m sure your husband will love his new space and wonder why he waited so long. Change is hard for a lot of people. I encounter that quite a bit with organizing clients. Breakthroughs are wonderful.
Hi Alys!! I love your feedback, thank you! I always love your thoughtfulness, which makes me see what I do in a different way. 🙂 You’re so right–a room makeover (in my opinion) is best when you bring in some new things (and “new” can be thrifted!) with things you already own, and things that can be made. It’s what makes the room makeover fun and creative. It makes me enjoy the process even more, instead of just running around looking for things that go together. No fun in that part! (I find it stressful at times, LOL).
Glad to hear your husband likes his sit/stand desk! I think the versatility is something that, once you’ve got it, you never want to resort to just sitting all day. Thank you, my friend!
Wow! This looks amazing. I love how it all came together… the art, the blue wall, the cool clock, the shelving inserts… etc!
Great job! And anything to make painting easier and safer, great point.
Thanks for the inspiration!
Thank you so much, Hannah!! I agree on the “easier and safer”! I have painted my hallway over the stairs with a traditional roller with an extension pole and oh my….talk about frightening!