My Pretty Custom Welcome Mat Makeover With Spray Paint
I don’t know if I should be embarrassed or amused that our new custom welcome mat belonged to the previous owners.
We never threw out their old worn-out rubber welcome mat when we moved in.
Who does that??
Apparently us.
It’s not my fault. The welcome mat was dirty, but it was still in solid condition. And you know how we do here at Thrift Diving: we don’t throw out perfectly dirty items…..now, do we?? 😉
Everything gets a new life.
Even my dirty ‘ole front door DIY welcome mat could use a good makeover!
(UPDATED: Keep reading to find out if this custom welcome mat held up over time!)
Watch My Custom Welcome Mat Makeover!
You can also subscibe to my YouTube channel so you don’t miss the next project!
BEFORE

AFTER!

The problem is that, aside from painting our front doors a punch of color last year, I’ve ignored the outside of my house. I can barely get through transforming the inside of my house, much less the outside. But I could at least make a painted custom welcome mat for the front door! 🙂
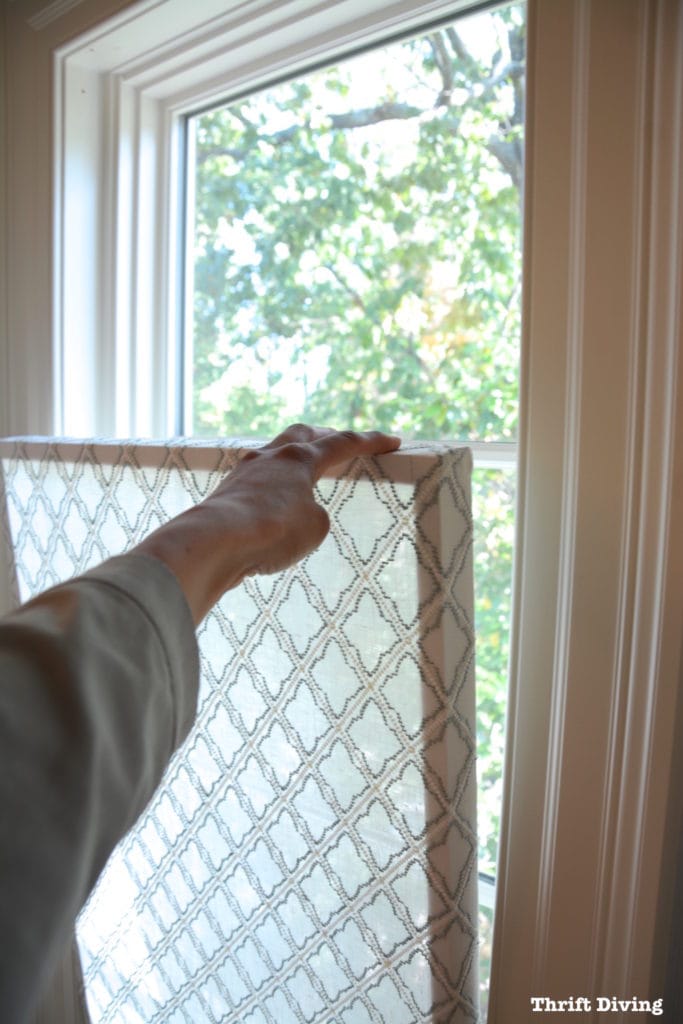
This is pretty much how my front walkway looked. It needed a good pressure washin’, needs some crack repaired, and you see those curtains at the windows?? Yep, they were also left over from the previous owners from years ago. EEK! I know….don’t judge.

See, this is how inspiration works for me–ideas just come out of the blue.
I got the idea to paint this mat while sitting on the stoop with my son. I looked down at the dingy mat and thought, “Why haven’t I done something with this rubber welcome mat in all these years?? I should totally paint it.”
The swirly pattern–how could I have missed that prettiness before? And how cool would it be to paint the letters “WELCOME”?
BEFORE

AFTER!


STEP 1: Go Grab These Materials to Make a Custom Welcome Mat
Here are the supplies you need to paint a welcome mat:
(I participant in the Amazon Services LLC Associates Program, an affiliate advertising program designed to provide a means for me to earn fees by linking to Amazon.com and affiliated sites).
- Rust-oleum Ocean Mist spray paint
- Rust-oleum Coral spray paint
- Primer
- Small foam brushes
- Old bowls
- Respirator or face mask
- Water hose or pressure washer for cleaning the rubber welcome mat
These paint colors were too gorgeous to pass up!
I knew they’d be perfect for the custom welcome mat and allow me to easily layer the colors. I just hoped they wouldn’t clash with my red door.
Related: How to Pick Awesome Color Combos

Protect Your Lungs From Spray Paint
Get yourselves one of these babies: a real face mask! If all you have are the small paper ones, that will work, too. Your neighbors might think you’re fighting some outbreak in your garage or yard, but hey–as long as you’re not wearing a hazmat suit, you’re all good. You won’t scare them too much. 😉 These things block the nasty smell of spray paint, and are awesome for any sanding or stripping you might do.

Okay, so back to materials.
I also made sure I picked up a primer. I really wasn’t too sure how it was going to stick to the rubber welcome mat since I’ve never painted rubber anything before. I am hoping the primer works well to keep the spray paint adhere.

STEP 2: Clean the Grime Off the Old Rubber Welcome Mat
I tried to clean off as much dirt as I could. We’re talkin’ years worth of dirt, my friends!


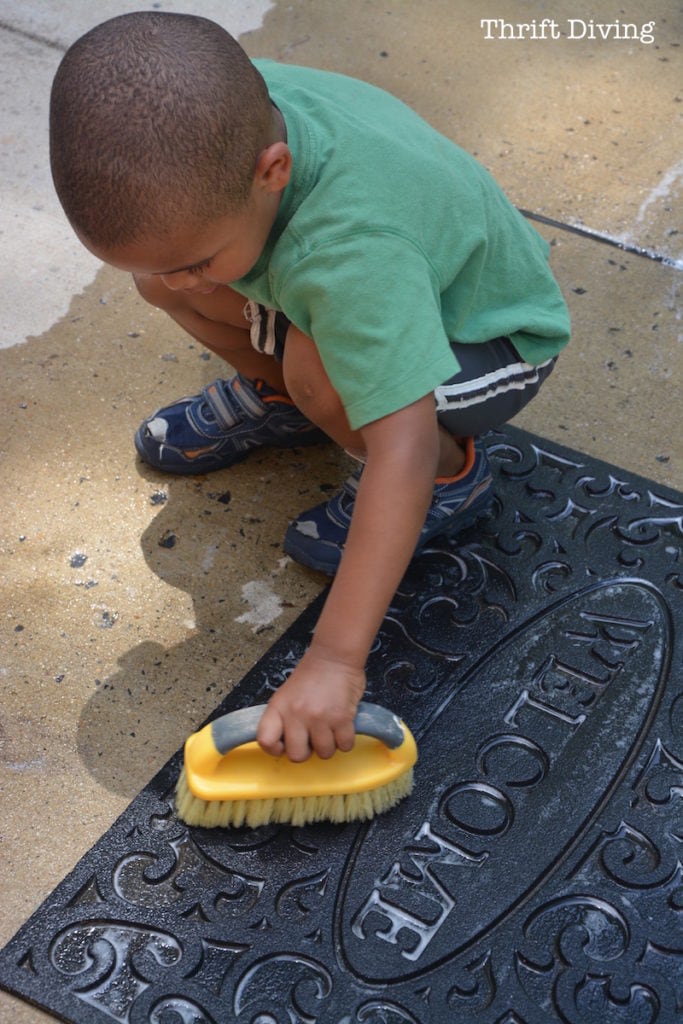
If you have a pressure washer, you’ve got to thoroughly clean off the rubber welcome mat before getting started with painting it. With dirt, the paint won’t stick!

Let a little boy get his hands on a hose, and it’s pure joy:


STEP 3: Prime the Rubber Welcome Mat
Okay, so while Kojo wasted water (haha), I laid the mat down on some old boards to spray paint, first with the primer.
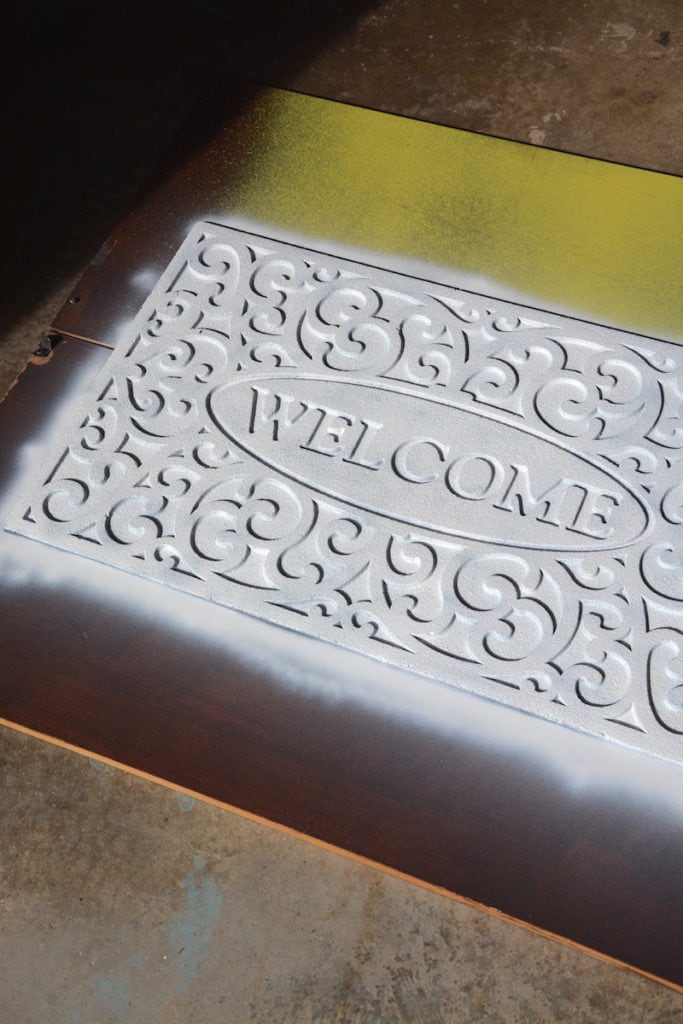
STEP 4: Add a Coat of Ocean Mist Spray Paint
Once it dried, I added a layer of Ocean Mist. I figured it would be easier to start with that so that I could saturate the valleys of the mat with the turquoise.
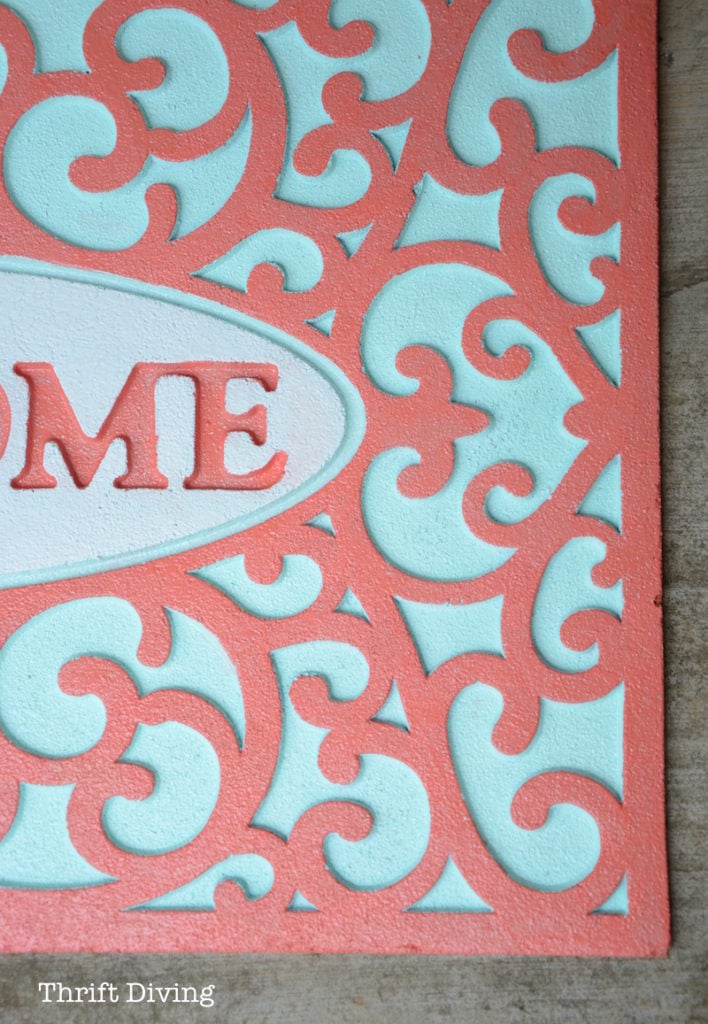
Then I sprayed some of the Coral into an old bowl, to collect the paint, and used the craft sponge and a paint brush on the swirly parts. I used mineral spirits to clean up the brush, but threw out the sponge, since it got all ratty-tatty.


Because of the uneven-ness of the rubber welcome mat, getting nice, clean lines was nearly impossible. But again, we don’t expect perfection here, do we? 😉

I lined the inside of the letters with the Cora, and painted the oblong shape in a bright white. I love the way it looks!! It looks so fresh!
Hubby thinks I’m crazy for taking on a project like this. He may have said I was “wasting my time.” LOL. Men just doesn’t get it, do they?? Having a personalized custom welcome mat like this, knowing that I did it–how awesome is that?? I bet no one else in the world has one exactly like mine! 🙂

I didn’t spray this with a clear sealant. I honestly wasn’t sure if this will “work” or not, or if it will get all gunky and chippy after people start stepping on it. Only time would tell!

BEFORE
Let’s have another look at that old, ugly rubber welcome mat that was left by my old sellers years ago!

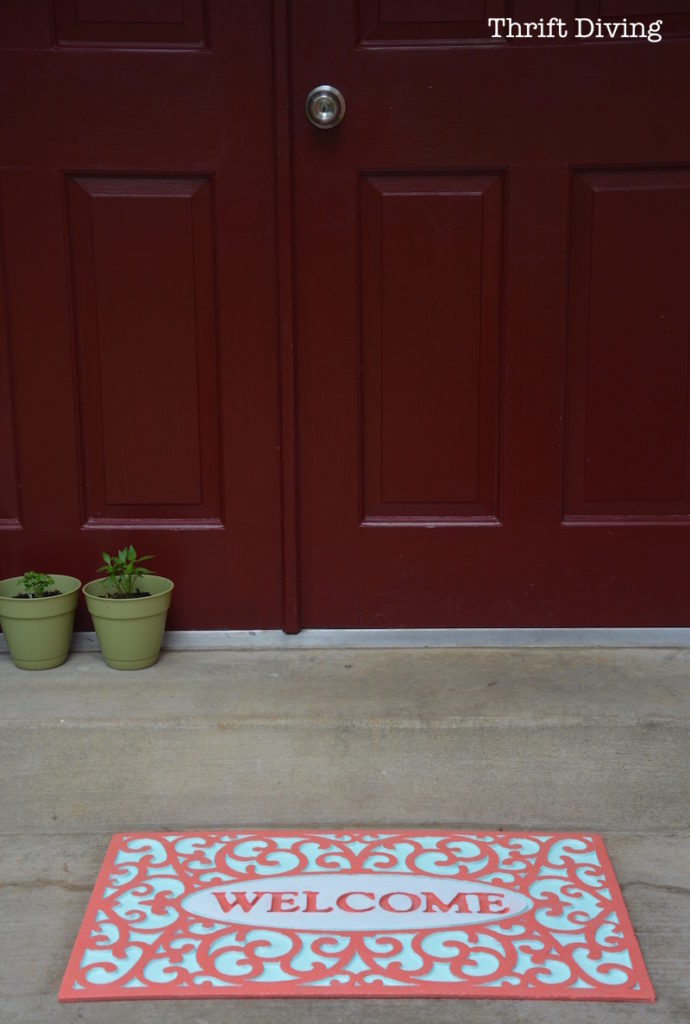
AFTER!
The custom welcome mat makes the entryway look so pretty!
Did the Painted Custom Welcome Mat Last??
I’m updating this blog post a couple years later with this fun video on my YouTube channel to find out….did the painted custom welcome mat last?
Watch the video: 7 DIY Projects THEN and NOW…Did They Last??
A Couple Other Outdoor Projects
Before you go, you might want to check out a few other outdoor projects:


So what do you think?! Have you ever thought about making DIY custom welcome mat with paint?

Download the 5 freebies!

Thrift Diving inspires women to decorate, improve, and maintain their home themselves...using paint, power tools, and thrift stores! Use these 5 printables, checklists, and ebooks to get started!
you do such a nice job on your projects! I’m gonna go do something inspiring myself!
Such a great idea! I’ve wanted to redo our door mats for a long time and this is such a pretty way to do it. Visiting from Style Showcase.
One question: did you apply sealant, and if so, what brand? Thanks. I am heading to Home Depot today ????
I was looking at my fun, previously brightly colored doormat I got on sale a few years ago and realized that we are wearing away the colors in one spot where we walk the most. I had the idea to repaint it but I’m not sure what to use to help it last. Thanks for your tutorial! How long ago did you paint yours and how well is it holding up?
that is an awesome little project! Just the right size project, not an all-week long and then some. Ah. I’m 63 years old and still can’t believe how much energy you have, even for a 25-year-old! It is adorable.
I can just hear your husband say “you’re wasting your time,” because that’s just what mine would say…LOL, but I LOVE your mat! It probably needs to be bigger though, for the scale of your front doors, but it looks like you have it on the back now. I know that b/c I started with the other post where you are talking about the patio makeover.
So my morning started by googleing a new fade resistant door mats. Nada. Well at least none I was willing to spring for, $68 for an outdoor mat for our crapping quacker to poop on, ummm no. So then I just decided to spray paint the one I had and it looked better but coverage was awful. Next I googled “painted door mat” because I knew SOMEONE had to have tried it before, and who do I find but you and your mat in all it’s painted glory. Next time I’ll just head right here to Serena and find out WWSD?
love the update on the mat!! I’m rescuing one that was on my mom’s front porch — going to paint as well but I’m going to hang on the outside to welcome people — It’s too pretty to step on 🙂
That’s a great idea, Vickie! We have to save the pretty stuff! LOL 🙂 Thanks for commenting!!
I was looking for a way to spruce up my old outdoor mats. I think I will try the spray paint but just wondering how yours is holding up so far?
Hey, Bri! I ended up putting it at my back door when I recently made over my patio! We don’t go in and out from that door as much, so I will have to report back once more traction has been going over it! 🙂
Here’s the link to see it at the back door:
https://thriftdiving.com/before-after-a-pretty-patio-makeover/