A Mid-Century Modern Chair Makeover- PART 1
I have a big goal for 2016: to turn my garage into a pretty, functional workshop for myself.
You might think I’m crazy to make such a lofty goal, especially when the “BEFORE” looks like this:
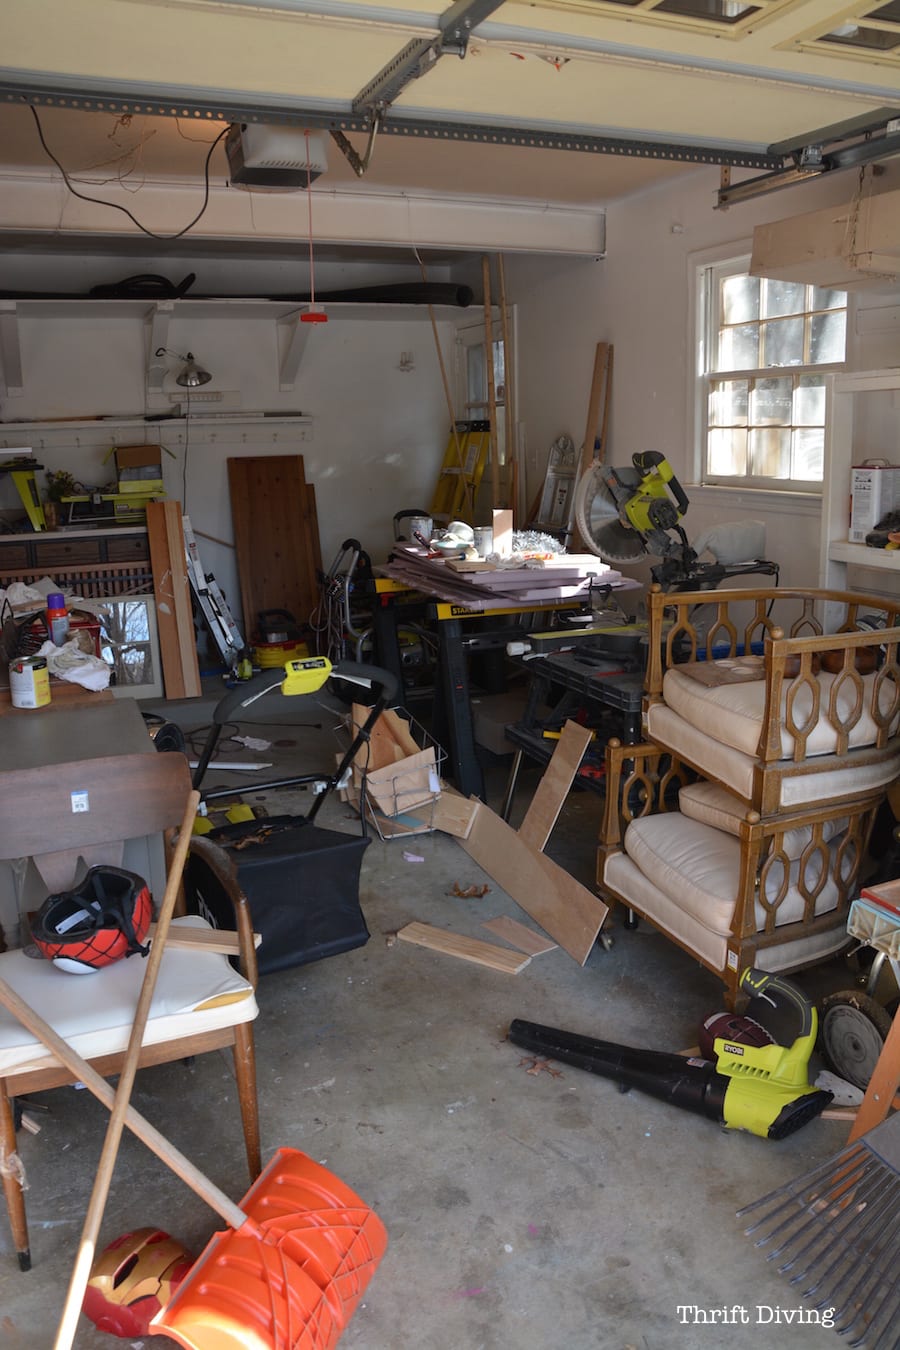
….or hey…..like this (how can one move around in garages like this, anyhow?!):
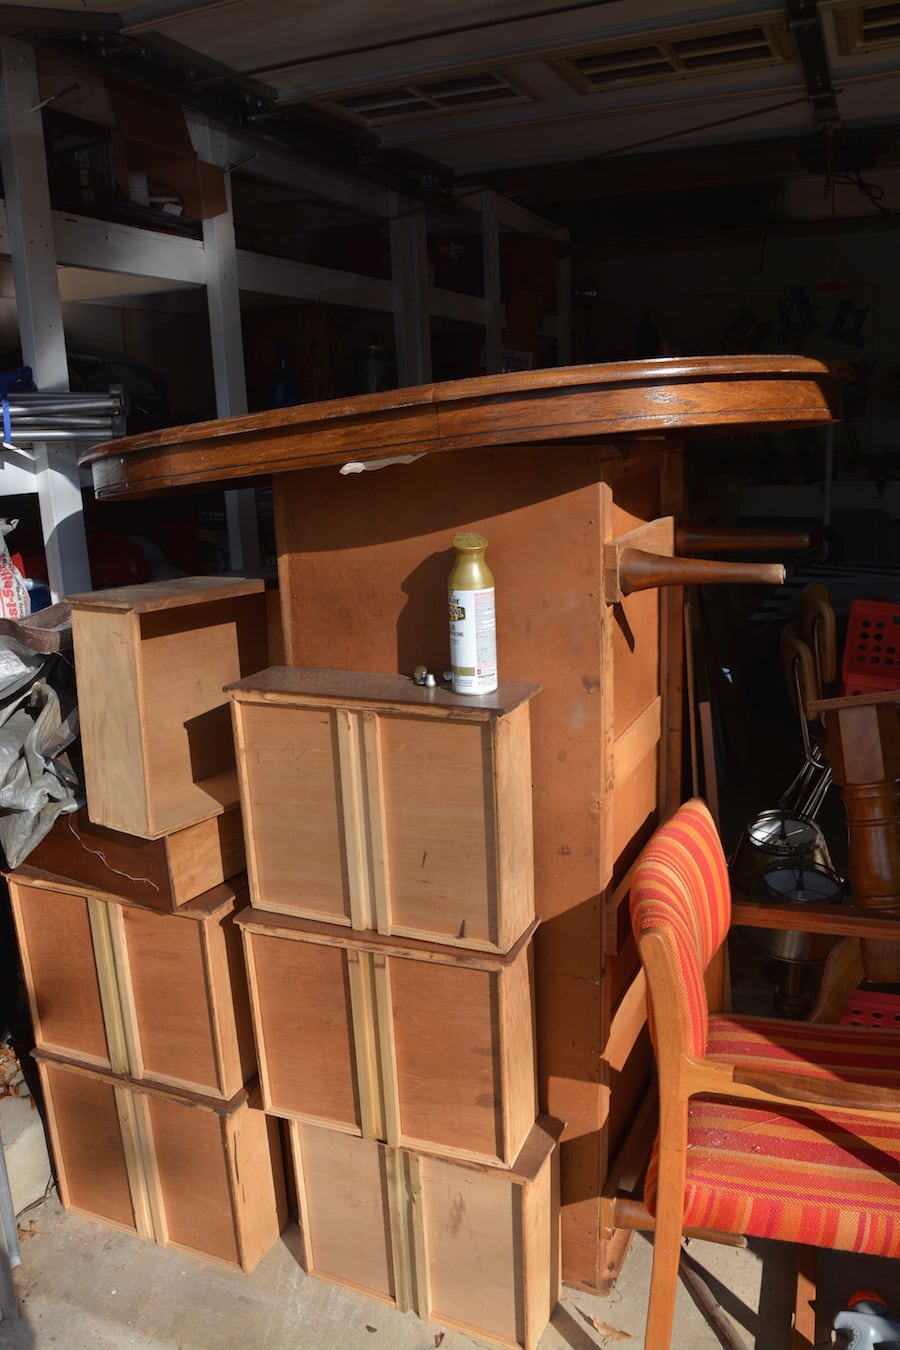
I walked out into the garage the other day and realized that before I can create a pretty garage, I have to get all the stuff out! (insert forehead slap here).
And the only way that is going to happen is to start tackling each furniture project piece by piece, so that I can either decorate my house with it, donate it, or sell it.
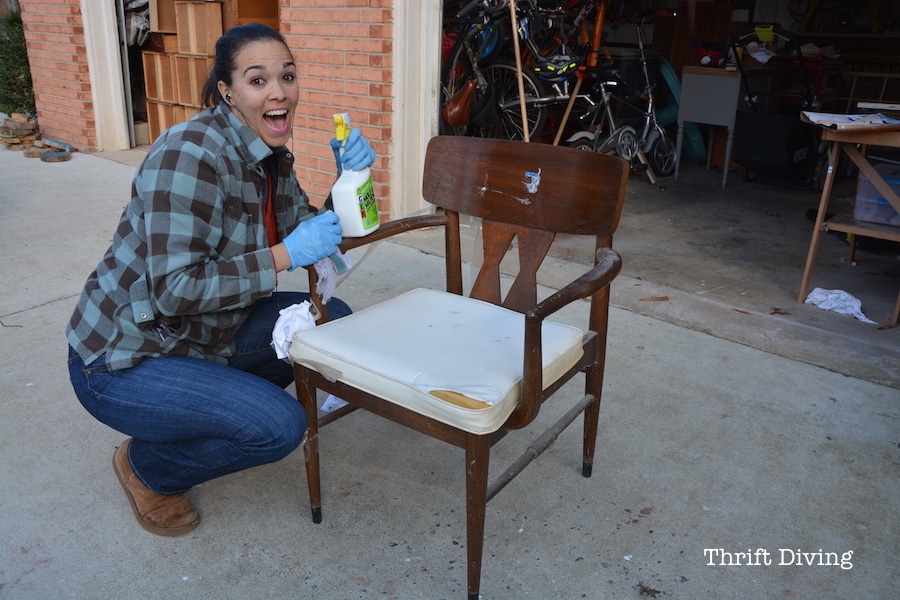
So let me introduce you to my mid-century modern chair.
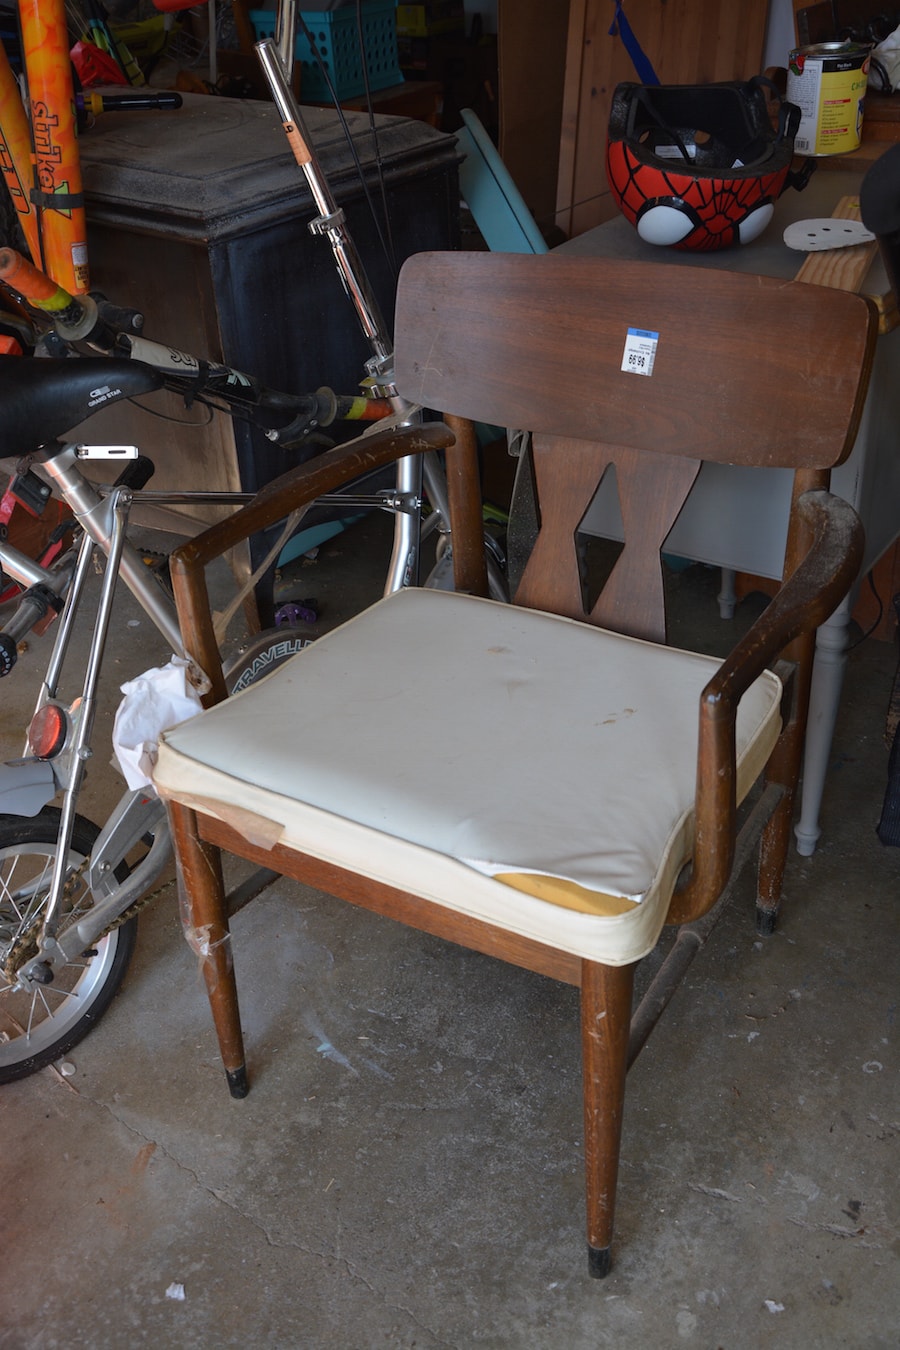
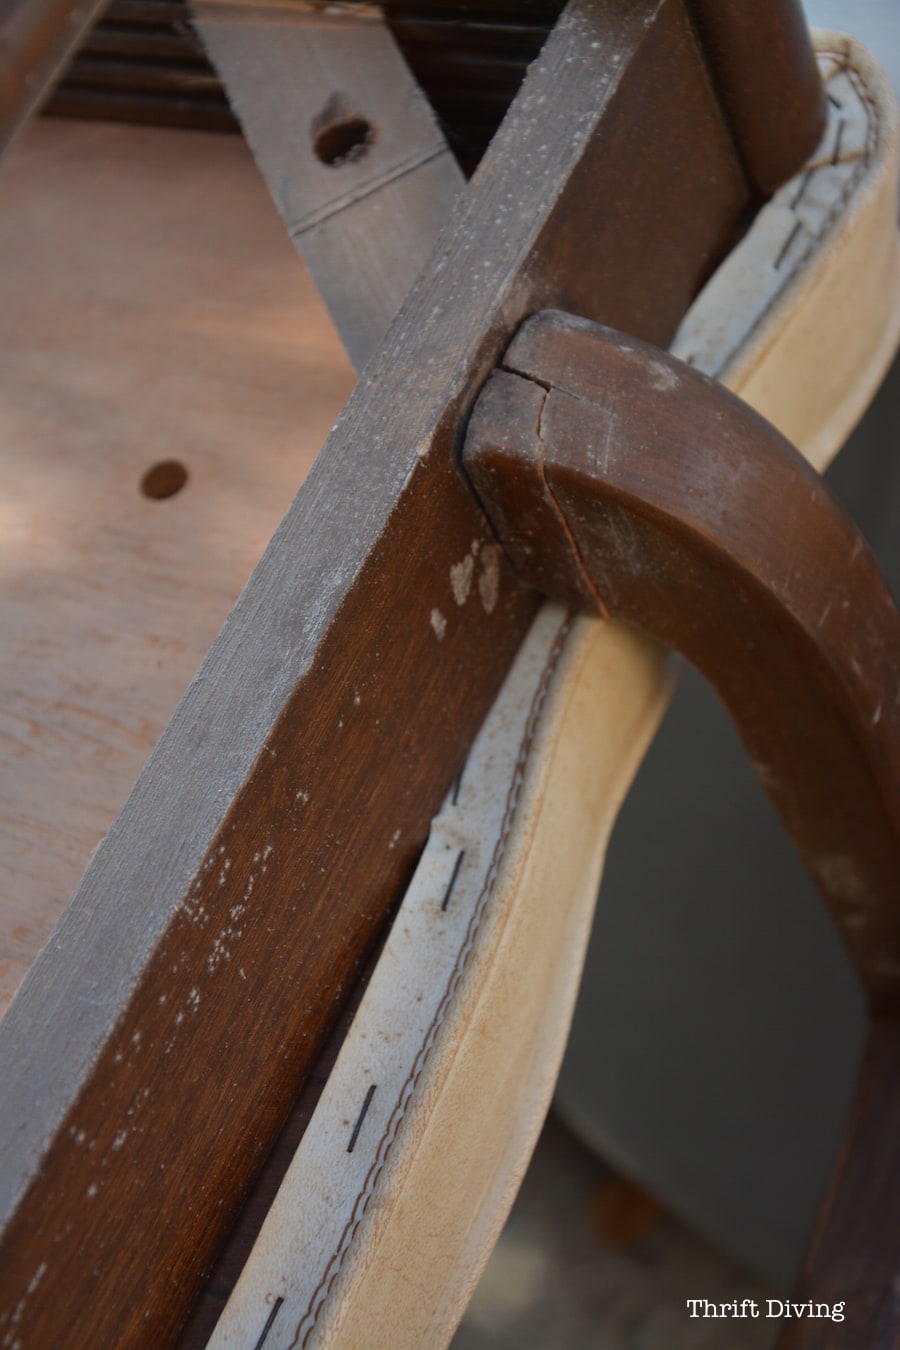
I had found it at Value Village well over a year ago. And even though it was broken/loose in one armrest, for $6.99, how could I pass that up?? So it came home with me.
To Paint or Not to Paint? That is the Question….
I ask myself this question every time I work on a project now. The reason why is because I’m developing a much greater appreciation for beautiful wood.
And let’s face it–not every piece of furniture should be painted.
An awesome mid-century modern piece like this needed to be stripped.
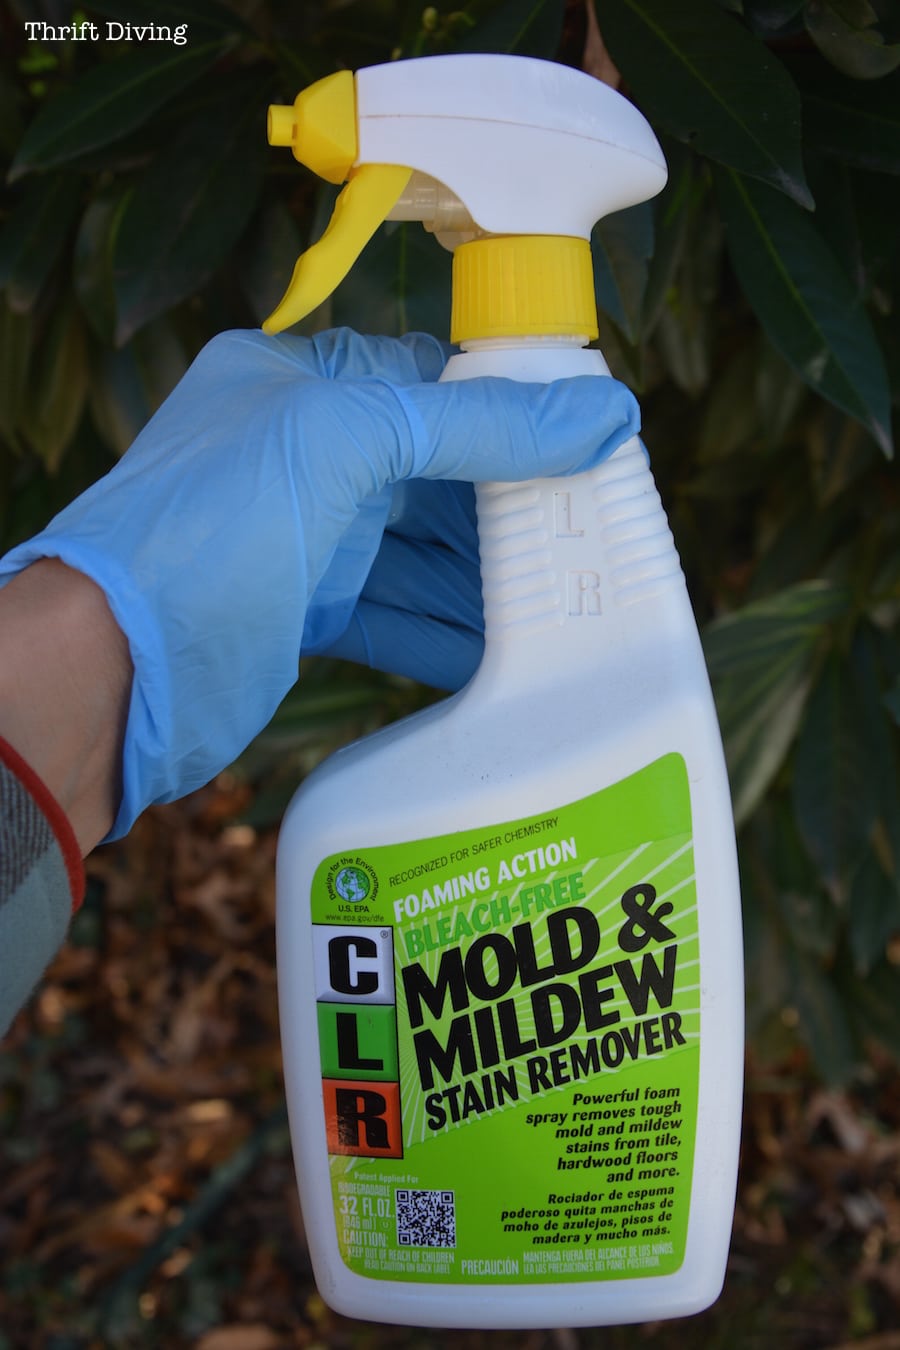
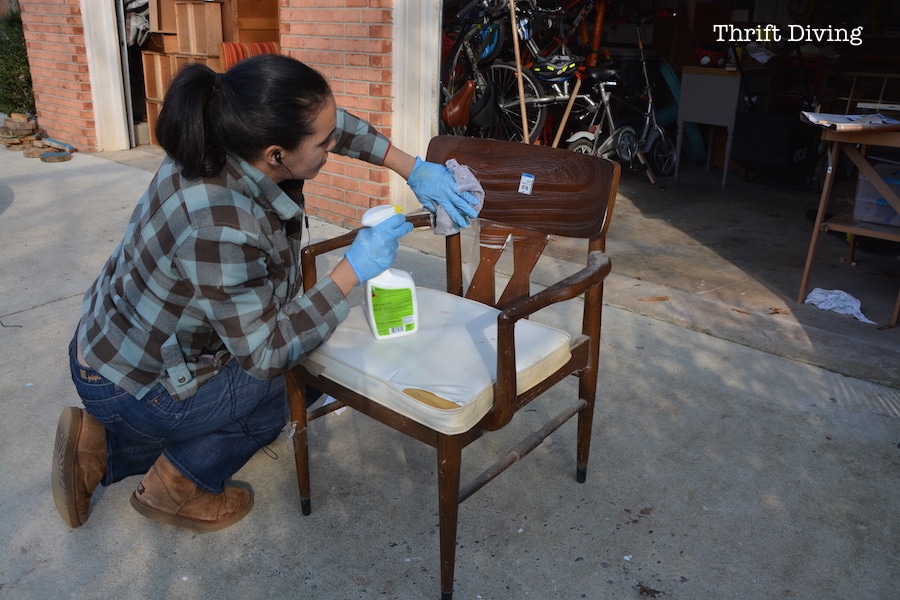
But first, I had to get rid of that nasty “garage gunk”!

I had some mold stuff lying around and decided this would do the job. I tend to leave furniture in the garage for wwaaaaayyyy too long! And it starts to develop ickiness. Does anyone else’s garage do that?? I think I need a dehumidifier for that area!
Sanding is HELL!!
I’m going to just go ahead and admit it–when you’re sanding a piece with a lot of curved edges, it’s hell!!
I used my little handheld sander and just worked over one arm and was like, “Um–no….we not doing this.” What a PITA.
I even pulled out my orbital sander and sanded the back, but it tends to leave swirly marks behind, and I didn’t want swirly marks on this.
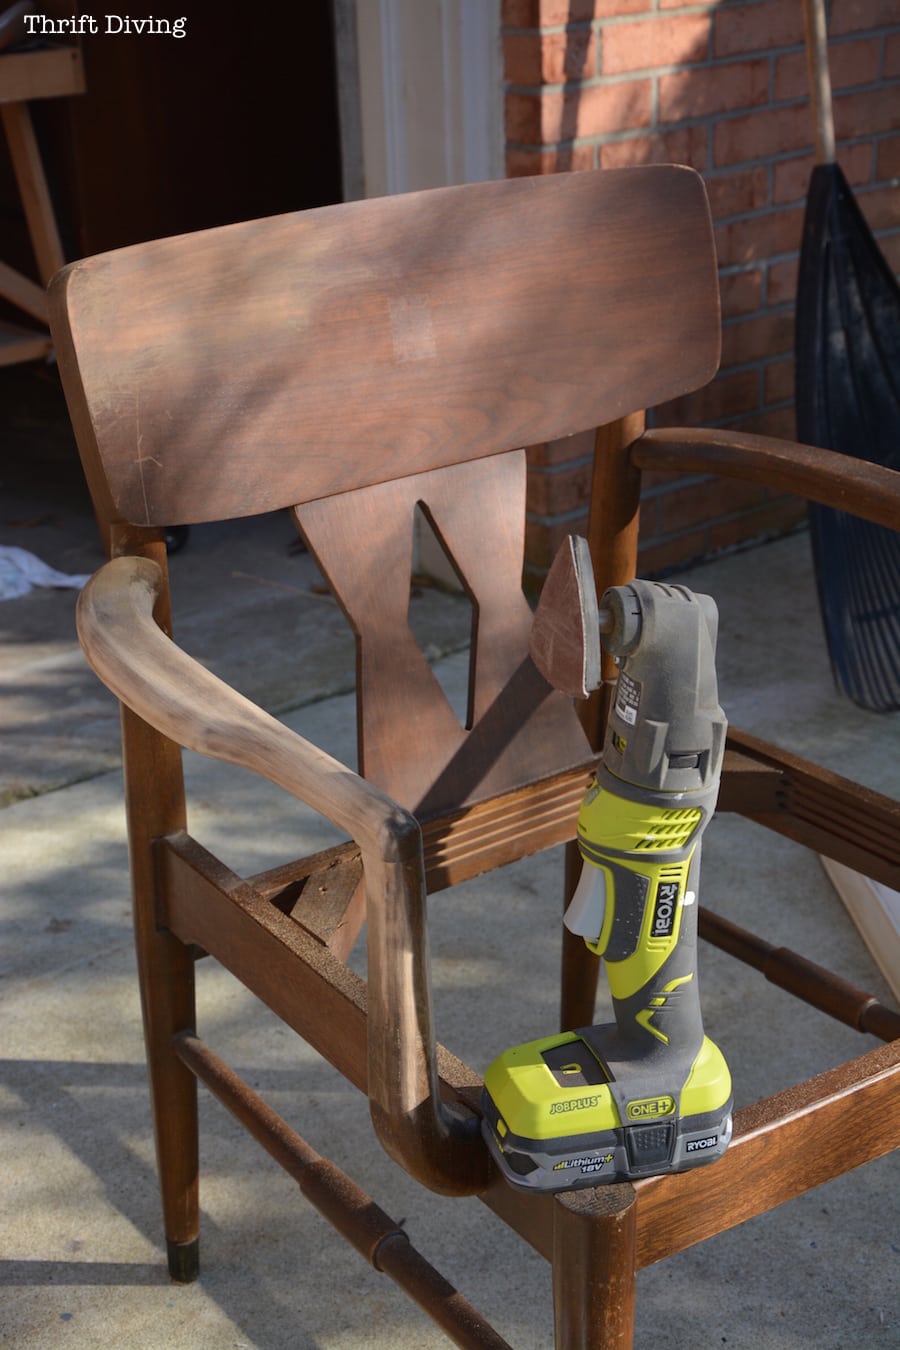
I’d much rather strip it and let the chemicals do the dirty work.
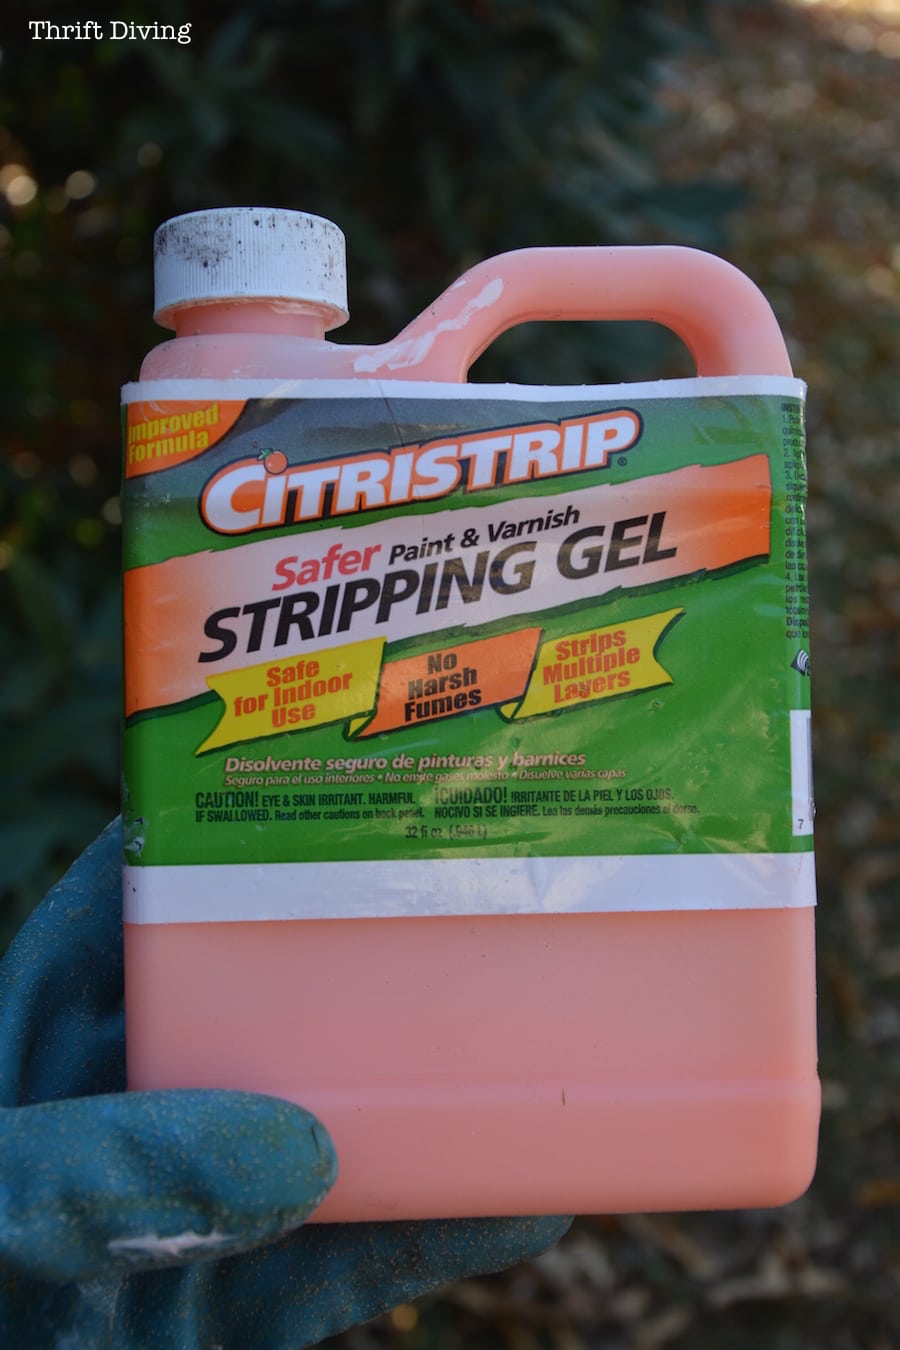
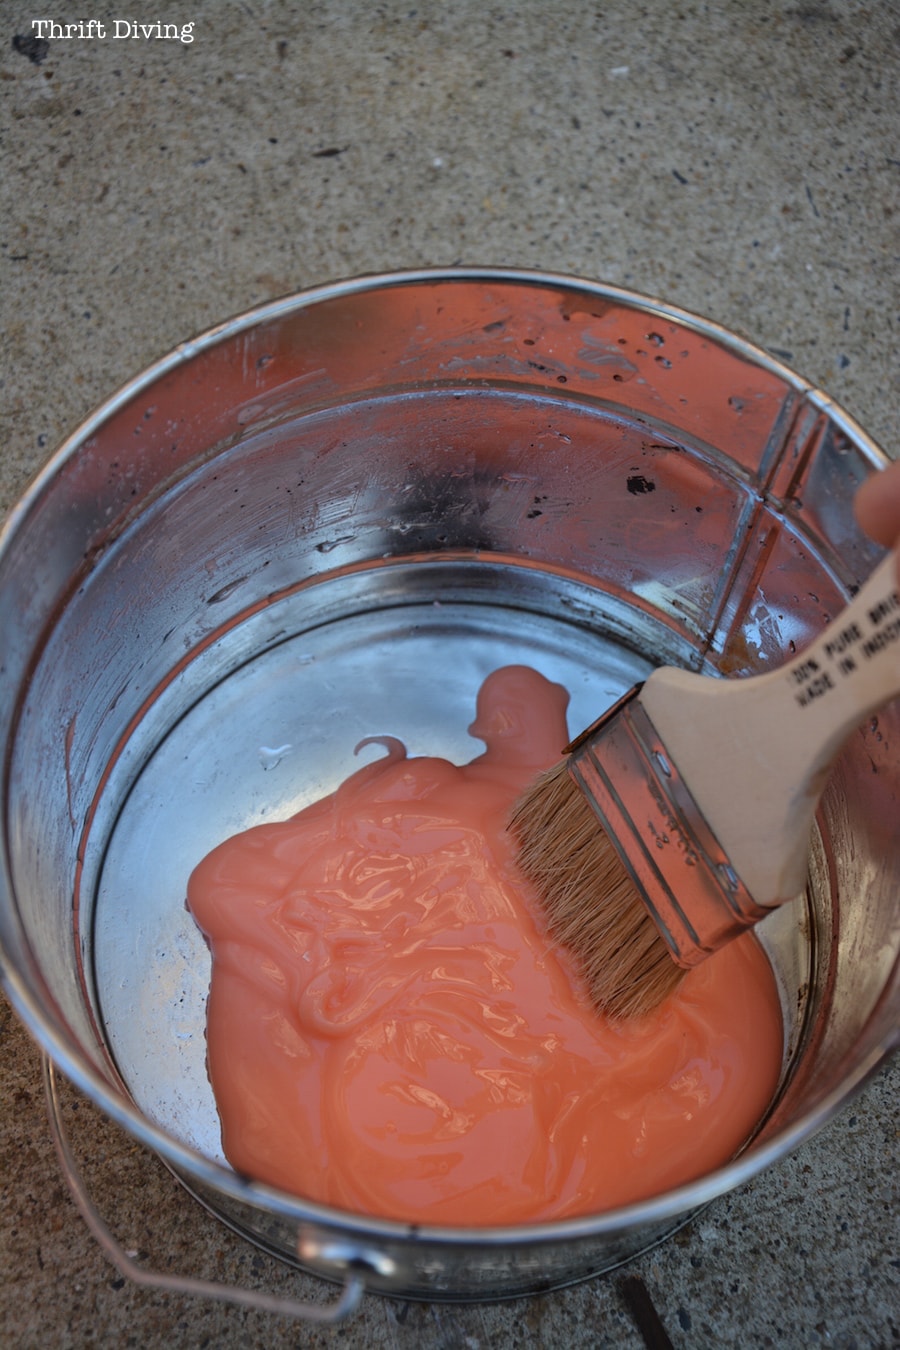
I had used Citristrip before and I love using it because it stays wet/damp for at least 24 hours. So you can start a project and come back to it the next day. How genius is that?!
But you have to make sure you use a metal bucket for it. If you use a regular plastic container, it will eat right through it! Trust me on that. I speak from experience, my friend. LOL
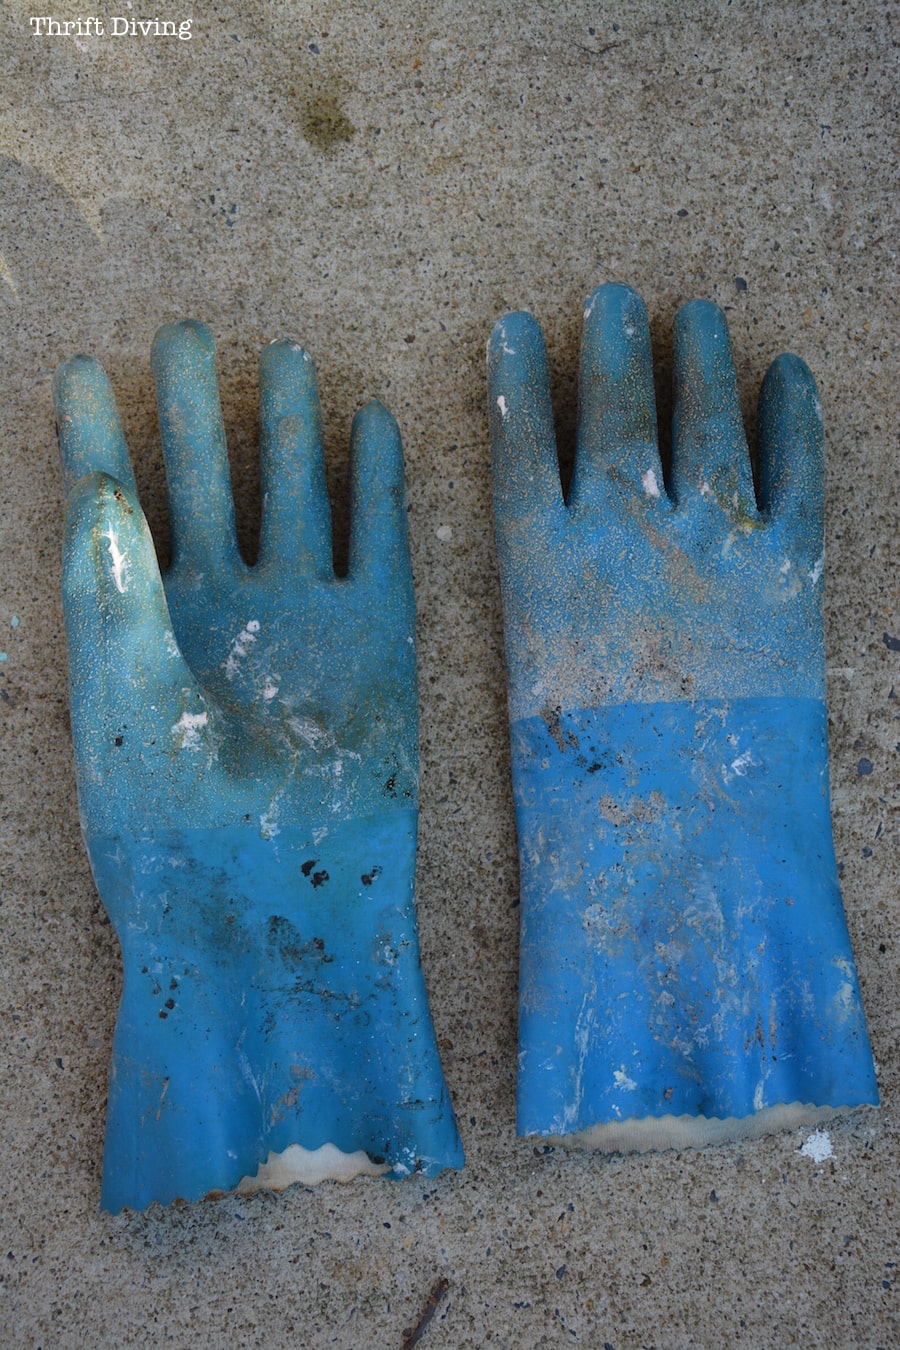
And don’t forget the chemical resistant gloves!!
Mine are all beat up now, but they still work! 🙂 Stripper will eat right through regular gloves and burn your hands, so you gotta stay protected!
And don’t forget the eyewear! Imagine having a fleck of stripper burn the living crap out of your eyeballs! Um, yeah, no thanks. I’ll take the sexy work glasses instead.
I used an old paint brush and just slathered it on and let it work its magic.
That’s the beautiful thing about stripper.
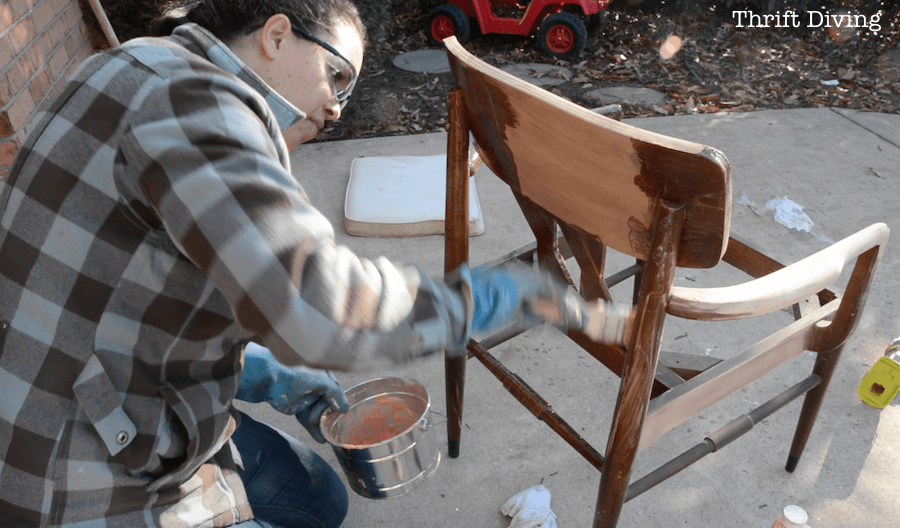
Within minutes, you start seeing the old finish crackle and disintegrate right in front of your eyes!
(But be smarter than me: have something underneath to catch any drips. Since I was outside in the driveway, I just wiped up any small splatters. But it’s smart to have down a painter’s drop cloth underneath, or paper bags, or something).
And while it’s nasty and leaves a huge mess, there’s nothing as satisfying as stripping!!!
Look at that gunk come right off!
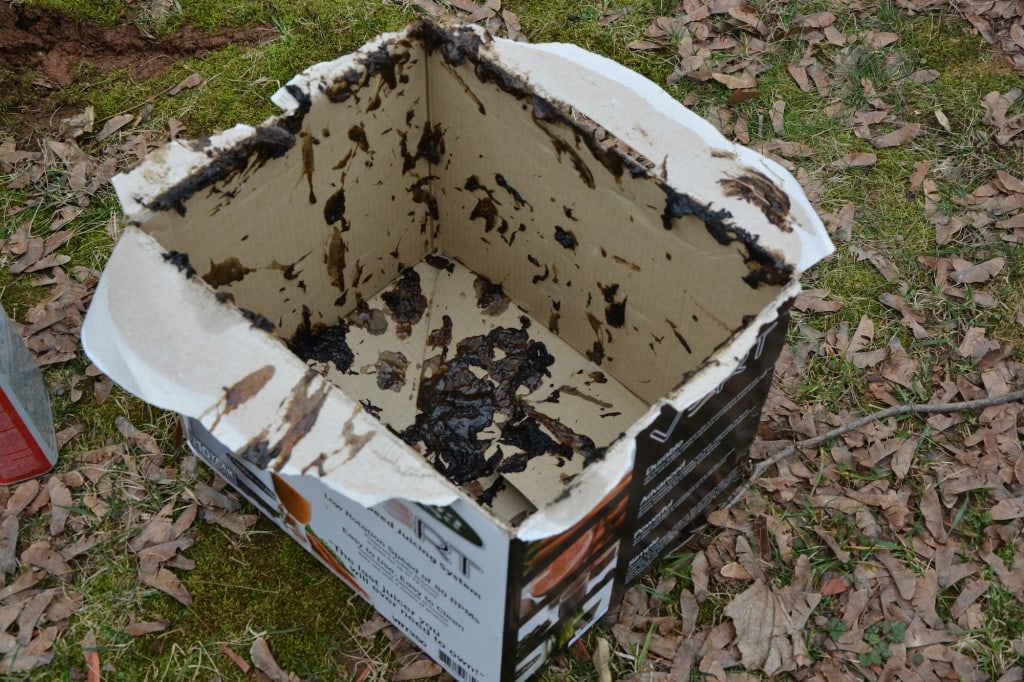
Normally you should use a plastic putty knife (not a metal putty knife, so you don’t gouge your wood) to gently remove the old varnish and stuff, but I didn’t have one around. So I just used an old wood shim.
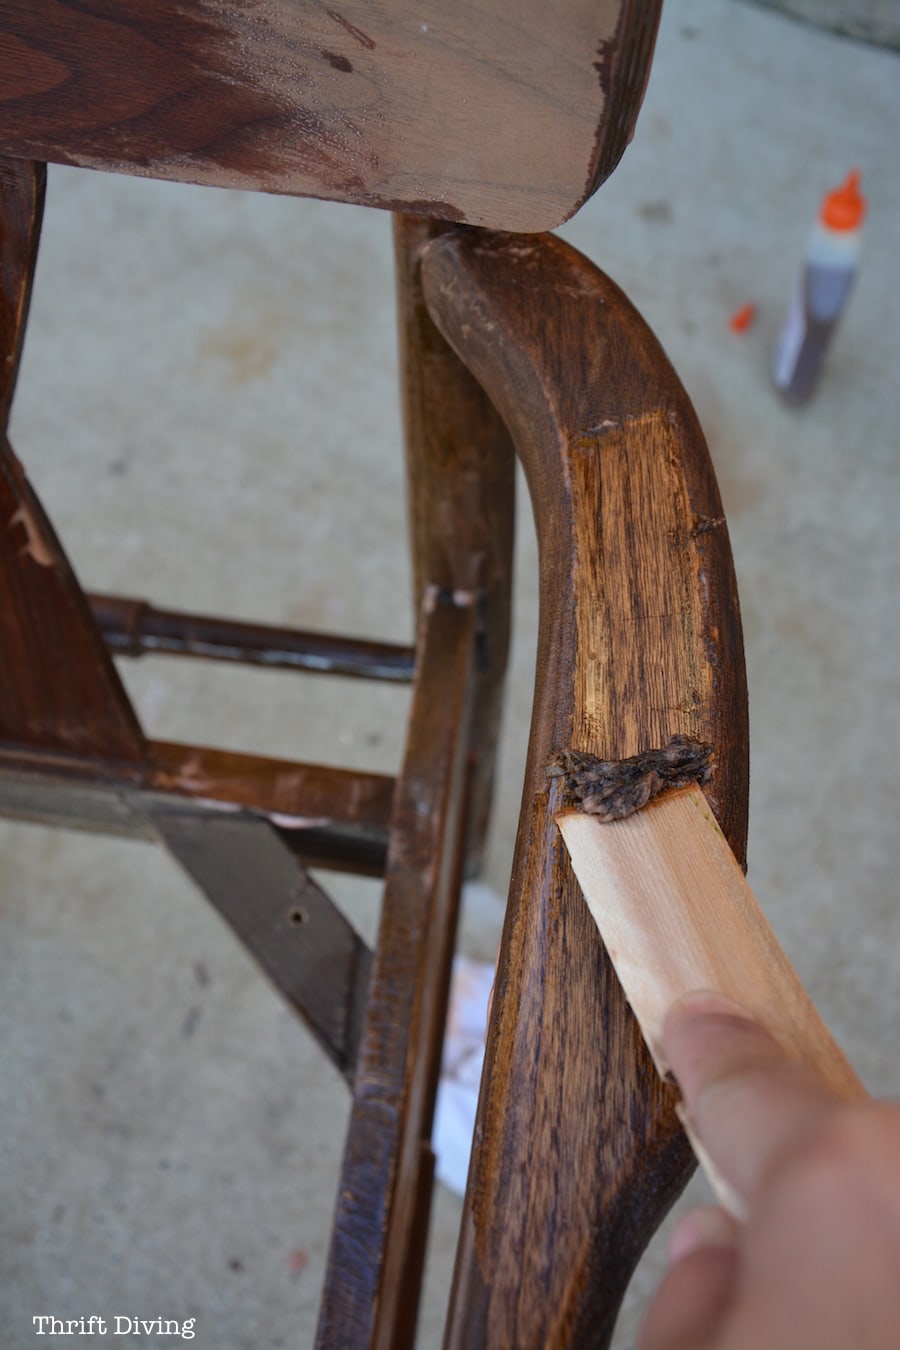
The stuff you scrape off is really gunky. So make sure you’ve got an empty box or an empty milk container to use to clean off your putty knife or wood shim as you’re stripping.
Don’t Forget the Wired Brushes!
Thank God for wired brushes. Seriously. I have stripped furniture using my kids’ old toothbrushes, yo! Sometimes you have to get creative, you know what I mean?
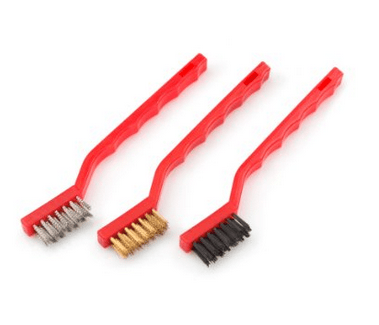
I used wired brushes with some paint thinner on them next to get into the nooks and crannies of the chair.
Next, I wiped it all down with a wet towel and left it to go to the bus stop to pick up my babies.
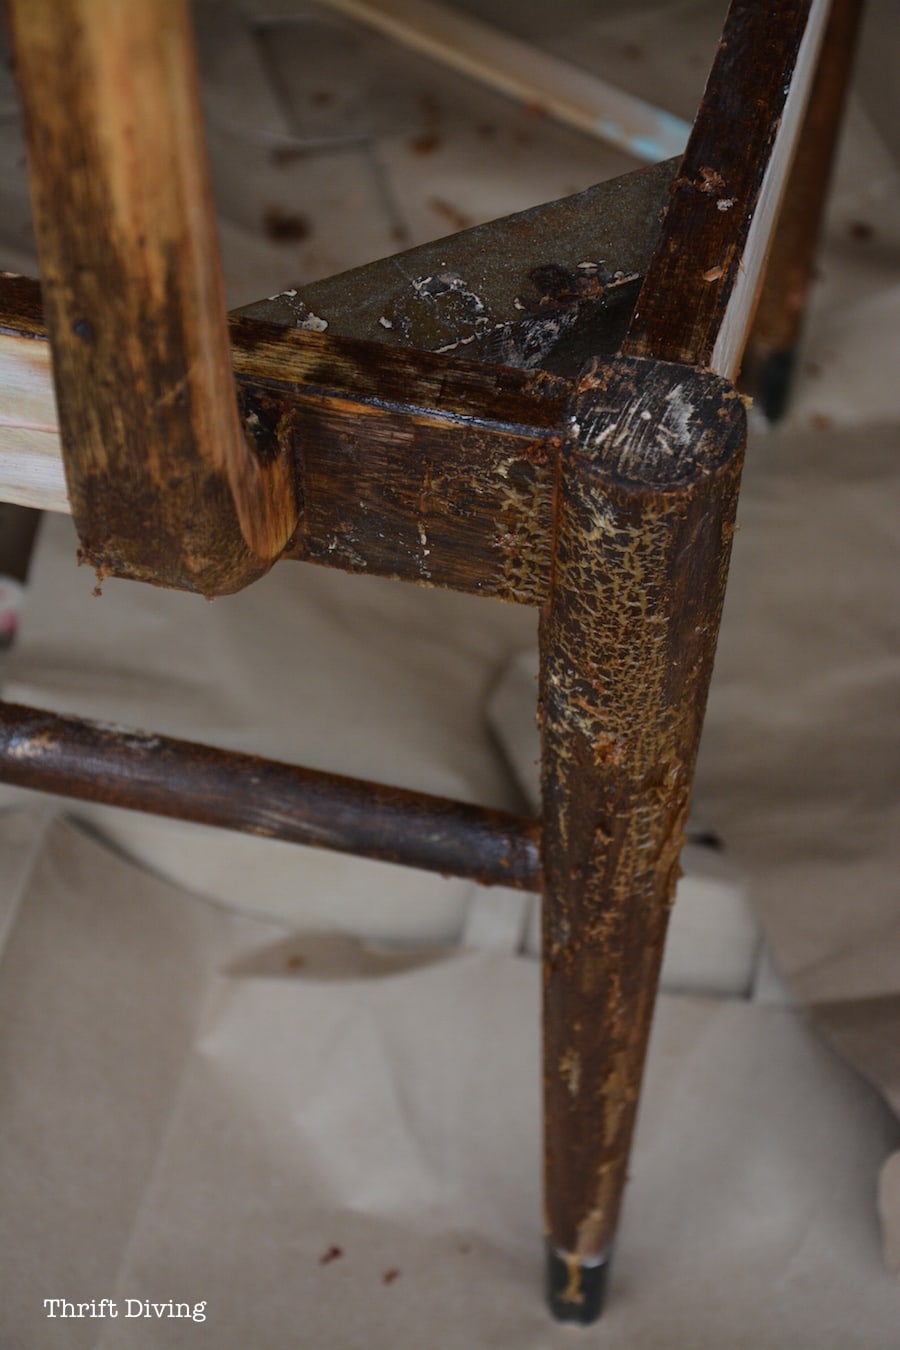
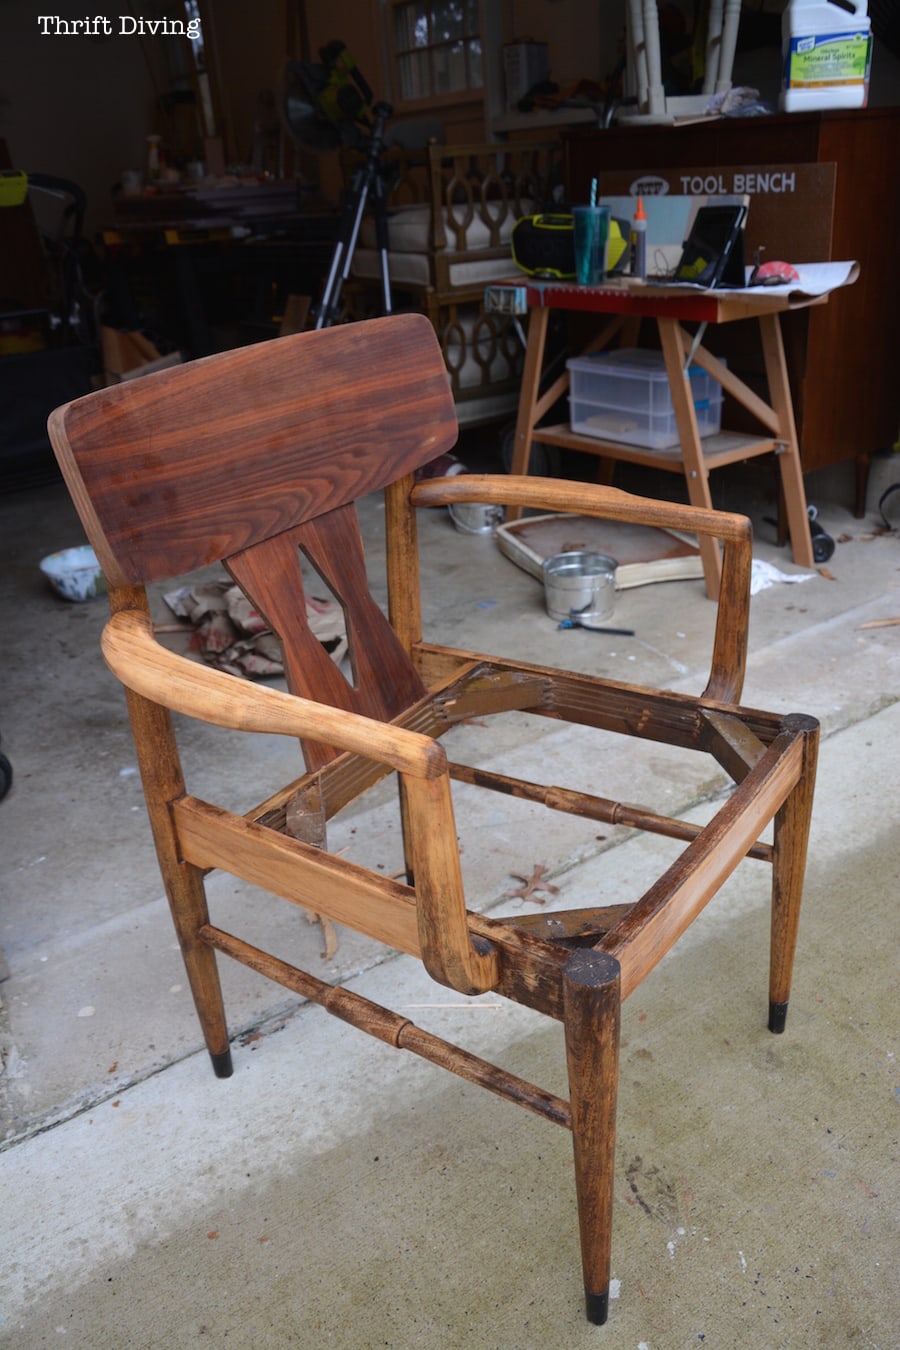
Weird Wood Tones?
One thing that shocked me with this piece is the different wood tones.
I’m not a wood connoisseur, so I don’t know if there was a structural or aesthetic reason it was made this way.
I’m not sure how it will affect the final “AFTER,” because whatever stain I use I’m sure the different shades will look different.
Got any ideas on why two different woods were used??
In Progress!!
If You’re Just Scrolling…..
You won’t find the “AFTER” shot. Sorry to disappoint you folks–there isn’t one. Yet. :).
You’ll have to come back next week for that.
It’s hard for me to finish a project all in one go (are you surprised?? Bloggers must work in chunks of time, too!).
Plus, with stripping, after wiping off the stripper, you want to let it thoroughly dry and then wipe it down with mineral spirits.
So it’s sitting in my garage waiting for mineral spirits, more drying, and then sanding.
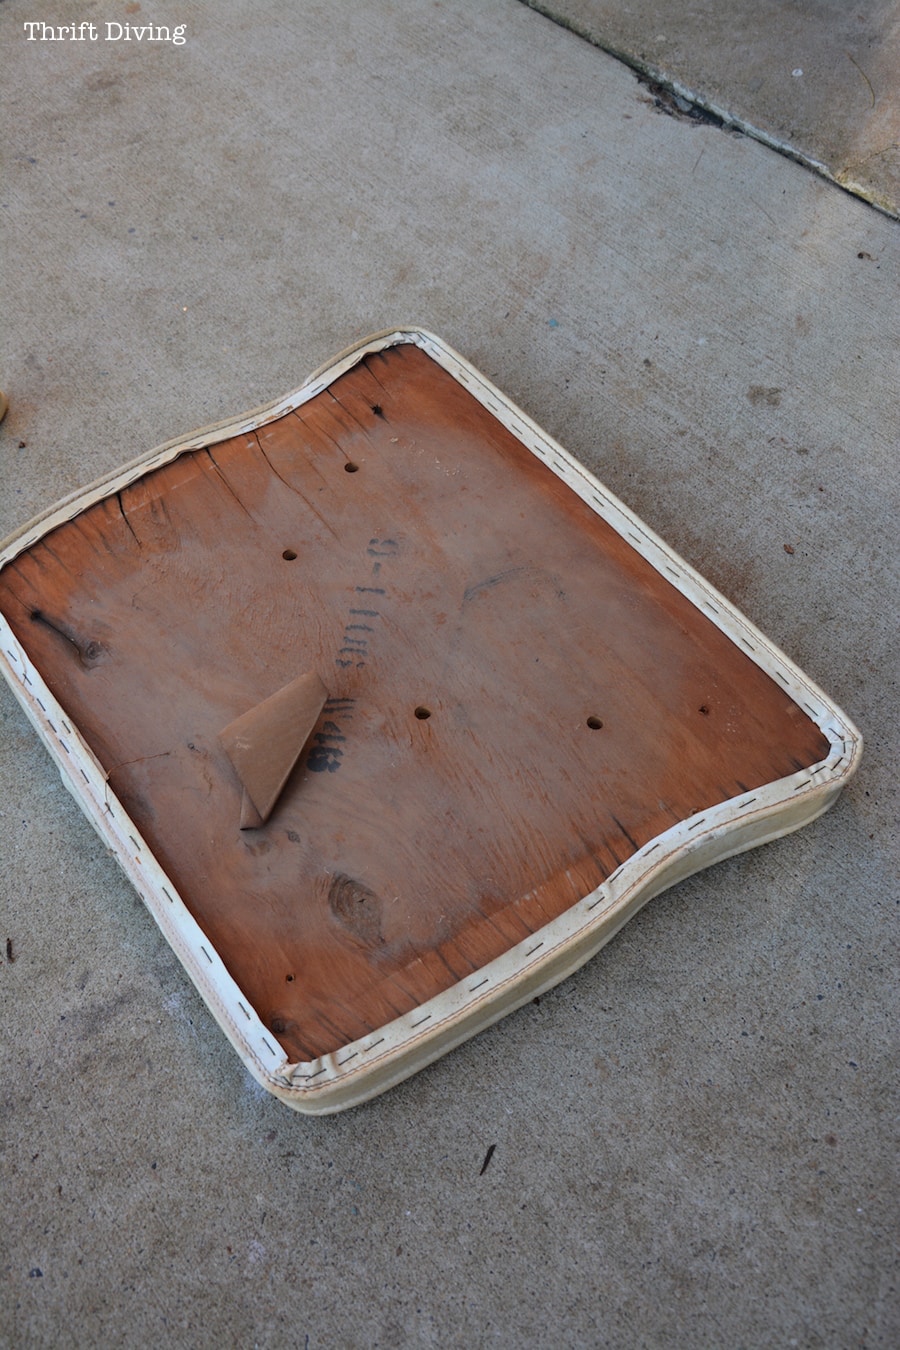
Cutting a New Seat
Thank God for power tools.
And the fact that I’m not afraid to use them.
Because this seat that came on the chair needs a new piece of wood cut.
That shouldn’t cost more than a few bucks, I think.
Oooh, and what do you think about black faux leather?! Wouldn’t that look amazing? But I’m not sure if my sewing machine (or my patience at sewing piping!) could handle that… We shall see!
The “AFTER”
So next week I’ll have the “AFTER” for you! I figured cutting this project into two posts will save you “scroll fatique”….at least, a little bit, right??
It’s not like this one isn’t just over 1,000 words….
(You know how I do!)
UPDATE Later….
So I was able to FIX my mistakes, and the chair turned out amazing!
Click here to see the “AFTER” and tutorial on how I saved this mid-century modern chair makeover!!!
I was a little shocked it turned out so well! 🙂

Download the 5 freebies!

Thrift Diving inspires women to decorate, improve, and maintain their home themselves...using paint, power tools, and thrift stores! Use these 5 printables, checklists, and ebooks to get started!


Oh girl. Kudos on the thorough and brave work. I’ve tried stripping furniture before. I’ve also said Ah, F*** it before. Both happened around the same time. Excited to see the fruits of your labor!
Lielani, i just burst out laughing!
Hey Serena! What is the latest on your modeling photos/magazine layout???
As to this chair, how did you mend the cracked arm?
Lookin good, gal!
Very neat and interesting chair. Whatever you do with it will be great because you always make everything look great!
The last time I stripped furniture, many years ago, the only strippers were horrid smelly noxious products that made me discontinue stripping stuff forever.
Your chair has some mid century modern parts like the arms, legs and basic frame. Those need to be made out of very strong wood especially due to the curved nature of the arms. The back and designed insert do not have to be nearly as strong. I can’t tell if the back is curved plywood or not from the pictures, that would be a very mid century modern design idea and it would also have thin pieces of fancier wood on top of it to get whatever look was planned for the original new chair. Since the chair was very dark looking I bet it was all made to mimic mahogany. Might have been quite fancy! So the price of different wood needed for making furniture plays a big part in manufacturing but the design of the finished product is just as important .Many kinds of wood are not nearly strong enough for the purposes intended for them – that’s why different woods are used for different parts of the end product. Some is for the beauty of the wood itself, some for strength and good looks and where it won’t be seen some is just for strength alone!
Can’t wait to see the finished product!
Merry Christmas to you and yours! What a great chair. I have stripped and refinished a number of items over the years. The one stripper I use now is called Peel Away. You brush it on thickly and then lay wax paper over it and let it do it’s thing over night. The next day everything comes off with a light scraping.
I have been told recently that there is no need to strip everything off a piece of furniture and that only the top layer of varathane or whatever the finish coat is just has to be lightly sanded to remove the gloss and then you can stain right over top. I have to do my whole dining room suite as one of my cats peed on the table and it is now a complete mess. Got the smell out of the wood but now the stains. Will have to go darker to hide the stains but that will be fine as golden oak is so passe now.
Use a belt sander or pad sander to avoid those swirls.
I love stripping furniture, although have not done any for about 25 years. I used the product you used. The most challenging piece I did was a glass front wall cabinet. I thought it would be a 2 day project – took over a week working on it every day. Turned out it had 4 layers of paint on it. When I finally finished I had the most beautiful walnut cabinet for my remodeled bathroom. When I sold the house the buyers requested I leave it. I kick myself for not taking as I really loved it. I did a platform rocker that had different woods like your chair. I ended up painting it for a friend’s nursery; was the easy way out LOL. Merry Christmas and a very happy productive, healthy new year. BTW loved seeing your garage, made me feel right at home.
I haven’t stripped anything for a looonnnnnnnggggg time – and that was an upright piano – beauiful mahogany wood and it looked great once I finished. I think I worked on it for months! They didn’t have Citristrip back in the 70s! I want to refinish my dining table so am going to get some Citristrip. I’m so glad it doesn’t smell like the old types. I’m looking forward to your finished chair – I love that wood on the back.
Hey Girlfriend! Merry Christmas! I’m married to a “wood” man for 37 years. He has spent over 40 years working in the custom kitchen and furniture business. He spent time making Windsor chairs so I went to him with your blog. There could be 2 reasons for more than one type of wood used. Either 1.) cost, it’s cheaper to produce or 2.) strength, your more expensive furniture co. would consider that as important to the quality of the finished product. You can’t tell till you strip! That]s the art of refinishing, matching stains and colors! Keep up the good work! You may need to use finer sandpaper, to avoid the swirly marks. You should finish by hand sanding. Have fun!
Barb, thanks for the tips via your husband. There is so much to learn via blogging.
I don’t have modern or mid-century decor in my home, but I always enjoy seeing it in other’s homes. That is a great chair, and I can’t wait to see the final result! The reason that furniture which has been stained or painted can have different woods is generally a cost-cutting practice by the manufacturer.
I have done minimal furniture stripping and I was never happy with the result. I think it is because I’m not the most patient person, and I’m not fond of all the detail stripping that would have to be done on most pieces. I admire your patience! 🙂
Hi, there, Serena Cool project! I am excited about seeing the finished piece. I love that you are refinishing, rather than painting this one. You are right about the different woods being odd. But you love a challenge, right?
Sewing on faux leather isn’t that difficult, but here are a couple tips that might help. First you can buy a “leather” needle that is designed to “pierce” the fabric. Some faux has a fabric like back which should be easier to sew, but if you have some trouble with it feeding smoothly, try placing a piece of tissue paper under it, then just pull it off after it’s sewn. If you can’t find a leather needle, try using a denim needle. Another thing that is sometimes helpful is adjusting the pressure of the presser foot. Mine has a little wheel that is numbered 1 to 4. Your sewing machine Guide Book should give that info. Heavier fabrics sometimes feed better with less pressure. You can do this!
I have refinished a couple pieces and found it to be quite satisfying. I did learn to follow the grain when sanding, though. Guess how? I’m wondering if you could use a belt sander instead of orbital? I don’t have either at this point so do it by hand. Just wish I could find a neat chair like that around here! I need one more chair, though goodness knows where I’ll put it! I’ll keep looking; who knows? Best of luck and I can’t wait to see it finished!
About 40 years ago I tried stripping an old cedar chest. First and last try. I hated it. Strippers have probably come a long way since then.
The wood on the back of your mid’-century modern chair has an absolutely gorgeous grain. Can’t wait to see the finished chair. Glad you’re going to stain it instead of covering it with paint!!