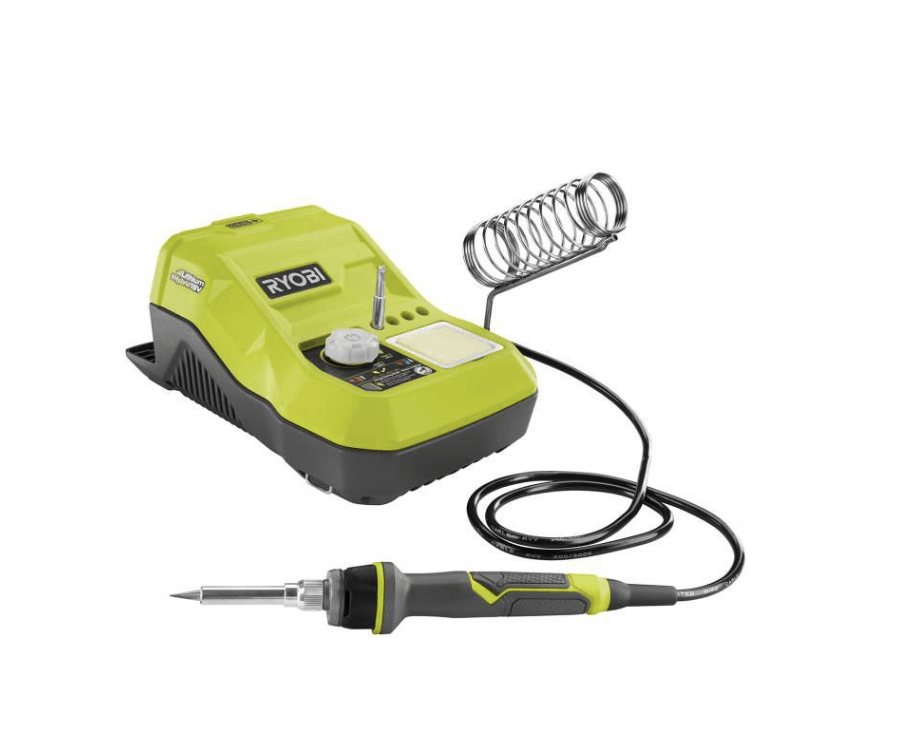
Getting Started: The RYOBI Cordless Soldering Station
This tool review of RYOBI 18V Cordless Soldering Station is brought to you by The Home Depot.
RYOBI never ceases to amaze me with the tools they engineer for its line of 18V batteries. Last spring I had the opportunity to attend a Home Depot event where RYOBI was displaying some of the new tools that were set to be released and this new 18V Cordless Soldering Station was on display. I was curious because hubby had always wanted me to buy one (despite never telling me what he was planning to use it for). But I was also curious because I had thought they would be difficult to use.
The word solder sounded so technical. Heck–I didn’t even know how to pronounce it! Was it SODD-der, or SOLD-er? (By the way…I think it’s “sodd-er” depending on where you live, but the jury is still out). Anyhow, moving on…
I will admit that I had never used a solder before. Well, I take that back: once, a plumber showed me how to solder copper pipes when I was replacing the shower faucets for my bathroom makeover. But that involved a blow torch and lots of intense focus and…..a bit of anxiety.
Thankfully, the RYOBI 18V cordless soldering station isn’t as intimidating at soldering copper piping. This soldering station, in fact, is perfect for:
- Welding circuit boards
- Appliance repair
- DIY hobbies
- Welding jewelry
This post will give you a close up look at the new RYOBI soldering station and where you can buy it to make it a part of your 18V cordless collection!
The RYOBI Cordless Soldering Station: A Closer Look
I’m enrolled in an electrical wiring class at my local community college. We haven’t soldered conductors together; we have spliced them and screwed on wire nuts to hold the two conductors together, like so.

So when the Home Depot sent me the RYOBI soldering station, I’ll admit that I was curious to try it out since I have been playing with electrical wires for the past couple of months since school started. I wanted to try my hand at soldering electrical wires together.
The soldering kit required hardly any out-of-the-box set-up. It came with some sample lead-free solder for electrical soldering. It also included a sponge for cleaning off the soldering tips.

There were 2 soldering tips included that can be stored on-board (so you don’t lose them!).

I tried my hand at soldering a couple of conductors together, but this was just a test and not an actual project. I am still researching DIY projects that I can use this soldering station for. I’m curious about jewelry making and would love to try my hand at using it for that purpose!

In doing my research on how to use this soldering station, someone pointed out that the soldering station can actually be used in a decorative fashion as a wood burner! I tried my hand at some ferns. Because the temperature can be adjusted between 300 – 900 degrees, I found it was pretty useful for wood burning.
I would probably prefer to use a wood burner for wood burning simply because with a wood burner you can use a variety of different tips (the soldering station has two tips). However, in my experience with using a wood burner, I generally only use a chisel point tip, particularly for burning names onto wood journals.
However, I love that this soldering station can be used for soldering and can run on both battery and cords. The 3-ft cord attaching the soldering station to the soldering iron will also allow you a great range across your workstation.

Battery-operated power tools are very convenient, but sometimes you want to use a cord when battery isn’t an option (or if you need to use the tool for extended periods of time and don’t have powered battery back-ups. With this soldering station, simply pop in an 18V battery or plug it in. Love that!

To test out this soldering station, I did a test of soldering some conductors together. Before I started, however, I coated some of the sample solder onto the soldering iron tip and then wiped it off onto the wet sponge on the soldering station. I learned that this is important to do with each of your soldering tips in order to protect the tip from the air. This is called tinning. Once I did this, the soldering tip was ready to be used.
To solder conductors properly, you must use a bit of solder flux first, which prevents the copper from oxidizing as the copper is being heated. Home Depot has a plethora of solder flux to choose from. If you’re soldering electrical wires, do your research to see which type of solder you should use first on the copper before soldering.
Also, when soldering, the iron tip should heat from below and the solder should touch the wires, allowing the heat from below to melt the solder. It should melt nicely over the connection and into the connection.

I have to admit that my soldering skills (my very first time!) left much to be desired. HA! I’m sure if my electrical wiring professor was judging this, I would have gotten a C, at best. While RYOBI makes it easy to solder, it definitely takes a bit of skill to do it properly. It’s also easier if you’ve got soldering alligator clips in order to hold the wires for you.

It’s helpful to have the sponge on board to help keep the tip clean and free from clumps of solder. Keep it moist but not too moist.
After a while, the soldering station may “go to sleep” but to wake it up after sitting idle, just turn the dial to heat it back up again.
I’m curious to use this soldering station again for a DIY project–perhaps some jewelry since I don’t do any circuit boards or appliance repair.
Where to Buy the RYOBI Soldering Station
All the materials you’ll need to use the RYOBI 18-Volt ONE+ Soldering Station can be found at The Home Depot. At just under $80, it’s an affordable tool to add to your DIY toolbox if you love circuitry, jewelry making, or are a DIY hobbyist! Stay tuned to see what I later create with my own soldering station!
Love this post? Click here to save it on Pinterest!

Download the 5 freebies!

Thrift Diving inspires women to decorate, improve, and maintain their home themselves...using paint, power tools, and thrift stores! Use these 5 printables, checklists, and ebooks to get started!