How to Reupholster a Bench: Upholstery Makeover
I had been wanting to reupholster this bench for nearly 4 years now.
Four.
But I had been the victim of “unfinished-itis.”
You know…that debilitating condition that happens to do-it-yourselfers when you start a project but some virus starts eating away at your resolve to finish and before you know it, the project is collecting dust in some musty corner of your basement.
Well, that’s what happened with this $25 estate sale bench that I lugged home years ago.
Lost leg bolts…broken bench arms…and DIY distraction prevented me from adding this potentially piece of furniture to my collection.
Until today, that is.
Success!
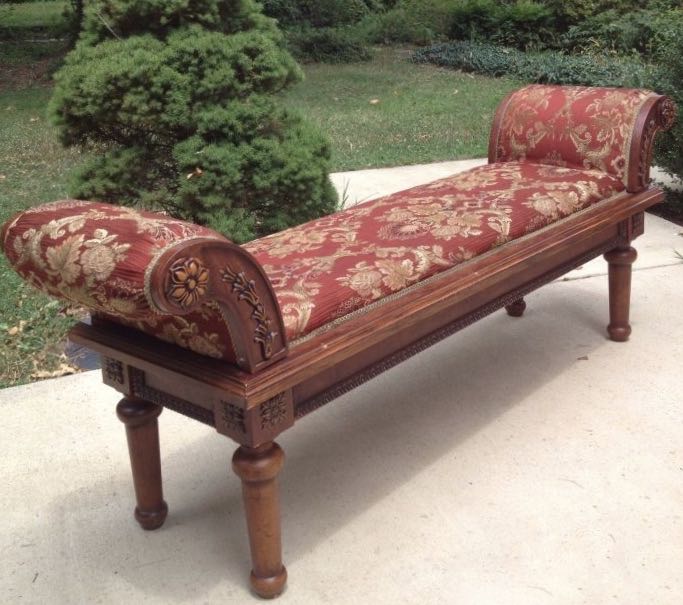
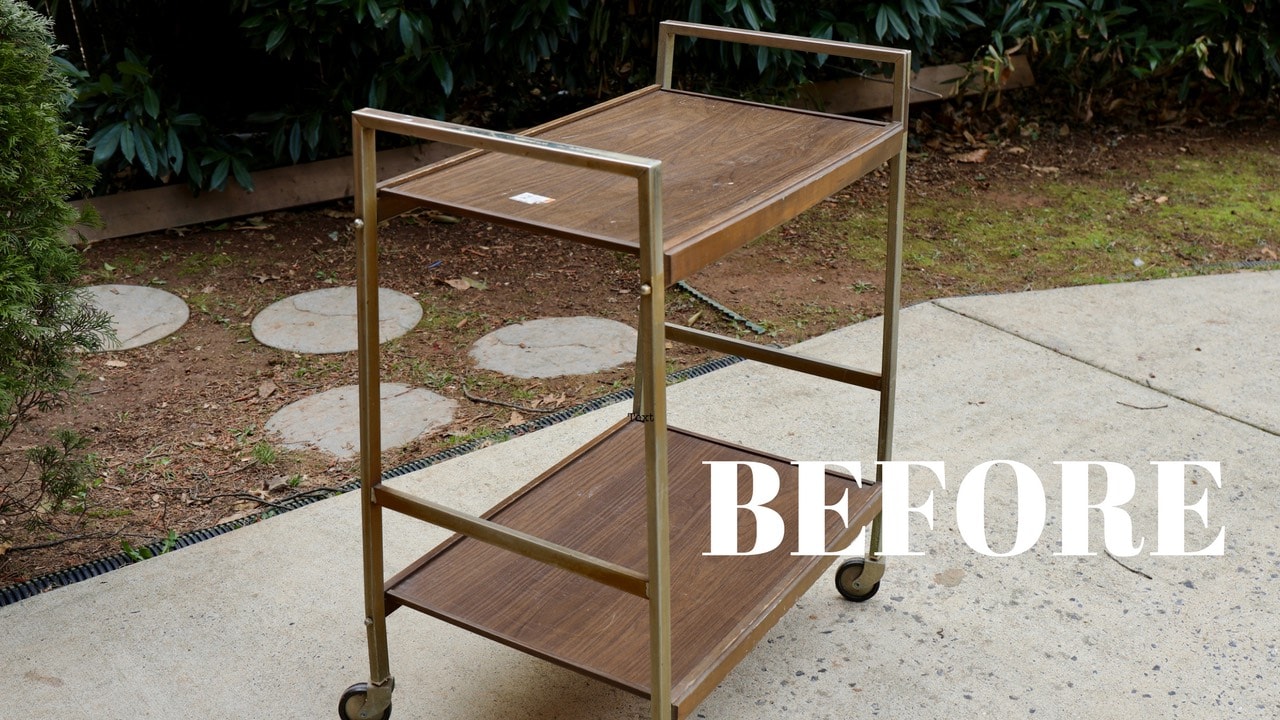
BEFORE
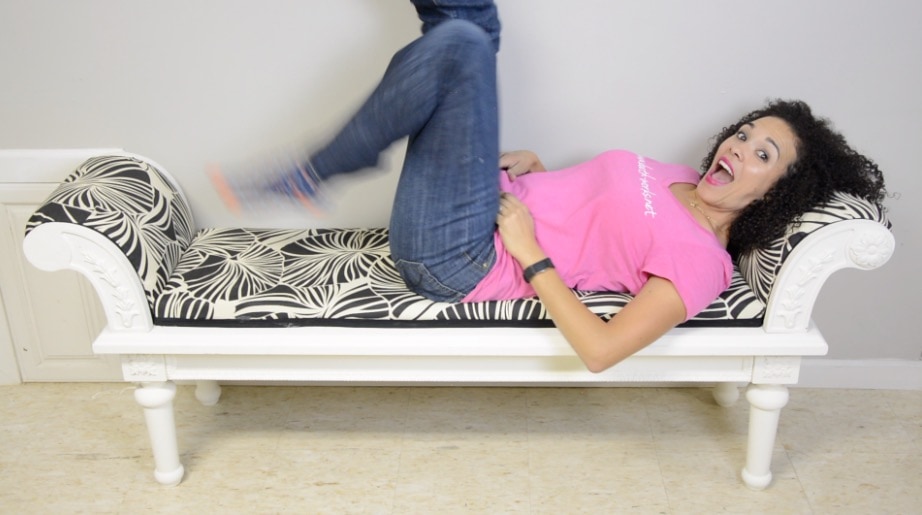
AFTER!

I can’t believe it turned out so pretty!
Keep reading to learn how I did it.
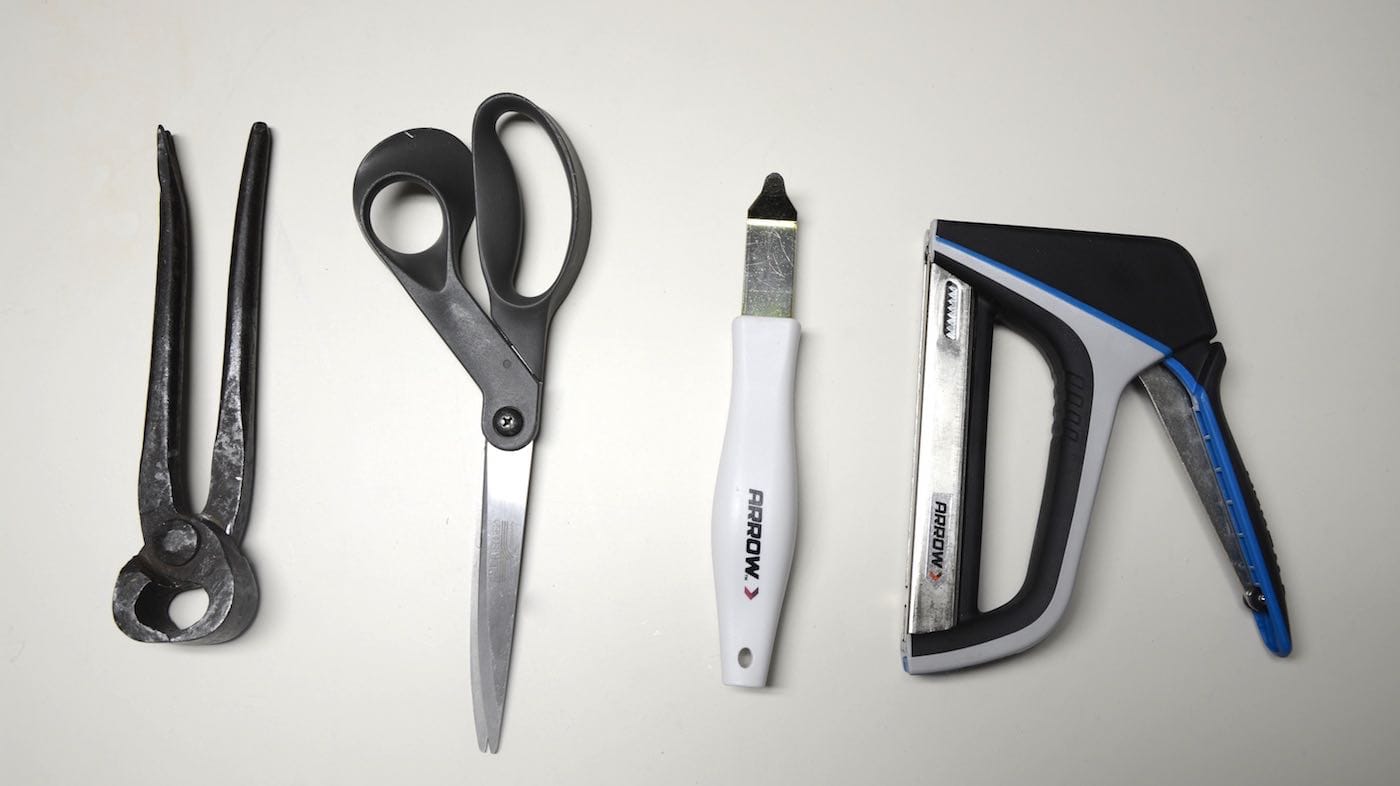
Upholstery Materials
Here are the materials needed to reupholster a bench.
- Arrow Fastener T50X TacMate
- Arrow Fastener Staple Lifter
- T50X Staples
- Pliers
- Scissors
- Fabric
- Hot glue gun
- Trim
- Tape measure
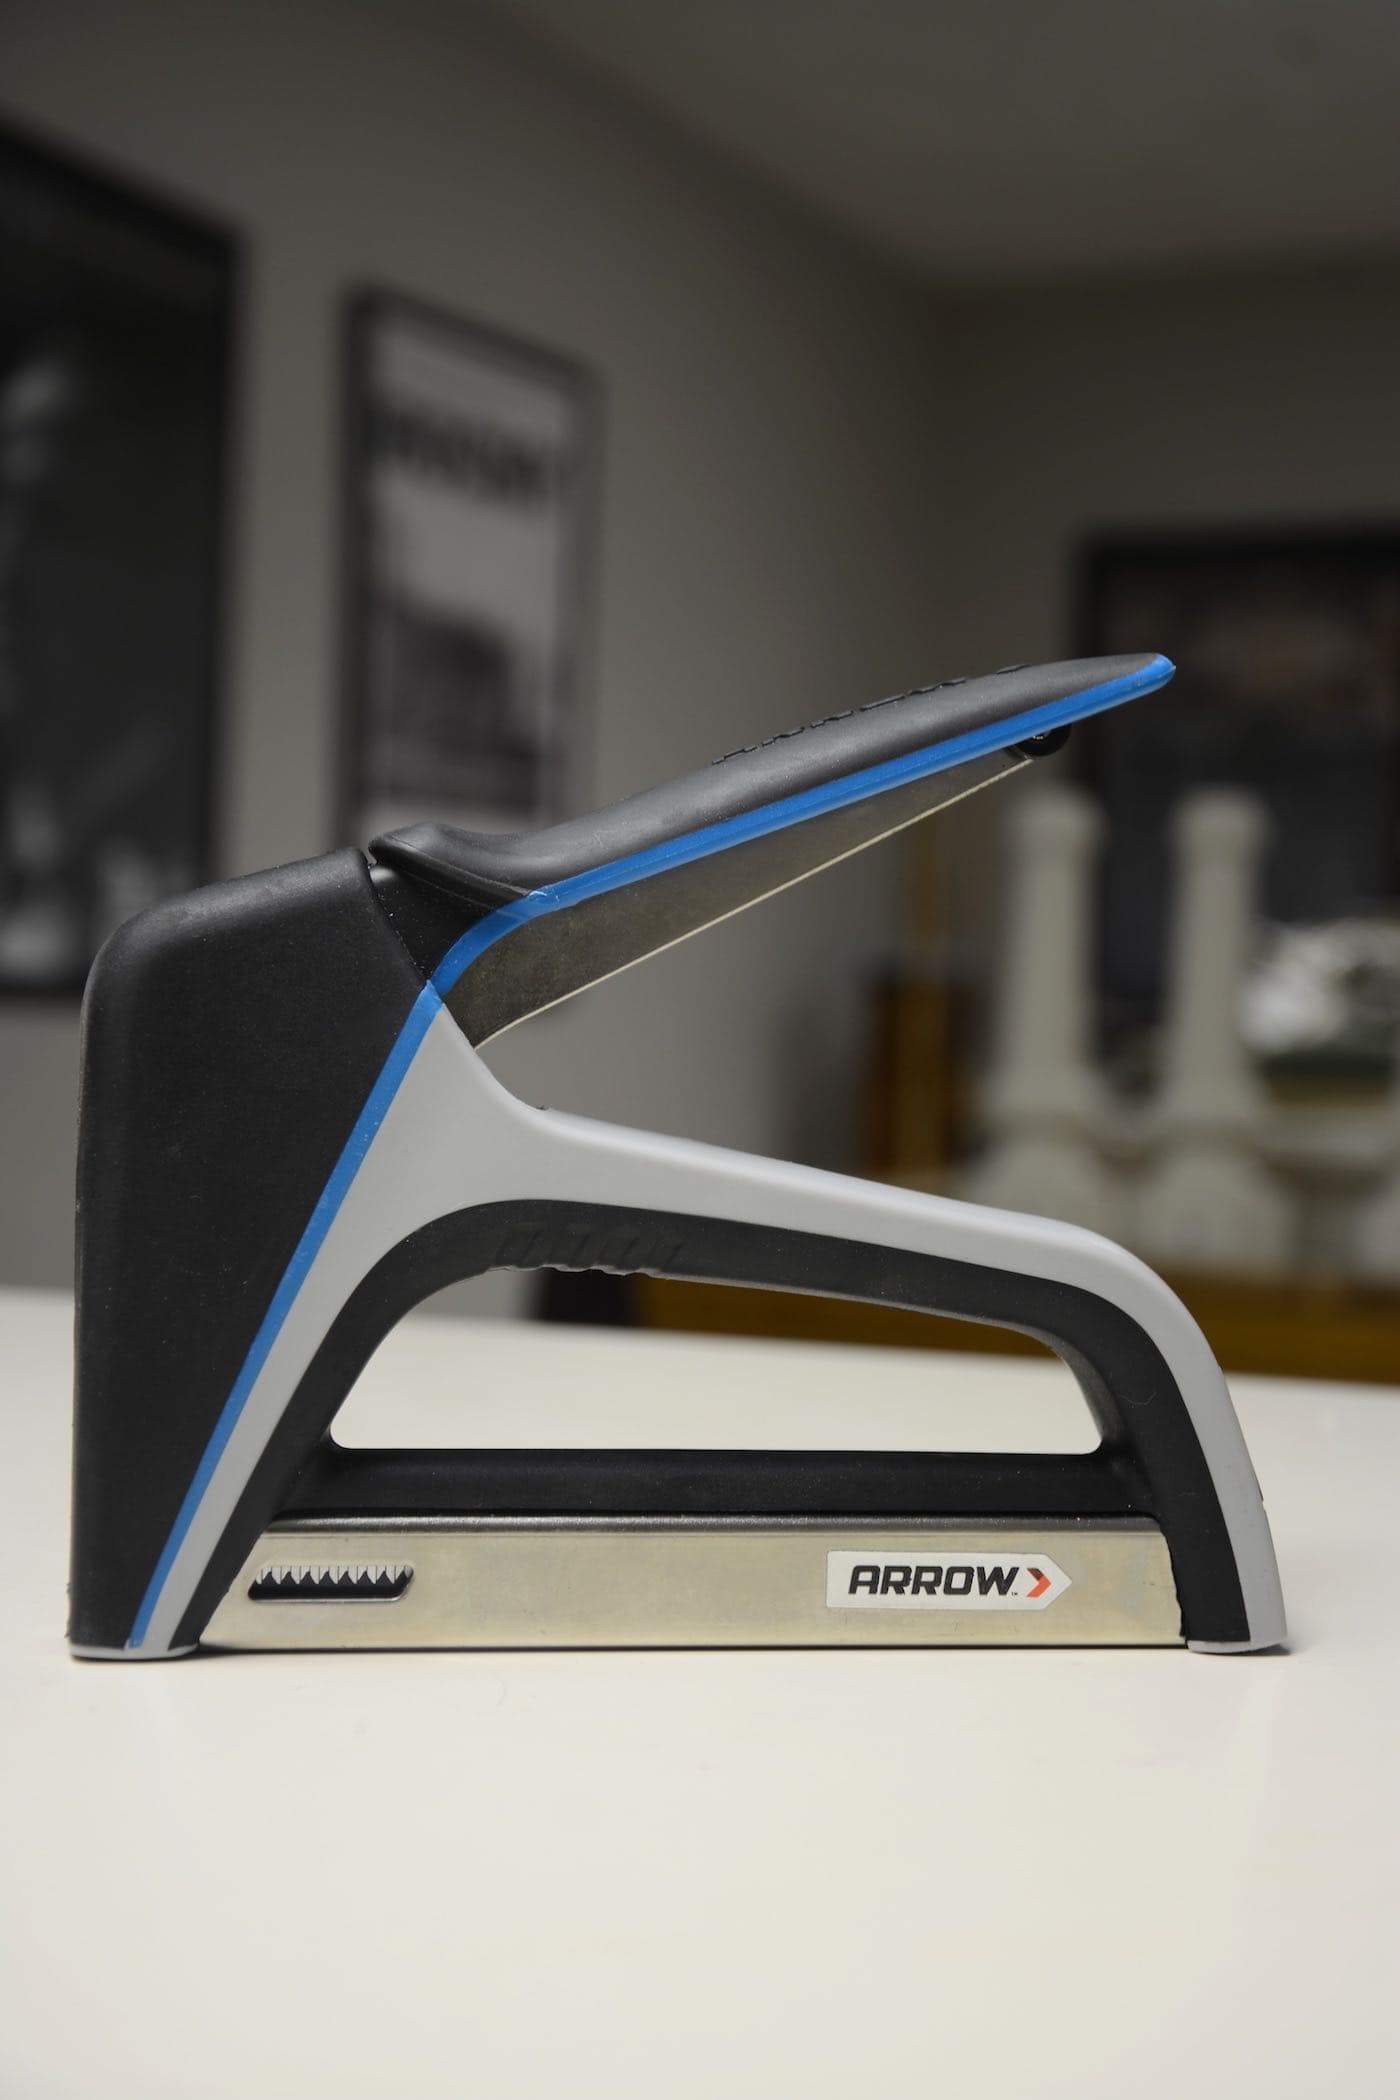
The T50X TacMate was super easy to use for this project. Because it’s got a rubber grip, my hand doesn’t slip off of it. And it’s got a little window on the side so you can easily check to see if you’re running low on staples. Genius!
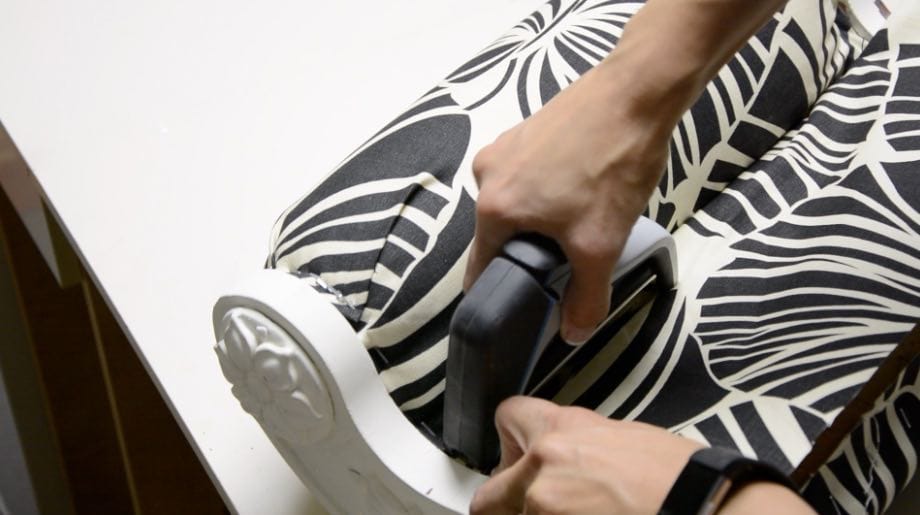
STEP 1: Remove the Old Fabric
This is probably the most intimidating part when you upholster a bench or another piece of furniture. Sometimes you’re just not sure where to start!
For this bench makeover, the starting point was removing the decorative trim that was hot glued over the staples to hide them.
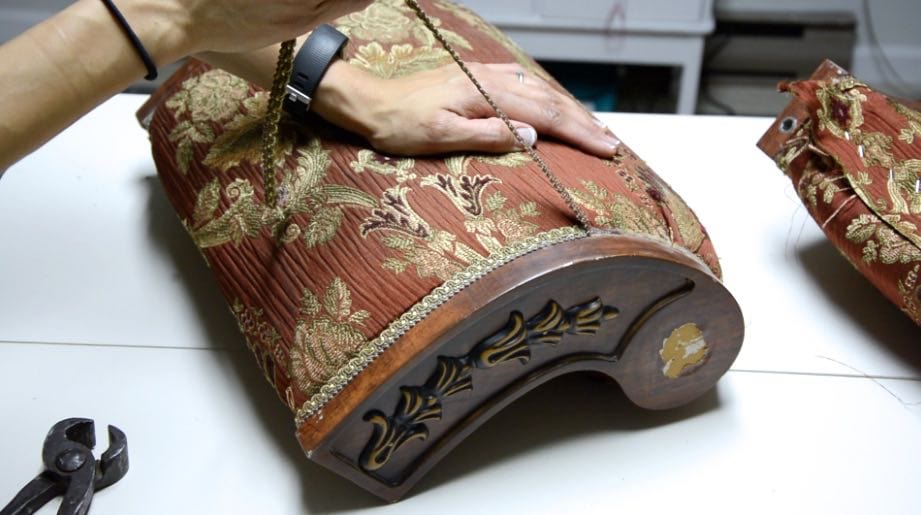
Next, I used my Arrow Fastener staple lifter and pliers to pull the staples out of the MDF boards that were glued together to make up the upholstered bench arms.
It’s always interesting when you remove the fabric and padding on upholstered furniture and see what’s really underneath! It’s just pieces of old wood and boards. The whole “smoke and mirrors” illusion doesn’t seem so tricky, after all!

STEP 2: Cut New a Pattern from the Old Fabric
I love saving the old pieces of fabric to use as a new pattern. You don’t have to do this, but personally, I think it makes things much more “no-brainer” than having to figure it out for yourself.

It’s still good to measure so you’ll know the measurements, but with the pattern, it takes the whole guess-work out of it.

When I was done laying out and cutting new pieces of fabric, I had two large pieces and two smaller pieces for the upholstered bench arm coverings.
And can I just say that the fabric for this project I already had on hand??
Let me correct myself:
The fabric I used was fabric my husband had on hand. He had removed from my “Giveaway Pile” when I got rid of a bunch of fabrics, unbeknownst to me. Only when I was lamenting to him about not having fabric for this upholstered bench makeover did he divulge that he’d been holding on to the fabric I thougt I had given away.
Lesson learned: never get rid of fabric.
Ever.

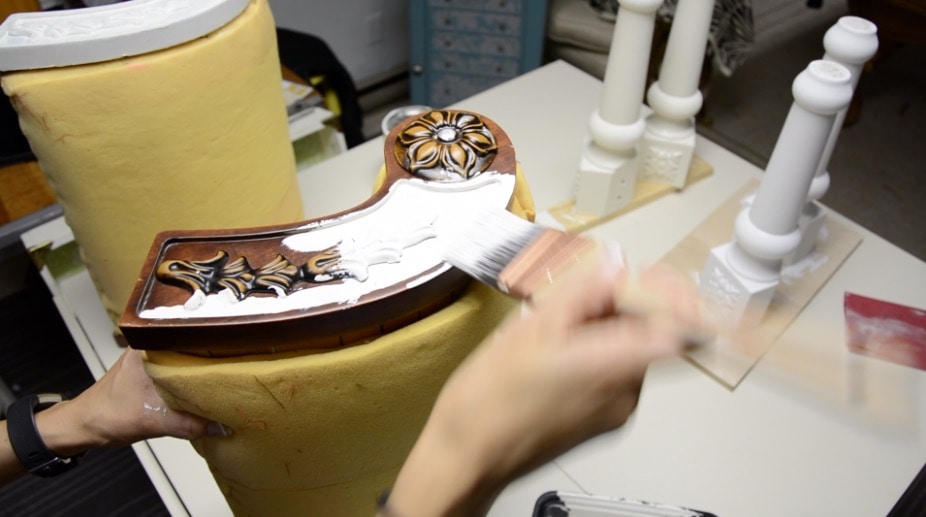
STEP 3: Paint the Bench (Optional)
You don’t have to paint a bench before upholstering it. But this one needed a pick-me-up.
IT was an ugly plastic coating over MDF boards, so I felt no qualms whatsoever about slapping paint on it. (Be sure to use two coats).
Related: What’s the Best Paint For Furniture?
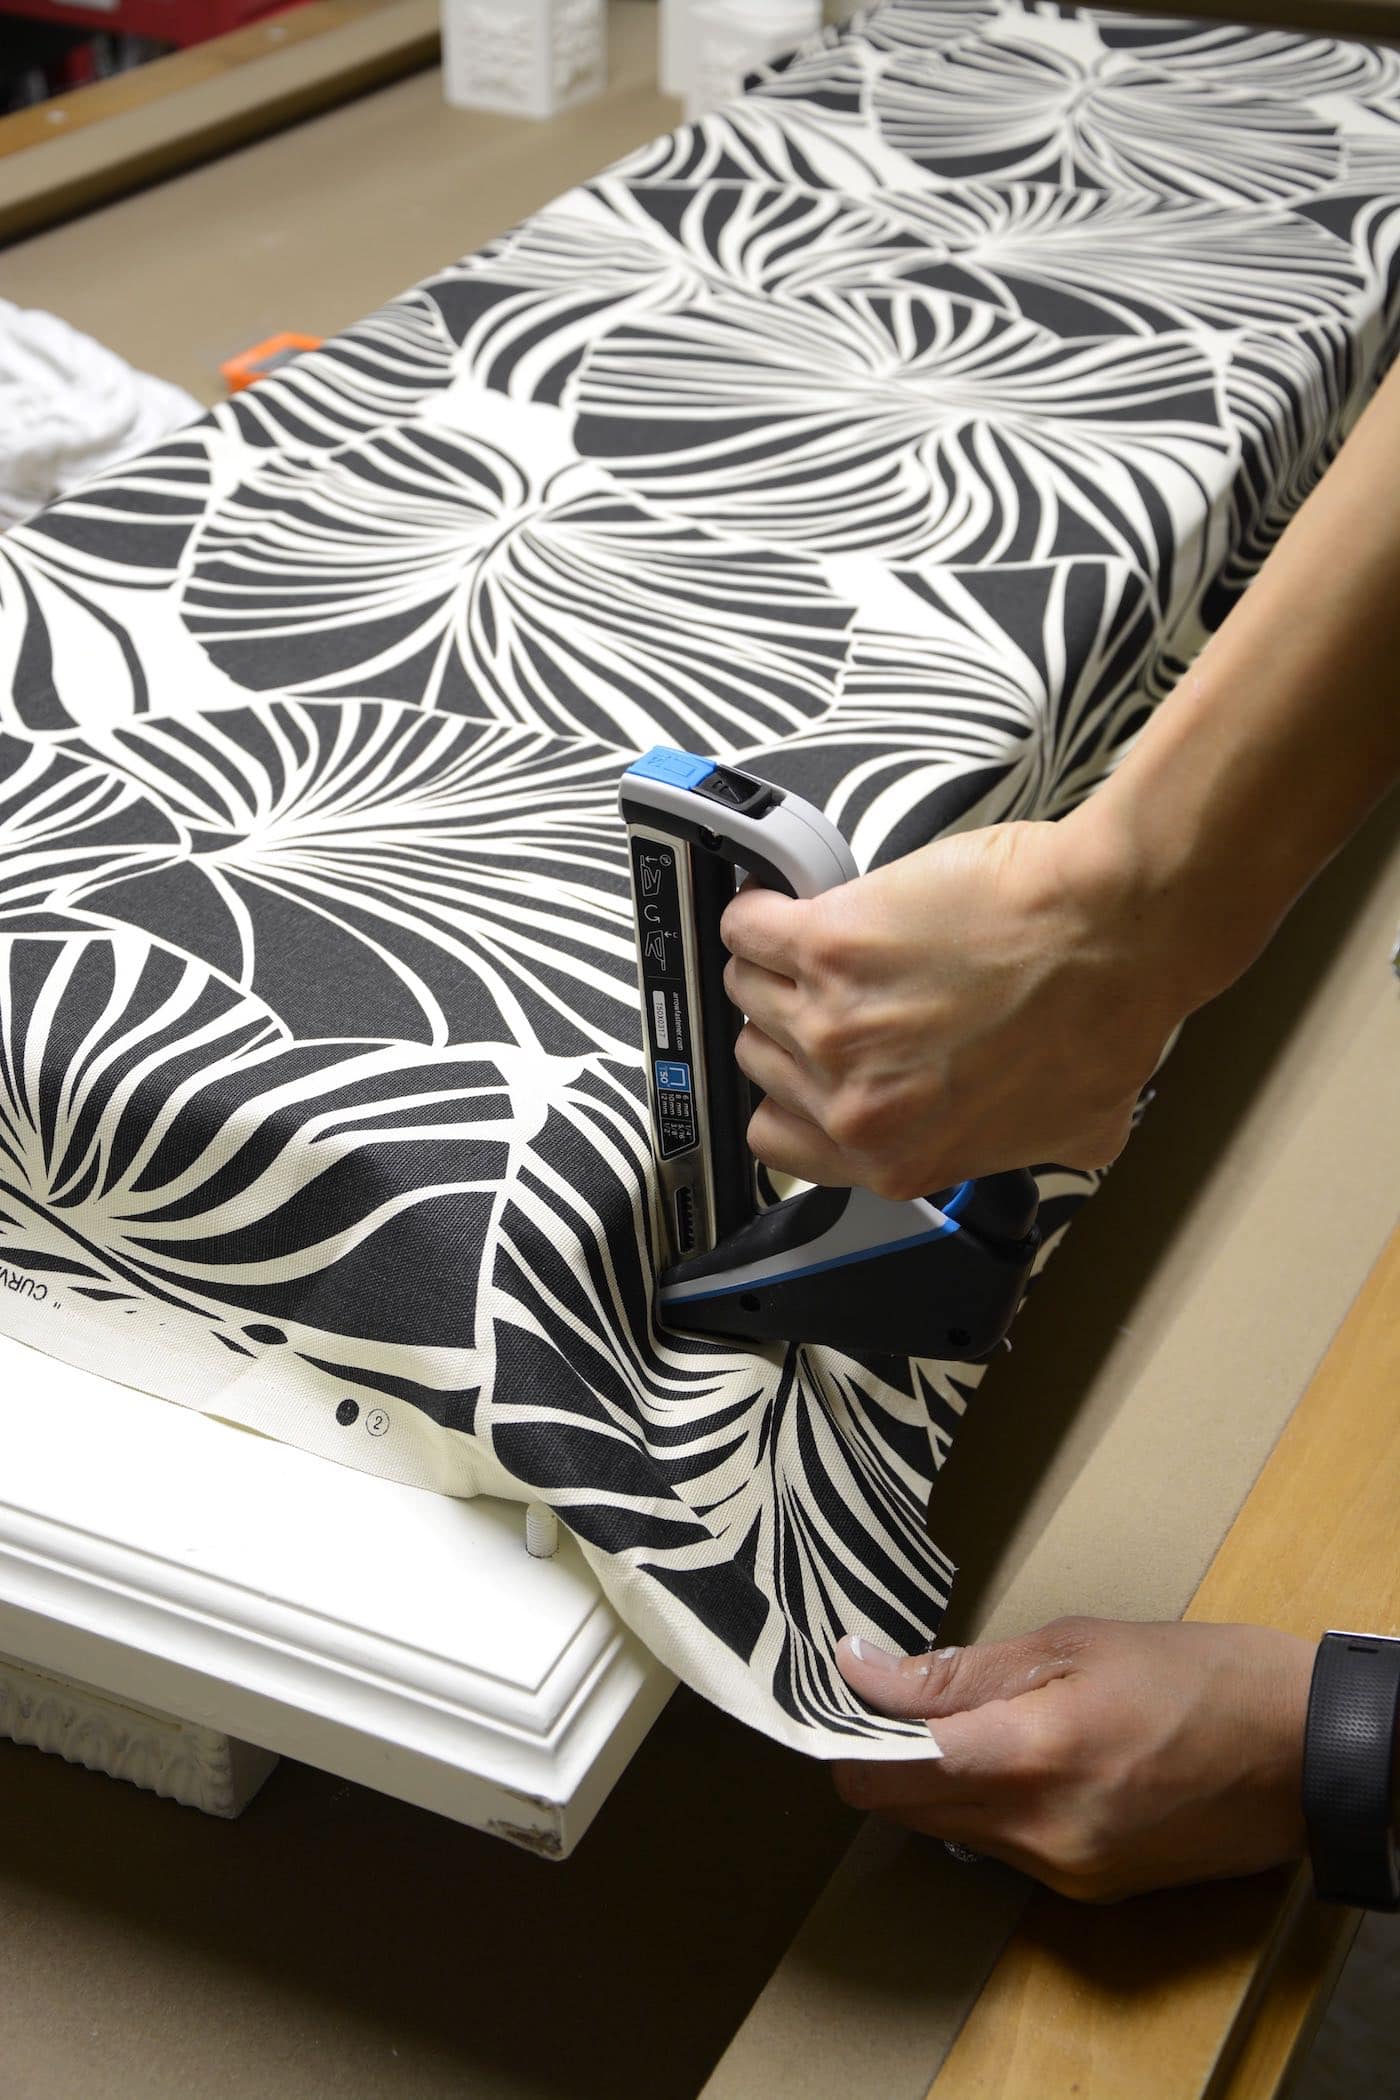
STEP 4: Upholster the Bench Seat
While the paint was drying, I draped fabric over the seat of the bench and trimmed it to fit.
Next, I used my Arrow Fastener T50X TacMate to secure the fabric as close to the edge as possible.
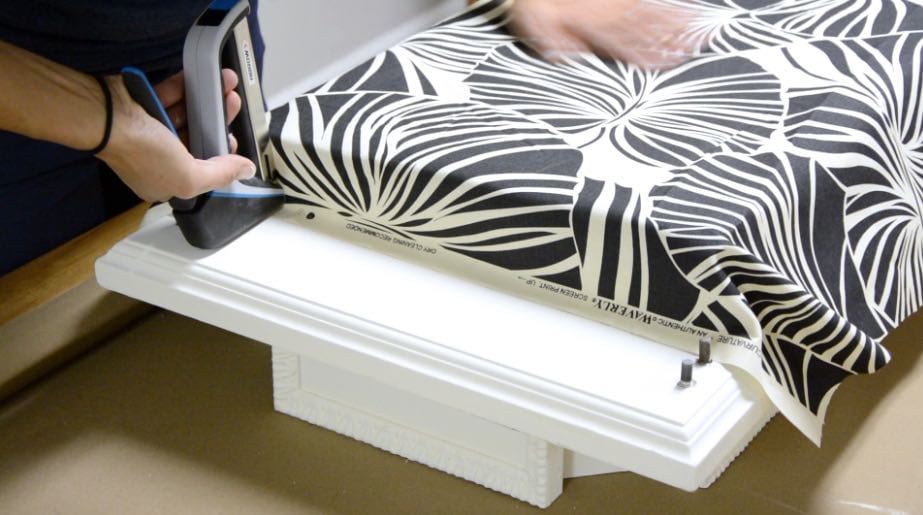
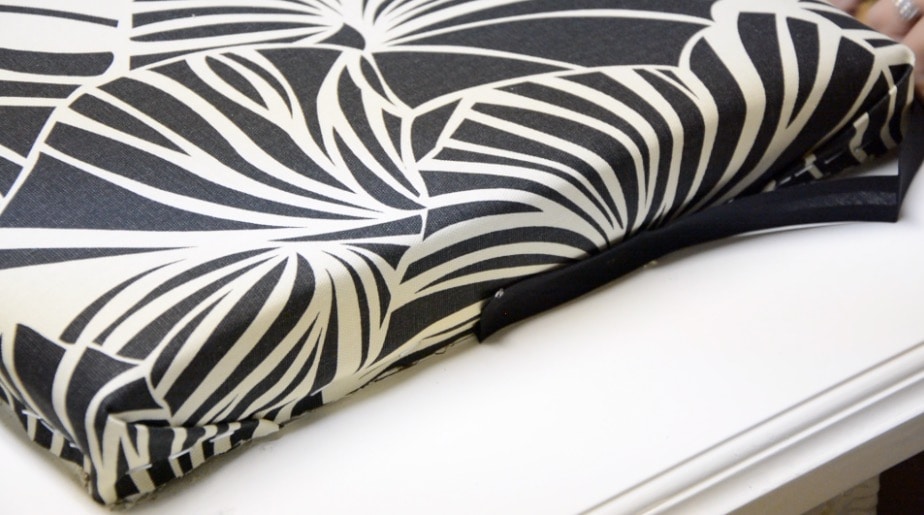
STEP 5: Trim the Excess Fabric
Once secured in place, I used my scissors to trim the excess fabric and folded in the corners of the upholstered bench.
At this point, with hot glue, the edge where the staples were place was ready to be hidden with hot glue and bias tape that I used as “decorative trim” since I didn’t have any other options.
But I think the black bias tape worked really well!
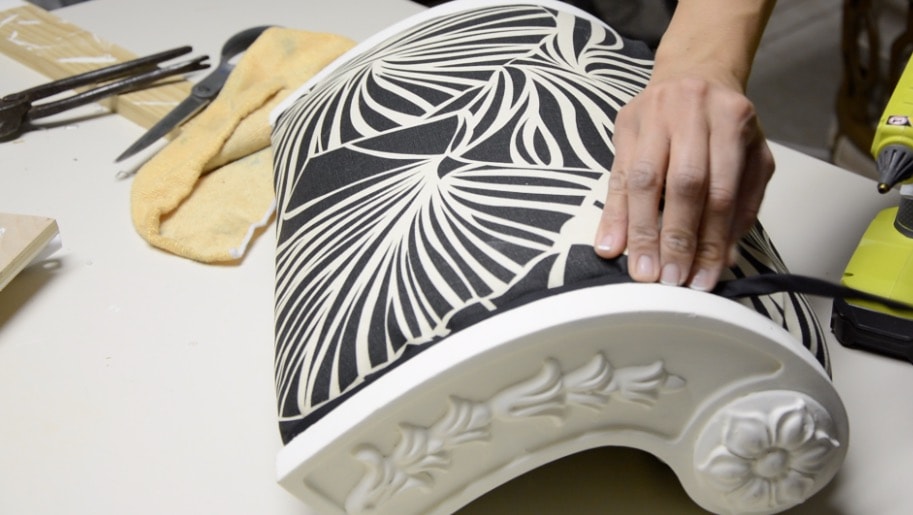
STEP 6: Upholster the Bench Arms
Now that the bench was upholstered, it was time to tackle the bench arms.
Starting on the underside of the arm, I folded the fabric in and used the T50X TacMate to secure the fabric to the MDF “wood.”
I tucked the fabric up underneath the roll, stapled, and added another piece of fabric to cover the rest of the upholstered bench arm.
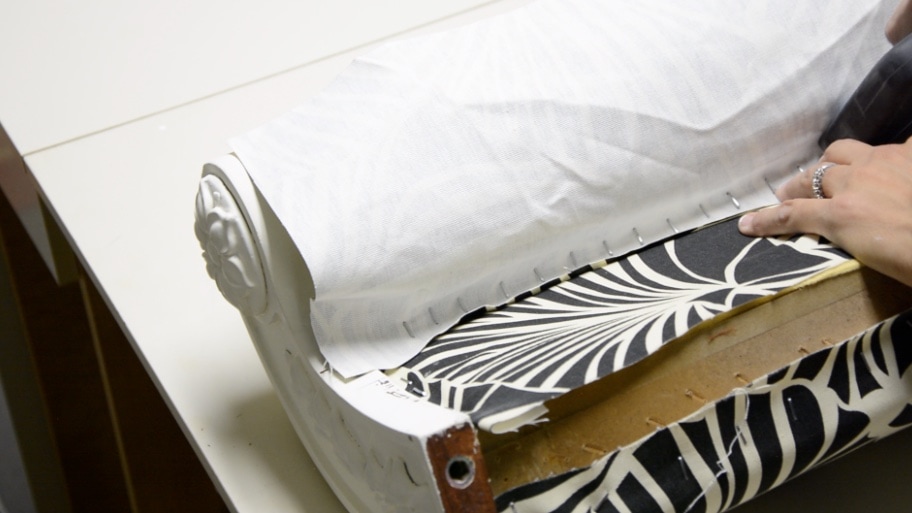
Around the edges, I had to fold the fabric so that it would fit.
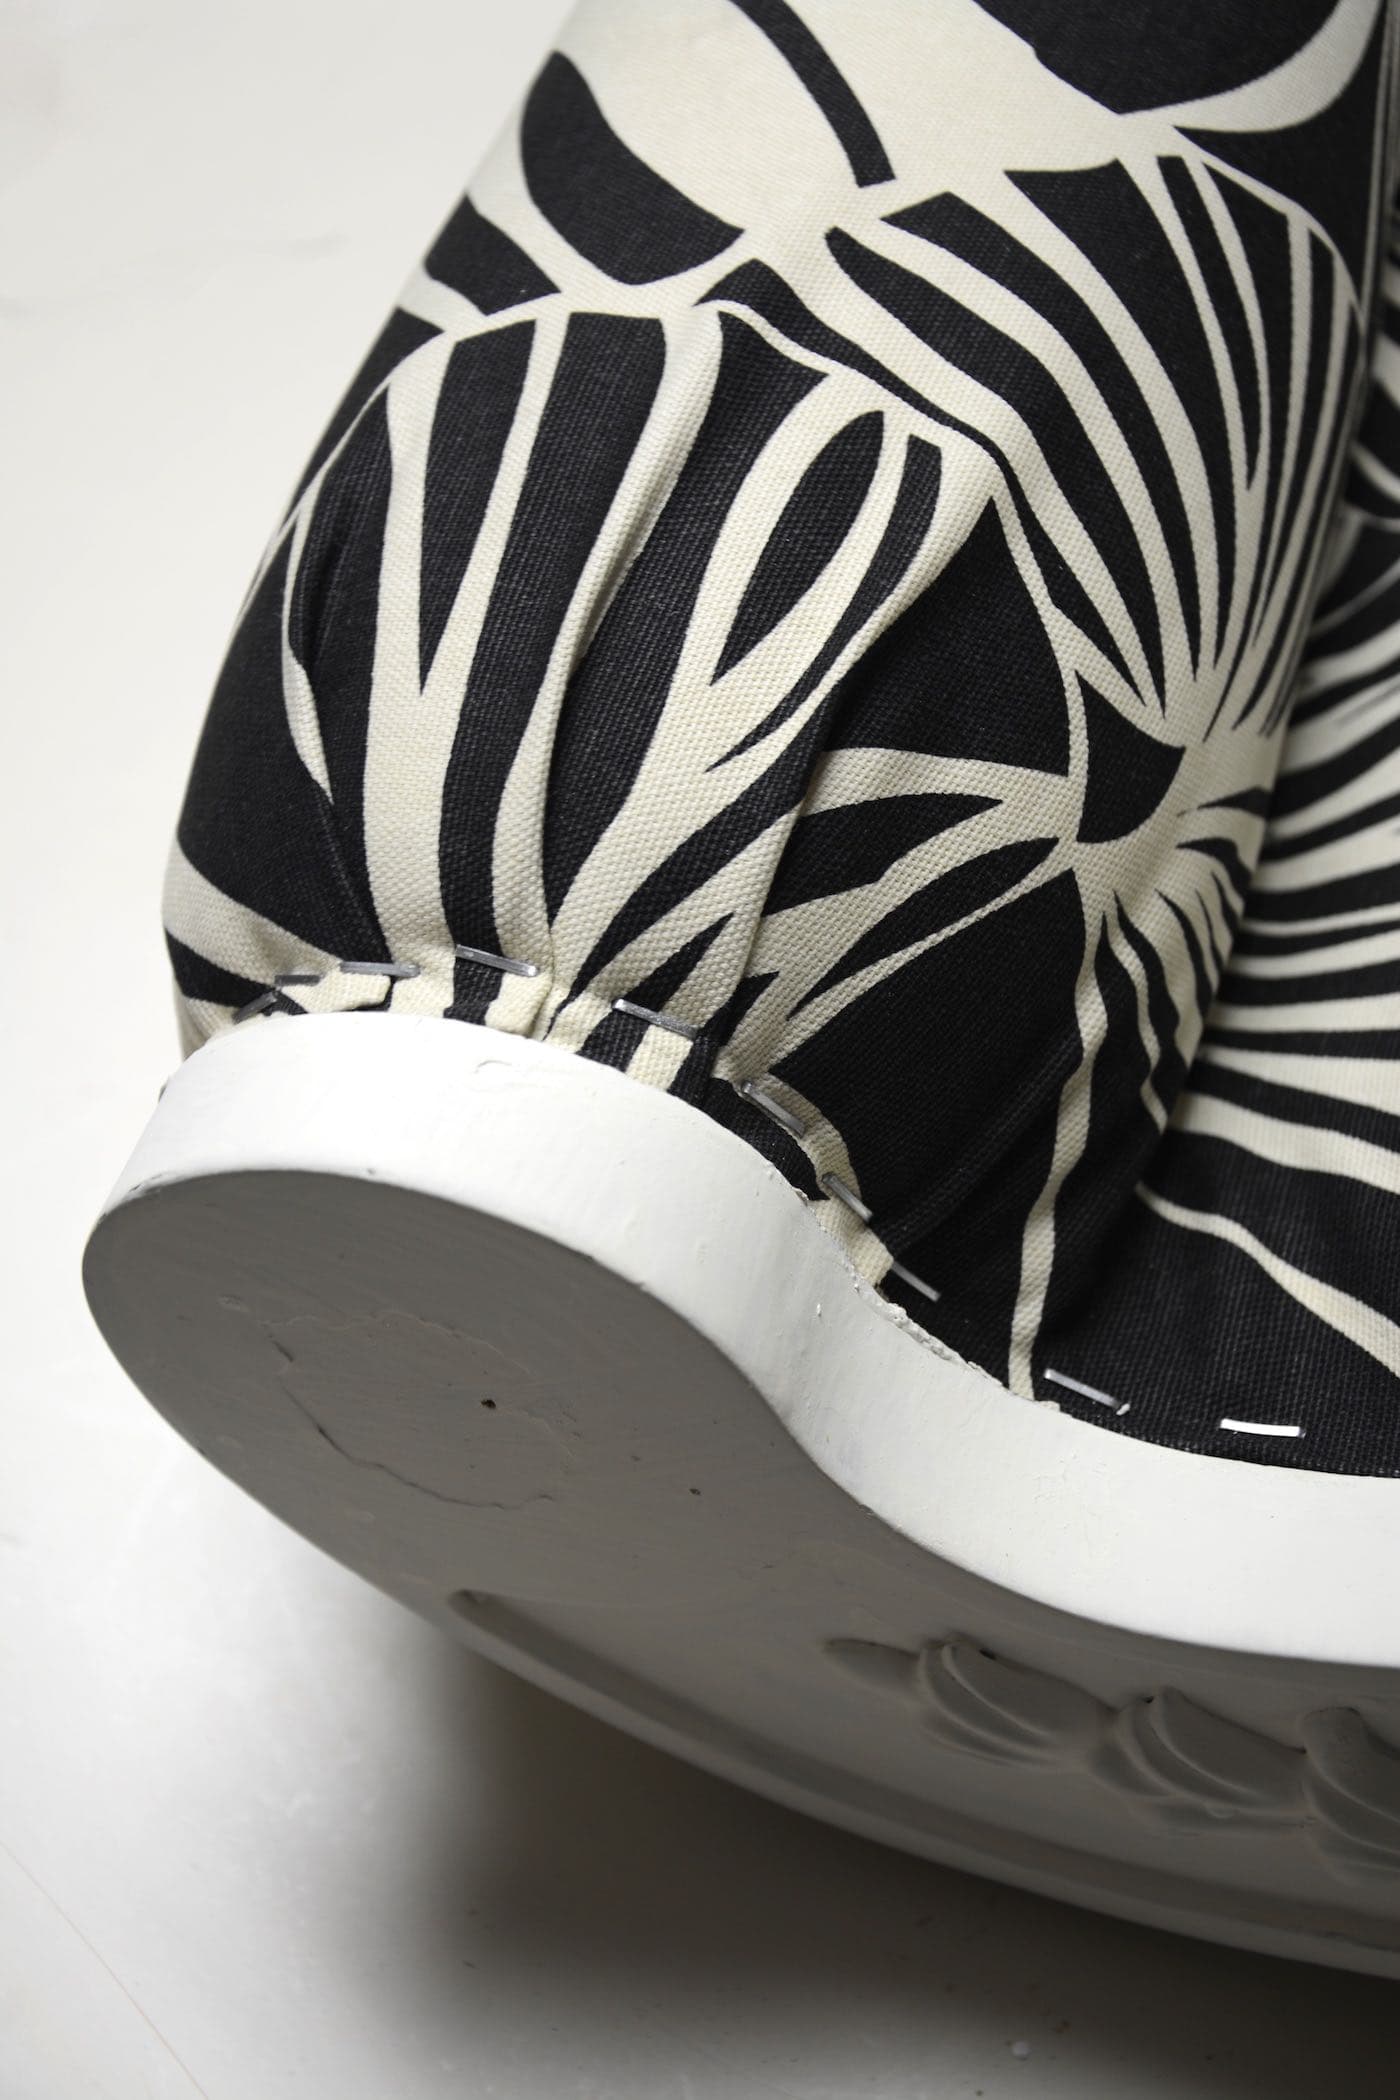
STEP 7: Hot Glue Trim to Hide the Upholstery Staples
To cover the upholstered bench staples, you’ll need to cover the staples with something decorative. I just used bias tape because I have some on hand, but it actually worked out perfectly well! It complimented the fabric nicely.

Be super careful with hot glue! I burned my fingers a few times when pressing down on the trim. Ouch!
The last step is to add the legs back onto the bench.
I’ll likely need to go back and add wax or a topcoat to help protect the paint. But for now, it’s a wrap–this project is 99% done! 🙂
Here’s another quick look at what it looked like when I bought it from the estate sale four years ago:
BEFORE
AFTER!


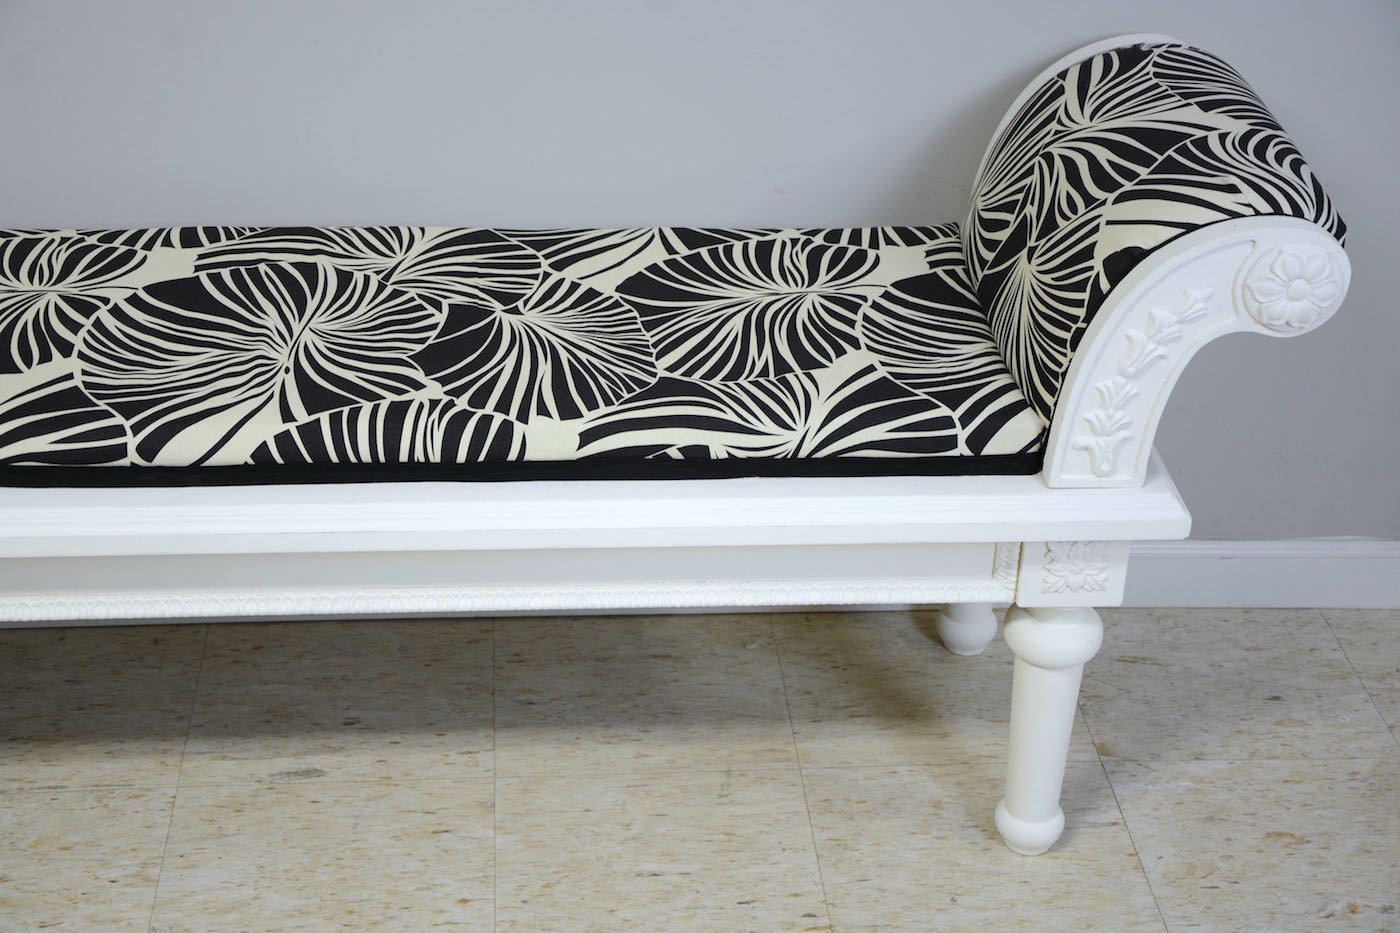
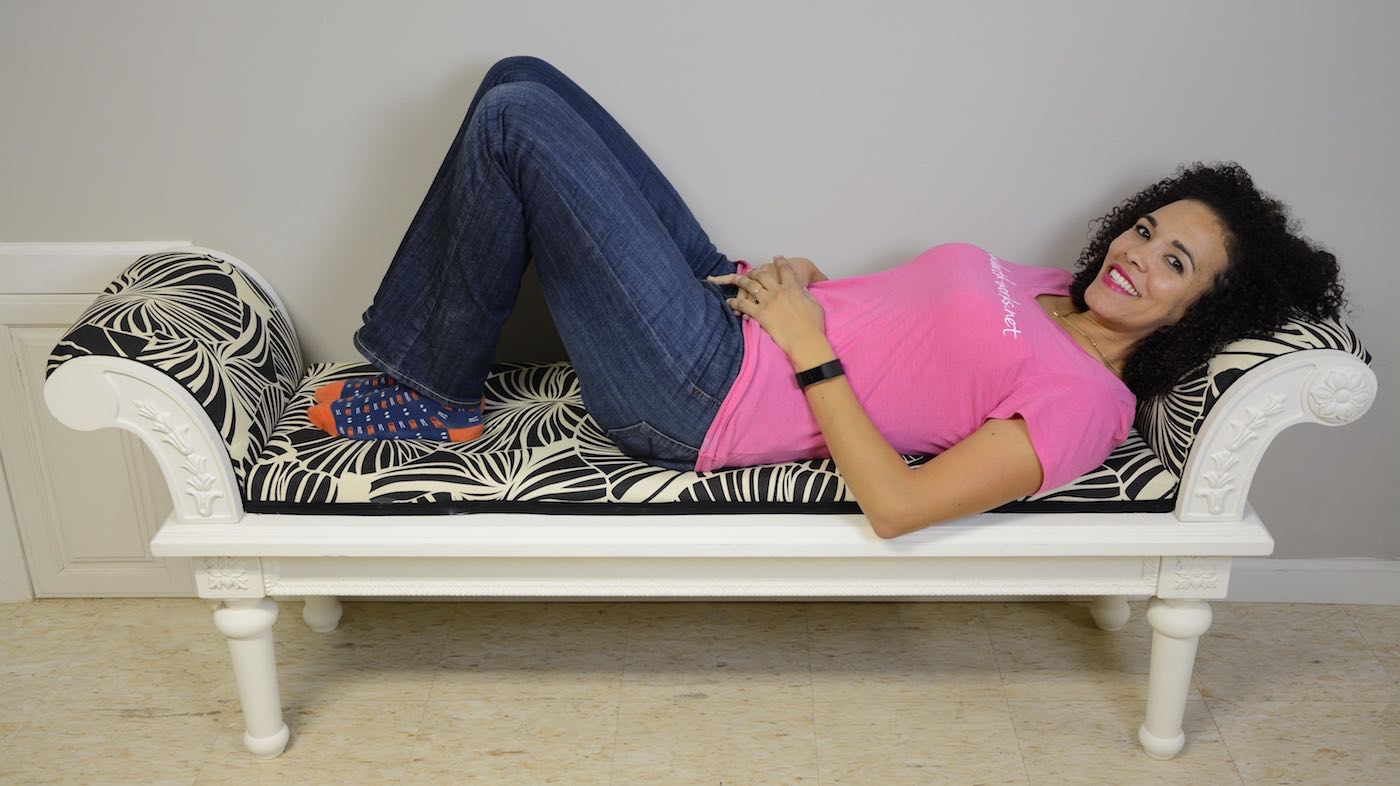
So what do you think?! Isn’t it super cute?
The challenge will be trying to find a space in my house for it! 🙂
Maybe I’ll just keep it down in the basement for when I need moments to chill out in between projects!
So do you have a goal to upholster a bench in the near future, or maybe some other furniture project?
Leave a comment below and let’s talk about it.
And be sure to head over to Arrow Fastener to learn more about the T50X TacMate for your upholstery projects!

Download the 5 freebies!

Thrift Diving inspires women to decorate, improve, and maintain their home themselves...using paint, power tools, and thrift stores! Use these 5 printables, checklists, and ebooks to get started!
Hi Serena! GREAT job on this beautiful bench! You’re awesome and love your redo projects. I’m thinking of reupholstering a French provincial chair I bought at an estate sale. Think you could help me out on it? I could really use your easy to follow directions. Thanks! 😊
Serena, this redo is absolutely stunning! Thanks for showing all of the upholstery steps, too. It makes me think that I could do something similar. I know you mentioned waxing it eventually. I always think waxing makes the details on the wood stand out even more. Thanks again!
So beautiful! I am enjoy very one of your projects and they are very detail.
I love it! Hats off to your hubby for saving the awesome fabric! Great job – plus I love the pop of pink from your shirt 🙂
Girl, my husband is the king of putting something away and pulling it out later when everyone has forgotten about it! HA! He does it with everything. I’m just glad he did in this case!!! 🙂 Thanks for commenting!
WOW, WOW, and WOW.tHAT BENCH IS SO STYLIN’ WITH THAT WHITE PAINT AND GORGEOUS FABRIC, AM SO JEALOUS. Would look great at end of our bed.
I have some fabric I bought at a Salvation Army thrift store 3 or so years ago. Is really nice fabric but is tropical brown and black print, doesn’t go with anything in our house as theme is mostly cottage with white, gray and aquas..
What was I thinking? Hate to get rid of it as soon as I do will want to change theme, right? or- Maybe someday our daughter will want it.
Love every one of your projects. What kind of work do you do from home? When I finish this comment will go watch the video. Isn’t that wonderful getting to spend day with your son? I had 4 kids so was hard to manage after youngest started school, she is 6 yrs. younger than youngest of 3 older kids, (2nd.husband’s kid).
Your fire pit turned out fantastically, enjoy.
Hi, JaneEllen!
I am right there with you–I look at fabric I’ve bought and thought, “Really, Serena???” LOL. Taste changes over time, I guess! As for what I do from home, I am a full-time blogger and publisher! 🙂 You can read more about it here on this post from 3 years ago when I lost my “day job”: https://thriftdiving.com/i-lost-my-day-job/
Wow you did such a great job, it looks beautiful, you gave such great details and tips !
Thank you, Wendy!! 🙂 I love adding as much detail as possible! The more I can explain, the more someone will learn a little nugget of something. 🙂
I was going to ask which size staples to use, clicked on the Arrow link you provided, and guess what came up? A handy guide to pick the right ones! I love this bench (and all of your other projects) and have always lived by the mantra; “Don’t buy new, re-do”! Your blog is great and I really like and appreciate your product reviews. Thanks Serena!
This looks great! I love that your husband liked the fabric enough to save it. I’m only good at the tearing apart part of reupholstering… so I have a bunch of projects that need to get finished.
I’m glad he kept it, too!! You need to get those projects done, girlfriend! You’ll feel accomplished. 🙂
This looks fabulous. I love the fabric you selected
Thank you, Debra! 🙂
So cute! You do great work – everything so neat and cleanly finished. I really enjoy your projects!
Aww, thanks, Sandra!