Tell everyone you loved this post! :)
Sometimes you never know if a project is a brilliant success……or a colossal fail. Such was the case with this dining room table I found at the thrift store for–GASP!–only $12.00!
I’ve been working on this DIY reveal for…..oh…..at least several weeks??? And I still can’t tell if it’s a colossal FAIL…………or if I inadvertently created a rustic, “weathered chic” look with the $12.00 dining room table I found at the (most awesome ever!) thrift store near my house. You know, the one I go to nearly eeeevvveerrrry Monday and Thursday when they boast 25% off of everything.
Anyhow, I digress……
You decide if this is a FAIL or an accidental stroke of genius. LOL
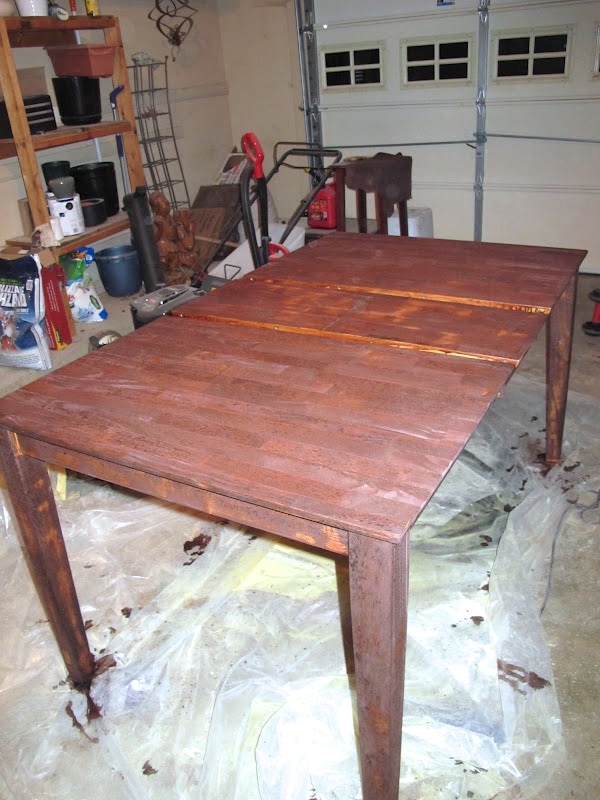
BEFORE
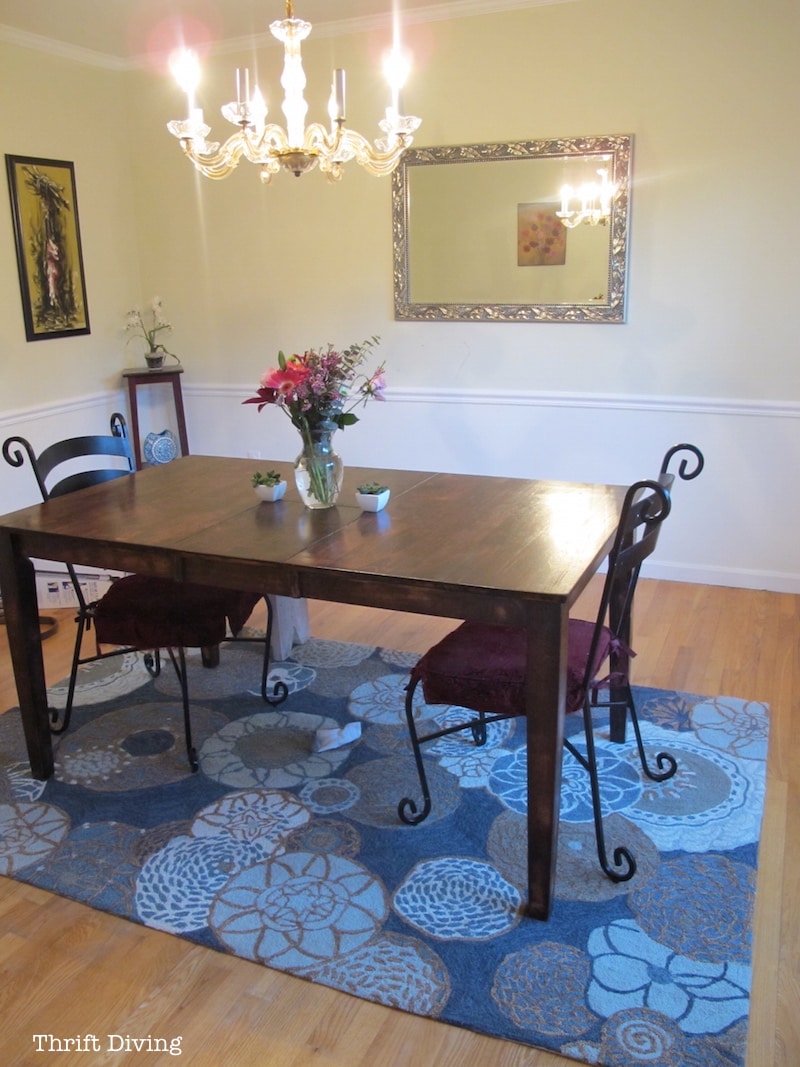
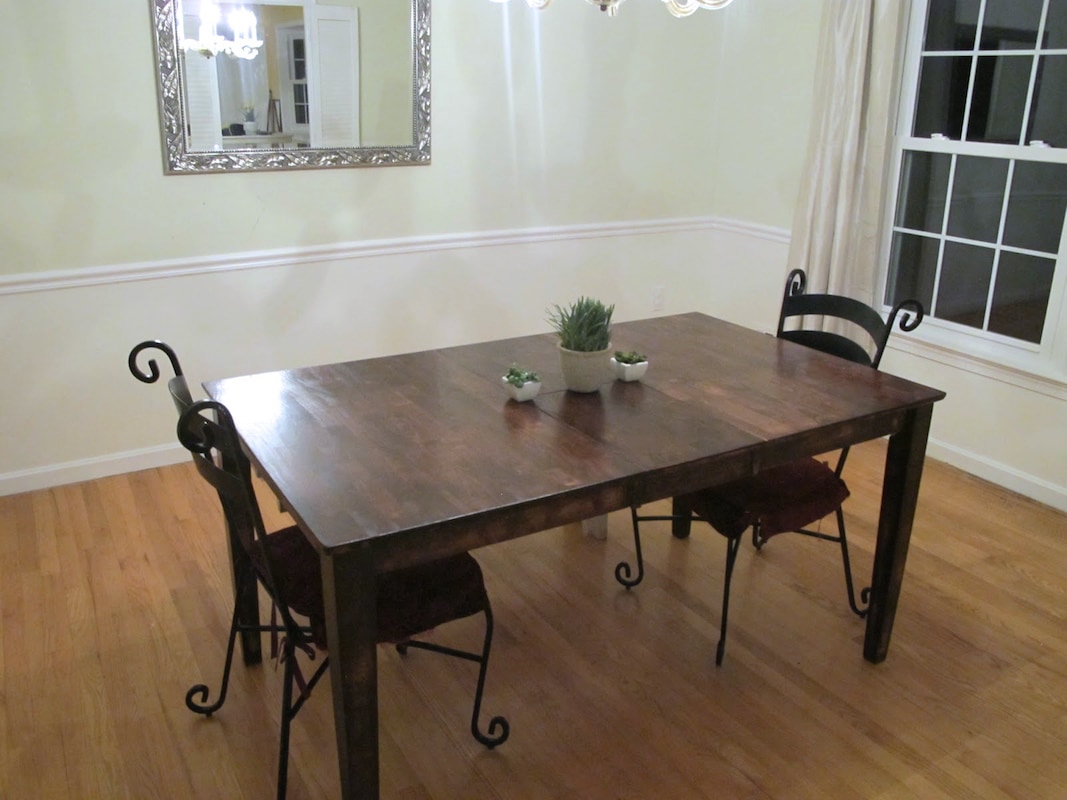
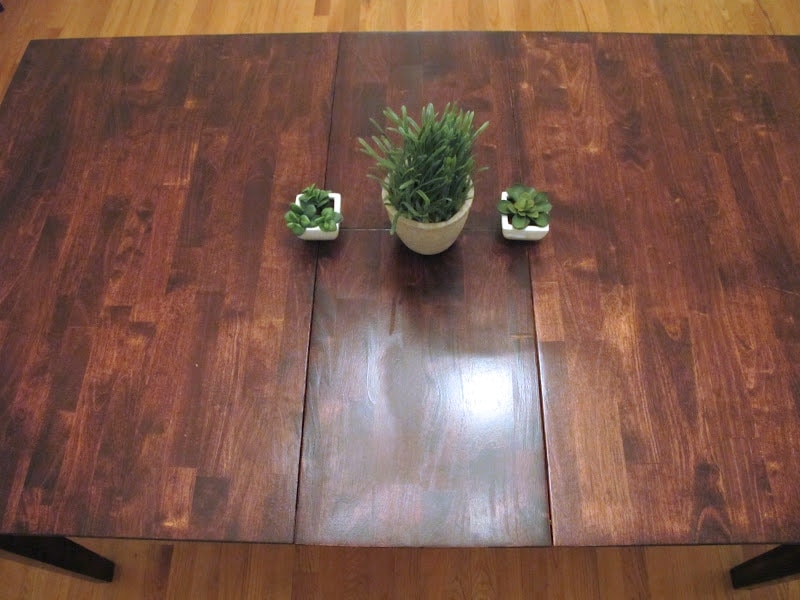
AFTER!
But don’t let that pretty dark wood fool you! LOL. It almost didn’t turn out so nicely! You’ll see why further along in the post. I was at my wits end on how I was going to turn this table around and actually create something I could use in my dining room.
But before I show you how I did it, here’s a list of materials I used for this project.
Materials Used:
Just some of the materials you will need to complete a job like this!
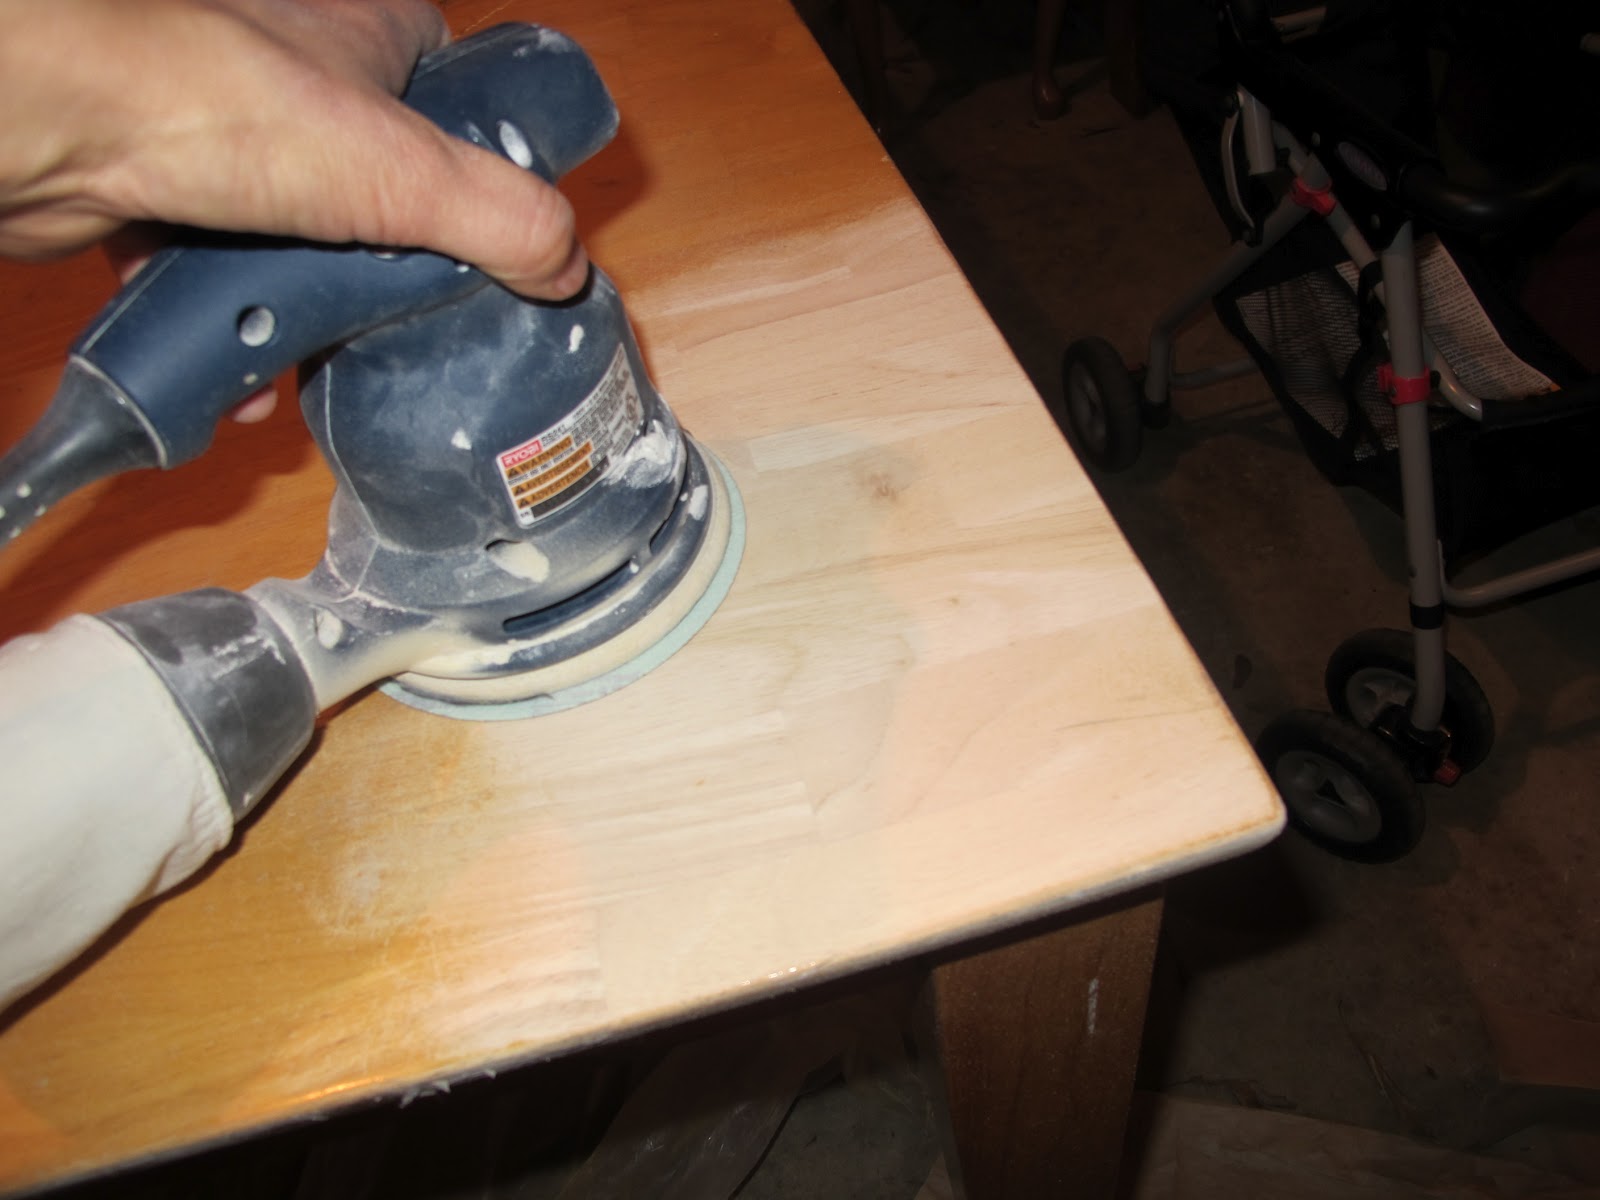
- Orbital sander
- Minwax pre-stain
- Minwax Polyshades
Before You Start
Before you tackle a project like refinishing a dining room table, here’s one bit of advice: do not “jump right in! 🙂
It takes a certain amount of planning so you can be sure how to tackle the project. For example, ask yourself:
1. Am I going to just sand this table, or use a paint stripper first?
2. How long do I want the stain to set?
3. What shade do I want the table to be?
4. How can I make sure I don’t gouge/chip the wood?
5. Do I have enough lighting to see what I’m doing?
My problem is that I “jumped right in” and skipped the stripper, I was left with invisible, spotty patches because the sander hadn’t removed enough of the old varnish. The stain couldn’t penetrate the old varnish, of course, which left me with seriously blotchy areas. Unless I wanted to start over (NOT!), I had to try to cover it up and pass it off as “distressed” and “rustic.” Was I successful? LOL
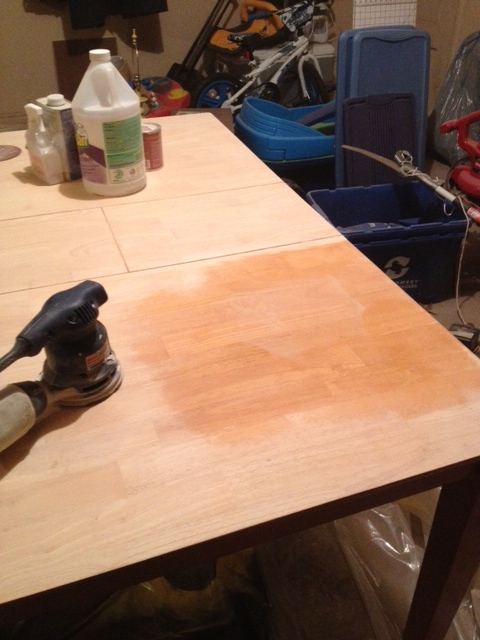
I did use the MiniWax Pre-Stain so that the color would be uniform. However, when you skip the stripper and rely on the sander to get all the previous varnish off, this is what you wind up with:
A blotchy mess!
This is what it looked like after the first 1-2 coats of MiniWax Red Mahogany, which I first used. HORRID, I tell ya….

I kid you not– I bought this table for $12.00! I knew instantly that I wanted to refinish it–stain it, or paint it with some Annie Sloan chalk paint, which I have yet to fully test!
Staining won out, and I couldn’t wait to get started since I had never stained a THING in my life. I TRIED to plan according by going to Home Depot and buying all these things I thought I would need.
I broke out my trusty ‘ole sander and decided to “jump right in” and skip the harsh stripping chemicals. Sanding will work just as well, right??
MAYBE NOT!
I thought I had removed all the finish, but once I started staining, I realized that I hadn’t.
I had been left with blotches everywhere from all the parts that were poorly sanded!
*sob sob*
What was I going to do with this now?!
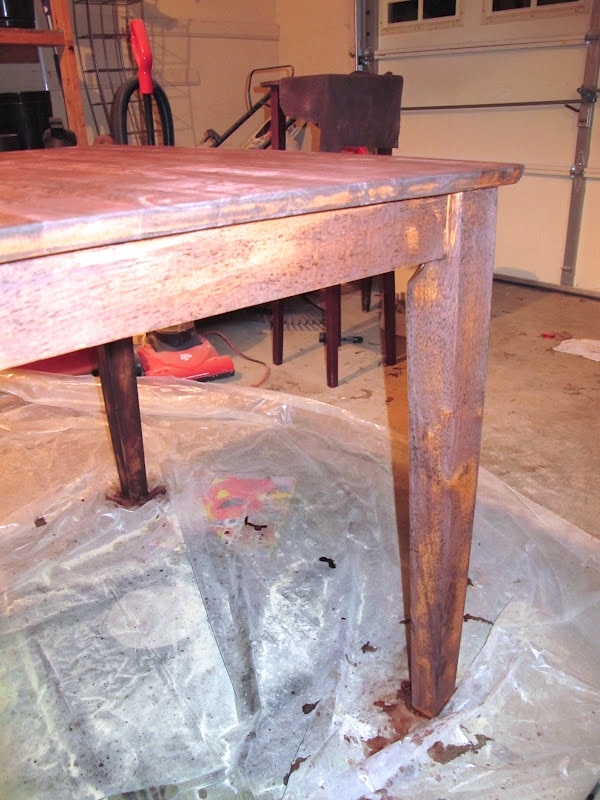
I ended up sanding out the middle leaf part again, and reapplied the stain. Doing so resulted in the middle leaf staining a bit darker than the other parts of the table. So if you look closely, it’s a darker. Be careful when staining so that all parts are stained at exactly the same time, to ensure even coverage.
After I applied the Pre-Stain, and then the Red Mahogany, I waited 24 hours and went over the body again with the Polyshades in the Antique Mahogany finish, which deepened the color, and helped cover up some of the light spots throughout the body.
I also put 3 coats of additional water-based Polycrylics over the whole table, using even strokes.
I’m actually loving the rich color, and shiny table top!
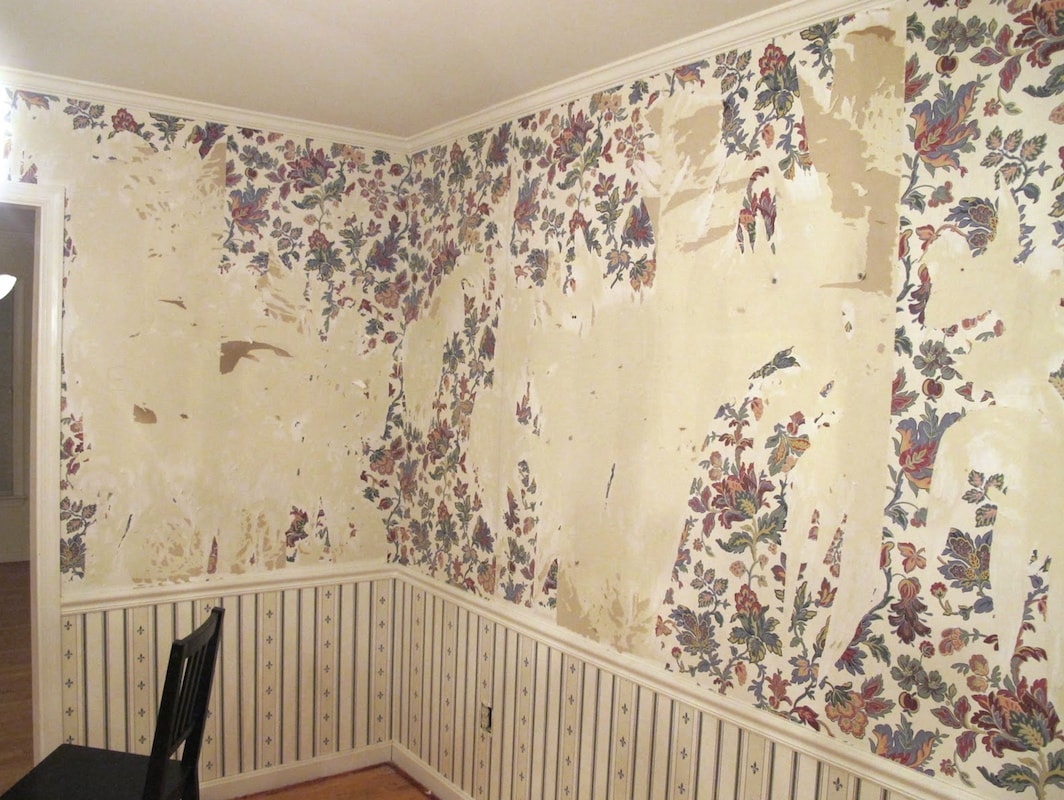
And just a reminder what this dining room looked like when we moved in, in 2010….ugh, the wallpaper! What a pain to remove. Wallpaper should be banned. Just sayin’.
BEFORE
AFTER – In progress
We still have a lot of work to do with our dining room. But when you buy an old house, sometimes it takes 10 steps just to get to this level of “after.” Maybe I’ll tackle this dining room in my next 30-Day Room Makeover Challenge. 🙂
(P.S. The rug was from Home Goods, my favorite place for buying rugs!).

BEFORE
So, to find this table for so cheap, and to turn it from this…..
….into this….
….makes me happy, regardless of its faults. Next time, I know better. Isn’t that what DIY is about??
Have you ever had a project that almost (or did!) turn out to be a colossal fail? What did you do about it? Leave a comment and add to the discussion now!
Tell everyone you loved this post! :)


Mickelson Family, yeah, it’s a PITA when people don’t know what PITA means (hee hee). 😉
Michelle, we used a variety of methods, but the most helpful was the wallpaper steamer for about $50from Home Depot. But once we removed the wallpaper, we were left blotchy brown paper-ish spots everywhere where the top layer of drywall had come off. That was a whole ‘nother issue and steps to repair. YIKES! We still have a couple rooms/areas that need wallpaper removal. I’ll be posting it here soon!
This looks amazing! I noticed you used the word”pita”…lol I say that all the time and nobody even knows what I am talking about!
LOVE it! And I think having the leaf a little darker adds to the rustic feel.
Love the table! What did you use to remove the wallpaper? Fabric softener and water works GREAT! I tackled several rooms in my father’s home this way. Comes off pretty easily and smells fabulous.
Didleigh, you said it right–wallpaper is the WORSE! I should re-post some of our wallpaper removal pics. You would never believe the big ‘ole crap piles of the stuff! LOL Congrats on the upcoming move!! A new house can drain you, so definitely DIY’ing it will get your place to where you need to fix it up. Thanks for the comment, btw!
Definitely NOT a fail on your table. It’s gorgeous and unique.
Wallpaper is the WORST! The rustic table is awesome! You’ve done a great job and that inspires me. We move in to our “new” home in a week and luckily it only has minimal wallpaper….but other unattractive things that need to be fixed on the cheap!!
Oh, “wallpaper disaster” is stating it mildly, Liz! Every room, with the exception of the boys’ room, was covered in wallpaper. Looking back, I can’t believe we tackled such a project.
I’m happy you were able to see past the wallpaper disaster that was your house when you bought it . . . LOL!
http://www.homeschoolingatwork.com/