BEFORE and AFTER: Walkout Basement Makeover (In Progress!)
The biggest reason that we never finish DIY projects is because we’re scared of something: scared it won’t turn out, scared that we won’t know how to fix it, scared it will cost more money than we can afford, or scared that we’ll fail miserably. Let me tell you the story of how I left an important project sitting for an entire year.
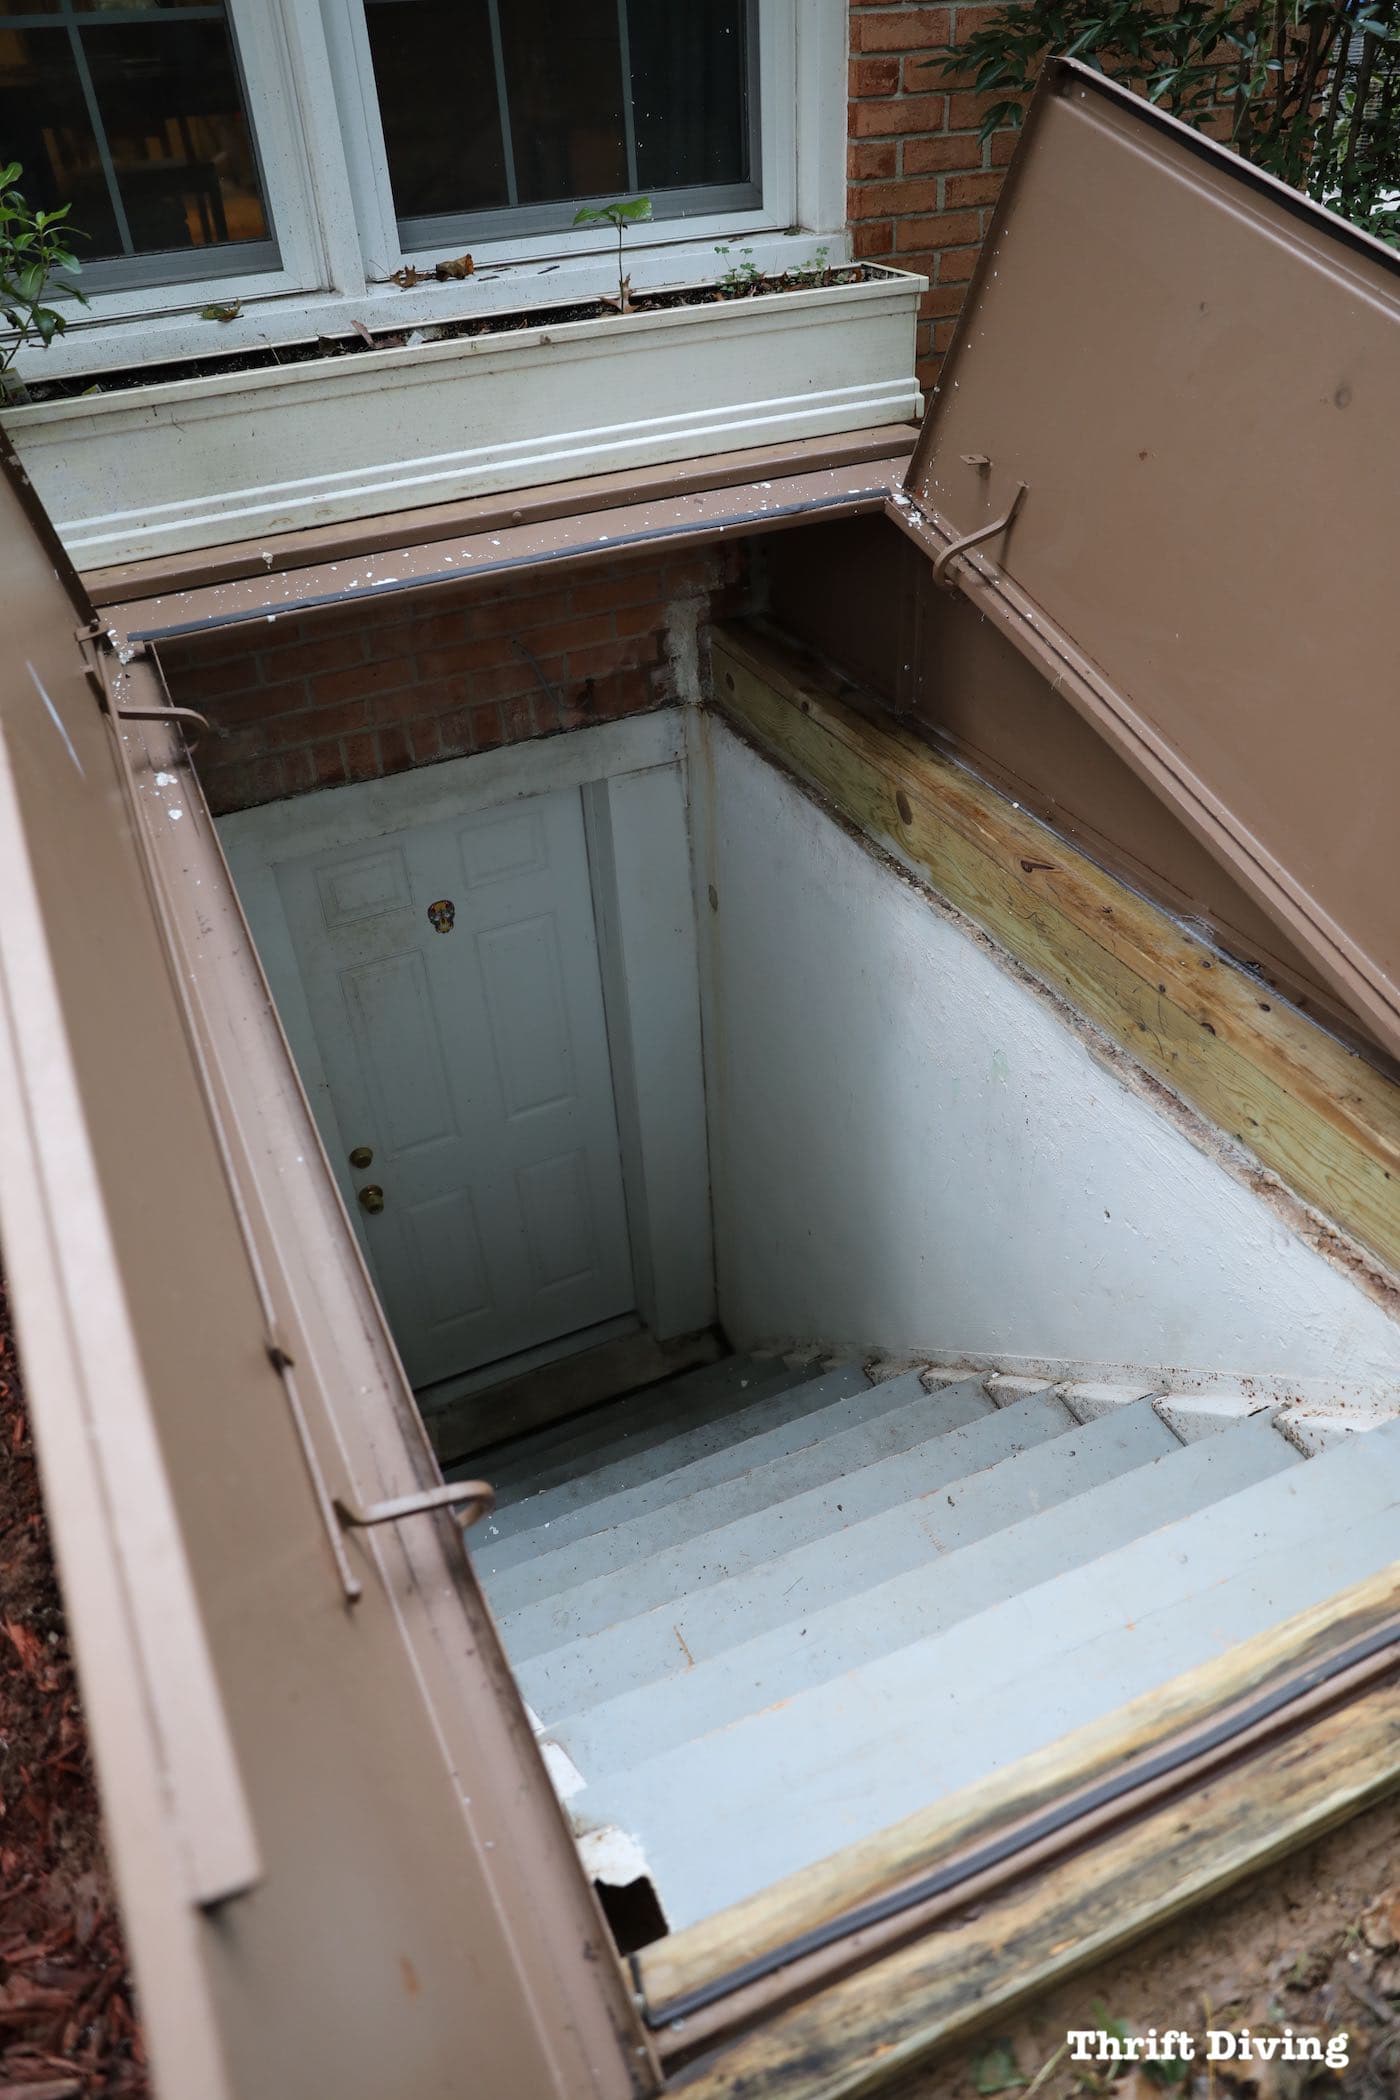
You see….I’ve been scared to tackle my walkout basement. Last year I laid vinyl plank flooring in my basement, over the old linoleum tiles, as part of a basement makeover project. But it was more than just laying new flooring, throwing down a new rug, and painting. The bigger problem was that I had to stop the leaks from the walkout basement doors (AKA “Wizard of Oz” doors) that plagued us for years before I could even think about prettying up the basement.
BEFORE
AFTER!
Doesn’t it look fantastic?! But it wasn’t just about prettying up the basement. It was about repairing and improving my home that has been the bane of my home ownership. It no longer gives me the heebie jeebies. And while I still run down to the basement with anxiety when it rains, for fear of finding water, I know that every improvement I make is taking me in the direction of waterproofing my basement walkout–something it has taken me a long time to do.
If you’d like to learn more about different types of basements, specifically what is a walk-out basement, head over to Redfin to learn more.
Watch This Project in Action
Over on my YouTube channel (are you subscribed??) you can find all of my projects. Here is my basement makeover in action!
Materials
To fix my basement walkout steps and stairwell, I needed a few materials. I also used four tools that were supplied to me by The Home Depot in order to test them out to see how they’d perform for my project. Here’s what I used:
- 2 x 8 pine boards
- Circular saw
- Metal primer
- Hydraulic cement
- Dry-Loc sealer
- DeWalt 20V Tripod Light
- DeWalt 20V 1/4″ Sheet Sander
- Behr Porch Paint for steps
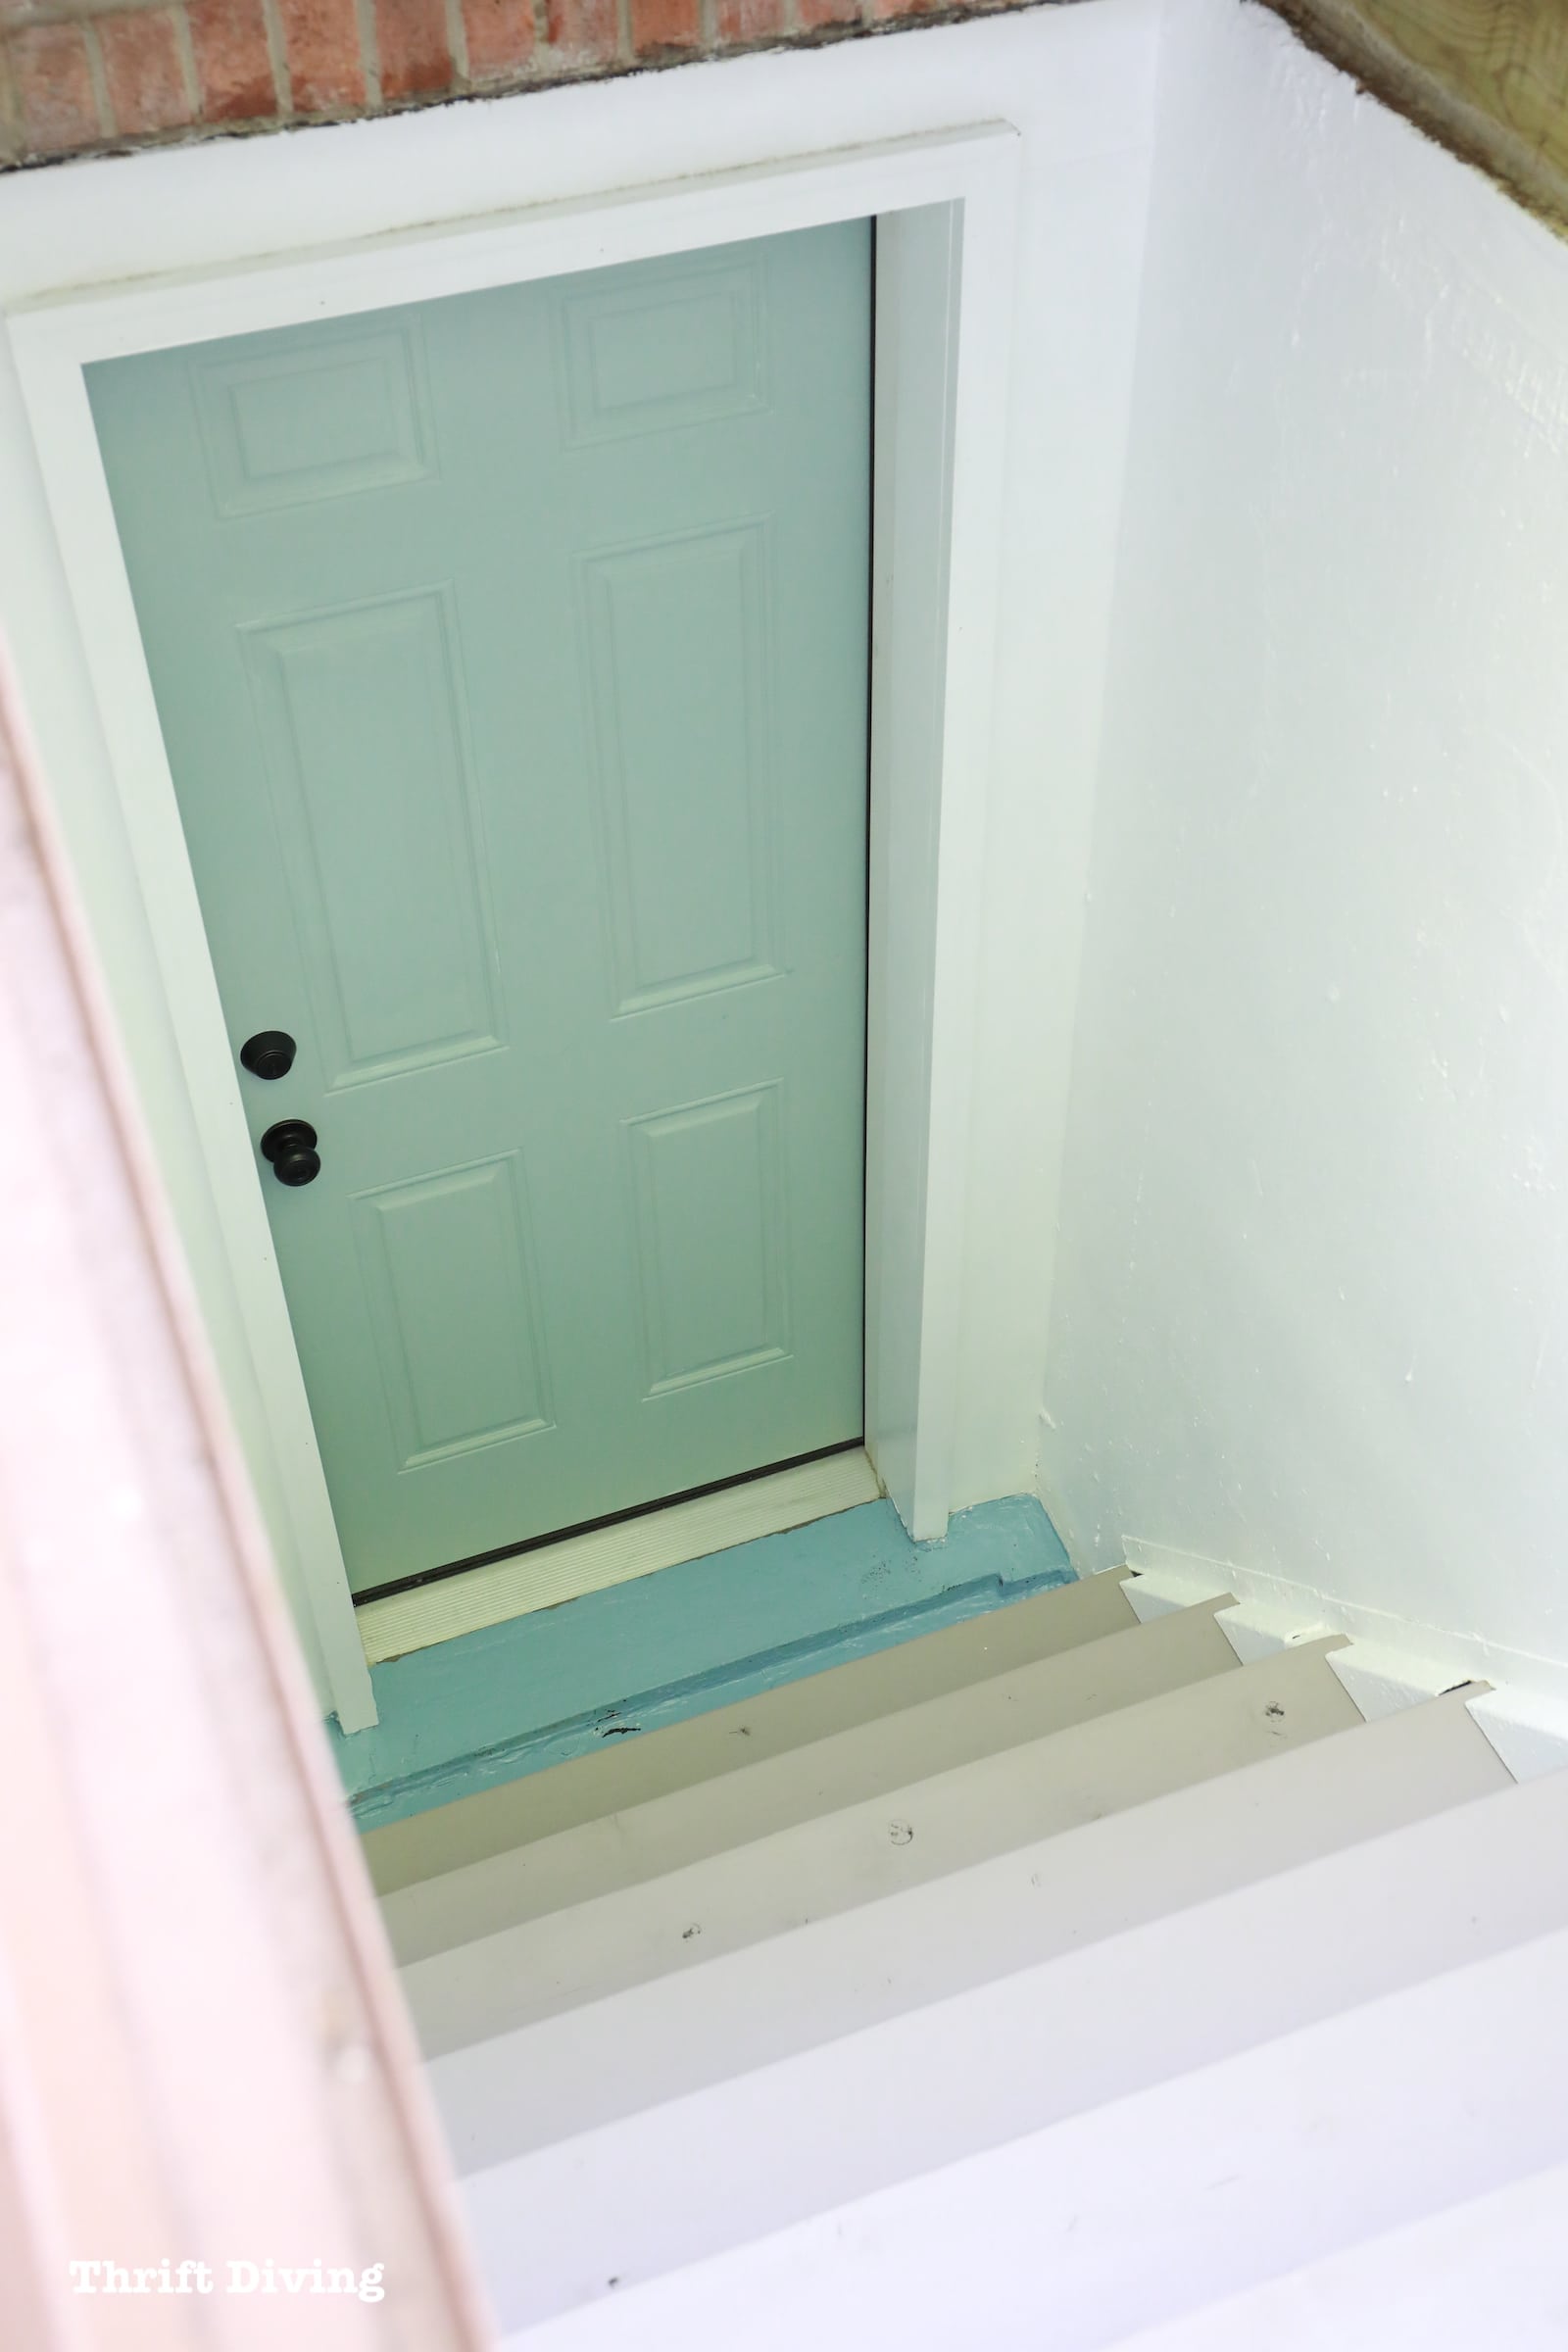
- Behr Exterior Paint – Quiet Teal (for the door)
- RIDGID OCTANE Brushless 18V 3-1/4 in. Hand Planer (optional)
- Urethane
- Paint brush
- Hammer
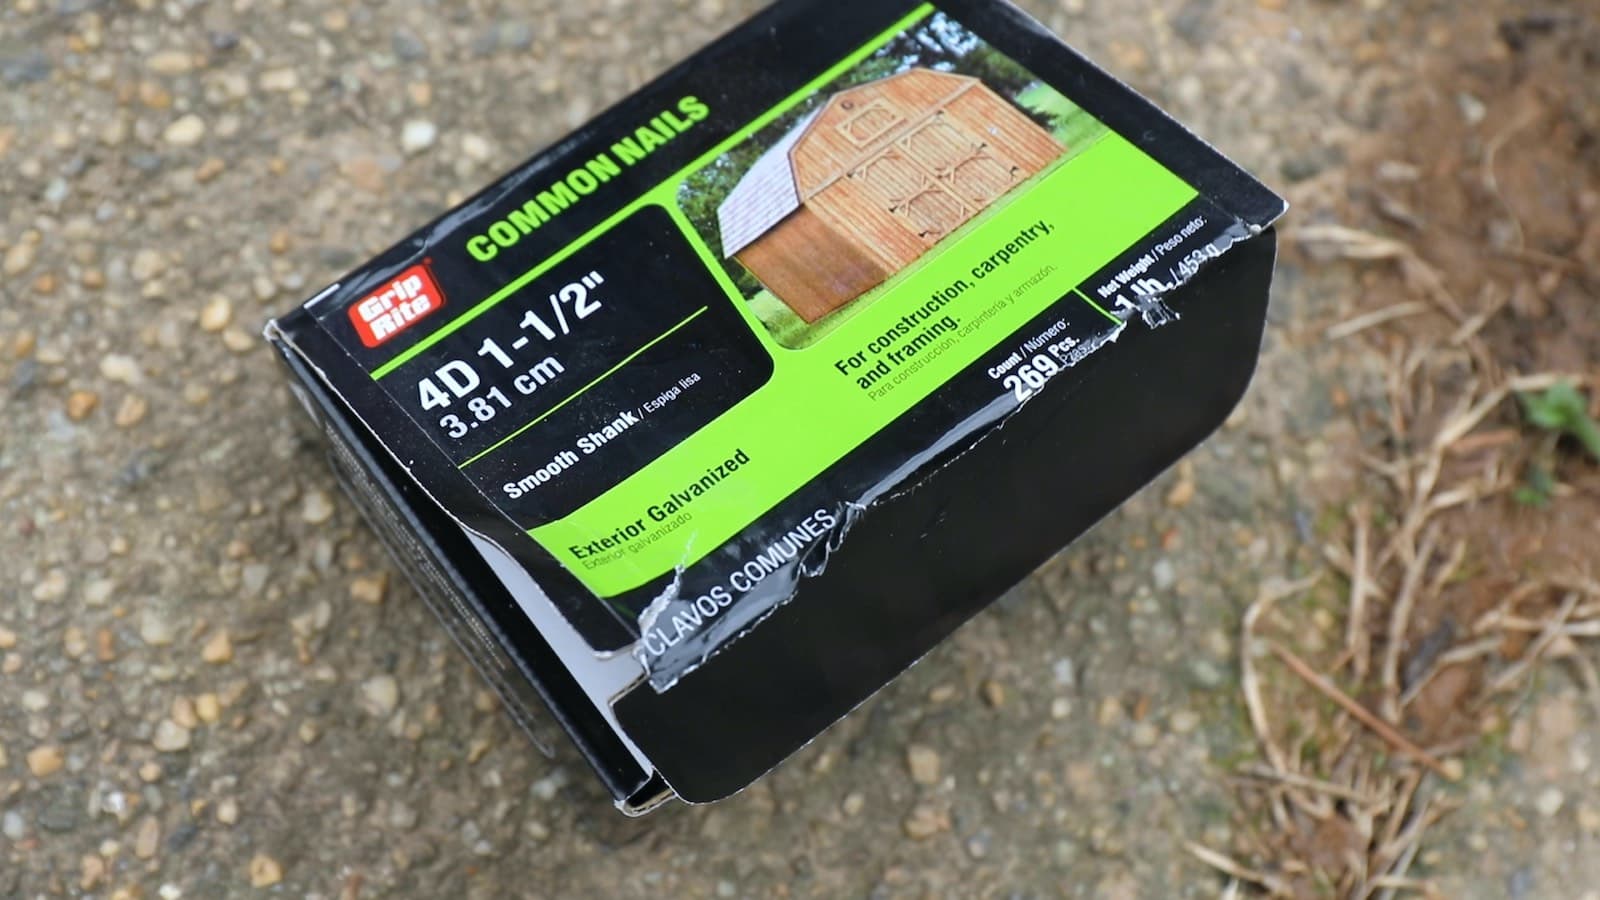
- Exterior galvanized nails (1-1/2″)
- Garage floor paint (for the floor)
- Trade Master Tan Duck Canvas Gloves
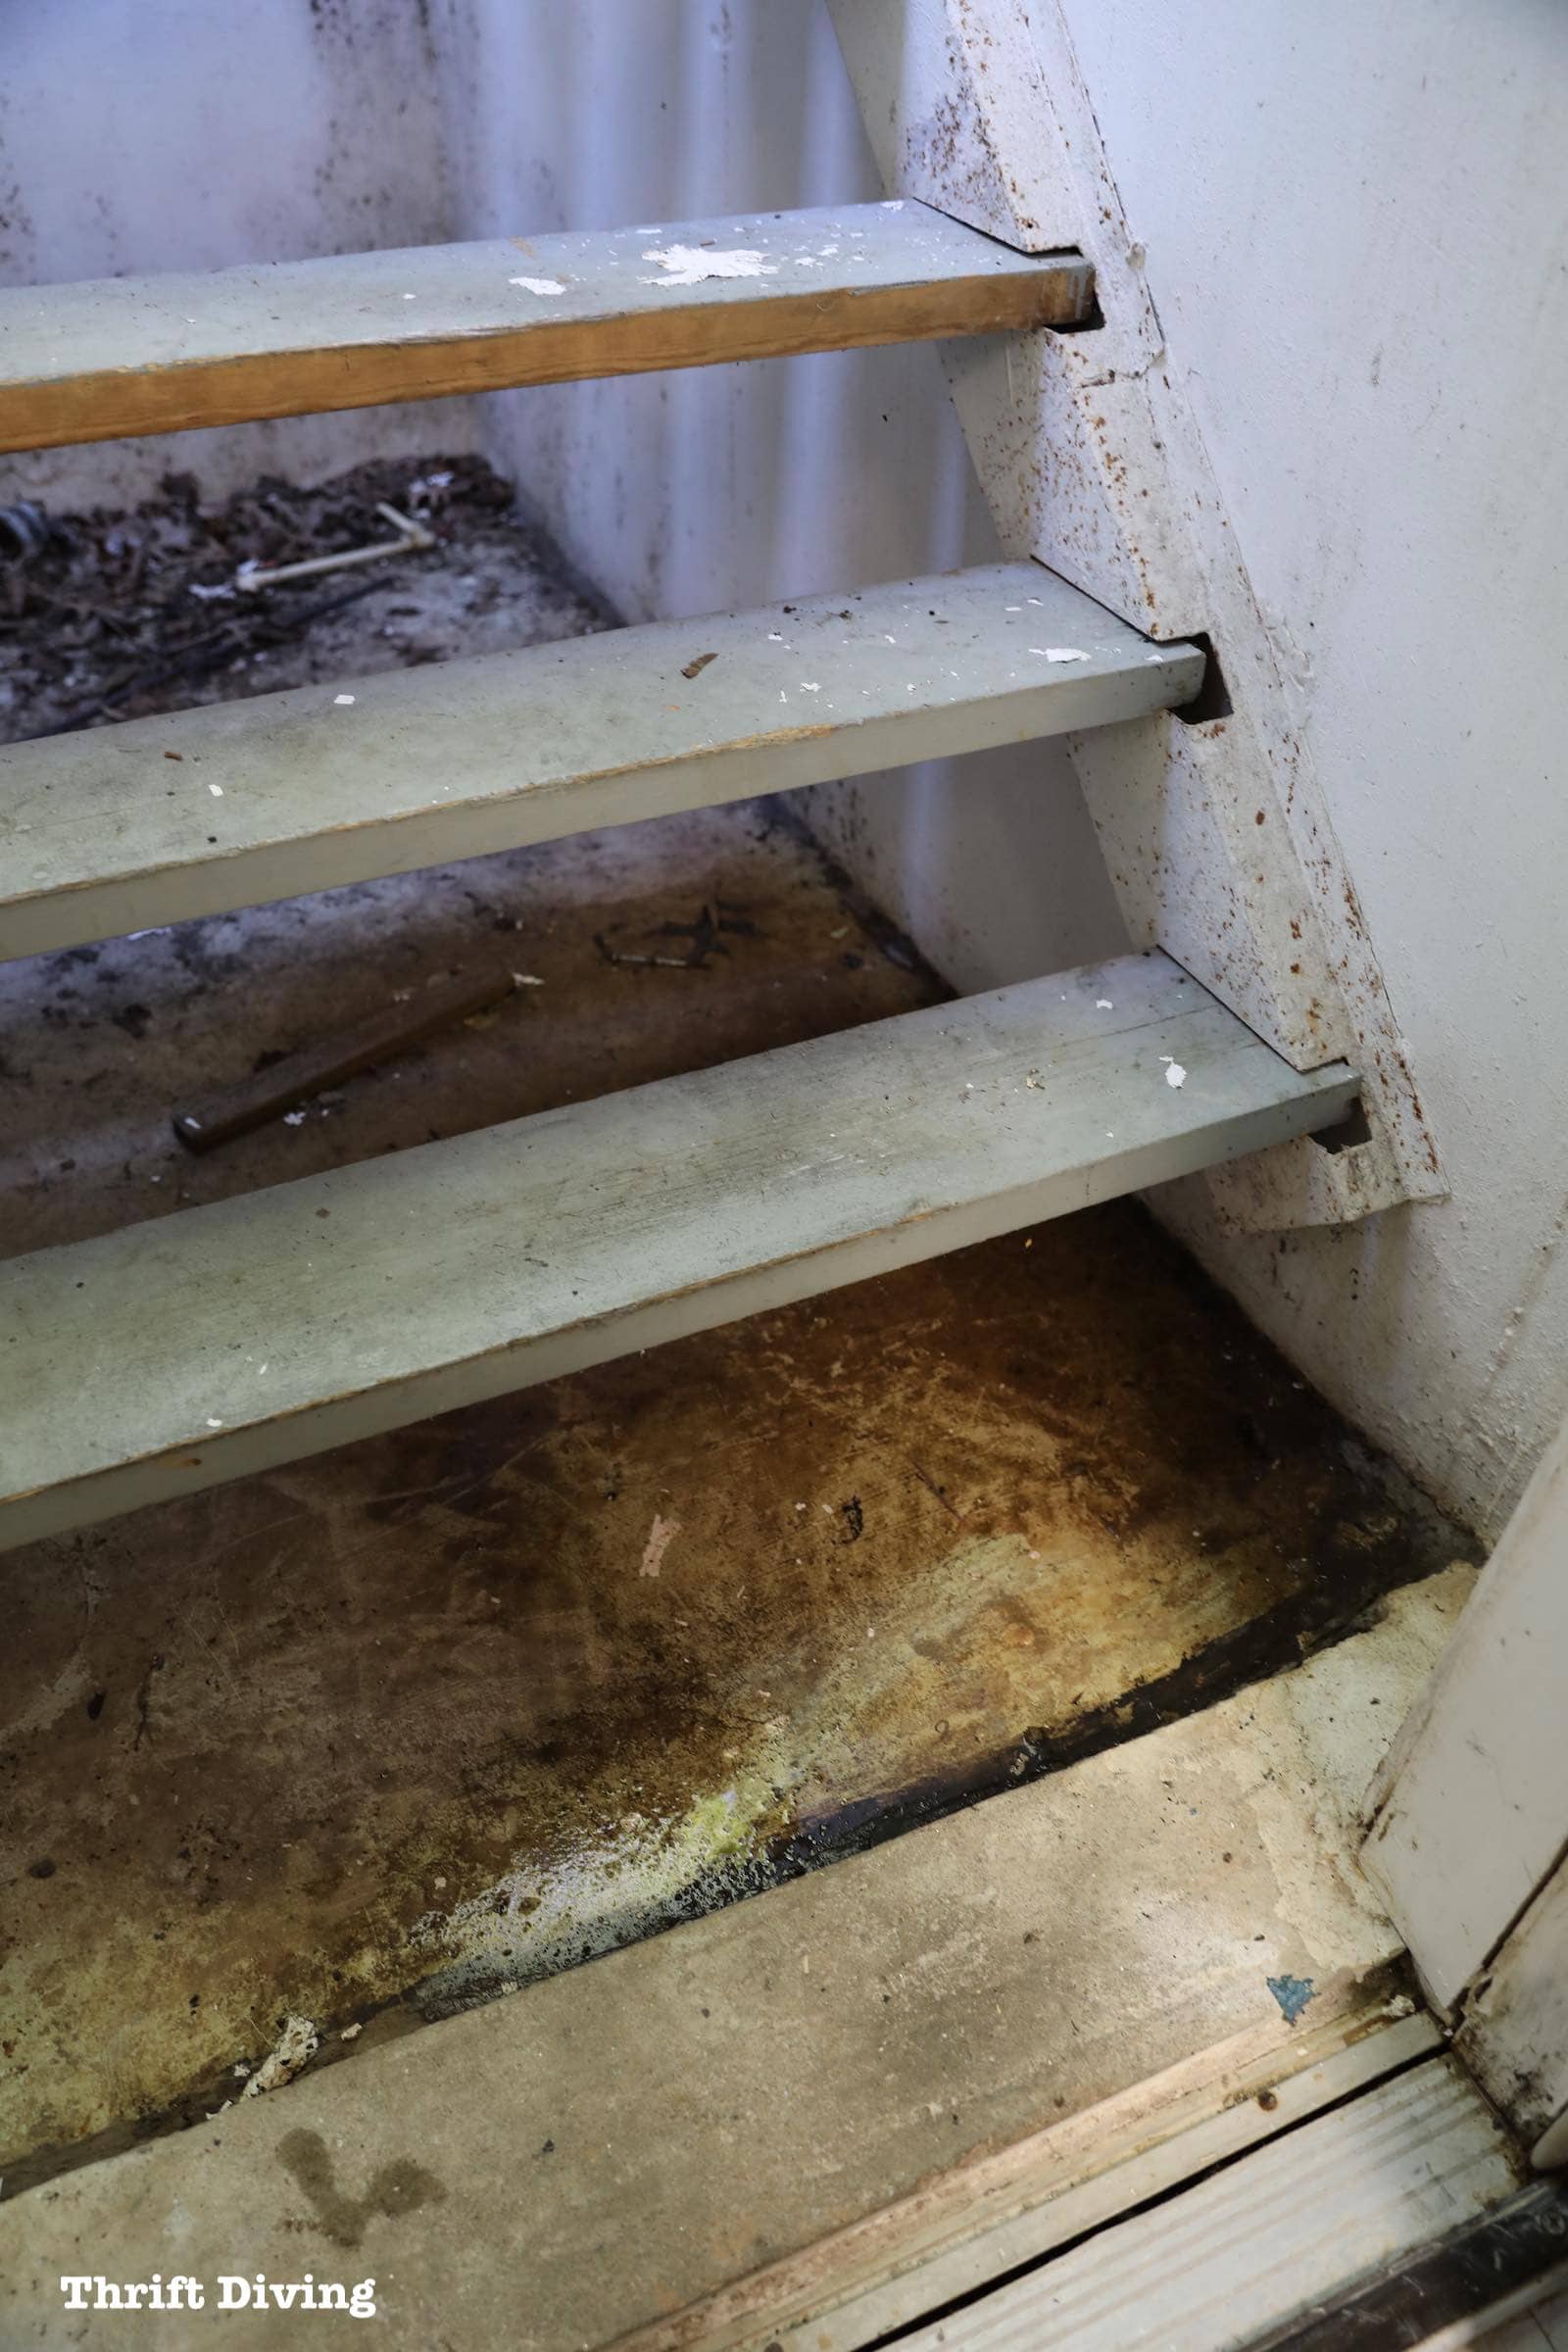
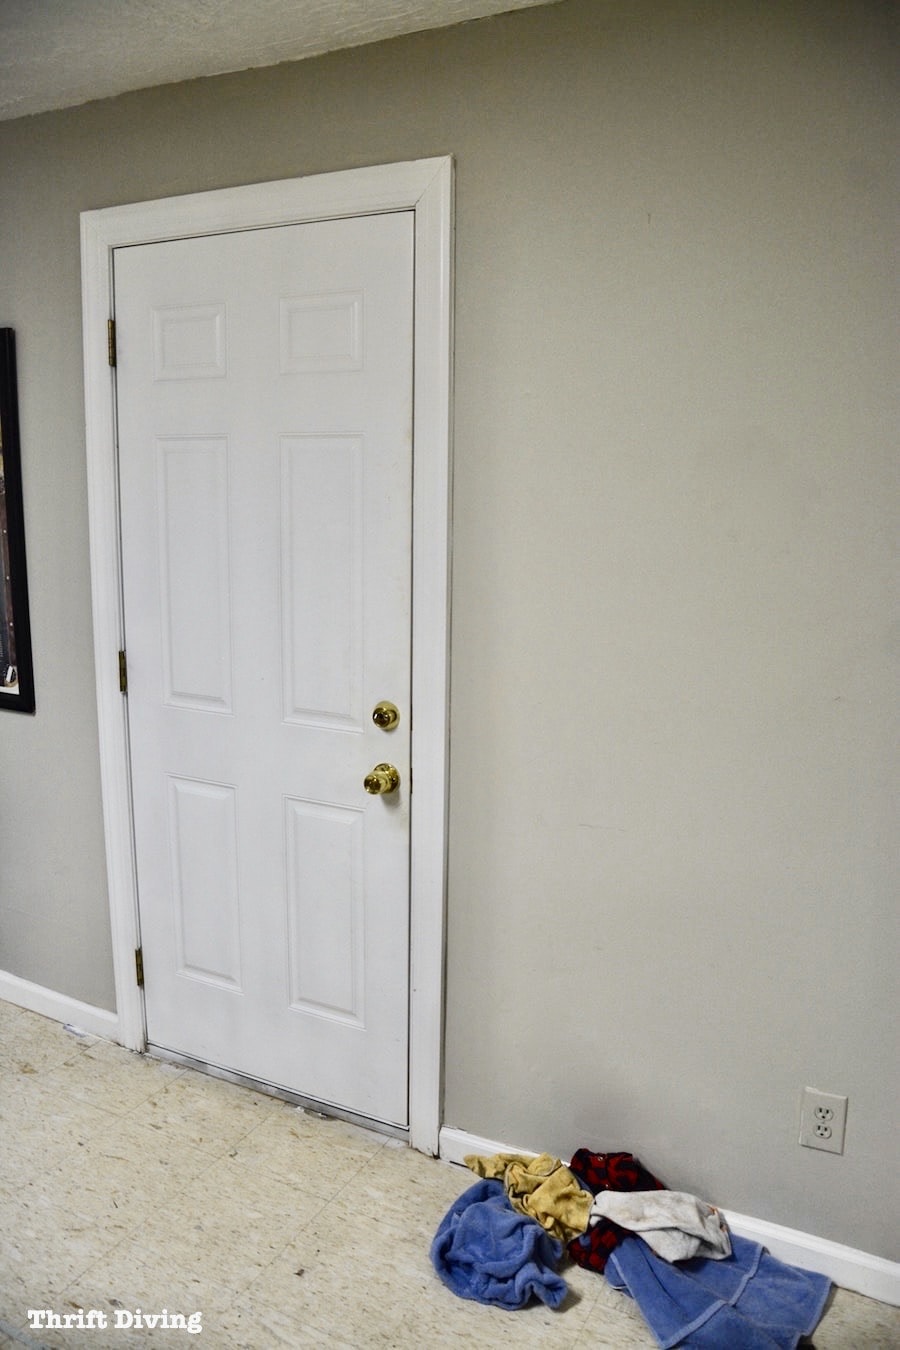
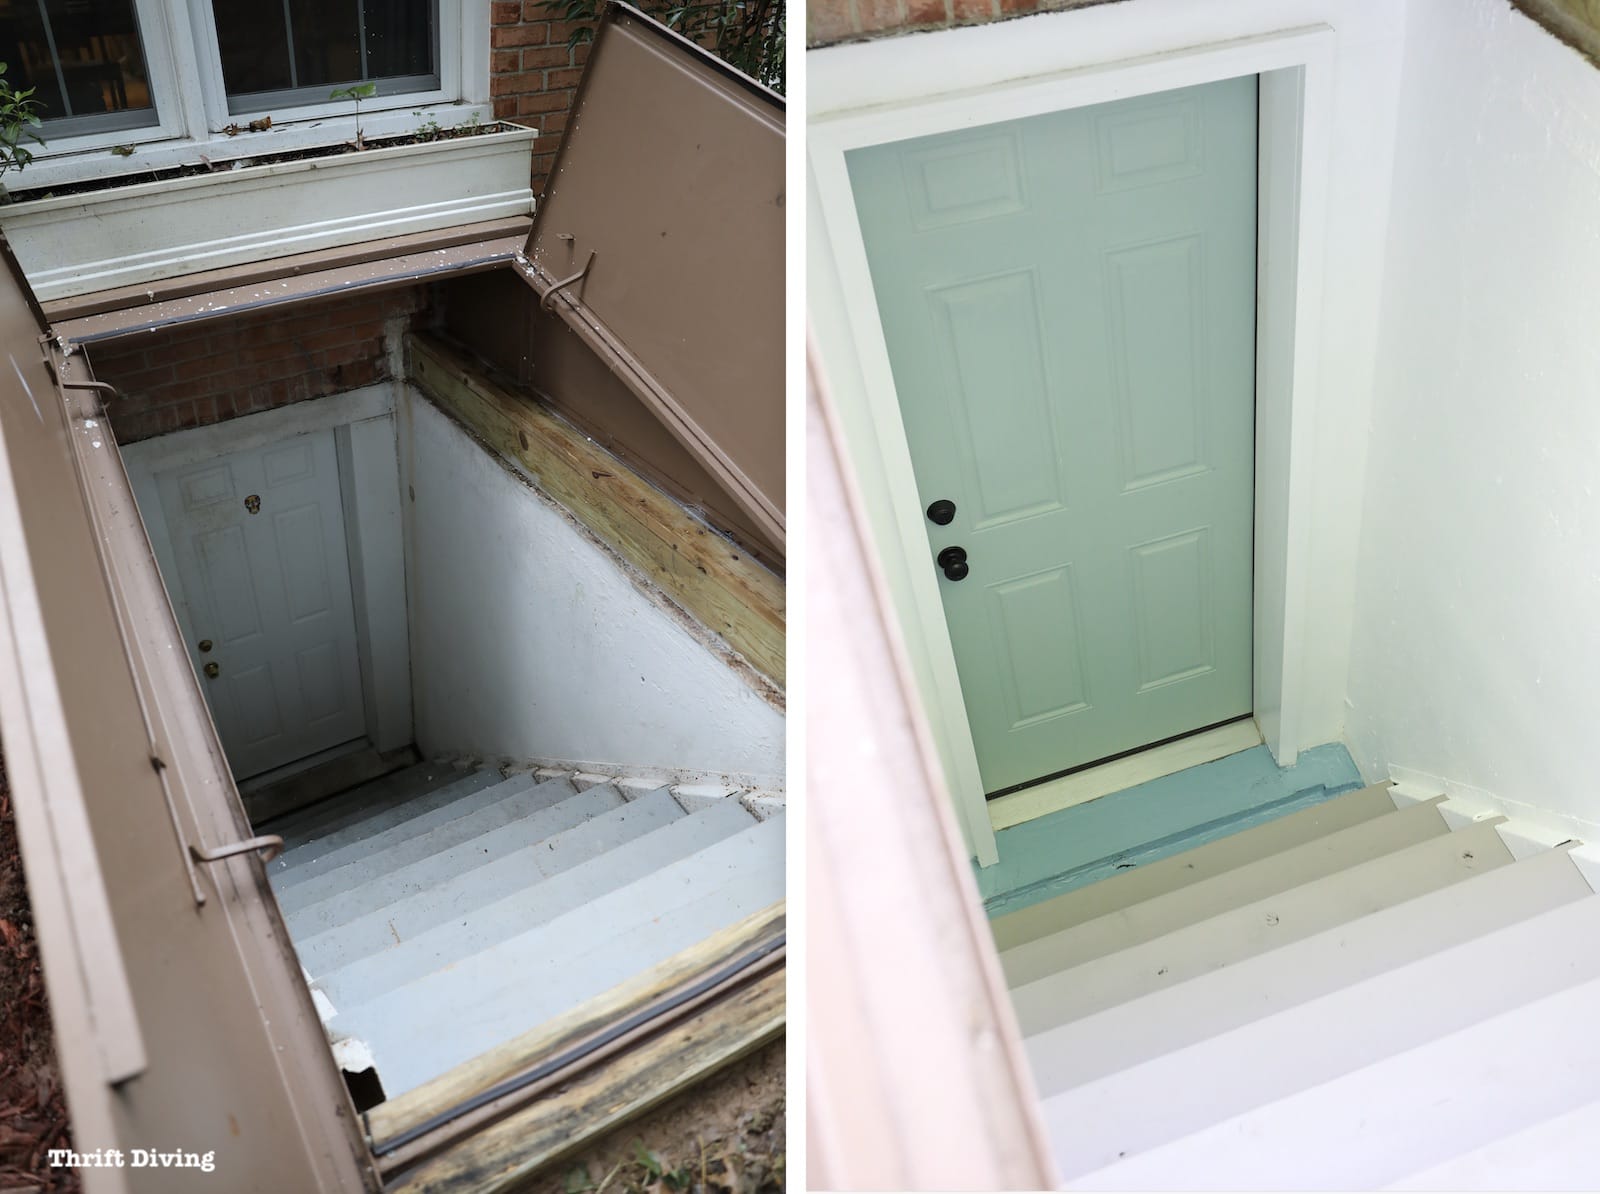
Even after having this Steelway walkout basement door replaced years ago shortly after moving in, there were still leaks that lead to years of “emergency” towels kept in front of the door, just in case. It wasn’t uncommon to come down to the basement in a heavy storm and find puddles dribbling onto my floor. You can see left-over water sitting in the basement stairwell after the rain.
BEFORE
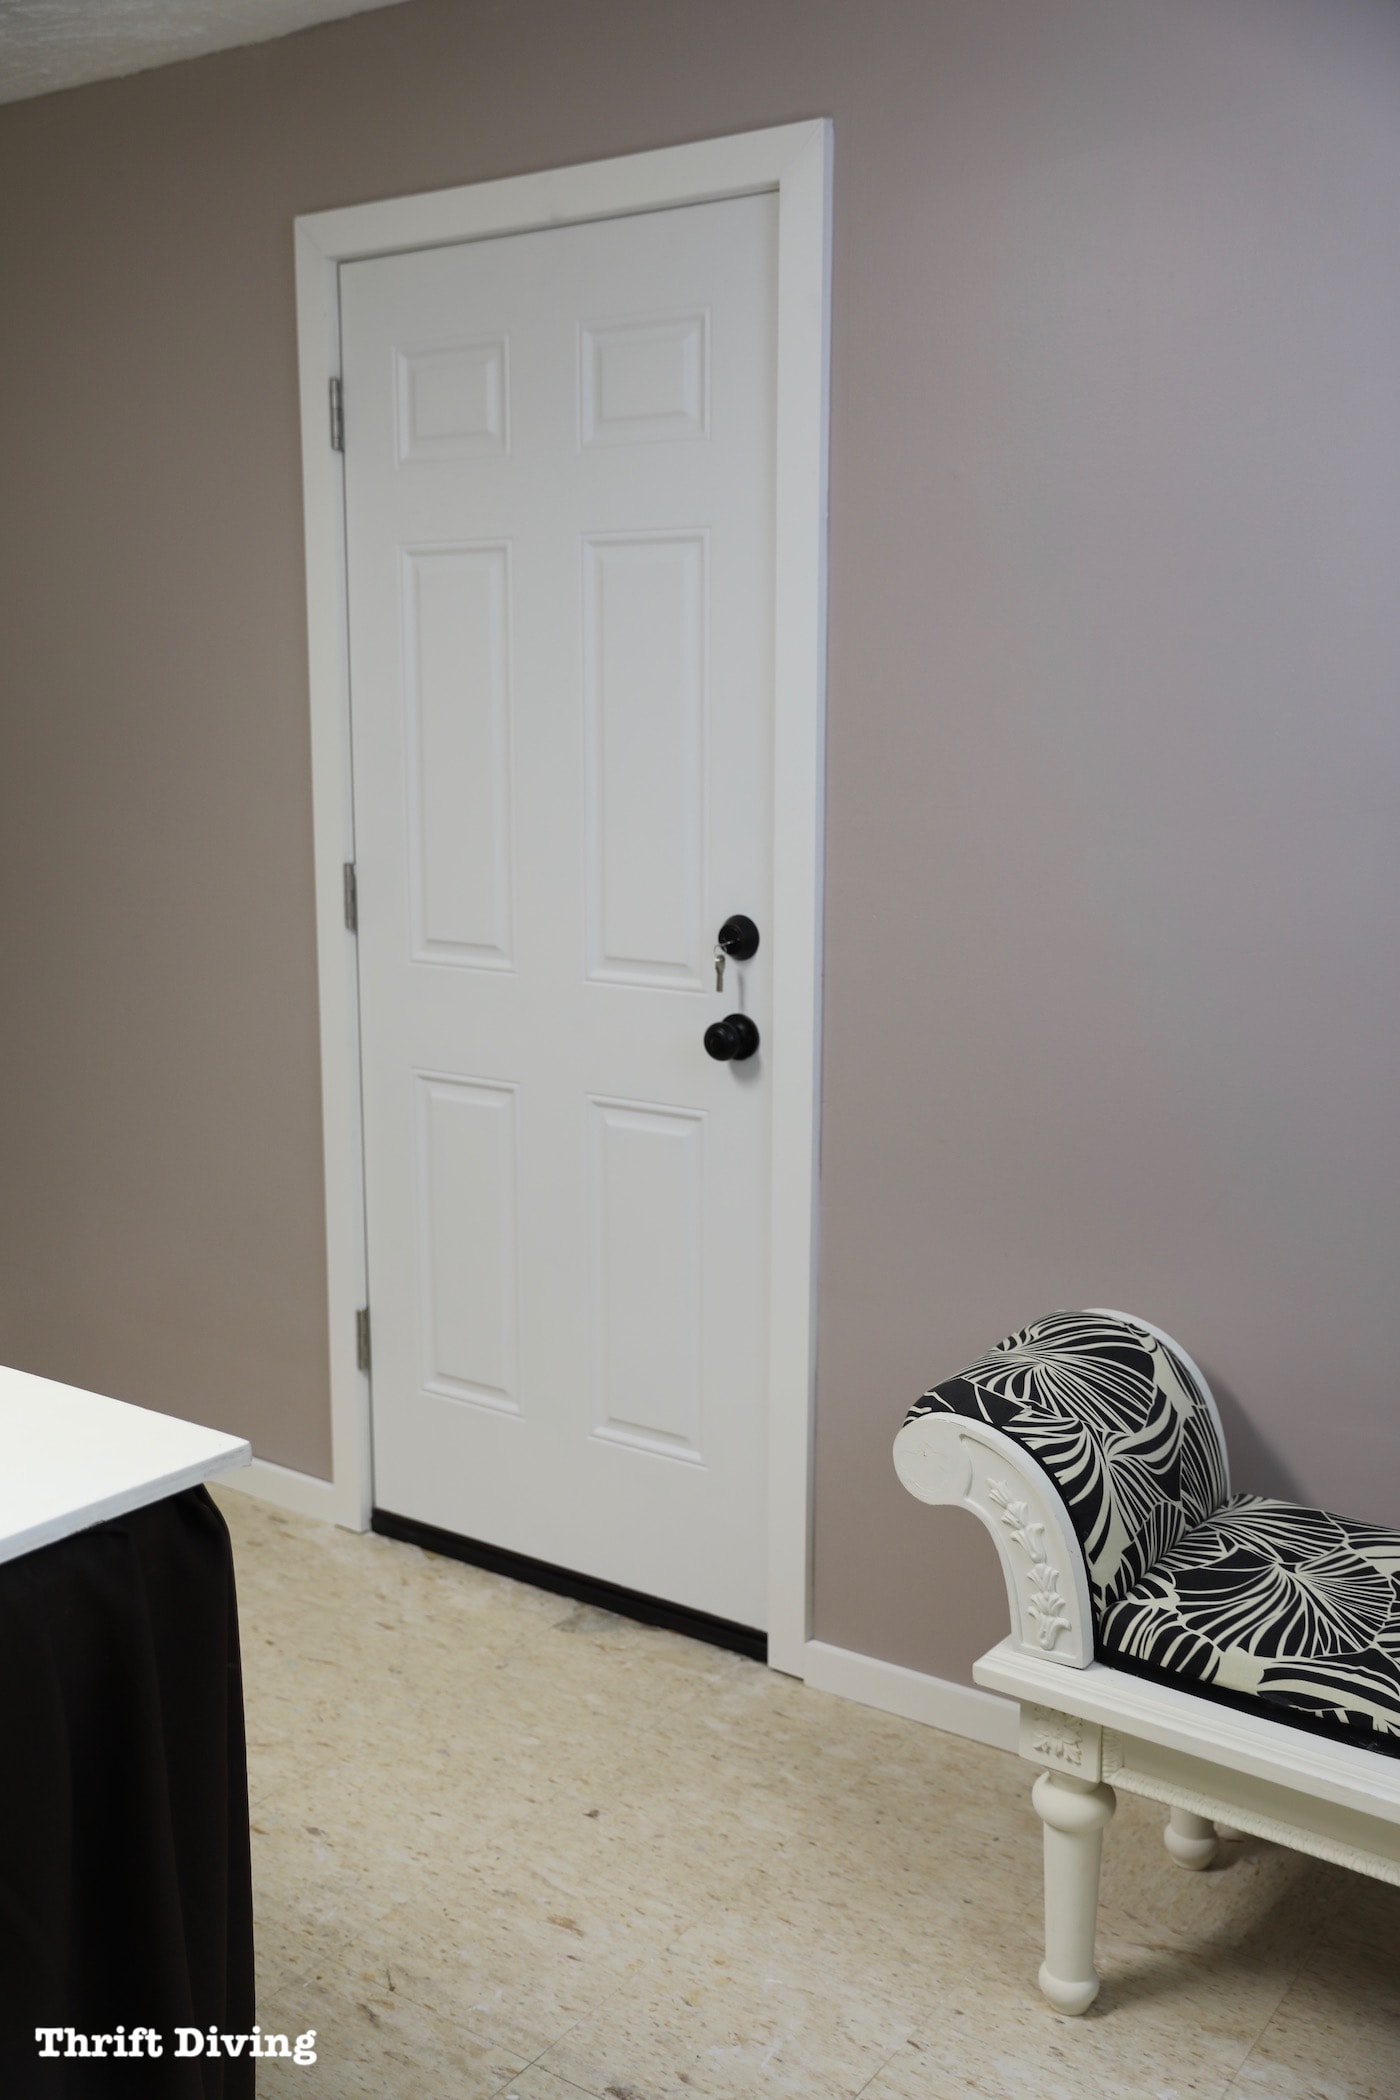
AFTER!
Now, it’s fresh and clean and doesn’t make me shudder when I open the basement walkout door!

BEFORE: The Mold Problem
Sadly, this is how we had to leave the basement: with a set of towels sitting in front of the door to capture any unexpected rainfall seeping into the basement. What you can’t see in this picture below is the mold growing behind the base of the drywall and the rotted wooden base plates near the door. You can see the entire process in this video on my YouTube channel. Everything looked and felt amazing once it was all fixed!
AFTER
When it was
The Vinyl Plank Flooring
Later, when enough time had passed and I felt confident that no more leaks were coming in, I felt confident enough to install vinyl plank flooring over the linoleum. It looked fantastic! Finally, this messy, dingy basement was getting the much needed improvement it needed! You can watch the entire installation of my vinyl plank flooring here on my YouTube channel:
What You Also Didn’t See
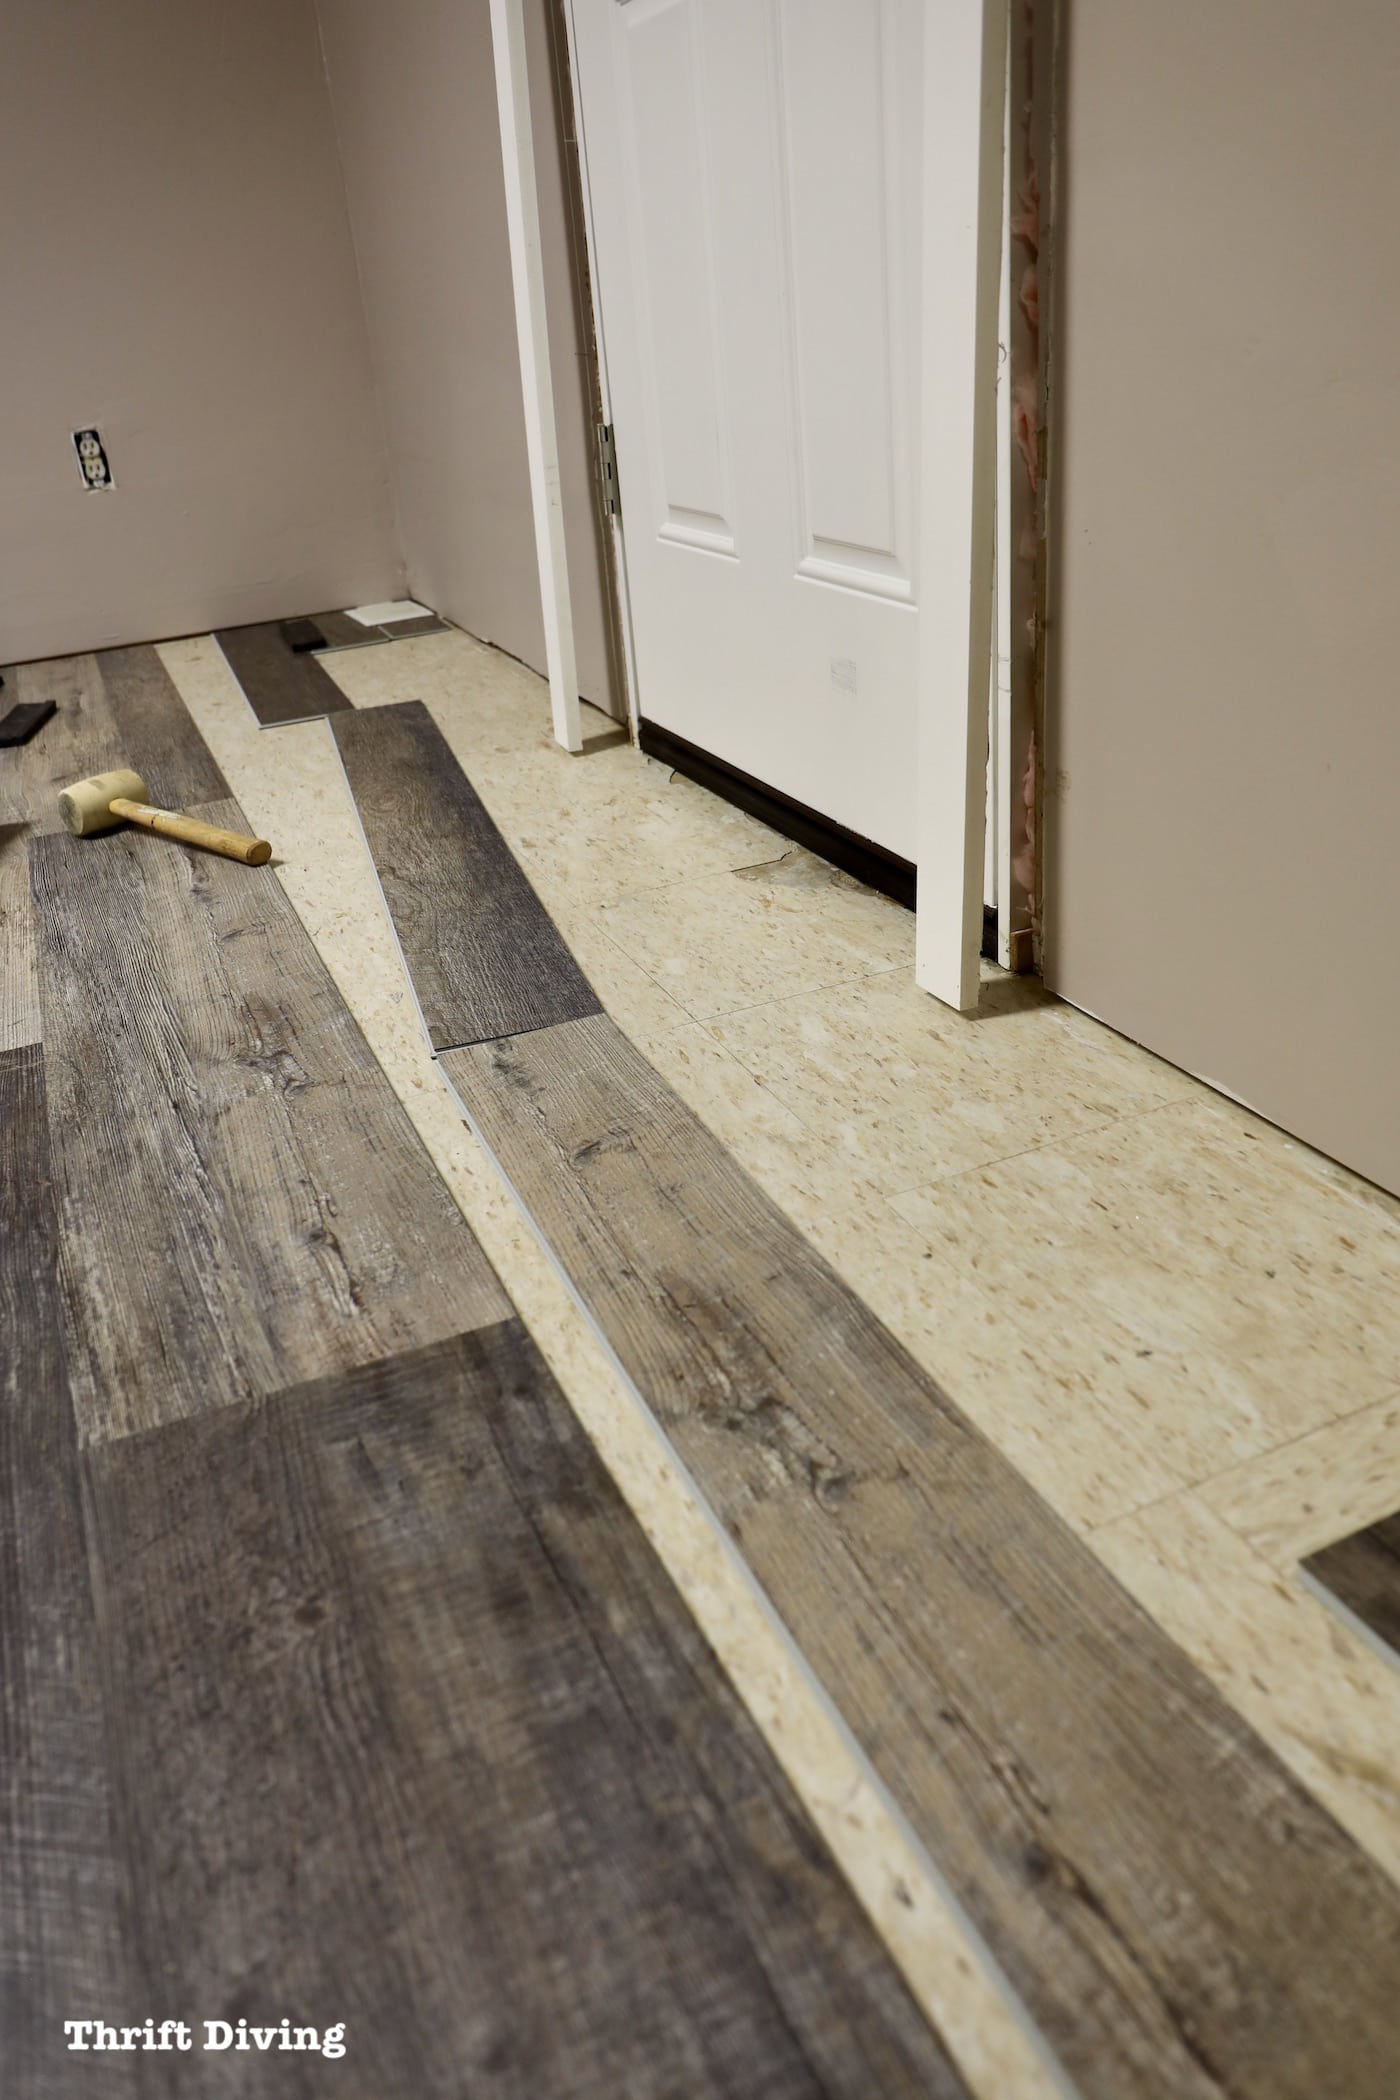
What you didn’t get to see is what happened when the video was over. All appeared fine until one day when I went to install the baseboards so that I could finally call this project a wrap. As I neared the door on my hands and knees, fitting the baseboards, I heard a squish, squish every time I shifted. Water! Again?! How?!
I worriedly (and carefully) pulled up a few rows of the freshly installed vinyl planks (breaking a few in the process) to discover that during a heavy rain, sure enough, water was still coming into my basement. You can imagine my disappointment. And my fear. What if all of these repairs were for nothing? What if it keeps leaking and I have to rip out the entire $2,000 vinyl plank floor I just purchased and installed?!
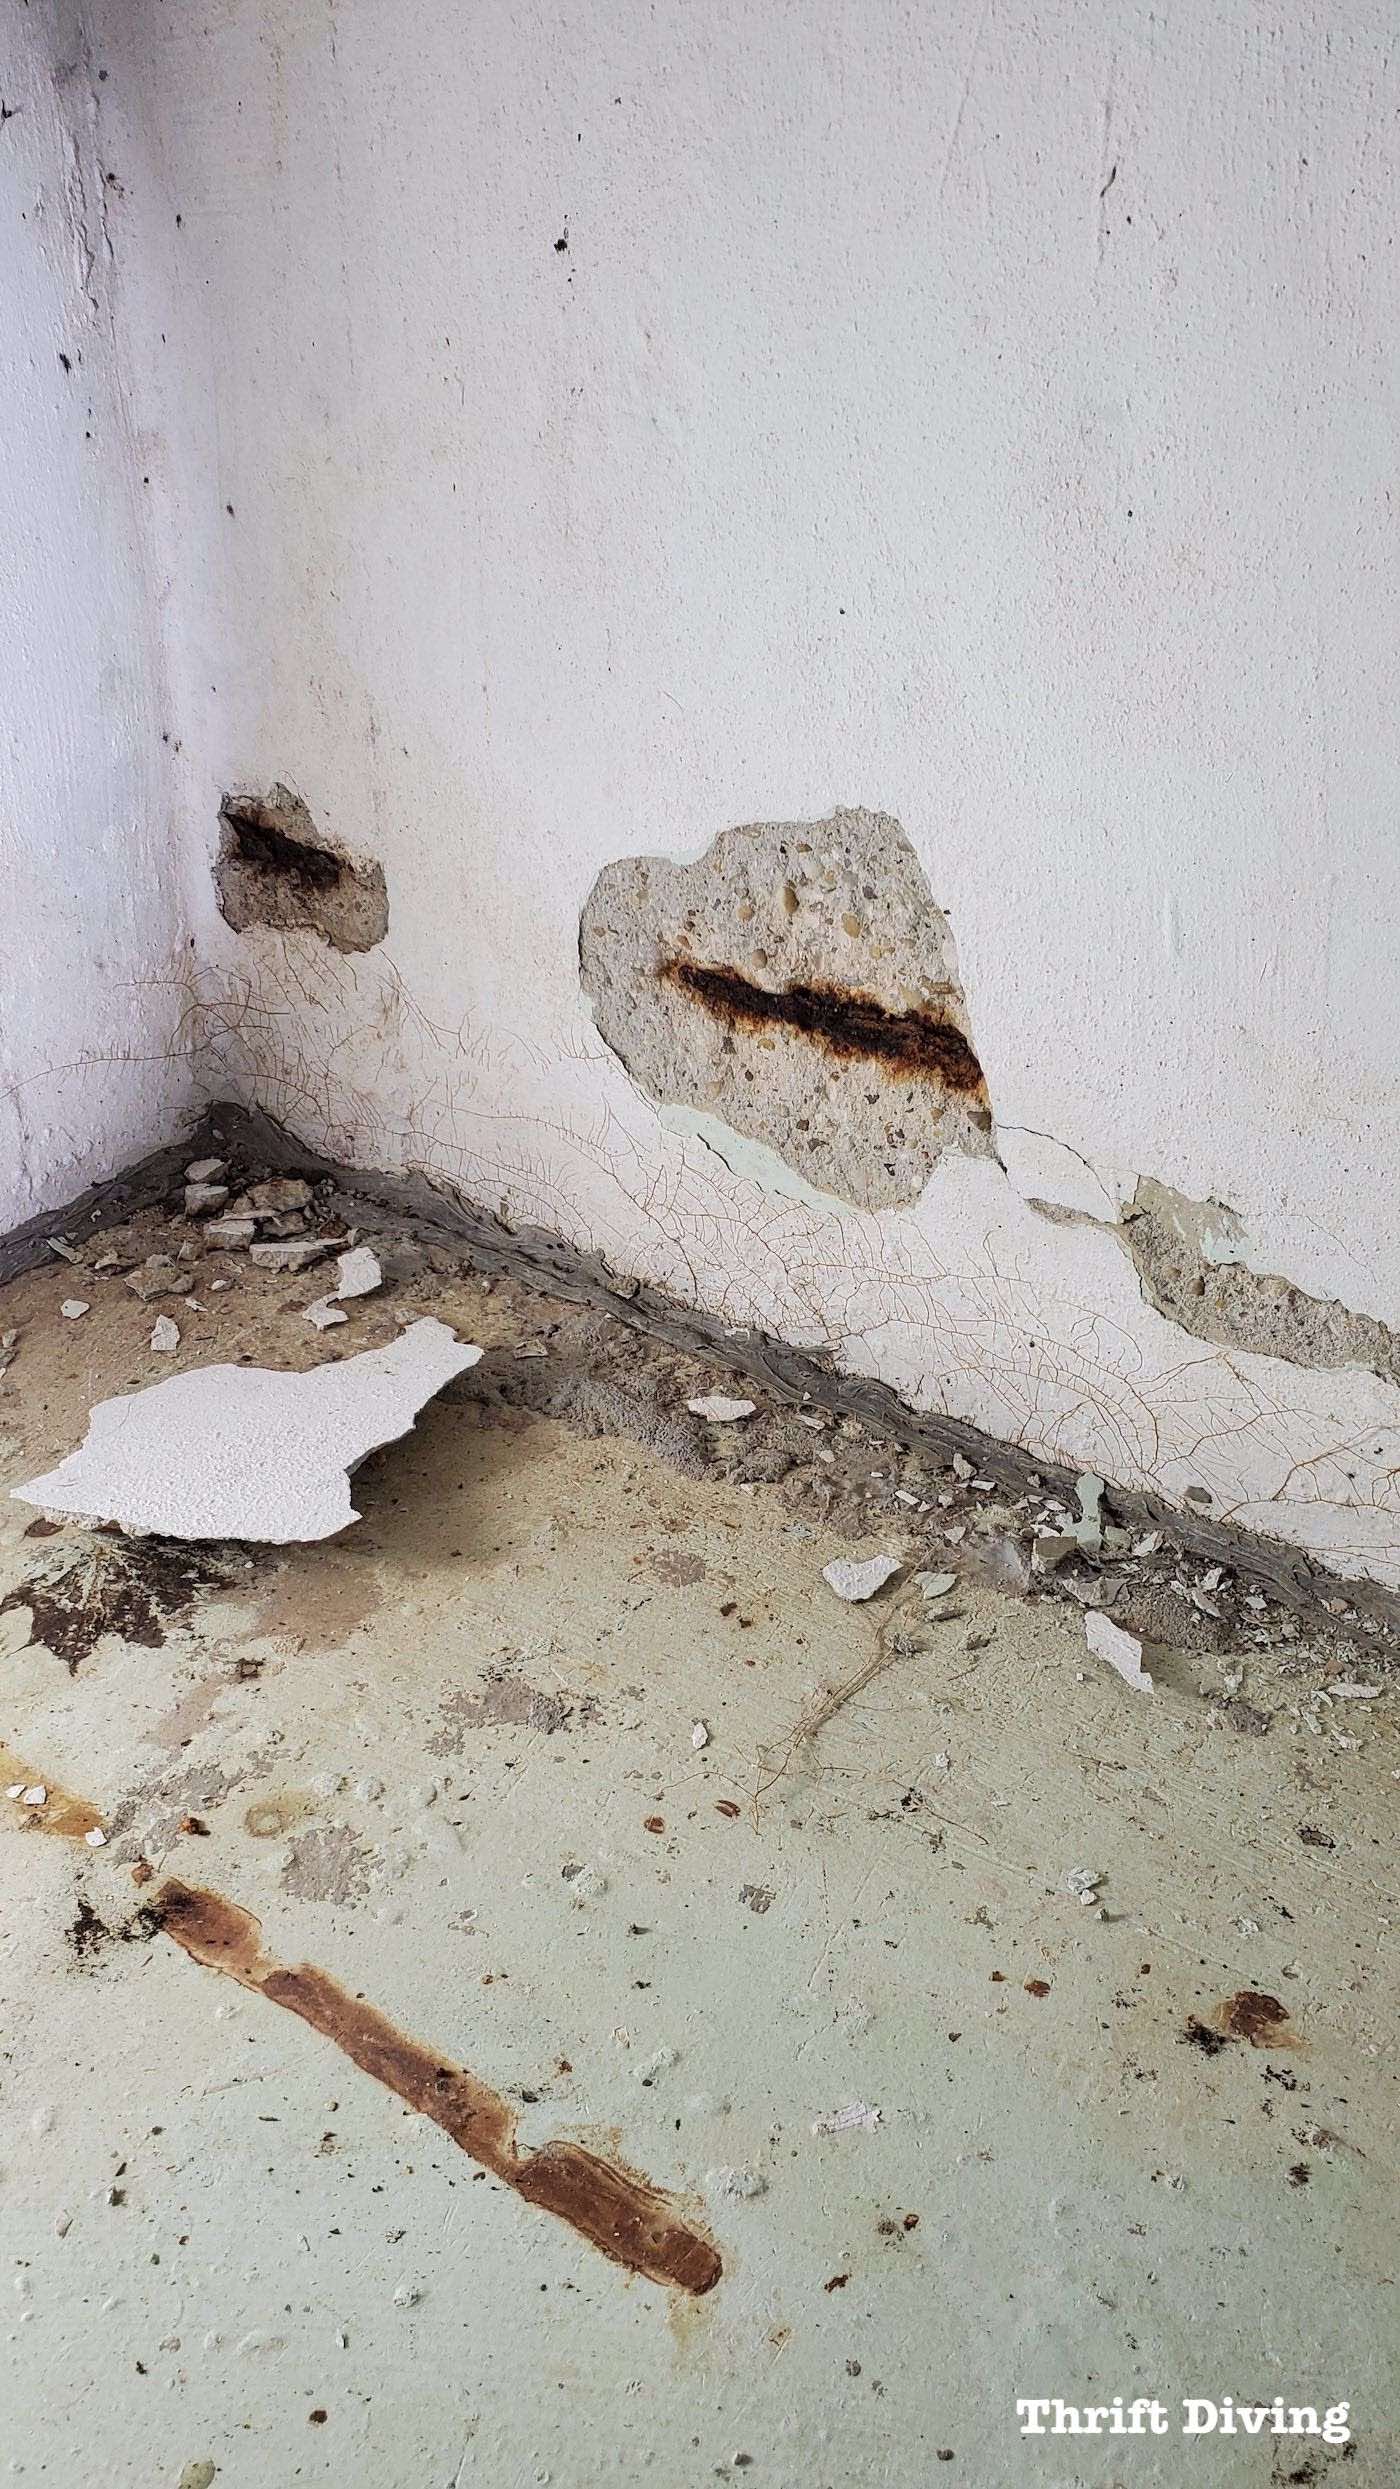
I thoroughly inspected the walkout basement concrete walls to discover that there was a slight leak coming through the concrete wall, dribbling down to the floor, and then finding its way under the door. The fix was to patch up the area with some hydraulic cement. And then I did what I didn’t want to do: covered up the walkout basement door with a tarp and called it a day.
It took me a year to jump back into this project, though. When I was ready to fix this walkout basement walls, I also discovered the tree roots had infiltrated the wall. I noticed the poured cement was a bit crumbly in some spots so I removed the loose chunks (yikes–rusted rebar!). I used some hydraulic cement to fix it. (I hope I fixed it properly because I have never used hydraulic cement to cover up such large sections).
Fixing the Vinyl Floor
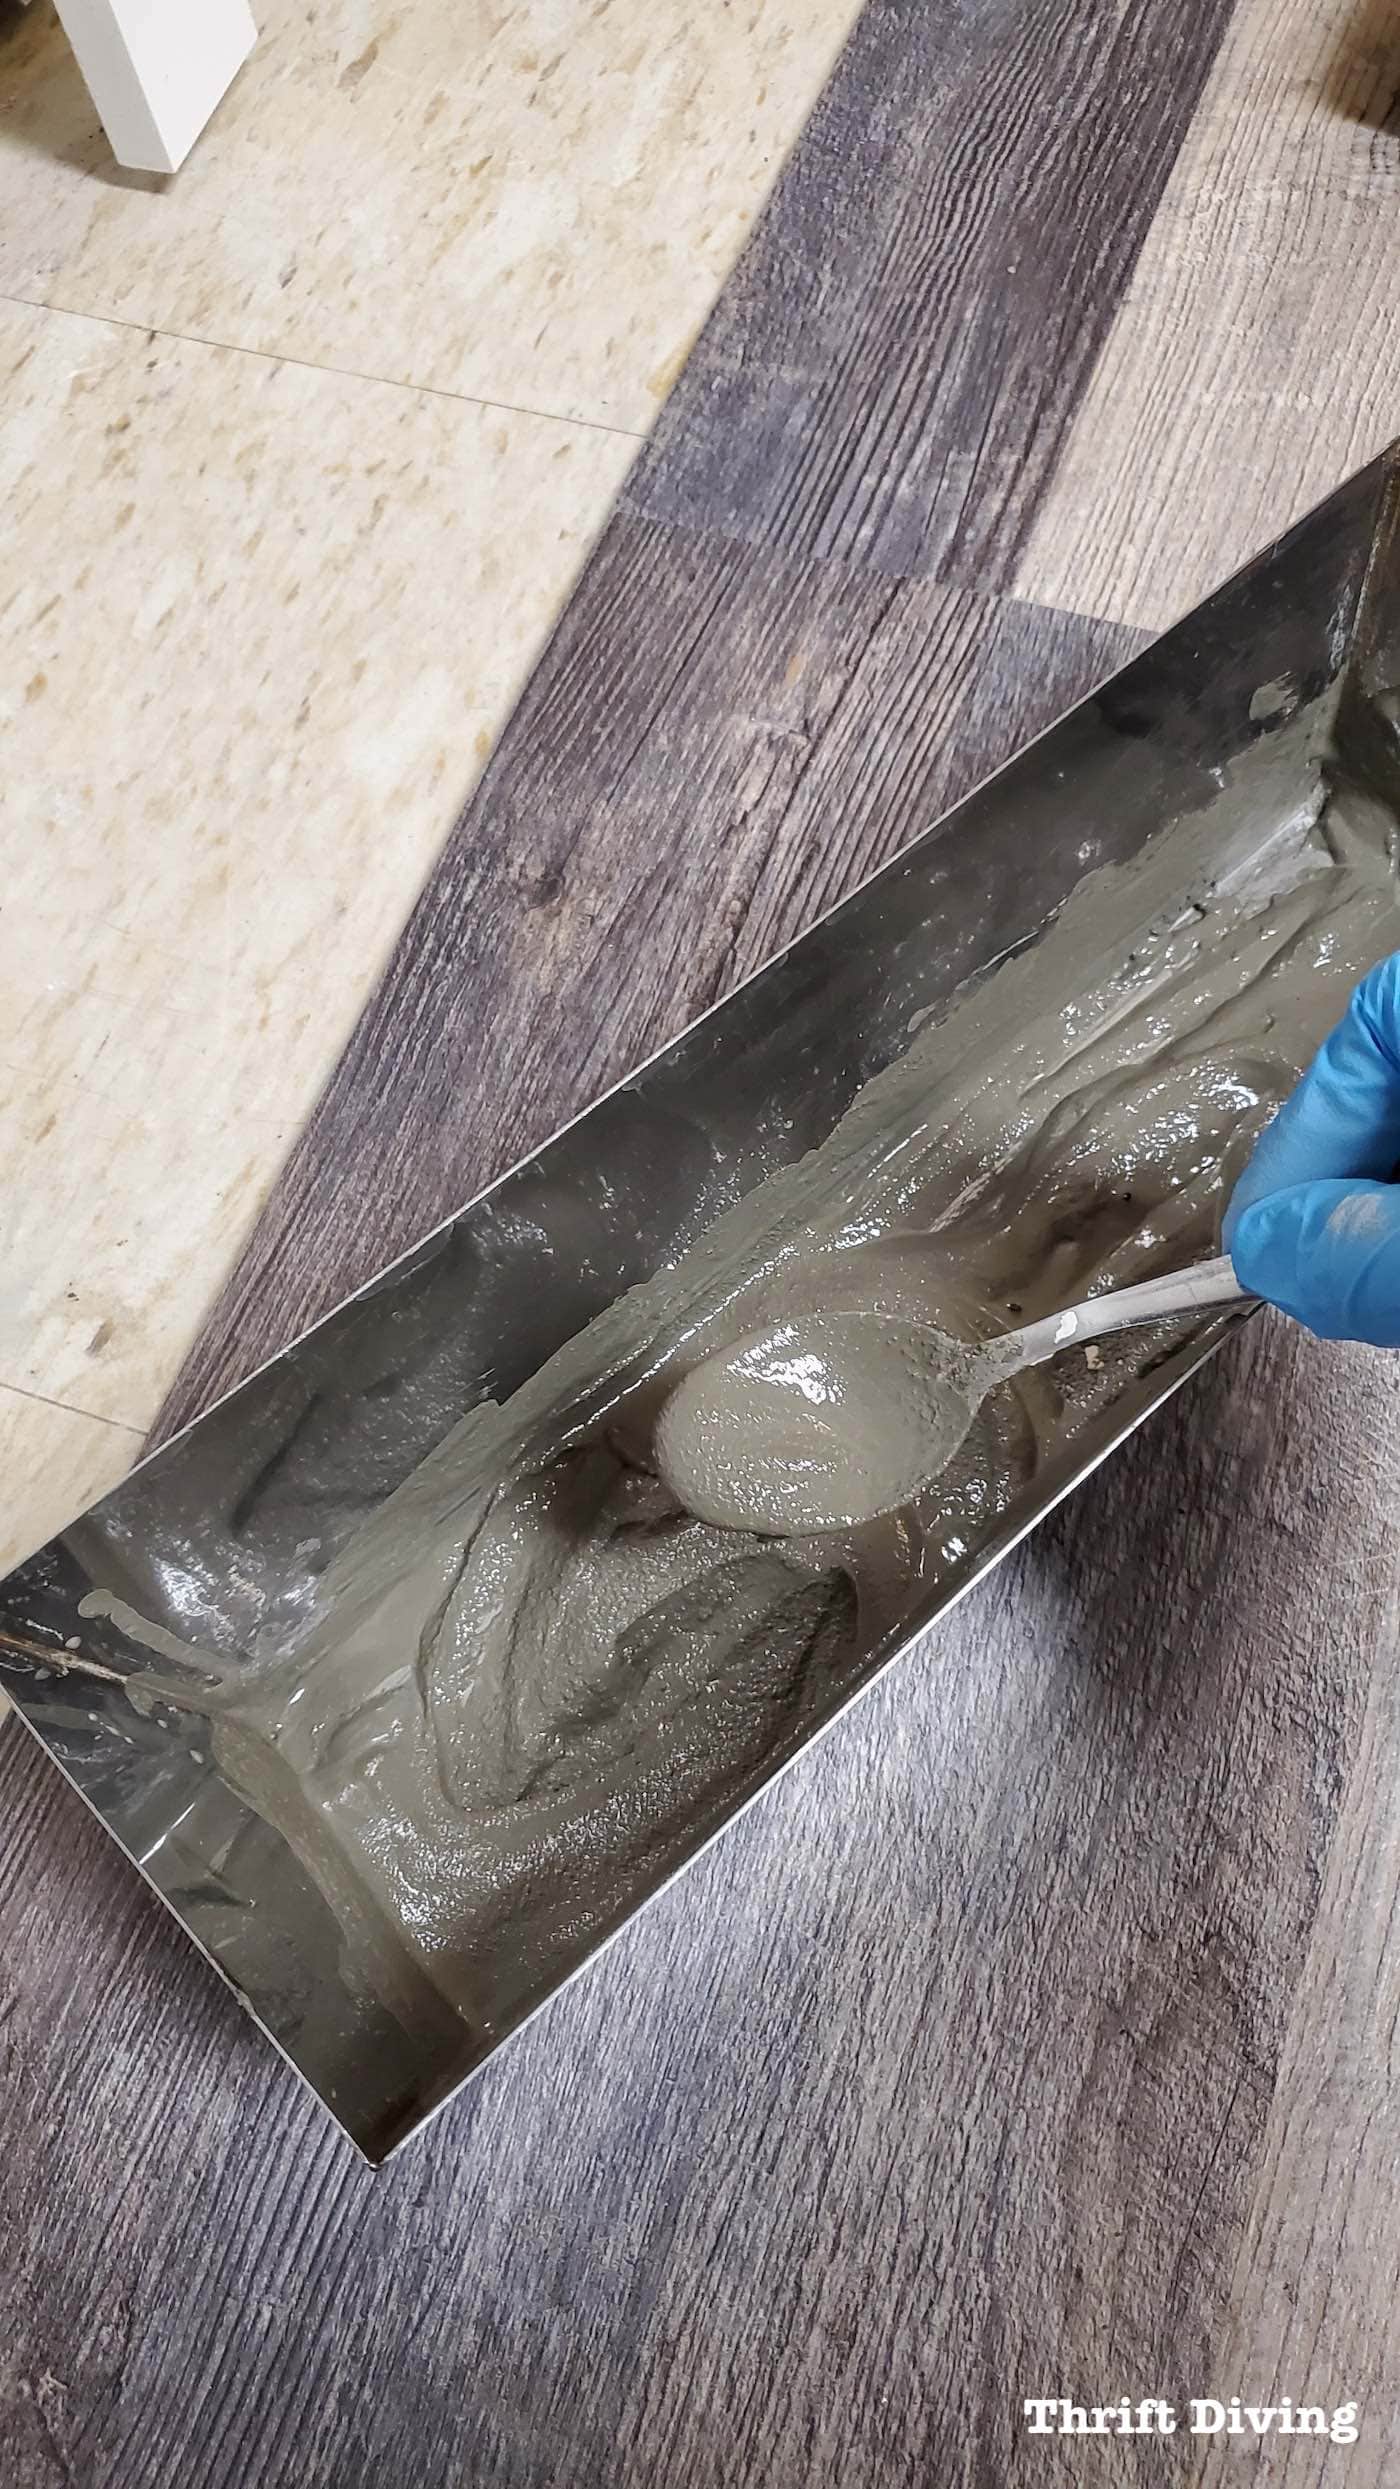
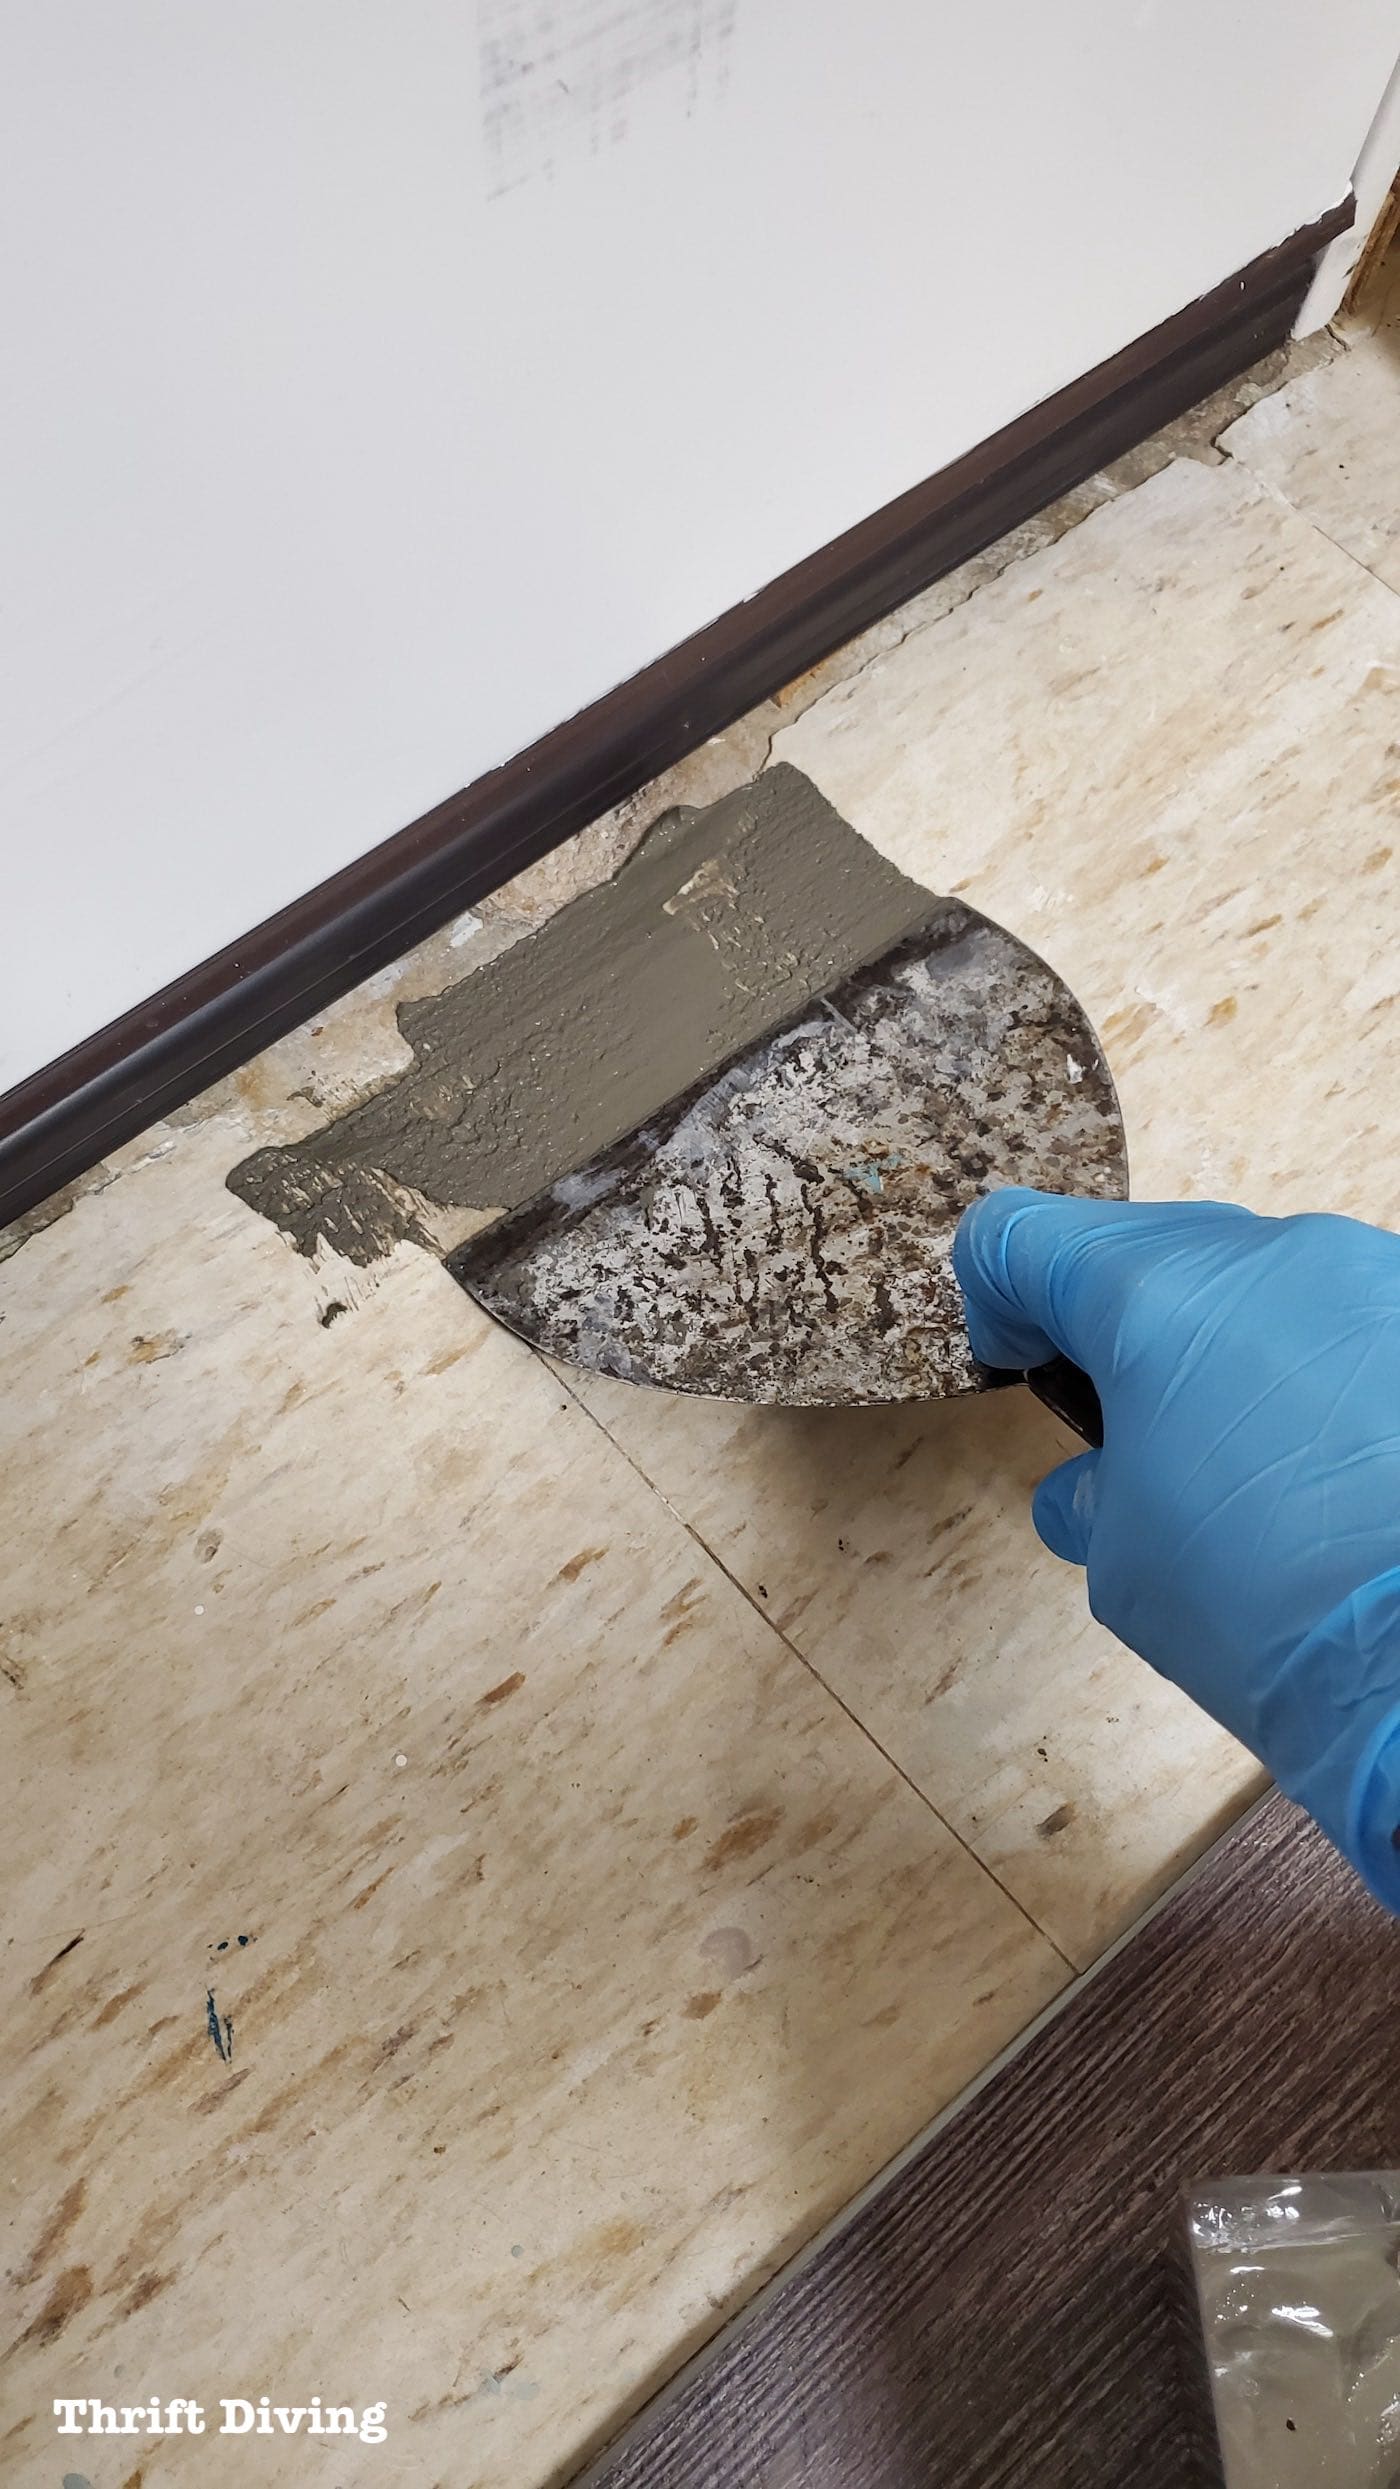
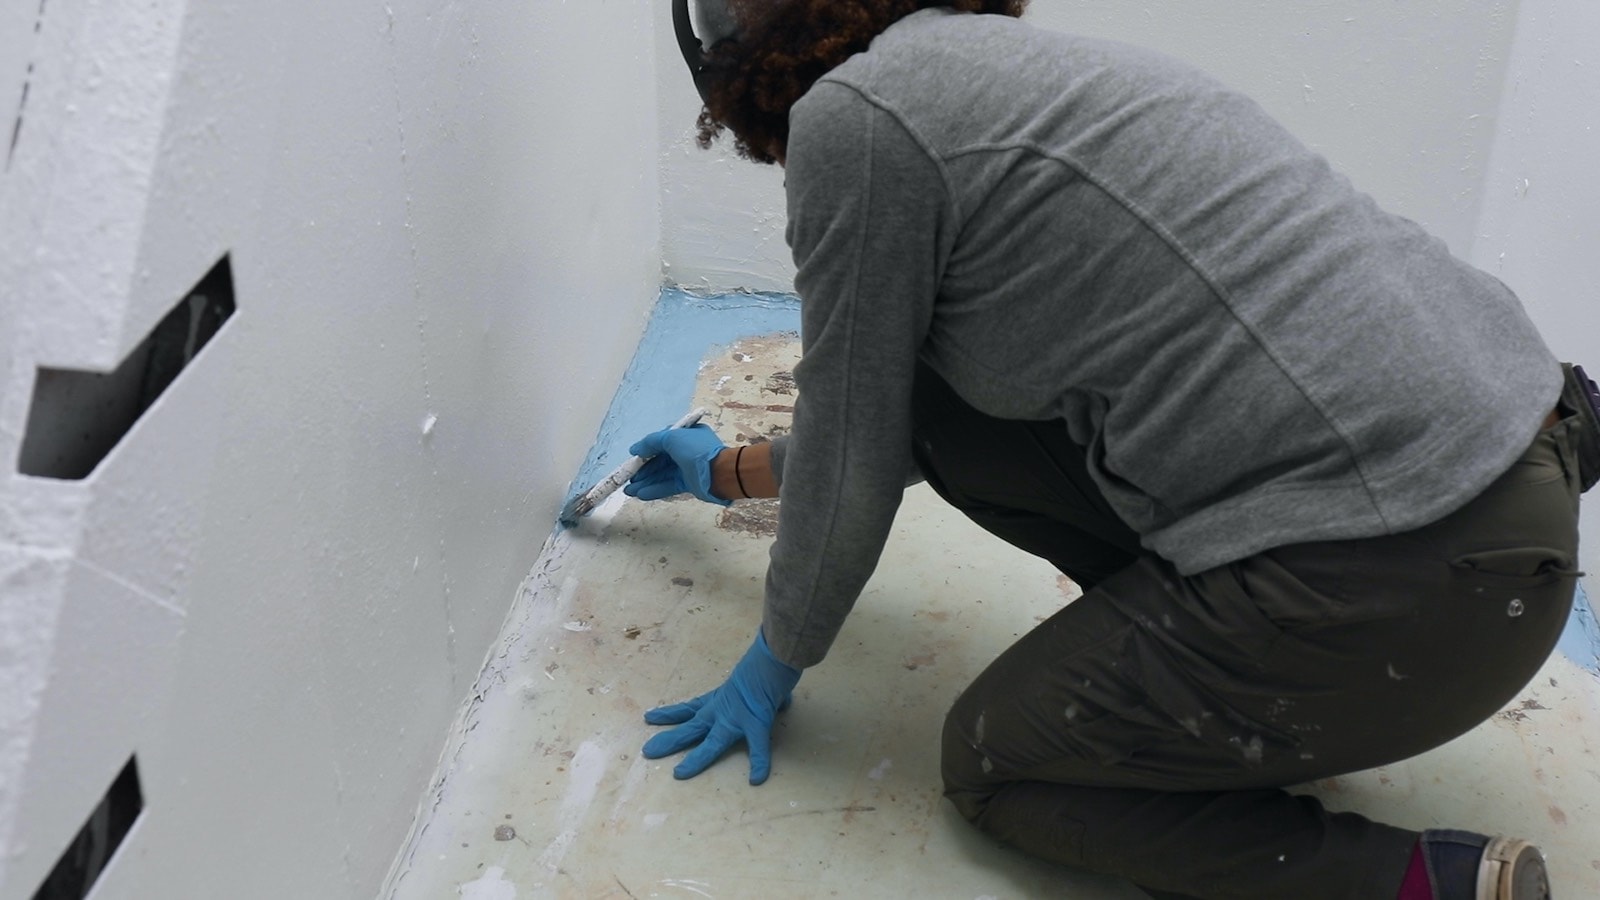
Before I could fix the vinyl plank flooring, I needed to fill in some of the linoleum cracks. I mixed up some hydraulic cement (where gloves and a dust mask) to fill in the low spot around the door, where water was seeping in. Plus, it would help the vinyl planks to sit better.
(Here’s an FYI about hydraulic cement: this stuff is awesome!! If you’ve got any leaking in cement, if stops the leaks like nothing else I have ever heard of. I have also used it to fill in some cement around the front of my steps. But be careful: it dries darker than regular cement, so once it dries, you may have to go over it with a lighter regular cement to disguise it).
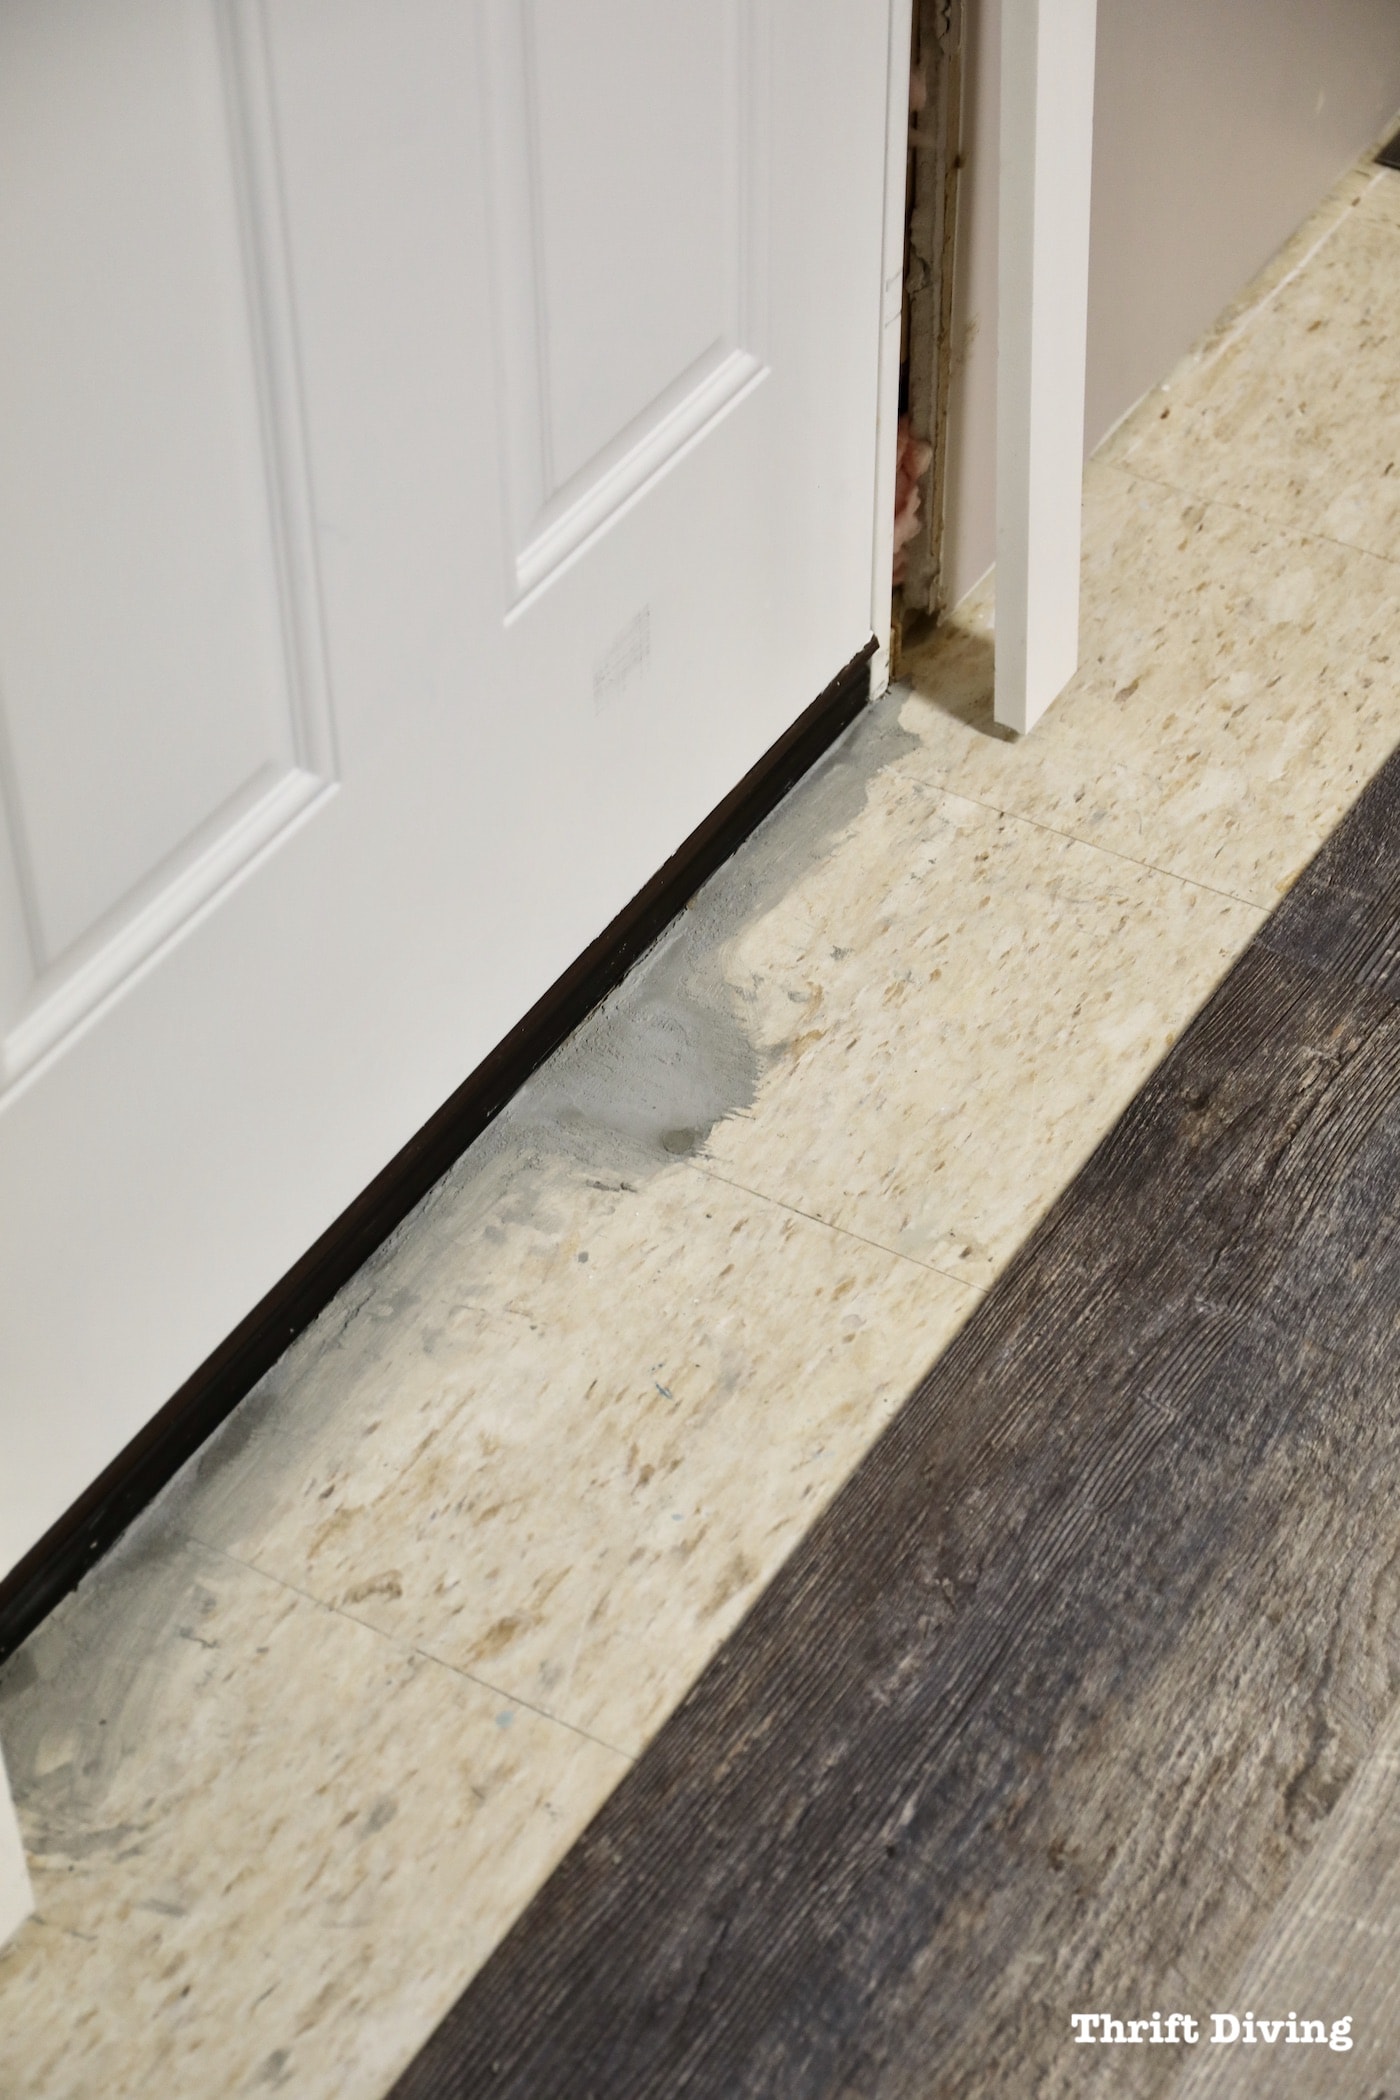
Using a 6″ putty knife, I filled in the linoleum cracks along the door, smoothing them out to make sure they’re flat enough for the vinyl plank tiles to go over top of it once it dried.
While the hydraulic cement dried, I started fixing the vinyl plank tiles, being careful not to break the delicate rubber edges that lock them together. Thankfully, some of the vinyl tiles I removed could be reused, but I also had 1 extra box left over from when I installed the vinyl plank tiles. Whew! (Always buy 10% more materials than you need for times like this!).
(Just as an aside, I would also say that I likely would never install a floating vinyl plank floor like this again in a basement, because if there is a larger leak or flood, this whole vinyl floor would have to be removed. While the material is waterproof, it wouldn’t be wise to leave water under a floating floor where mold could grow. Next time, I would install a tile floor with a cement HardieBacker board, which would be soooo much better in a leaky basement. Let’s just hope I never have a water issue down here again! Use this helpful tutorial on how to install Hardie backer board).
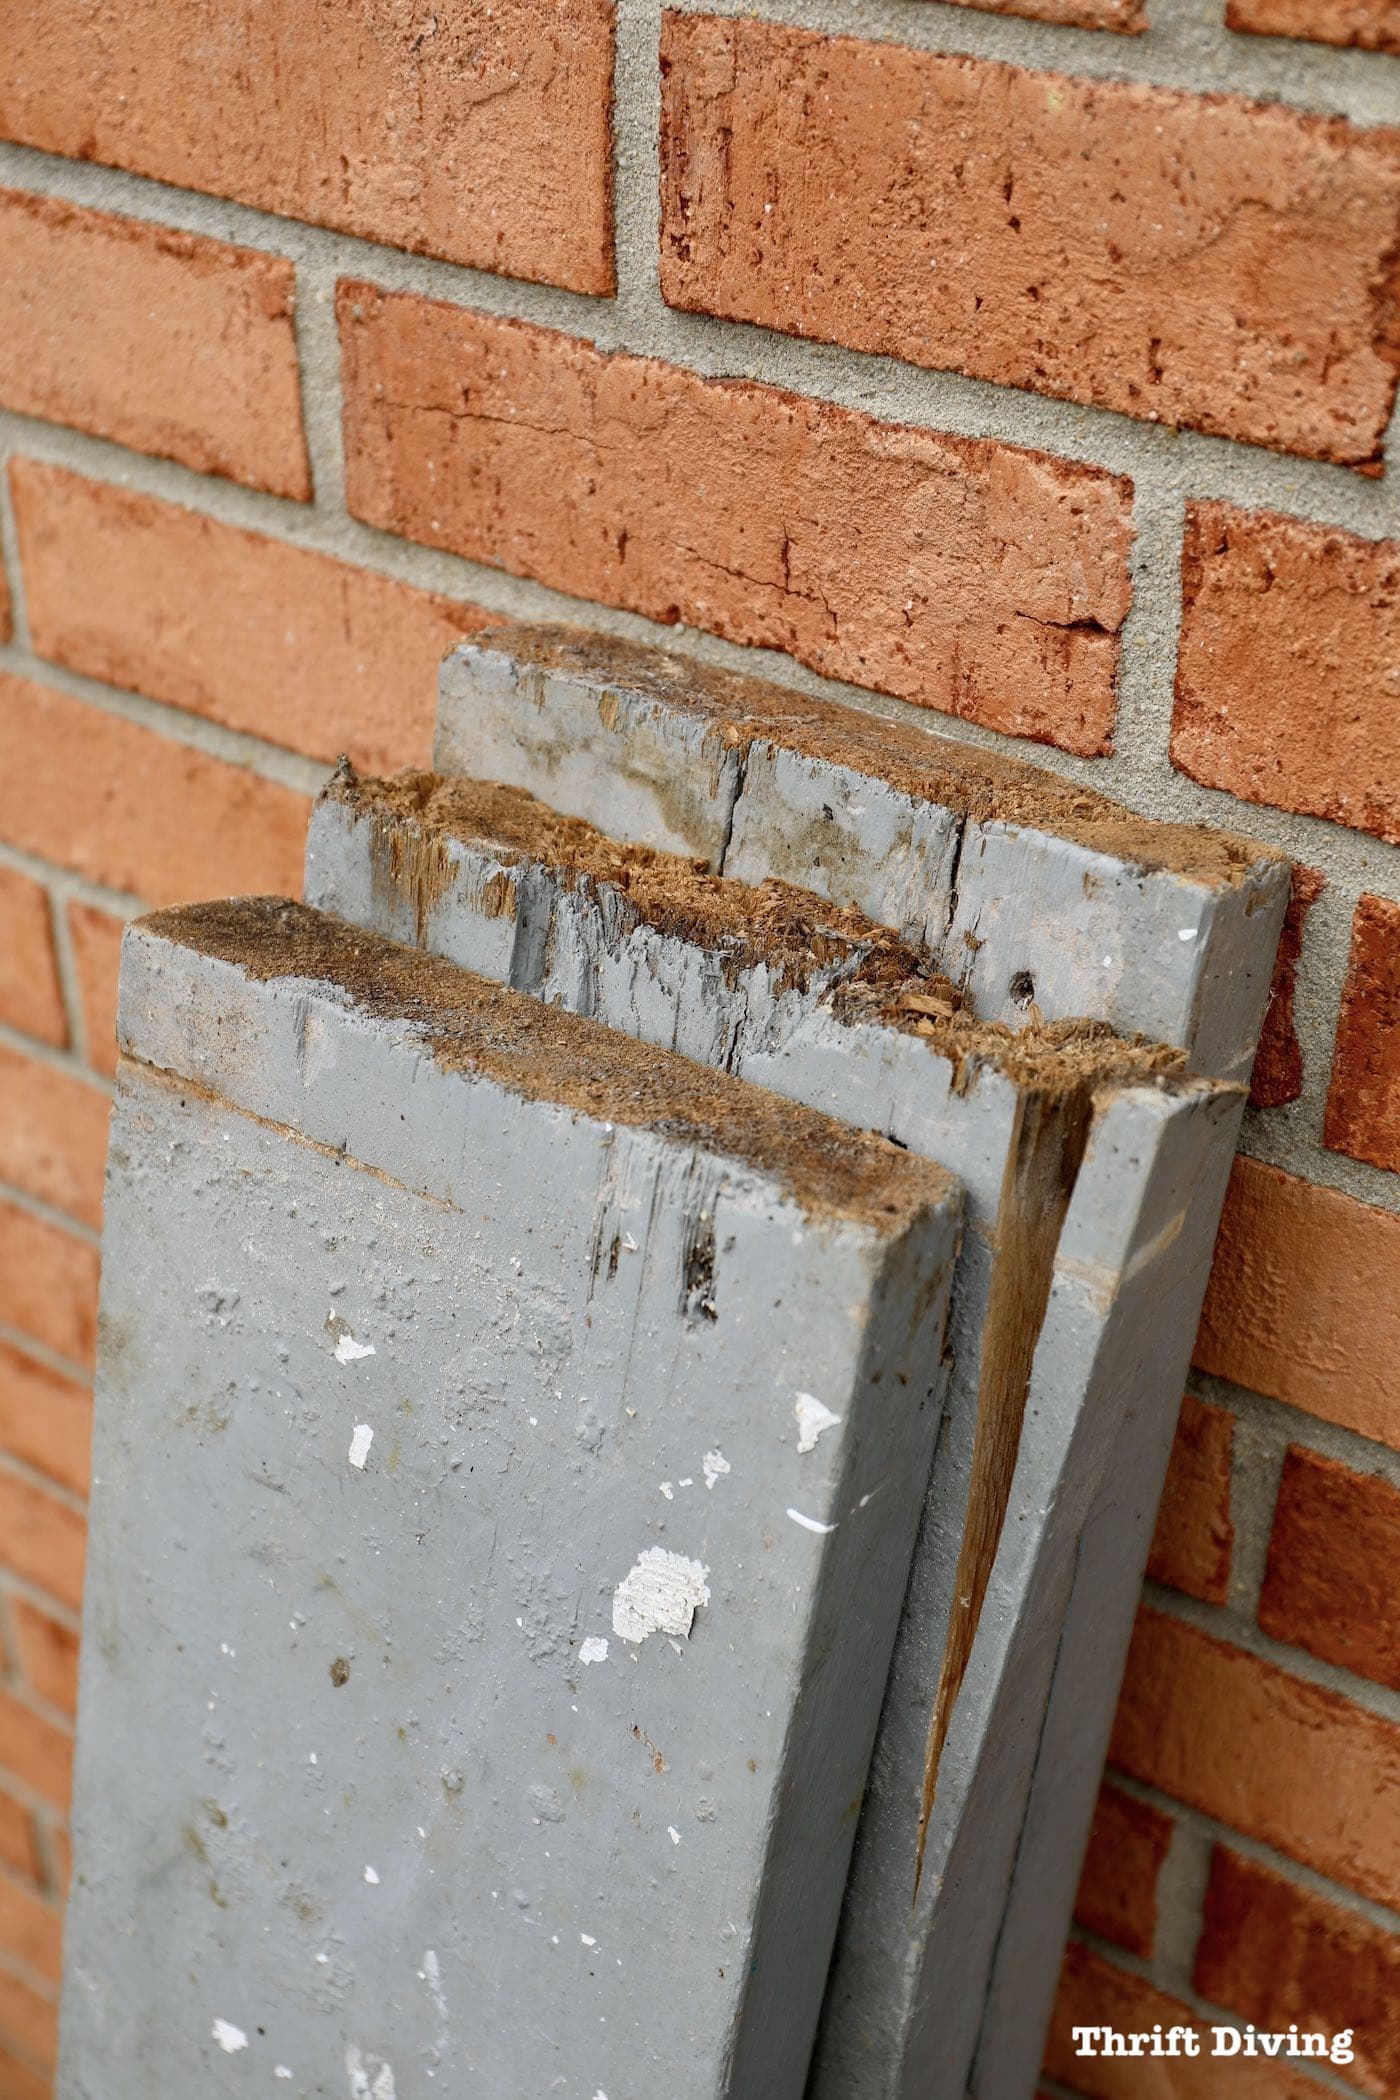
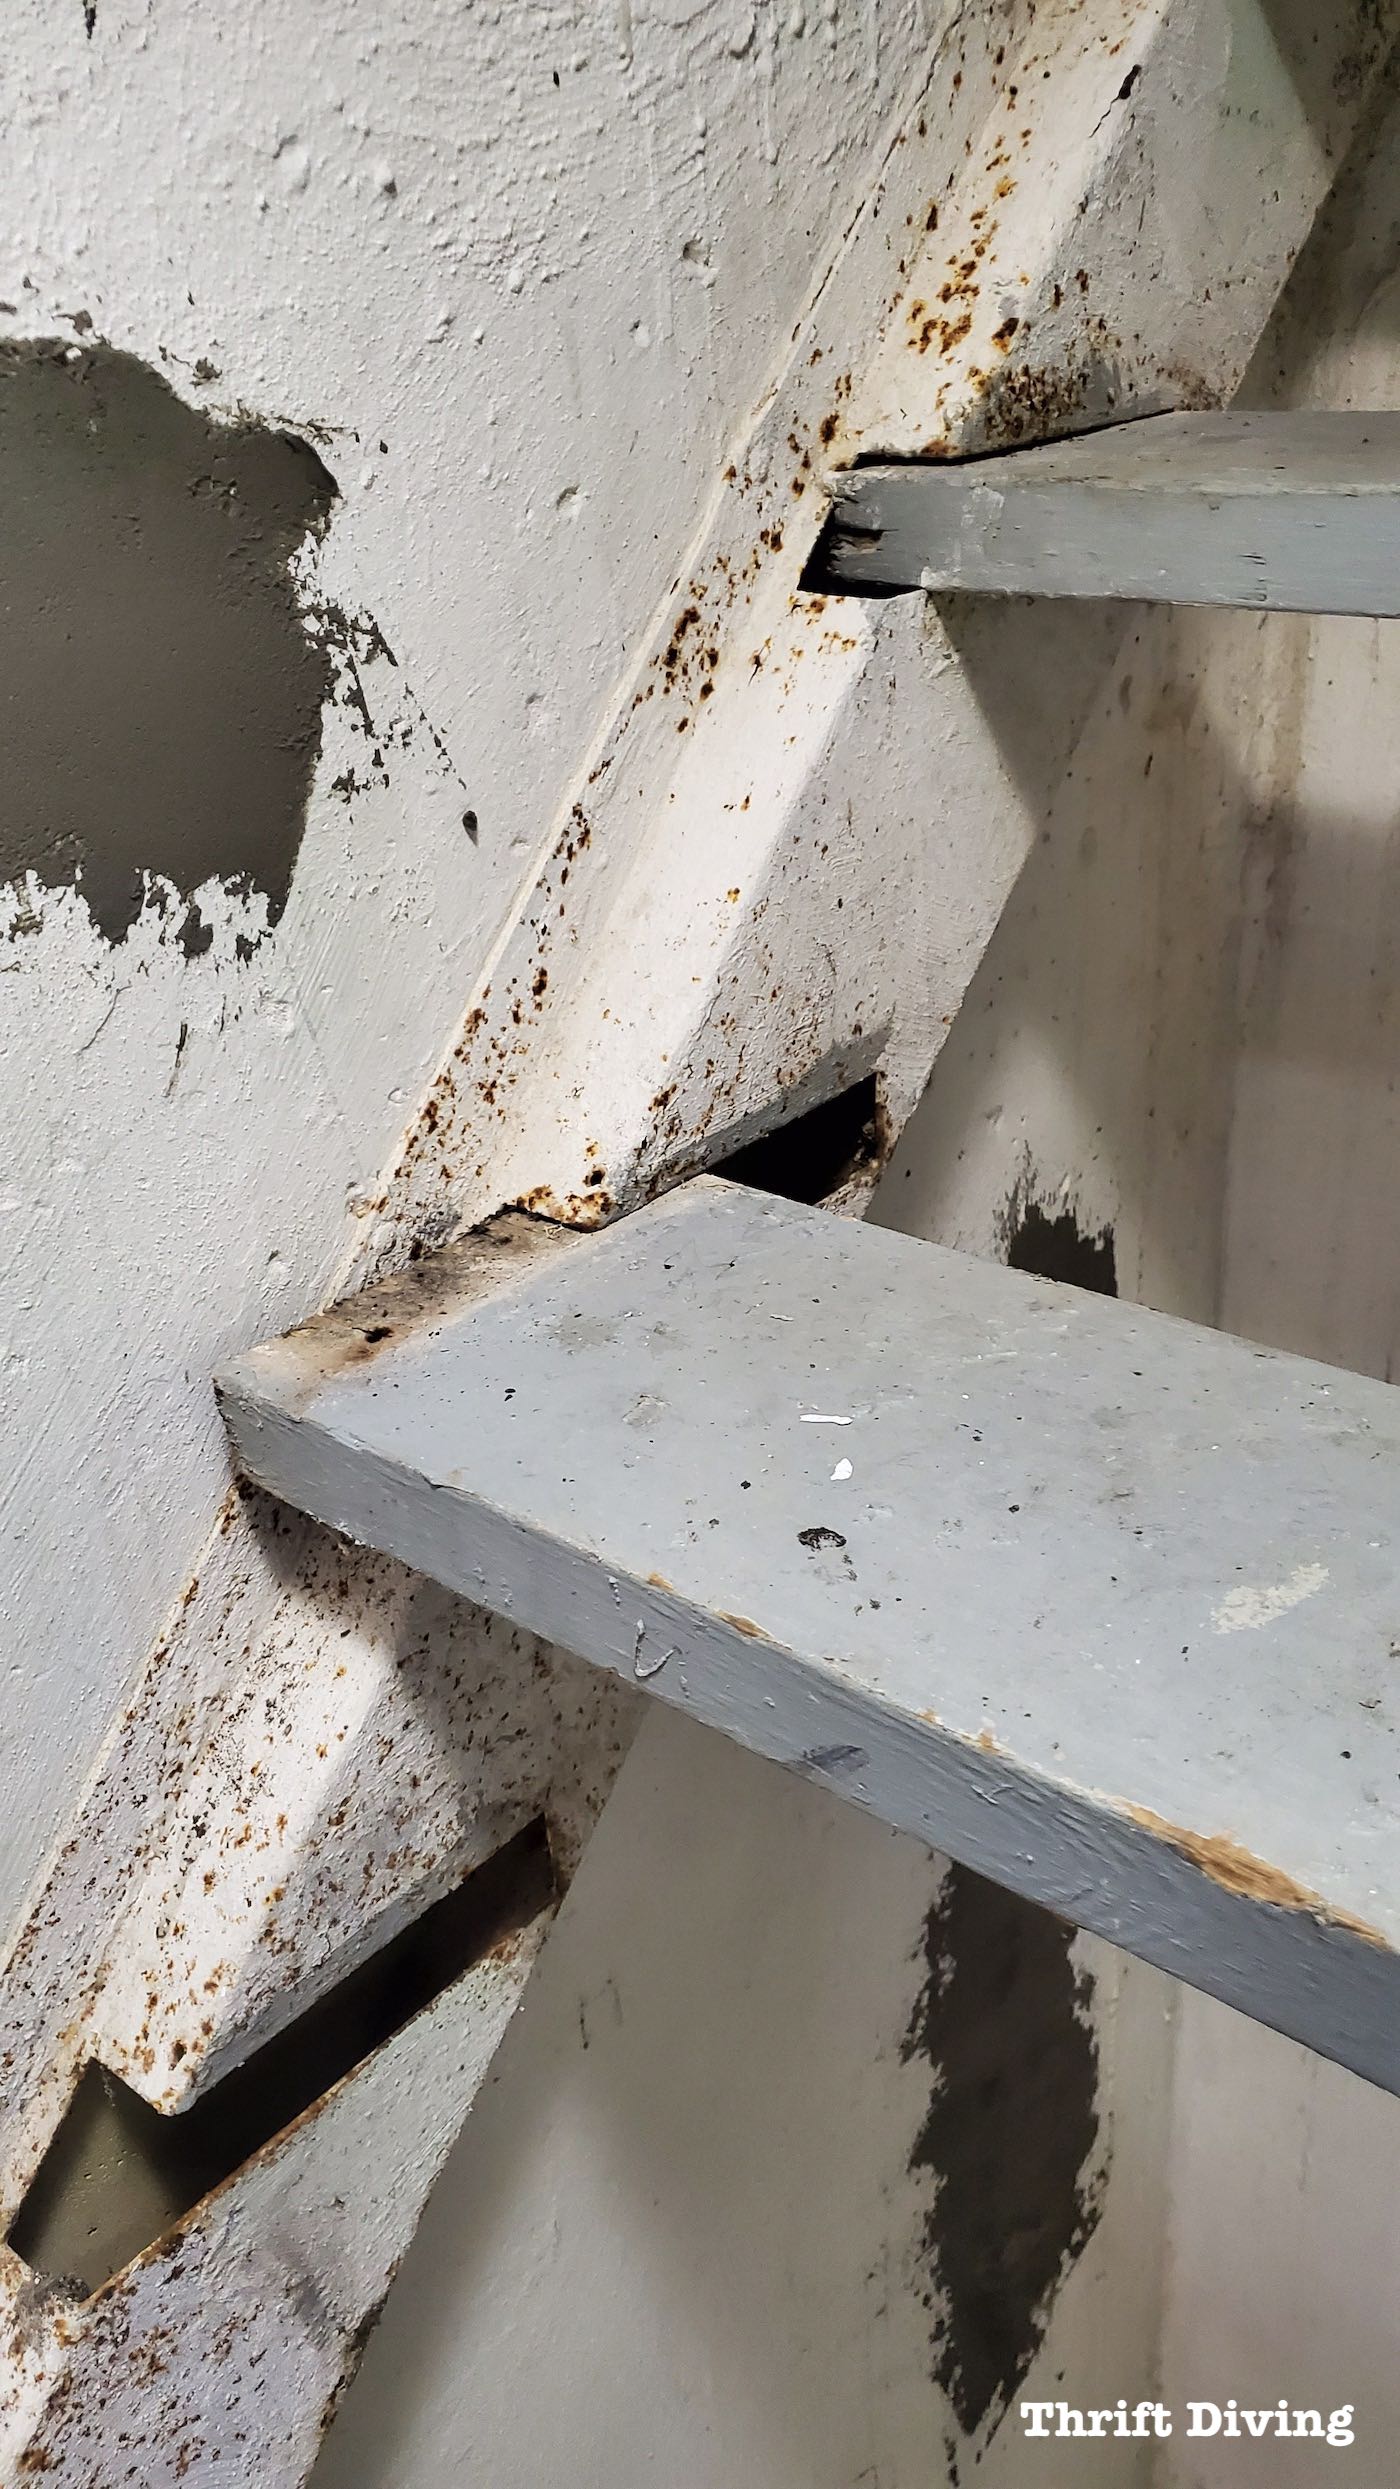
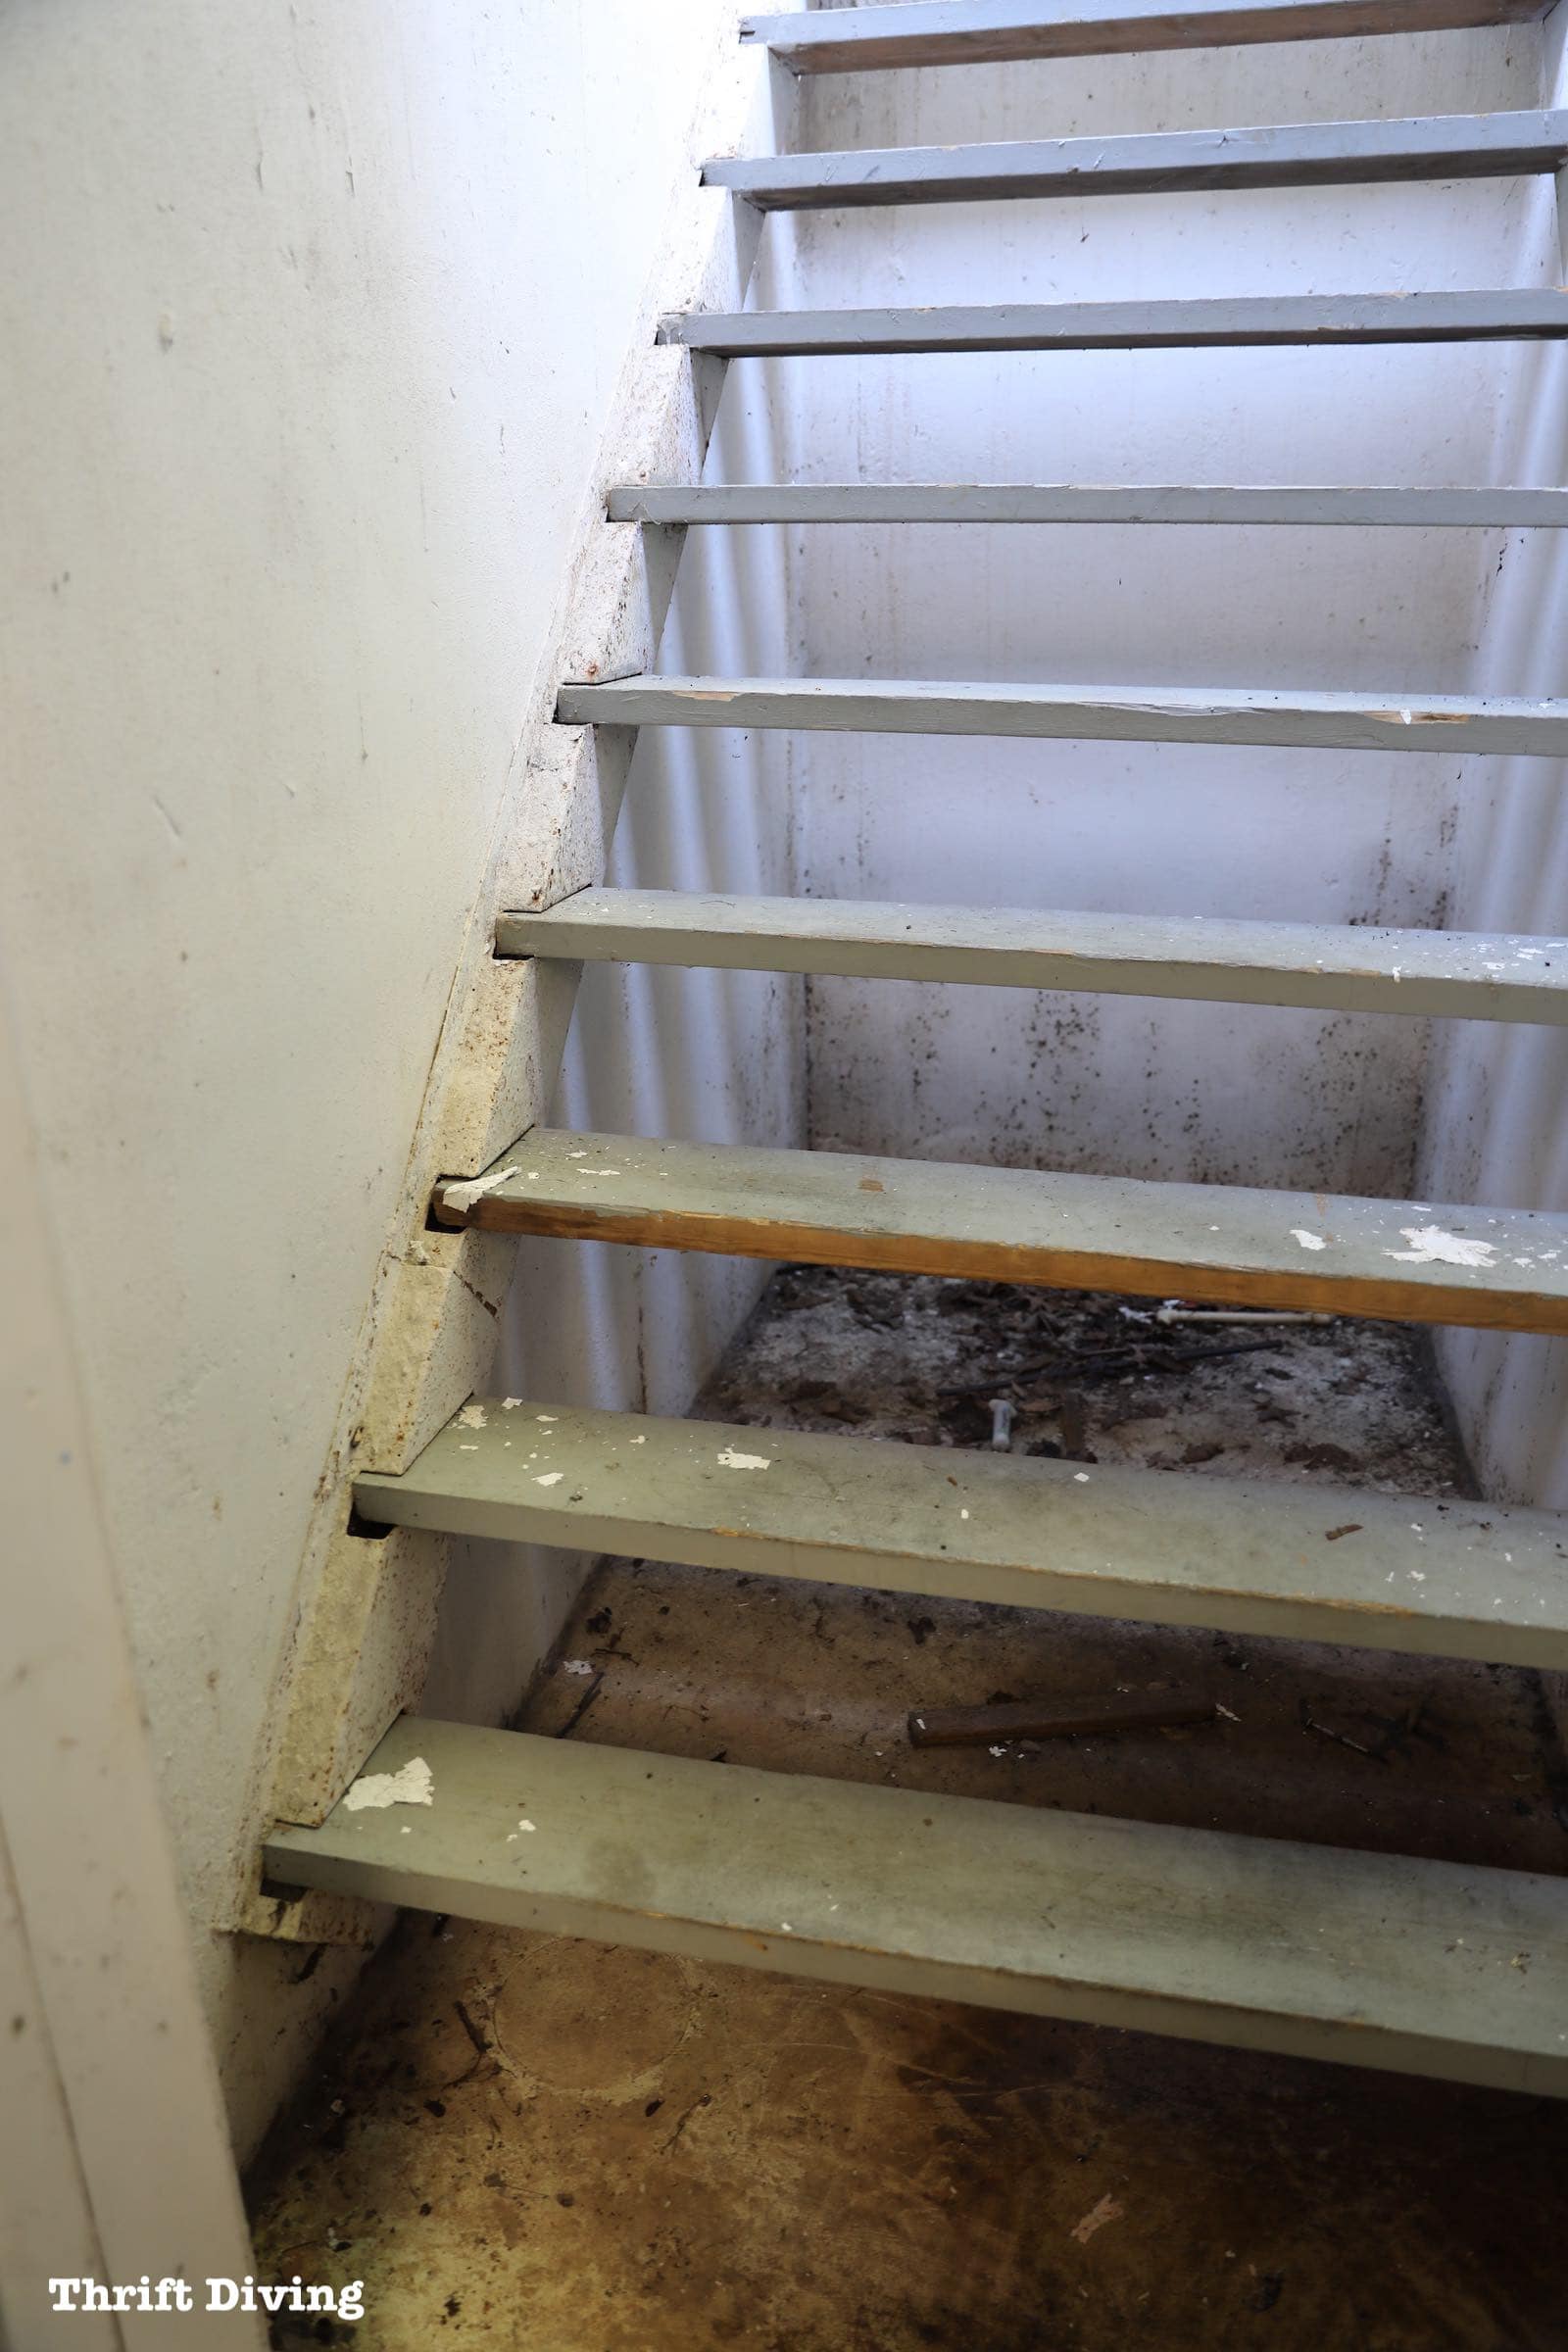
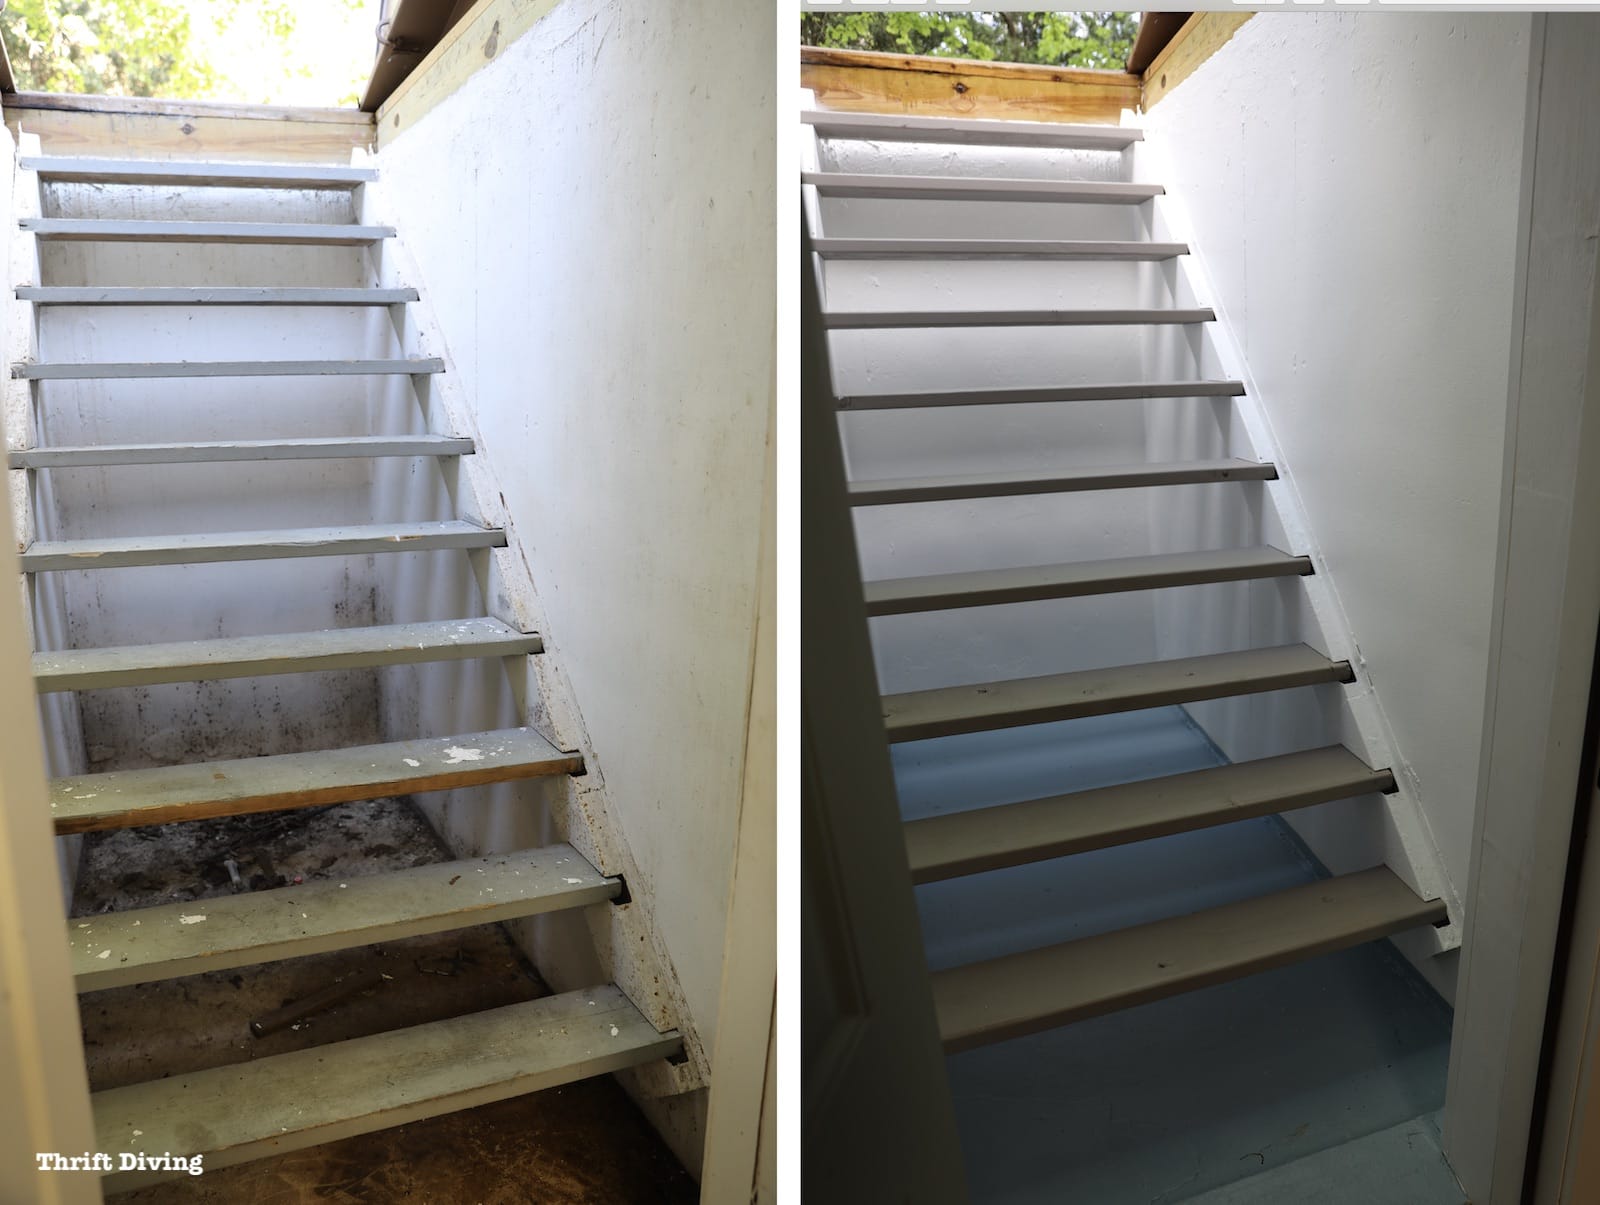
In the walkout basement stairwell, the original stairs were in really bad condition. Not only were they dry-rotted, but they were all marred up and pretty ratty looking.
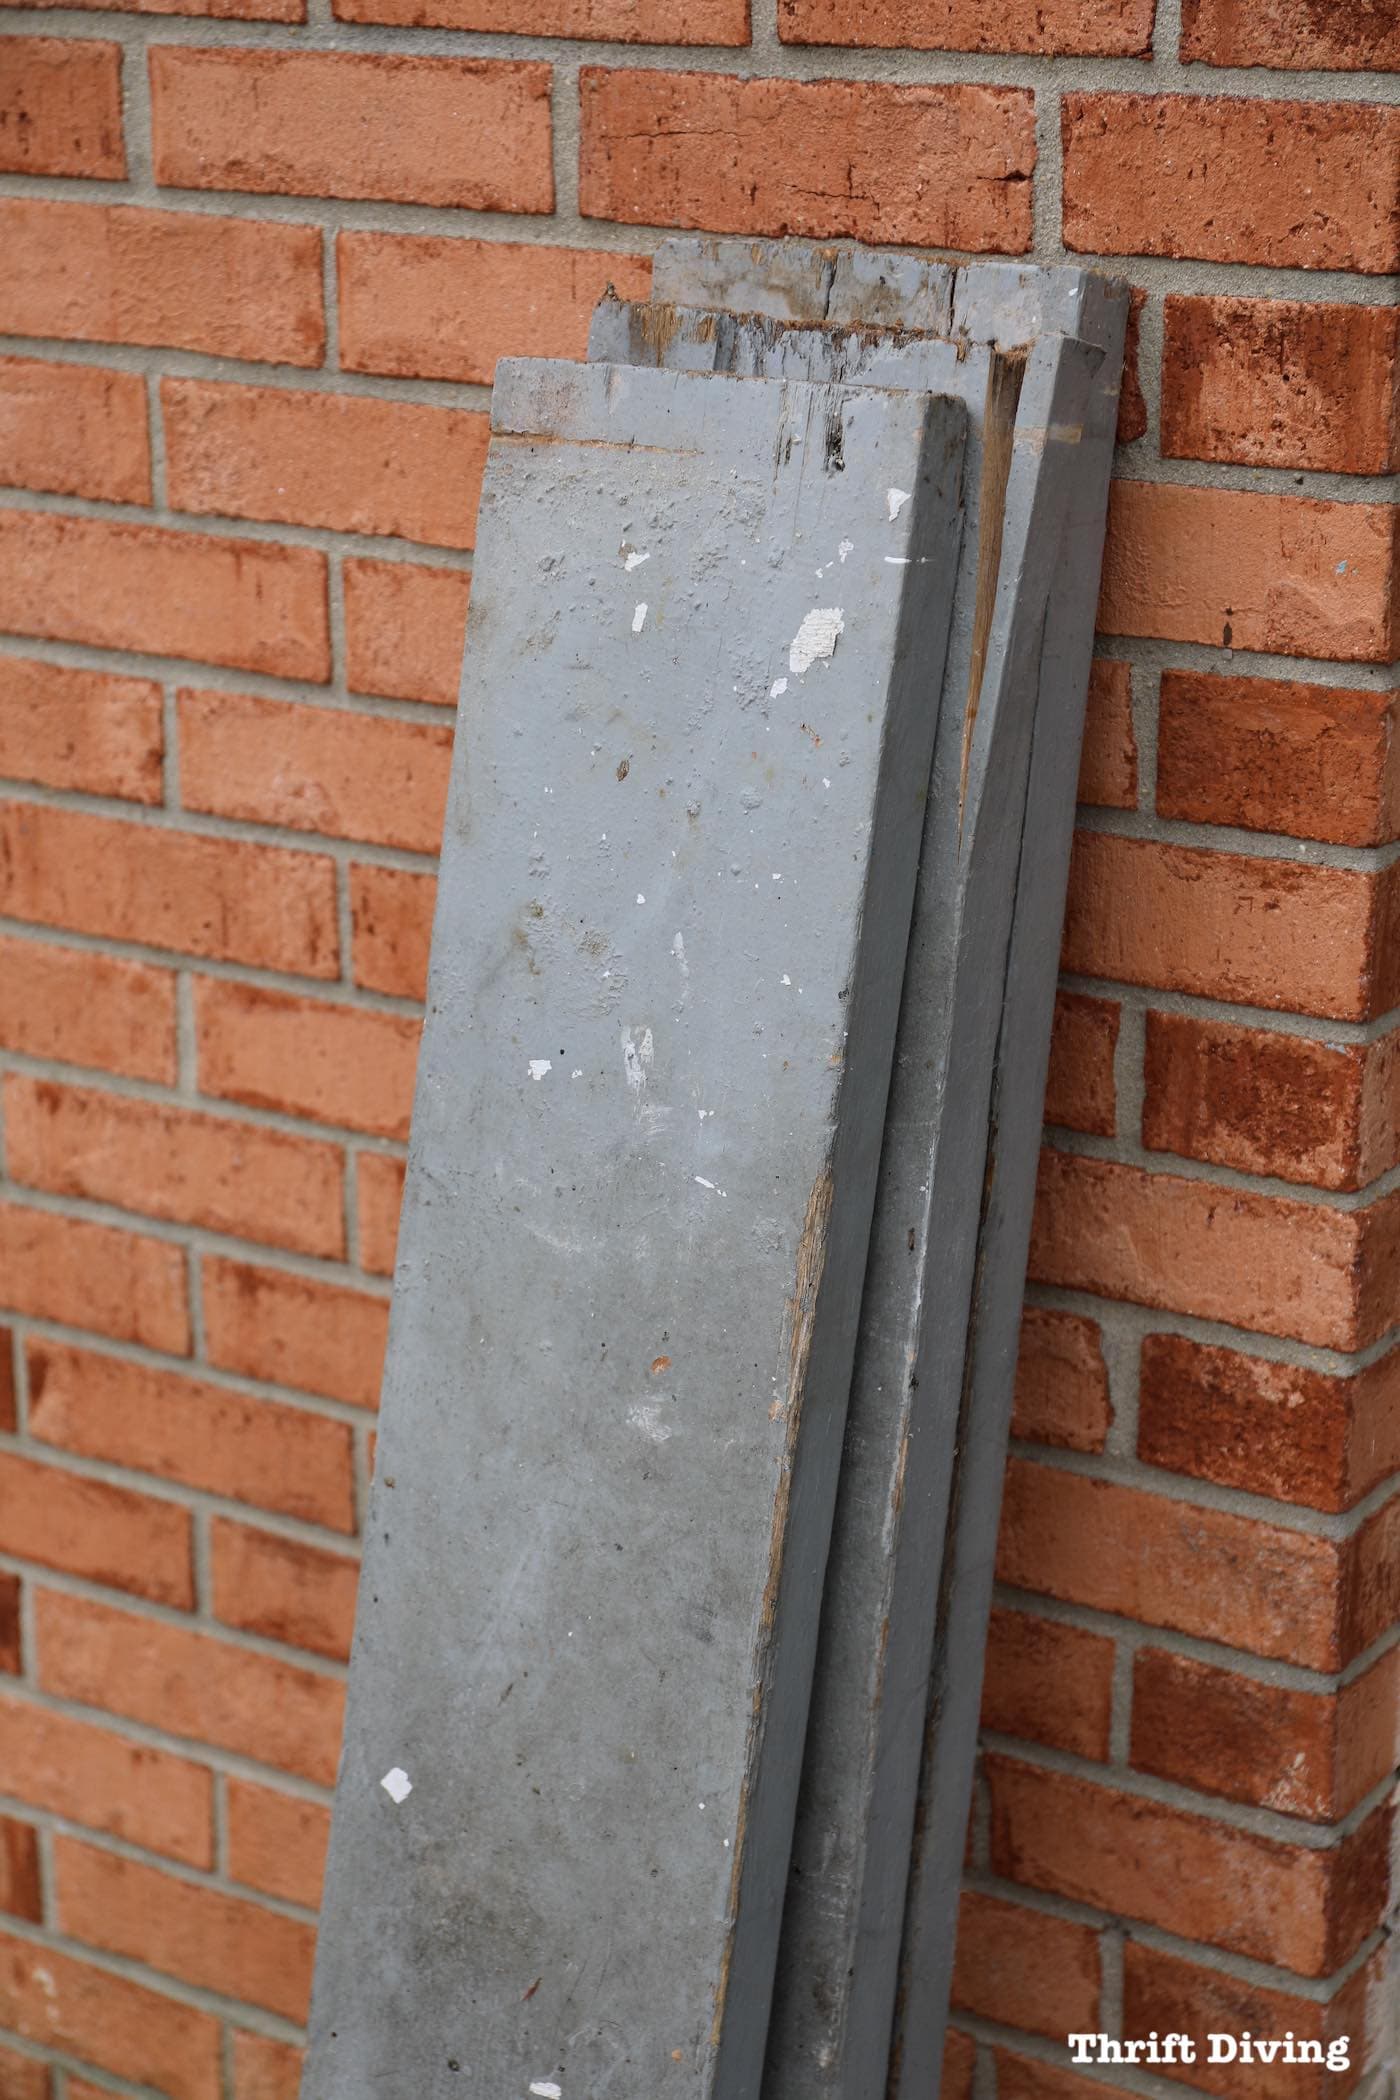
The walkout basement stairwell is protected from the elements, but it gets very humid in the spring and summer. Over the years, the humidity has damaged the wood. So those needed to be replaced. I know that no one ever “sees” these stairs, but for me, getting the basement stairwell freshened up and made over was pretty important to me.
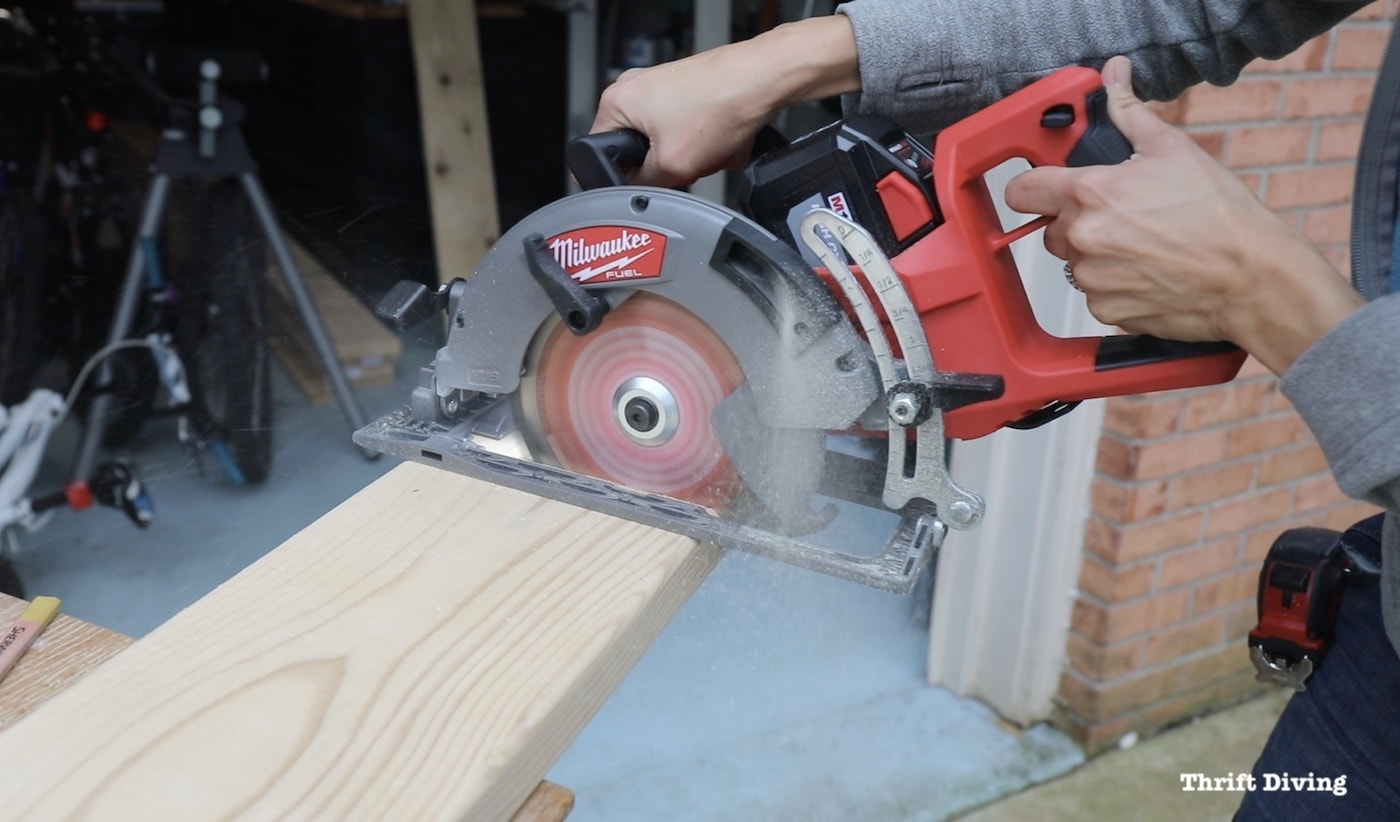
For this project, I used a circular saw to cut 10 boards, sized 2 x 8 each (I used my Milwaukee Rear Handle Circular Saw).
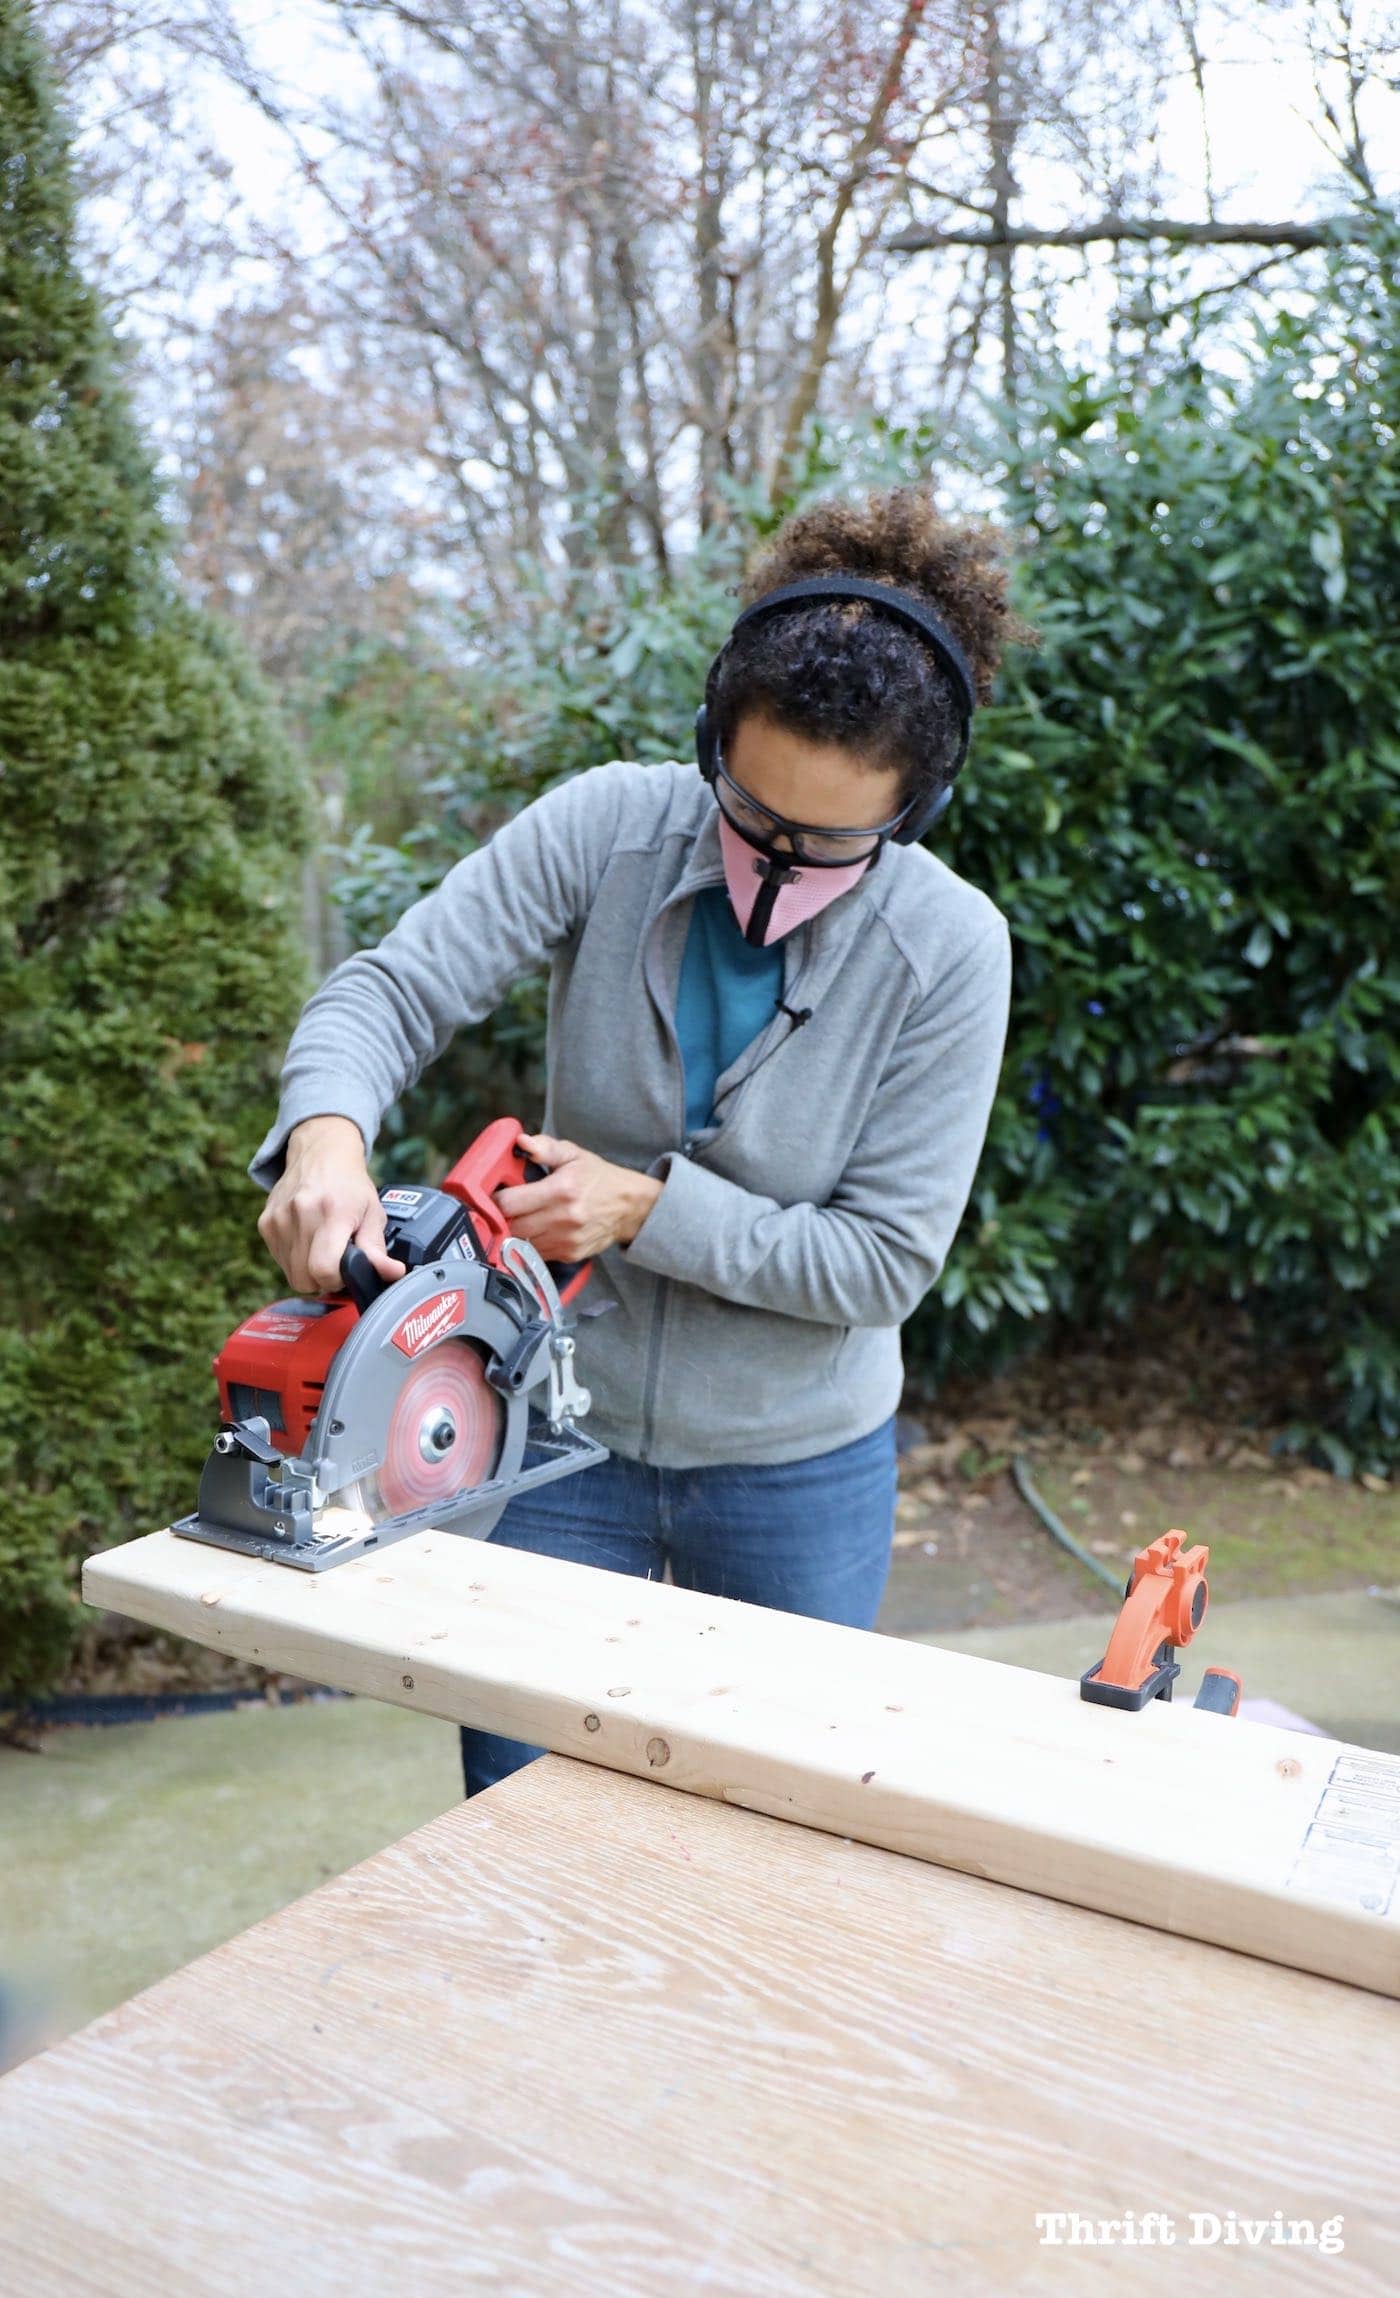
(FYI….I’ve used and owned several circular saws in the past 7 years since I started using power tools, but I have to admit, this one is the most powerful I have ever used (and heavy!). The best part is that all this power is run on battery–no cords to worry about. It generates the same power of 15 amp corded circular saws, but actually cuts faster. It cuts like butter! I anticipate that this will be the only circular saw that I’ll never need in my DIY toolbox).
Once the 2 x 8 pine pieces were cut, I sanded them down with 180-grit sandpaper with my DeWalt 20V 1/4″ sheet sander. What I like best is that it’s got a variable speed. I’ve used many sanders that only have one speed and it’s either too much or too little. This one was just right because I didn’t need an aggressive sanding–just something light and easy to prepare this board for smooth painting!
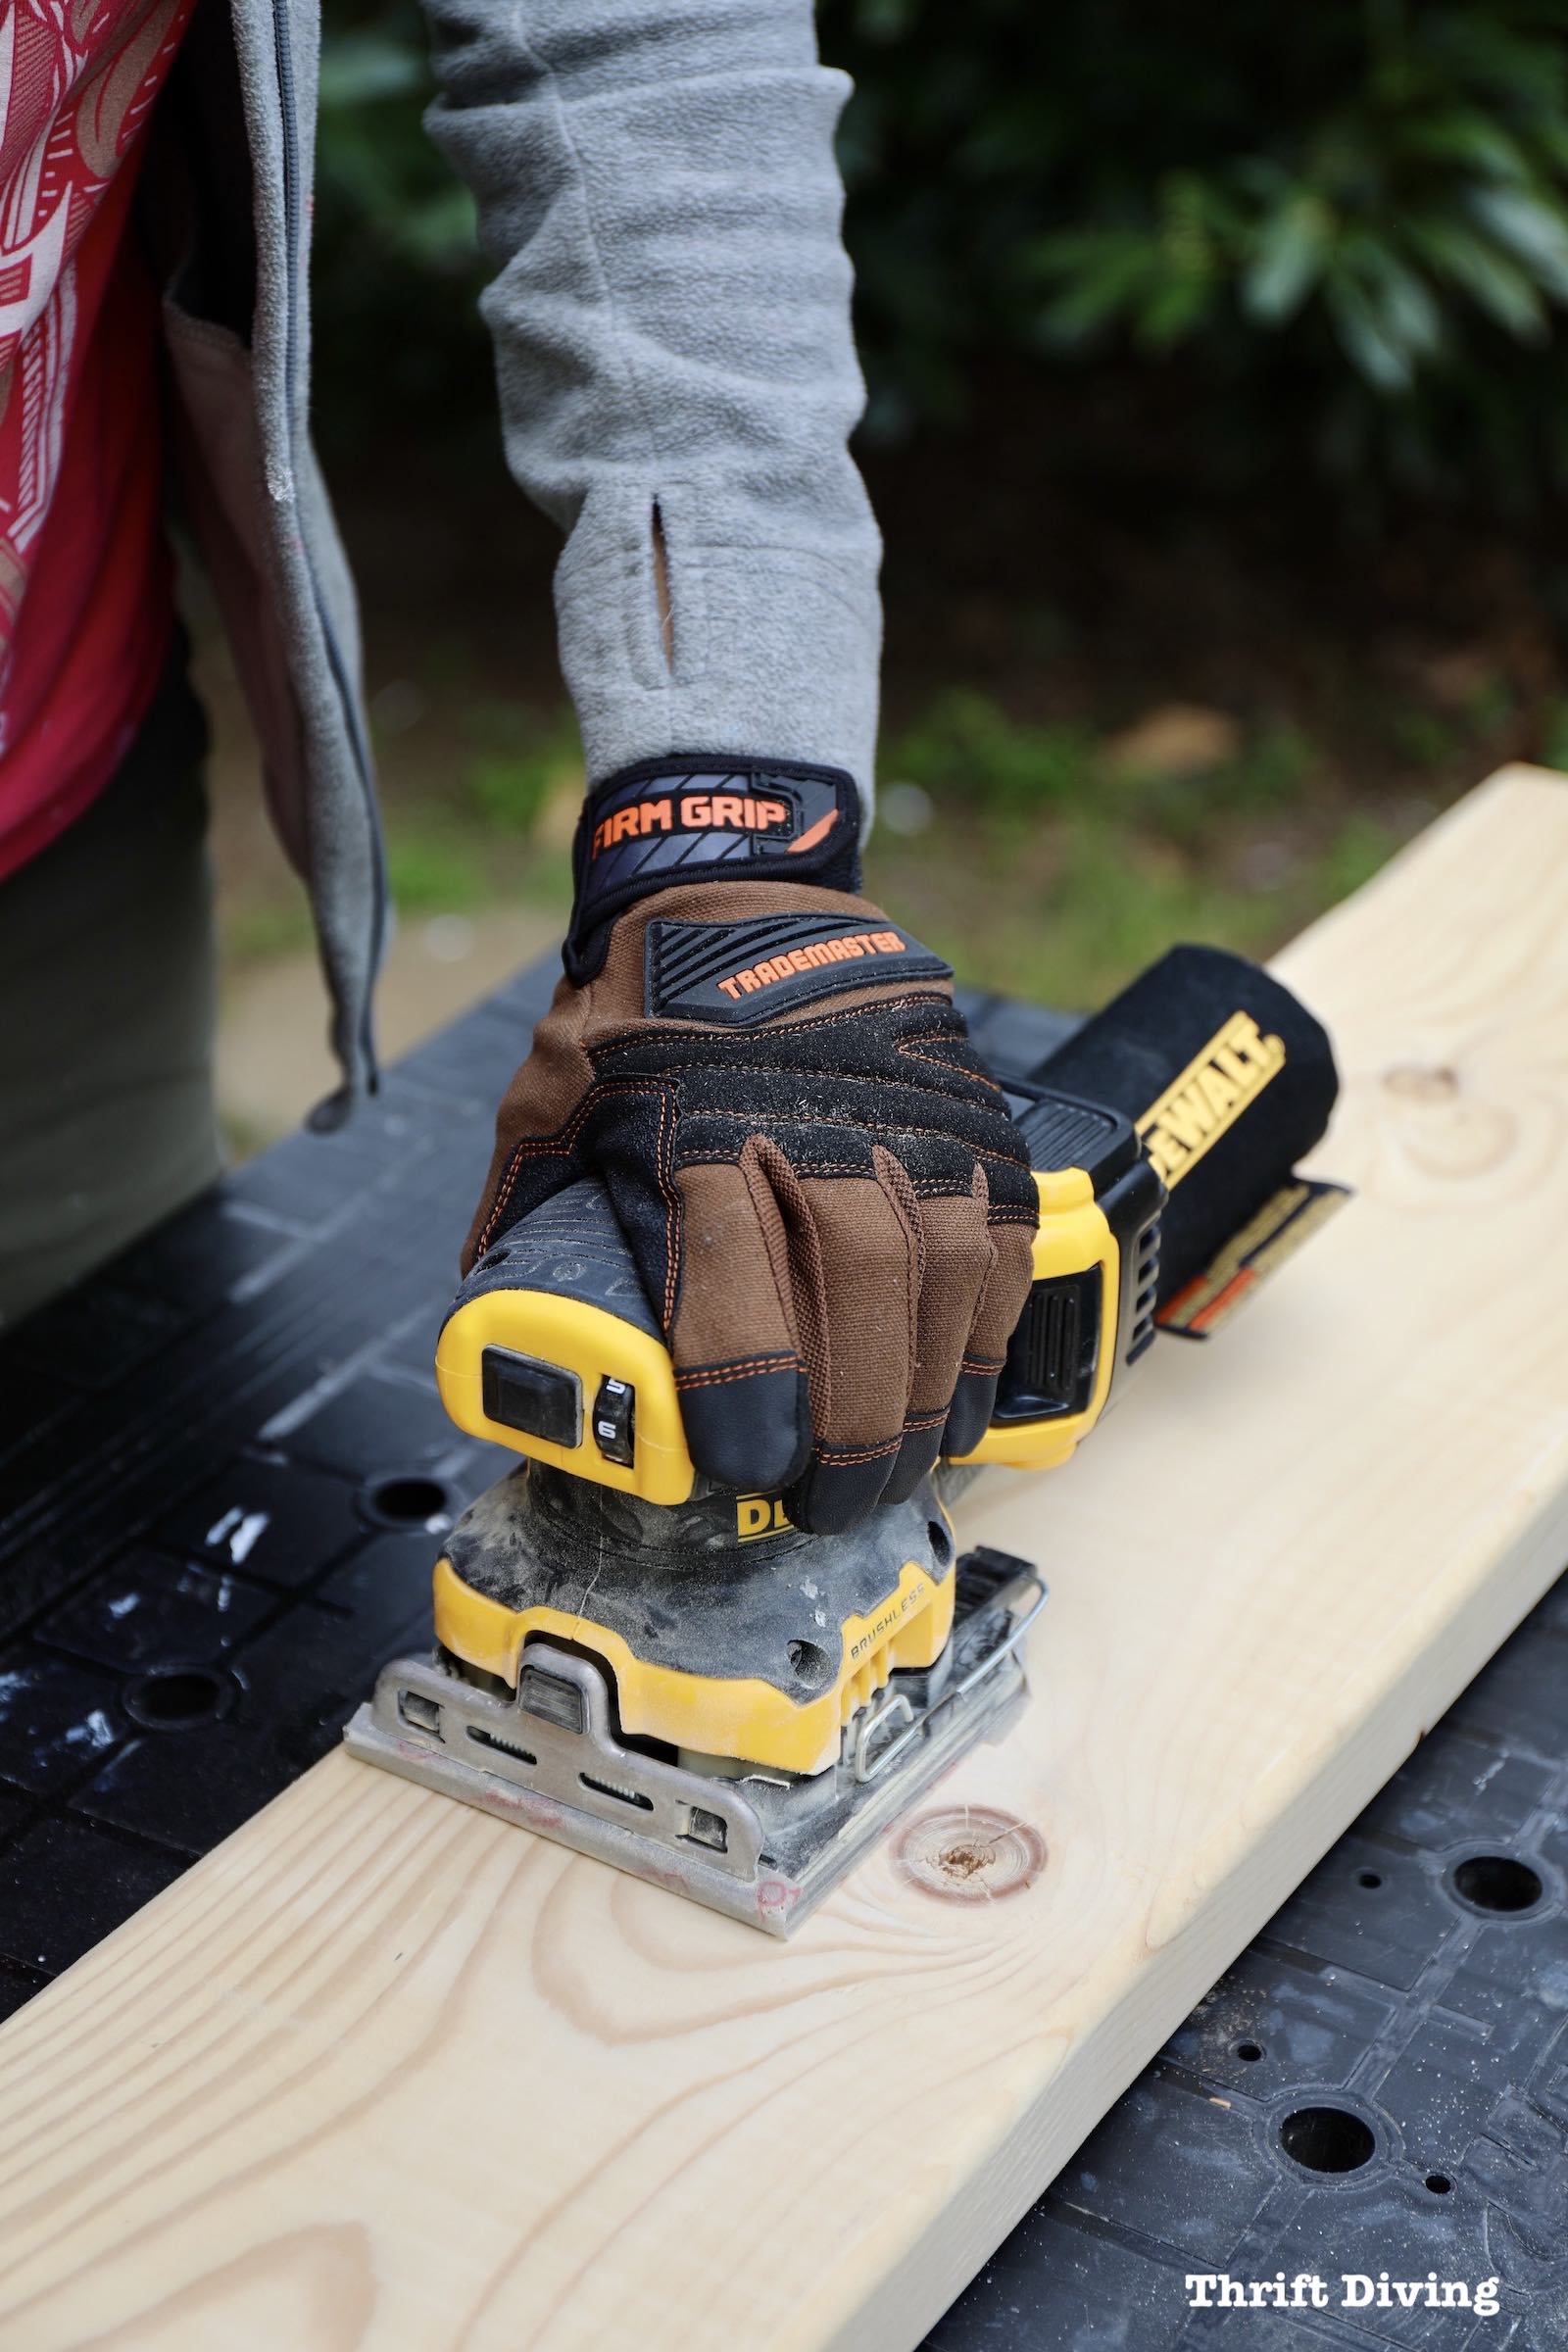
You’ll notice the gloves I’m wearing, too. These were also part of the Home Depot ProSpective program where I got to try these Trade Master Tan Duck Canvas Gloves to see how they worked out for my project. I loved them! They even worked by allowing the tips on the pointer fingers to use touch screen. This was super helpful when I wanted to use my phone while working, without having to remove the gloves each time!

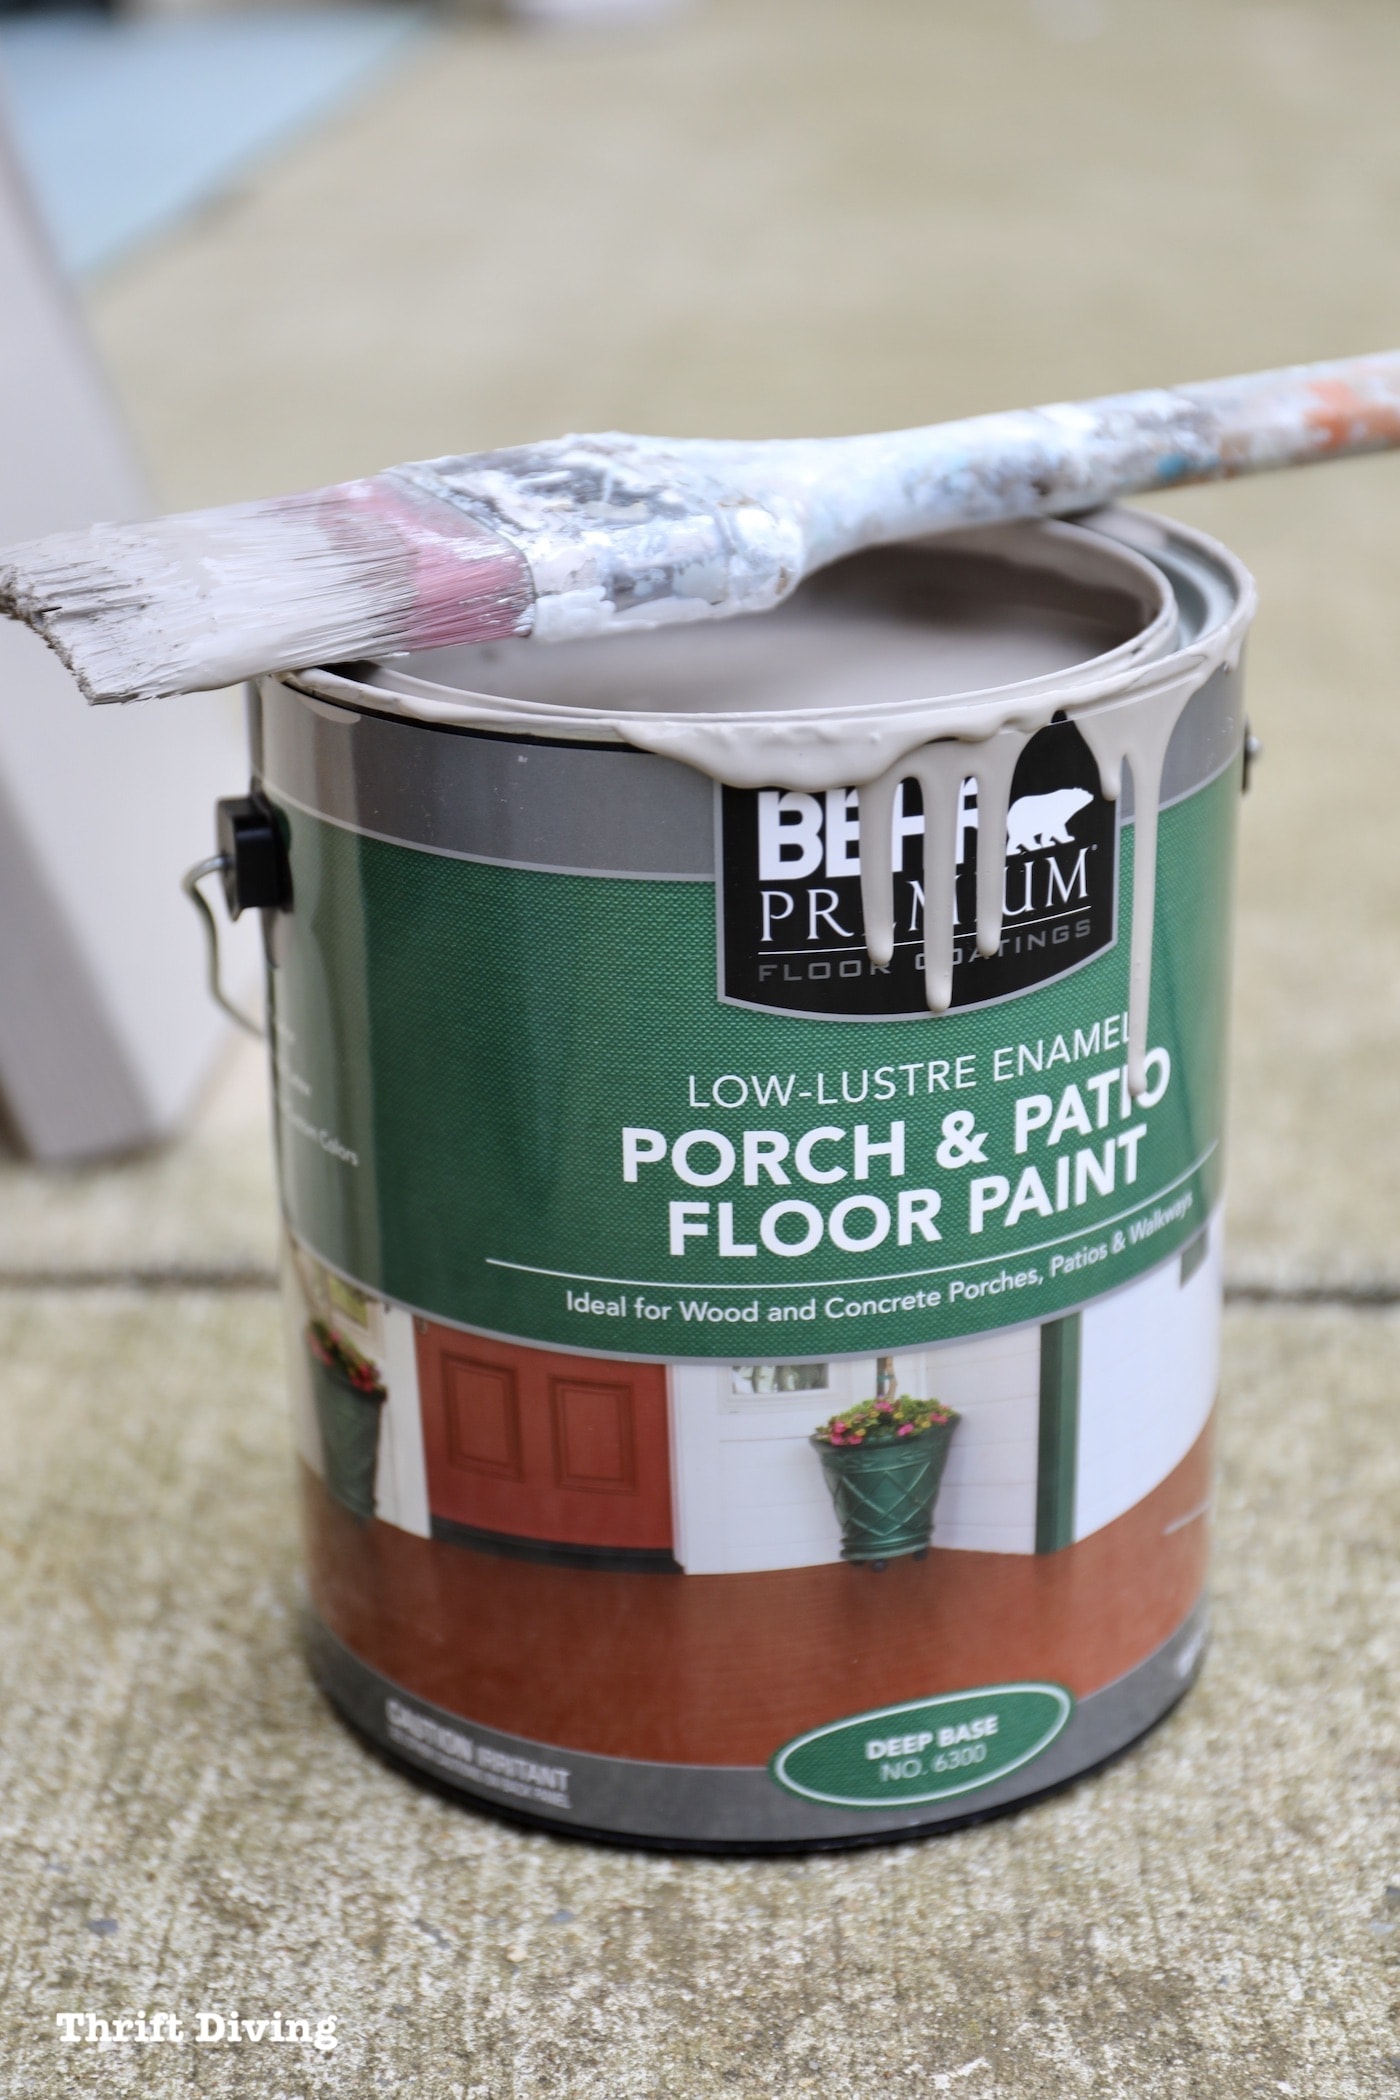
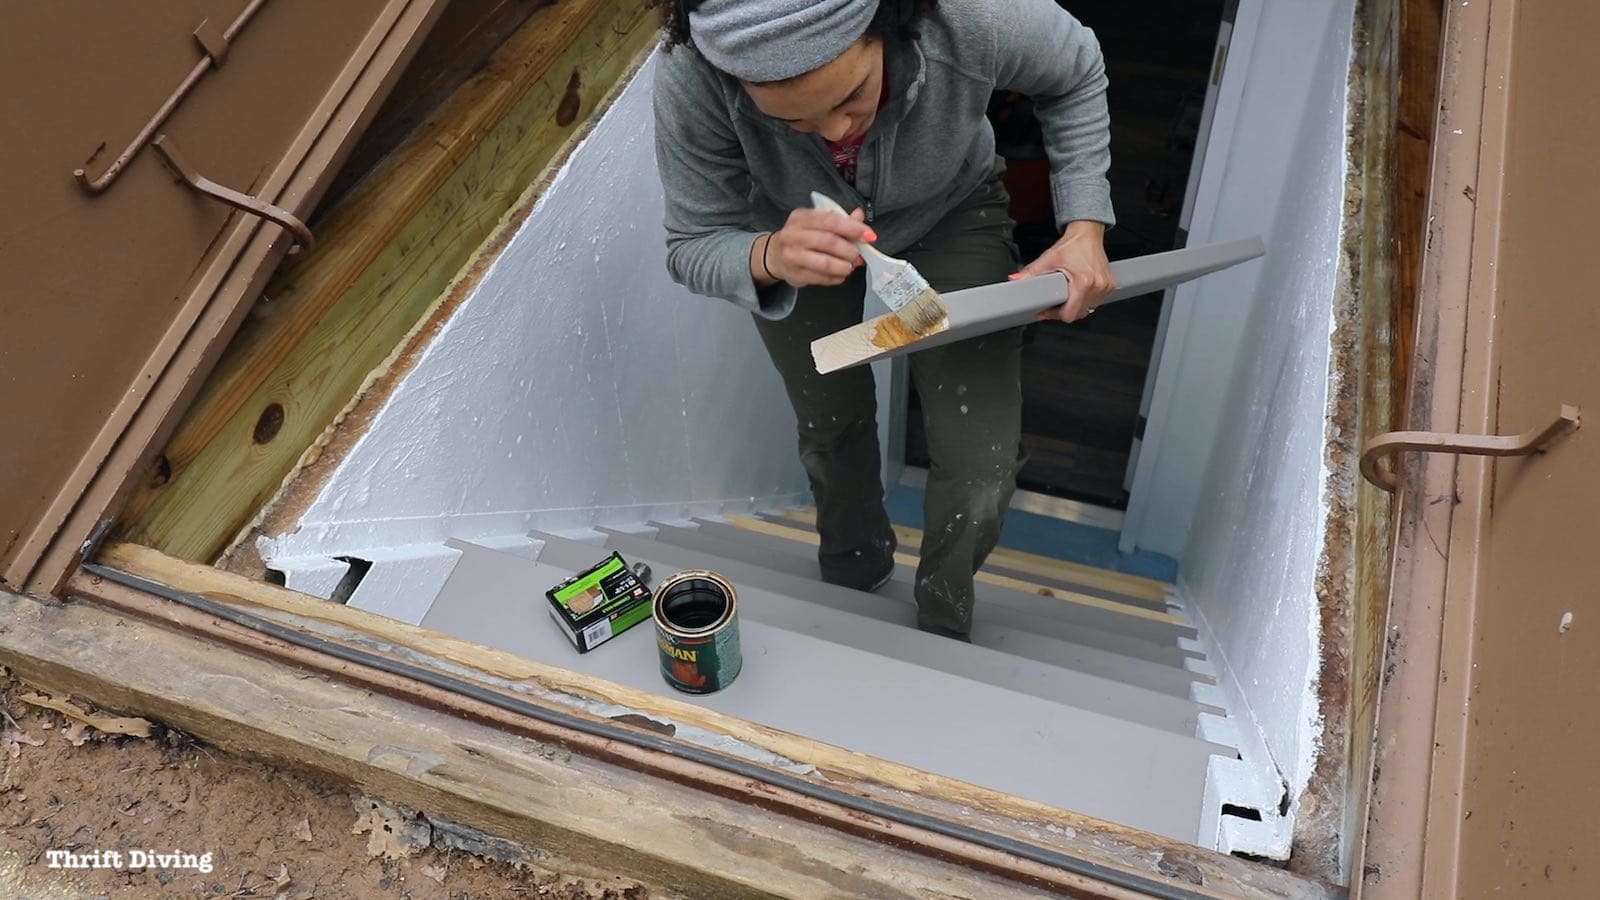
Then I used some Behr Porch & Patio Floor Paint to paint the boards. I needed something that would hold up to moisture and was specially made for these walkout basement steps that would be in a humid environment but wouldn’t necessary be exposed to the elements. I added 2 coats of paint to each, and I didn’t add any top coat or finishing to them; I didn’t want them to be slippery.

I also did some patching of spots that needed reinforced with hydraulic cement. But I couldn’t go any further on this project until the temps increase a bit. Right now, the temps on the walls have to be at least 50 degrees, and I’m not sure they are. So I’ll hold off a bit to make sure I get the best results possible with the paint that needs to be done.
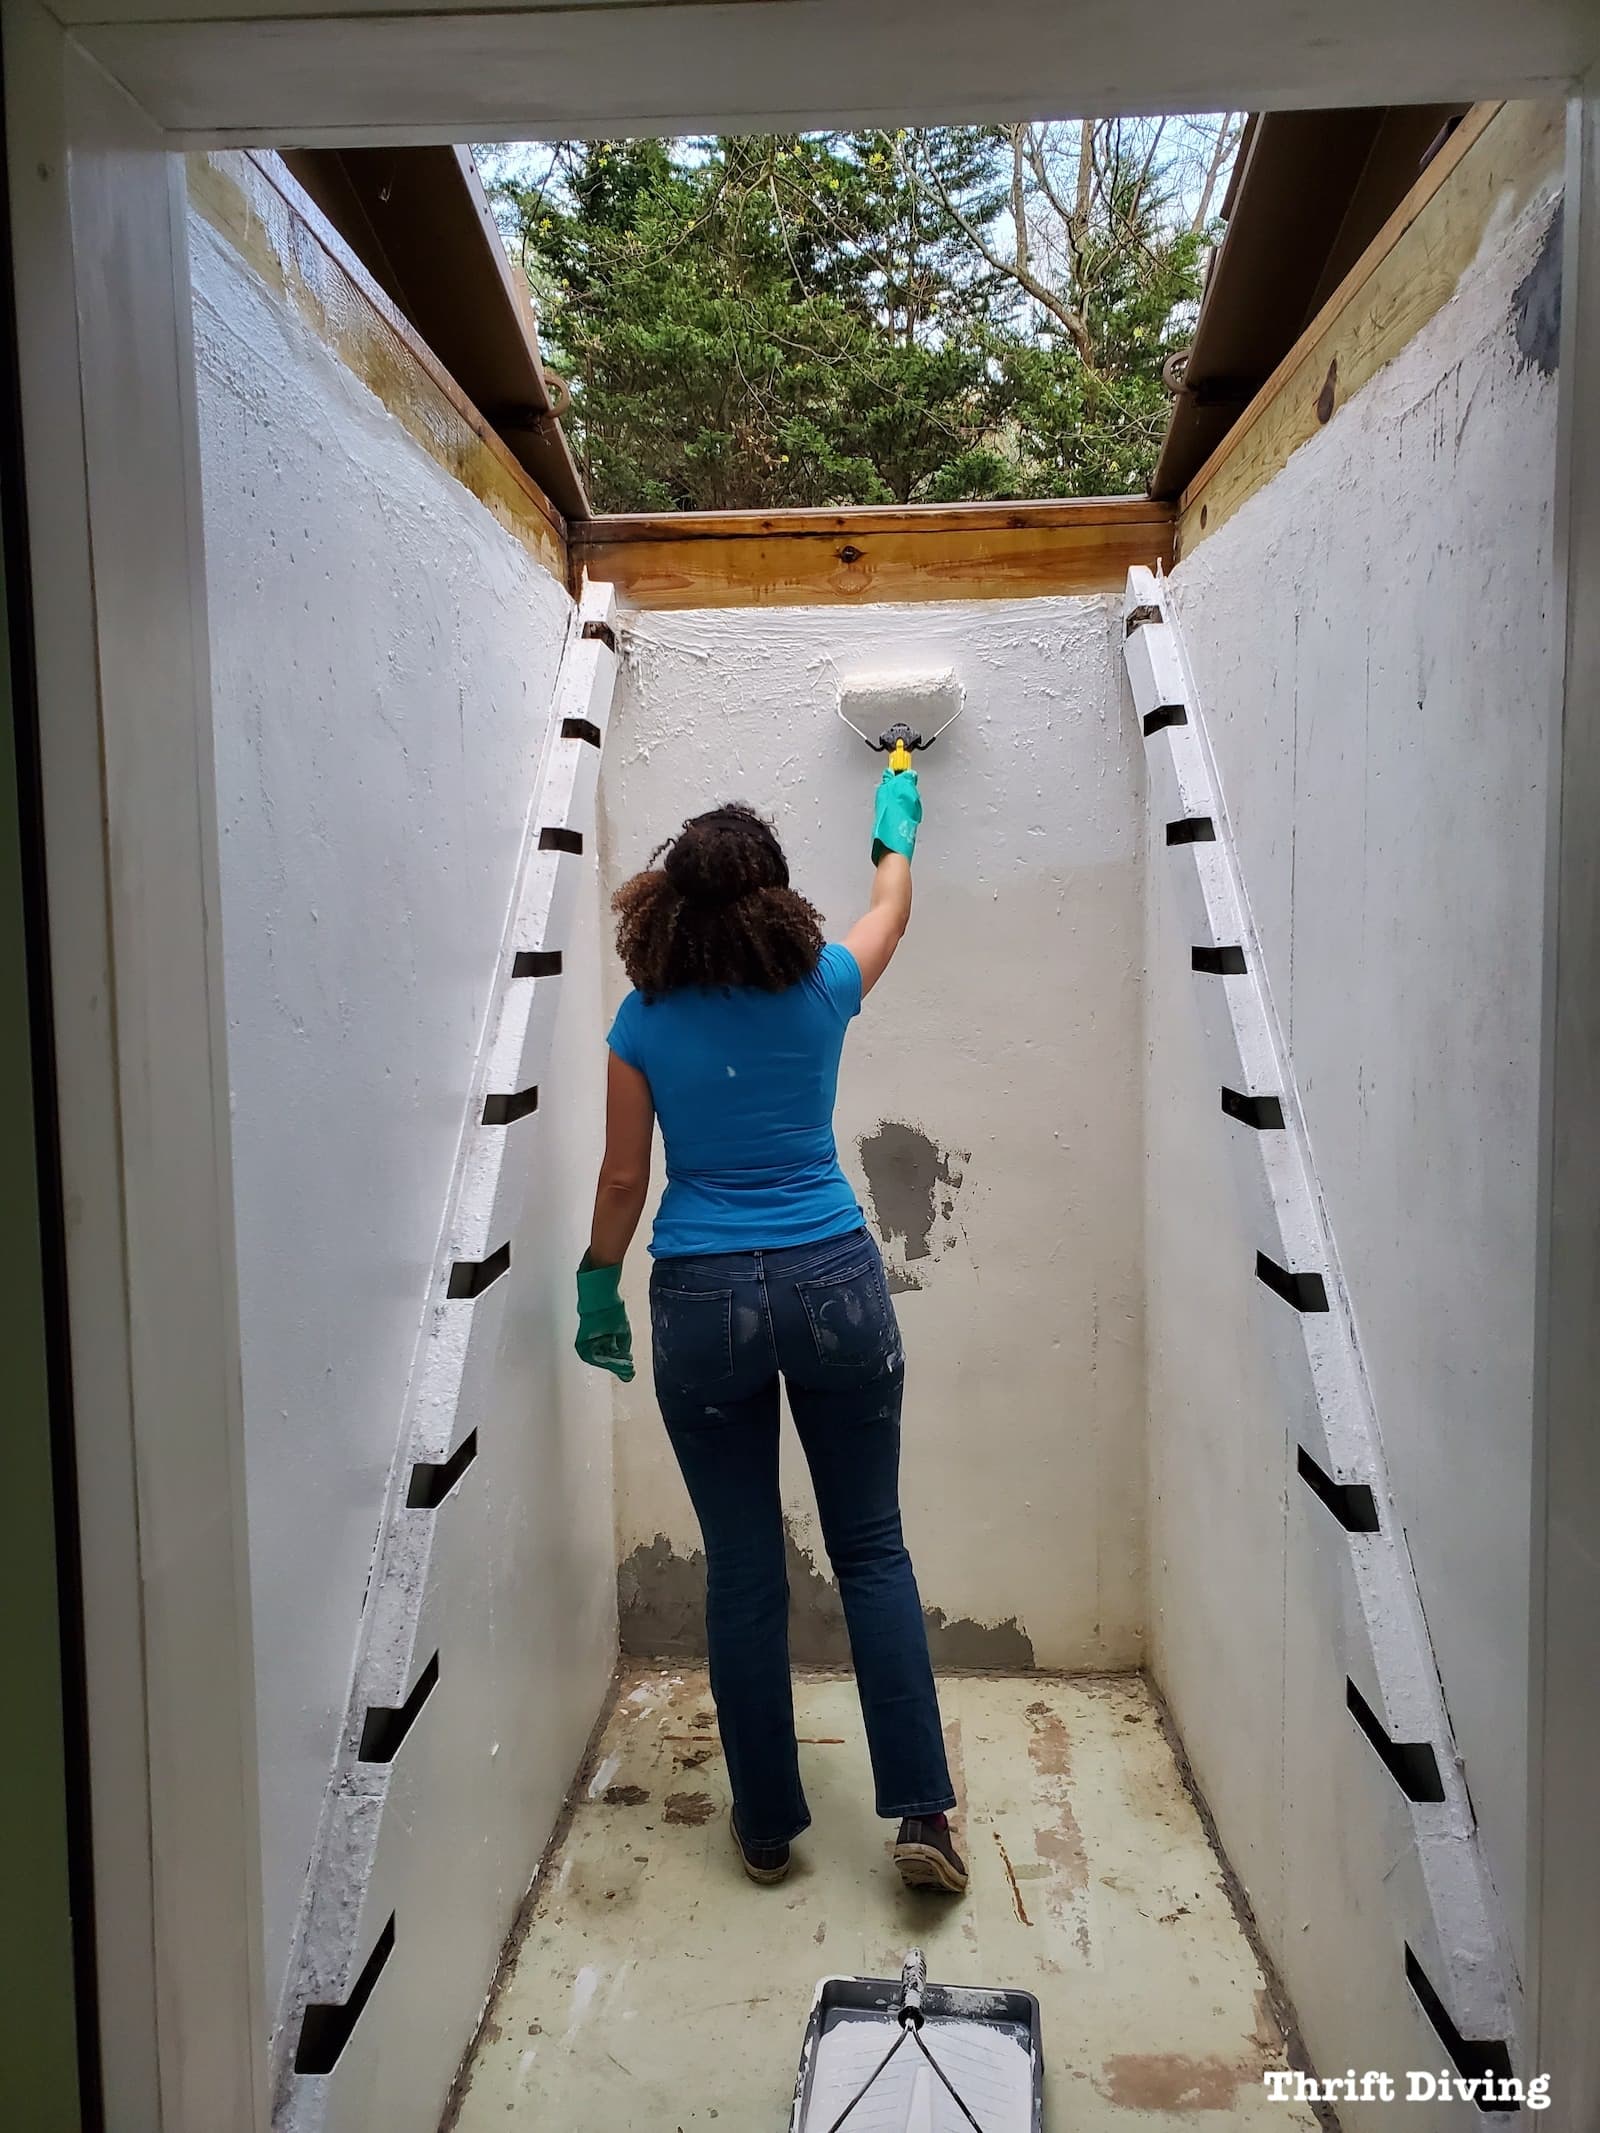
To tackle the rusty metal stringers, I wiped them down and sprayed them with a rust-controlling primer. I also added two coats of DryLok, a latex masonry waterproof paint to help prevent moisture from seeking through the cement walls. You’ll notice I’m using a roller with a pretty thick nap. Since the walls were rough textured, using a thicker roller helped get better coverage.
I added two coats and let it dry overnight. The following day, I painted two coats of exterior paint (in a bright white) over the DryLok.
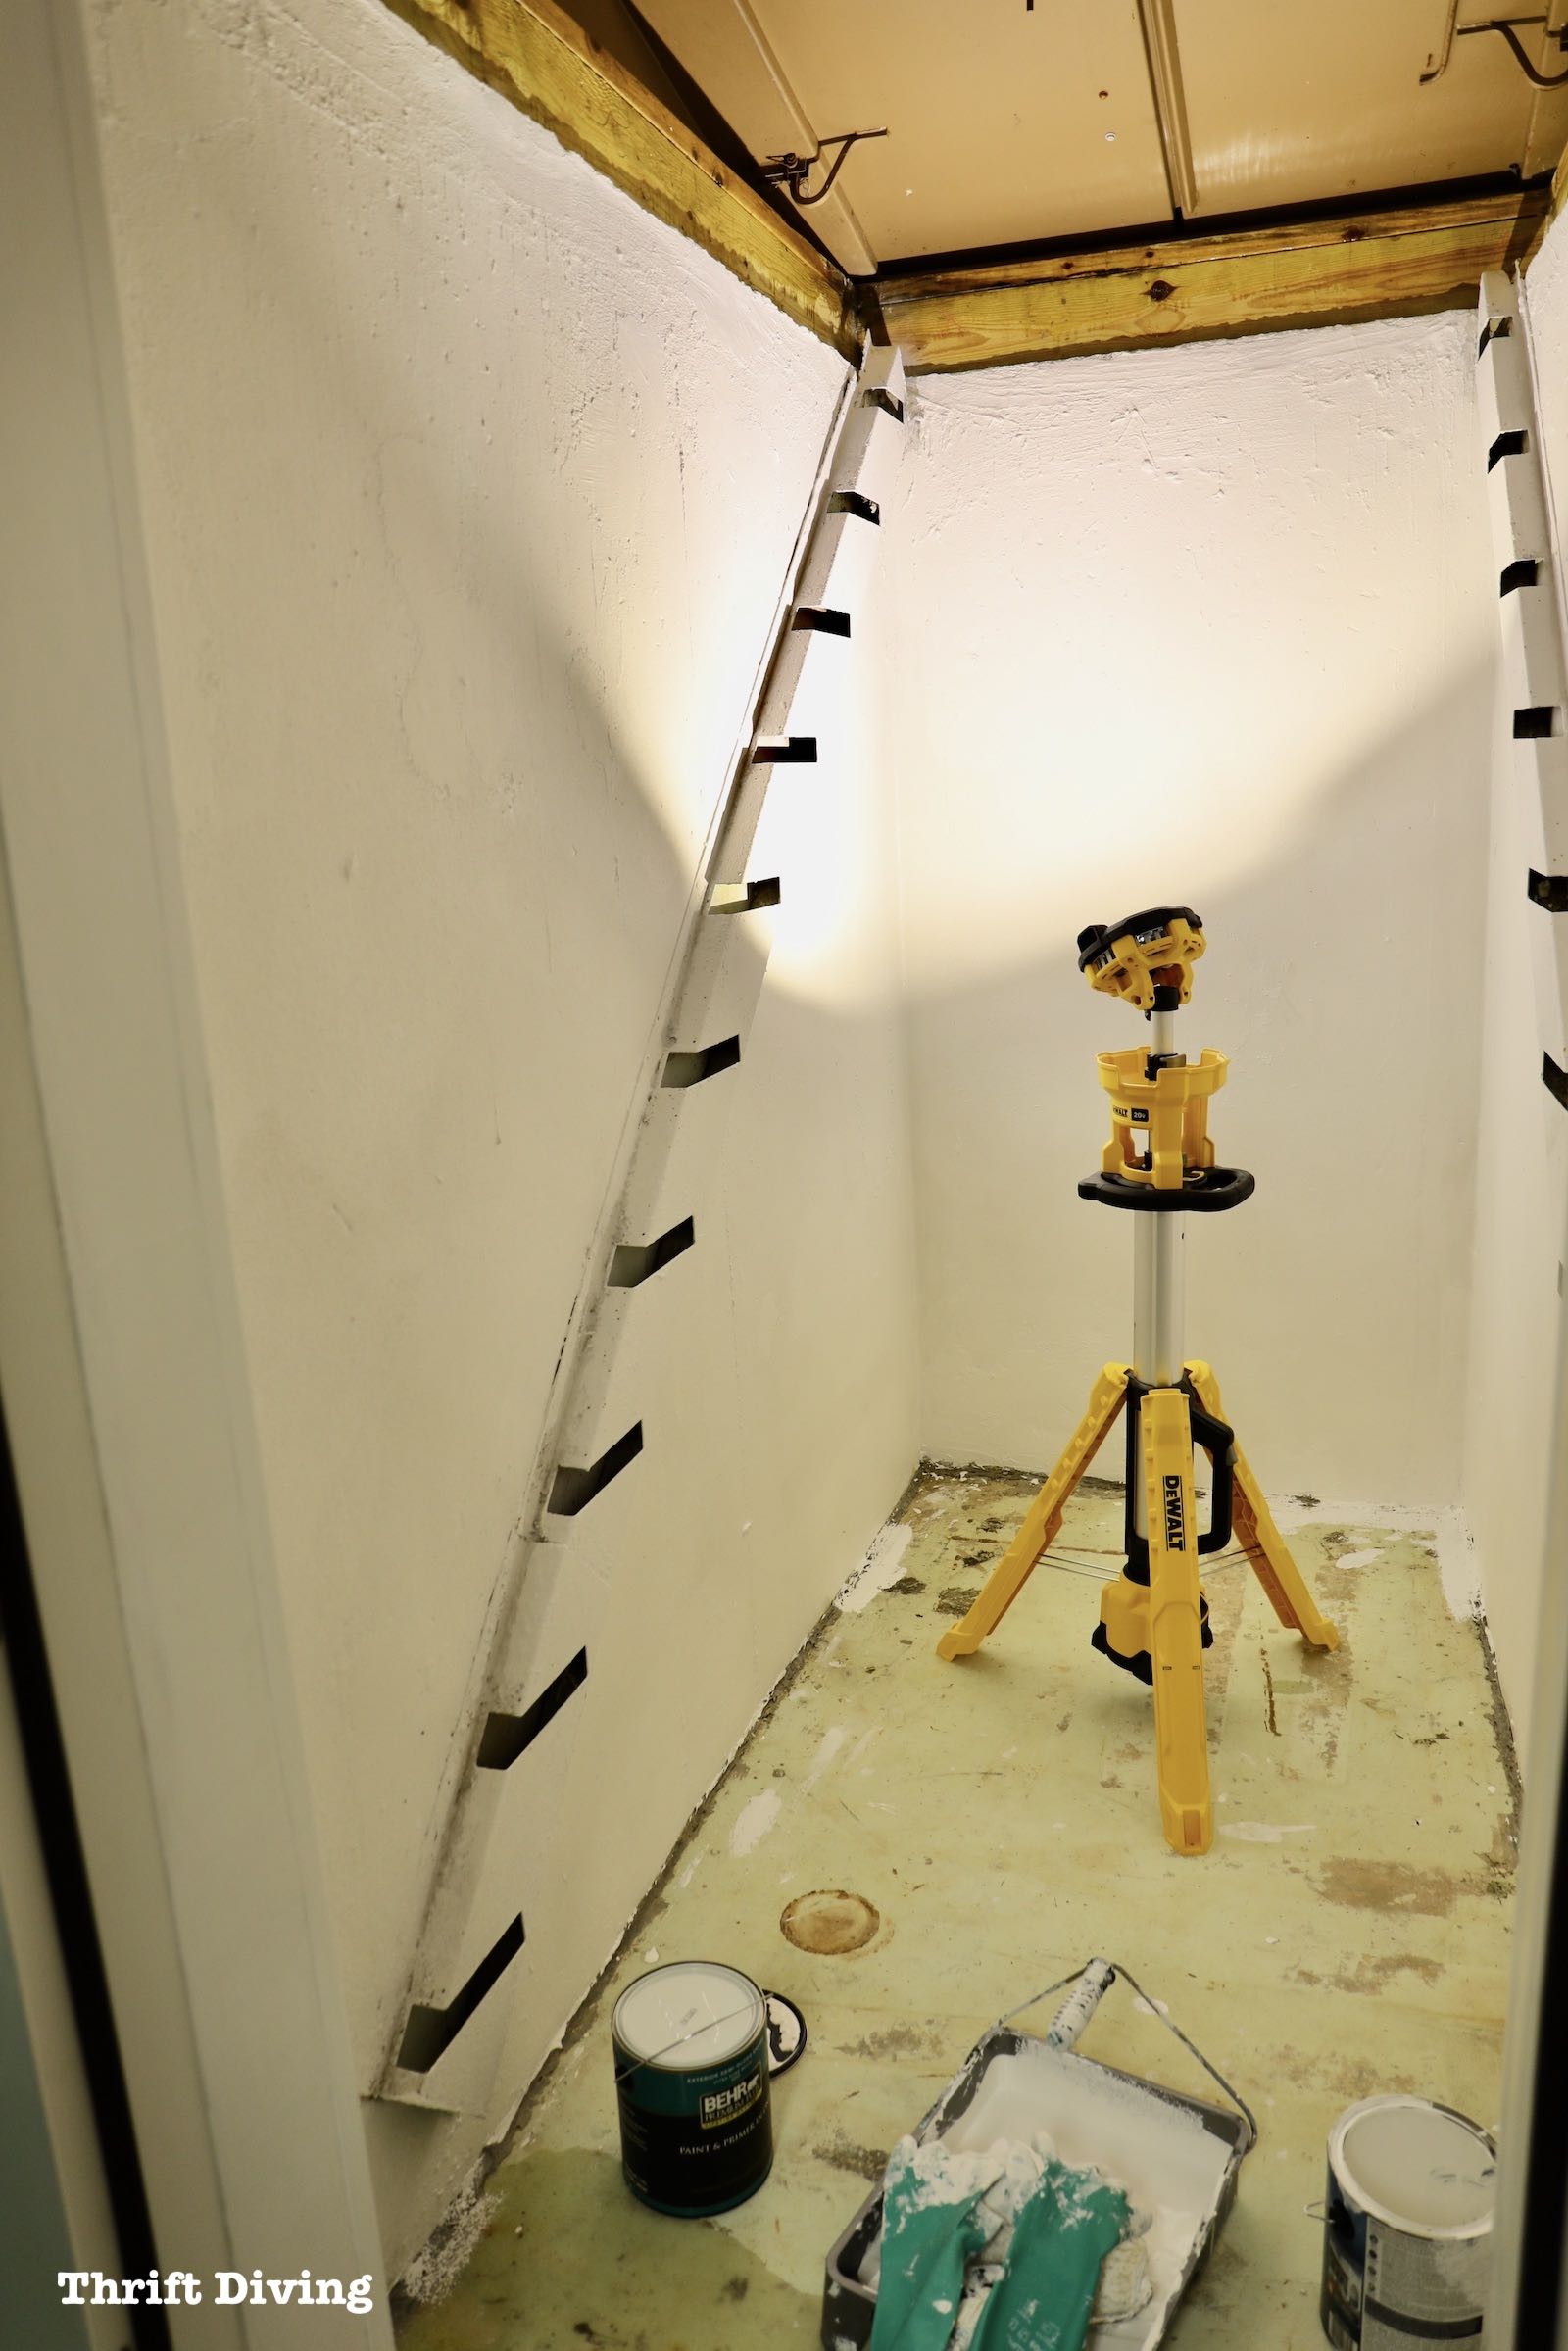
Fortunately, I was able to open (what I call) the “Wizard of Oz” doors and work while it was light outside, but when the sun went down, I had to pull out my new DeWalt 20V Tripod Light. I’m used to working in dark spots around the house, but this light has been a game-changer!

As part of the Home Depot PROSpective program, I get to test out various tools to see what I think about their quality and usefulness during my DIY projects. And this tripod light was perfect for this dark stairwell! It runs on a 20V battery so it has lots of run time and I’m not tied down to wires or cords. This light was a must-have for being able to work on this project at any time, not just during daytime sunshine! There’s nothing that’s more annoying in being limited to working on projects only when you’ve got sunlight!
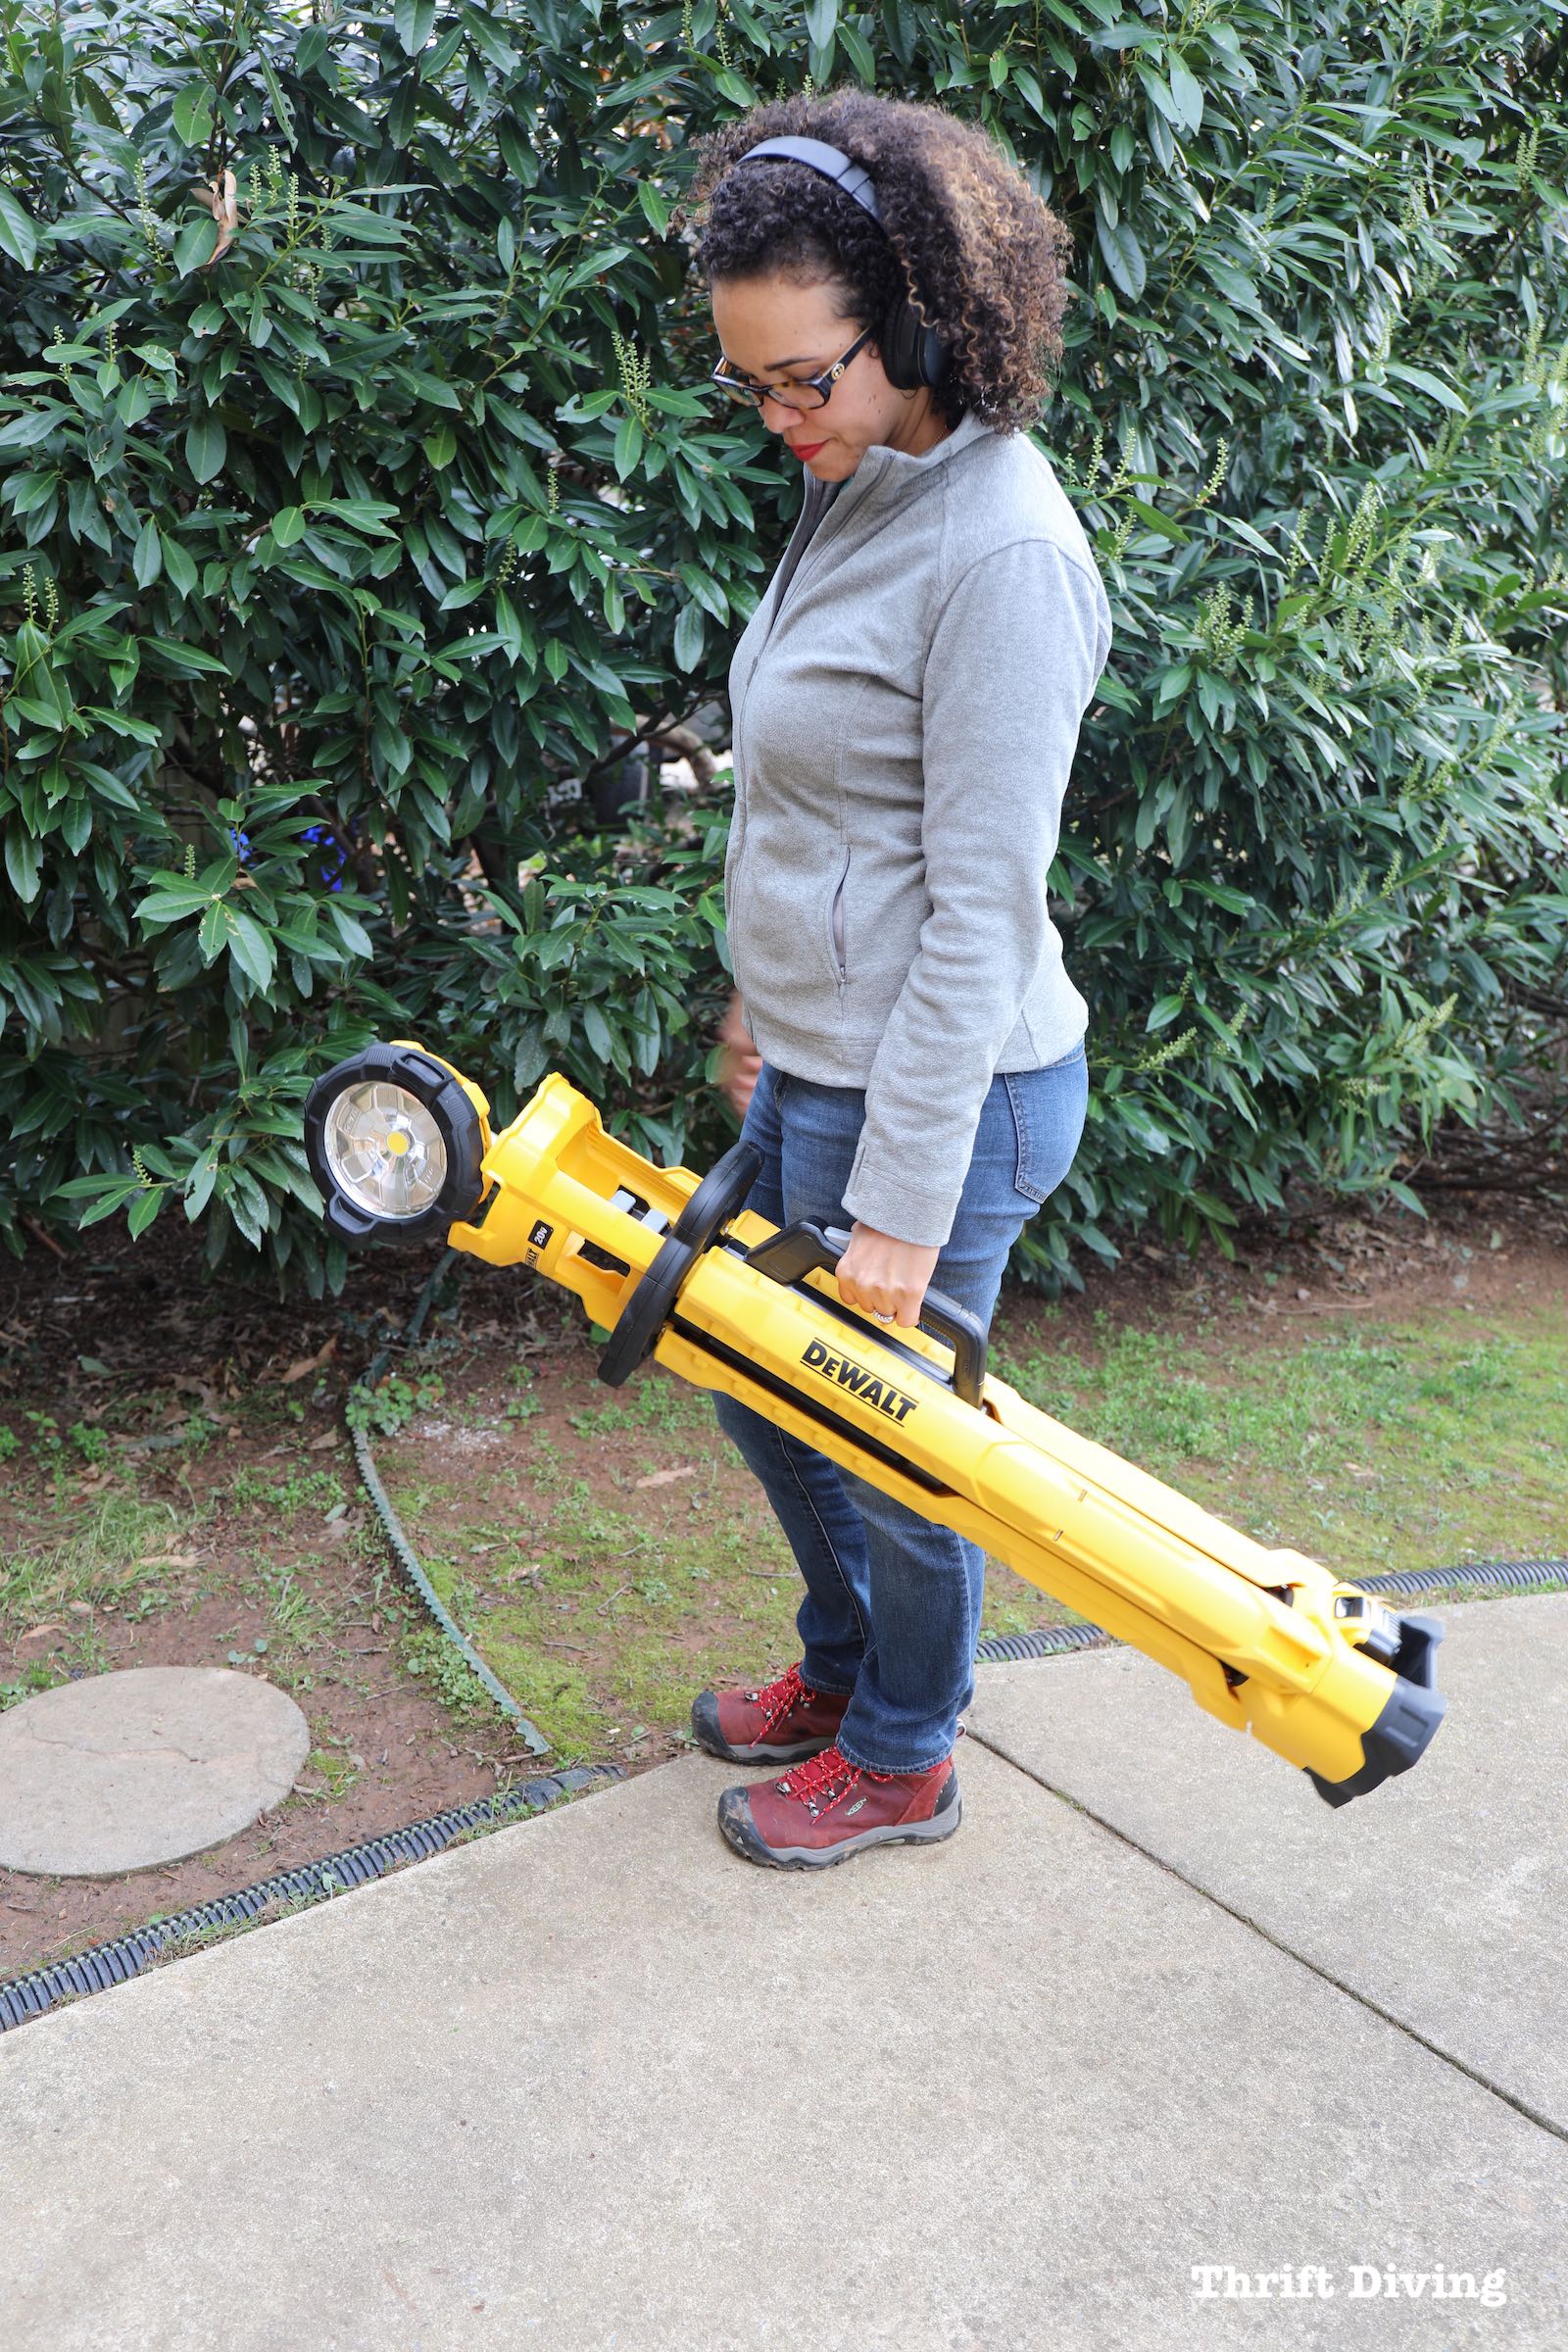
What I really liked, too, in addition to how it telescopes to 7-feet tall, is that it folds up nicely and can be transported easily with a handle. One day soon I hope to buy an investment property “fixer-upper” and I’ll need tools like this that allow me to easily transport from home to jobsite!
I had some left over paint let from when I painted my garage floor. This little section of floor was perfect for using the leftover paint without having to spend more money to buy floor paint. Typically you should prep your floor with etching cleaner and such before painting, but since I didn’t have those supplies (and this section of floor wouldn’t really be walked on), I just cleaned and painted.
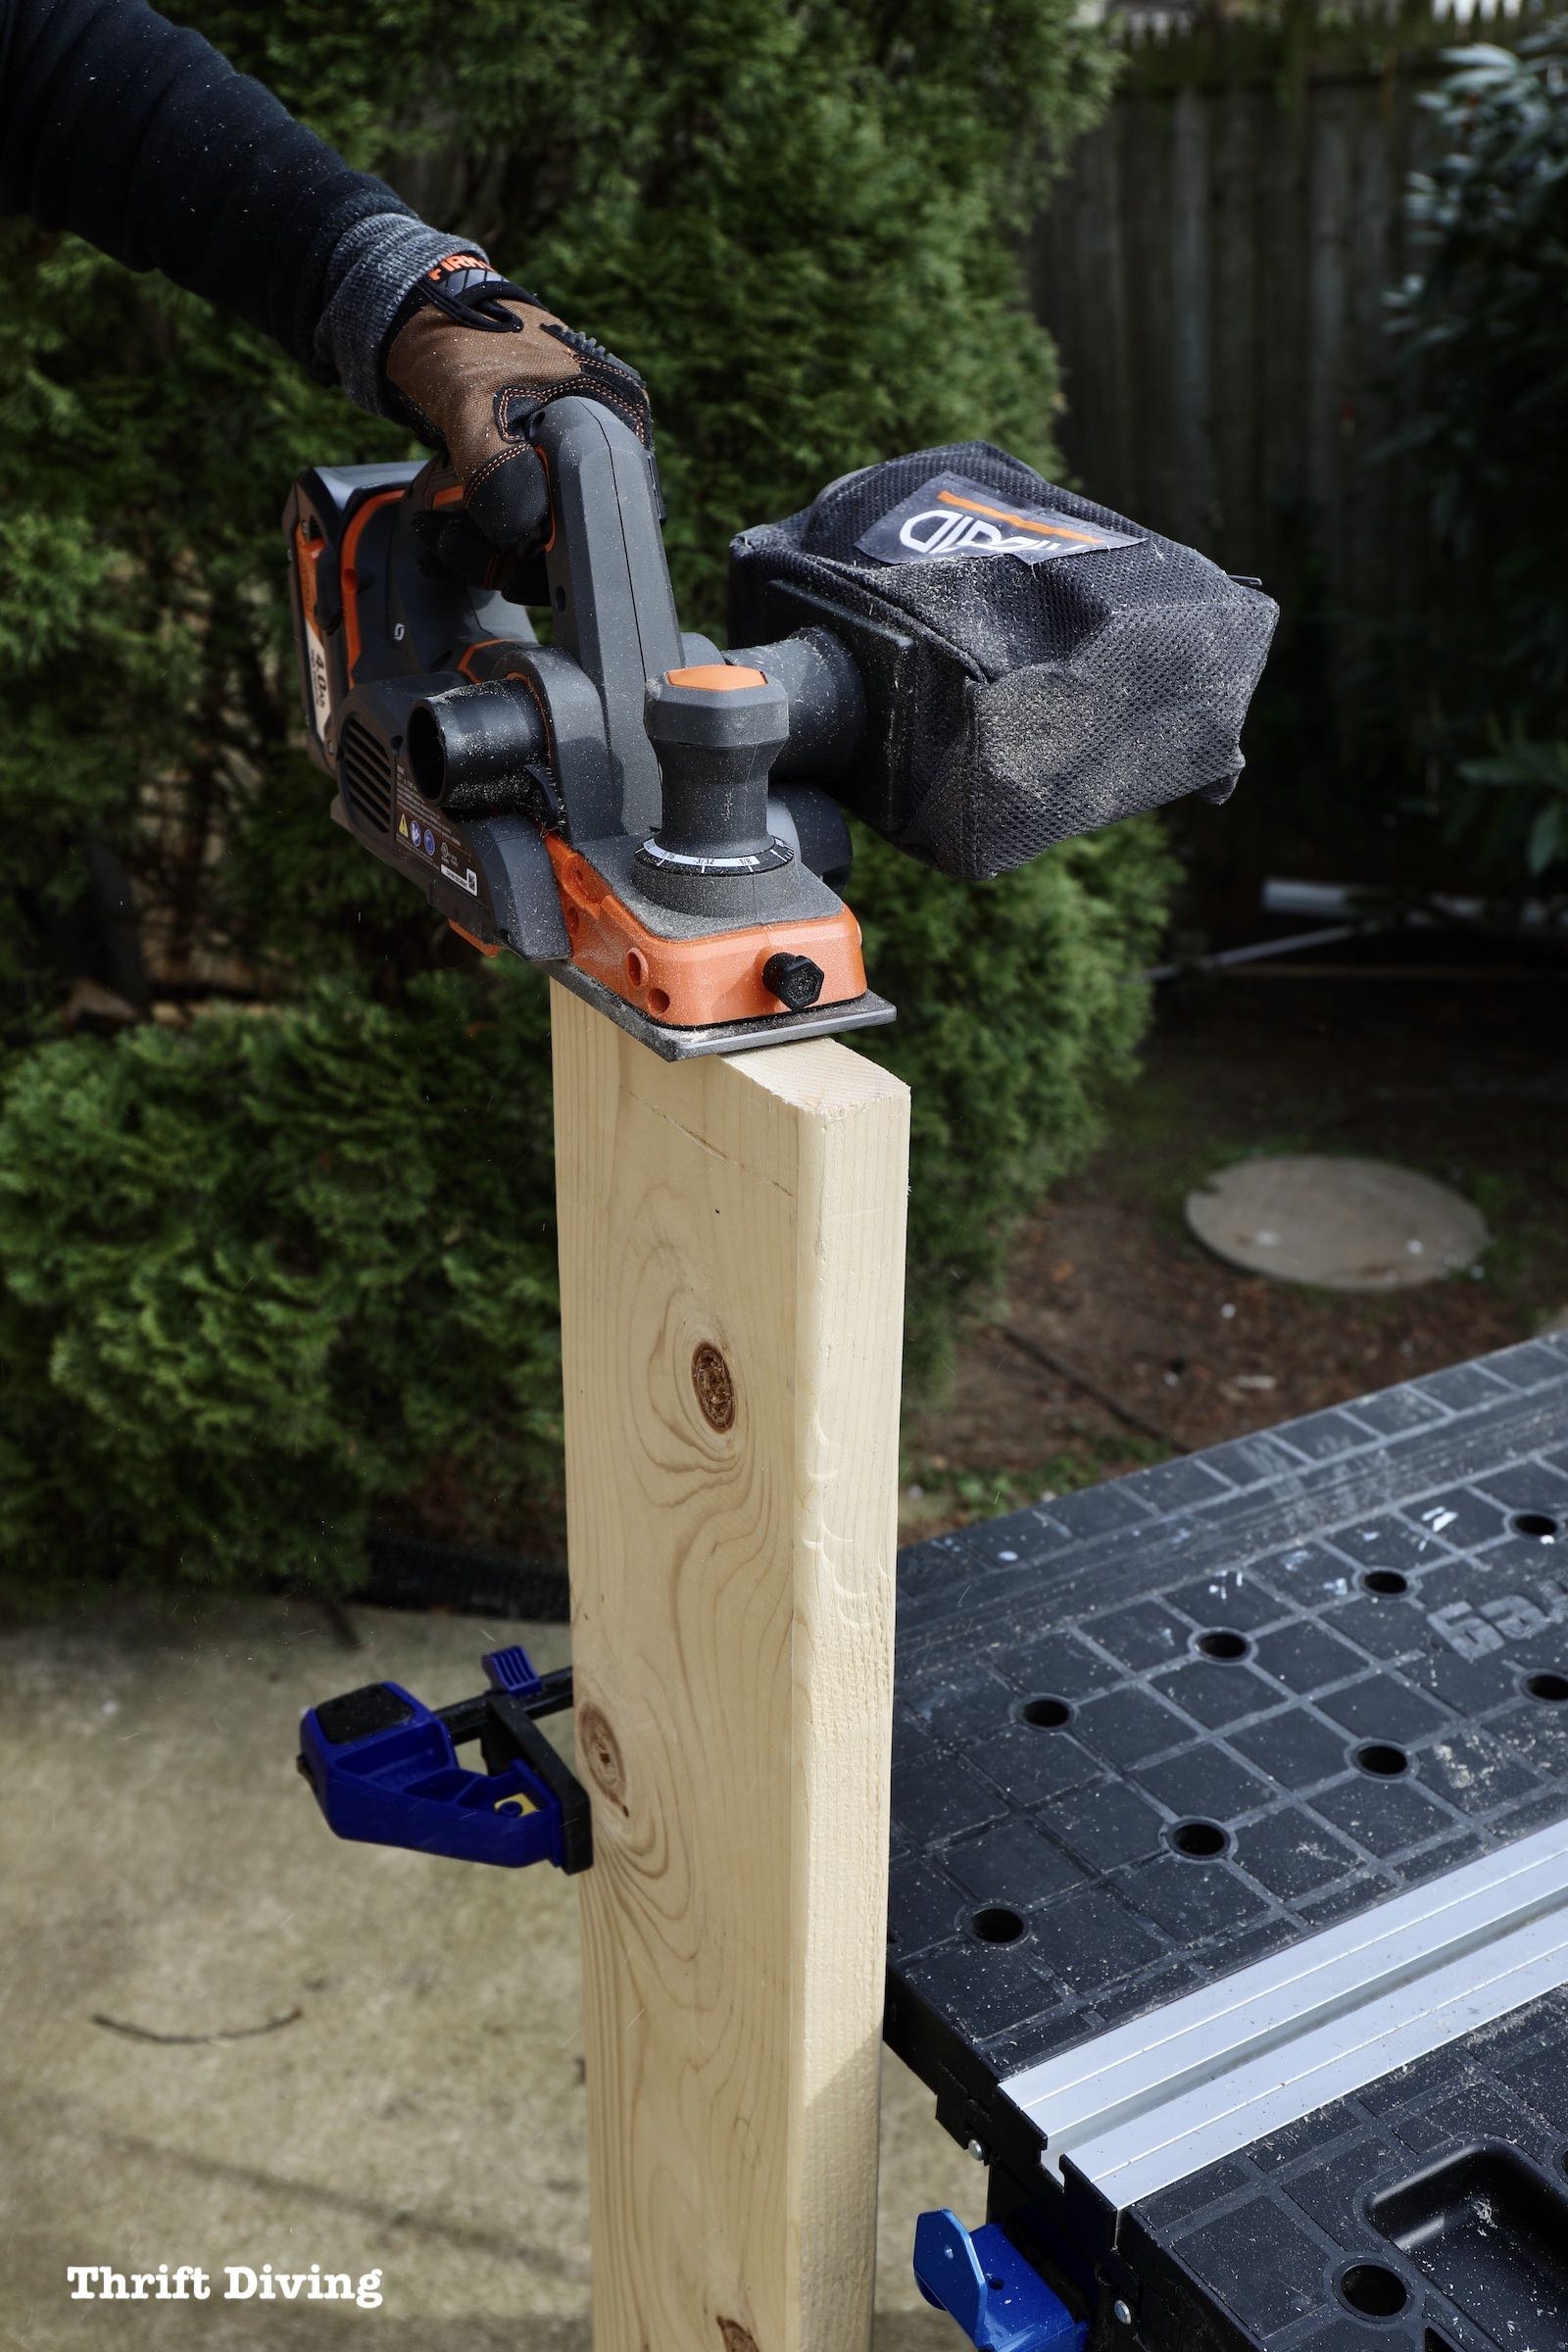
As I placed each 2 x 8 wooden step into place to make sure they fit, I found that some of the boards were cut too long. The reason why is because the walls were not perfectly spaced. Therefore, each board need to be individually measured and cut instead of assuming they were all the same length.
So the other tool I got to try out was the RIDGID OCTANE Brushless 18V 3-1/4″ Hand Planer. It allowed me to shave off a bit of wood so that each 2 x 8 fit perfectly along the metal stringer. It has a depth adjustment knob with 20 locking positions for a more precise cut. I found it very easy to use and I’m excited to have this as part of my DIY toolbox now!
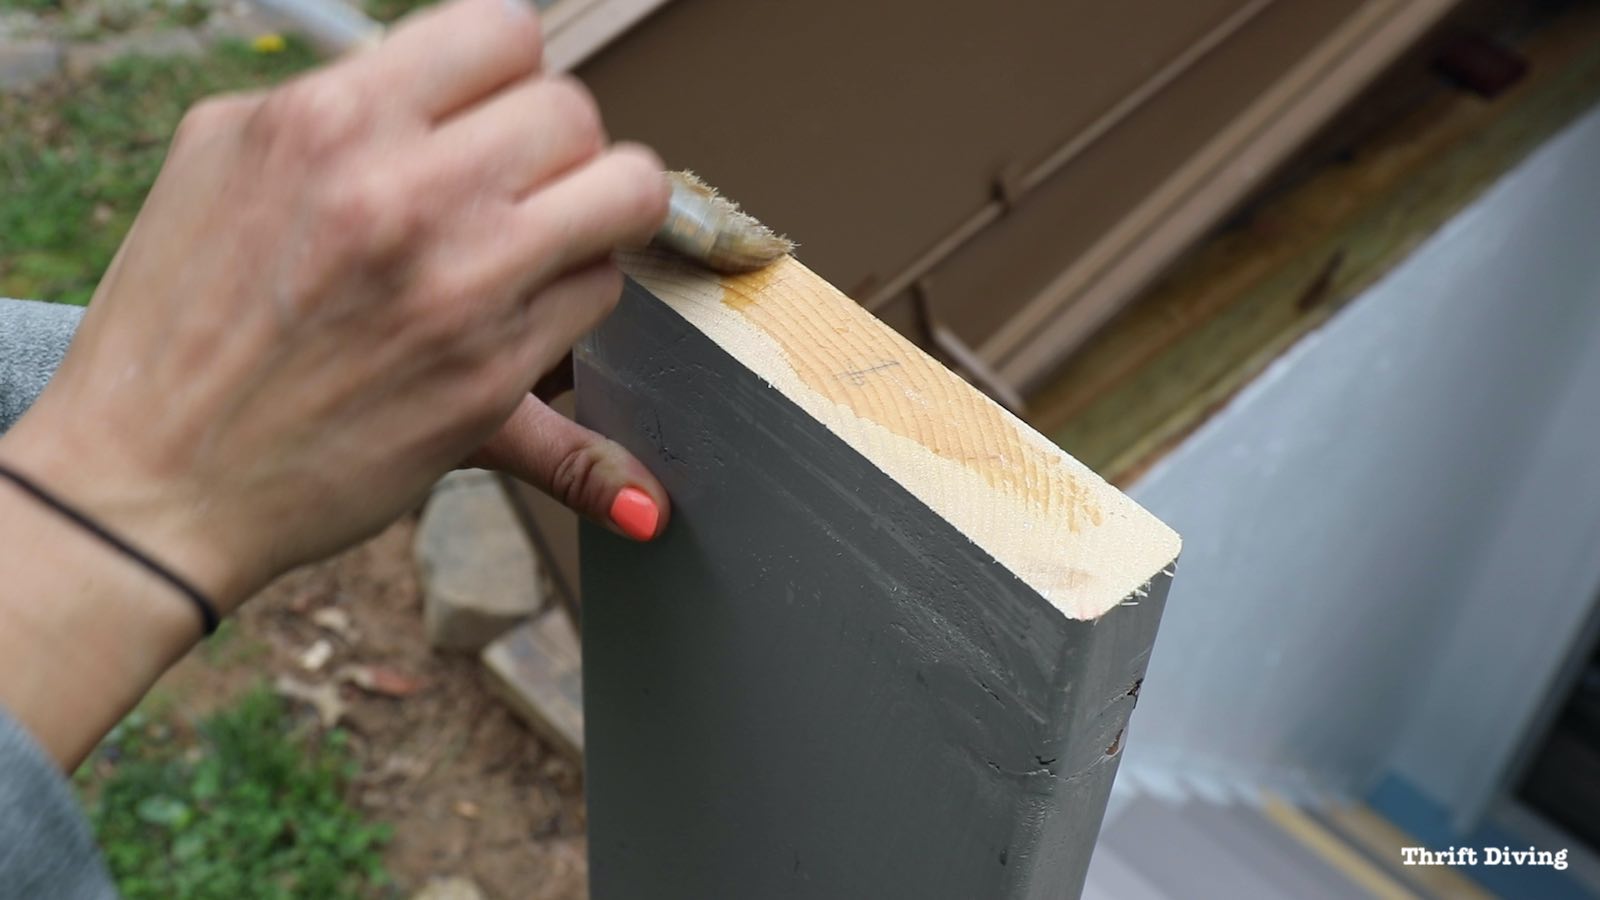
I removed each and put a top coat sealer on the end grain of the boards to prevent moisture and water from warping and destroying the wood.
Any time you cross cut a board like this, the end grain of the board is like a straw, sucking up water, moisture, or whatever else it comes in contact with. Sealing it off helps to keep the board resilient to the moisture that builds up in this stairwell during the warmer months.
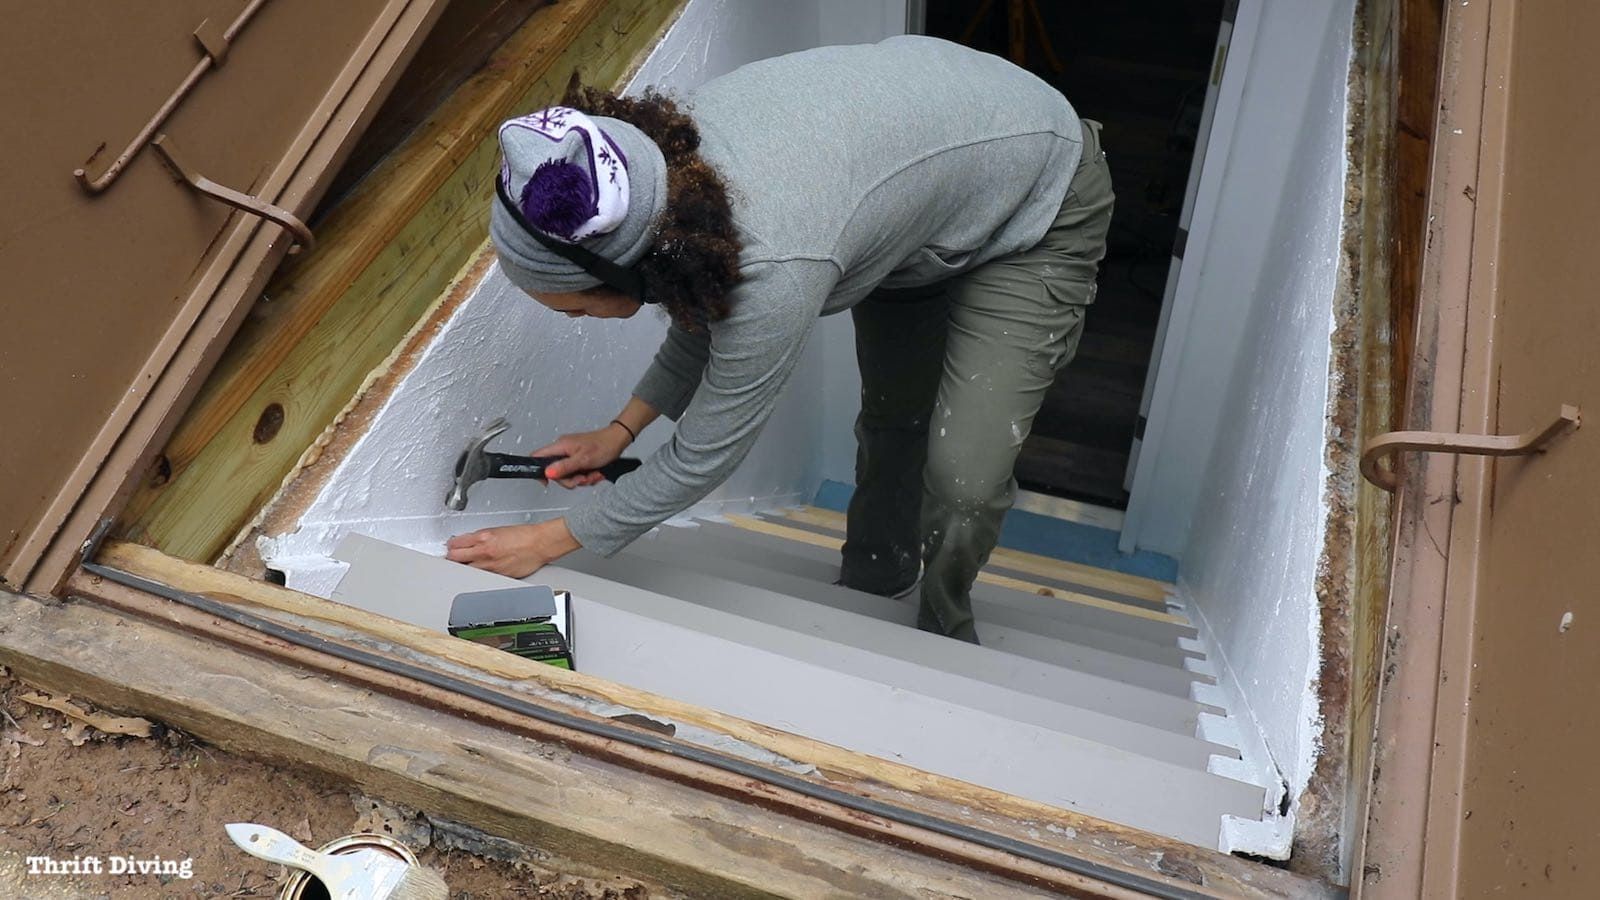
I also used exterior galvanized nails (1-1/2″) to hold the boards in place. They won’t rust in the moist stairwell.
The metal stringer where the wood steps slide into have holes for the nails to secure the boards. I left the bottom 4-5 steps without nails so that if we ever need to get under the stairs (for storage, maybe??), we could just slide out those boards and get underneath.
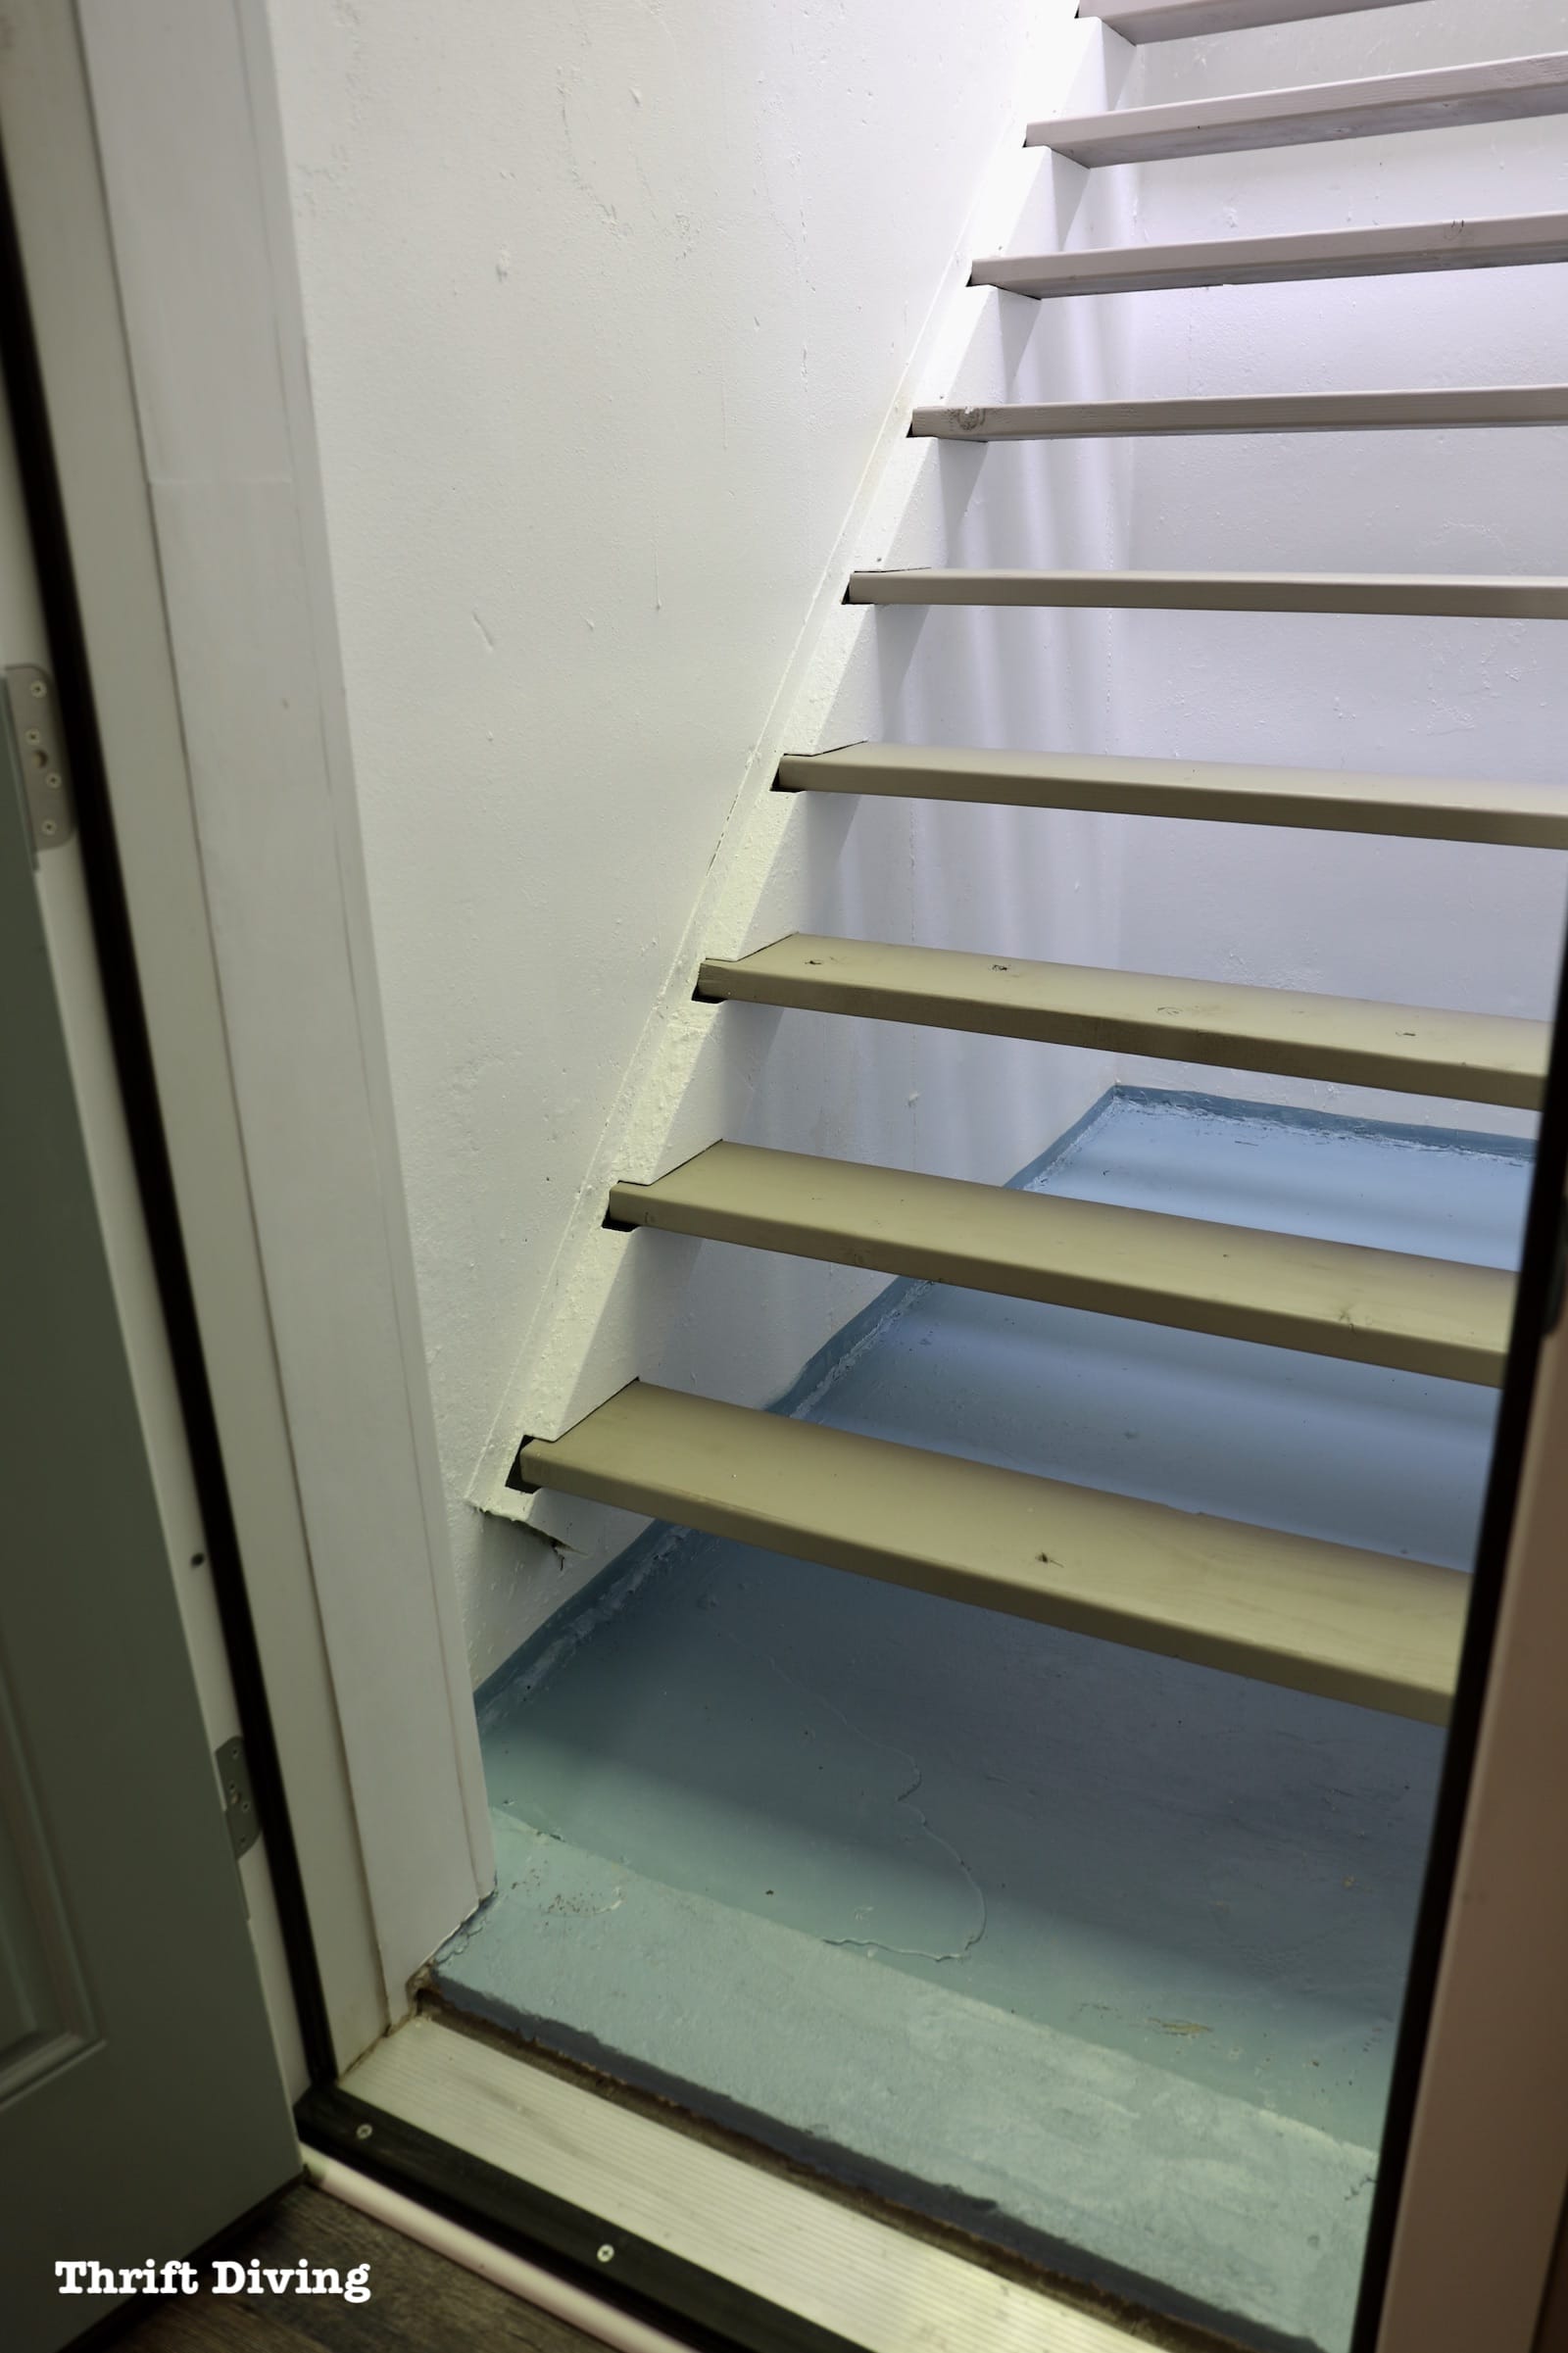
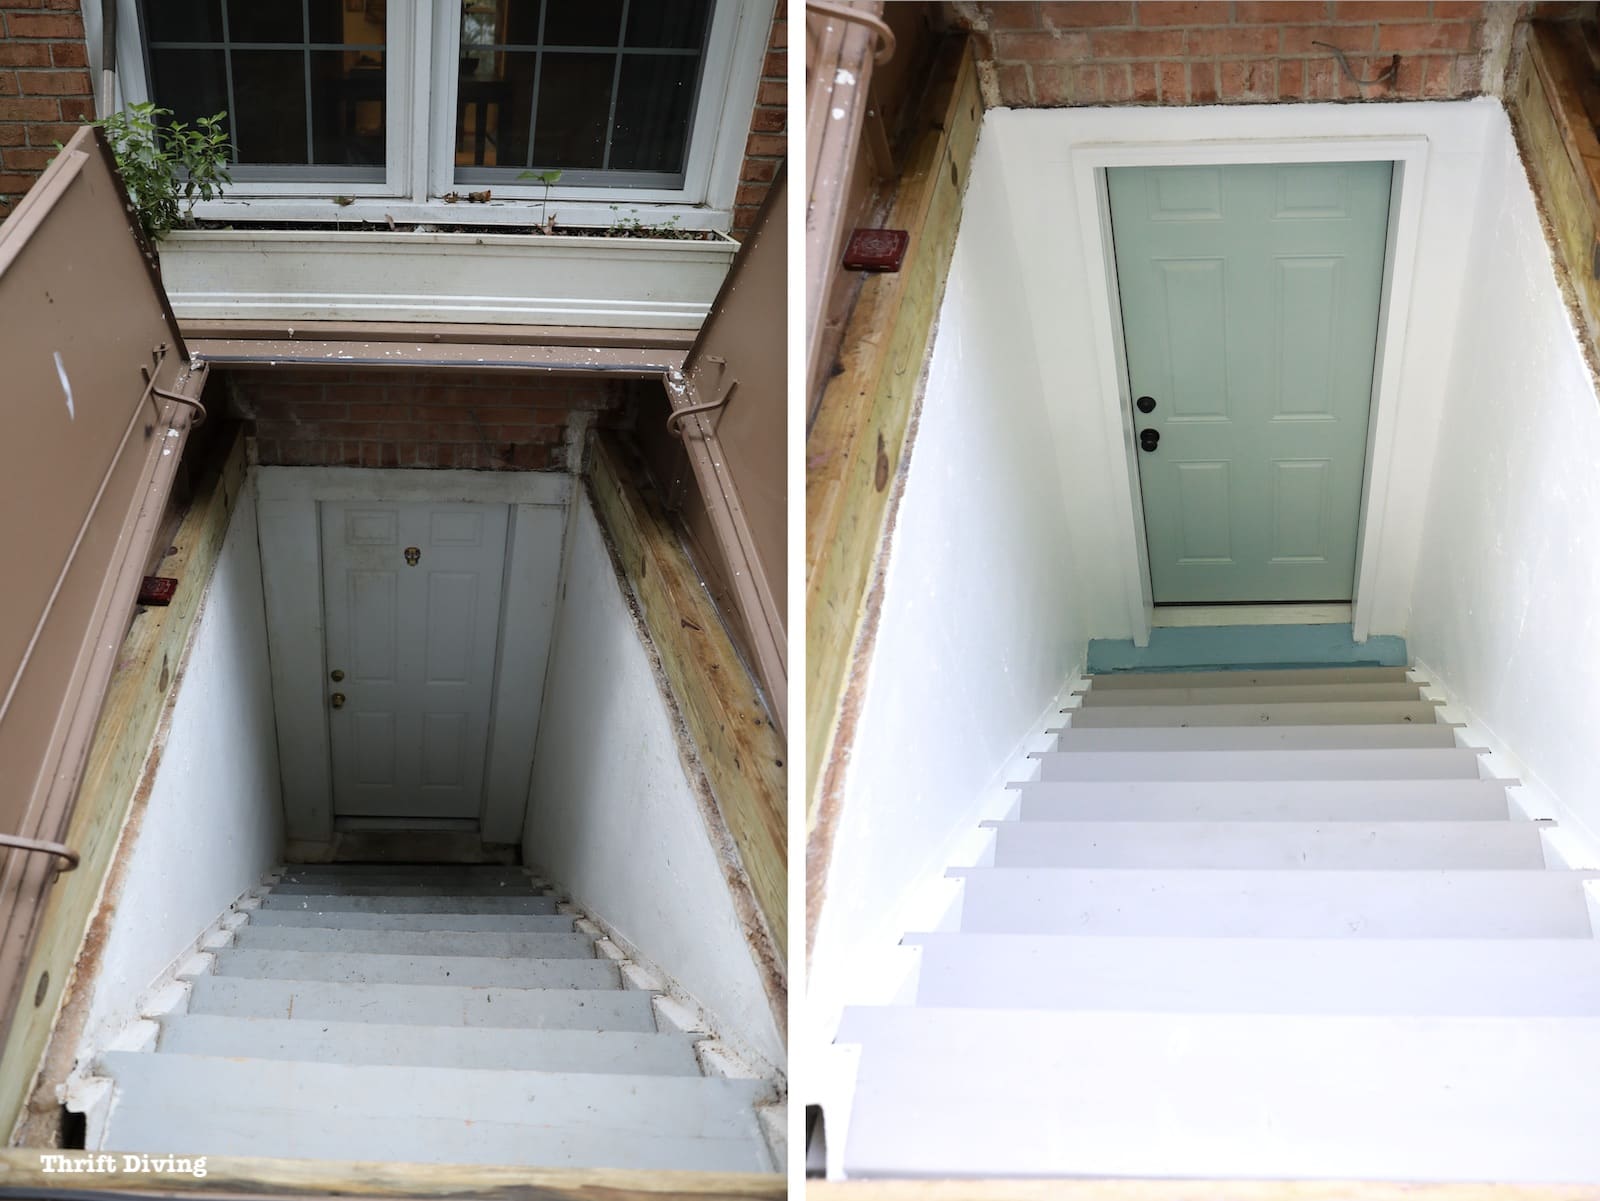
So let’s take another look at how this project turned out! Here’s a reminder of where this basement walkout started: wet, mildewy, stained, and in need of some TLC.
BEFORE
AFTER!
Now, it’s fresh and clean, has less leaks, and is on its way to becoming leak free once I complete the last and final step of this project: digging up around the steel door and caulking along the seams where the door sits on the pressure-treated wood.
After spending the last year of my life doing bits and pieces of this transformation in the basement, including the vinyl floor tile in the basement, along with cleaning up the basement mold, I can tell you that you should tackle your home; don’t let it you. It’s easy to put off projects that seem daunting and difficult to figure out the right solution. But projects sometimes take time, especially if they’re not fun projects (and this one wasn’t fun!!). Keep plucking away at it until you’re done. Baby steps count as long as you’re moving in the right direction. 🙂
Now, opening this “Wizard of Oz” door isn’t quite so scary. 🙂 In fact, it feels refreshing…despite the fact that large black spiders love to make their home down here under the stairs! I did add some sticky glue traps to catch those little buggers, including worms that like to weasel their way here.
When the weather gets nice, I like to open this large set of doors, and this exterior door, letting in sunlight and fresh air to air out the walkway. I put a piece of screen up, keeping out the bees and flies. And it feels so wonderful! Especially knowing that I did this all myself. 🙂 Yep–even changing that door myself!
And if you’re wondering, this project still has a last leg: to dig up the soil around the “Wizard of Oz” door and apply a generous amount of exterior caulk to all the seams where the door sits on the pressure treated wood, to seal out any rain. We’ll see if that will be the final answer for sealing out those tiny leaks!
Do you have a project that has been the bane of your home ownership that you’ve been wanting to repair and tidy up, too? Leave a comment below and let me know!

Download the 5 freebies!

Thrift Diving inspires women to decorate, improve, and maintain their home themselves...using paint, power tools, and thrift stores! Use these 5 printables, checklists, and ebooks to get started!

I too admire your “can-do” attitude. Thank you for showing all the nitty-gritty that some other posts “gloss-over” – It’s important to see ALL the steps along the way because some of these take more time and attention than average.
Awww, thank you so much, Tracy!! I appreciate your comment and acknowledging how thorough my blog posts are. 🙂 Means a lot!
Hi Mrs Serena!!!
Lady you are such a joy to watch I’ve learned so many new things and ways to tackle projects…. I get EXCITED!! abmy project when I watch you tackle yours..
I’m working on my in-closed porch now going on 6 weeks it’s old windows don’t open but they don’t look bad I grew tried of my entrance to my home looking like I just moved in and still didn’t care…. 🙄 was very excited at first I had it all worked out in my head 😊 I go back and forth with the yard and other small things (groundhogs) wich isn’t small at all I had to put bricks along my home to keep them from digging more holes…back to the porch 😊 Just repainting windows floor, adding curtains and some caulking I have a big UGLY fron door I want to replace it but financially it won’t be this summer so paint will be my improvement .
THANK you for sharing and caring…I can’t wait to complete my project so I can say I finally finished the porch!!
Hey Hun!!! Congratulations on your basement renovation!!! You wanna be my sister? I would Love to work beside and learn from you!! At 63 yrs old, I started late, but my daddy was a carpenter by trade. Guess that’s where I get it from. Be Blessed my Dear and Stay Safe!!!
Hi Serena! I was looking around because we are trying to fix up our “Wizard of Oz” doors too! I’ll def be referencing what you did. Looks great!
Wow! Congratulations on completing this project – it looks beautiful! Absolutely radical change. I have never seen those metal stringers before, and what a difference you made. Insprational. Thanks!
Thank you, Tenney! It feels wonderful in that walk-out basement. It’s not scary to open it up now. 🙂
Thank you for sharing your struggles. I am a novice DIYer who had a hole in my bathroom ceiling due to some water damage for 3 years!! I went back and forth with thinking I would pay someone to fix but wanting to try myself but being scared that I would screw up. I had never worked with drywall or joint compound or any that stuff before. This was very much outside of my comfort zone! But, last month, I did it and it’s done! It’s not perfect but it’s good enough and I no longer have a hole in my ceiling. Thanks again for sharing.
I would be completely overwhelmed by a project like this. I continue to admire your can-do attitude, Serena.
Awww, thank you, Alys!! I’m amazed that I’m not overwhelmed! Well, I was worried about fixing the floor, but after fixing one vinyl tile, I found that it wasn’t as hard as I thought it would be. I am just waiting for the temps to raise. Next week I think we will be having 60-degree temps, so I’ll be excited for that!