How to Install Vinyl Plank Flooring and Baseboards in Your Shed
This tutorial on how to install vinyl plank flooring in your shed is sponsored by Arrow Fastener.
A vinyl plank floor is a floating floor, which means it’s not nailed or glued down to a subfloor. It “floats” on the subfloor while the tiles are interlocked or snapped together. The strength of a floating floor is strong if the seams are properly spaced. (Plus, it just looks better, too!)
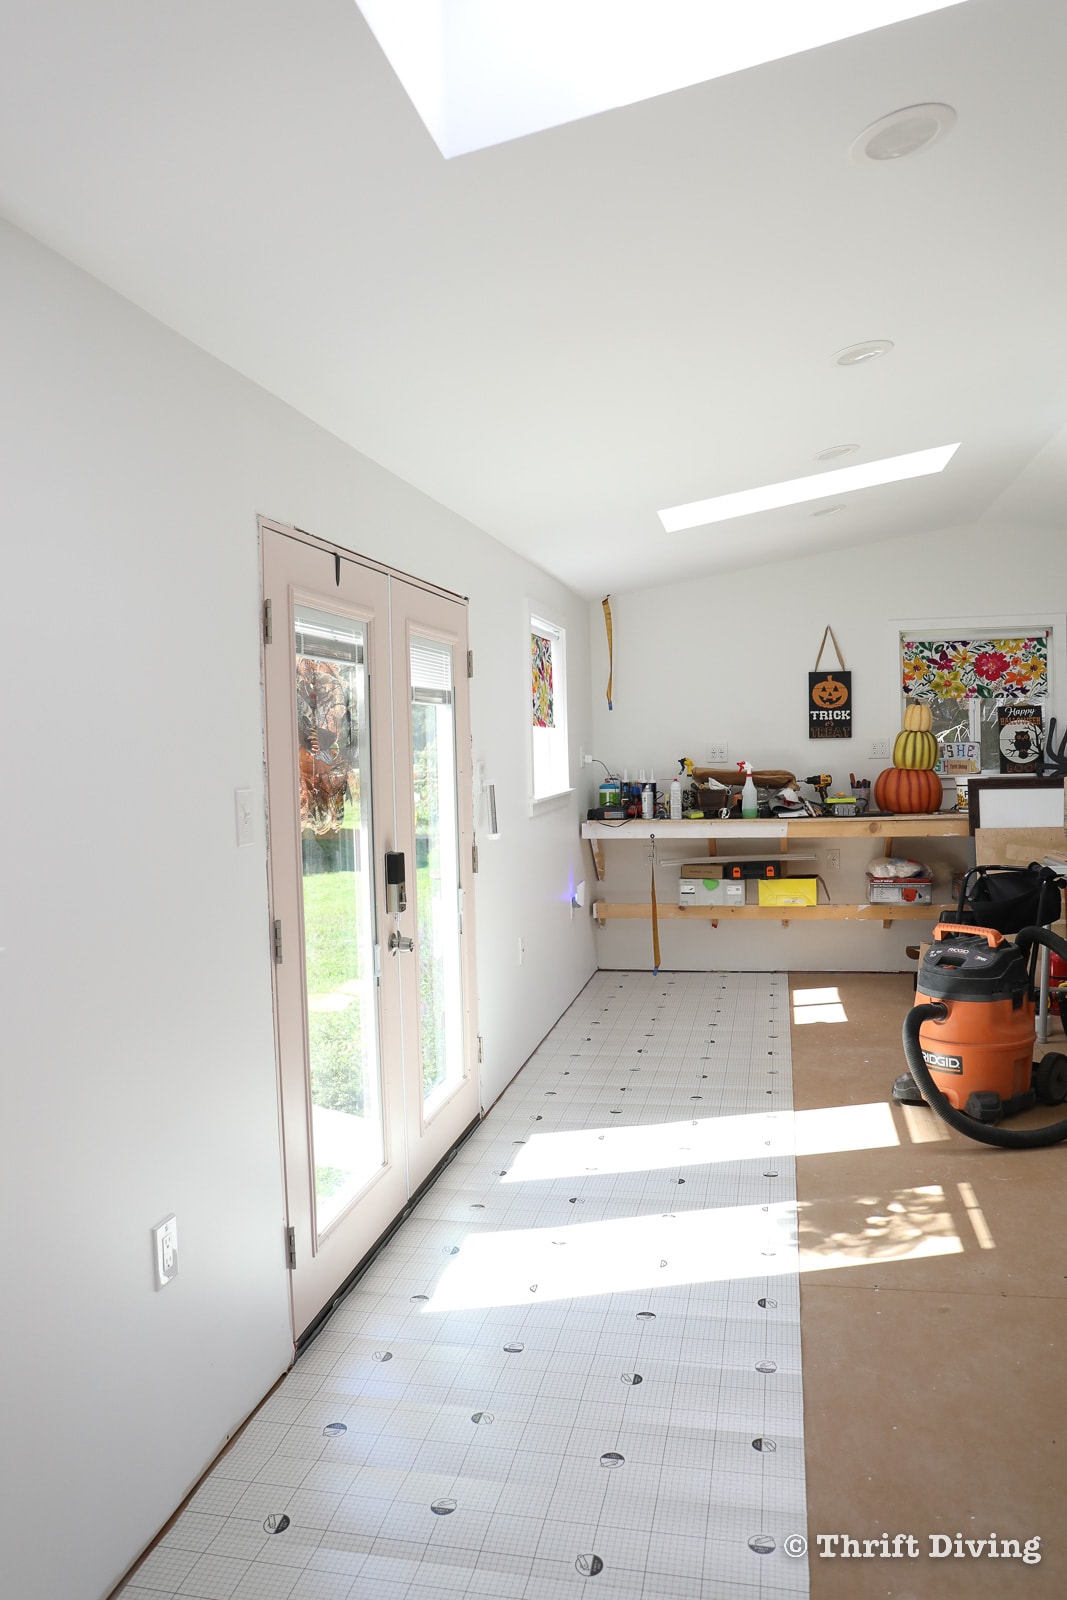
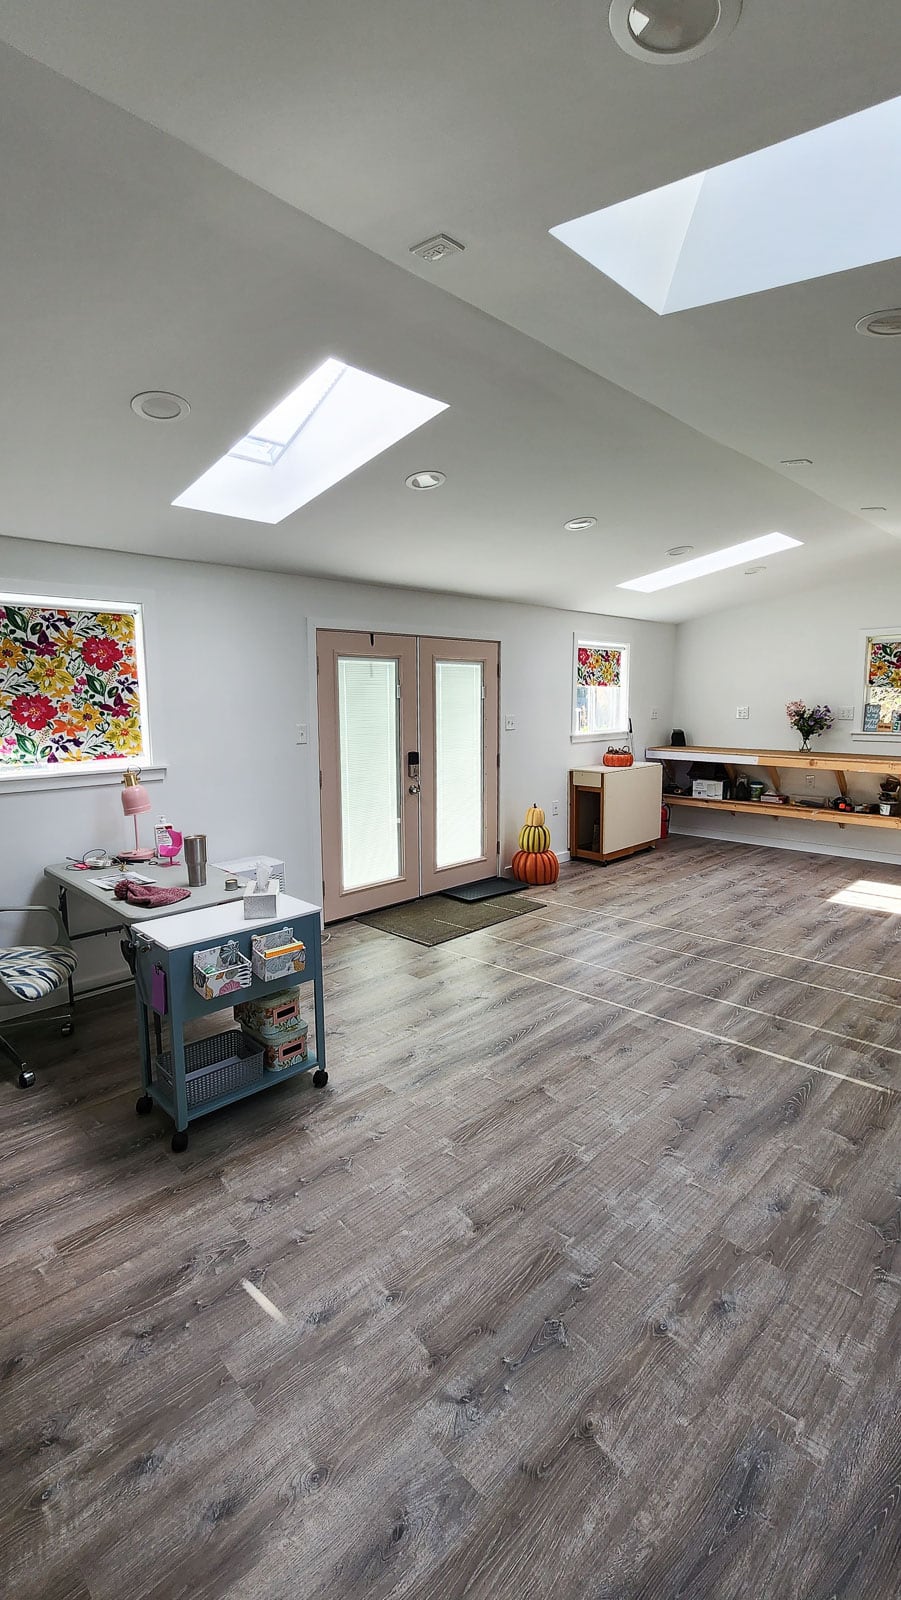
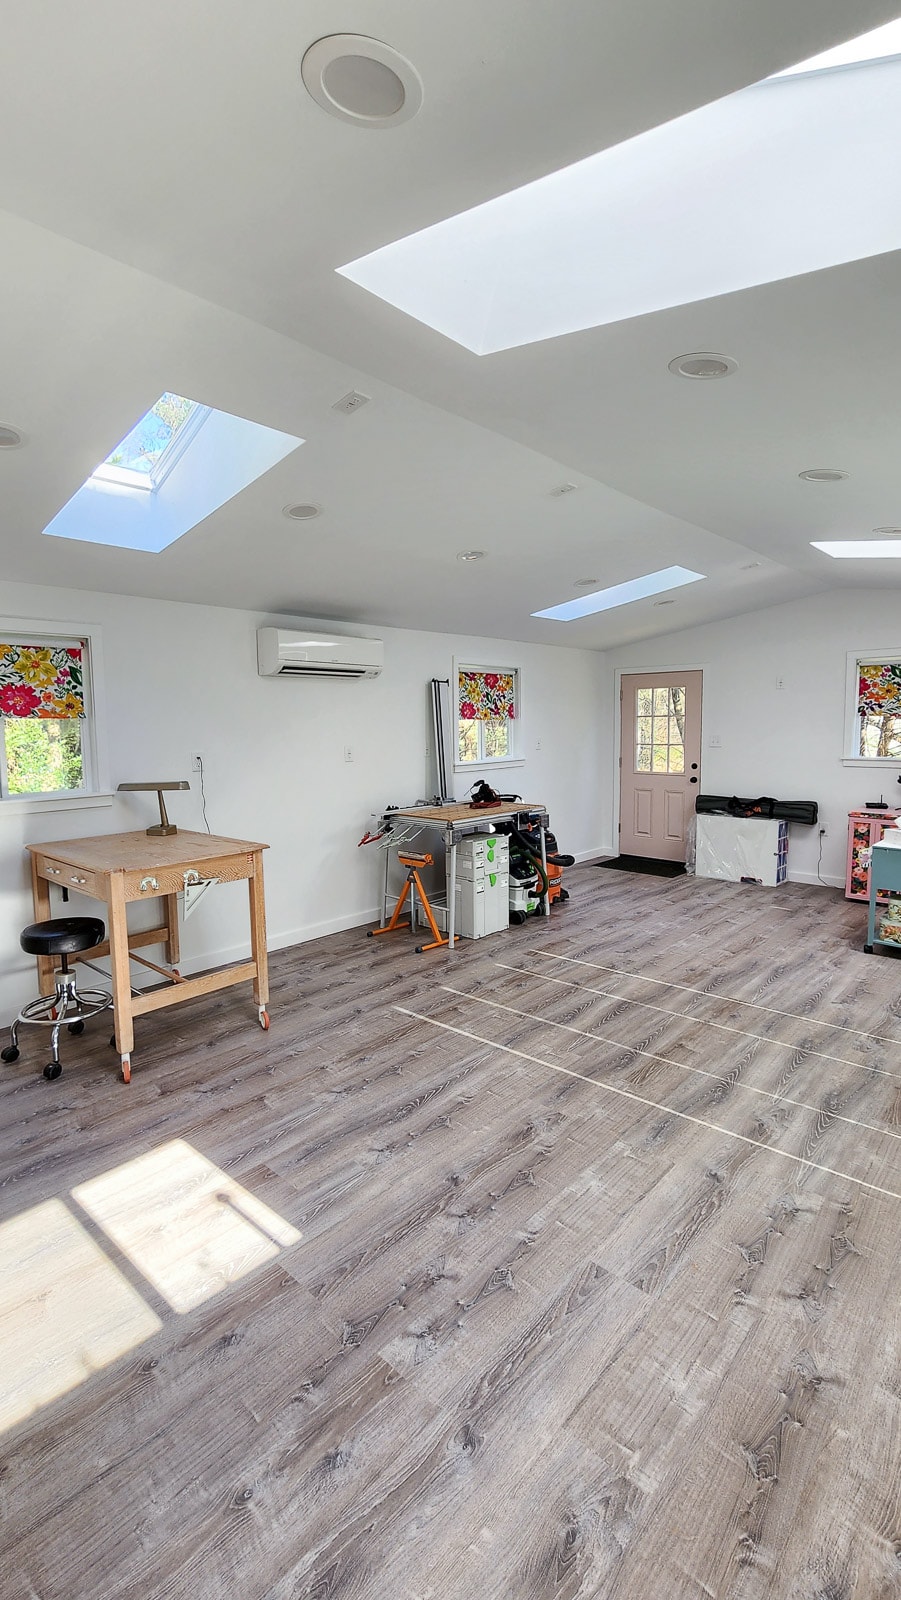
Here’s how my “she shed” looked before I installed the vinyl plank flooring, when I was wiring it for electricity! How bland, right..?
Click here to save this tutorial on Pinterest!
BEFORE
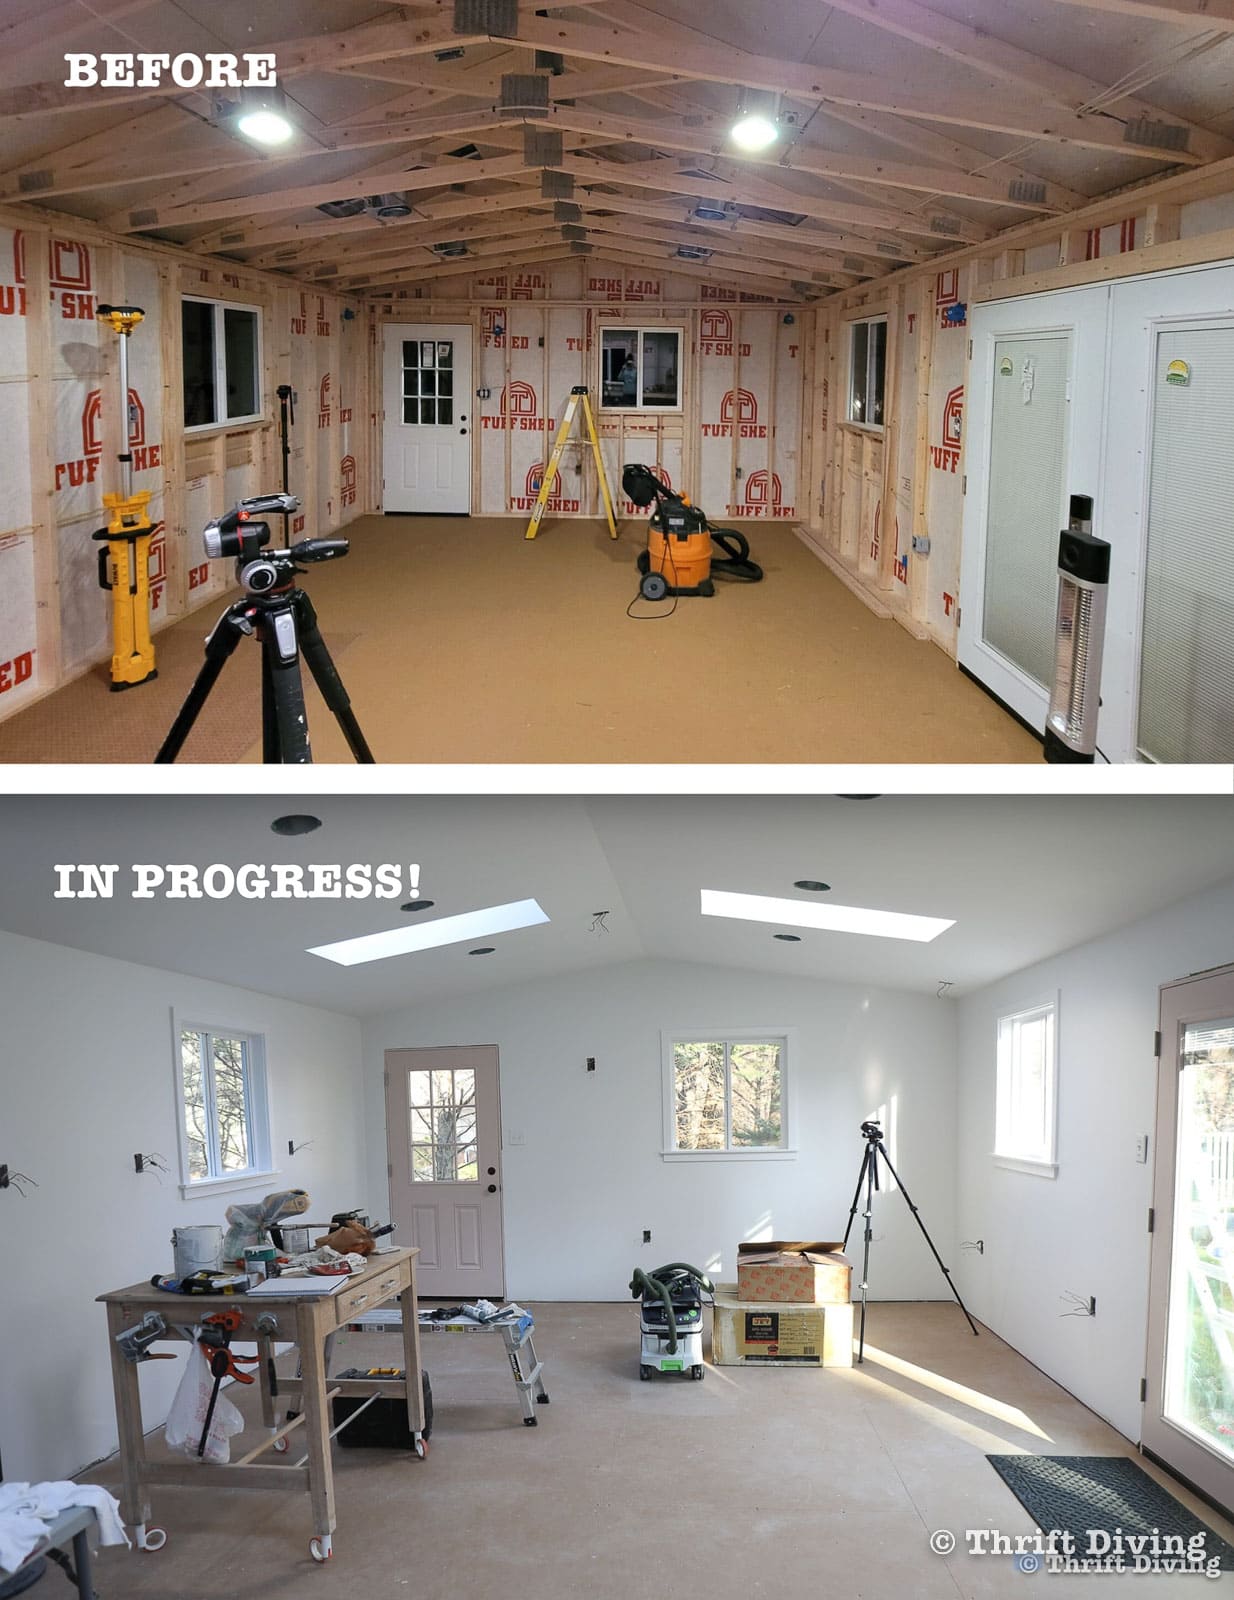
BEFORE
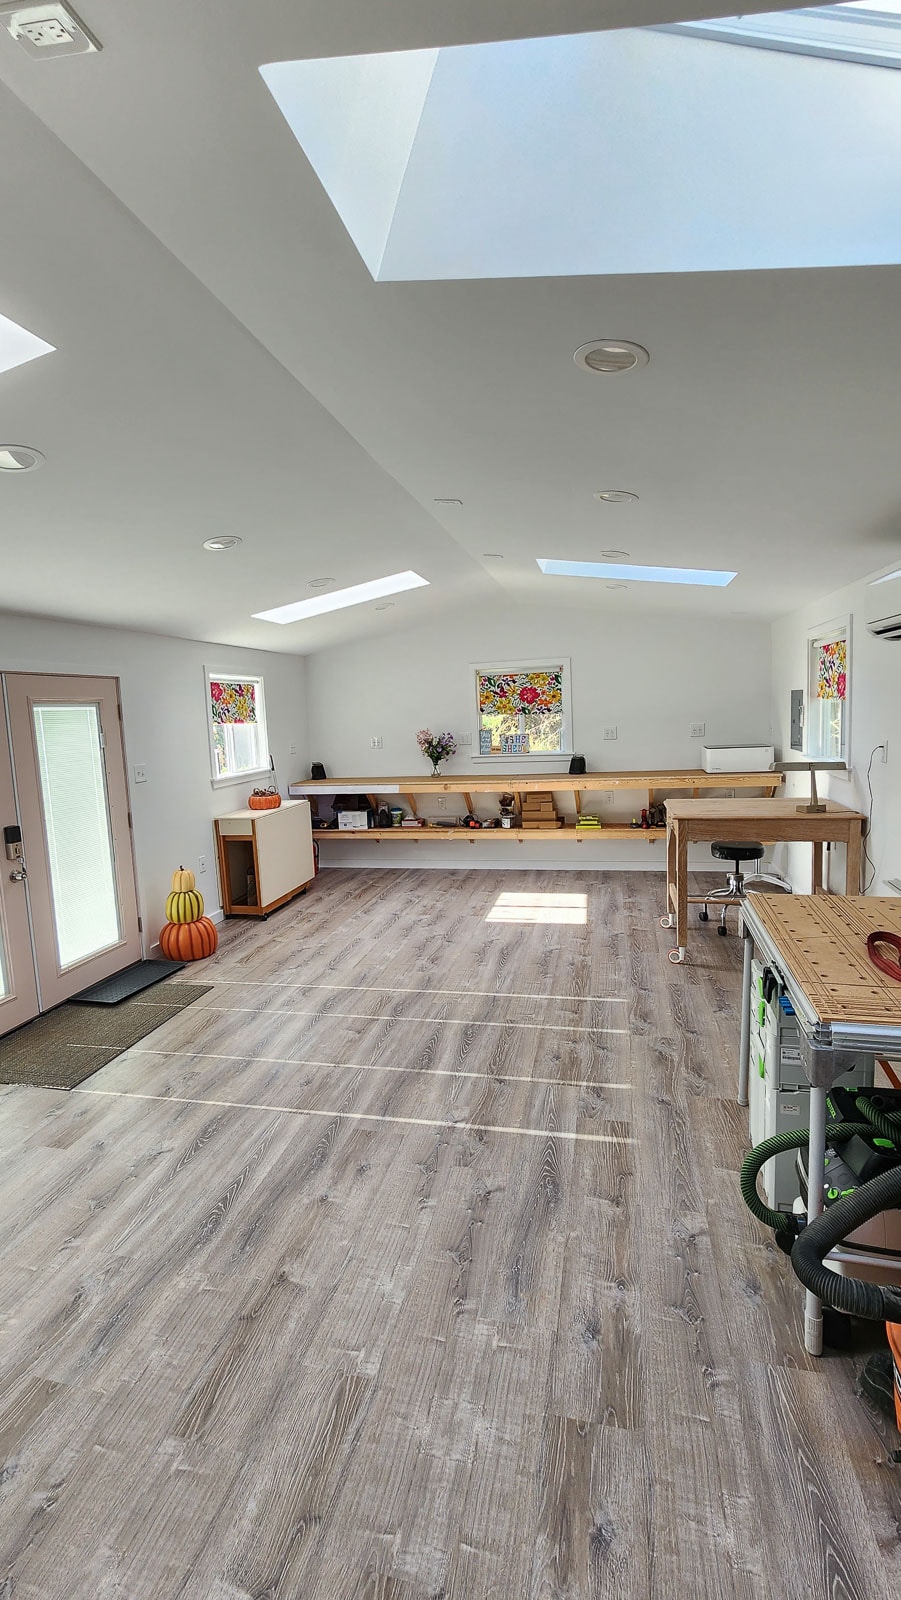
AFTER
Doesn’t it look amazing now?!
Materials and Tools
These are the tools and materials used:
- Arrow Fastener PT18G brad nailer
- 2″ Arrow Fastener brad nails
- Lifeproof Sterling Oak luxury vinyl plank flooring
- Lifeproof Universal Underlayment
- Underlayment tape
- Floor installation kit
- Air compressor
- Caulk
- Caulk gun
- Wood filler
- White semi-gloss paint
- Quarter round – Flint Grey
- Rubber mallet
- Knee pads
- Utility knife
- Jigsaw (optional)
- Tape measure
- Speed square
- Pencil
- Rags

How to Install Vinyl Plank Flooring in a Shed
Watch this project in action from my Youtube channel!
Here’s how to install vinyl plank flooring in a shed:
STEP 1: Measure Your Room
Use the calculator to figure out how much flooring you’ll need.
You can use an online calculator at HomeDepot.com to estimate how much vinyl plank flooring you’ll need. When I did my estimation online, it showed that I needed 23 cases, which included 10% for waste. Remember to keep some of the flooring when you’re done in case you need to later repair a floor tile.
STEP 2: Lay the Underlayment
I have concrete under my shed for the foundation and noticed the humidity gets high inside of the shed. I use a dehumidifier in my shed to keep it low. However, I also knew that laying underlayment under my vinyl plank flooring would help to keep out some of that moisture.
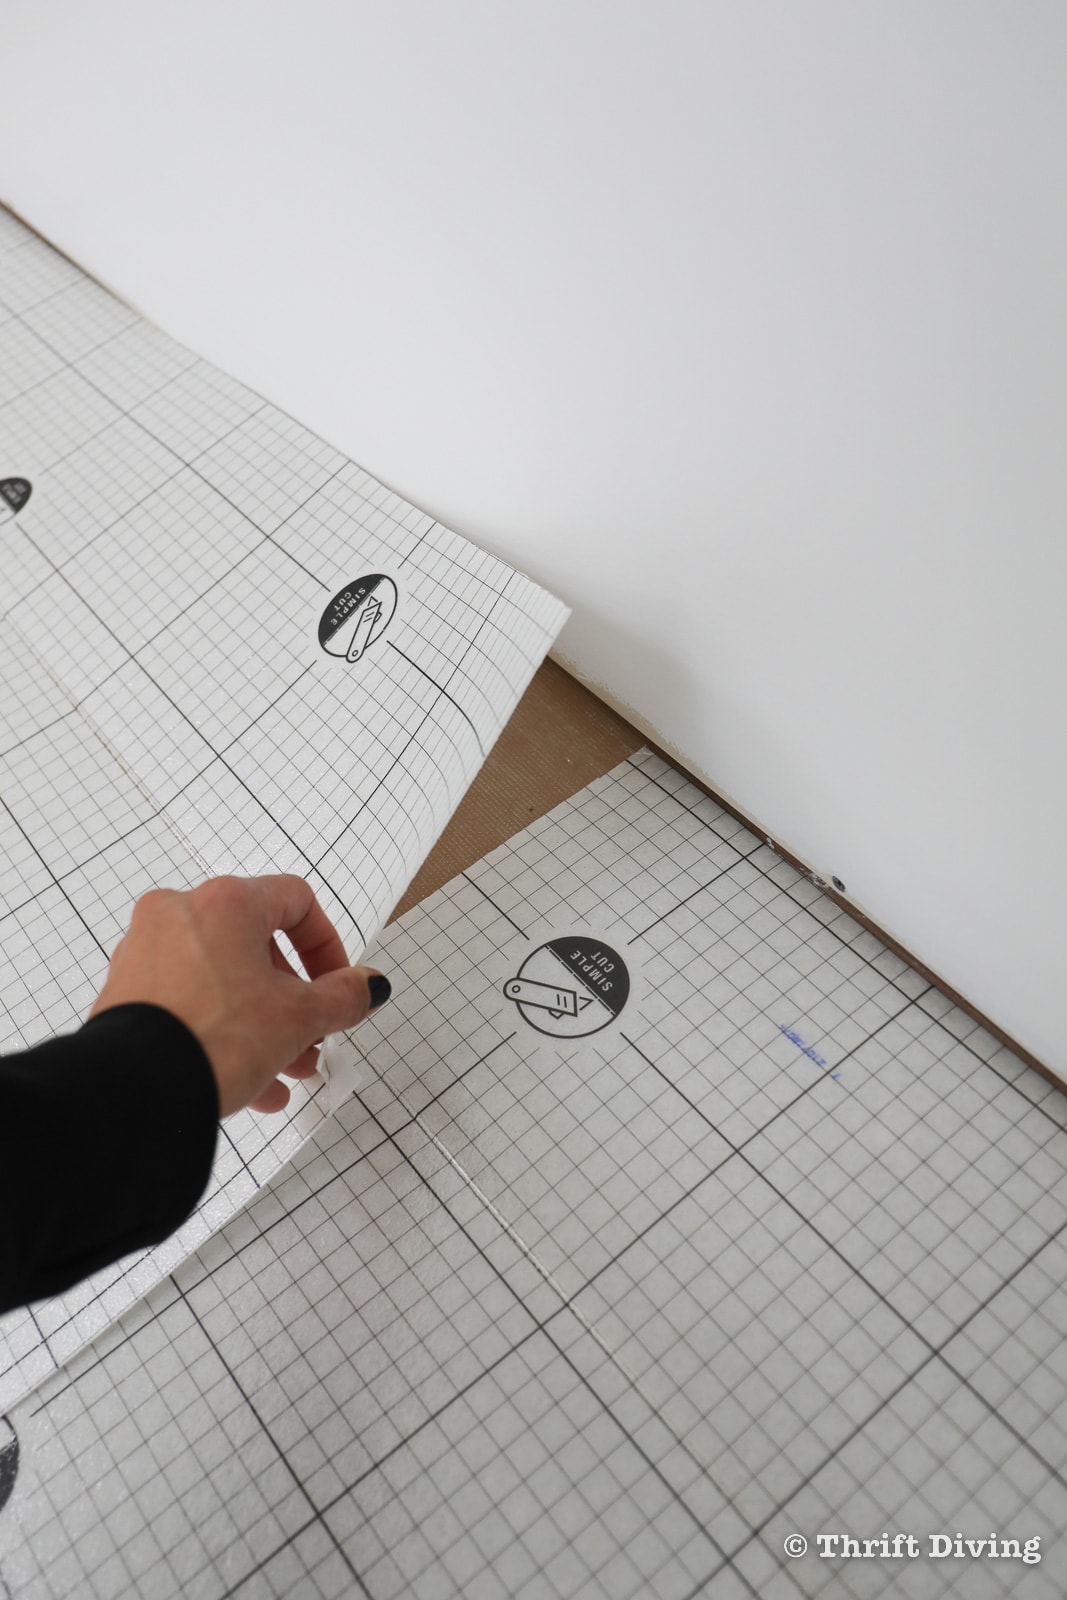
The Lifeproof luxury vinyl planks have a waterproof backing on them, which offer some cushioning, too, but this foam underlayment is also helpful with making the floor feel warmer, keeps the vinyl planks in place, and helps smooth out any imperfections in the floor.

It comes folded up accordion-like, unfolds easily, and just uses a utility knife to trim it to fit.

I couldn’t find any instructions on how much of an overlap it should have (or if it needed to be overlapped at all), but with moisture barriers, an overlap is definitely needed. I used about a 3″ overlap, but up to 6″ is likely preferred.
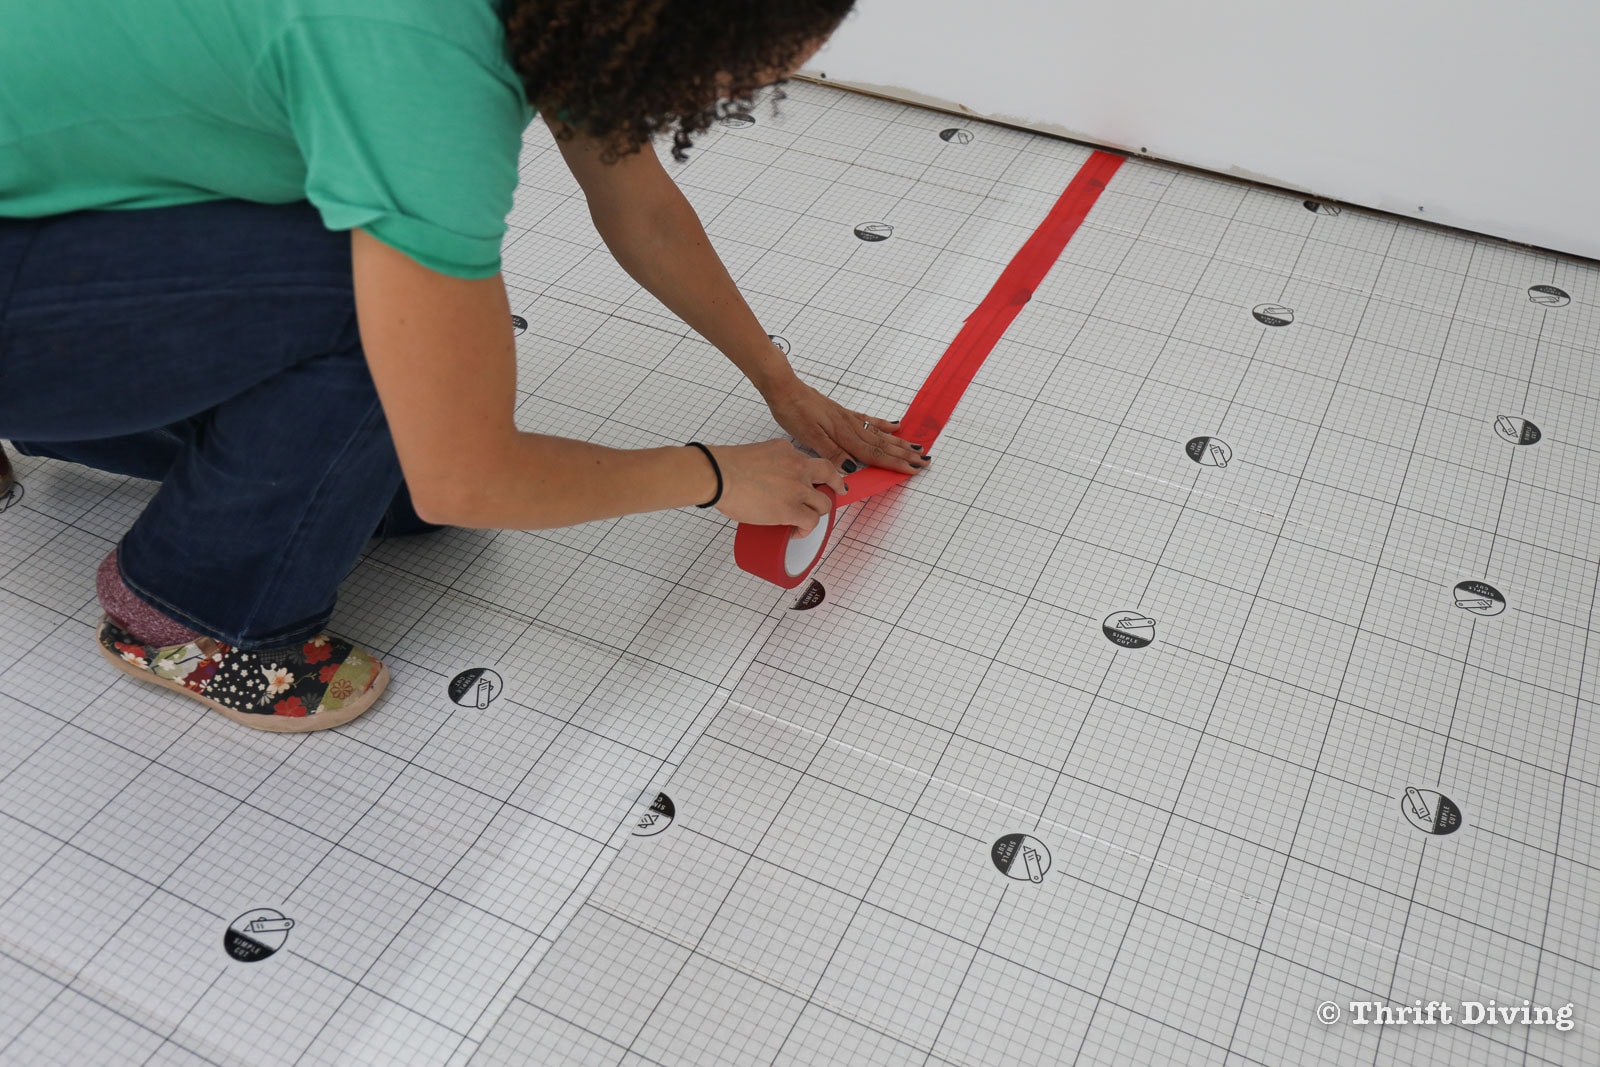
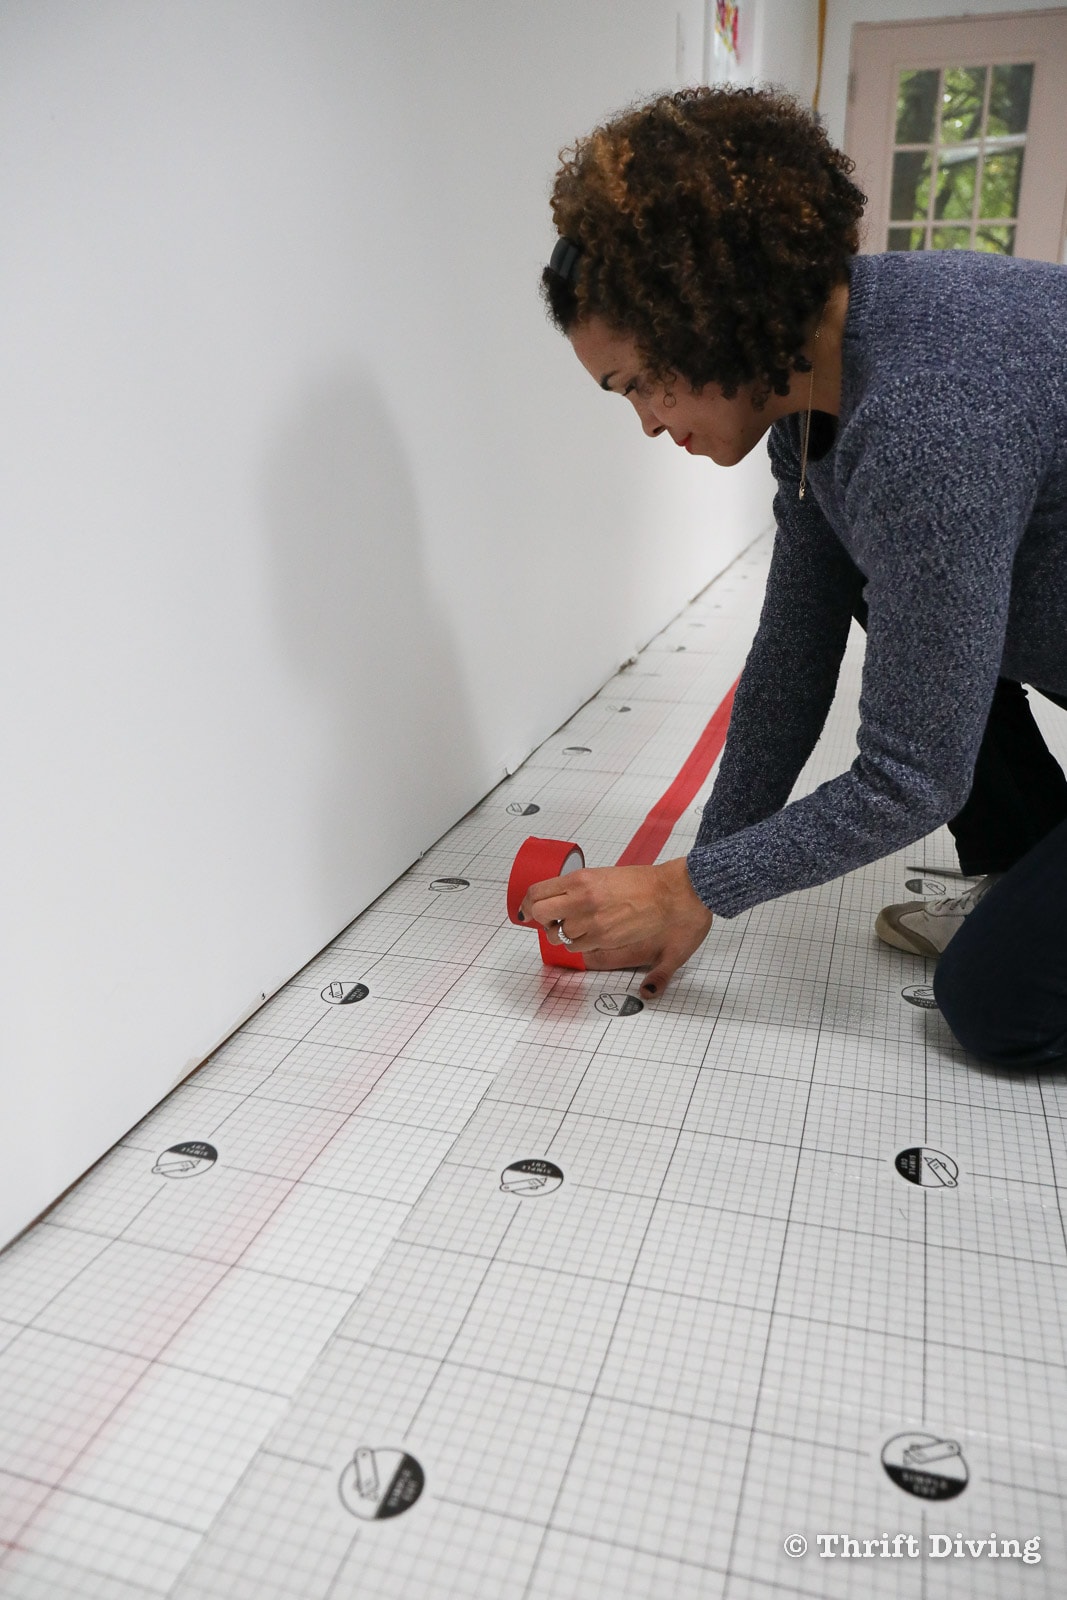
You’ll need to buy a couple rolls of underlayment tape to tape the seams when overlapping them.
When I got to the end of the room, I cut a small piece of underlayment about 12″ wide to fit the remainder of the floor. I don’t know if this is wrong or not, but I didn’t tape the underlayment along the perimeter of the room. I simply tucked it under the drywall.
STEP 3: Don’t Skip This Easy Math!
I know, I know… You don’t like math. It’s confusing. It’s not your “thing.” But this is a step you don’t want to skip if you want your flooring to turn out properly.
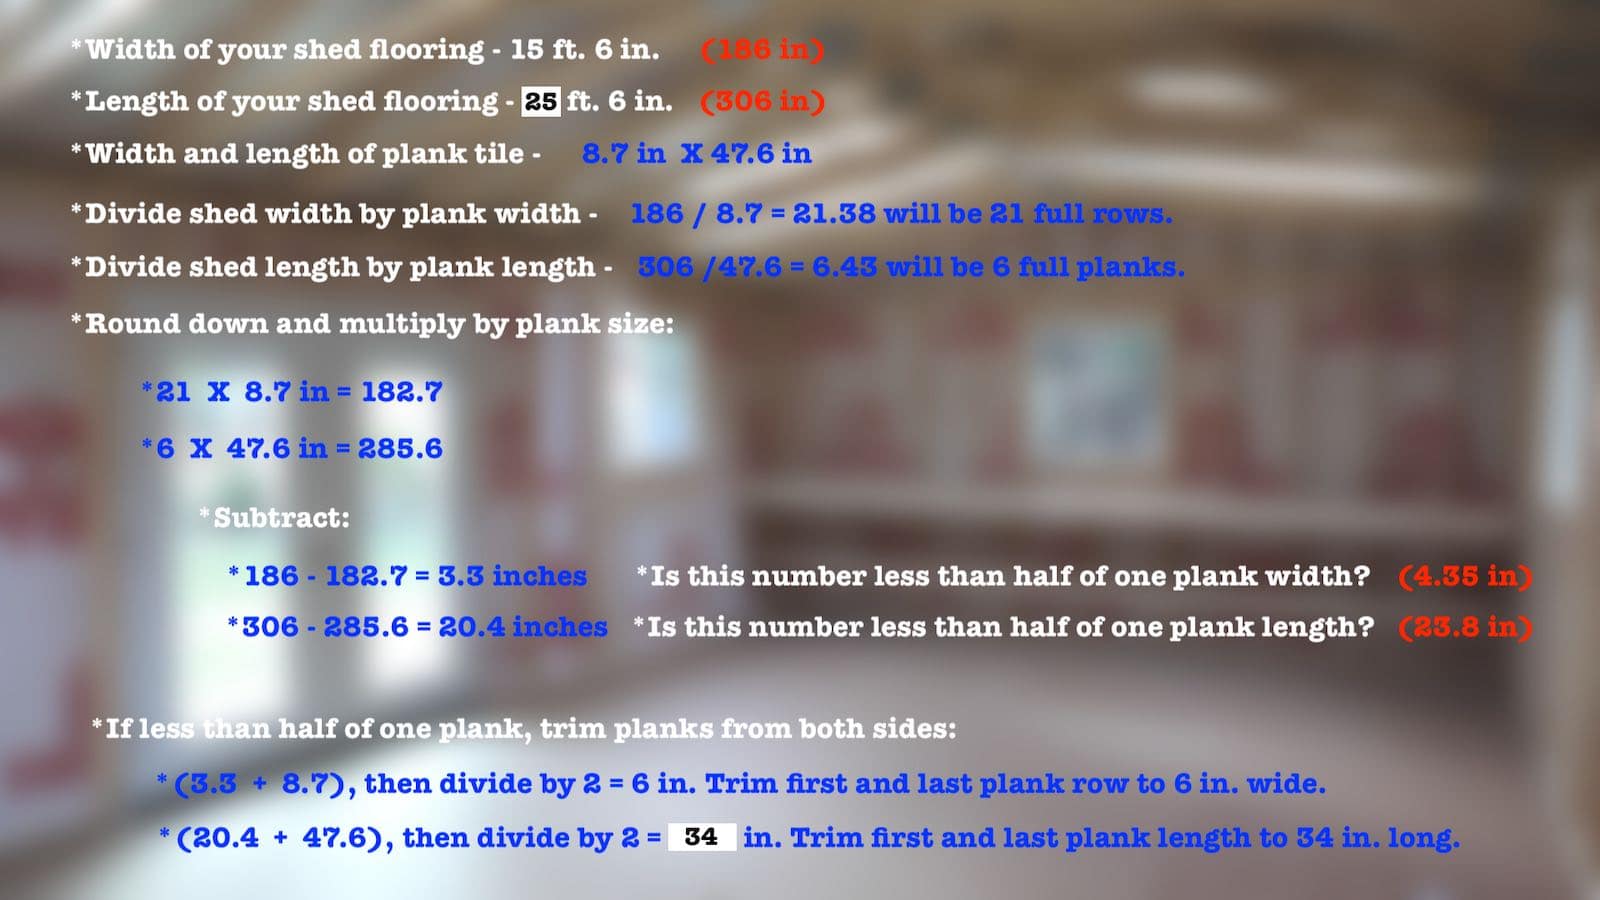
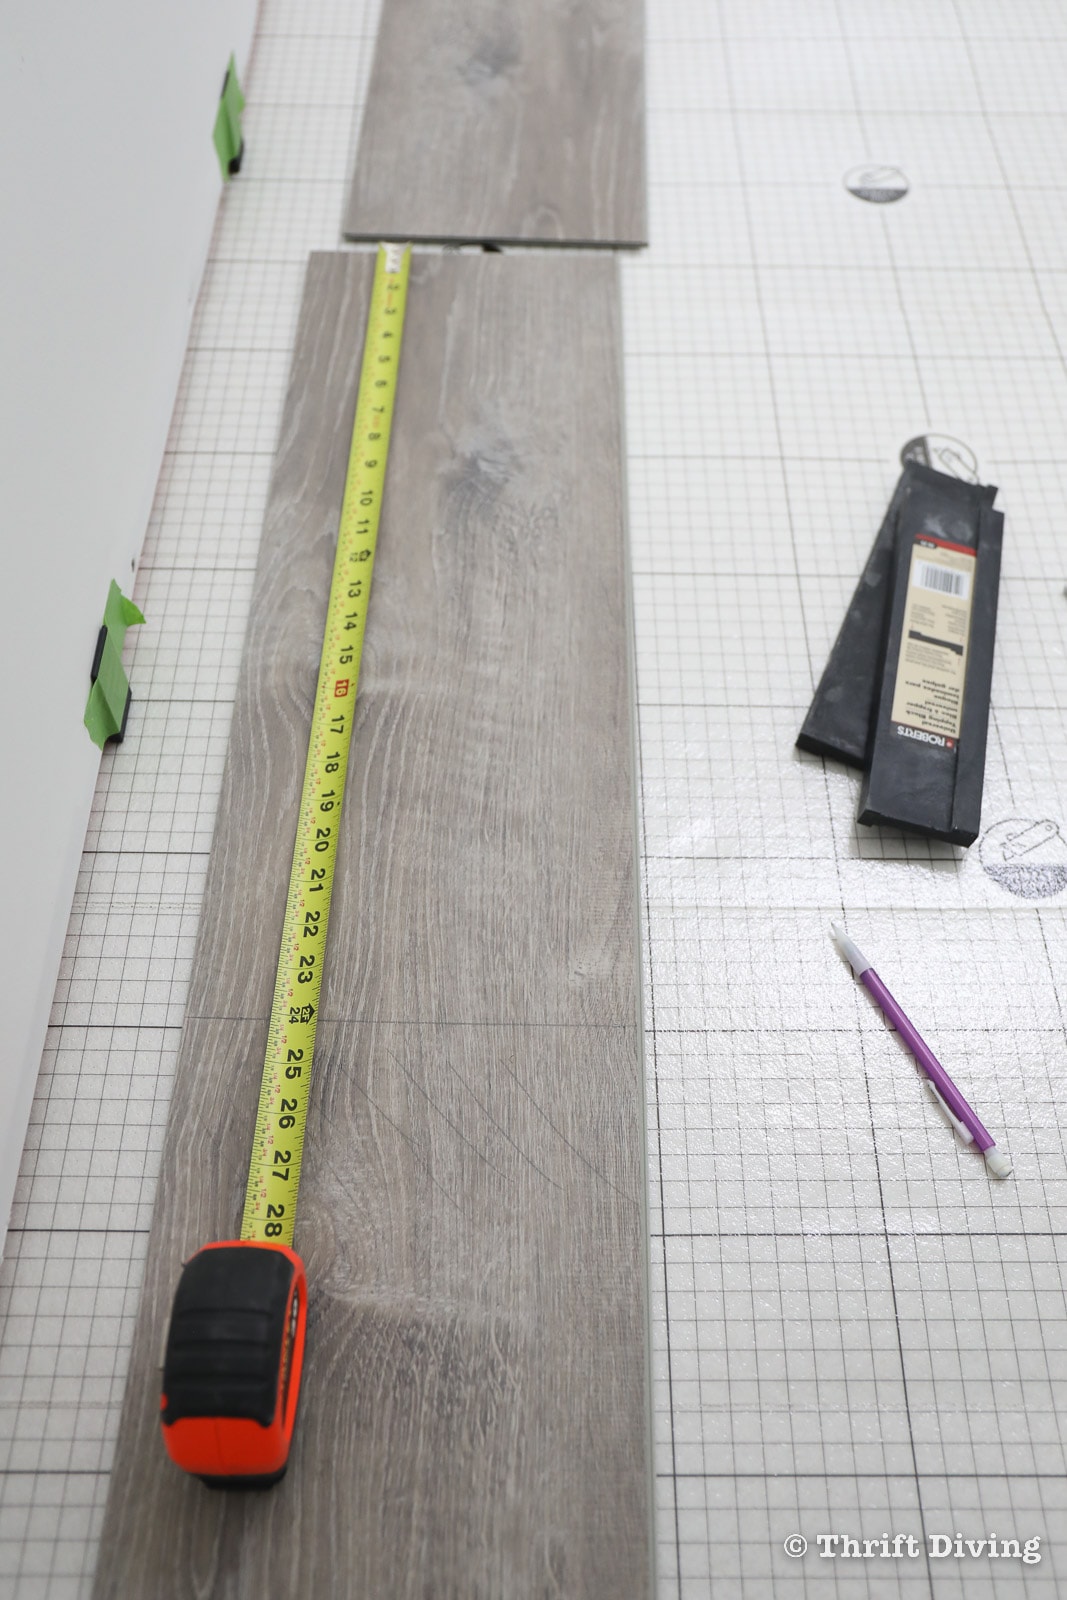
This Lifeproof Luxury Vinyl Plank flooring is 8.7 in. width x 47.6 in. length. Whichever flooring you buy, the website will tell you the exact measurement of each vinyl plank tile, or you can use a tape measure.
You need to note these measurements on a slip of paper so you can figure out how many of these luxury vinyl plank tiles that will fit across your shed flooring. You don’t want to end up with a small gap at the end of your shed when you get to the end of your installation.
I’ll admit that I skipped the actual steps to calculate this because I assumed it would work out based on some quick calculations in my head. But when I got to the end of my shed flooring, I was left needing to cut a 2″ piece of vinyl flooring to cover the gap that was left. I should have known better. 😉 Thankfully, it all worked out and the small piece blends in beautifully. But it also depends on the flooring you’ve selected. It could look very odd!

- Width of your vinyl plank tile: ____________
- Length of your vinyl plank tile: ____________
- Width of your shed flooring (inches): ____________
- Length of your shed flooring (inches): ____________
- Calculate the number of full rows.
- Divide width (in inches) by width of plank: _____________
- Divide length (in inches) by length of plank: _____________
- Divide width (in inches) by width of plank: _____________
- Round down the full rows.
- Rounded down number of width rows: _____________
- Rounded down number of length rows: _____________
- Multiply
- Multiply round down width by width of plank: ___________
- Multiply round down length by length of plank: ___________
- Subtract to find remaining width & length of last row and last plank.
- Subtract width of shed flooring
minus rounded down width calculation: _____________ - Subtract length of shed flooring
minus rounded down length calculation: _____________
- Subtract width of shed flooring
- What are the half sizes of the plank you’re using?
- Width (width of plank divided by 2): _____________
- Length (length of plank divided by 2): _____________
- Is the remaining width and length less than half the size of the plank?
YES: Then your first plank row will be trimmed. This will result in the last vinyl plank row being evenly trimmed, as well, so the floor will look balanced.
NO: You won’t need to trim the first plank since the last row or plank won’t be too narrow; no adjustments will be needed for a balanced floor. - Add the remaining width to the width of the plank tile, then divide the total by two. This amount in inches is the measurement to trim the first plank.
- Add the remaining length to the length of the plank tile, then divide the total by two. This amount in inches is the measurement to trim the first plank of the first column/row.
Look below at the calculations for my own shed as an example:
STEP 4: Start Your First Row
Now that you’ve figured out how many rows and partial pieces of vinyl flooring are needed, including how to install the underlayment, it’s time to actually start installing the vinyl plank flooring in your shed.
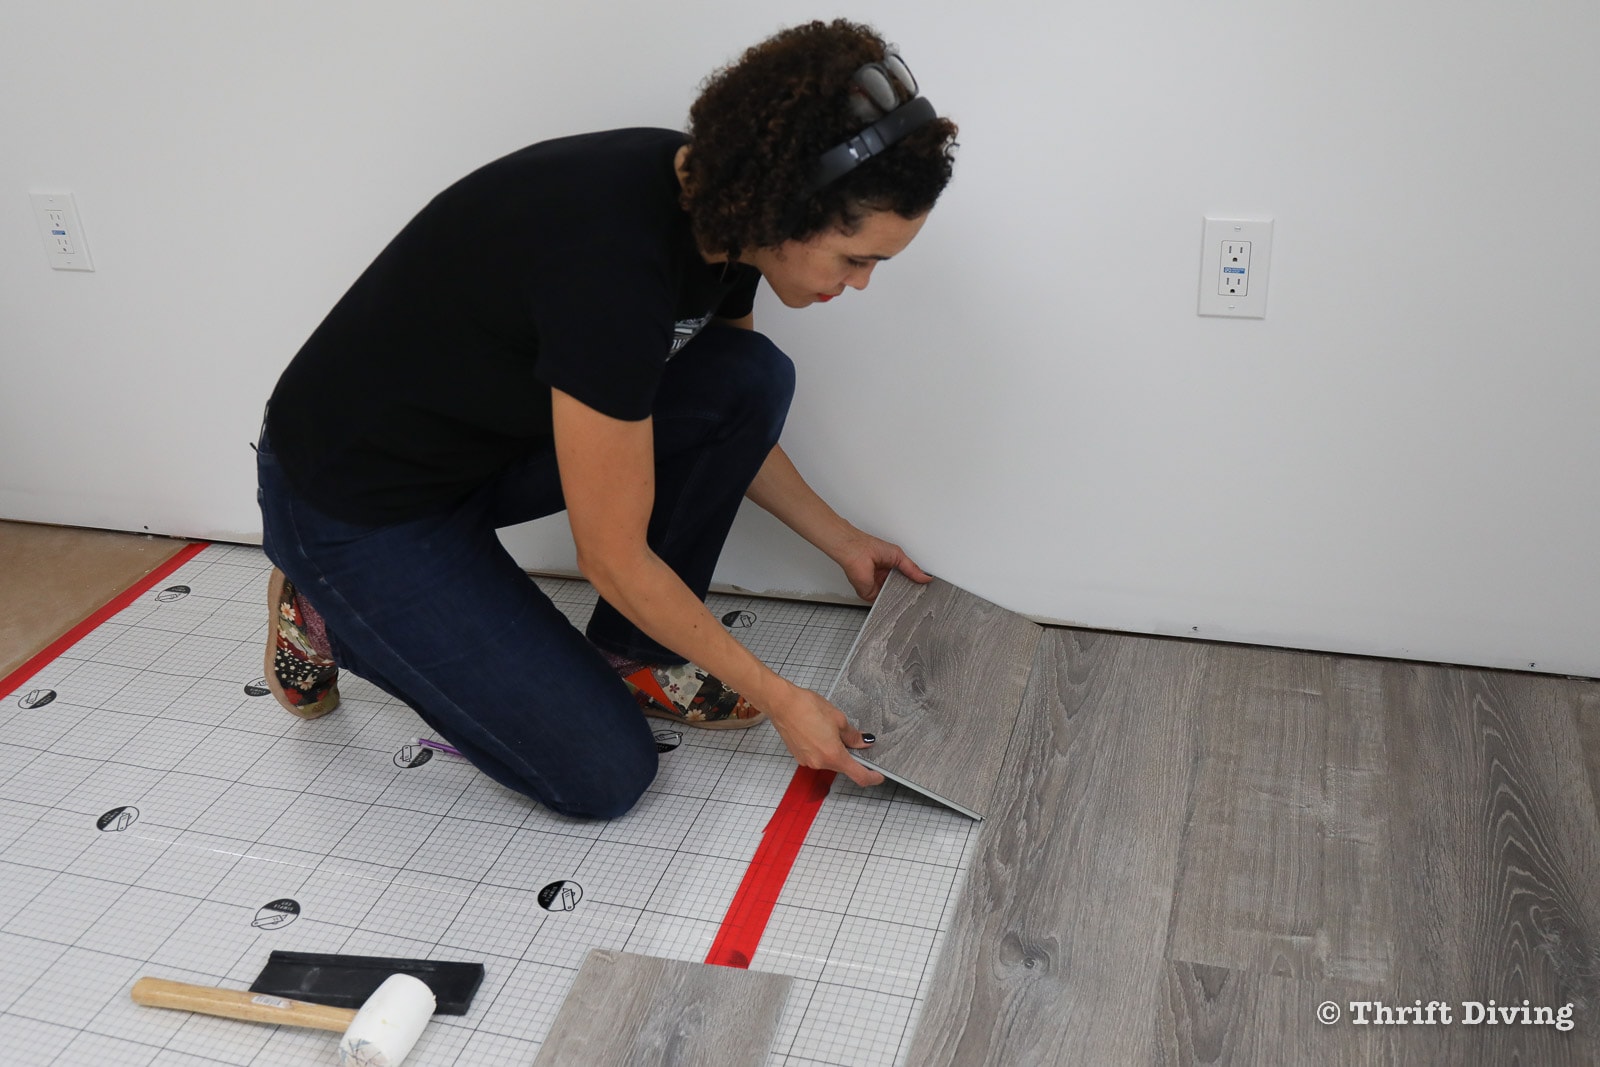
You’ll want to leave a 1/4″ expansion gap along the perimeter of the room. In the flooring installation kit, there are 1/4″ black spacers to use around the perimeter of the shed. I find it helpful to tape them into place along the drywall. They tend to fall over, especially as you install the vinyl plank tiles and it begins to shift a little bit.

Start on the side of the room that allows you to easily click the flooring into place.
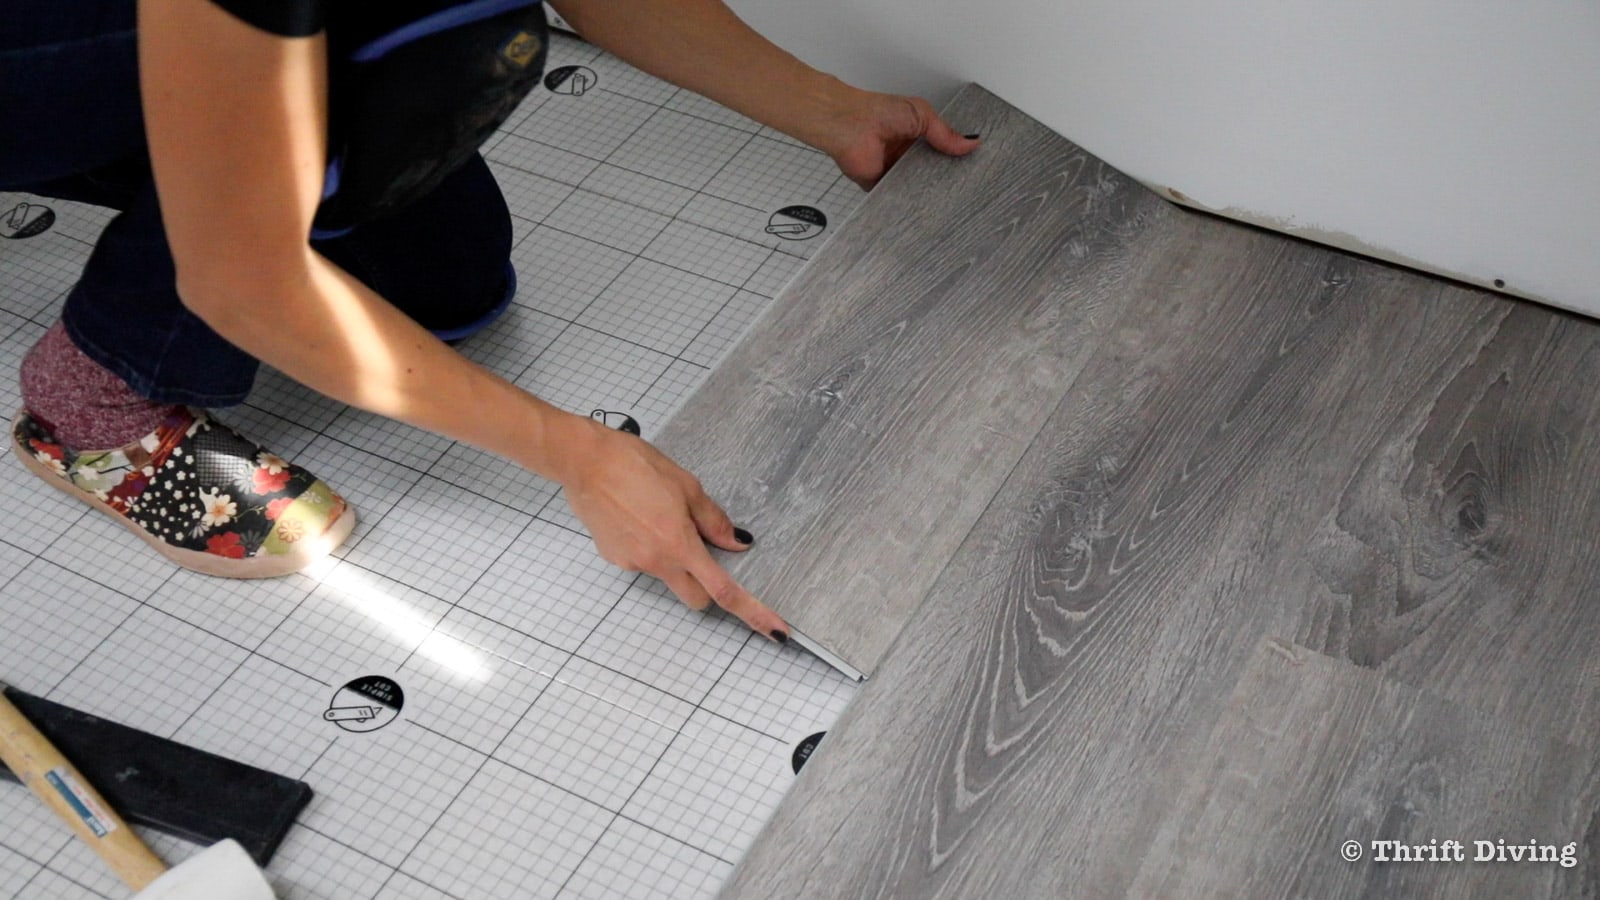
When installing your vinyl plank flooring, you’ll need to start your first row along the wall, with the edge that has the gray locking tab facing towards the center of the room.
Lay the first plank into position along the wall (make sure to trim the tile width, if needed, based on the math you did above).
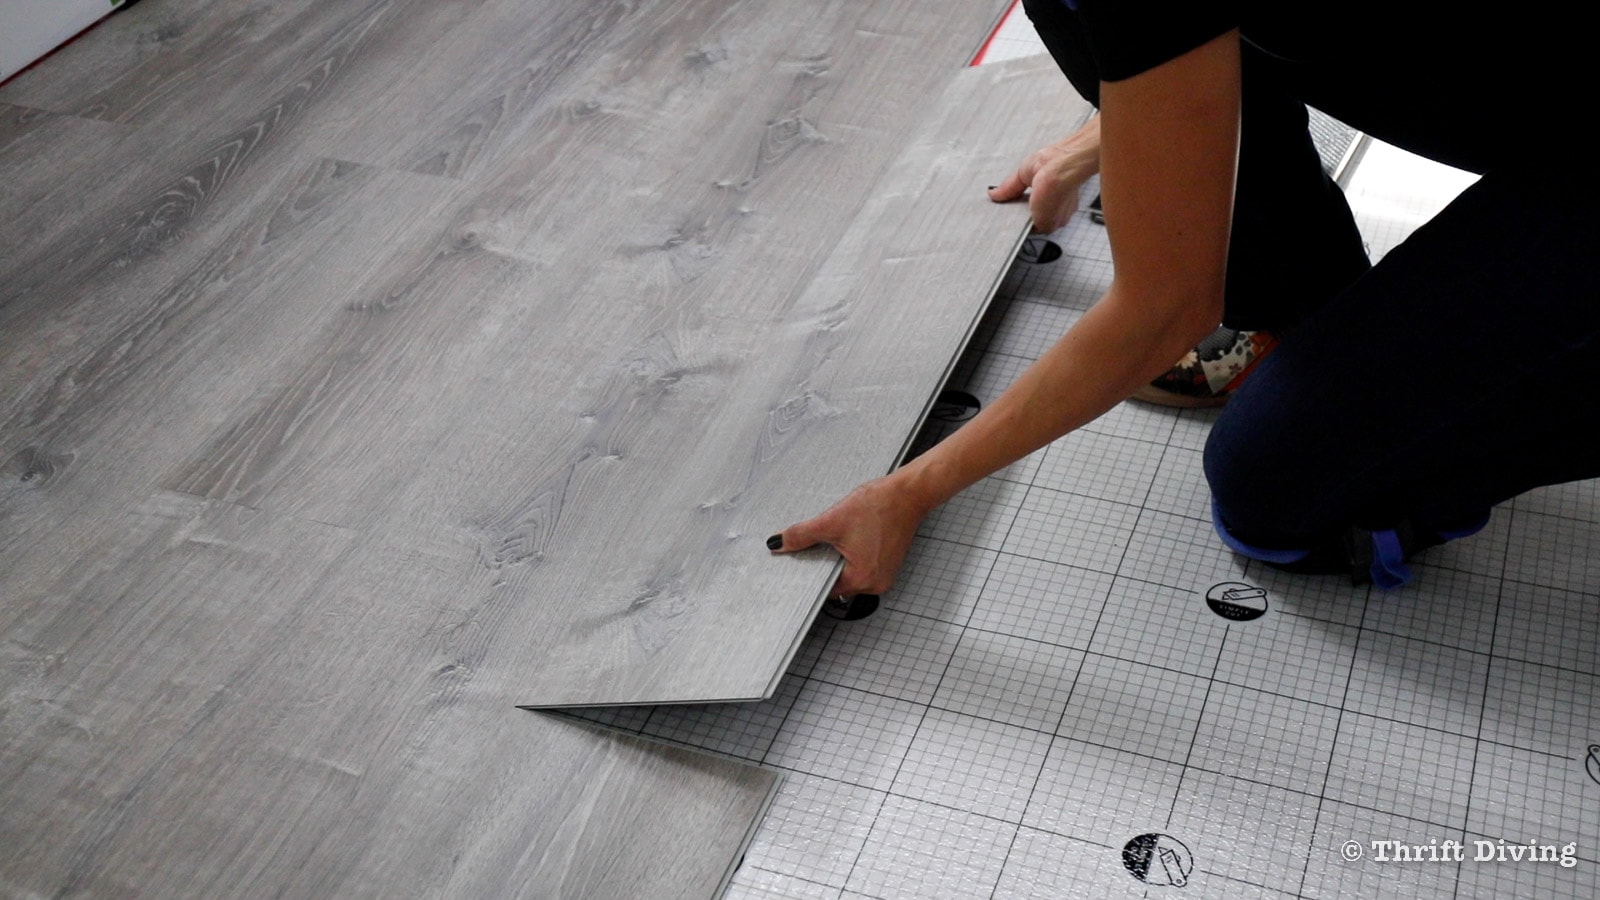
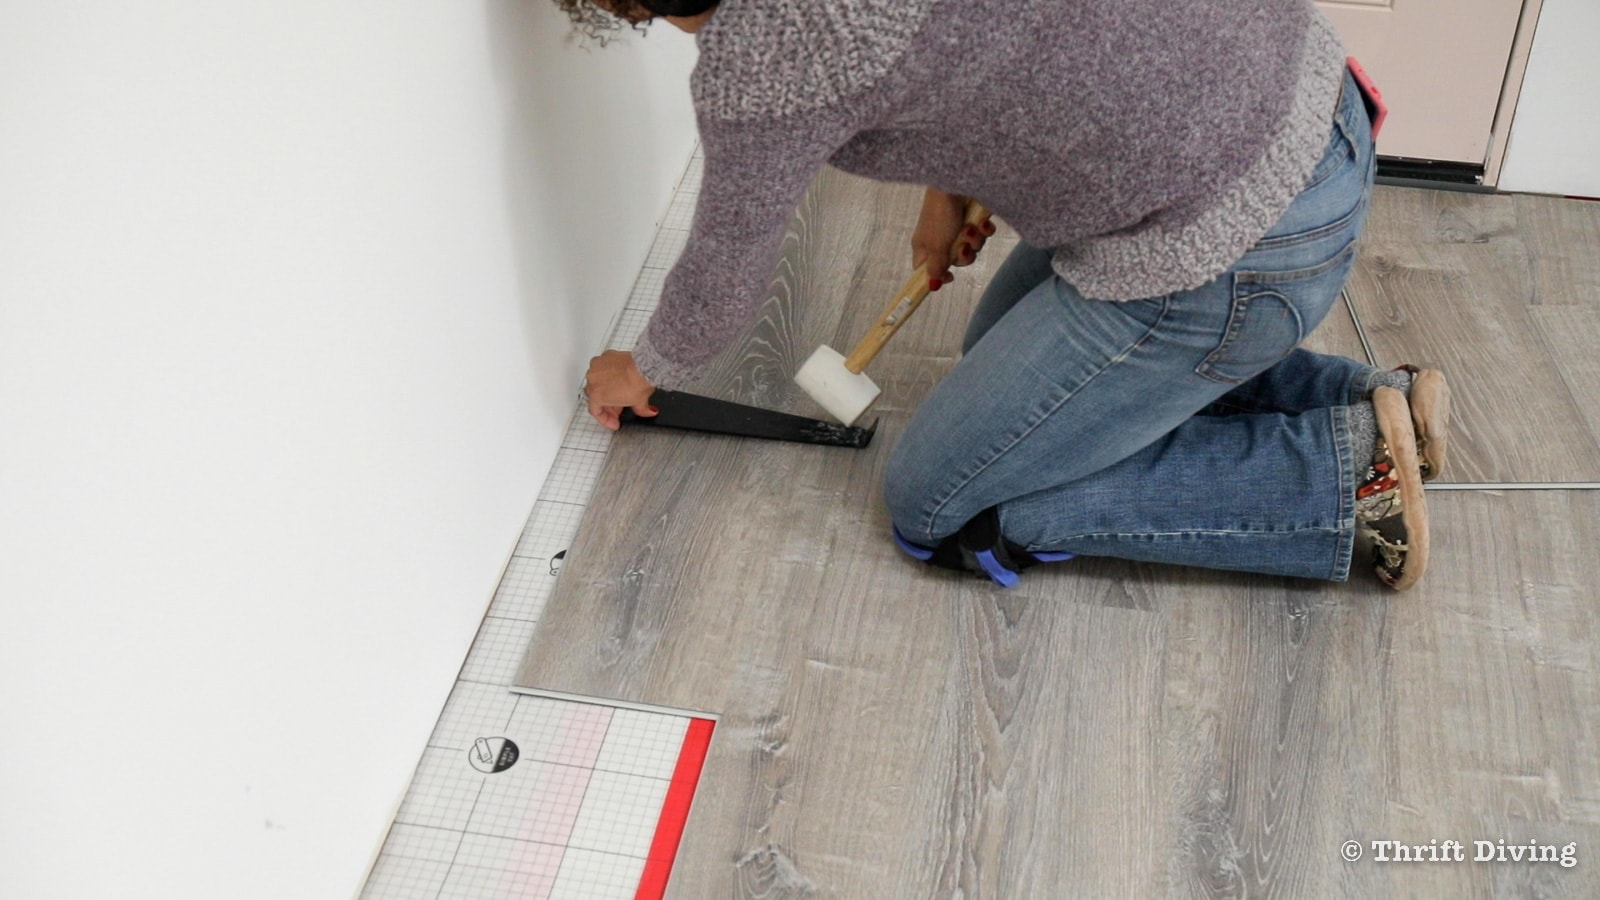
For the next plank, hold the plank tile at a slight angle and connect the rigid foam gray locking systems along its ends.
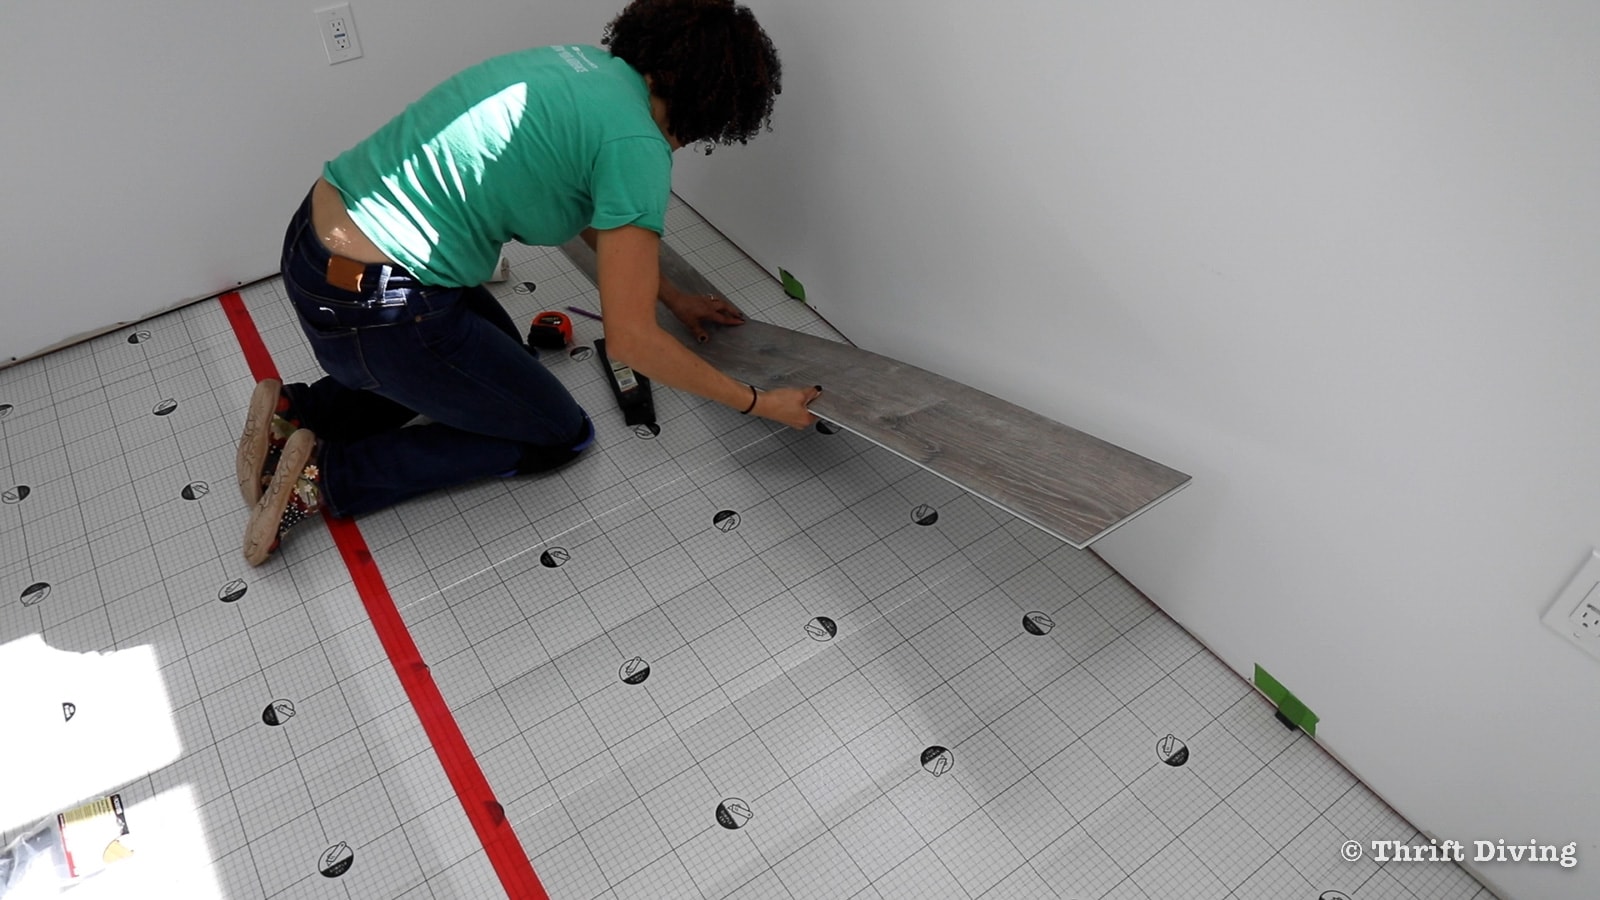
Gently lower the second plank tile down into place. When installed correctly, the tile should lie flat.
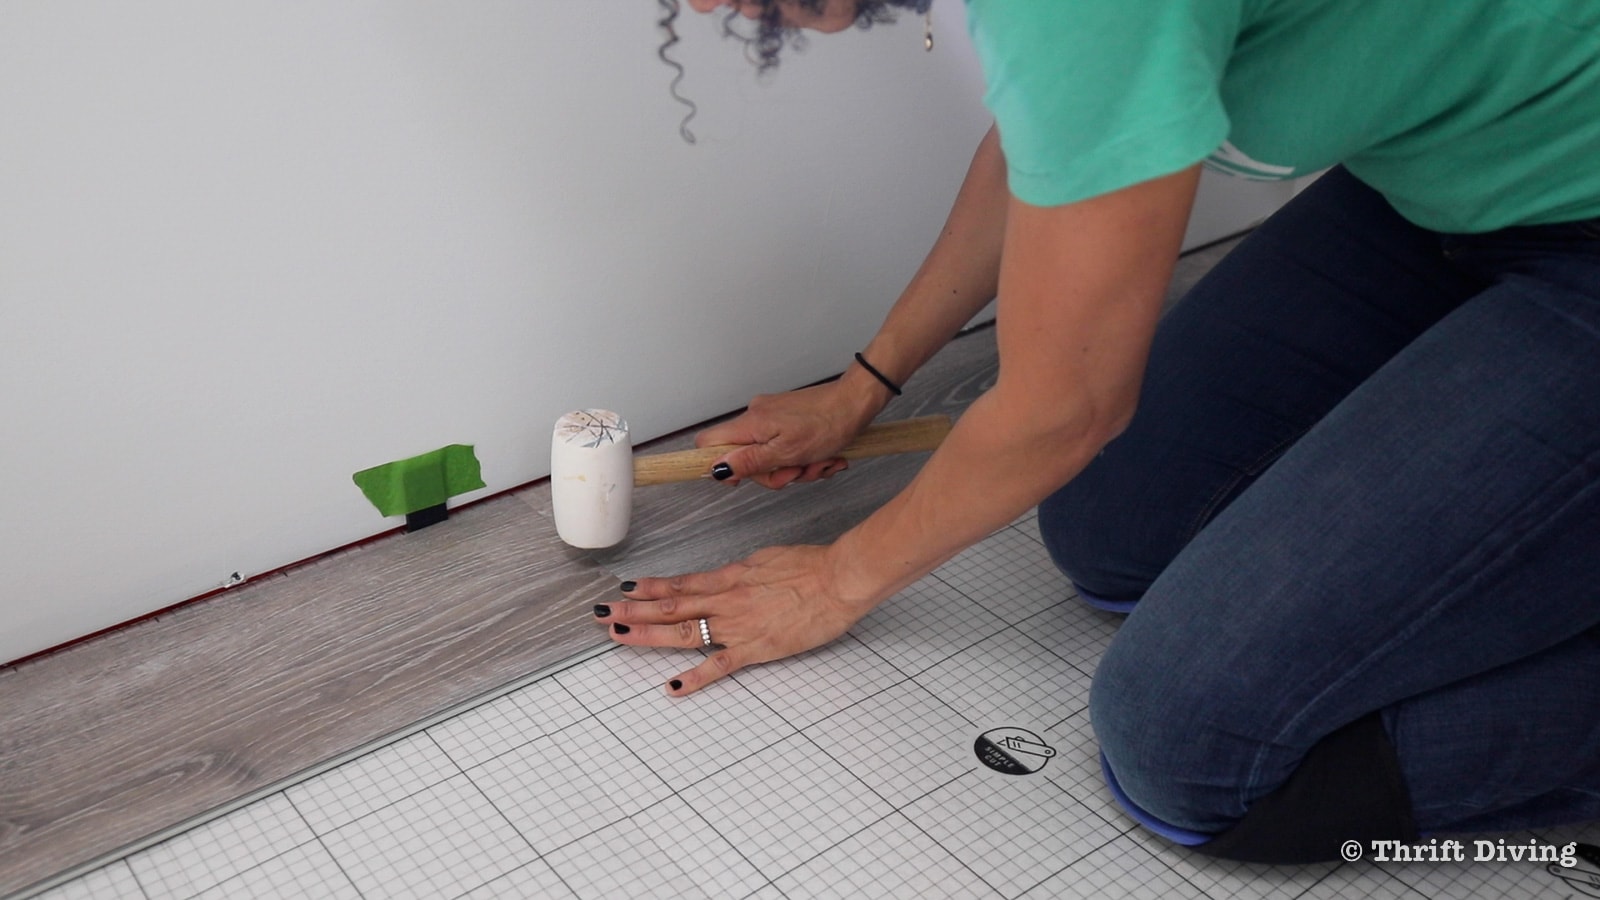
Use the rubber mallet to gently tap onto the two vinyl plank tiles at the seam to secure them together. There shouldn’t be any gaps in the connected seam, and when running your hand over the seam, it should feel smooth and not with any raised edge. Keep joining the tiles in this first row together, end to end.
When you get to the end of that first row, you’ll likely need to measure and cut your first vinyl plank tile.
Next, let’s talk first about how to measure and cut vinyl plank floor tiles.
How to Cut Vinyl Plank Flooring Tiles
Luxury vinyl plank tiles can easily be cut with a utility knife, but there are some cuts to vinyl tiles that you won’t be able to make with a utility knife, including:
- Cutting out shapes for fixed objects (like corners or plumbing) around your shed.
- Cutting a vinyl plank flooring tile lengthwise.
Thankfully, in a simple “she shed” like mine, you likely won’t have corners, plumbing, or odd shapes to fix the vinyl flooring around it. (If you do, then go watch this vinyl flooring video I did for my basement to learn how to cut out for fixed objects).
If your shed is square or rectangular, then your cuts will be easier, but you may still need both a utility knife and a jigsaw or other cutting tool.
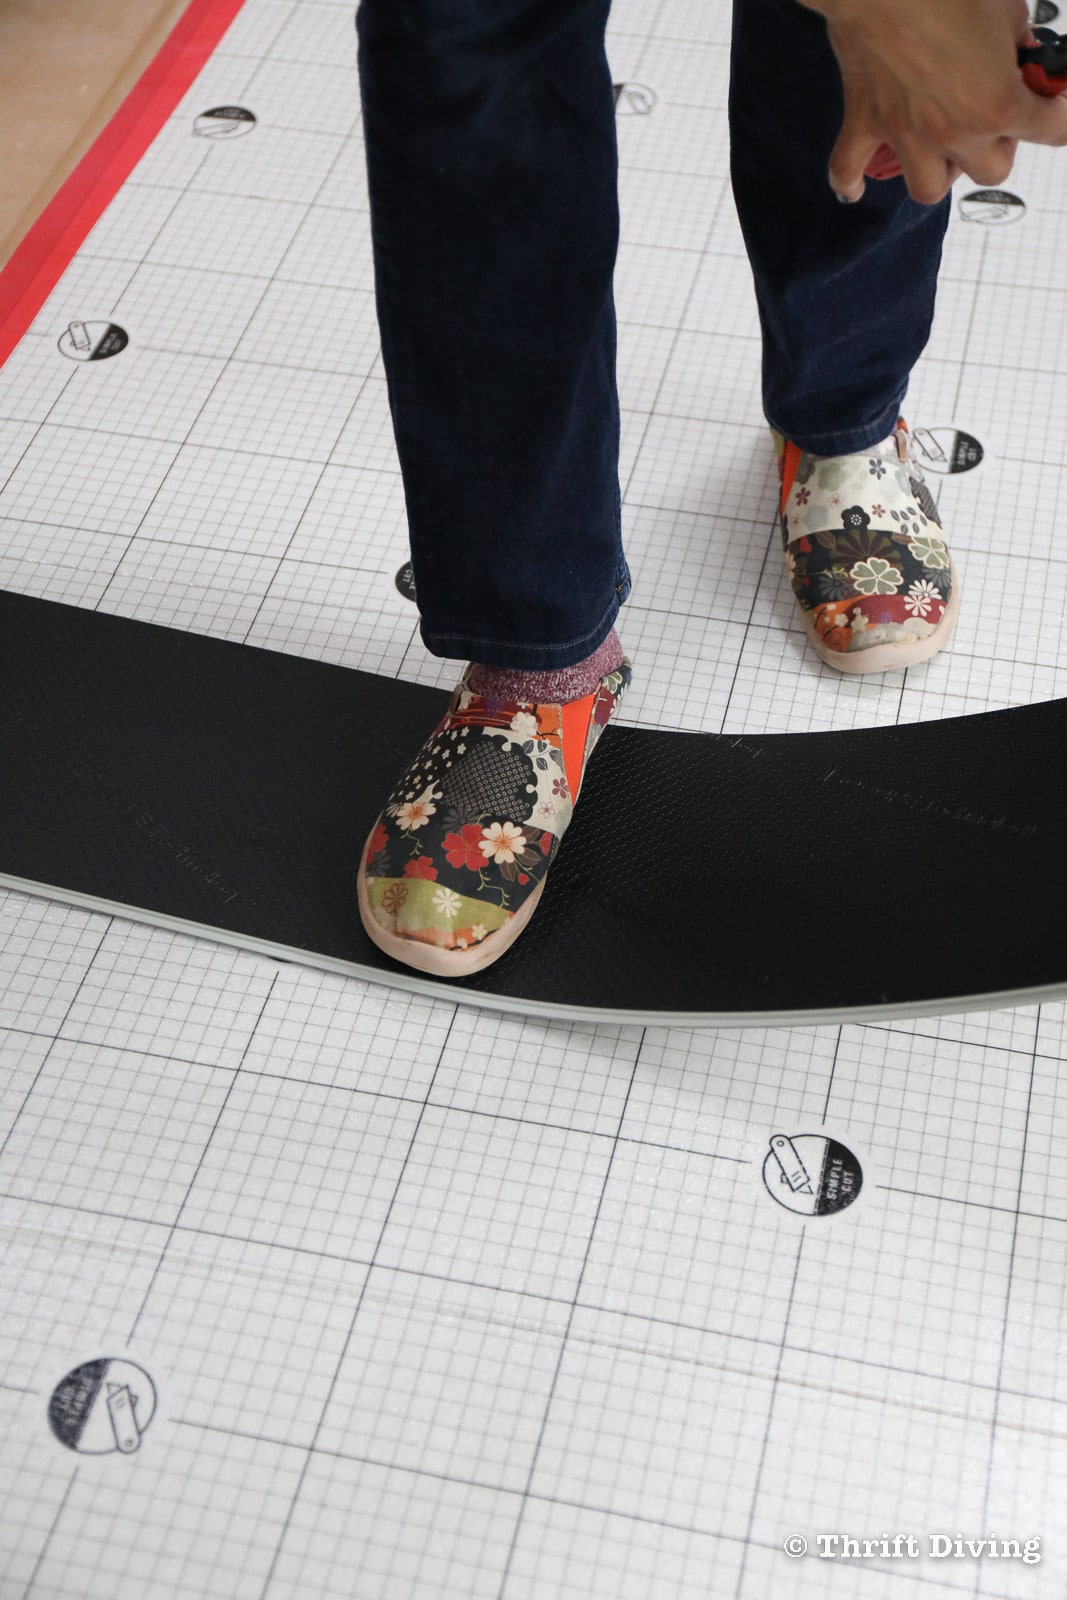
Use a speed square to mark an accurate pencil line on the tile.
Run the blade over the pencil line a few times, going slowly so that the blade doesn’t wander from your line.

Turn the vinyl plank tile over, and with your foot holding the plank in place, pull up to snap it off. If it’s not a clean snap, use the utility knife on the cushioned back of the floor tile to separate it.
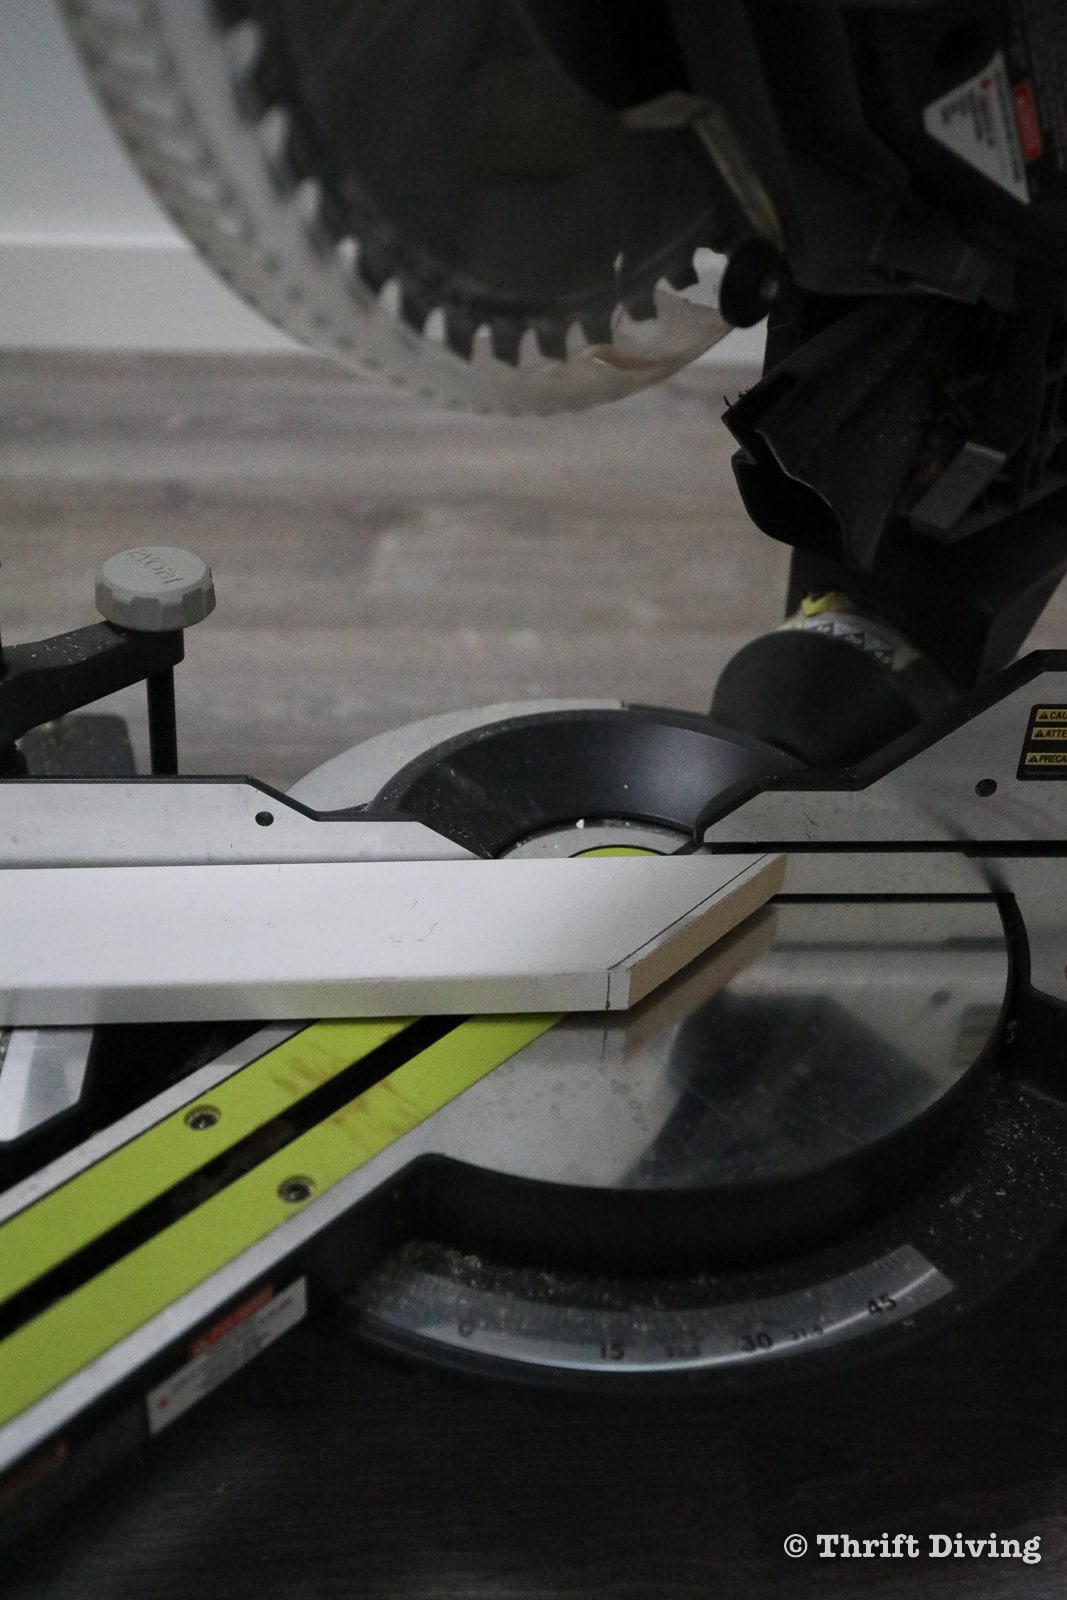
As mentioned, a jigsaw is perfect for cuts that require the flooring to be installed around corners or other fixed areas.
Also, when trimming a vinyl plank tile length-wide, a jigsaw works best, as well. I like using a scroll saw, which has more teeth on the blade and gives a finer cut. Although the cut edges will be hidden under the baseboards, I still prefer a fine cut. (Sorry, but a clean cut is a clean cut, even if it’s not visible!).

In a shed, you likely won’t have any (or many) corners to work around. So I won’t cover those steps. But if you watch my video on How to Install Vinyl Flooring showing how I installed vinyl flooring in my basement, I show you how to install vinyl flooring around corners.
How to Measure and Cut the Last Vinyl Tile in a Row
As I said above, you’ll likely need to cut the first and last piece of vinyl plank tile in a row. And that scrap piece cut off can be used to start the next row.
However, on the third row, and going forward, you may change up your layout so that you don’t have a weird pattern repeat.
That means you will come to the end of a row and need to measure and cut the last vinyl tile. It can be tricky to place this measurement in the right direction on the tile. Doing it right helps to prevent wasted tiles that were cut incorrectly and can’t be used. Here’s how you do it:
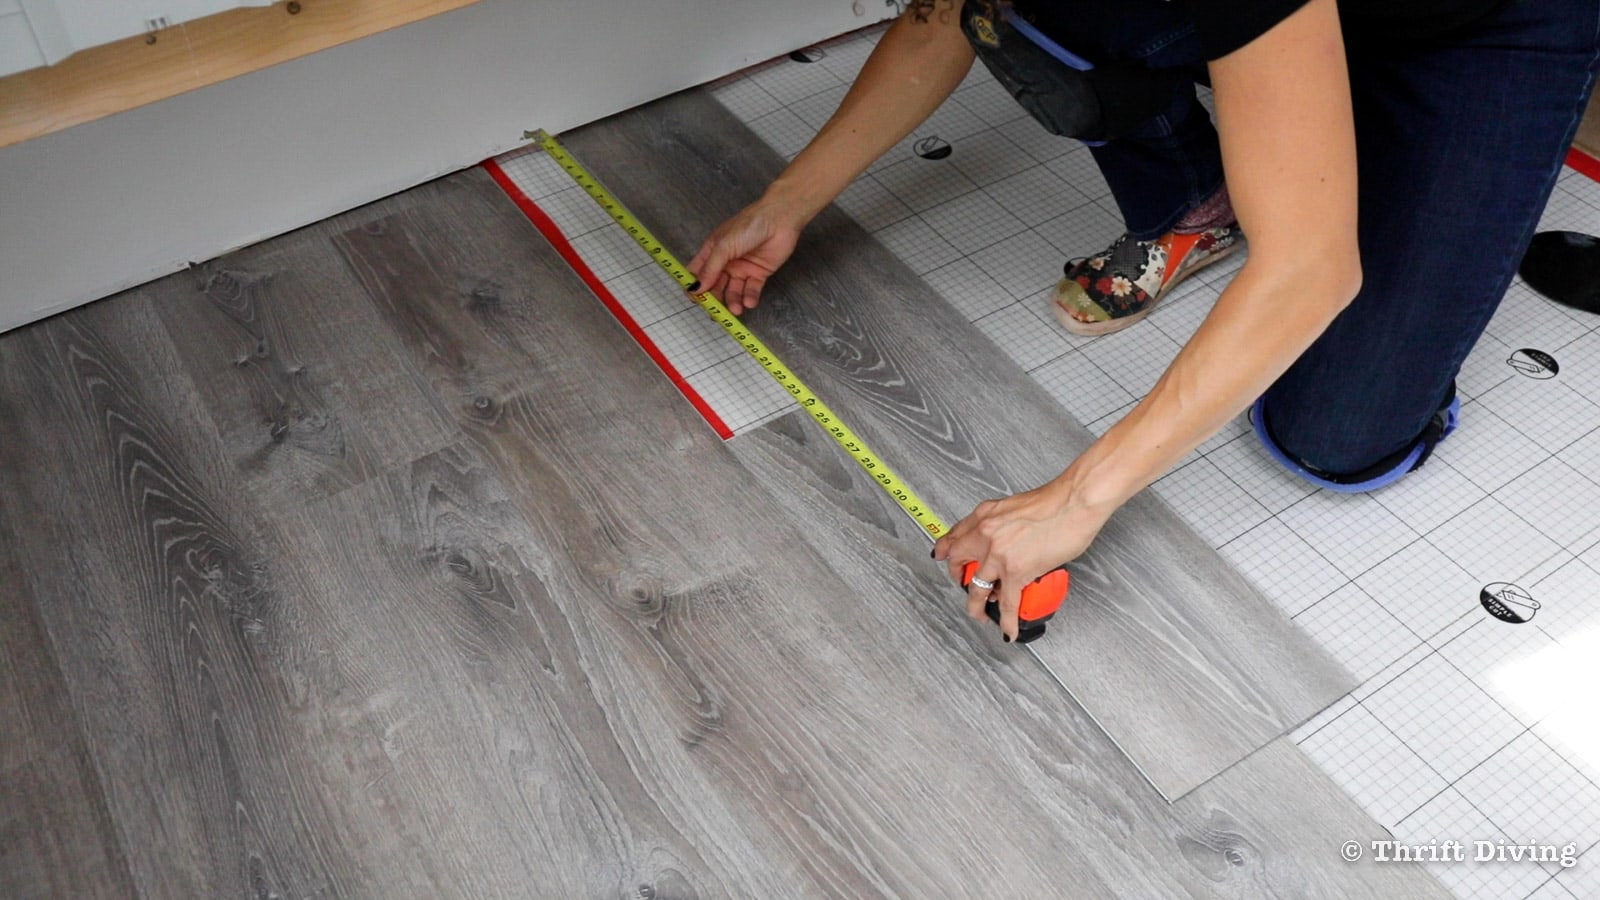
STEP 1: Take the measurement at the end of a plank row. Be sure to not include the 1/4″ expansion gap.
Use a tape measure to measure from the wall (do not to include the 1/4″ expansion gap that you’re supposed to leave) to the end of the last installed plank tile.
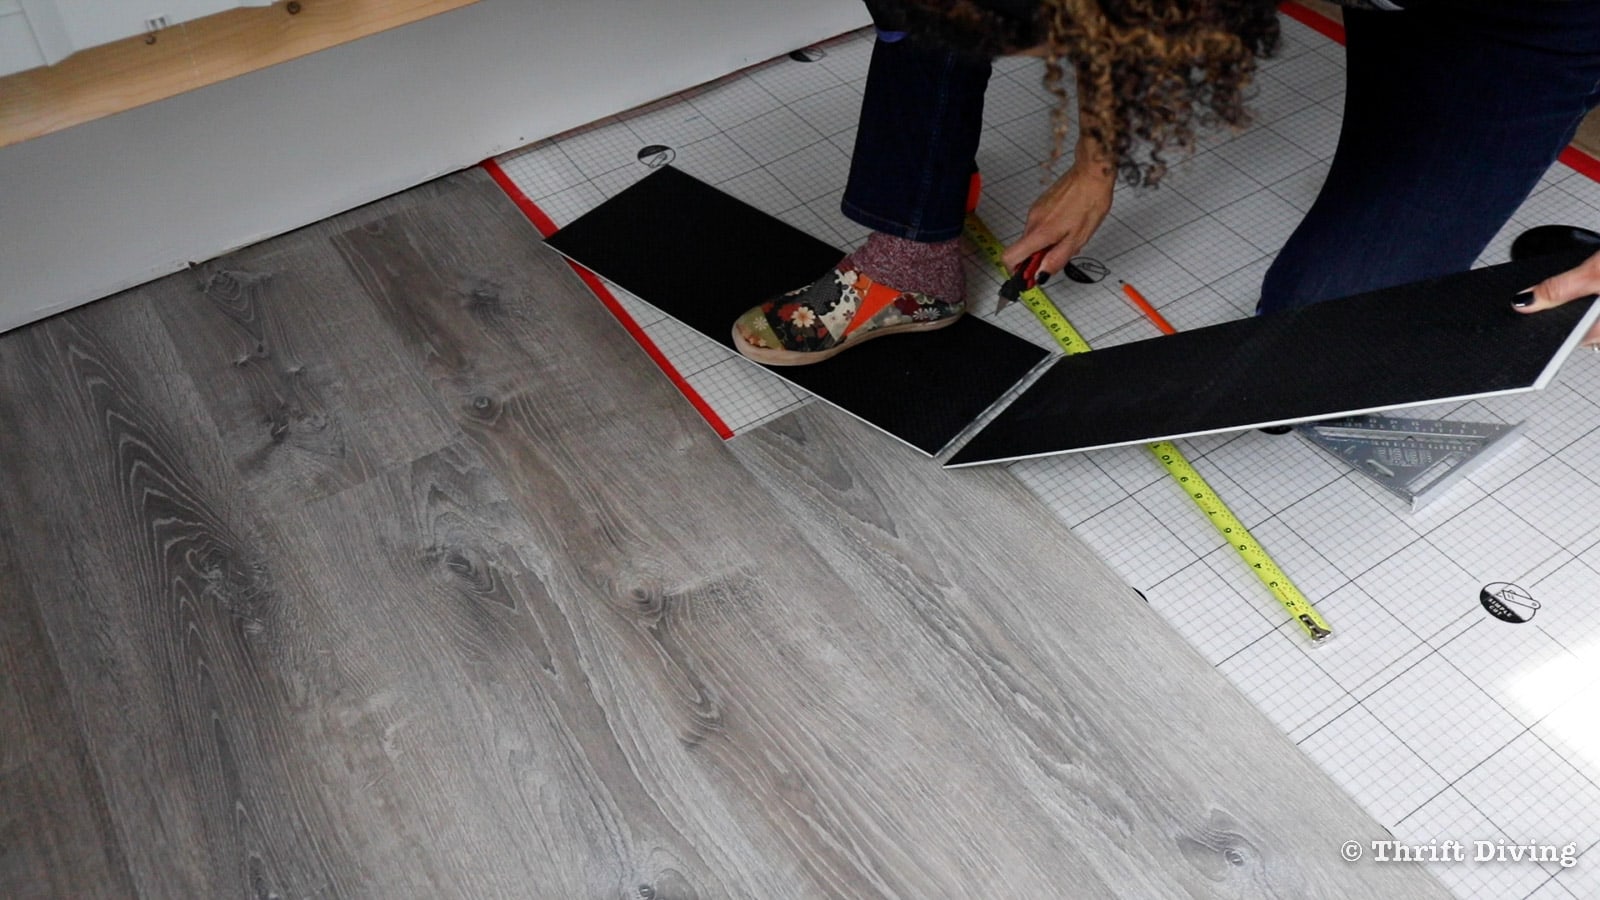
STEP 2: Lay a piece of vinyl plank tile into position.
Casually lay a full piece of vinyl plank on the floor in the correct installation direction. Laying the tile in place will help you to keep the orientation straight so that you can mark the tile with the measurement.
STEP 3: Transfer the measurement to the tile, but measure from the connected end of the tile in the direction of the wall.
This is where it’s easy to make the mistake of transferring the measurement to the wrong end of the floor tile. With your floor tile casually in front of you, place the end of the tape measure on the left end of the floor tile in front of you and measure from left to right. Make the measurement on the tile.

STEP 4: Cut off the excess with a utility knife or jigsaw.
This line where you just made your cut is the side that will go next to the drywall. Remember: all cut edges will go next to the wall, with a 1/4″ expansion gap between the cut edge and the drywall. If you cut the end that is supposed to be connected to the previous tile in the row, you will not be able to use that tile in that row.

If you do happen to make this mistake of cutting the wrong end off a plank tile at the end of a row, don’t discard these pieces. They might be able to be used to start a new row, instead.
The goal here, however, is to create as little waste as possible. And to do that, you want to get each cut right. At the end of a project, if you’ve got two boxes left over, you can keep one box for future needs if you need to make a repair. But the other box can be returned. That’s money in your pocket!
STEP 5: Install the flooring tile.
Next, install the trimmed flooring tile at the end of the row to complete that row.

How to Measure and Cut the FIRST Vinyl Plank Tile in a Row
You did the math above, right? For the very first row of your vinyl plank flooring in your shed, it’s always good to make sure that you won’t be left with a small teeny piece of flooring needed at the end of that row.
For my shed flooring, I started the first row with a full plank tile, and the last one needed to be trimmed to about 20″ long.
The left-over piece of tile that I just cut off can be used to start the next row, as long as there is at least an 8″ seam. This helps to save on waste.
Here’s another tip: Before starting a row, I like to lay out my plank flooring tiles before installing them, to make sure I’m not going to be left with any really short tiny pieces at the end of a row. If I do find that there is a tiny piece left over that isn’t at least 8″ long, then I’ll make the adjustment at the beginning of a row.
STEP 5: Keep Working Your Rows
One of the most important rule-of-thumbs when it comes to installing any type of flooring is to stagger your seams, and when staggering the seams, make sure each seam is at least 8″ apart.
This means that you can’t start each row with a full plank tile. Otherwise, your entire floor could look like a grid pattern, which doesn’t look good at all, and it would have very weak seams.
For your second row, you’ll want to trim that piece (see the advice above about how to cut vinyl tile and lay it out to make sure your last piece in the row isn’t teeny tiny).
Here are some words of caution: Make sure that the first piece of vinyl flooring in the row will allow you to end the row with at least an 8″ piece of tile.
How to Lay Vinyl Plank Tiles
Here is the process for locking the plank tiles together:
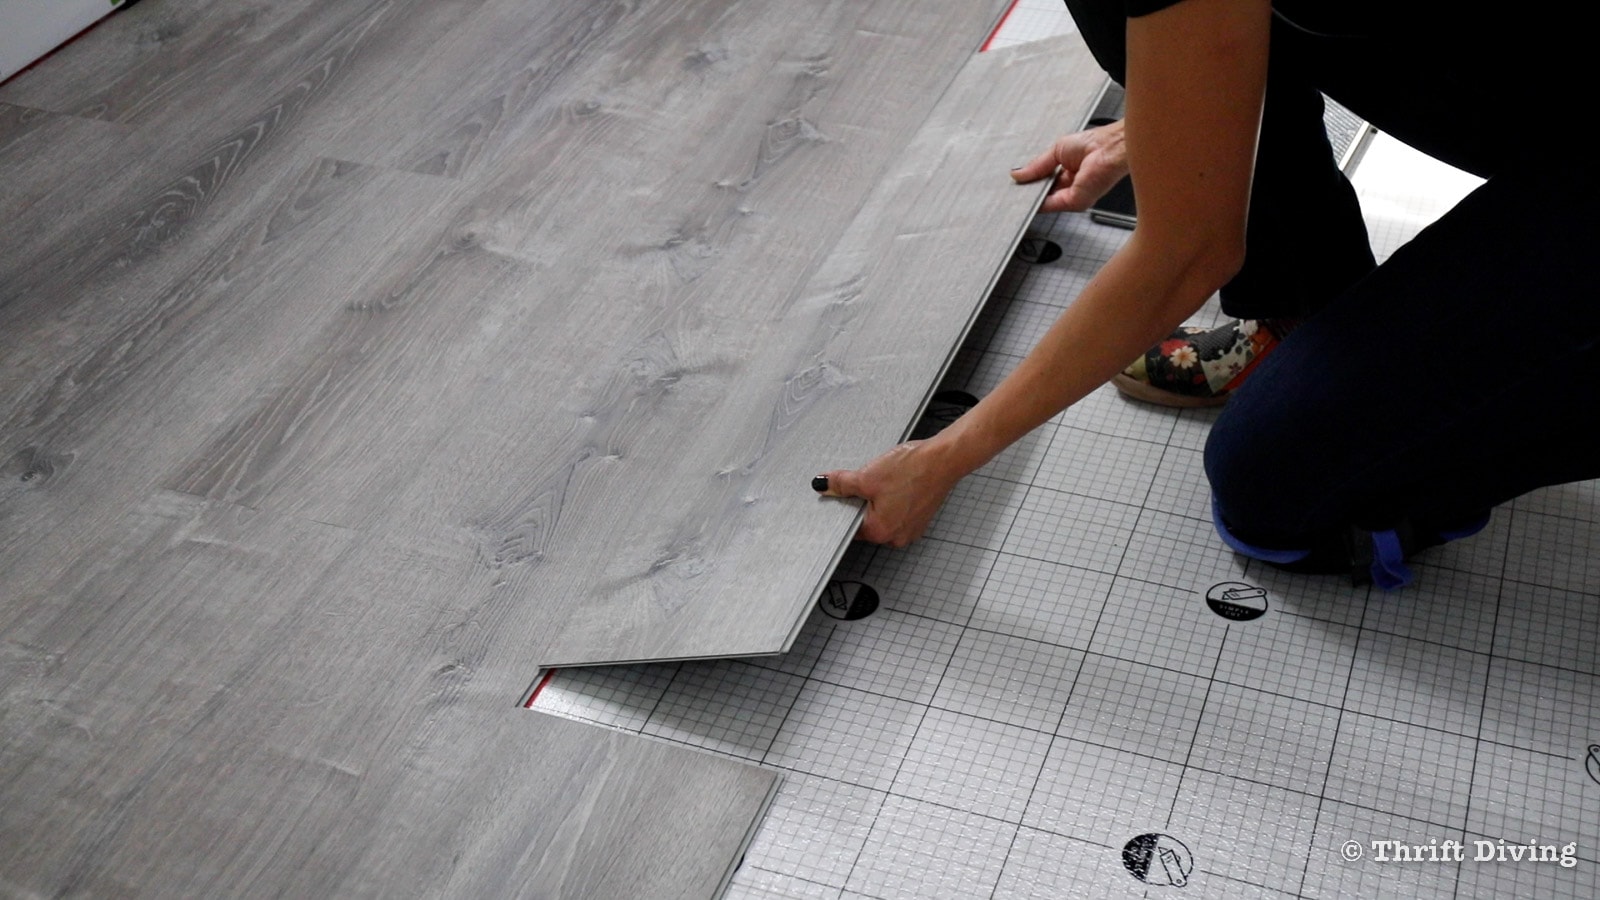
- STEP 1: Hold each piece at an angle.
- STEP 2: Slide each piece into place.
- STEP 3: Lie it flat and connect the ends.
- STEP 4: Tap each piece to close the gaps with a tapping block and mallet.
- STEP 5: Gently tap the seam to secure the plank tile ends together. The seam should feel smooth and not raised. If it feels raised, give it a few more gentle taps.
How to Prevent Gaps in Your Vinyl Plank Flooring
I think the biggest problem when installing vinyl plank flooring is not taking the time to tap each plank into place with a tapping block and mallet and closing up those gaps.
What I found is that sometimes you may have to give the tapping block some hard taps to close those gaps. Position the tapping block on the edge of the tile and not on the edge of the gray rubber locking strip or else it could damage the rubber locking strip.
STEP 6: Finish the Last Row
At this point, your rows of vinyl plank flooring should be staggered without any obvious funny-looking repeat pattern.
This is why you want to do the math at the start of your vinyl plank flooring so that you don’t end up with a narrow or short piece.
I’ll admit that I skipped the math and ended up with a 2″ narrow piece of plank at the end of my shed flooring. This wasn’t ideal, but it could have been worse. The flooring blends in well, plus it will be covered up with baseboard, so it wasn’t too much of a problem. But depending on your room and your flooring choice, it could end up looking very odd and unbalanced. For my shed, however, it was okay.
To prevent this, what I should have done was to cut the first row of tiles in half so that the first and last vinyl plank rows were nearly equally wide. But I started my first row with a full width plank.
Doing the simple math before starting could prevent this.
If you end up with a small strip such as this, the solution is to use a jigsaw and trim a plank down to the width that will fit, keeping in mind the 1/4″ seam allowance. Be sure to lock those pieces in, making sure the seams are tight. Baseboards will help to either hide it or secure it.
Also, it should be noted that the regular tapping block won’t fit so close to the wall, so you’ll need to use the pull bar that comes in your flooring installation kit, along with a mallet, to tap the flooring securely together.
STEP 7: Pick and Cut Your Door Trim and Baseboard
I personally love a flat and wide baseboard. It looks modern, clean, and it’s easy to install. For my shed flooring, I chose 1″ x 4″ primed pine, but I also love PVC because it’s waterproof (which is perfect for any areas where water or moisture will be an issue, like bathrooms and kitchens).
Around the door, I select flat trim, but typically like a smaller 1″ x 3″ trim.
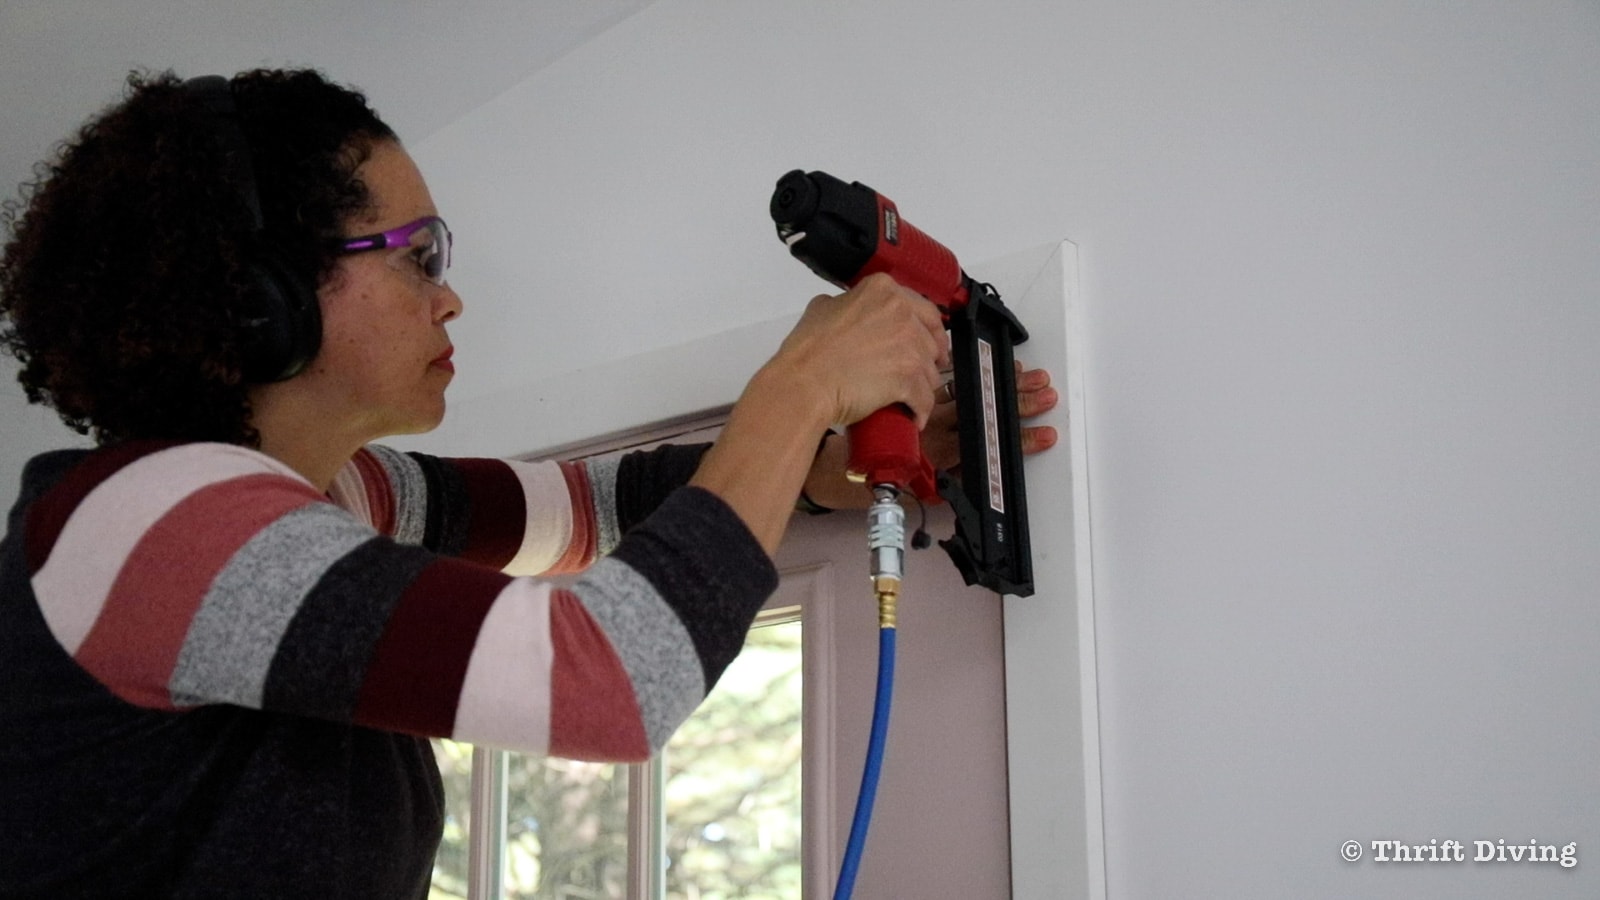
STEP 8: Install Your Door Trim Around the Doors
Months before, I installed trim around the shed windows already, so those were done, but I didn’t add trim around the doors yet because I knew the flooring would be getting done soon. And flooring should always go underneath door trim. It’s easier to add trim around the door after the vinyl flooring goes in; otherwise, you’ll need to trim your door casings with a flush cut saw so the flooring will slide underneath the door casing. You can watch this clip of when I installed vinyl flooring in my basement to see how I trimmed the door time and slipped the vinyl flooring underneath.
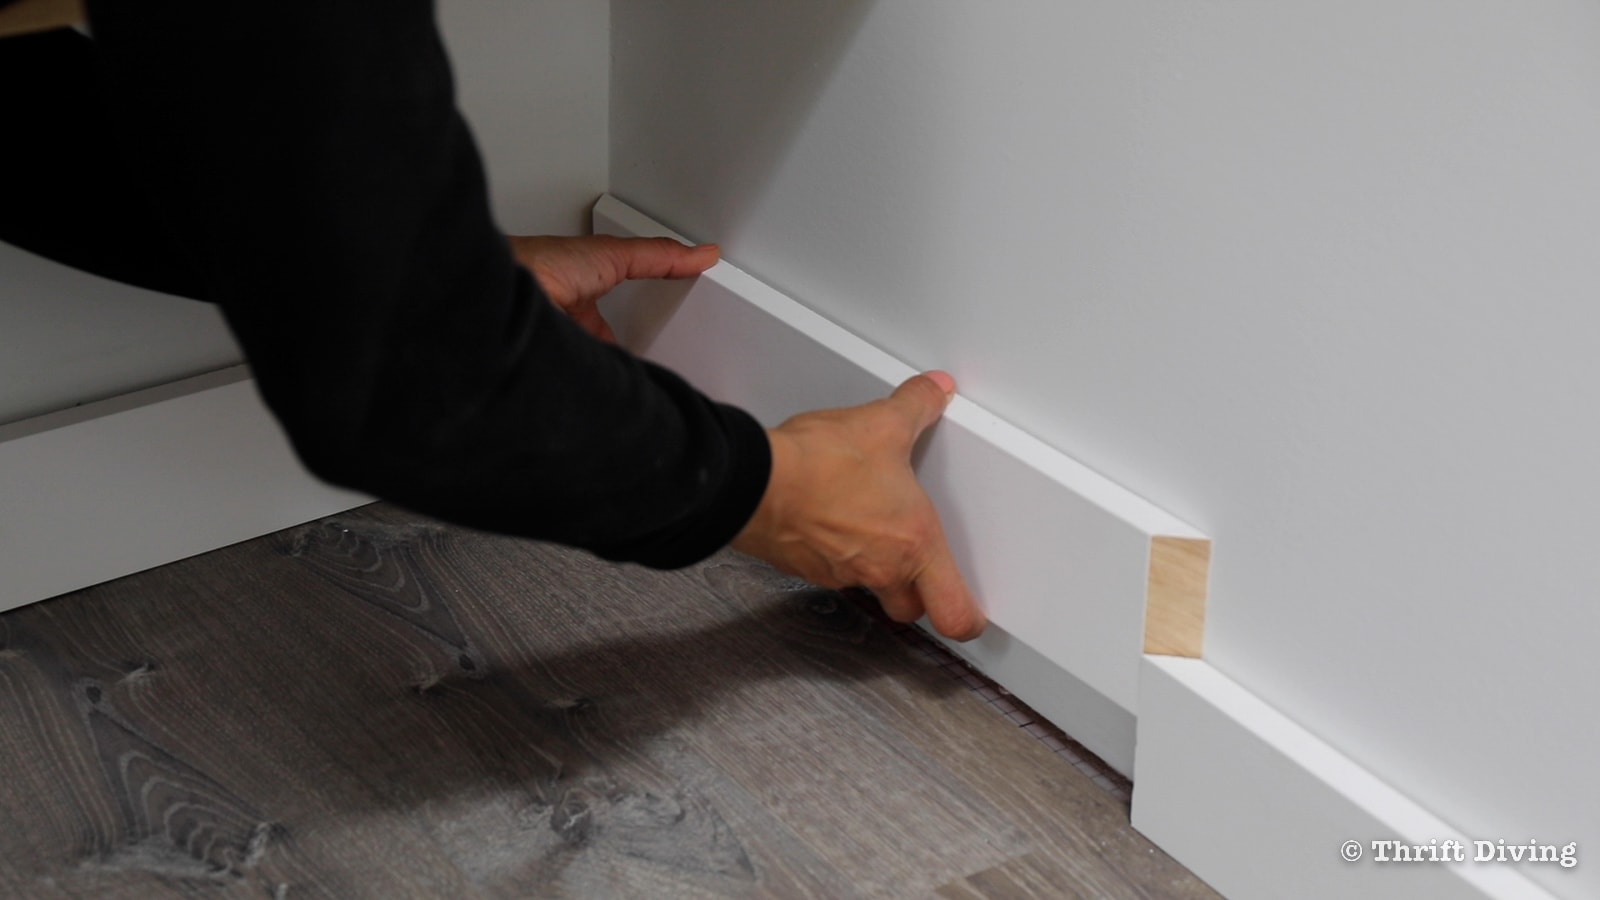
STEP 9: Install Your Baseboard over the Vinyl Plank Flooring
Gaps between the baseboard and your drywall is perfectly normal. Walls and drywall aren’t completely straight, for any number of reasons. Don’t worry, because caulking in the next step will cover those gaps.
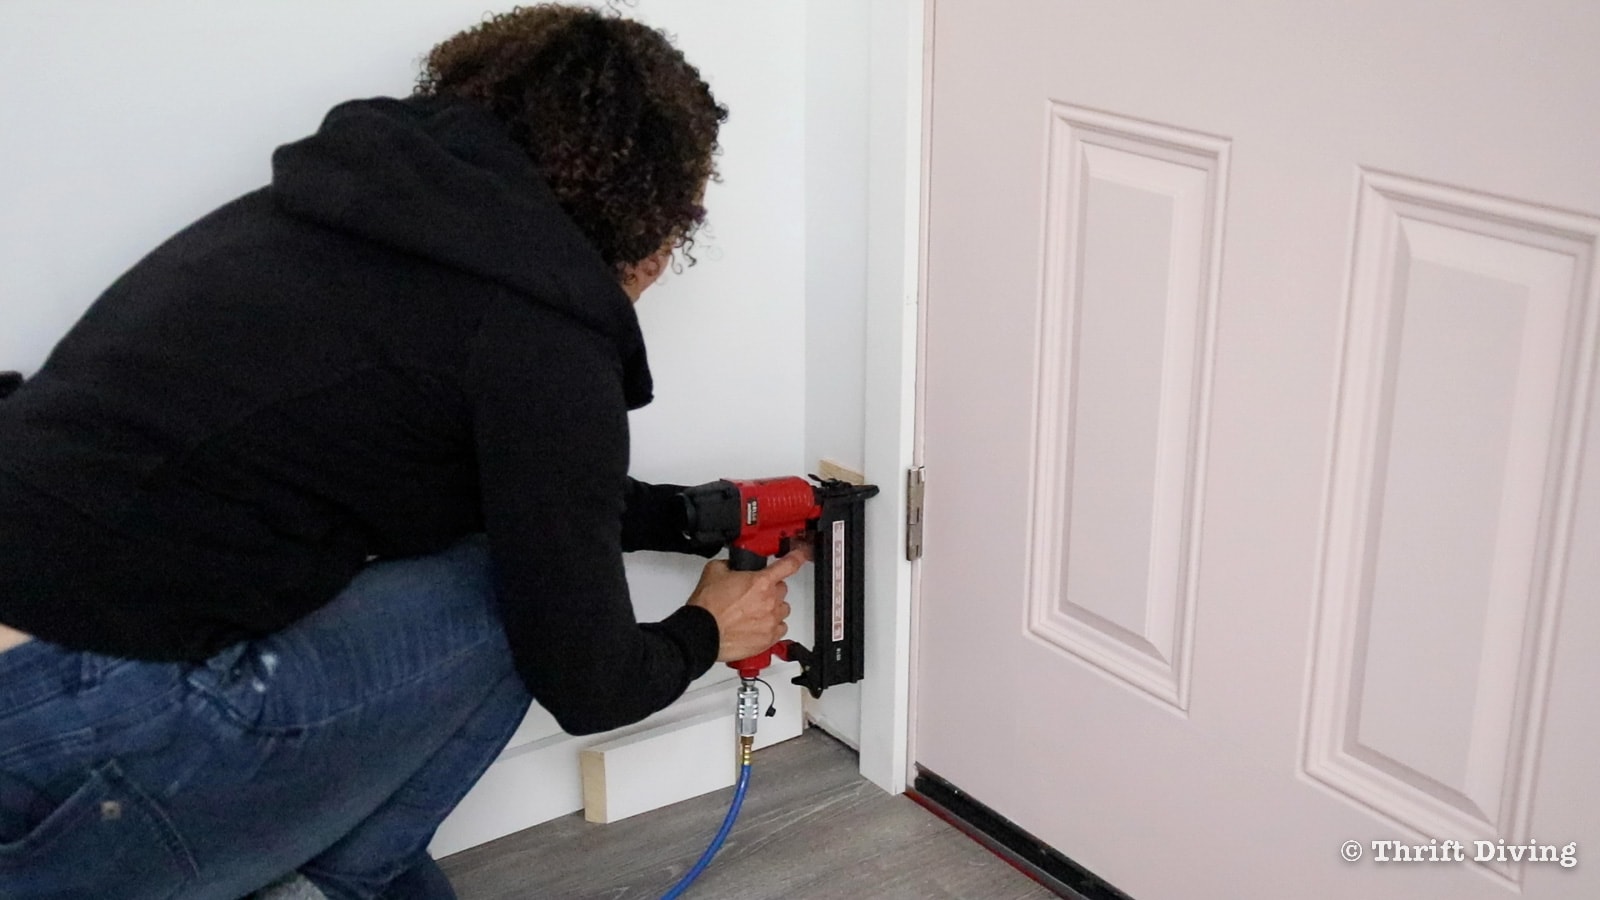
To secure the baseboard to the wall, use an Arrow Fastener brad nailer and shoot 2″ brad nails into the bottom of the baseboard so that it goes through the bottom plate of the wall framing behind the drywall.
You’ll also want to use a stud finder to locate where your studs are so that in those places, you can place a brad nail higher up along the baseboards, which will secure the baseboard to the studs.
You might be wondering if you have to use glue to secure the baseboards. I wouldn’t use glue. Remember, this is a floating floor, not a glued floor.
I did forget, however, to apply diatomaceous earth behind the baseboards! Food-grade diatomaceous earth is a natural “powder” of ground up sea fossils that is used as a natural pest control (the shards of sea fossils cut the exoskeleton of ants and other bugs!). It’s great to apply behind your baseboards for any bugs that may get in. I totally forgot to do this, but I can always try to puff some underneath the cracks under the baseboard.


STEP 10: Fill Nail Holes, Caulk the Gaps, and Paint
I didn’t photograph this step, but I used wood filler (I prefer white wood filler; it paints over much easier). Sand it smooth with fine sandpaper, and then use semi-gloss paint. Use interior/exterior paintable caulk to hide any gaps or cracks. It’s normal to have gaps, because walls are never perfectly straight inside corners! 🙂

Pretty Little “She Shed”!
I’m so excited how my “she shed” is turning out to be!
BEFORE

AFTER!


BEFORE

AFTER!
I still need to organize my shed, and most importantly, figure out how to “pretty up” the workbench area. I’d also like to add cabinetry below the workbench in order to hide all the things I’ll need to be storing.
While this is going to be a workshop and office space, I don’t want it to look like a dirty workshop with sawdust everywhere. I want it to be clean, organized, and everything in its place, without the clutter.
Love this post? Click here to SAVE it on Pinterest!
![]()
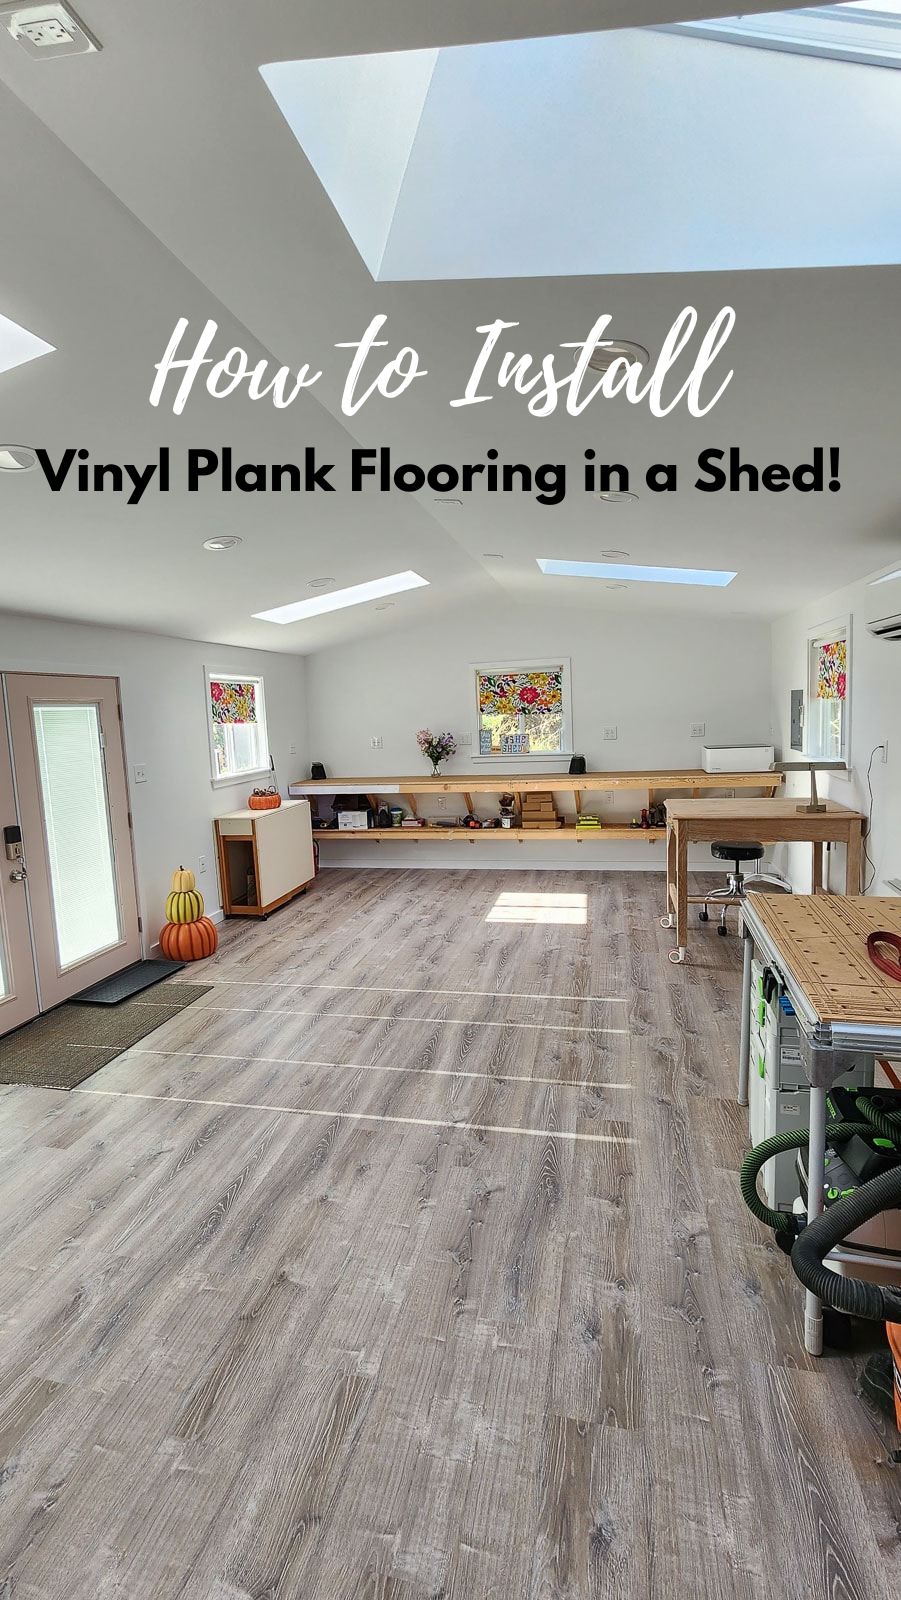
Didn’t it turn out fantastic?!
Be sure to come back often to see new updates on the “she shed”!
Head over to ArrowFastener.com for more information on the PT18G brad nailer used for the trim and baseboards, as well!

Download the 5 freebies!

Thrift Diving inspires women to decorate, improve, and maintain their home themselves...using paint, power tools, and thrift stores! Use these 5 printables, checklists, and ebooks to get started!