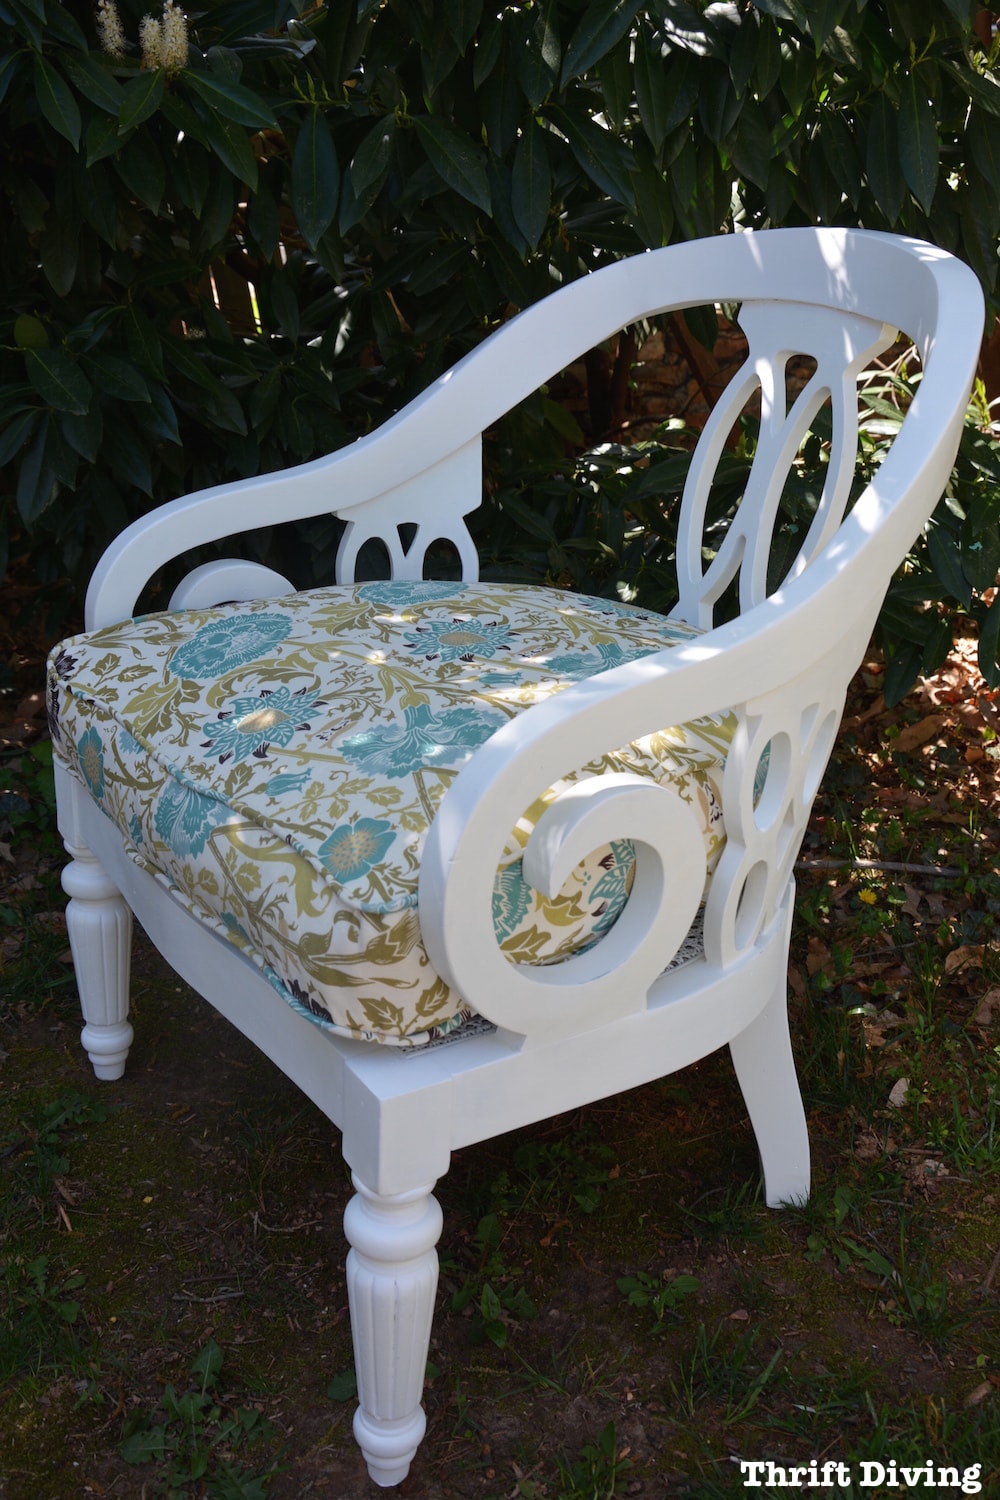
The $60 Thrifted Vintage Chair Makeover
You know those projects that you start but never finish? Dude, what’s UP with that?! I have a gazillion of them lying around my house: half-dissected furniture…….sewing projects with threads hanging loose…..and knitted garments with knitting needles still attached!
Other than DIY ADHD, I can’t fully explain that phenomenon. (Does it happen to you, too??)
This year, however, let’s vow to FINISH. WHAT. WE. START!
….So I finally finished this vintage chair that I found at the thrift store (–ahem–) last year…………Yes, I said last year.)
Cost at the thrift store: $60. It was solid, heavy! Just needed some new fabric!
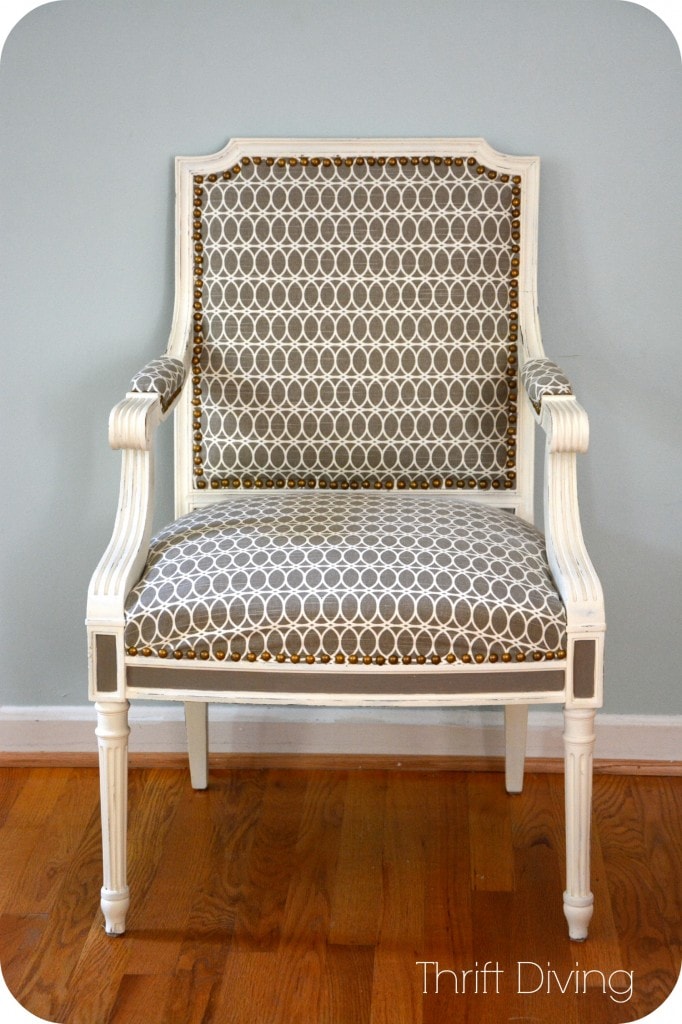
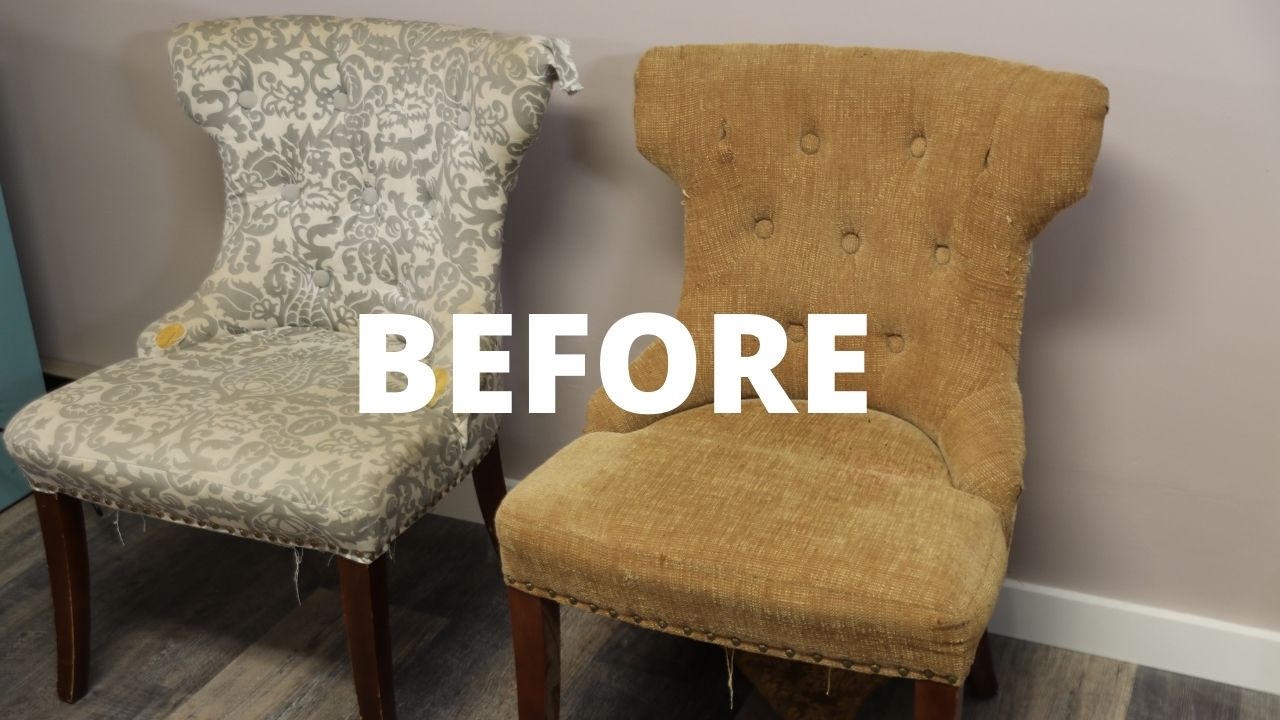
BEFORE

Finally it’s DOOOONNNEEE! Woo hoo! One less piece of furniture in my messy garage!
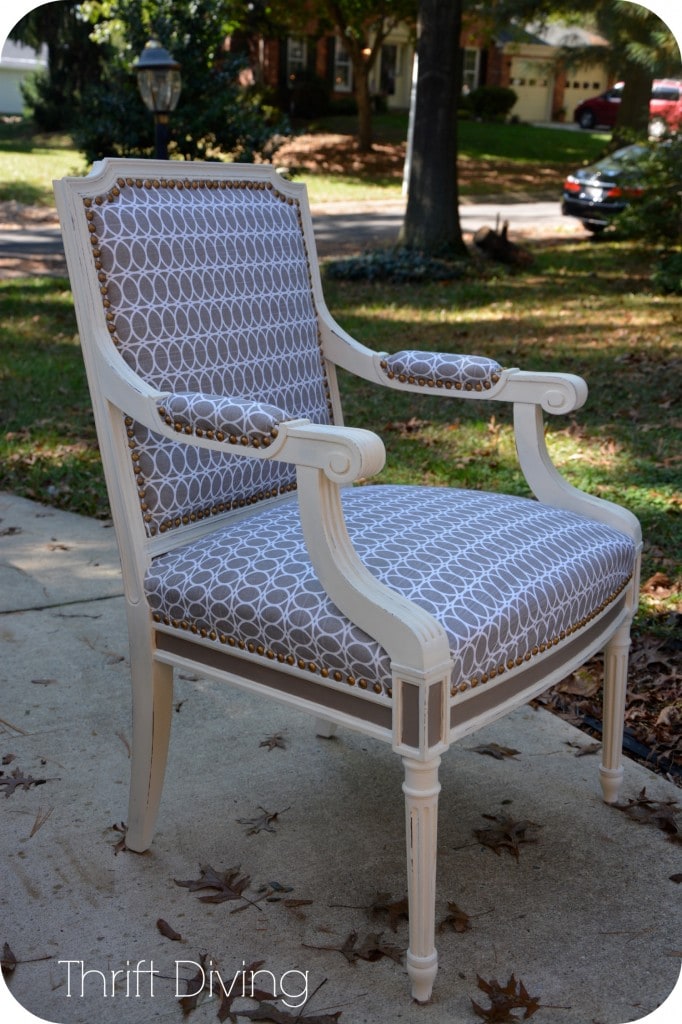
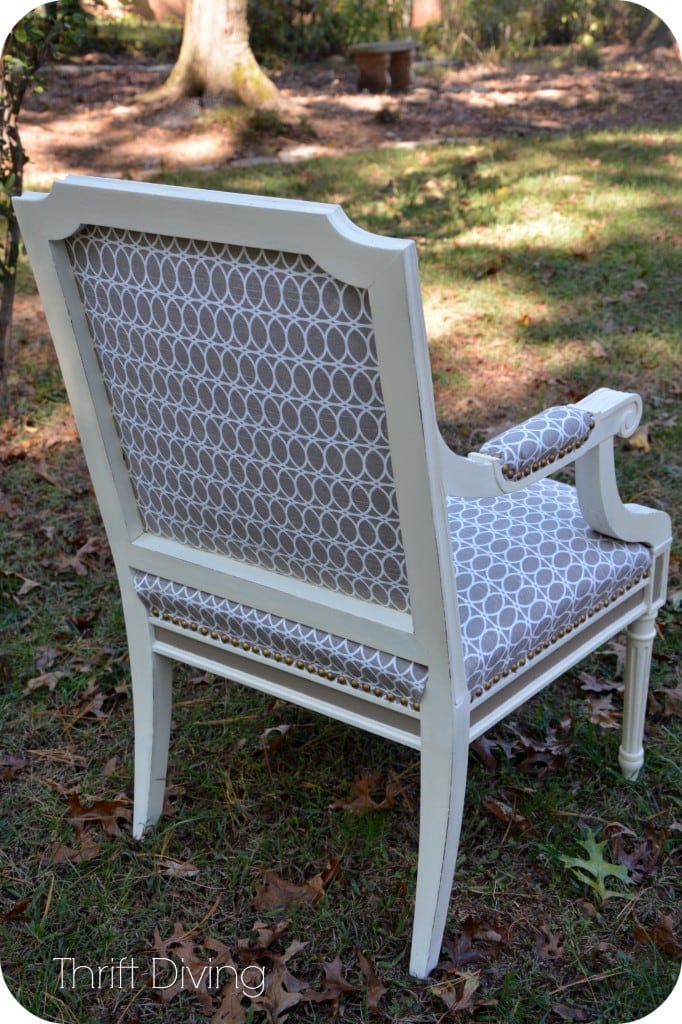
AFTER
Materials Used
- 1.5 – 2 yards HGTV Fabric from HouseFabric.com
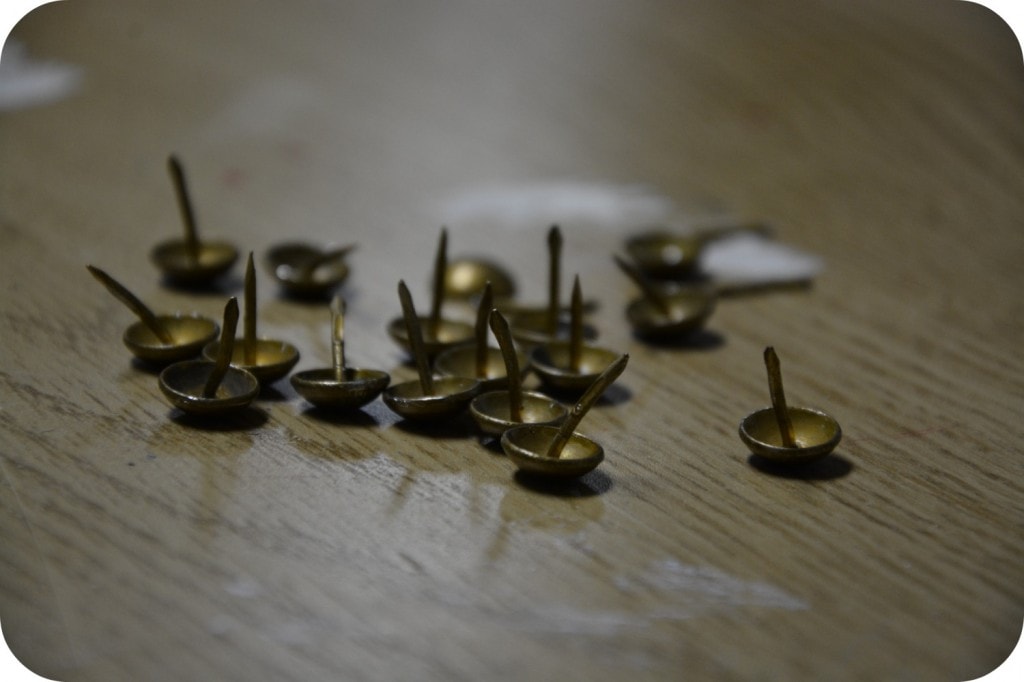
- Total of 276 Decorative tacks (oh, don’t forget the ones I bombed!!! Okay, add in about 30 more tacks…)
- 1 -2 yards of batting for added cushioning
- Annie Sloan Chalk Paint “Old White” for the body
- Annie Sloan Chalk Paint “Coco” for the cut-outs on bottom edge of chair.
Tools Used
- Staple and tack lifter
- I used a light-duty stapler, but I would highly recommend you buy this Arrow 5-in-1 corded stapler, which I love!
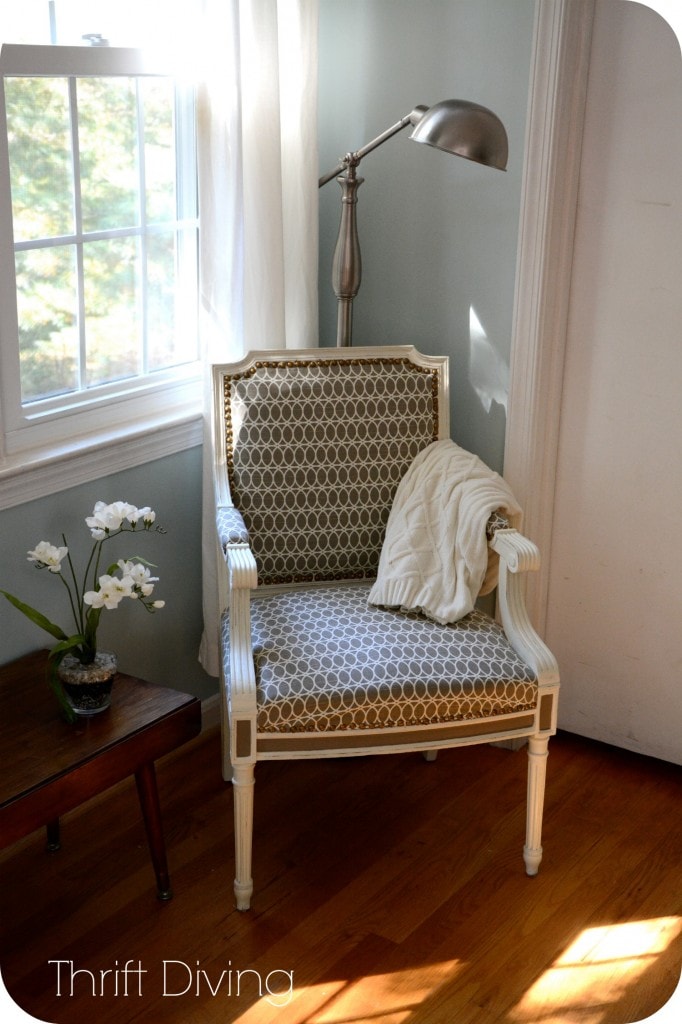
Now I’ve got a cozy corner in my master bedroom, which still needs a lot of decorating. It’s been three years and all I’ve been able to do is remove wallpaper and paint the walls a pretty Sherwin Williams Rainwashed!

It’s amazing how many things you learn when you do a project that you’ve never done before. Oh, the skillz you acquire!
And yes….there will be trial and error. This is just a sampling of the decorative tacks I wasted in trying to get them hammered in PROPERLY!
I’ve done a previous reupholstered chair ions ago when I started this blog (hahaha, looking at that post now makes me laugh at how ridiculously fuzzy my pictures!). But that chair was a piece of cake compared to nailing on 276 decorative tacks onto a vintage chair makeover when you’ve never done it before! EEK!
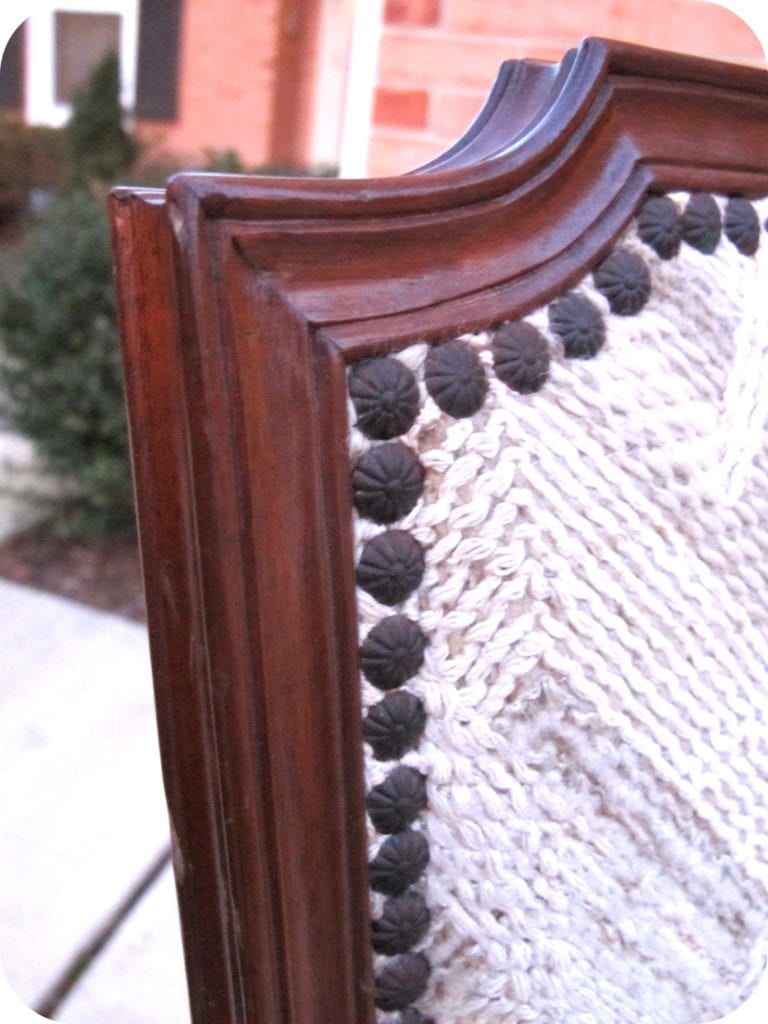
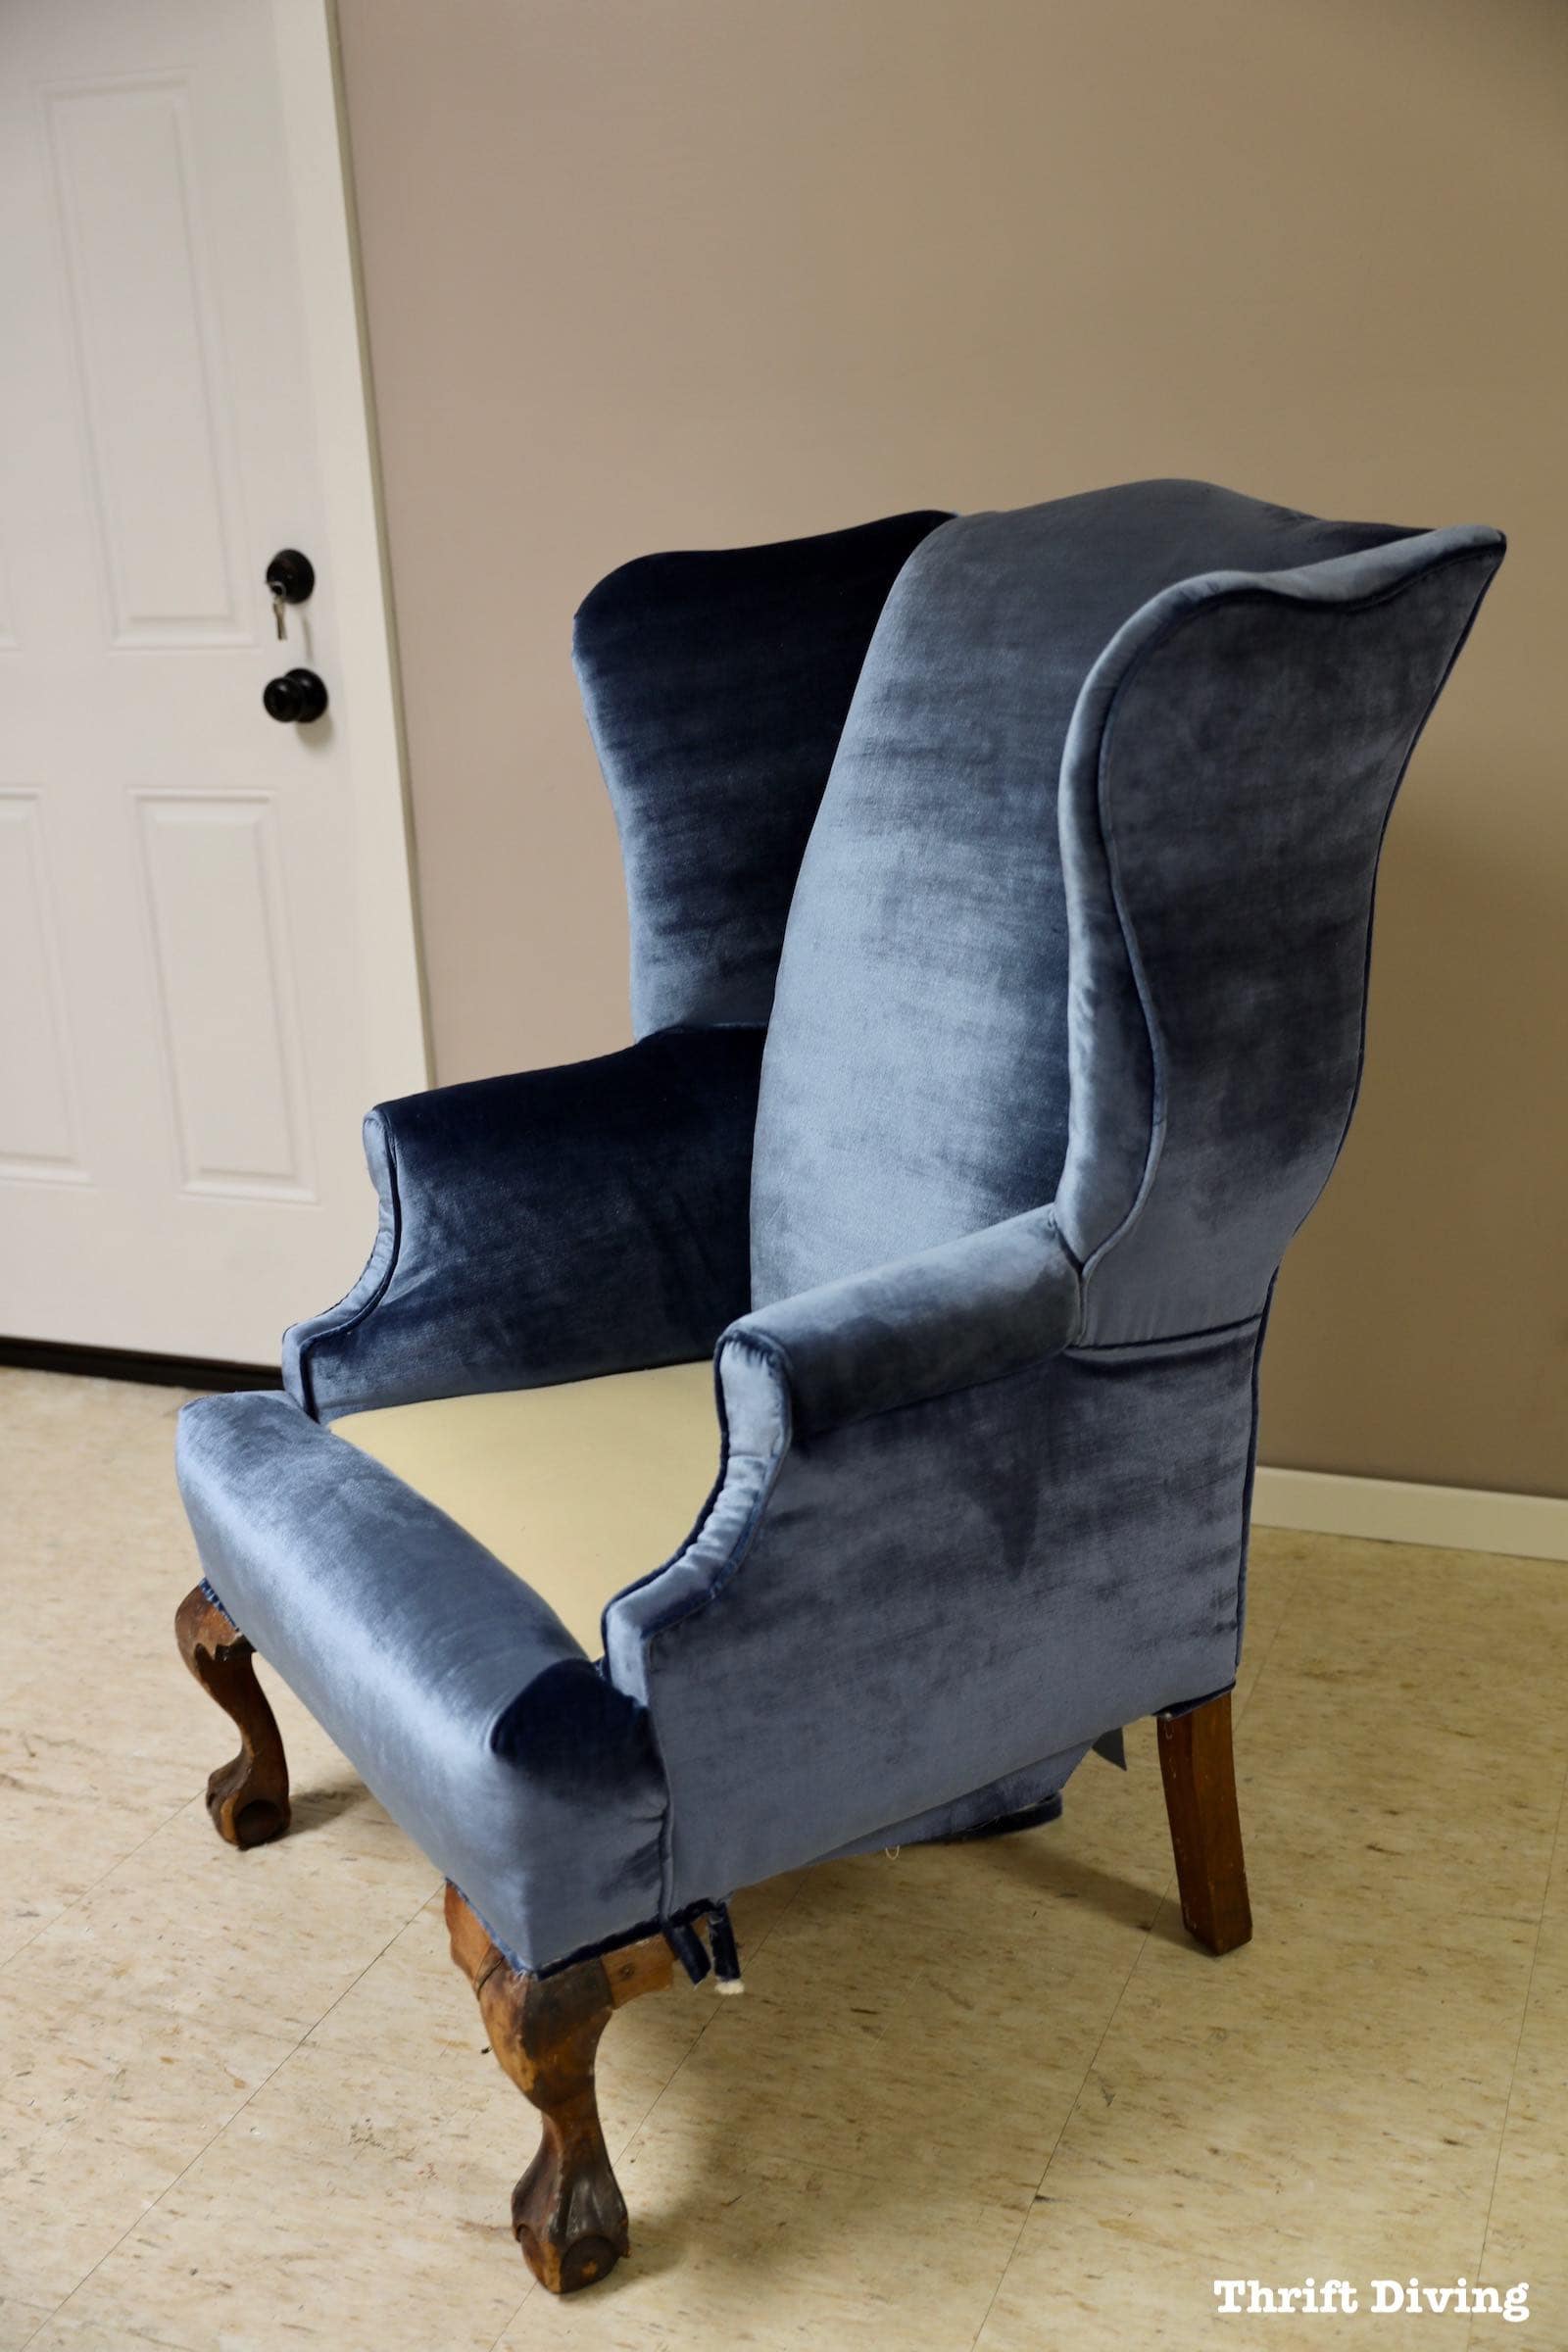
For long-term readers of this blog, you’ll remember this chair from previously when I attempted to reupholster it with a butter knife. HA! Sometimes you just have to work with the tools you have.
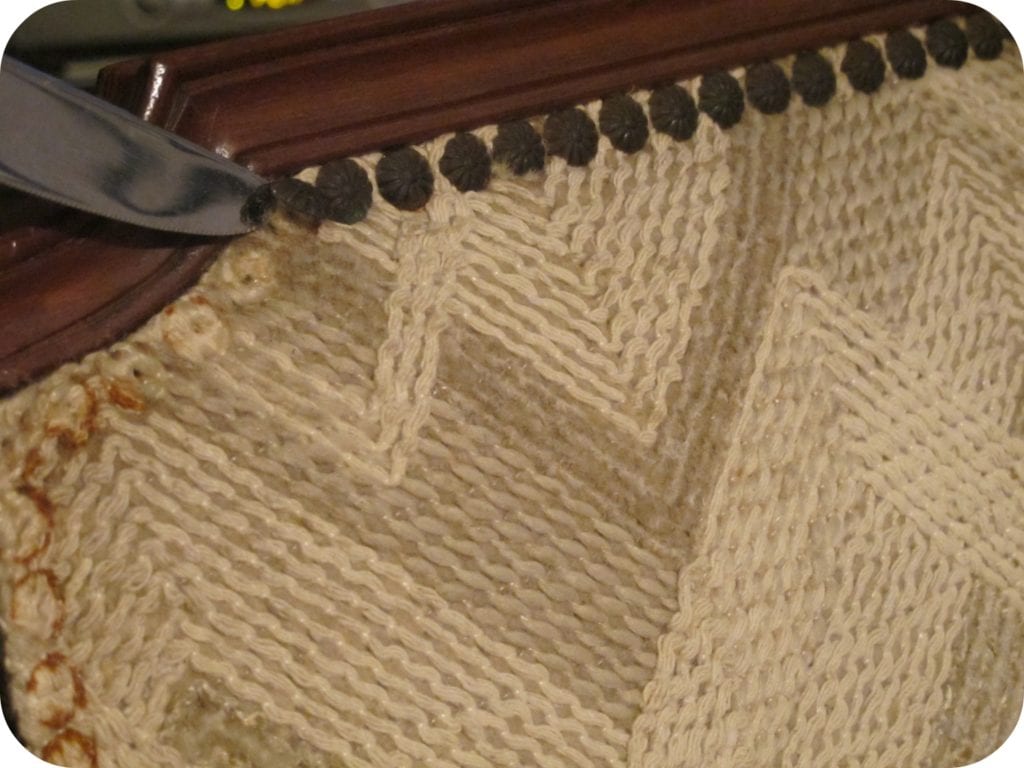
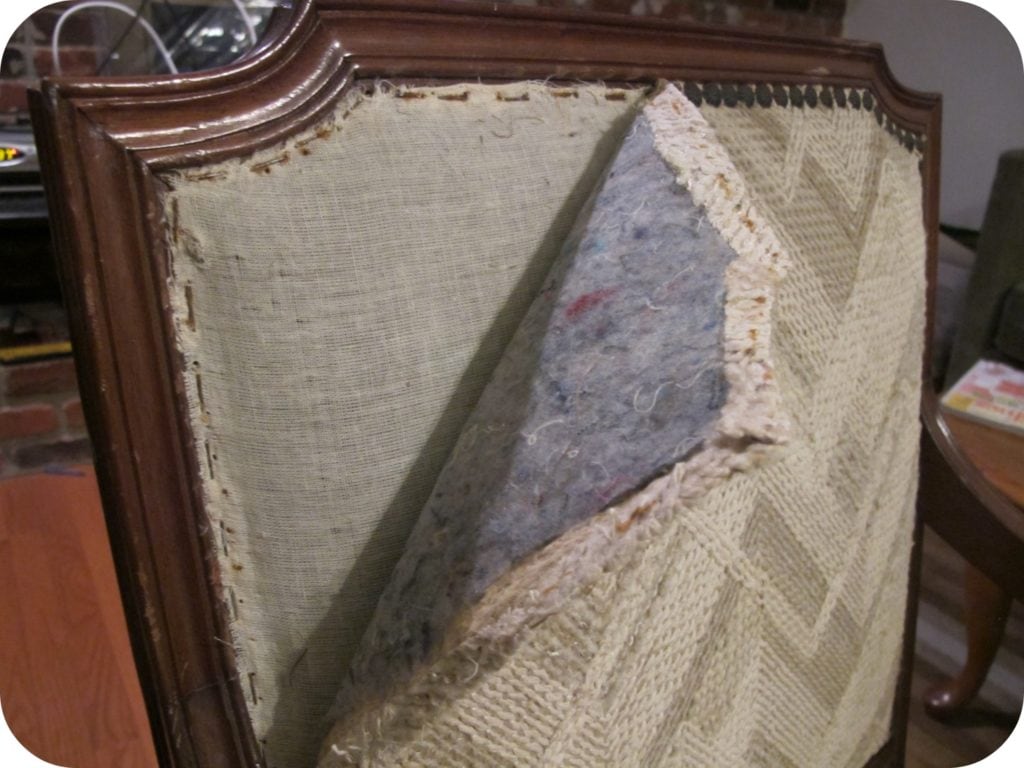
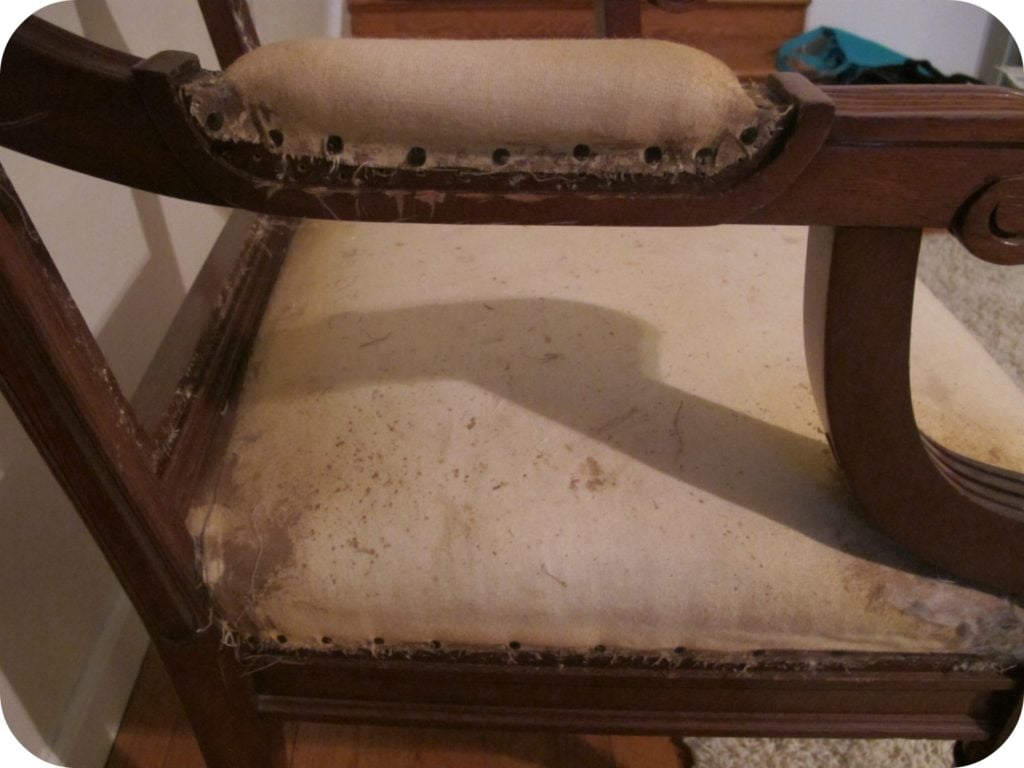
Inside of the chair….NOT pretty!
Which Fabric to Use?!
I think this is the most fun (and most difficult!) part of reupholstering a chair, too. It all depends on the look you’re going for. I really wanted something classic and pretty. It’s a very traditional-looking chair, so I didn’t want to go all modern and crazy on it. Plus, I knew I wanted it in my bedroom, and with the Rainwashed paint colors, I knew a white chair with tan fabric would look really nice!
Did you know that HGTV makes fabric now?! Actually, OnlineFabricStore.com is a great place to buy fabrics online. The selection is awesome and I find their site cleaner to use than some other online fabric stores!
Here’s the fabric I chose from HGVT, called Curl Up Quartz fabric, which you can find at House Fabric. It was perfect for the chair!

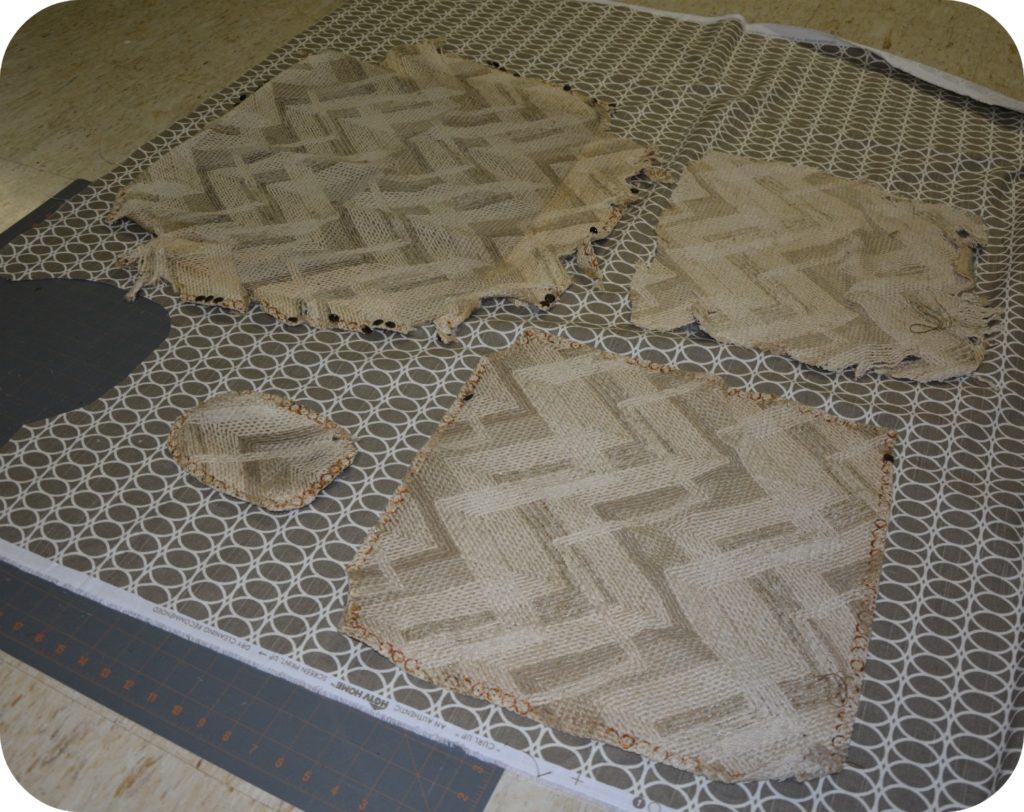
Always use the old pieces of fabric as a pattern, and be sure to add in seam allowances (jeez….that old fabric was HORRIBLE).
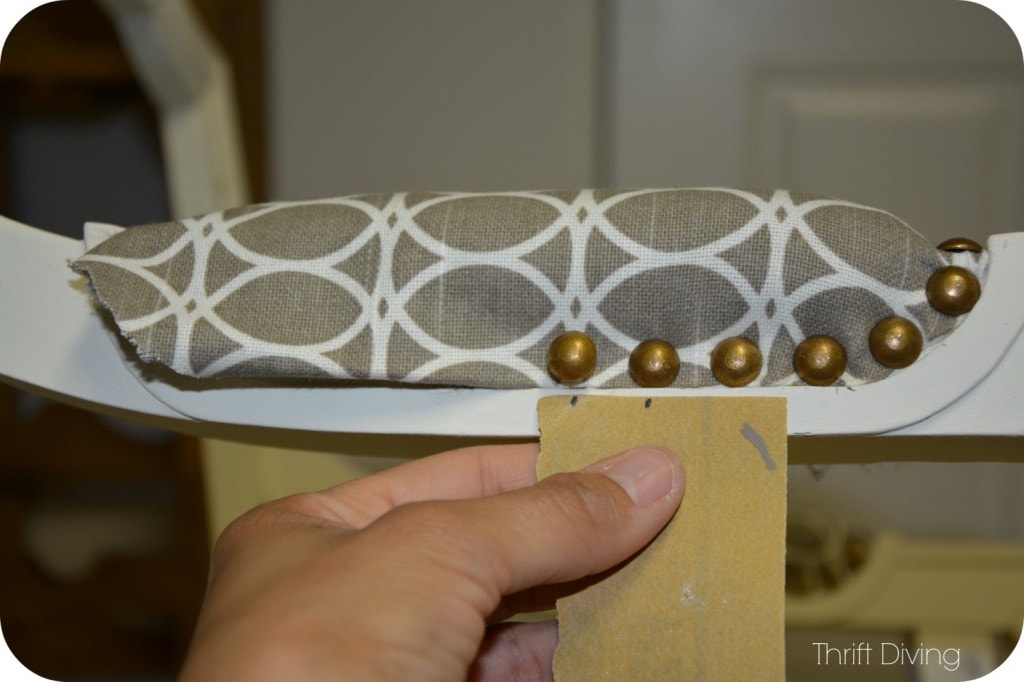
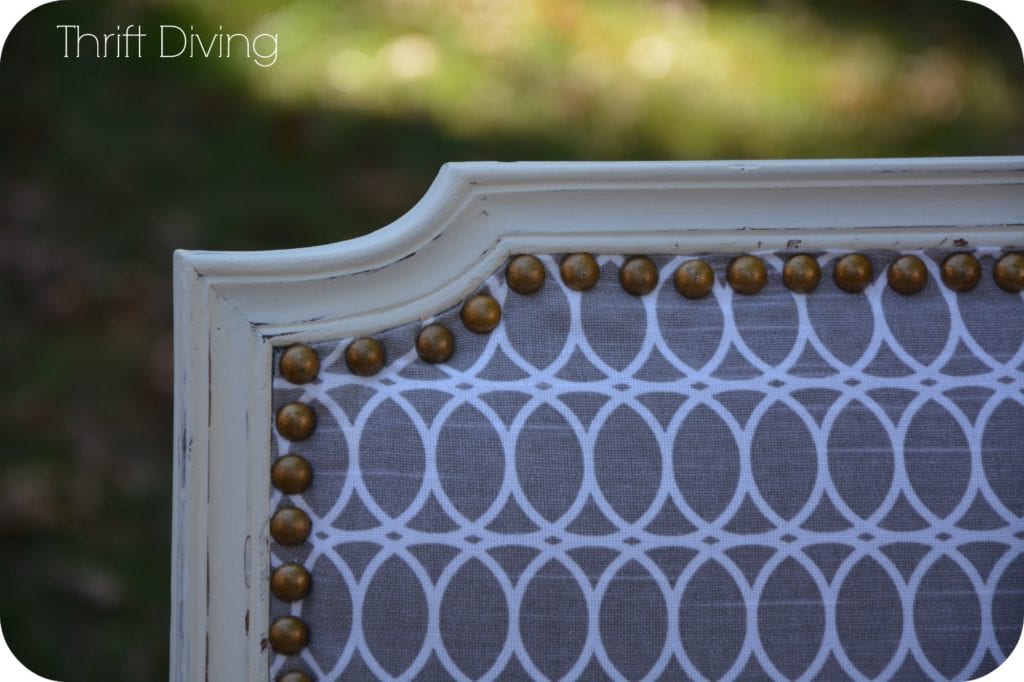
276 Decorative Tacks Later……..
Yes, I hand-nailed 276 decorative tacks onto this chair…..and I am not ashamed to admit that not all of them are straight! But 1) the chair is in my bedroom, which doesn’t get any traffic or judging looks, and 2) who cares? I’m not perfect 🙂
But I did almost decide to give up after getting started because it just wasn’t turning out how I had envisioned….But hey, how will you ever learn if you run from challenges? I told myself that DIY’ers never quit :). I started with the arm rests because they looked to be “easier” than the back and seat, though!

I had ordered a box of 1000 decorative tacks from OnlineFabricStore.comNet. These are the ones I ordered. I loved the gold! And I have plenty of them left for another project!

Oh no!…….C R O O K E D Decorative Tacks!
Aside from the obvious of using decorative tacks that come in strings so you can’t help but get it right, here’s how to keep decorative tacks straight:
Use a piece of paper (or a ruler) to make the distance between two tacks. Do your best to make each notch falls in the center of the decorative tack.
I tried to use a little tool that they’d found online to keep decorative tacks straight, but it didn’t work well for me. I found that by placing one at a time, and just using my makeshift spacer, it worked much better. I felt like I had more control over my tacks :).
Give it a whirl. After about the first 25, you actually start finding it easier to drive them in!
Ditch the Butter Knife!
….or any other “makeshift” tools, for that matter. You’ll just hurt yourself, and make your DIY project harder than it needs to be. Ain’t no body got time for that! LOL
This is the tack hammer![]() I used, which is much lighter than a traditional hammer, and easier to drill them in.
I used, which is much lighter than a traditional hammer, and easier to drill them in.

Other than the tack hammer, I found a regular hammer helpful in removing tacks. You can always use a staple and tack lifter![]() .
.![]()
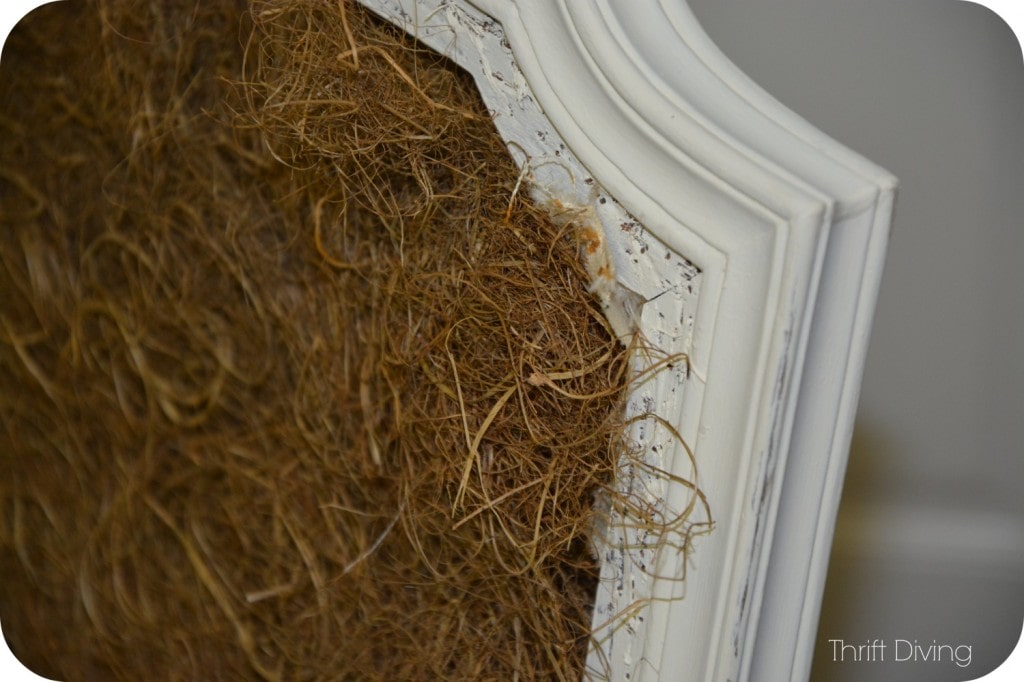
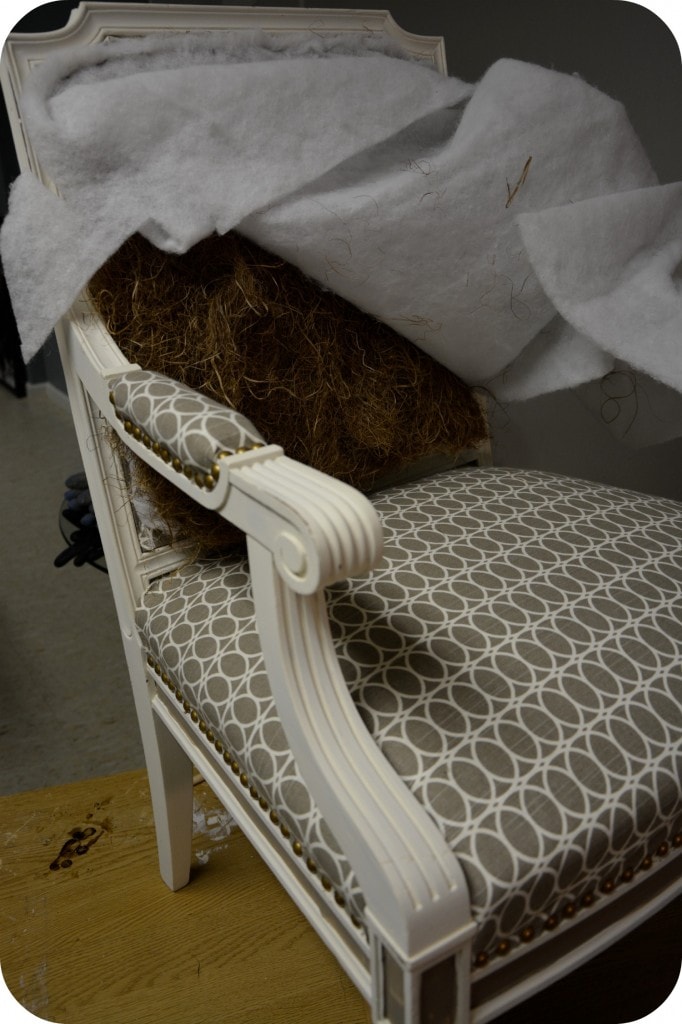
The Innards
One of the nastiest things about making over old thrift store chairs is the innards. You never know what you’ll find!! YUCK! But sometimes, you find some “gold” inside……in other words….good, solid materials that you should reuse if you can.
Yes, my friends…..that’s authentic horse hair!!!
According to my reader and ‘net buddy, Scott, upholstery shops sell a blend of hog and horse hair (and it’s expensive, too!!), which is used to overlay springs to provide some padding and protection. So yeah, this definitely got reused!
Before I added the stuffing, however, I stapled the fabric to the back. (Update: My favorite electric stapler is the Arrow 5-in-1 corded stapler. It has the power of a compressor, but you don’t need one! 🙂 I will say that I prefer the corded to the cordless. But both work well! I just think the corded stapler is a bit “zippier” when pulling the trigger.
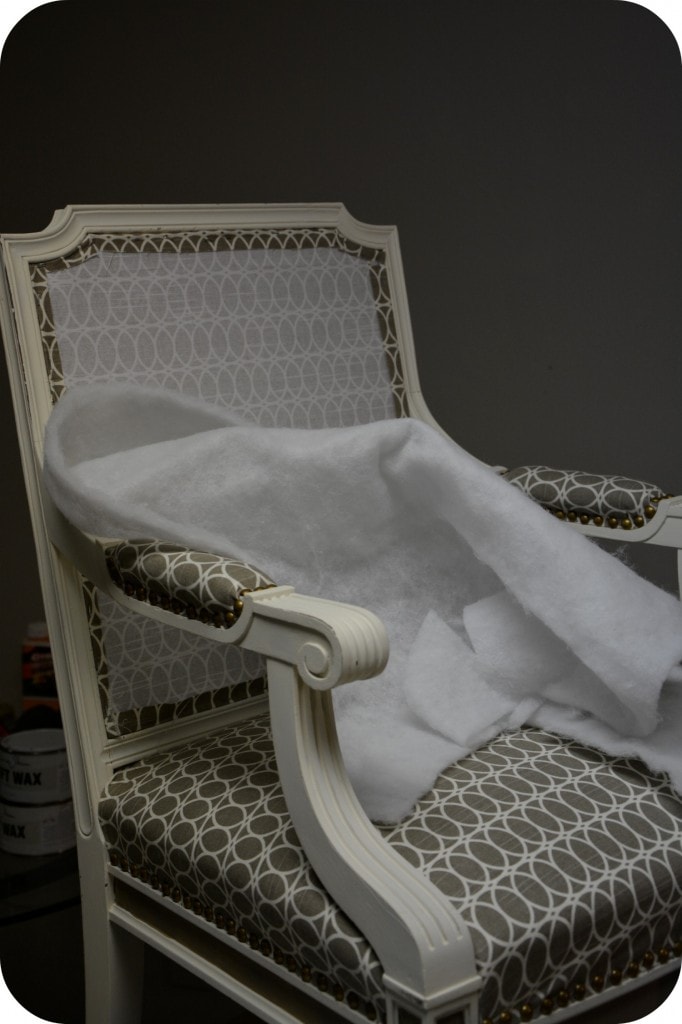
Then I stapled an extra layer of batting over the stuffing for more padding.
If You’re Not Sure How to Get Started….
If you’re new to chair makeovers, I put together this video to help get you started with 7 tips for easy chair makeovers:
The End Result?
I’m super stoked! I love how it turned out!
BEFORE
AFTER
The back of the chair. I forgot to mention that I also used Annie Sloan Old White for the chair body, and in the cut-outs of the bottom of the chair I used Annie Sloan Coco.
I picked up that little wooden bench from the thrift store, too, for a mere $7.00……. Oh, how I LOVE the thrift store! 🙂
Cost
- Chair – $60 from my favorite thrift store
- Fabric – About $26
- Tacks – About $7
- Paint – Already had on-hand
- TOTAL COST: About $93! Not bad for a super heavy, sturdy vintage chair!
TA-DA!
So what do you think?!

Did you like this project? Why not just go ahead and PIN IT? 🙂

Feel free to check out my other chair projects before you leave! 🙂

Do you have a chair makeover that you’ve been wanting to do? Tell me all about it in the comments section below!

Some supplies were sponsored by OnlineFabricStore.com. However, this post is strictly my own creativity, and all my crazy opinions are my own.
Download the 5 freebies!

Thrift Diving inspires women to decorate, improve, and maintain their home themselves...using paint, power tools, and thrift stores! Use these 5 printables, checklists, and ebooks to get started!

LOVE this! So beautiful – I have been wanting to try my hand at reupholstering furniture but haven’t yet been quite brave enough. This is definitely great inspiration! I LOVE LOVE LOVE thrift stores and if I had the time I would re-do old furniture and décor all day long! 🙂
Oh, Christina, just jump right in and try it! I was nervous when I started this chair, too. I was afraid of those dag-on decorative tacks. LOL. But you know, once you start, you’ll figure it out! And don’t expect it to be perfect. The more you do, the better you’ll be. I had some flaws in this chair, as well. Thanks for my dear HUBBY for pointing them out to me when I asked him, “So what do you think of this chair now?” lol. Just try it and you’ll surprise yourself with how good you’ve done! 🙂 Good luck!
It looks awesome! That fabric was a great choice and the chair itself has such pretty lines. Thanks for sharing!
Have a great weekend,
Amy @ Home Sweet Thrifty Home
LOL, I got a shout out! HA!
Although staring at the filler there, that makes me think that’s not horse hair but probably raffia. Raffia is the stuff you sometimes will find glassware packaged in (it looks like curly straw). That usually helps date the piece to the 1950’s or 60’s. Horse and boar hair were more prevalent in the 1800’s and early 1900’s when horses were more plentiful.
Looks great though! And I’d take your tack spacer idea a little further. Use a narrow file or thin saw blade (even a good utility knife) to make notches in a piece of thick cardboard or hardboard. Slip two or three tacks into each groove (depends how many grooves you cut and how curvy the piece is), line them up and hammer away! It helps line them up while keeping fingers free from swinging hammers.
You most definitely got a shout out, Scott! You’ll, like, my FIRST READER almost?? 🙂 Gotta show you some luv, dude! 🙂 Okay, so maybe it’s raffia. Whatever is it, it works well! No need to replace it! You always teach me “something” about “something.” Love that!
And yes, that’s the tack spacer I tried, but for some reason, it just wasn’t working well for me. I found that just placing them individually, it helped keep them pretty straight once I got the hang of it. The first section was a HOT MESS! lol
Hey, thanks for commenting! Hope things are well with you. Hit me up on Gmail! 🙂
Oh yes, OK Scott answered my question. I’m from the 50’s/60’s. The chair def has a familiar look to it!!
Beautifl and inspiring! Gave me the idea to try this on a chair. May even use this same fabric with my SW Sea Salt bedroom. THANKS!!!
YAY, Amy!!! You’ll love the fabric! And great choice on the SW Sea Salt 😉 😉 😉
Gorgeous!!!!!!!!!!!! I LOVE THIS CHAIR!!!
Love it – great job – You have really taken this chair from thrift store blah to designer style.
I get overwhelmed trying to choose fabrics for projects – I end up buying 4 or 5 different patterns because I love them all 😀
Oh, and I am overloaded with half done and prospective projects… I am determined to spend the next 12 months really focused on clearing the backlog.
Same here, Tracey. I have TONS of backlog of projects, and I’m about to start listing them out, and spending time organizing them from “Most Important” to “Least Important” and try to start knocking some out. 🙂 And I hear you on the fabric! I wish we could just make ONE choice, because it gets expensive buying fabric you end up not using!
EXCELLENT !!!!!!!!!!!!! You did an amazing job
Great job! What a beautiful makeover! I have an old chair with a lot of character, just waiting for me decide if I should paint or stain it and what kind of fabric will look best. Hopefully I will have that Aaahah! moment and choose the right colors that bring it back to life!
WOW! What a SPECTACULAR job you did. It’s gorgeous. You are SO talented! I want this chair. 🙂
What do you mean a butter knife is not a tool? Learn something new every blog,lol. Love this chair,you do awesome work and WHY would anyone complain? Dumb and rude. Can’t wait to see the next dive project.