BEFORE & AFTER: Vintage Chair Makeover From the Nursing Home
I get easily attached to things, like this vintage nursing home chair.
Especially if they conjure up thoughts of people I love, places I’ve gone, and things I’ve experienced.
Organizing guru’s would just call this “memory clutter” and preach that we should always pear down these things.
But there’s something to be said for tangible objects that help us to remember parts of our life that were meaningful.
It’s like holding a piece of the past directly in our hands so that we know we didn’t just imagine it.
It’s the reason why I’ll never be able to scan pictures of my children’s artwork into digital files.
My kids’ little hands actually touched the page…You can’t see the bleed-through of the crayons and markers on a digital copy…
It’s just not the same.
And that’s why I also saved this chair from my grandmother’s nursing home the day before she died on New Year’s Eve.
No one else saw its beauty but me.
It’s not like I needed one more piece of furniture in my house.
It’s not like my mom needed one more piece of furniture, either.
But I knew this vintage chair that sat in her nursing home would be beautiful with a makeover and that our family would appreciate its memory.
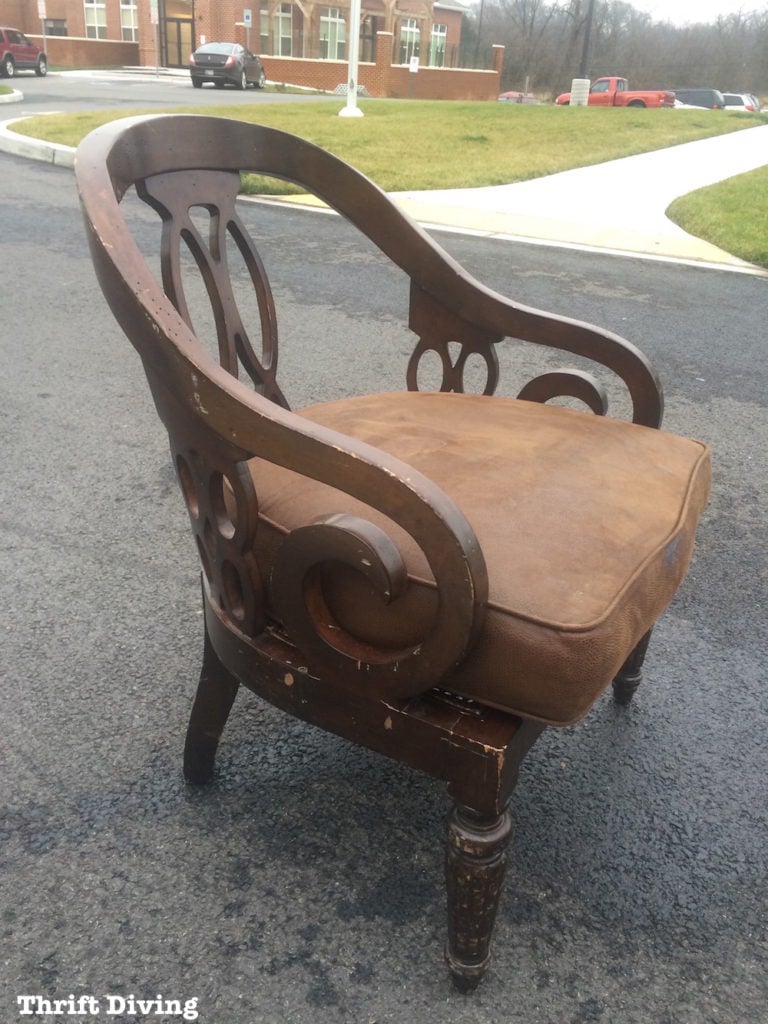
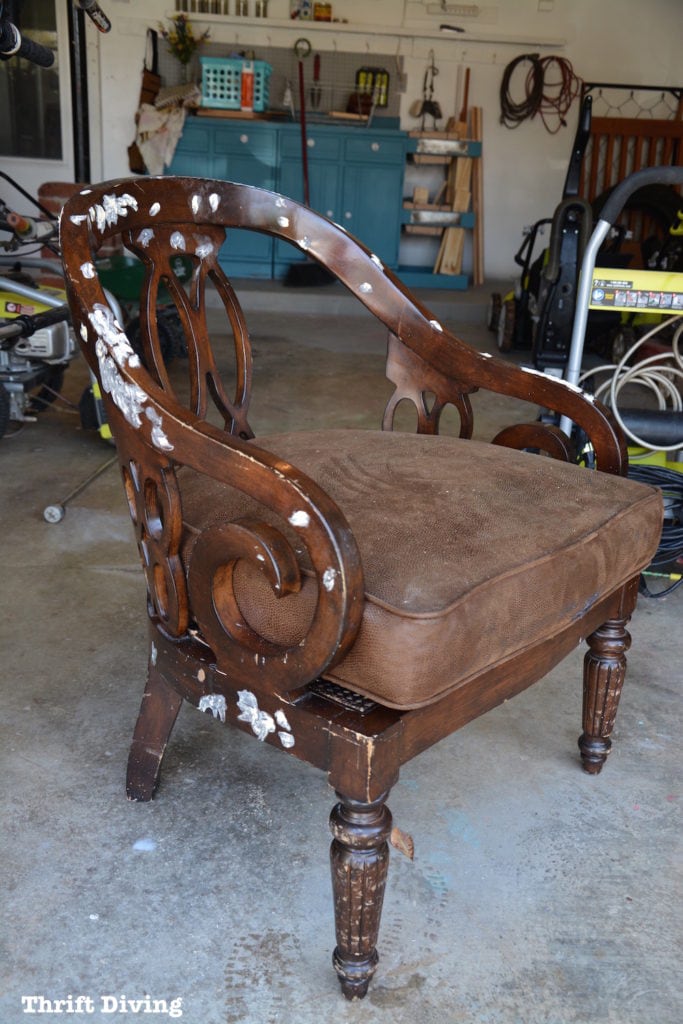
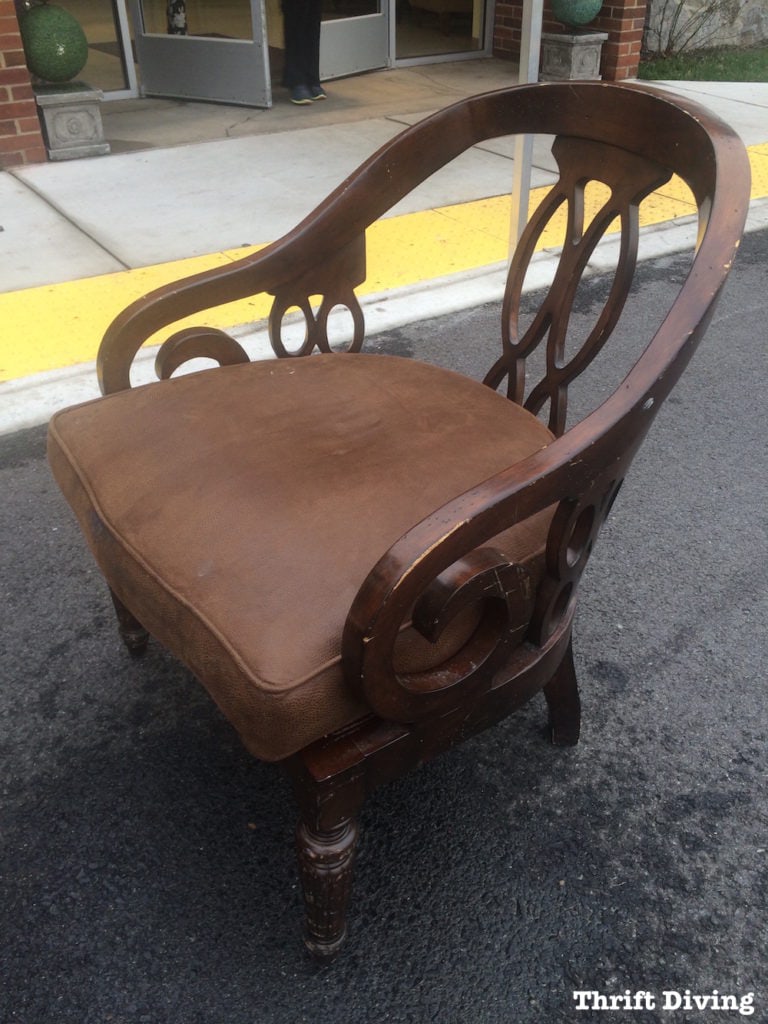
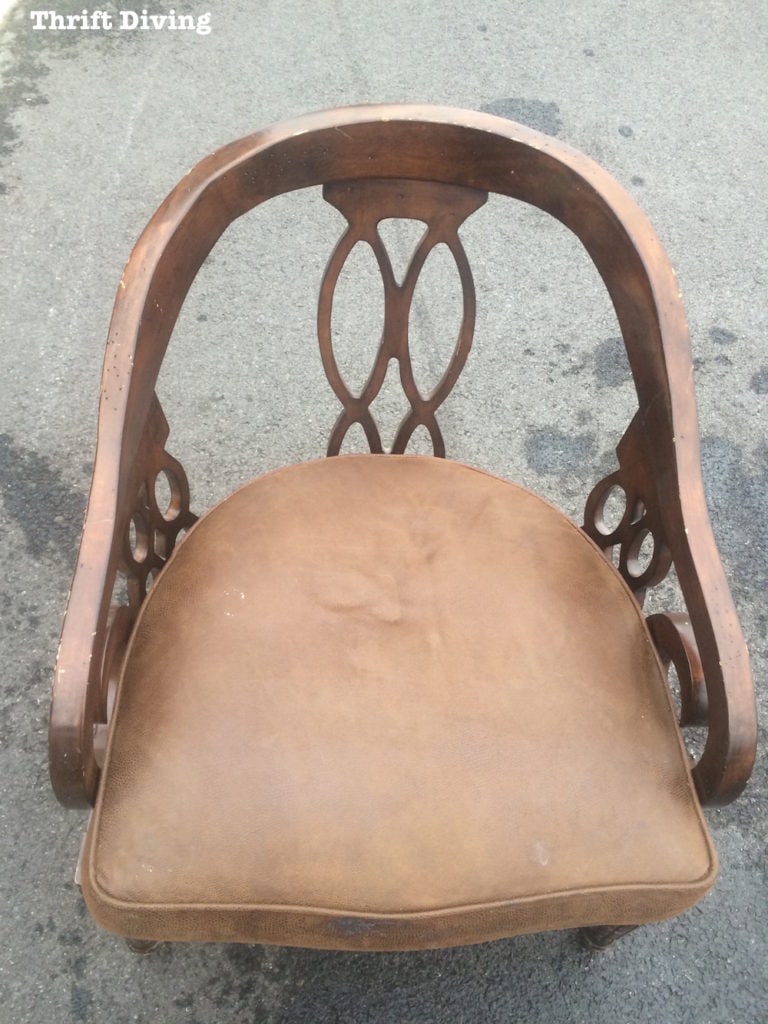
This is what it looked like the day I lugged it out to my van, knowing this would be the last time I was visiting the nursing home.
My grandmother had passed the morning after.
BEFORE
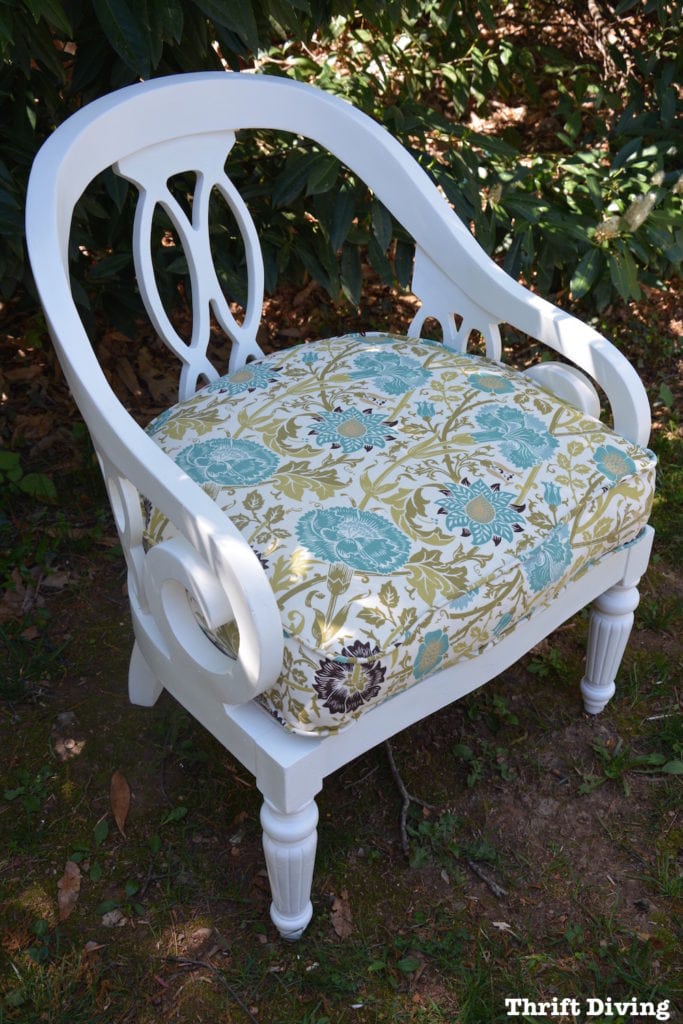
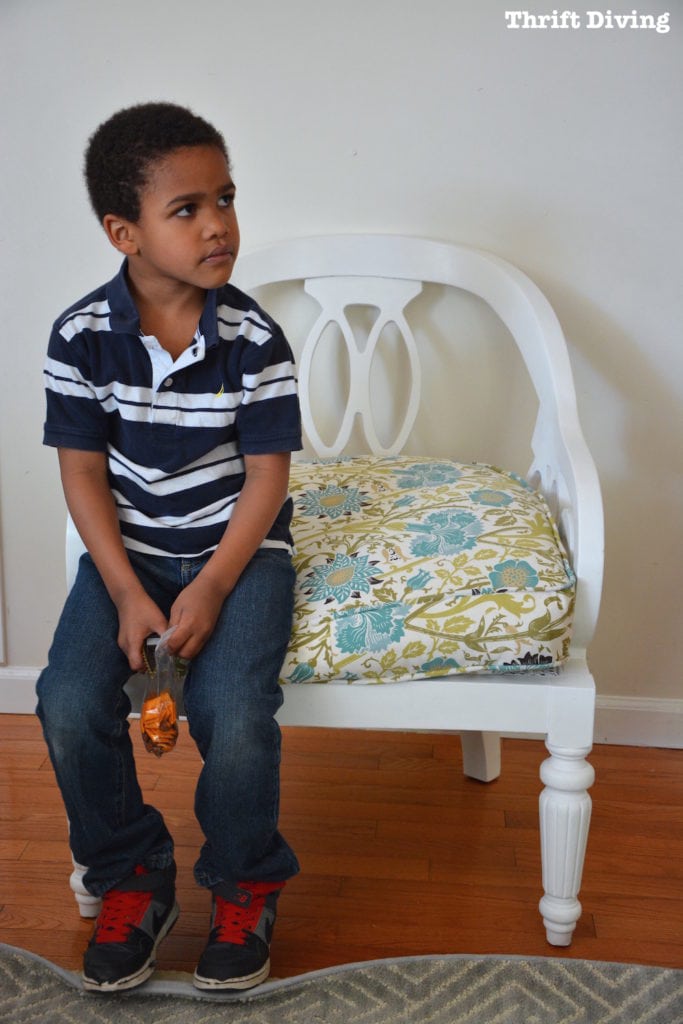
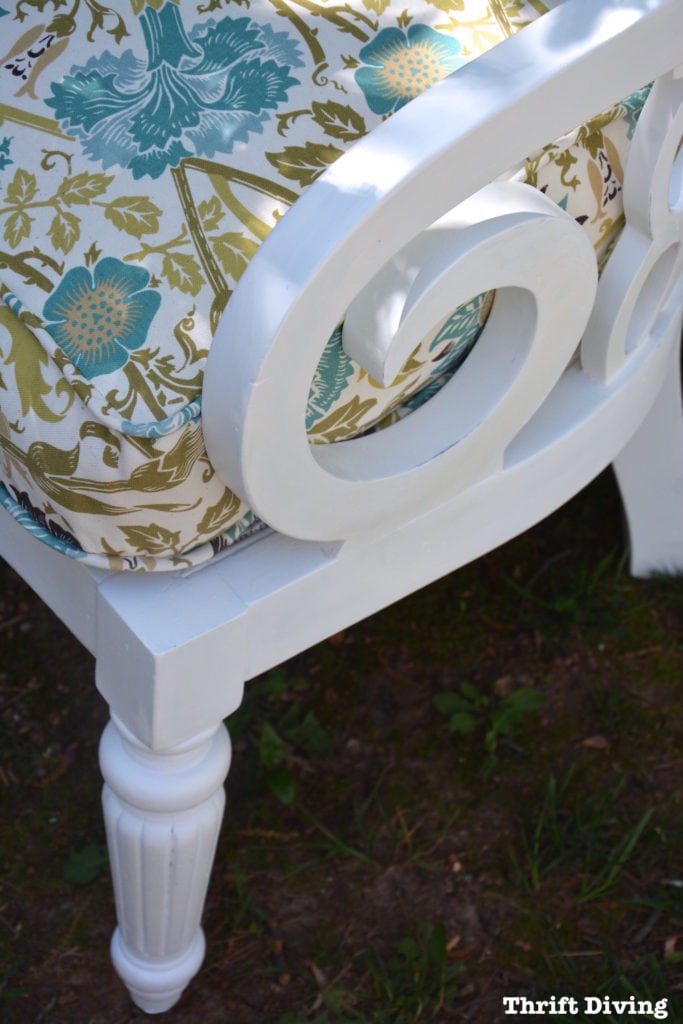
A few months later, after I got my hands on it, this is what it looked like the day I gave it to my mother.
AFTER!

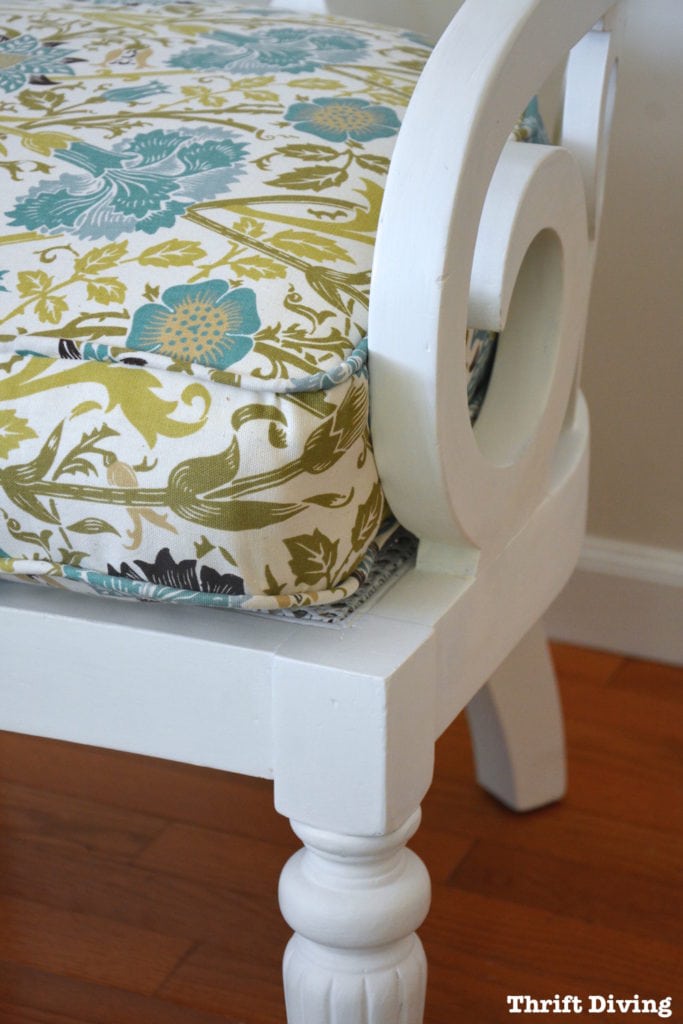
I have recovered cushions before, but this one threw me for a loop because I had never done piping before.
In all my years of sewing and furniture makeovers, I steered clear of doing it because it looked too time consuming and easy to mess up.
But with this chair, it was practically unavoidable. I had to do the piping. The cushion just wouldn’t look the same without it.
In the end, although it was a little wonky, it turned out pretty awesome for a first-timer!
A Vintage Chair Makeover From the Nursing Home
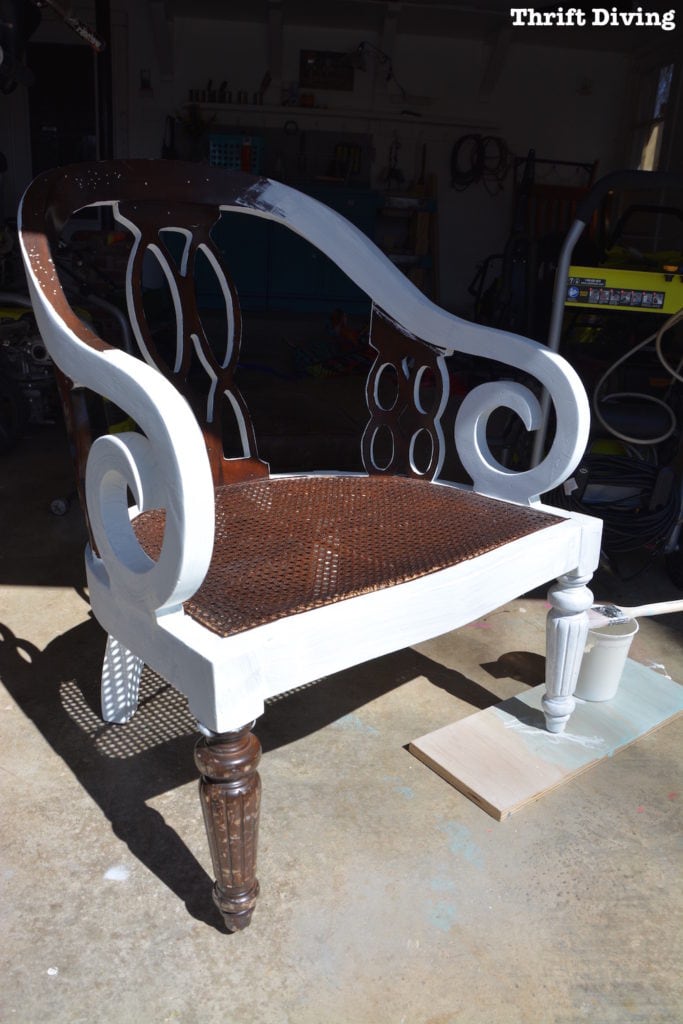
When I first started working on this vintage chair makeover, I was confused about these holes.
It looked like wormwood holes, but I had never encountered wormwood holes so I didn’t know what do.
Silly me didn’t know if they were real or just fake ones that the chair manufacturer had made (wormwood is generally a desireable look).
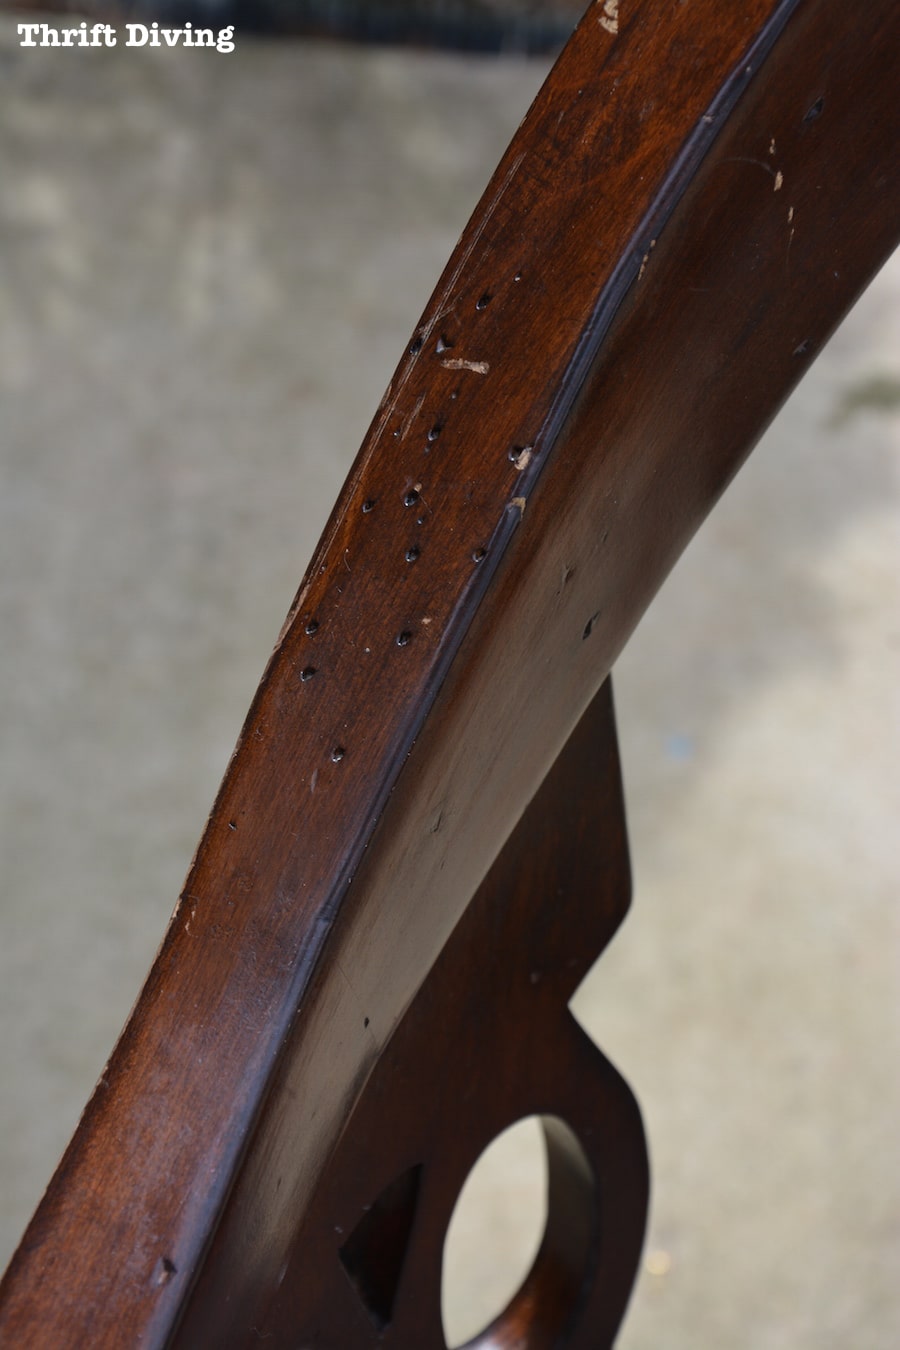
But since I had already filled most of the holes with wood filler before even knowing it could be wormwood (and painted it!!), there wasn’t much I could do to keep the wormwood.
I sat it in the garage for a few weeks to see if I notice any weird worm-boring holes re-emerge (to see if there was an active infestation). Thankfully, there wasn’t!
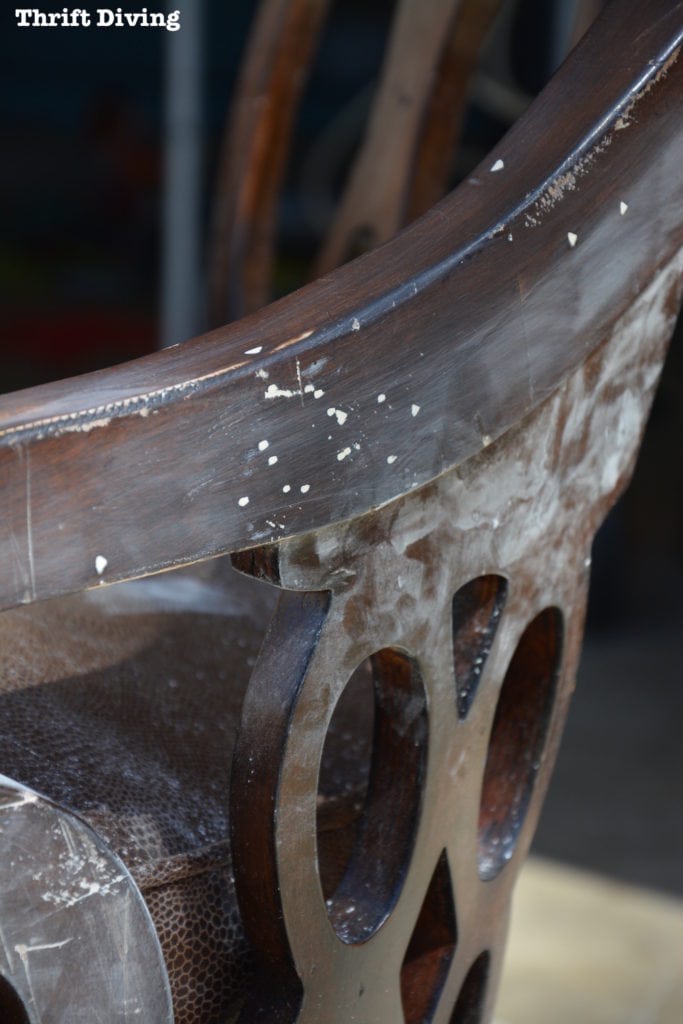
You can see here that I had filled as many of the holes that I could find, and then sanded them smooth with 220 fine grit sandpaper.
Next, I slathered on a few coats of Annie Sloan Pure White chalk paint.
(TIP: If you’re not sure which furniture paint to use on your projects, click here to read about the 12 Best Furniture Paints.
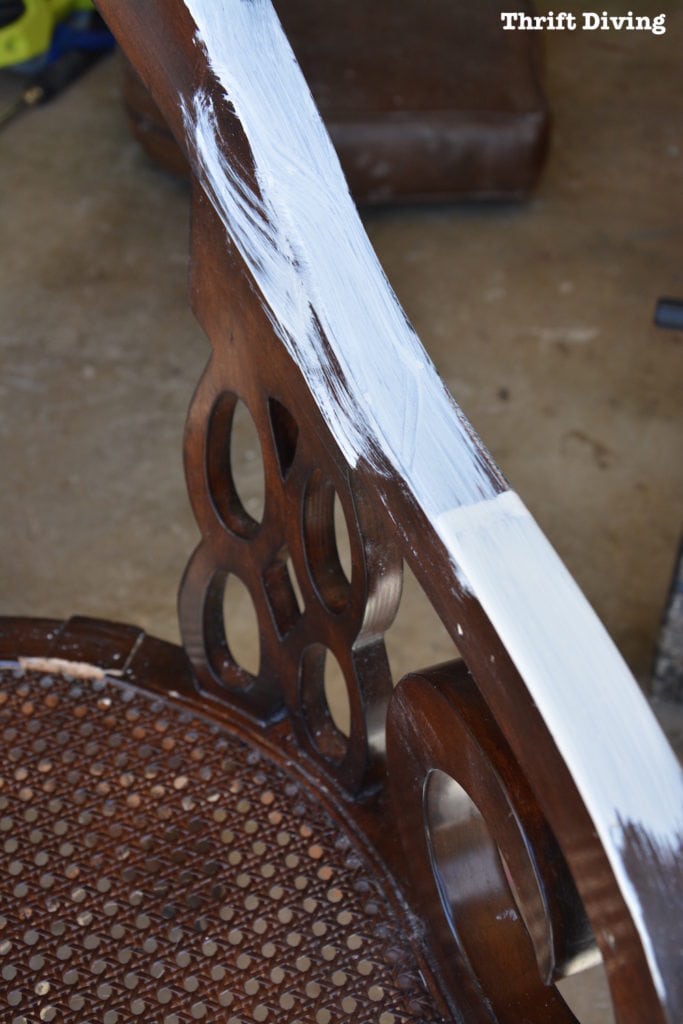
When I say a few, I mean a few.
Usually, with chalk paint, you have to put two coats, but sometimes, you have to do more.
This was one of those cases.
No matter what I did, I couldn’t totally cover some areas; some of the brown kept peeking through.
This is what it looked like with just 1 coat. You see how spotty it is?
Don’t be afraid to add more paint as you go. Sometimes you just have to.
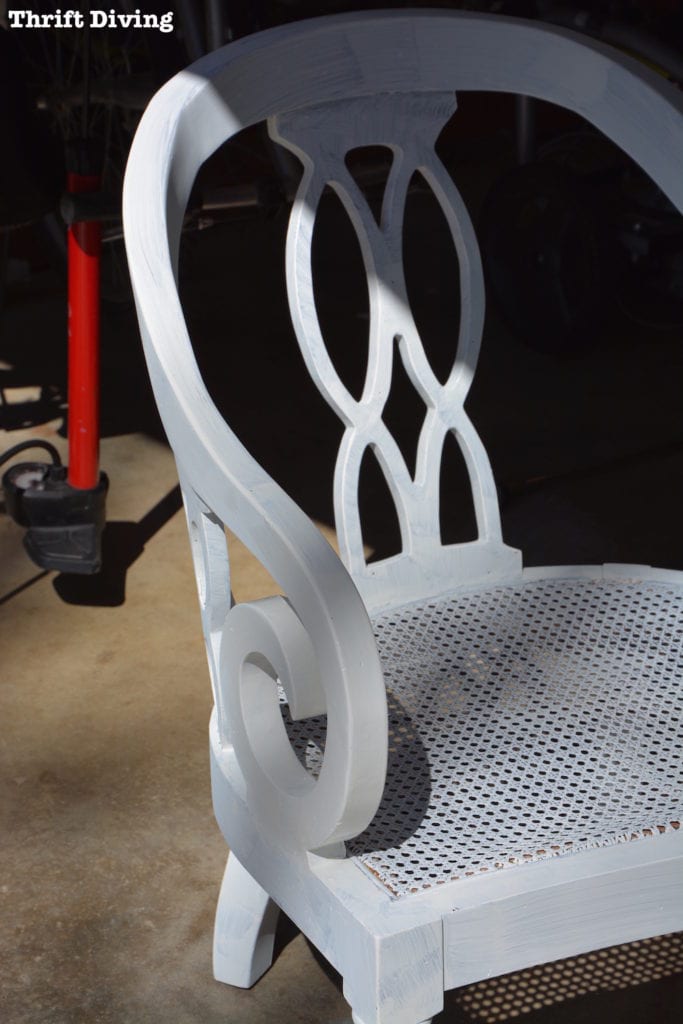
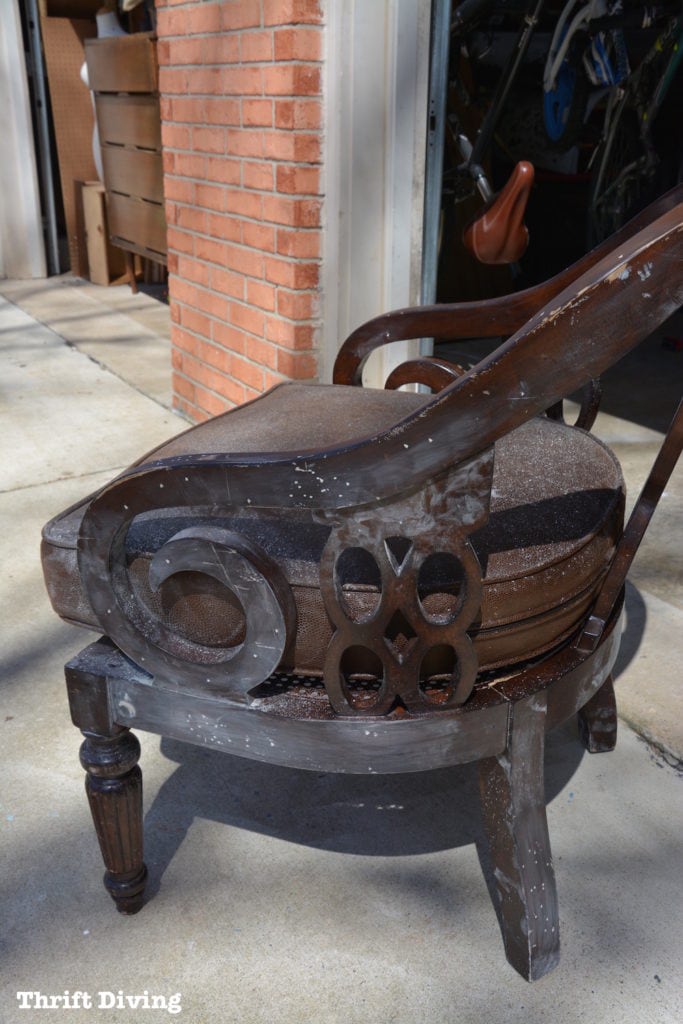
After painting, I took a fine-grit sandpaper and smoothed out the whole chair, then added a coat of Annie Sloan clear wax weeks later when I realized that no worms were coming out of the chair. Ugh….how disgusting! LOL
I Re-Used As Much as Possible!
The most amazing thing about this chair makeover is that it didn’t cost me a single penny.
Nada. Nil.
I reused everything, or already had things on hand (like the fabric, which I can’t remember where I had ordered it from years ago!).
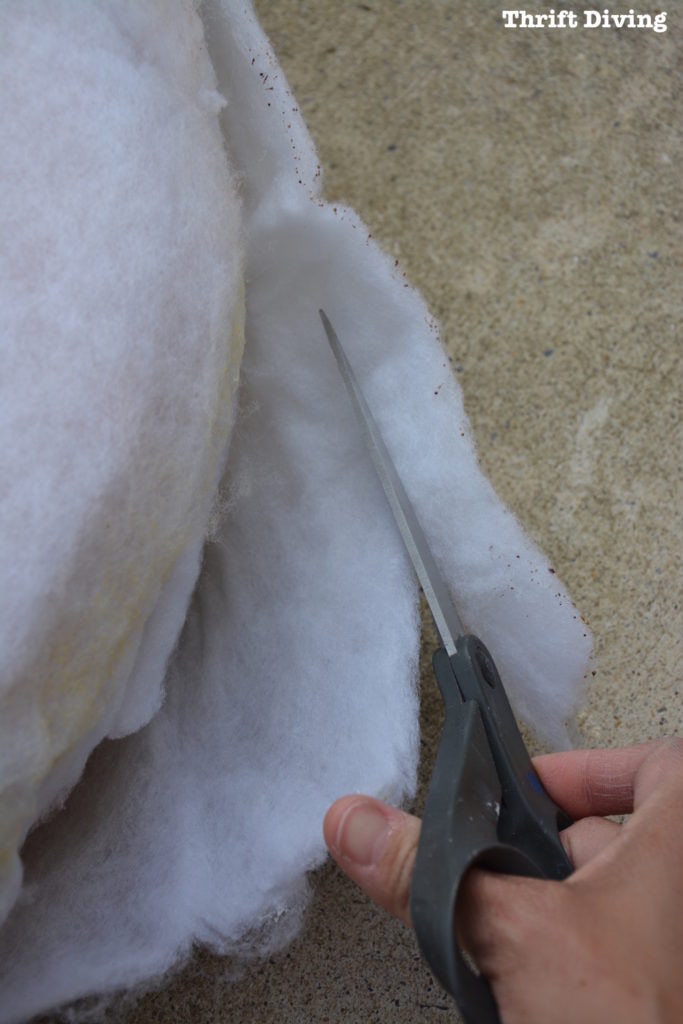
Surprisingly, the inside cushion insert wasn’t as nasty as I thought.
Well, there was some nasty ickiness on the edge of the batting, so I just cut that off and kept it movin’.
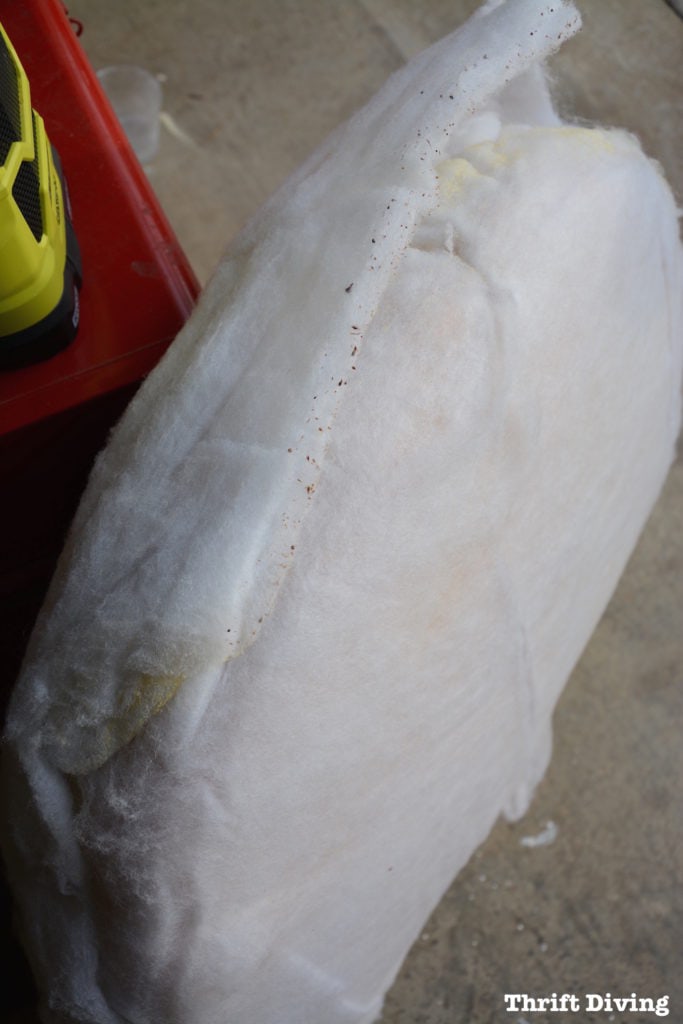
After I trimmed off the yuckiness, I tossed the cushion in the dryer on high heat.
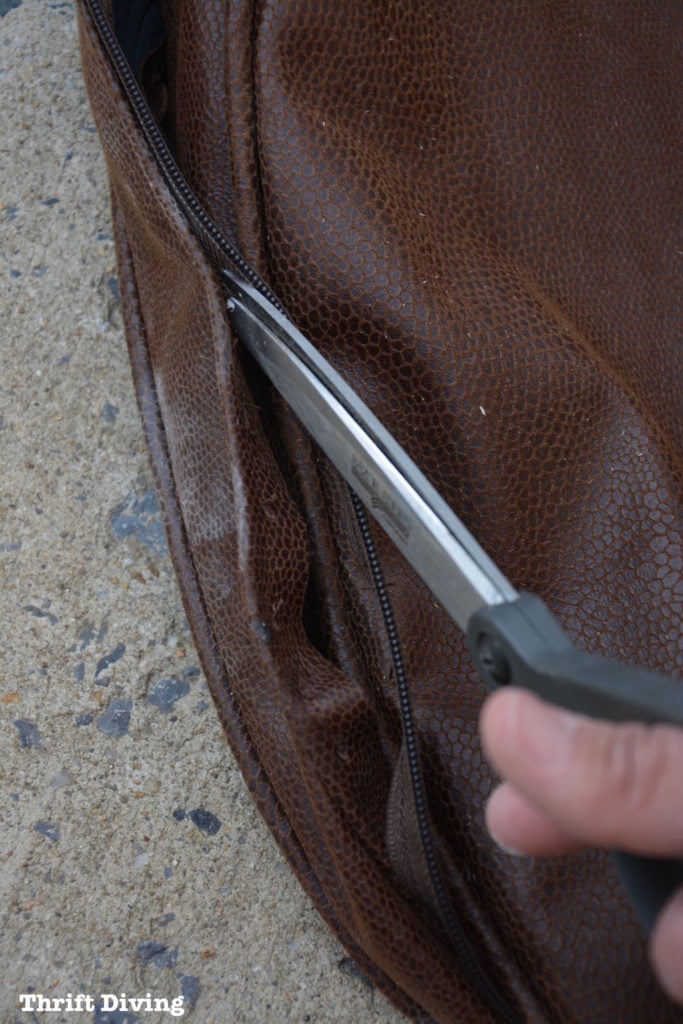
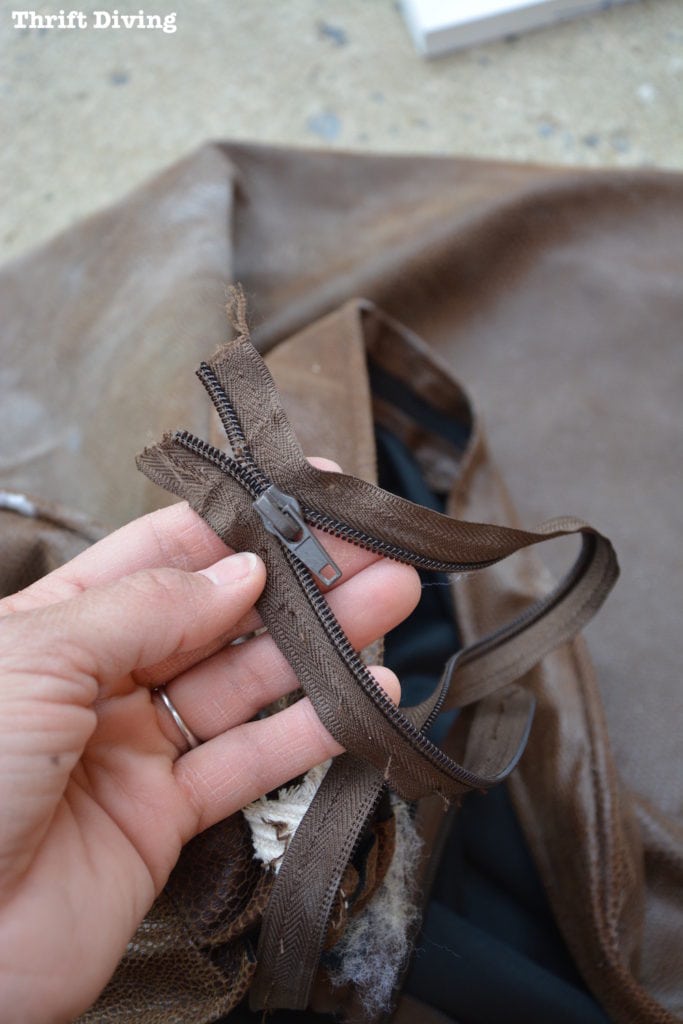
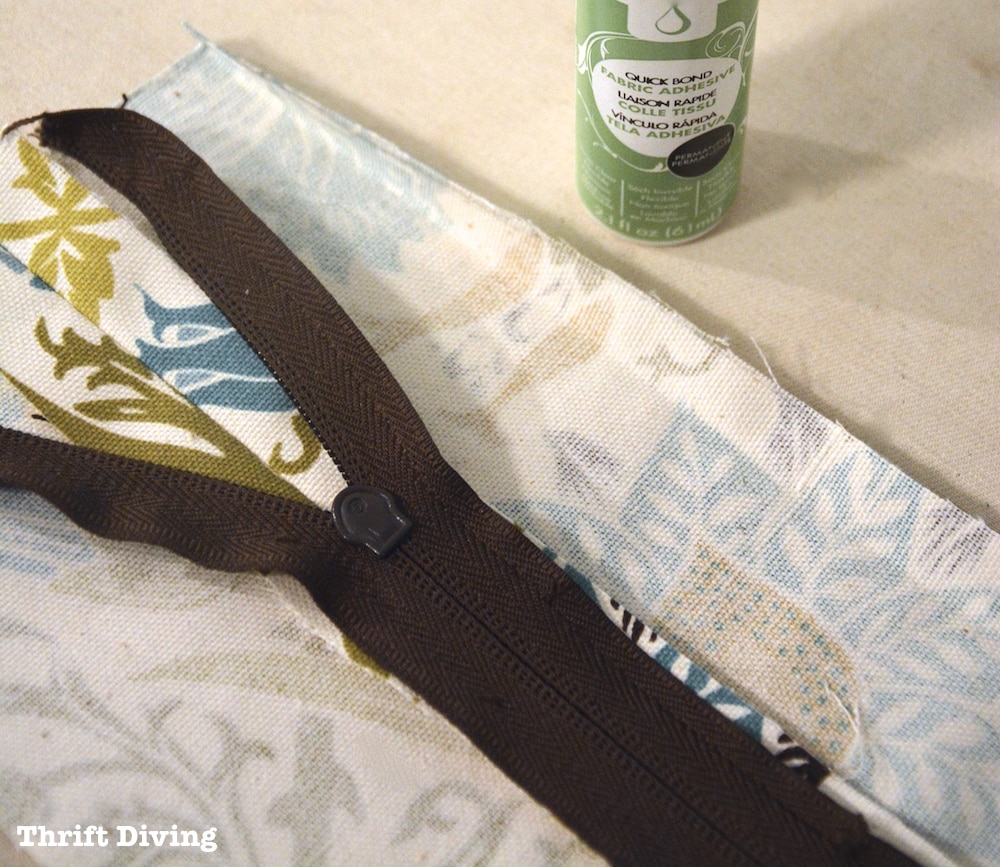
I also salvaged the dark brown zipper from the original cover.
Why buy a new zipper when the original would work just fine, you know?
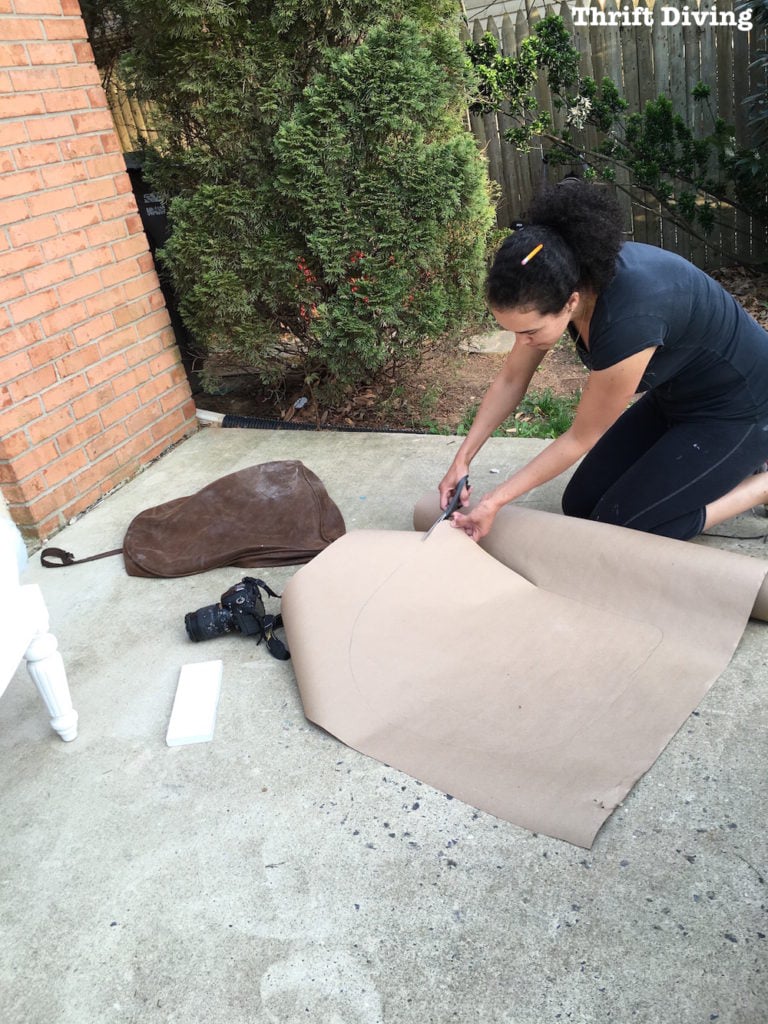
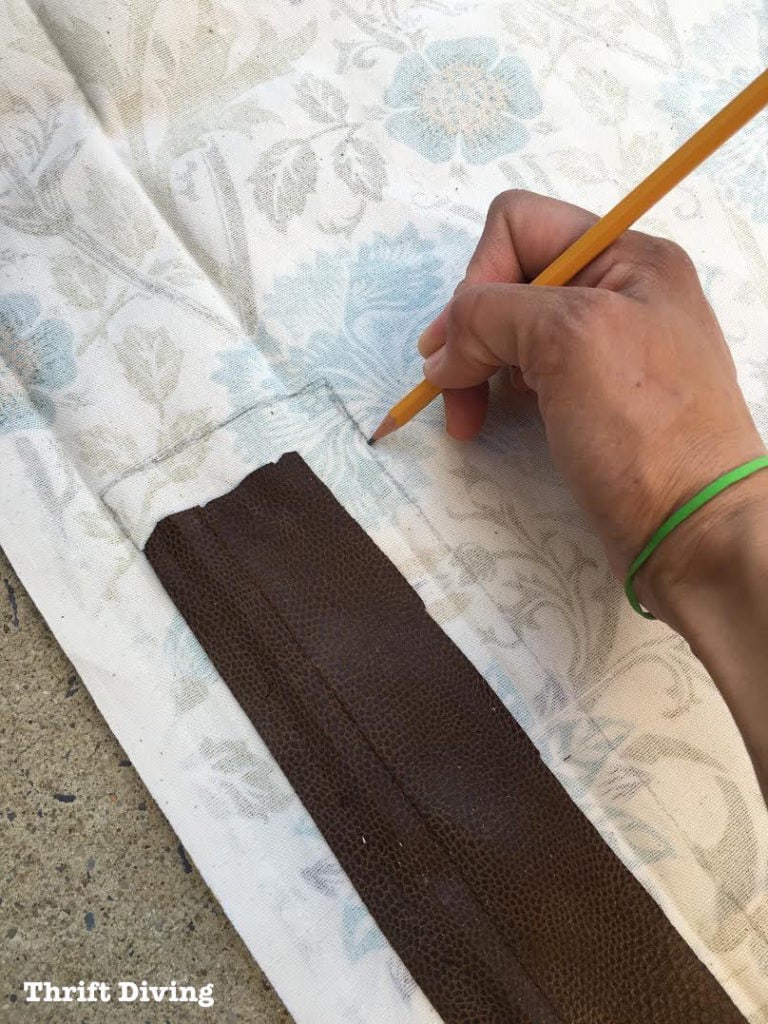
I laid the cushion down on paper and traced out its pattern.
When doing this, though, you have to make sure that you add in 5/8″ up to 1″ for seam allowances when sewing the pieces together.
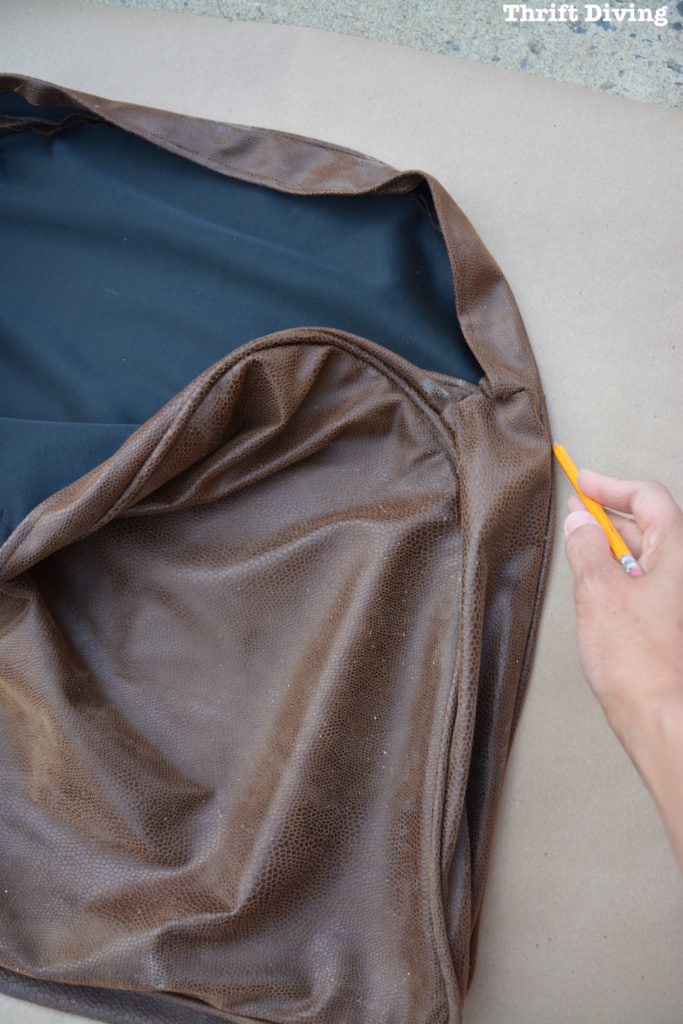
Then I cut it out.
(TIP: You can get those big rolls of brown builder’s paper from Amazon for under $12!) They’re great for making patterns or covering tables and workspaces when you’re painting!
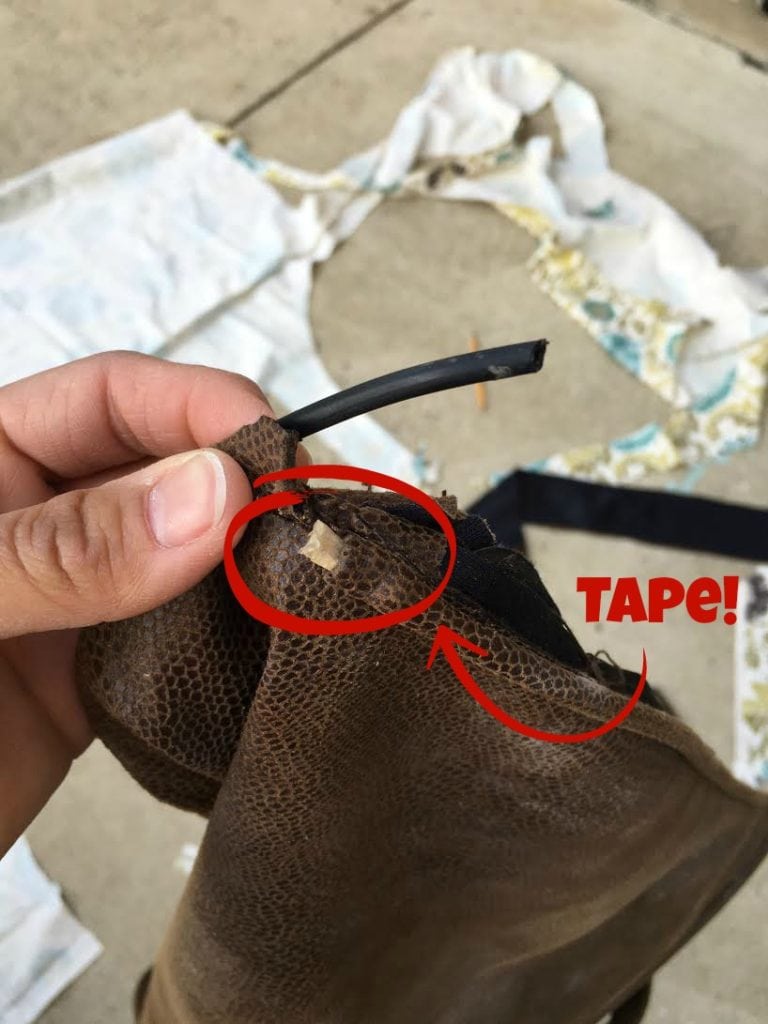
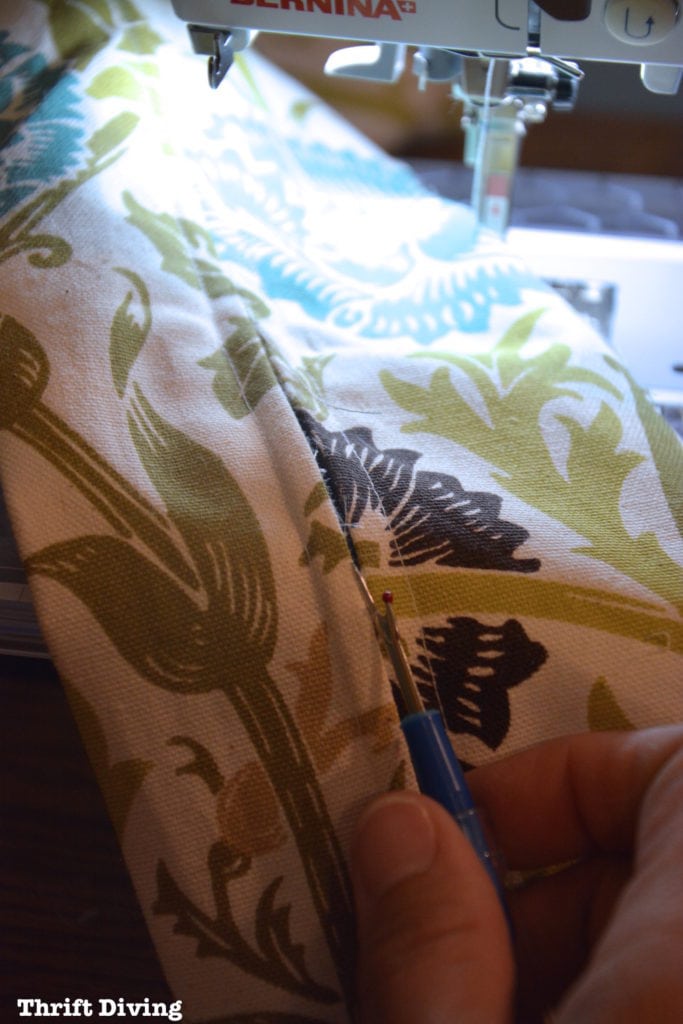
I also cut out the two long pieces of piping. Piping isn’t too expensive, but since I had some that was already good to go, no need to buy more. Looks like mine was a plastic, but piping today is cotton (and maybe easier to use??).

Since I had never used piping before, I didn’t realize that I should pay closer attention to using tape to secure the piping in place [insert palm slap to the face here]. 🙂
I used my seam ripper to help tear apart the other pieces, and then used them as patterns on the new fabric, making sure I had enough seam allowances.
Constructing This Vintage Chair Cushion
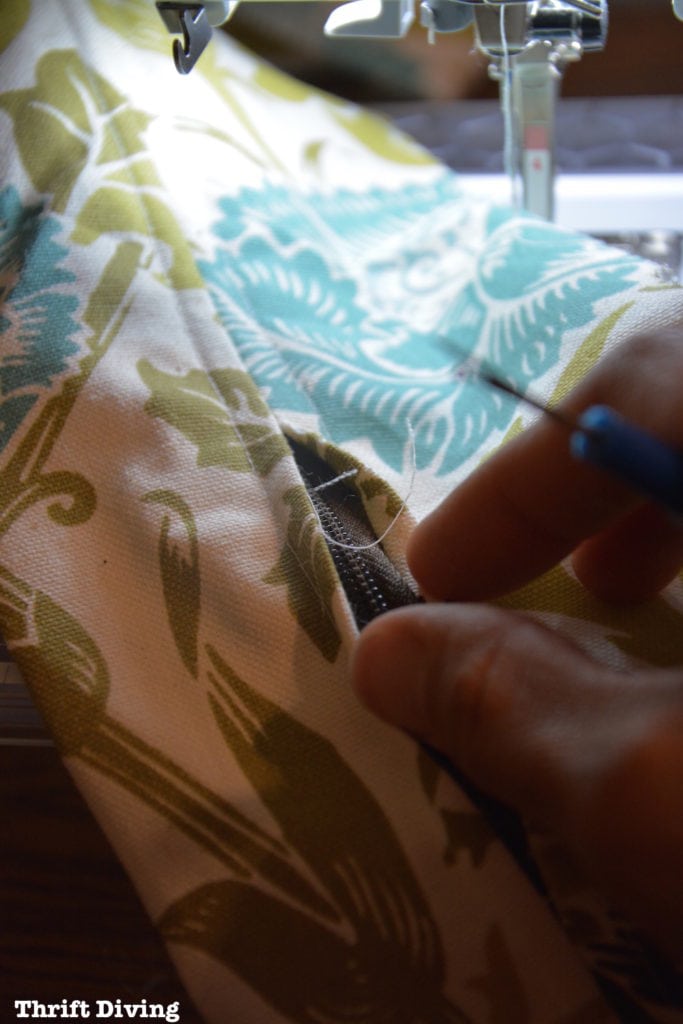
It’s been ages since I’ve sewn in a zipper, but I knew I could do it. I used to sew pants and skirts back in ‘da day before I had kids (and had alllllllll this free time on the weekends to do it, LOL).
But I knew it wouldn’t be too hard to do again.
In a nutshell, how you sew in this type of zipper (which I believe is called a lapped zipper…??), is to sew a seam with a baste stitch (which is just a long, temporary stitch).
Then lay your zipper down on top of the seam.
I actually like to use hot glue to help zippers stay in place (this fabric adhesive didn’t work well).
Flip it right-side over and sew about 3/8″ from that temporary seam, on both sides, which secures the zipper in place.
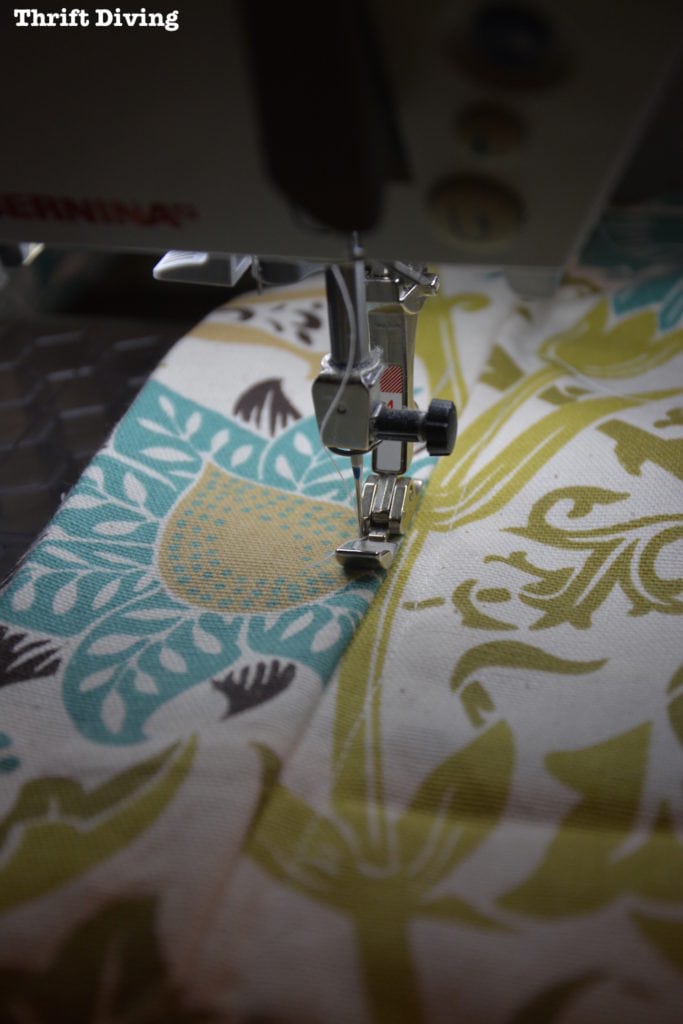
Afterward, the seam ripper opens up those temporary stitches to reveal the zipper.
Ta-da!
Now there’s a zipper! 🙂
Mine came out okay. It was a little wonky in some places because the fabric adhesive I used didn’t keep the zipper in place while sewing, so it slide around a little. But overall, not bad at all for being the first lapped zipper I’ve done in years!
Sewing the Piping–GULP!
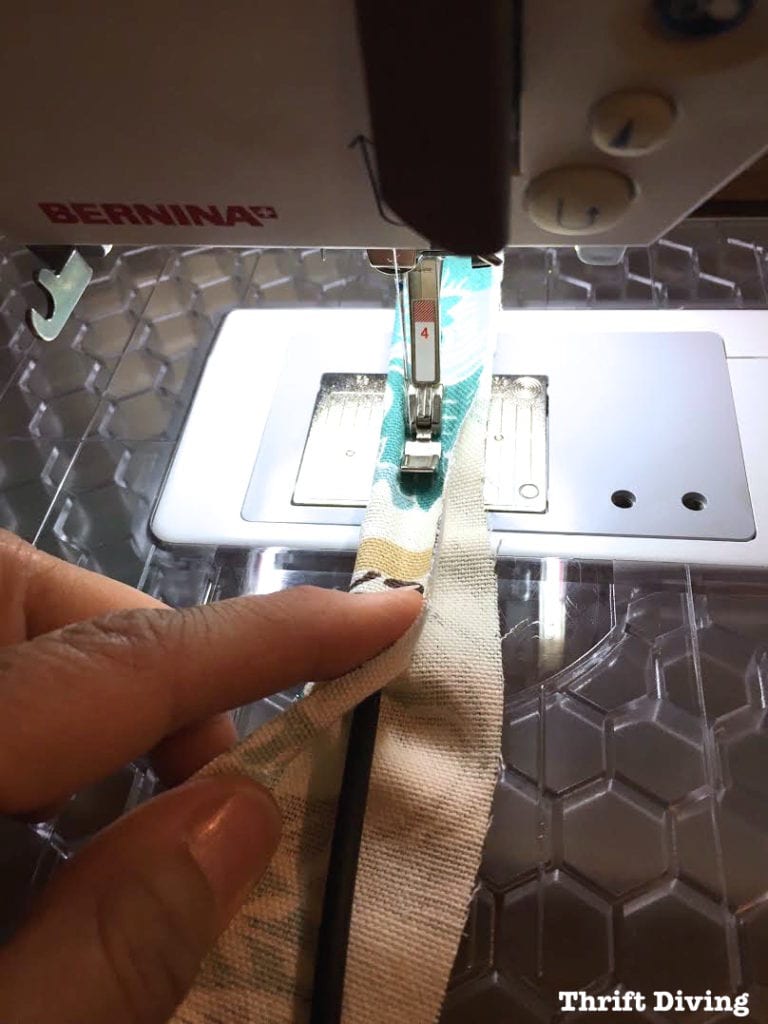
When sewing piping, you should use fabric cut on the bias (which means using strips of fabric cut at a 45-degree angle). But I was working with a limited amount of fabric, so I just used strips not cut on the bias.
Silly me forgot to use tape to make sure the cord didn’t move while sewing, so there was a lot of adjusting. Plus, it was a plastic piping, which has to be harder to sew than cotton piping!
Next time, I’ll be all the wiser! LOL
The Hardest Part
I’m skipping some of the steps.
I mean, this post is already wayyyy too long. LOL.
But to sum up, I sandwiched the piping in between the top fabric and fabric holding the zipper, and sewed as close to the piping as possible.
Getting around the tight corners was the hardest part.
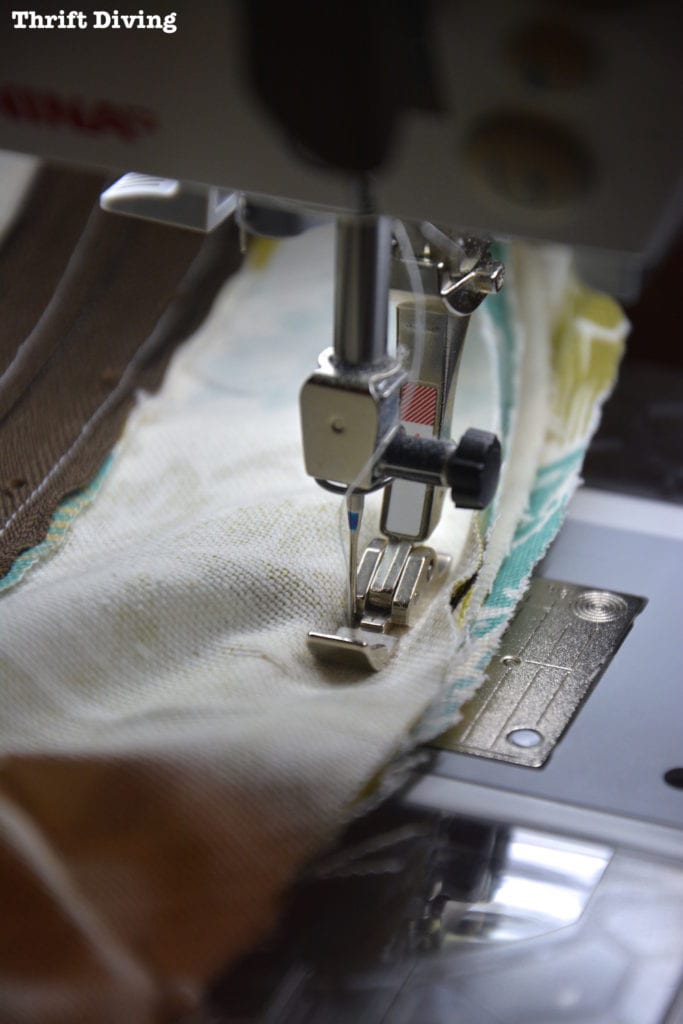
It was looking pretty good by the time I was done!

Squeezing the cushion in was tough because–oh no!–it was a little too small.
And all that adjusting of the piping creating some wonky twisting of the piping in the final cover.
But overall, it still looks much better than when I started!
BEFORE
AFTER!

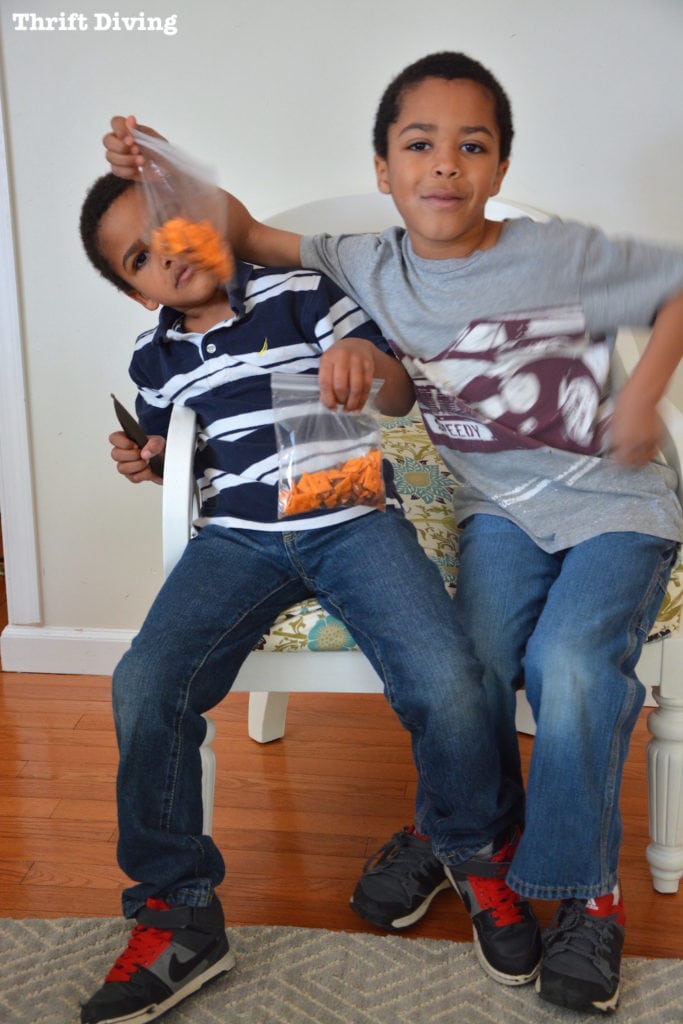
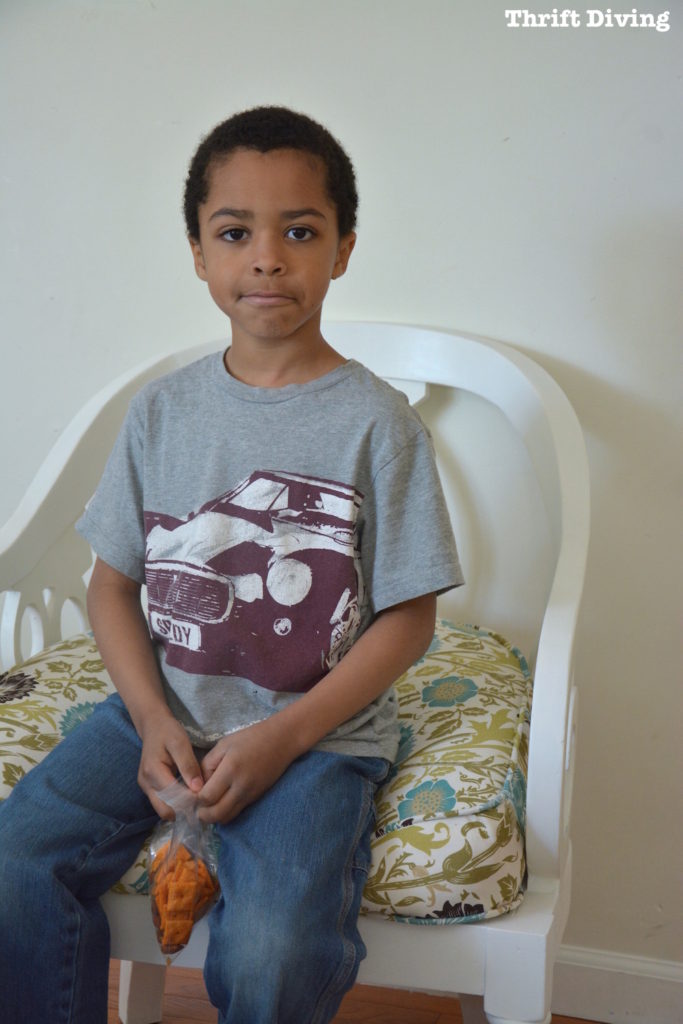
Kojo, my 4-year-old, wanted to take a pic in the chair before we delivered it to my mom this weekend.
And before you know it, he and Ohene (his 6-year-old brother) were fighting over who would get to take a picture in it. LOL
Don’t you love the elbow to the cheek?
Silly boys….
BEFORE
AFTER!


When I took it home to my Mom this weekend (an early Mother’s Day present), she absolutely loved it!

She said she had already cleared out space in her bedroom for it, right here:

And although my mom clearly didn’t need any more furniture in her house, this is one piece that belongs.
She says it’s going to be her new reading chair.
I hope that when she looks at it or sits in it that she thinks about the fond memories she had with her mom during the last year of Nanny’s life in the nursing home.
Times like this, it’s okay to hold on to “memory clutter.”
Sometimes it’s exactly what is needed.
So what do you think of this vintage chair makeover? Leave a comment below and let’s chat about it!

Download the 5 freebies!

Thrift Diving inspires women to decorate, improve, and maintain their home themselves...using paint, power tools, and thrift stores! Use these 5 printables, checklists, and ebooks to get started!

What a great Mother’s Day gift. I like how you re-used the zipper. I always do that if it’s in
working condition.
Yep!! Buying a new one is money…then getting to the store is gas….reuse what you can! 🙂 Thanks, Kelly!
wow! beautiful job! and bless you, I have noooo patience for sewing. I could never do that. I came out great!
I mean “It” not I
LOL, it definitely requires patience!! Especially when you mess something up and you have to rip out stitches. I hate that!! I used to make baby carriers, baby diapers, baby shoes for my boys…But after they grew up, I lost interest. But those babies carriers….man, I would use them until the kids were 2 years old and (OUCH) even though it was tough carrying them (like when we were at Disney and my youngest was 2), those homemade baby carriers were sturdy and never fell apart!! 🙂 Ahhhh…..I miss sewing now. You should try it!! Do an easy project that doesn’t take much time. I like to turn on the music and just lose myself in it for hours.
You have completed another beautiful project. Love the chair, love the sweet mom, beautiful boys and love your post. You always make me chuckle.
Awww….thanks, Nora!! That means a lot! 🙂
Serena, You did an amazing job on this makeover! I love that it was a sweet present to your Mom and it connects her to her Mom. What a beautiful heart you have. Lovely makeover, pinned!
Thank you, Wendi!! 🙂 She really appreciated it! I love those kinds of gifts–the ones that are meaningful and not the ones that you can necessarily buy! Thanks for pinning!
Hey Serena, WOW!! Love how it turned out! When something comes from the heart, as this chair did, there’s nothing “wonky” about it, just pure love! Love ya’
Thank you so much, Patricia! 🙂 My mom didn’t even notice the wonky parts! 🙂
What a beautiful finished product, and what a wonderful gift to give. I always see old chairs and furniture, but never can envision them redone, people who can make a new chair from an old one are talented. Way to go with using items you already had!
Thanks, Cara! Sometimes it’s a feature of a chair, or imagining it with different colors, or a new fabric. I think that any old furniture can be make new again, whether it’s a chair, dresser–anything! 🙂 It’s part of the fun, the challenge of it! Just open your mind the next time you see something ugly, and I bet you’ll start seeing it differently!
I am with you 100%! It is always good to save our memories and if you have a physical way to hold on, do it. The chair has beautiful craftsmanship – I love the curved arms and the “figure 8s” – you did a remarkable job transforming the old chipped finish to a smooth white. It’s gorgeous – just love the shape, and you did a good job reupholstering the cushion. Way to go. Determination and grit are the name of the game!
Yep! Those who save EVERYTHING….well….you just can’t! It’s best to find the winners and save only those. It’s hard for me to throw away my kids’ stuff. They come home with papers daily from school, and I always feel guilty for pitching ’em. But when I see something they wrote that says something like, “I love my family” all scribbled in kids-writing, I can’t pitch those. Ever. They’re all sitting on top of my fridge. HA! After 6 months, I declutter and file them away. LOL
Great job! What a wonderful way to honor your Grandmother’s memory.
Thank you, Donna!!
Love it!! You have a Bernina – nice! They have a special sewing foot (if that’s what its called) for piping to make the job easier – well, for what I saw and read. I have a very old singer, probably only does straight lines, it has its own carrying case! Glad your Mom loves it!
Yes!! I love my Bernina, Tammara! I’m so glad you mentioned the foot for piping! Since I had never done it before and wasn’t even planning on doing it, I hadn’t even thought about that! You are smart, girl! Next time I head to the fabric store, I will look to see how much they cost. I bought my machine before I had kids (or financial difficulties, LOL), so I could afford the expensive machine. I even though a walking foot (which is a sewing foot that allows fabrics to feed evenly). I think it was $150 for that foot alone! YIKES!!!! Thank God I invested before I had kids! LOL. As for your sewing machine, straight lines is all you need for a bunch of projects, like pillows and stuff. You should break it out! 😉
Great job – total re-do and made it look completely different!! So fresh and updted! Love it – and I noticed no wonkiness!!!
Whew!! As long as you don’t NOTICE the wonkiness, then it’s all good. HAHA! Thanks, Sharon!