How to Paint Metal Cabinets That Are Rusty
I wish I had an exact number of special people like us that exist in this world.
You know the kind: the ones who can stumble across an ugly, rusty metal cabinet and know (without a doubt) that if you paint metal cabinets (after removing the rust), those babies will serve you for another lifetime in your home, office, or workshop.
One of my favorite shows back in the day was Extreme Makeovers where women who have spent a lifetime lamenting over bad skin, crooked teeth, and (what they considered to be) unflattering features.
But with a bit of cosmetic surgery, and yes…..paint, makeup….those women completely transformed themselves into “swans.”
No matter your feelings about whether women should even be transforming themselves into “standards of beauty,” one thing was clear: paint can help transform anything.
Including rusty metal cabinets found at an online auction for $60 each.
Click here to save this project on Pinterest.
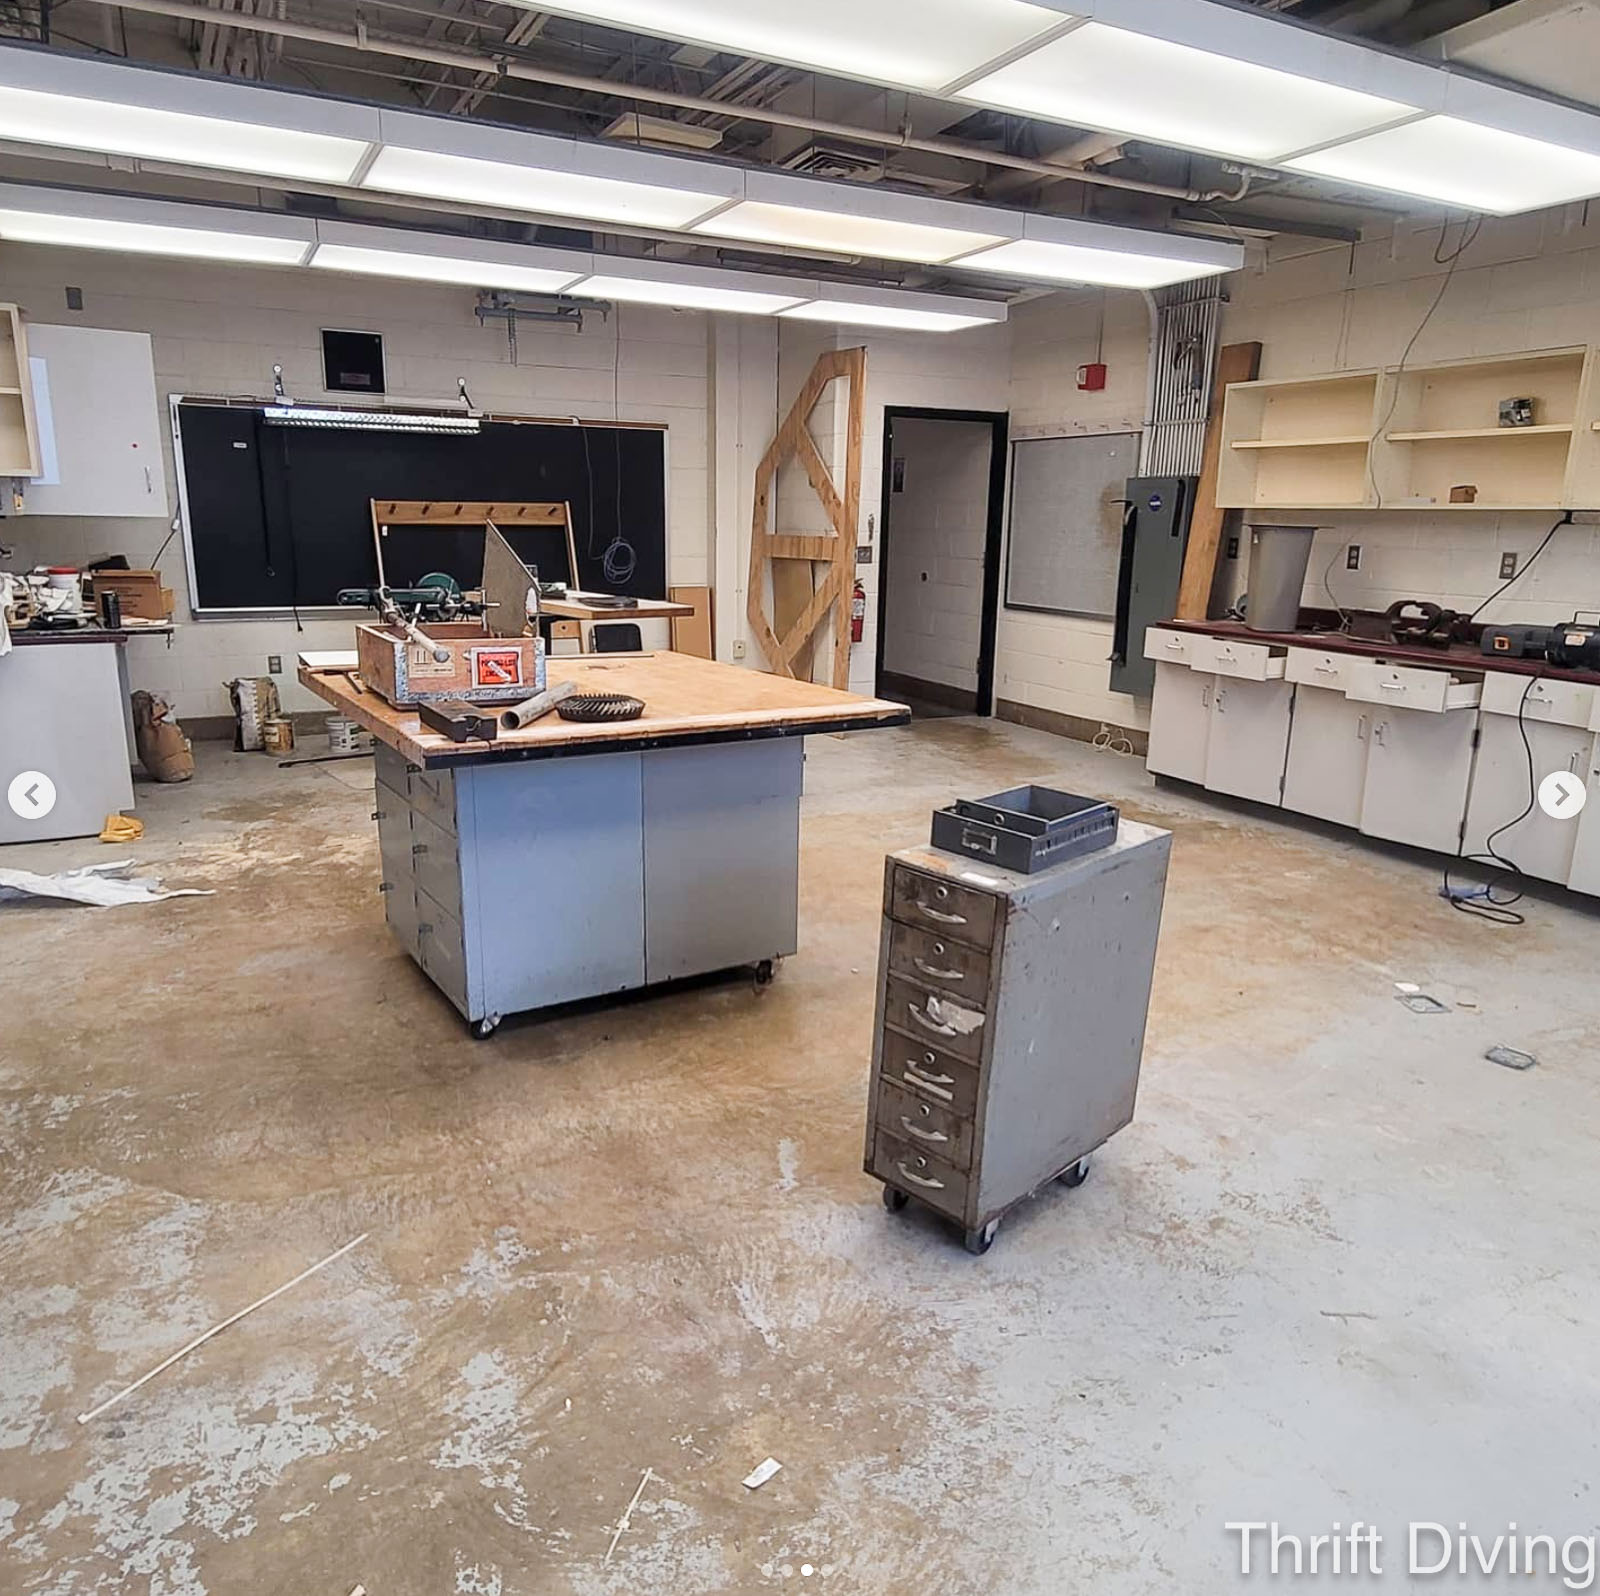
A friend of mine tipped me off about a Virginia high school that was being torn down, and literally everything in the school was up for auction: chalkboards, tools, bookshelves, office furniture…even whole science labs!
As tempting as it was for a lover of all things vintage and old and metal, these two cabinets were the only things I drove away with in the back of my minivan.
Then I waited over 2 years to pull them out to transform them.
I bought a “she shed” in early 2021 (see my shed here!) and spent all of 2022 finishing as much of the interior myself that I could. I knew that once I got done the heavy stuff, like insulation, drywall, and vinyl flooring, the next part will be making the interior pretty and functional as an office and workshop.
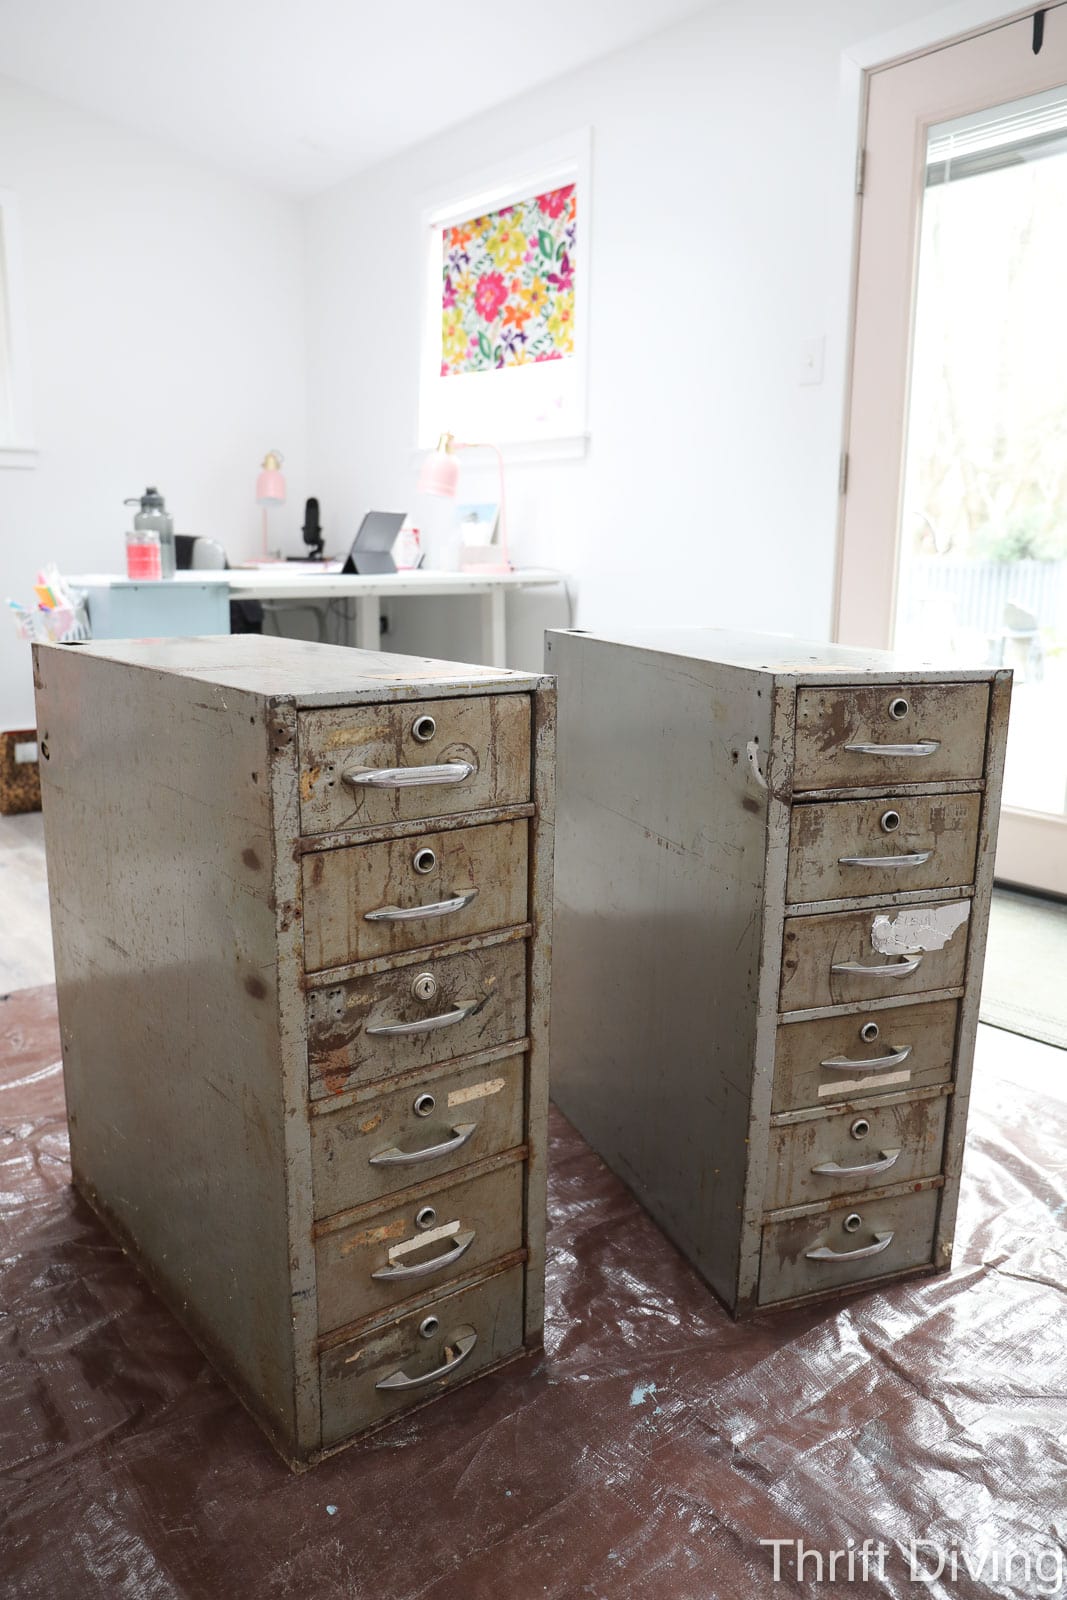
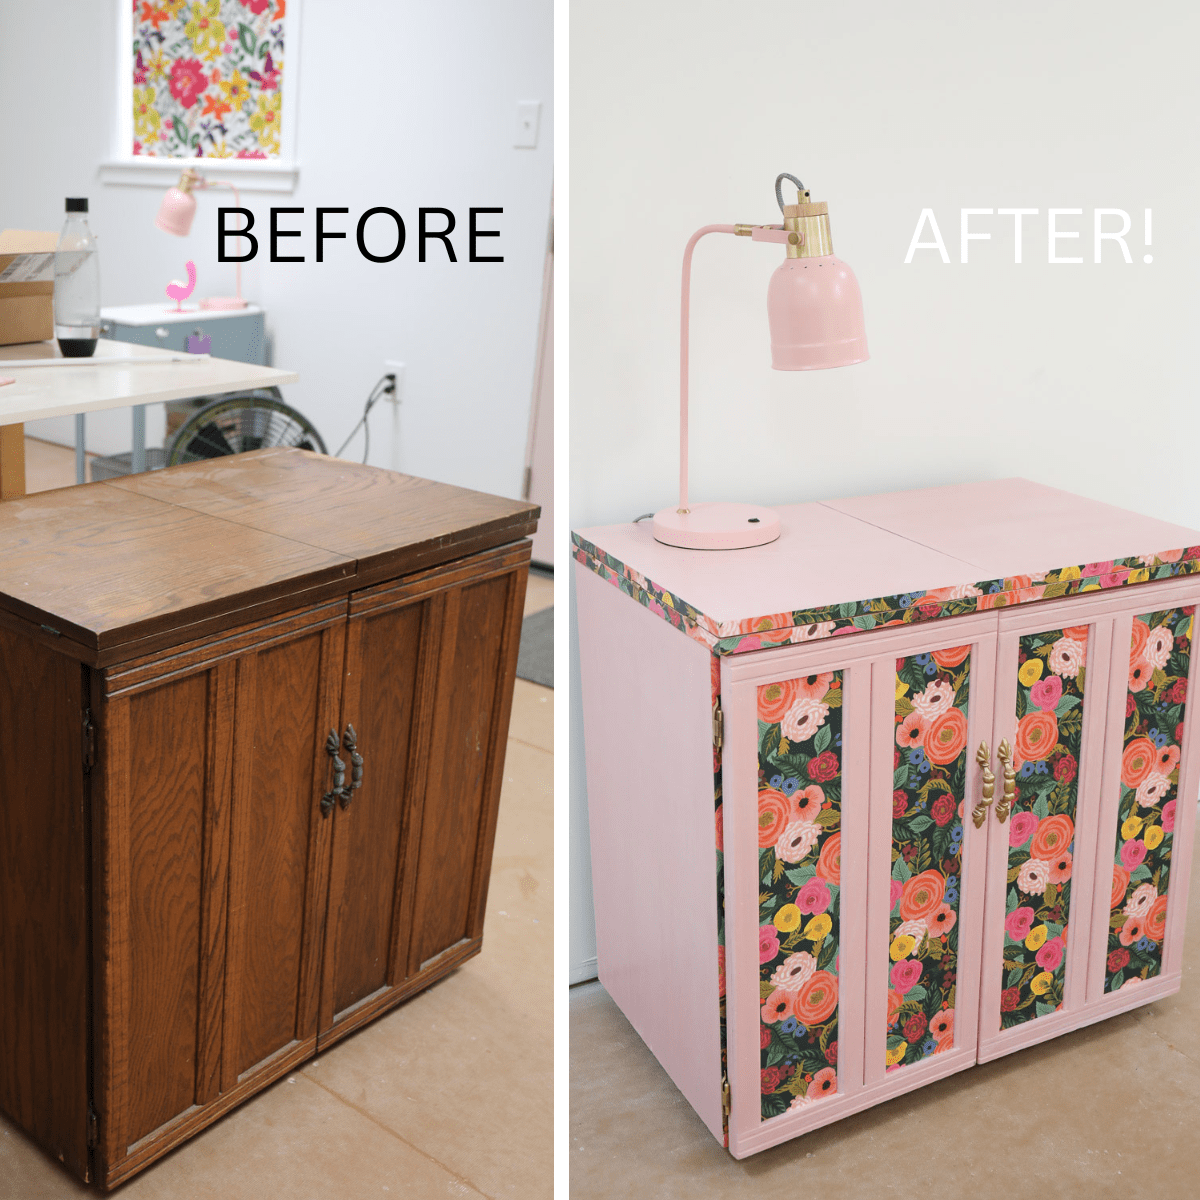
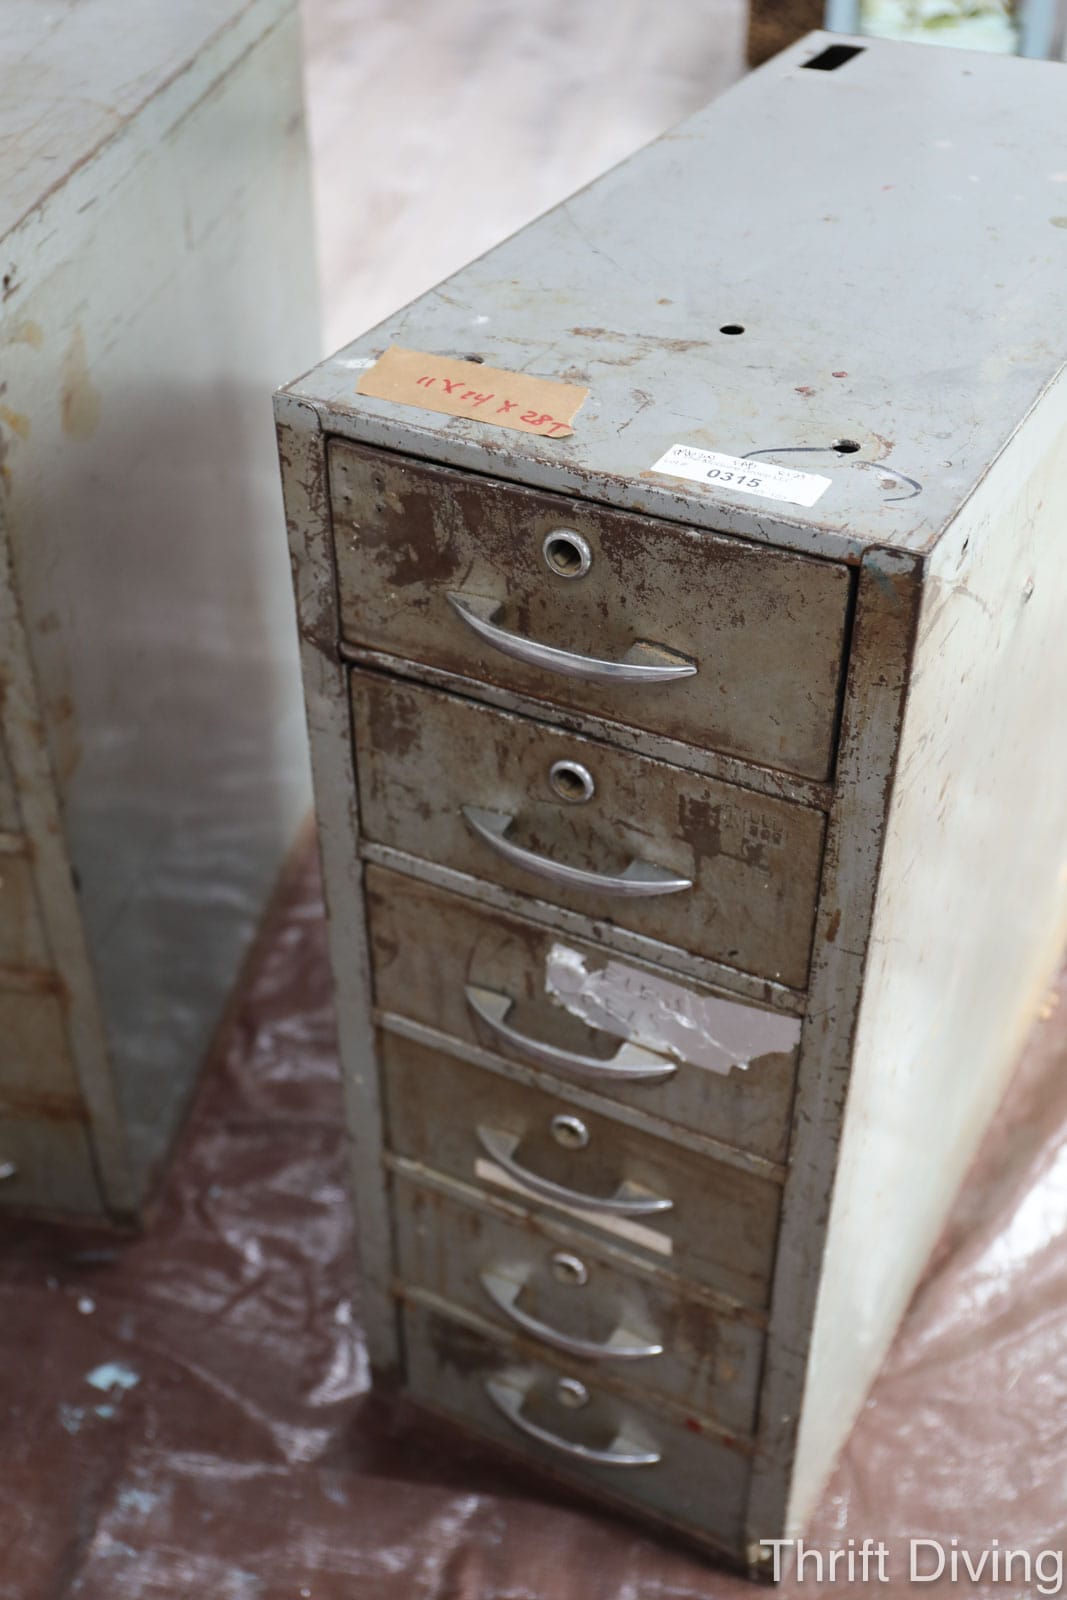
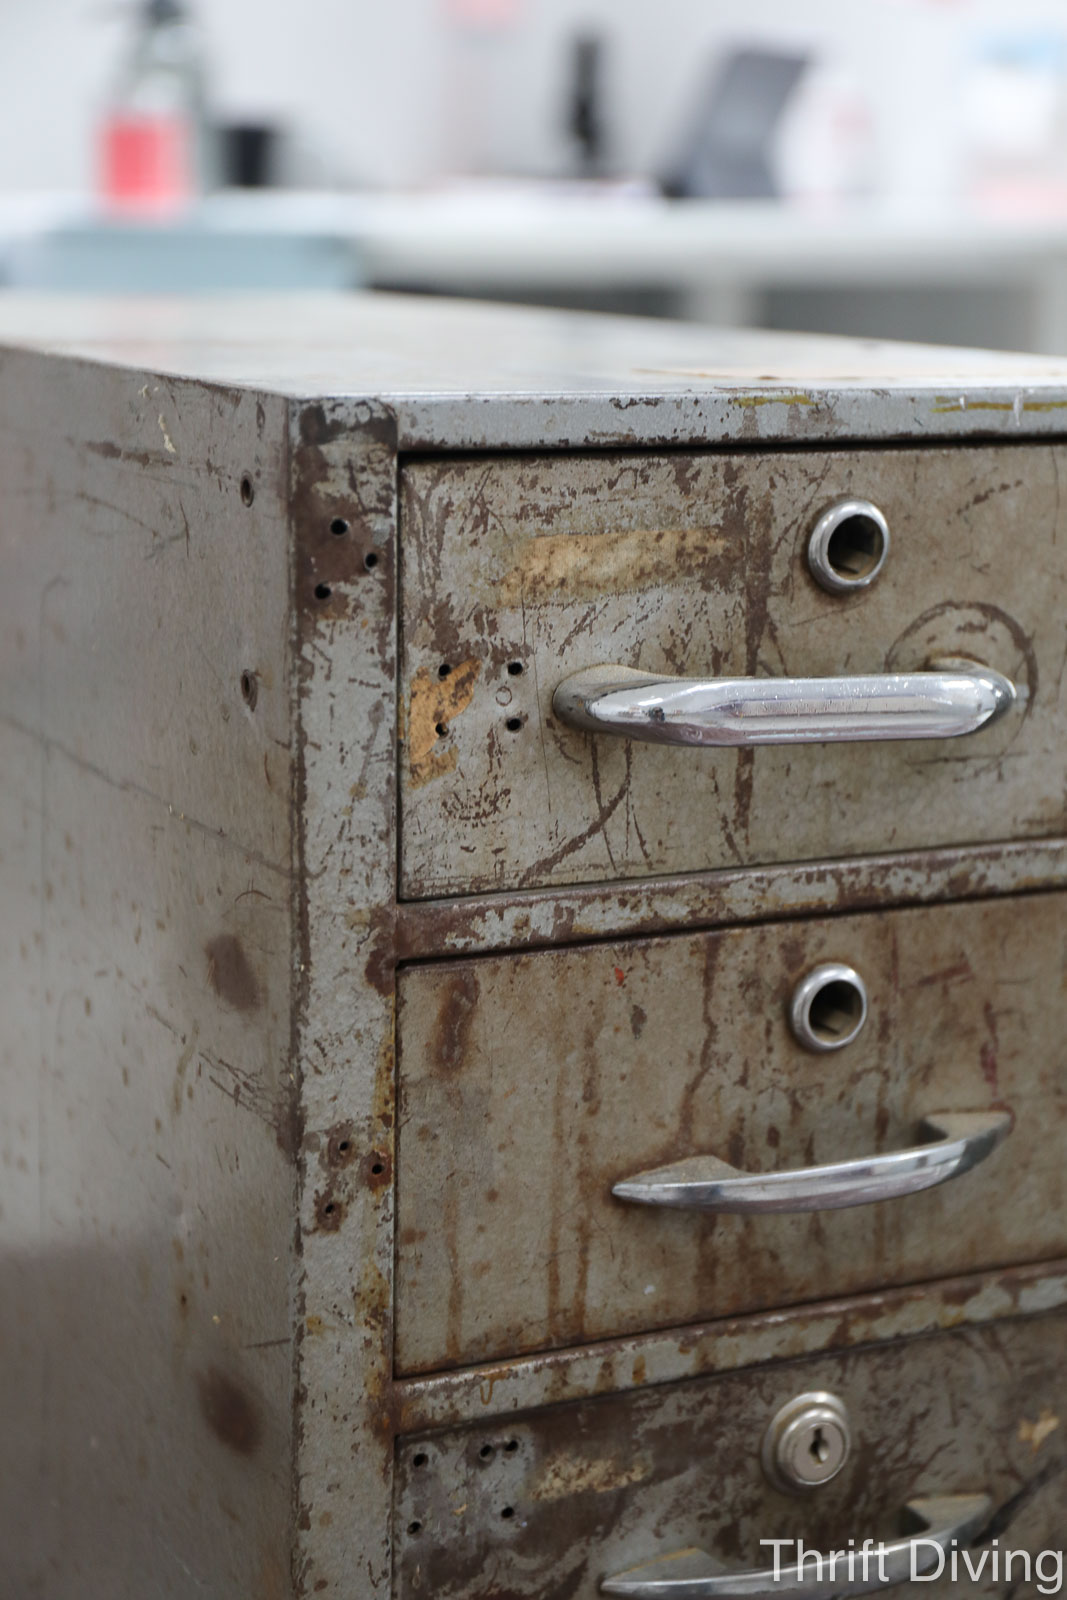
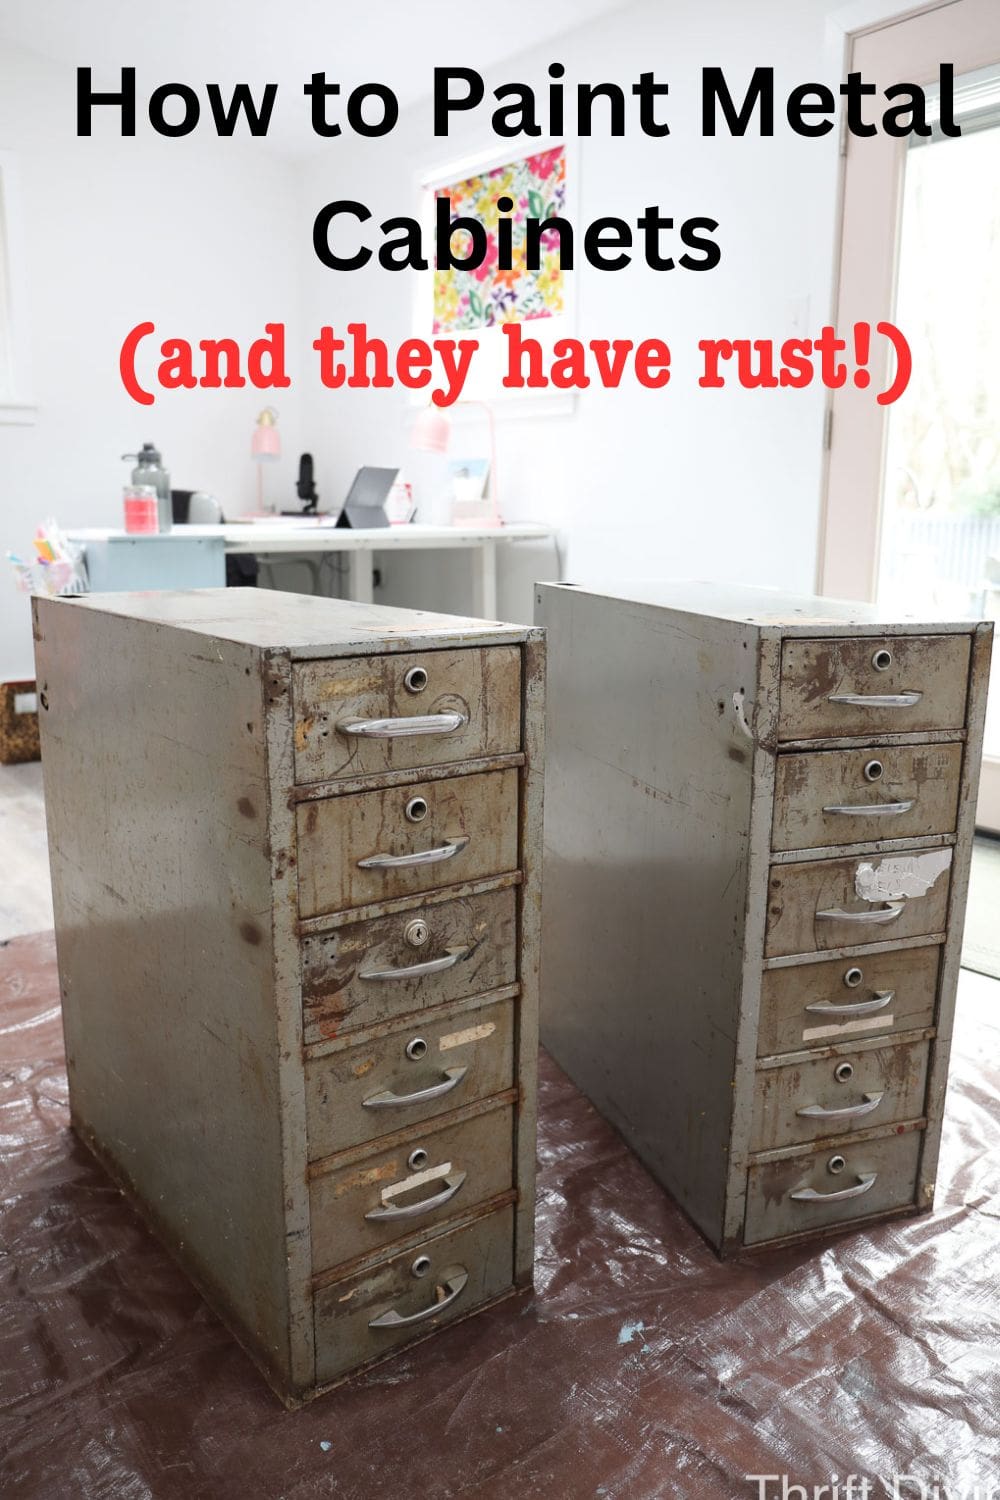
BEFORE
Recently I dragged the two cabinets into my “she shed”, ready to get started on them! If possible, they looked even worse than I remembered!
I want my shed to be light, airy, with pops of color (like those pretty floral DIY roller blinds I made!). Ideally, I would paint the metal cabinets to accentuate the vibrant colors in those blinds.
But I also didn’t want to spend a lot of money getting supplies since one of my goals this year was to use up all the supplies I already have before buying more supplies (this is hard to do!!!). It’s nearly impossible to do that when it comes to paint, but I tried.
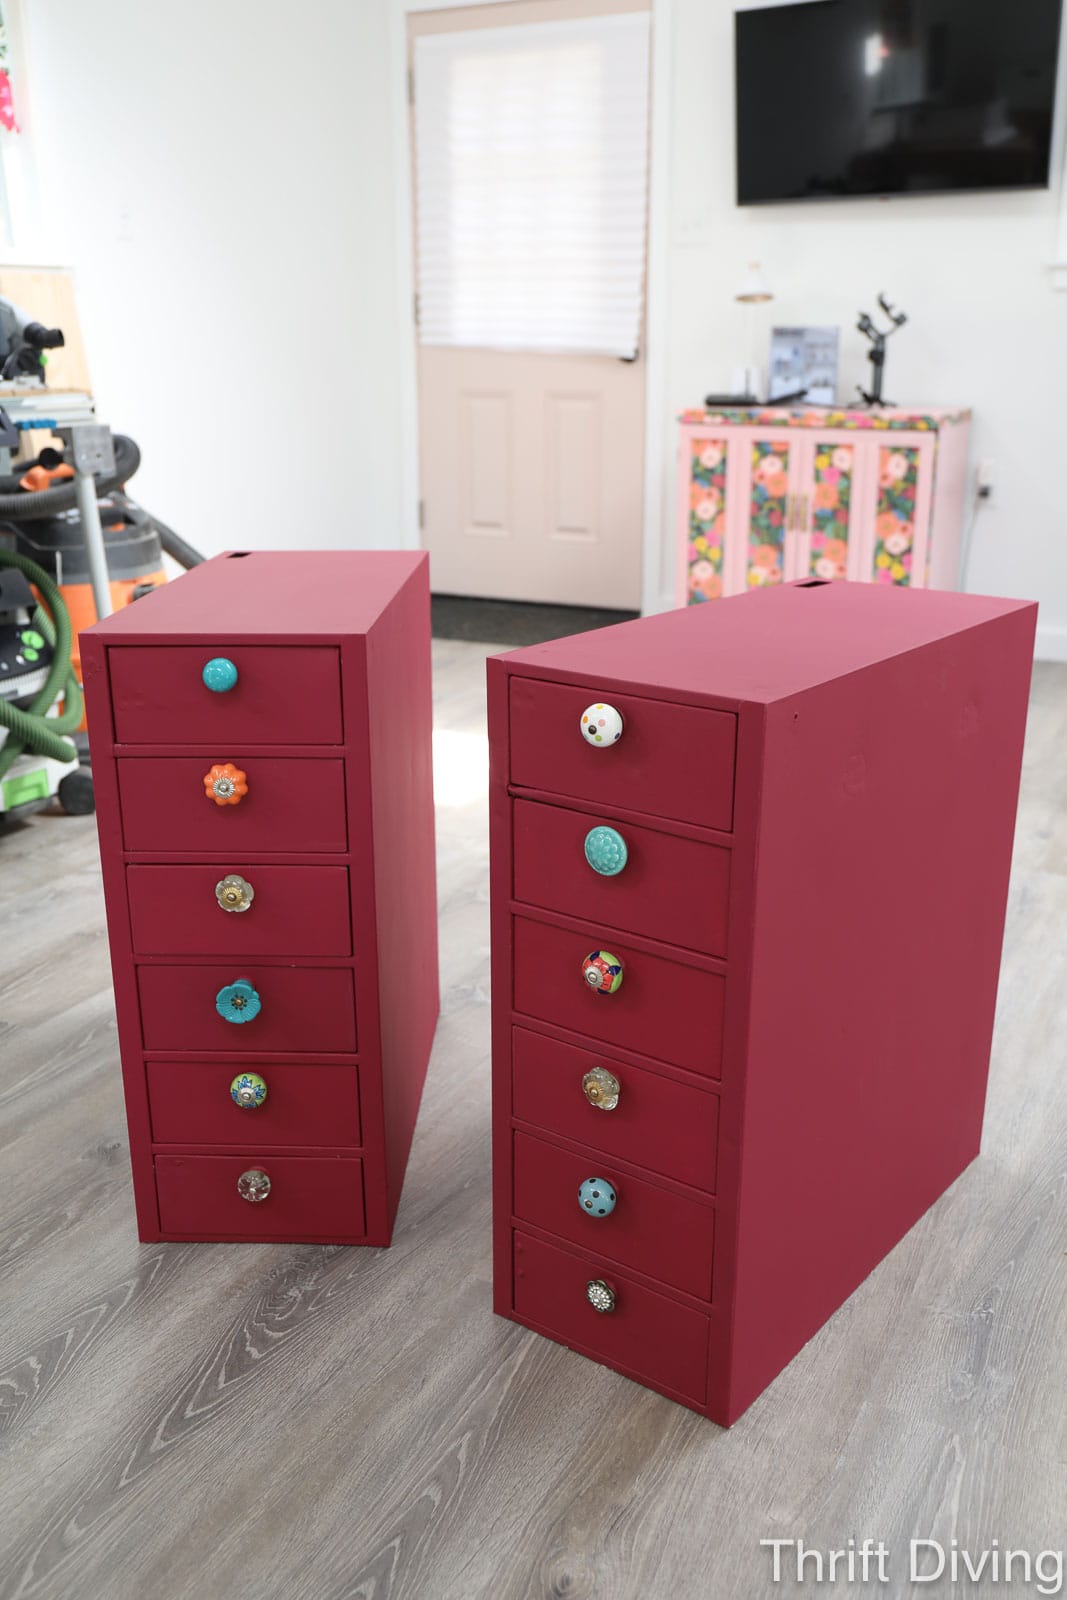
Here’s how the painted metal cabinets turned out!
AFTER

Click here to save this project on Pinterest.
Don’t they look absolutely amazing?!?! They turned out much better than I had expected after painting them! But let’s jump into how I actually achieved this project, because there are some important steps you’ve got to take before you paint metal cabinets, especially if they’re rusty. Here are the materials and tools I used.
(I participate in affiliate advertising programs by linking to sites such as HomeDepot.com, Amazon.com, and other affiliated sites. Shopping by clicking these links does not cost you anything. If you purchase something after clicking these things, I receive a small commission, which I appreciate and helps to support this blog.)
Materials & Tools
- Rusty metal cabinets (found at an online auction)
- Floral removable wallpaper
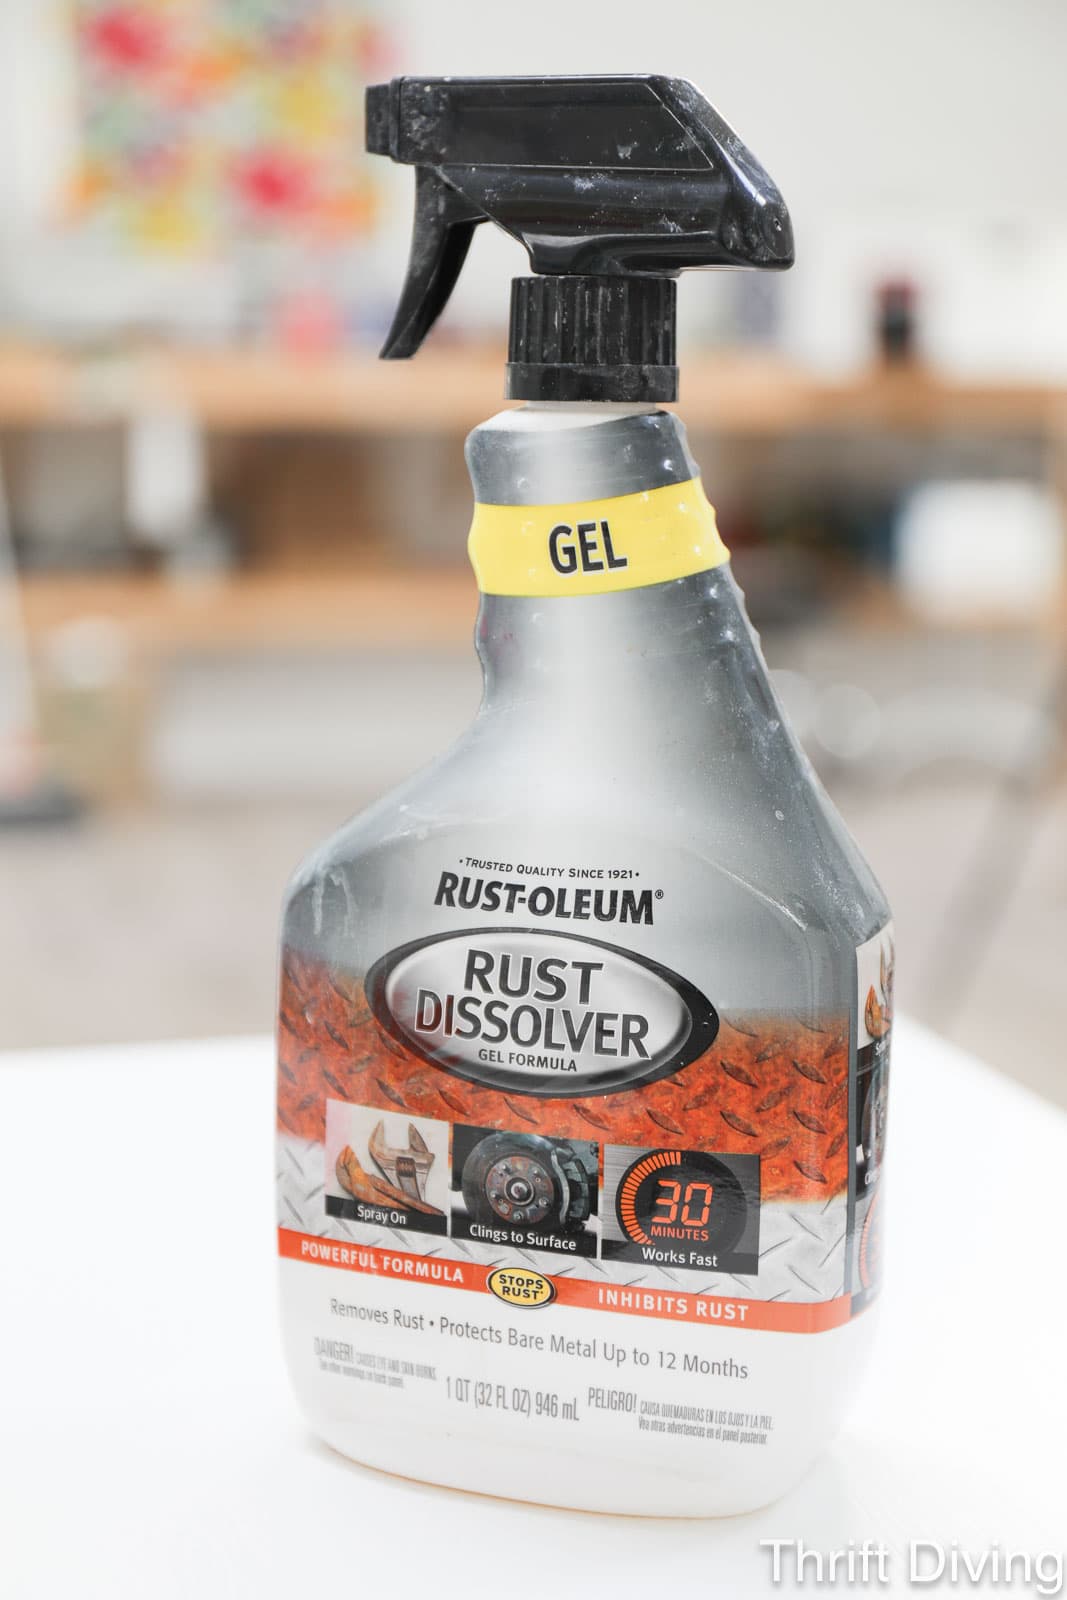
- Rust Dissolver
- Behr Sugar Beet (the most gorgeous deep berry pink!)
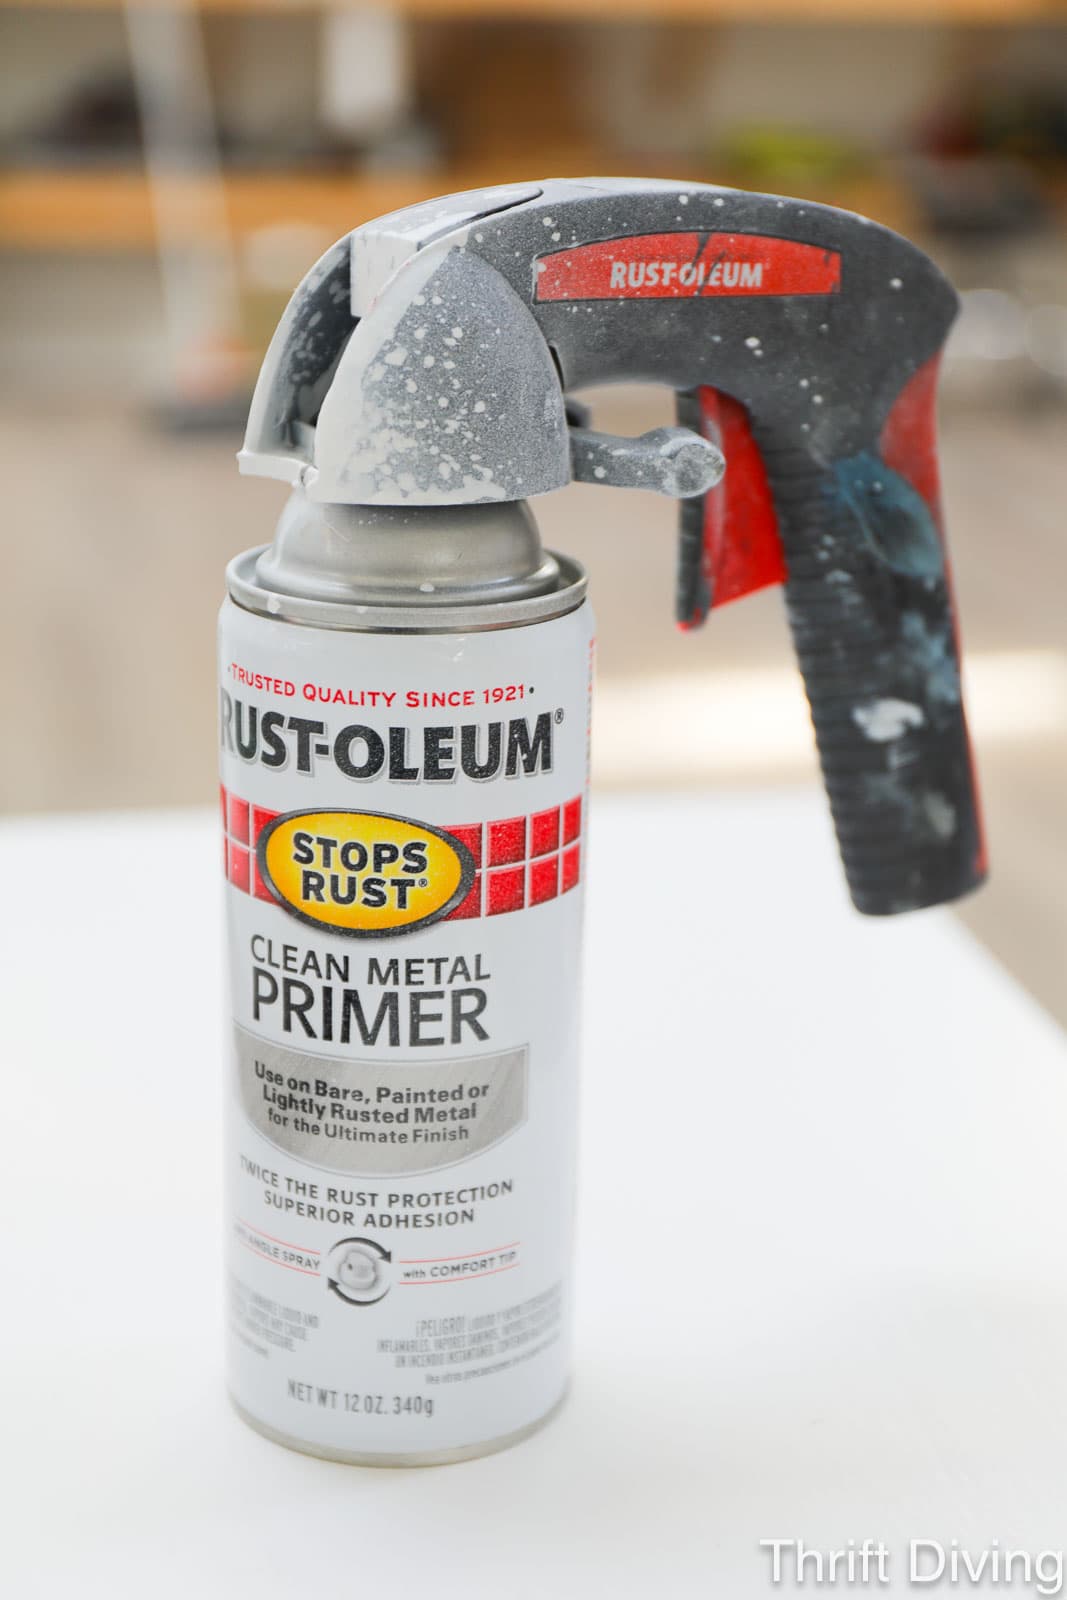
- Rust-Oleum Clean Metal Primer
- White spray paint
- Auto and Plumbing Repair Metal Epoxy Putty
- Paint brush
- Mod Podge
- Pretty glass knobs
- Cleaning cloths
- Sandpaper
- Dust mask
How to Paint Metal Cabinets That Are Rusty
Don’t have time to read a full article? Watch the video tutorial here!
STEP 1: Don’t Skip Cleaning the Metal
Can I confess something to you? As embarrassing as this is, I used to skip cleaning furniture thoroughly before painting it. I mean…I would wipe it down, but it wasn’t a step that I put much effort into.
As nasty as that sounds, there are some good reasons why you want to clean anything you are refinishing, especially if it’s something you bought or found second-hand:
- Paint isn’t going to stick well to a dirty surface; it’ll chip later as the dirt comes off.
- If you’re removing rust, you want the rust remover to do its job on the rust; dirt just stands in the way.
- You get to inspect the interior and underside of furniture to make sure there are no bugs hiding there. (ICK!!)
- There’s nothing worse than having gorgeous painted cabinets only to find mold, rust, dust bunnies on the inside. Especially if this is a piece of furniture you are selling!
Use Simple Green to wash down the exterior of furniture, the interior sides, the underside, and yes, even the bottom. Remove all the drawers and wash those, and wash all the way back behind where the drawers go.
Basically, go into the belly of the furniture!
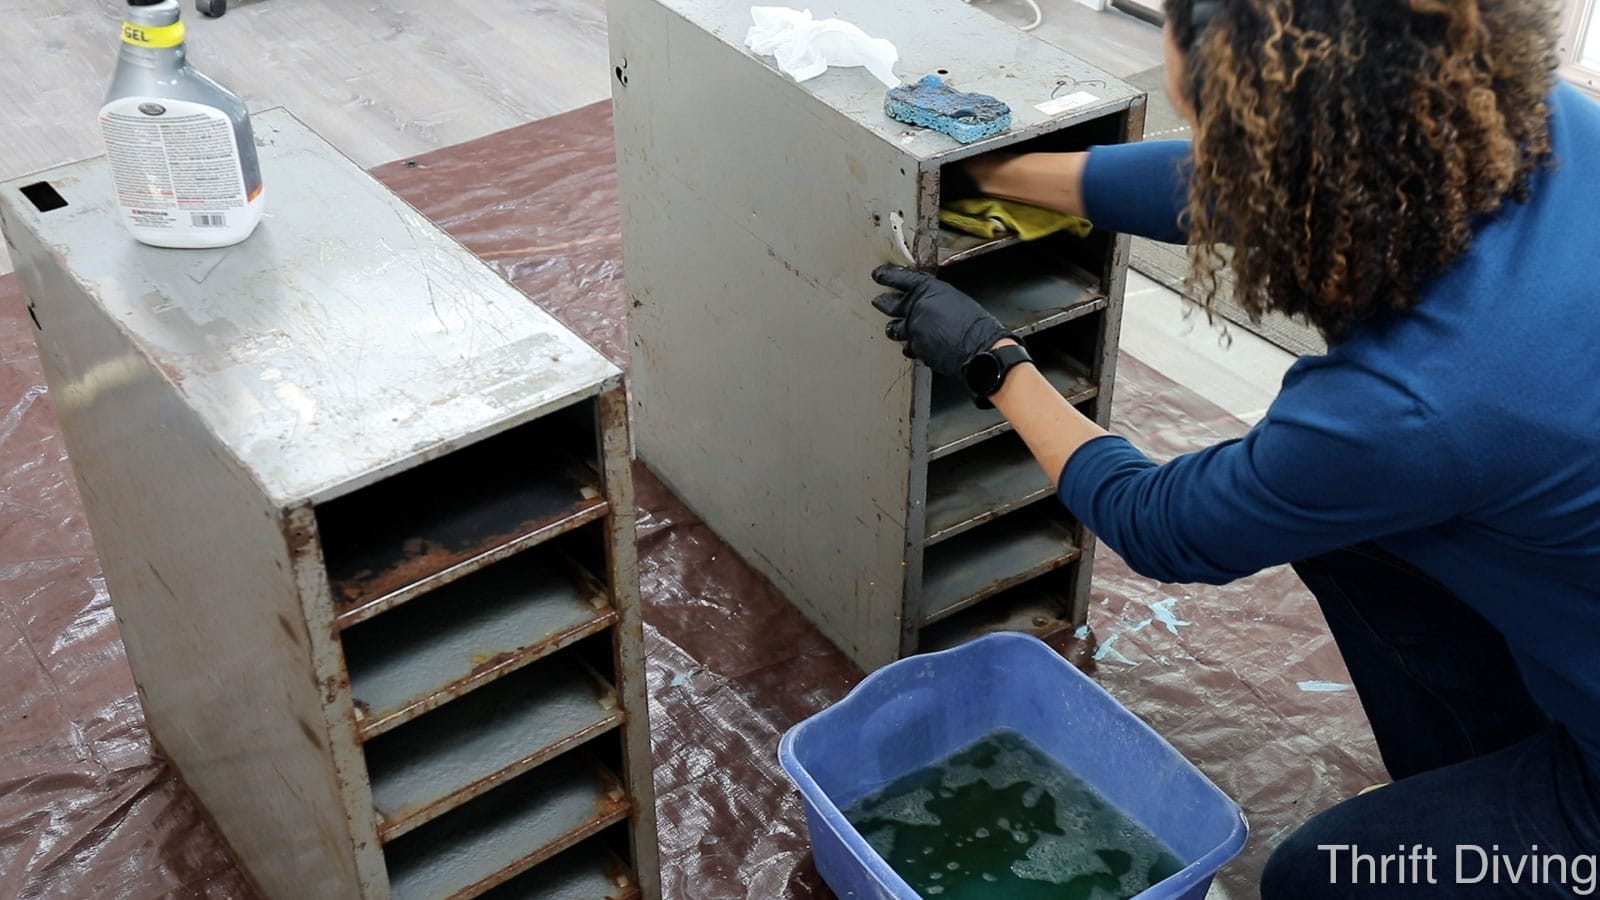

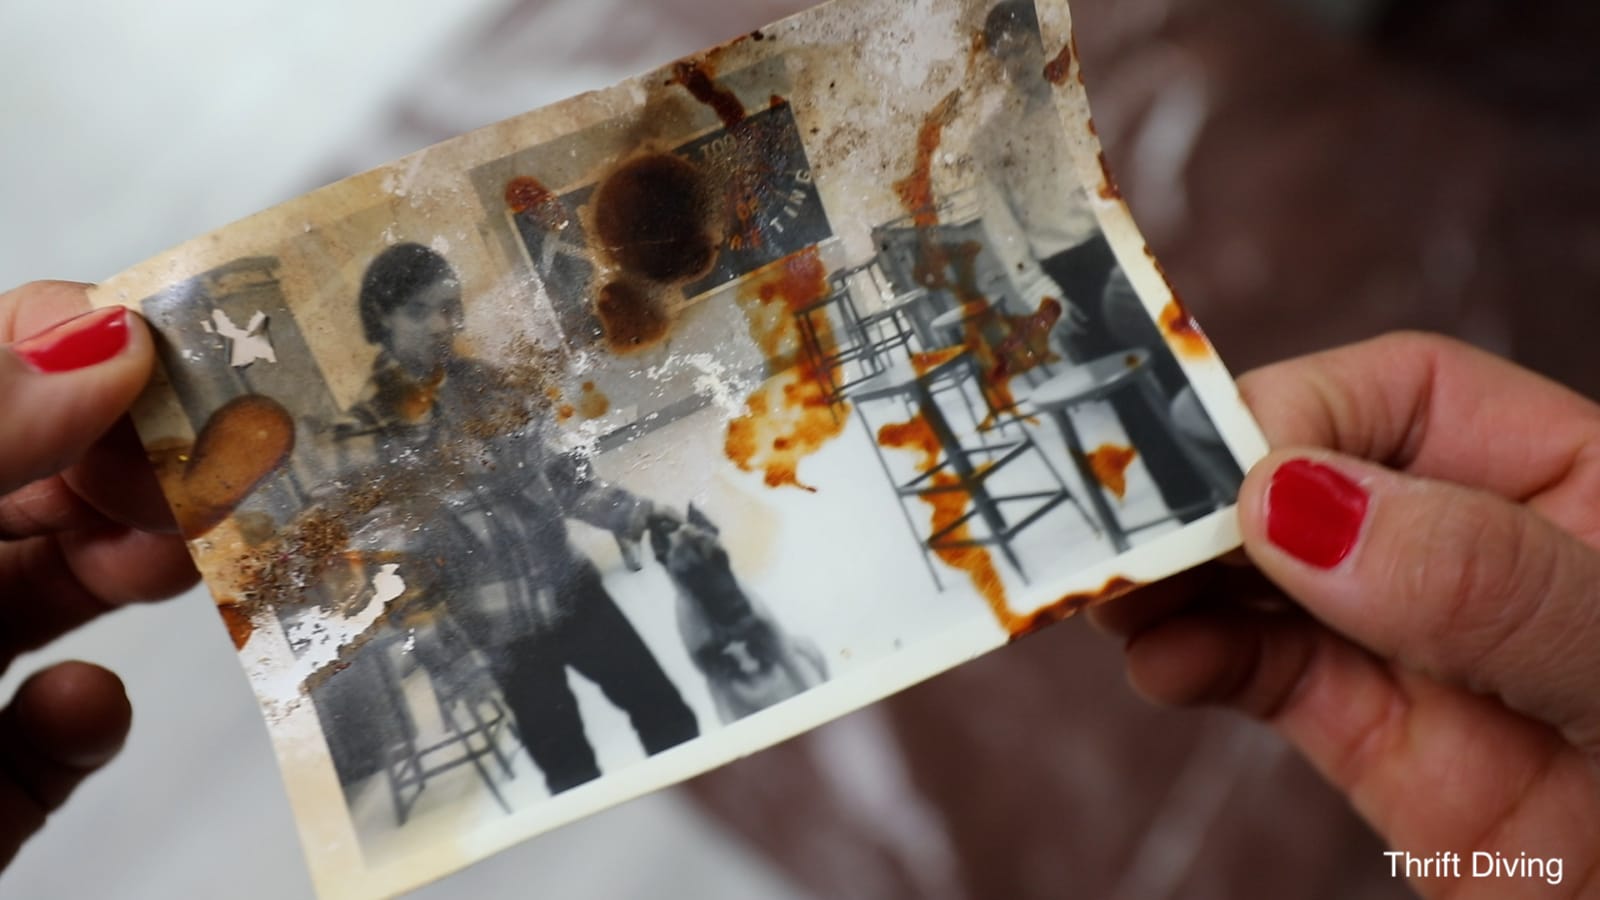
When I was cleaning these vintage metal cabinets, I found old drafting tools and papers shoved far back into the cabinets, behind the drawers. I even found an old photograph of what had to be a young student and his dog in the same classroom of the abandoned school where I had gone to pick up the metal cabinets! The chalkboard appears to be the same. Isn’t that cool?!
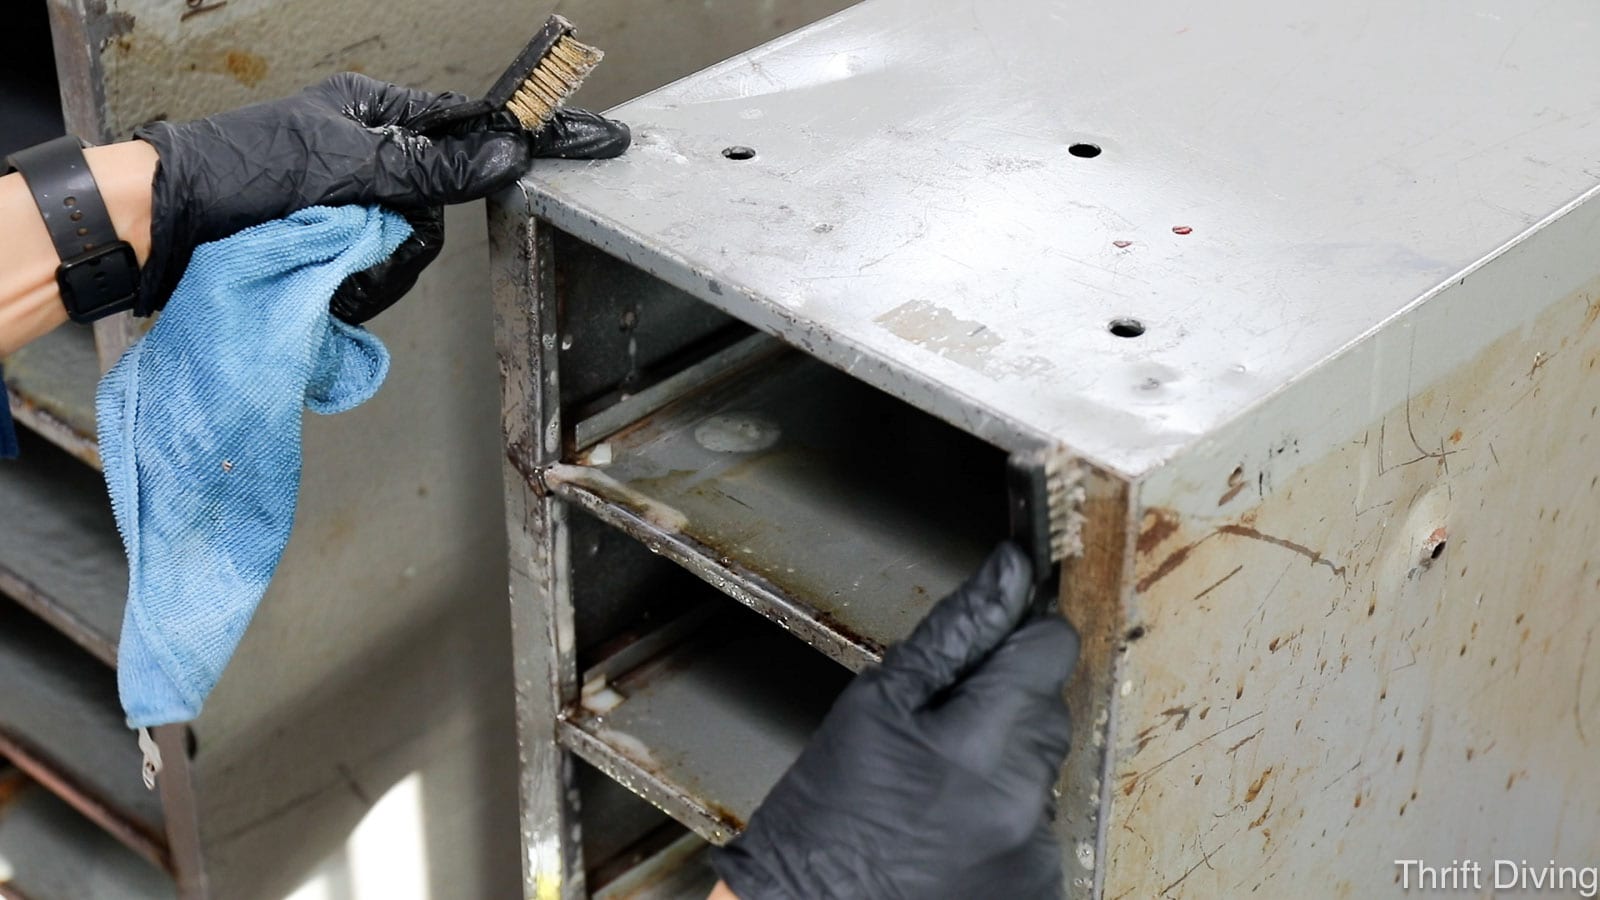
STEP 2: Remove the Rust with a Wire Brush and Rust Remover
I’ve used rust remover twice before: on this vintage bar cart makeover, and on this painted metal file cabinet.
Personally, I like this brand of Rust Remover Gel better because once it’s applied, the instructions say to wrap it in plastic wrap (like Saran Wrap) to let it work. It can even be left overnight.
But the rust remover that I used for this project was this Rust Dissolver, which helped to remove some of the rust. Its instructions don’t say anything about wrapping it and leaving it overnight to work longer, though. Instead, this rust dissolver says:
- Do a test area that’s not so obvious on your metal first, just so you know what kind of results to expect (some metals can be darkened).
- Use a wired bristle brush to remove the rust flakes.
- Then wet the surface of the metal where you’ll be applying it to the rust.
- Leave it to sit for 10-30 minutes for light rust, but don’t let it dry.
- Reapply and remove for additional applications for heavier rust.
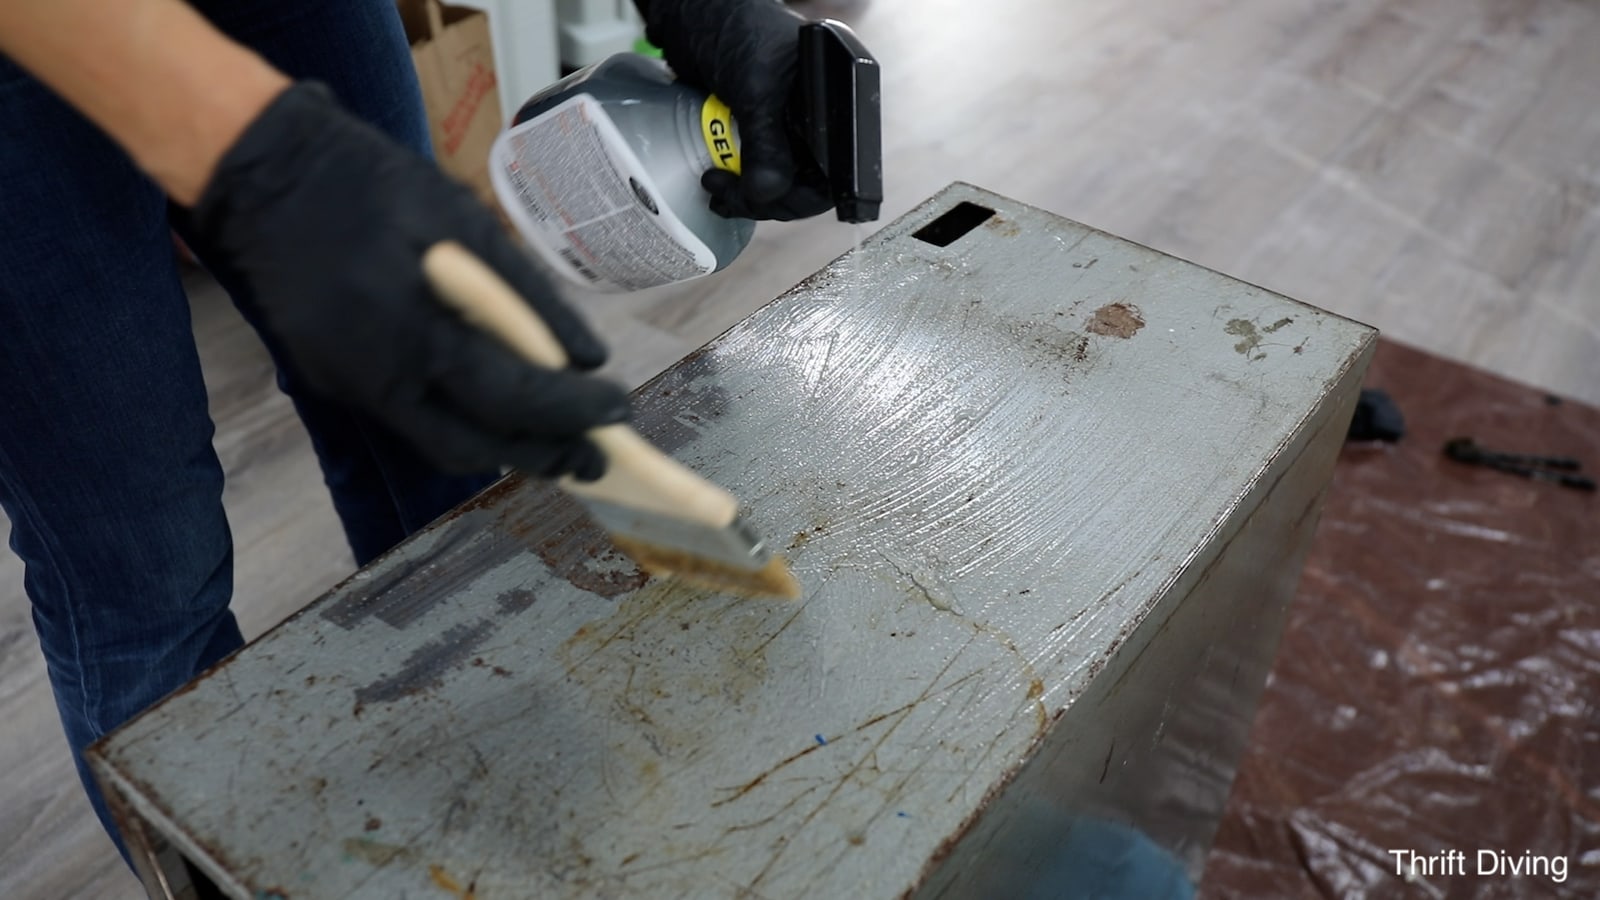
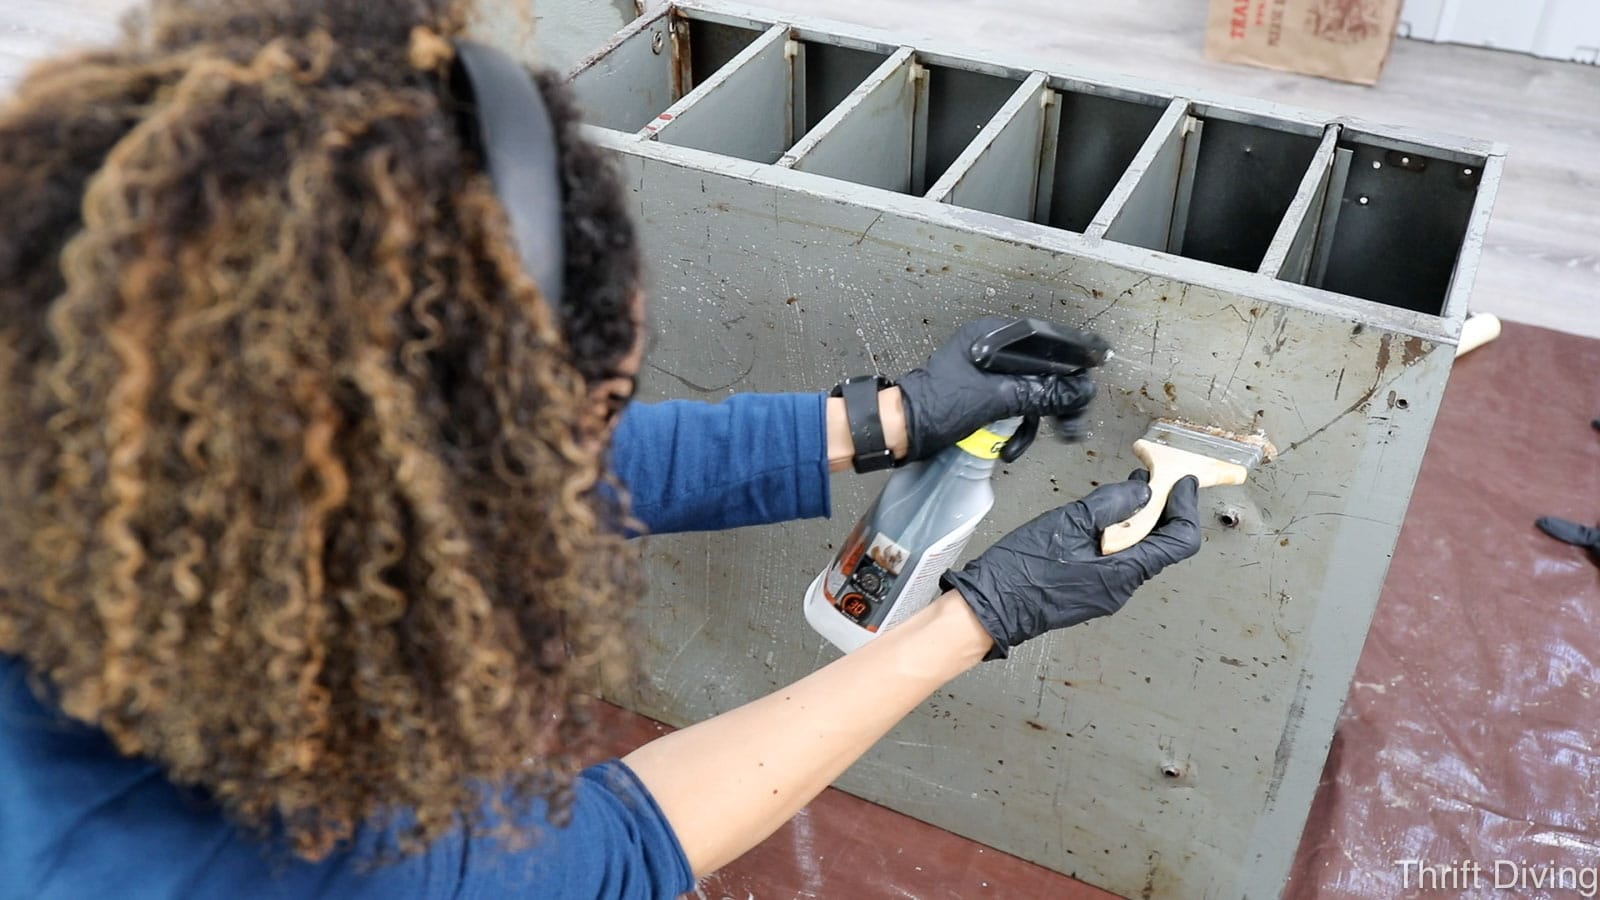
Since these cabinets have several areas of rust (some heavier than others), I used a paint brush and spread the gel onto the entire surface.
Don’t spray the entire metal cabinet at once. Instead, work in sections so you have time to apply and remove it before the rust dissolver dries.
You might be wondering, what’s the big deal if the rust dissolver dries?
Well, if you’ve got a painted or factory finished surface on which the rust dissolver dries, it can strip the finish off of a surface. That’s what happened with the file cabinet that had some spots of rust. As I was wiping the rust dissolver away, the factory finish of the metal file cabinet started to come off, leaving a “pock-marked” uneven surface that I was afraid the paint wouldn’t cover. Thankfully, it wasn’t an issue, but it did cause me to be more conservative with where I apply the rust dissolver and making sure it isn’t left on too long.
Therefore, these are a few good rules of thumbs when using rust dissolver on a surface with a finish to it:
- Don’t let the rust dissolver dry. Keep reapplying it, if needed, but be sure to remove it within 10-30 minutes.
- Only apply the rust dissolver where you need it: on the rusty metal spots.
- If you apply it to an entire surface, work in small sections. Finish one part of the rusty metal before moving on to another section.
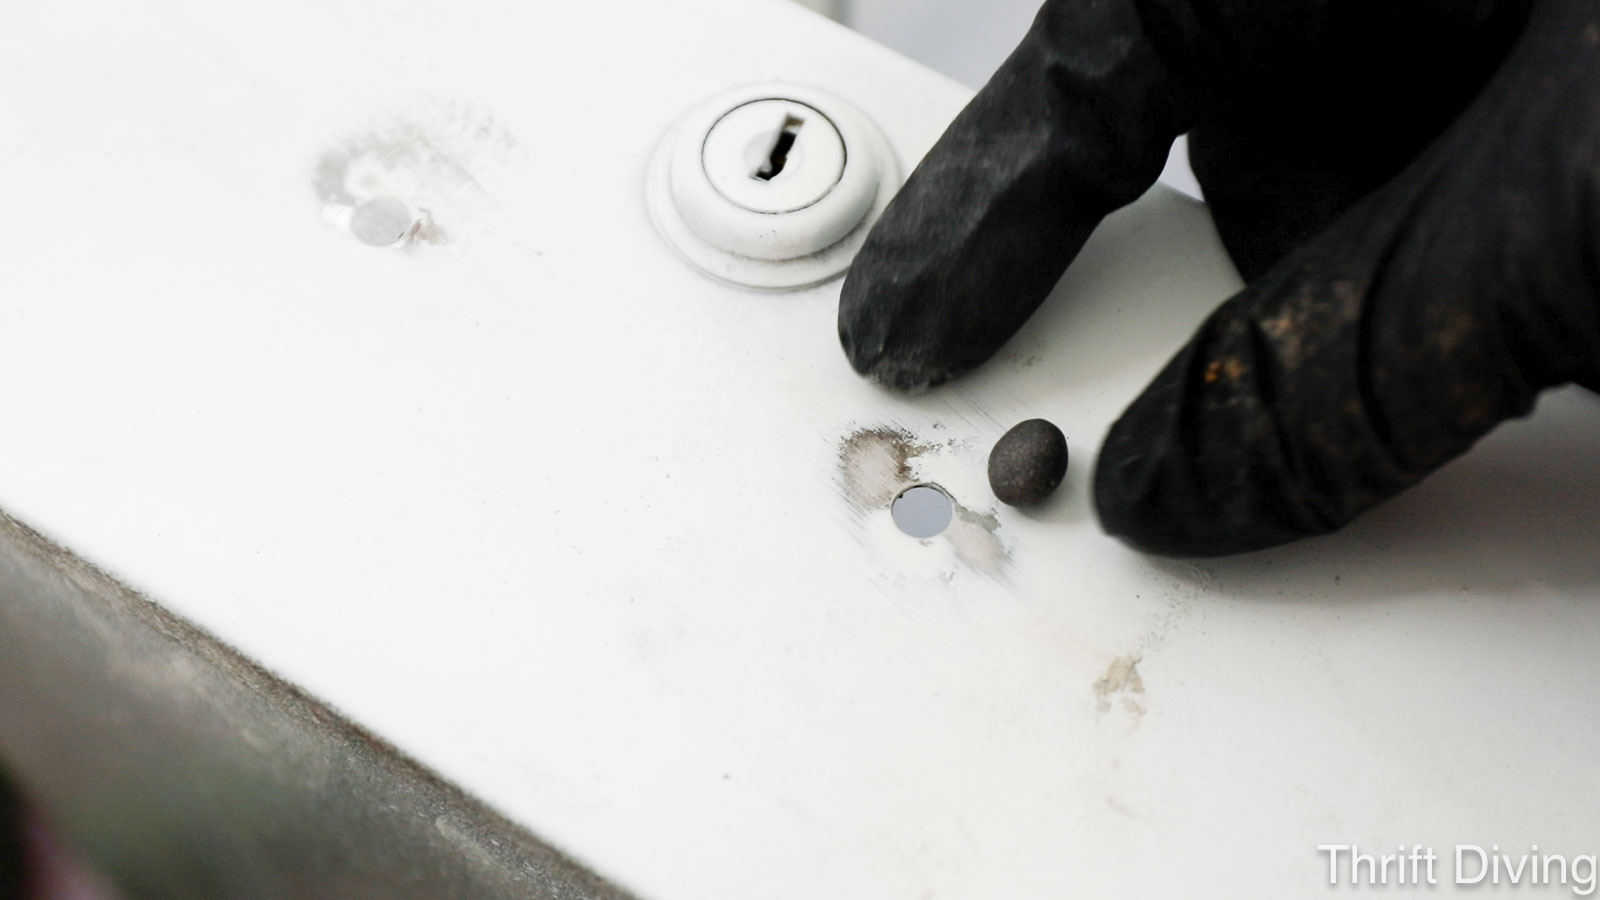
STEP 3: Fill or Repair Holes in the Metal
These metal cabinets didn’t have holes created by the rust eating through the metal, thankfully. Some of the holes in the body were due to old hardware that was no longer there, including some holes that looked like damage, and lastly, I had removed the hardware and wanted to add knobs instead of using the existing pulls, which left hardware holes that needed to be filled.
If your metal cabinets have holes due to rust, it may be able to be repaired (depending on how extensive the rust damage is) but it’s not going to be easy or perfect because epoxy hole filler that can be used on metal isn’t quite *as* malleable as wood filler.
This is the first time I used filler on metal. Bondo is the brand that comes to mind for most people, but I picked up an unknown brand at Ace Hardware because it’s what was recommended to me. But JB Weld WaterWeld Epoxy Putty is a comparable moldable epoxy, which can be used for auto or plumbing repairs.
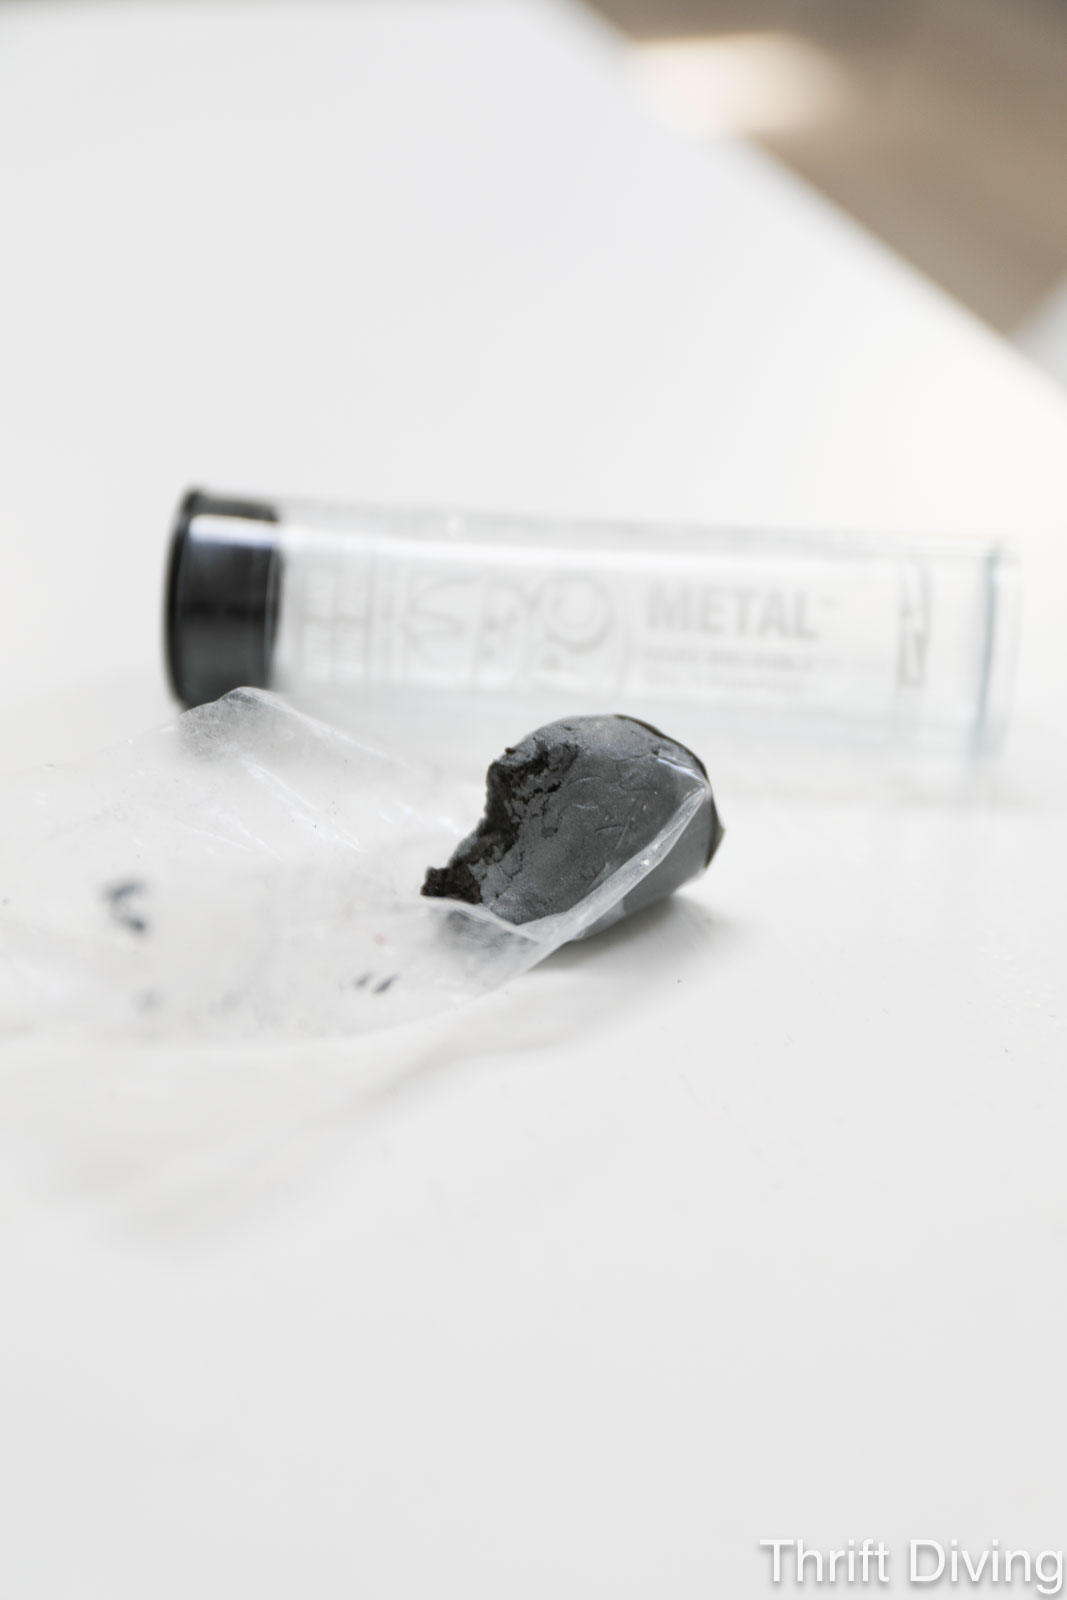
It comes in a small tube, smells horrendous (be sure to wear gloves), and is mixed between your fingers like Play-Doh to get the materials activated. Once the color is uniform and mixed, then:
- Use the putty to plug the hole.
- Try to flatten the putty surface while leaving enough bulk of putty over the hole so that it can be sanded smooth once it dries in 1 hr.
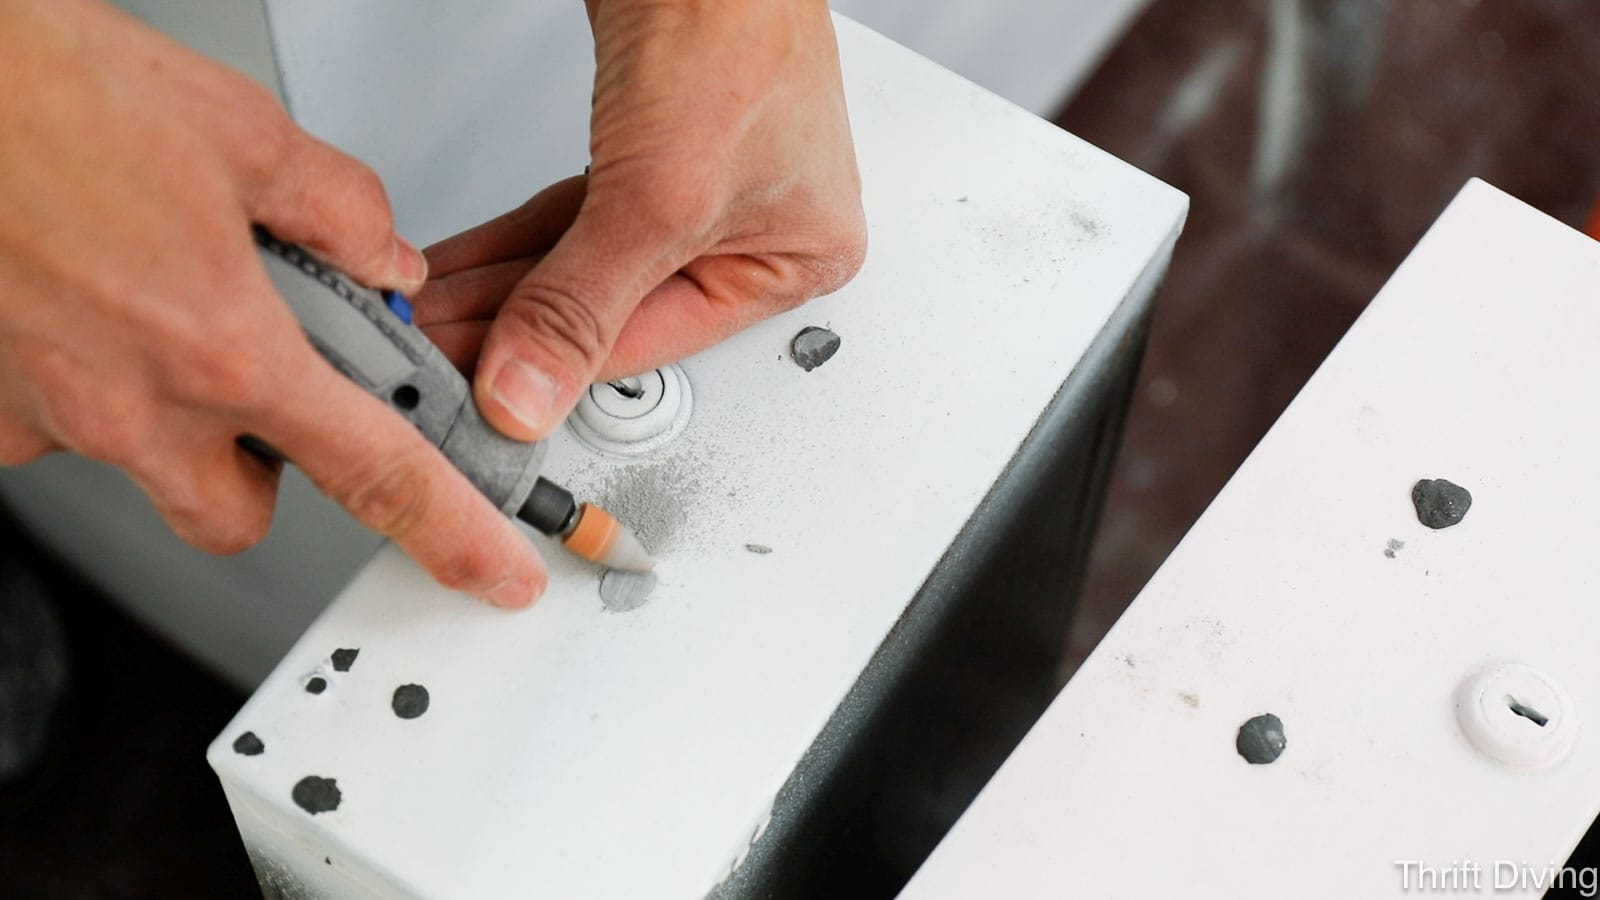
- Use a small Dremel rotary tool to sand down a bulk of the dried putty (or an orbital sander) and then use 150-grit sandpaper to smooth it flush with the surface.
TIP: Add a little bit of putty to the back of the hole, too, so that when you later sand it smooth and flush with the surface, that the thin putty doesn’t fall through the hole. Adding a tiny bit of putty to the back of an open hole (like with these metal cabinet drawers), prevents the putty from falling through the hole.

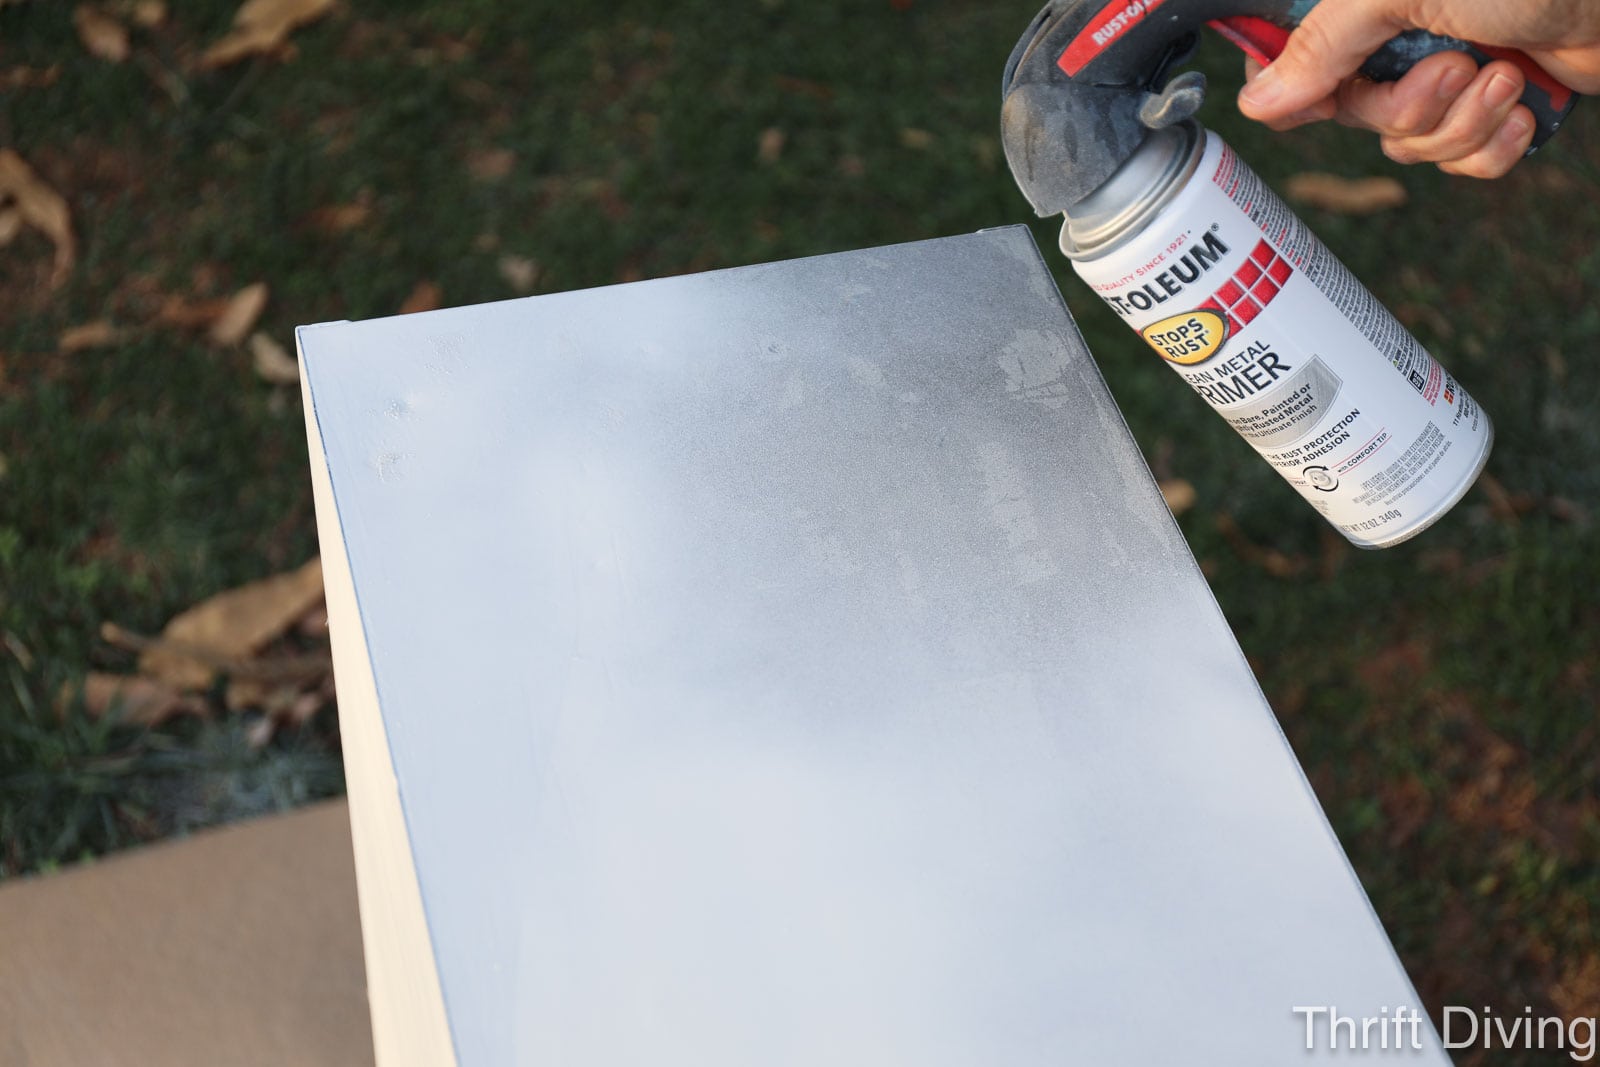
STEP 4: Add 1-2 Coats of Clean Metal Primer
You’ll notice in the pictures above that I had already primed the metal cabinet drawers before realizing, “Wait! I need to fill all the holes!” This lack of attention on my part created additional work for myself. The hole filler should be primed because when I tried to just paint over it, it was clearly visible through the paint.
Therefore, I’m writing this blog post with the correct steps of what you should do……not in the order in which I messed up. HA!
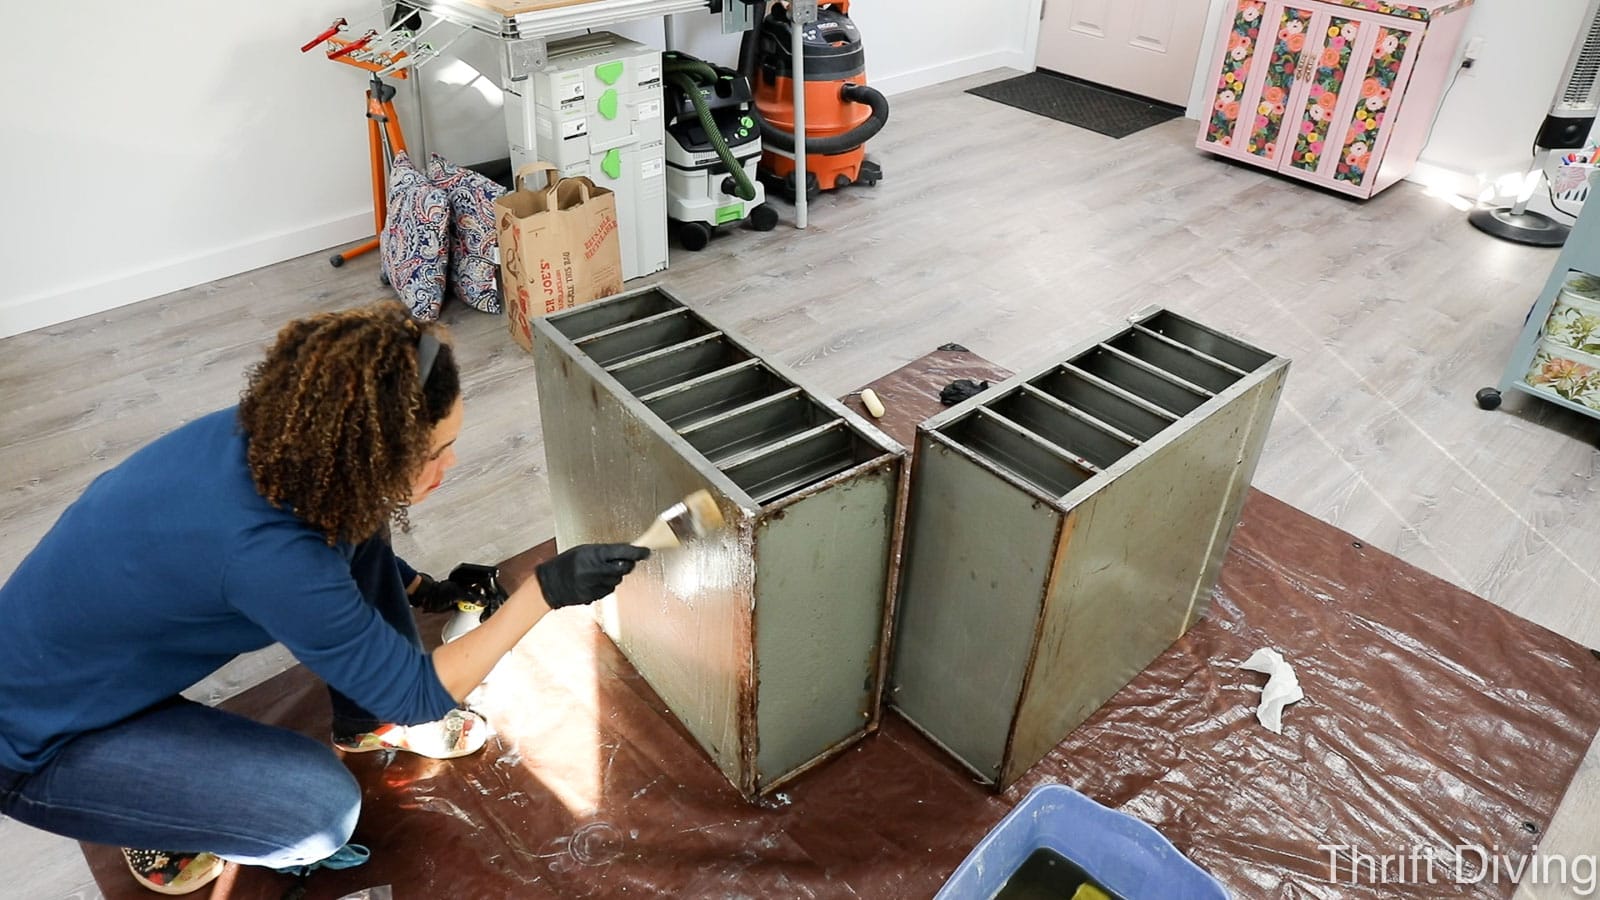
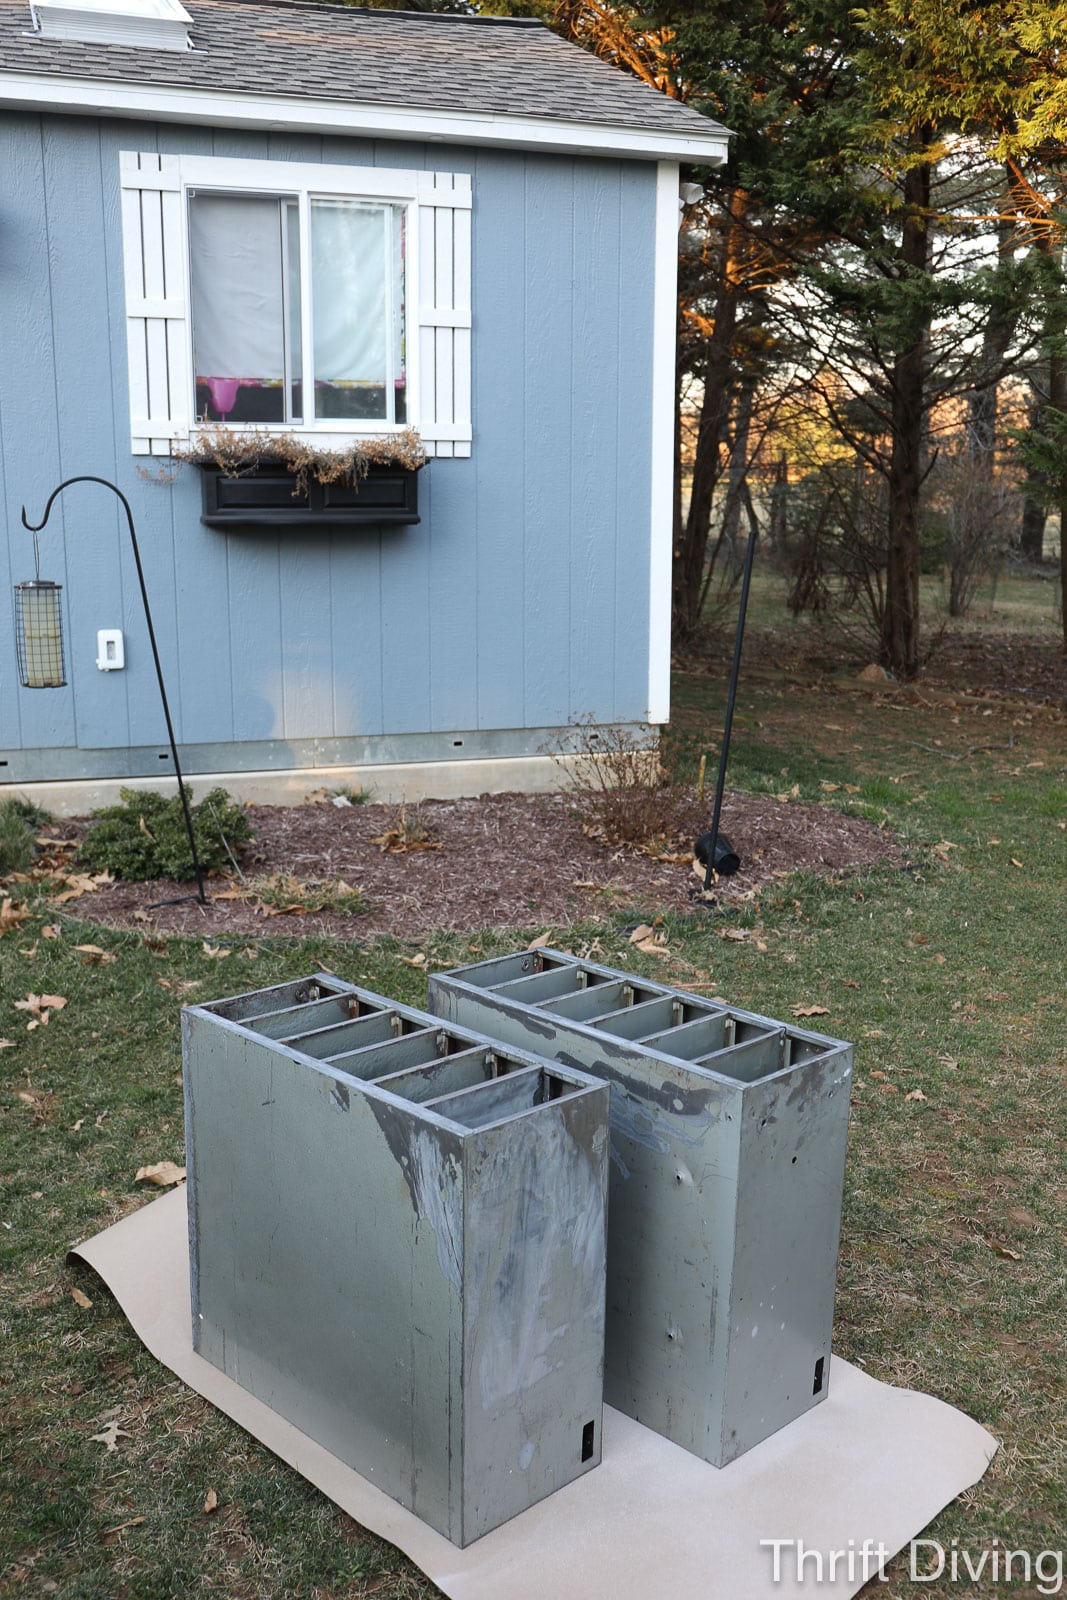
Moving on….. Once the metal has been cleaned, the rust is dissolved, and all the holes have been filled and sanded smooth, now you can use a Clean Metal Primer on the surface.
I took the cabinets out front of my “she shed” and gave them both a coat of primer.
TIP: Be patient when using spray paint. I always get drips when using spray paint, even if I do thin coats. So here’s what I do: I never spray paint a vertical surface. Instead, I spray paint one flat surface at a time…. let it semi-dry…..turn it to another side and paint another face-up flat surface….let it dry….. etc. If you try to spray paint a vertical surface, gravity always wins and you get runs. (Or maybe I’m just a crappy spray painter, but that’s been my experience!)
TIP: When turning your metal cabinets over to spray paint another “face-up” surface to prevent runs, just be sure not to put a surface down that isn’t fully dry, or else the paper can stick to the metal cabinets.

Do You Have To Use a Primer When Painting Metal Cabinets?
Well, if your metal cabinets have rust, and you’ve removed that rust as I walked through in a previous step, then yes, you should use primer with painting metal cabinets.
But you don’t want to use the same primer that you’ve painted your bedroom with; instead, you should use a clean metal primer before you paint metal cabinets. It’s specially formulated to help stop the rust from coming back. Because if your rust comes back, it will destroy the beautiful paint job on the metal cabinets.
By the way, I highly recommend using one of these handy Comfort Grip attachments with your spray paint! It simply clips on to the top of a can of spray paint so that your finger doesn’t get fatigued, especially if you have a lot of spraying to do!
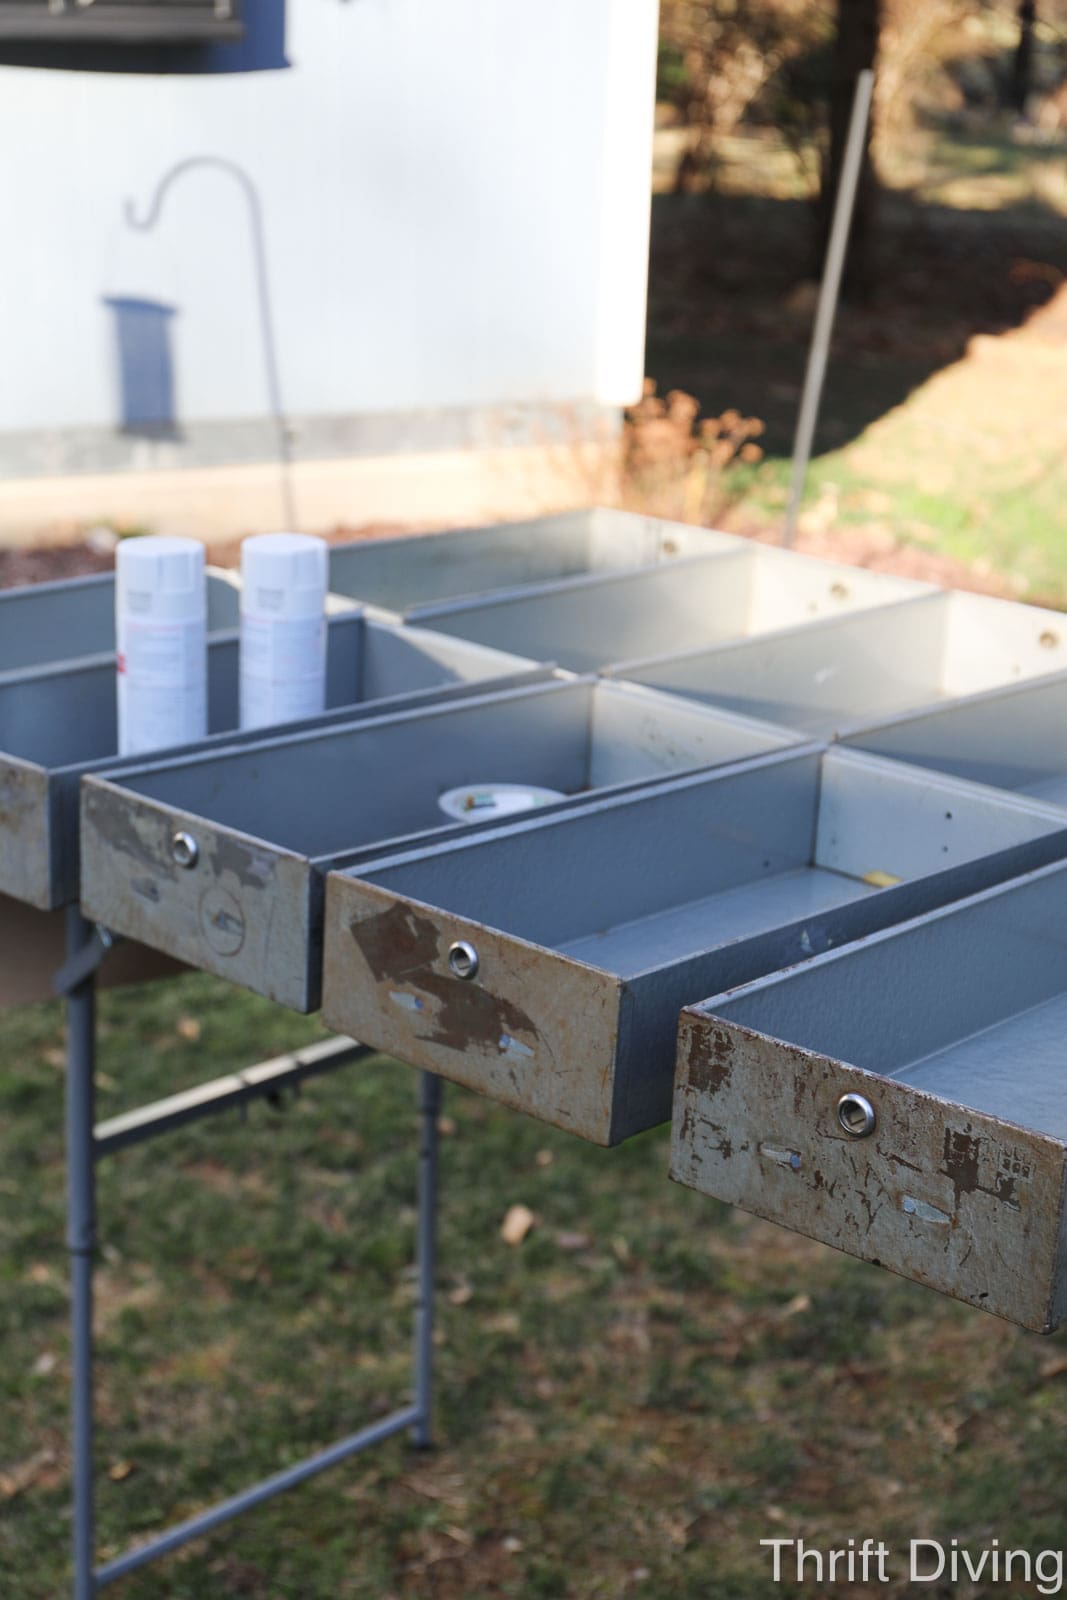
Do You Want to Paint the Drawers, Too?
Before going further, think about what you’ll do to the interior of the metal drawers. As you can see, these drawer fronts weren’t in great condition, but the interiors weren’t rusty or dirty.
However, I wanted to make them look pretty when opened. There’s nothing I dislike more than seeing beautiful painted metal cabinets, only to open the drawers and see the original mediocre finish (or even dirty and stained surfaces!) on the interior.
You’ll notice that these drawers, in their past, must have all had locks, which were big round holes. I planned to use these holes for new pretty knobs (which is why in Step 3) I filled the original hardware holes.
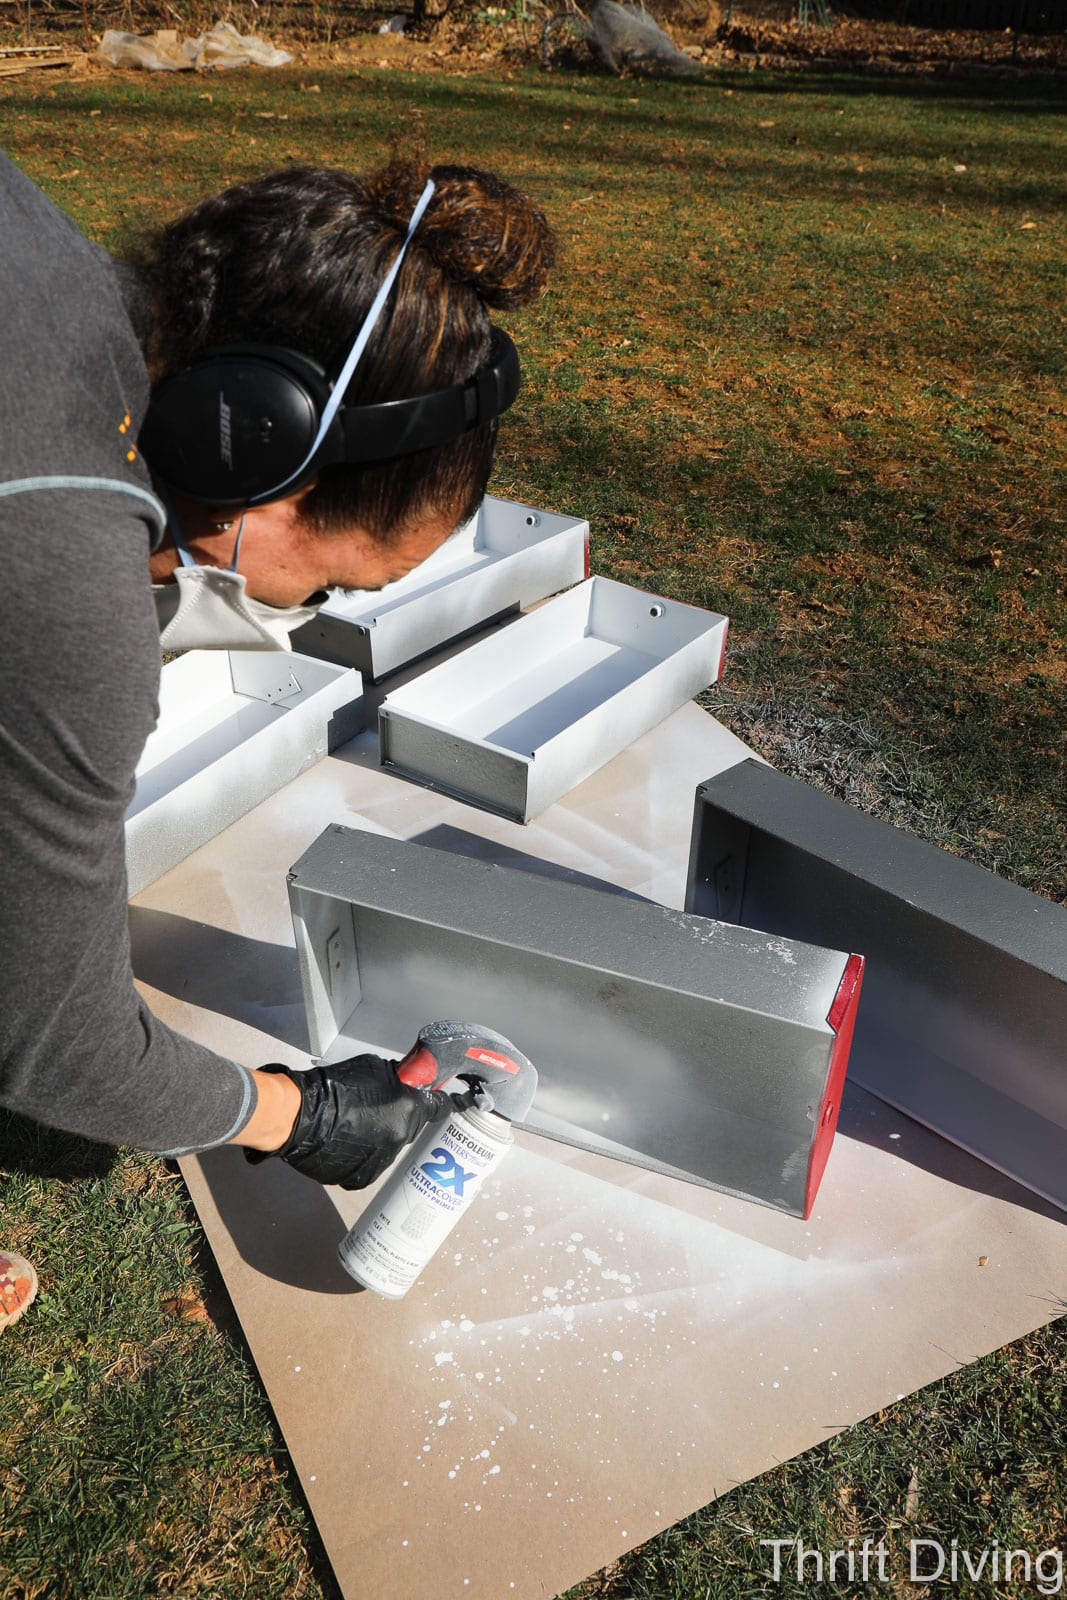
But the problem is that I didn’t realize soon enough that I would want to finish the metal cabinet drawer interiors. So you can see that I had already started painting the drawer fronts, only later to have to go back and add a coat of white spray paint (which ruined the drawer fronts).
I planned to line the drawers with pretty wallpaper, including the sides of the drawers. But I painted the entire drawer white, for uniformity. I later even painted the bottoms of the drawers. Not that anyone is going to see them, but again–if I have this pretty painted metal cabinet, I want all parts of it to be as “finished” as possible, even the parts that no one will see. Call me obsessed. LOL
TIP: Always wear an N95 mask when spray painting, even if outdoors! The particulates linger in the air and can still be inhaled. Don’t do that to your lungs, my friend!
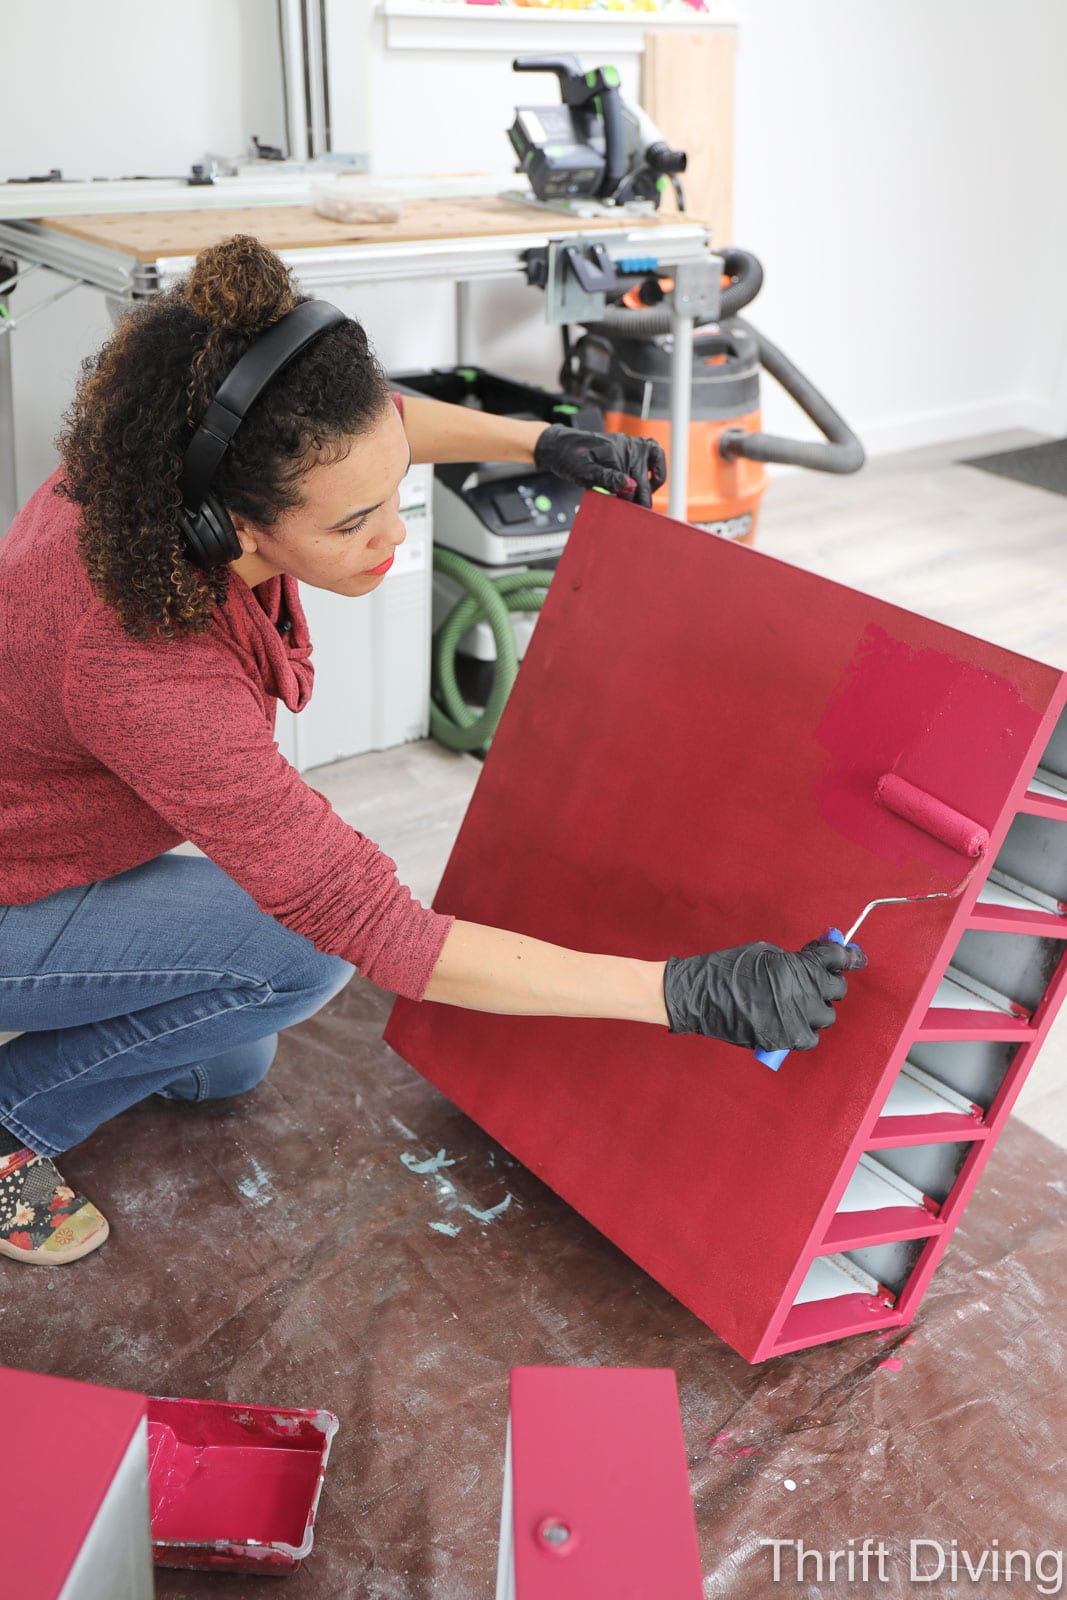
STEP 5: Paint the Body with Two Coats of Paint
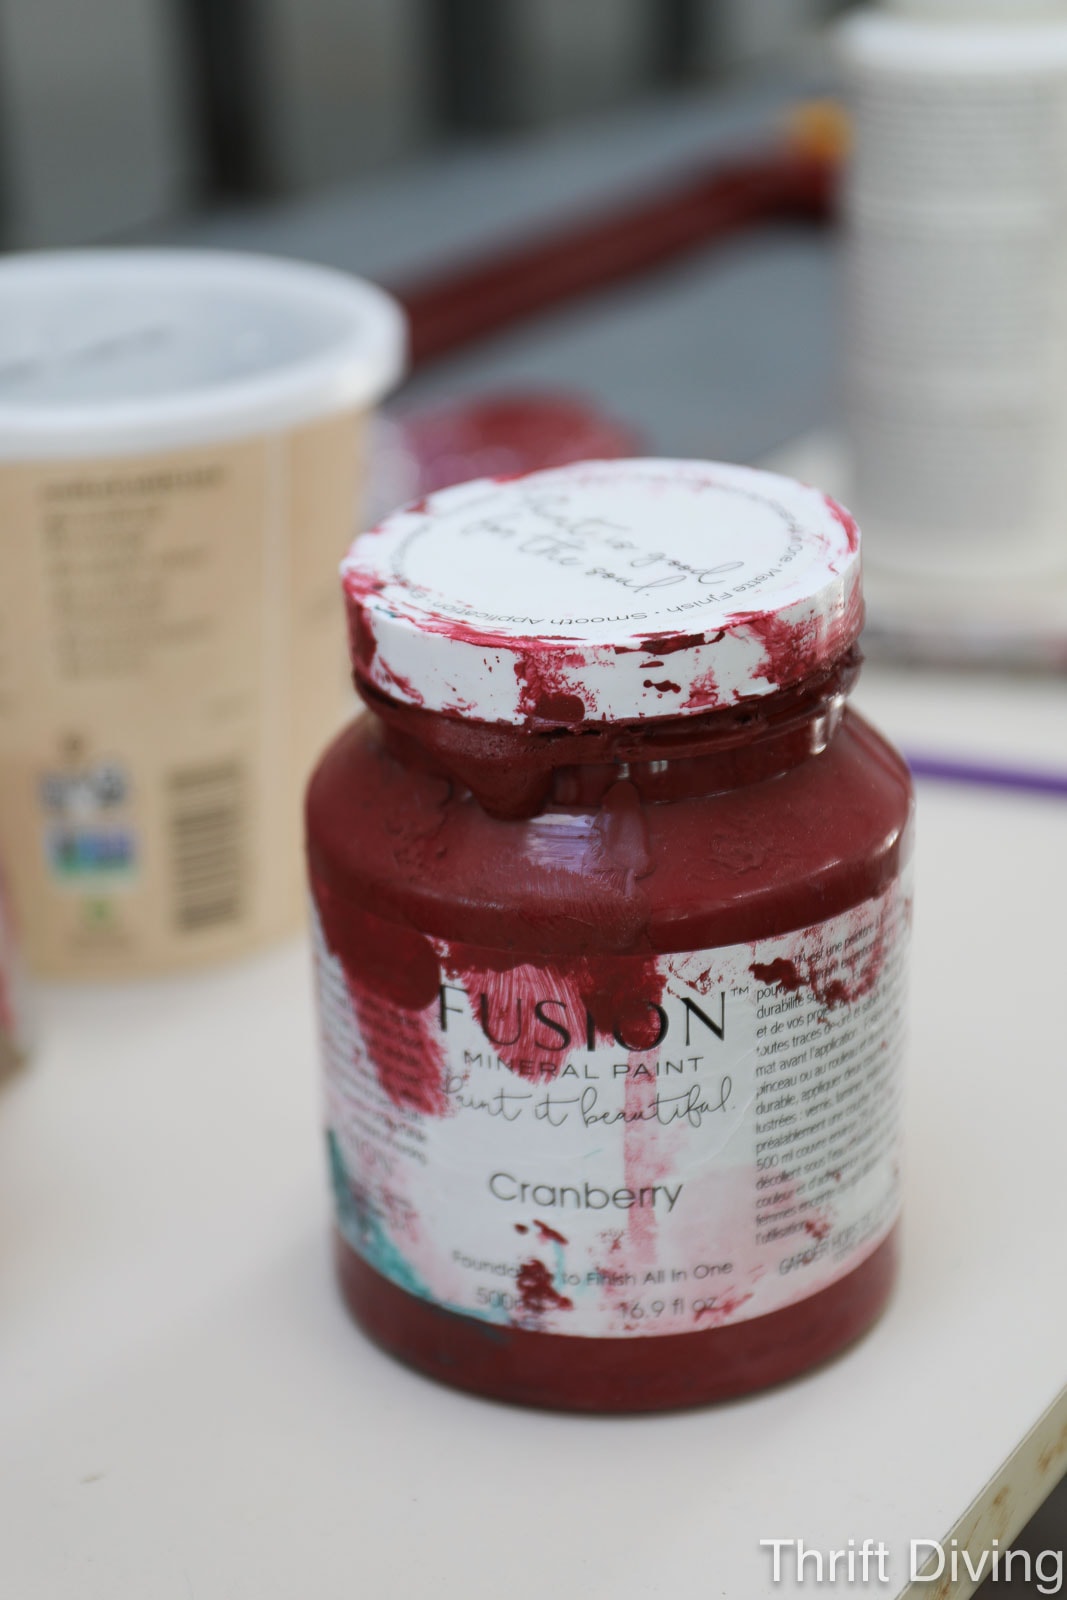
You might be wondering what kind of paint to use on metal, but as mentioned in Step 4, the most important is the Clean Metal Primer. Once you’ve used the Clean Metal Primer, you can use any paint to paint old metal cabinets. Rust-Oleum does make spray paint in the Stops Rust line of products, which you can use. But I didn’t want to use spray paint on them. I wanted to use furniture paint. So I chose this Cranberry red from my stash of paints. It’s by Fusion Mineral Paints, which I really love because they have top coats built right inside the paint and it has a slight sheen to it (whereas something like chalk paint is very flat).
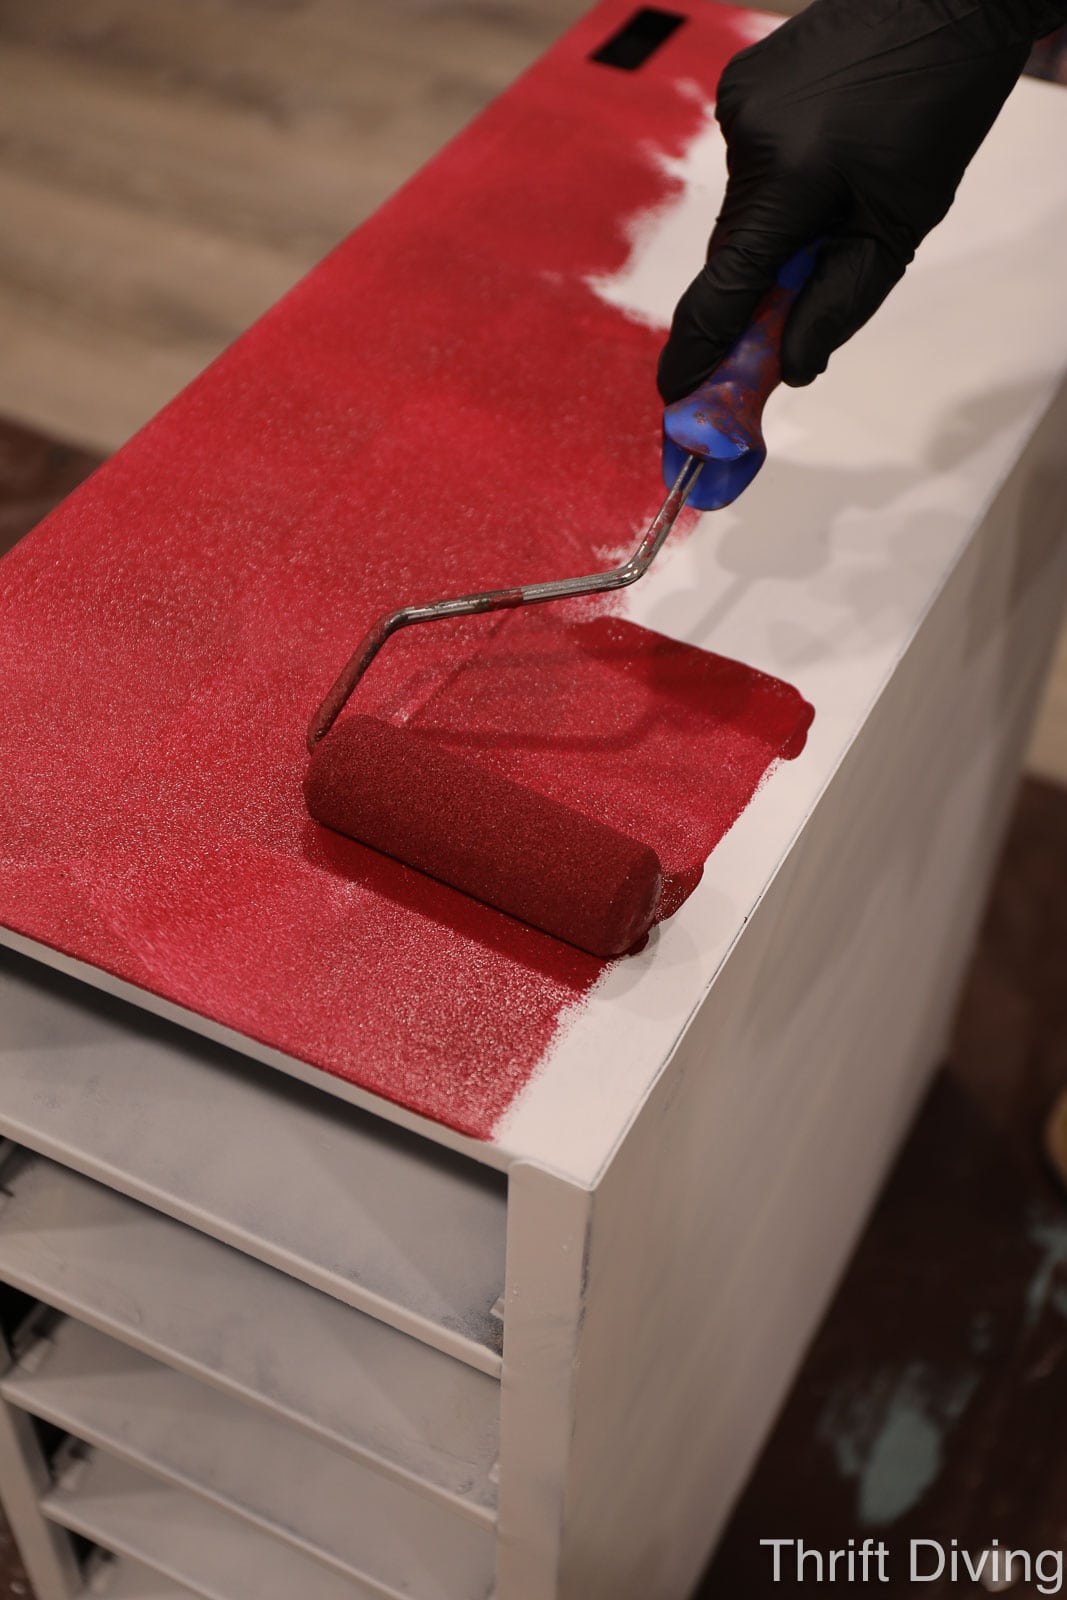
Do You Have to Use a Brush or Can You Paint Metal with a Roller?
Personally, I love using a roller when painting furniture, even metal cabinets, because it’s sooooo much faster. I like to use the smaller 1/4″ rollers. I had a small foam roller on hand, so I used that. It worked fine, but just note that when you use rollers, it can leave texture on your furniture. If you’re going for a super smooth surface, I would recommend using a chalk paint and sanding in between coats with fine sandpaper (or using spray paint for smoothness).
But for me, a roller is just fine.
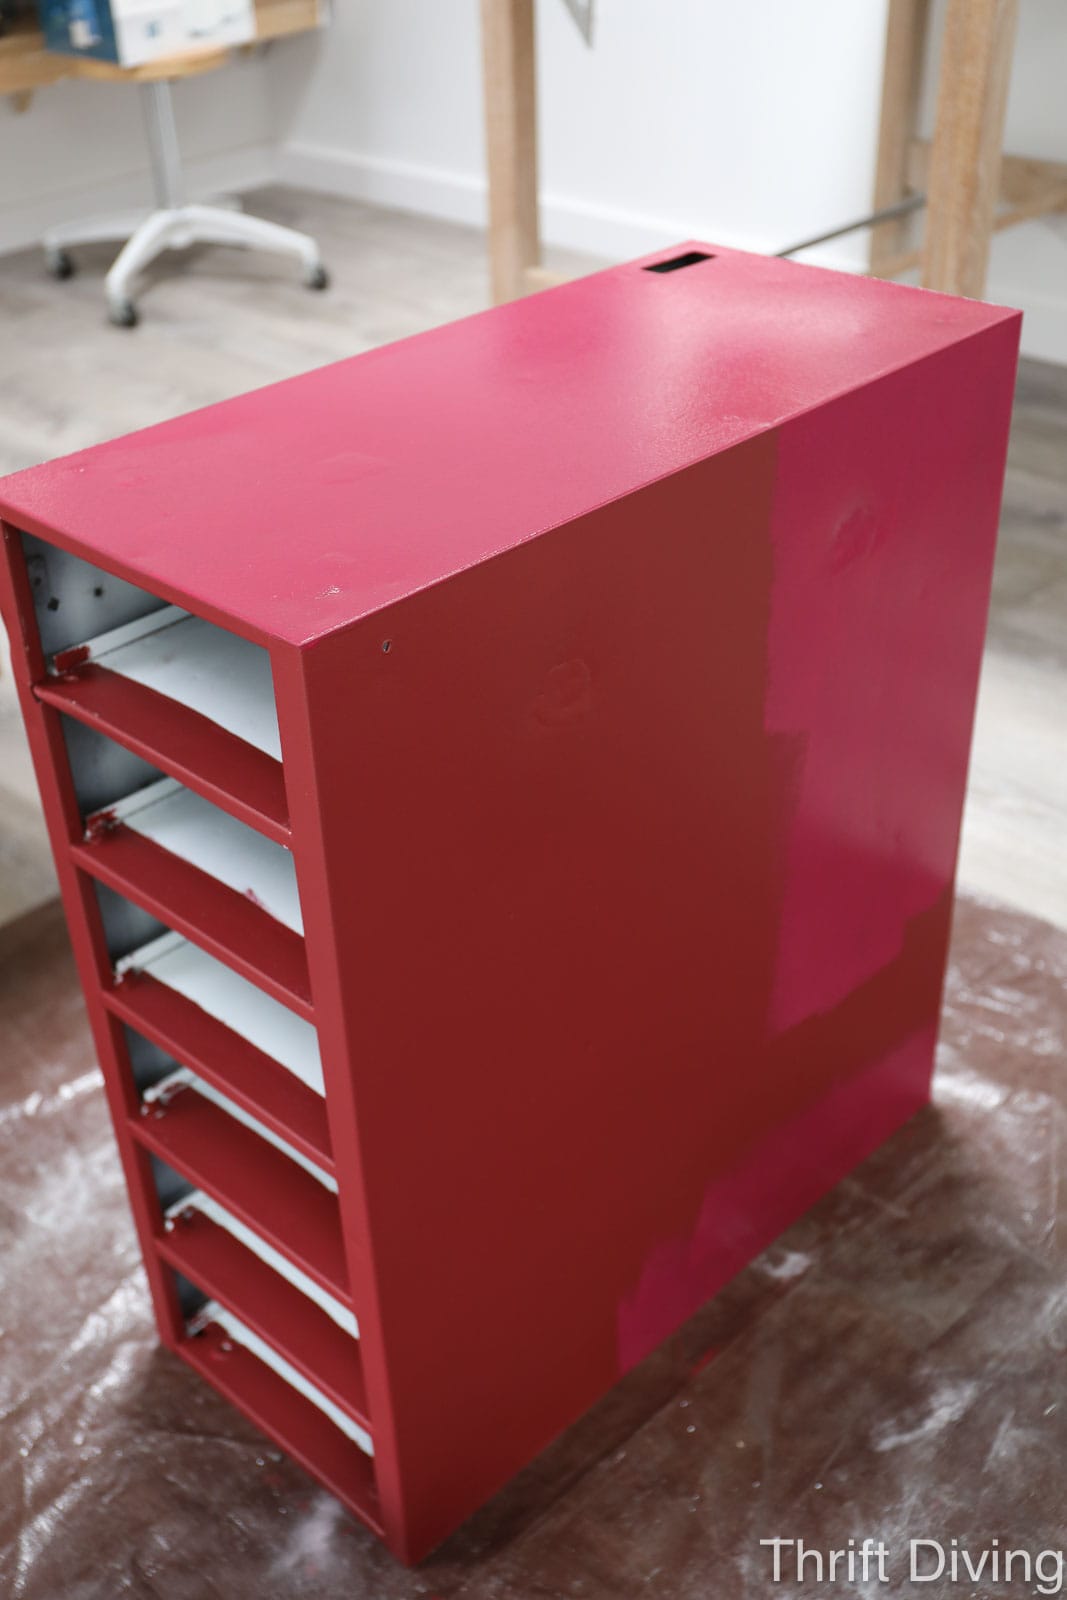
The problem I ran into, though, is that I ran out of paint! I had painted two coats onto one of the metal cabinets, including one coat on the drawer fronts. But I knew it wasn’t going to be enough paint to complete the project. So I headed to Home Depot and was planning to get a color-match. But then this similar, but more gorgeous, Behr Sugar Beet color drew my eye! While it looks hot pink in the can, it definitely dries a deeper berry color!
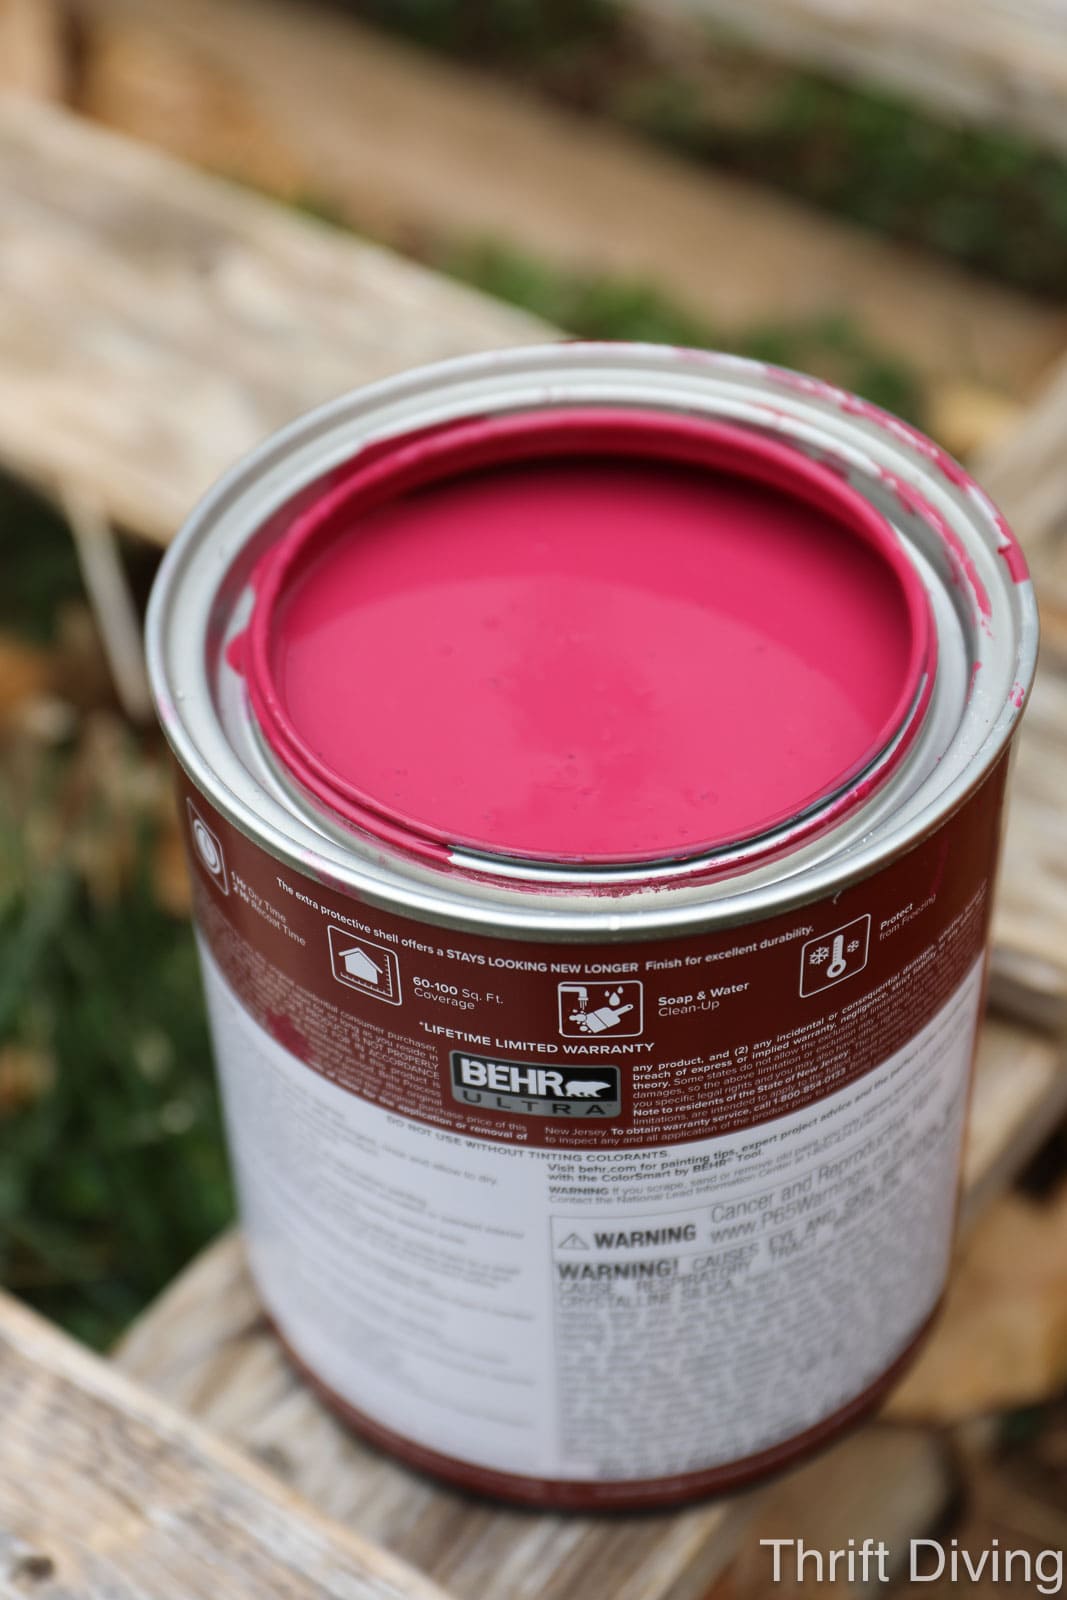
I started on covering up the one-coat coverage and loved this color so much!!! I love when things like this happen, don’t you?? What started as a frustrating problem of running out of paint turned into choosing a color that I loved more! These are called “happy mistakes.” 🙂
You can see the slight vibrancy upgrade from the Cranberry to the Sugar Beet!
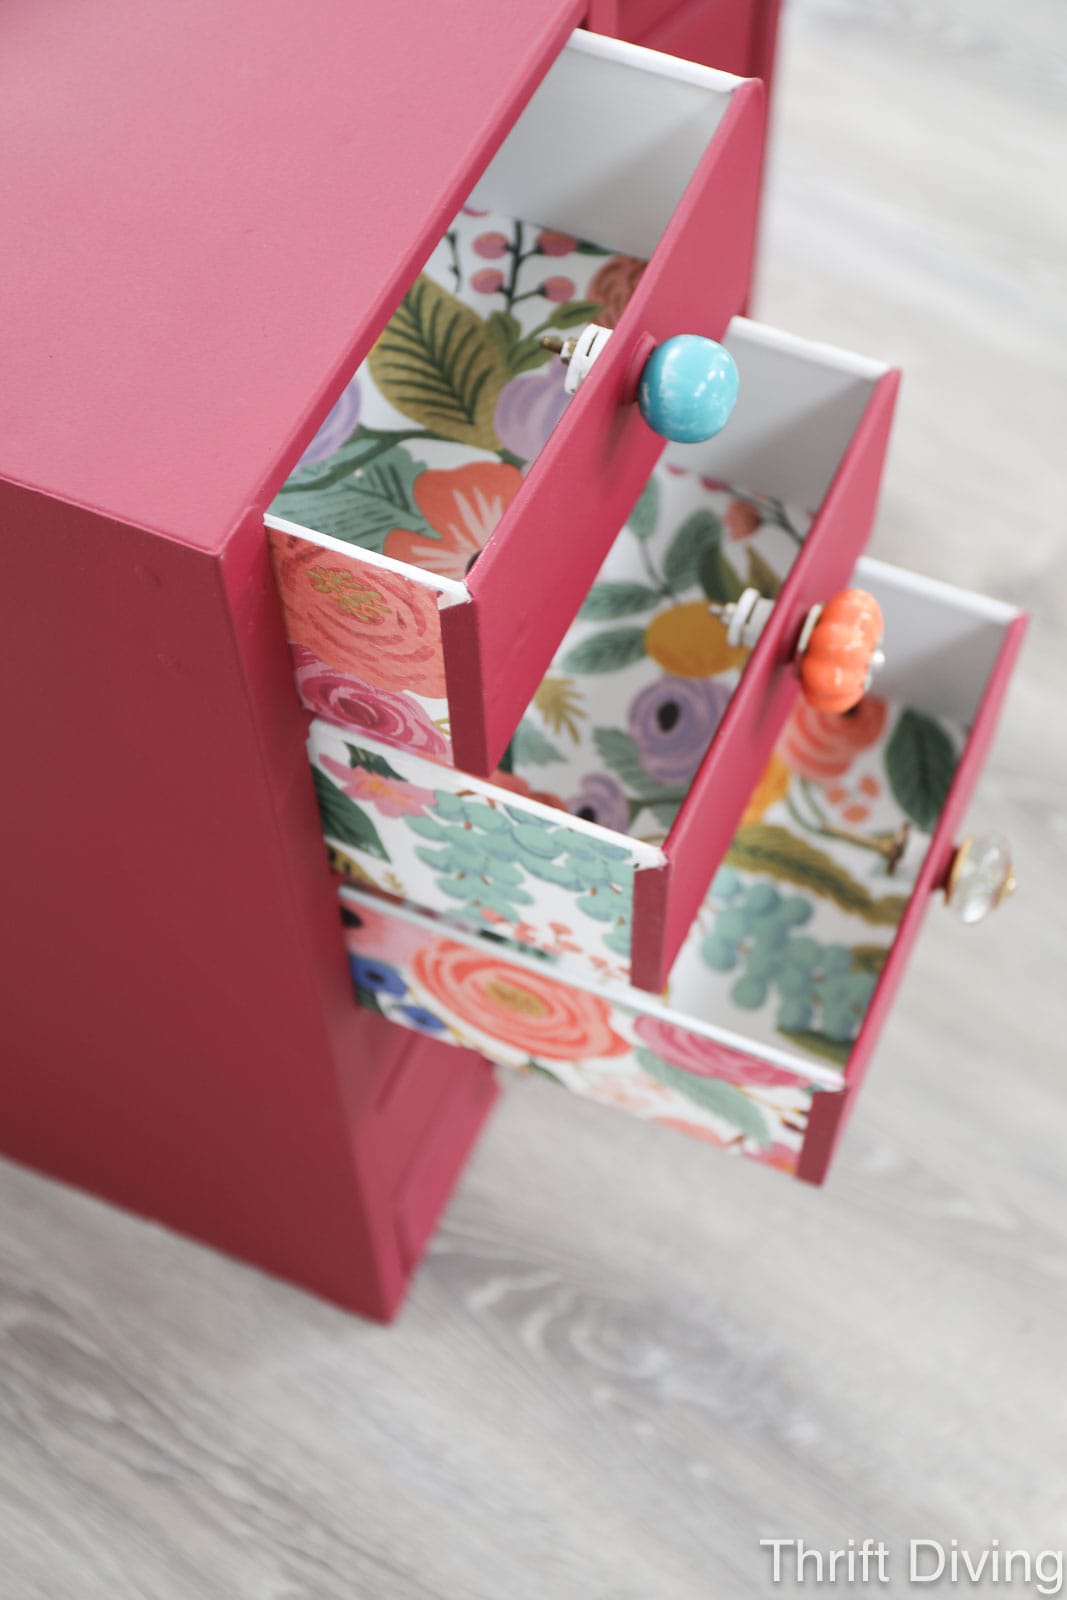
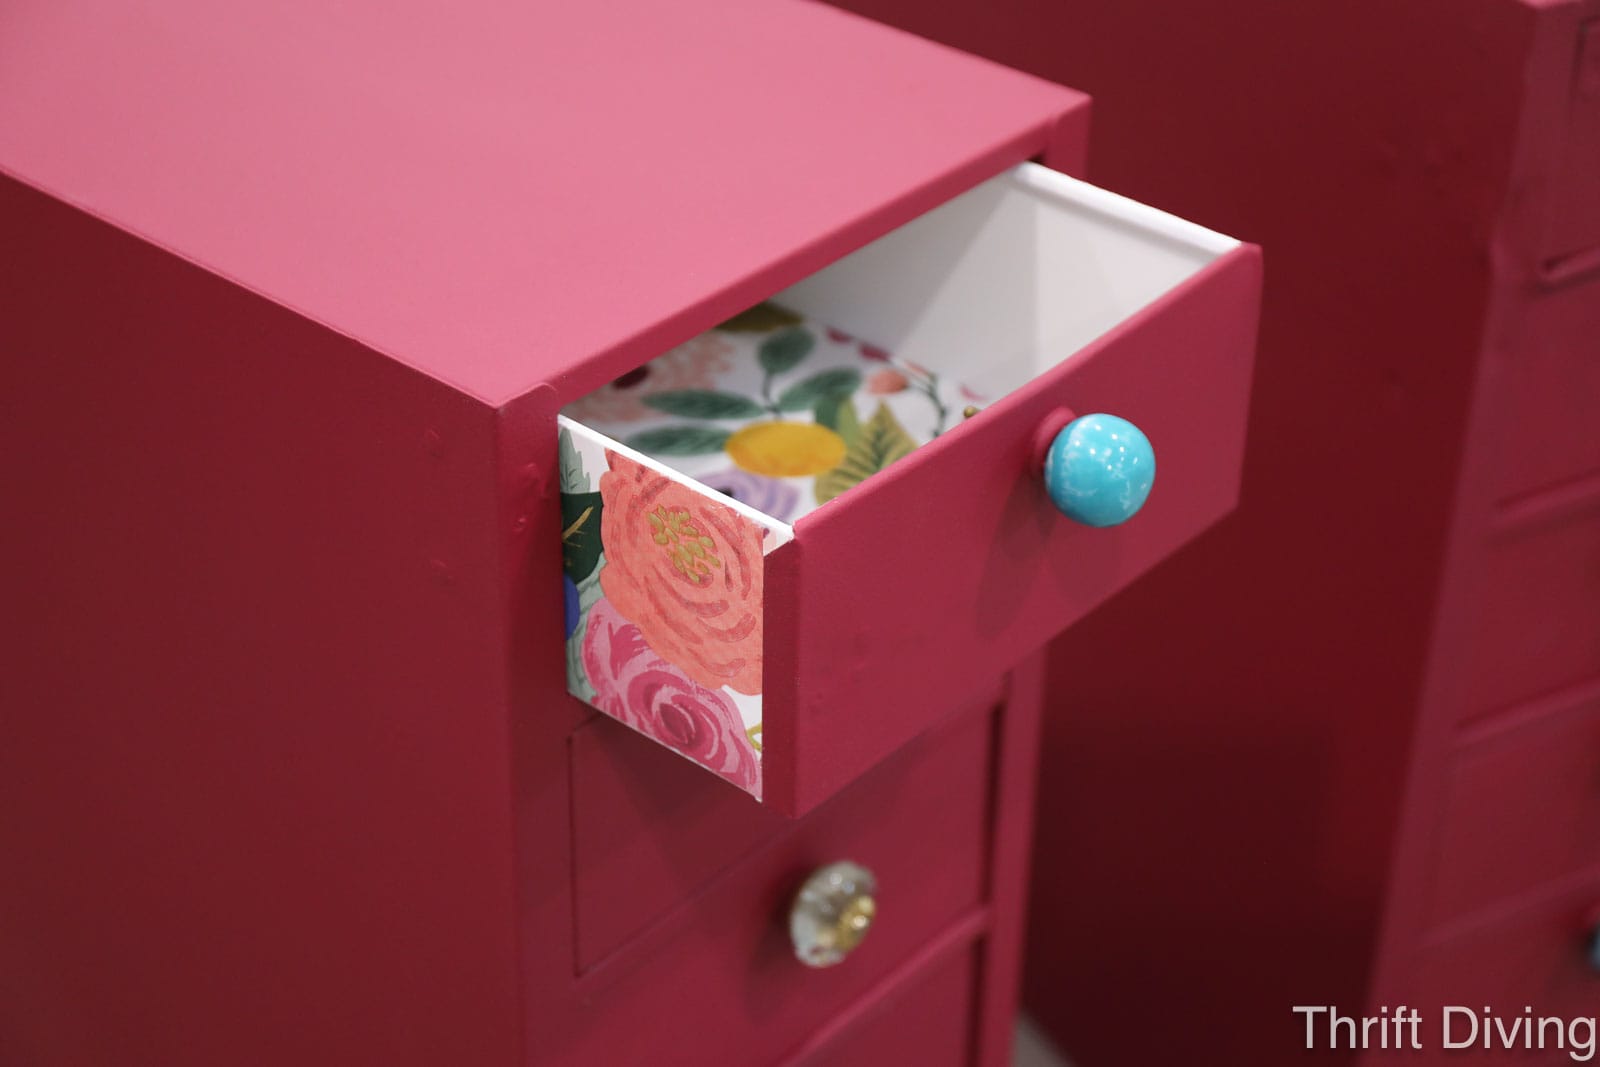
STEP 6: Add Wallpaper or Scrapbook Paper to the Drawers!
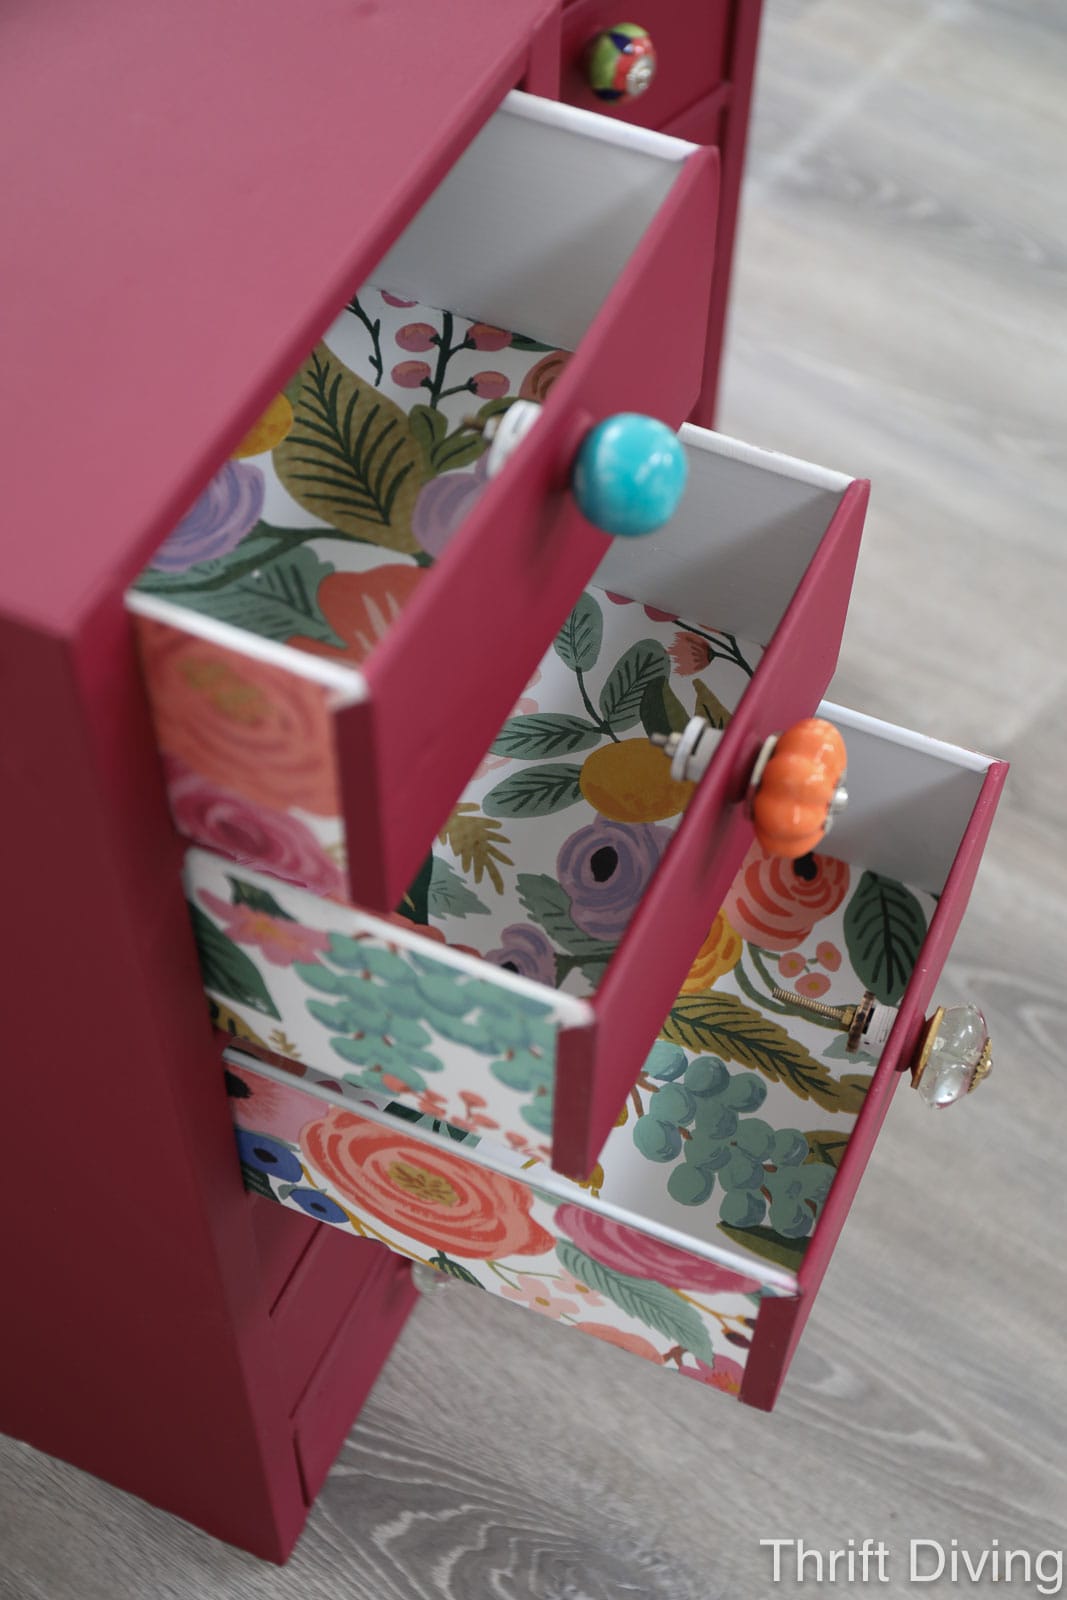
Painting metal cabinets isn’t difficult. Anyone can do it. But what truly transforms metal cabinets (or any piece of furniture, really) to make it your own and to make it unique, is what you do to the drawers. When I open them up and see something pretty or unexpected, or whimsical, it brings a smile to my face. So I chose to line the drawers with this floral removable wallpaper.
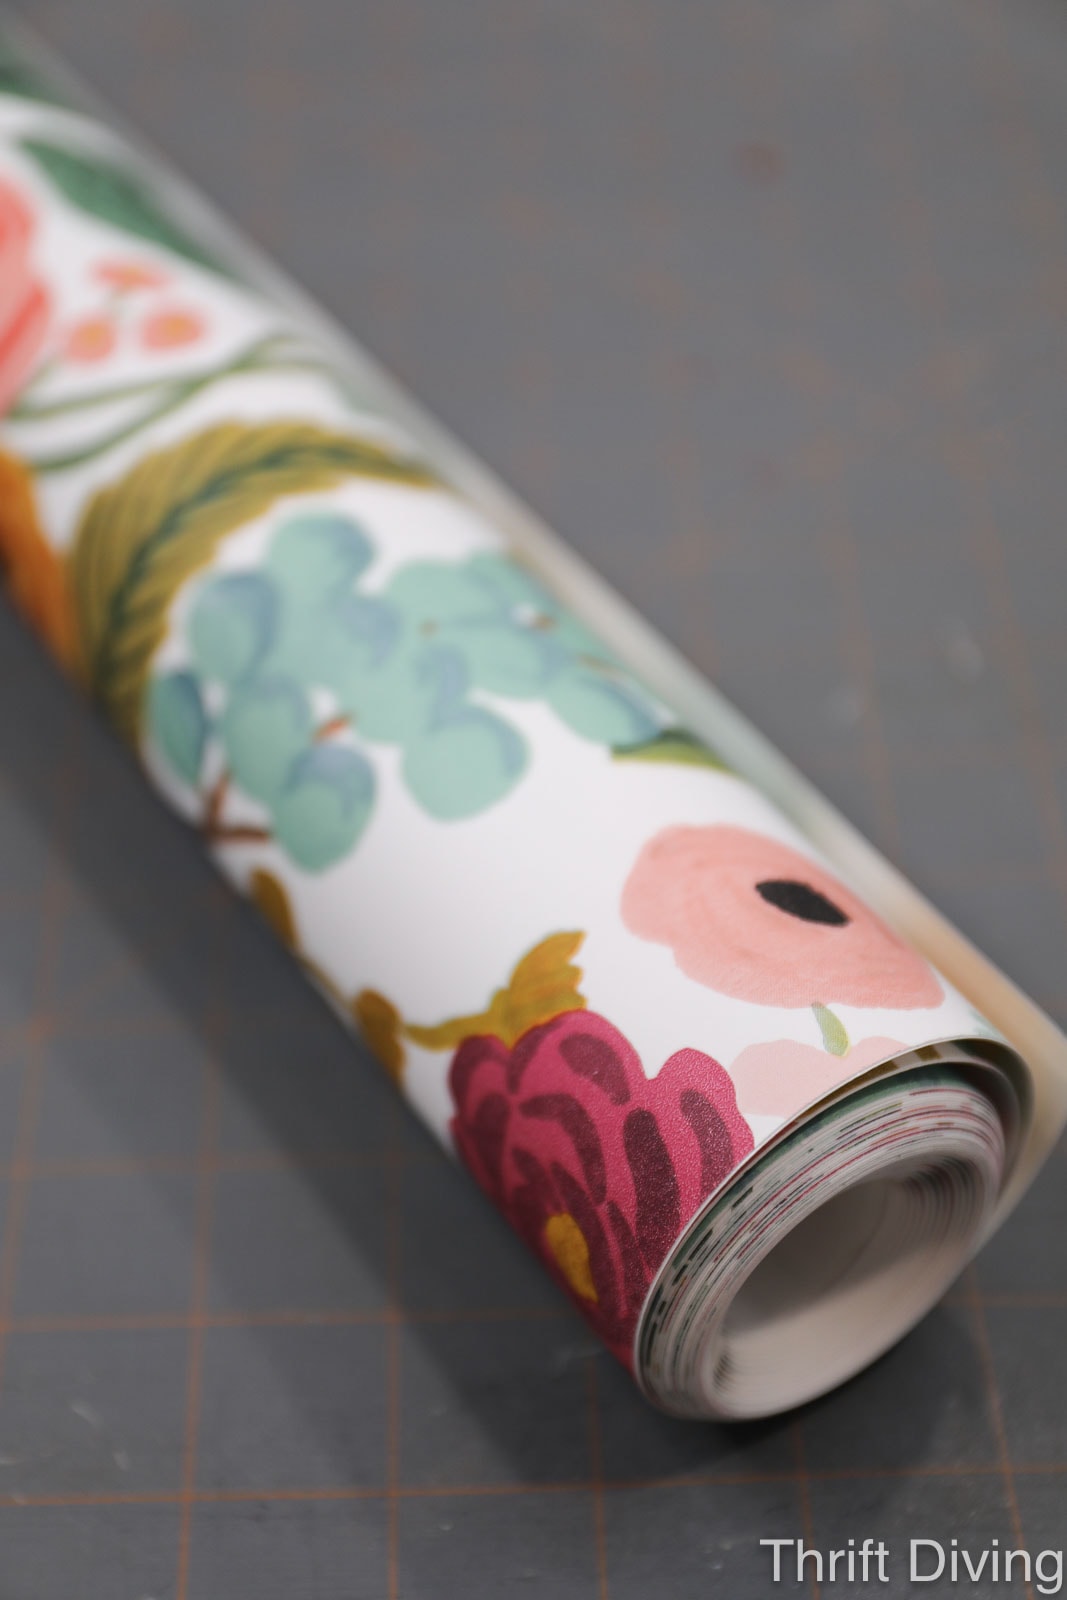
Last year I had bought this roll of removable wallpaper because it was the same brand as the paper I used to line that oak sewing cabinet that I refinished last year.
I had bought the roll last year on a whim, knowing the perfect project would come along (this one!). I ended up using the entire roll to line 12 drawers (about 9″ x 20″ each), and lining both sides of the drawers. It was about $70 a roll (including taxes), so not cheap. To keep costs down, you can use scrapbook paper and glue a patchwork pattern like I did in this vintage vanity makeover.
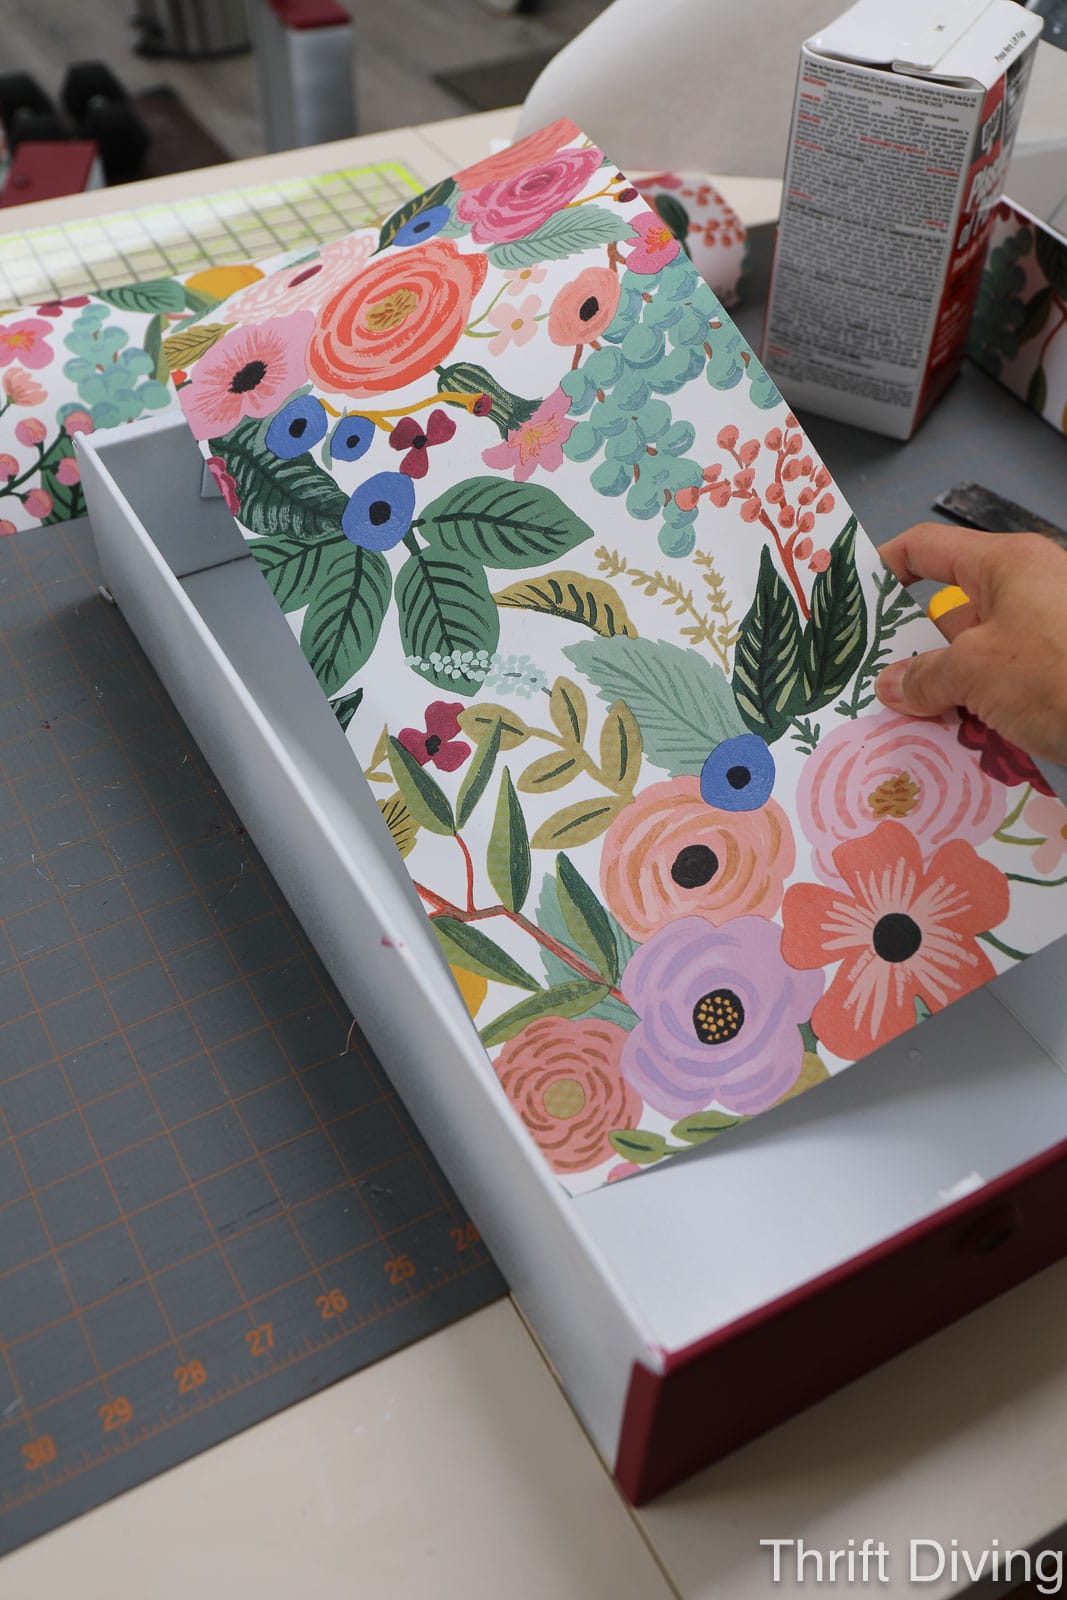
I cut each piece of wallpaper to fit the drawer bottom, and I cut 24 pieces to line the sides of the drawers.
But I found a few things interesting when using wallpaper to line drawers:
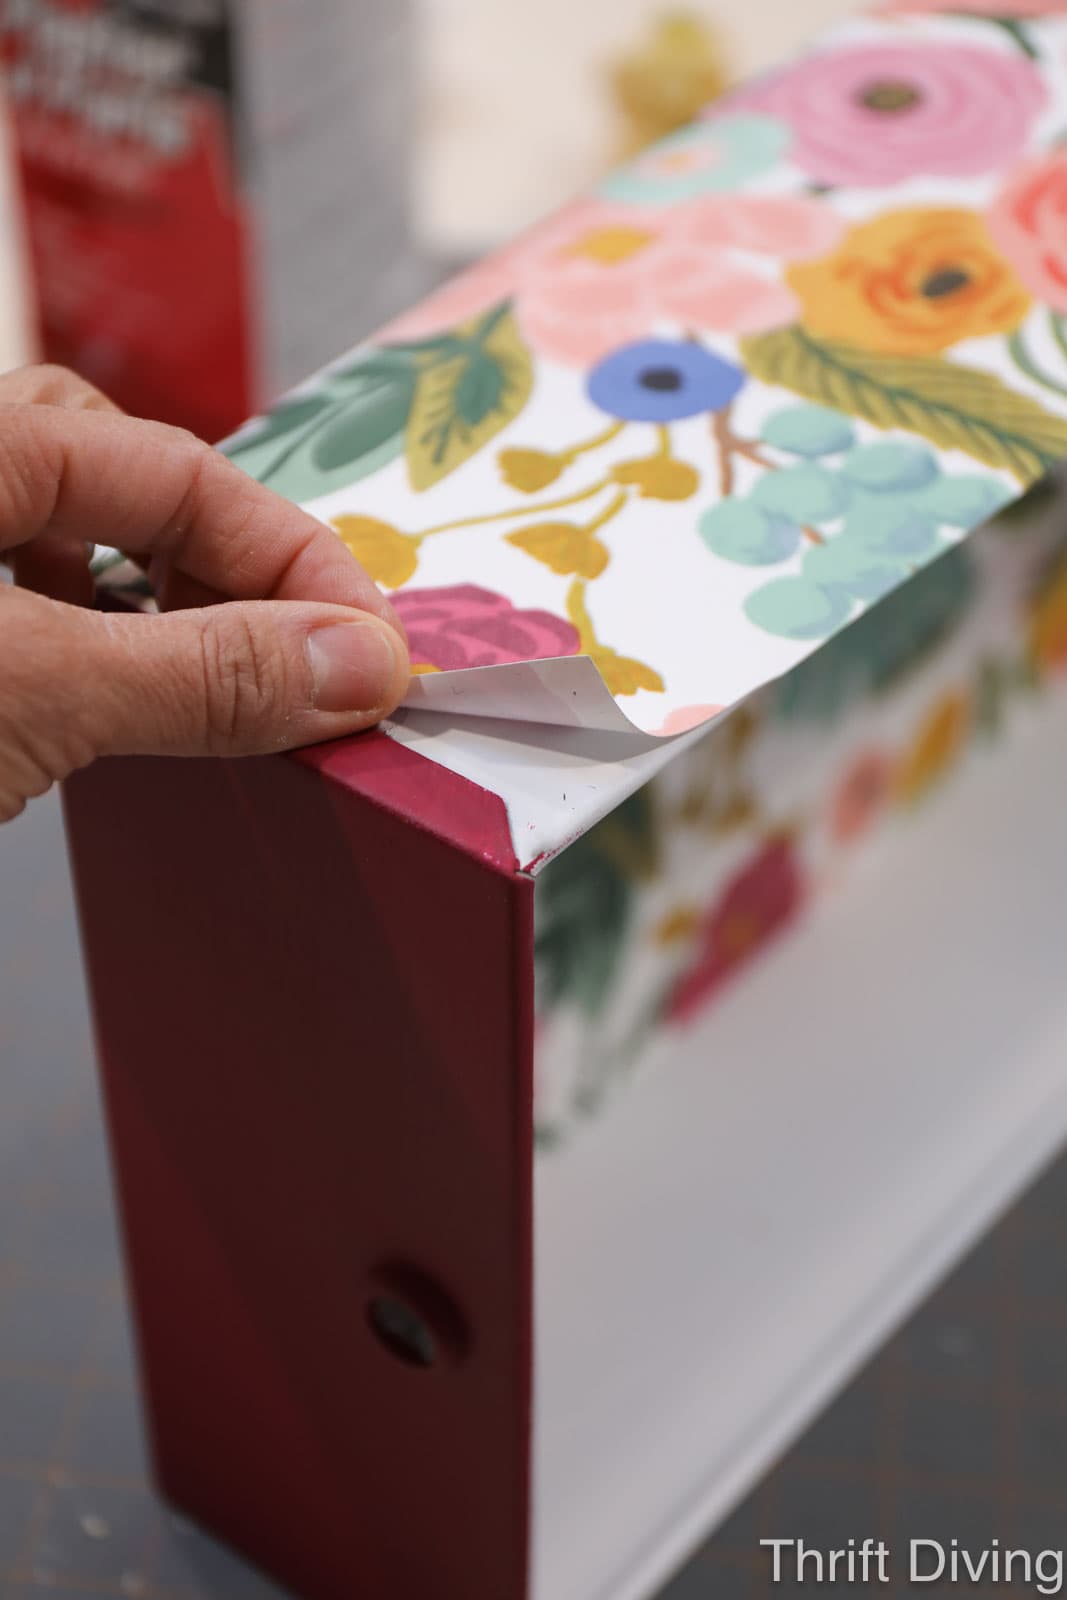
- Removable wallpaper is just that: removable. It didn’t stick very well to the painted drawers and kept lifting at the corners. To keep the wallpaper in place, I simply applied a little Mod Podge sealer over top of the edges of the wallpaper to keep them in place where the edges meet the corners.
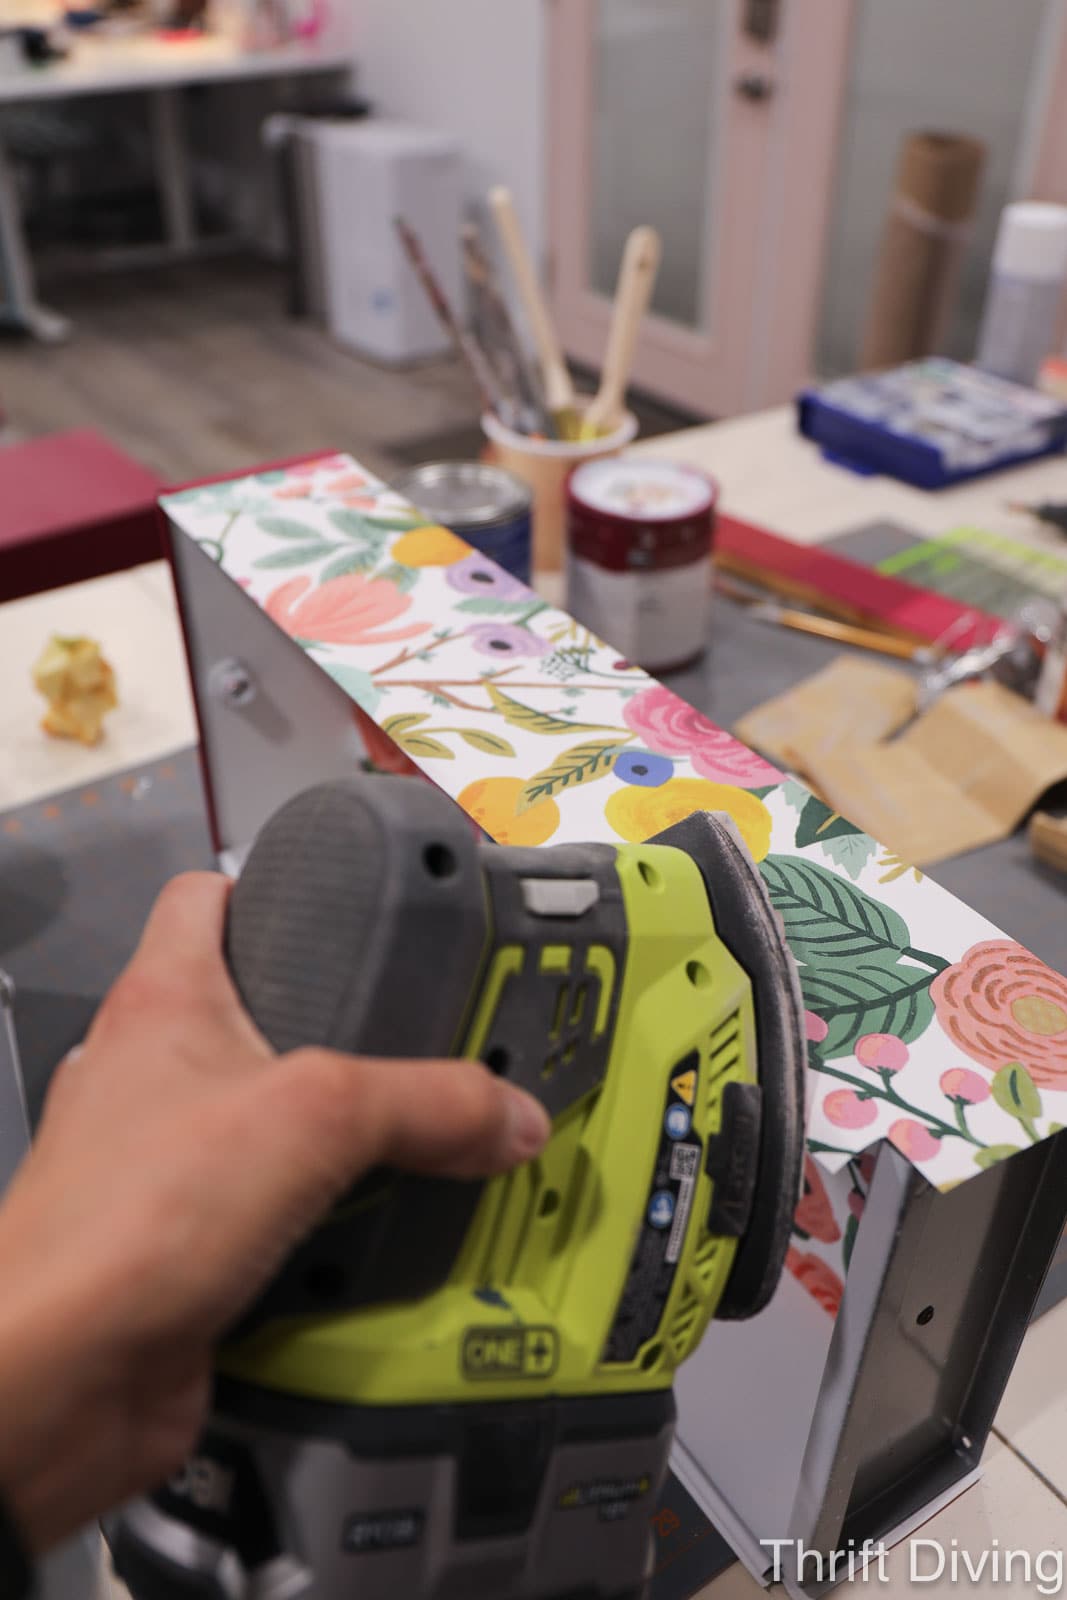
- To line the sides of the drawers, cut the wallpaper slightly bigger than the drawer sides. Then use a sander held at an angle to carefully sand away the excess. This will leave a nice, crisp edge. Read this blog post on how to get those crisp edges.
STEP 7: Add Whimsical Hardware!
Over the years, I’ve collected knobs and other hardware that I saved from furniture I made over, including free hardware samples that brands had sent to me. I never used any of it because…well…it was all mismatched; I never had enough of one kind to “do” anything with them.
Until this project, that is.
I was inspired by:
1) the deep berry color and wallpaper combo, which felt very whimsical,
2) being cheap; do you know how much it could be to purchase 12 cute matching knobs?!
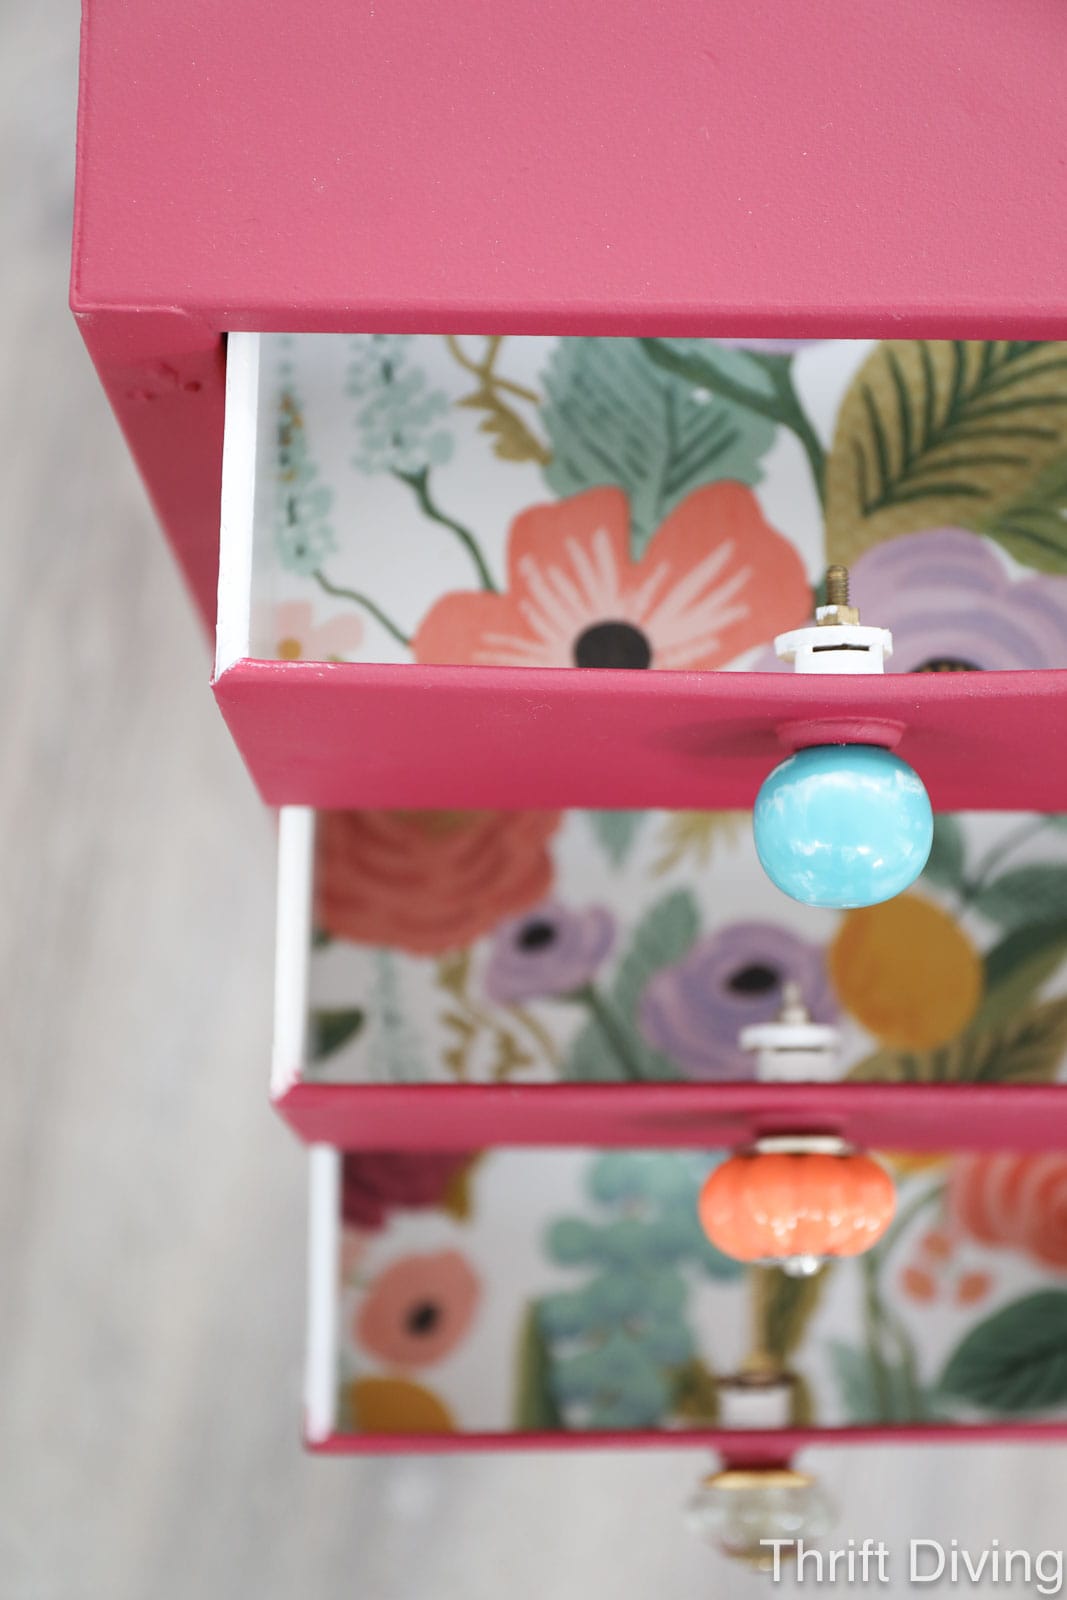
3) wanting to cover up those empty lockset holes in the cabinet faces; knobs would be perfect.
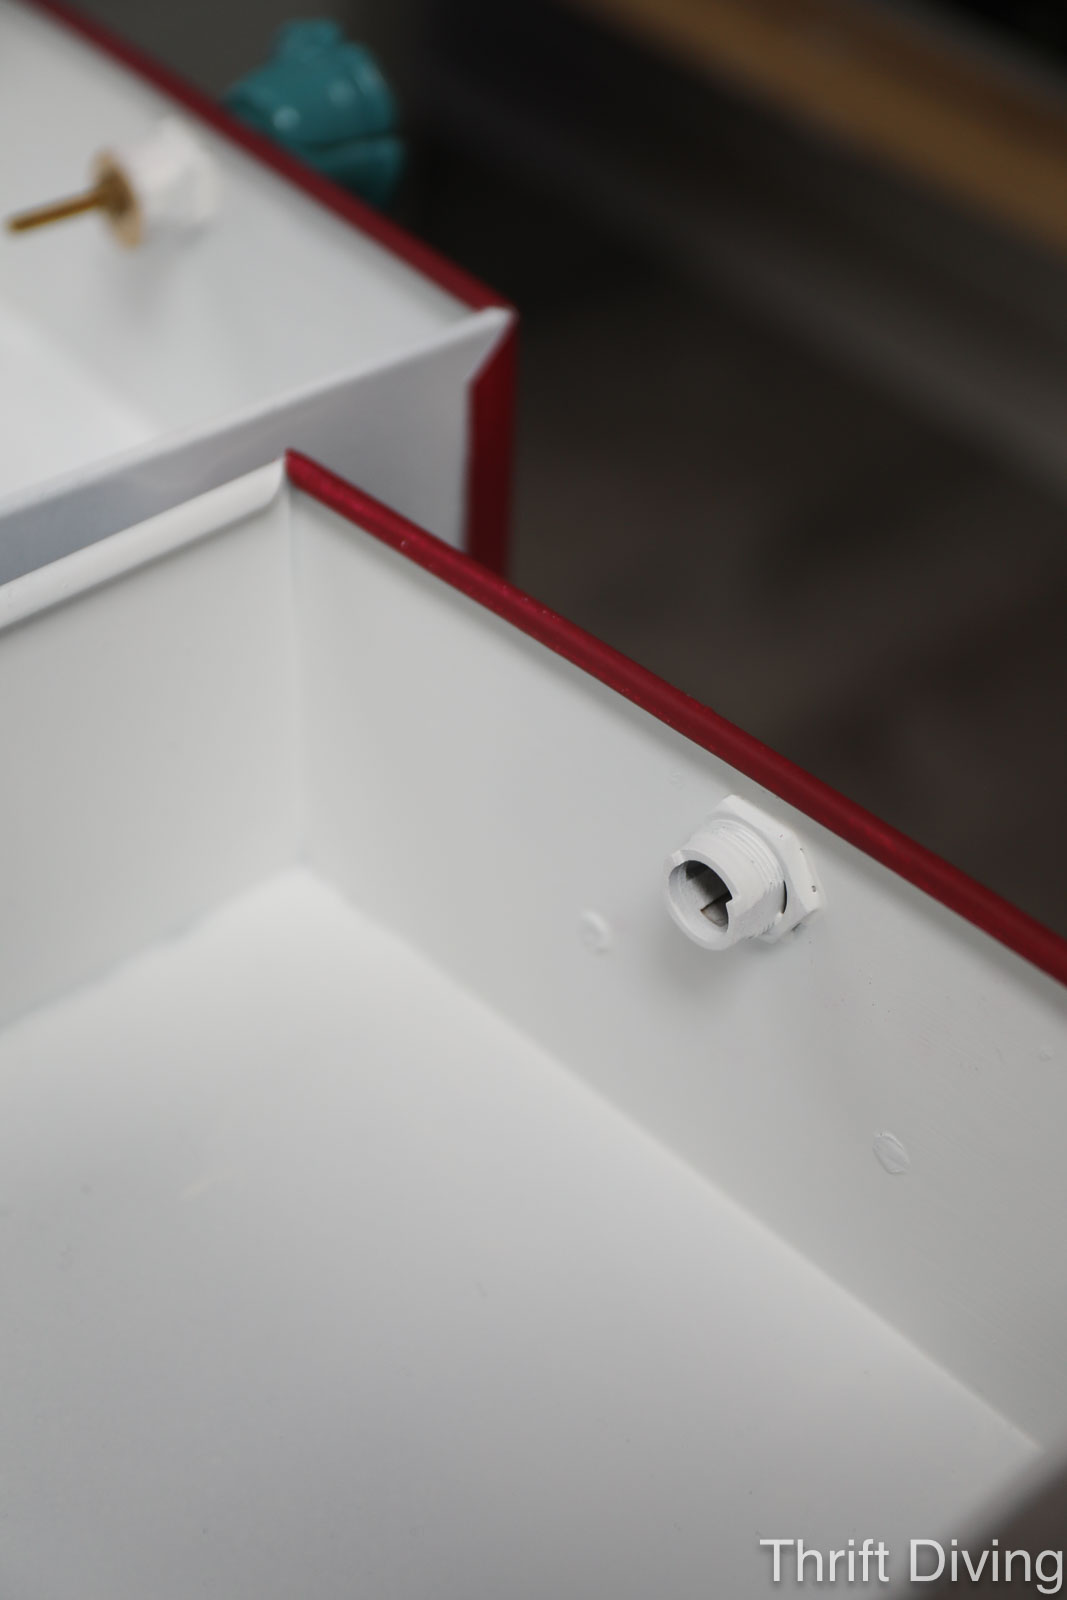
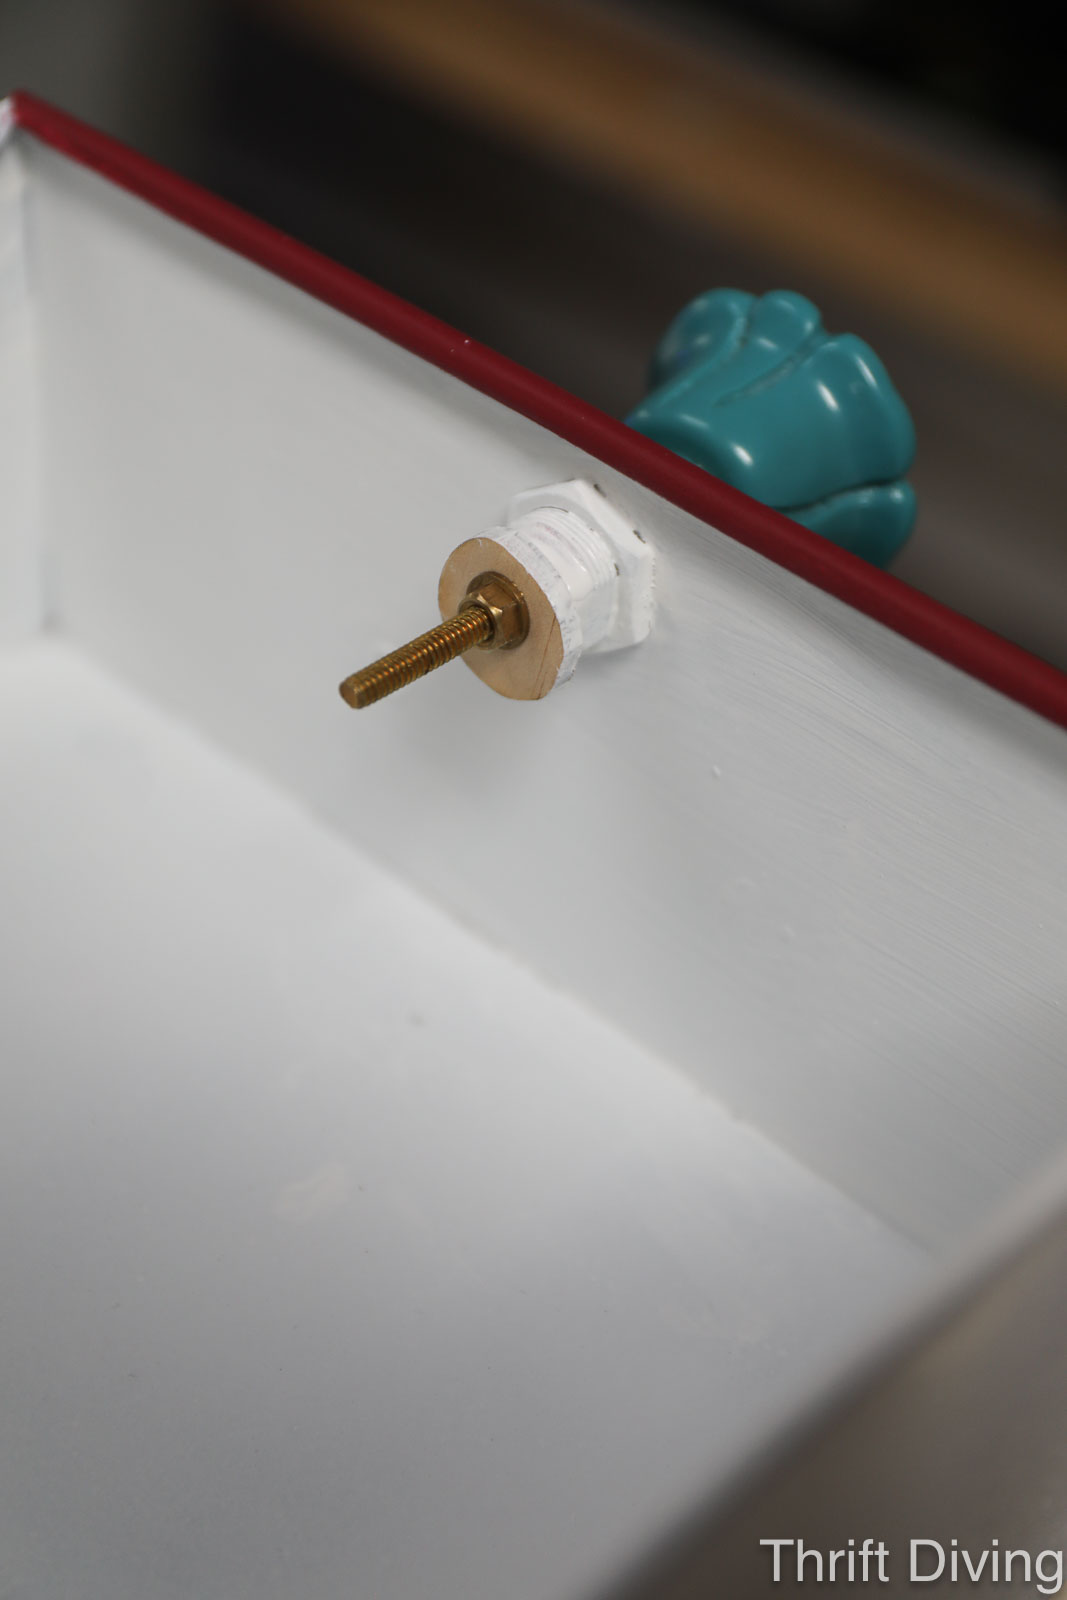
However, because the hole was so large, there needed to be a large washer on the backside to prevent the knob from falling out.
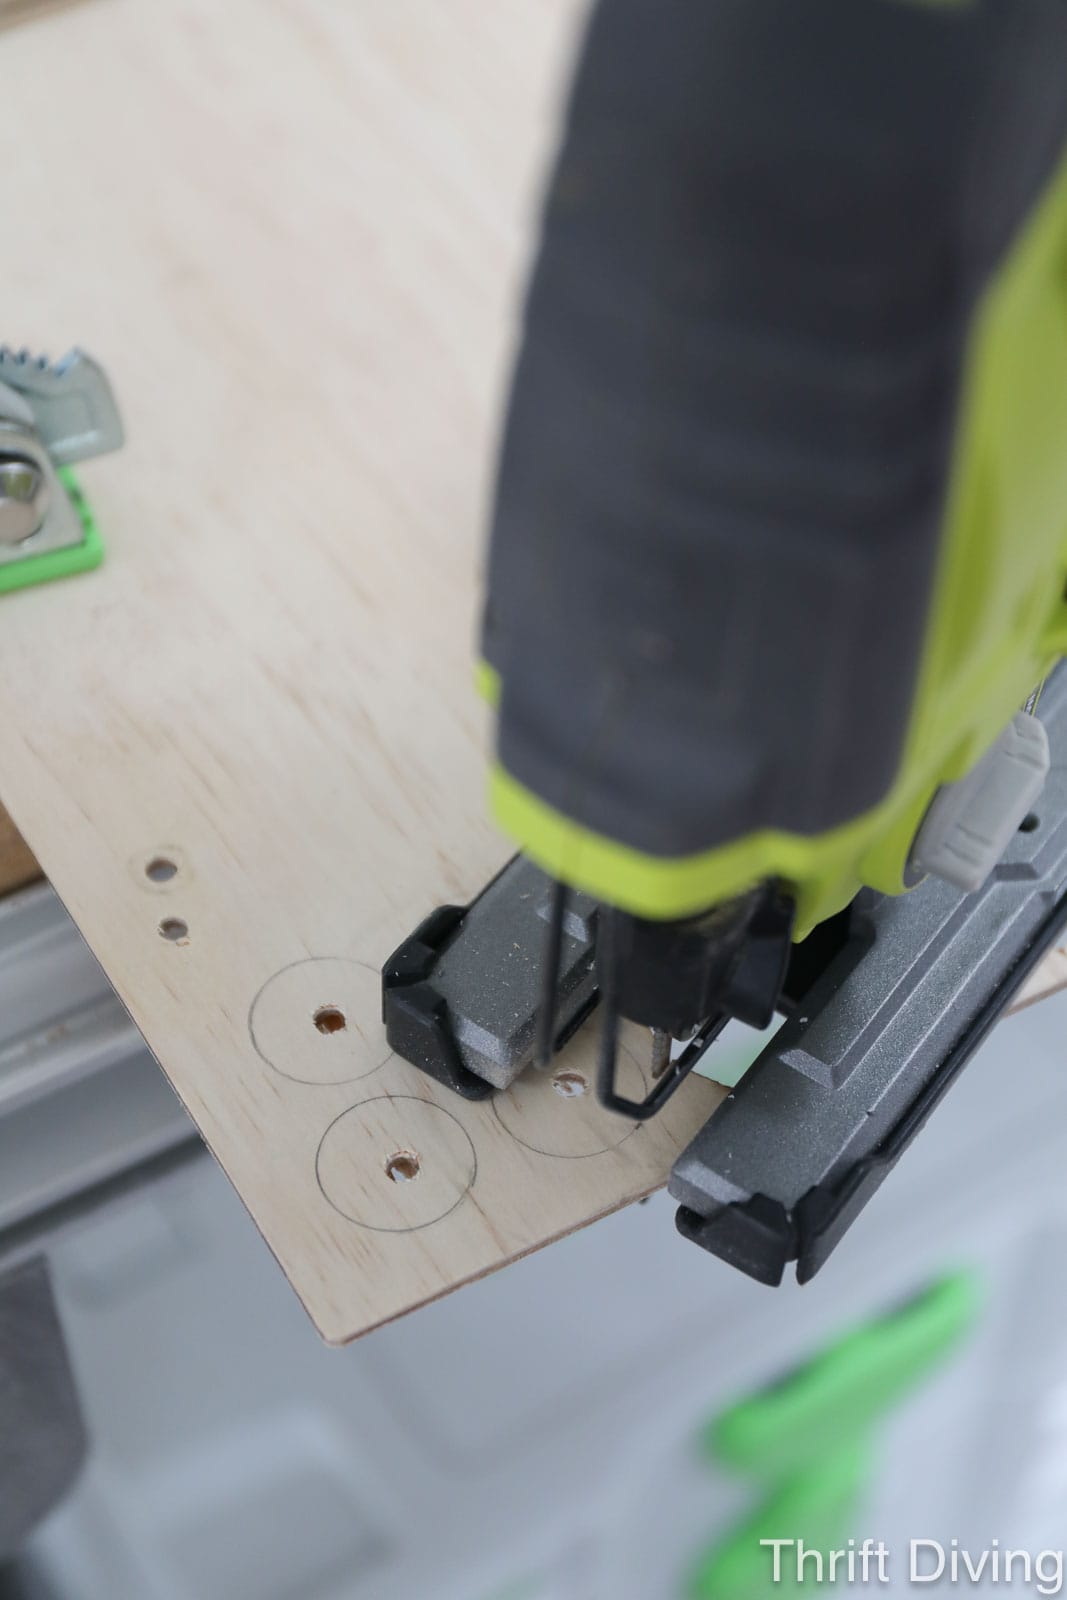
So I used a nickel and traced 12 wooden “washers” that have holes drilled in the center to hold the knobs on.
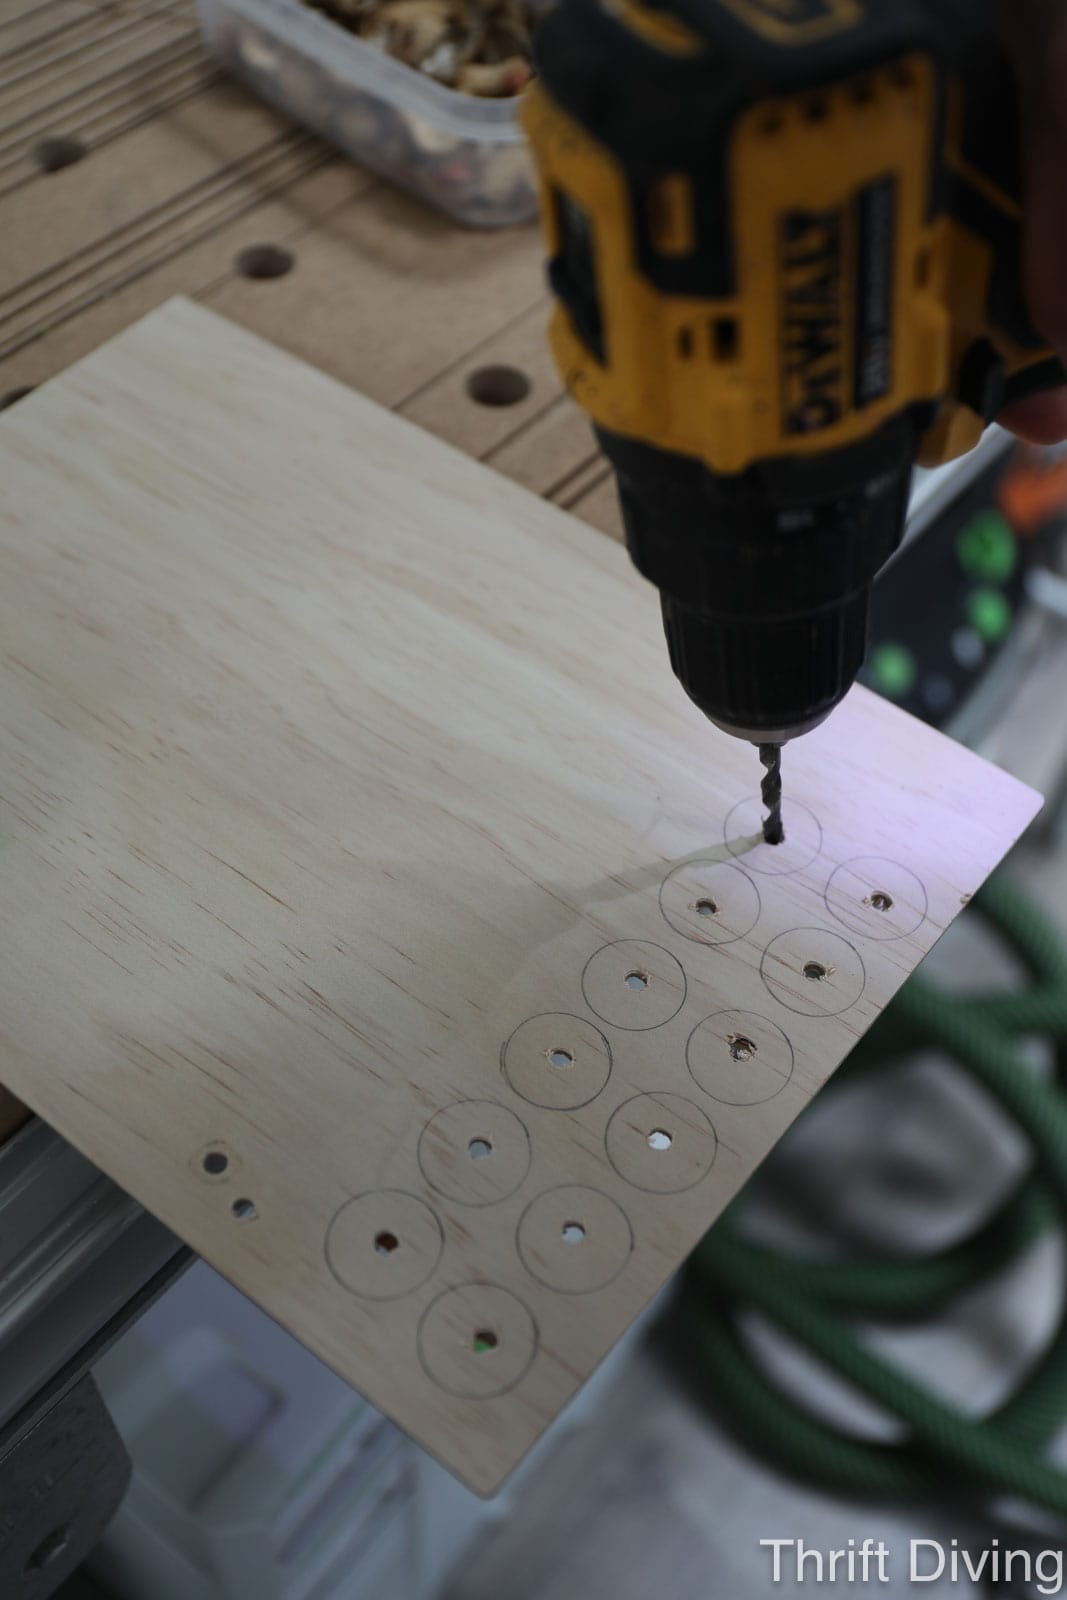
I used a jigsaw with a scroll saw blade (which allows for small, creative cuts) to cut them out. I would have liked to use my xTool laser engraver to cut them out with clean accuracy, but my shed isn’t doesn’t have all my fancy tools set up to easily use on a whim. (Soon, I hope!) Cutting them out by hand was going to have to do.
With the wooden washer on the back, the knobs fit perfectly and those ugly gaping holes due to the missing lock-sets on the drawer fronts were now gone!
This project took a lot longer than expected just because I kept discovering things I wanted and needed to do that I hadn’t realized at the start of this project!
But isn’t that how DIY goes?? You have a vision when you start, but you haven’t completely worked out the entire vision from start to end. Plus, it was nice just working on this project without a demanding deadline other than my own desire to get it done so I could show off how cute it turned out!
Here’s another look at how it looked.
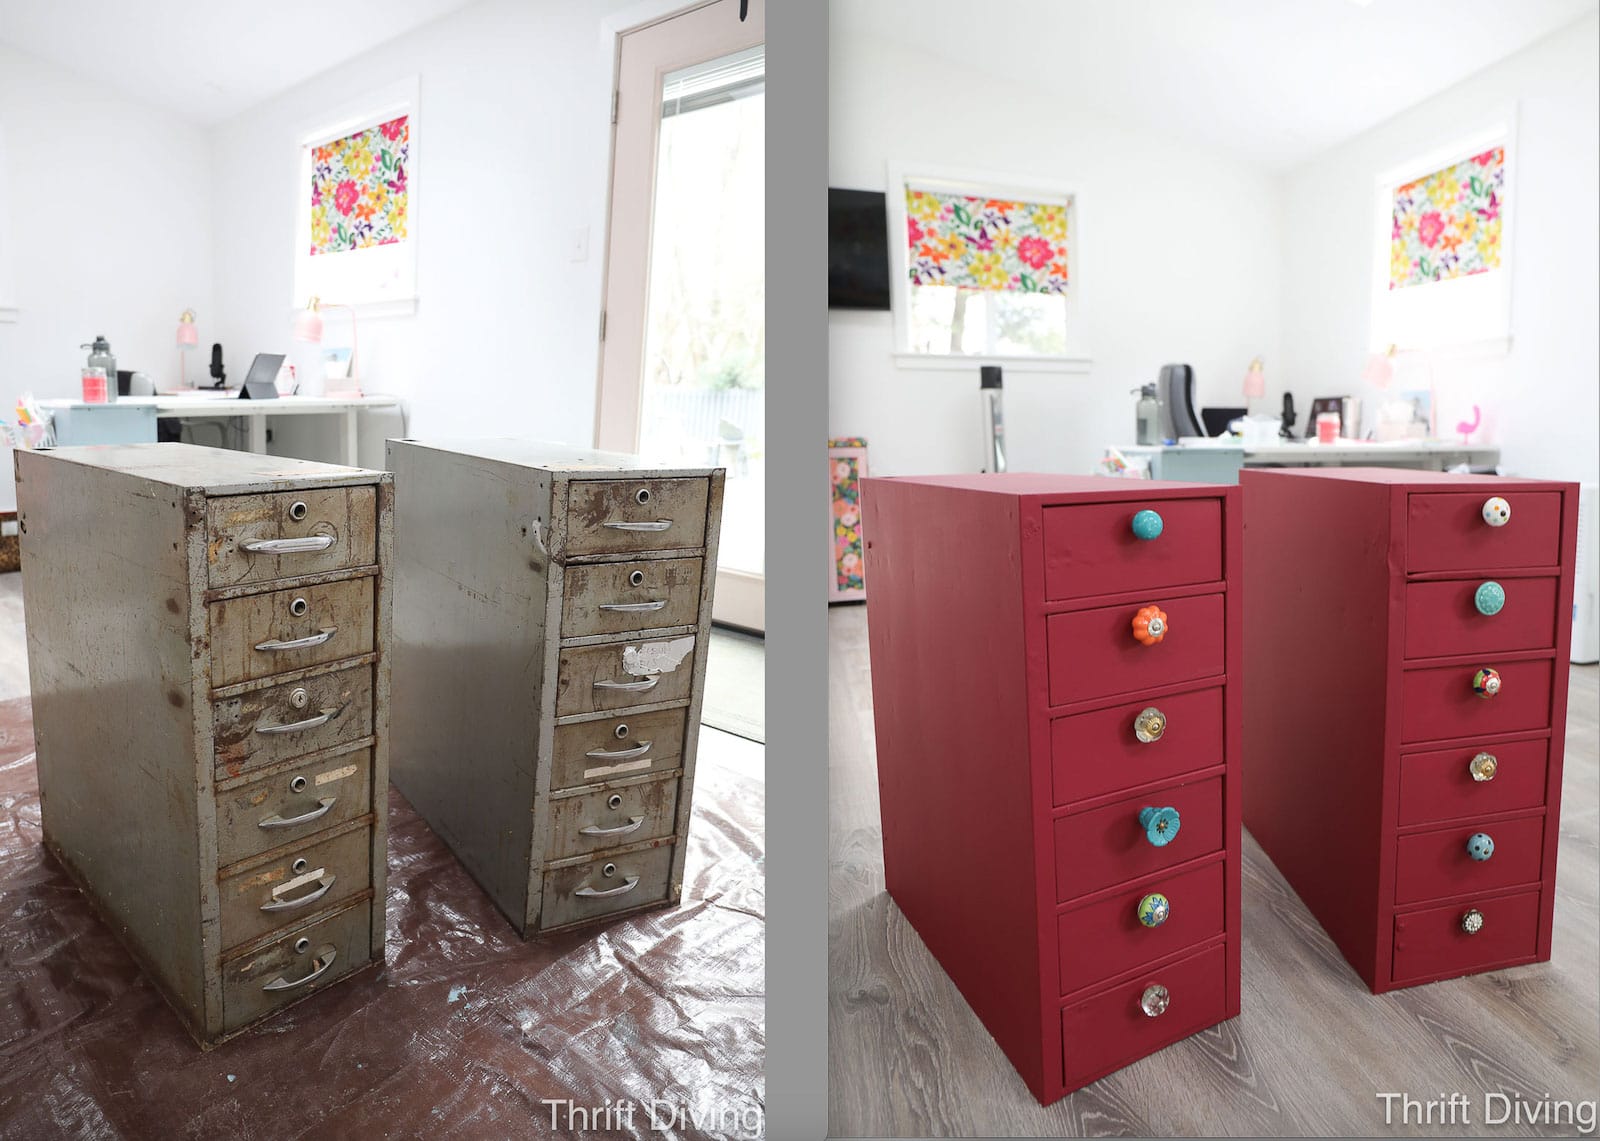
BEFORE
And here is how pretty it looks now!
AFTER!
What Went Well?
- I chose a better paint color! While the Cranberry was nice, I’m thankful that I ran out! It didn’t have that “WOW” factor that the Behr Sugar Beet flat finish had! I love this color so much more.
- I made a good choice with the whimsical knobs. Although I wasn’t sure how I was going to attach the knobs, I figured it out, and was able to save a lot of money by using all the pretty knobs in my stash!
What Could I Have Done Better?
I would love for us to start thinking of our projects this way, asking what we could have done better. Next time, we’ll hopefully use what we learned for the next project. In this case, here’s what I should have done better:
- I could have planned better. The fact that I kept having to re-paint a drawer or another surface because I forgot to fill the holes first before painting….or because I added wallpaper and then tried to paint the interior sides of the drawers….just made no sense at all. Next time, I’ll sit down and create a step-by-step plan of what I need to do first, second, and third, to avoid having to do re-work.
- I could have sanded the holes better. I’m not totally happy with some of the patch jobs I did on the holes and other areas. Next time I’ll fill those holes first and work to smooth it out completely before priming.
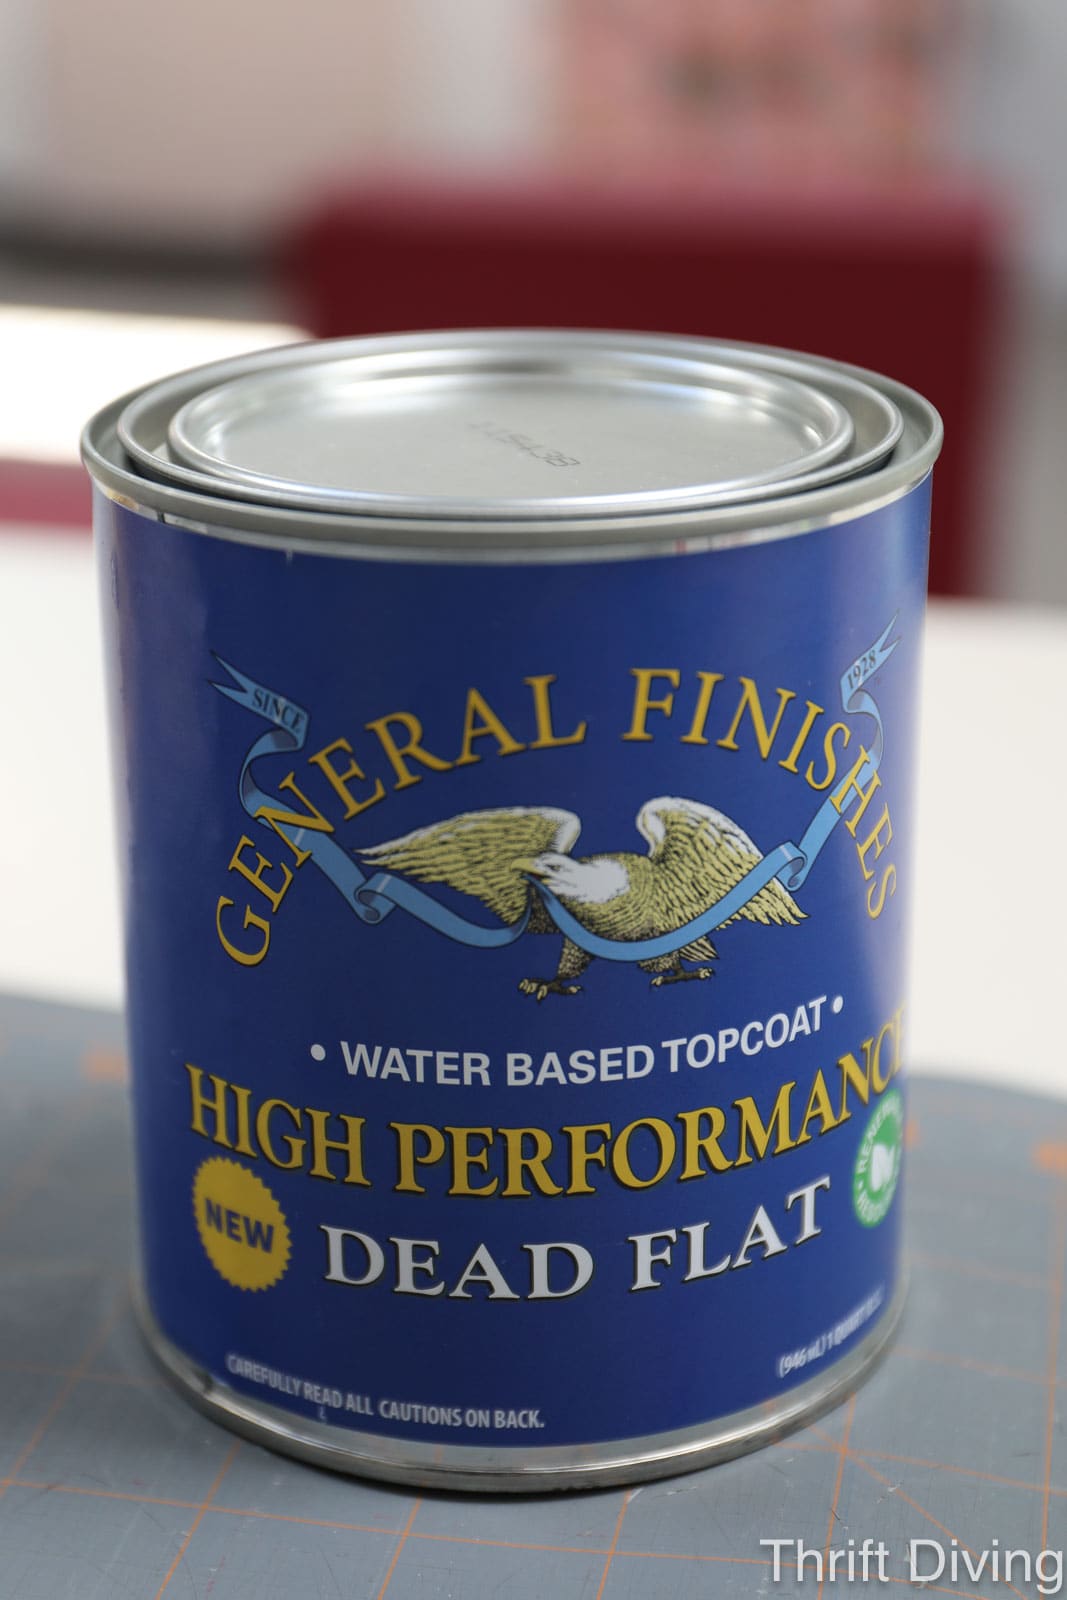
- I could have done more testing before using a topcoat over the paint. What I didn’t share in the post above is that I actually tried to use the NEW General Finish Dead Flat topcoat over the paint for added protection. I did a small test on a board, but didn’t observe it properly to see how the paint or finish would react. The top coat left the paint dull and the top coat actually started to crack the following day. I ended up having to re-paint the areas that I had tried using the top coat. I didn’t apply anything else over the paint, for fear that it would crack, too. It could be that the humidity in my shed is so low that it caused this issue. I love General Finishes top coats, so I am pretty sure it was an atmosphere issue.
What Was the Cost?
- Cabinets $60 each
- Original Cranberry – Already had
- New Paint ($20)
- Roller ($3)
- Hardware ($0) – Already had
- Clean Metal Primer ($7) – Already had so I paid $0
- White spray paint ($7)
- Wallpaper ($67) – But I already had it, so I paid nothing extra.
- 1/4″ plywood to make wooden washers – Already had so I paid $0
- Putty for filling holes in metal ($11)
Basically, I had most of the items needed to paint these metal cabinets, but my additional out of pocket costs were about $40 – $43 with tax included. Not bad! If I had to buy everything from scratch, it could have been very expensive. But that’s the beauty of DIY: over time, you acquire tools and materials that allow you to work on projects for less money than when you’re first starting out. You’ll always need something; most projects won’t ever be totally free.
BEFORE
AFTER!
BEFORE & AFTER
Love this project? Click here to SAVE this on Pinterest!
![]()
Painting metal cabinets isn’t impossible. With the right cleaning, prep, primer, and paint, you can easily transform metal cabinets!
I plan to put mine in my “she shed,” in the corner office area of my shed. I found some IKEA desks in the “Damaged/Open” section of the store. I have some other plans for my corner office. So stay tuned to see how these painted metal cabinets look as I pull the look together!
Leave a comment below and let me know what you think! Have you ever painted metal cabinets, and if so, how did they turn out?

Download the 5 freebies!

Thrift Diving inspires women to decorate, improve, and maintain their home themselves...using paint, power tools, and thrift stores! Use these 5 printables, checklists, and ebooks to get started!
Very nice makeover!! I love the color you went with!
I am going to refinish an old metal first aid cabinet for my son. He intends on using it in his bathroom. There are no cabinets in his rental house. I am worried about the paint being scratched off when I am done. Do you recommend anything to put on over the finale coat of paint? I noticed in your video you did not.
Thank you,
Shannon
What did you use to remove the adhesive (looks like from an old sticker)?
I think you can use Goo Gone for removing adhesives, like stickers!
Great job. They look wonderful.
Thank you so much, Sandi! I absolutely love them! 🙂
What a delightful surprise to find your program this morning. I had missed seeing you for quite a while….and now you are back. Not planning to redo anything as complicated as your metal cabinets, I thoroughly enjoyed going thru each step. My all time favorite was when you decorated the little wooden houses for children.
Hey there, Sally! Sorry I haven’t been in contact for awhile! I have things I am always working on, but I don’t always get around to some of the more creative projects like this. I was happy to finally get to spend some non-rushed time to just leisurely work on it. 🙂 So glad you like it!
I have missed your wonderful “make over” and was delighted to find this one this morning. Thanks for all the effort (S) you put into your projects.
So glad to see you again.
Funny I was just painting a metal file cabinet today. Nothing fancy like yours. I finally have my version of a She Shed done and I am loving it.
Keep it going. Love to see updates!
Isn’t it the best, Letty?? Just having a place dedicated to what you love to do, carved out for you and you alone. I love it. I’m sure your cabinet looks great, too. 🙂 I love that metal cabinets (like file cabinets) are usually easy finds at thrift stores. I think it average folks realized they could just repaint them and make them pretty, they’d probably be more likely to keep them. Who doesn’t want more storage?! LOL
WOW!! Love the transformation. One of a kind storage cabinets that are beautiful!
Awww, thank you, Irma! So glad you like them. They turned out better than I had hoped!