How to DIY When You Have NO Time and NO Energy
Let’s face it– when “life” gets in the way, what’s the first thing to go (besides taking care of yourself)?
YOUR PROJECTS!
It’s so frustrating because as creative people, creating is our life’s blood, isn’t it? And to not have time or energy to get it done takes away a small piece of joy in my life.
So here’s how I combat it. And hopefully these 10 steps to will help you move a project from “it’s been sitting here for 6 months” to the “I’m DONE, baby!!” file :).
STEP 1: Stop Fooling Yourself, Dude!
It’s time to get real about why you really have no time or energy to finish your projects. Or rather, why you THINK you have no time or energy. I bet that part of the reason is that you’re overwhelmed! You’ve got a list a mile long, and you don’t know where to start. Right?
Okay, first–make a list of all the projects you’ve been wanting to get done. Everything that you can think of. Because, how are you going to know what you need to get done if you don’t even know what needs to get done? Yep. That’s a genius statement right there. You have my permission to quote me. 😉
Use Mobisle Notes
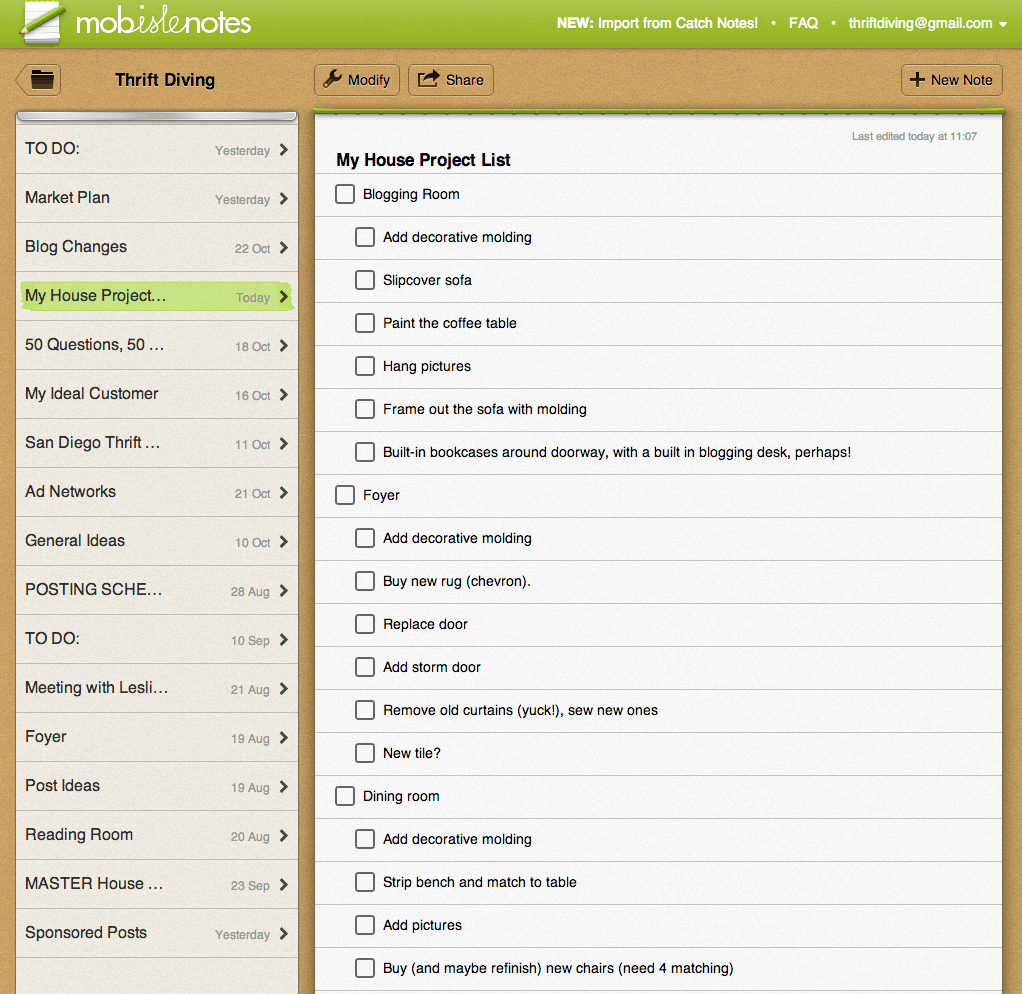
You need an easy way to keep track of your “Master Project List.” The Mobisle Notes app and website are by far the best app for making to-do lists. Use the “free” version. You can create tons of folders and sub-folders for each of your projects. It also syncs automatically between your tablet and the website, so you never lose a step! Here’s a sample of my House Project List. The beautiful thing is that you can create lots of sub-tasks under each task. Get this free app now!
You’re not going to believe how long your list is! But doesn’t it feel awesome to get everything out of your head and onto a real list?
STEP 2: Pick a Project….But Pick the RIGHT Project.
Come on…I know you have a gazillion projects on that list. But which one would yield you the biggest results? Getting done the guest room for your mom to come and stay with you? Setting up a craft room for yourself so you can spread your stuff out and see where everything is? One of them has to be at the top of your “Gotta Knock This Out” list. Choose a project that you’re excited about and think you would actually want to finish, but that you just haven’t gotten around to, for whatever reason. For me, this is what I have been wanting to tackle {{{insert dun-dun-DDDDUUUH dramatic effect here}}}:
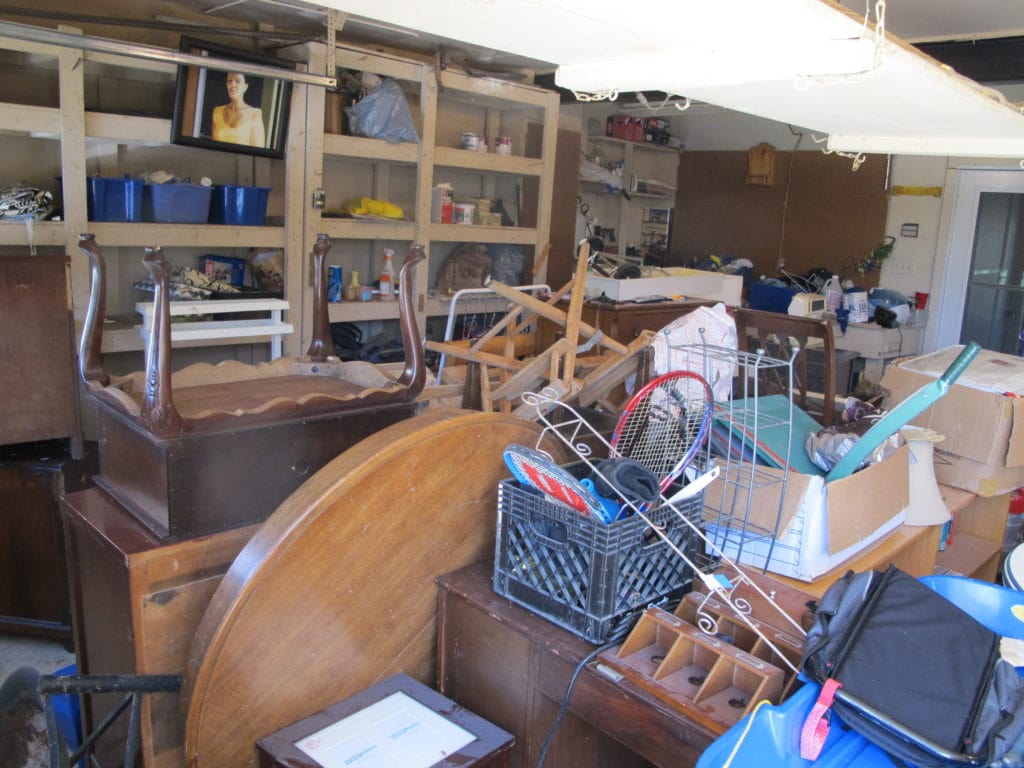
…it’s my “hot mess” garage!
It has steadily gotten worse over the 3 years we’ve lived here. I’ve stuffed it full of thrift store furniture and items I clearly have nowhere else to put. Now, I want to transform it into a garage workshop for me so I can dibble dabble in power tools and learn how to install some decorative molding around the house. (Oh, and did I mention I have lofty goals of building a play house for my boys some day? Yep. Some day 😉
STEP 3: Forsake all other projects.
Now, mentally “X” out every other project on your list. Yes, I just gave you permission to STOP worrying about all the other crap you just listed. Don’t you feel better? 🙂 Focusing on just one project at a time will give you the ability to give it your entire attention so you’re more likely to get it done instead of worrying about all the other things you “have” to do!
STEP 4: S-P-E-L-L I-T-O-U-T
Yes, you know how to spell. But do you know to to clearly spell out your tasks? That’s a whole different story! I’m talking about listing every imaginable tasks that you can think of for your project. I bet you there are things you never even considered. For example, in my garage, I know I need to fill the holes in the wall….prime it….and paint it. Dude, that’s 3 steps! If I only put “Do the walls” then clearly I’m not spelling out every step involved.
Why does this make a difference, you ask?
Because when you’re doing a project, it’s easy to kid yourself about how much time something will take when you lump it all together. You may think it will only take you 1 day to “do the walls,” but when you spell out what “do the walls” really means, you may find you’re looking at a WEEK! Yikes!
So, be sure to list detailed steps so you don’t miss a beat :). And you can always add more steps as needed!
STEP 5: Make Home Depot Your Best Friend!
Or Lowes….Either one. You’ll need a list of materials for your project. Identify what you need and buy it before you get started. Wanna know why this is so important??? Because if you start working on a project and you forgot to get the ___[insert random object you forgot!]_ guess who’s going to get derailed? You’ll risk losing your “mojo” because you don’t have what you need to continue. And 2 years later, your project will still be sitting there, staring you in the face. Noooooo! We must prepare 🙂
Start by adding to your list all the materials and tools you’ll need for your project.
STEP 6: Don’t Go Broke!
It’s time to figure out a project budget. Have you ever heard of “scope creep”? Meh–probably not. Well, in DIY-land, there is something I call “cost creep.” It’s the idea that you think a project will cost $X number of dollars, and then by the time you get done, it actually costs $XXXXXX. It happens! You think you’re going to go with the “economy” sink for your bathroom makeover, and then suddenly you’ve upgraded to the vanity that’s etched in 14K gold. LOL.
That, my friends, is “cost creep.”
To prevent “cost creep” list prices for every single material, tool, object you need to do your project, and then vow to not go over that budgeted amount!
STEP 7: Bribe Your Friends!
If you’ve got awesome friends, especially DIY-friendly ones, you won’t have to bribe them much. Maybe pizza and beer? Hey–works for me. Ask them to come and help if you know that you won’t be able to do it on your own. Plus, extra hands make things go faster! I’ll probably end up working on my garage alone (waahhh!), but I will enlist hubby to help clear out some of the old furniture there.
STEP 8: Deadlines, Baby….Deadlines!
Want to know a surefire way of sabotaging your project? Not setting a deadline. Here on Thrift Diving my readers and I have started doing 30-Day Room Makeover Challenges (sign up to get notified when the new challenges start up!) where we pick just ONE room in our house and totally focus on it for 30 days. If you don’t believe me that it works, see my laundry room makeover and my kids’ bathroom makeover as proof that you can be a DIY rockstar with a deadline looming over your head!
STEP 9: Kids….? What Kids?!
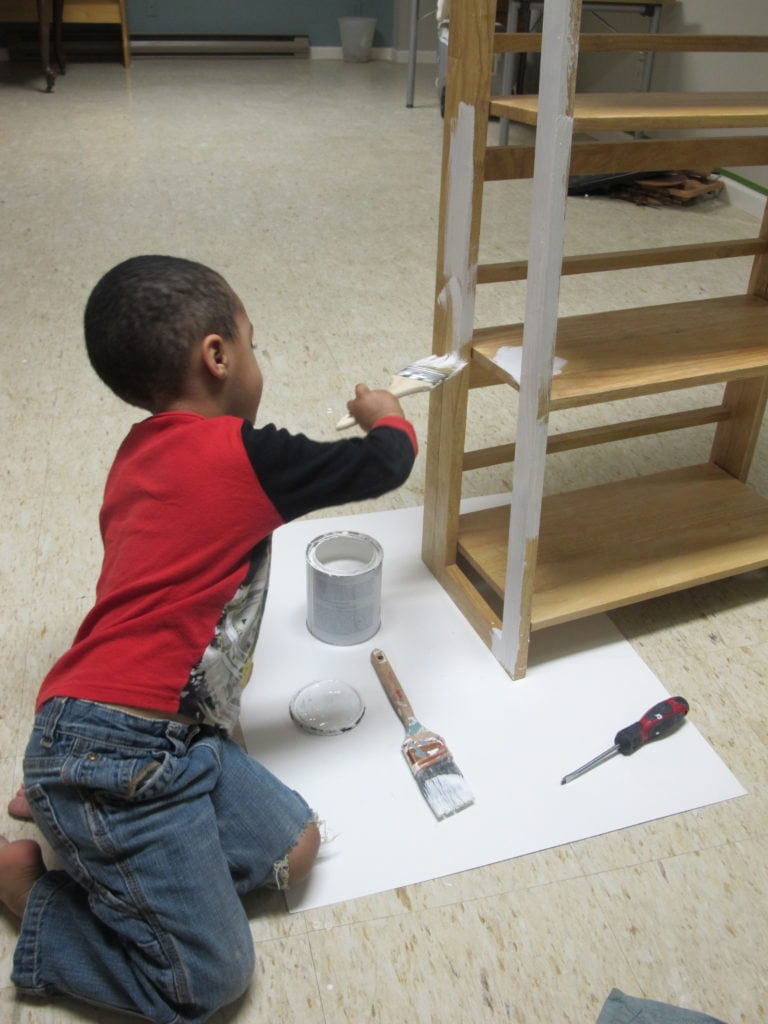
Find a place to shuffle your kids off to while you’re working on your project. As much as I love my three boys, they are rowdy at times and do get in the way when I am trying to work (thus the reason I wait for them to go to bed and then stay up super late). But if you can swing it, invite your kids to “help” by giving them a project to do along side of you with their own paint brush, tape measure, and “tools.” They’ll love it! Here’s my 4 year old helping out!
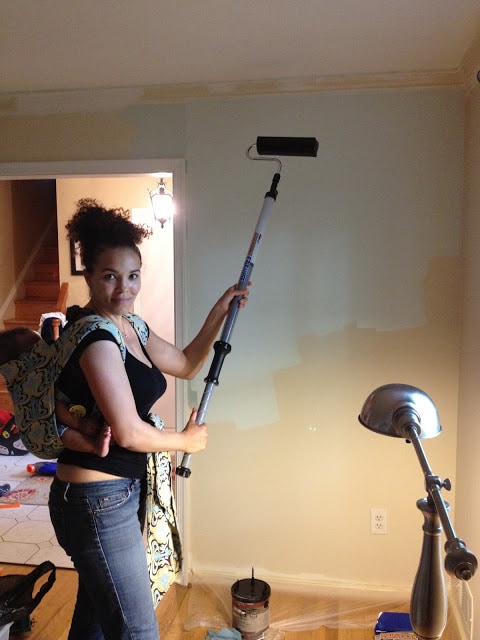
And if you’ve got young babies, use a backpack carrier while you work on your project (as long as it’s safe to do so, that is). My “baby” is now almost 3, so he’s pretty independent to play with his cars and trucks while Mommy DIYs. But if you have a yougin’, strap them on and get moving! Trust me–they’ll fall asleep. 😉
STEP 10: Skip To It!
Okay, now get to work! You have to take the plunge and carve out time in your busy schedule, and STICK TO IT. You’ve got all the tools, materials, etc. If you’re a night owl, carve out the time for your project and put it on your calendar from 8:30 p.m. to 10:30 p.m. four to five nights a week, or whatever feels doable. Heck, even just an hour a night is something more than what you may be getting now!
You may have to go back and adjust your project deadline if you find 2 hours a night isn’t enough time for getting your project done. Do NOT forsake sleep to accommodate. I do this all the time, and it’s simply unhealthy. Instead, you might find an hour after you get home from work. Or perhaps you can go to bed early and get up at 4 a.m. and put in an hour before hitting the shower before work. No matter what, carve out that time. Otherwise, something else will eat up your precious DIY time!
But Remember….Don’t Compare Your Projects to Others’ Projects!!!
Don’t compare your progress and projects to what you see some blogger doing! Professional bloggers have Virtual Assistants and other employees and resources to make their blog look effortless even though they work extremely hard. (Hopefully I will be professional soon!). But the point is, their projects are their full-time job. You and I have “9-to-5” jobs so our projects have to be our side hustles. So don’t short-change your efforts, and don’t compare yourself to any bloggers.
Okay?
Good. Now go. Your DIY projects are waiting for you.
So tell me….after reading this, what project you’re going to now complete? DOWNLOAD this free printable to help get you started! Leave a comment below!

Download the 5 freebies!

Thrift Diving inspires women to decorate, improve, and maintain their home themselves...using paint, power tools, and thrift stores! Use these 5 printables, checklists, and ebooks to get started!



This is a great list of tips and I’m half way there with you lol . . . NO MORE EXcuses …
Yes, girl, let’s get it done!! I’m stopping at Home Depot tonight to pick of materials, hopefully!
Well heck, funny you should post this, cause I vowed right before this post of yours, I looked at my garage and said, ” man I need to get on the ball and get organized, cause my workshop garage isn’t a workshop at all. I have a draft table and two cute stool that I had all prettied up but there’s too much junk, then the rest is my garden/yard tools, I don’t have a shed, but one day I will.
Then I just happen to be a sucker and store other people’s stuff, cause I have a 2 car garage. The other half is my van’s spot but sometimes I have to park out my van so I can have a workspace to work on. ;-]
Yep!
Just recently I have cleared some stuff, as I buy light fixtures to replace, I have done some on my own, but for those that need some hard wiring, I hire out. I keep it safe when I am not sure on those kinda things.
So looking forward to your project posts. I also just completed a couple other smaller projects, so it’s less stuff in the garage. I can actually walked thru the garage. 🙂
Well, as long as you can fit through sideways, then you’re all good! When you have to start climbing OVER stuff, THEN you’ve got a problem 😉 LOL
Great post Serena – I have a big dining room hutch that I want to paint – I’ve been wanting to do it for at least three years – I know I have no time so I haven’t started – think it’s time to start…
Thank you, Johanne! Okay, to get started, think about everything you’re going to need to get started on painting the hutch, since you don’t have a lot of time to go running around for materials that you’ve forgotten. Then, start carving out the time, even if it’s just 30 minutes a day! Paint one side and then come back to start another side the next day. Before you know it, it will be done! 🙂 Please, start today! Okay, tomorrow then 😉
Thanks for commenting!
Awesome blog post, and I couldn’t agree more! I would love to quote/link this on my blog– would that be okay?
Either way no worries and I’ll be challenging myself to finish a bedroom set before the end of November! 🙂
Shaleeta, yes, can definitely quote or link to me! 🙂 I’m excited to hear that you’re going to challeng yourself to finish a bedroom set! YAY! Please keep me posted on how it goes! I’m going to be posting updates on my garage! Thanks for commenting, girl!
Just an idea for your workshop. You can get old doors from Restore Store. They make great work stations. If you are lucky you will find old cabinets to put underneath them, for storage. You will want at least one solid-core door so you can screw down tools like a miter saw. When you get the miter saw get a sliding one. That will allow you to cut wider pieces of stock.
What a great idea! I actually have a built-in work bench that I think I could anchor it to….? Ryobi provided me a compound miter saw, but I haven’t unbox it yet to see if it’s a sliding one. If not, I may want to upgrade soon! Thanks for the suggestion! I think having an extra work bench like this from doors would be a great idea for other surface area I might need. Thanks for that!!!
I need to paint our bedroom and the dining room and I want it done before Thanksgiving. I see in the photo you are using an EZ Twist Paint Roller, how well does it work? I purchased one but I haven’t even opened the package yet.
Hey Denise! Funny you should mention the EZ Twist Paint Roller! I filmed a video of that. I just haven’t had time to post it yet! Here’s a link to it! Yes, I like the paint roller. It really makes big jobs easier. Clean-up is more than a regular roller you just throw away, but environmentally and economically, it’s better to be able to reuse than to just toss, so I think the extra effort to clean the stick is good. Plus, it’s GREAT for places where it can be unsafe to work, like painting along stairs in the hallways. Here’s a link to the video! Way to go on getting your bedroom done!
http://www.youtube.com/watch?v=ZUg8CgUGTgc
Hi Serena,
I was so psyched about re-upholstering my dining room chairs, found material I loved, did one chair, and hated material and lost all interest! I kept looking at the material, bouncing back and forth…did I love it, hate it? But, after reading your blog, I got renewed interest in it and decided that yes, I do love the material! Funny, guess I was in a “mood”, so I’ve re-committed to the project. BTW, the last project of yours was a re-upholstered chair. IT was so awesome!!!! It truly looked like a chair you’d buy from the Ballards catalog for $$$$$$. Rock on, girl :)))
Awww…Karen, I’m sooooo glad you picked up where you left off on that project! It’s soooo easy to get discouraged because you start something and decide that you don’t love it, or you get stuck and don’t know how to move forward. I think that if you just make a plan and keep moving, then you can complete it. I guess the exception to that is if a project is turning out so awful that it’s giving you hives when you even LOOK at it, it’s best to just move on. LOL. But I’m glad that you found a renewed interest and I was able to inspire you! That makes me extremely happy to hear! 🙂 And thanks for the compliments on my vintage chair makeover! It was one of those projects where I got stuck for a year and only recently finished it! LOL. Hey, thanks for commenting, seriously. I appreciate it!
Good inspiration and motivation there, Serena! Thanks for the structure. It’s what I need, for sure. I am going to try that Mobisle app thing, too. Thanks for shaing!
Sue
Thanks, Sue! We all love DIY, so we have to rally around each other to keep the momentum going! I am so NOT a structured kind of person, but this past 6 months of my life, I’m learning more and more that structure is the key to success in everything we do, including our creative projects! You’ll love that Mobisle app, too! Thanks for commenting!
Serena,
Your blog Rocks so hard! Love it! BTW, I have two sisters that live in Severn,Maryland.
How far is that from you? I will planning a vacation after the holidays(I work n retail) and would love to meet and have coffee!( Hint hint ) you can show me some of those awesome little shops you get your funky finds from. I will bring an extra bag just in case! LOL!!!! Thanks again for an awesome blog!!!
Hey Dannneel! I’m probably 40 minutes from Severn. But in this area, that’s still pretty close. LOL. Yes, let me know when you’re going to be here and we will make a “date” to hit up my favorite thrift store! I guarantee you’ll find something you love! So glad you enjoy my blog!!!!! 🙂 Thanks for commenting!