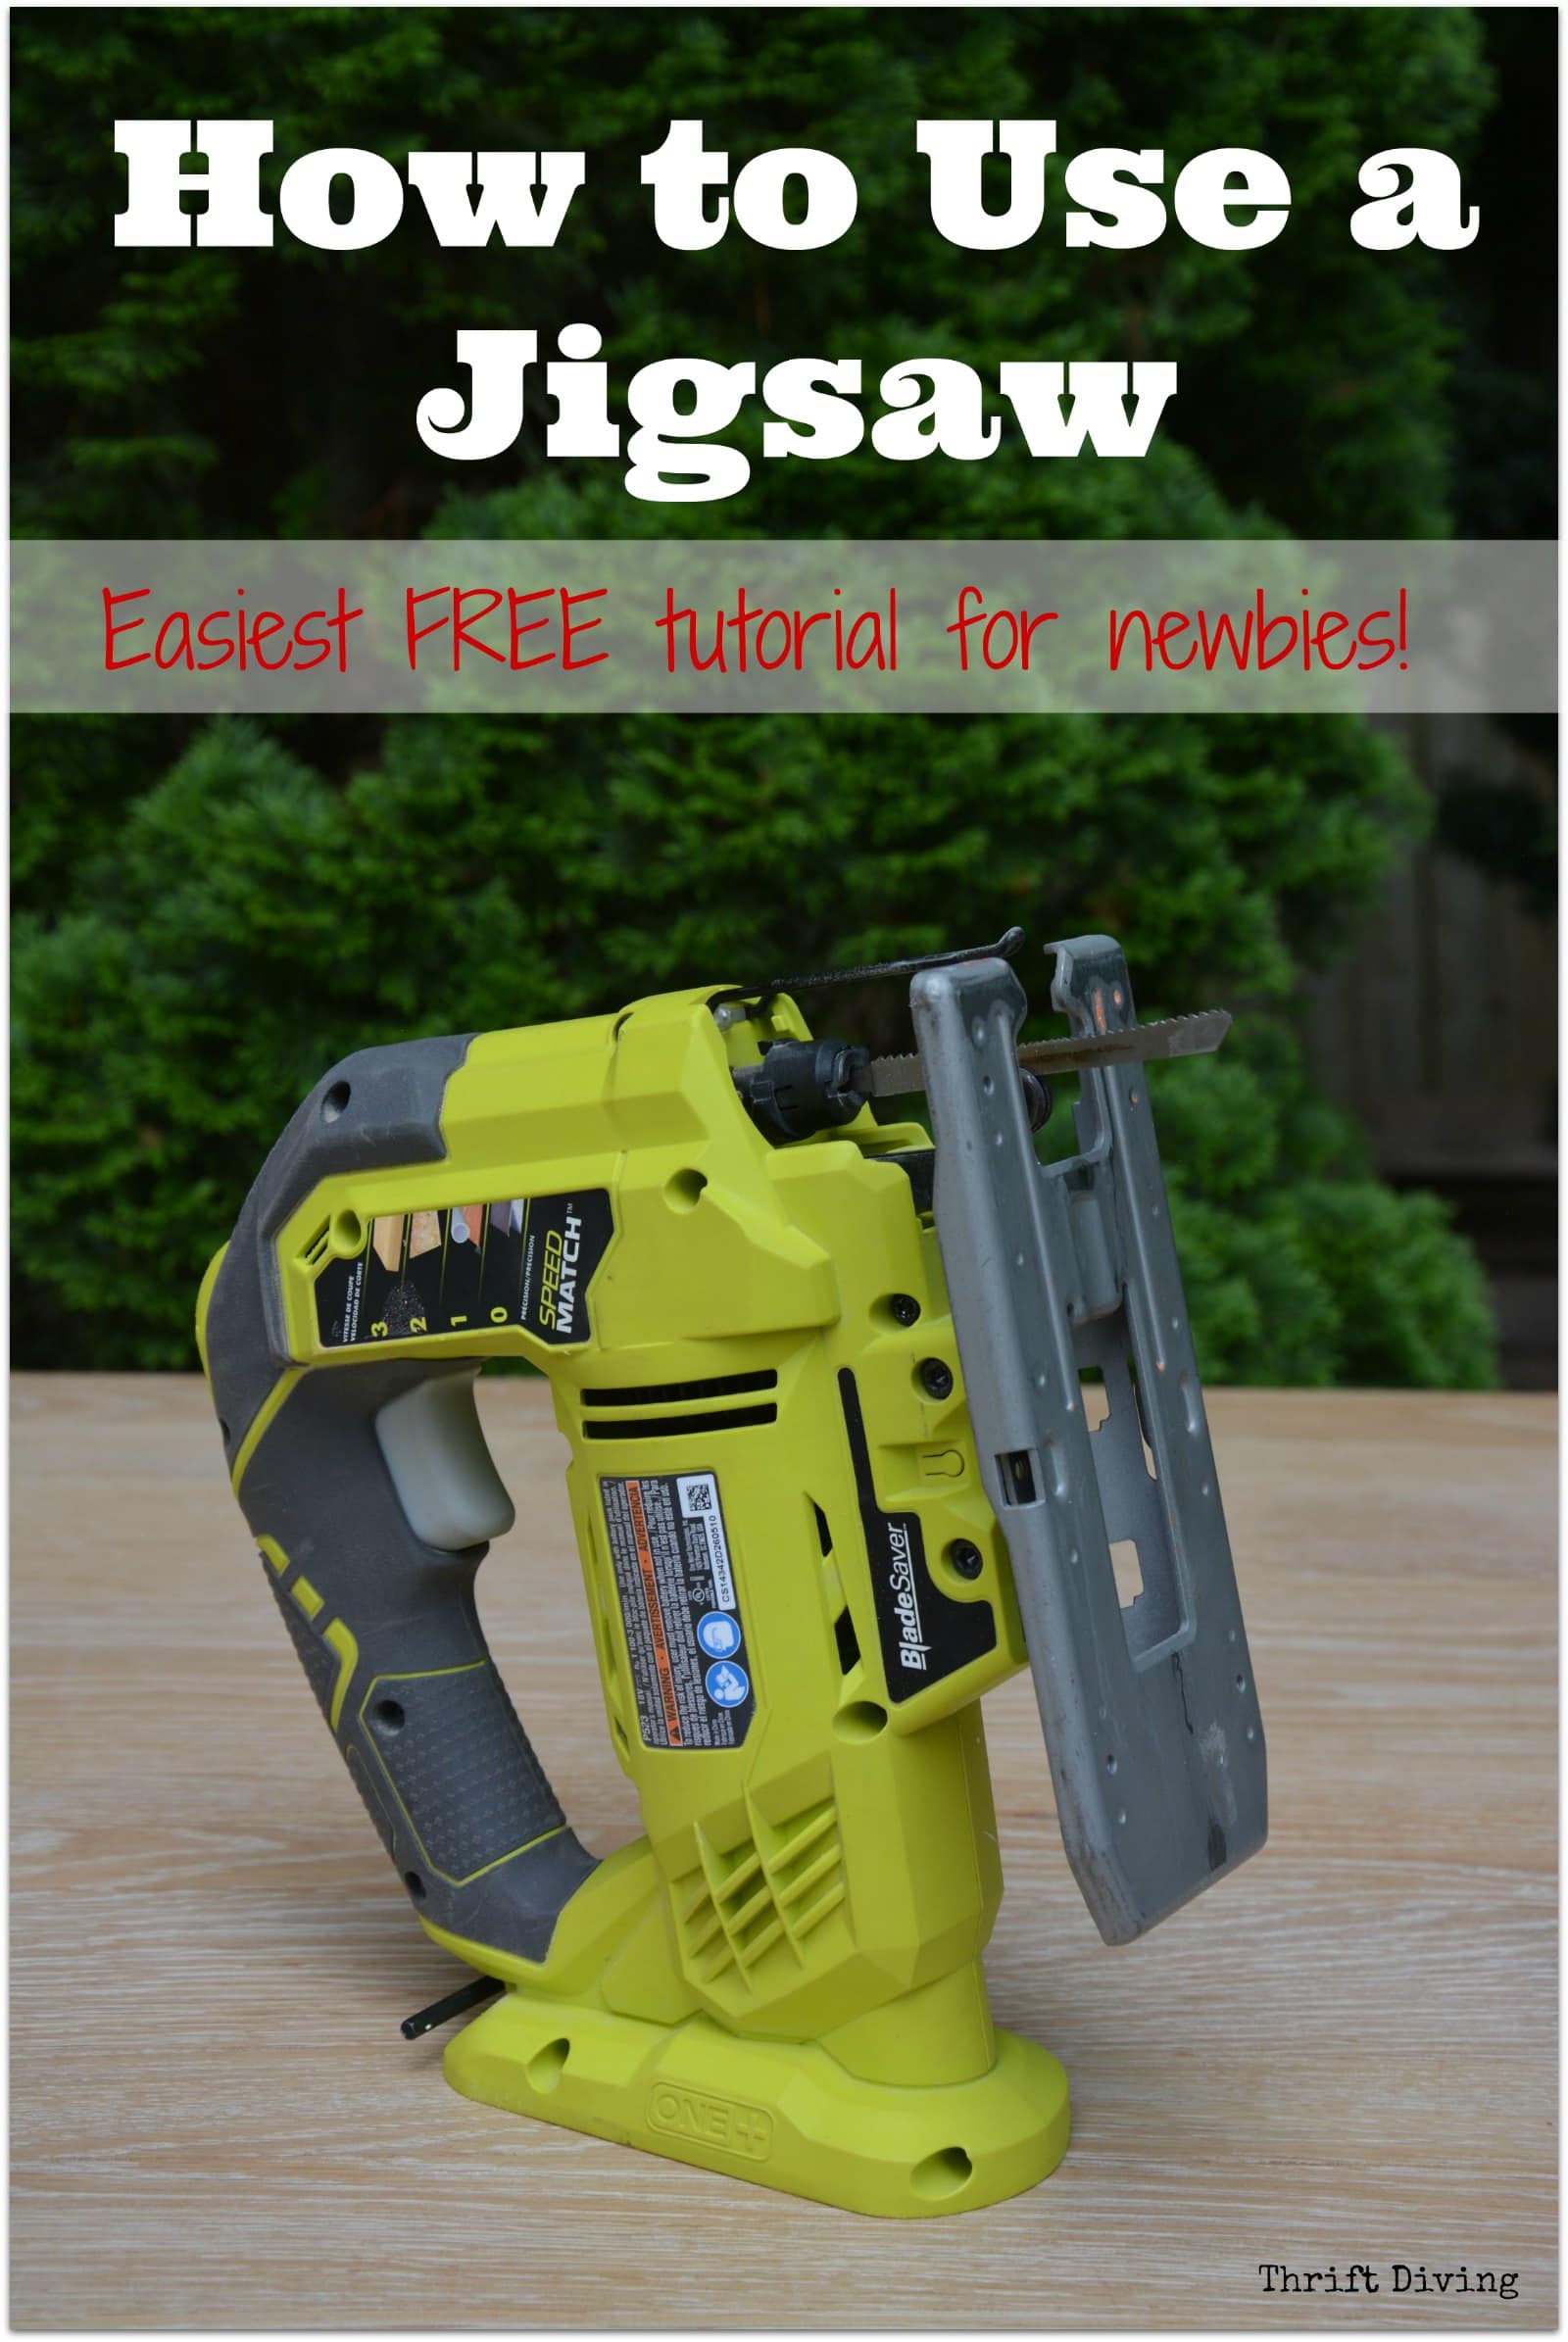
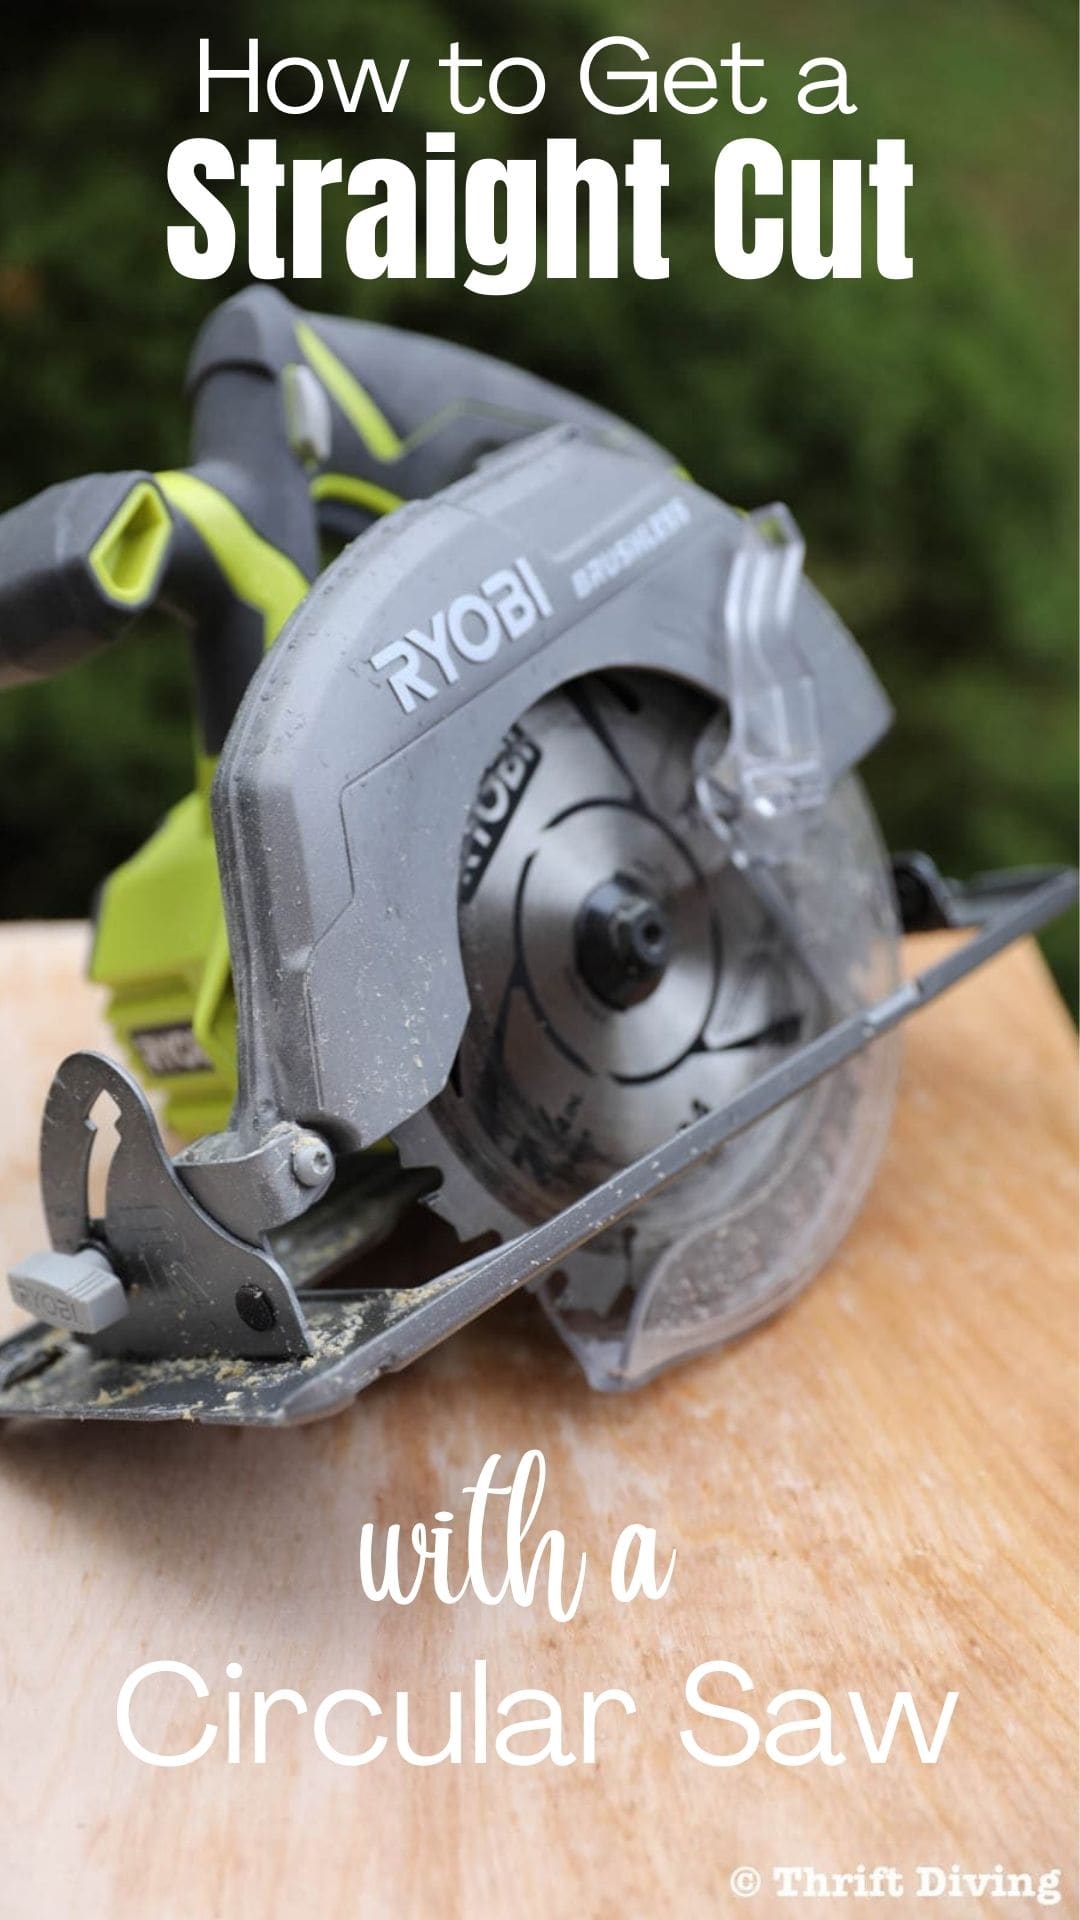
How to Use a Jigsaw: The Easiest Tutorial EVER For Newbies!
I’ve always wanted to do a tutorial on how to use a jigsaw.
But this info has sorely been lacking from my content for a long time.
I knew that I needed to address what was missing.
But when you’ve got projects coming out the wazoo, it’s hard to make time for the things that aren’t shiny and glamorous.
Isn’t it true, though, that sometimes the most important things are the most simple and basic??
I’m talking about the fact that I haven’t been providing you with the fundamental basics of how to use power tools!
This can’t be any longer, my friends!
My mission with this blog is that one day, everyone has the skills and confidence to tackle any DIY project their heart desires.
How can you do that if you don’t even know how to use a jigsaw, one of the least intimidating power tools??
Today, we’re changing all that!
*NOTE: Be sure you completely read the manual before using your jigsaw.
This week there was no more excuses: I must take time out of my schedule to make sure that you understand the fundamentals.
I’ve been doing more and more repurposing and upcycling (and building) projects that require power tools, so it’s my duty to make sure that you have all the info you need to get started and create your own repurposed, upcycling, and building projects!
So let’s go!
Why I Use RYOBI Power Tools
Let me start off this tutorial with addressing why I am using RYOBI power tools. I use these tools for several reasons.
- because I partner with them and they have been great at providing me the tools I need to create my most exciting projects! If it weren’t for RYOBI tools, I wouldn’t have been able to create many of the projects I have been creating!
- because these are the tools I first learned on, and it’s true what they say that once you get comfortable with a certain brand, you’re less likely to switch, right?
- because they’re affordable! These jigsaws (without the battery) only run about $60 at The Home Depot where they’re exclusively sold. Taking my family to see a movie can easily cost upwards of $60! HA! What’s the better investment, though? A movie that lasts 2 hours, or a power tool that can provide creative projects for years to come??
Why You Need a Jigsaw
There are 4 reasons why you must add a jigsaw to your DIY toolbox.
- You deserve more than just painting furniture and crafts. Eventually, you’ll want to cut the legs off of furniture….add wood here….add something there….You can only do that if you have a tool to cut, my friend! Without a tool to cut, you can only dream about the projects you wish to create!
- It cuts so many things! Jigsaws can cut wood, plastic, metal, laminate, etc. Need I say more? LOL And because of easy adjustments, you can make angled cuts, too, just like bigger, more intimidating power tools.
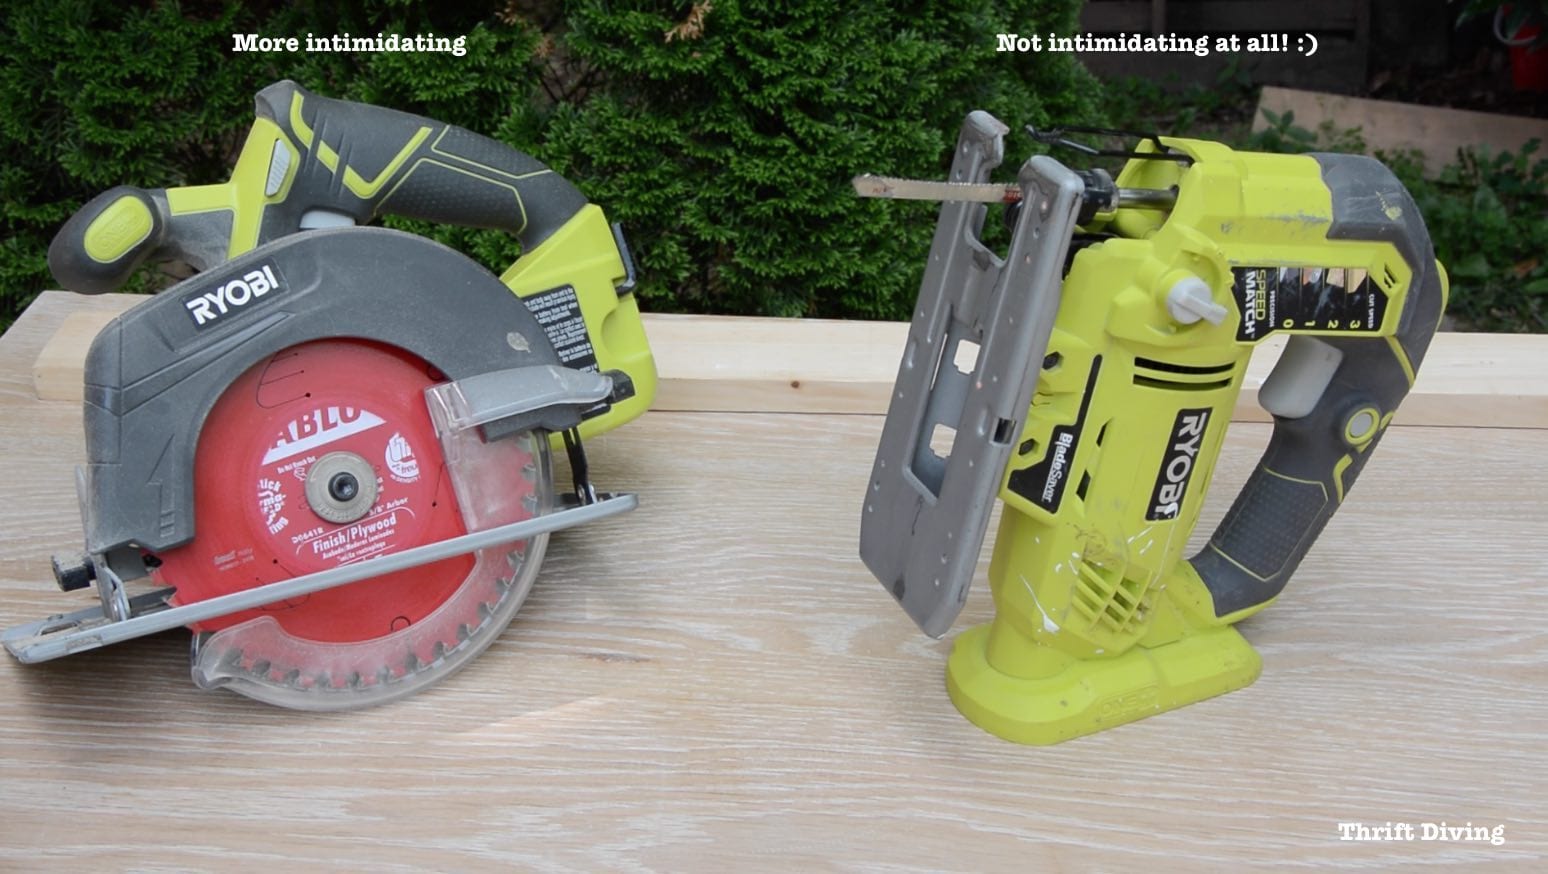
- Jigsaws are one of the least intimidating power tools. Especially if you’re new, don’t try to jump right into tools that scare you the most. Jigsaws are the least intimidating!
- Detailed cuts! Have you ever wanted to cut out shapes or intricate, detailed cuts? Well, aside from using a scroll saw, the jigsaw can easily handle these types of decorative cuts!
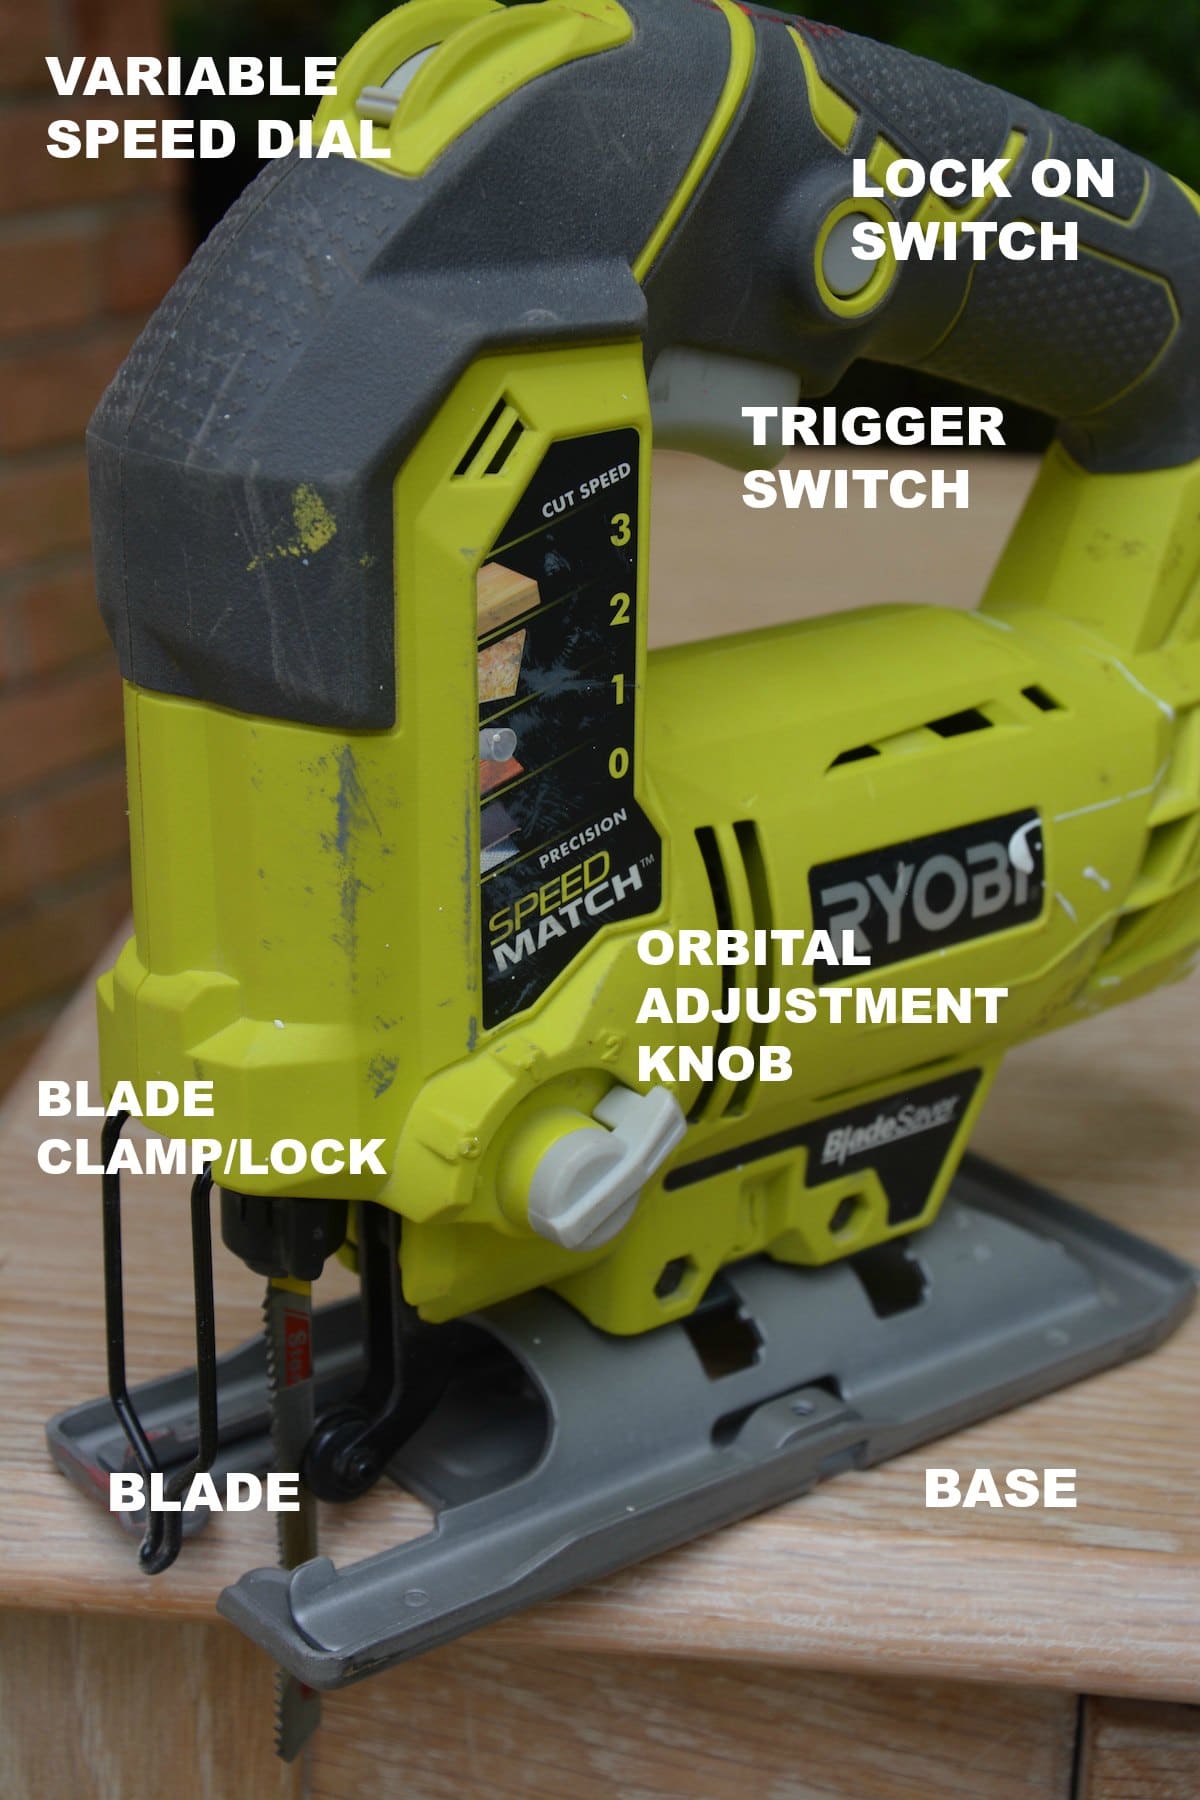
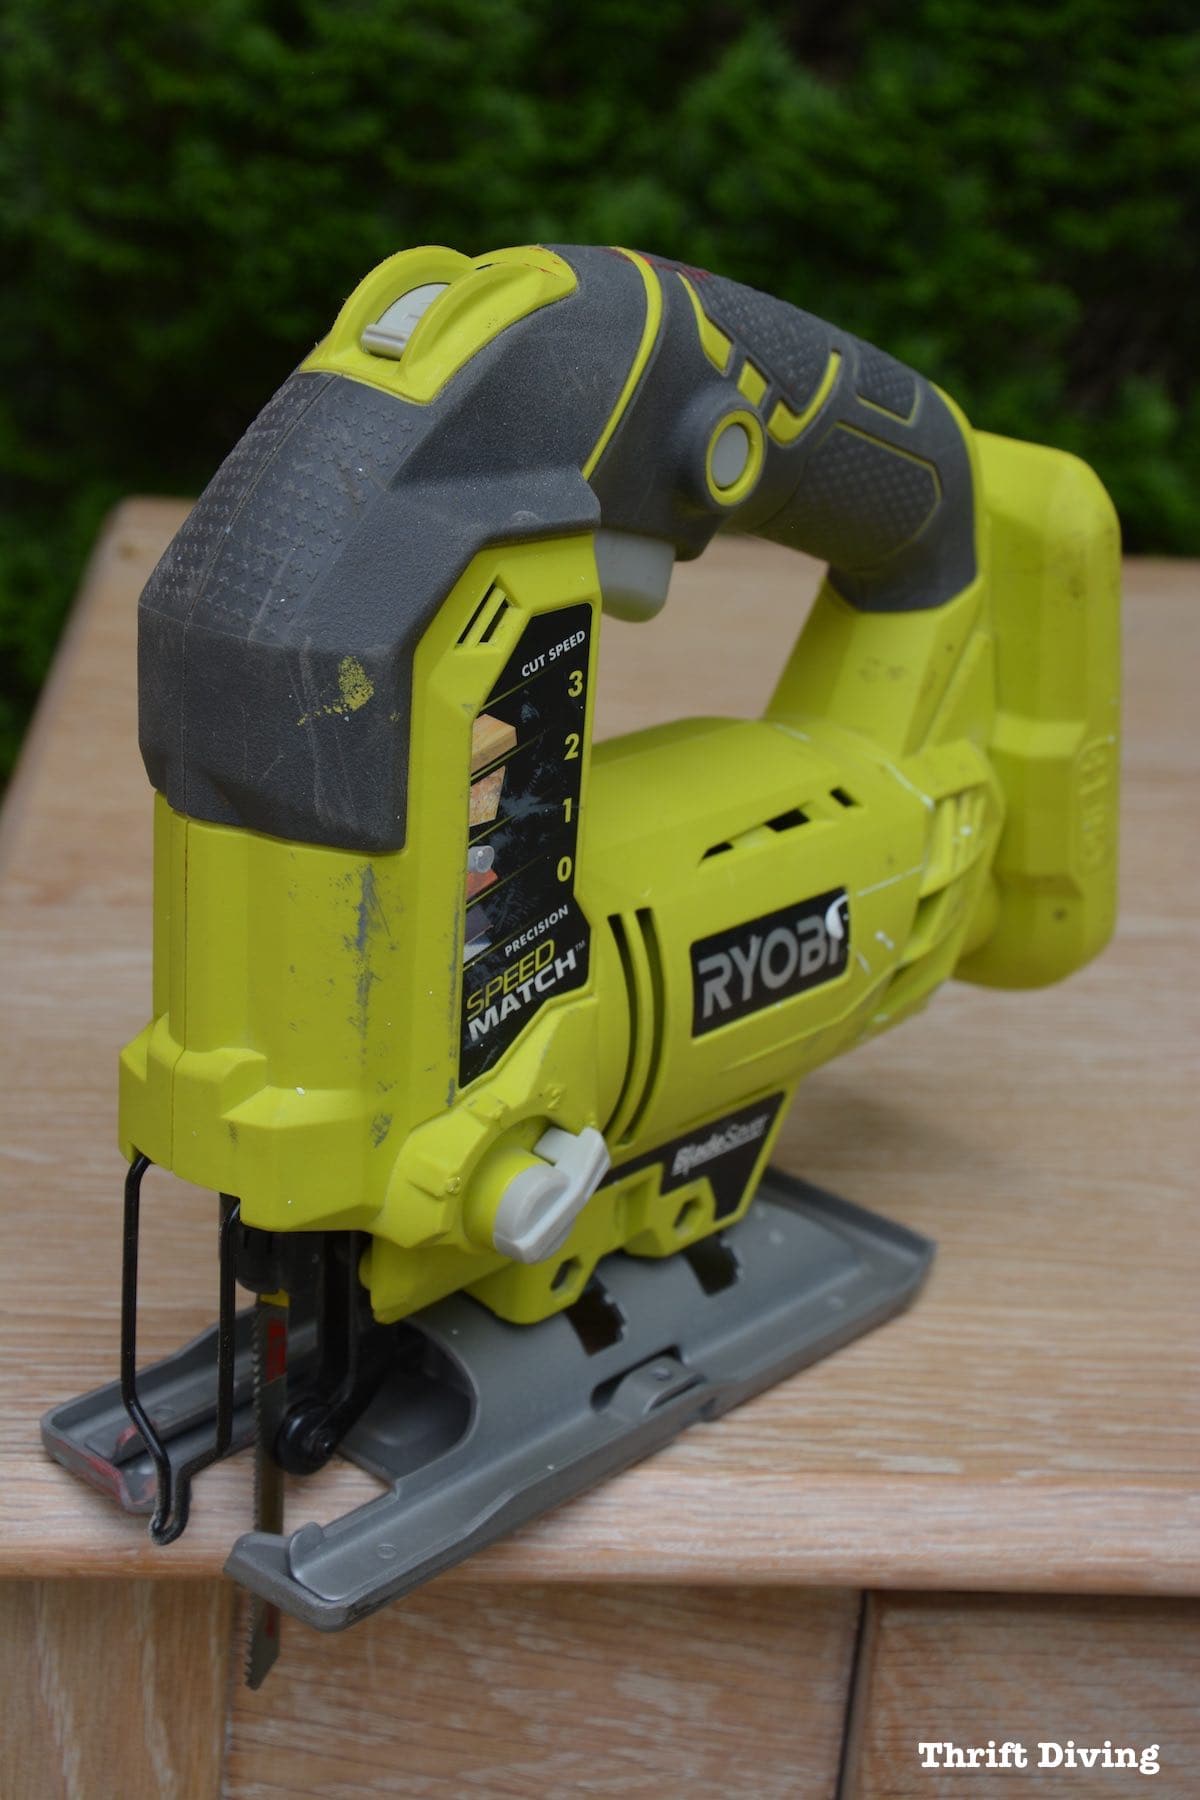
Parts of the Jigsaw
Here are all the important parts of the jigsaw you need to know before using it!
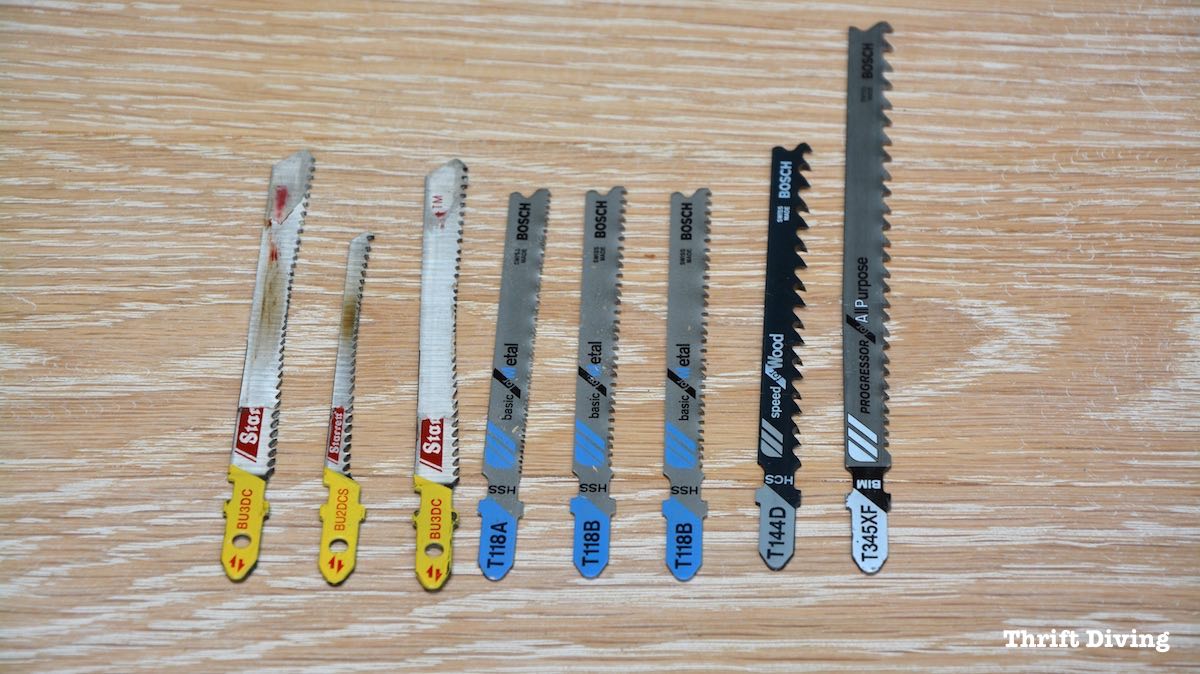
Which Jigsaw Blade Should You Use for Wood, Metal, or Laminate?
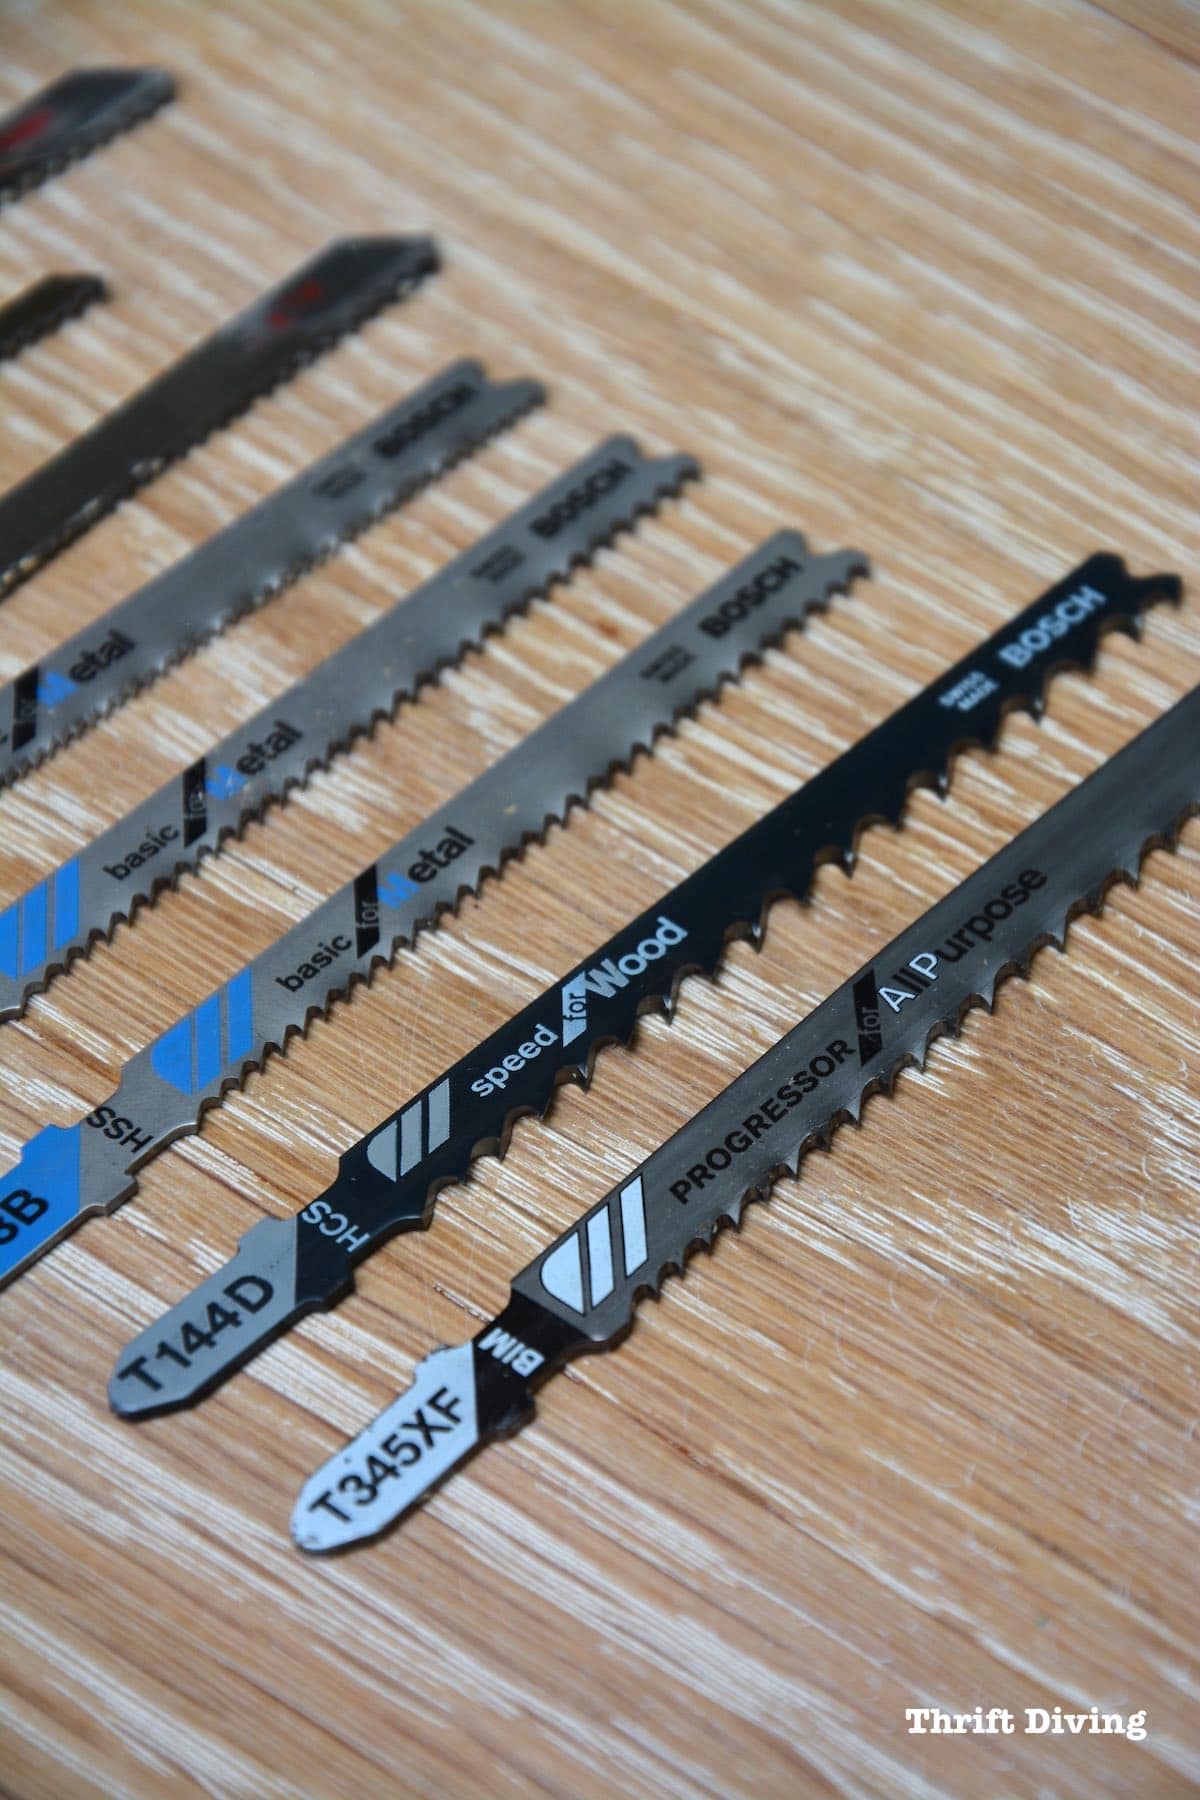
Blades are the most intimidating part for people because they just don’t understand them. But they’re pretty simple once you know the basics!
If you look closely, each blade tells you exactly what it’s used for:
It will say right on the blade! No memorizing needed. It will tell you “WOOD” or “METAL.” 🙂
You’ll also notice that the bottom of the blades are shaped like “T”s. These are called T-shank blades. The RYOBI jigsaw accepts T-shank blades, but check the brand and type of jigsaw you’re using to be sure that you get the right shank for your jigsaw. Some jigsaws accept U-shank (universal) blades.
RESOURCE: This article explains even more in-depth about jigsaw blades.
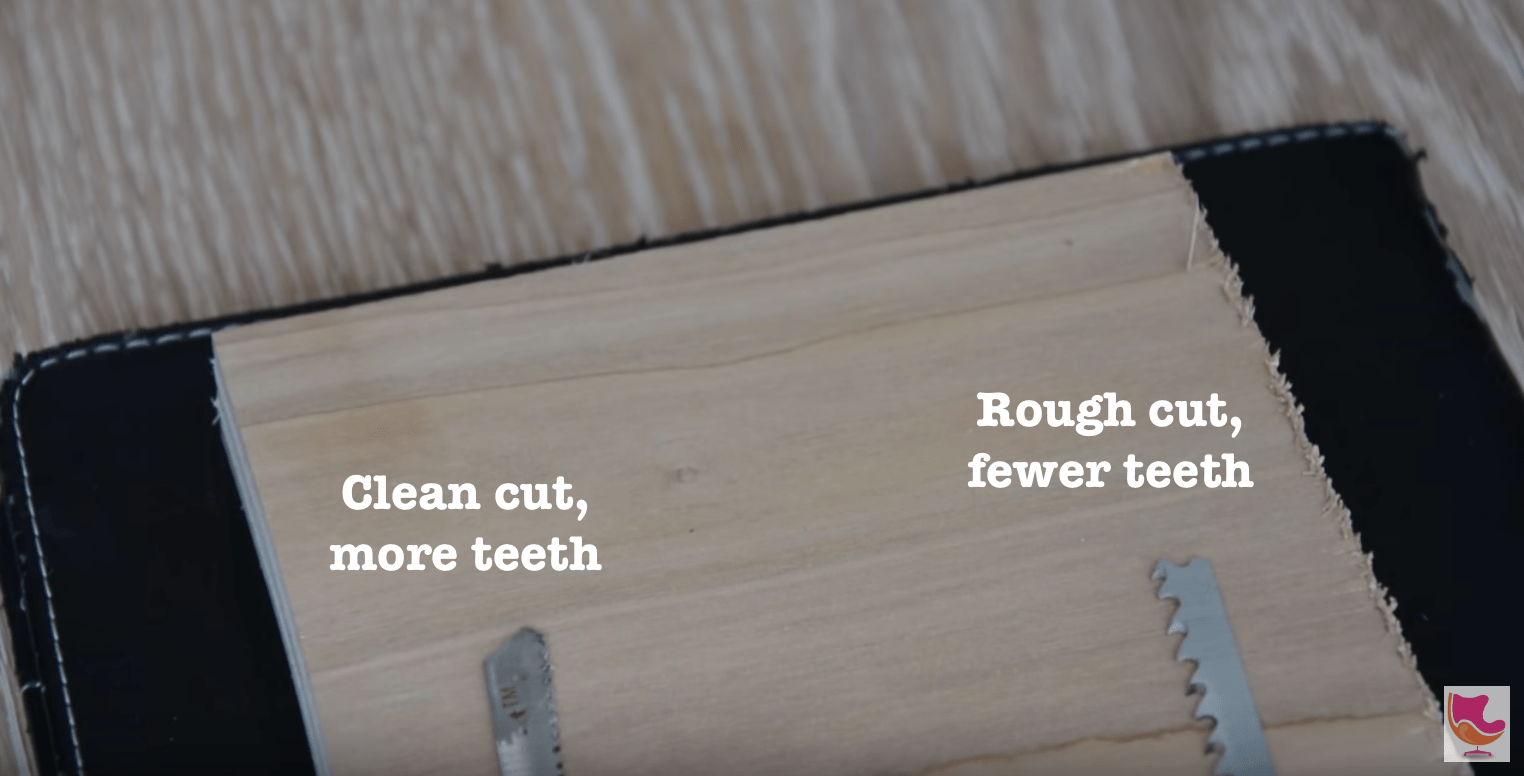
What is Teeth Per Inch (TPI)?
The other important thing to remember about blades is something called TPI: teeth per inch.
The basic idea is this: the fewer teeth a blade has, the rougher and faster cut it makes. The more teeth a blade has, the smoother and finer and slower cut you get.
So why does this even matter?
Well, if you’re just trying to make a quick cut to separate a board in half and you’re not concerned about getting a clean cut, then you could very well use a blade with fewer teeth for a fast, rough cut.
But if you’re doing a project where you need a clean cut, definitely choose the right blade for the material, and be sure that is has more teeth for a finer, smoother cut.
In this demonstration, I cut a piece of 3/4″ wood with two separate blades: one with more teeth and one with fewer teeth. You can see here how the blade with more teeth (on the left) gave me a finer cut, versus the blade on the right (with fewer teeth) gave me a more rough cut that would probably require a lot of sanding and may have chipped the wood.
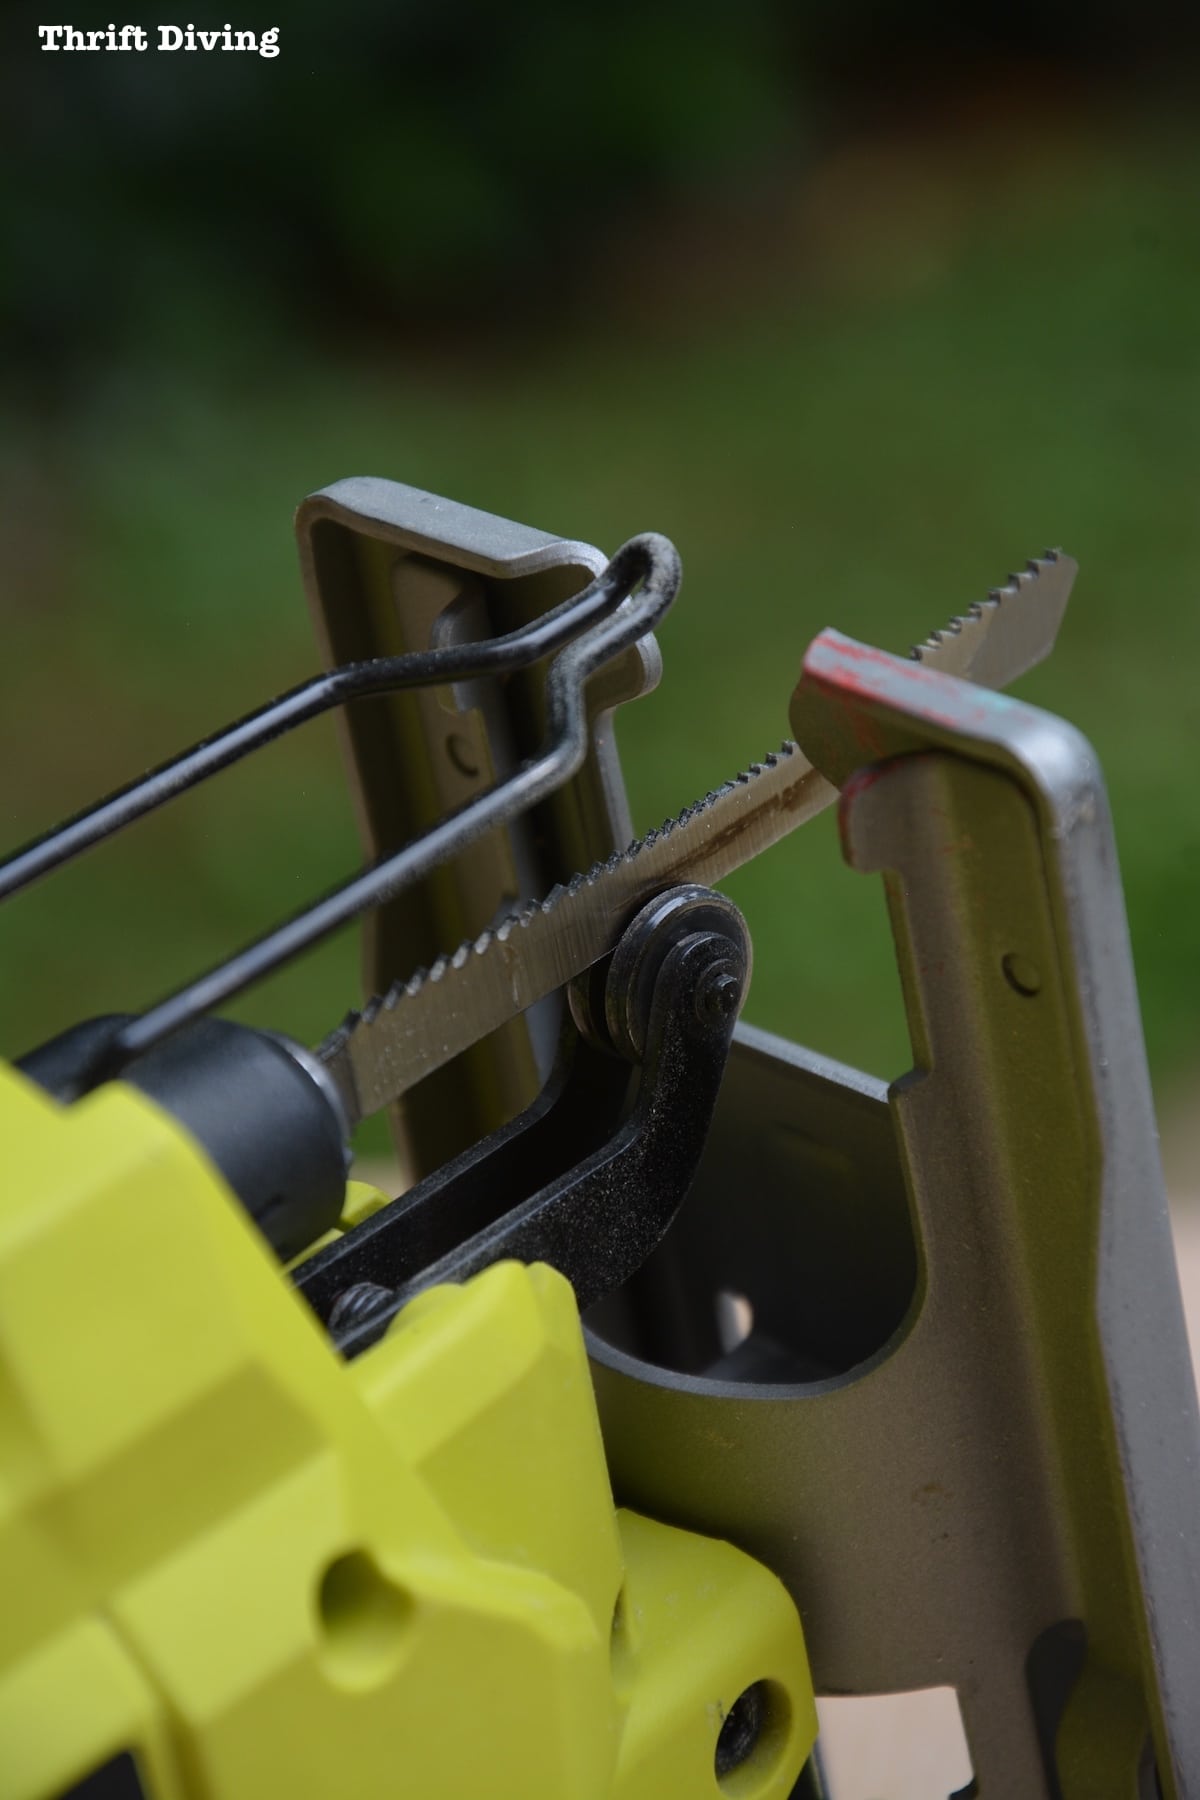
How to Change a Jigsaw Blade
My biggest question when I was learning how to use a jigsaw was, “But how do you change the blade??”
It’s pretty easy!
You have to push the spring-loaded clamp towards the blade guide, slide the blade in, and release the clamp/lock. Give the blade a tug and more sure it’s in there properly.
It’s that simple!
The video tutorial on my YouTube channel explains it all!
Be sure the teeth are facing UP when you slide in the blade.
So How Does a Jigsaw Cut?
Jigsaws typically cut on the UPSTROKE.
Which means, as a standard blade is coming up, it’s cutting from the bottom, giving you a clean cut on the bottom of your wood, plastic, or metal.
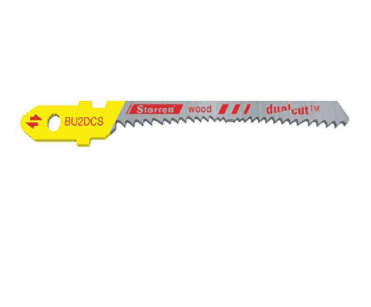
The jigsaw blades I love to use by Starrett called Dual Cut blades because they cut on the upward stroke and on the downward stroke so that each side of your material gets a nice, clean cut.
You can see on this Dual Cut blade that the angle of the teeth are perfect for cutting both downwards and upwards as the blade is moving.
I discovered these blades at the Builder’s show earlier this year and they’ve been life changing in my workshop!
You can’t imagine my excitement when I discovered these!
Many times I would cut wood and get lots of chipping on the top of my wood, ruining projects. But with these blades, that doesn’t happen anymore.
If you want to cut laminate, which can easily chip, these blades can get the job done and prevent tear out and chipping. If you’ve got laminate you’re cutting with a jigsaw or other delicate materials where it matters how the cut looks, then you must get these blades.
I don’t think I’d ever switch back to other blades.
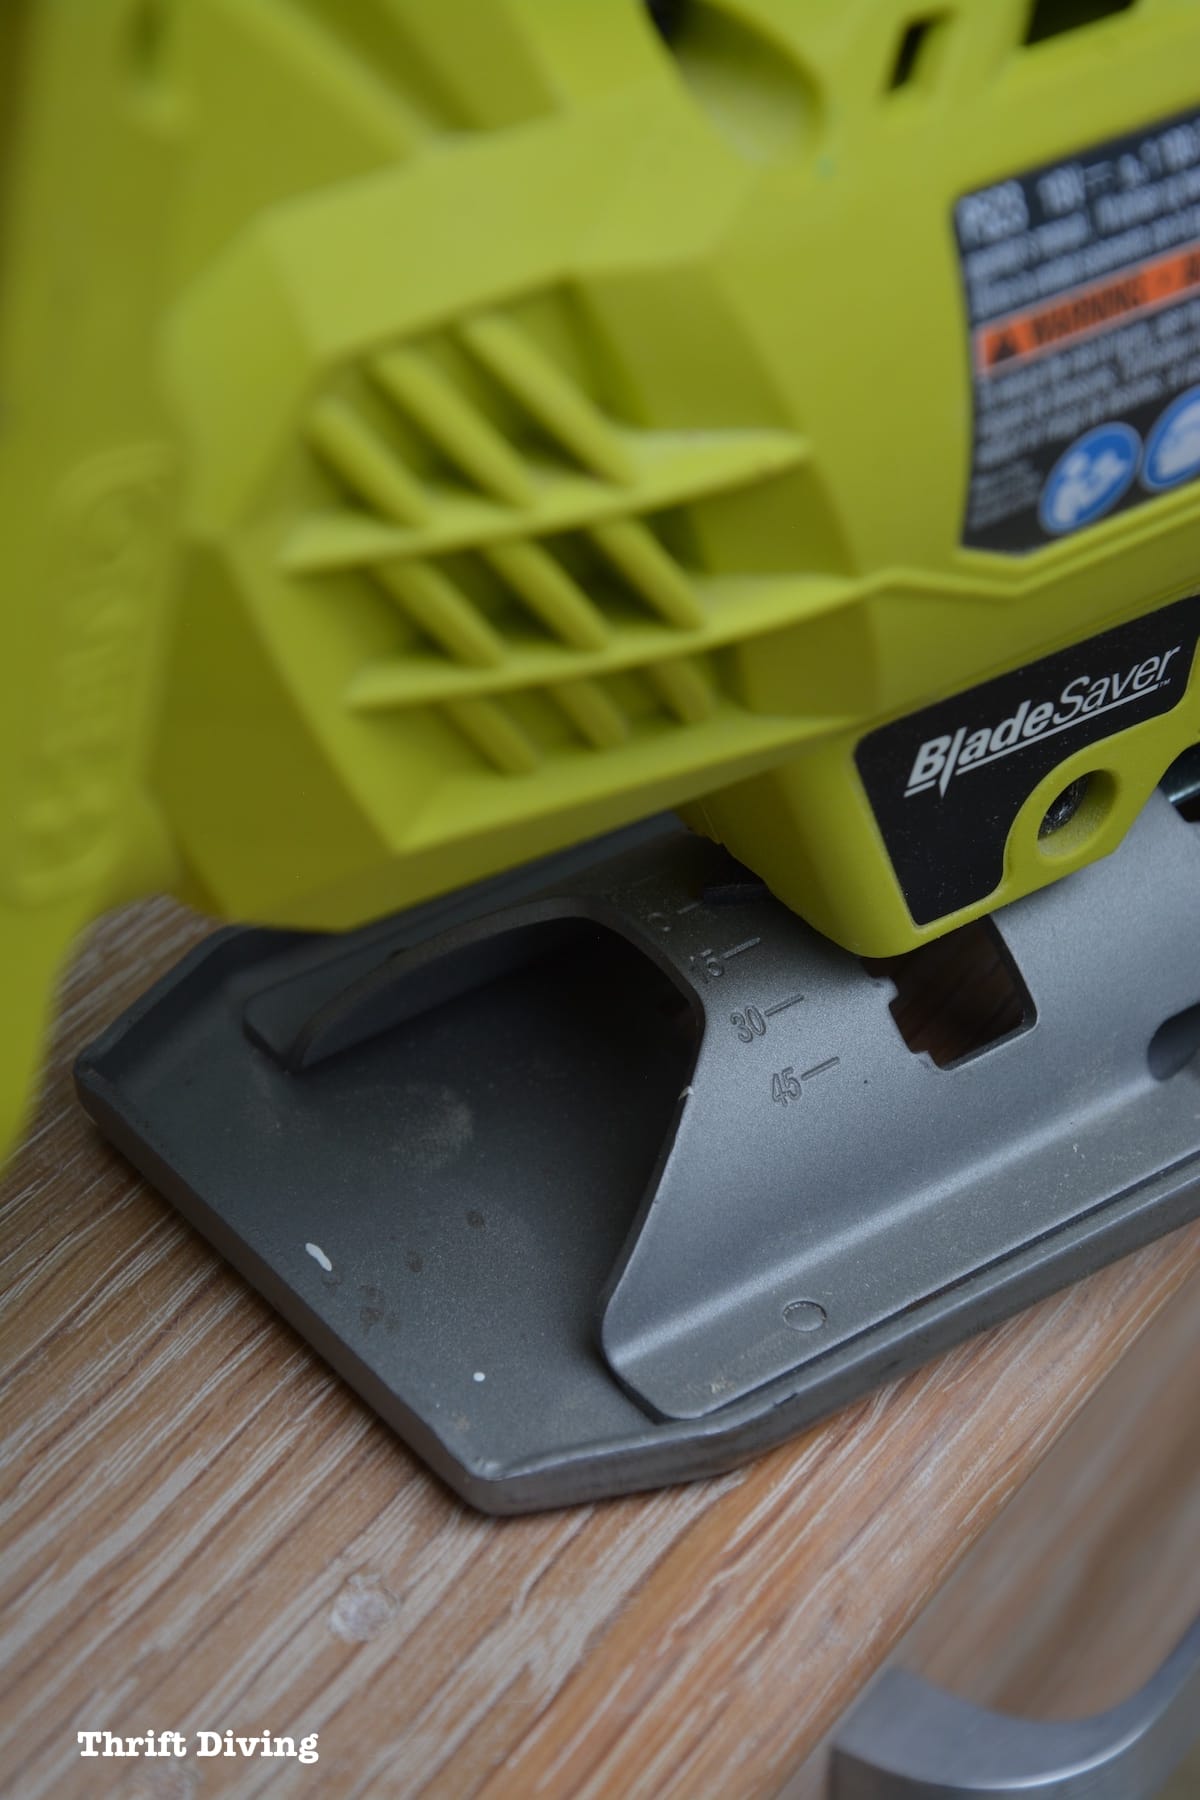
What Are Some Special Features of the Jigsaw?
One feature that is cool about jigsaws is that they can cut at angles, too, just like circular saws and miter saws!
Yep–they can cut straight angles (which is considered “0” degrees), along with 15-, 30-, and 45-degree angles.

But making minor adjustments to the screws on the base of the jigsaw, you can easily change the angle of the cut (watch the video tutorial “How to Use a Jigsaw” on my YouTube channel for details on how to make this adjustment).
You can also adjust the speed of your cut, along with engaging a trigger lock so that if you’re making long, tiresome cuts, you can lock the trigger and won’t have to squeeze the trigger for long periods of time.
This is a great feature for folks that may lack hand strength!
How to Get Started With Cutting With a Jigsaw
Getting started with cutting with a jigsaw is pretty simple, too! Let’s start with the obvious:
Do you have a workspace?
Not everyone has a fancy workshop or garage. But the good thing is that you don’t need it. Get yourself a couple sawhorses that easily fold up and lay a piece of plywood over them. Make sure it’s steady.
Got Clamps?
Clamps are super important. Whatever you’re cutting needs to be securely fastened to a table, workstation, bench, etc. so it doesn’t move when you start cutting.
The Process For Cutting
STEP 1: Clamp your workpiece down.
STEP 2: Adjust the orbital action on the side of the jigsaw (see the above diagram).
STEP 3: Insert your blade.
STEP 4: Insert your battery.
STEP 5: Place the edge of the base on your workpiece, making sure the blade isn’t yet touching the edge of your workpiece.
STEP 6: Pull the trigger and run the blade at full speed before making a connection between the blade and the workpiece. Use an edge guide or a piece of wood clamped to your table to help keep the jigsaw cutting in a straight line (if you can’t free-hand it).
STEP 7: Let the blade fully STOP before lifting it to return to the workbench.
STEP 8: Remove the battery if you’re walking away from your jigsaw, for safety reasons.
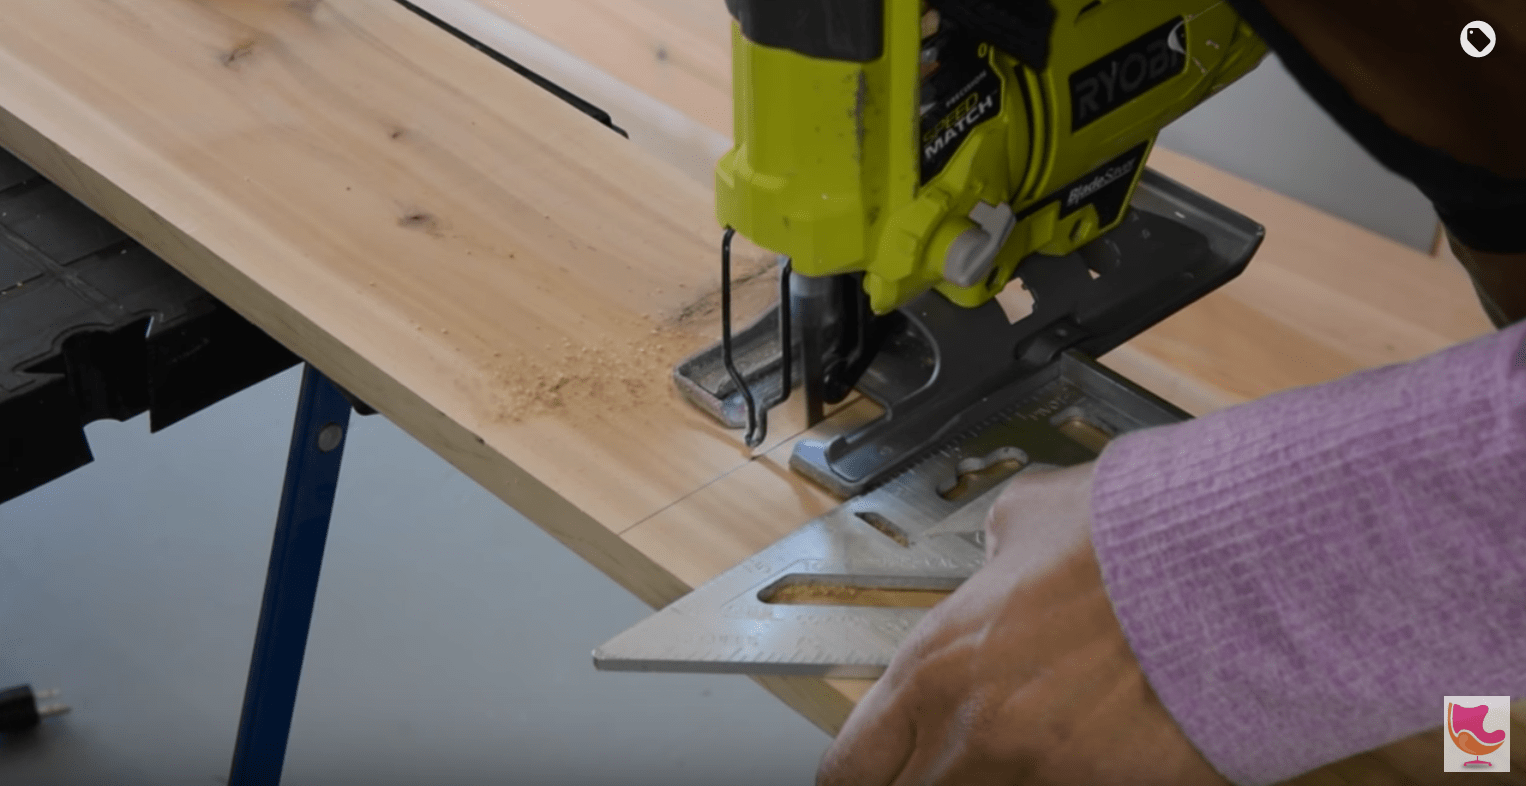
How to Get Straight Cuts When Using a Jigsaw
This is something I filmed for the jigsaw tutorial, but somehow, it accidentally got left out of the final video! Argh!
Getting a straight cut is pretty important, not just for the jigsaw, but for any hand-held power tool.
Most times people will use some sort of edge guide that the base of the jigsaw can move against, keeping it steady.
I’ll admit that I’ve never used an “official” jigsaw edge guide, so I can’t review them or even know which to recommend.
But I can show you what I do use when I cut straight lines with a jigsaw:
I use an empire square!
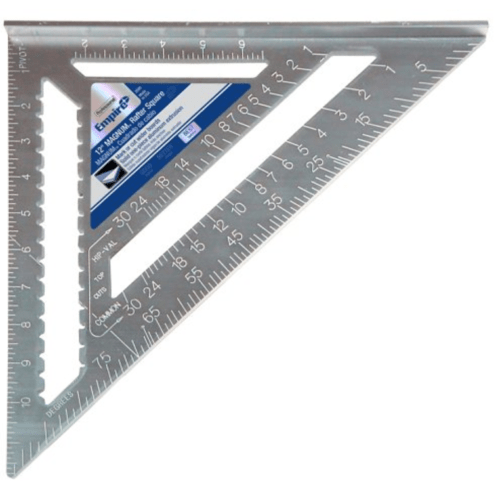
An empire square is a handy tool that I highly recommend every DIY’er get in their toolbox! It’s only about $8-12 and is the tool you’ll use to always get straight cuts and angles!
When I’m making cuts, I use an empire square to first mark the material, setting the “lip” of the square on the edge of the material.
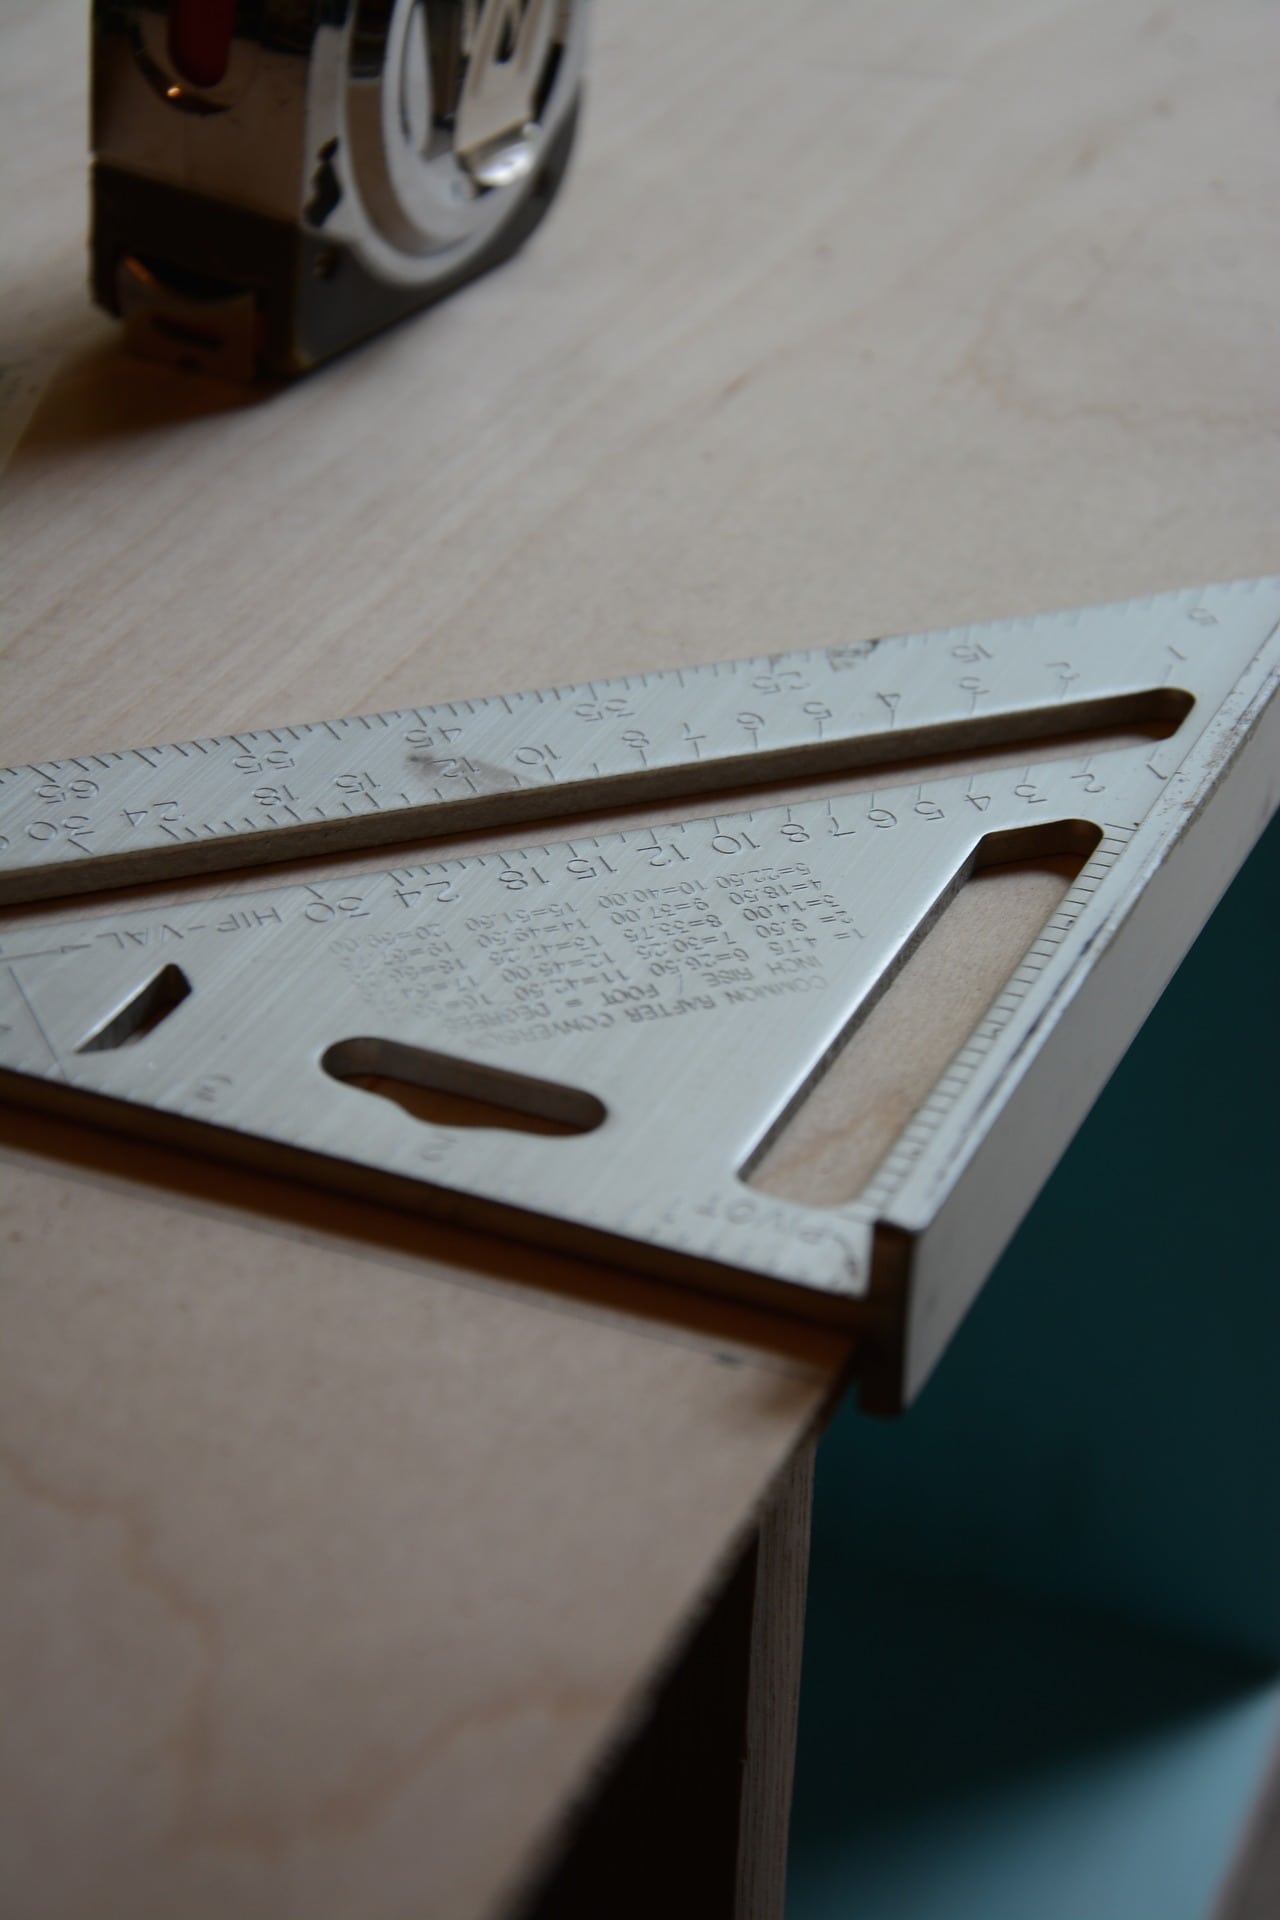
But an empire square also helps when you need a straight edge for your jigsaw to move against as you’re cutting.
It’s best to clamp the empire square to the wood so that it doesn’t move.
And this works really well!
If you’re doing longer cuts where the empire square isn’t long enough, then you can use a board as a steady edge and just clamp that board to your worktable.
Pretty simple, right?!
Don’t Forget Safety!
Safety is definitely important when it comes to power tools! Although the jigsaw is one of the least intimidating power tools, it still deserves respect and following a few safety precautions:
- Always read the jigsaw owner’s manual when you start using this tool.
- Even if you wear eye glasses, don’t skip safety glasses. They’re made especially for working with power tools; your glasses are not!
- Save your hearing! Wear some little small foam hearing protection every time.
- Always make sure your jigsaw blade fully stops before bringing it back up after a cut.
- Never touch a hot jigsaw blade after making a cut.
- Closed-toed shoes are a must! Save the flip-flops for the beach!
- Always keep the base of the jigsaw flat against your workpiece.
- Stay focused when working with power tools. Don’t talk on the phone or attempt to take pictures while blades are running.
- Never put your fingers near the blade.
- Always remove the battery (or unplug) before changing the blade or making adjustments.
Just following these basic safety precautions makes using power tools much safer! 🙂

So…Do You Feel More Confident Now? 🙂
Again, I’m sorry that it’s taken me this long to provide an in-depth tutorial on how to use a jigsaw!
I hope after this tutorial you feel more confident to tackle using a jigsaw, especially if you’re a newbie!
Be sure to watch the 29-minute YouTube tutorial for more details about each step listed here!
So what do you think? Are you ready to pick up a jigsaw now?
Leave a comment below and let’s talk JIGSAWS!
If you found this tutorial helpful, be sure to PIN IT to save it for later!
![]()

Download the 5 freebies!

Thrift Diving inspires women to decorate, improve, and maintain their home themselves...using paint, power tools, and thrift stores! Use these 5 printables, checklists, and ebooks to get started!

Bought one of these over winter, can’t wait to use it! Pinned!
Question…Question….First of all your presentation on how to use a jigsaw was awesome! Being a new DIY’er I really appreciate your expertise. So now on to the question. I’m installing a cat door for an indoor doorway. I carefully leveled the template, then drew the lines. After drilling the lead holes as instructed I began to use my Ryobi Jigsaw for the first time. I’ll tell you…I’m still a little nervous but, getting use to it. My door in a metal one with foam insulation and has the square beveled panels. My cut started real smooth, using your direction for almost the entire top of my square template. When it got to the end the jigsaw kicked back and the blade broke. I diligently replaced it after removing the battery and started at another lead point from the bottom up the side. Again, pretty smooth until I got another kickback and broken blade. Then I almost got to the end of this cut and…you got it…kick back and broke my third new blade. I’m using blades that are labeled basic metal. It seems that when I get to the beveled portion of the cut this occurs. How can I cancel this kick back-broken blade curse???
Very handy guide, thanks, Serena! I get a clear idea after read your post. Must bought a jigsaw saw and was beginning to get Inspire !