How to Make a Large Kitchen Sign
This is a sponsored post written by me on behalf of Cricut. All opinions are 100% mine.
The kitchen is the supposed to be the heart of the home. It’s the gathering place where friends and family (pre-corona, that is….) would stop through and mill around, chit chatting. It’s supposed to be the happy place of the home. But that hasn’t been the story of my home.
Nope.
My kitchen had always been dreary, plain, and a really sore spot that prevented me from loving my home.
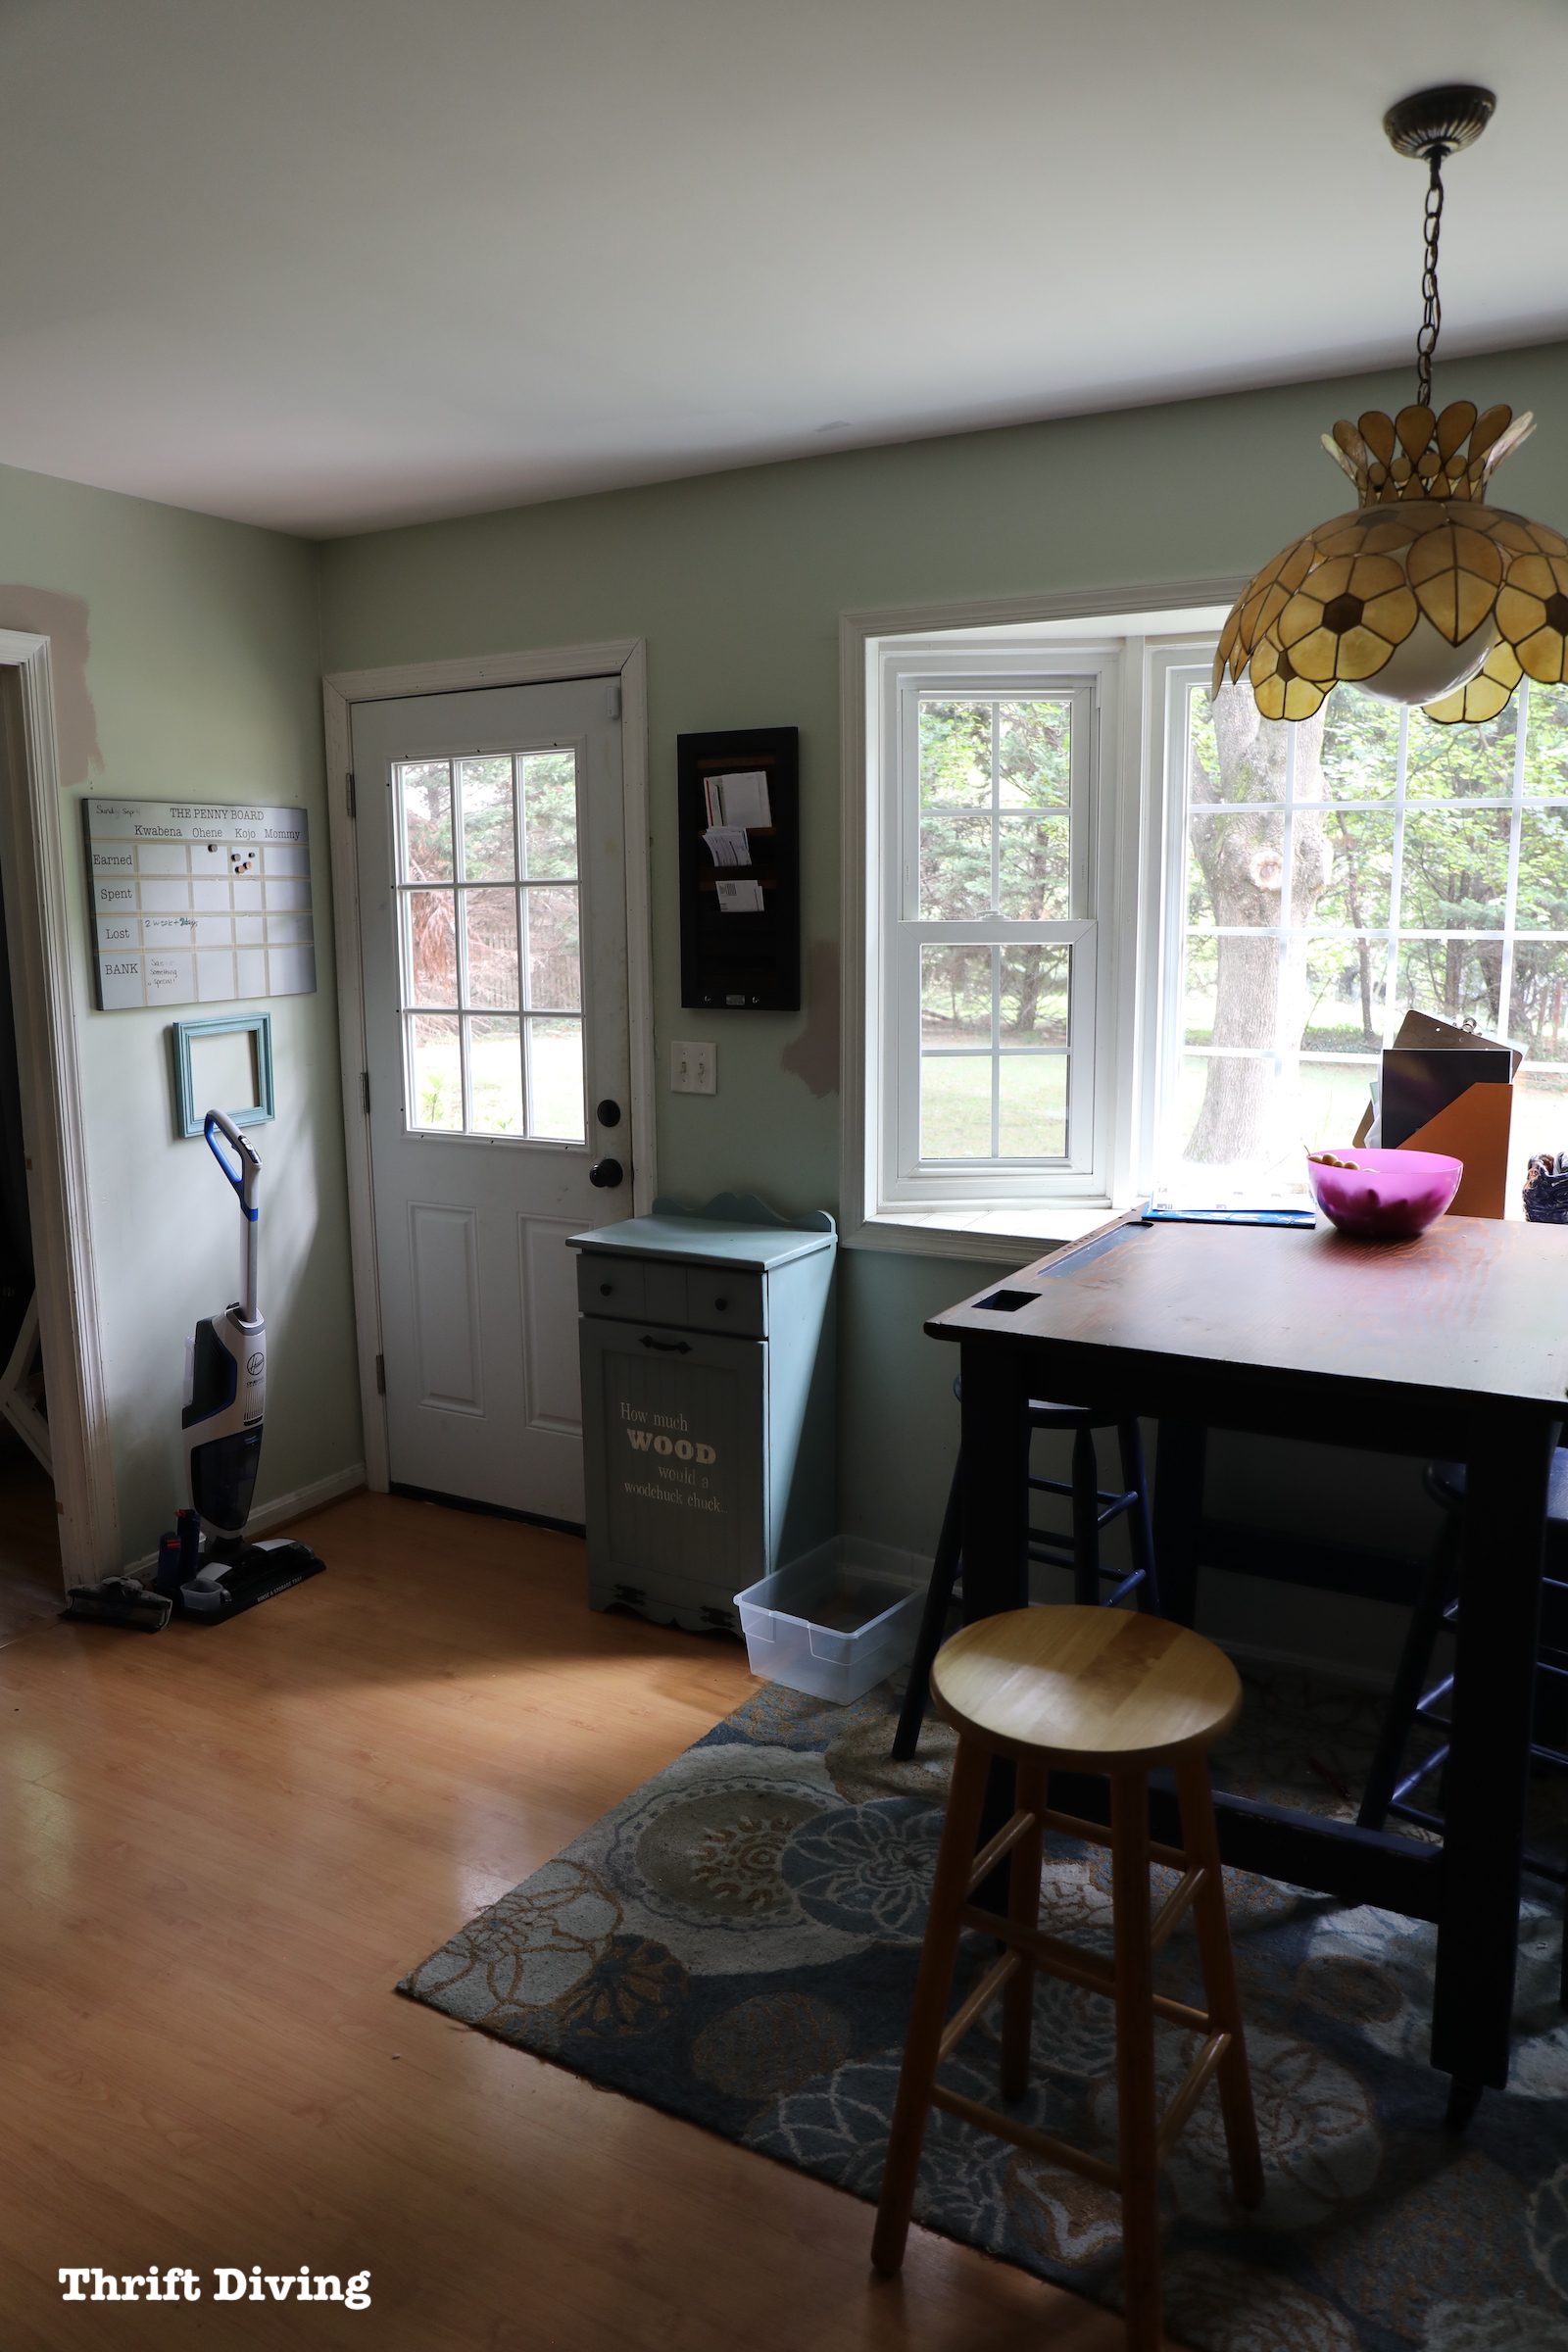
BEFORE
AFTER!
Now….I have fallen in love with my kitchen! It has become the sunny heart of my home and that makes me smile every time I walk into it!
Let me explain….

My home buying journey in 2010 was filled with pangs of regret that we had picked the wrong house. I didn’t walk in and fall in love with the kitchen. I fell in love with the home’s potential, rather. And not only was I overwhelmed by the responsibility of improving and maintaining a single family home, but I was dismayed to learn that first spring rolled around, and the trees filled in, the house suddenly turned very dark, as if we were living in a cave.
BEFORE

We bought our home in the winter when the trees were bare and sun could beam through with little filter. That first spring, however, the leaves filled in and were like an eclipse, blocking sunlight in the back of the house where the kitchen, dining room, and family room were located.
Quite honestly, it was the reason I dreaded spring each year.

Over the years, we had scraped together enough money to get one of two huge light-sucking maples removed from our backyard. But at nearly $2,000, we couldn’t afford to get the second one removed.
Until now.
This past week, we said good riddance to the remaining sugar maple in our backyard. I also had learned that its roots were beginning to infiltrate parts of the poured concrete foundation. Yep–it was time to go.

AFTER!
Now, there is very little that stands in the way of sunlight streaming into my kitchen, into my home, (not to mention the threat of damaging tree roots is gone). I couldn’t be happier!

A Kitchen Transformation
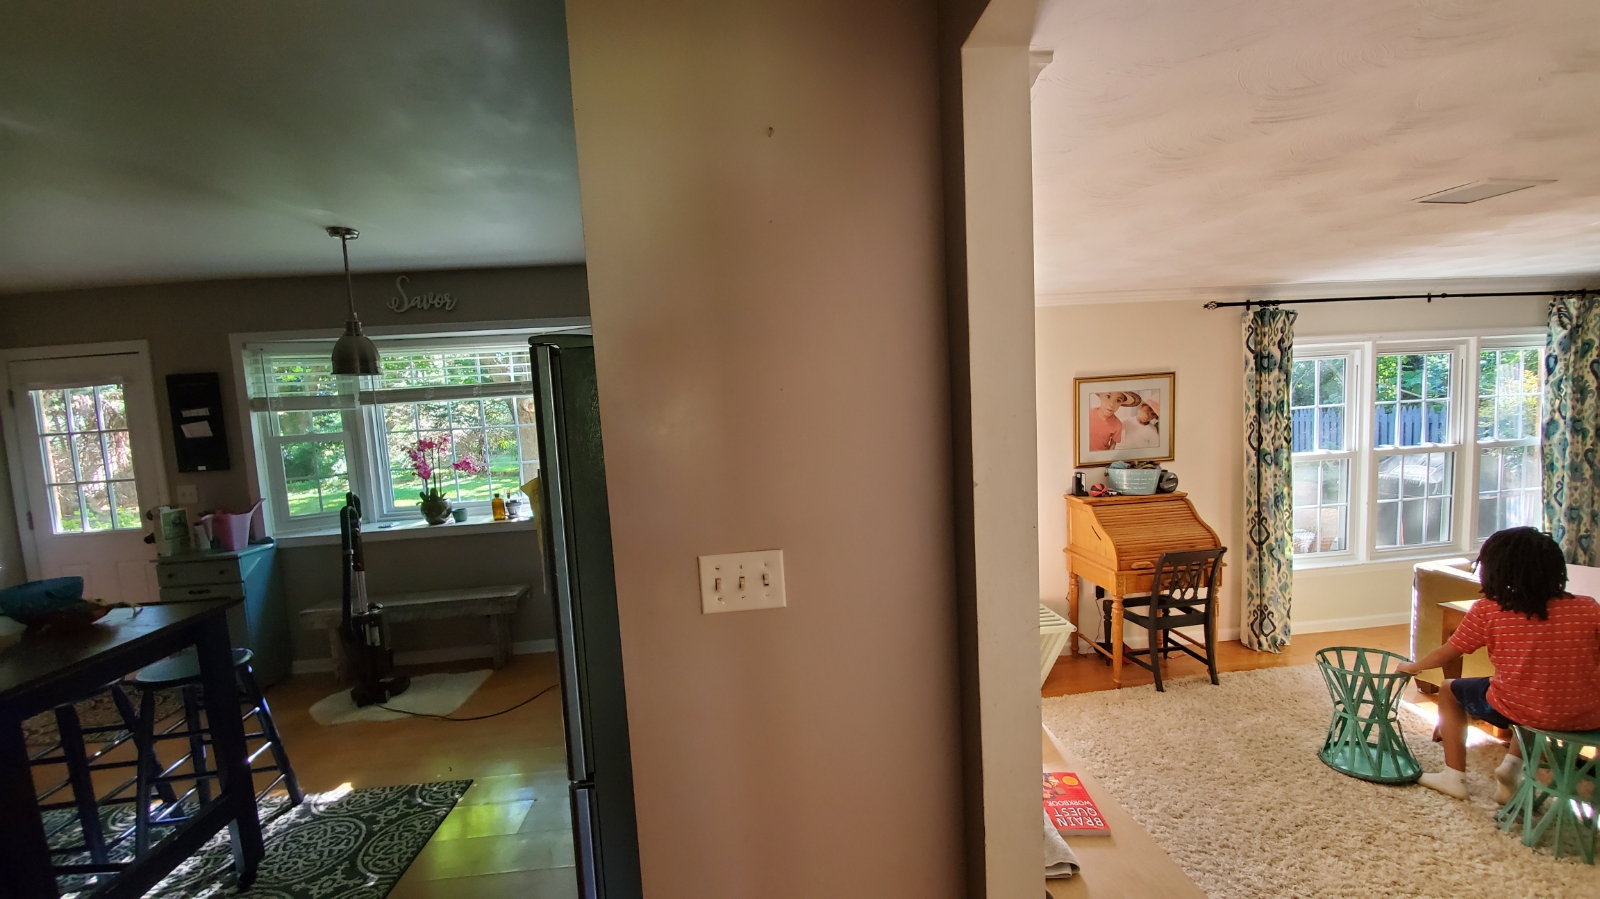
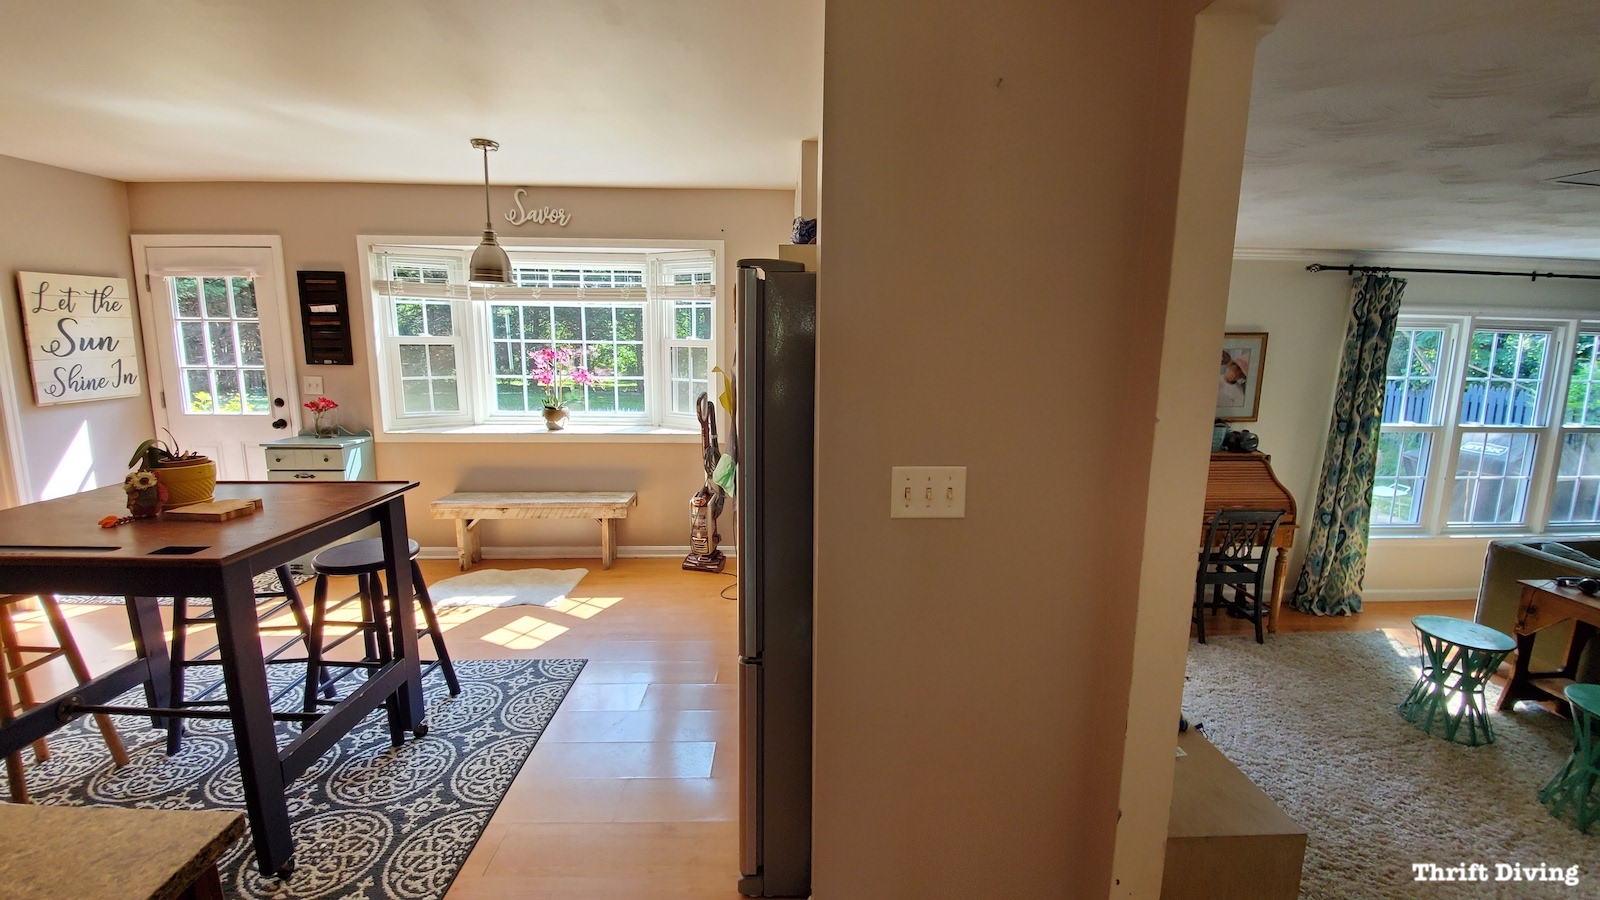
Below is a shocking transformation of my kitchen that shows exactly how dark my kitchen was in relation to my family room thanks to the oppressive tree. From the doorway, I snapped this picture of the two adjacent rooms, where you can see that my family room got bright early and mid-morning sun. But the kitchen was soooo dark. This picture was snapped around 10 a.m. Yes….10 a.m. and we needed to use overhead lights in order to see.
BEFORE
AFTER!
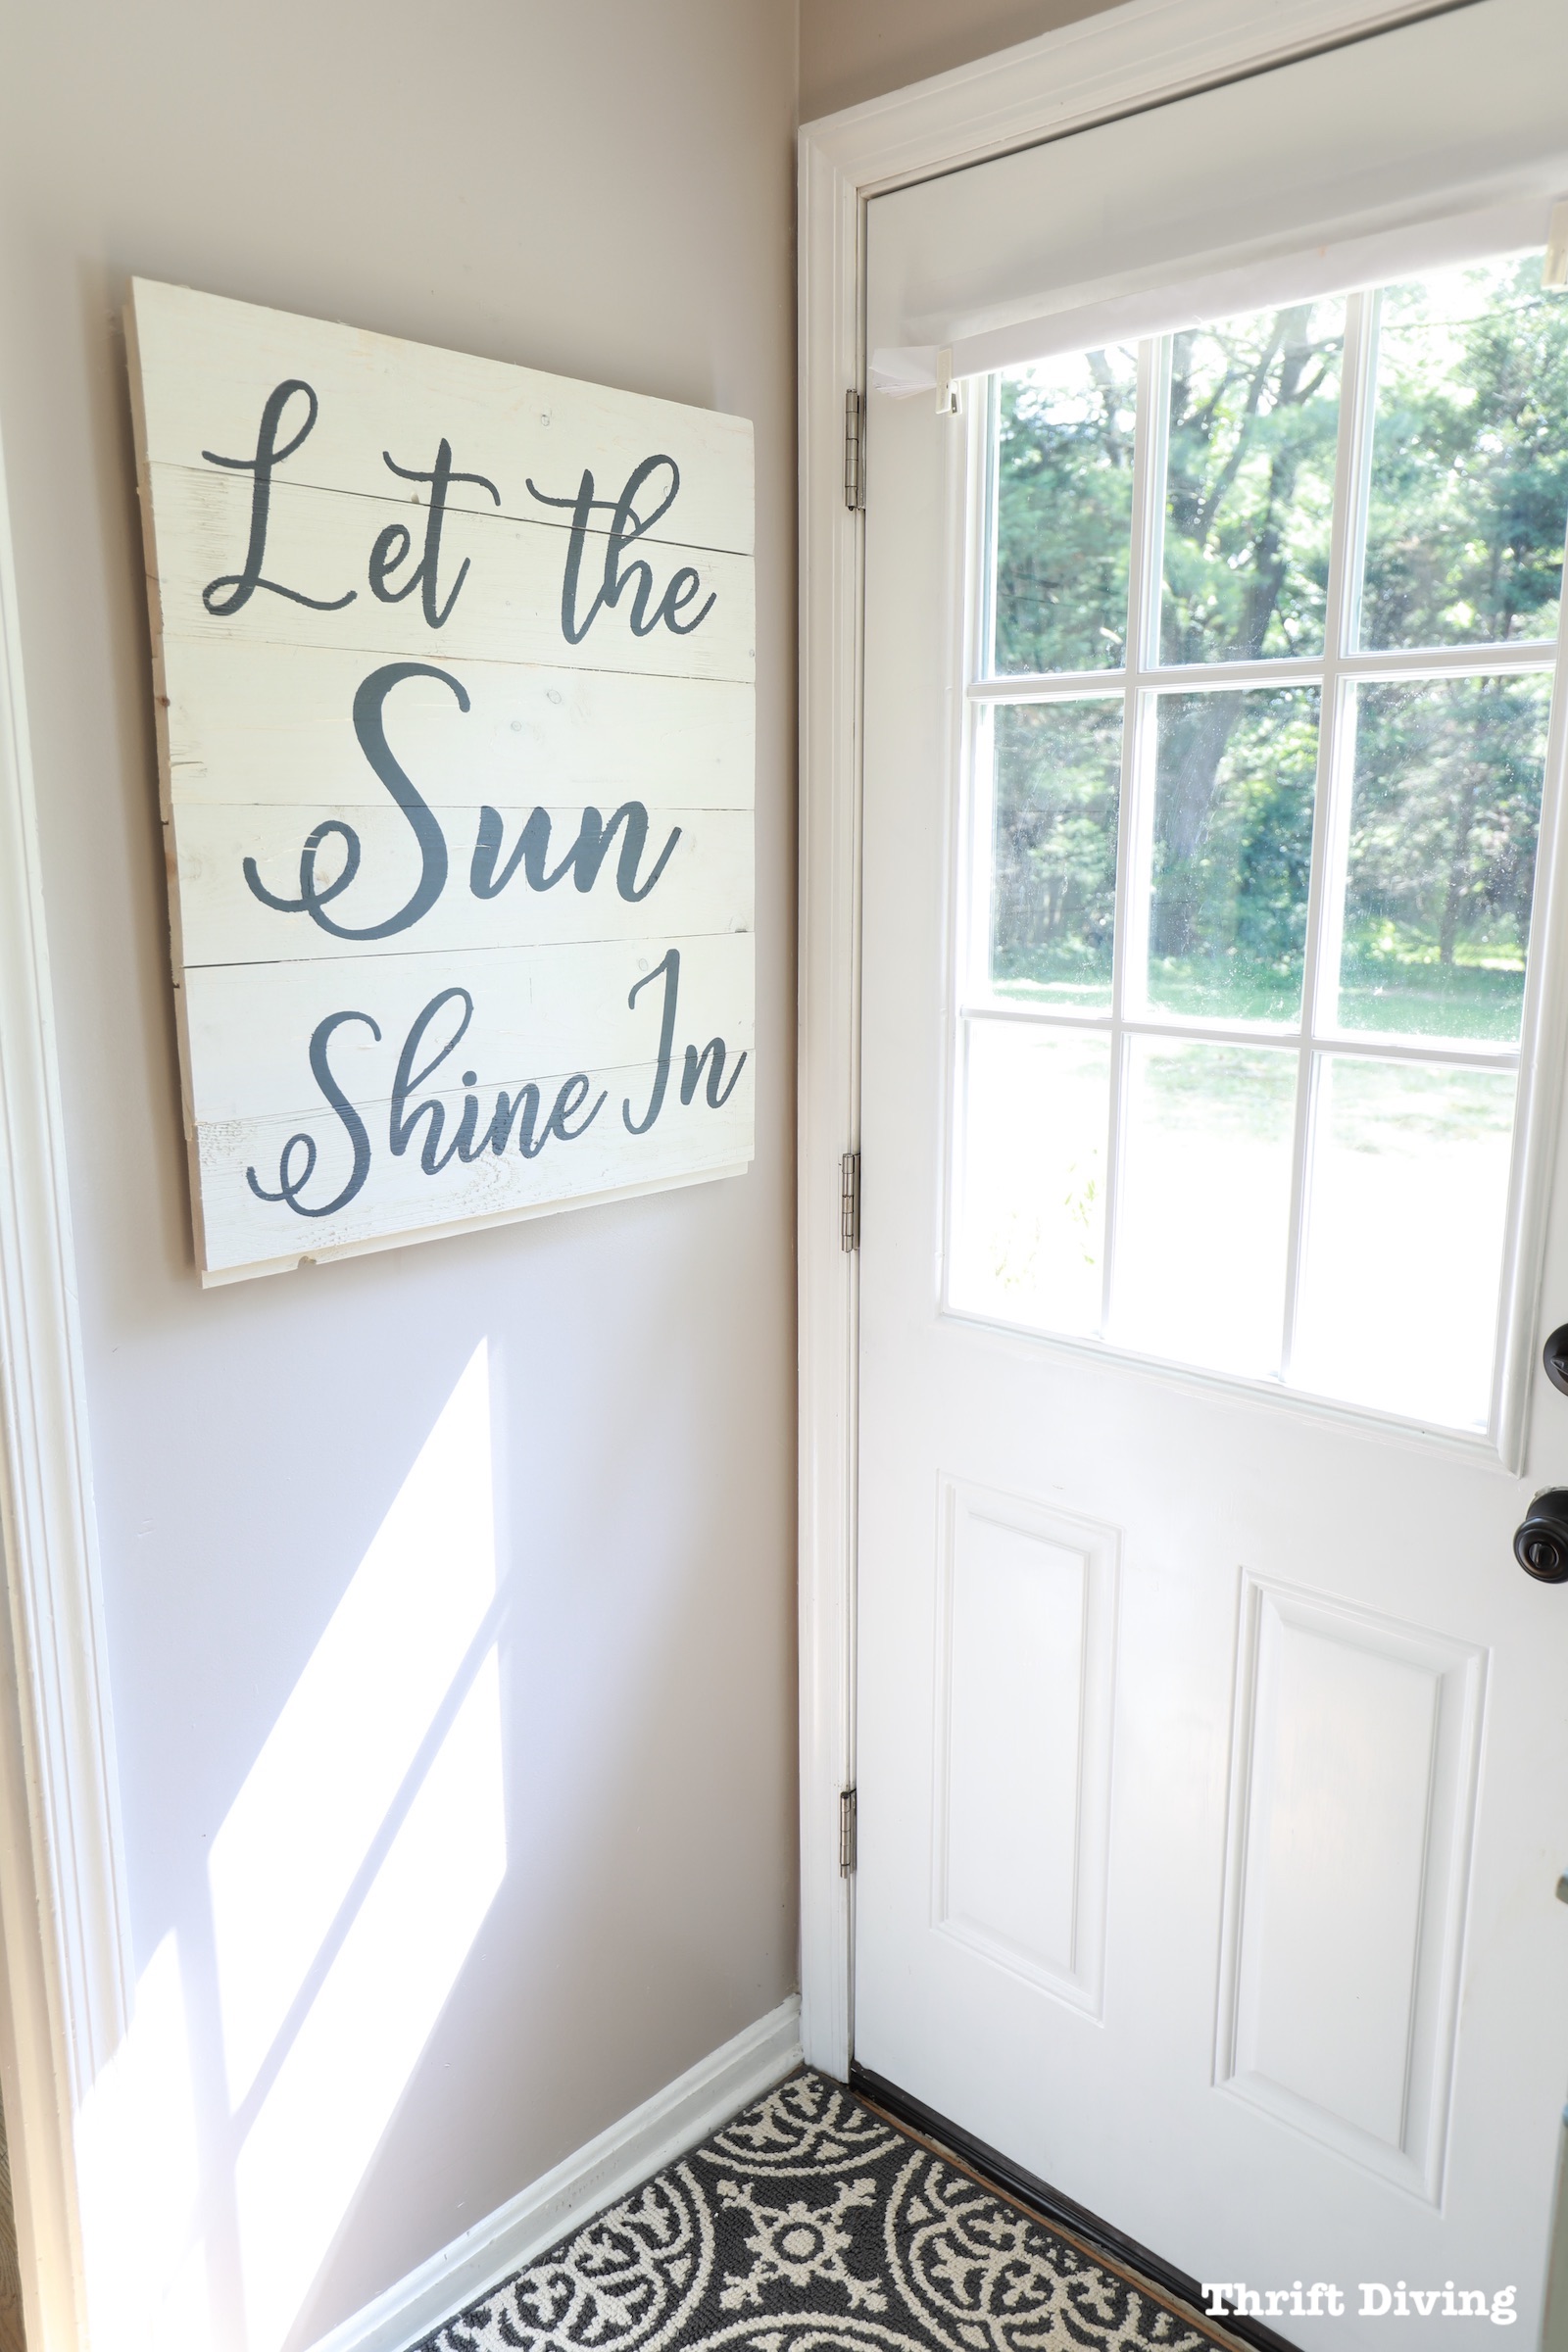
With the tree gone, the kitchen is brighter–even brighter than the family room now! This kitchen is literally the center of our home and is passed when coming and going anywhere in the house. Seeing how sunny it is now with the tree gone makes me smile and give thanks for the opportunity to create the home I love.
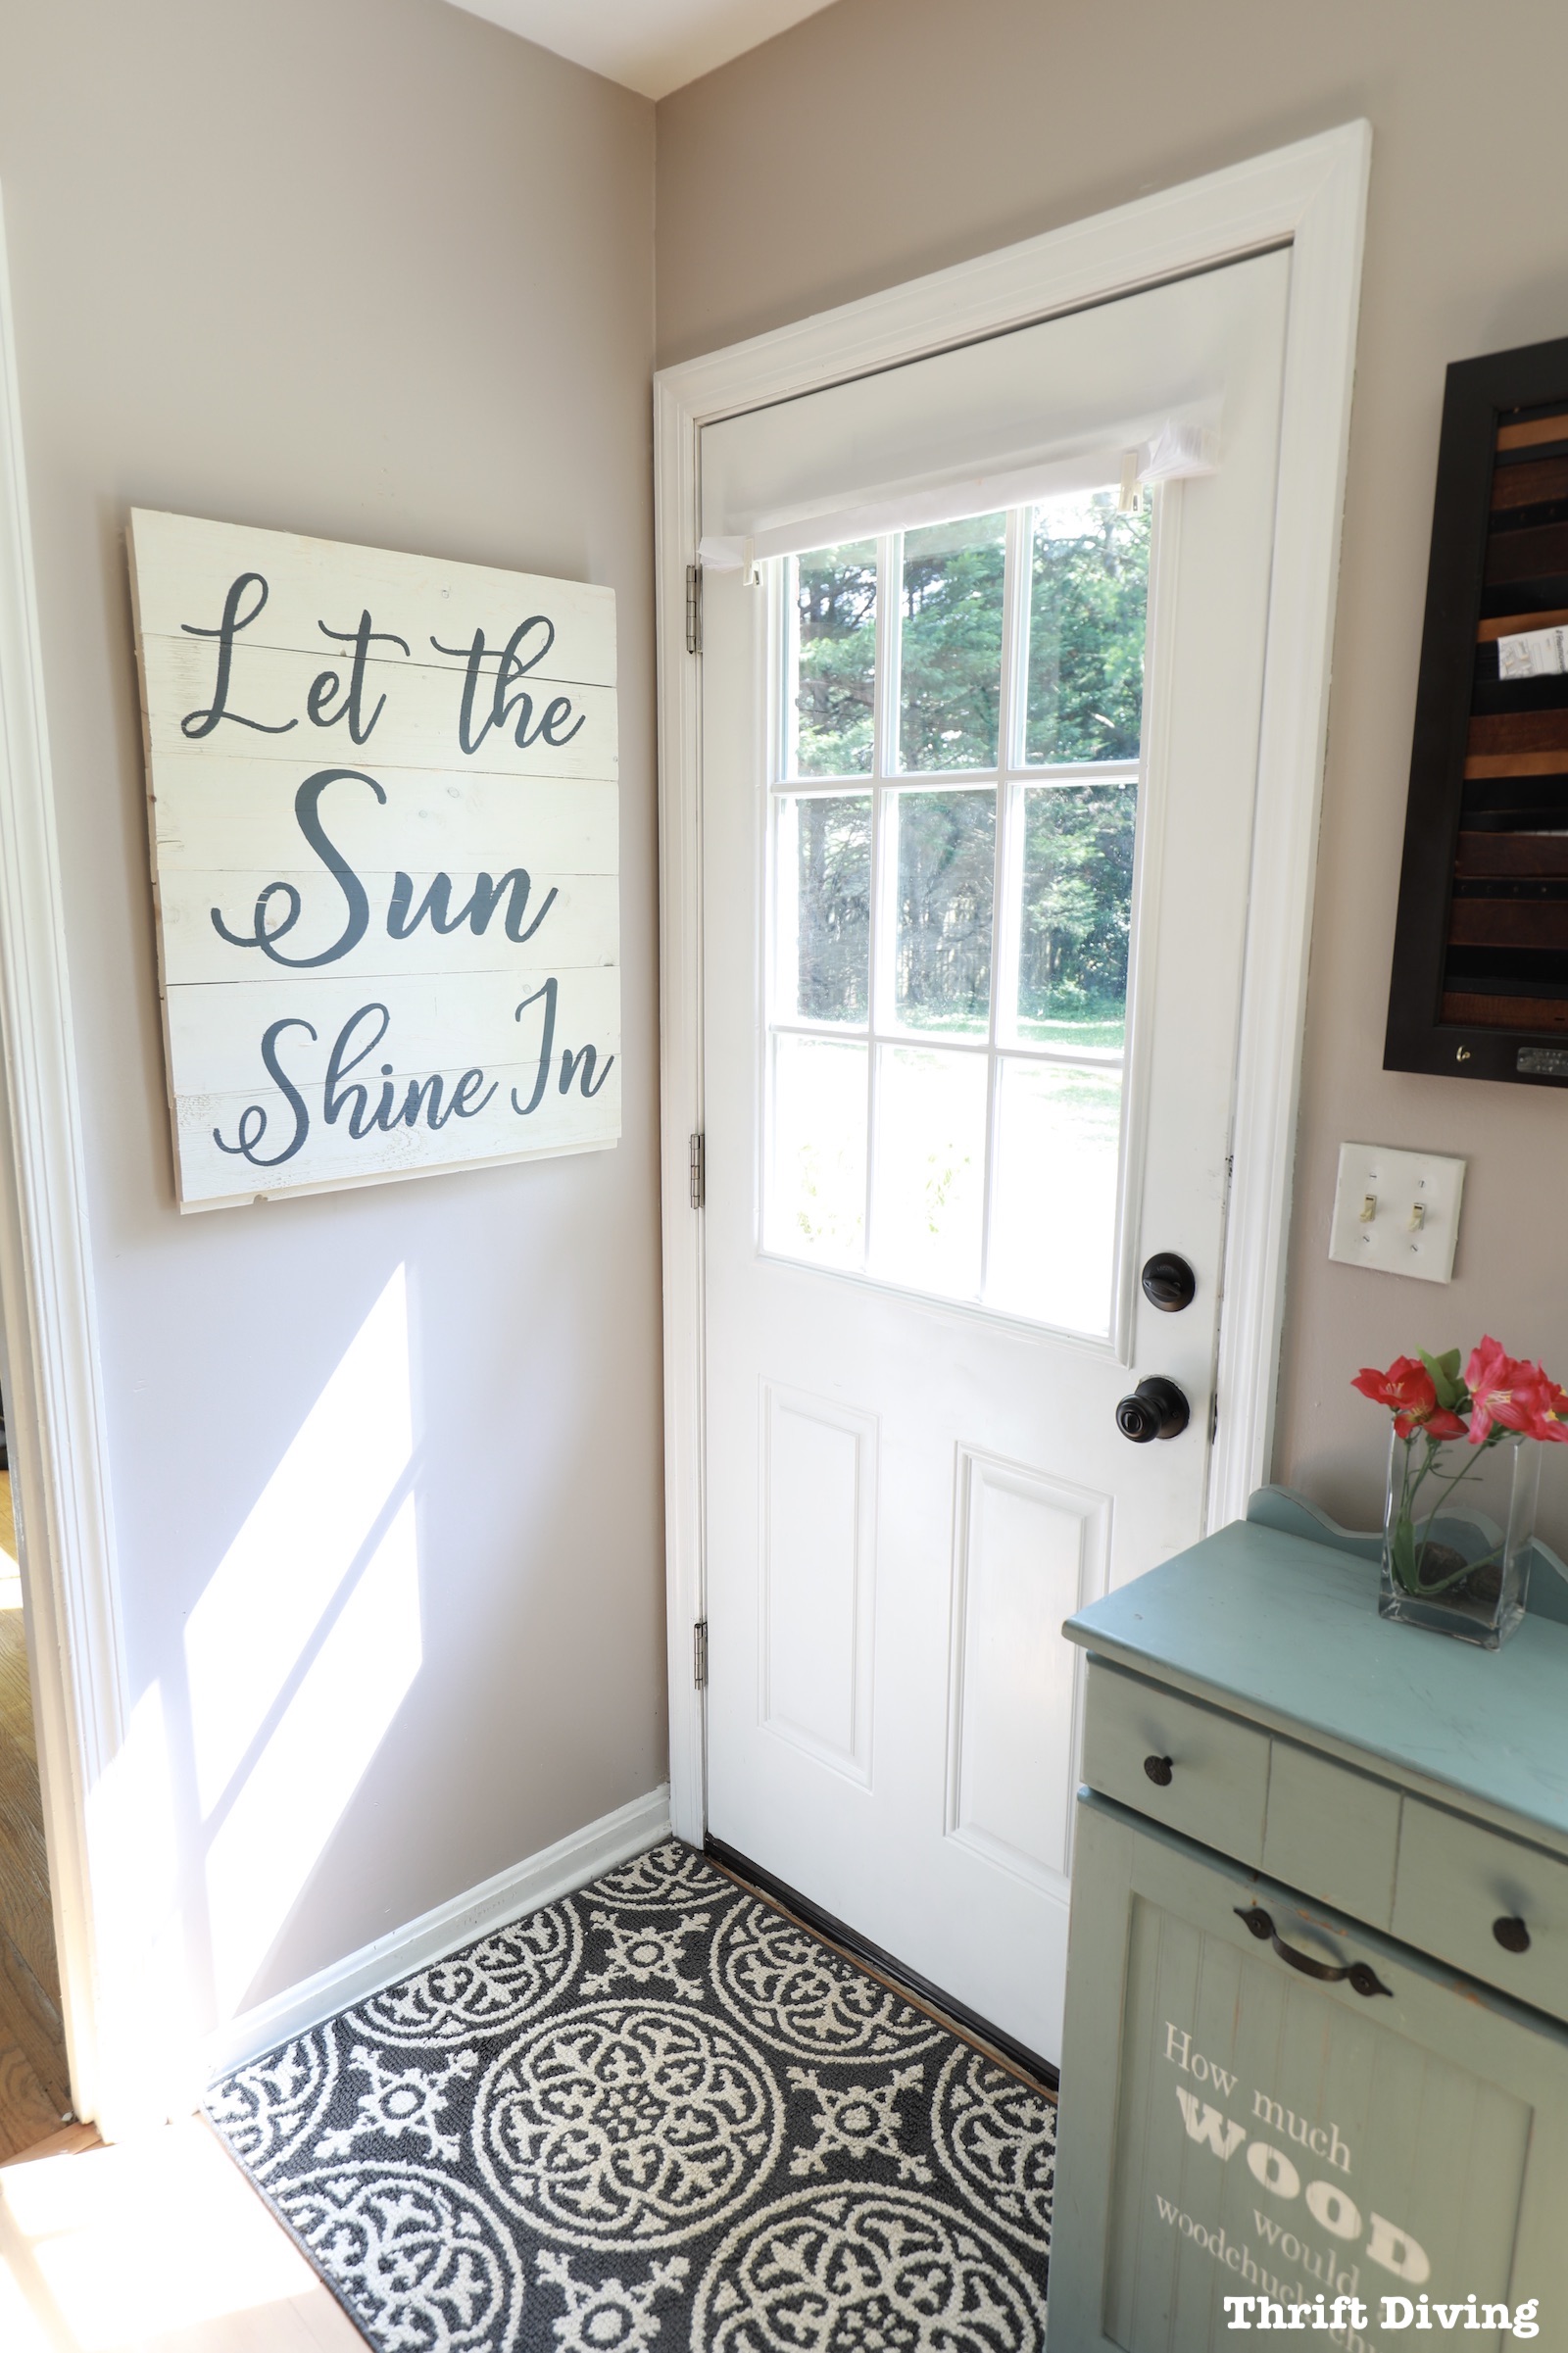
I made the large kitchen sign that says “Let the Sun Shine In” to celebrate the sunlight!
How to Make a Large Kitchen Sign
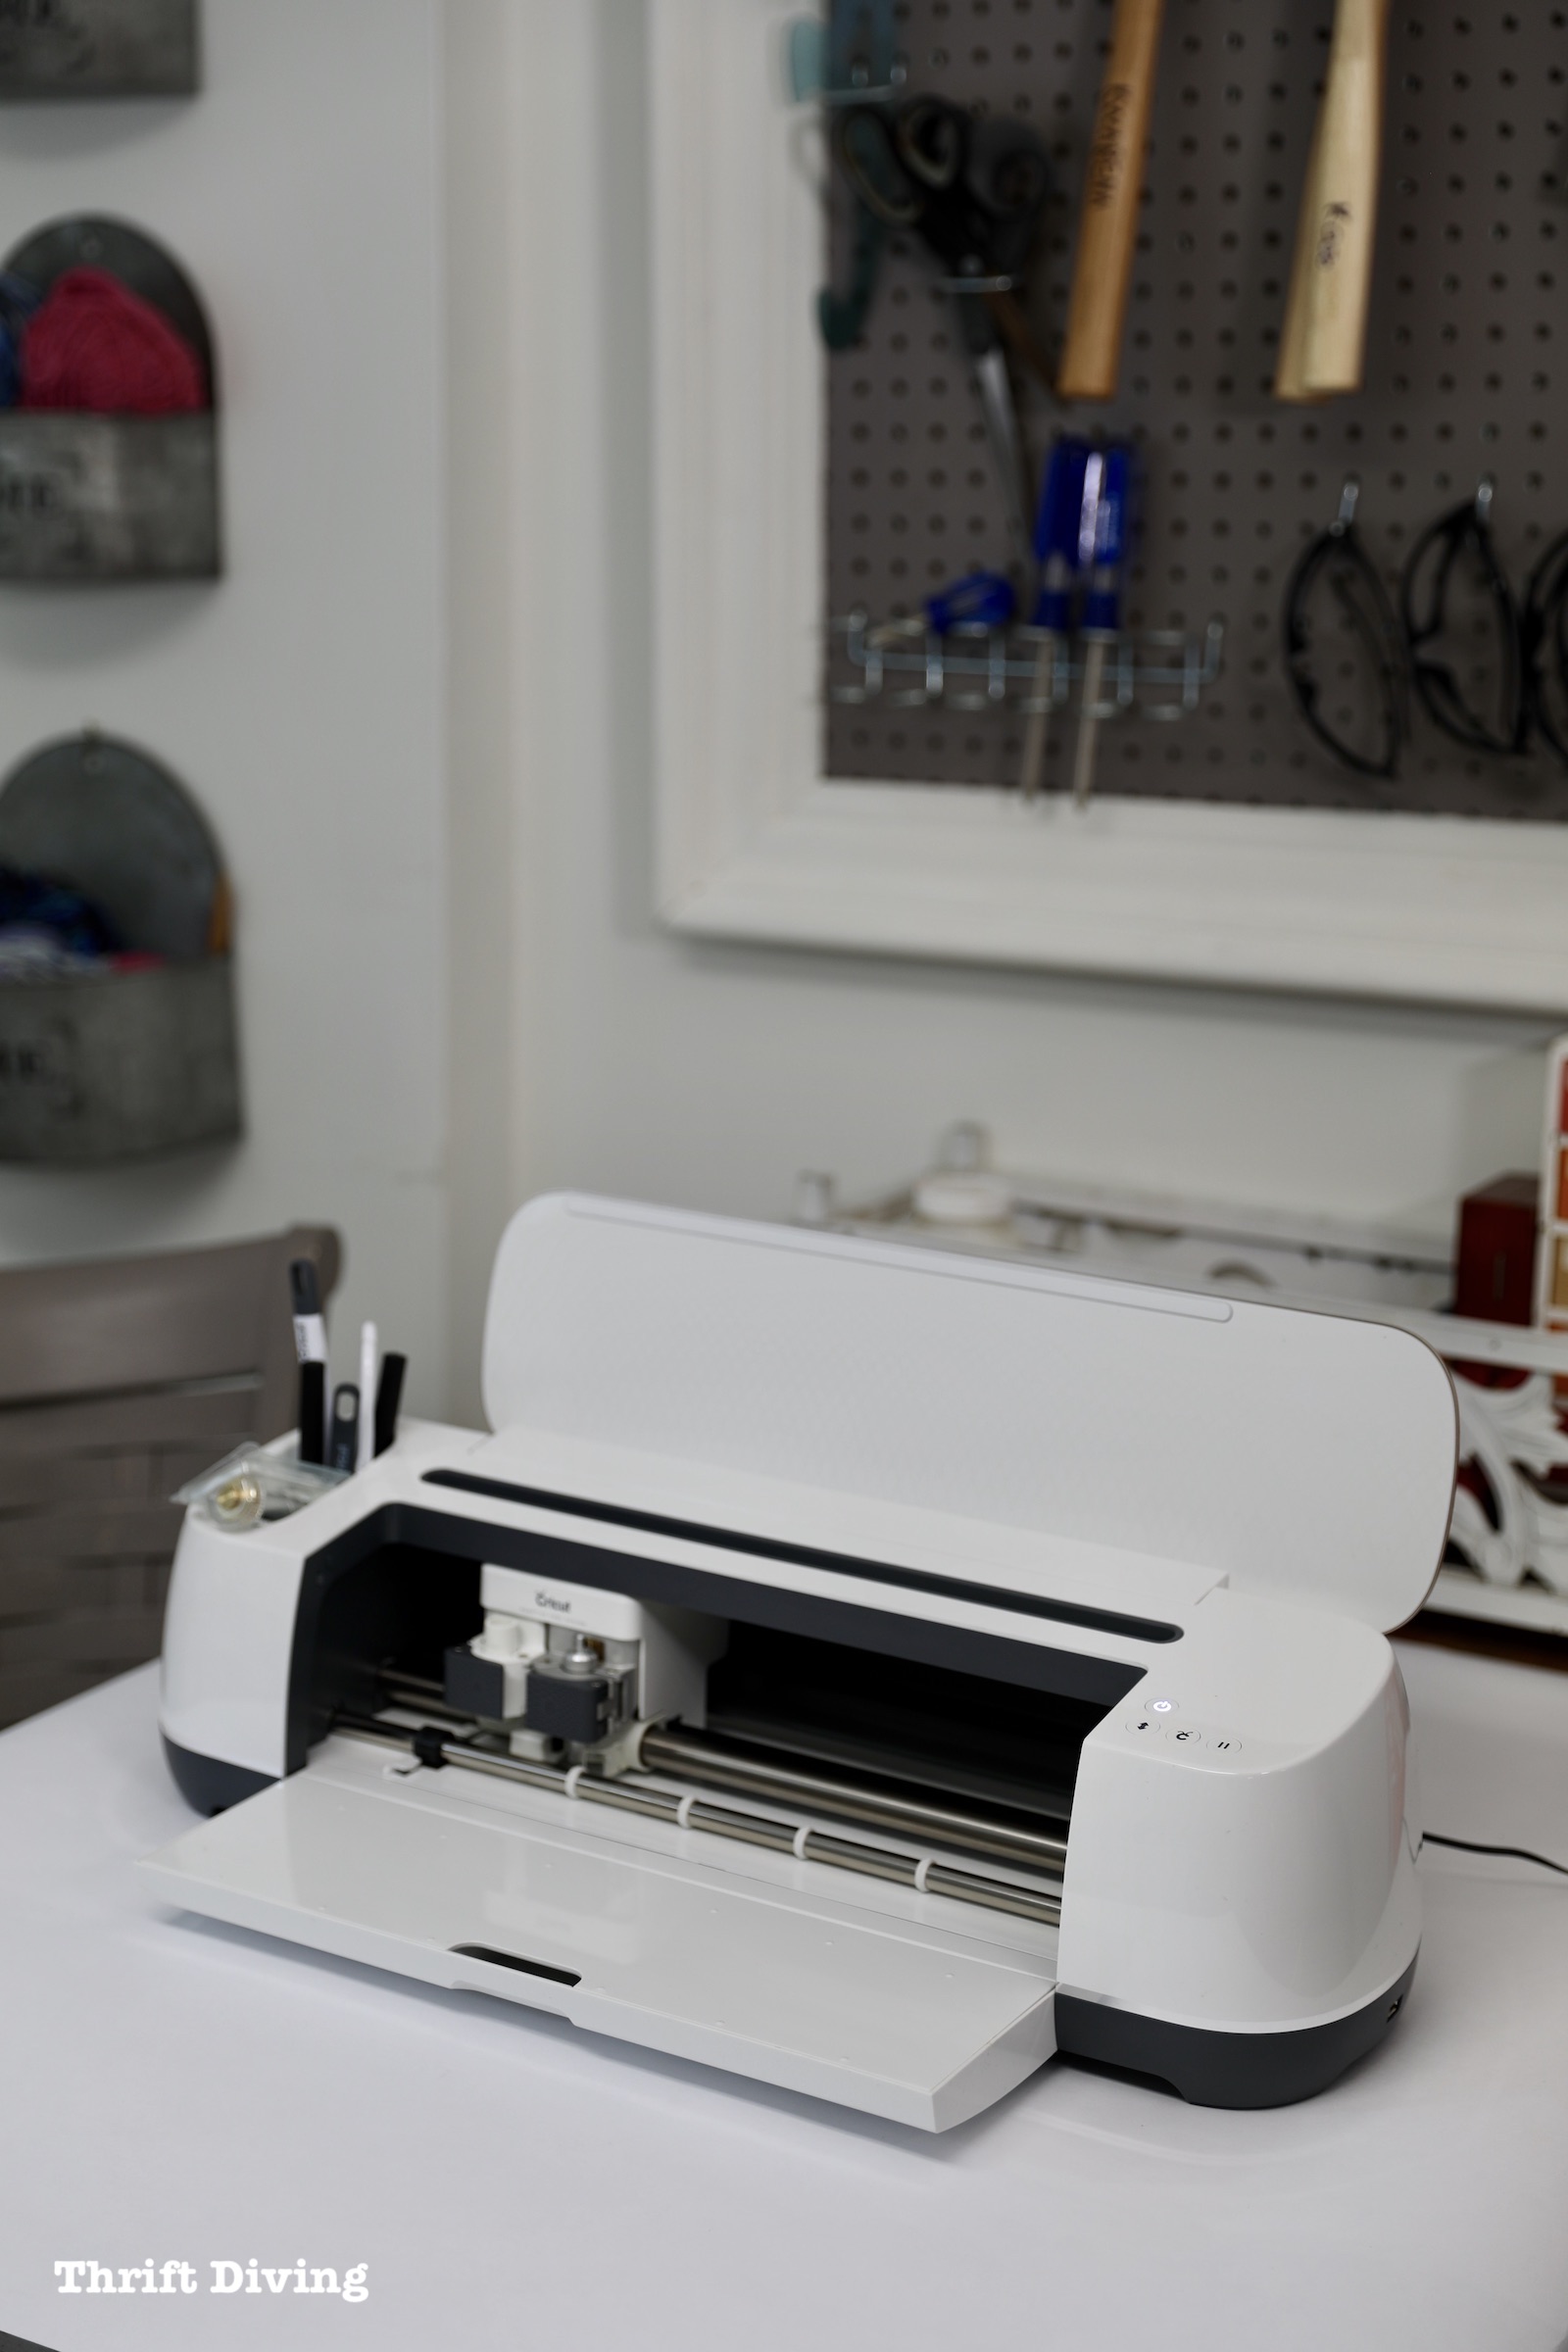
To make this large kitchen sign to celebrate the sunlight in my kitchen now, I used my Cricut Maker. Cricut is the “go-to” smart cutting machine brand on the market. Ask any crafter and they’ll tell you how awesome they are! They make a few varieties, but I own the Cricut Maker.
This machine cuts over 300 materials–everything from vinyl, to fabric….to matboard….leather…basswood. The possibilities are endless! (I have even made t-shirts with Infusible Inks with a Cricut!). This is the machine I usually make all my stencils with when doing DIY projects.
Here’s what you’ll need to create a large sign for your kitchen or any part of your home:
Materials
- Cricut Maker
- Shiplap Wood
- Circular saw
- 18 gauge brad nailer
- 1-1/4″ brad nails
- Vinyl
- Transfer Tape
- Cutting Mat
- Picture hardware
STEP 1: Choose Your Wood
For this project, I used some scrap shiplap that was in my garage. It was perfect! You can also use pallets, 1 x 4 boards, or 1 x 3s. Any wood would do, really. 🙂 Just keep in mind that the smoother your wood, though, you’ll get more crisp lines from your vinyl stencils.

STEP 2: Measure the Width
I wanted my boards to be 24″ wide for the space on the kitchen well. Measure your space and subtract a few inches from each side, making sure your large kitchen sign will be centered on the wall.

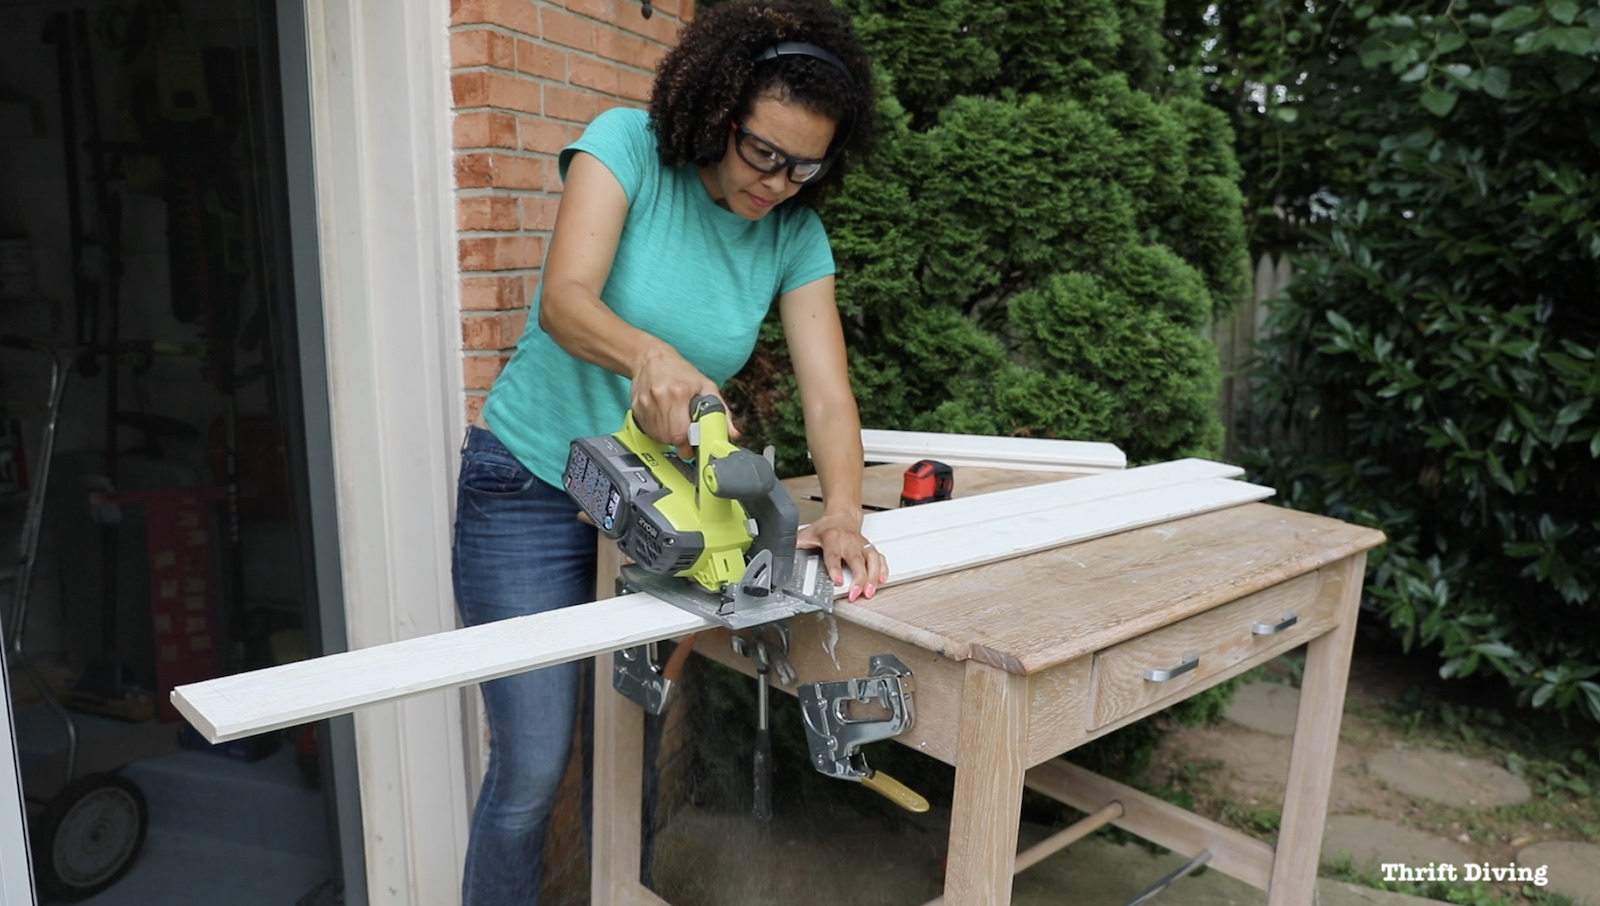
STEP 3: Cut Boards
I used my circular saw to cut the boards to length. You can also use a jigsaw or miter saw. Or if all you have is a miter box, you may also use that. Even better, have your home improvement store cut the boards to size. You’ll save yourself a step! 🙂
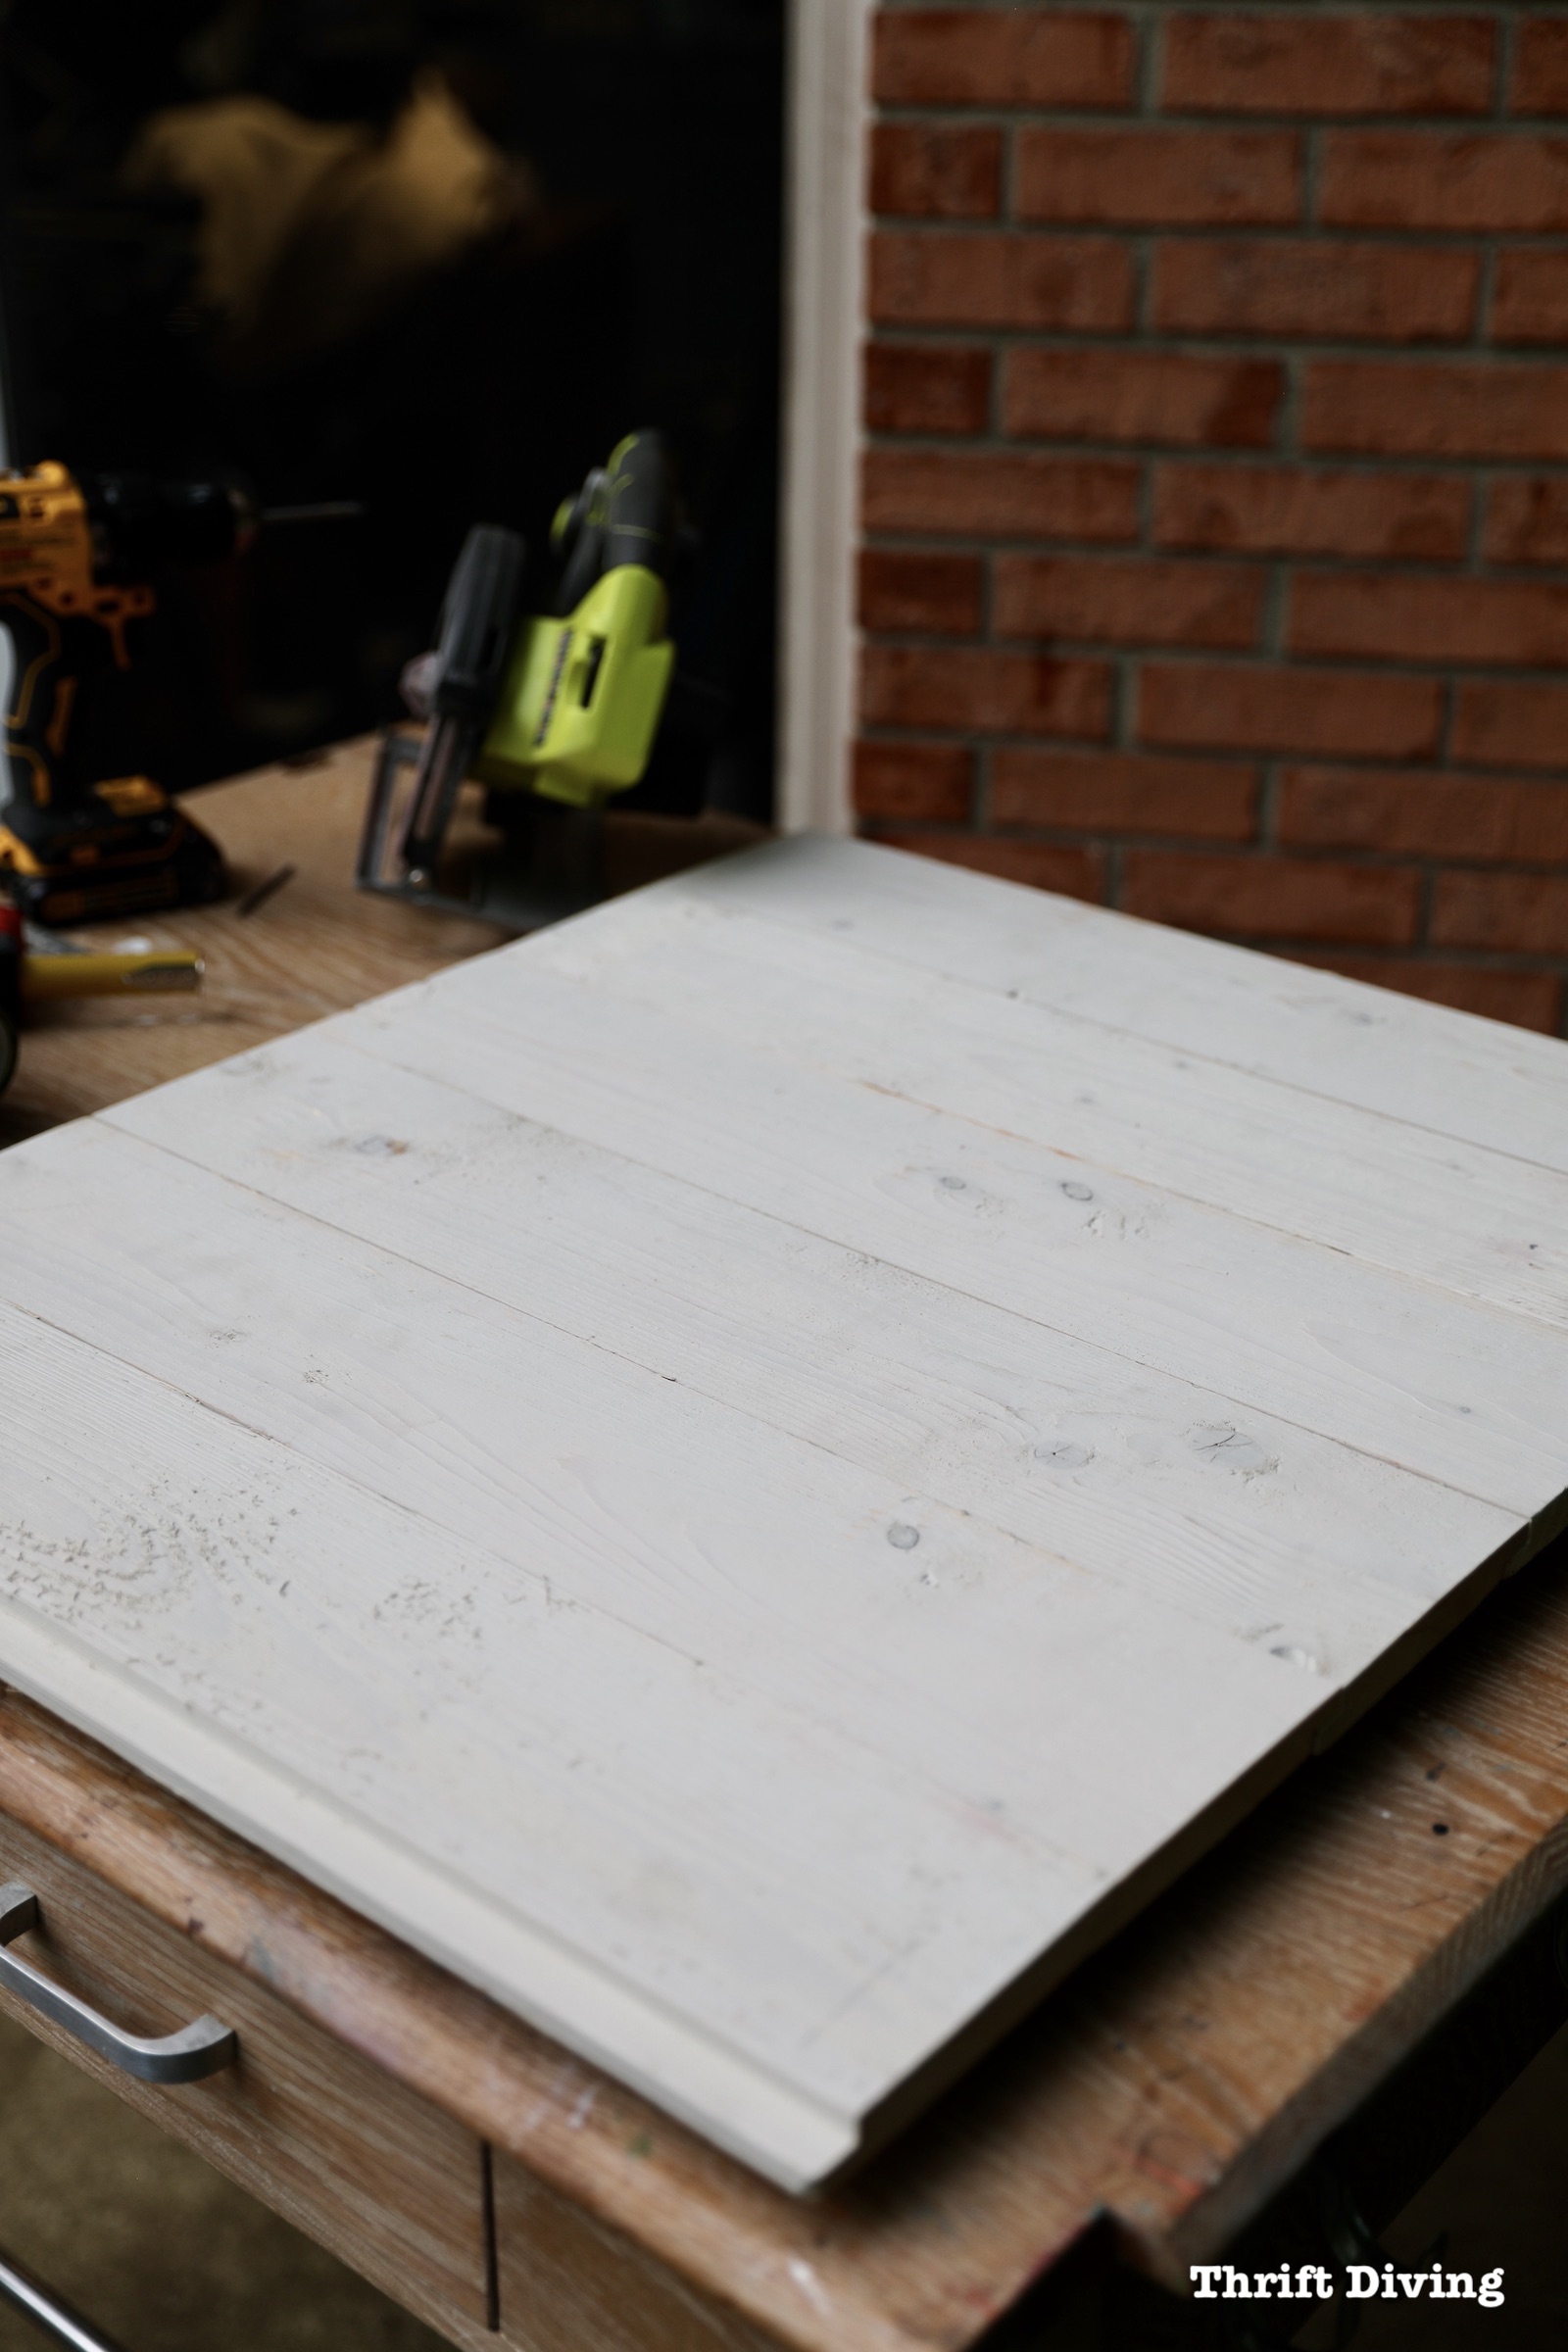
STEP 4: Nail the Boards Together
Turn the boards over onto their front and place them close together. Use two boards that are a bit shorter and nail them together. Make sure the two backer boards are evenly spaced from the edges. Use a nailer (or hammer and nails) to adhere them together. I used 1 – 1/4″ brad nails.
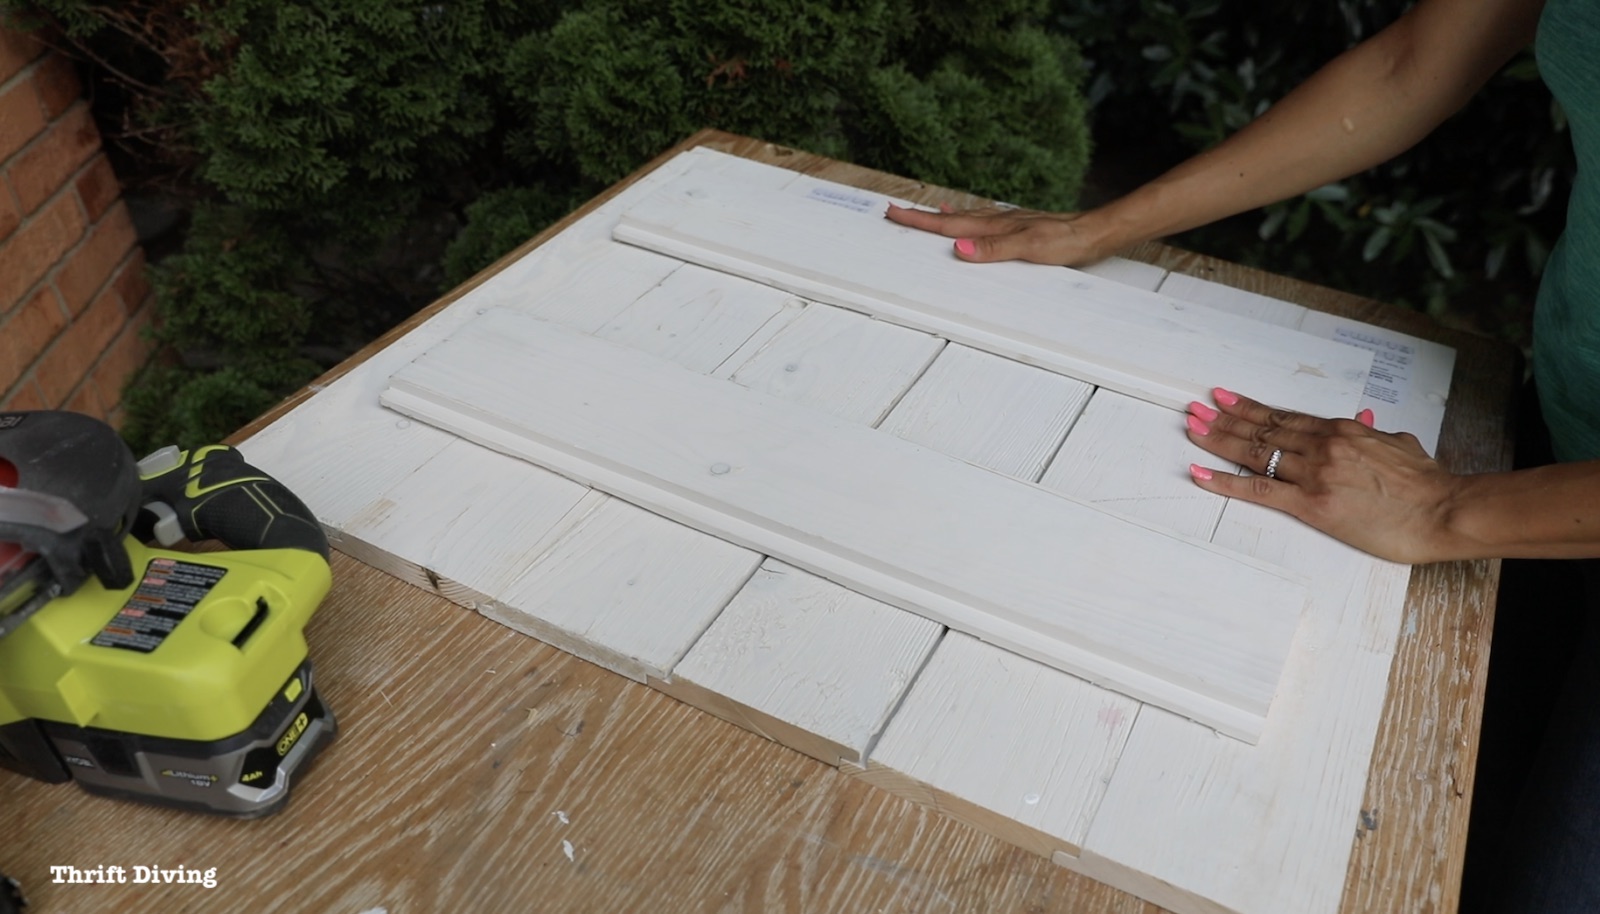
When you flip it over, it should be a nice sign upon which you’ll get to stencil something awesome with your Cricut Maker!
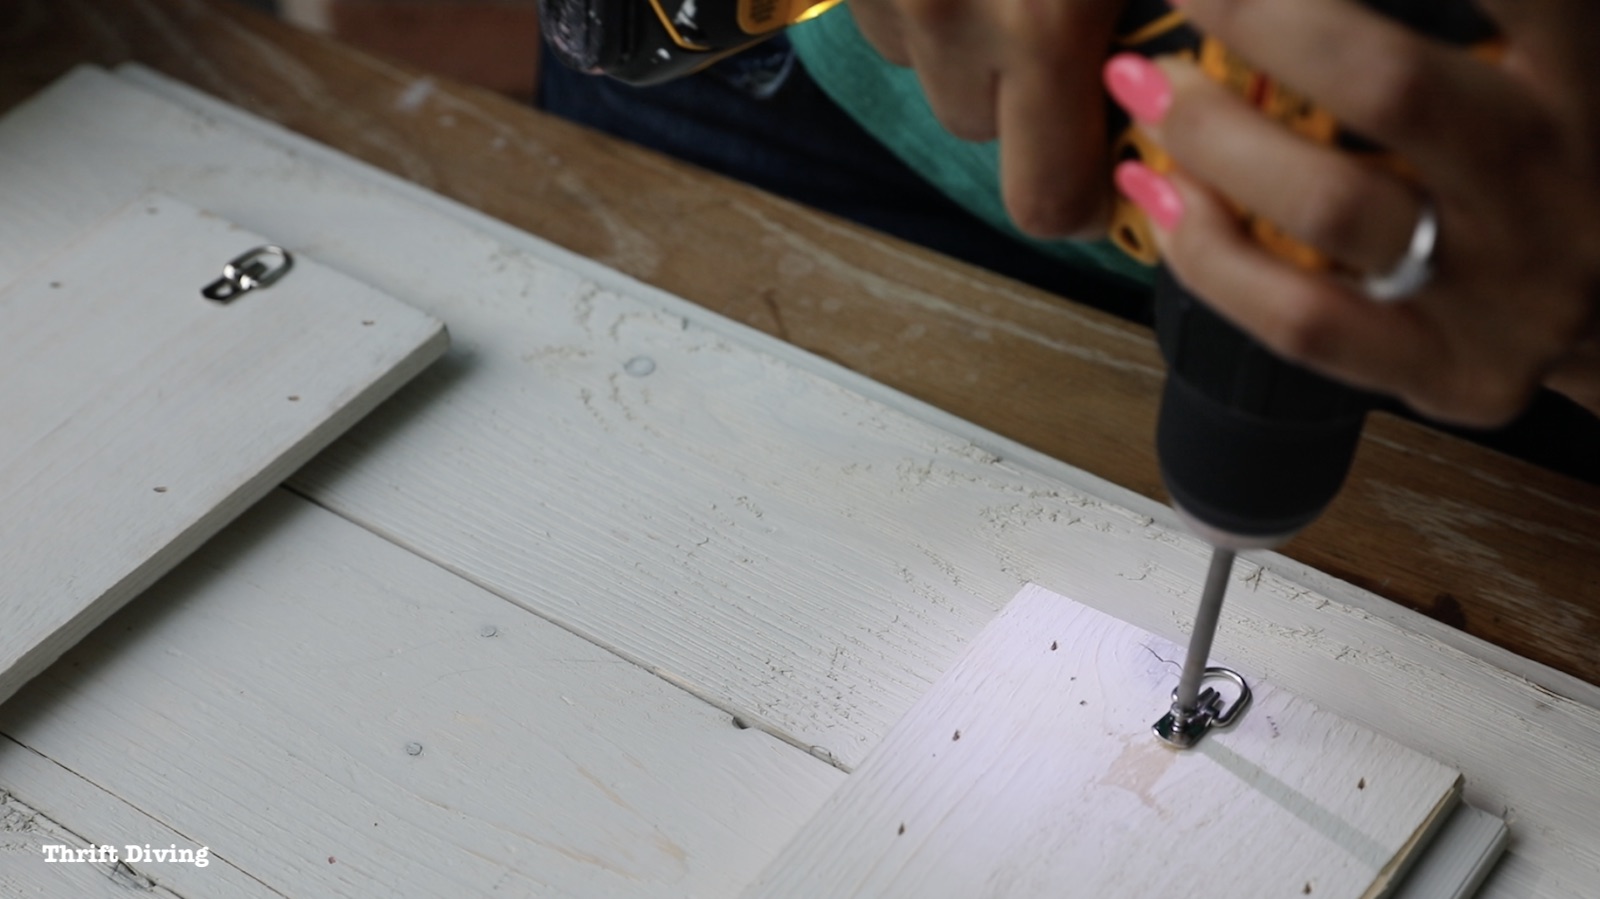
STEP 5: Attach Hardware
My favorite type of hardware is D-rings. They’re easy enough to screw in, but just make sure you’re evenly spacing them so that your sign isn’t lopsided once hung.
STEP 6: Create a Design in Cricut Design Space
I’ve owned my Cricut Maker since I bought it for myself as a gift a couple years ago. Most of the projects I have done were stencils made from vinyl. I always felt limited to create stencils that were only 12″ x 12″ since that is the standard size of vinyl sheets and cardstock (and other materials) Cricut provides. But I’ve always wanted to cut stencils larger than this size!
The Cricut Design Space on desktop (and mobile, too) is pretty easy to use (and can be used anywhere), but I always find it helpful to look for YouTube tutorials to teach me new skills.
One skill I always wondered was how to create a large vinyl sign that would fit beyond a 12″ x 12″ piece of vinyl. This tutorial on YouTube helped so much!

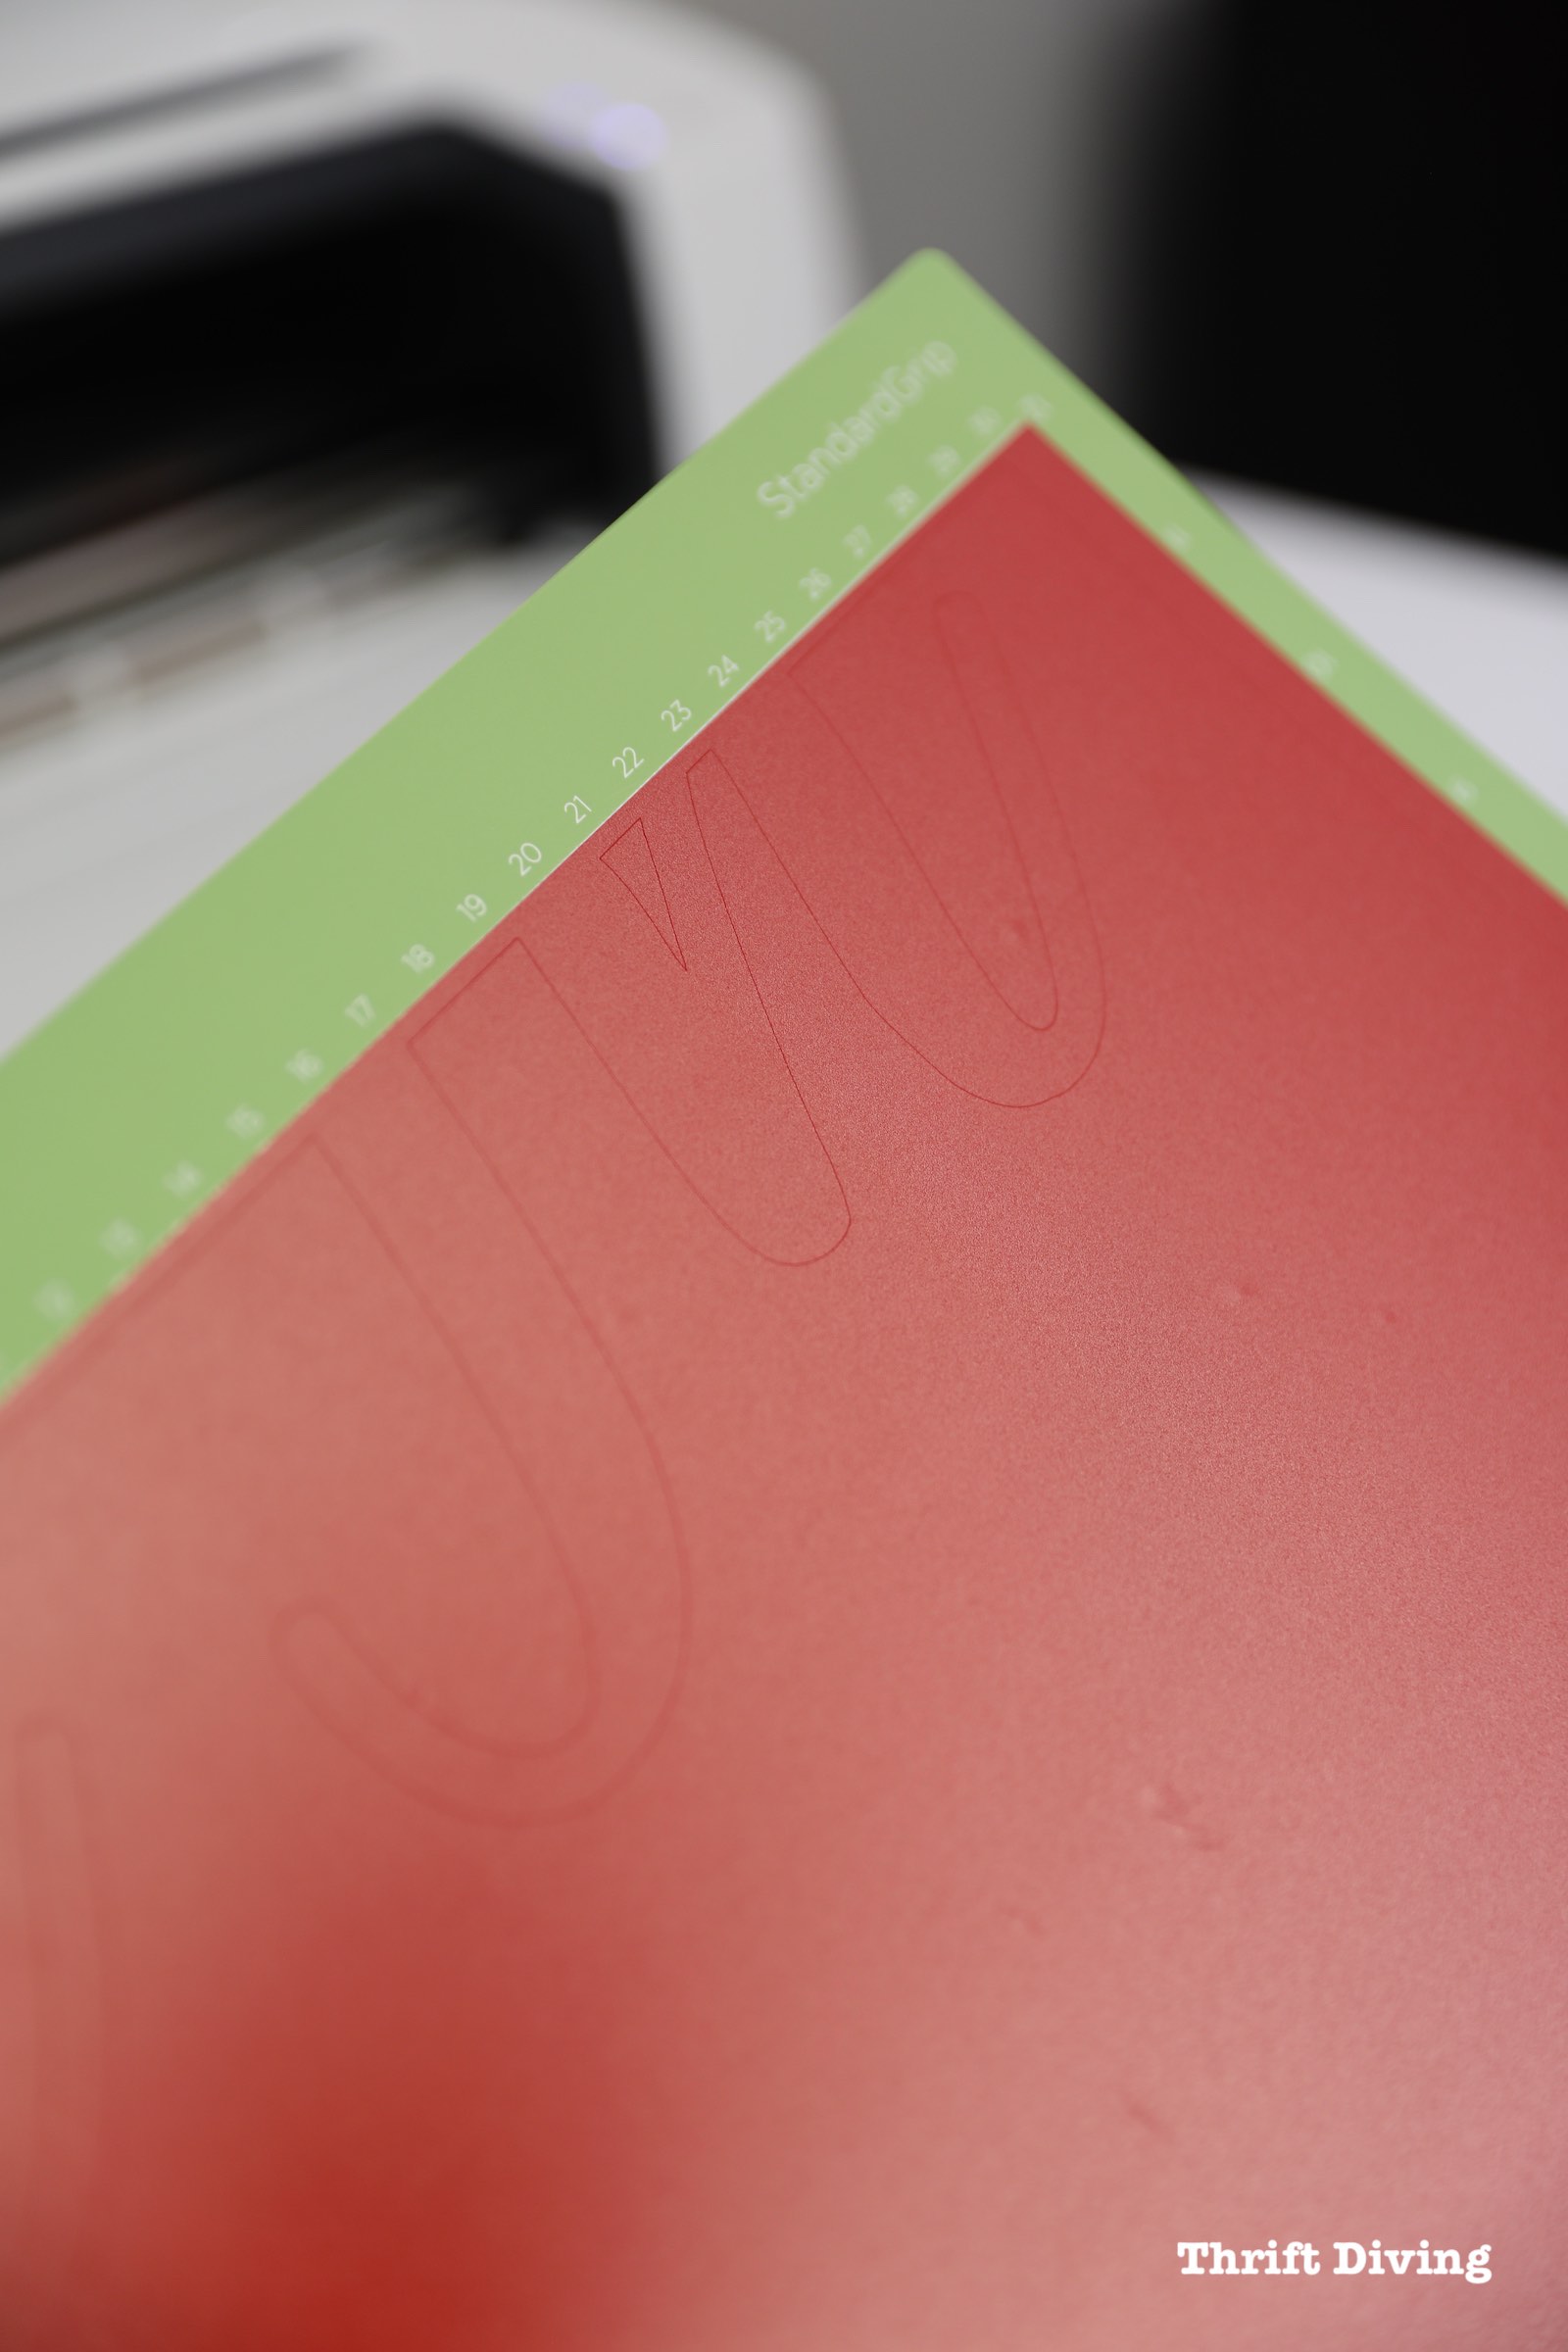
If you’re cutting a larger design than 12″ x 12″ (Cricut also has a 12″ x 48″ cutting mat), you’ll have to slice your image up into sections.
STEP 7: Cut Out the Design on the Cricut Maker
When I was ready to cut, the Design Space walked me through cutting out all 6 panels that would need to be cut out. I loaded the 12″ x 12″ vinyl sheets into my Cricut Maker and got started with quickly cutting.
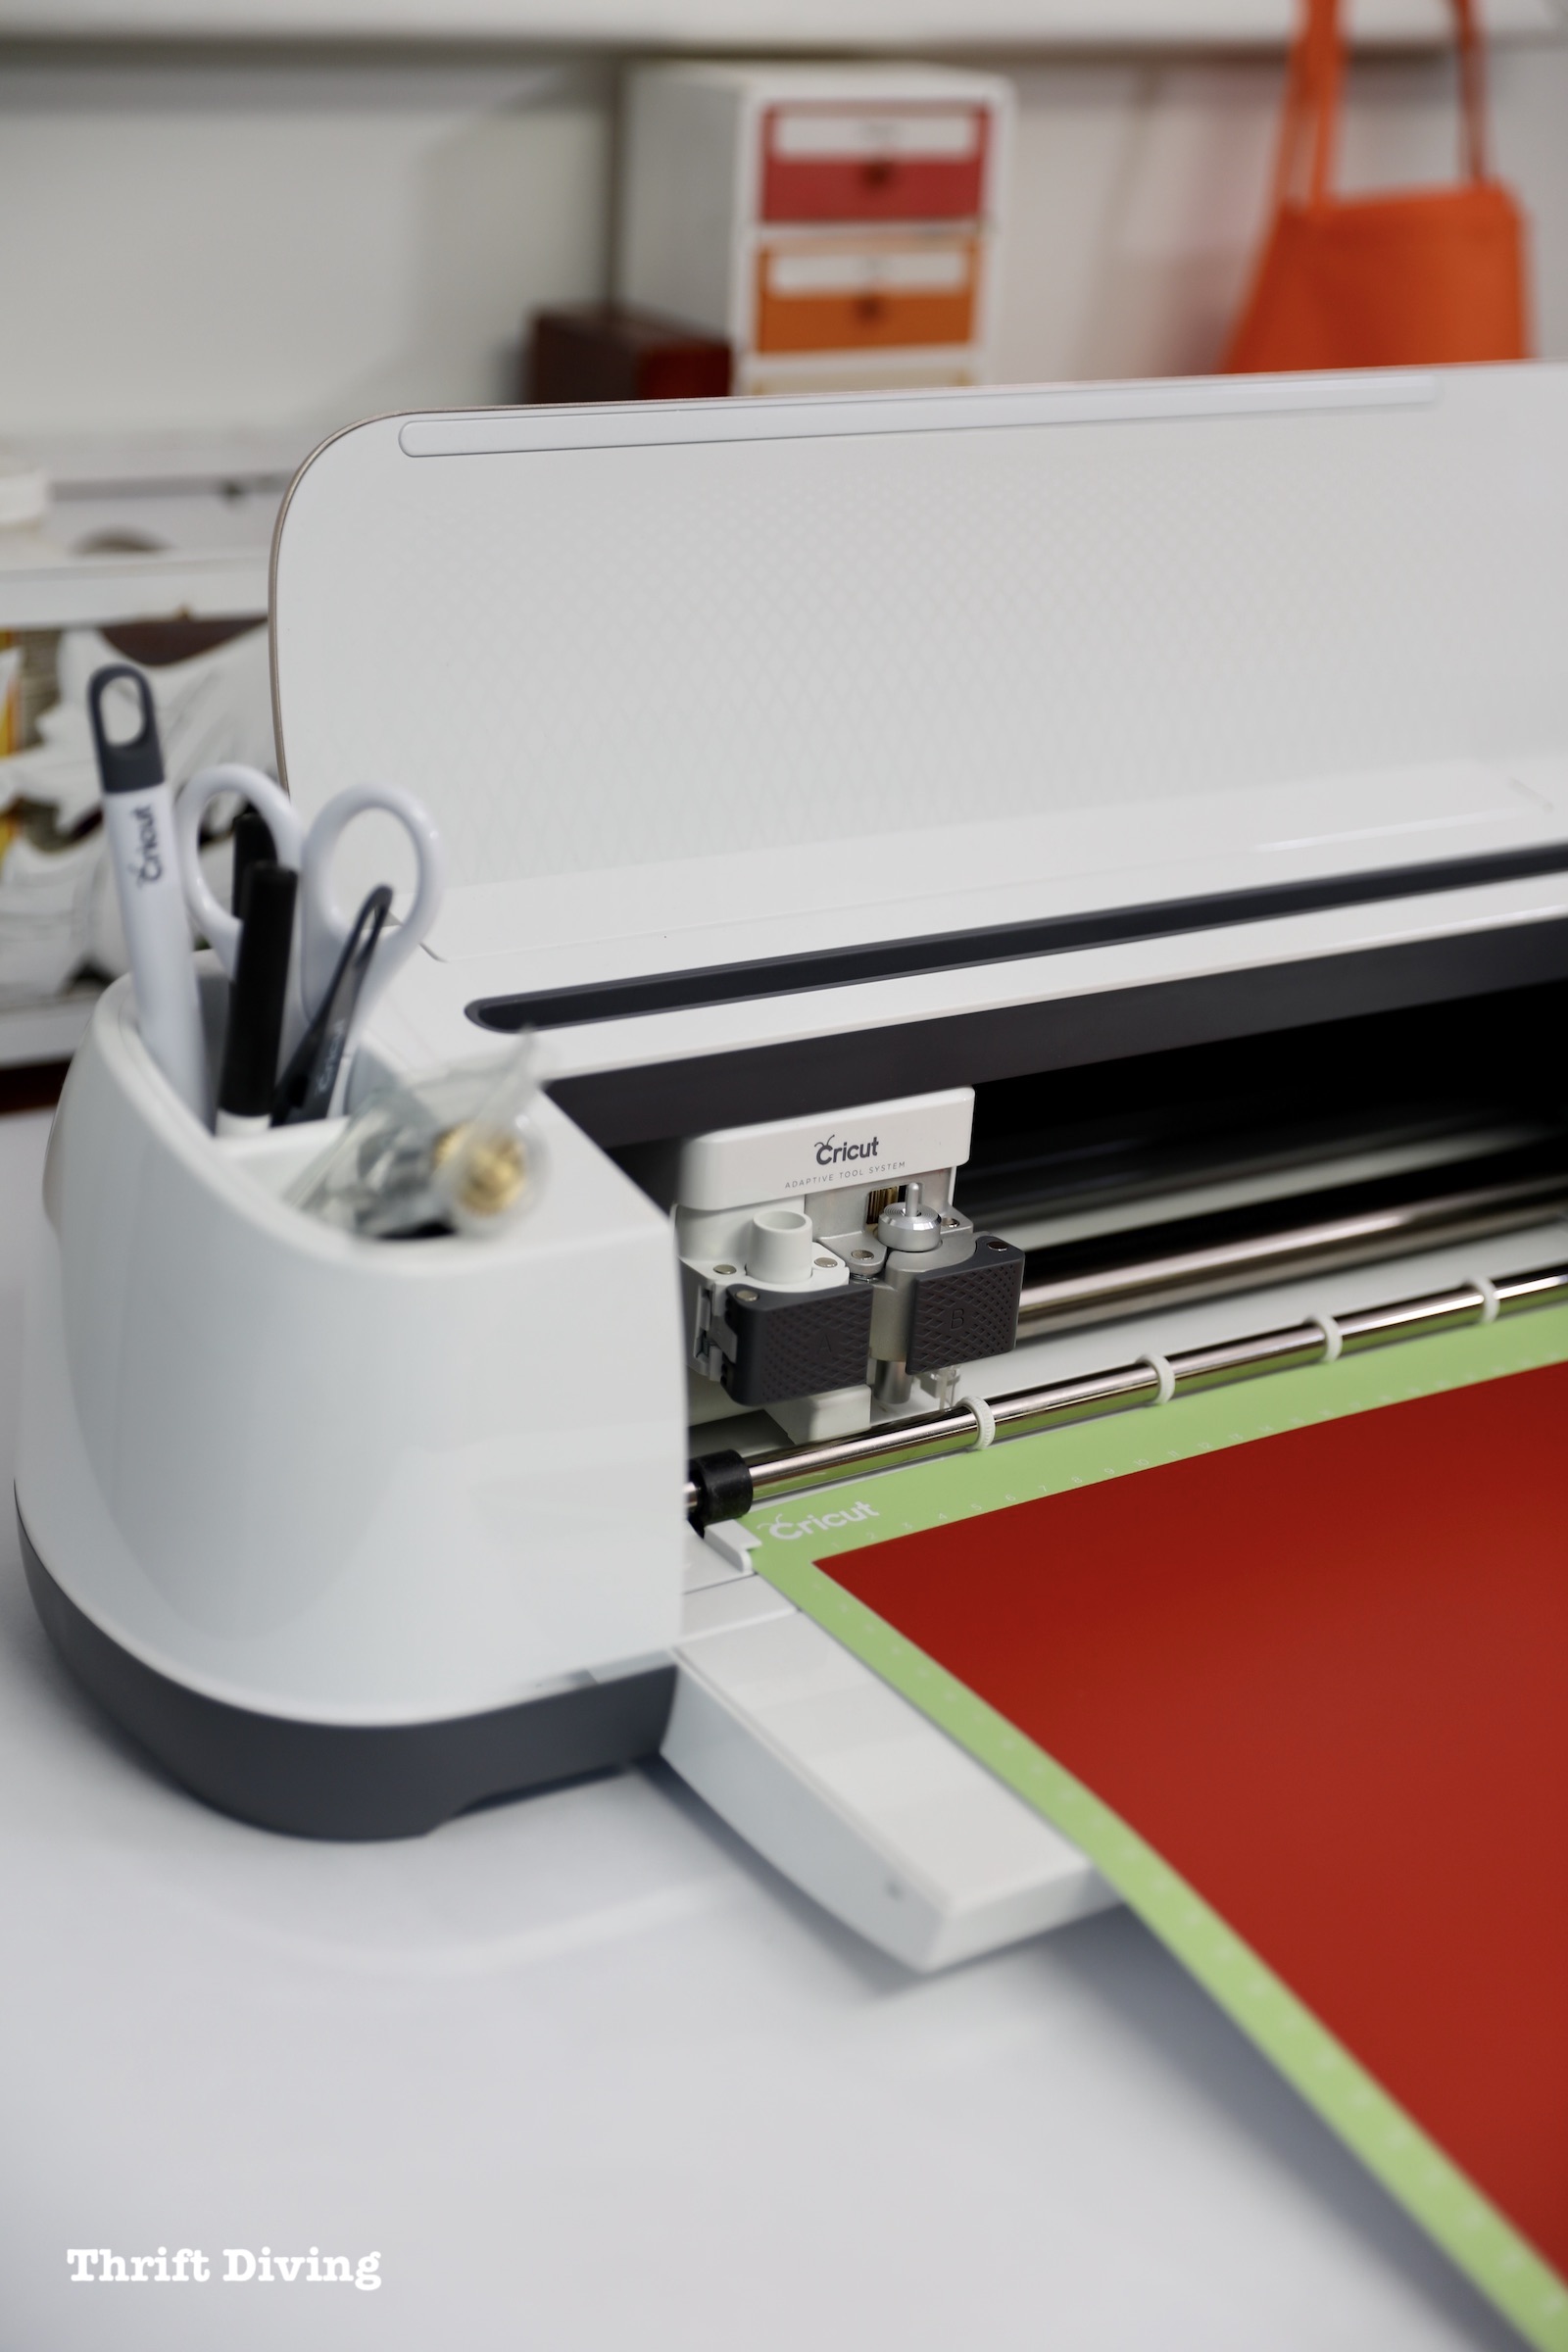
What’s great about my Cricut maker is that you can do sooooo many things with it! I feel embarrassed to admit that I have only really used it for vinyl and t-shirts (iron-ons). But as a crafter, I can be doing so much more with it: cutting, drawing, scoring, embossing, engraving (Yes, please!!!), creating perforations, and even doing wavy lines.
They’ve got so many tools and cutting options that I found myself standing in the aisle at Michaels just googling what some of the tools even do! I’m most excited to try the engraving tool!
STEP 8: Attach the Vinyl with Transfer Tape
This is where I had a snafu. I accidentally picked up the wrong transfer tape at Michaels. I bought the StrongGrip transfer tape and I should have bought the standard transfer tape.
Transfer tape is the most critical step to successfully applying the vinyl to the wood, because without it, the vinyl would get all messed up and stick to itself. Fat chance getting it on smooth and straight!
You’ll also notice I’ve got multiple sheets of vinyl making up this sign. Because this sign was larger than the cutting mat (the sign is 24″ x 30″), I had to break up my design into sections and print each section out individually and then arrange them on the board.
![]()
The transfer tape is applied, then the paper backing on the vinyl is peeled off, allowing you to play the stencil. Then the transfer tape is peeled off and voila! Your vinyl should stick in place. Just peel it over very slowly.
STEP 9: Stencil with Paint
With the vinyl stencil in place, I used a mixture of black and white paint to create a dark gray. Then I carefully dapped paint over the vinyl. Because my wood was textured, I knew I would have some bleeding under the stencil, so I was careful not to overload my stencil brush with paint.
I added 2 coats. When it was dry, I pulled off the stencil.

To remove trees, it’s very expensive. Our tree was $1,750 to remove, which I balked at the price at first. But what I got in return was worth much more than that: a newfound sense of affection for my home. The price for sunshine was worth it.

Did you enjoy this project? Click here to save it on Pinterest.
![]()

Download the 5 freebies!

Thrift Diving inspires women to decorate, improve, and maintain their home themselves...using paint, power tools, and thrift stores! Use these 5 printables, checklists, and ebooks to get started!


Congrats on finally getting the tree down and enjoying some sunlight. I also live on a wood lot and crave sunshine in my living room and dining room too. Your sign is such a great celebrating. Good job. Thanks for sharing your projects with us each week. #HomeMattersParty
The room looks so much better with natural lighT! You will love the sun beams coming in on a cold winter day! Thanks for the tutorial about how to join boards and make a large stencil on a Cricut.
That is lots of natural light…a few house plants would really thrive in the space. It looks really nice Serena.
I’ve been checking out the cricut machines, but they’re a bit pricey. I’m waiting on a fantastic sale, lol.
I love the light and truly love the way you have the room decorated. It is not overdone and looks like a useful and inviting space. You have just the right balance going on and TBH I am a little envious.
Hey girl. The kitchen looks great. The sunshine truly makes a difference on our emotional stability too. Everything looks great.
Loved it!!! Turned out fantastic!! So much brighter 🤩🤩
Love the sign! Wow, what a difference with the sunlight! We actually have the opposite problem, the land we built our house on has very few small trees and we wish we had more taller ones. Definitely something to think about though regarding too much shade and tree roots causing problems. We planted a tree in our backyard years ago and then decided to get an above ground pool for our kids, and the best spot for it was pretty close to the tree, which was only a few feet tall at the time. Needless to say, all the water splashing from the pool really helped the tree grow like crazy, but eventually the tree roots were growing under the pool and we’re pretty sure that’s what cause a leak in the liner we couldn’t find, which is an expensive problem! Thanks for sharing!
Good choice. We moved into our house in 1993. There was builder grade landscape. Ugly, overgrown holly bushes/ trees, about 7 feet tall. They were cut off and roots dug out. The result was great. However…I fell in love with Crepe Myrtles. We planted 2 Tuscarosa ? Tuscarora? Trees on each side of the front porch. I chose them because I loved the color. I had no idea that their height would be 25 feet tall. Not to mention the roots. The color is still wonderful. But As so many other homeowners, if I knew then what I know now… I would have read up and chosen better. Silly me. They will be seriously pruned down. Crepe Murder they call it. I am sad to say, for the sake of our home’s foundation, I think we have to. So, I understand your choice.
Result….nice sunny kitchen! Now your Boys need a swing set or Fort, or something to play on!….(you are welcome😊)
p.s. out back we planted 3 large Crepe Myrtles and a Tulip Poplar on the fence line. And….wait…not finished 6 on the street side.
Note to the wise….Research the trees before you plant!
Pat Kennedy
Wow! Your kitchen transformation is fantastic – all that light makes such a difference. Do you mind if I ask what the paint color in your kitchen is? It’s so nice, looks like a perfect neutral, not too beige not too gray. Such a nice feeling in this room.
I love the sign too. I don’t have a Cricut but could maybe do it old school and print the letters and trace onto plastic sheets or something like that… Thanks!
Beautiful.
I need the know how I can get the same kitchen table.