How to Build a DIY Bench With Storage
This post was sponsored by the awesome folks at Elmers, but the project and writing are mine! 🙂
Click here to pin this project for later!
As much as I love me some thrift stores, I love building stuff from scratch.
Even better, I love building stuff and then tossing in some repurposed stuff from the thrift store to make it even more unique.
That’s what I did for today’s project.
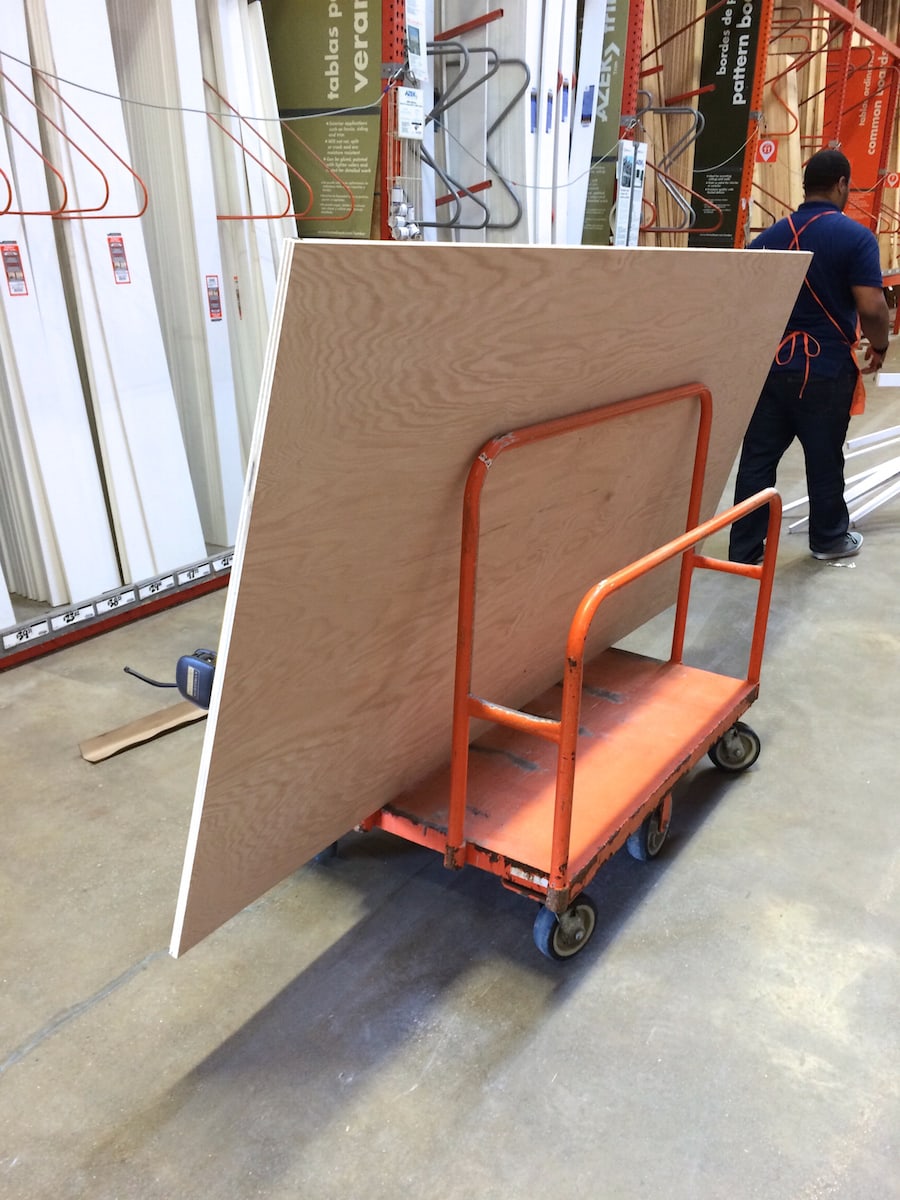
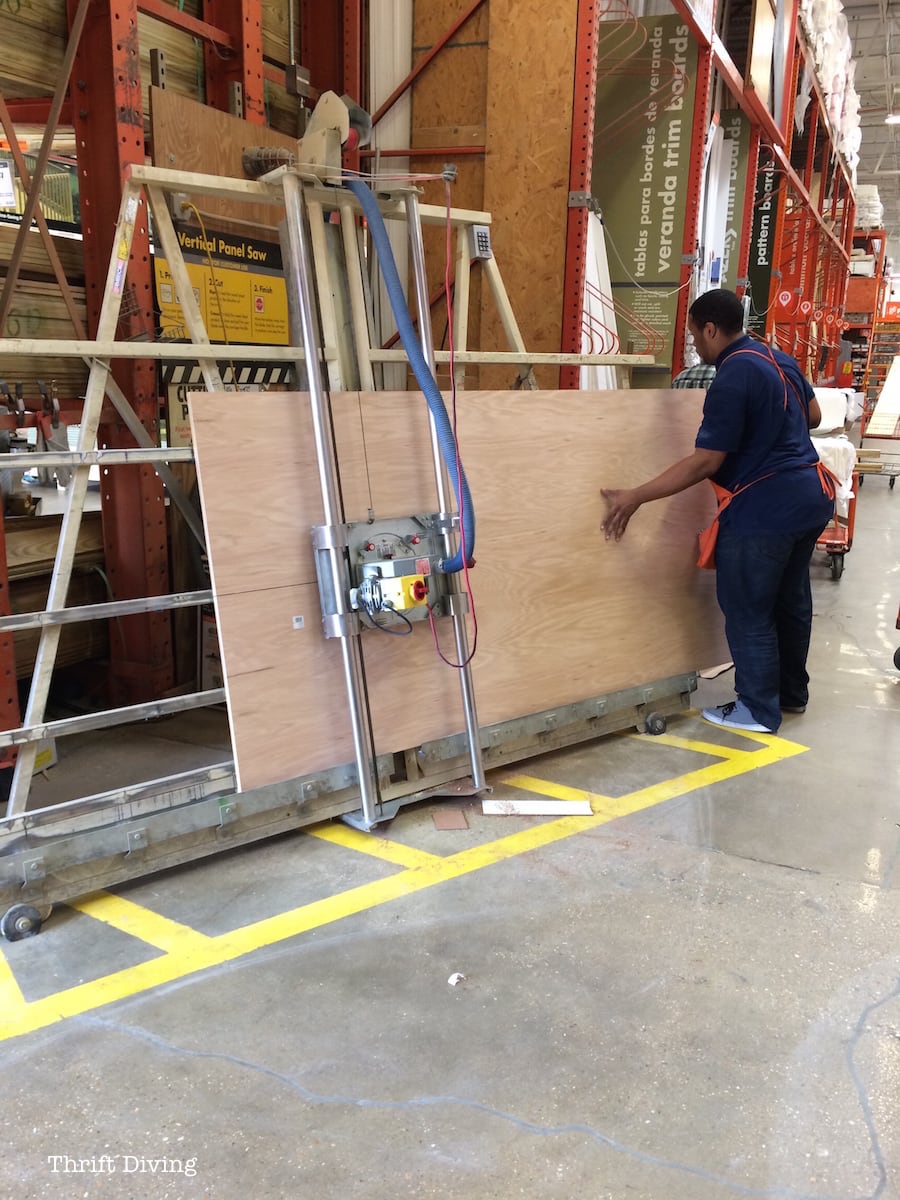
First, it all started with this big ‘ole hunk a’ wood.
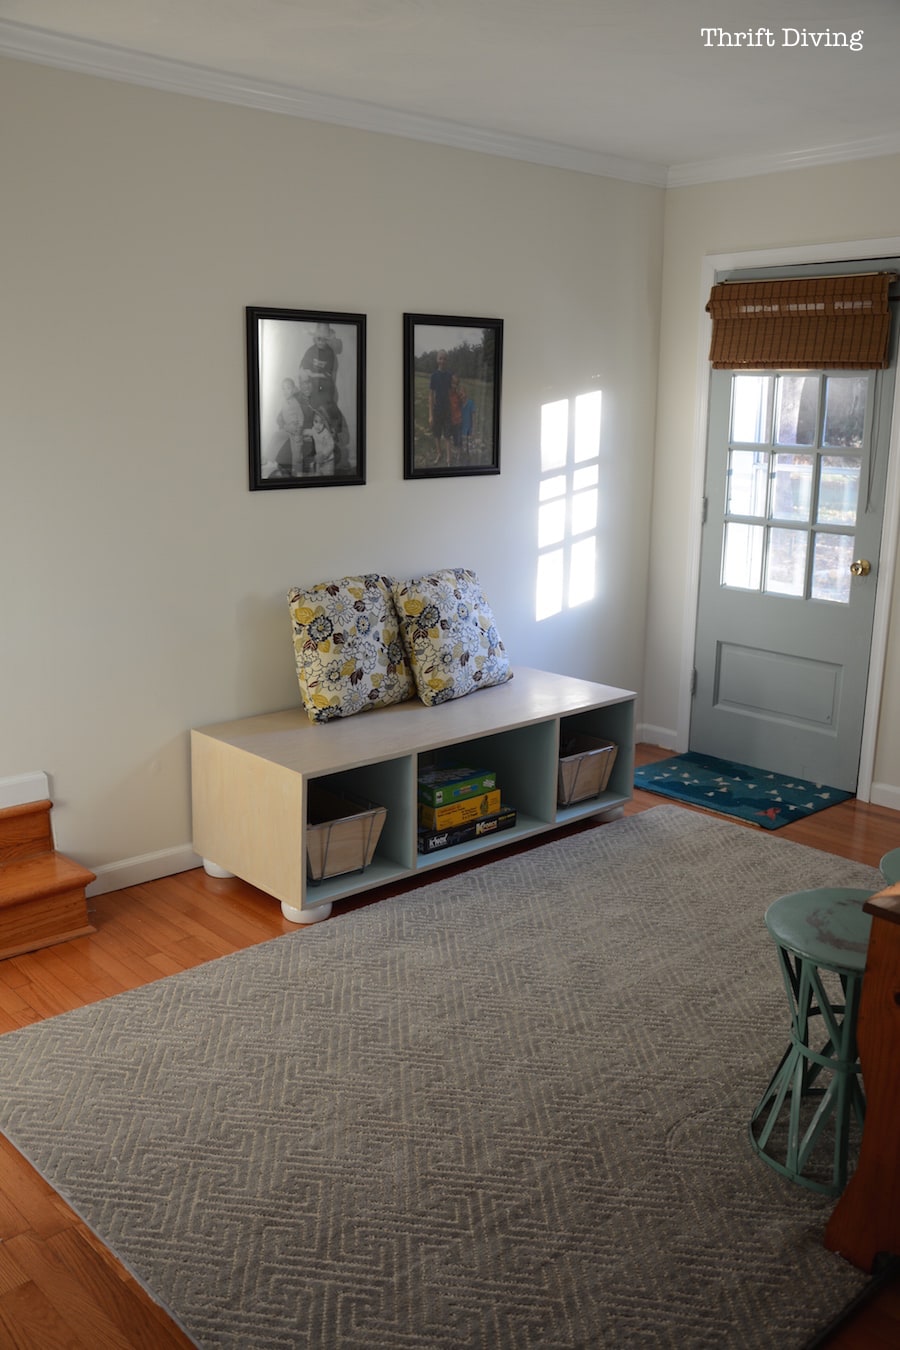
BEFORE
I started off wanting to make a coffee table or something with storage for my cozy family room that I just made over.
Somehow it morphed into this bench with storage! LOL
Let me start off by saying, don’t let this post intimidate you!! As much as I love power tools, I have never built something this big. I usually build smaller crafts projects, like this DIY tablet holder that you can hang on your wall.
I was just going to wing it and see what I could come up with (how’s that for planning?? HA!).
I really like how it turned out!
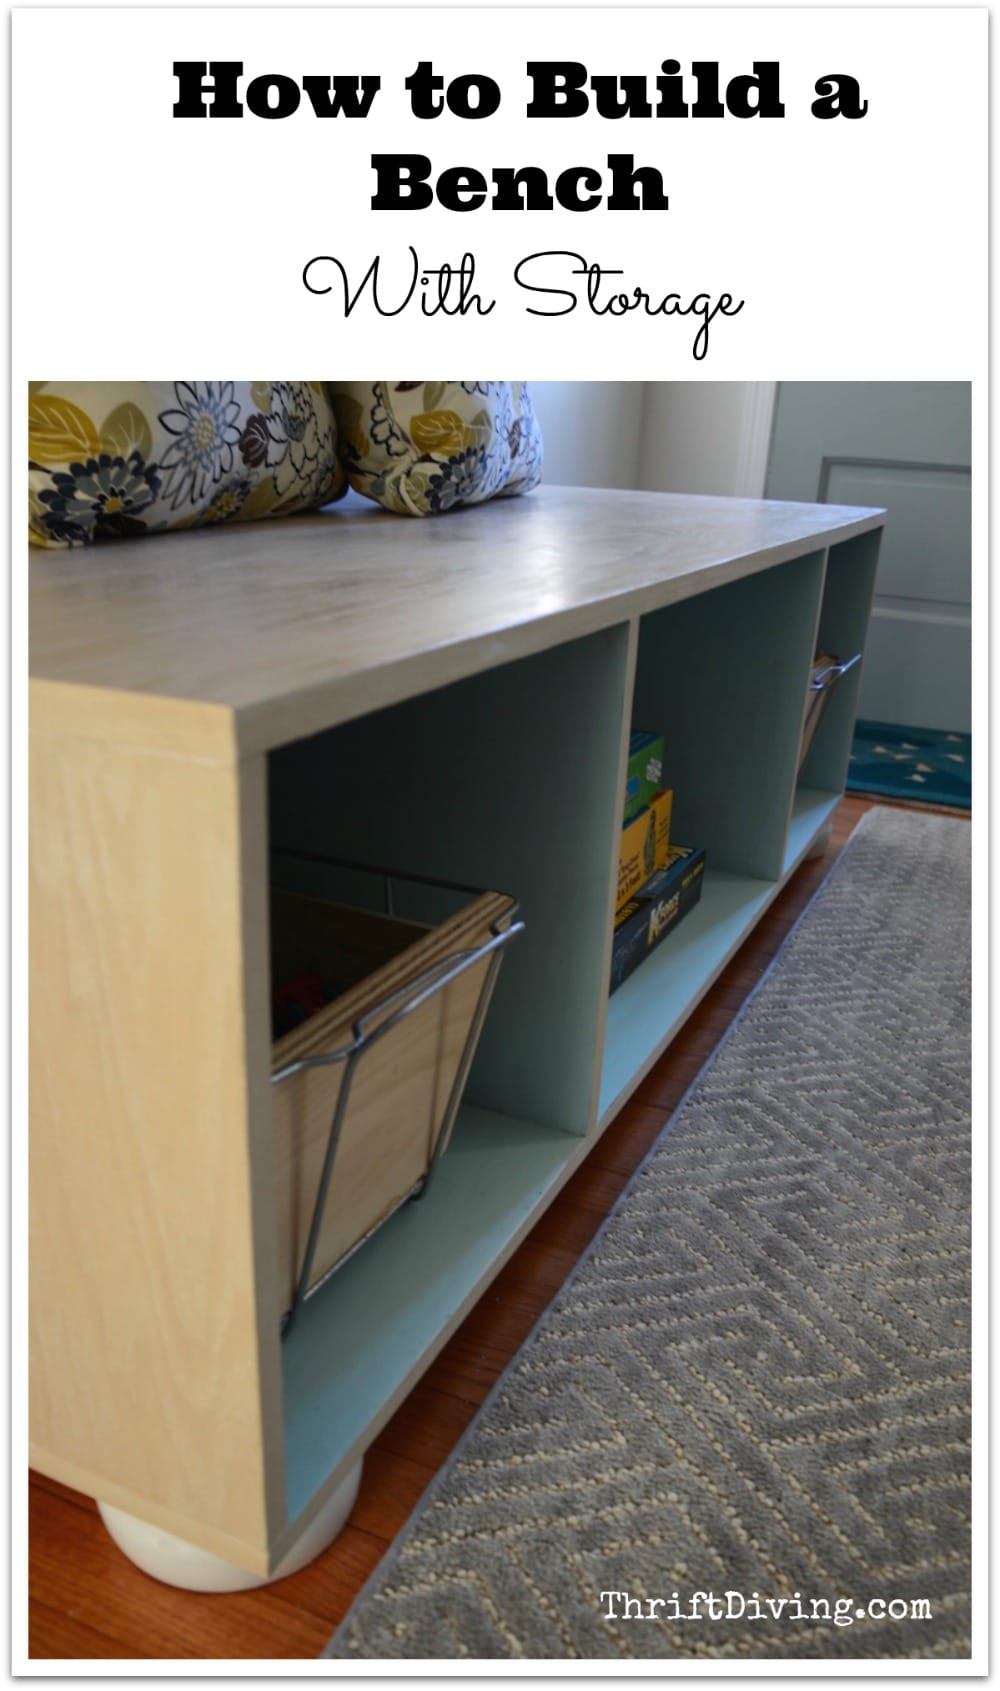
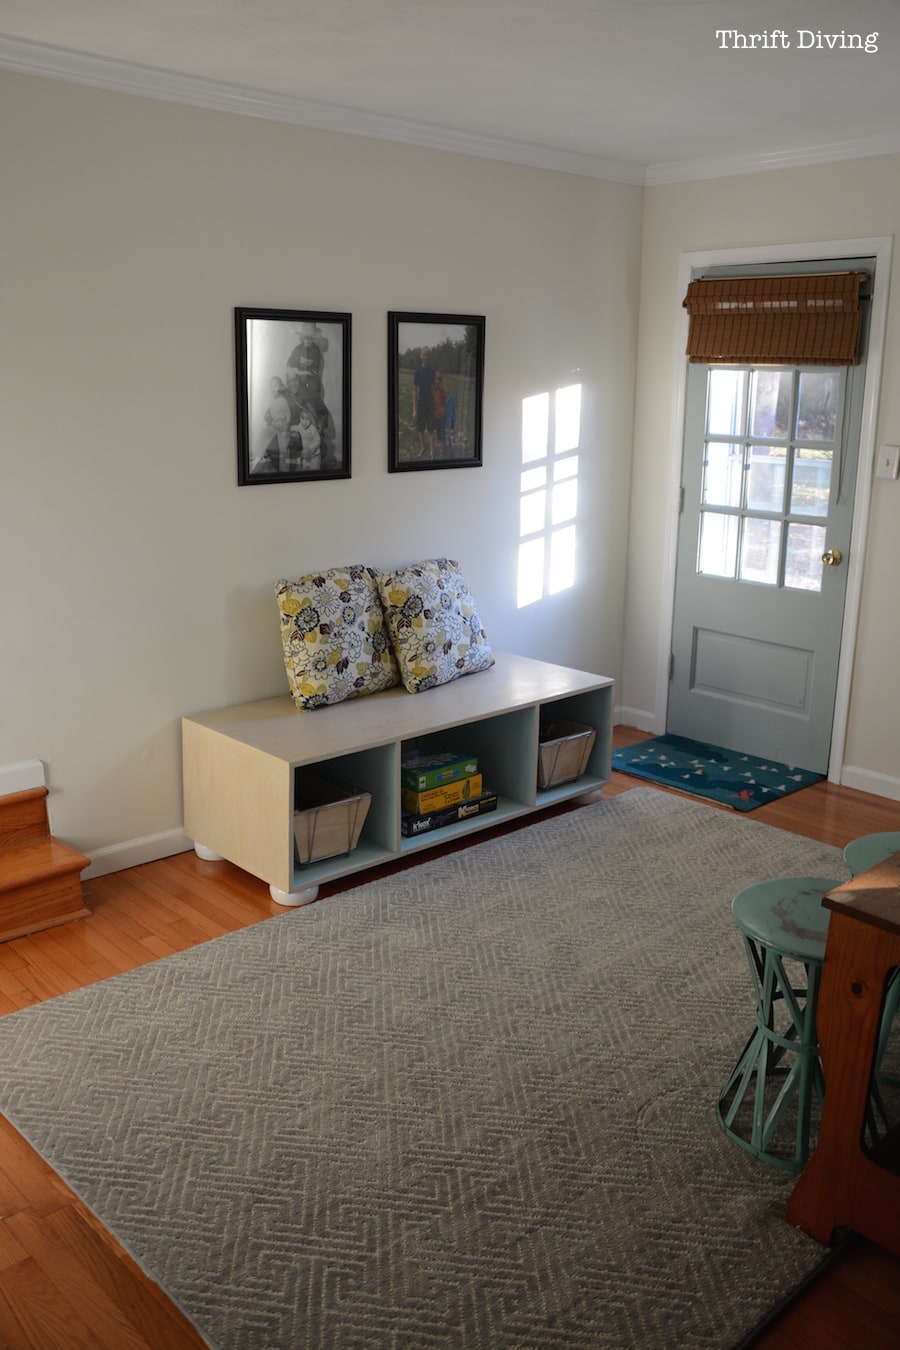
AFTER!
Using Wooden Bowls for Faux Bun Feet
When I build things, I usually choose birch plywood, but this time I chose oak because I loved the big grainy texture and wanted to keep the look of the wood. More on that in a bit.
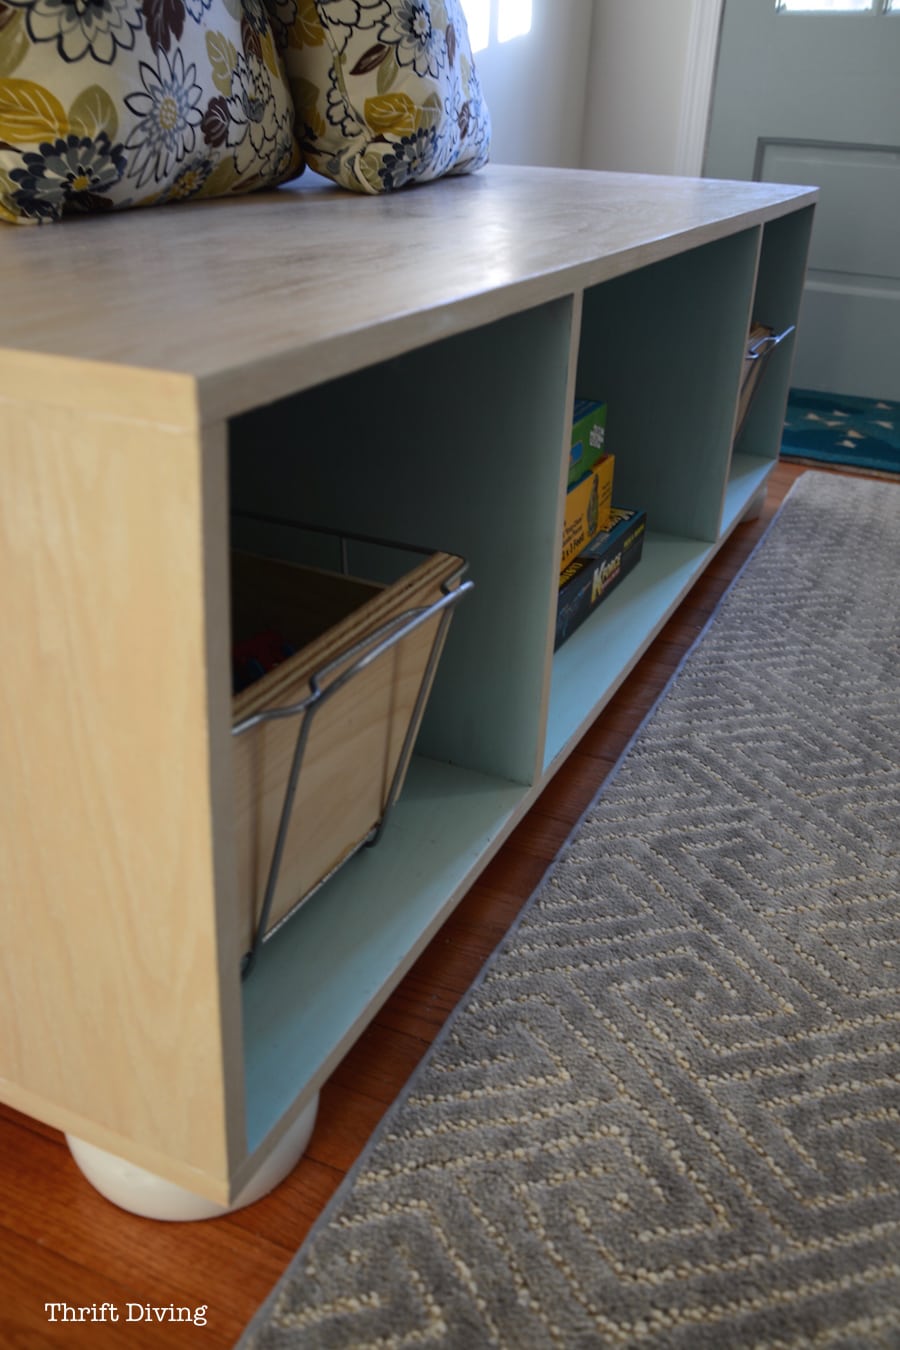
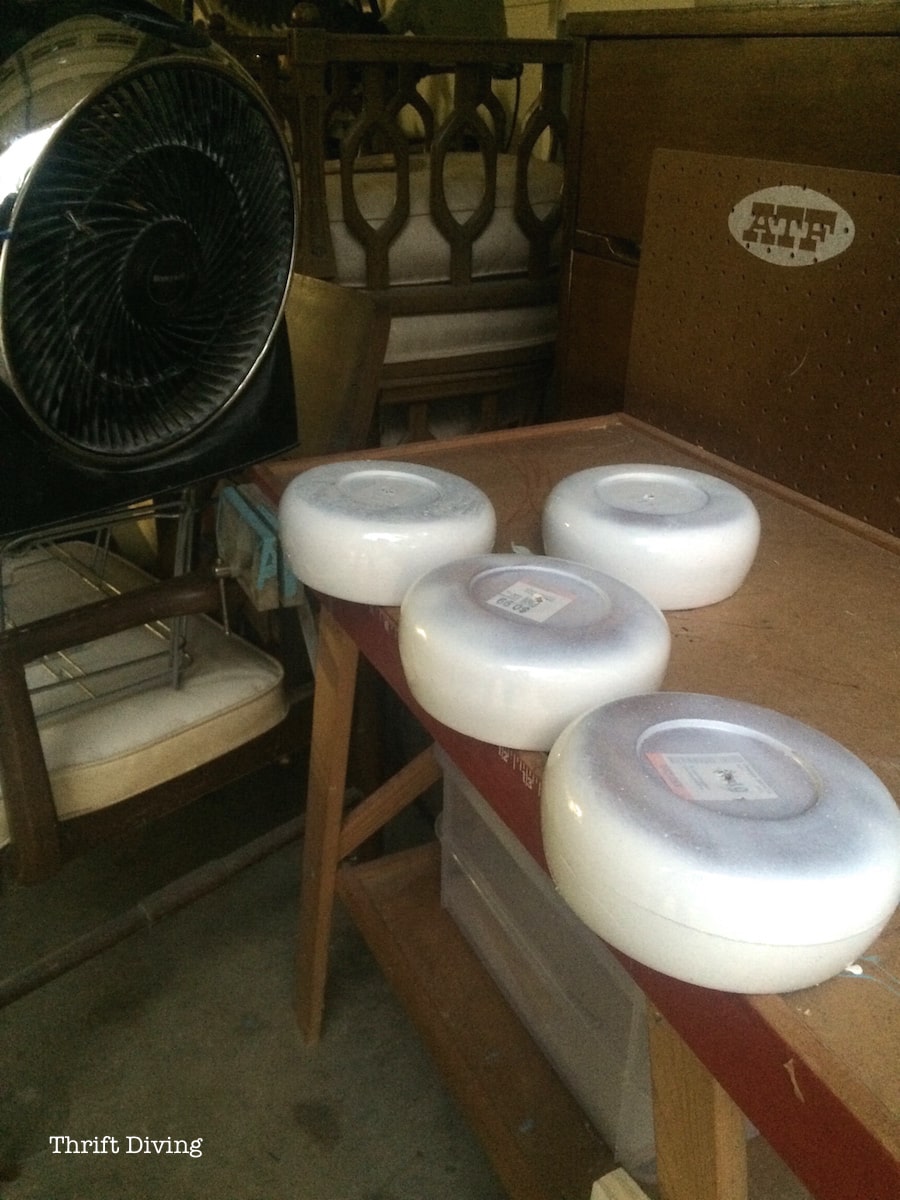
I also used wooden bowls from the thrift store for bun feet!
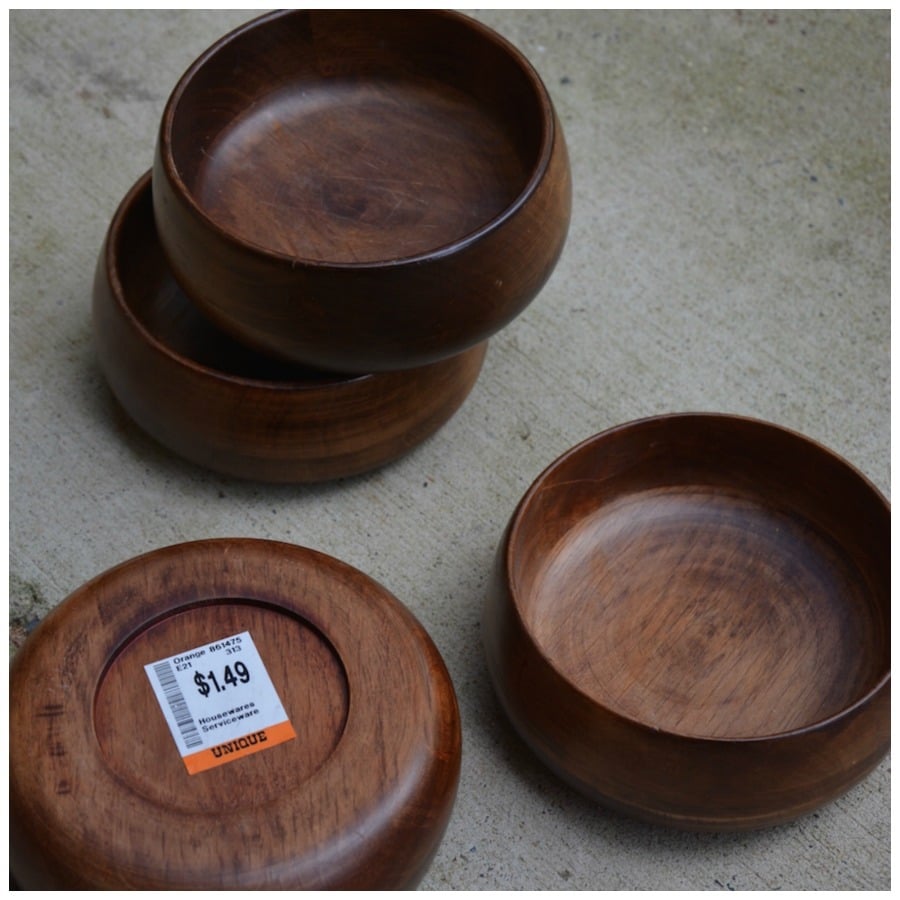
I bought them months and months ago and knew I’d use them for faux bun feet, and this was the perfect project to do it.
Have you seen the price of real bun feet?? At $11 a pop, you’re spending $40 on feet alone!!!!

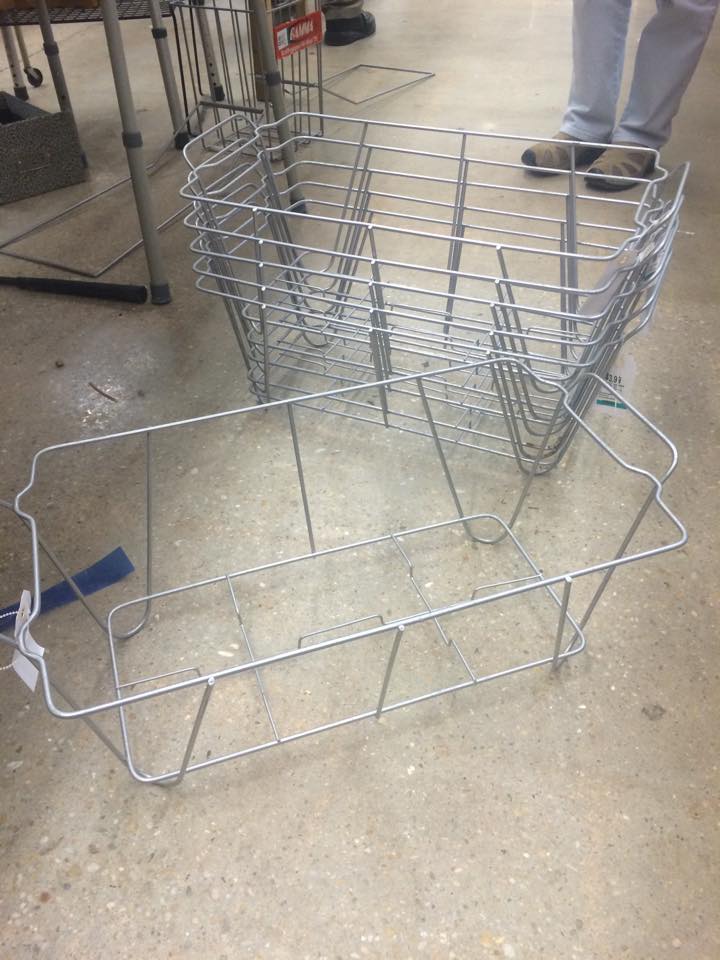
I also wanted baskets for the inside, but again, baskets are expensive, and I knew I’d need 2-4.
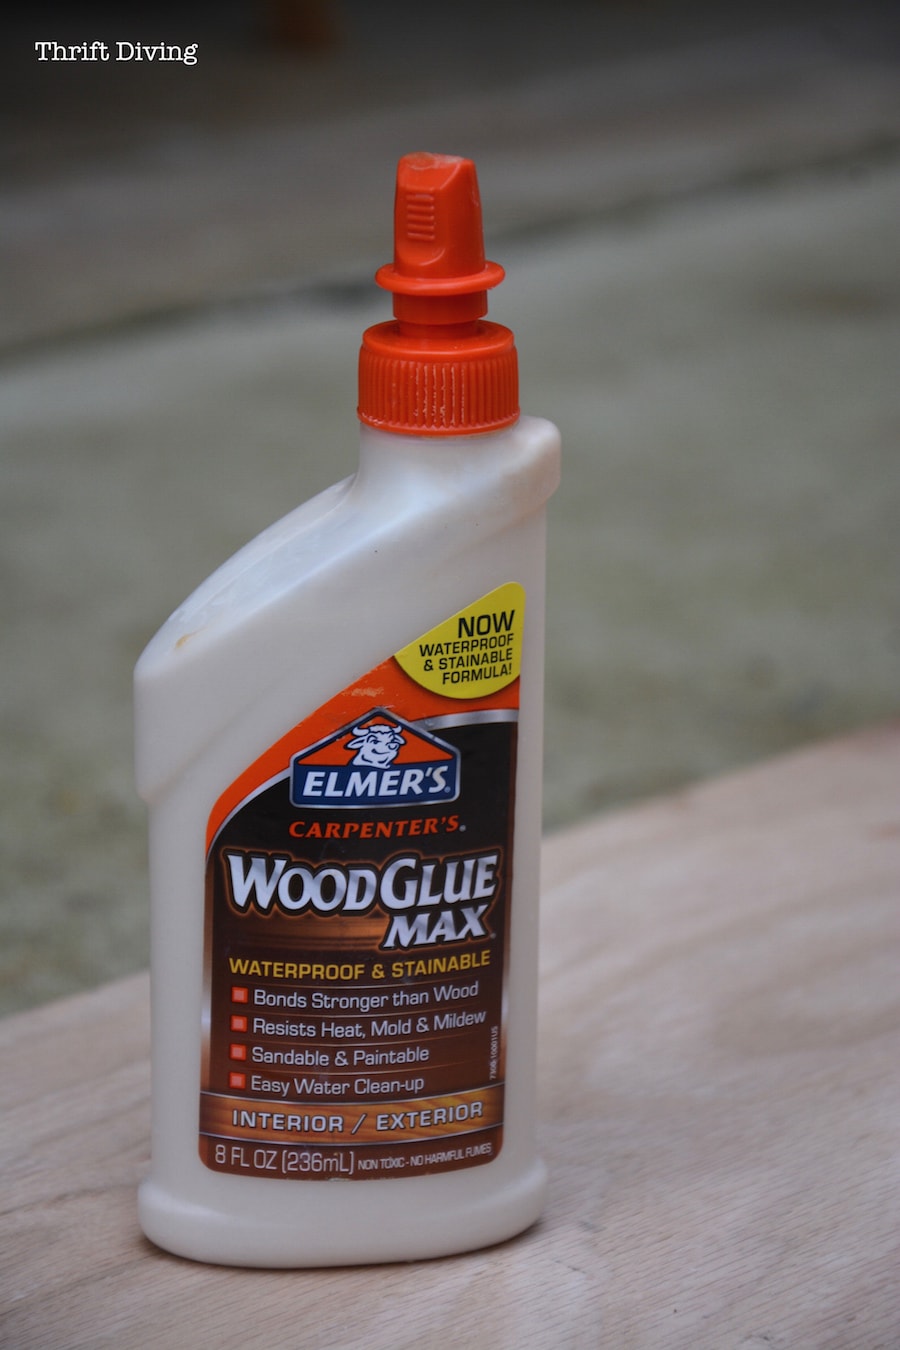
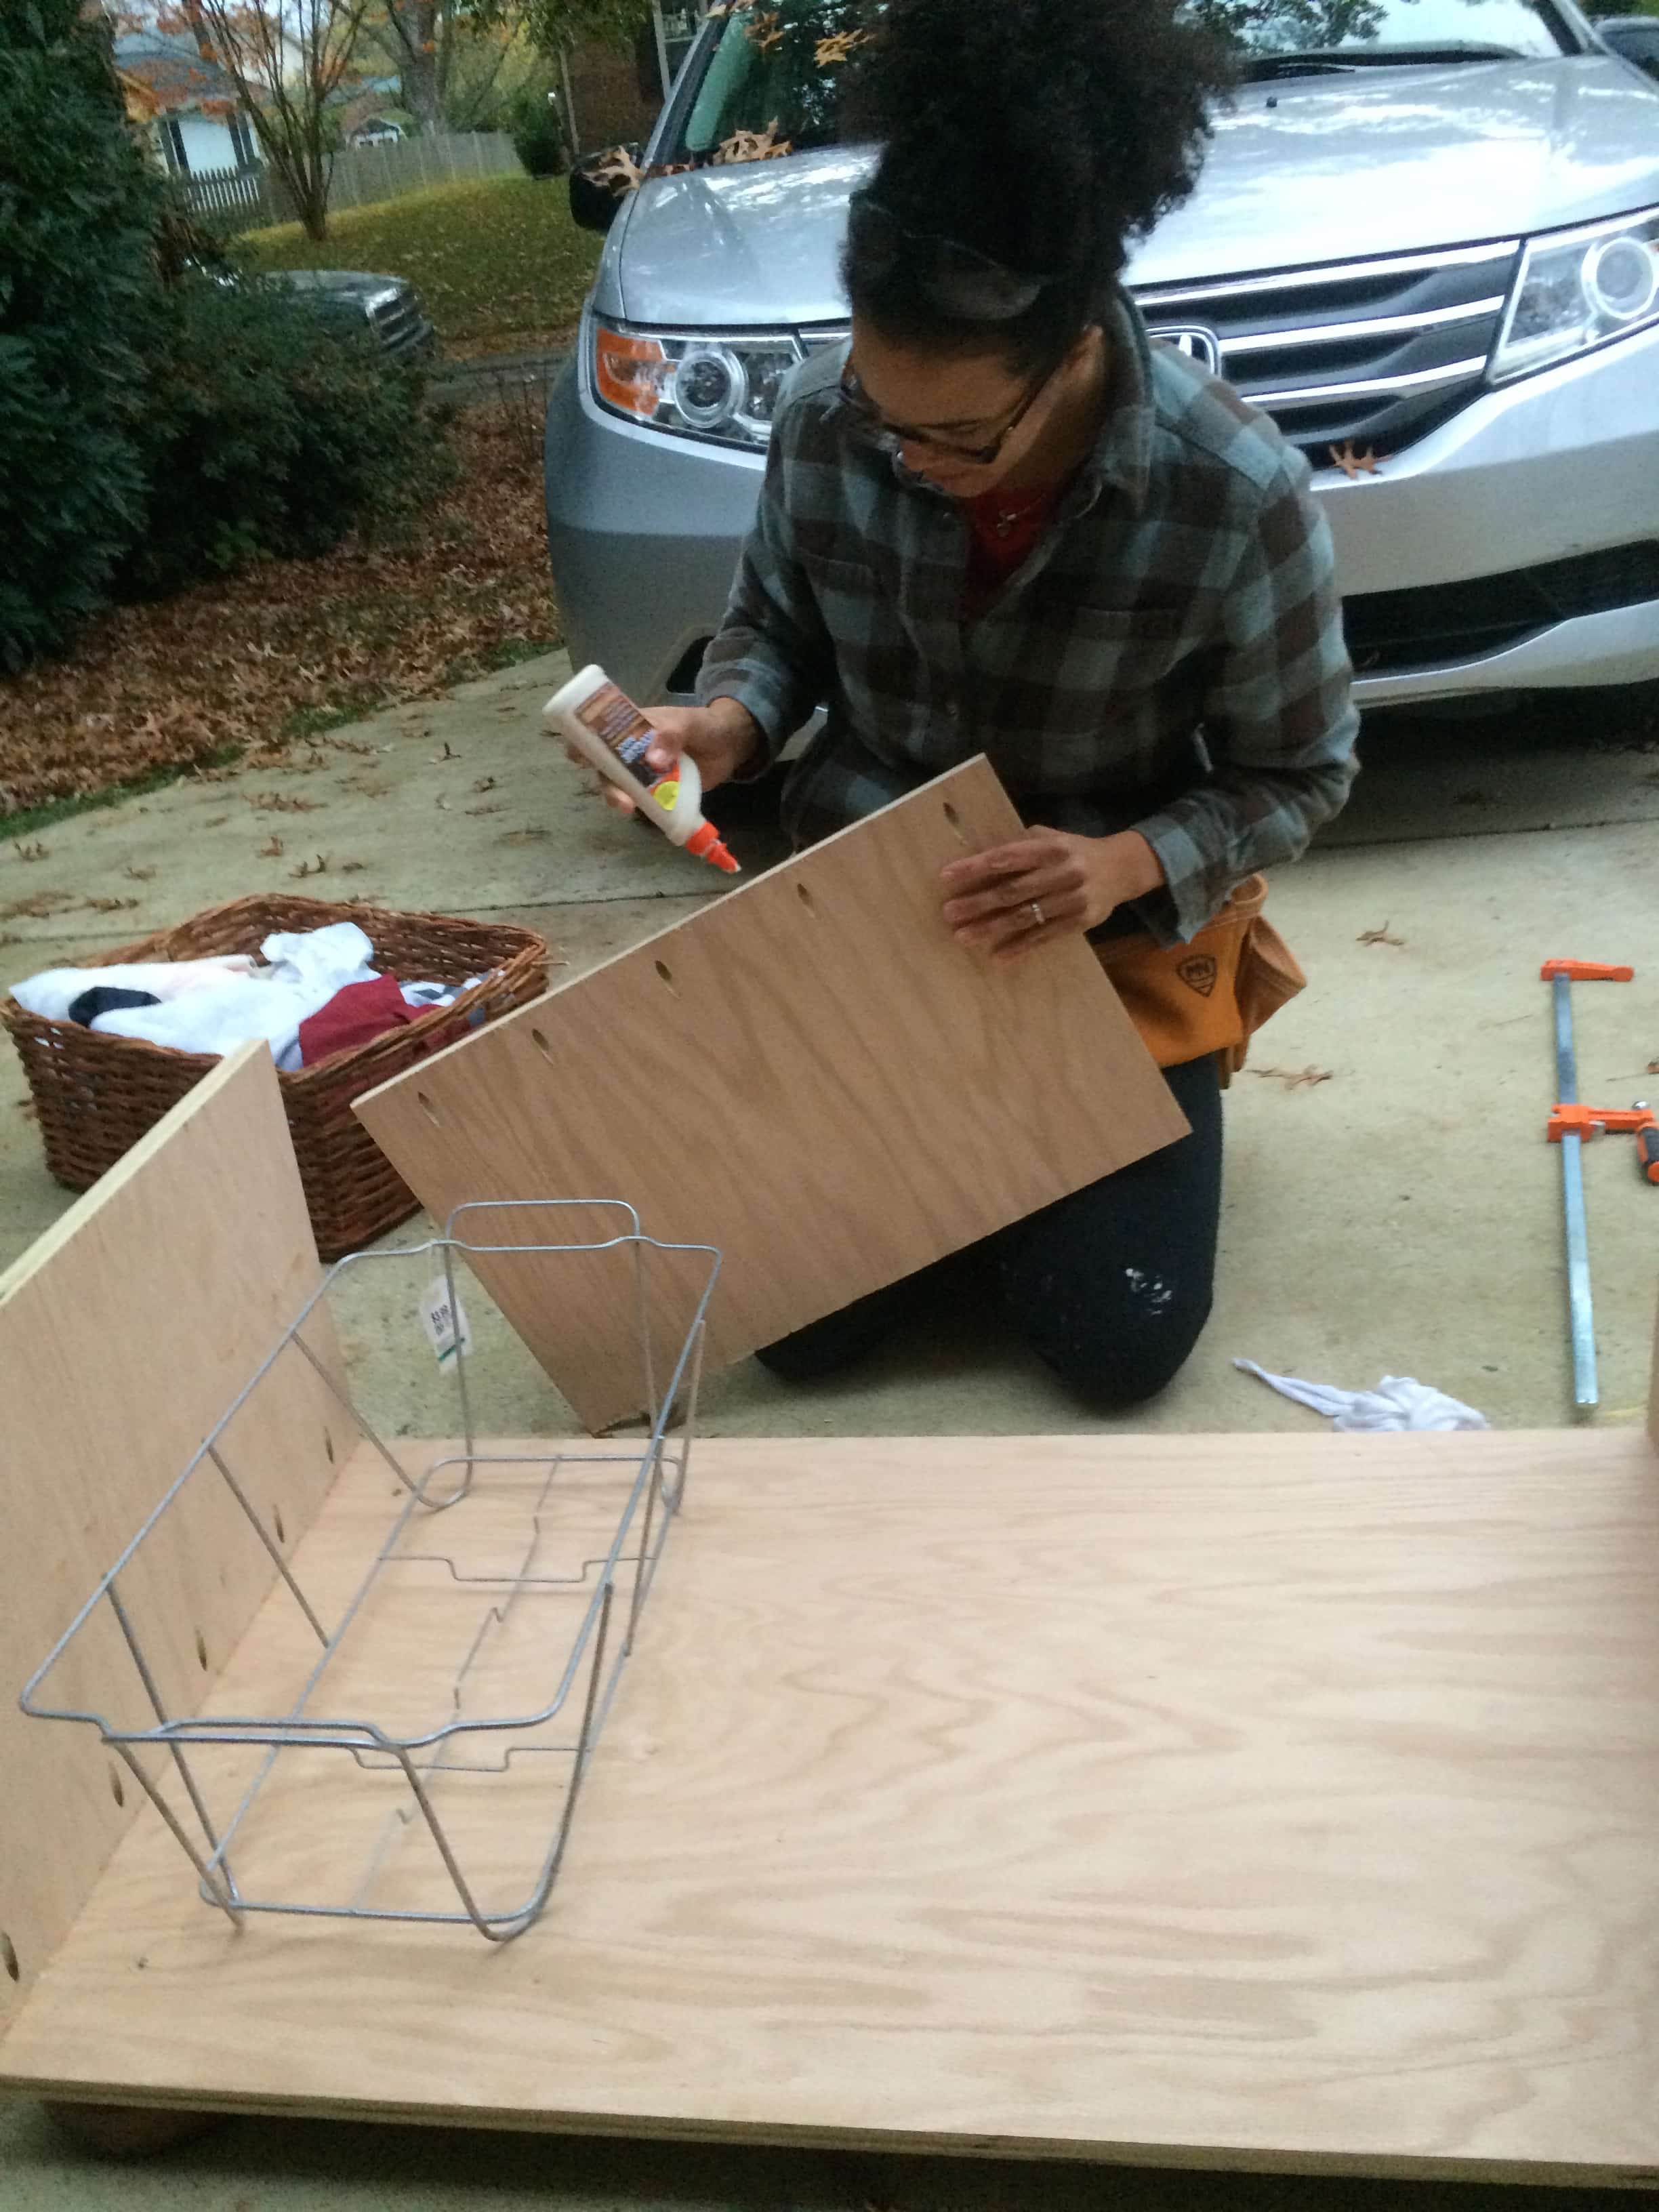
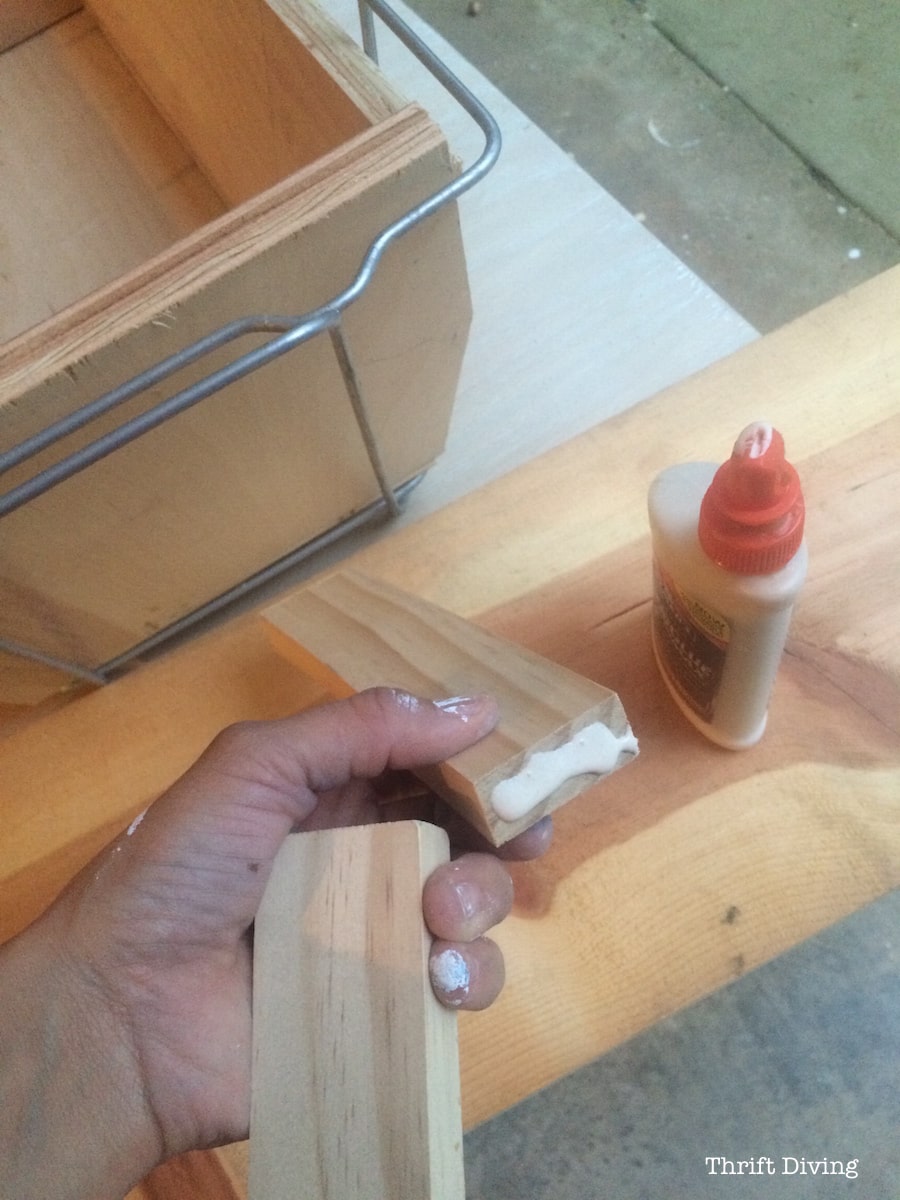
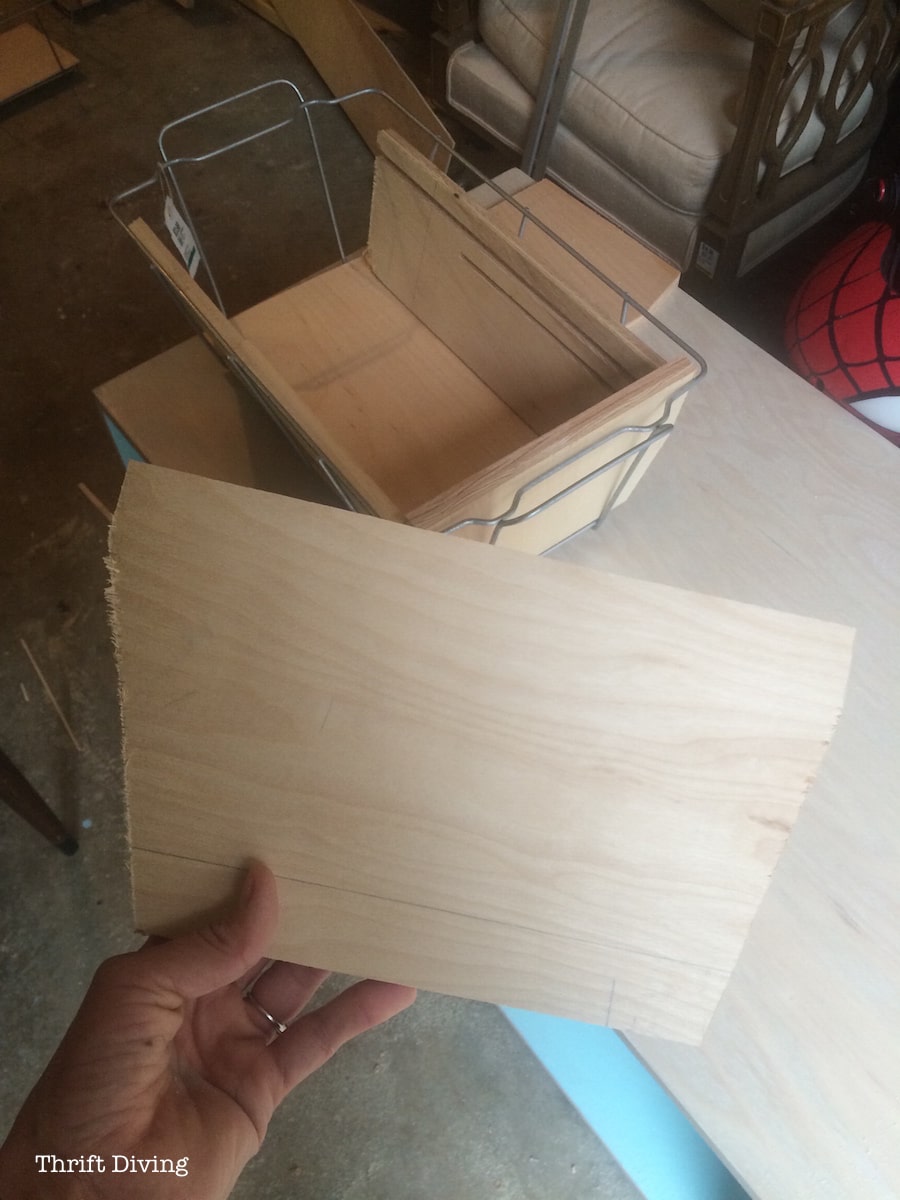
I had found these buffet warmers a whole year ago and someone on Facebook gave me the awesome idea to line the inside with wood, so I lined them with scrap wood I had lying around my garage and glued the pieces together with Elmer’s wood glue!
BEFORE
AFTER!
Okay…Now For the Deets
I’ll warn you…this is going to be a long post. So kick your feet up and learn everything that I learned about putting together this project! 🙂
Go Grab This Stuff
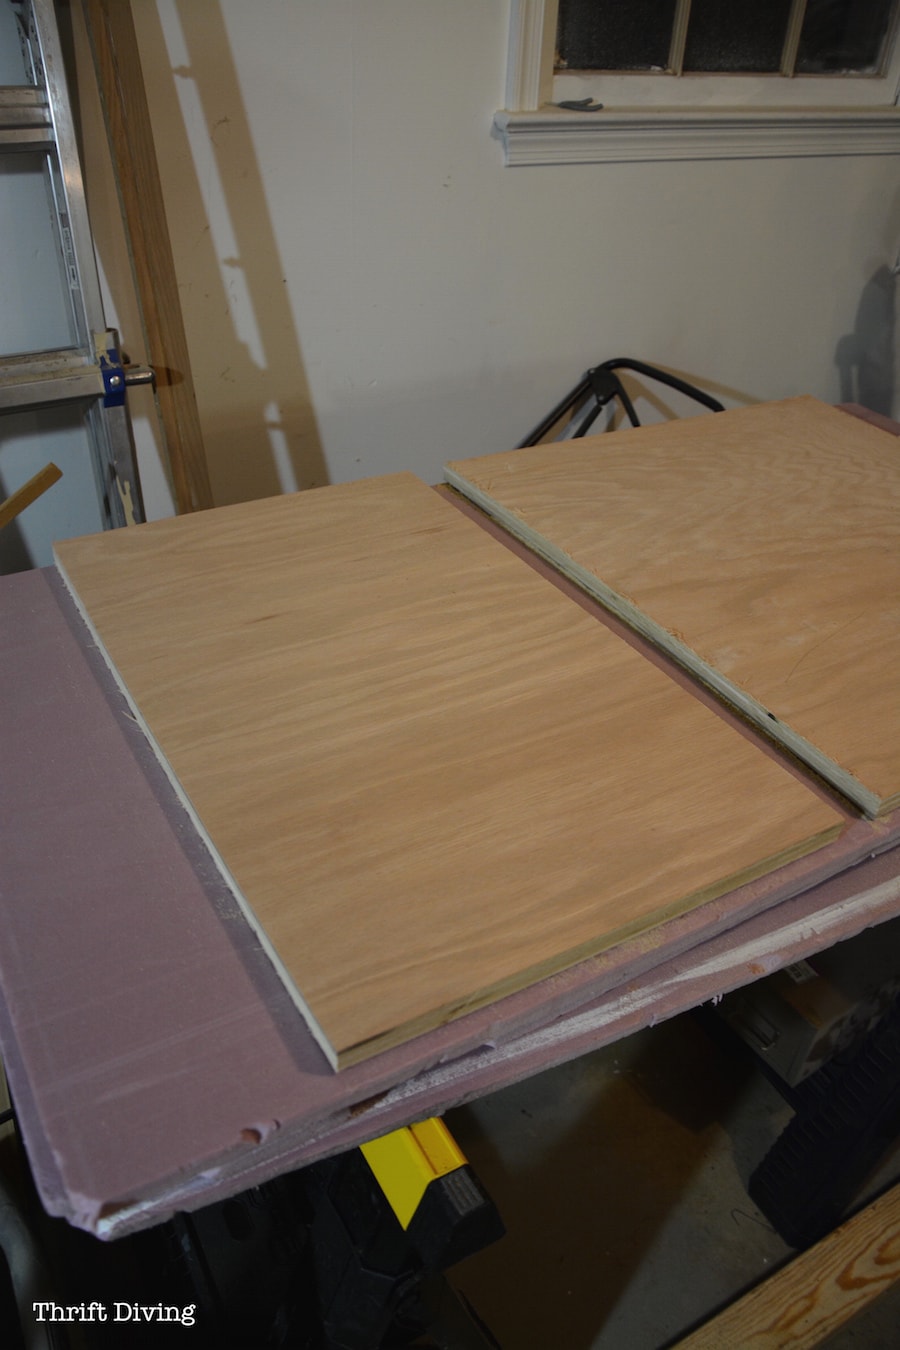
- 1 sheet of oak plywood (I used Purebond) 3/4″ thick. Have them cut it length-wise in half for you, like this.
- 4 bowls from the thrift store for faux bun feet
- 4 baskets (or buffet warmers if you can find them)
- Elmer’s Wood Glue
- Some power tools (I used a miter saw, circular saw, and jigsaw, but at the very minimum, you’ve got to have a jigsaw)
- Scrap wood for the inside of the baskets
STEP 1 – Get Cuttin’
Have Home Depot or Lowe’s cut your sheet of oak plywood length-wise. It comes in a 4’x8′ sheet, and there’s no way that thing is fitting in my van! The coolest thing is that if you know your measurements, you can get your wood cut close to size. If they measure properly, you can just assemble it when you get home!
Cut these sizes with a circular saw if you’re cutting the pieces yourself:
Top panel = 58 1/12″ x 2 ft
Bottom panel = 58 1/12″ x 2 ft
2 end panels = 14 3/4″ x 2 ft
2 inside panels = 14 3/4″ x 2ft
With the bowl feet attached, the bench measures 18 5/8″ in height.
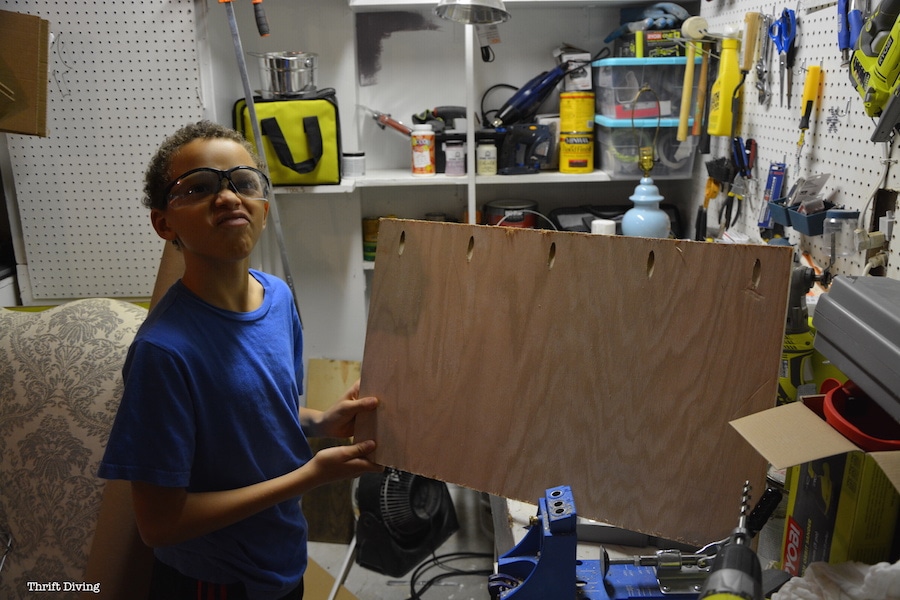
STEP 2: Drill Pocket Holes
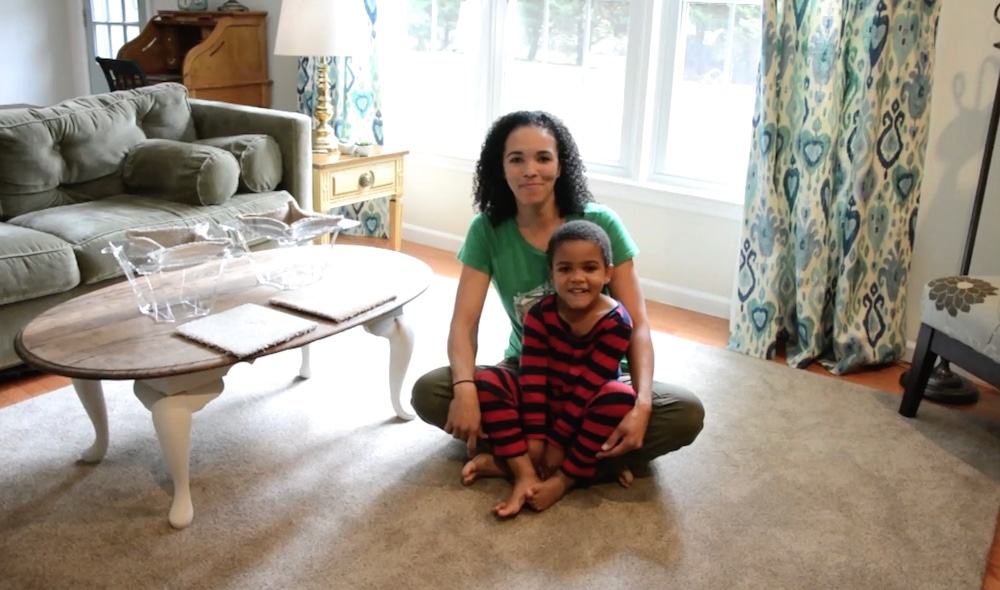
I enrolled the help of my 9-year-old to make pocket holes in the end and inside panels. (For the sake of time, I won’t get into details about pocket holes, but if you want more info on this, just email me!).
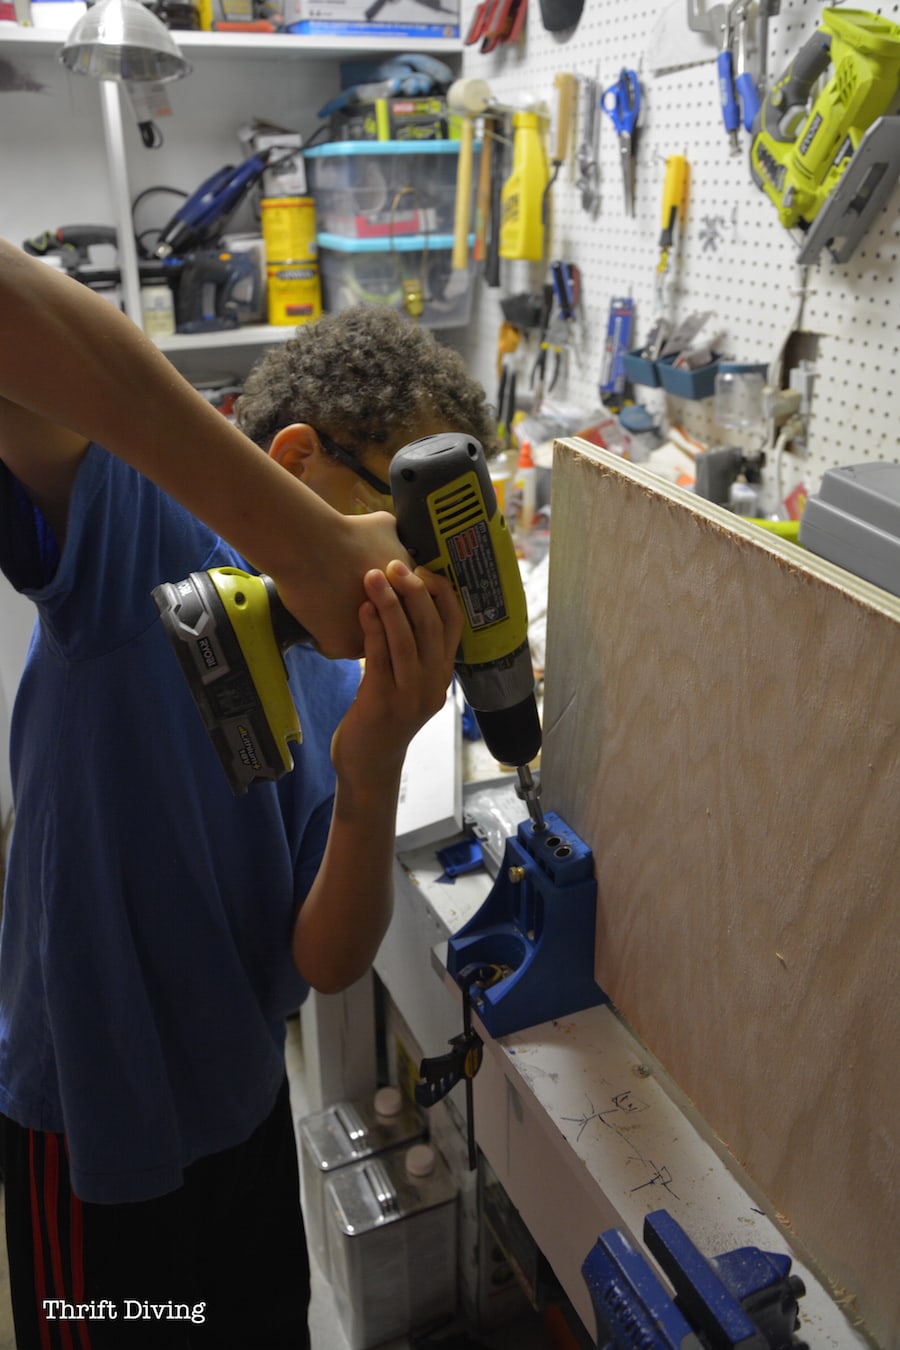
He was so proud of his work, but for the life of me, I couldn’t get him to take a picture without making a face. HA!
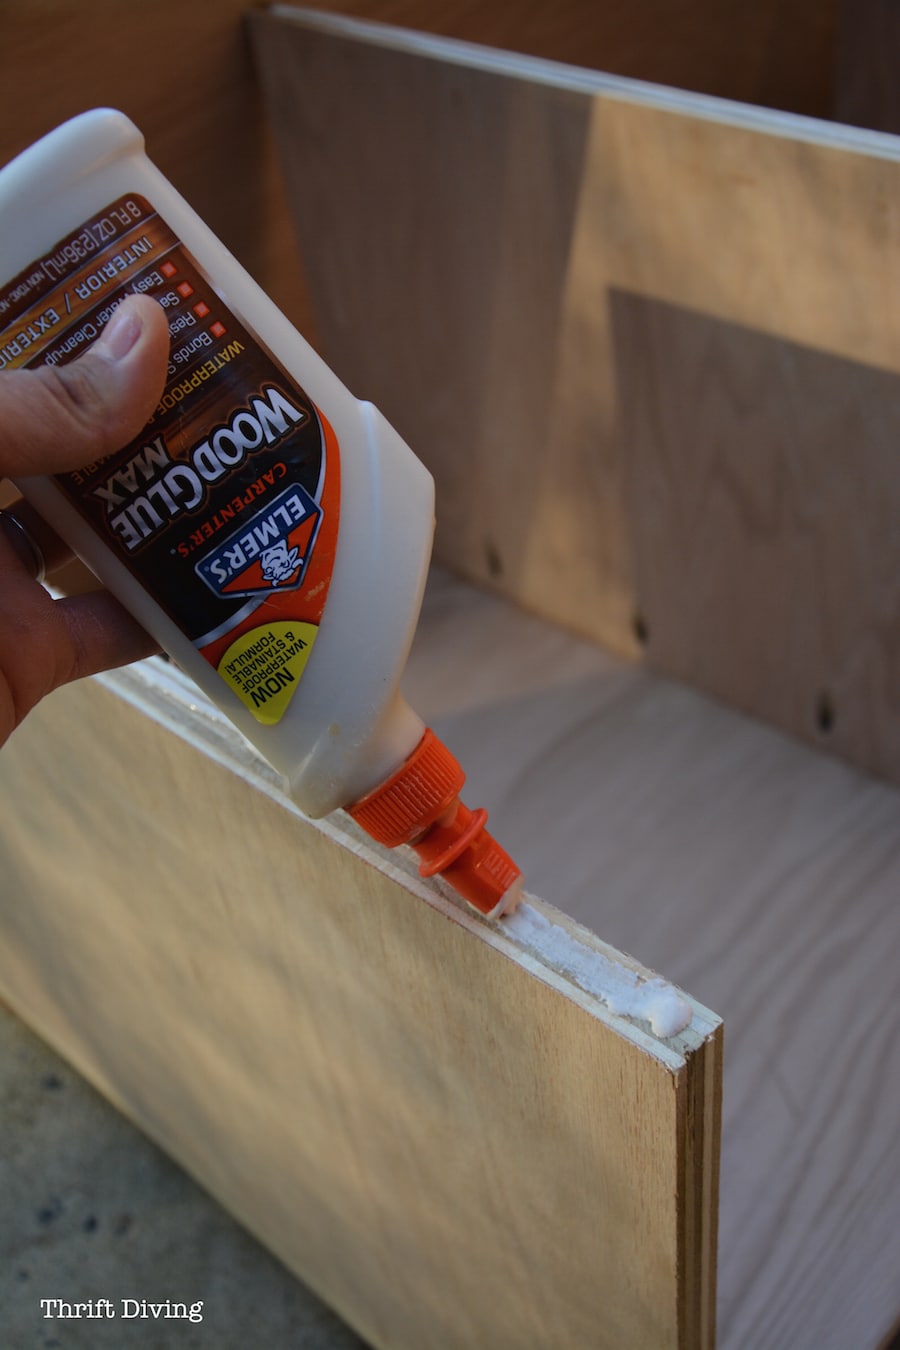
STEP 3: Glue Before Screw
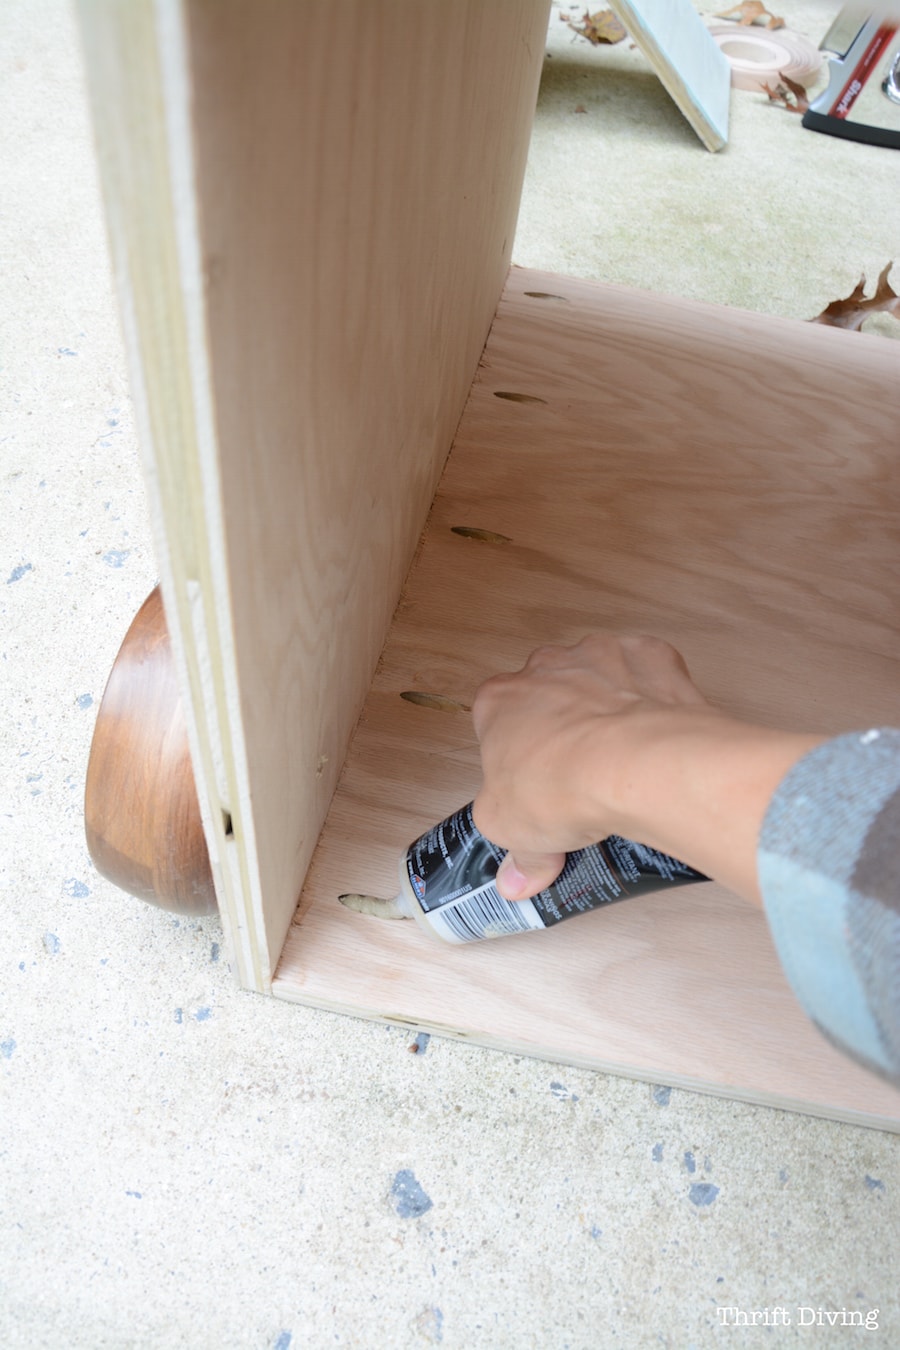
When I’m working with wood, I always use Elmer’s Wood Glue to glue before screwing! I’ll usually let it set a few minutes before trying to screw or nail boards together. Not only does it help keep boards from getting shifty when trying to screw or nail them together, but it helps to create a stronger bond between the materials.
Just put a bead of wood glue along the edge and hold in place with a clamp to let it set for a few minutes before screwing in.
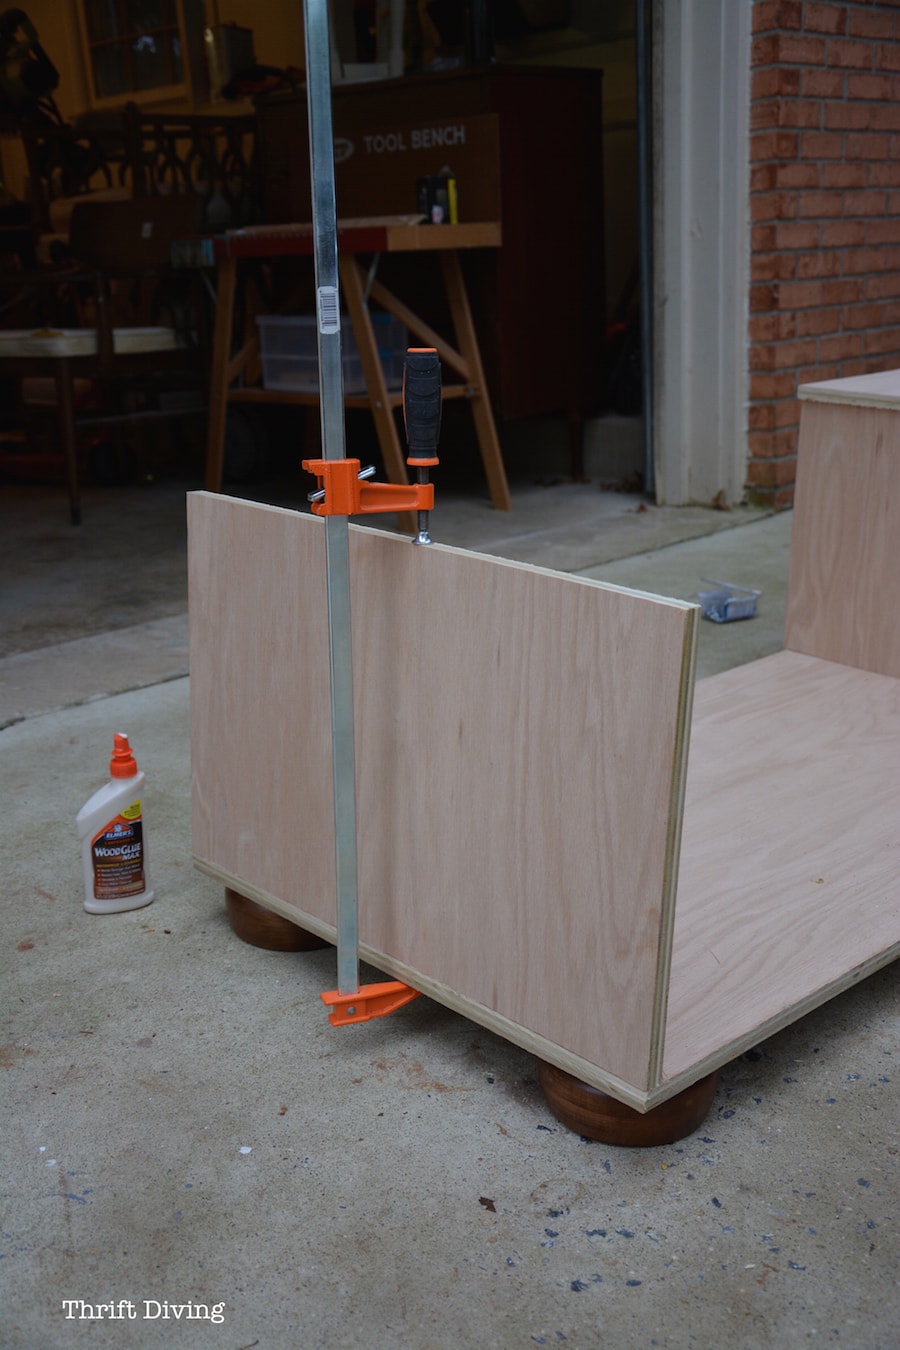
Here you see the ends are now glued in and pocket hole screws have been added, so those joints are suuuuuper tight!
Just a little tip: it’s easy to make the sides lopsided. One of mine actually did turn out lopsided! HA! But if you use an empire square, you’re less likely to screw this up and get the sides as close to 90 degrees as possible.
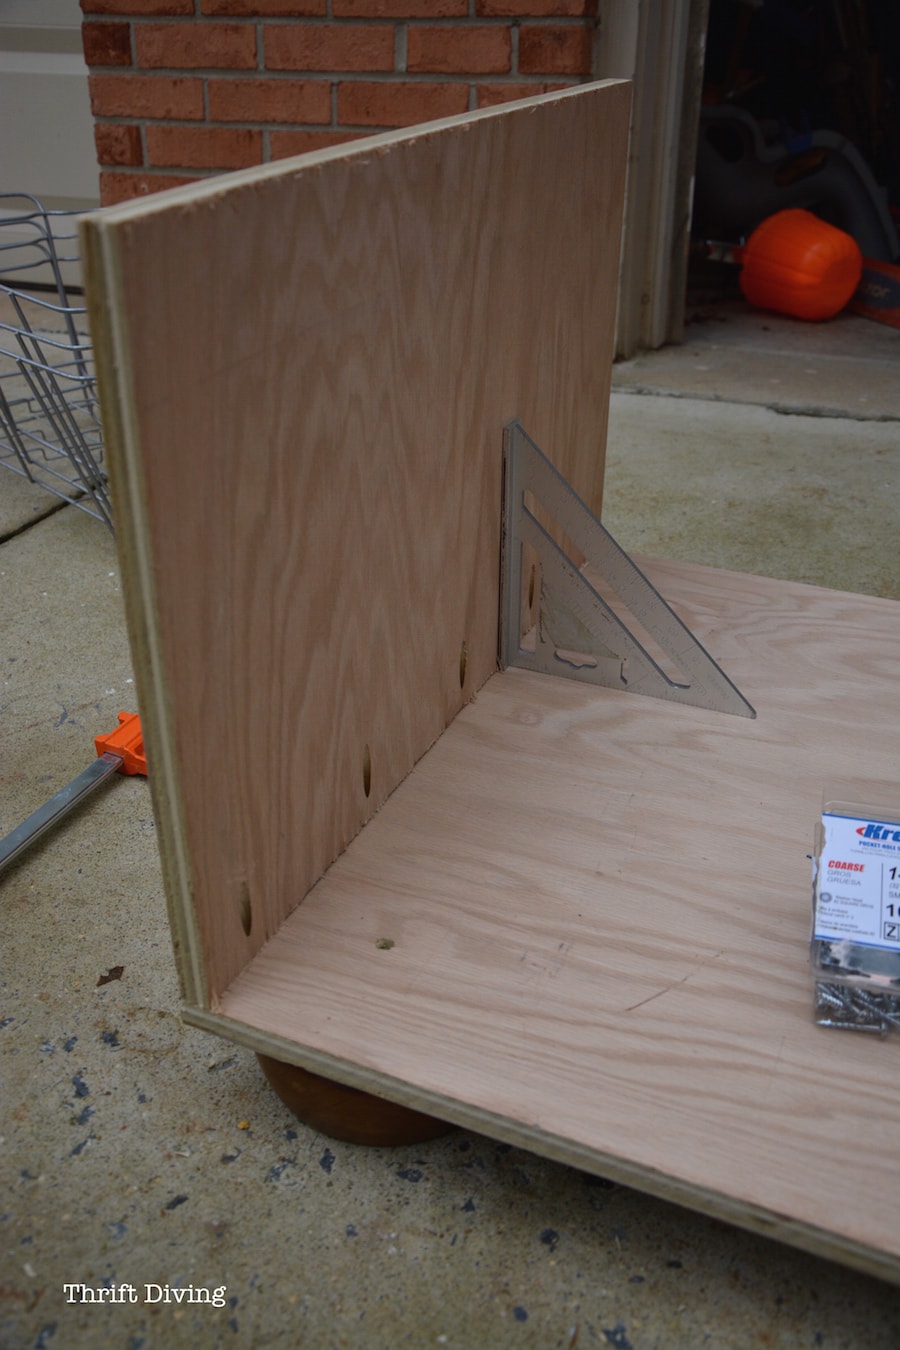
STEP 5: Topping It Off
Now it’s time to add the top panel.
I didn’t have a good idea how I was going to get the top on, so I just decided that wood glue on the ends and inside pieces would work, then placed the top on, and nailed it down with my brad nailer with 2″ nails, but you could use a regular hammer and nails, too.
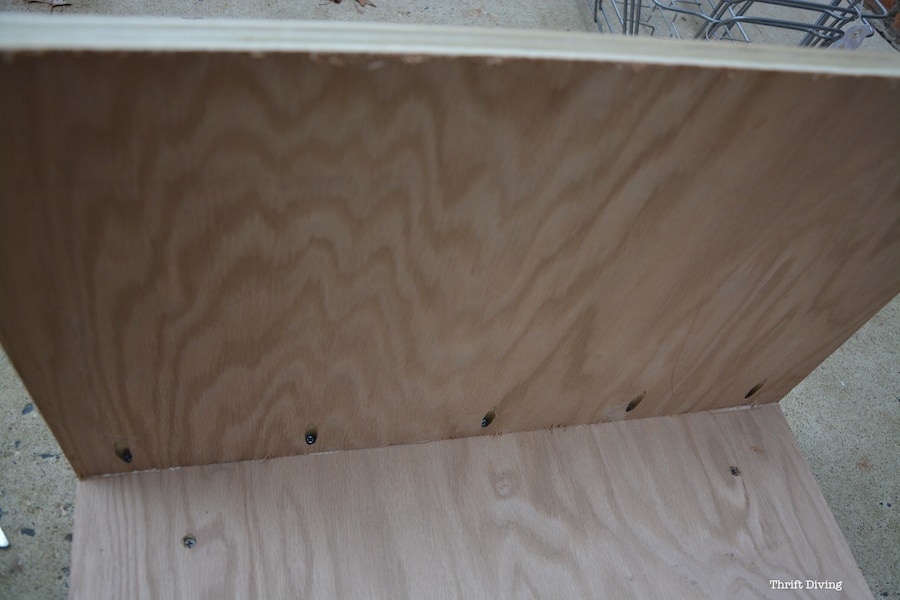
STEP 6: Time For Hole Filling!
I made pocket holes (I use a Kreg Jig to make easy pocket holes with a simple drill) so I can’t leave these exposed. Even if you use small nails or a nailer, you’ve got to hide the holes.
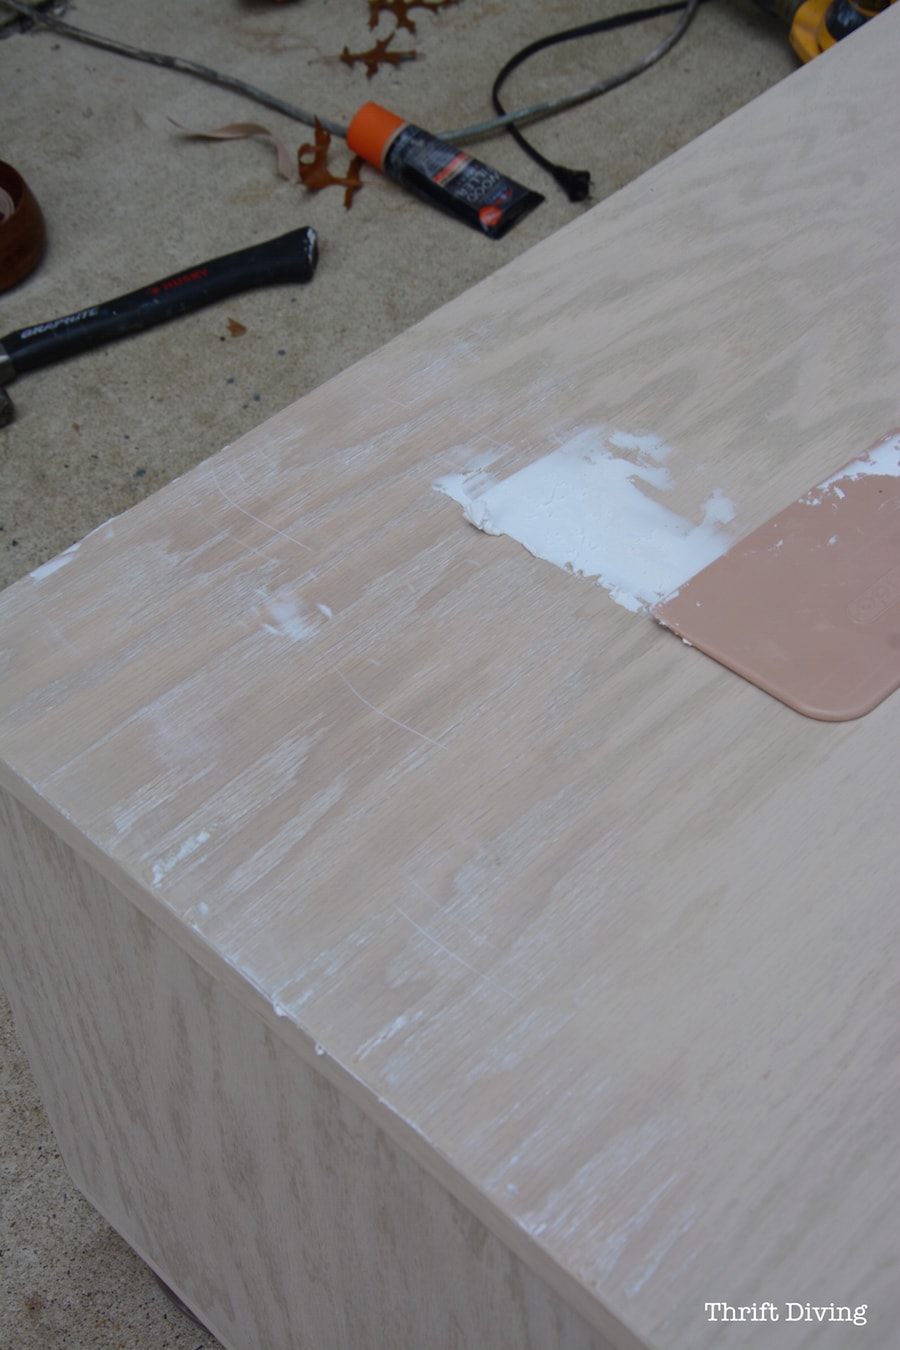
Elmer’s wood filler has always been my go-to for filling holes. It dries pretty quickly, and just sands smooth.
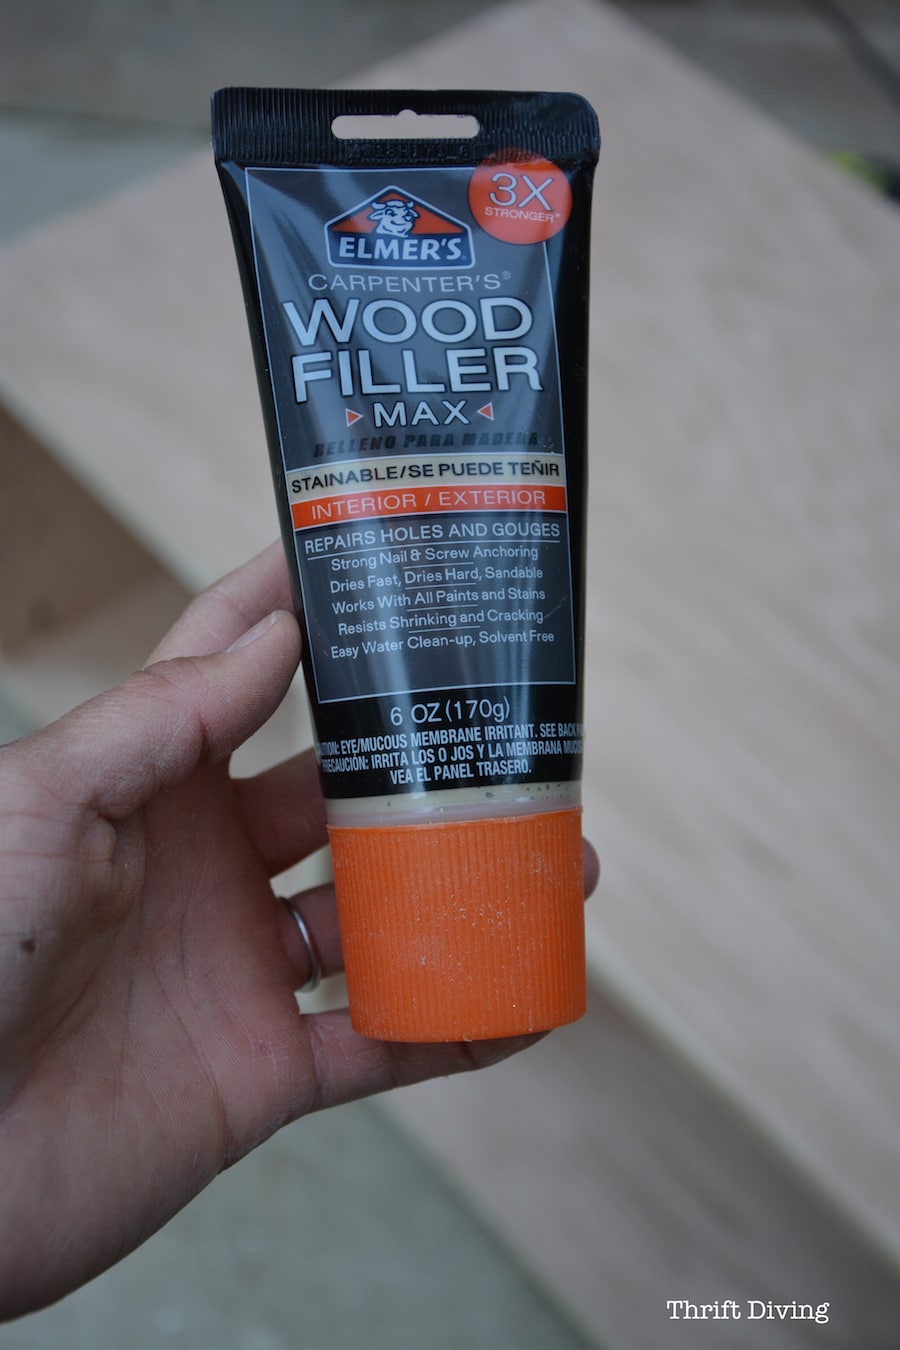
I filled each of the pocket holes and let it dry for a while before sanding.
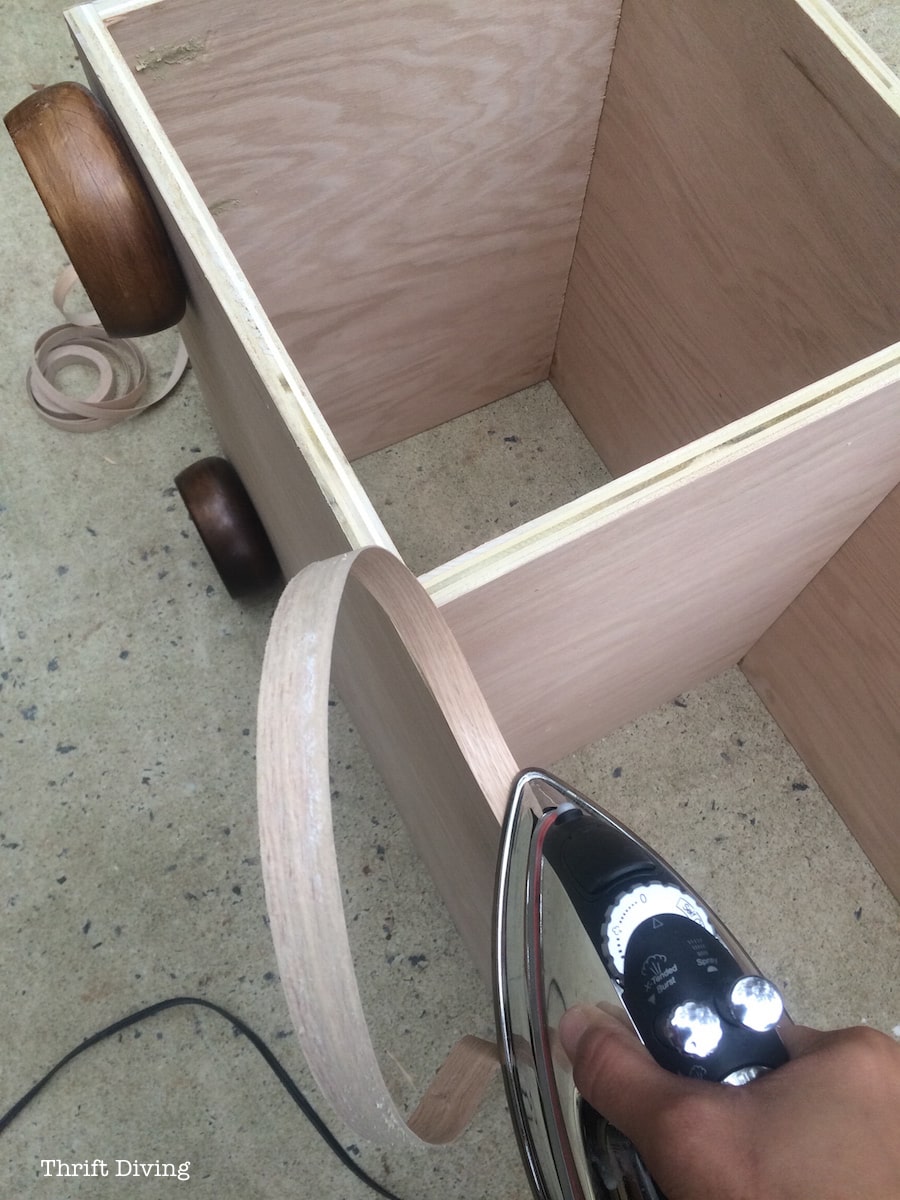
STEP 7: Finishing Off the Edges
This stuff is the most magical invention for making a piece feel finished! It’s a roll of wood veneer that you iron onto the edge of your project to finish off the raw edges of your cut wood. Yes, iron. I looked hysterical ironing my project in my driveway. HA! And don’t think I didn’t burn myself at least twice!!
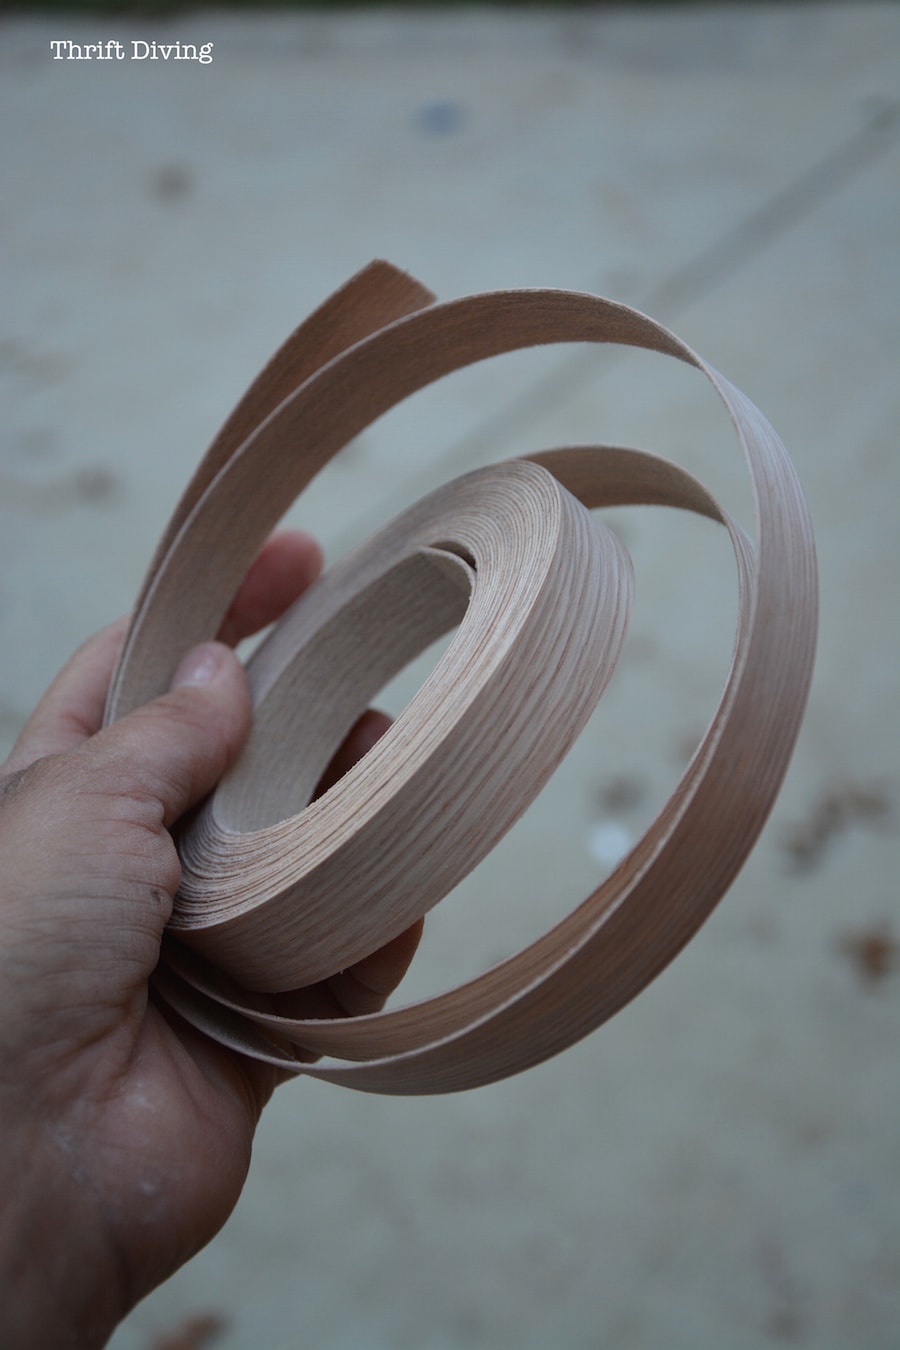
It’s 3/4″ wide, which was perfect for my 3/4″ thick oak plywood. Use a razor to shave off any overhang, though (I have a video tutorial coming for this later!).
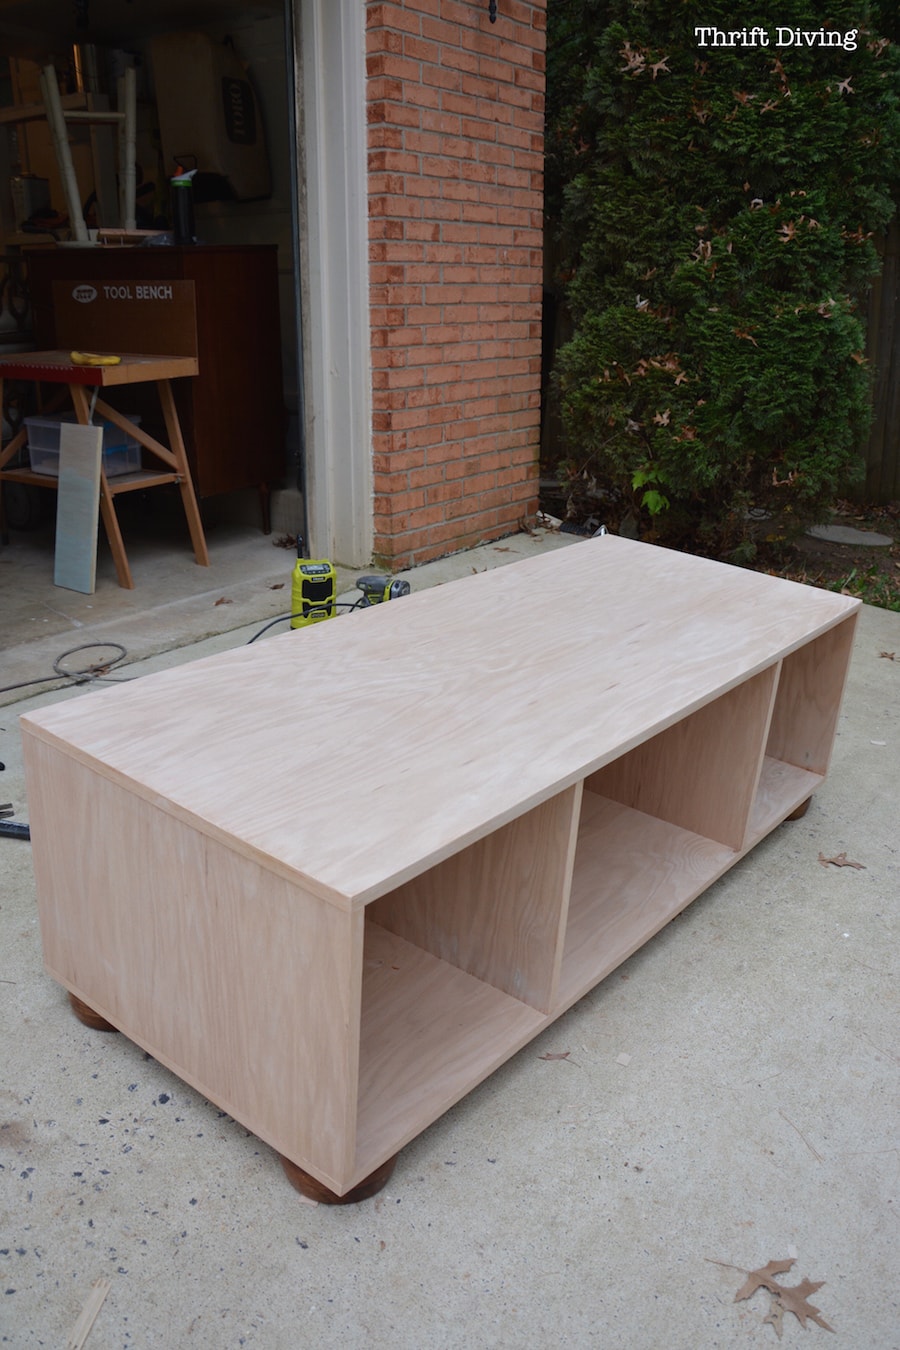
(In this pic, you see that I’ve got the bowls on the bottom, but I later took them off to paint them. Save that step for last!)
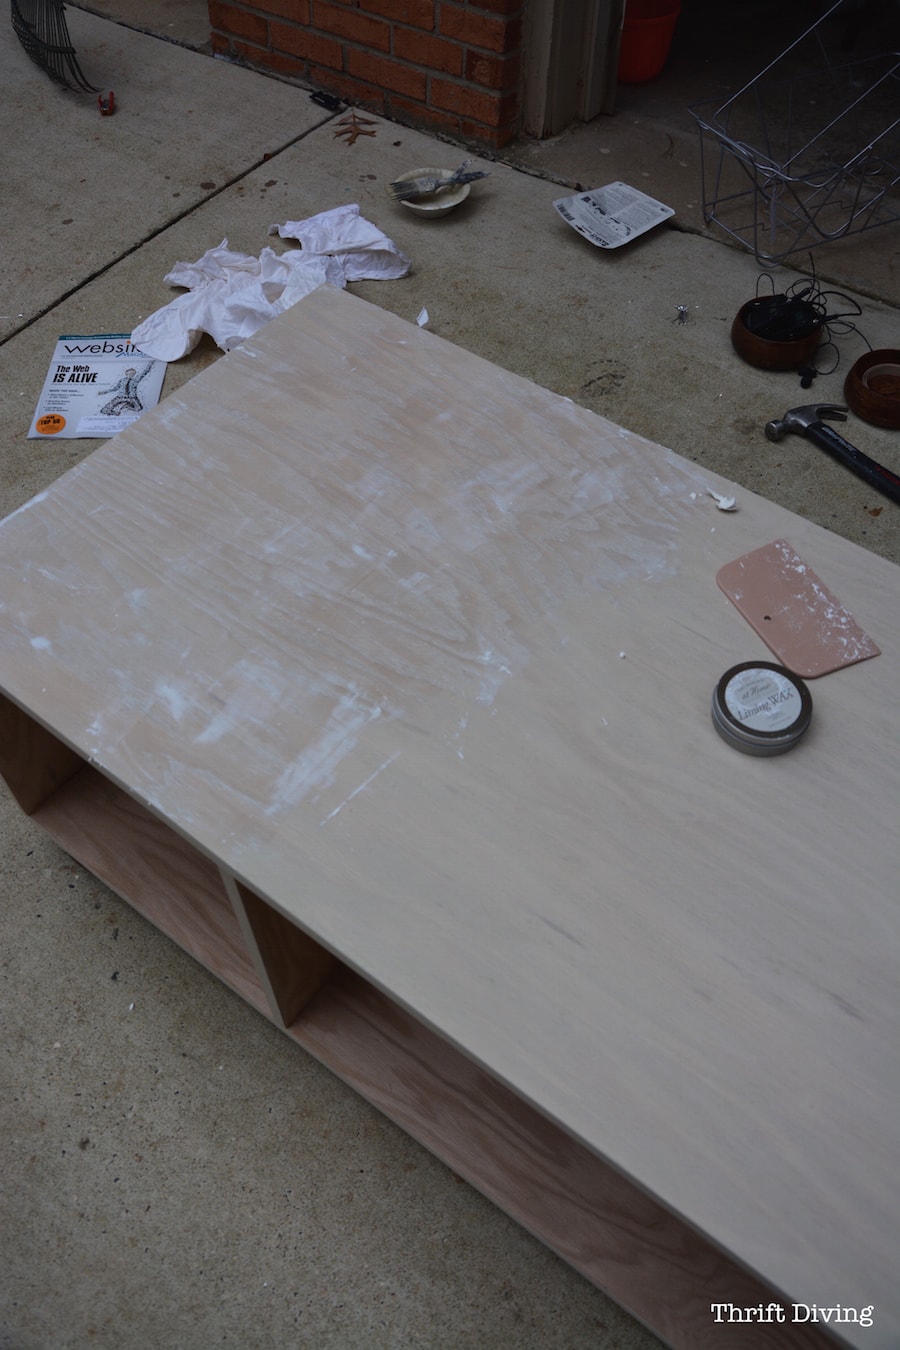
When the top was on and all the veneer edging was done, it looks like this!
Now it was ready for paint!
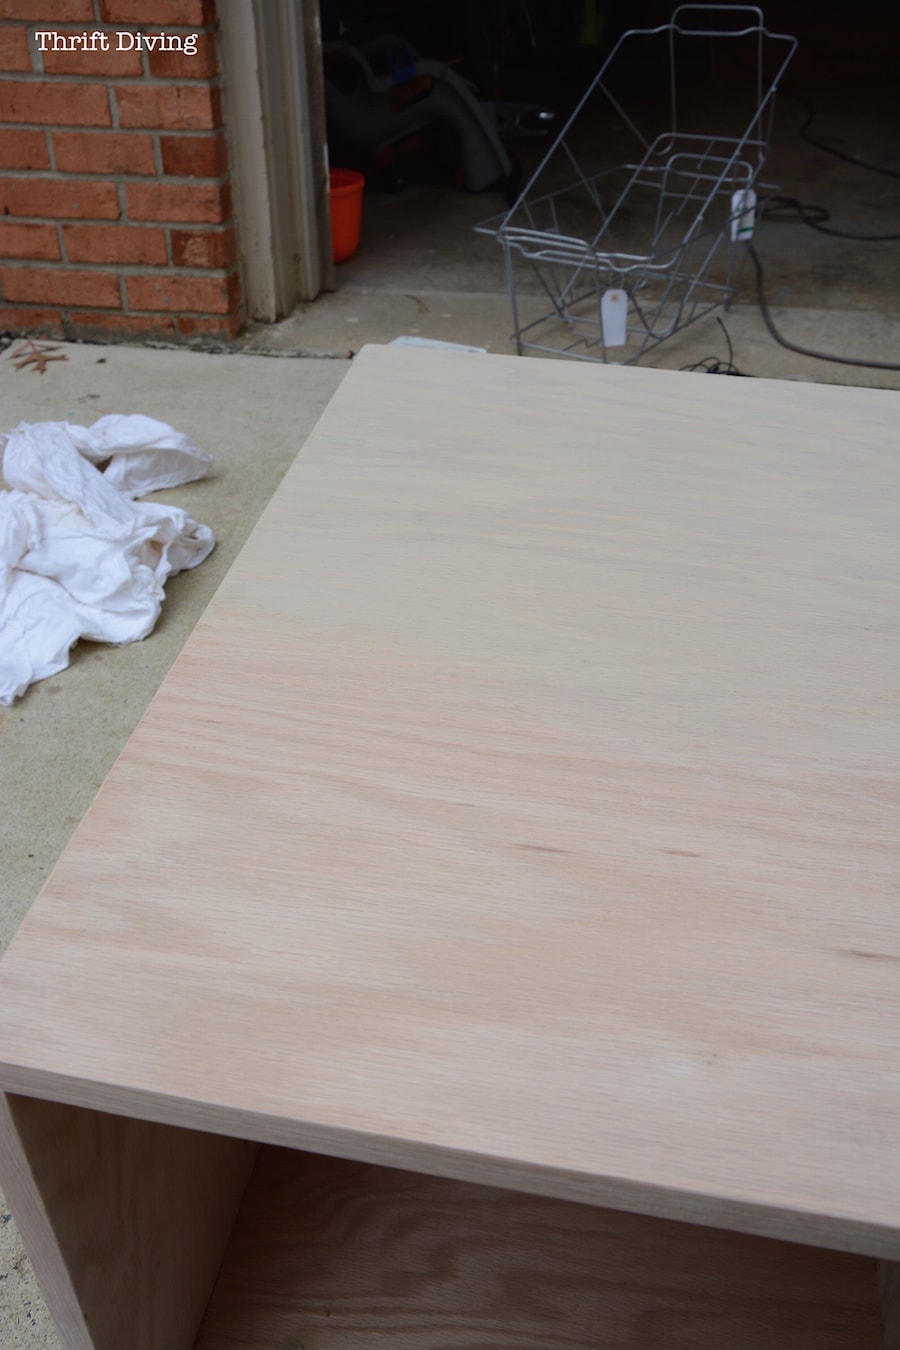
STEP 8: Give It a Good Wash and Wax
Remember I said in my recent posts about whether painted furniture is dead or not?
Well, it’s not.
But I do love seeing the grain of wood. So I decided to give this piece a wash of chalk paint (I used Annie Sloan Country Grey) mixed with some water, then brushed it on, and wiped it off quickly. What’s amazing is that it still looks totally natural, but it’s still painted and has a different tone. :).
You can see the difference here.
It’s like wearing makeup when no one is thinking you’re wearing any!! ;).
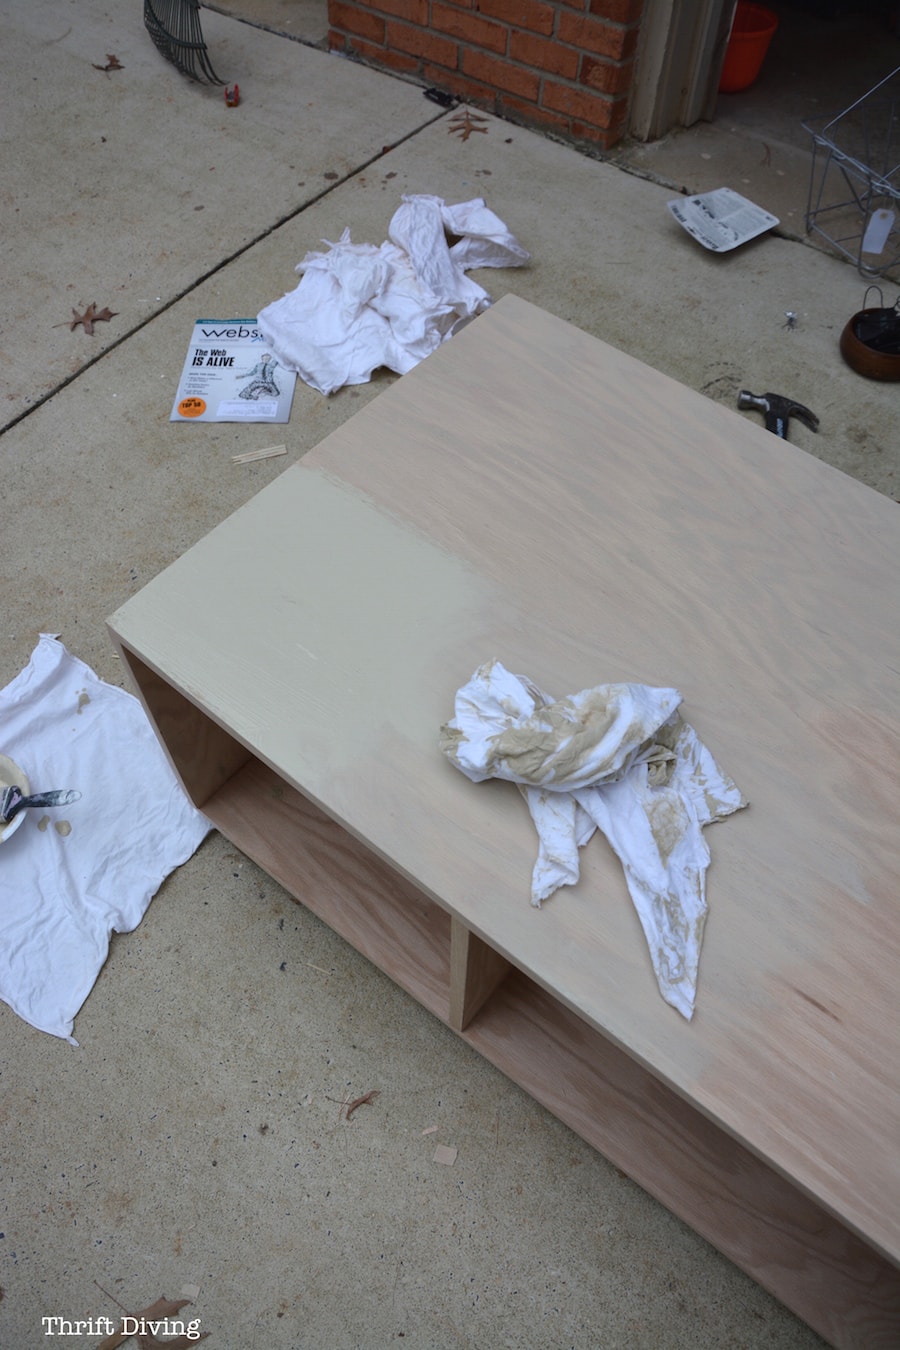
Then I used liming wax dragging it perpendicular to the grain of the oak, pushing the white wax into the grain, and allowing it to settle into the grain so it would make that grain “POP” more. Goodness–my back and arms ached later that night, as if I had done 100 push-ups! Who said DIYing isn’t a workout?!
See the difference the liming wax made??
That white wax brings out the texture! LOVE that stuff!
I wiped off the excess, allowed it to dry for a few minutes, and tried to buff it to a shine. It still looks a little spotty in some places, but I”ll figure it out!
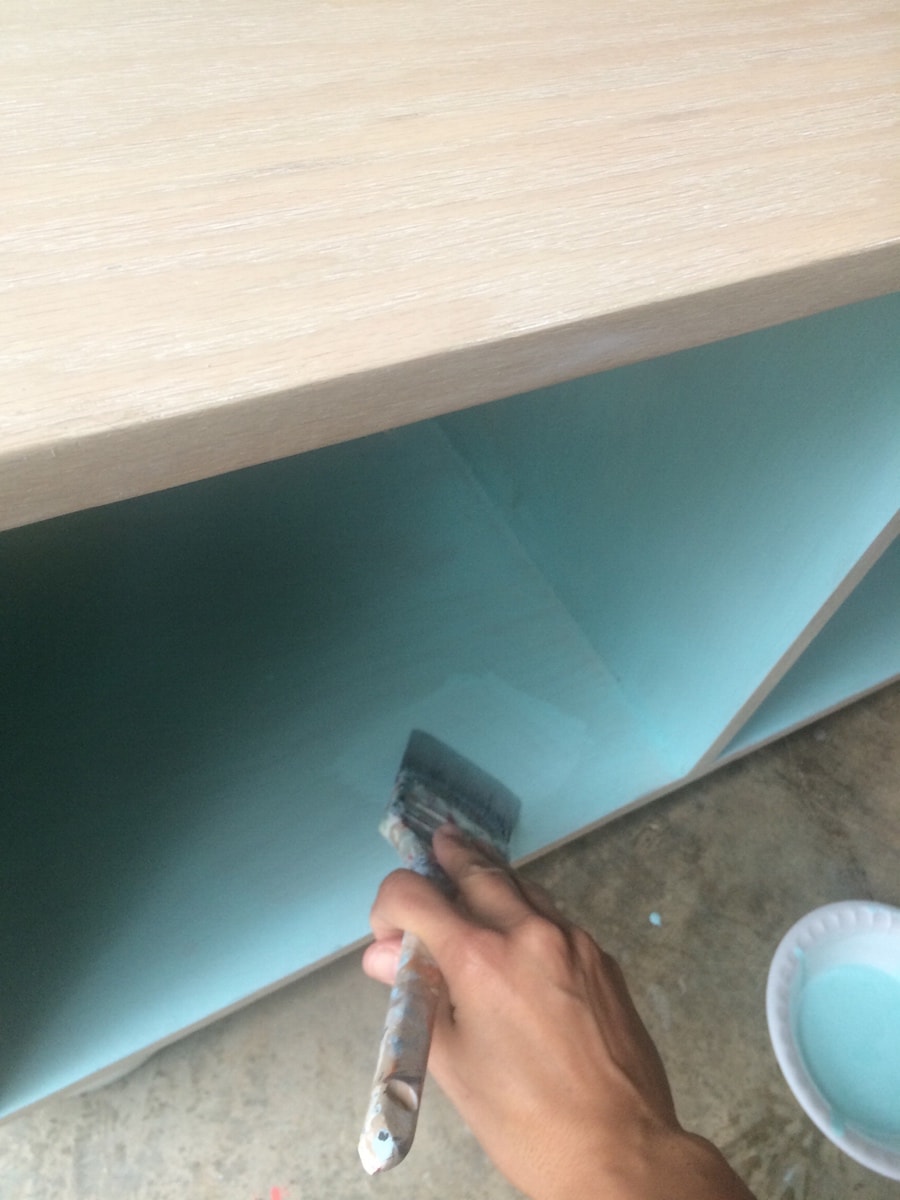
STEP 9: Go With An Inside “POP” of Color
I absolutely love turquoise, so I chose that for the inside! I did two coats of a light wash of Amy Howard Tick Tock.
Be sure to lightly sand and use regular clear wax.
STEP 10: Let’s Talk Bun Feet
These wooden bowls from the thrift store are perfect for faux bun feet!
Just drill a hole in the middle…

…then drill a hole in the base of your bench and add them to the bottom with screws and wing nuts!
Whoever turns furniture over to know?? Nobody does (unless you’re selling it). For now, it will be our little secret…. LOL.
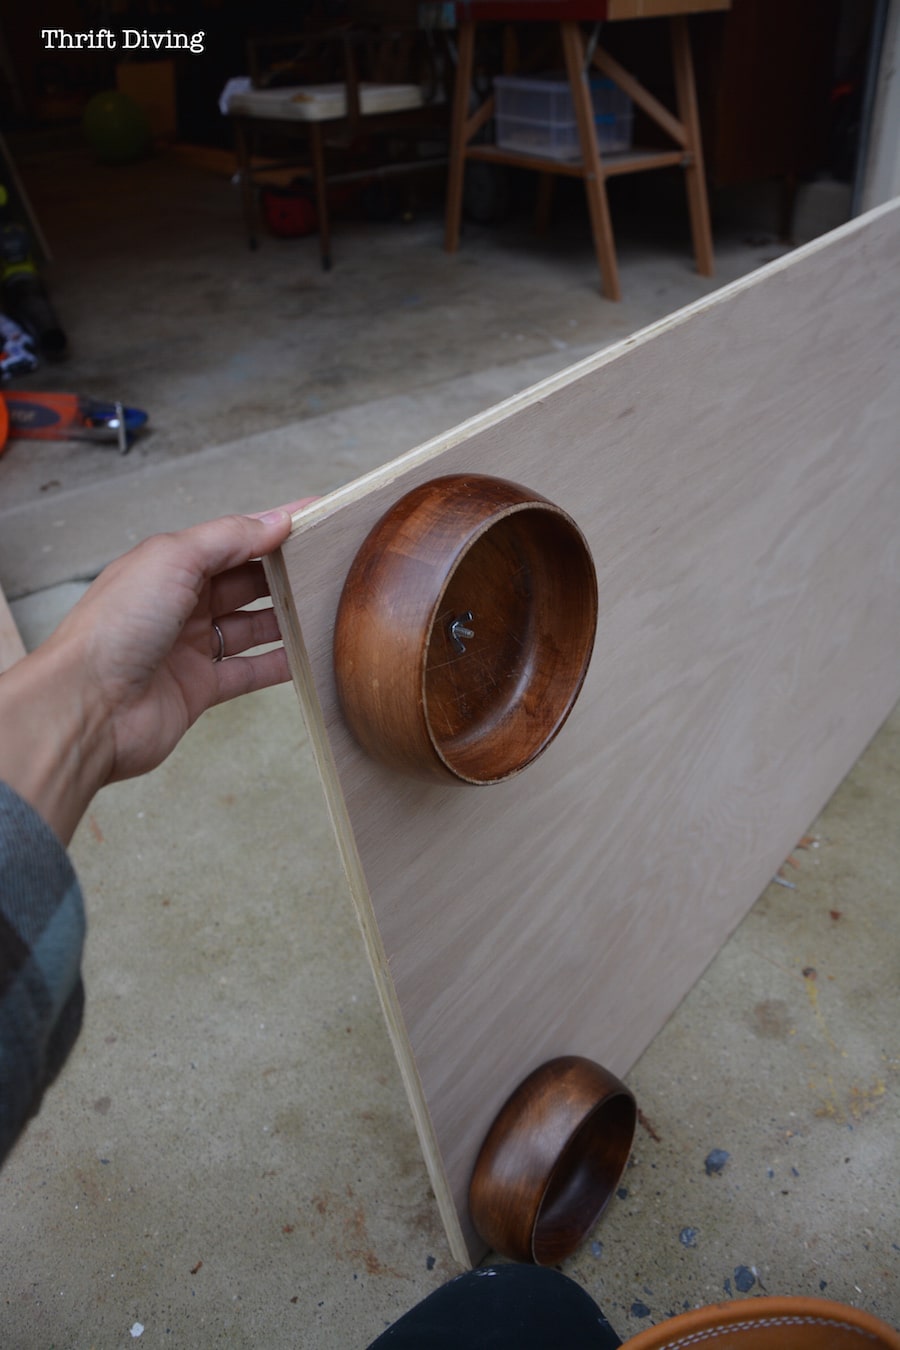
I did prime and spray them with glossy spray paint after I test-fit them on the bottom.
I was even too lazy to remove the stickers. LOL
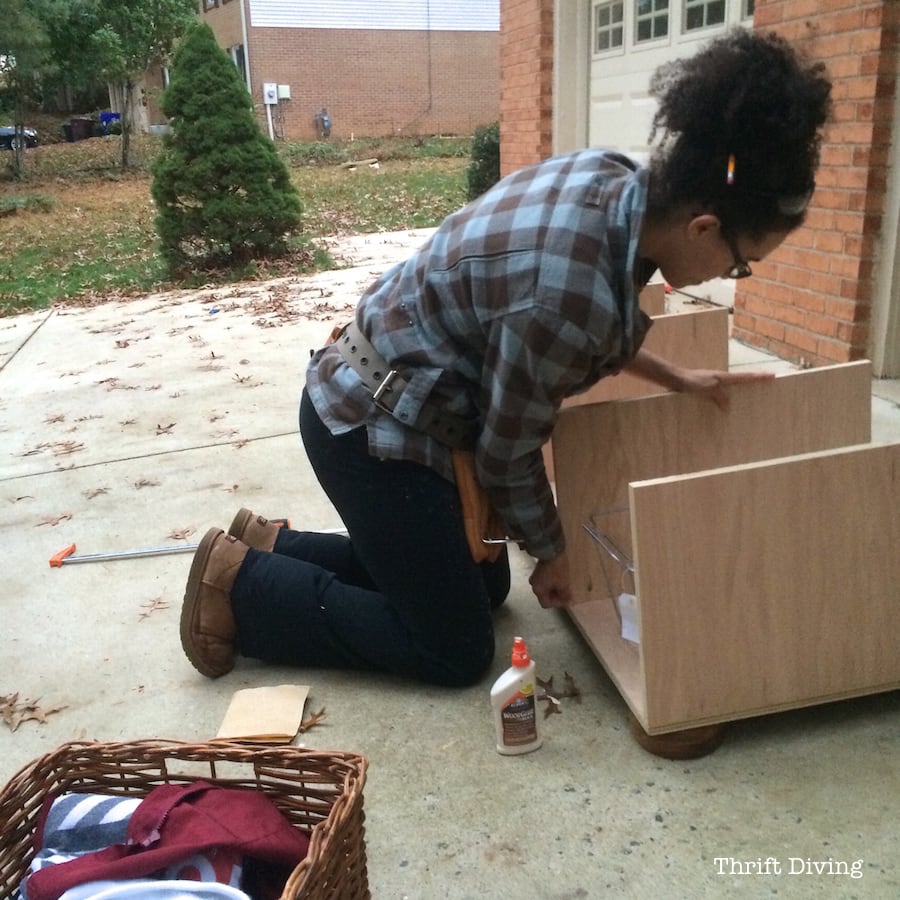
STEP 11: The Baskets!!!
Okay, so this tutorial is already 1326 words….Did you even make it this far? 🙂 I hope so!
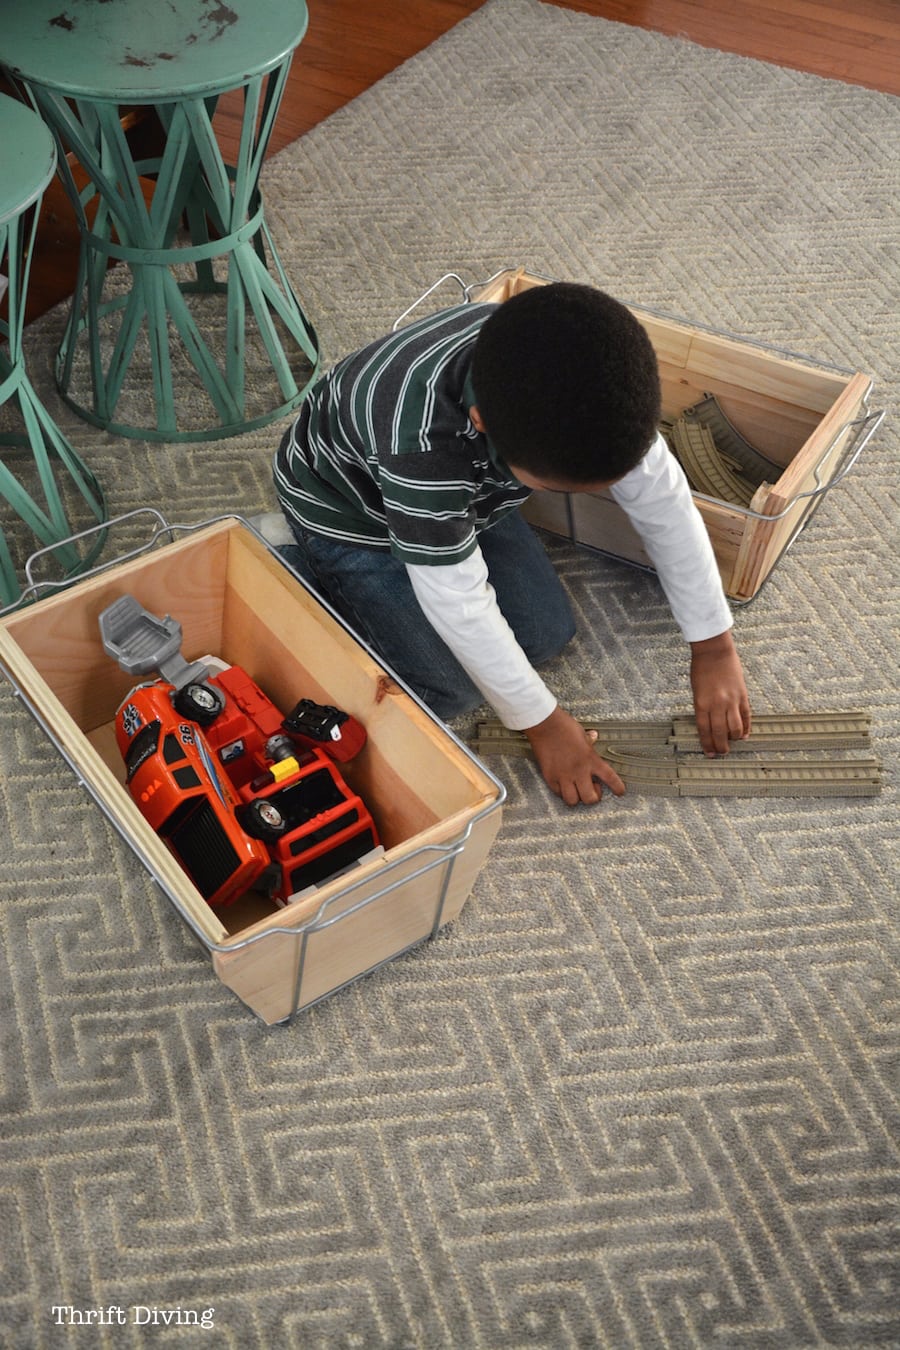
If you’ve got some cheap baskets, use those. Or if you can DIY your own baskets like I did, glue and nail pieces of scrap wood together like I did from my garage, and line the old buffet warmers.
The only thing left to do is to get some soft pads to stick to the bottom of the warmer baskets so they don’t scratch the paint inside.
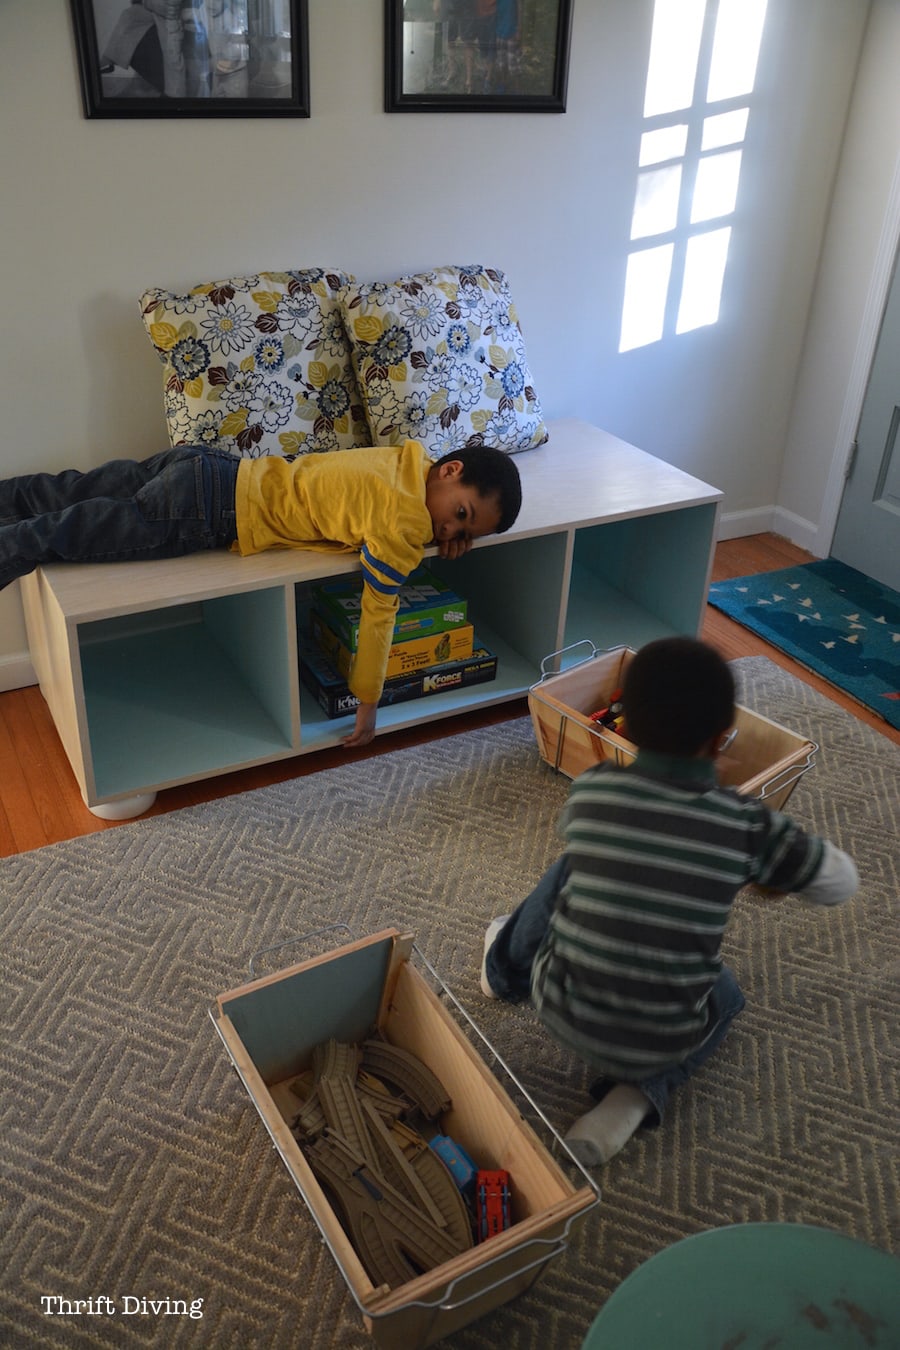
But Kojo thought they were pretty cool! They’re perfect for storing some of his toys!
Let’s take one more look:
BEFORE
AFTER!
So what do you think?!?
I know it seems very basic, but you’d be amazed how many steps are involved in the most simple projects!!
And no one would ever know that my new bench storage has thrifted bowls for feet! HAHAHAH!!!!!!
Sign Up for Elmer’s DIY Community
If you want more projects like this, and more, sign up for Elmers’ newsletter for inspiration!

Download the 5 freebies!

Thrift Diving inspires women to decorate, improve, and maintain their home themselves...using paint, power tools, and thrift stores! Use these 5 printables, checklists, and ebooks to get started!
Hey Serena, I love it!! I have no room for it, but I love it! I just have one question…. Have the board cut to 58 1/12? Are you serious 1/12? lol I’m hoping that’s a typo, caused by all your hard work! I think it’s a fantastic idea! When you said baskets, I was picturing those from the photo shoot location! lol Thanks again for such amazing design and inspiration. Love ya’
Oh dear, that was just too much work.glad there are people like you who want to do this kind of stuff lmao.keep up the good work. Can’t wait to see what’s up next.
This is a fabulous project, the bowl bun feet are awesome and I’m so with you on oak plywood. Oak is a beautiful wood that people skip over, which means better finds and better prices for us oak lovers.
An excellent tutorial! I learn by pix so there can’t be too many. Lol Following you and all your projects has me believing that maybe I can do this, too! Thank you for sharing!
this is so cleverrrrrrr. I love the idea, especially where we buy one thing, but turn around and use it for another thing….. and really, who wants to use wooden salad bowls for salad? I’d rather use another bowl for salad so I can wash it in the dishwasher. who wants to use bun feet for salad? Not I. I know it was a lot of work, but it’s so way worth it, and it’s uniquely you! Good job with the boys, too!
..my son also wouldn’t let anyone get his picture unless he was making a silly face. Ha, he’s 32 now, but no photos!
LOVE the feet …so novel !!
Great job Serena! I especially love your low cost solution for the feet.
Hi Serena, This bench project is awesome!! Especially love the bun feet idea, especially since you had the earlier vision of someday using them for bun feet on a future project!! My vision ideas usually come to me in the morning when I wake up for an idea to happen. You’ve got it and love your diy skills and ideas!! Love reading your blog!!
You should have seen me, Sherrie! I was standing there at the thrift store for about 10 good minutes…. coming up with ideas, even for a lamp, by stacking them together! But the bun feet idea stuck and so I bought 6 of them! I’m going back for more! 🙂
Oh, and do you get ideas in the shower??? I find that’s a great time to be inspired, too! Must be the hot water…. 😉
You had me at your creative bun feet my friend! Love it and your storage unit! I can’t wait to try out the liming wax either:) You rocked this!
Hey, Wendi! I was allllll over that liming wax!! I rushed out to ACE to buy it. Couldn’t even wait until Amy sent it to us! HAHA I really loved using it, but OMG, my arms and back were sore that night!! 🙂 Amy forgot to tell us about THAT part….
Wow Serena this is great and I just love how the kids are involved in the project.
What a difference in your family room you can invite any one over at all now and if they get any kind of look on their face well the door is right there so show them out !!! :))
love it, love it, love it – well done !!!!!
So true, Sue! I have had over a few people since getting the living room done, and not once did I feel shy or embarrassed about the status of that living room! If anything, I was showing it off, and now I can show off the piece of furniture I built! 🙂 Woo hoo! Thanks for taking time to read my looooonnnngggg post! LOL