How to Make a Halloween Spider with Lights
Fall is my favorite time of year.
It’s not so much that I get the house all dolled up for Halloween, or lay out a Thanksgiving Day-inspired table (and I definitely don’t do much more than put up a tree at Christmas).
But once October rolls around, I fantasize about crisp days, cold nights, and sipping hot tea and cocoa. These last three months of the year feel lighter, happier, and more family-focused.
With Halloween coming up, I wanted to create a project for beginners who want to learn to use power tools, but don’t want a project that is too intimidating, time-consuming, or expensive.
That’s where this Halloween light-up spider comes in!
Click here to save this project on Pinterest!
Several years ago I made a similar light-up sign that said FAMILY, and I enjoyed it so much, that I wanted to make one that would be just as cool, but a bit easier in terms of the simplicity of the cuts with a jigsaw.
Let’s jump into it!
Watch This Project in Action!
How to Make a Halloween Spider with Lights!
First, run through the tools and materials you’ll need to create this projects.
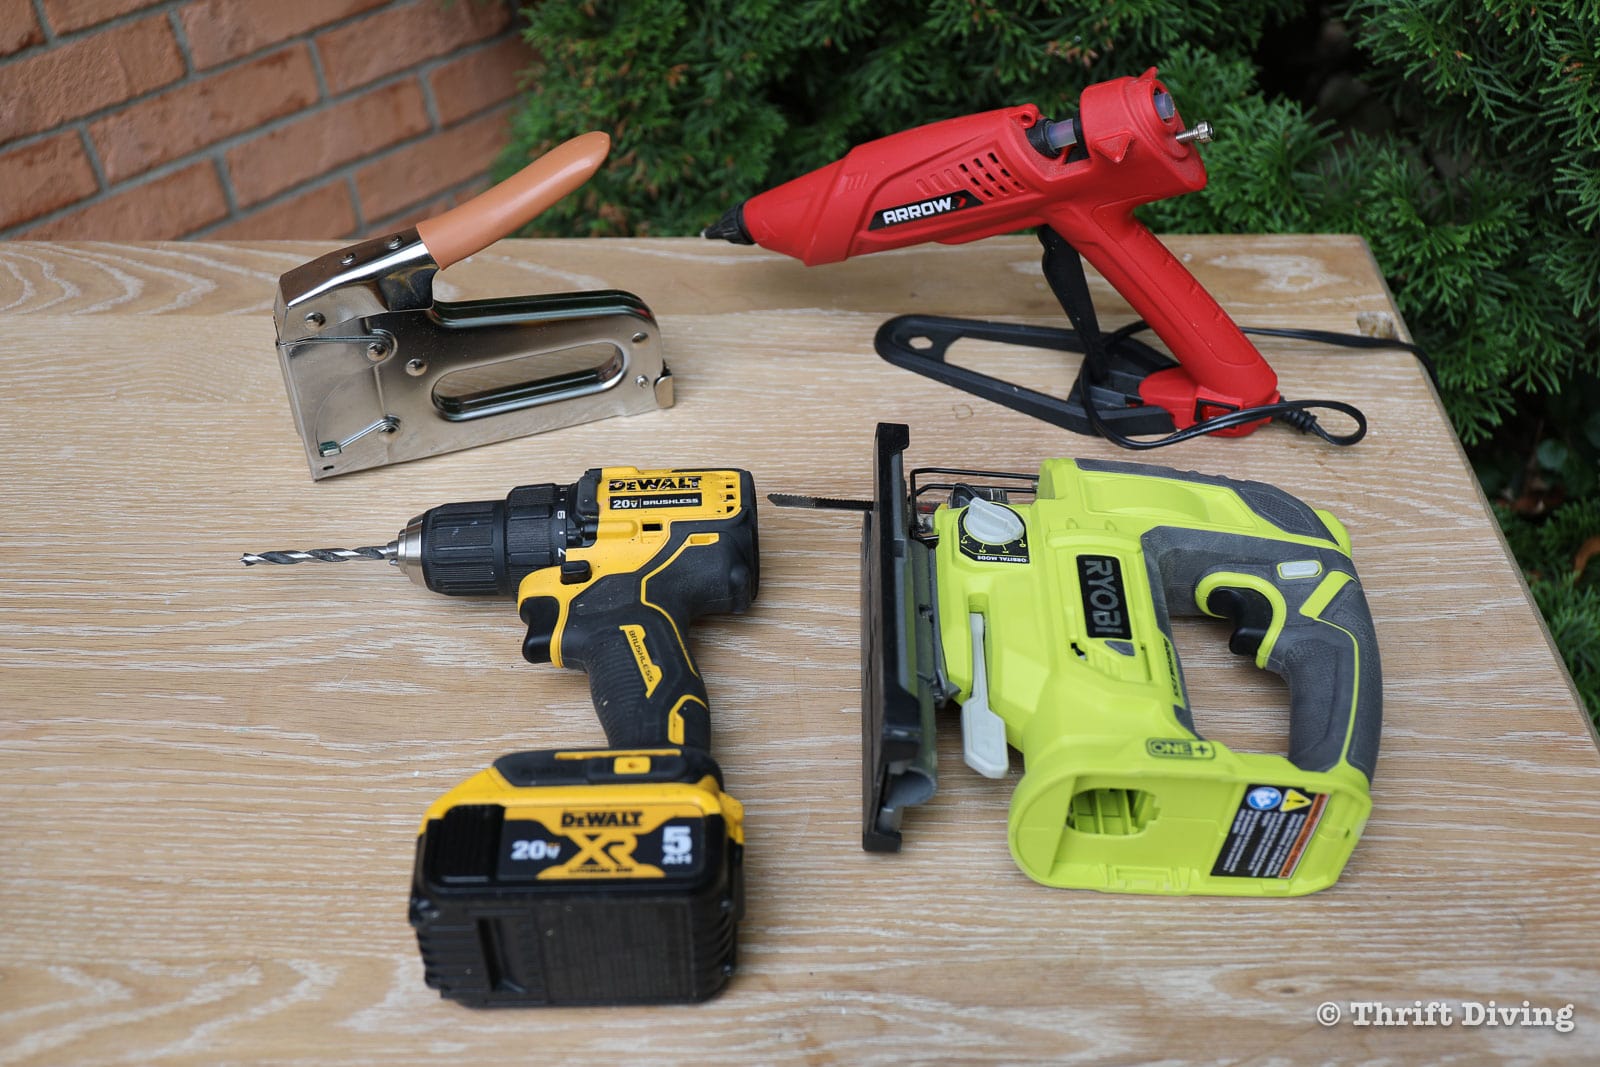
Tools and Materials Needed
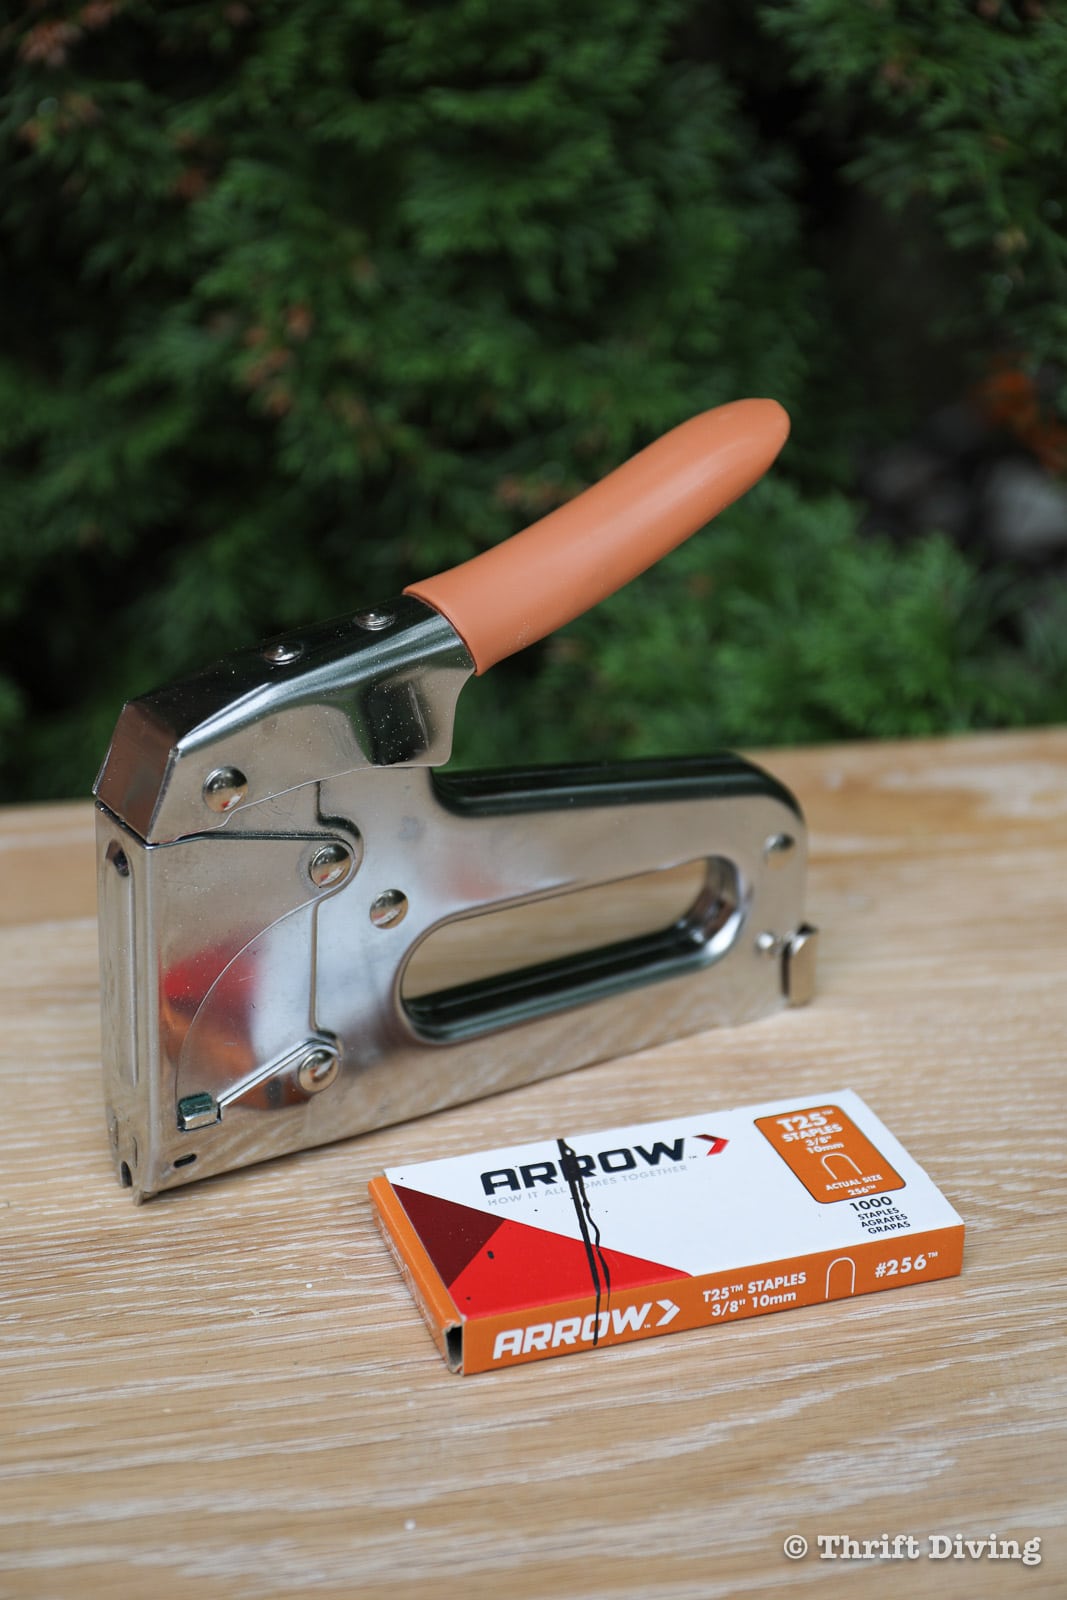
- Arrow Fastener T25 low voltage stapler
- Arrow Fastener T25 staples
- Jigsaw (with a jigsaw blade.)
- Power drill (with a brad-point drill bit. The size of the drill bit will depend on the size of the lights you’ll be using.)
- Arrow Fastener GT300 Glue Gun (optional)
- Clamps
This project was sponsored by Arrow Fastener. I have used many of their fasteners and staples over the years, such as reupholstering this cute foot stool.
But one of my favorite staplers of theirs is the T75 low voltage stapler. It’s unlike their T50 stapler in that the staples are actually curved to accommodate safely stapling low voltage wires into place.
The holidays are here and many people are planning to put up lights (or do home improvement projects that involved low voltage wires). The most secure and safe way of stapling wires is with a low voltage stapler like the T25.
For this project, the wires of the lighting set I’ll be using will need to be secured to the back of the light-up wooden spider so that they aren’t seen from the front.
Materials Needed
Now…don’t let the number of tools needed for this project scare you off. If you’re a craft person already, you’ll likely have much of these materials already. And if not, they’re not super expensive to purchase.
- 2′ x 4′ piece of plywood (choose either 1/2″ or 3/4″ thickness)
- Spider pattern (see instructions below on how to make this)
- Indoor/outdoor lights
- Scissors
- Black paint (get the small sample pots from the home improvement store)
- White craft paint
- Scrap board
- Paint brush
- Thin craft paint brush
- D-ring hooks for hanging
- Wall anchors with screws for the drywall
- Tape
- Velcro or command strips for attaching battery pack to the back of the spider
- 150-grit sandpaper
- 220-grit sandpaper
- Pencil
- Safely glasses
- Dust mask
You may need to purchase the tools, however, these are tools you’ll use over and over again. The upfront cost is the only thing you’ll need to pay, but these tools will last for many projects.
I’ve learned from doing DIY over the past 12 years is that as you build, your DIY toolbox gets packed and you’ll have many of the tools needed to starts a huge number of projects. You’ll only need to buy some specific tools and materials for some projects.
STEP 1: Create Your Pattern
Several years ago I discovered an awesome site called Rasterbator.net to create large custom-sized posters. It’s a simple as uploading a picture to the site, and then decide how many pieces of paper you want to print out from your home printer in order to create a large picture or poster. Here are the steps you need to follow to create your own large spider print out:
- Go to Rasterbator.net.
- Click on “Create your poster.”
- Select “Choose File” to select the spider file from your computer. (By the way, I’ve created the spider file for you already. Just right-click on the image below and save it to your computer). Once the image is selected, click “Upload.”
- Next, in the bottom right corner, change the settings to “inch.”
- You shouldn’t have to change any of the paper settings if it already shows that your large image will be printed on A4 8.27 x 11.69 paper in Portrait. However, choose your Output size to determine how many sheets of paper wide your image will be. For larger prints, increase the number of sheets of paper. For a spider that’s my size, select 4 sheets wide.
- Click “Next” for style and select “No effects.”
- Select “Continue.”
- For color, select Raster color “Black” and Background color “White.”
- Select “Continue.”
- Under Options screen, click “Complete page poster!”
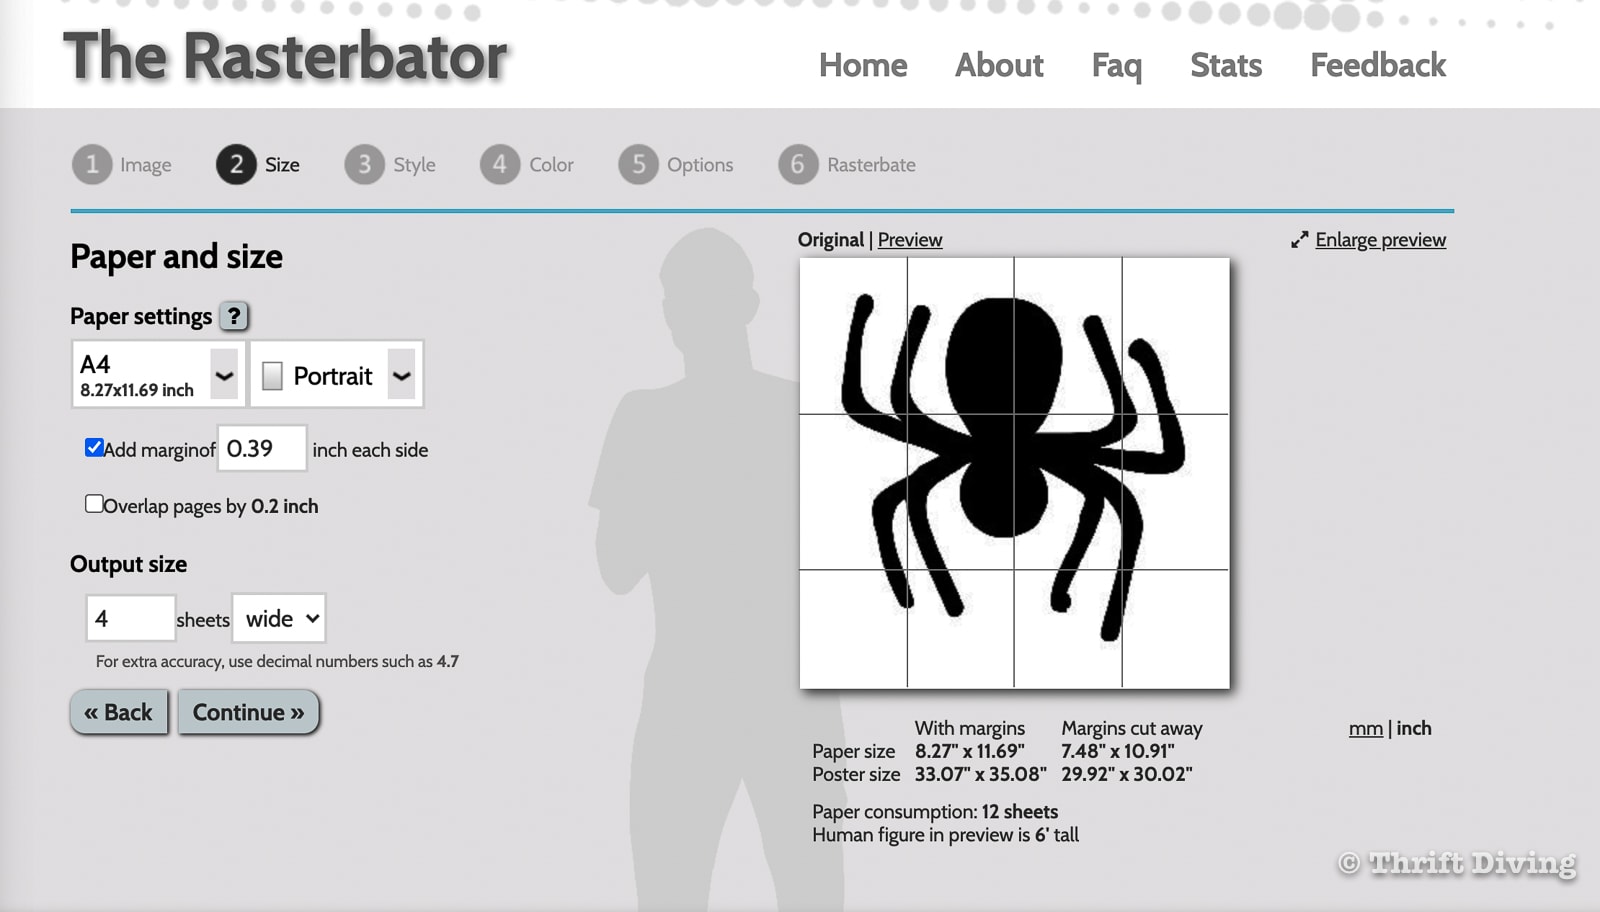
This will create a PDF file of your large spider in a series of sheets of regular printer paper. Feel free to make your own poster, or click here to download the PDF file that I created to print out this spider.

I have been using the site to create large wooden signs. But it’s perfect for creating big templates of anything you want to cut out of wood! This spider was about 2 feet x 2 feet in size but if you use a 4’x8′ sheet of plywood, you could make one even larger!.
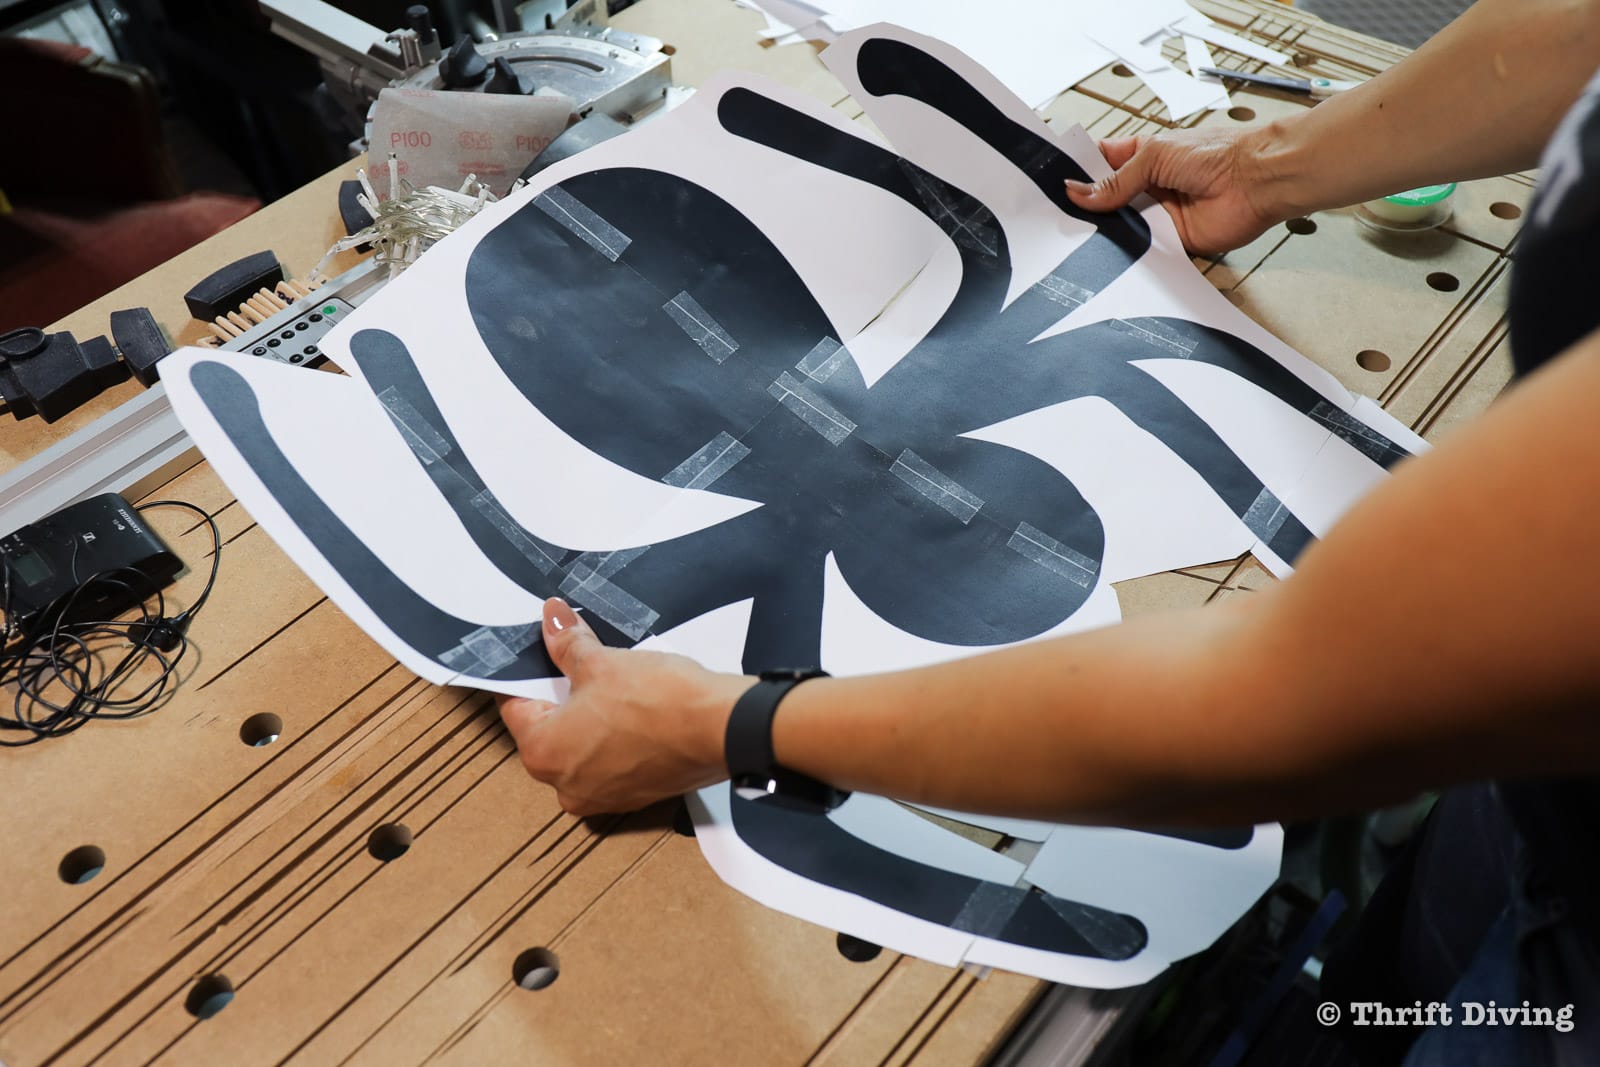
I printed out all the sheets in the PDF and laid them in the order in which they would need to be trimmed and taped together.
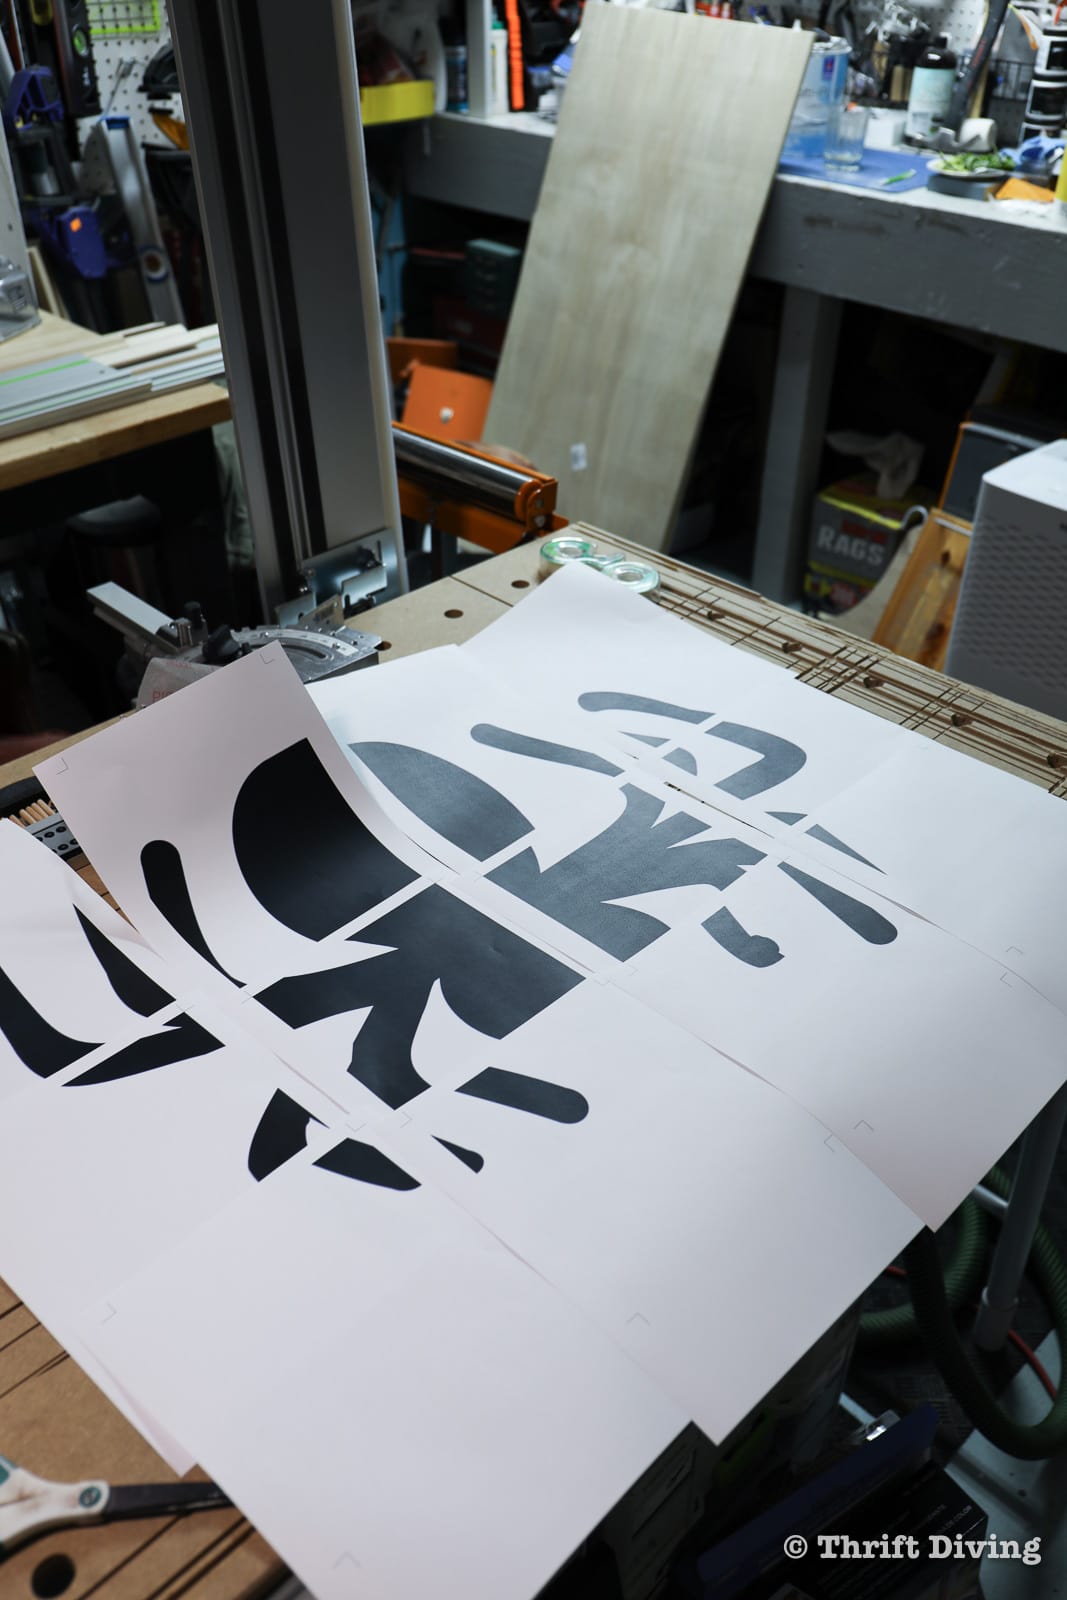
Once taped together, I used scissors to cut out the imagine. You’ll want to remove the entire white space, leaving only your image. Keep in mind that you’ll need to cut the margins of the sheets and line up the edges of the spider.
STEP 2: Trace Your Pattern onto the Wood
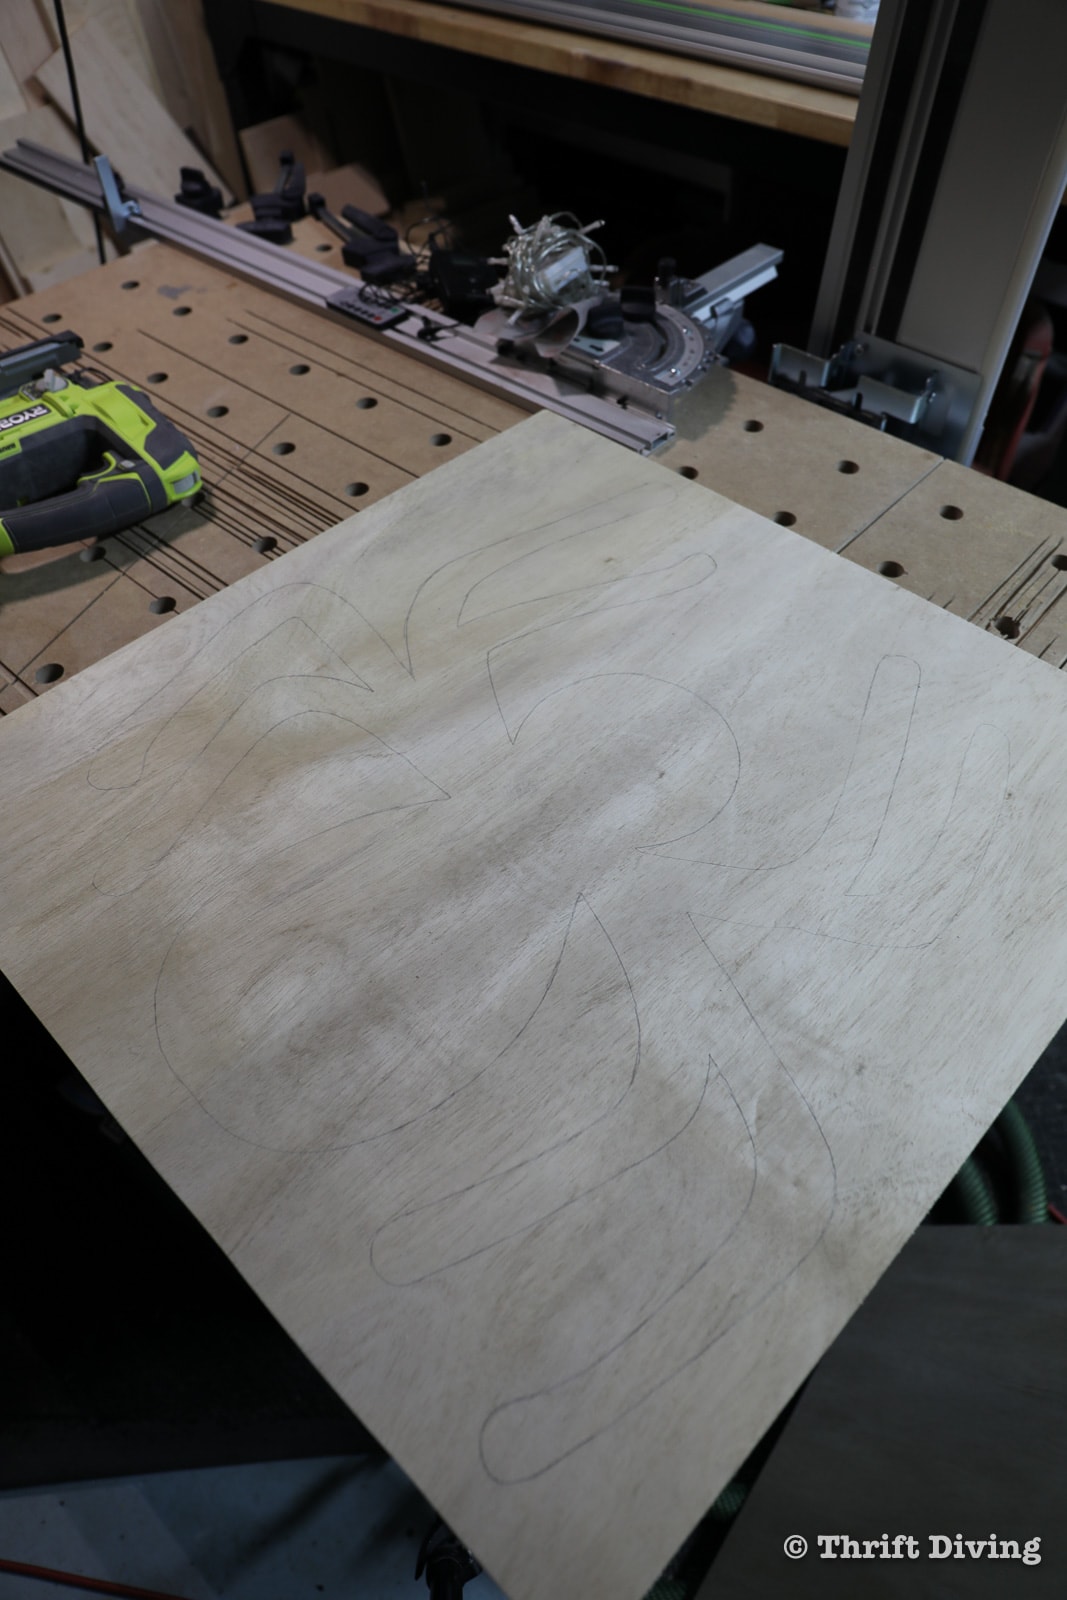
Once the image is completely cut out and taped, trace the pattern onto the wood, making sure the image doesn’t move. Use something heavy (like your cell phone) to keep it in place while tracing.
Use either 1/2″ or 3/4″ thickness of wood. If you’re using lights with a long bulb or base, use a thicker wood to accommodate the length of the lights. Thinner wood can be used with smaller or shorter lights.
Carefully trace out the spider onto the wood.
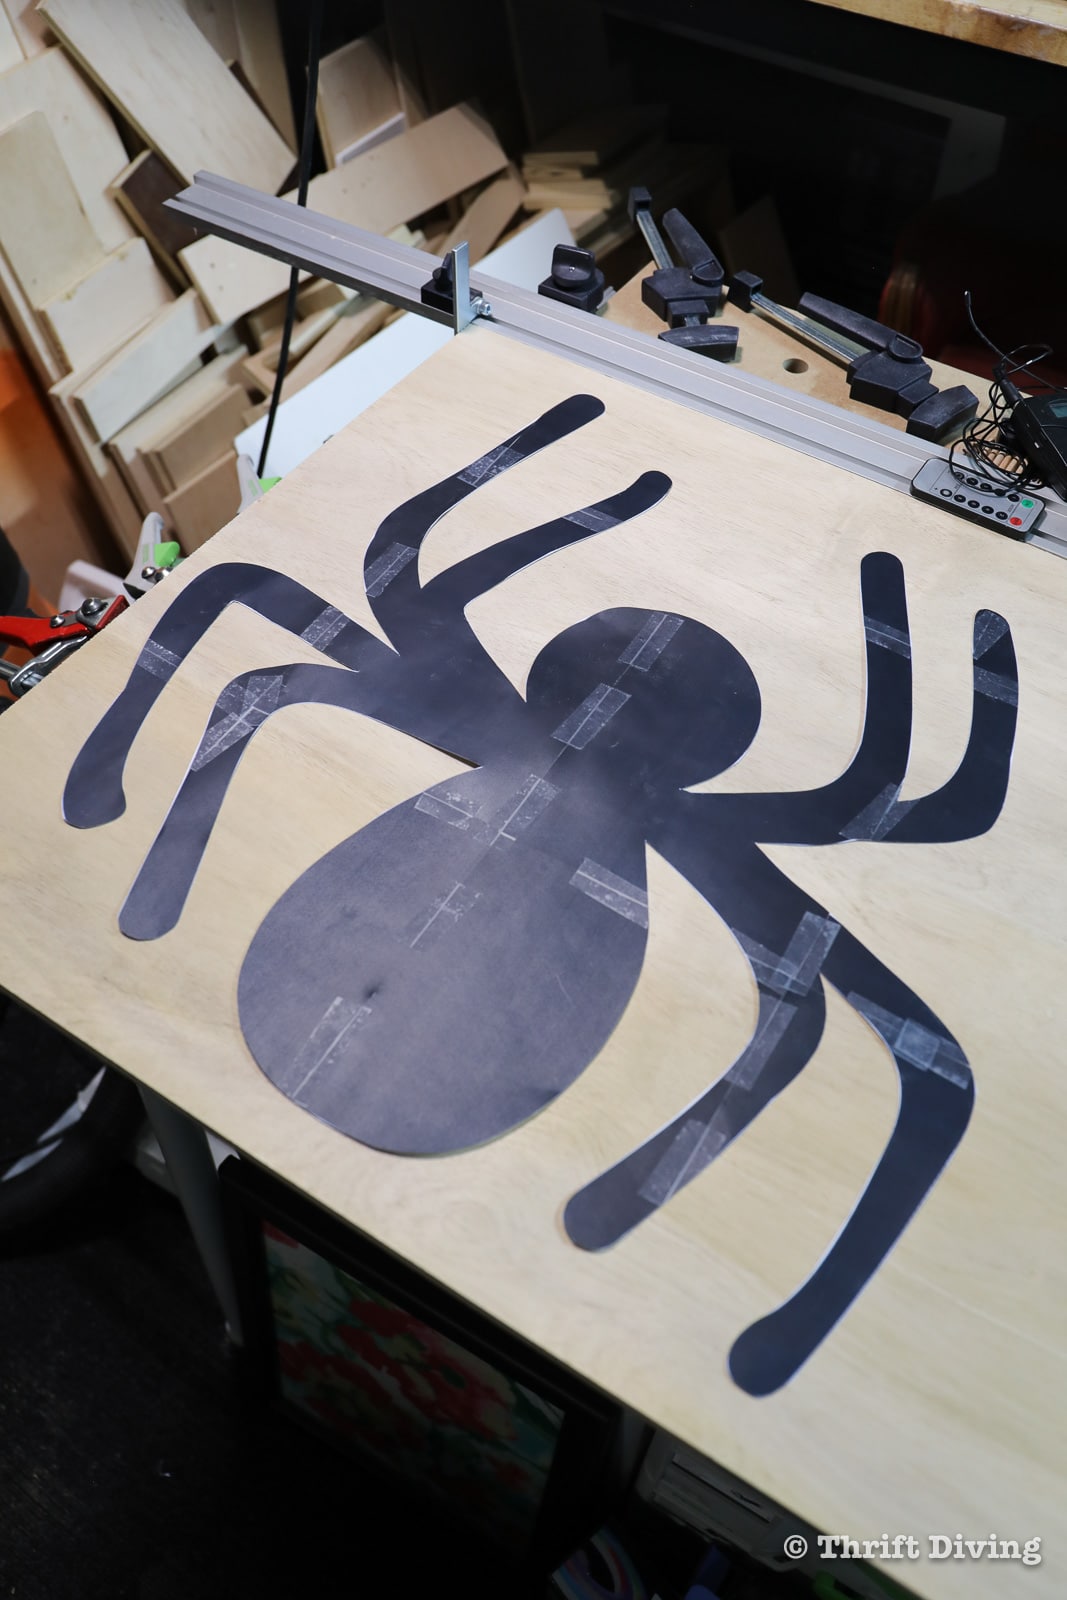
If your trace lines are too light, use a pencil to dark then up, or even a black marker so you can see them when cutting out the shape.
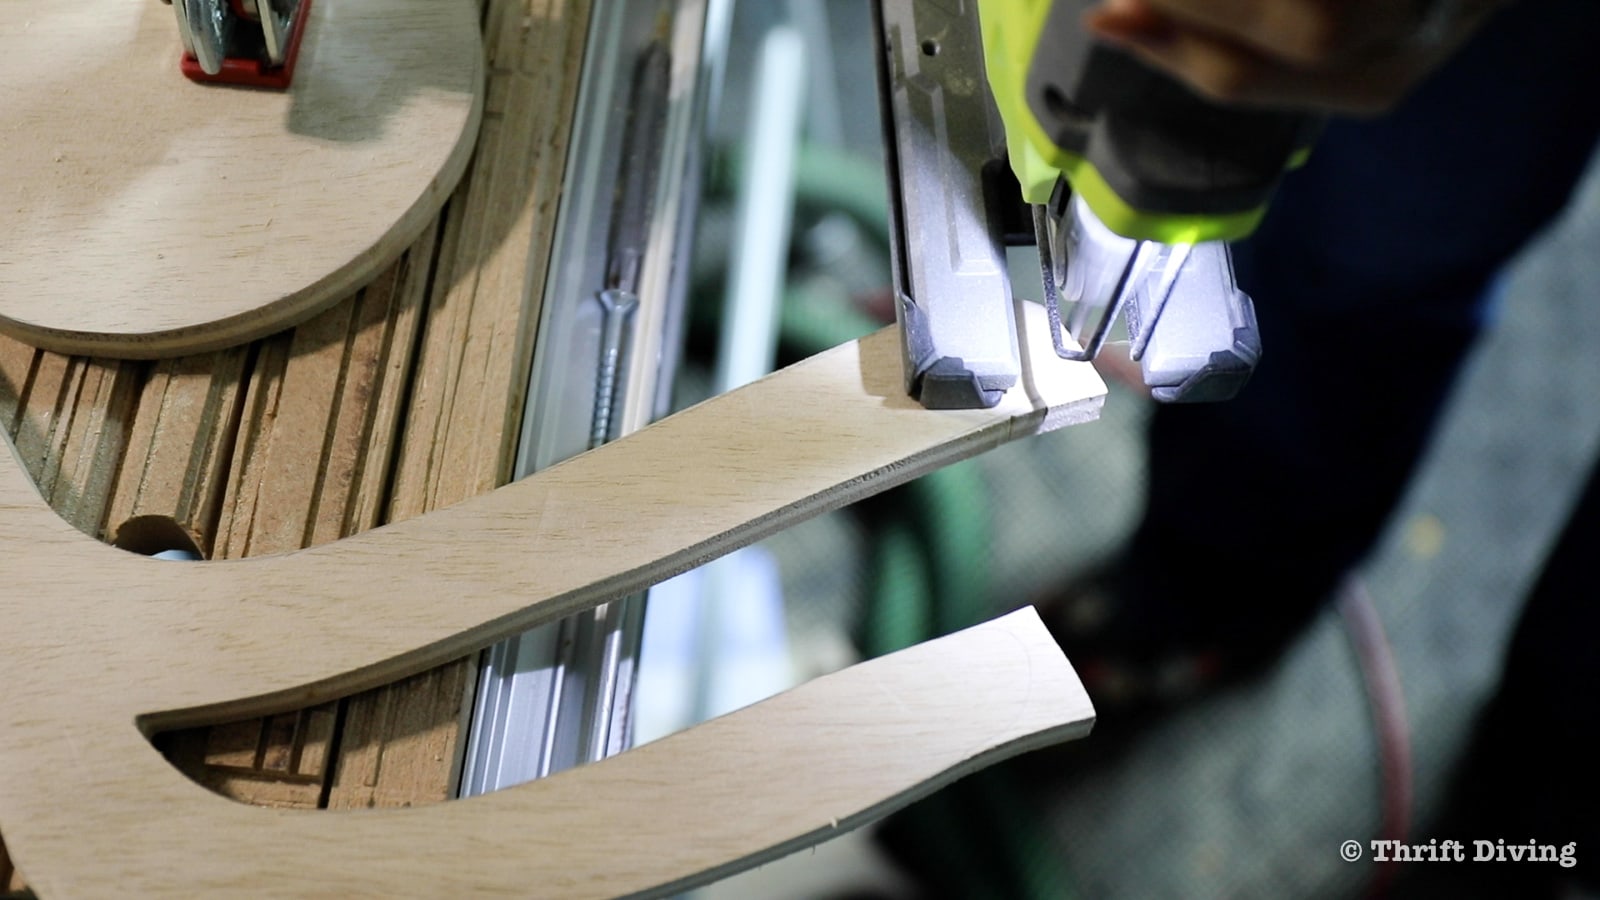
STEP 3: Cut Out Your Spider
I absolutely love using a jig saw! It cuts wood, plastic, and even some thin metal sheeting. It’s perfect for making decorate cut-outs like this, too.
If you’re a complete newbie and don’t know how to use the jigsaw, be sure to watch or read this awesome tutorial I put together on how to use a jigsaw. I guarantee you’ll be comfortable using the jigsaw after checking out that tutorial! (Oh–and if you’re interested in learning how to use power tools, sign up to be alerted when my power tools online course becomes available! to help you become comfortable and secure when using power tools.)
The most important thing is to clamp your wood to a workbench or a table, while leaving it hanging off the edge securely (without any movement or shifting), with an open space below, to begin cutting out the spider.
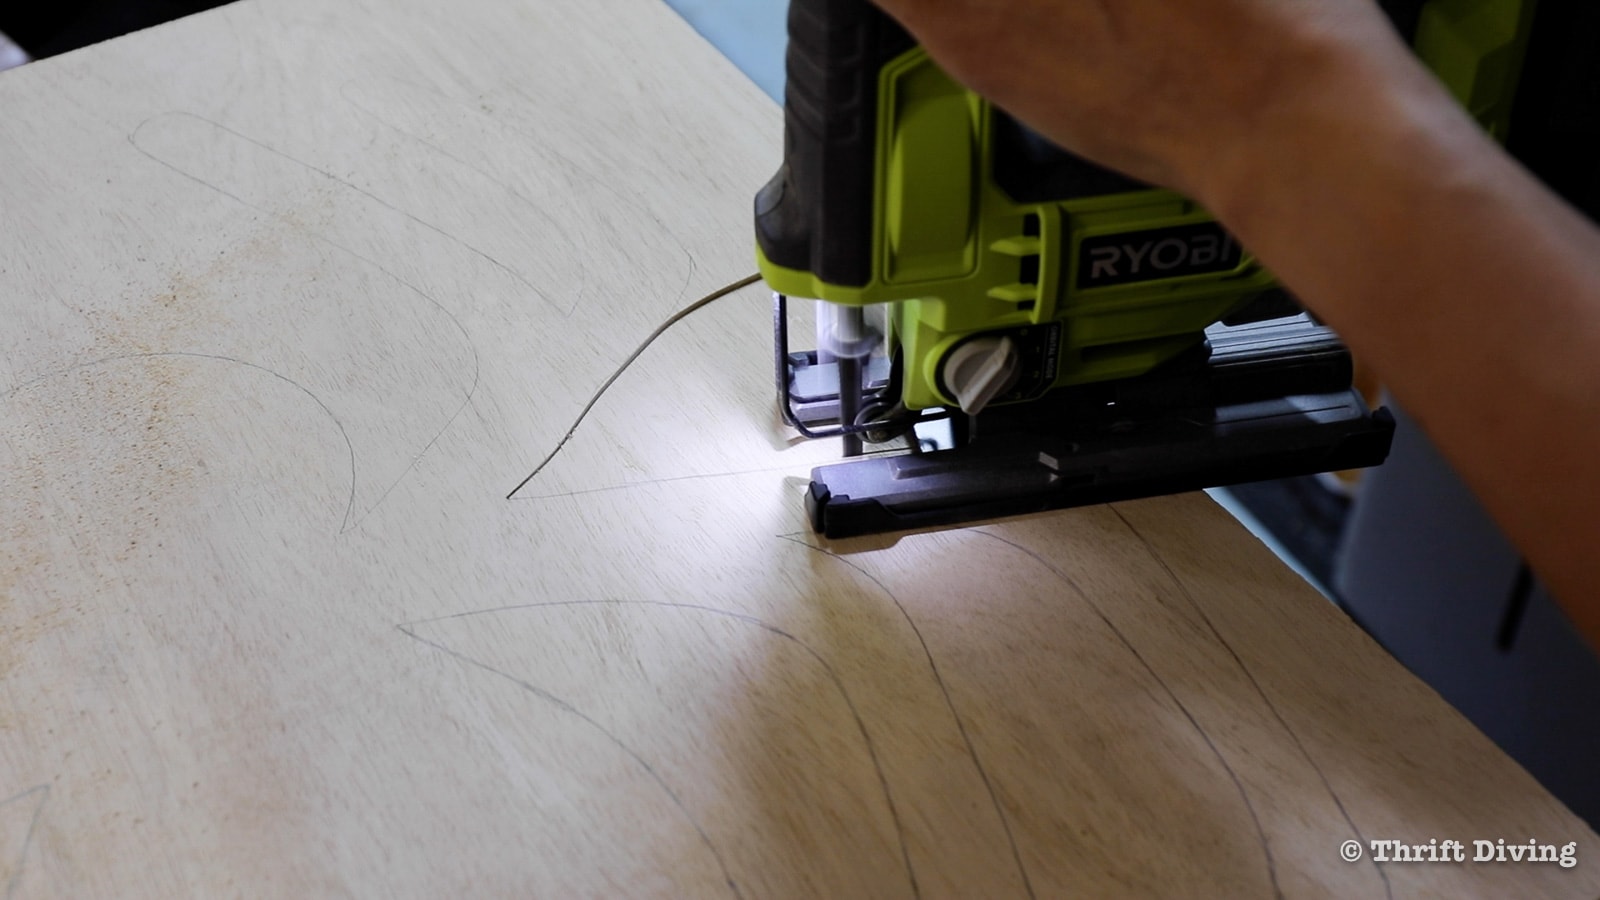
Your cut doesn’t have to be soooo precise. I typically like to try to cut to the outside edge of the line. Go slowly so it at least looks neat and resembles the shape you’re cutting out, though.
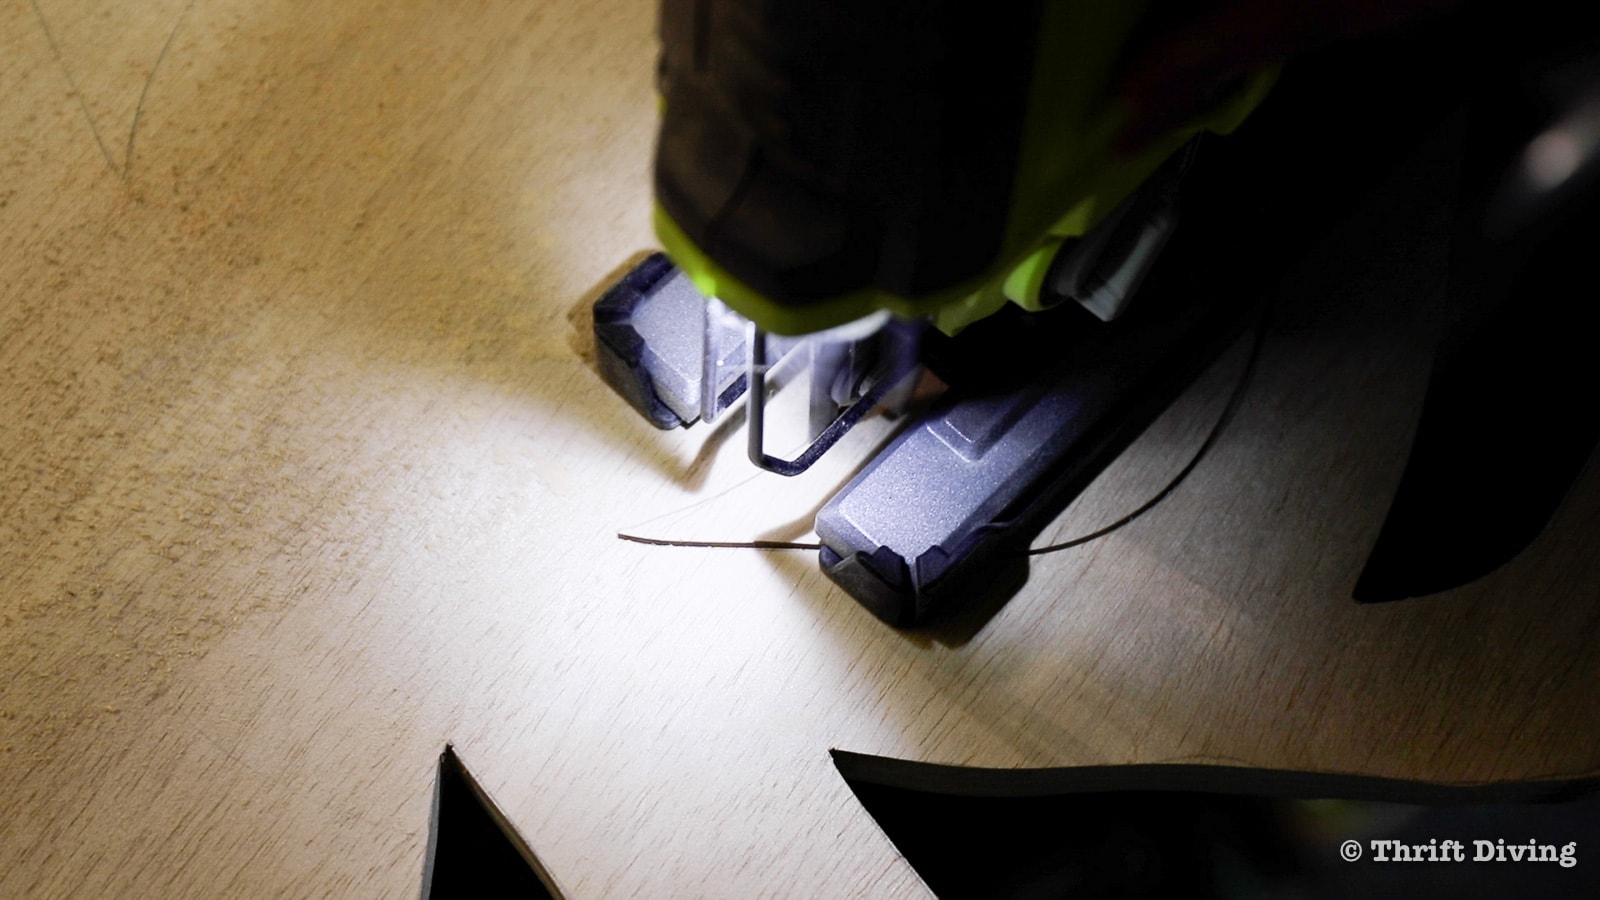
As more pieces fall away, rotate and clamp the spider, then cut out even more. This spider doesn’t have a lot of really close curved areas so I could use a regular jig saw blade. But if you’re cutting out a spider (or a wooden sign) that has a lot of twists, turns, and decorative areas, you’ll need to use a scroll blade, which is thinner and allows you to freely move the jigsaw in any rotation. Watch my jigsaw training to learn more about the different jigsaw blades.
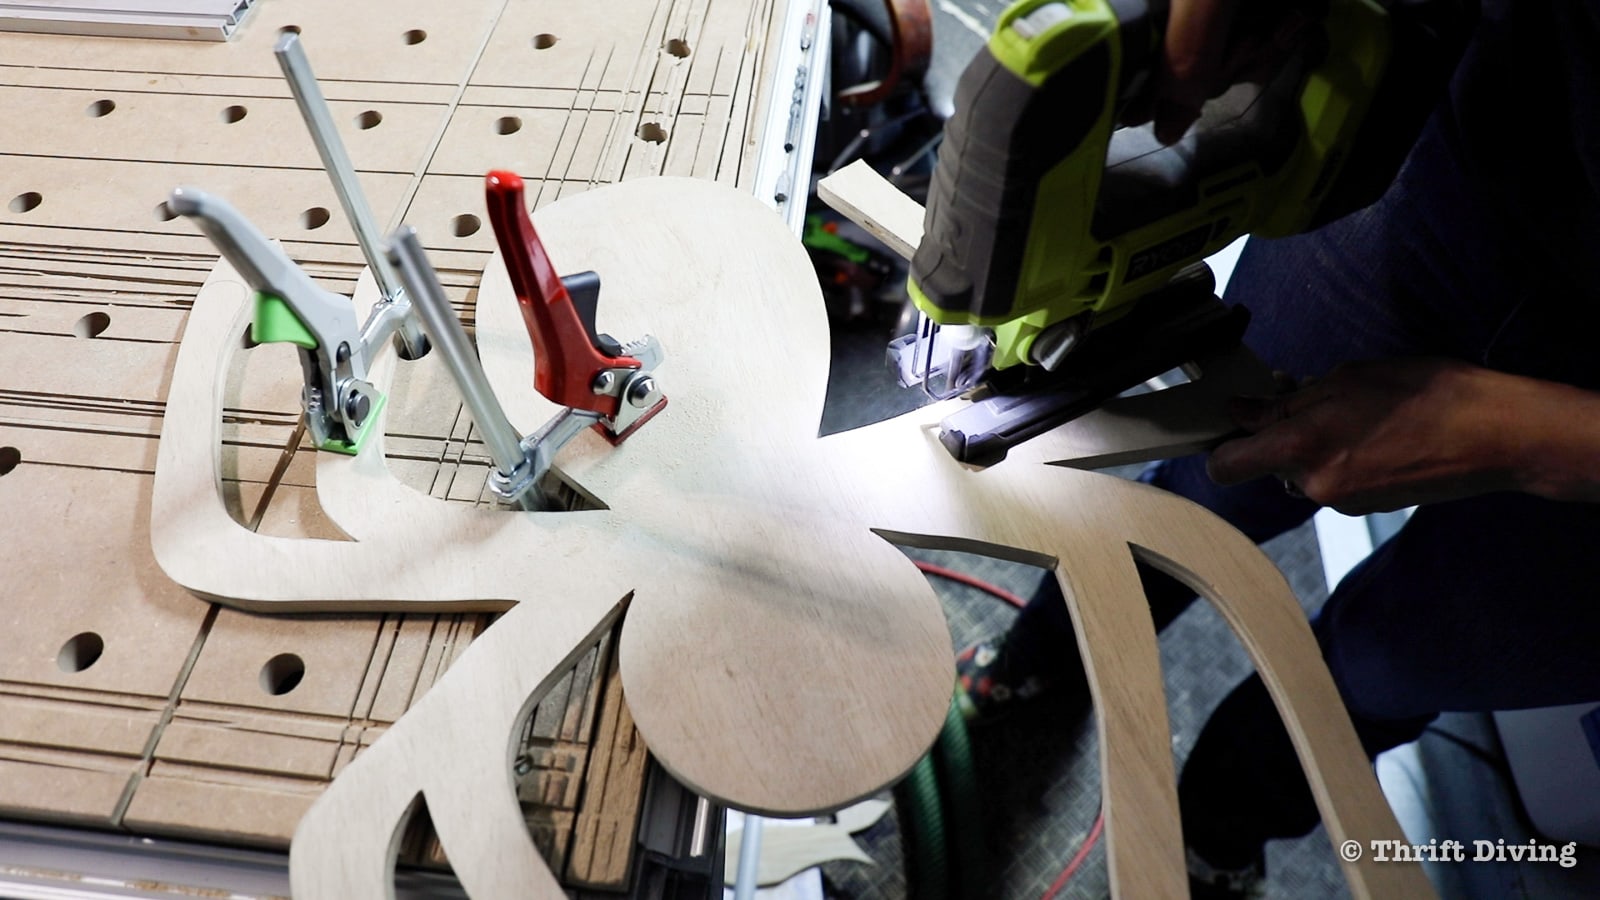
Cut carefully around the rounded edges of the spider feet. Make a series of cuts to cut them out if you don’t have a scroll blade that allows you to easy maneuver the jig saw.
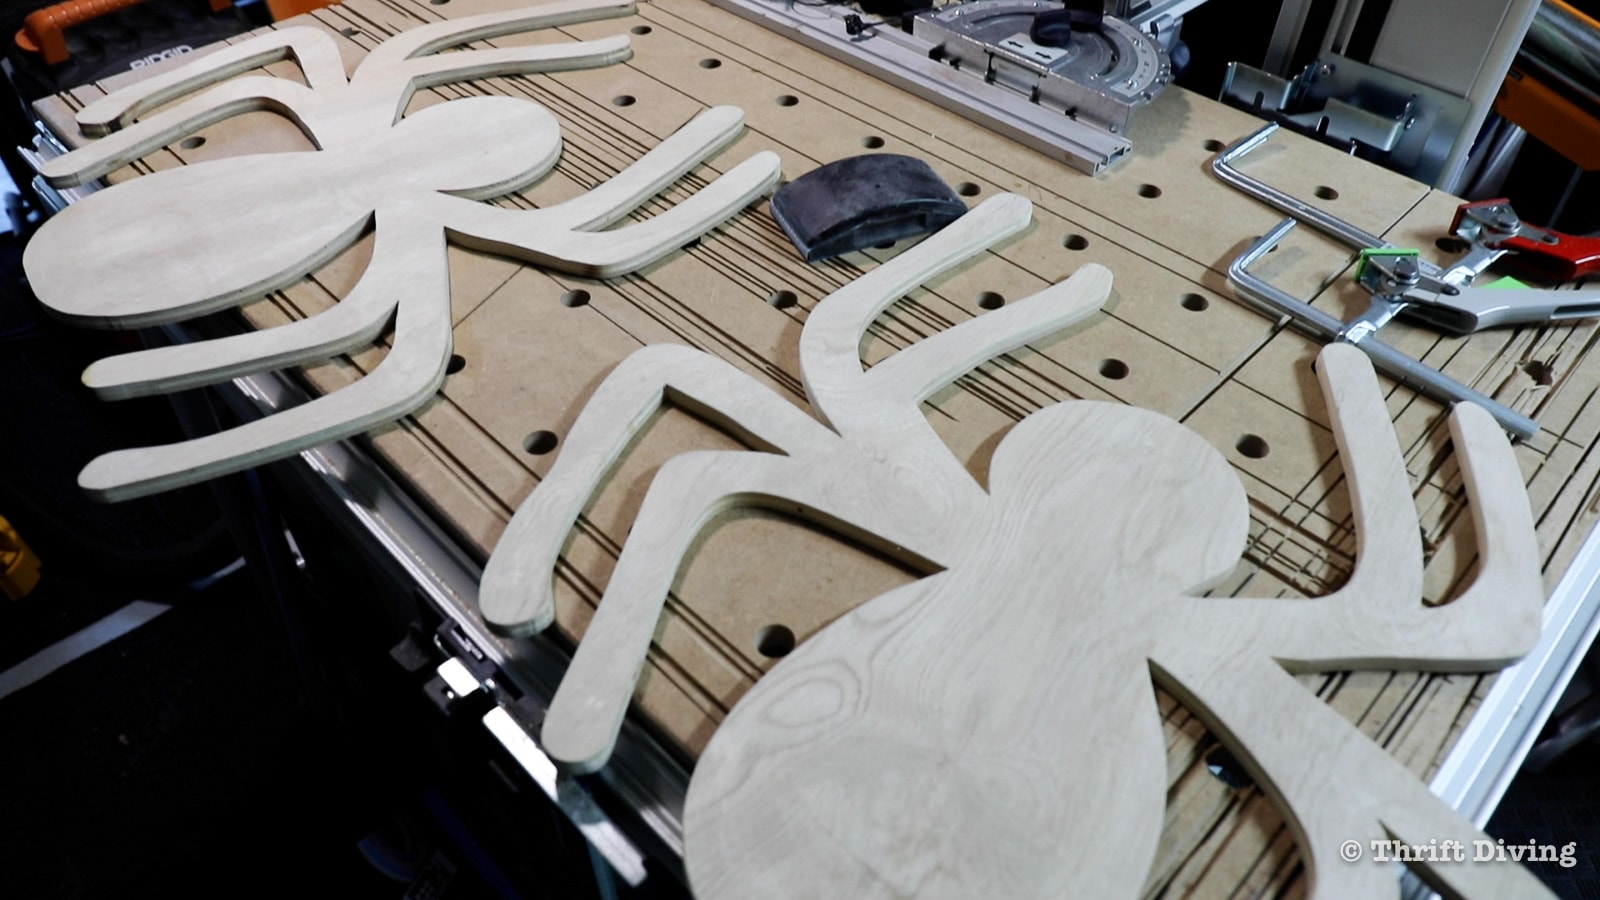
I used the other piece of wood from the 2′ x 4′ plywood and made two spiders. 🙂 I had to order new lights to finish the second spider since I ran out of lighting. 😉
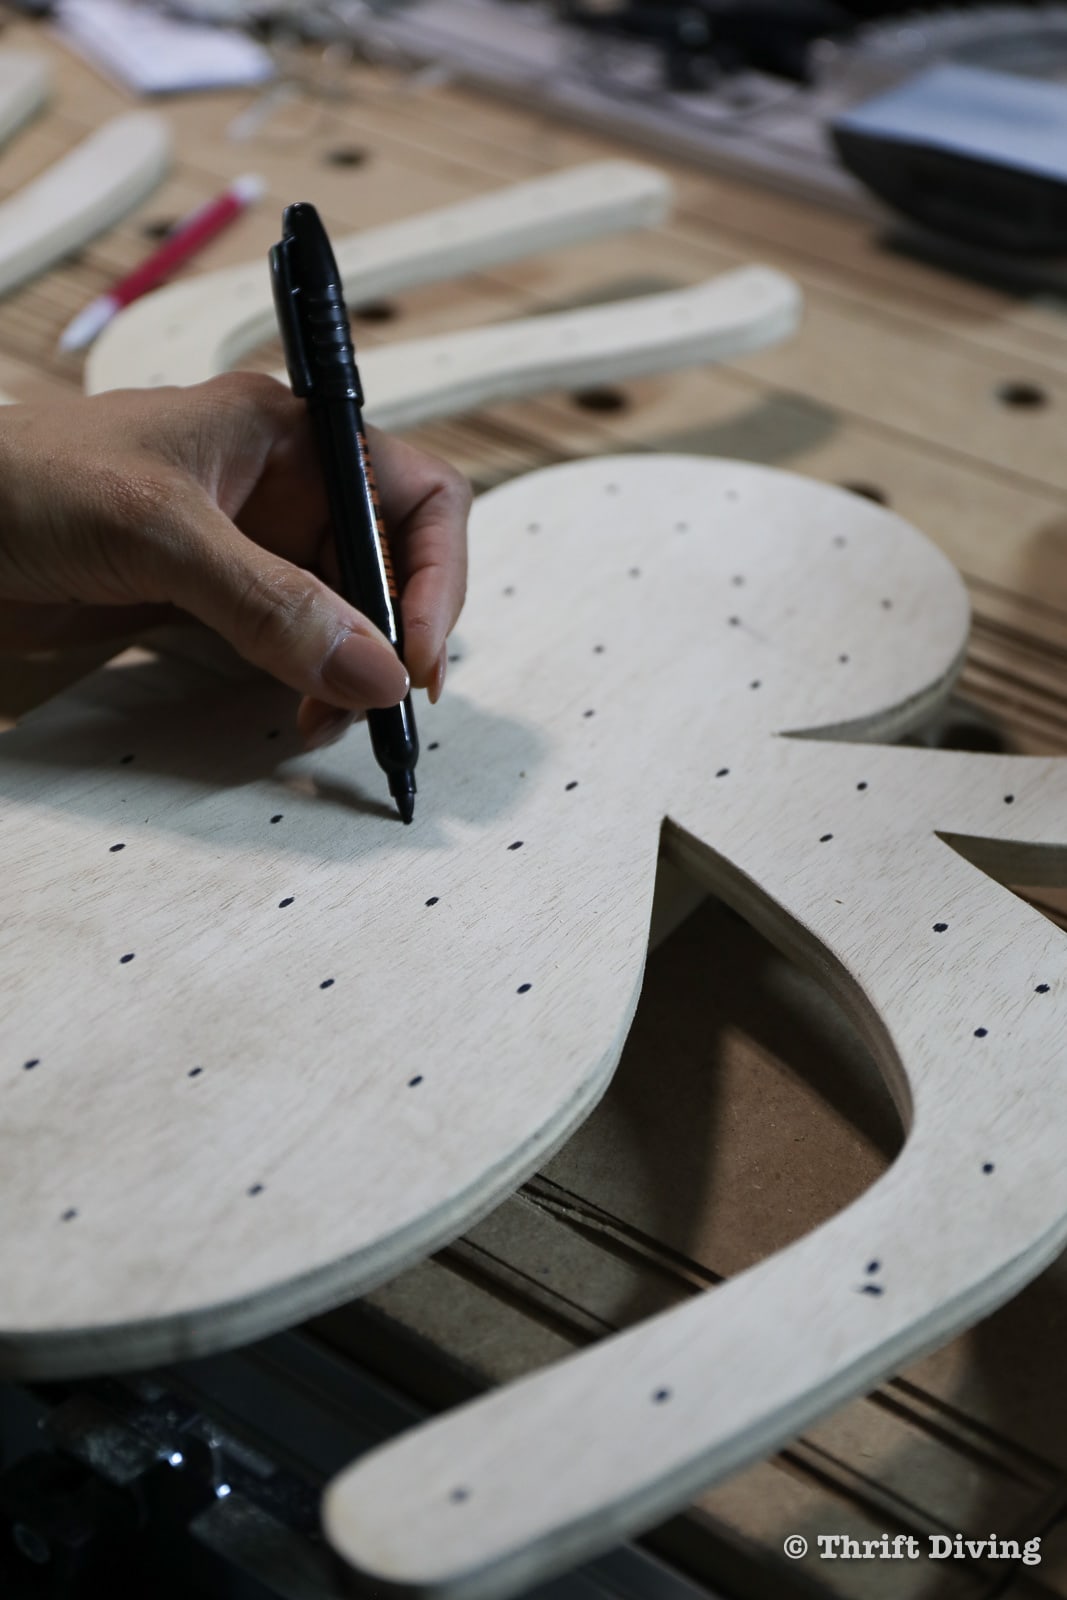
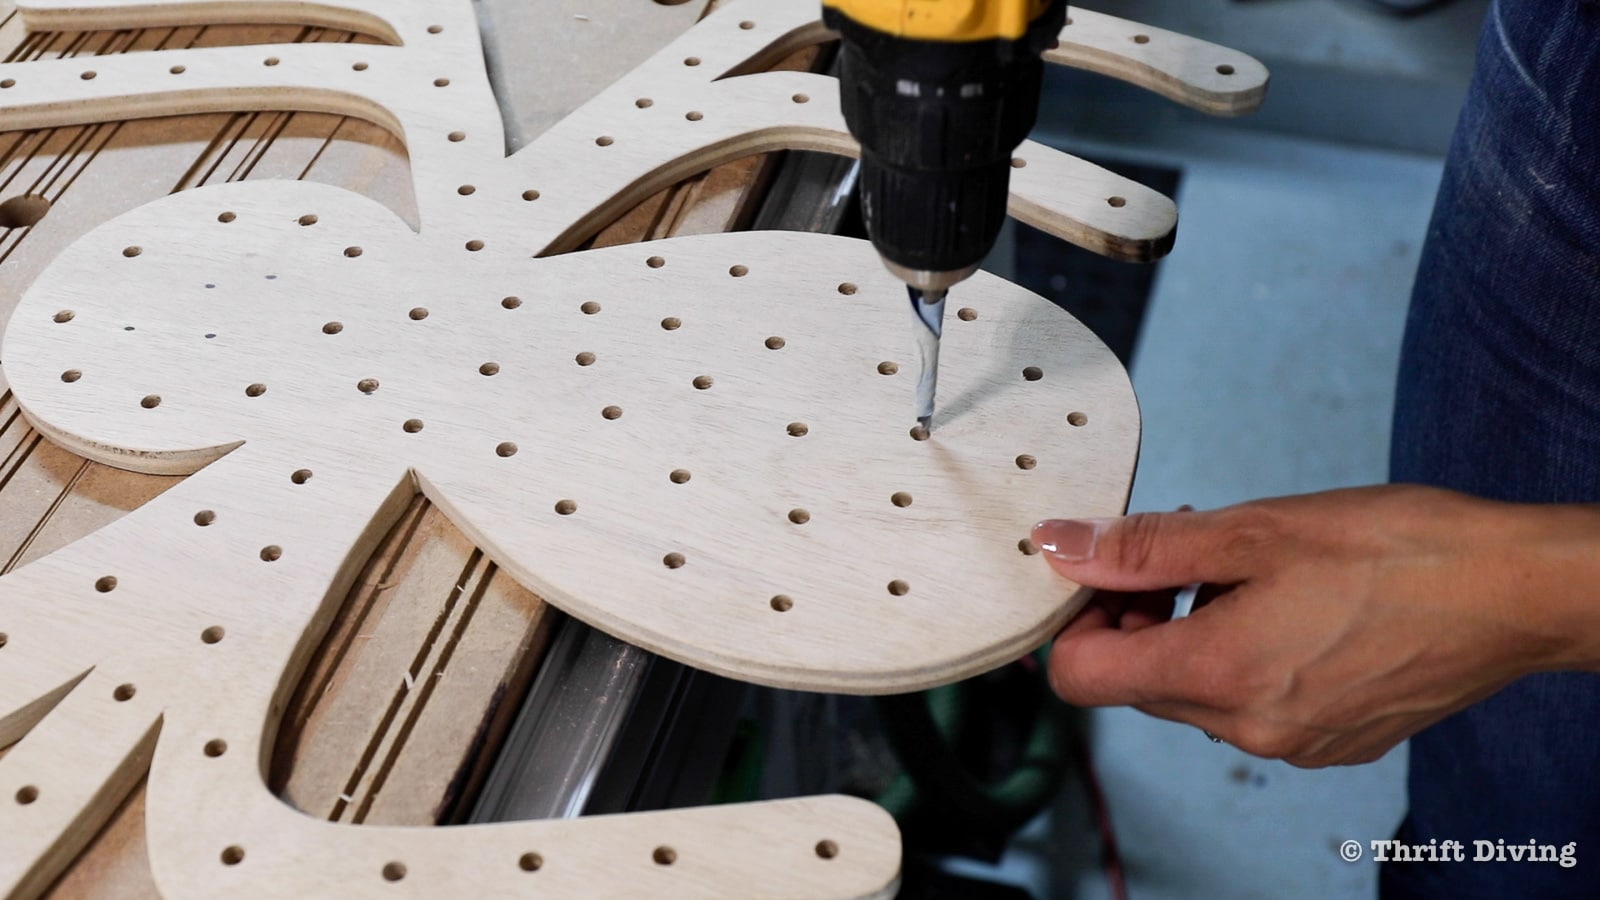
STEP 4: Mark Where You’ll Want the Lights to Be and Drill Holes
Use a marker or pencil to mark where you’ll want the holes for the lights. Be sure to evenly space them out. But even more important is make sure you don’t drill more holes than you have lights available on the strand. This is where a little planning helps. 🙂
I actually drilled too many holes and ended up with left over holes, with required me to use two sets of lights. That worked okay, but it added to the bulkiness on the back side of the spider, where I had to mount the battery packs to be hidden from the front.
I would tell you, my fellow woodworker, this tip:
If your strand of lights has 100 lights, drill about 90 holes. Always create a few less holes than you have lights on the strand, to ensure that you will have enough lights and to account for any lights that will have to be skipped while back-tracking around the spider when securing them.
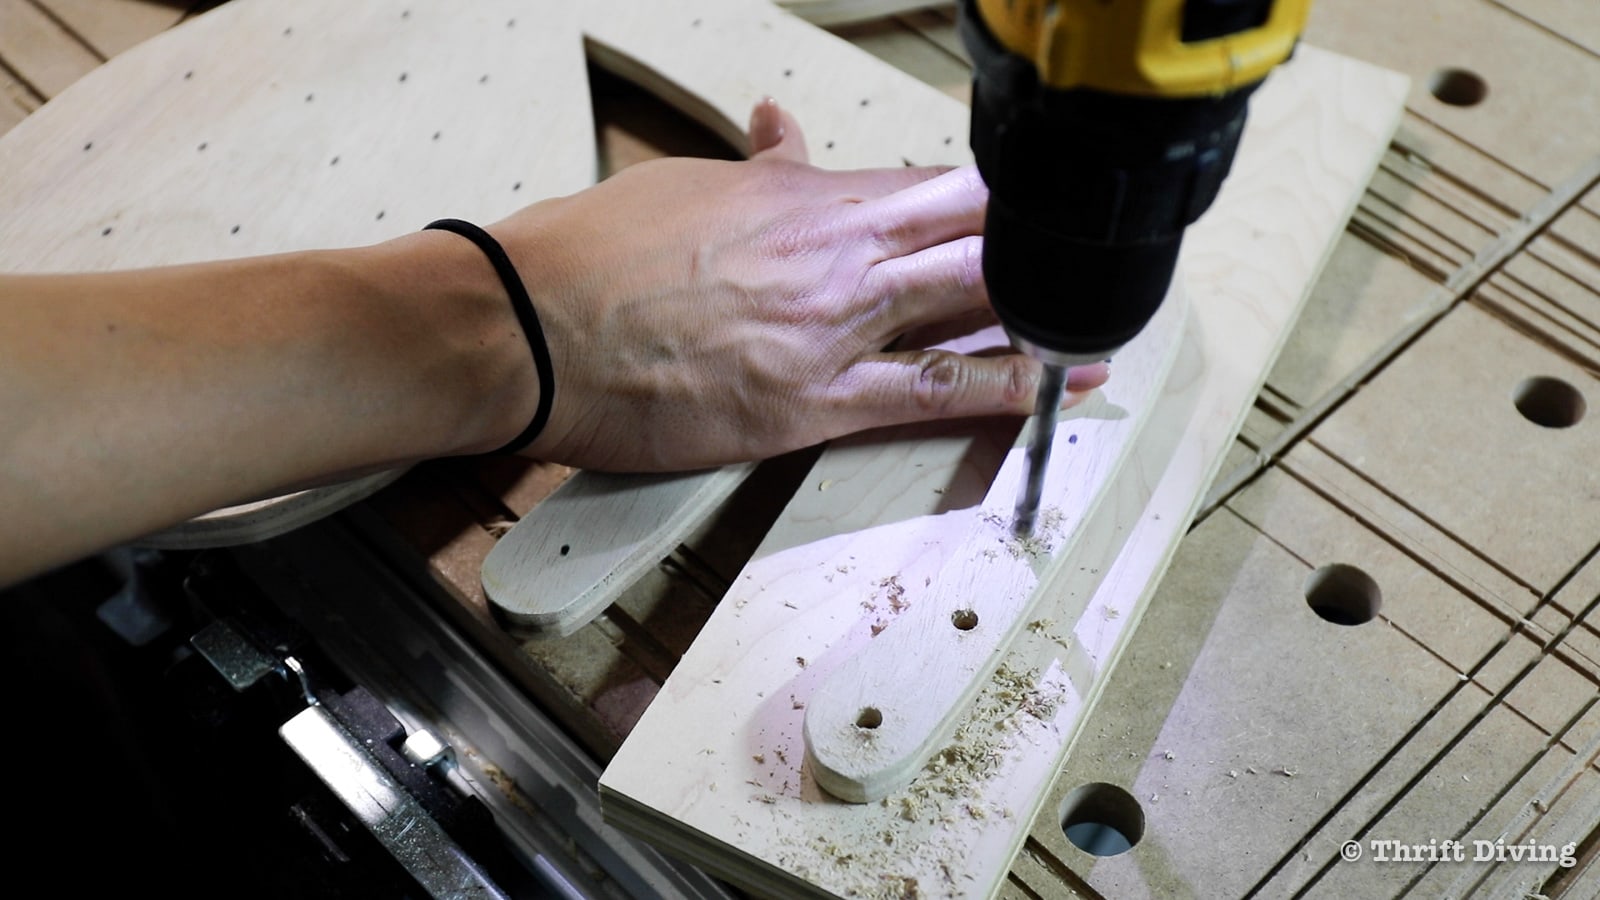
You’ll need a drill and a brad point drill bit for this part. (The size of the drill bit will depend on that lights you’re using, but for me, it was 1/4″ brad point drill bit).
I love using a brad point drill bit because it has a spade on it that creates a really clean hole on your wood. That’s what you will want for the front of your spider.
You’ll also want to put a scrap piece of wood underneath when drilling. This is called a sacrificial board. Not only will this prevent you from drilling into your table, but it also helps to prevent the ugly “tear out” of splintered wood that happens when drilling through plywood.
Test-fit your lights to make sure the bulb will fit through the hole before drilling all of your holes.
STEP 5: Sand the Holes Smooth
Even with the brad point drill bit, the holes still need to be cleaned up a bit. Tape the end of a piece of fine sandpaper (220-grit) on the drill bit, and wrap the sandpaper around a smaller drill bit. Slowly run the small drill bit through each hole, gently sanding the edges smooth.
Sand the back of the spider, too, to remove any splintered wood that occurred.
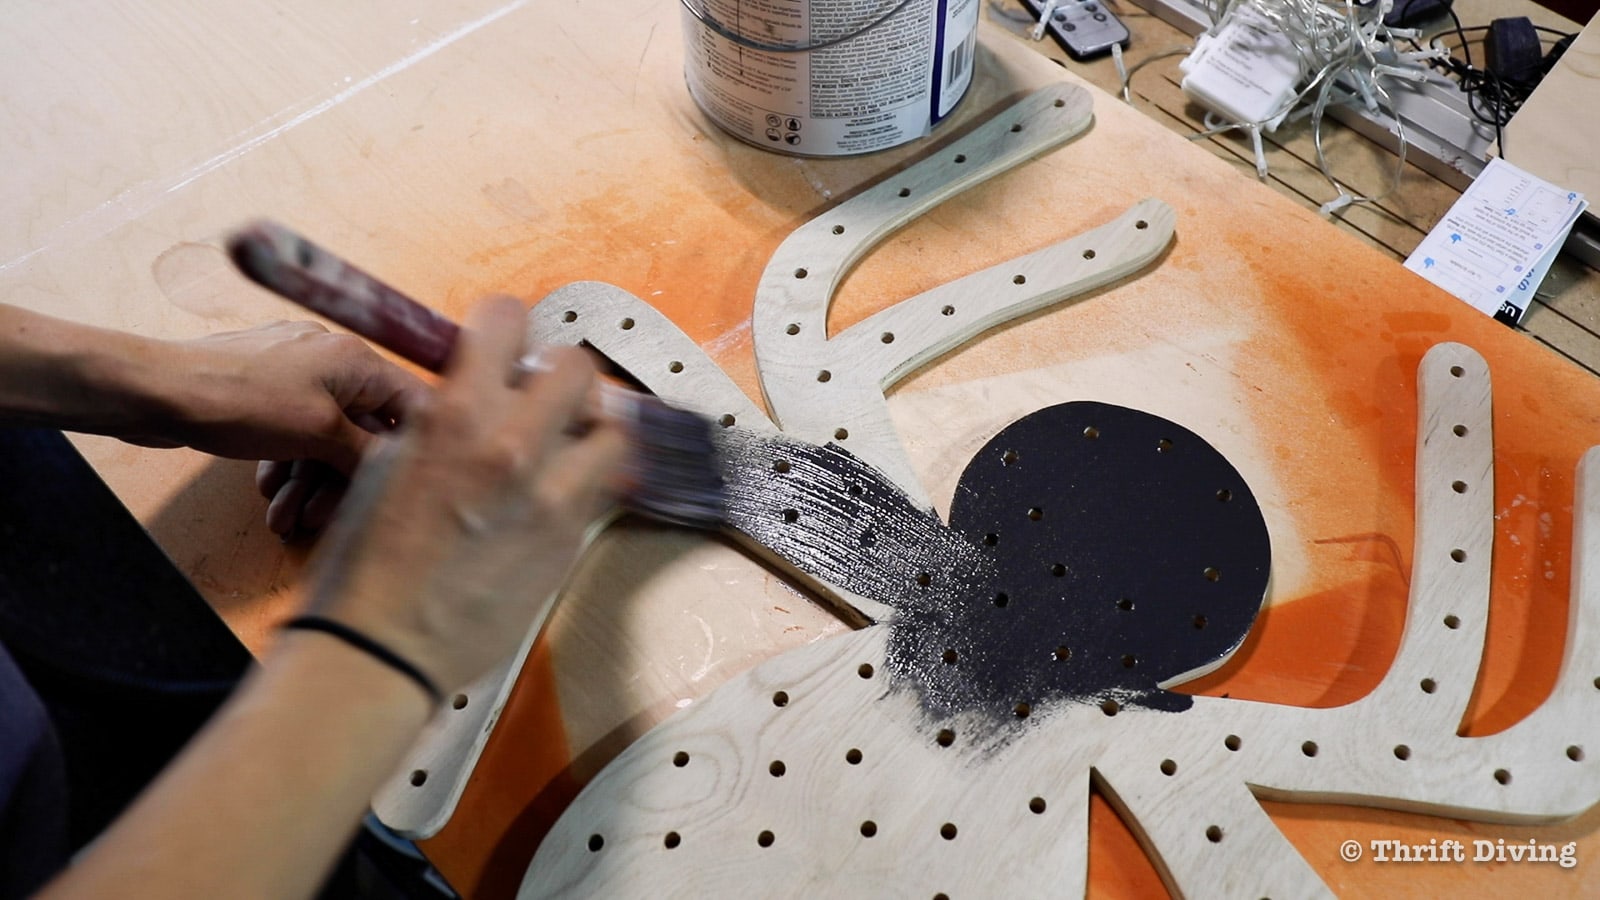
STEP 6: Paint the Spider
I recommend using an exterior paint which will protect the wood better if your spider will be outdoors. However, if it will be indoors, you should use a black chalk paint, or even better, get a small sample pot of paint from the home improvement store to use for this project.
Keep scrap wood underneath when painting to catch the drips of paint coming through the holes.
Also, use a small craft paint brush to slather paint into each drilled hole, to protect the wood, and to prevent the light-colored plywood from showing through.
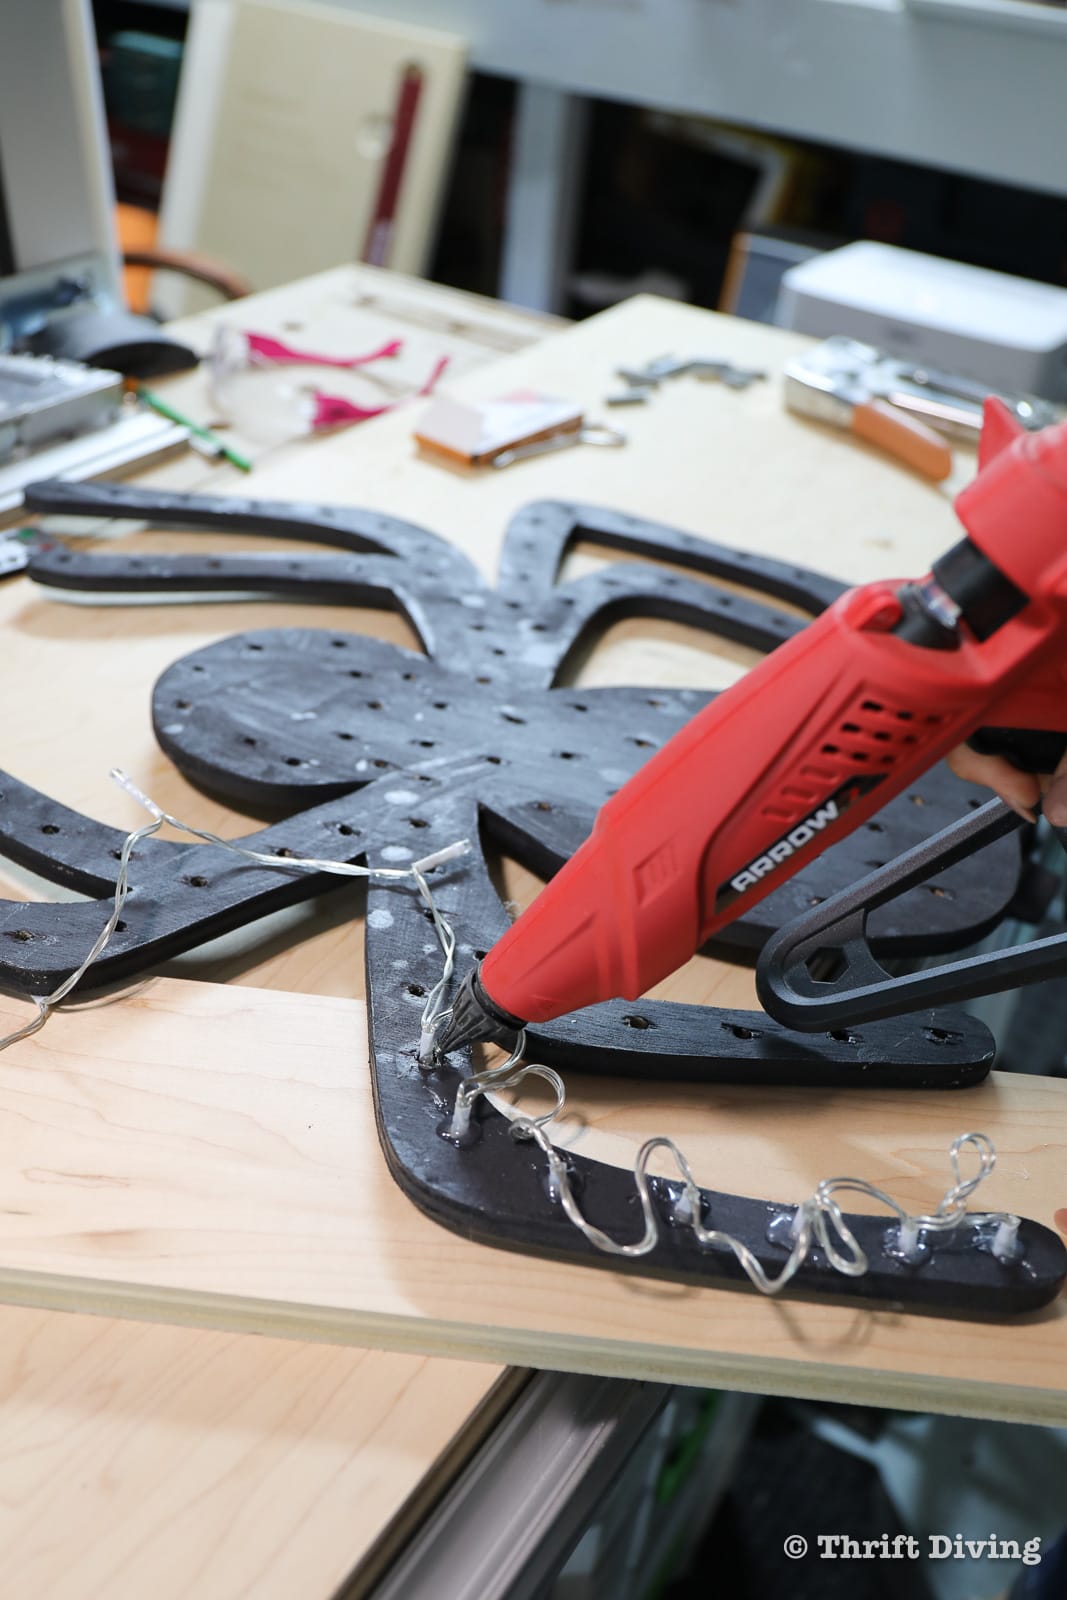
STEP 7: Attach the Lights
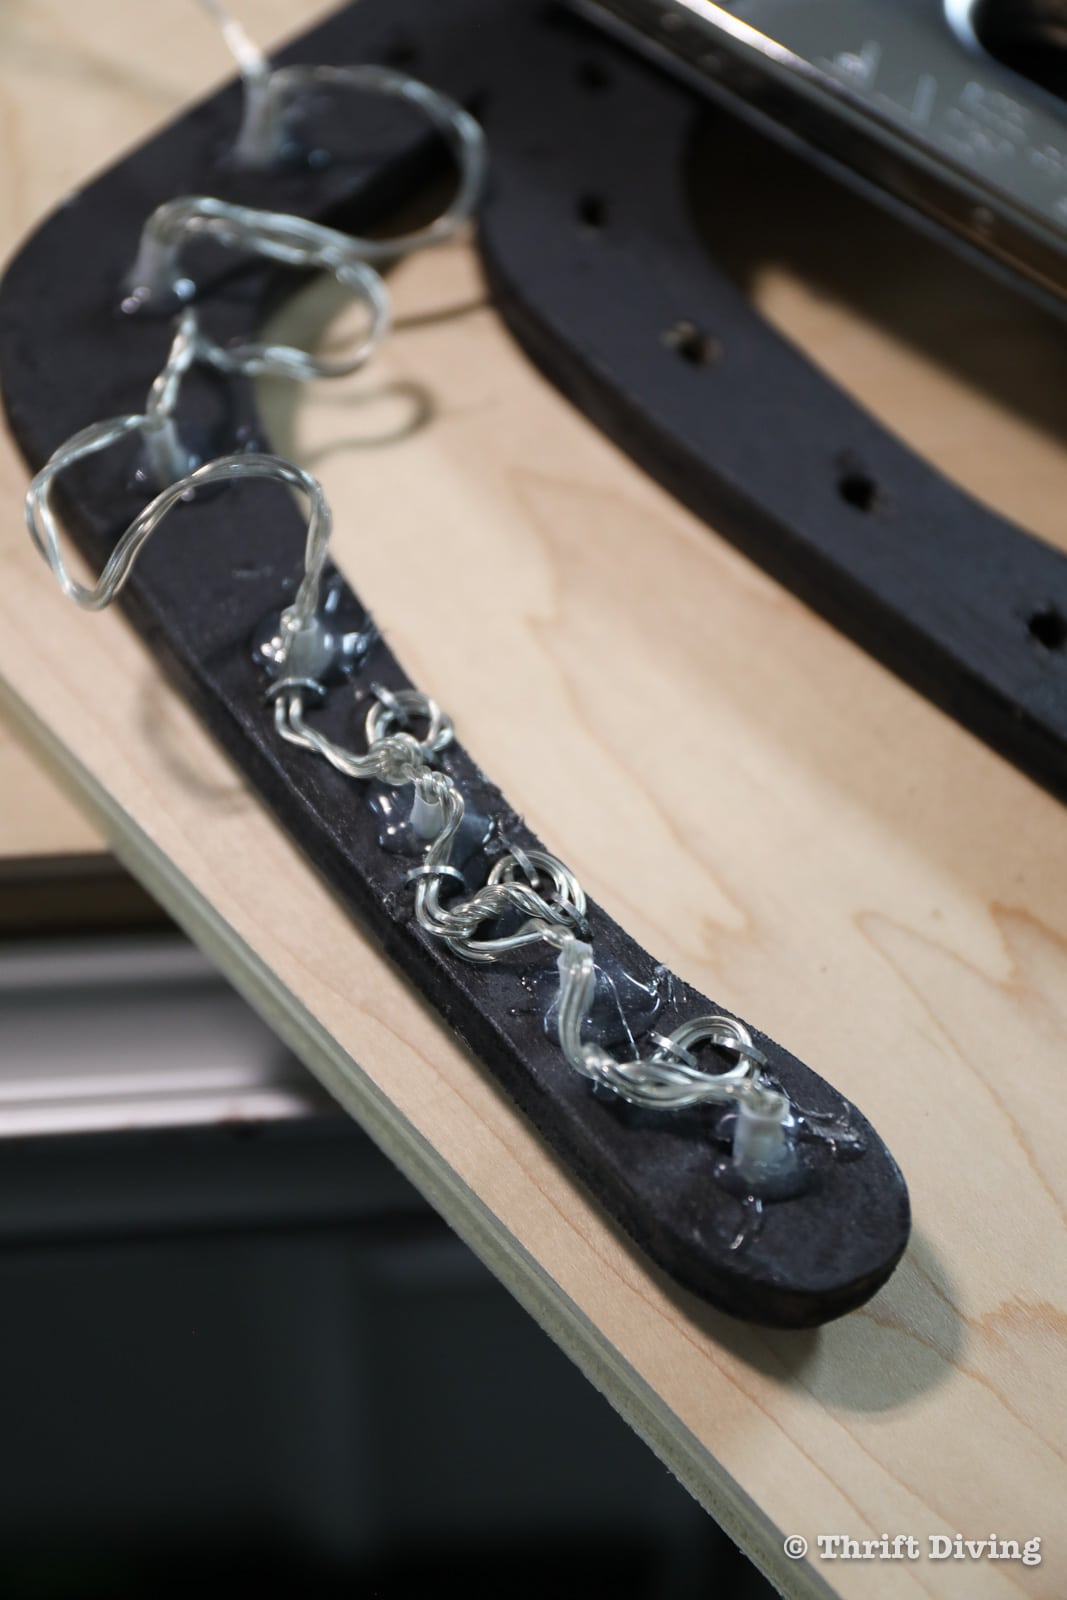
Since I used 1/2″ plywood, my light bulbs were a bit too long and were poking too far through the front of my spider, which isn’t what I wanted.
(This is why 3/4″ plywood works so well for these types of projects, but 1/2″ plywood in a 2′ x 4′ size was the only thing I could find at the time).
To correct for the lights falling through too deeply into my spider, I used the Arrow Fastener hot glue gun to secure the lights into position where I wanted them, preventing them from going through too far.
You won’t have to do this step if you use 3/4″ plywood, since it’s thicker. If your lights have shorter bulbs, you can use 1/2″ plywood. It really just depends on the lights you are using. I recommend using these 100 lights strand or the 40 lights strand for smaller projects.
Make a plan for where to start and end. I recommend starting at the tip of a spider leg and working your way up and down each leg, towards middle, where battery pack can be mounted and hidden from view.
You will have to backtrack on the legs, when stringing the lights, but if you plan accordingly, you should be able to easily fill each hole.
This is where the T25 low voltage stapler is amazing because it allows you to secure the wires in place on the back of the spider without cutting into the wires. The rounded T25 staples allow ample room for wires for lighting such as this, which is perfect for holiday and crafting projects where you’re using lights!
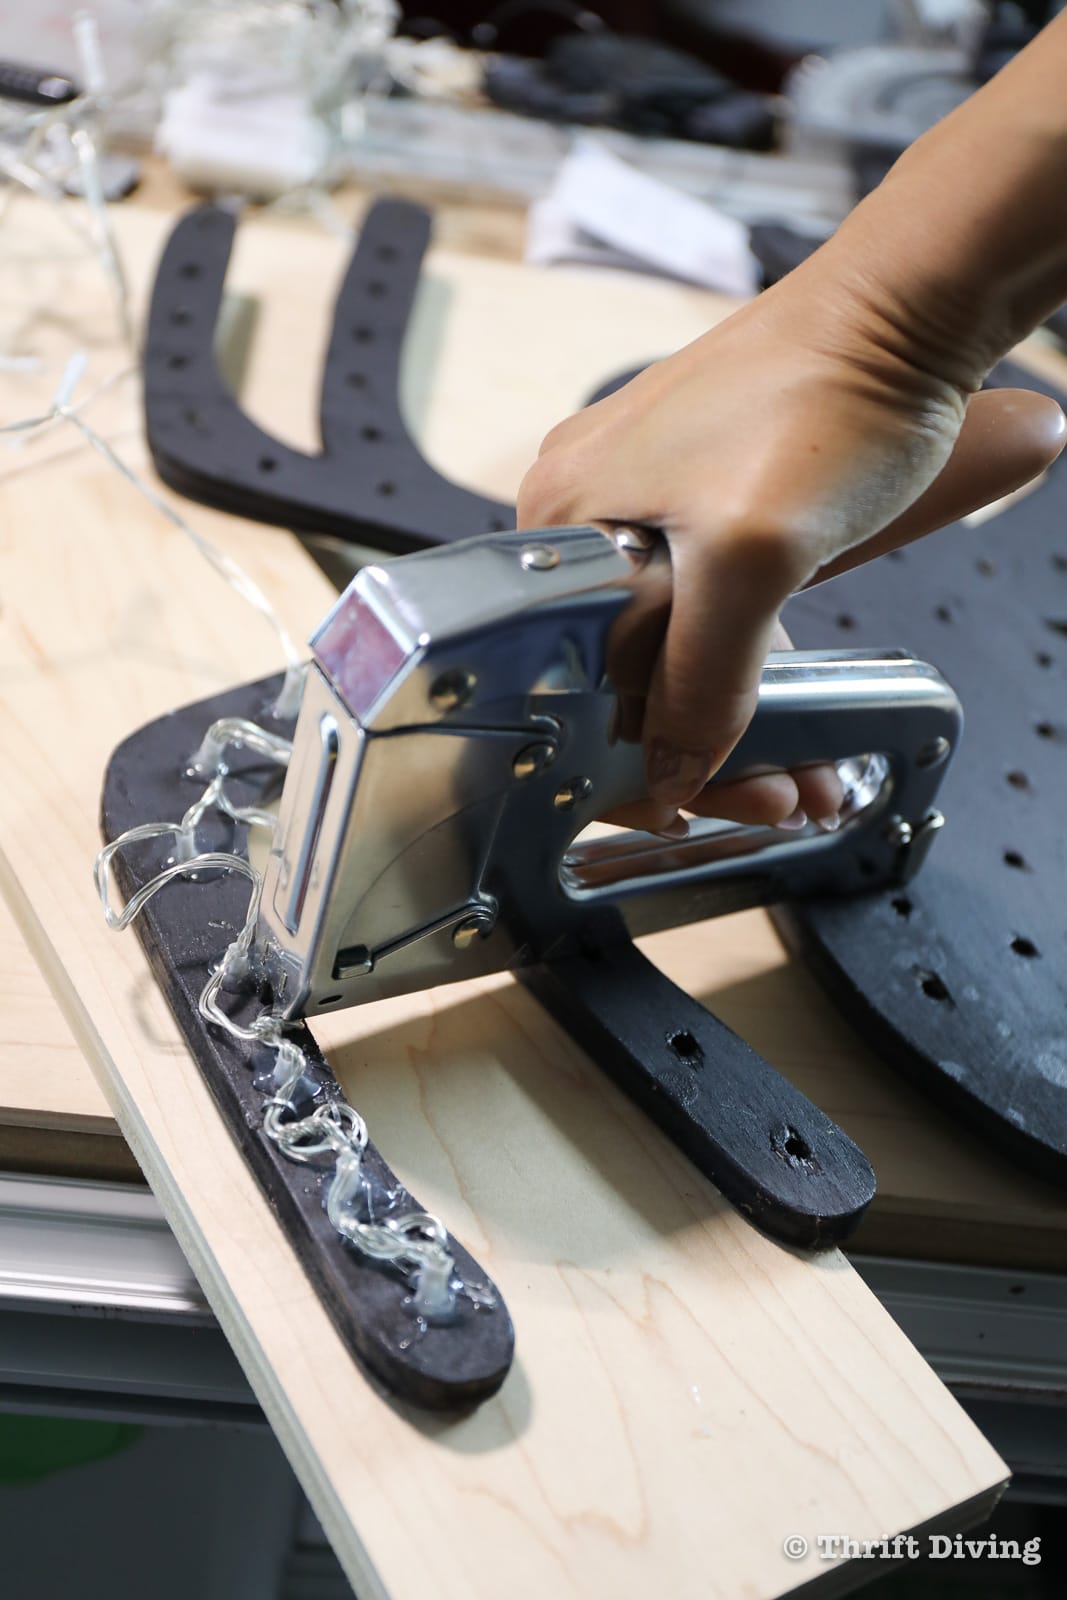
I find that the closer the holes are spaced, the more the wire will have to be looped. Gently twist the excess wire and lie the wire loop flat. Next, take the T25 low voltage stapler and secure to the wood. Be sure that the wires aren’t visible from the front of the spider.
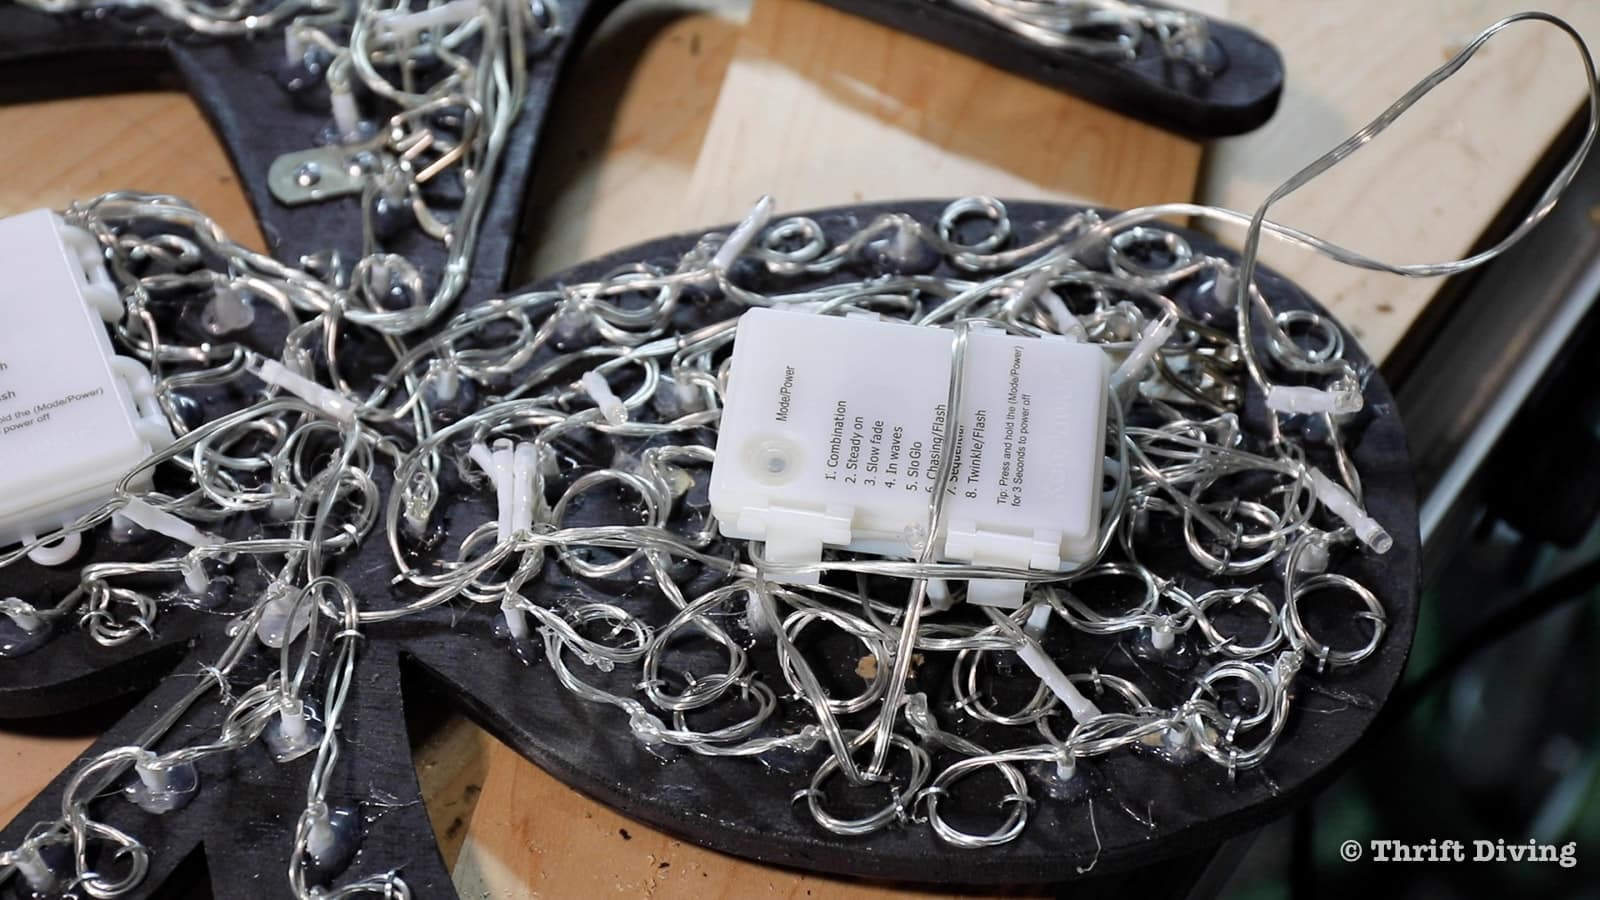
STEP 8: Attach the D-Ring Hooks and Battery Pack
If you’ll want to hang your spider on the wall, you’ll need to plan on where to screw D-ring hooks onto the back of the spider. Also, to attach the battery pack to the back, I simply set it on the wires and used some of the excess wiring to staple it across the battery pack to hold it in place. When the batteries need to be changed, carefully slide the battery pack up, change the batteries, and replace the pack under the wires.
If you’re wondering if this makes the spider bulky in the back, yes, it will, but not too much. Also, if your spider is larger, you will have even more space to spread the wiring out to staple it into place. When hanging it on the wall, I recommend using a couple of long nails or anchored screws that can extend a bit further to hook onto the D-rings.
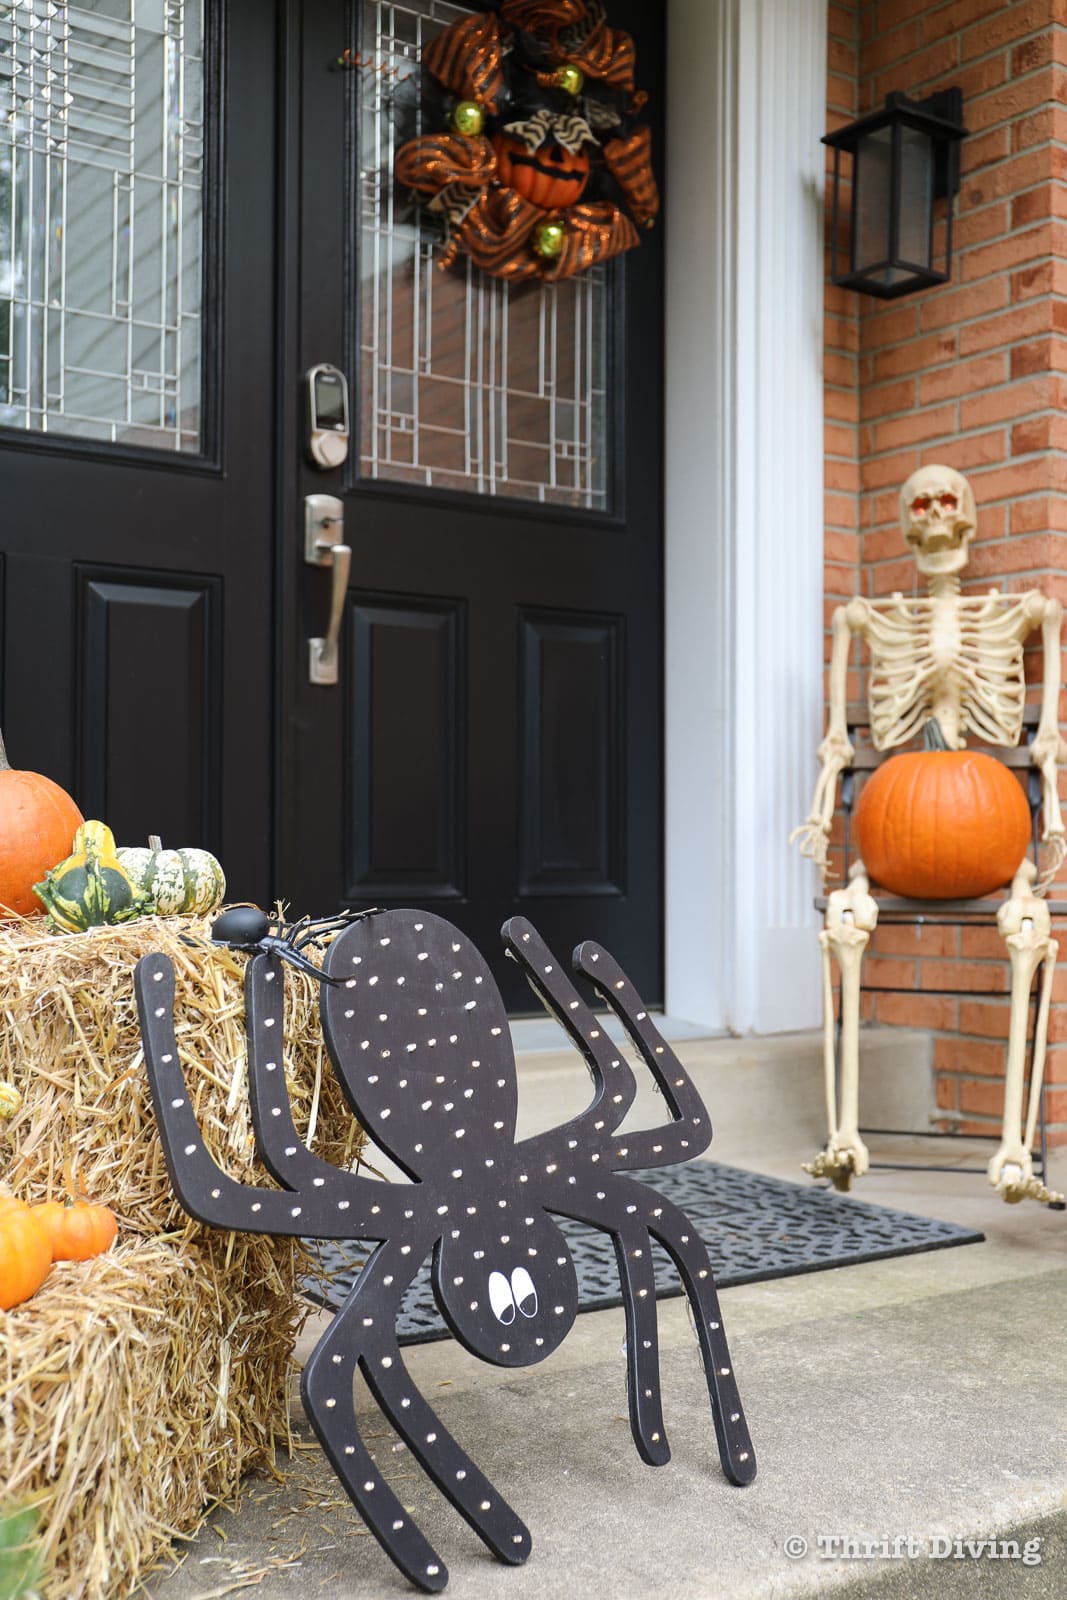
Lastly, paint some eyes on the front of the spider. You’ll notice that I left that portion of the spider free of lights so that I could paint eyes in this area.

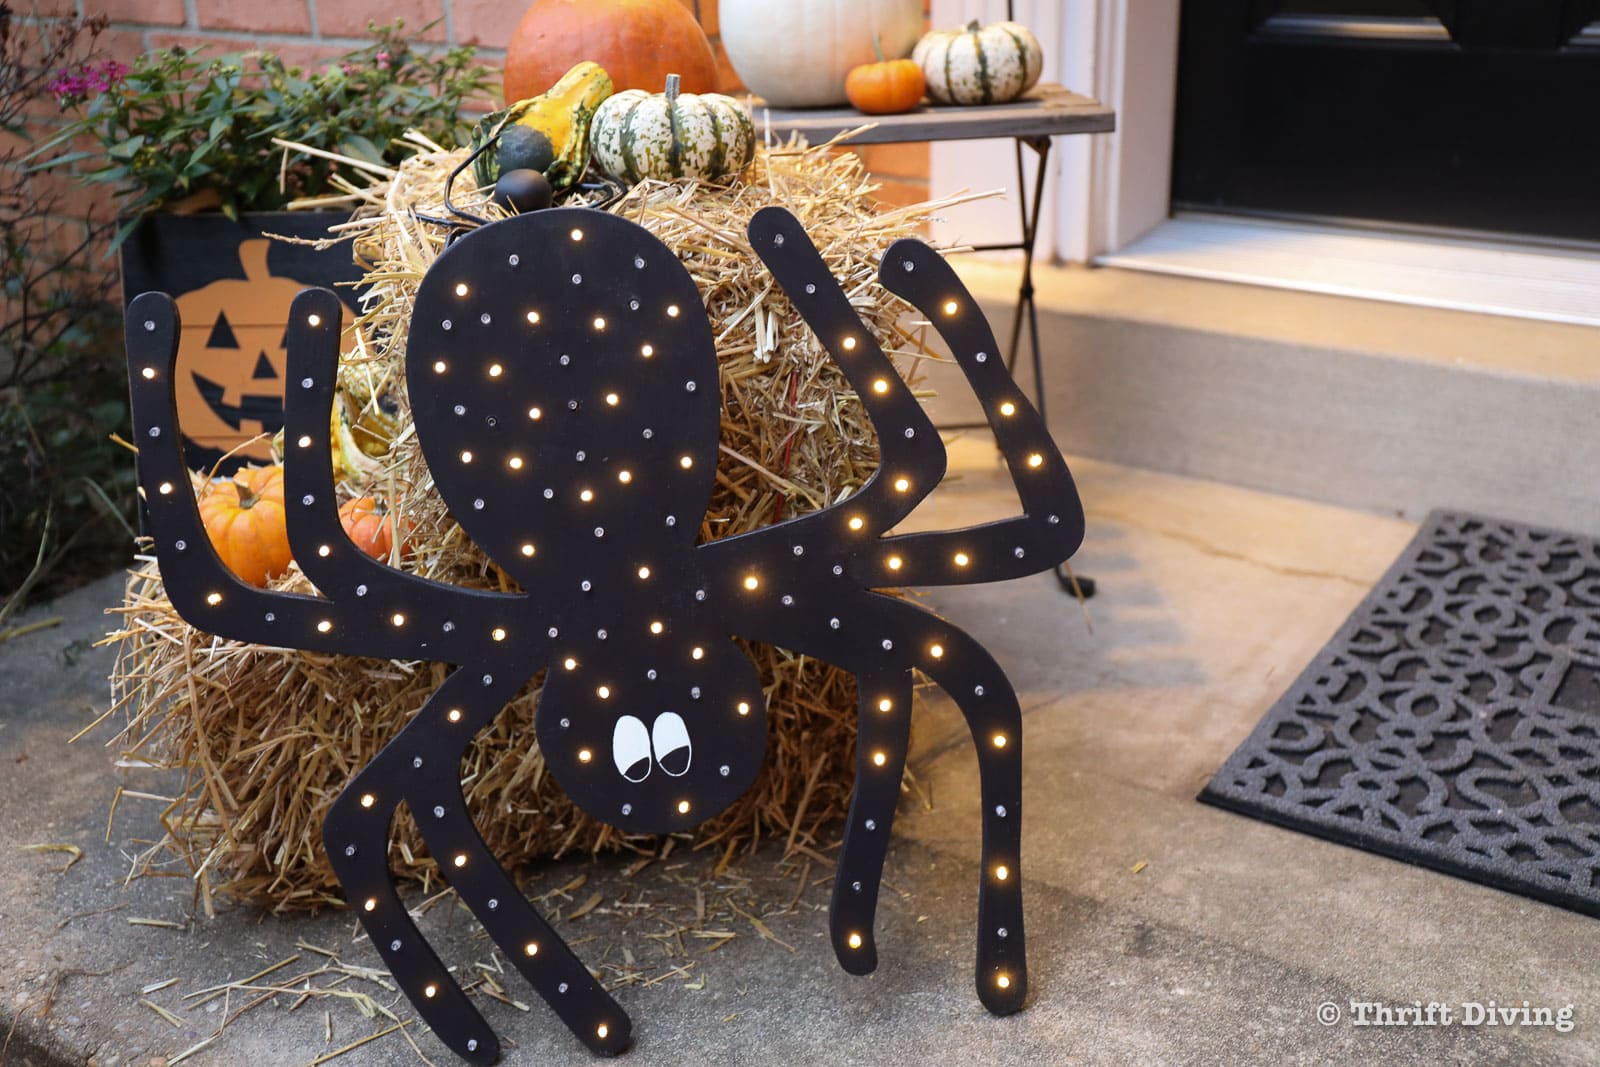
STEP 9: Hang or Place on Your Porch!
Finally, you’re done with your Halloween light-up spider! I can’t tell you how much I love this project! The lights can be used interior or exterior, and if you use exterior paint to help protect your wood and the drilled holes, you can create a fun feature to your front porch or family room!
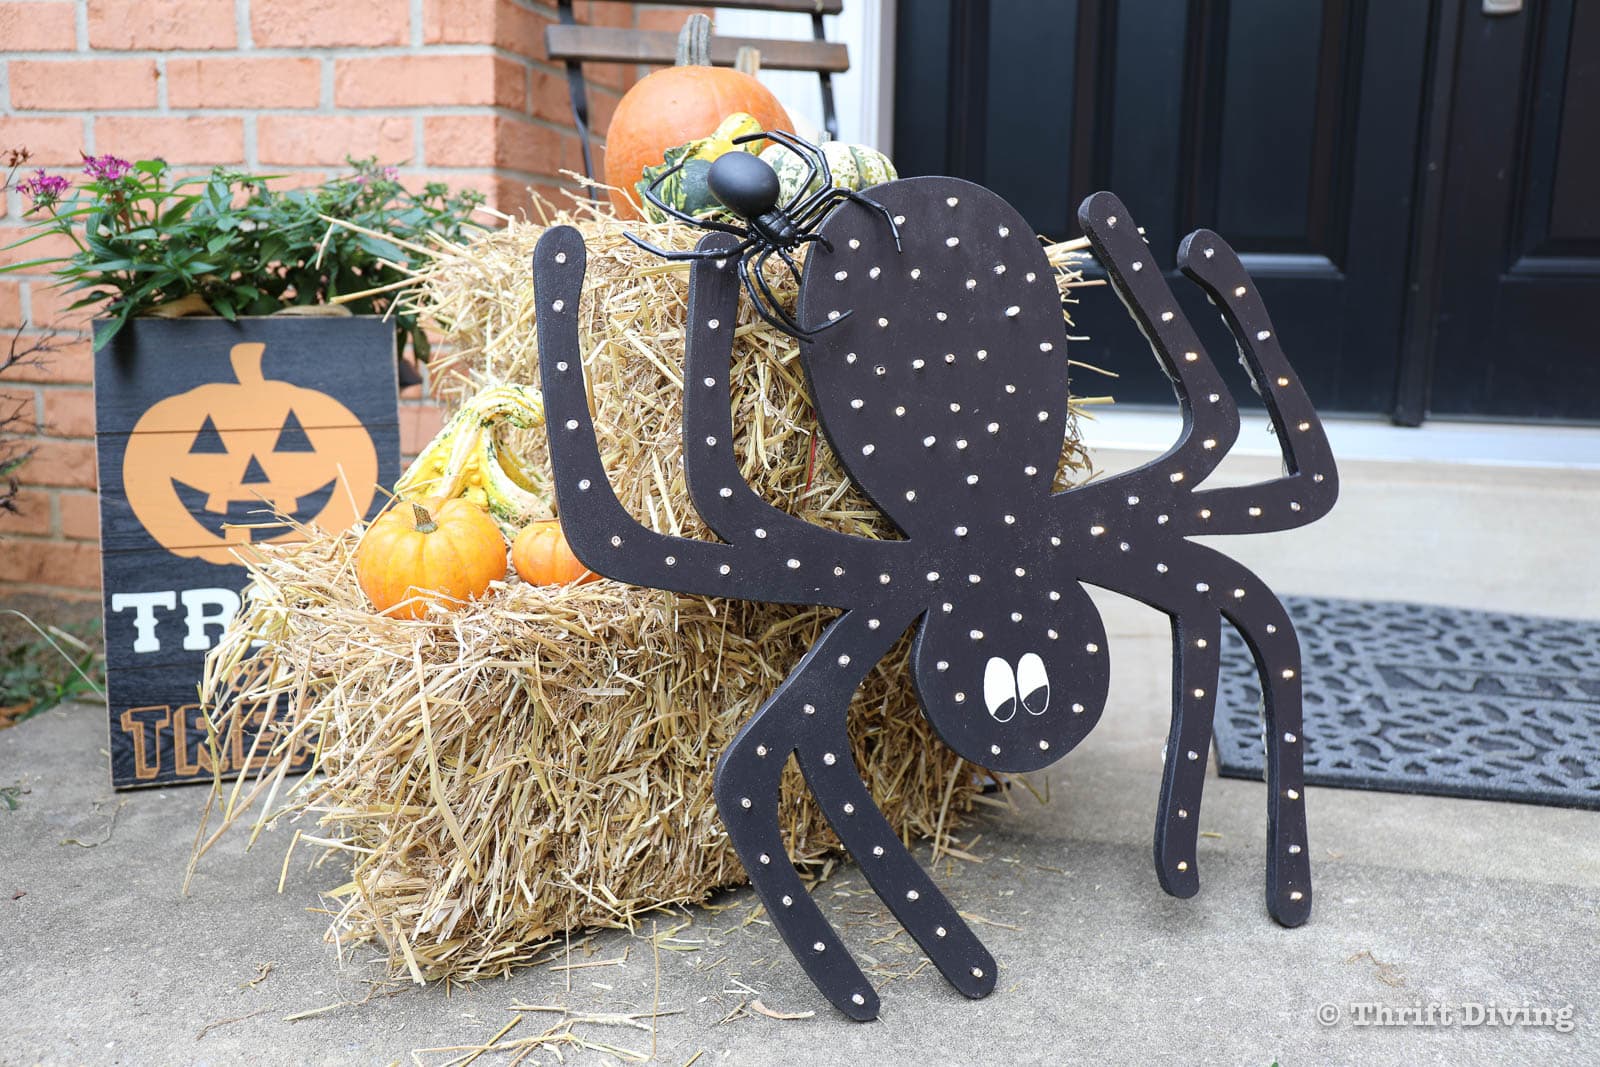

Are you ready for Halloween, too?? Now that I’ve got all of my decorations on the front porch, it’s beginning to feel more like my favorite time of the year! I just wish this hot, humid, sticky weather would get the hint and send cooler days and nights! 😉
Love this project?? Click here to save it on Pinterest!
![]()

Download the 5 freebies!

Thrift Diving inspires women to decorate, improve, and maintain their home themselves...using paint, power tools, and thrift stores! Use these 5 printables, checklists, and ebooks to get started!