How to Make Gazebo Screens: 10 Easy Steps!
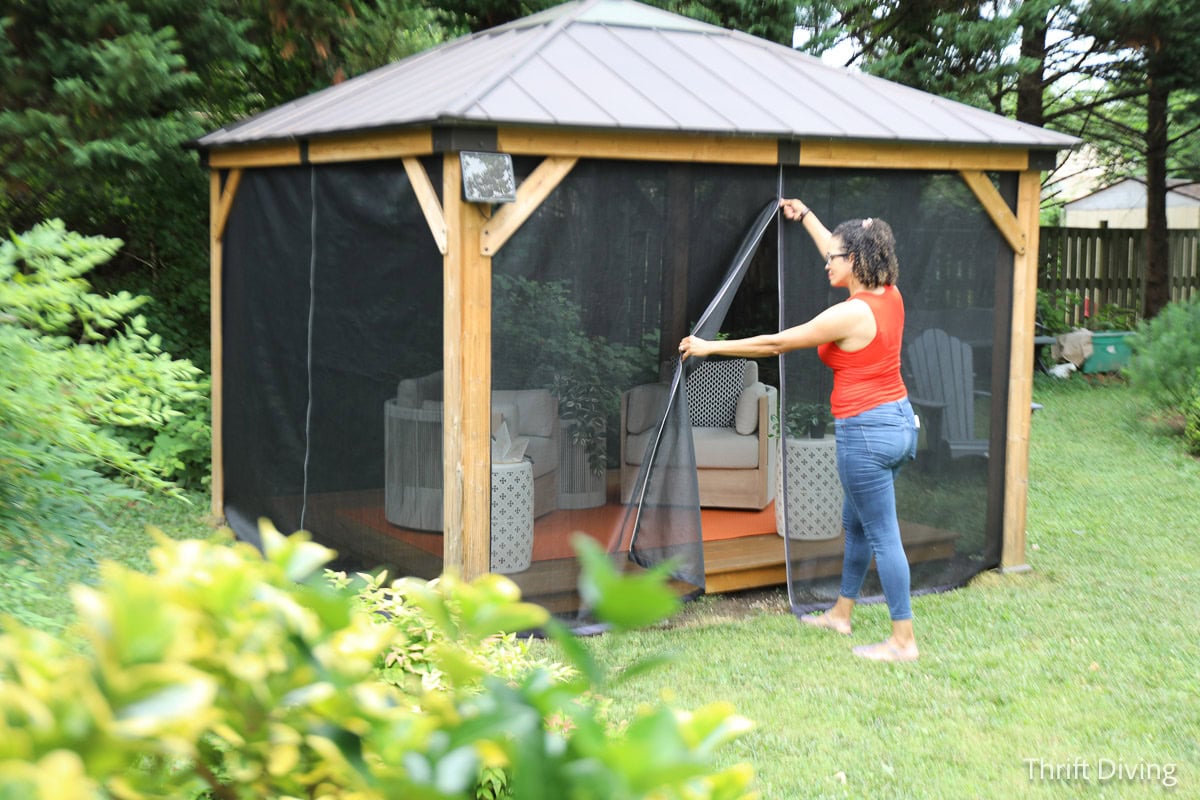
I thought these mosquito curtains for our gazebo would last and keep out the bugs, but after just one year, they became brittle and tore. I needed a better way to keep the bugs out. I really wanted a gazebo with screens, so I made my own DIY gazebo screens! 🙂
A few years ago, my family and I assembled this gazebo in my backyard. Not only were the mosquito curtains cheaply made, but they were so wispy that even a slight breeze would blow them inside the gazebo, right in my face. HA!
Gazebo screens, though, would be a better fit, because they can enclose the gazebo, offer some privacy, but would also be removable if I wanted to take them down. But I didn’t want to pay $500 at least for them.
I have my 20-year-old Bernina sewing machine, a roll of heavy-duty screening, and my tried ‘n trusty Velcro (just like how I had made DIY Garage Door Screens to keep mosquitos out of my garage workspace). I realize that with Velcro, screen, and zippers, you can literally enclose any space, even a gazebo!
Love this project? Click here to save it on Pinterest!
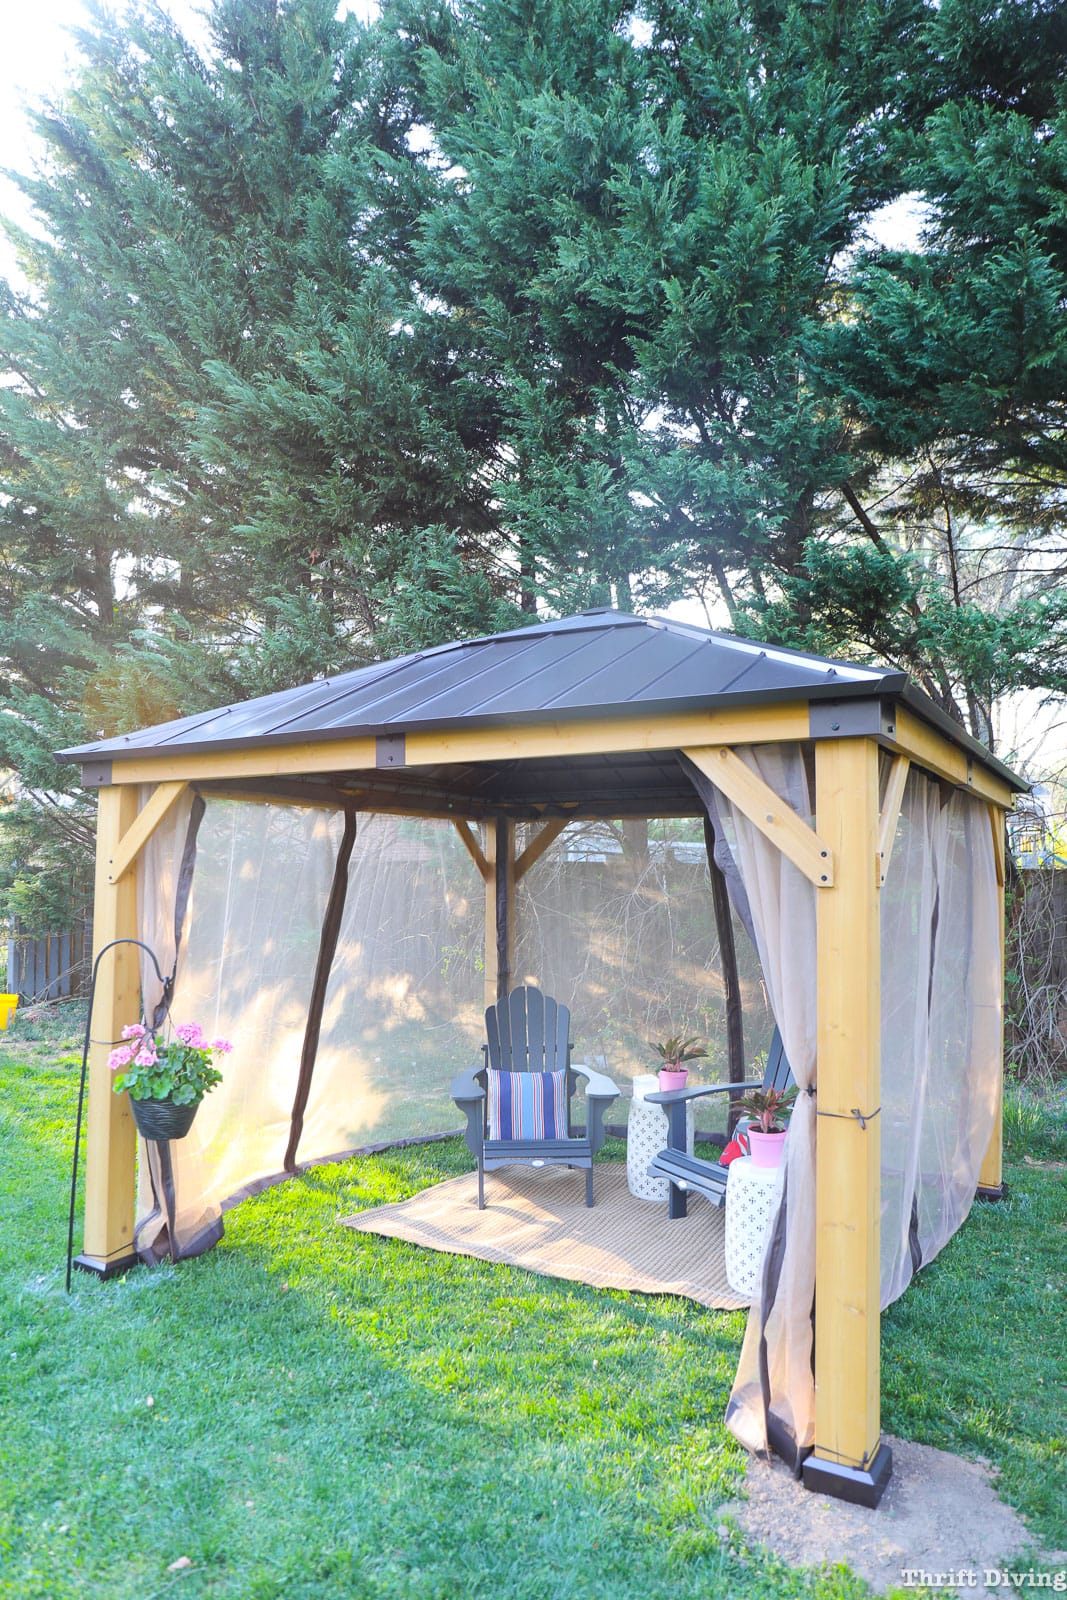
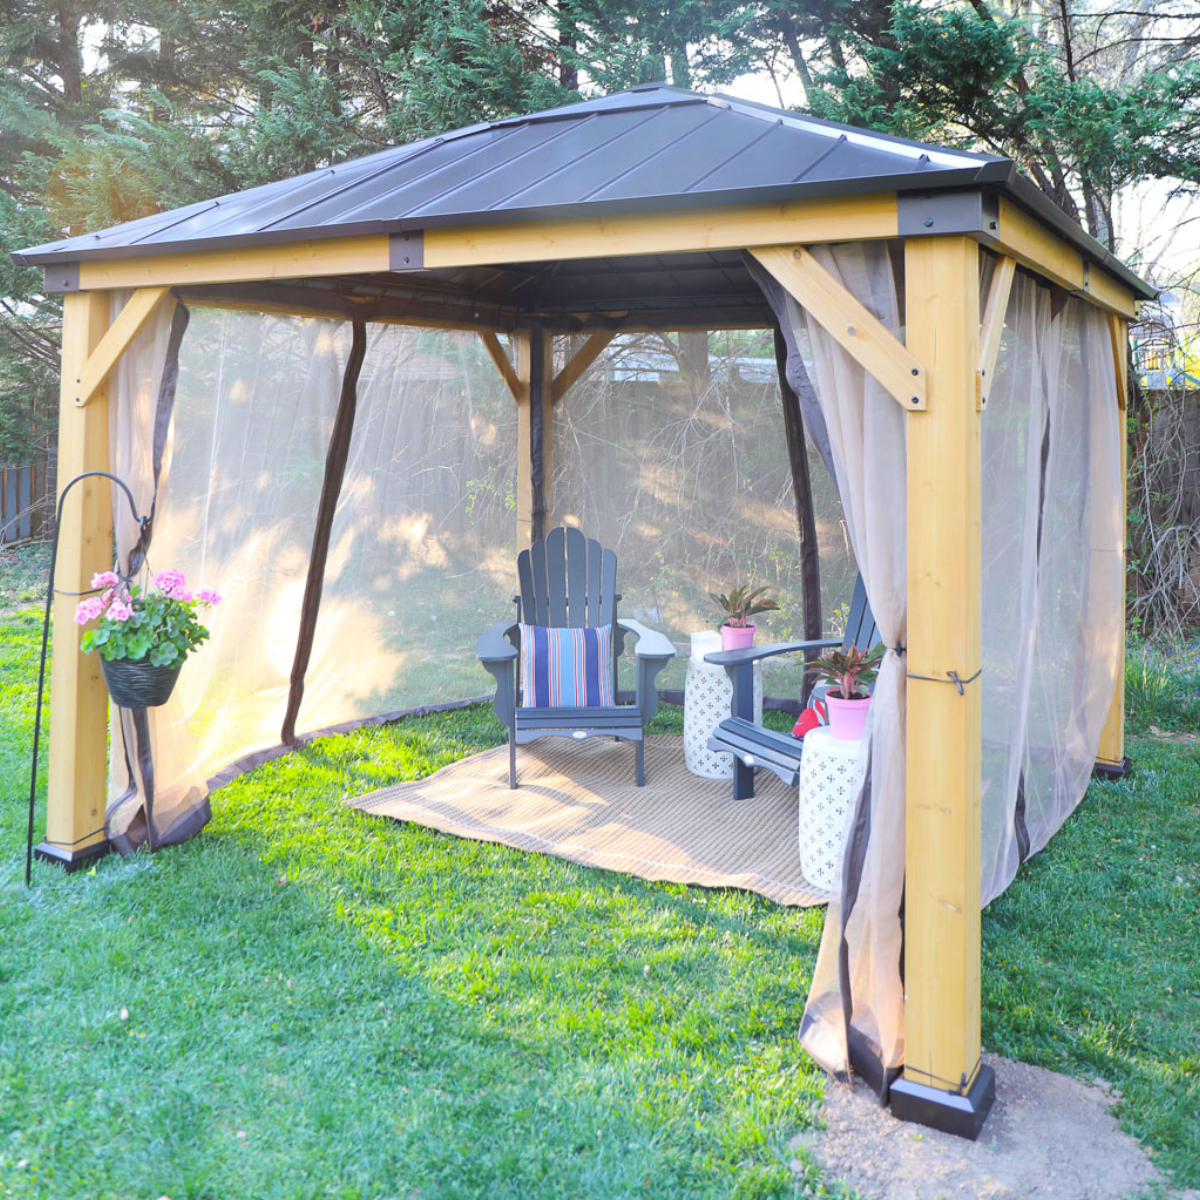
BEFORE
Here’s how my gazebo looked when assembled with mosquito curtains, before the mosquito curtains fell apart.
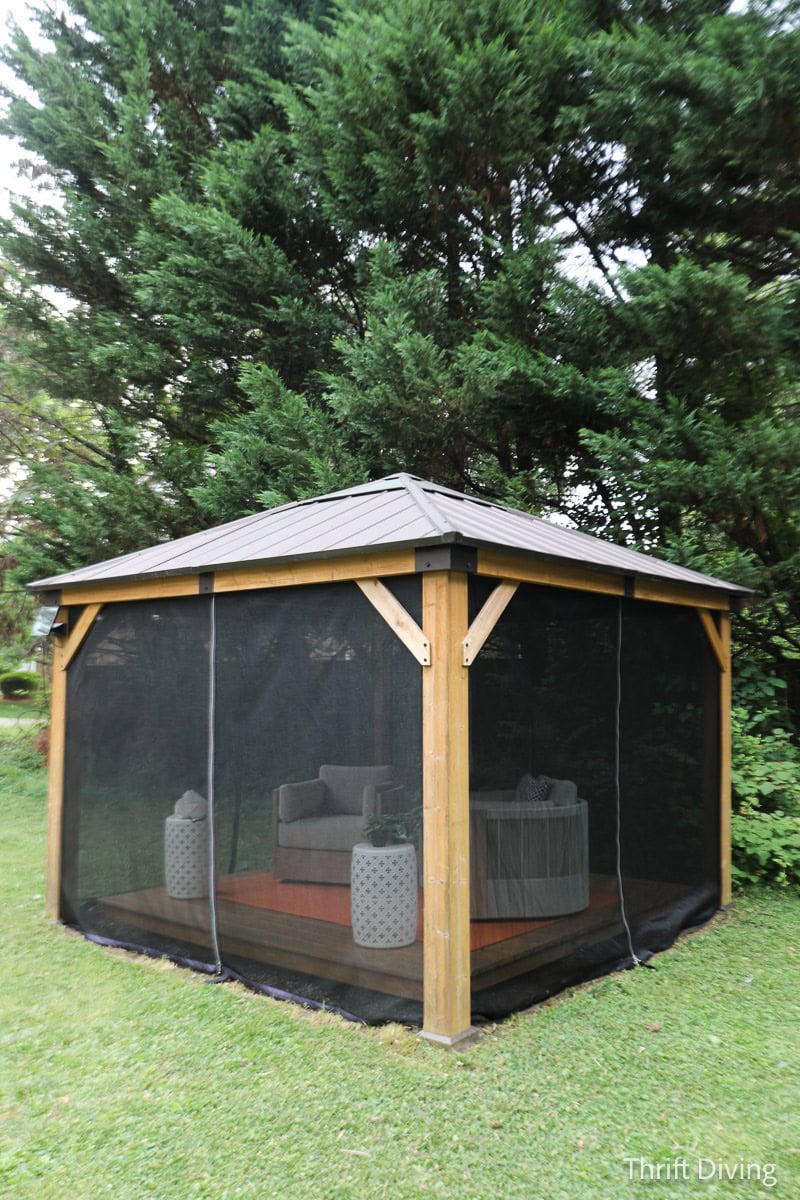
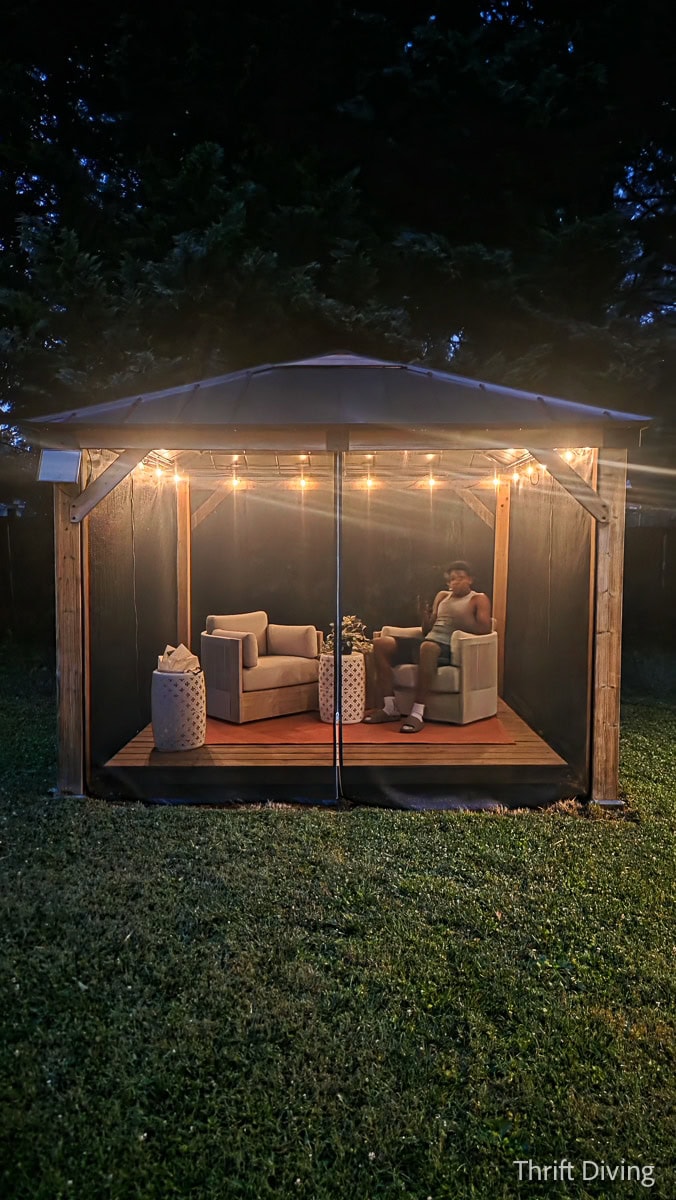
AFTER
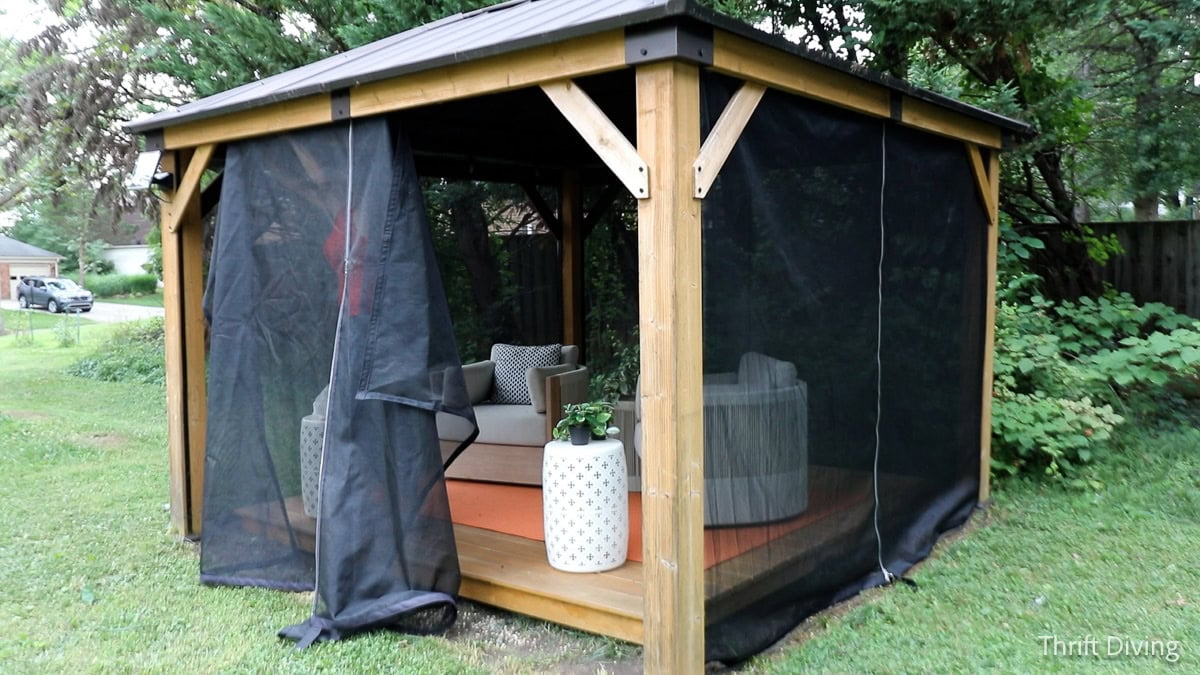
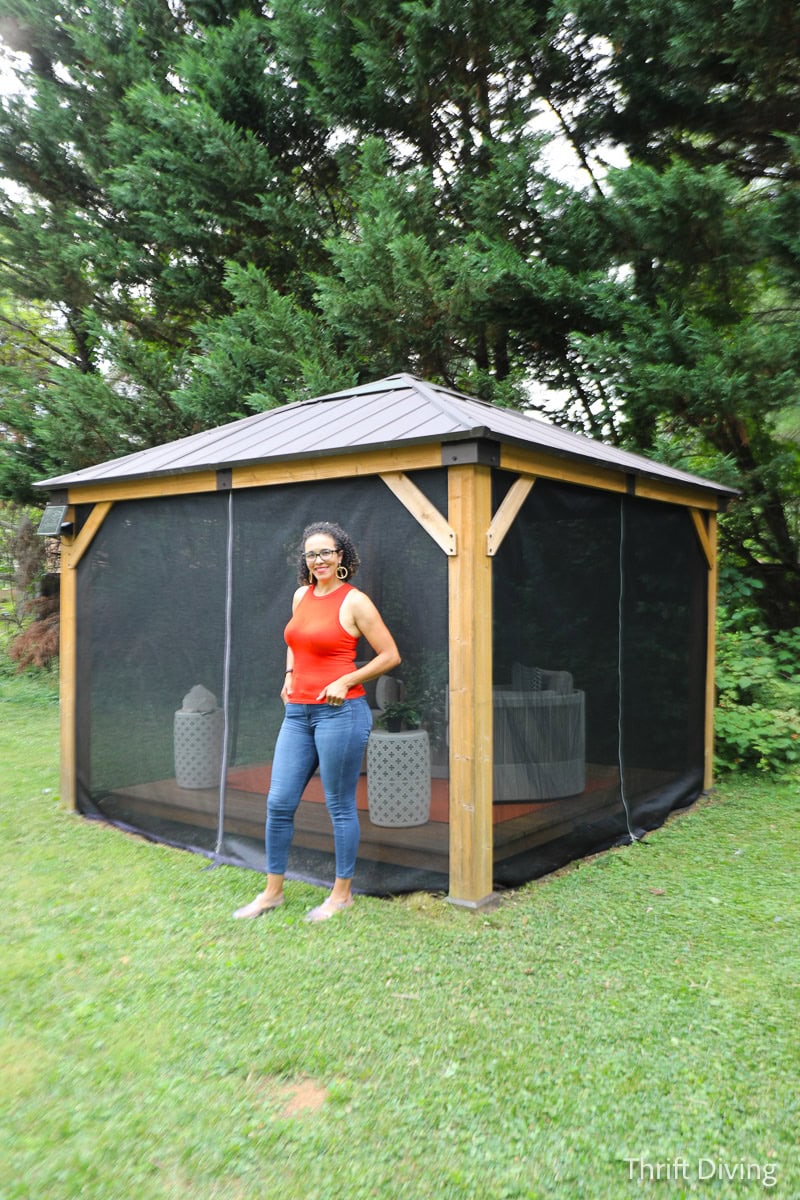
I have since built a floating ground-level deck under my gazebo, changed the furniture to chic BOHO furniture, a new rug (IKEA), and…..TA-DA!!….gazebo screen replacements that I made myself, to keep out the bugs! WOOT WOOT!
Okay, so let’s walk through, step-by-step, including tools and materials, for how to make gazebo screens yourself to enclose your gazebo (or, rather, semi-enclose it, from flying bugs!)
Tools & Materials to Make Gazebo Screens*
It doesn’t take much to make your own gazebo screens, but the main thing is that you’ll need to sew in zippers. Yes, there are magnetic enclosures, but the screen I used is really tightly woven, which can affect the ability of the magnets to adhere to one another.
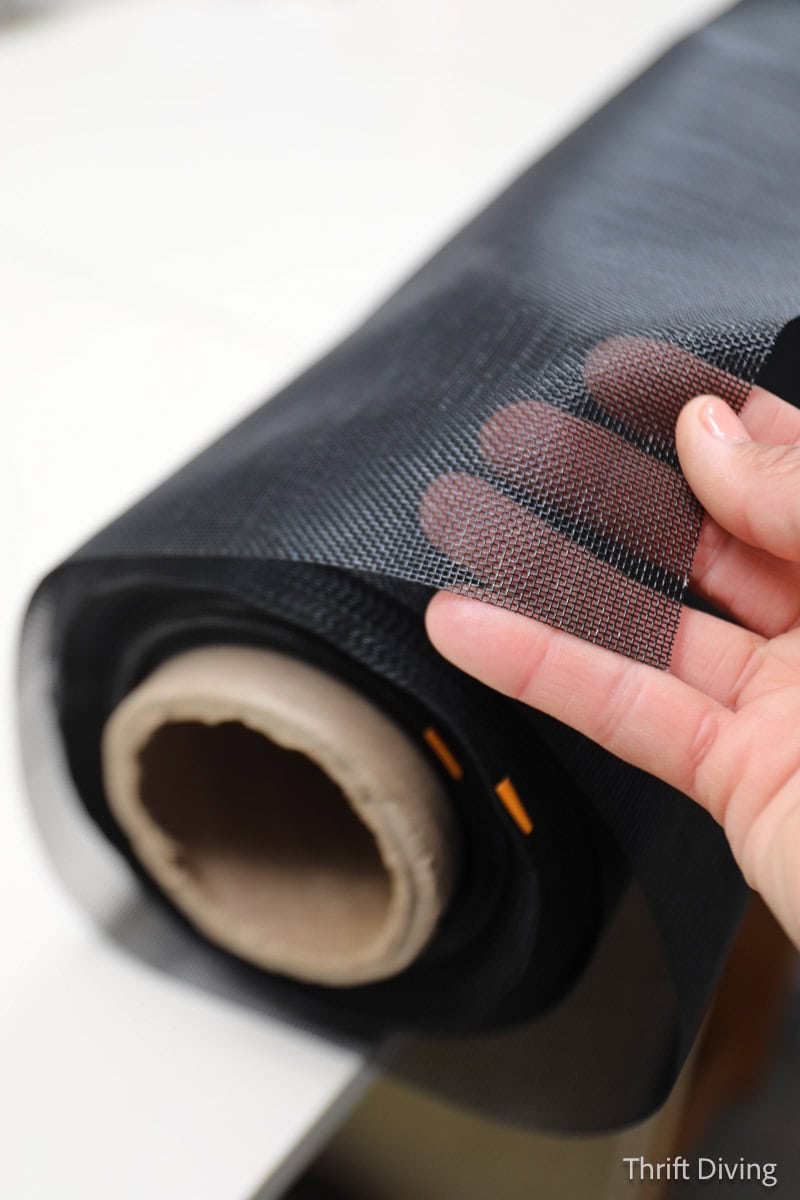
- Phifer TuffScreen No-See-Ums (comes in various widths and amounts)
- Sunjoy Gazebo (11′ x 11′)
- Waterproof fabric (for edge binding; optional, but it helps the gazebo screen panels look more finished!)
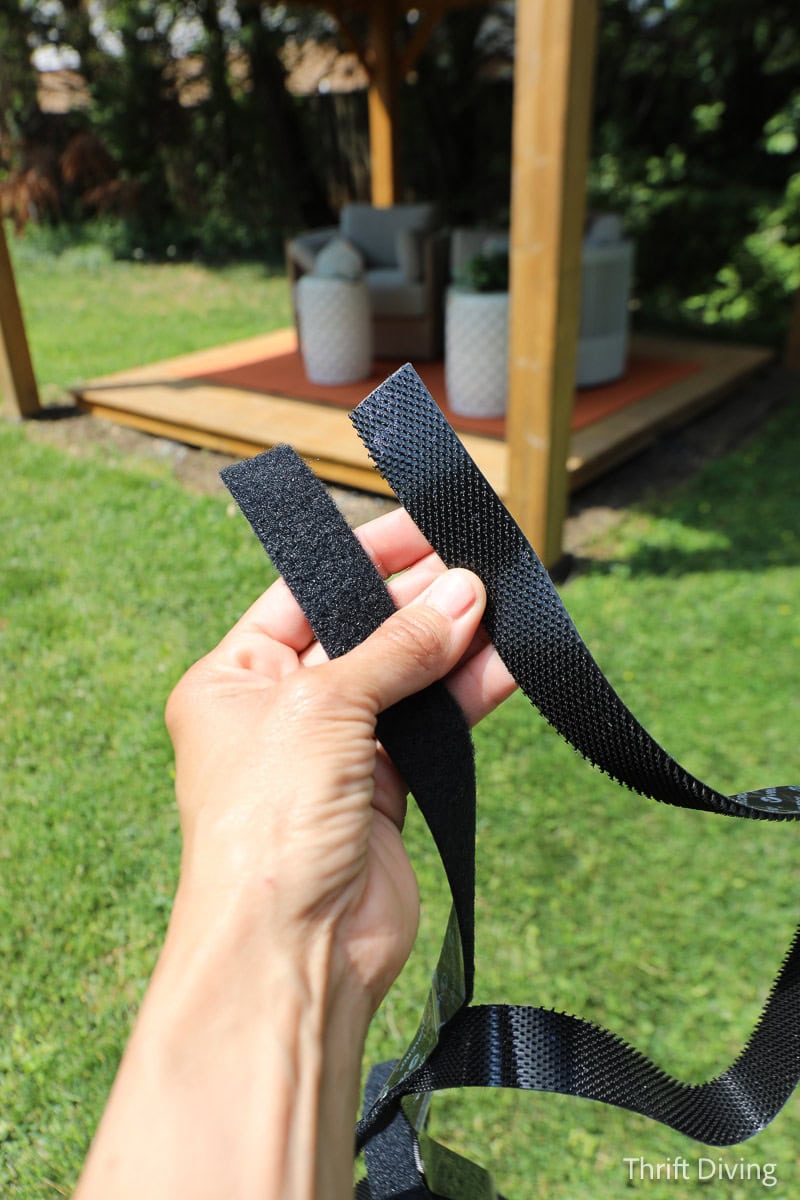
- Velcro Extreme Outdoor
- Arrow T301 stapler
- Arrow 1/2″ T50 staples
- Camping bag zipper (or similar #10 long zipper that’s double pull tab, like this one, which is more affordable)
- Sewing machine
- Arrow 8″ box-cutting scissors
- Tape measure
- Thread
*Includes affiliate links
Will This Work For YOUR Gazebo?
Before we just into this tutorial, you might be wondering if this is something that will work for your gazebo. Without seeing your particular gazebo, I think this will work since most gazebos have four vertical posts and the top framing. Even if it’s made out of metal, the Velcro will stick. You just wouldn’t be able to use a stapler for more reinforcement.
If you have any other features of your gazebo, you might need to plan around those. But otherwise, I think this will work with standard gazebos, big or small. 🙂
Watch This Project in Action: How to Make Gazebo Screens
How to Make Gazebo Screens to Keep Out Bugs
But what if you don’t sew? Well, I know that not everyone has a sewing machine or has sewing skills to pull off a project like this. Regardless, we all know someone who knows how to sew, right?! An auntie…a creative friend…a grandma who would love to help you out and save you from the mosquitos. LOL. Sweetly ask them to help you with this project. You buy the materials, and show them this tutorial, and see if they’ll whip it up for you. 🙂 Let’s jump into how to do this.
How much time to make these gazebo screens?
You can expect to take a weekend, up to a week, to make this project. Turn on a good show (my favorite: Dateline). And before you know it, you’ll be done. 🙂
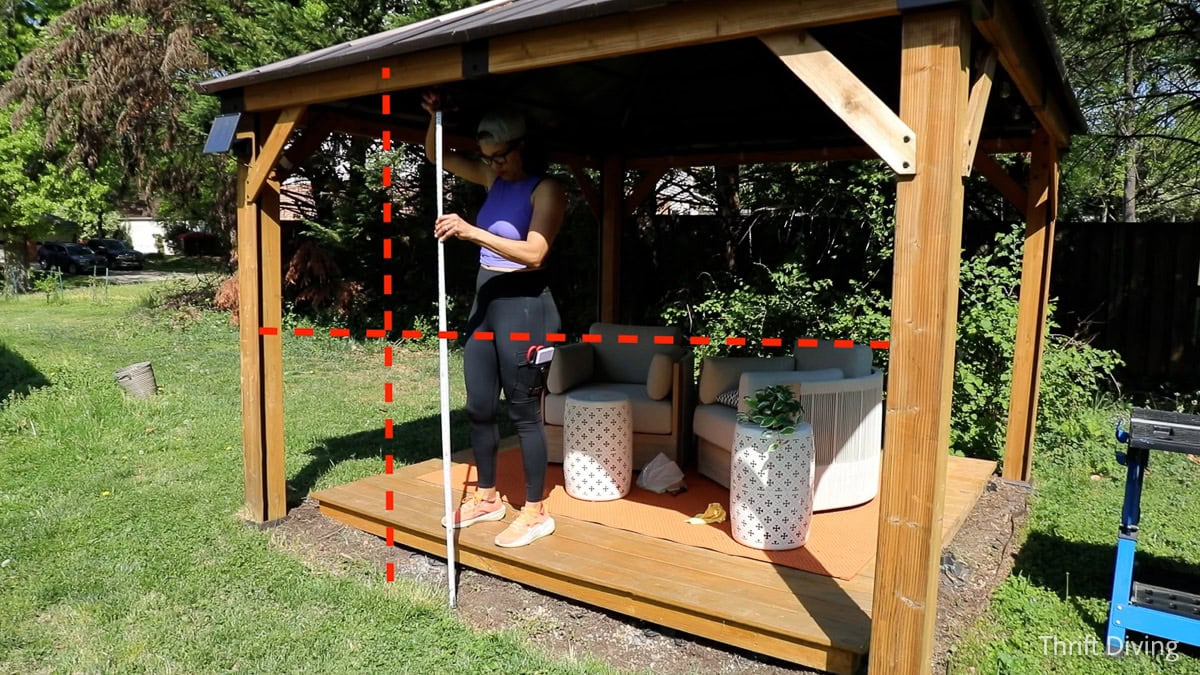
STEP 1: Measure Your Gazebo Height and Weight
Remember this rule: it’s always to cut bigger than it is smaller. LOL. Meaning, if you’re not sure how big to make your gazebo screens, it’s always better to cut the screen slightly oversized. It’s much easier to trim the excess than it is to realize later that your screen is too small!
So carefully take your measurements from top to bottom (where you think the screen will touch at the top and bottom), and then measure from side to side, where the Velcro will be placed. You won’t need to add seam allowance to the top and bottom, but you’ll need to add some seam allowance to the sides.
My measurements ended up being 82″ tall, and 111″ wide from the edges of the gazebo posts.
As I mention, this means that I would need a roll of screen that is wide enough that, when I sew a zipper in the middle, the width would stretch at least 111″ wide between the posts. (By the way, the screen I am using is 72″ wide, so two panels sewn together would be plenty wide at 146″).
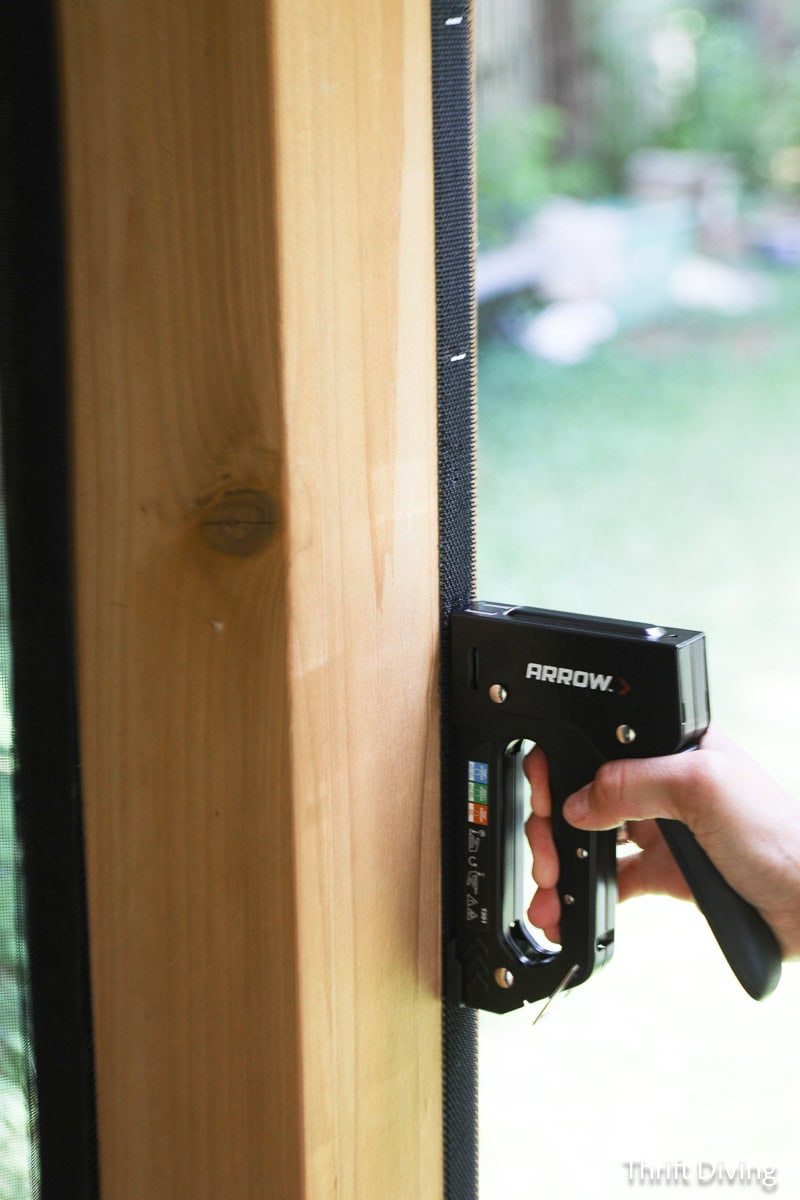
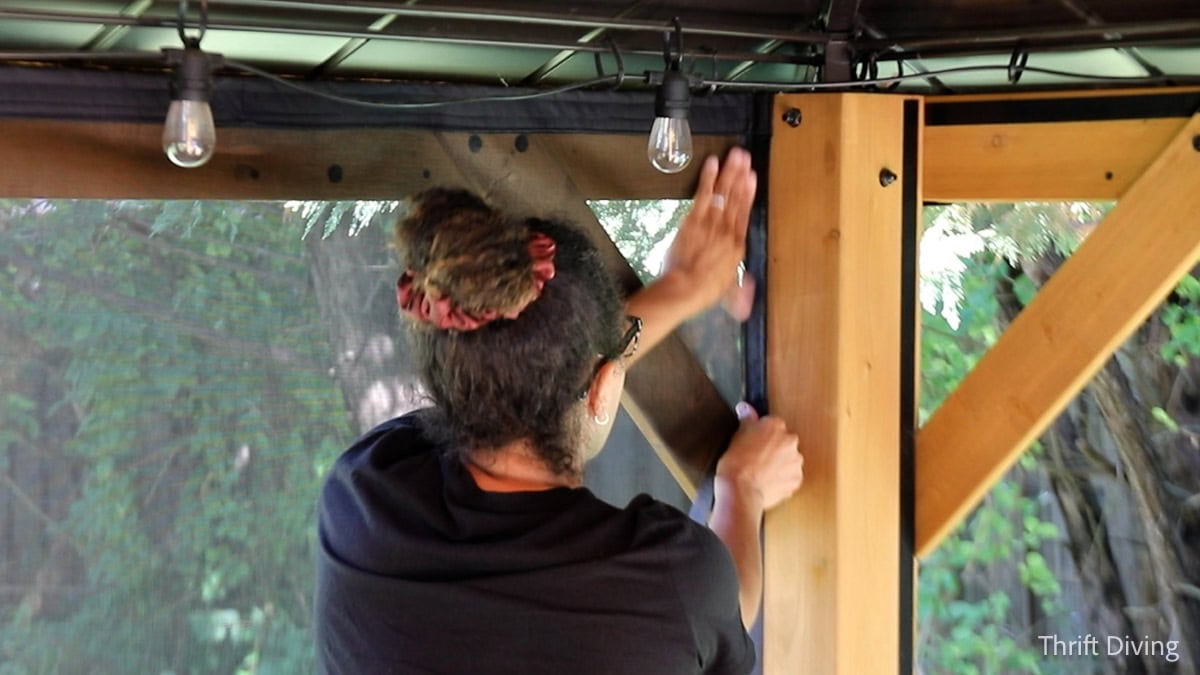
STEP 2: Attach the Rough “Hook” Part of the Velcro to the Gazebo frame.
I’m using Velcro Extreme Outdoors for this project. The reason I’m using Velcro is because I already made a similar project like this to my garage door so I could keep bugs out of my workshop, and it worked well. It’s easy to peel off the back and stick it up. It’s sticky as sin, too, so it’s less likely to come off than regular Velcro.
I like to add the rough “hook” piece of the Velcro to the gazebo frame first so that as I make the gazebo screens, I will have the Velcro in place and can test fit them as I sew them.
Once the screens are all sewn and attached, it should look like this, with the Velcro attached across the top of the posts, and along the vertical posts, so that the gazebo screen can easily be secured.
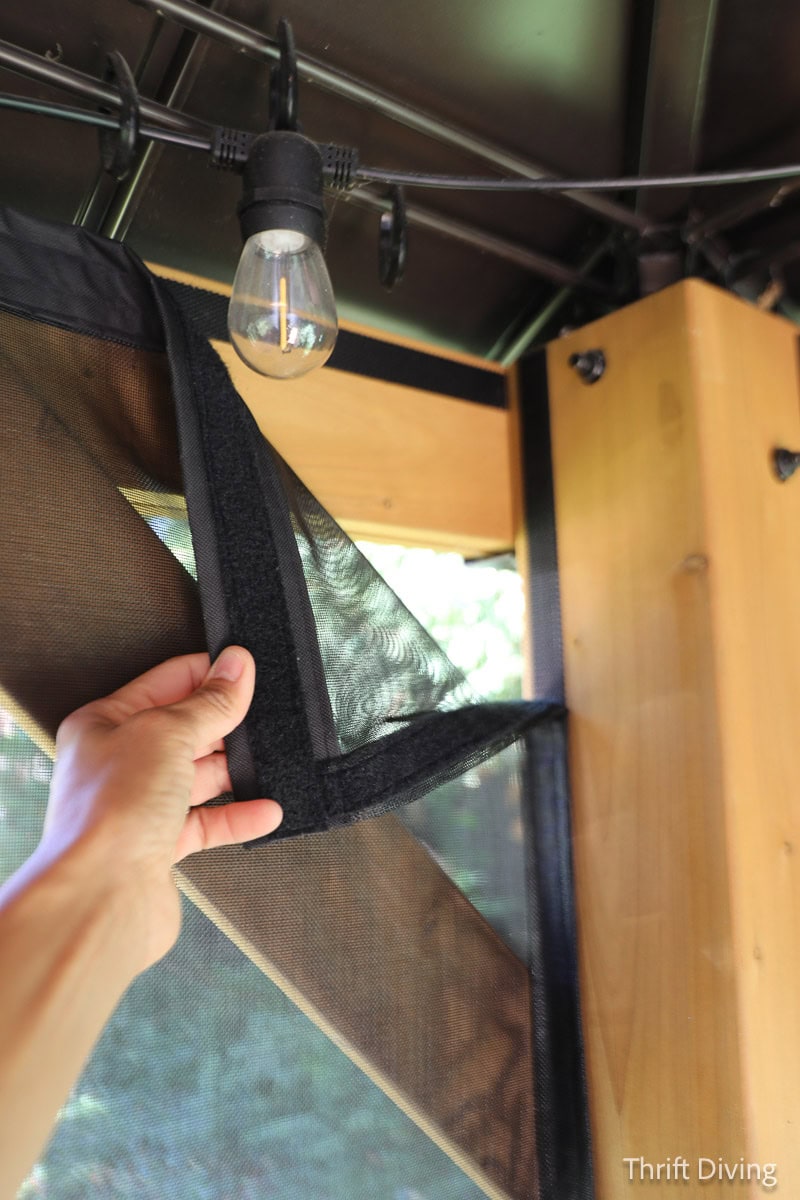
I used my Arrow T301 multi-staple stapler with 1/2″ T50 staples to secure the Velcro to the gazebo posts and frame. While this is Velcro “Extreme Outdoors,” attaching the gazebo screens and pulling them off could pull off the Velcro. Best to attach it with staples.
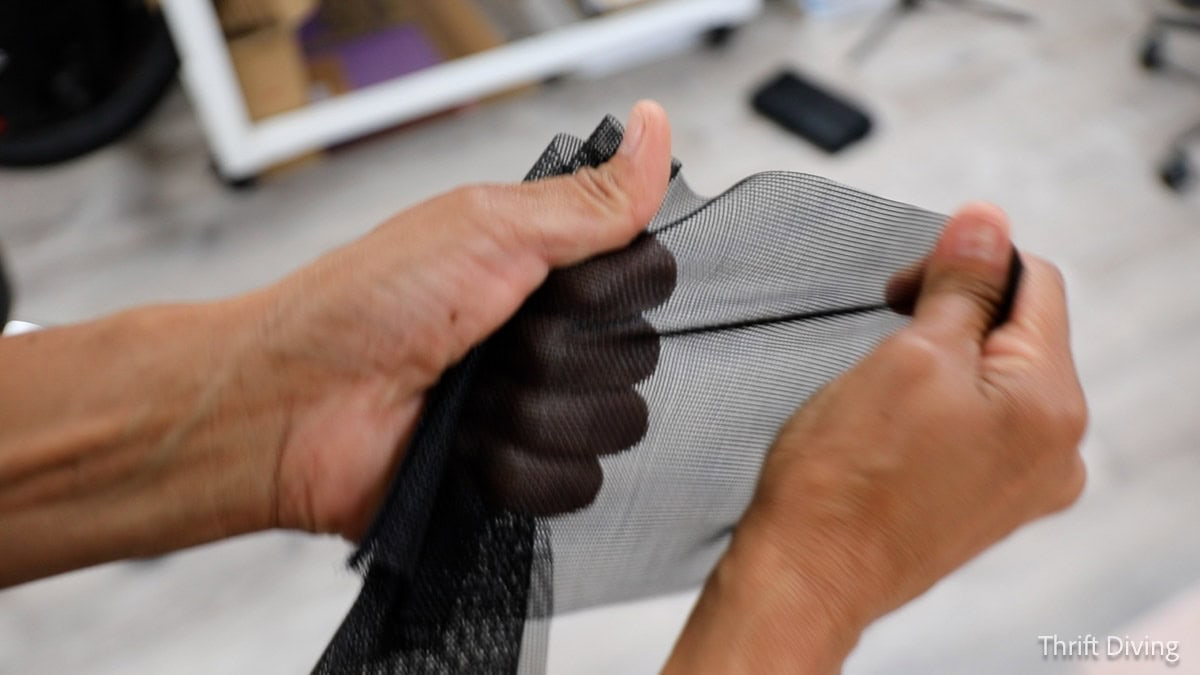
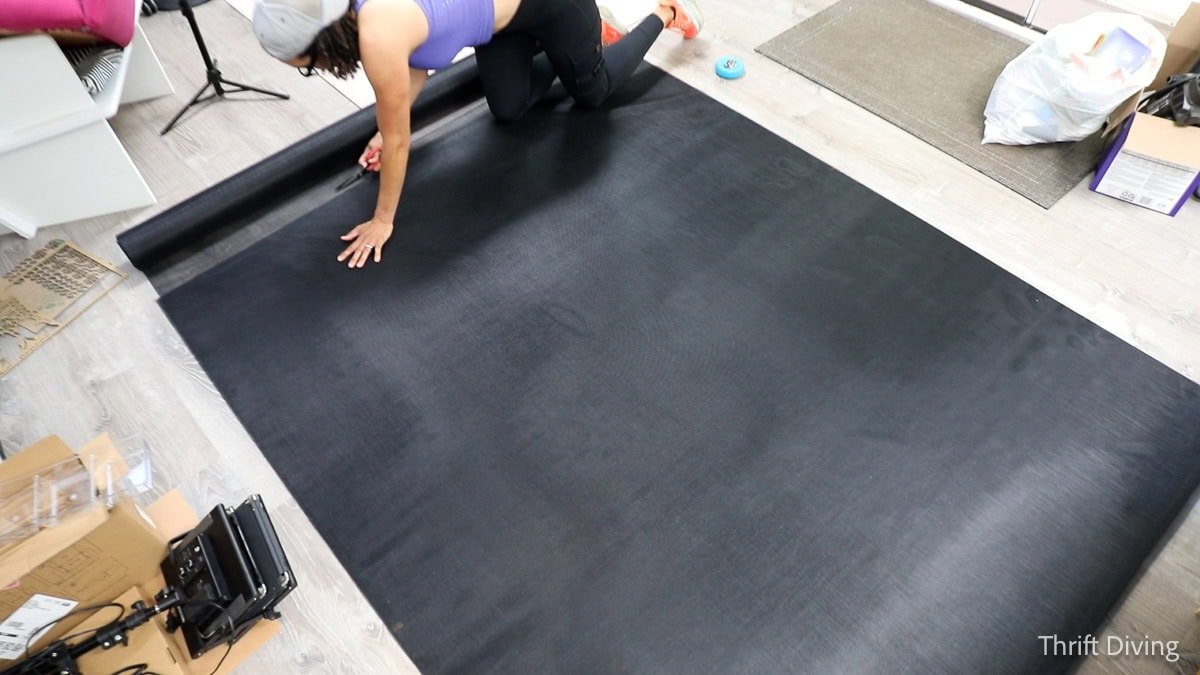
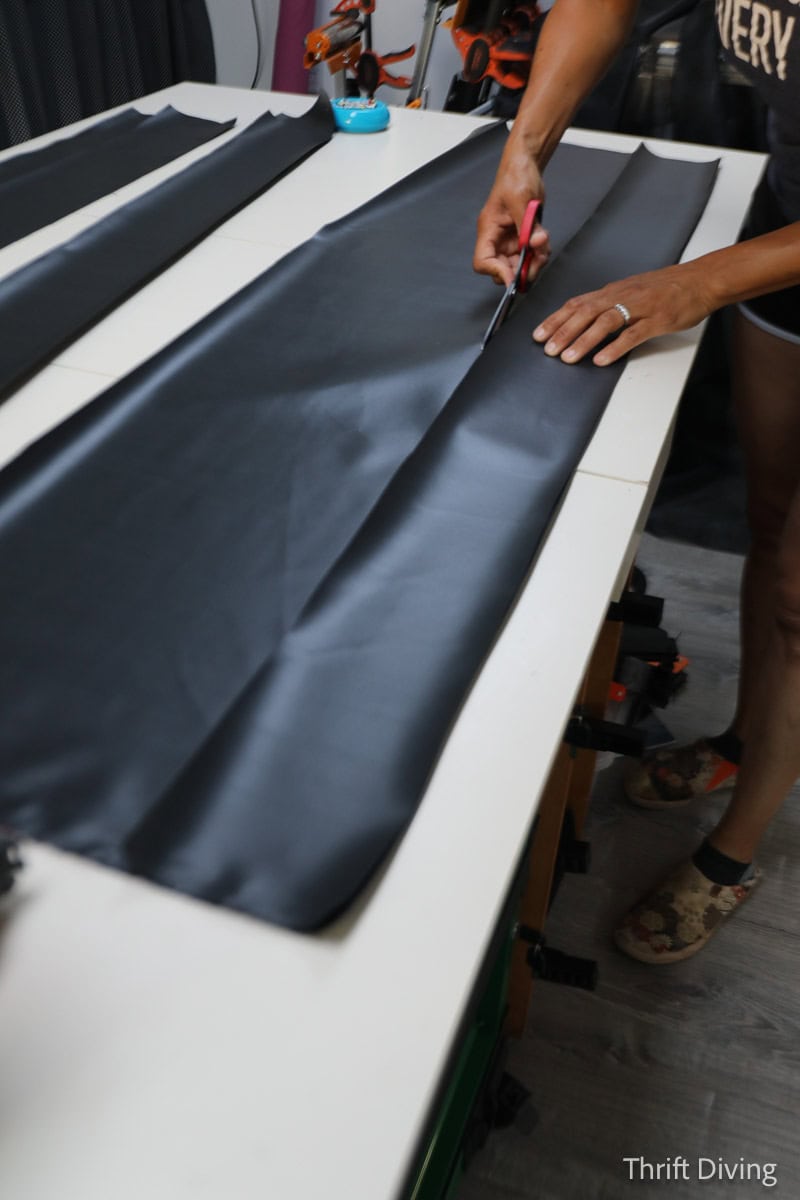
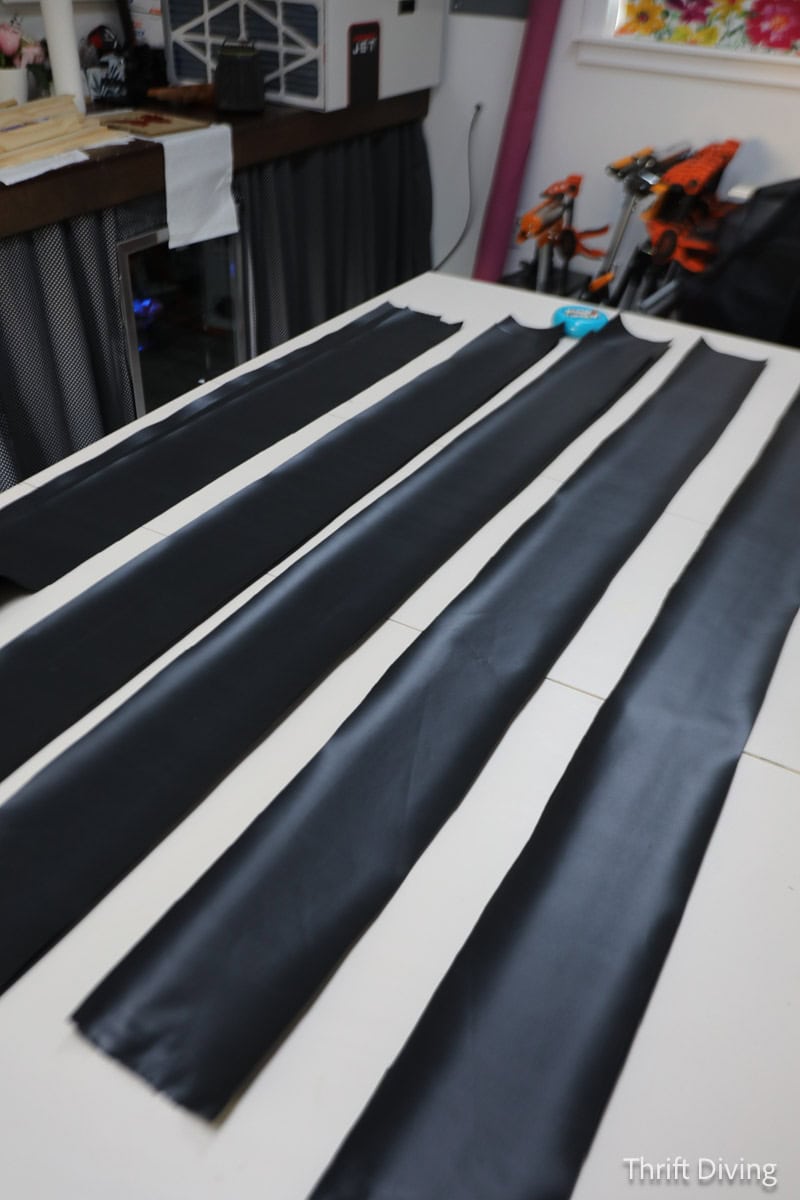
STEP 3: Lay out the screen and cut 8 panels of screen.
You’ll need to cut two panels of screen for each screen panel for each side of the gazebo, for a total of 8 panels. You’ll need to make sure your roll of screen is wide enough, too. My screen roll was 72 inches x 100 feet. Yes, it was a huge roll! A big thanks to Phifer for sending their new TuffScreen “No See Ums” screen to me for this project.
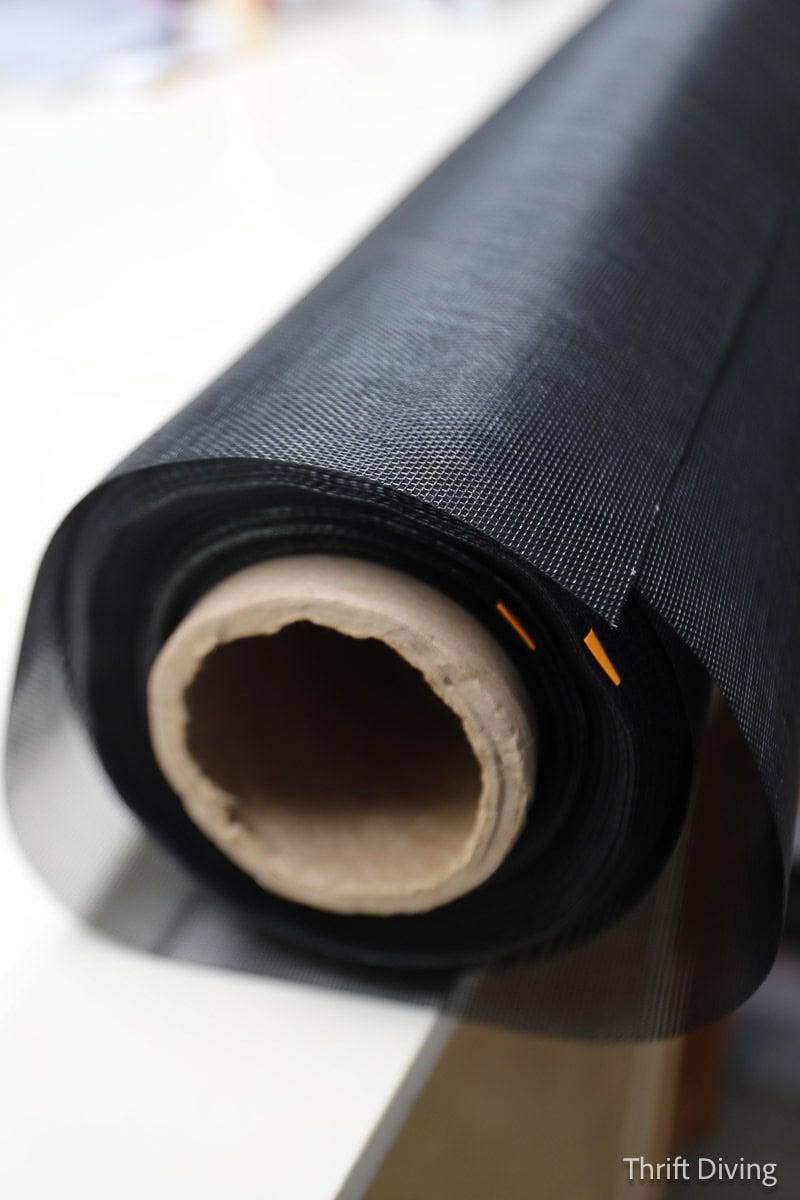
Can I just say that the quality of the screen you use for your gazebo makes a world of difference. Not all screen is built the same! I had contacted Phifer last summer to ask them if they would supply the screen for this project, because they make TuffScreen “No-See-Ums” which is tightly woven with vinyl-coated polyester so that the smallest inserts can’t crawl through. I wanted something that would give a little bit of daytime privacy, too. And, of course, something that wasn’t going to tear after one year of exposure to the elements! This would be perfect for this project (and I have enough left that I can use it for windows and doors around the house!).
My gazebo is 111″ wide from post to post. The screen was 72″ wide, so I needed to use two panels of screen and sew a zipper in the middle of the two panels. It would be too wide with 144″ inches of screen width, which means I would have extra to trim some off the sides.
And as you can imagine, working with wide widths of screening, you’ll need a lot of floor space to work! 🙂
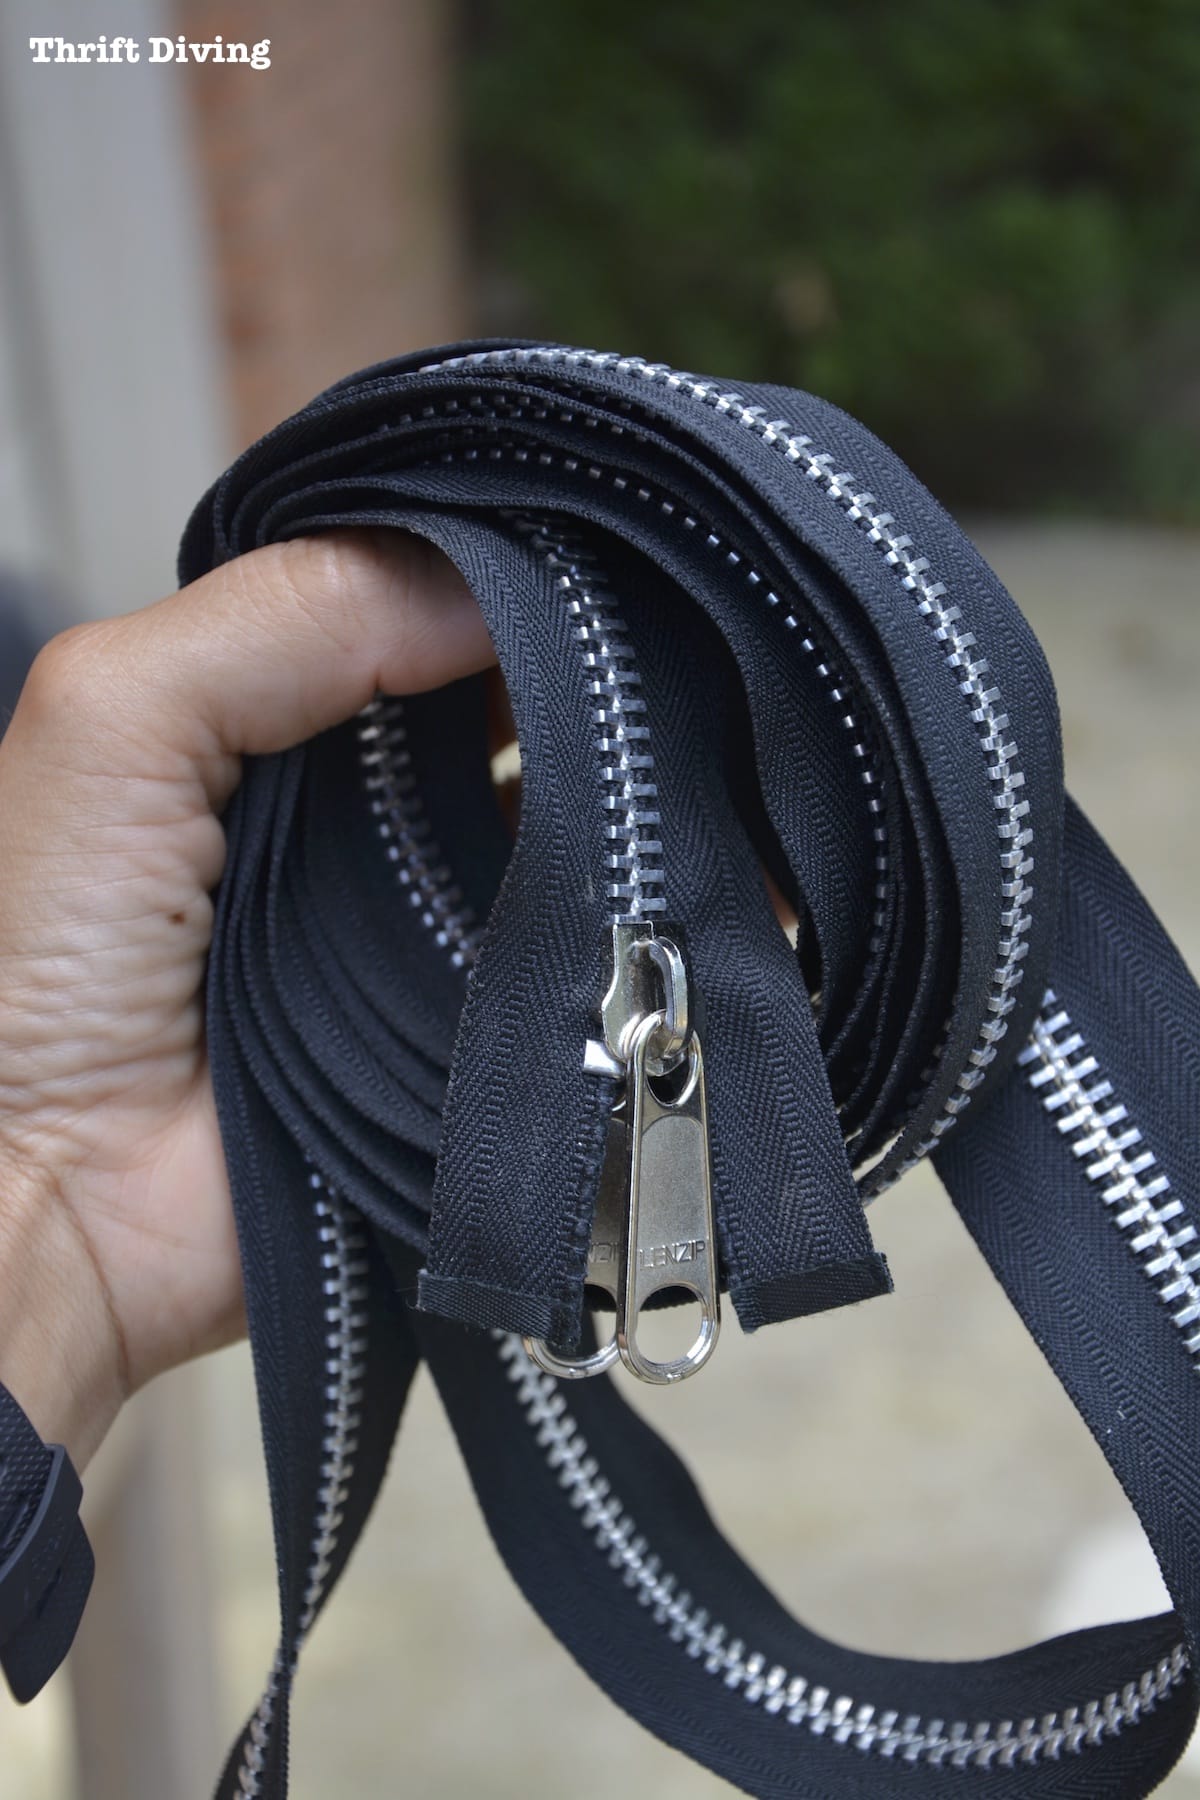
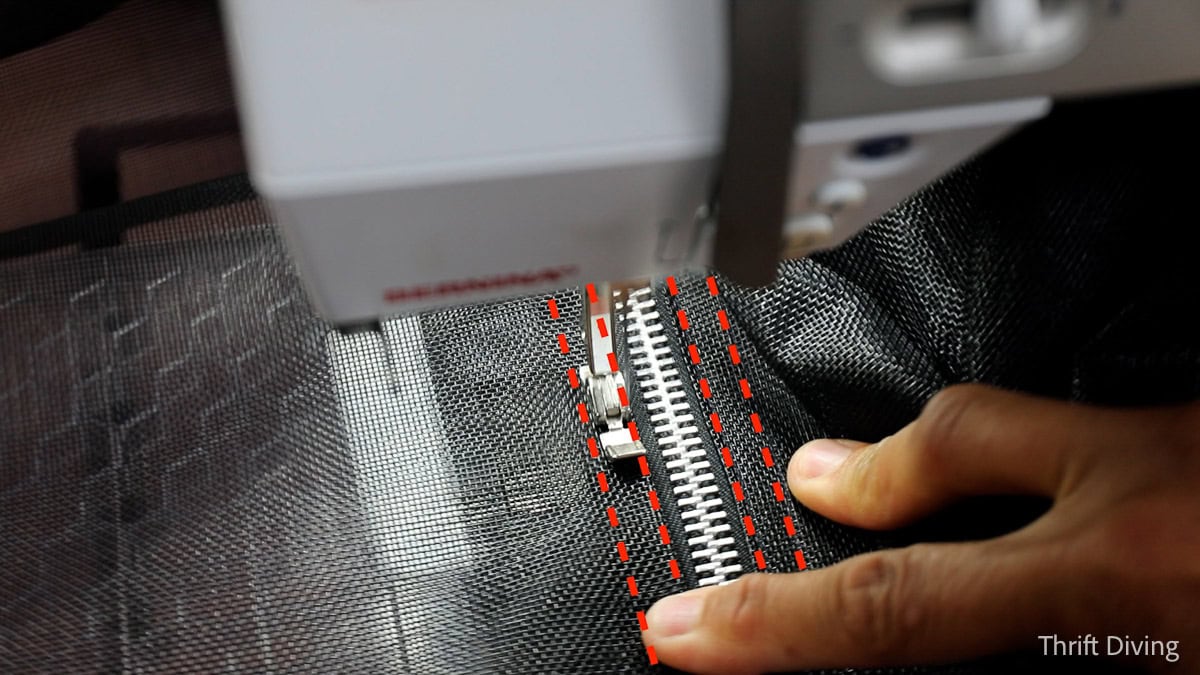
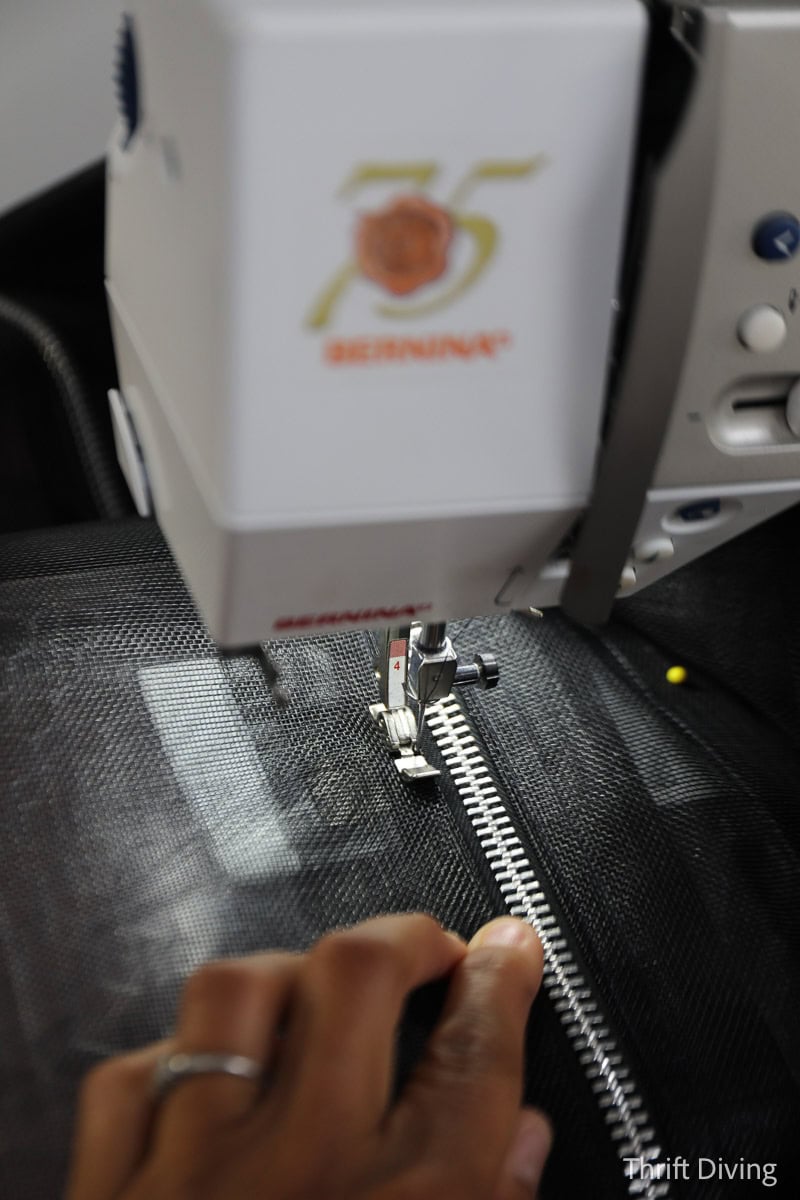
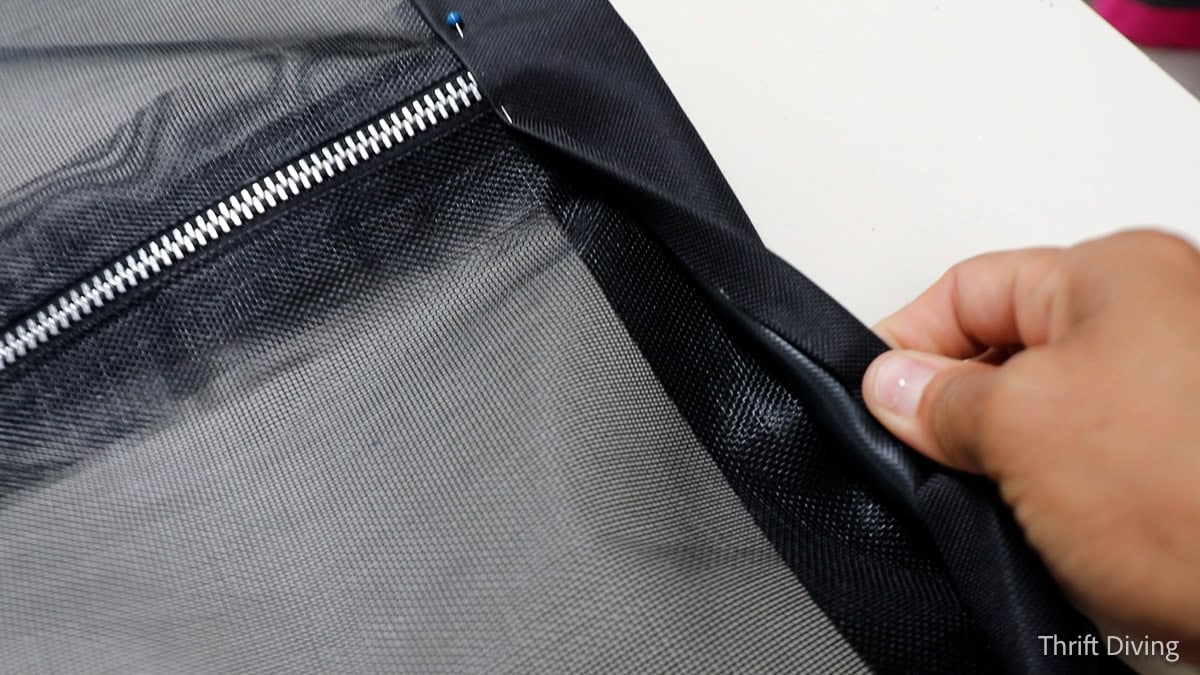
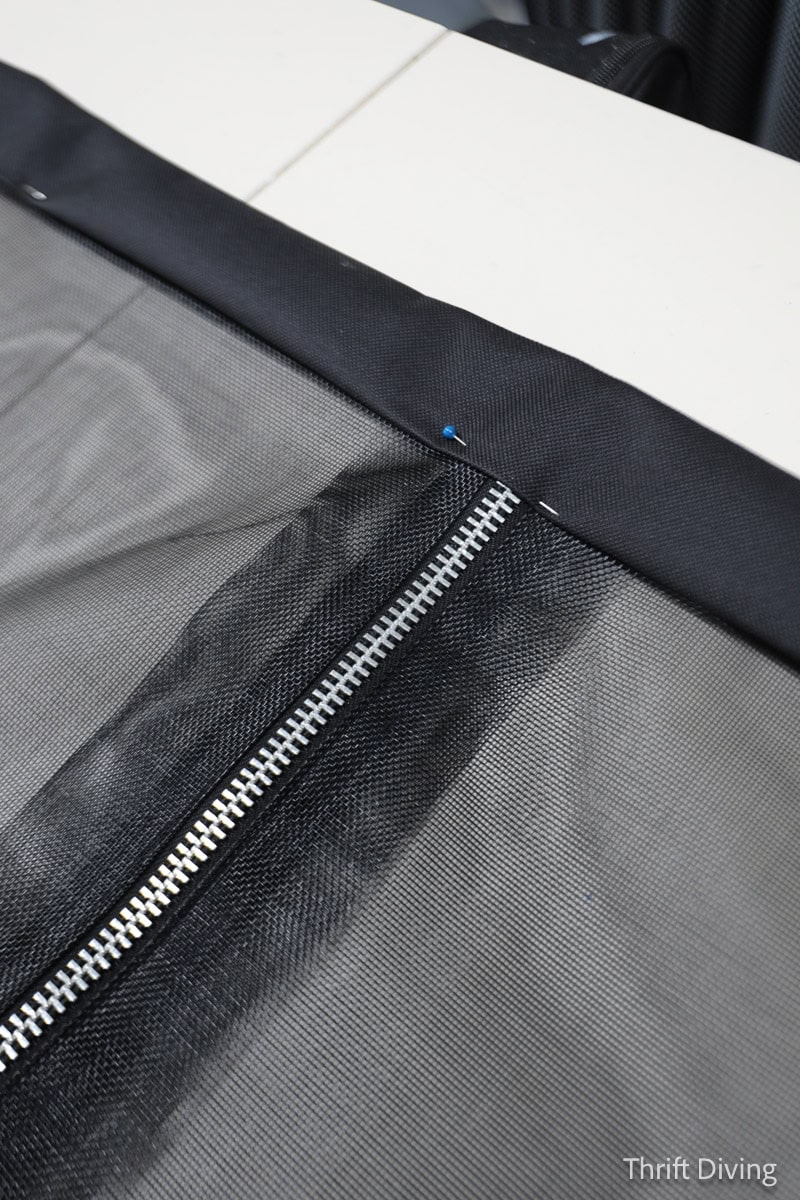
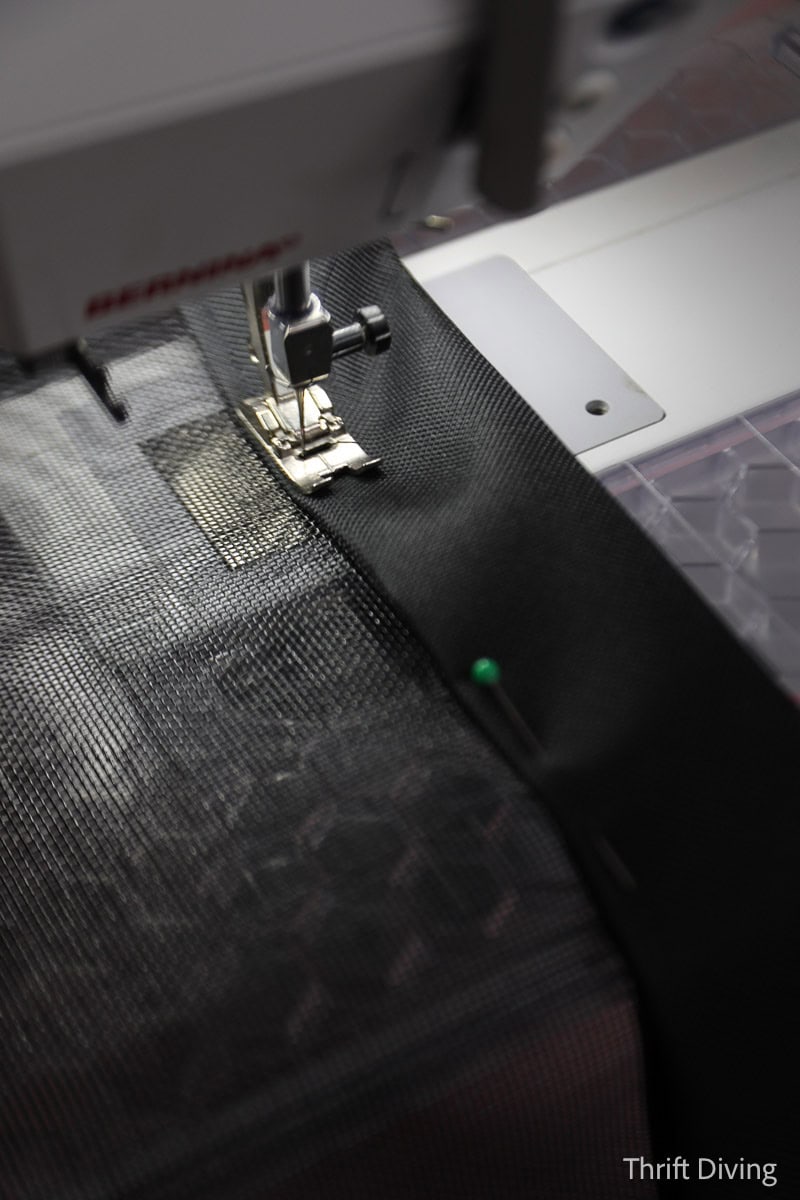
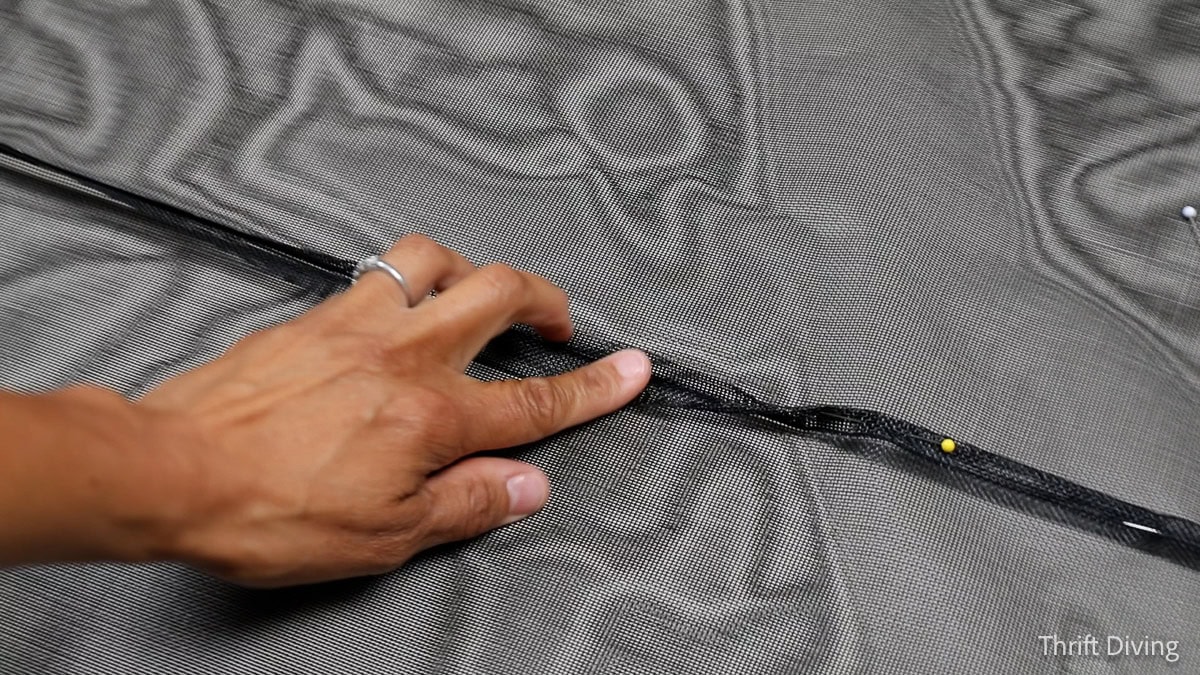
STEP 4: Pin and sew a huge zipper down the middle of the panels.
These are sleeping bag zippers. They’re perfect for making Velcro panels to screen in your gazebo (and DIY garage door screens, like the one I made a few years ago when the garage was my workspace). They’re heavy duty and are reversible. These have metal teeth and are a little more expensive (about $25 each). But on Amazon, you can find similar plastic reversible #10 zippers for a fraction of the cost, so I would recommend you try those, to keep costs down.
By the way, there is a lot of sewing in this project, and you may need to be an advanced or intermediate sewer to do this project. But if you can sew a straight line, you got this. 🙂 If you can fold a piece of screen and sew over it with Velcro, you’re good. If you can put in a zipper, you’re golden. 🙂 The hardest part is that the gazebo screens are big and bulky, and that can feel overwhelming to a beginner, but it’s not impossible.
Okay….so back to the project–You’ll want to double sew them along the sides of the zipper to secure the screening to the zipper. It’s awkward maneuvering the large panels of screen through the sewing machine, so I liked to roll up the screen while sewing in the zipper. It just made it so much easier to maneuver through the machine.
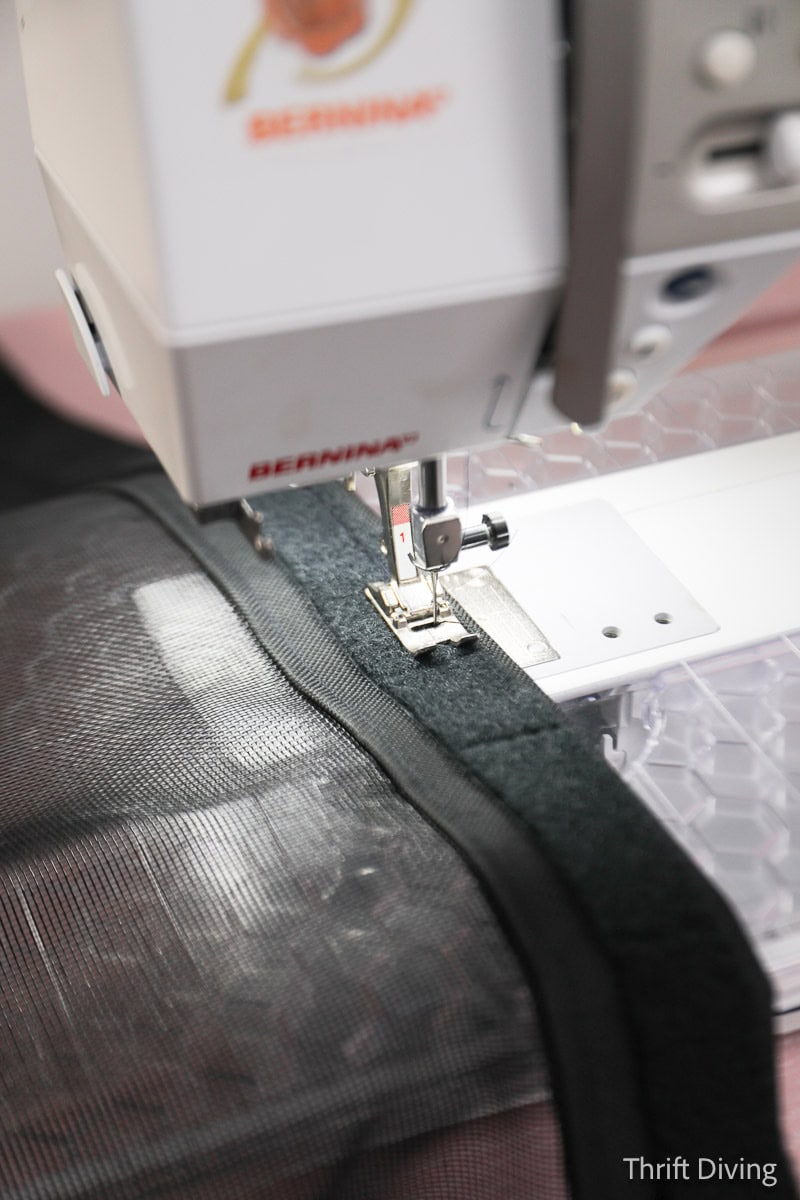
STEP 5: Add a panel of waterproof outdoor fabric to the top. Sew on Velcro.
There is no seam allowance needed at the top, because the binding will be fitted and sewn to the top of the screened panels. This fabric is a waterproof fabric I bought from the fabric store. I wanted the edges to be finished off nicely. You can make the binding as thick as you want, but it should be at least the same width as the 1″ Velcro. Mine is a little thicker. I cut out strips of fabric to make the binding.
I folded each end of the waterproof outdoor fabric under 1/2″ inch, then folded it in half. I placed the raw edge of the gazebo screen inside of the binding, then top-stitched it in place.
Once the top binding was sewn in place, I peeled off the sticky back to the Velcro and placed it on top of the binding at the top edge of the gazebo screen. I sewed the Velcro in place with two rows of stitching close to the edges. I actually left the edges of each end at the top un-sewn until I could fit the screen to the gazebo and mark exactly where the end of the panel would attach to the vertical post.
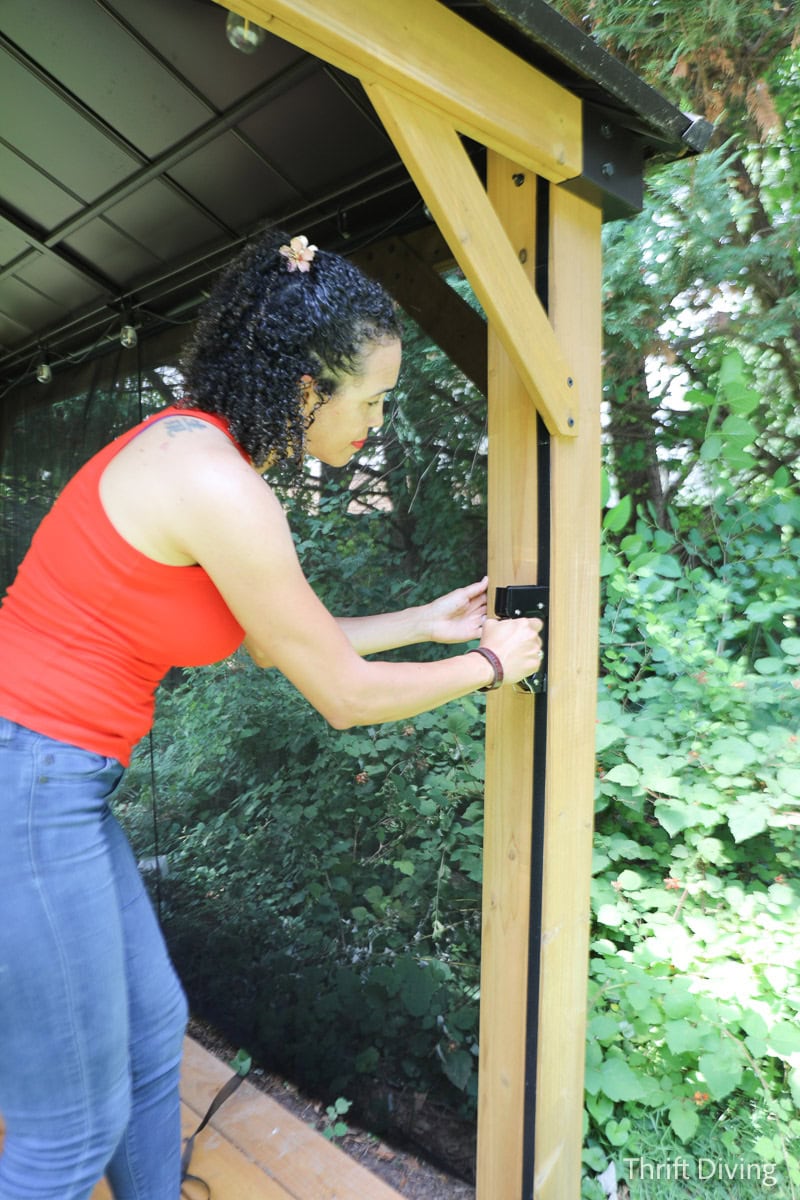
STEP 6: Test-fit the panel and add Velcro to the sizes of the gazebo screen.
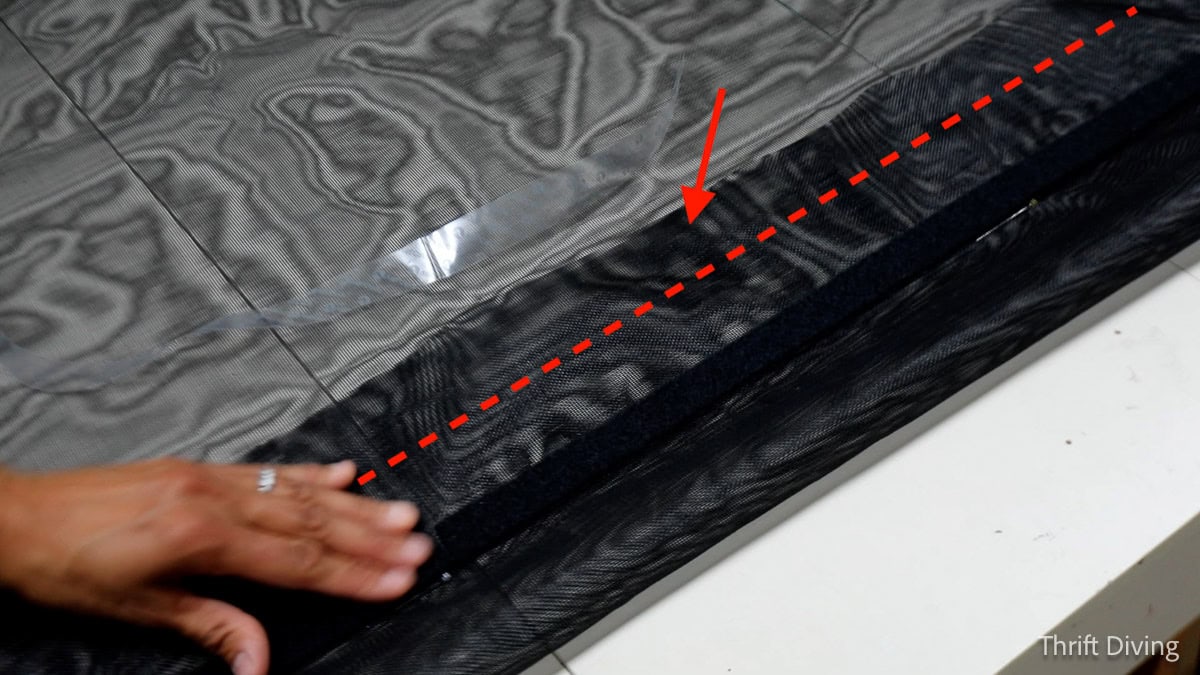
When you’re sewing, it doesn’t matter if you are making a dress or a gazebo screen–everything fits better when you test, test, test! So after I sewed the Velcro in place at the top, I took the panel to the gazebo and test-fit it in place. I pulled each side to the vertical post, marking with pins exactly where the edge of the screen hits the post (where the red dotted line is). This is where I would sew in the soft Velcro at the sides of the gazebo panels.
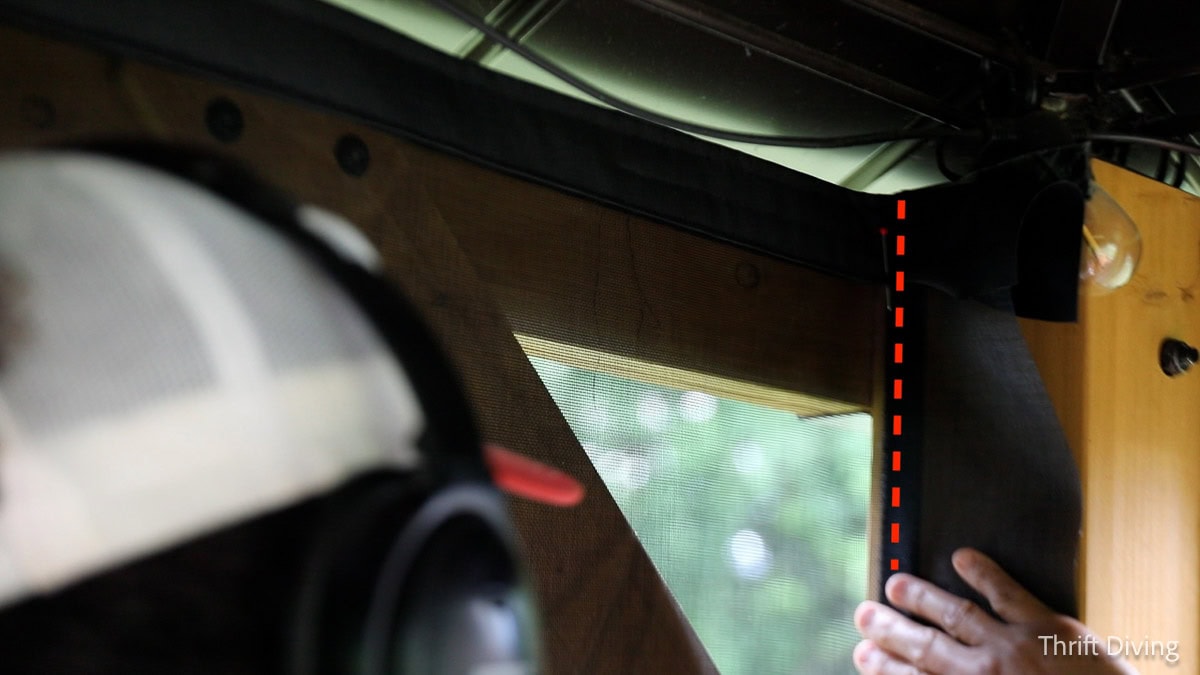
Check the height of the panels to the ground (e.g. do you want them even with the ground, or draped on the ground with a little more length to them). Check these measurements against the measurements you took earlier.
STEP 7: Sew the Velcro to the sides of the gazebo screen panel.
The gazebo screen works because they’re mounted to the inside edges and posts of the gazebo using Velcro. The top Velcro is sewn to FRONT of the gazebo screen, facing outwards, attached at the top. The sides have Velcro that is sewn to the FRONT of the gazebo screen edges.
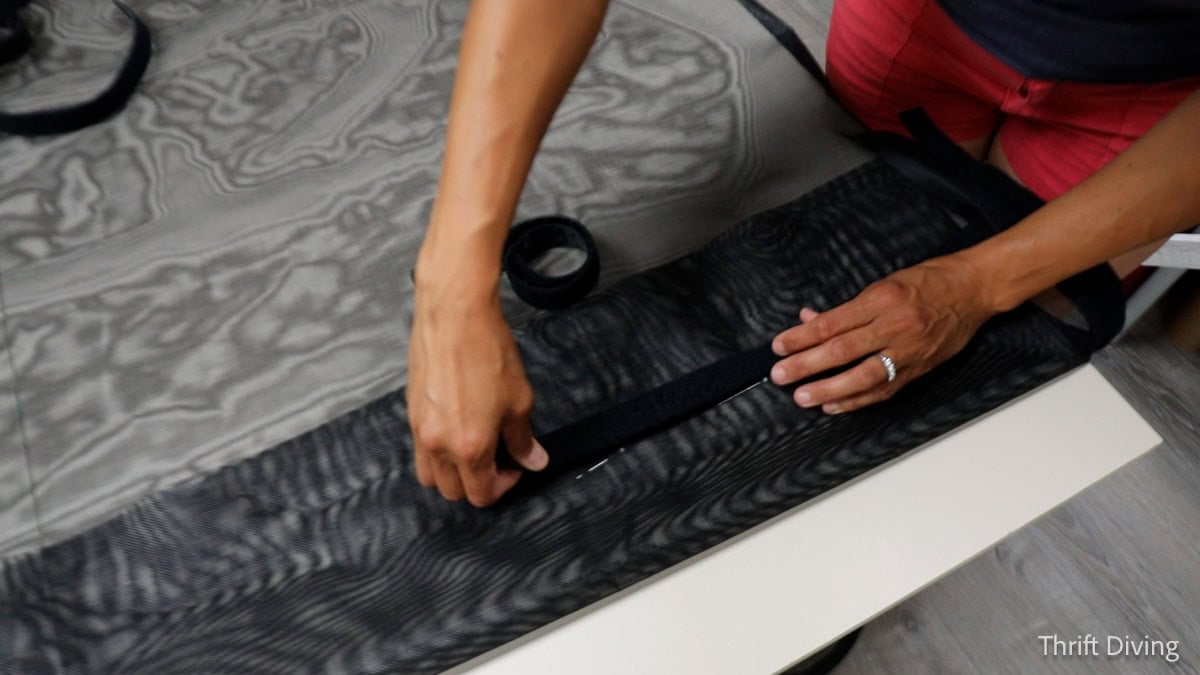
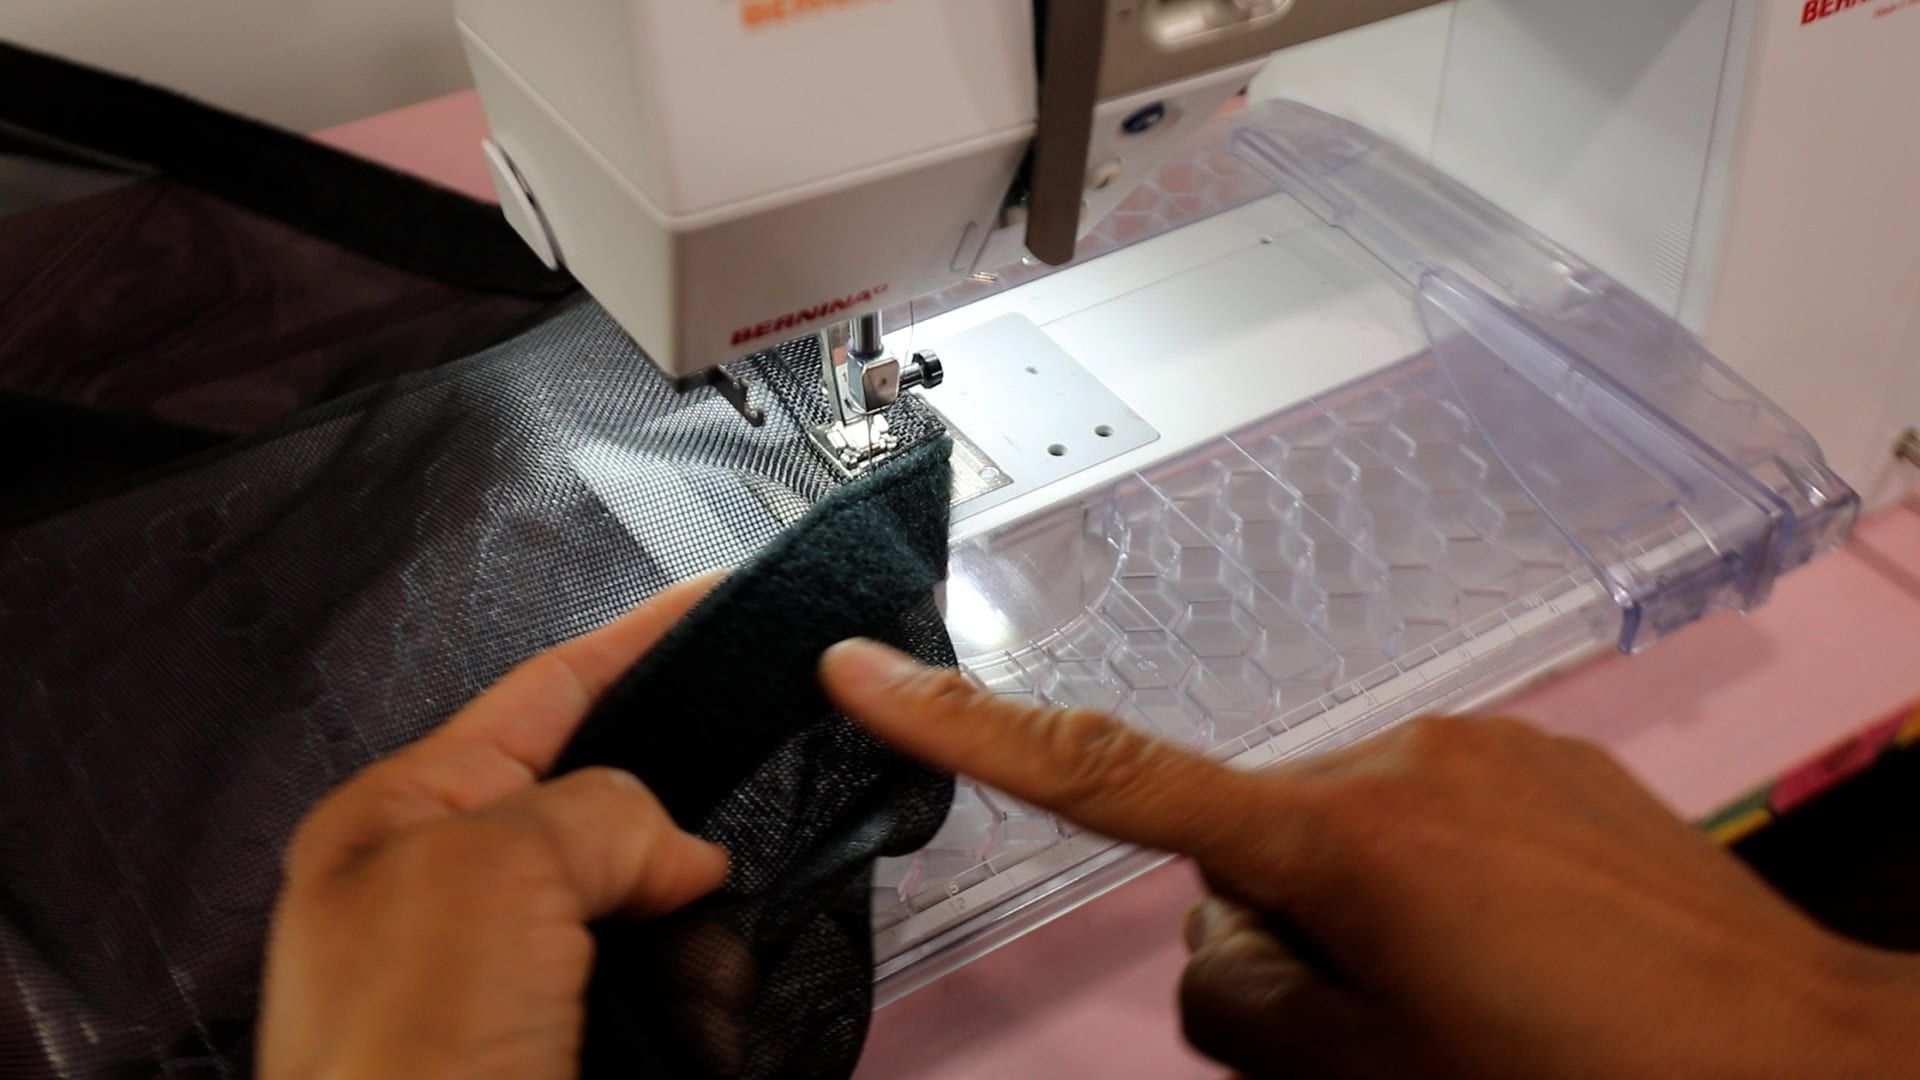
When I test-fit the gazebo screen and marked where the Velcro should be attached to the sides, I used pins to create the edge of where the Velcro should be placed. I attached a soft piece of Velcro to the edge, and folded under 1-1/2″ to 2″ to create a fold under the Velcro. I topstitched the fold and Velcro into place. Next, I finished sewing the top edges with the binding and Velcro so it’s neat and tidy (and secure!).
Sew two rows of stitching on top of the folded screen, securing the Velcro in place along the sides of the gazebo panels.
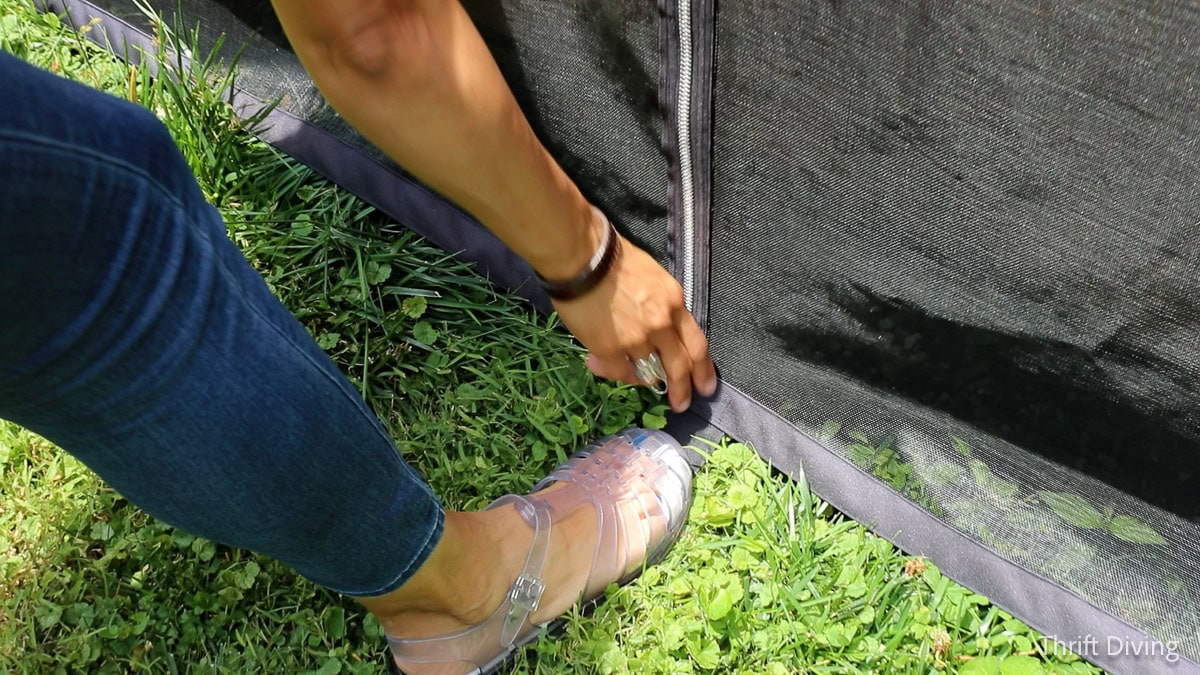
STEP 8: Create a bottom hem, applying binding.
At the bottom of the panels, I added binding to finish off the raw edge of the screen, just like at the top, stitching into place, making sure the zipper could open at the bottom.
My gazebo sits next to a wooded area of my lawn, so the front and sides are the only viable ways to come and go. The back didn’t need a zipper, so I just sewed two panels together using a flat felled seam (this quick tutorial was awesome for helping me figure out how to do it). I used Velcro at the top and sides. And for the top, I just rolled the screen under to create a hem (I ran out of waterproof binding). At the bottom, I left it raw since it was hidden in the back of the gazebo.
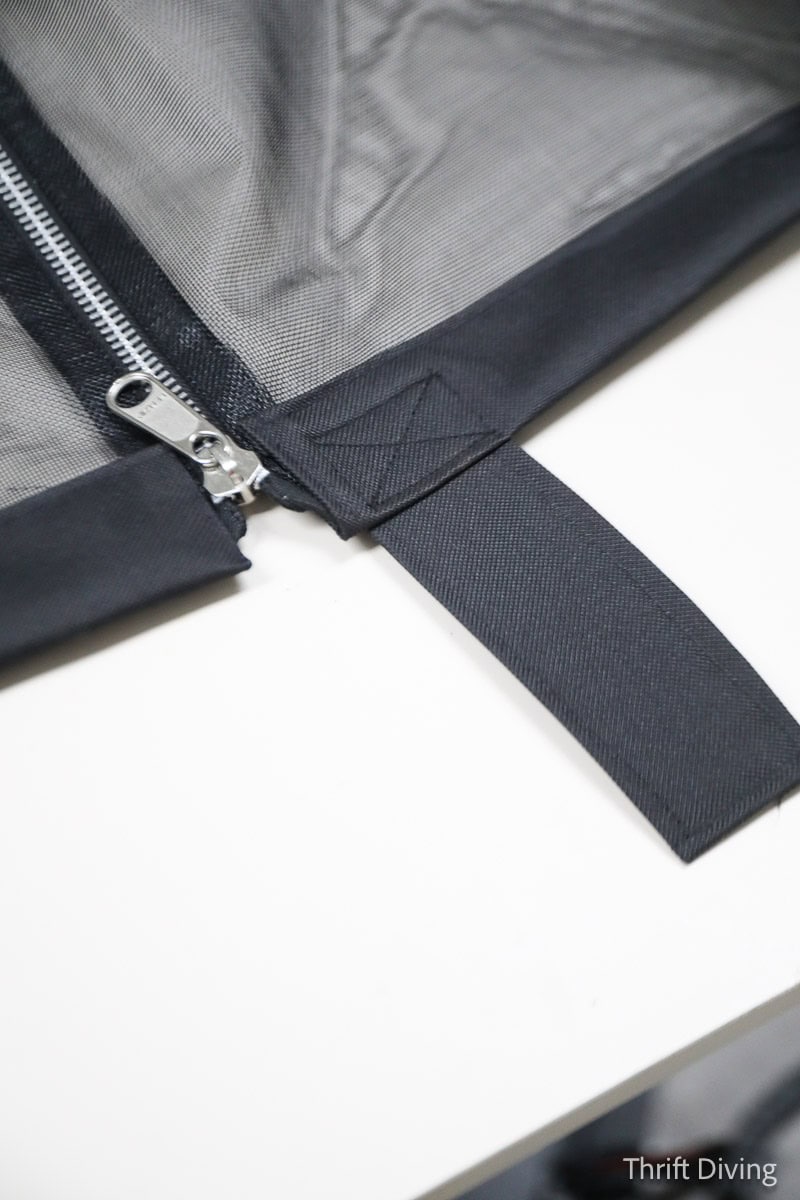
STEP 9: Attach a foot tab.
I love, love, love this idea! I came up with it while testing the gazebo panels and going in and out. You know how when you want to open a zipper, you need to hold the other side to keep the other side in place while you’re opening and closing the zipper? Well, opening the gazebo screen would require two hands: one to pull taut, and the other to pull the zipper. Well, using some of the waterproof fabric to make a “foot tab” at the bottom of the panel and sewing it to the bottom edge near the zipper, allows you to step on it, and pull up the zipper with one hand.
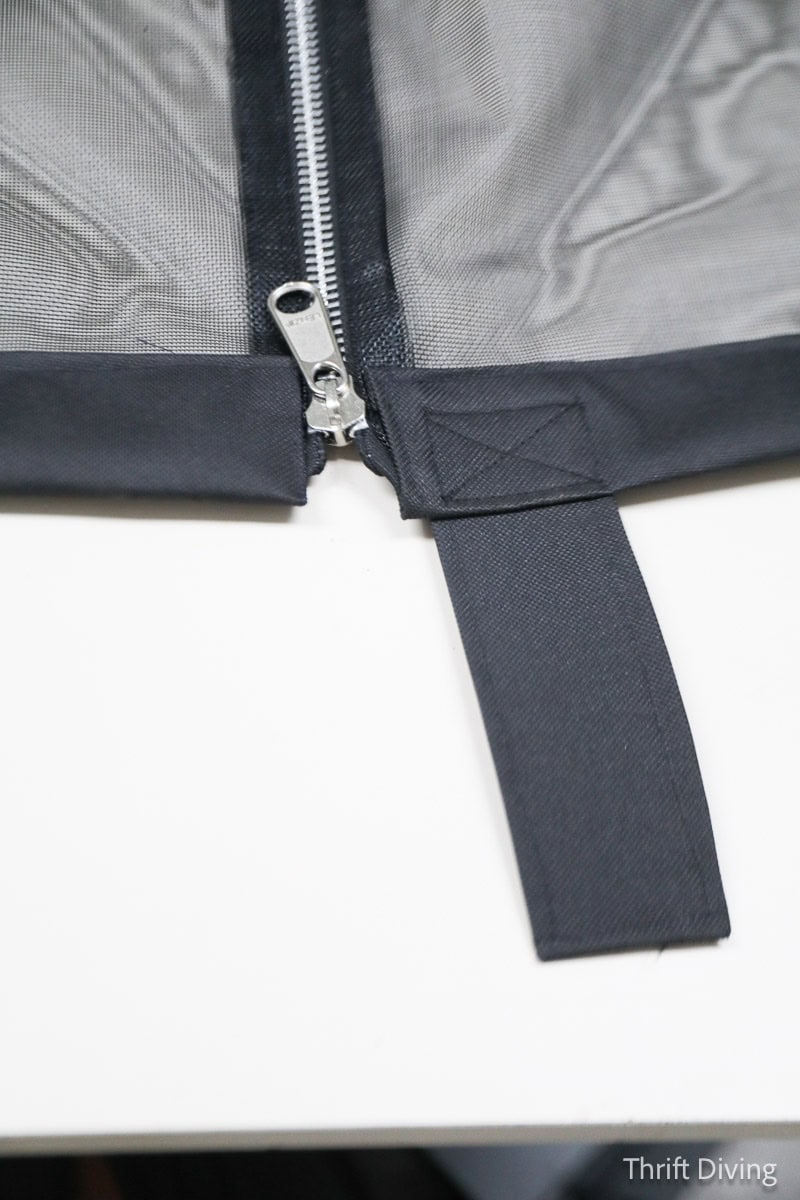
YAY! Imagine bringing food to the gazebo and having to put it on the ground because you need two hands. NO! This allows you to keep one hand on your food, and the other on the zipper. 🙂
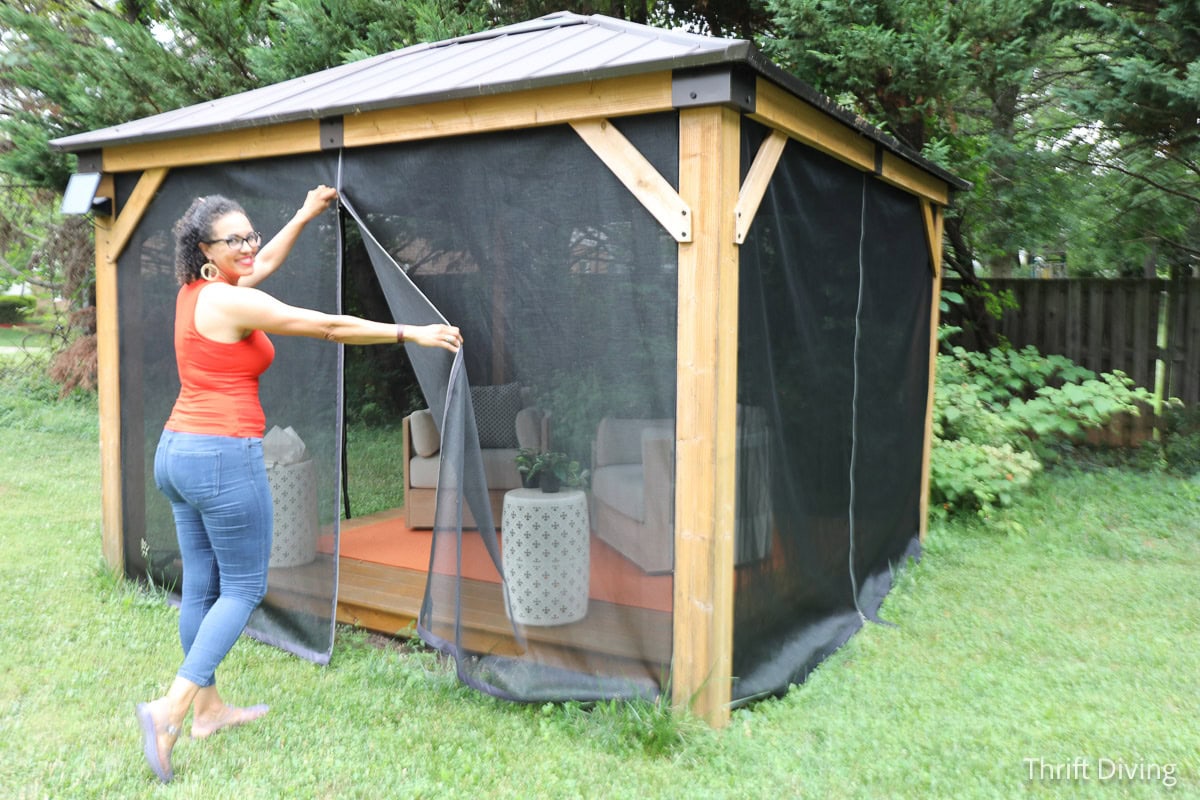
STEP 10: Hang all the gazebo screens!
Since I did a bunch of test fitting along the way, the panels are a perfect fit once I attach them with the Velcro up top and along the sides! They fit snugly because of the test-fitting. Yes, there is a gap along the top of the gazebo, where the roof slopes, but even with mosquito curtains, this gap is just part of the gazebo. I’d like to think that most flying bugs aren’t smart enough to navigate their way to the gap just to get in to annoy us. 🙂 HA!
Don’t worry about the wrinkles in the gazebo screens. They get wrinkled because of all the maneuvering of the fabric through the sewing machine, but once they hang, get exposed to sun and settle in place, the wrinkles disappear.
Voila, you’re done! Oh, and if you want, add a string of gazebo lights (like these gazebo lights with a solar panel) and a small rechargeable camping fan to keep it cool when it heats up.
So How Much Did the DIY Gazebo Screens Cost?
It’s really hard to say, since Phifer supplied the screen. But let’s break it down:
- Phifer TuffScreen No-See-Ums – $260 – This was provided at no cost to me, but if I have to purchase it for my 11′ x 11′ gazebo, that’s about how much I would have paid for the screening.
- Waterproof fabric – I don’t remember how much I paid, but I think it was a yard, no more than $15.
- Velcro Extreme Outdoor – I already had this on hand from a few years ago, and I paid about $11 a roll for it. It’s now a whopping $24 a roll!!! I used 10 rolls. If I had to do this project over again and buy the materials now at that price, I would consider using smaller sections of Velcro, or using hooks at the top to hold the gazebo screen in place. Or even better, I would still use Velcro, but I wouldn’t use the Extreme Outdoors variety, since the interior of the gazebo isn’t exposed to rain or sun. And because it’s stapled into place anyhow, as long as it’s sticky on the back, the staples are doing all the hard work, not the Extreme Outdoors Velcro.
- Arrow T301 stapler – I also had this tool, so I didn’t need to purchase this or the staples.
- #10 Camping bag zipper with double tab – I already had the 3 zippers that I purchased years before, for another project, so I didn’t have to buy these. If I were paying for zippers today, I would use a cheaper zipper from Amazon, like this #10 nylon zipper, for $10 and not the $24 metal-tooth zipper that I used.
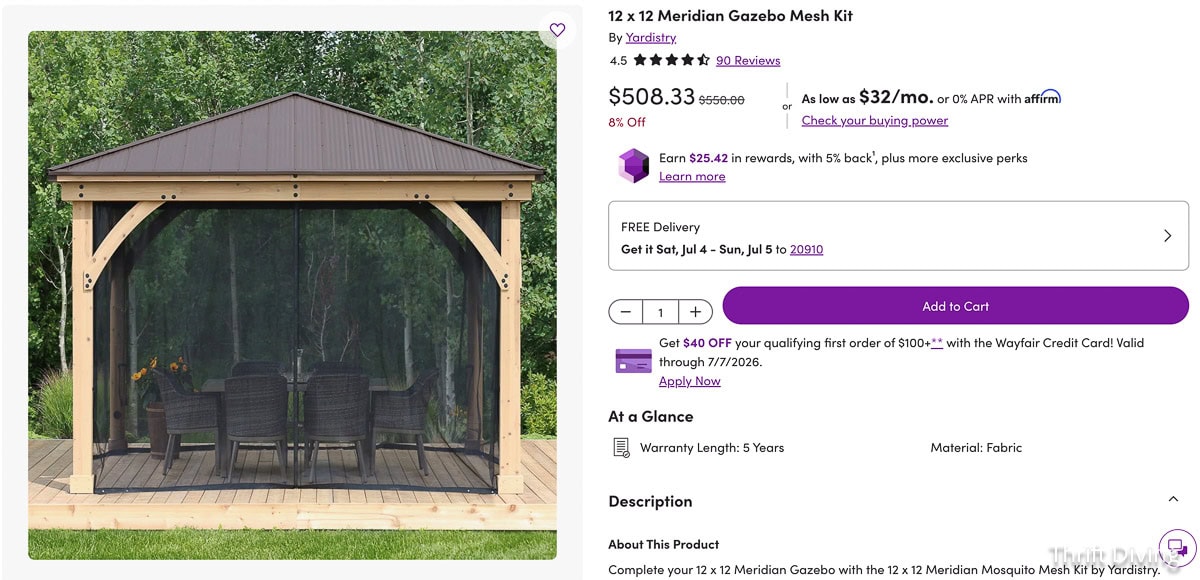
So, depending on the size of your gazebo, you can probably do this project for about $300 -$350 for an 11′ x 11′ gazebo, depending on what type of Velcro or hooks you use. 🙂 Still cheaper than the $500 gazebo screens I saw at Wayfair! Interesting enough, these Wayfair gazebo screens use Phifer mesh, too! 🙂 The only difference is that they use a curtain rail for the gazebo screen to slide along a track.
Do You Have to Take Them Down in the Winter?
Nope! I won’t have to take them down in the winter. This screen mesh is so solid that the cold and freezing temps aren’t going to destroy them the way it did the mosquito net curtains. I might want to take them down if I just want the gazebo to be open, for whatever reason. They’re easy to fold and put away.
Anyhow, let’s take a look at the gazebo BEFORE and AFTER!
BEFORE
It was a great space, but the mosquito netting curtains didn’t last. And without curtains or screens, twigs and leaves would litter the gazebo. Not to mention the bugs were annoying. It definitely needed an easy solution. The new furniture I added earlier in the spring was exposed to the twigs and leaves, and I didn’t want it to get dirty, either.

AFTER!
Now, it looks amazing and we’re protected from falling debris, annoying mosquitos, and flying insects! I’m actually shocked that the screens are more like fabric because they’re so tightly woven. It gets a little hot in the gazebo, so the rechargeable camping fan hung on the inside hook of the gazebo has been helping to keep it cool!
This is a project I had been wanting to get done for a long time. As long as we have lived in our house, we’ve been plagued by mosquitoes and had never found a reasonable solution for outdoor living space, until now!!
So what do you think?! Have you been wanting a gazebo with screens, too, but didn’t know how to affordable make it happen? This is an easy DIY project, without paying an arm and a leg. And you can customize it to the size of your own gazebo.Leave a comment below and let me know what you think!
Love this project for your backyard? Click here to save it on Pinterest!
![]()

Download the 5 freebies!

Thrift Diving inspires women to decorate, improve, and maintain their home themselves...using paint, power tools, and thrift stores! Use these 5 printables, checklists, and ebooks to get started!
Serena, you did a fabulous job. Your gazebo is stylish and secure from mosquitos and other biting insects. I hope you can sit back and enjoy it this summer.
Awww, thank you, Alys!! I am soooo proud of it. I feel like it’s taken years to finally find the perfect outdoor living space, thanks to these gazebo screens. 🙂 Hope you enjoy summer, too, my friend! Thanks for commenting!