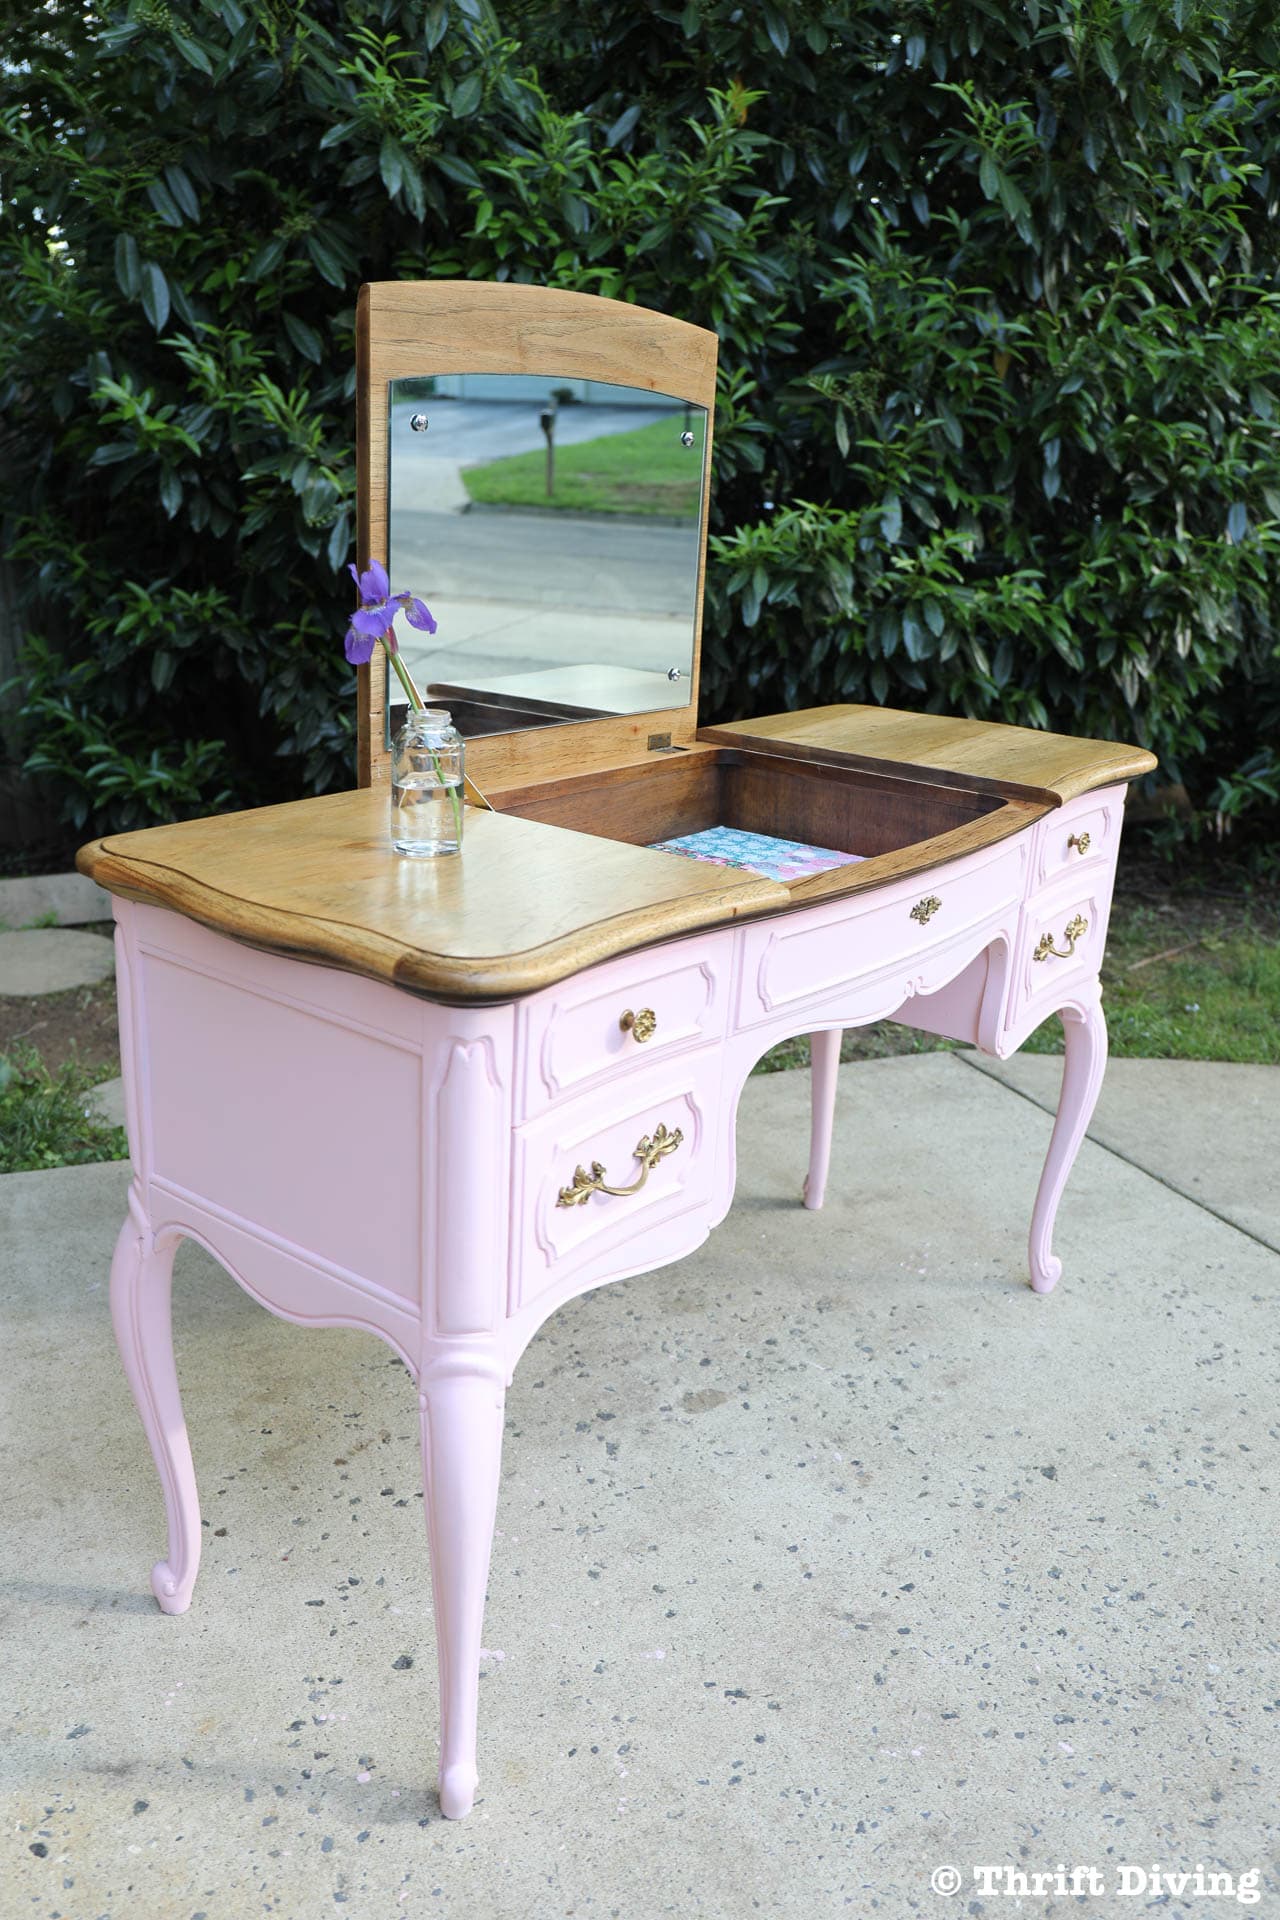
French Provincial Vanity Makeover: BEFORE and AFTER With Paint and Scrapbook Paper!
It feels like forever since I have done a proper furniture makeover, so I’m feeling very giddy with my latest project: a French Provincial vanity makeover!
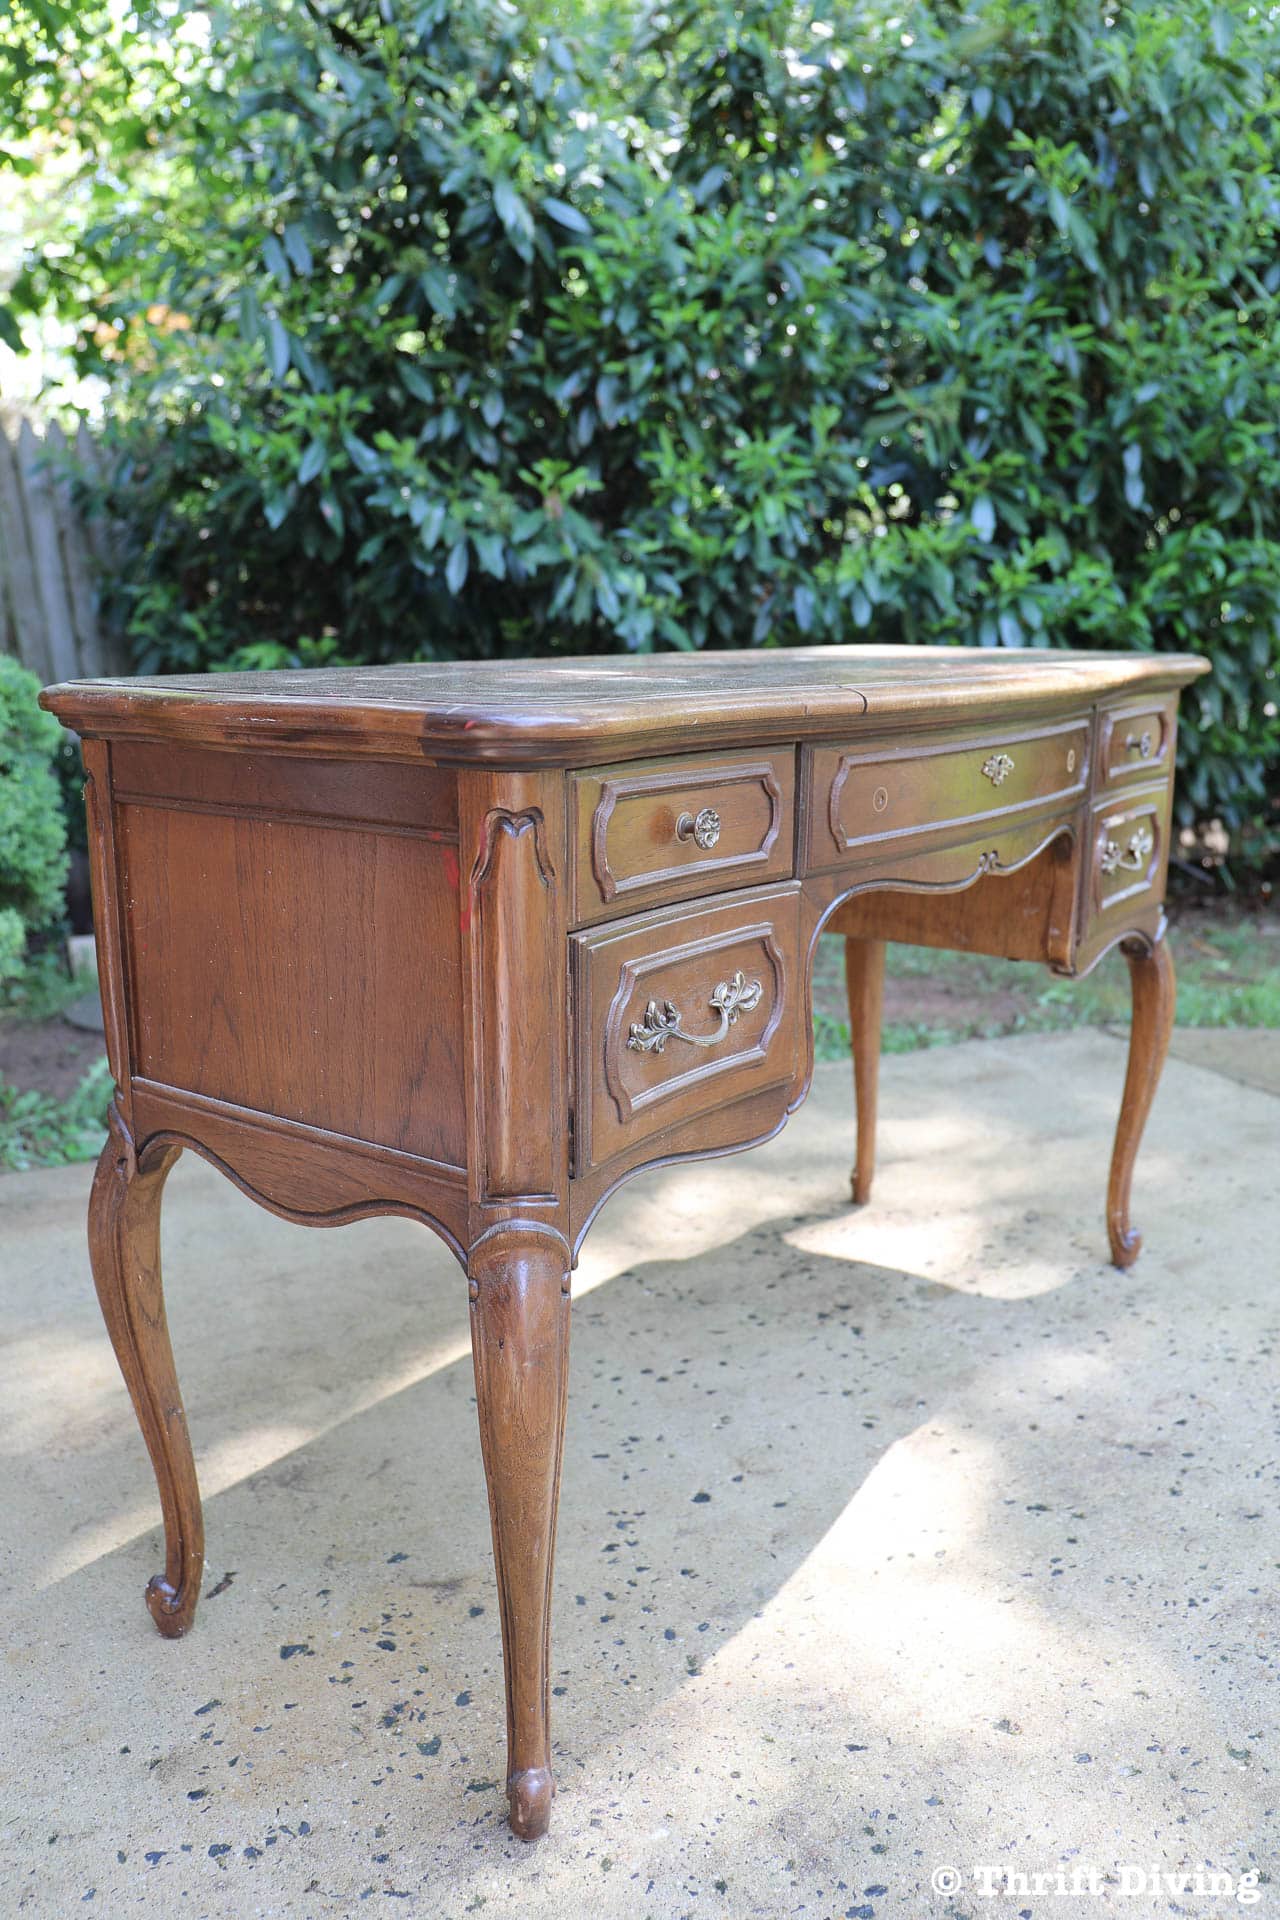
If you recall, exactly a year ago I found this beautiful French Provincial vanity at the thrift store for under $10. That is freakin’ insane. No joke–under $10!
(Psssst, if you enjoy this furniture makeover, check out these 3 posts on how to glam up your thrifted furniture with furniture appliques, Rub n’ Buff, and pretty stencils!)
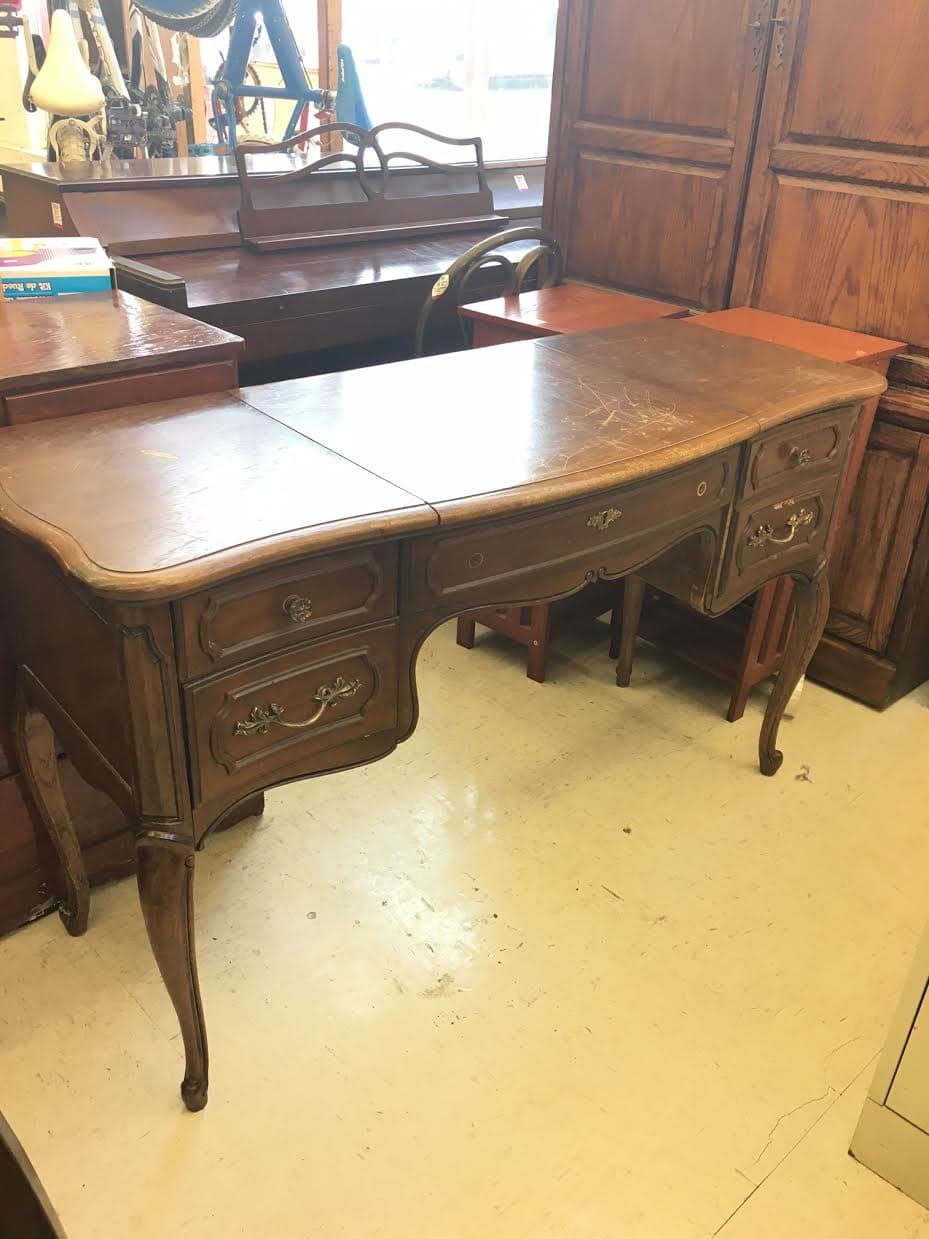
This beauty was hidden behind some other pieces. I gasped, grabbed an employee, and nearly choked when they said it was about $12.00.
Of course, with a coupon, I drove away feeling like I have won the lottery, paying only $9.67 for the vanity!
The lines were so beautiful. I debated on how I should refinish it. I asked my Facebook friends and they were also split down the middle: strip and re-stain……vs……paint it.
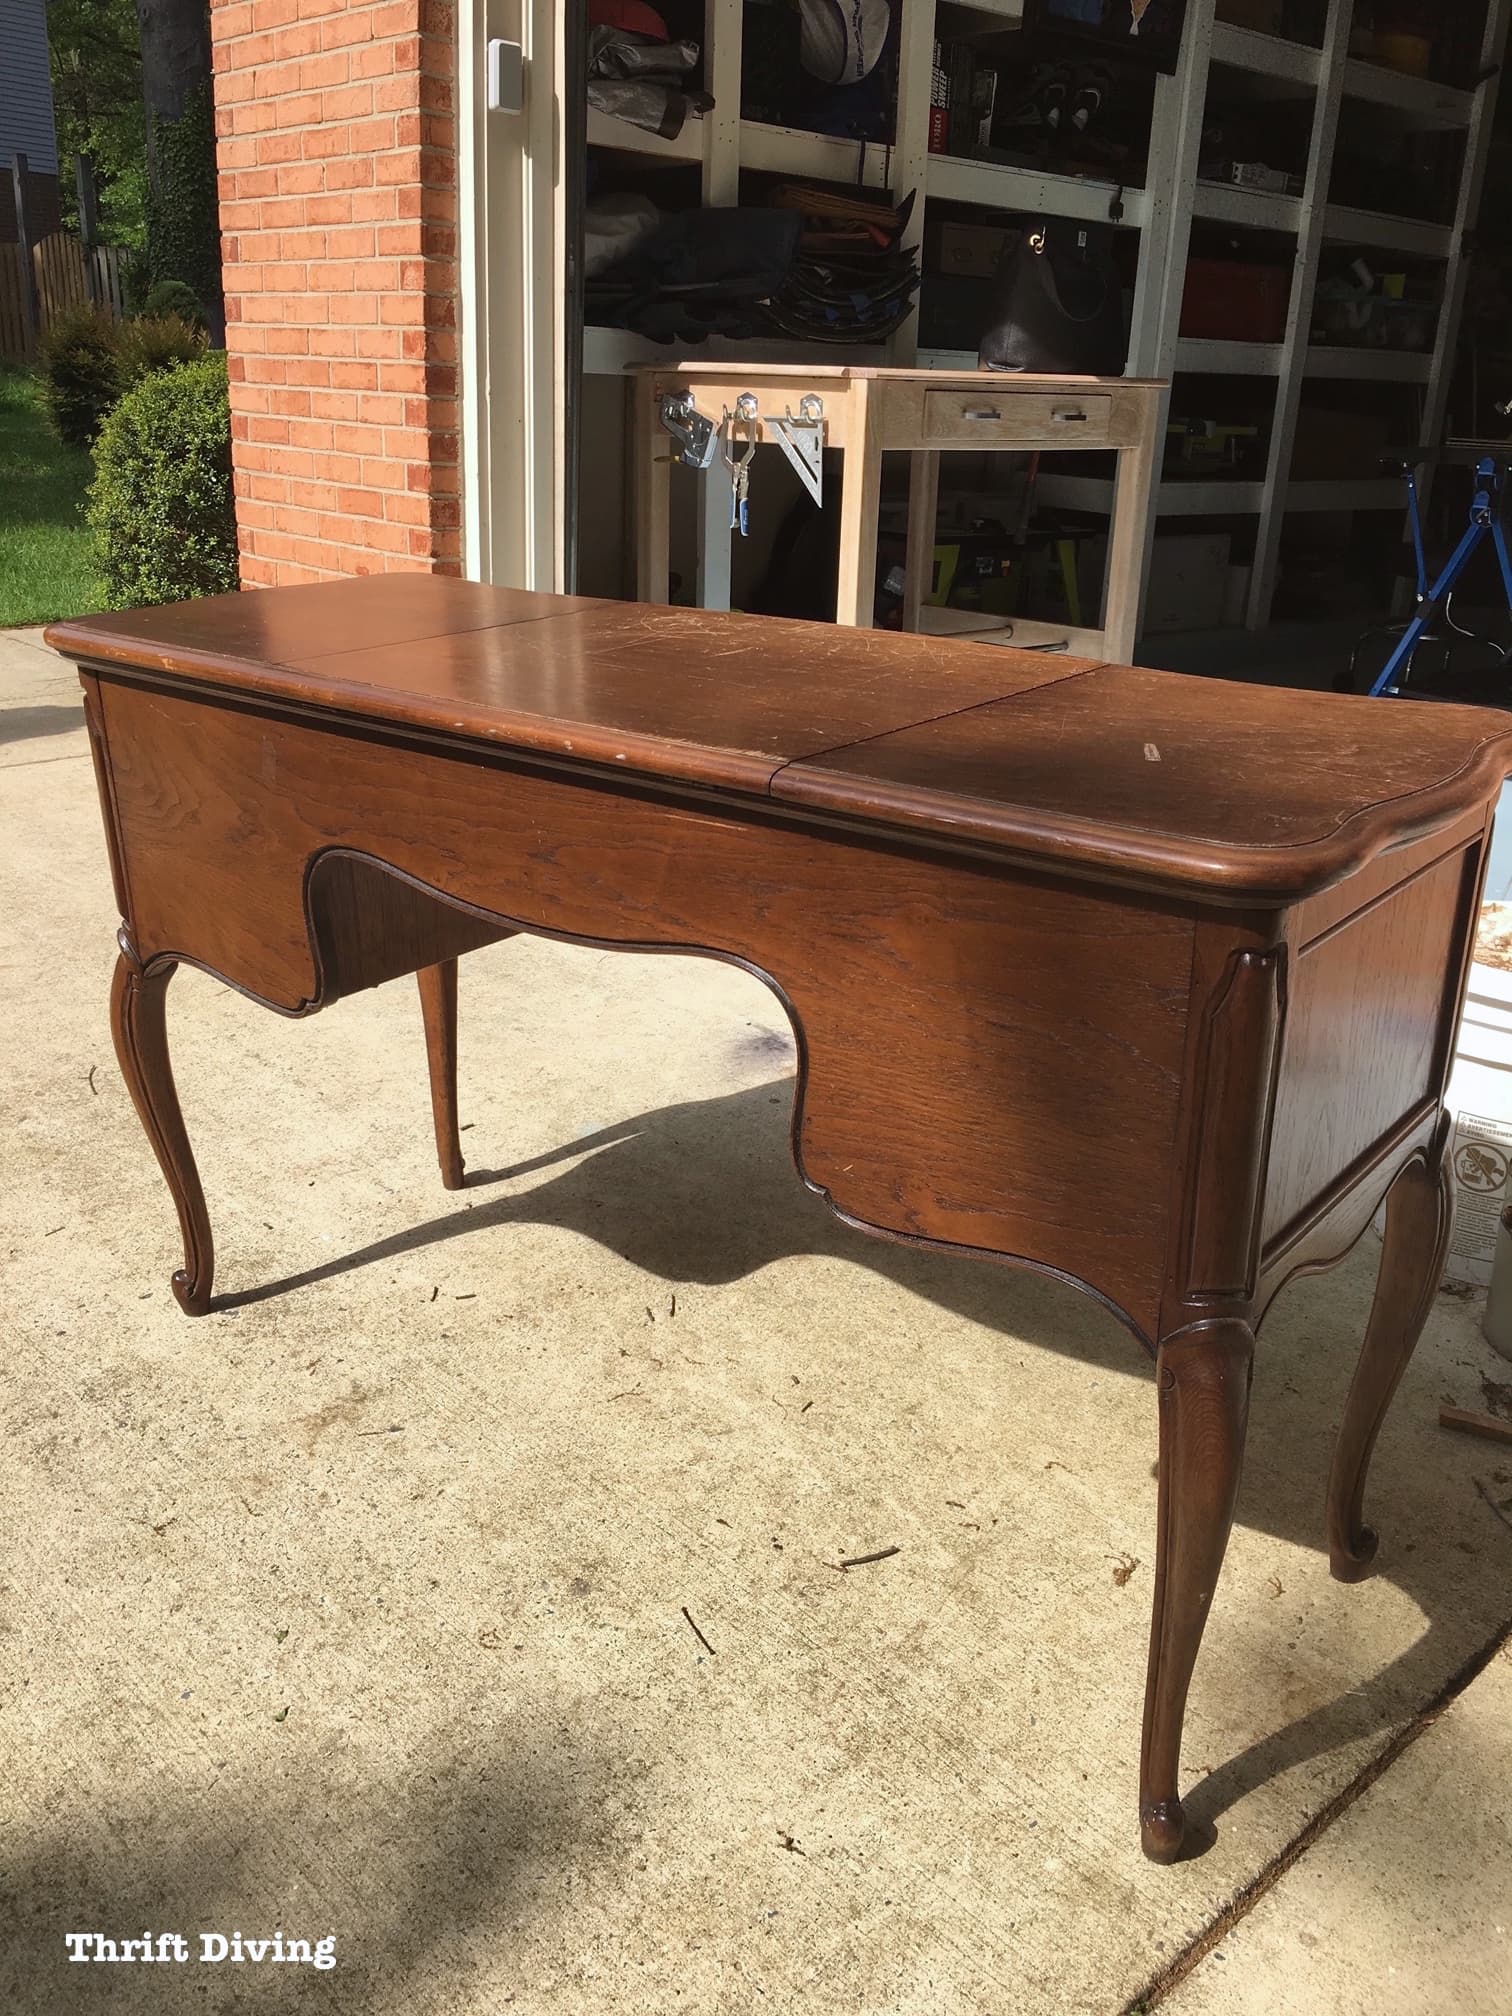
The reason I couldn’t decide is that the more I understand and learn about wood, the more hesitant I am to just slap a coat of paint on a piece of furniture. Wood grain has grown on me, so to cover up “good wood” as I like to call it, seems like a travesty.
Especially pretty oak like this.
But you’ll see why in a bit why I decided to do a mix of stripping and painting.
Let’s talk about materials, shall we?
But first, if you’re a visual learner…..here ya go! 😉 Remember to subscribe to my YouTube channel for more videos!
Watch This French Provincial Vanity Makeover in Action!
Materials
(I participant in the Amazon Services LLC Associates Program and other affiliate advertising programs designed to provide a means for me to earn fees by linking to Amazon.com and affiliated sites).
- Black Dog Salvage, I Need a Bandage red chalked paint
- Black Dog Salvage, Clean Canvas white chalked paint
- General Finishes High-Performance Top Coat (Satin)
- Blue Bear Soy Gel Paint & Urethane Stripper (eco-friendly, no toxic fumes)
- Sanding sealer
- Scrapbook paper
- Brayer for getting rid of bubbles
- Mod-Podge sealer (Glossy)
- Orbital sander
- Rub n’ Buff for tarnished knobs and handles
- Scissors or paper cutter
- Sandpaper (in various grits: 80, 150, 22)
- Wood filler (optional if you have repairs to make)
- Sanding mask
- Towels/rags
- Vinegar and water or Simple Green
- Paintbrush
- Power drill and/or screwdriver for removing handles
- Gloves
- Foam brushes
Let’s walk through the steps of how to paint a piece of furniture and my thought process behind this French Provincial piece of furniture.
STEP 1: Inspect the French Provincial Vanity. Is There Damage?
When I refinish furniture, the first thing I do is check to see if there’s damage.
Wait. I’m lying.
First, I check to make sure there are no bugs. HA! 🙂
Then I check to see if it’s damaged and if I can repair it.
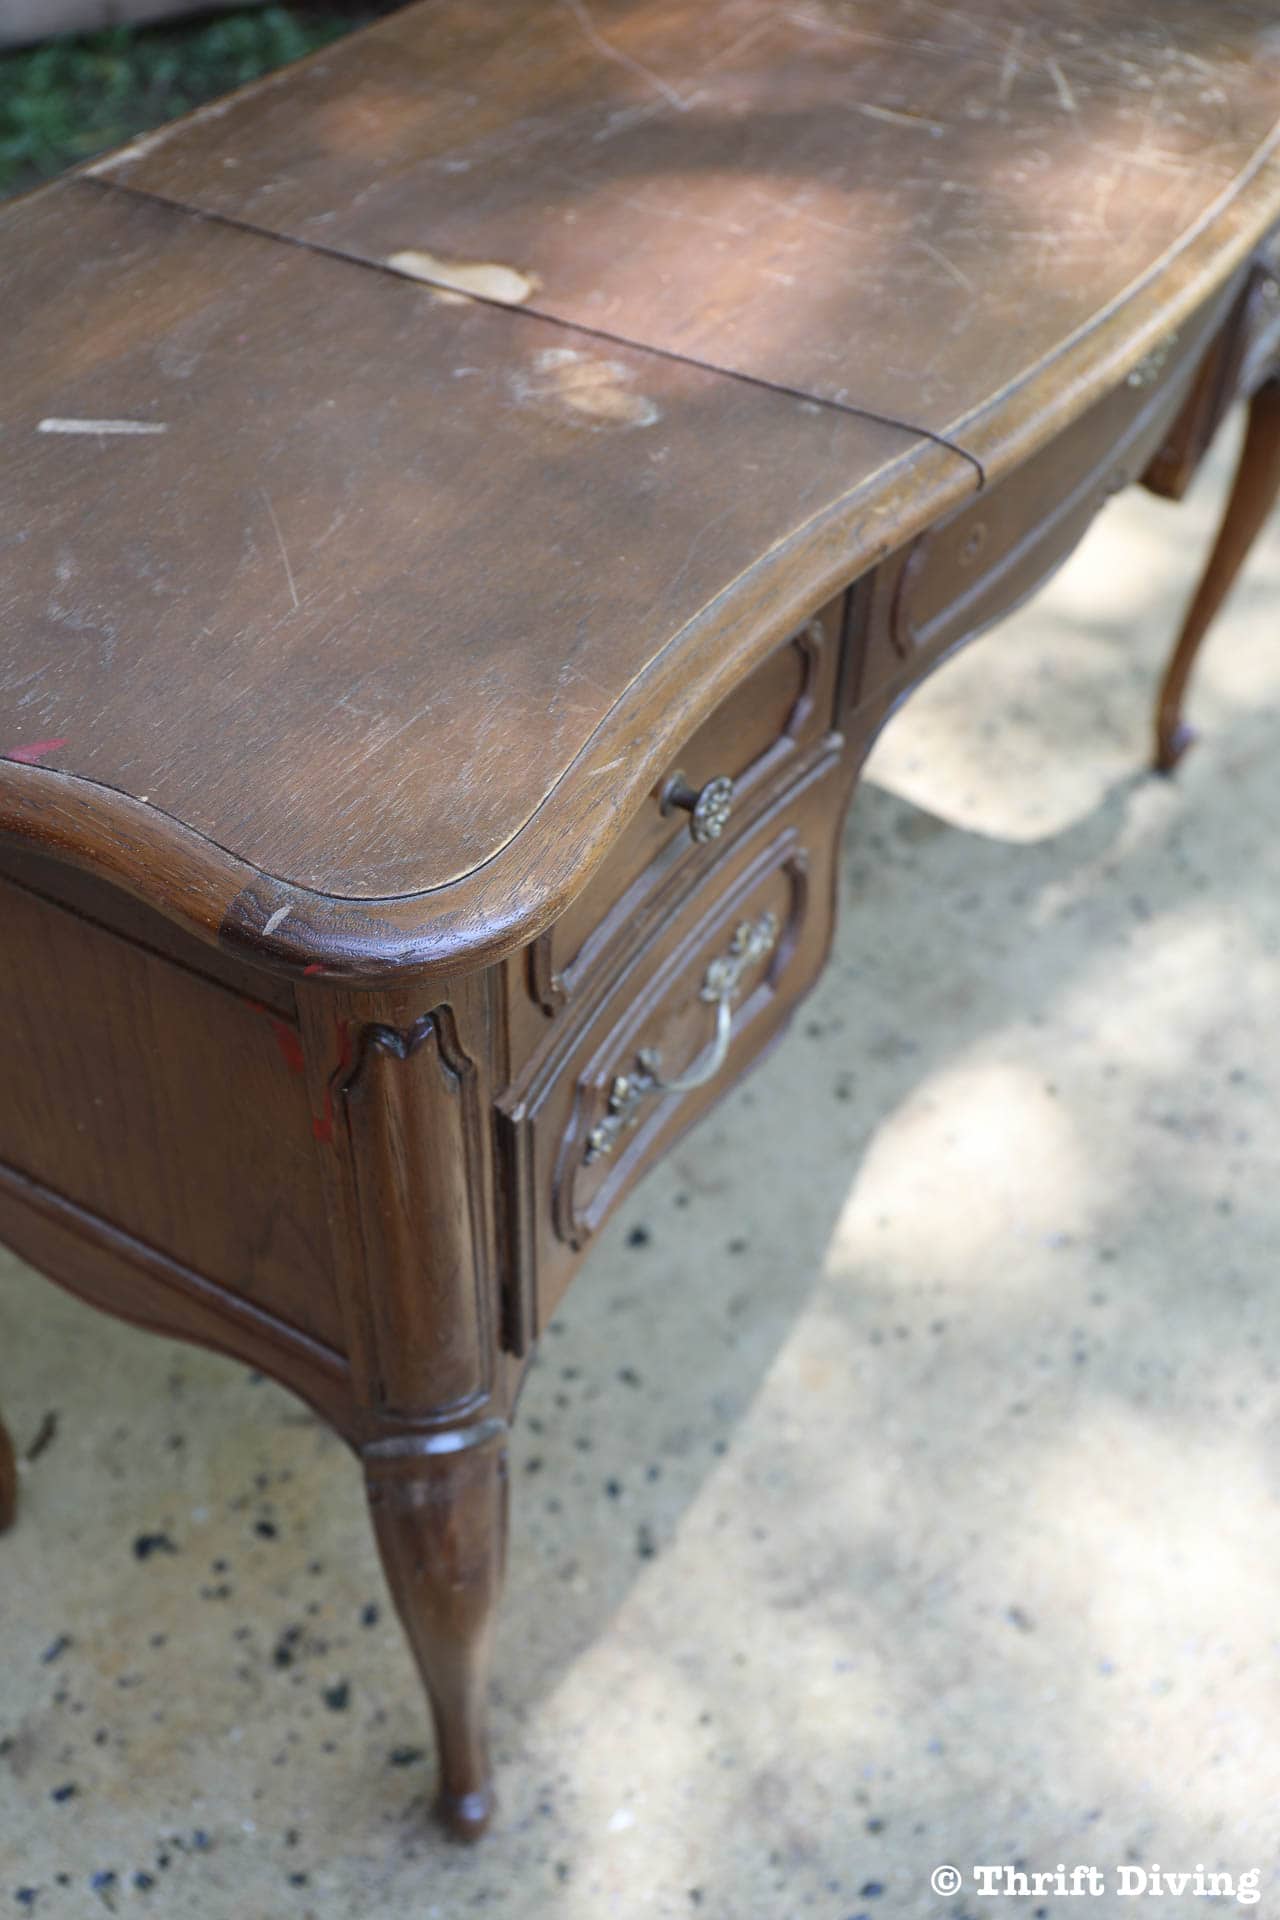
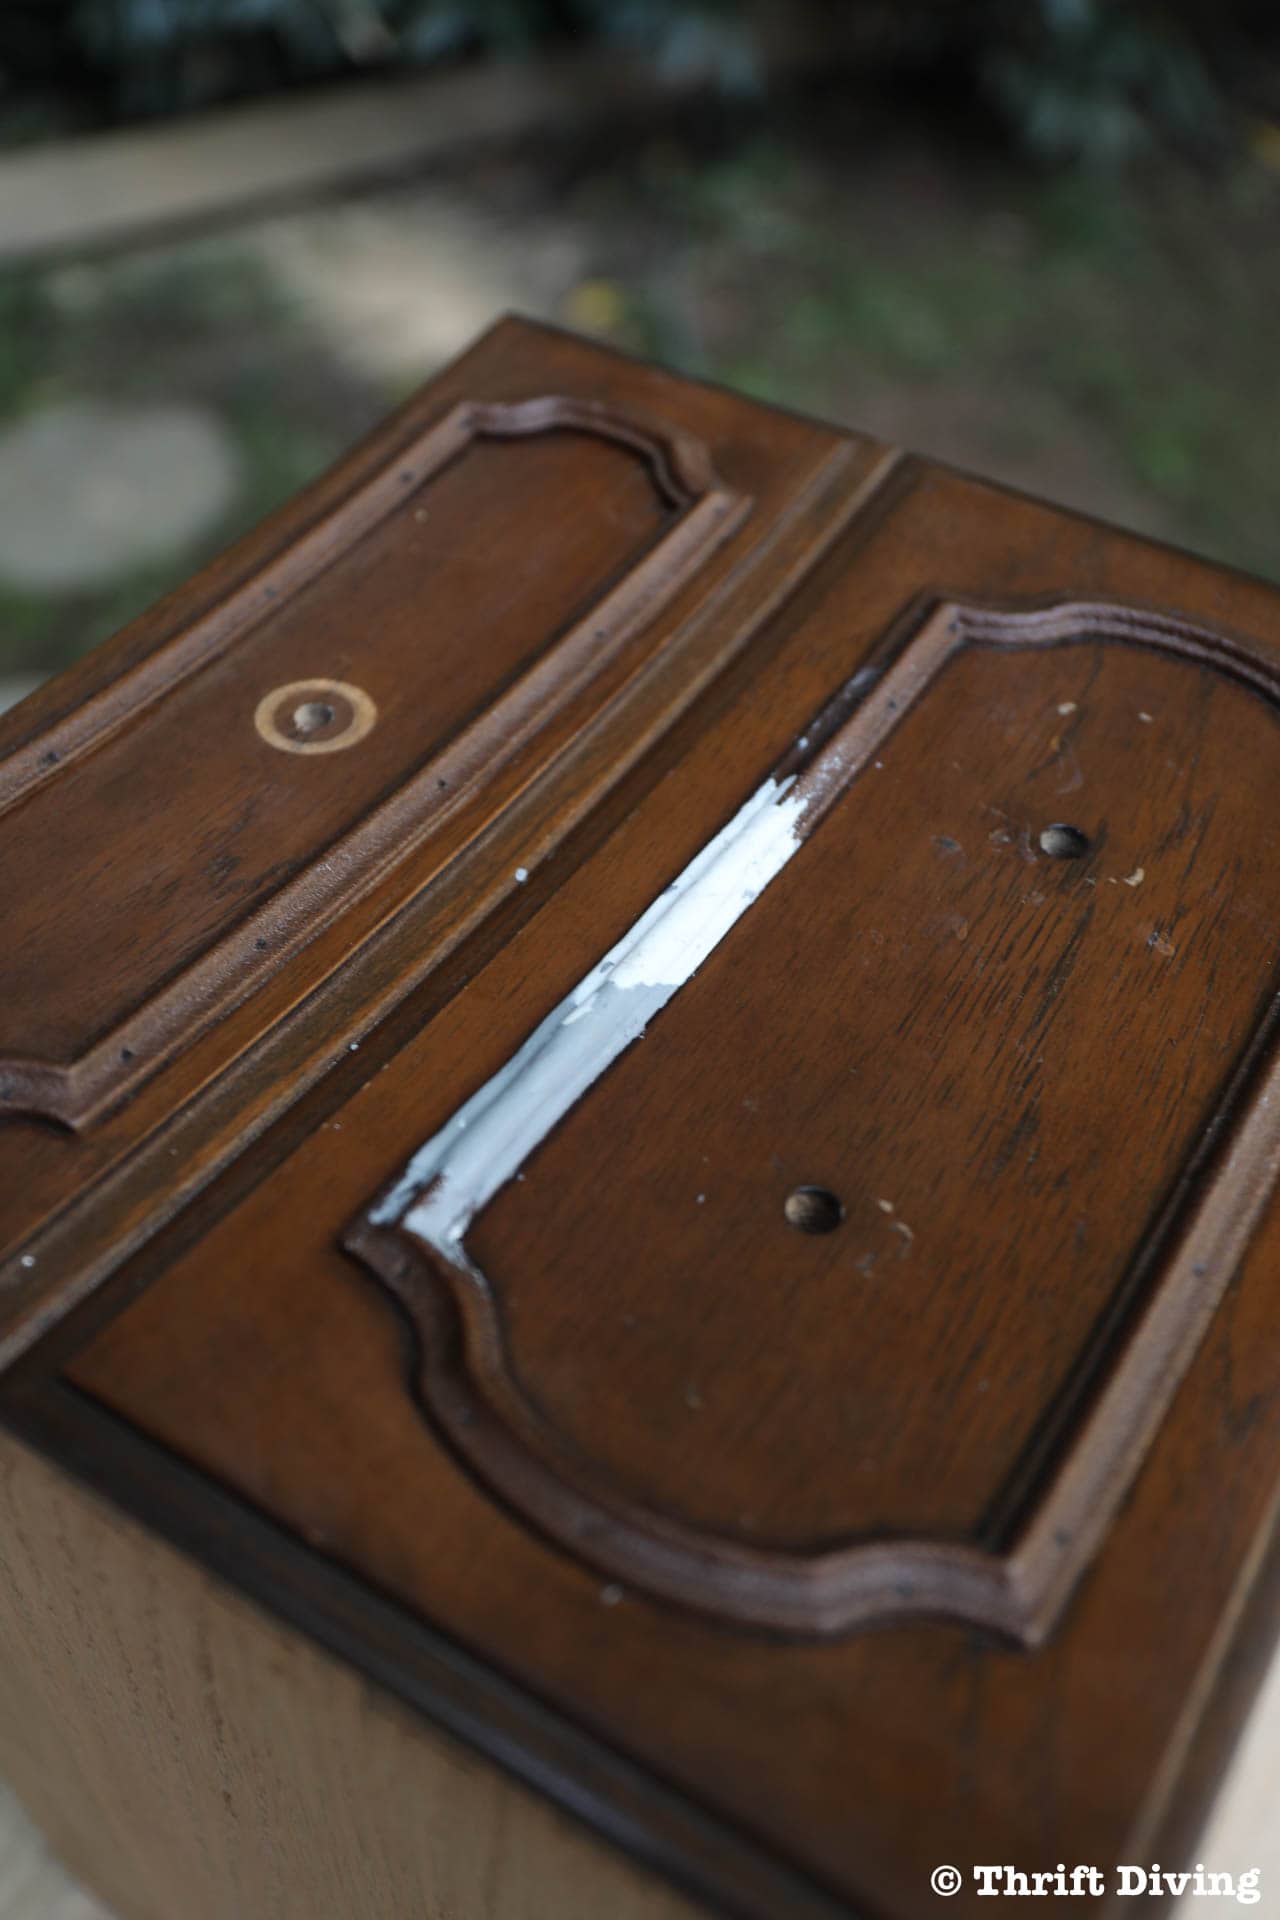
With this vanity, it did have some damage to the trim of the drawer, plus the top was scratched and had some marks on it that looked like they weren’t “sand-outable.” (Is that even a word….?).

STEP 2: Clean the Furniture with Vinegar and Water
In the past, I’ve been notorious for painting some dirty furniture. Can you believe that?! I’d be too lazy to paint it. But that’s not the case anymore. I always wipe things down with a mix of vinegar and water, or I’ll use Simple Green, then wipe off the Simple Green.
STEP 3: Fix the Broken Things
The other problem you’ll find with furniture is that it may have holes or cracks that need repaired. Or, sometimes a knob is missing and instead of finding a replacement, you simply fill the hole with wood filler. I had to do that with this vanity.
In this case, I also had broken trim. I didn’t know how in the world I was going to fix that. I mean, I could go and buy new trim, but if you’ll notice, this old trim was bumpy and rough. Whatever trim I could possibly buy at a hardware store would be smooth. The different would be noticeable.

I happened to find some Sugru moldable glue in my toolbox and–voila!–I was able to shape it into something that somewhat resembled trim!
YAY for moldable glue!!
I ended up letting it dry for 24 hours and then used an oil-based primer on this moldable silicone so that I could paint over it. Otherwise, paint wouldn’t have stuck to it.
STEP 4: Sand the Top Smooth..But Use Chemicals Where Needed

I love stripping furniture, but it’s a messy job. If you’ve never done it, ooooooh boy, you’re in for a real treat for your first stripping job! HA!
“Messy” isn’t even half of it!
So because of that, sometimes I just like to use an orbital sander to strip a top. This is possible when it’s flat and you don’t have any curved areas or cracks and crevices.
The edge of this vanity, though, I decided to use a chemical stripper. Using an orbital sander on the edge of furniture is waaaaay too harsh. Trust me, I’ve learned this the hard way! The next thing you know, you’ve totally changed the edge of the furniture and it looks all sloped and wonky!
With the stripper, I could gently remove the old topcoat and stain, use a wire brush to further loosen it up, and use After Wash to help remove the build-up.
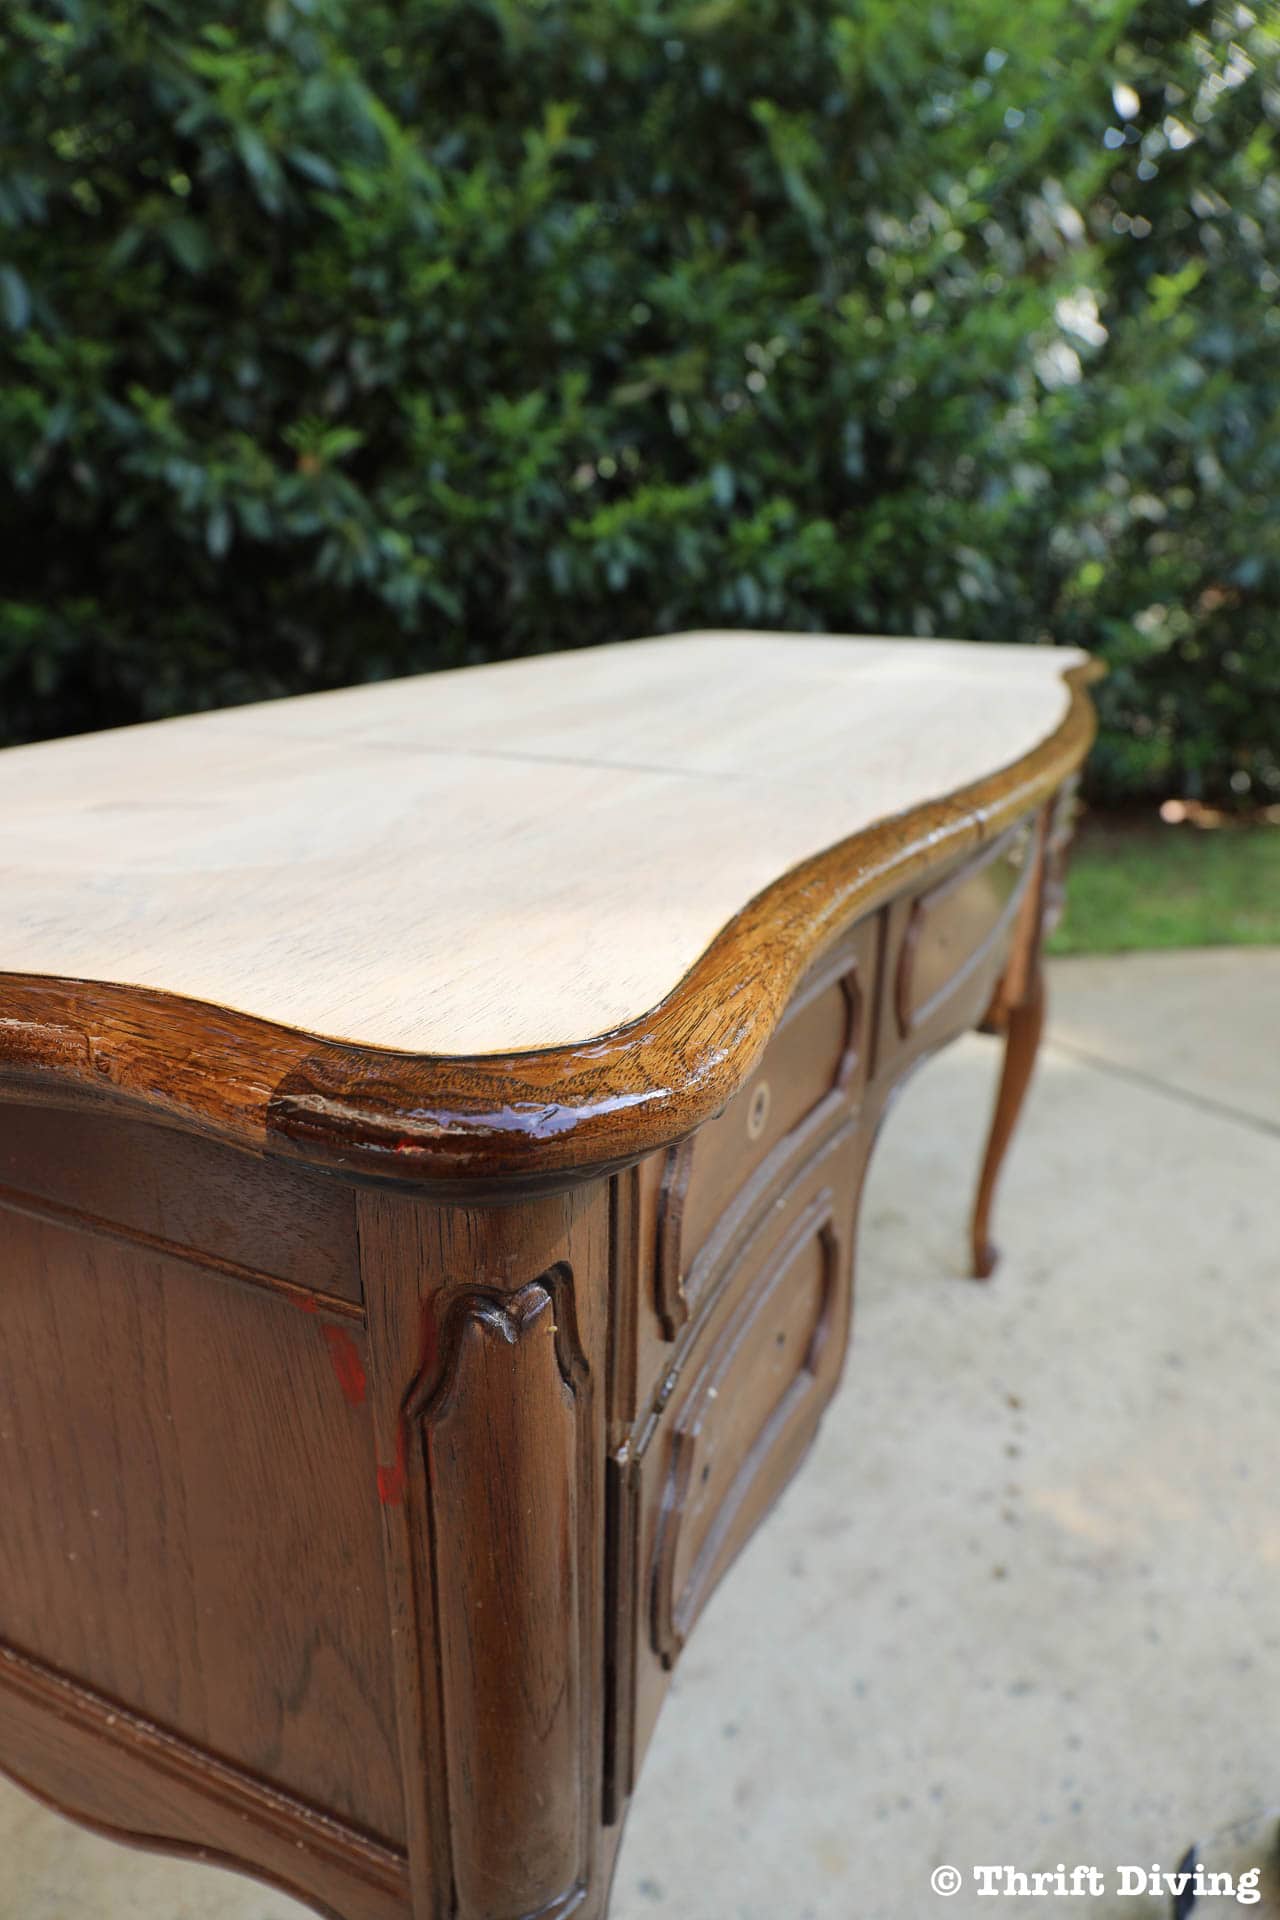
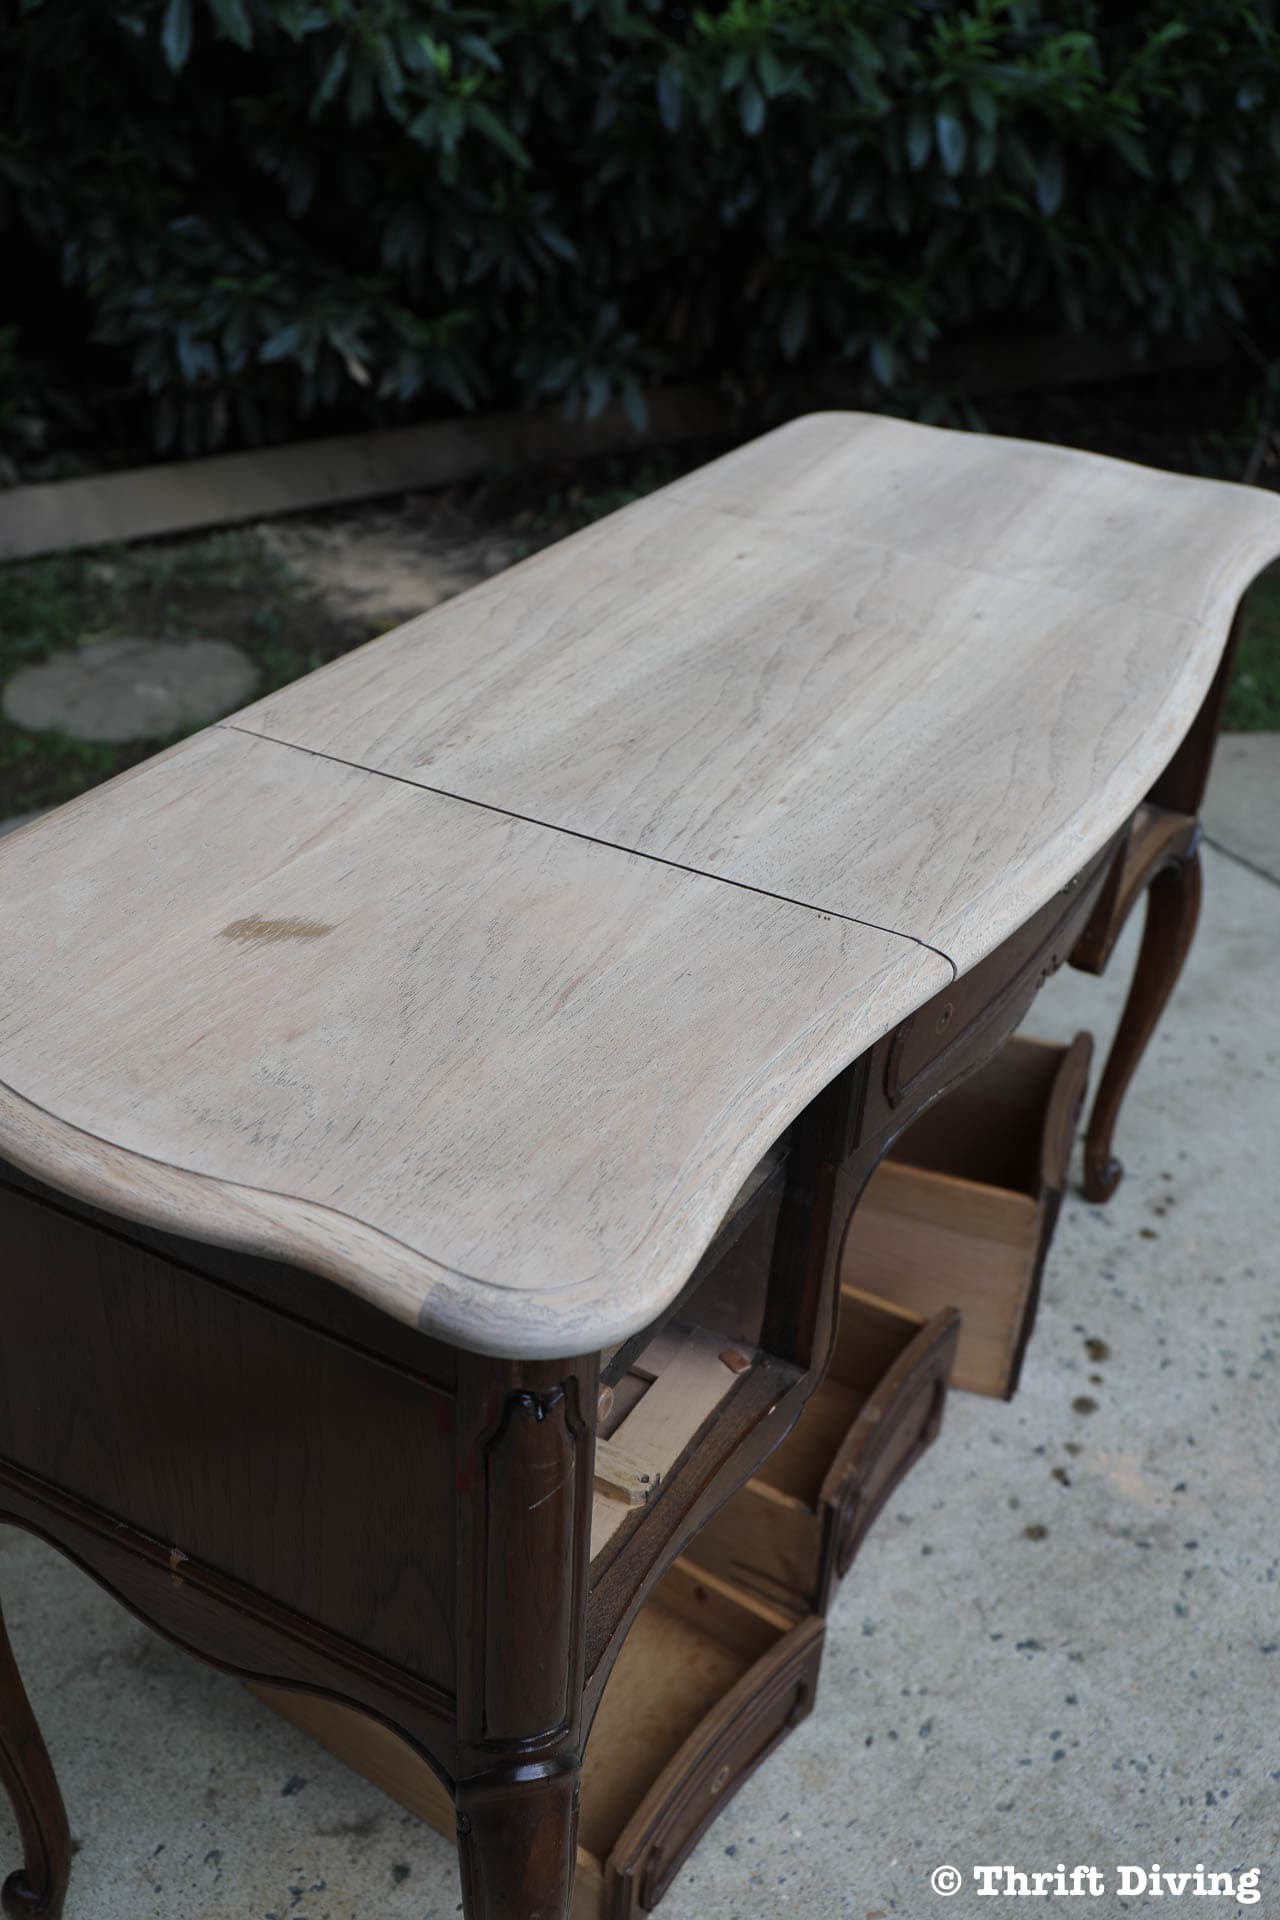
I sanded the top and edge both (watch the video for details) and it looked great afterward!
There was one area that I couldn’t fix, but I think someone had dropped oil or hot wax on that area. There was no way that was coming out! So I just left it. Consider it added character. 😉
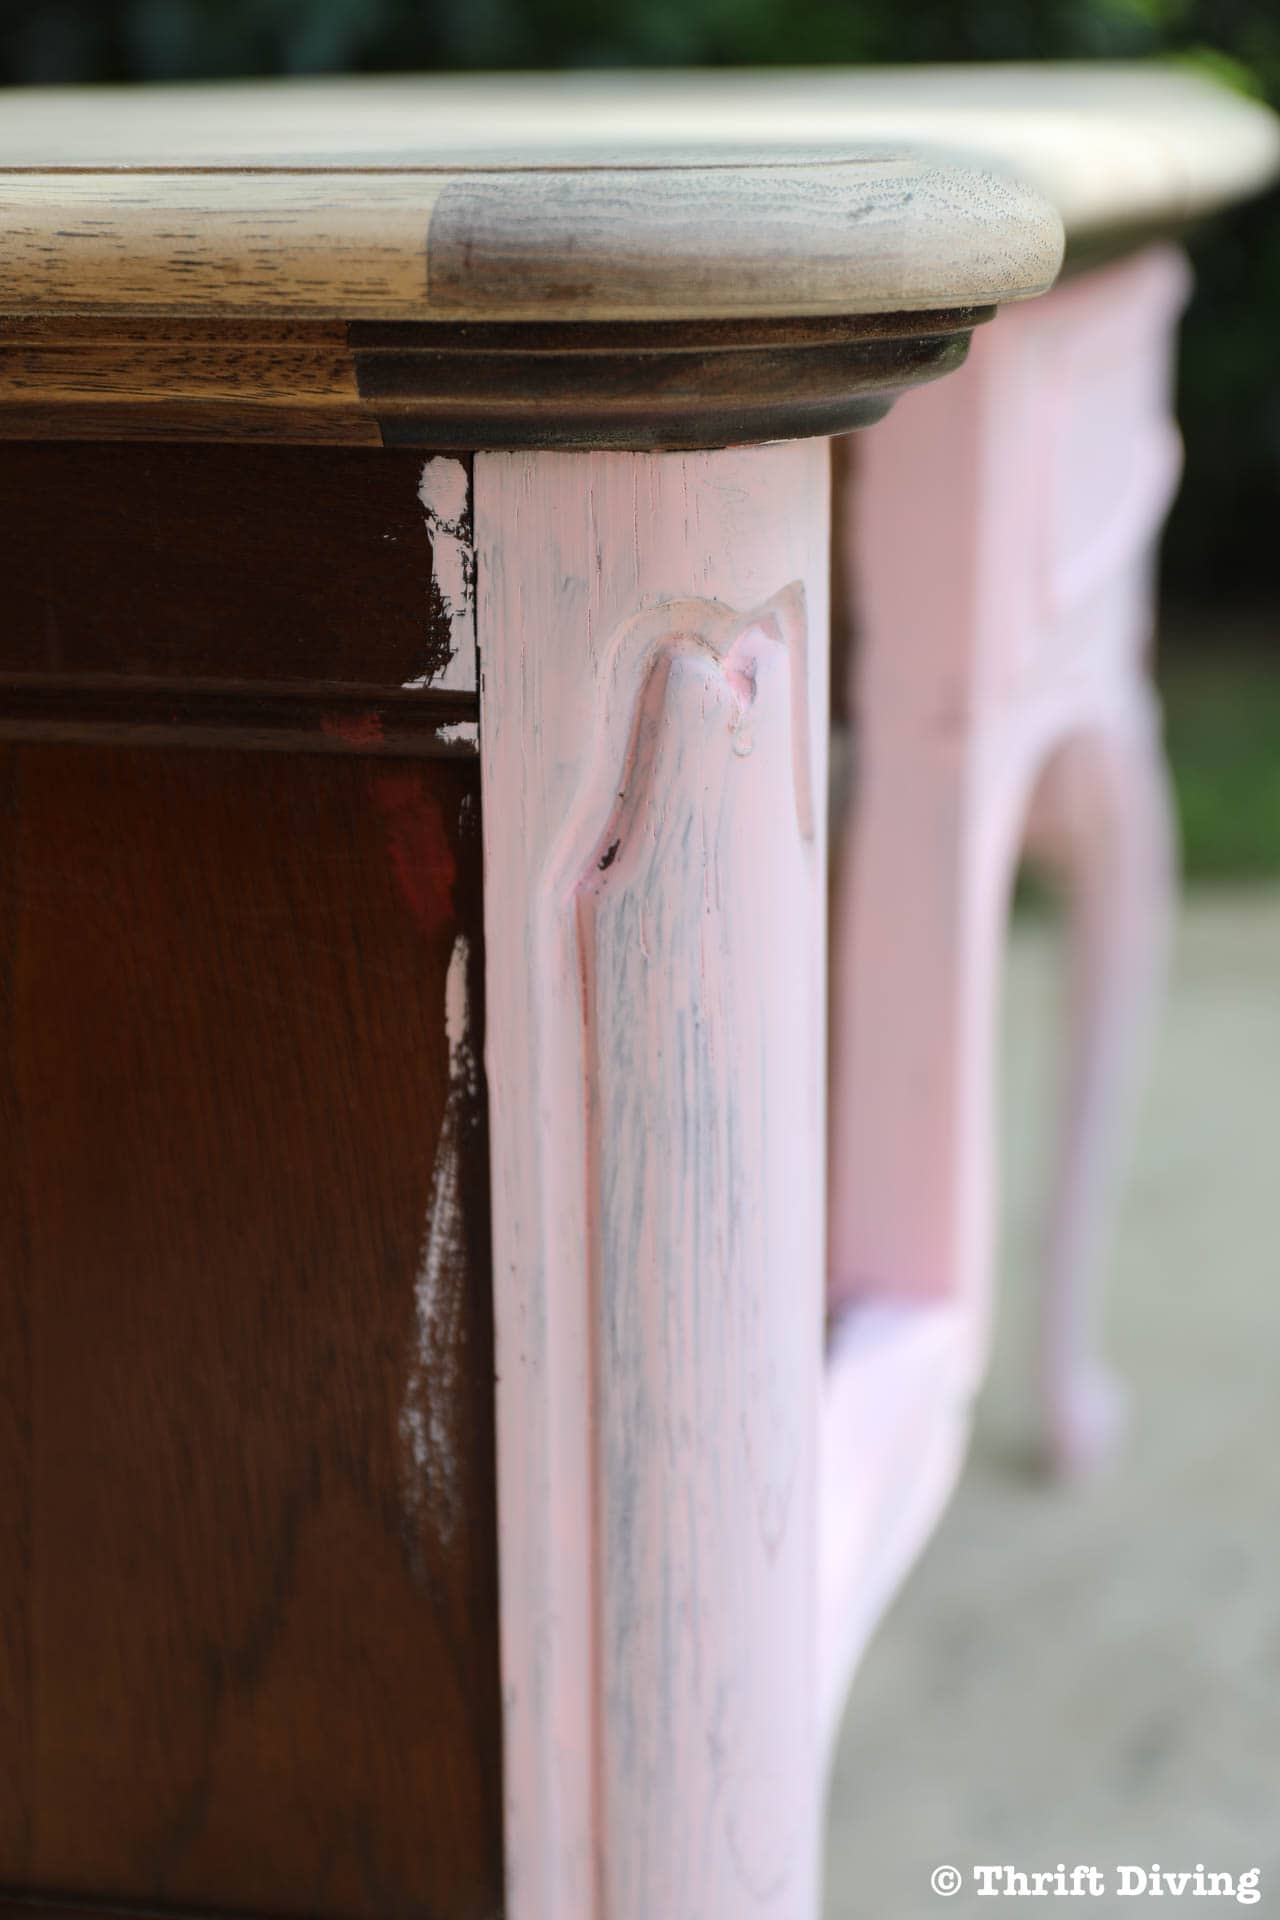
STEP 5: Paint the Drawers and Body with Two Coats of Chalked Paint
For this project, I mixed my own batch of pink paint by Black Dog Salvage. I bought the chalked paint from Woodcraft, but you can also buy their I Need a Bandage (red) and Clean Canvas (white) on Amazon.
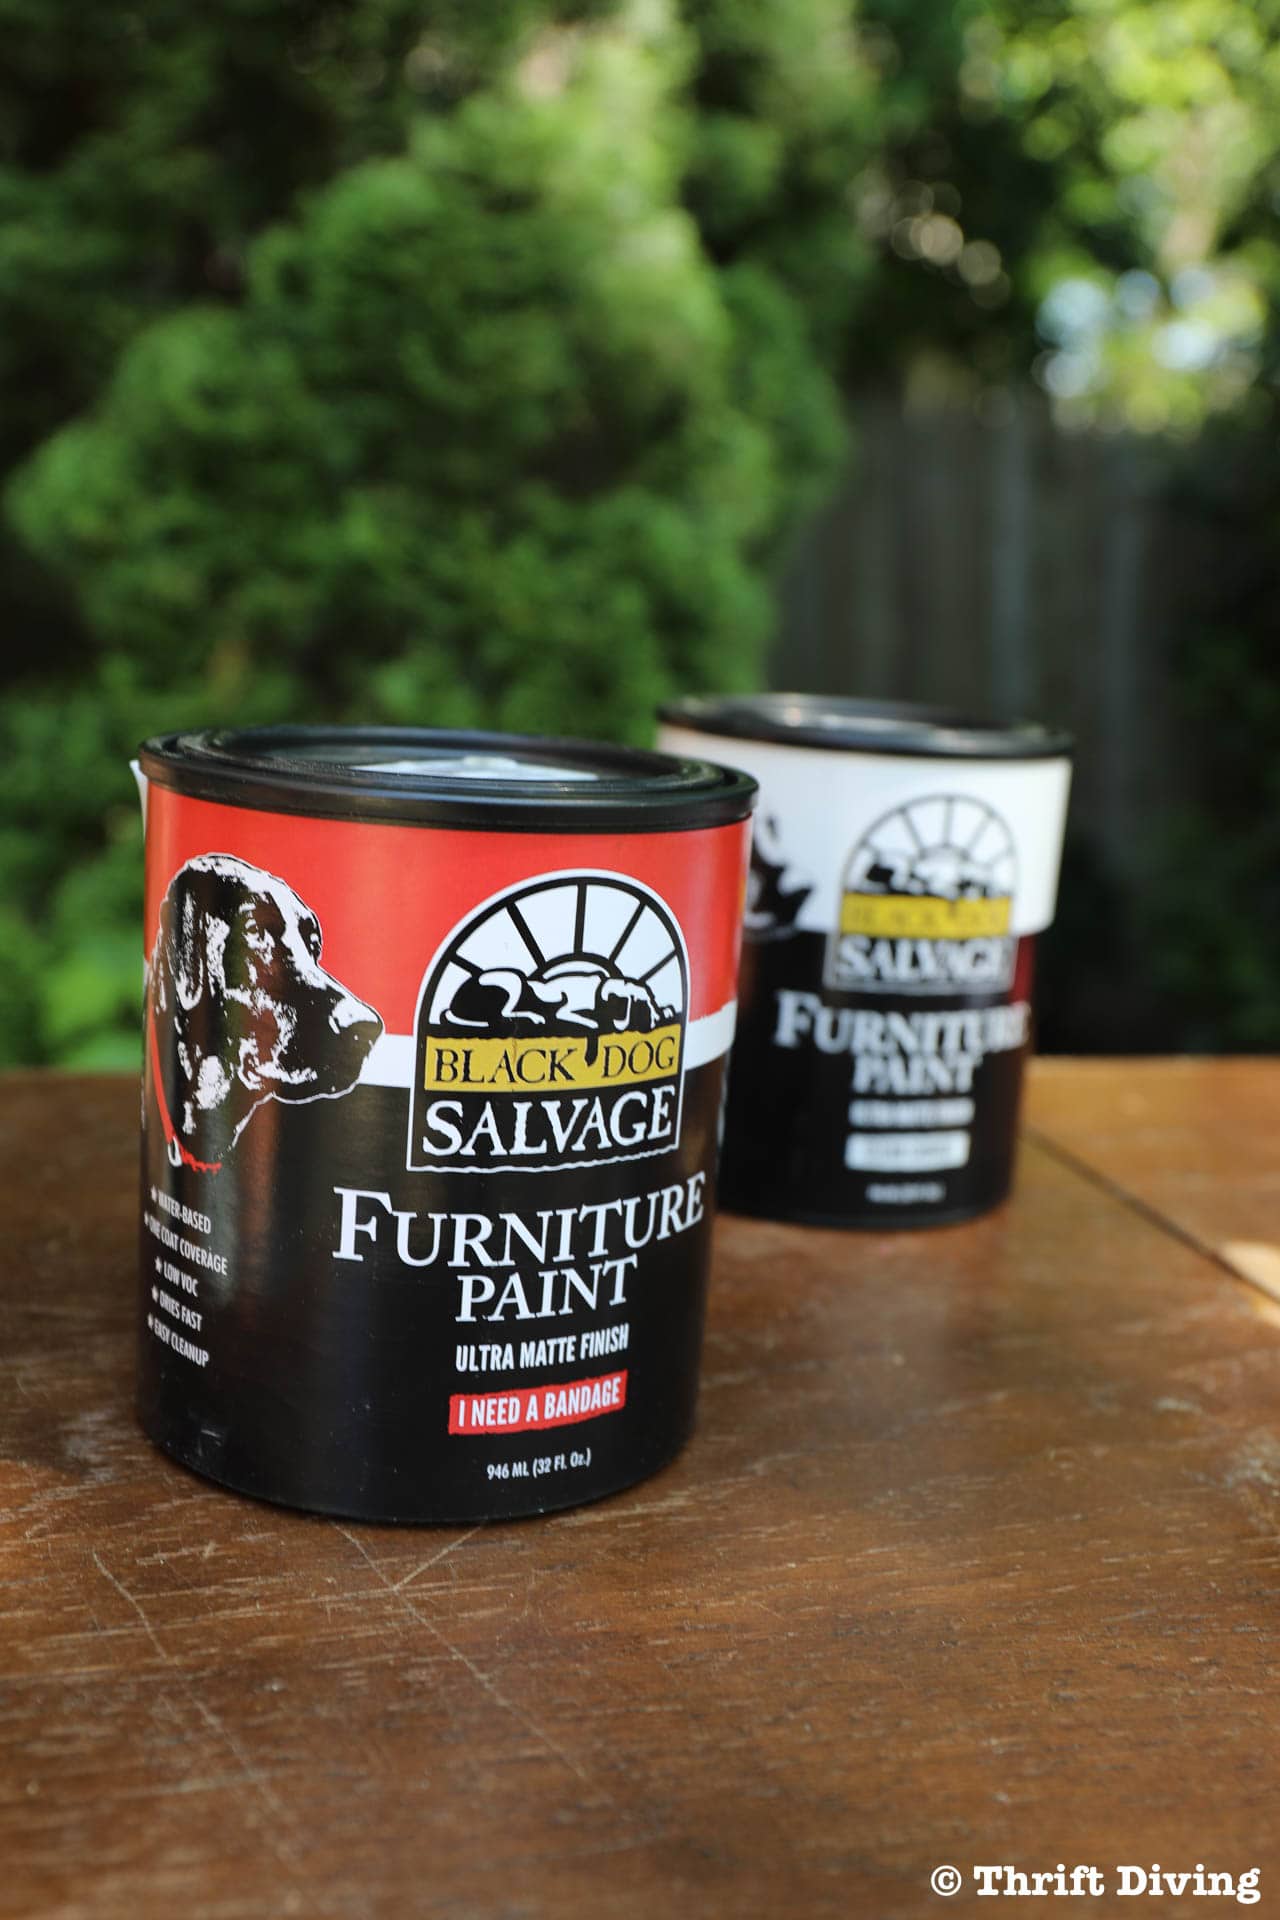
I have used their paint before when I did that vintage Chromcraft reupholstered chair makeover and I loved it. They don’t sell the shade of pink I was looking for, so mixing my own was the next best option.

Most people think you have to sand and prime furniture before painting. Nope, not true.
I will say, however, that because you haven’t sanded or primed, you’ll end up adding two coats of paint anyhow.
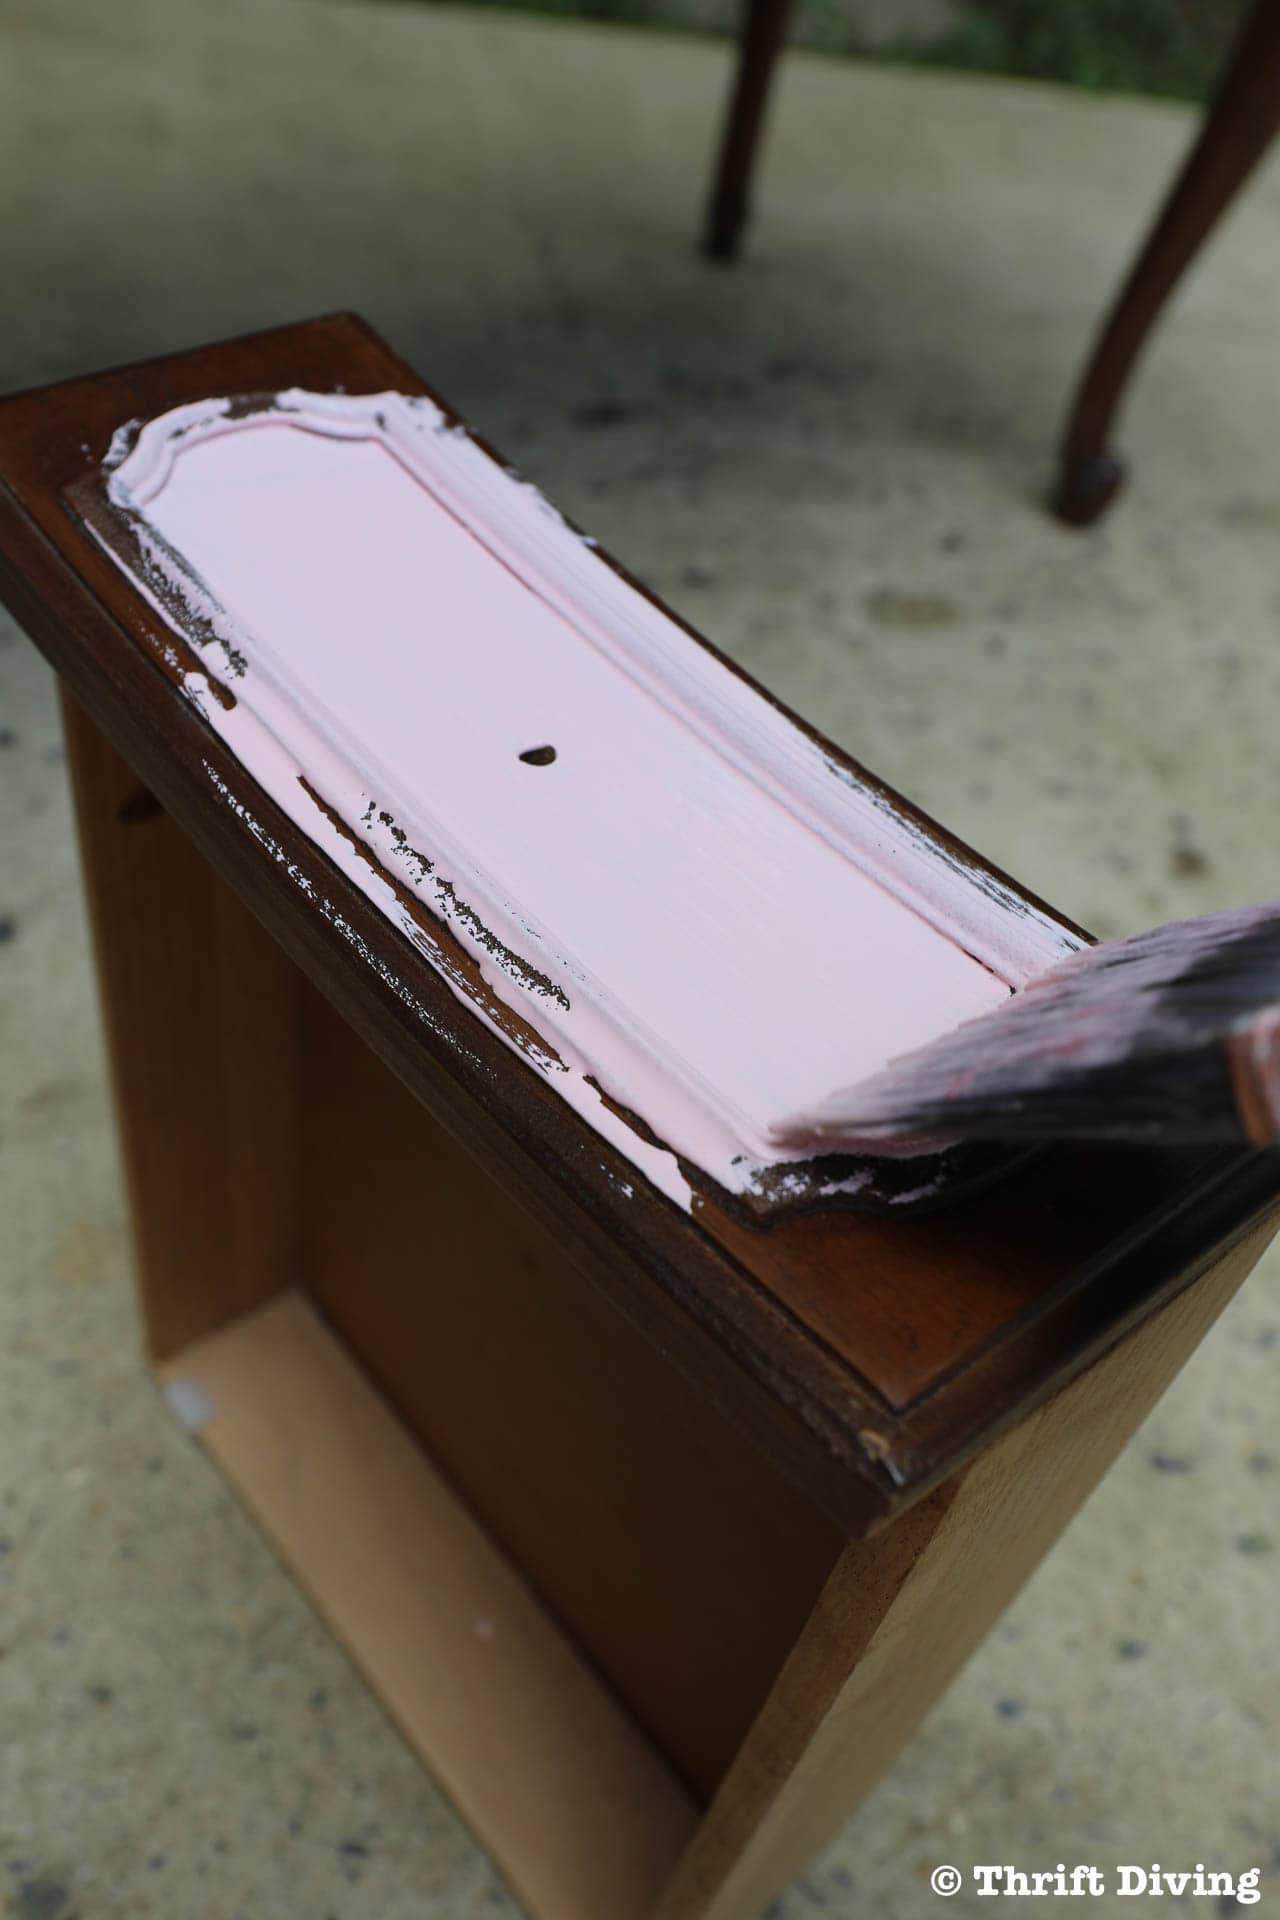
The first coat will look like crap, especially if you have dark wood. And you’ll be wondering if you did something wrong. You didn’t! It’s just that you need to add more coats. I typically do 2-3 coats when I paint furniture.
I will say this: use a small 1/4″ nap roller if you can! It will go much faster, and you won’t get the brush strokes!
After not having painted furniture for awhile, I found myself getting a little frustrated that it didn’t go faster with that small brush. Next time, I’ll have some rollers on hand!!
See more projects: Vintage Chromcraft Chair Makeover
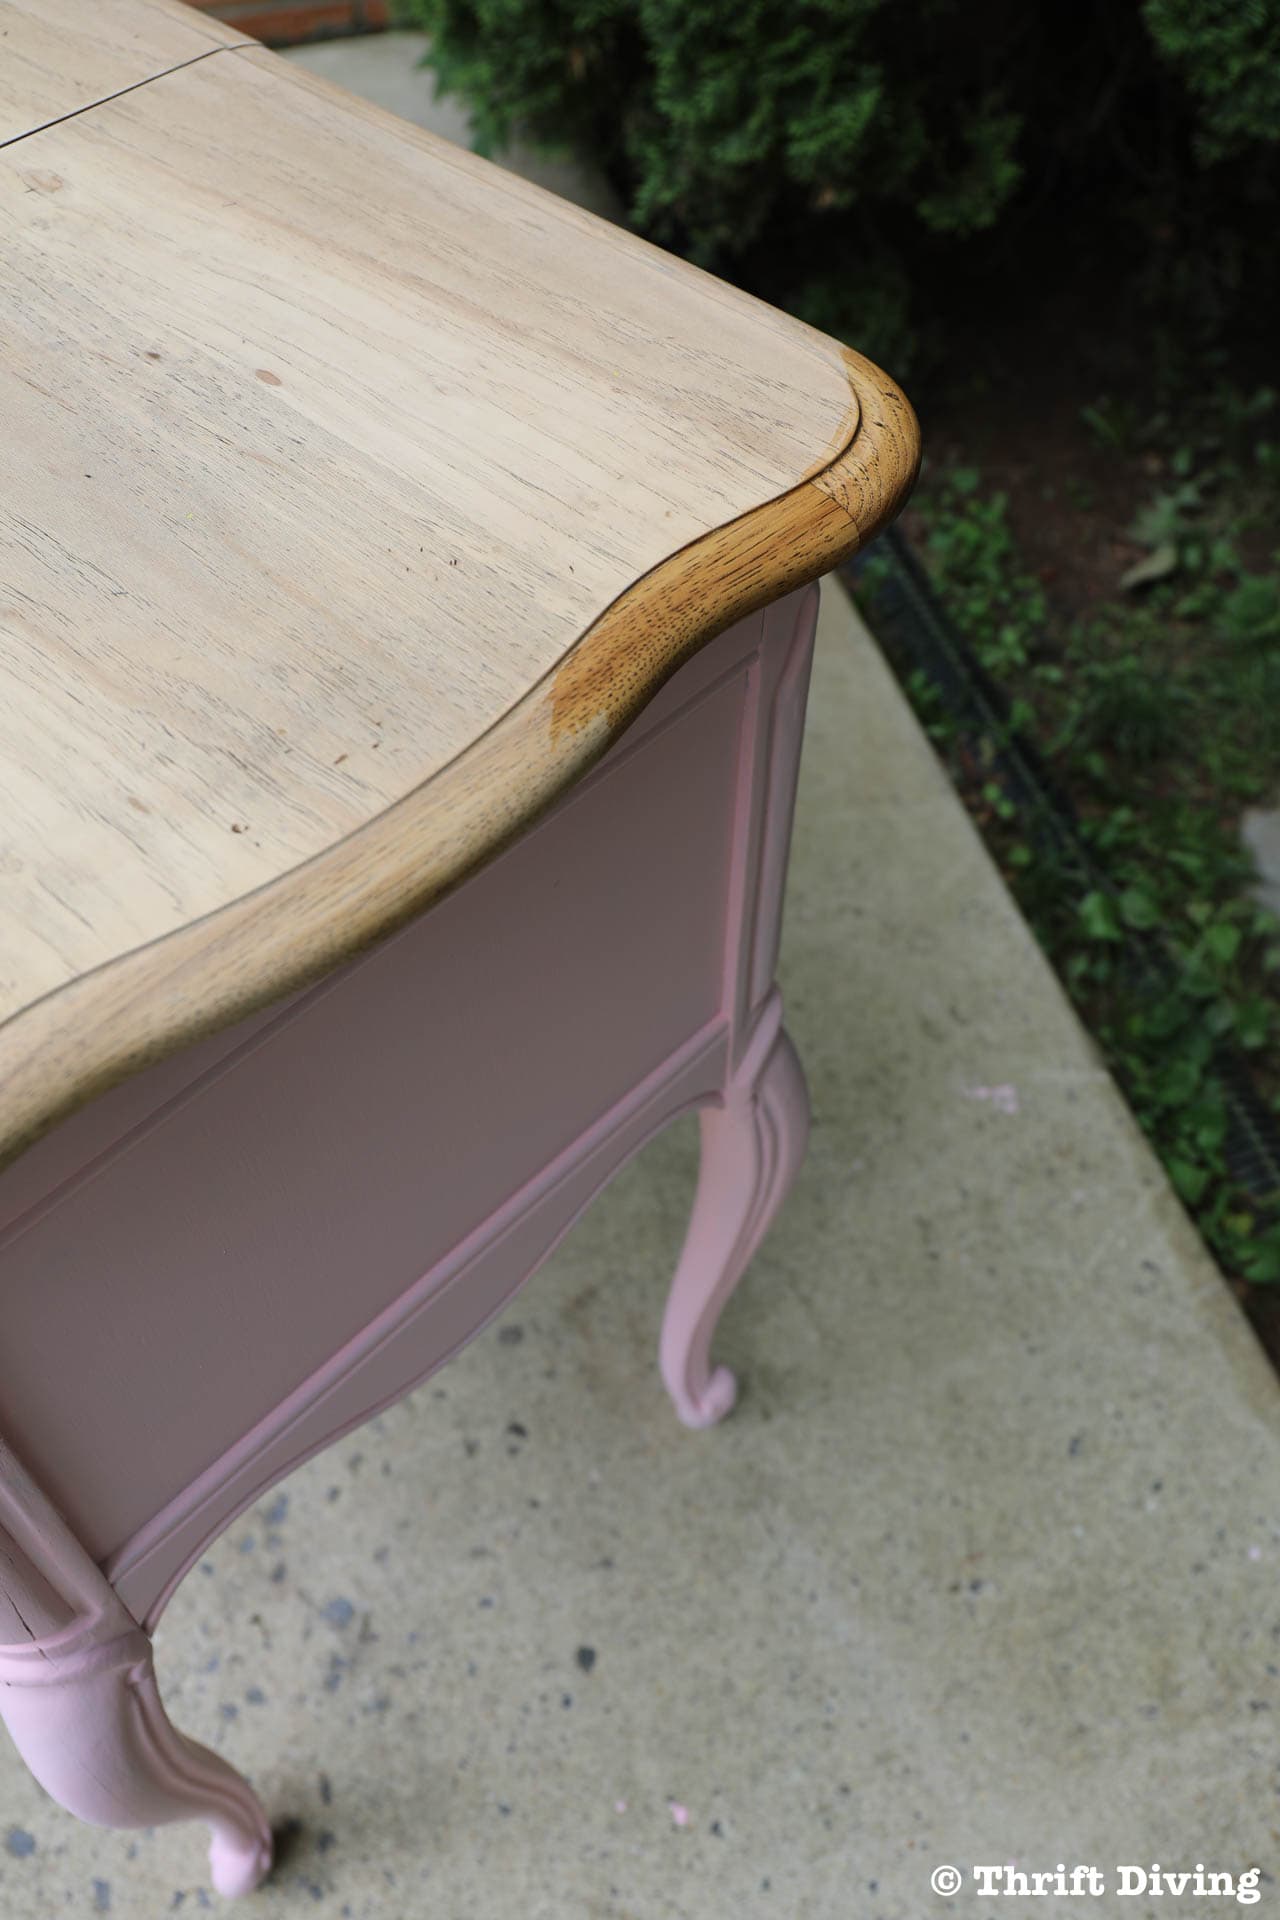
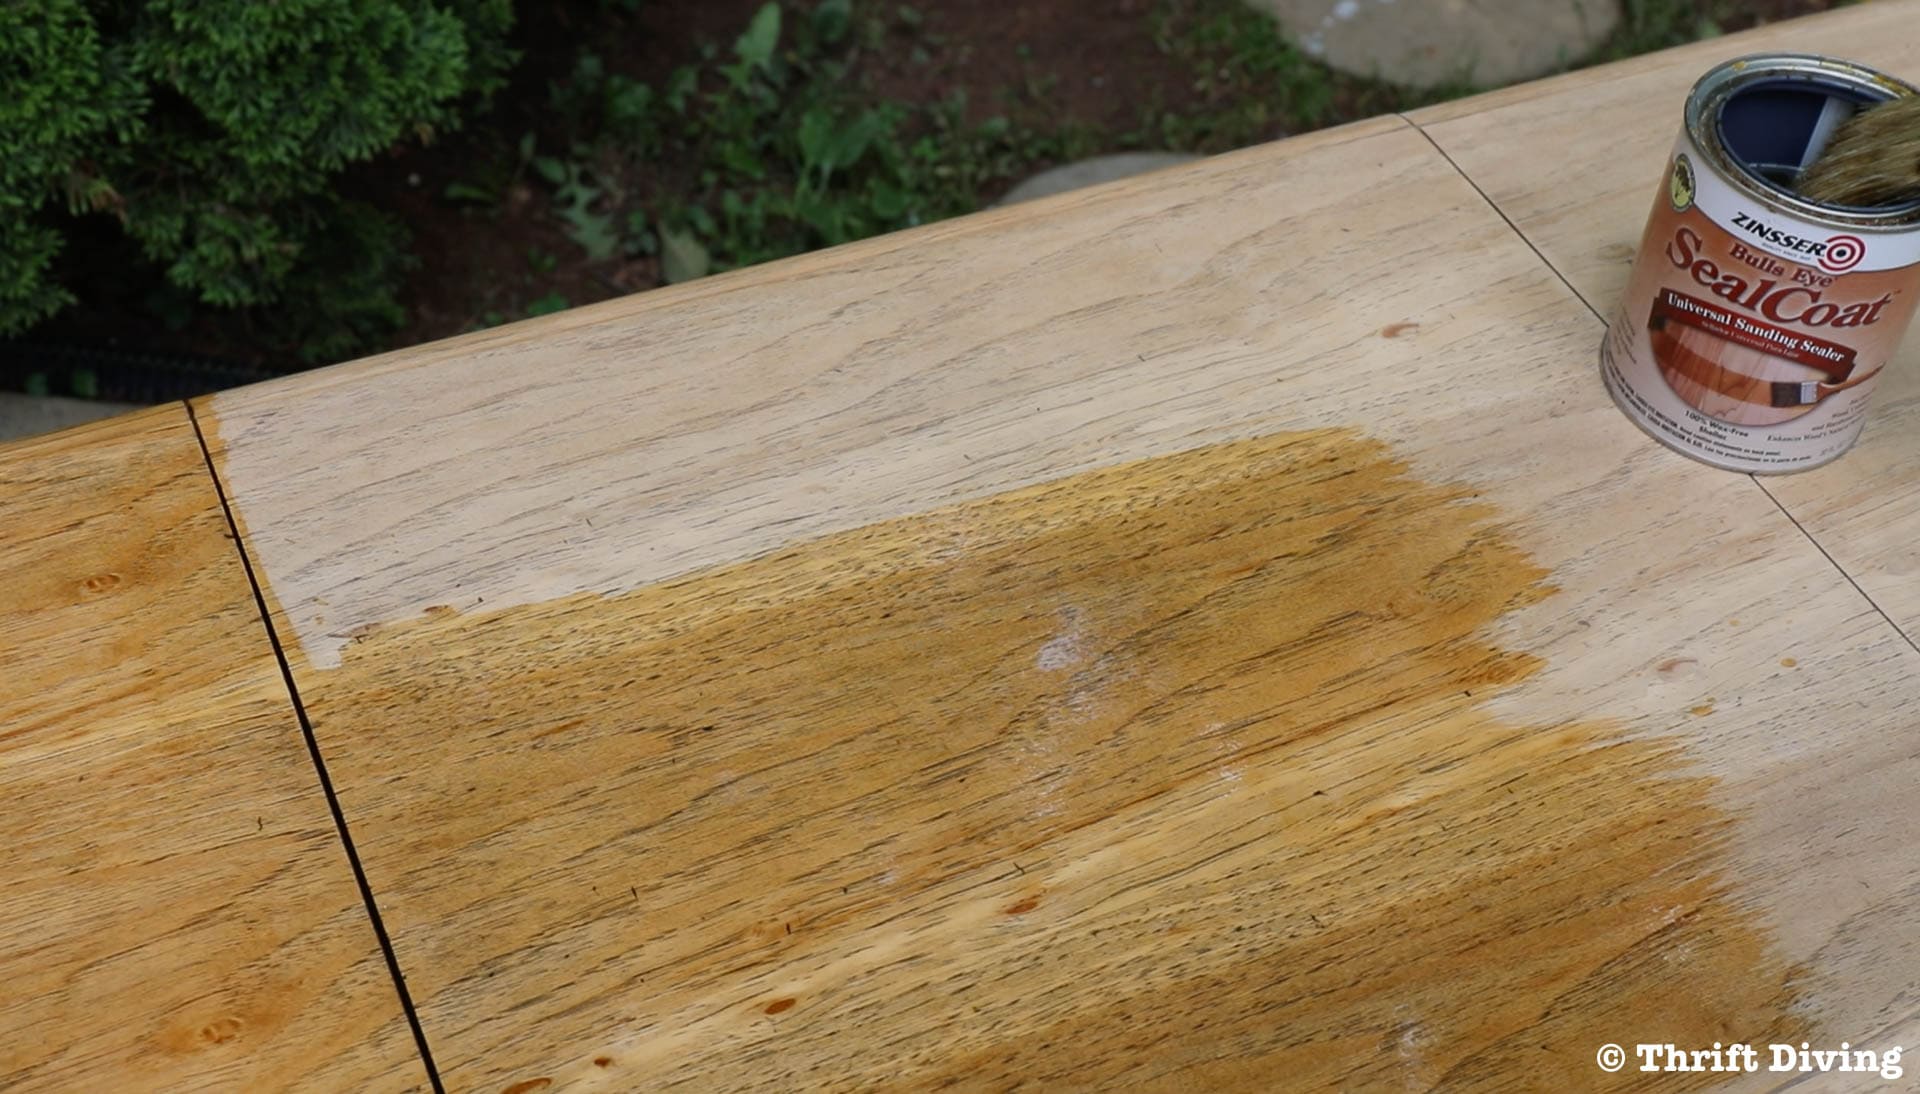
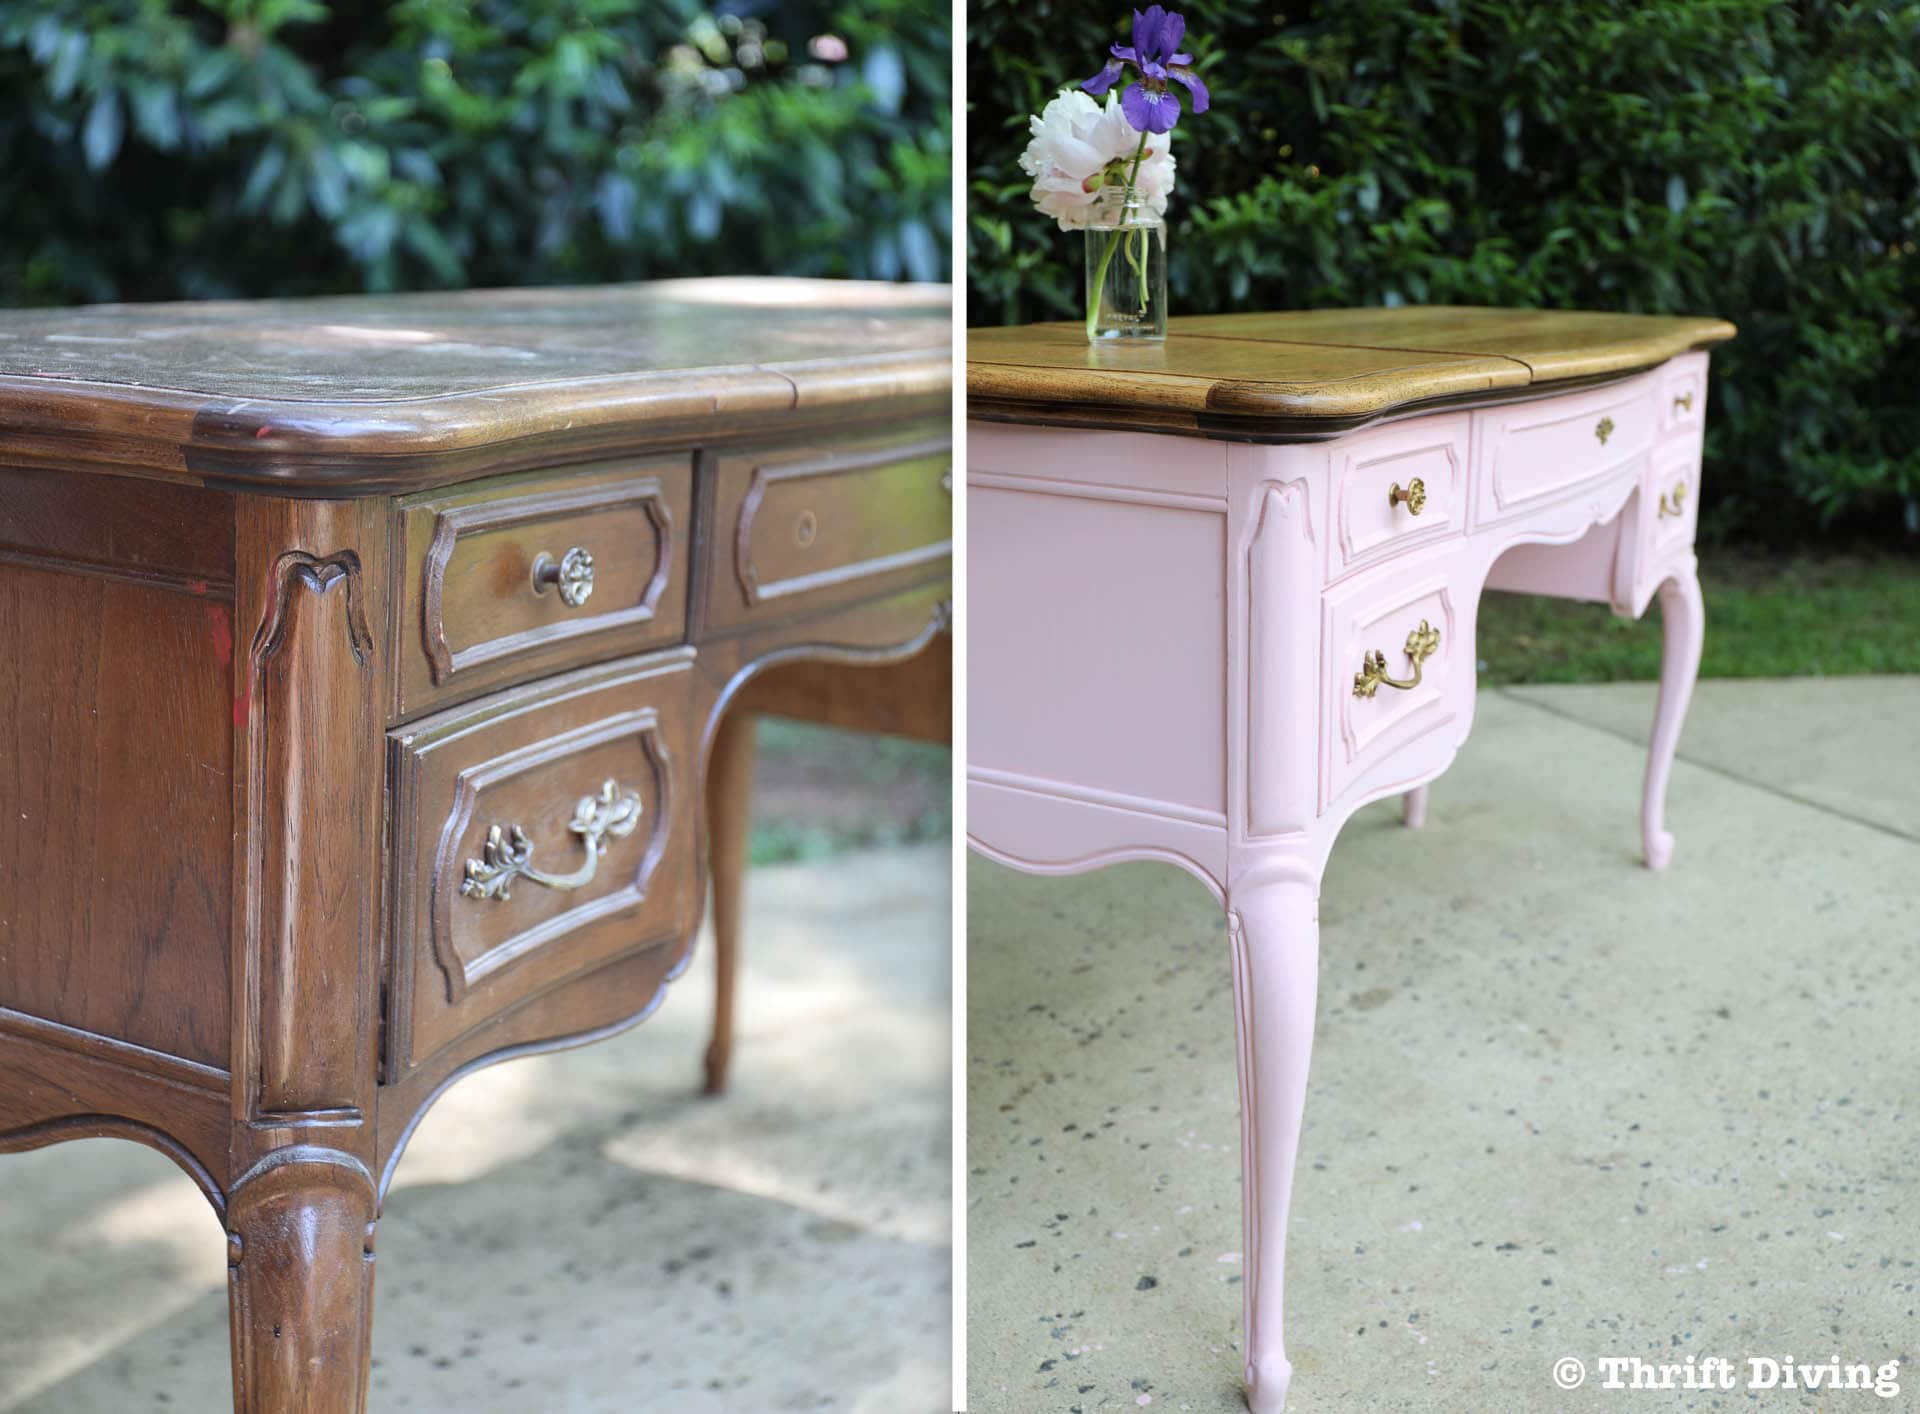
STEP 6: Add a Coat of Sanding Sealer to the Raw Wood on Top
Last year I discovered this thing called sanding sealer. It’s really a fabulous product because it can be a sealer between layers of dyes and top coats, sands well, and can add just a hint of color to a piece of wood.
In this case, I decided to use it to add a hint of color to the oak top of this French Provincial makeup vanity.
Something awesome happened, too!
The wood grain turned dark and the wood turned a honey color! It was absolutely beautiful! Even hubby said, “Wow, look at the grain,” and if you’ve been reading this blog for any length of time, you’ll know that means a lot coming from him. 😉
STEP 7: Add Two Coats of a Clear Top Coat
Once the sanding sealer dried, then I added a couple coats of General Finishes High Performance top coat. It dries really quickly and I find it the easiest top coat to use. Plus, it gives really amazing results. Soooo smooth and satiny!
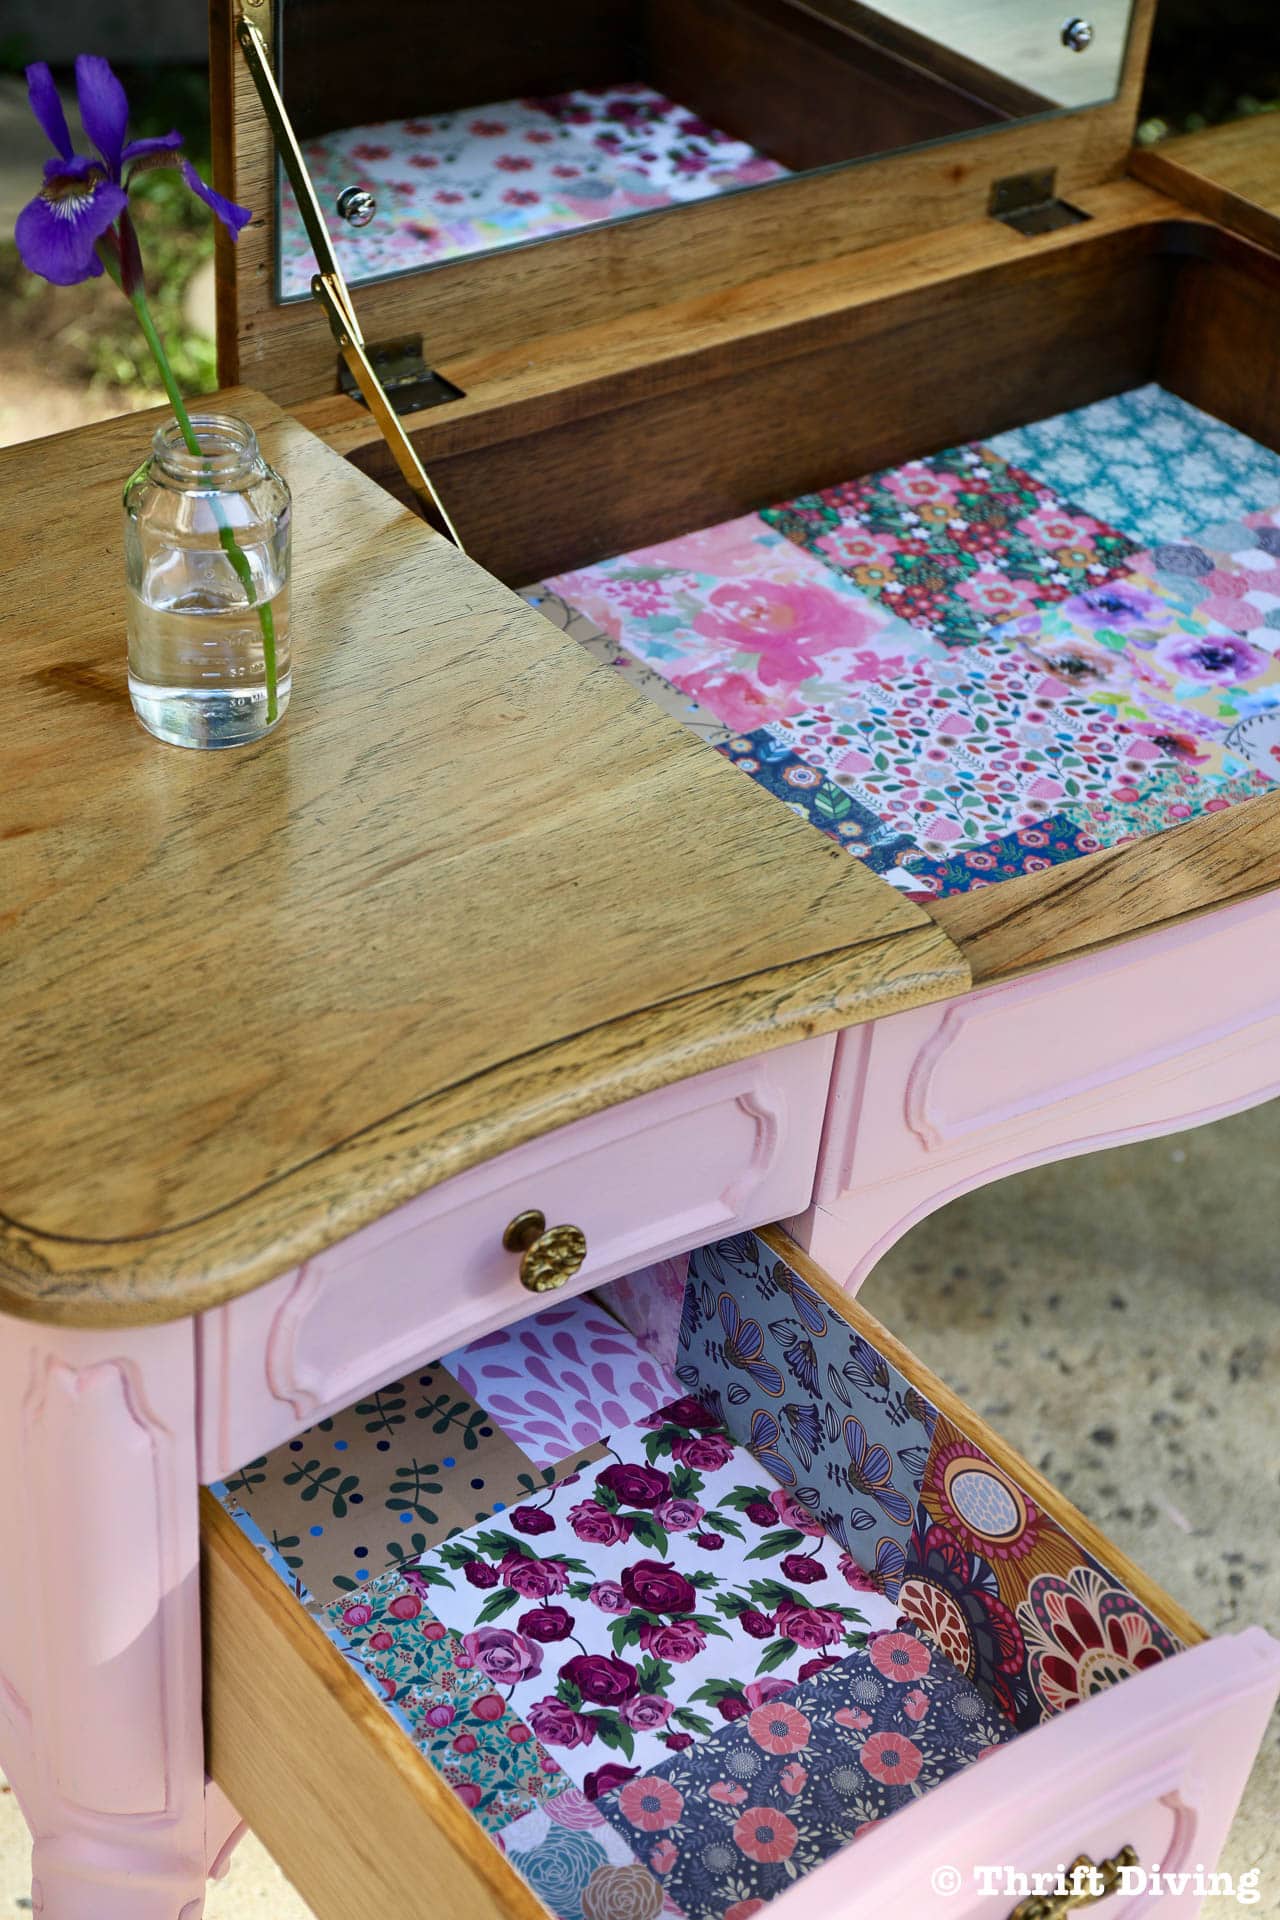
STEP 8: Line the Drawers with Scrapbook Paper
This was the most fun part of the project: adding pretty scrapbook paper in a patchwork pattern to the drawers!
You don’t have to line the drawers or paint them, but I think it tells a lot about how much time and effort someone put into a furniture makeover, don’t you? It’s a fun surprise to open the drawer and expect to see this:
BEFORE
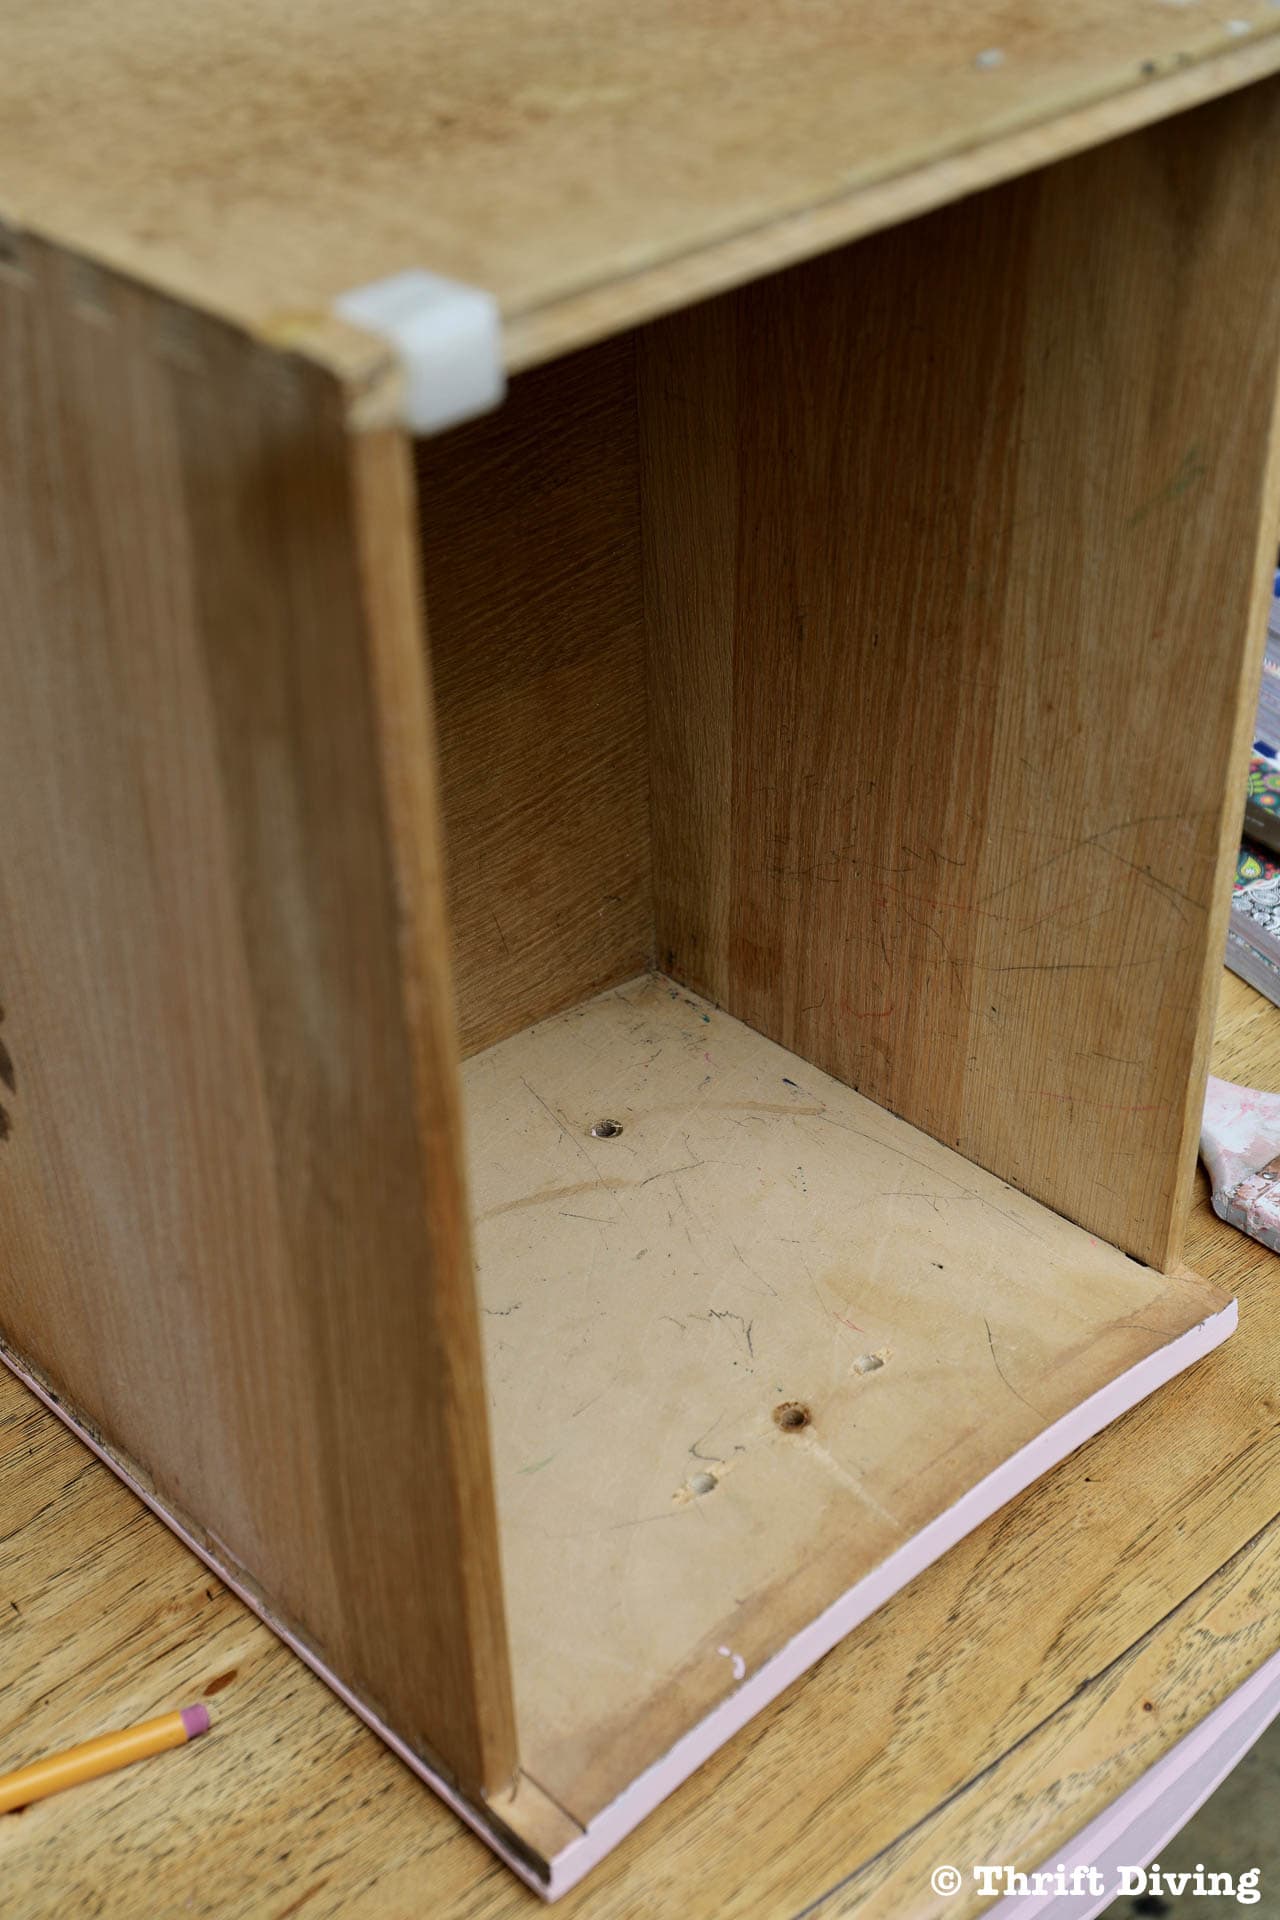
…but when you open the drawer, you see this instead!
Doesn’t that make you happy? Because it sure makes me smile!

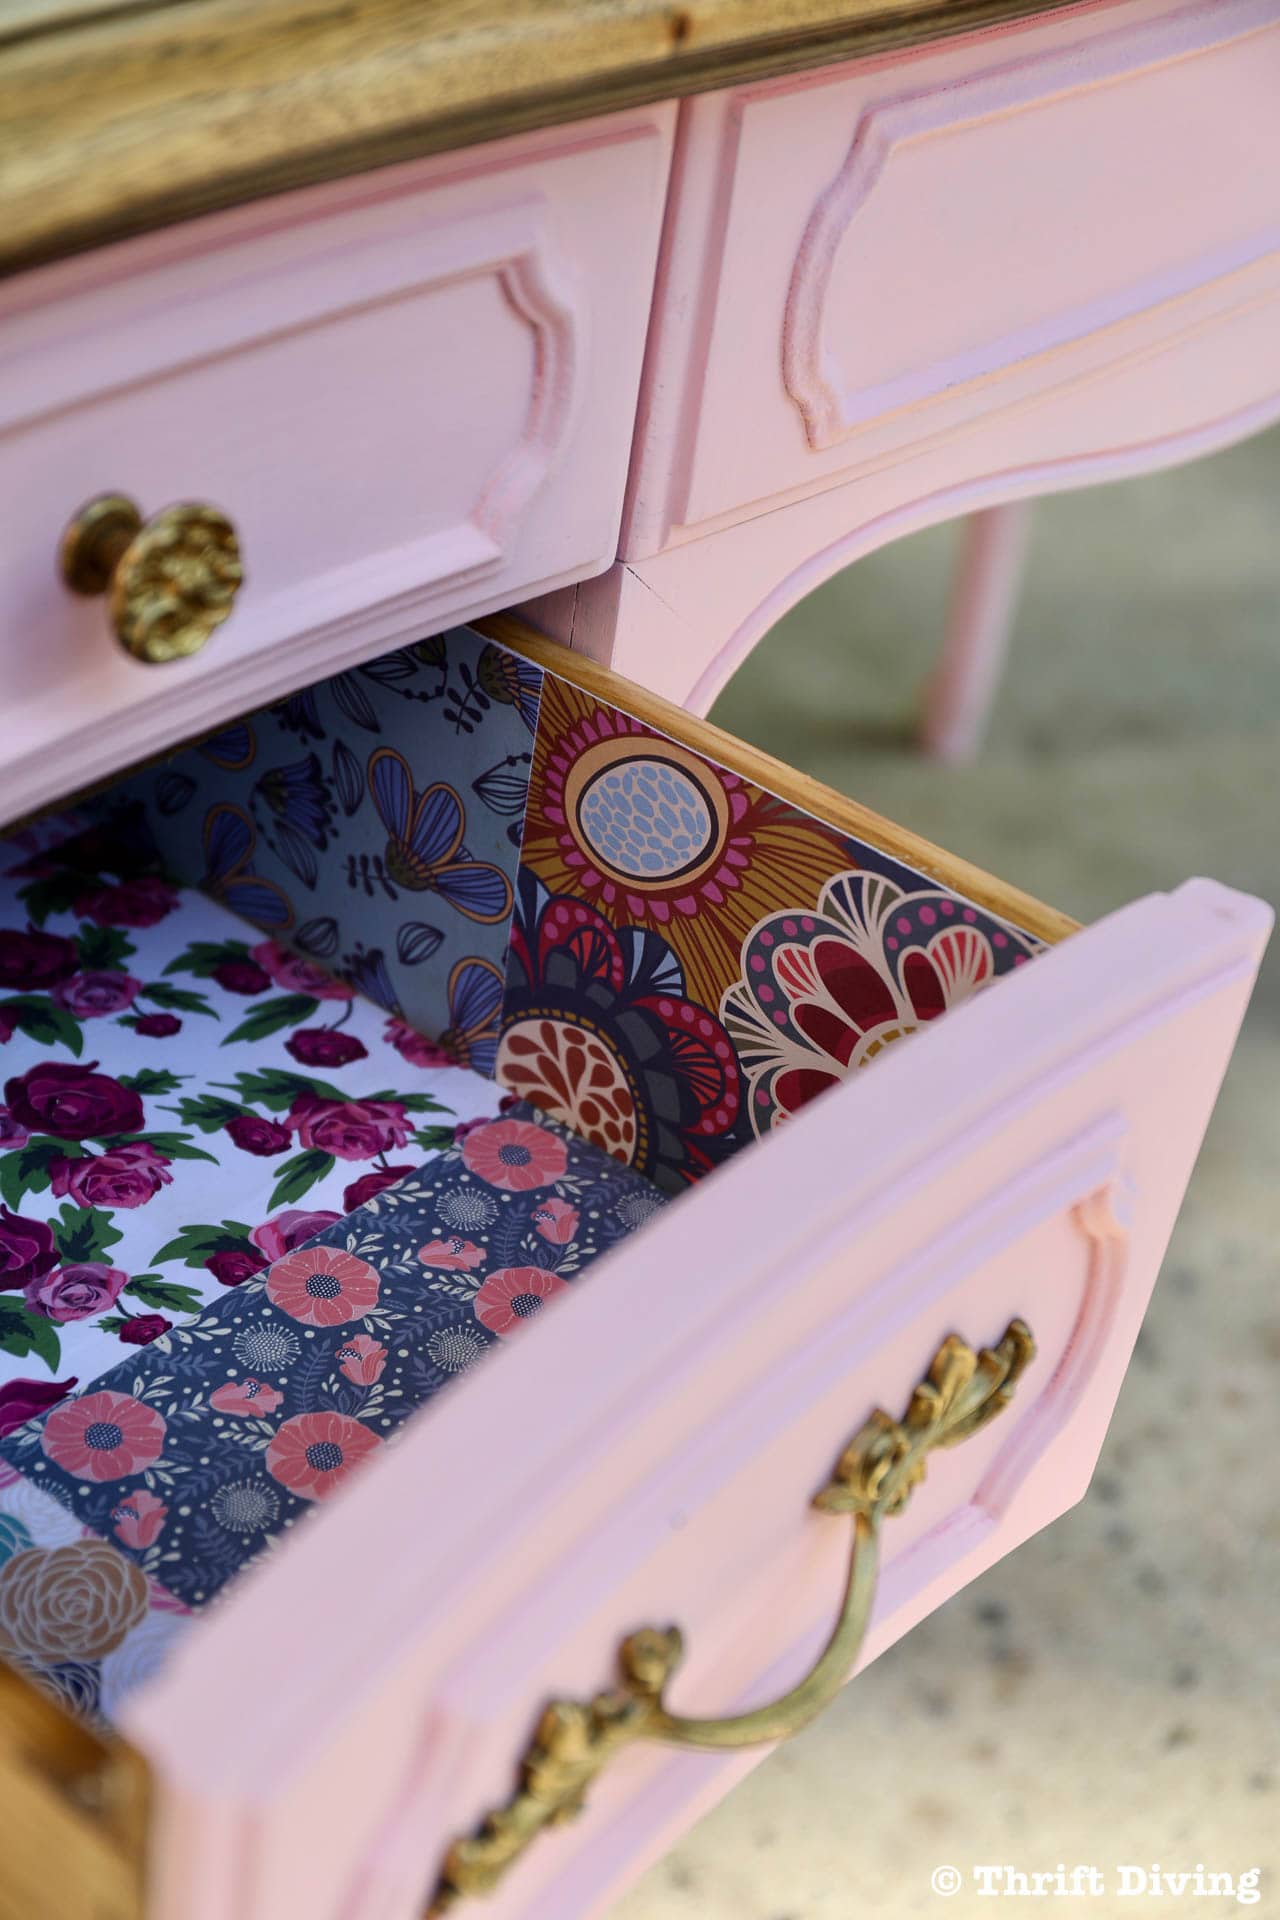
I will have a separate post and video on how to line drawers with scrapbook paper, because there are a few tricks to doing it well and getting that crisp, clean line! Watch out for that tutorial soon!
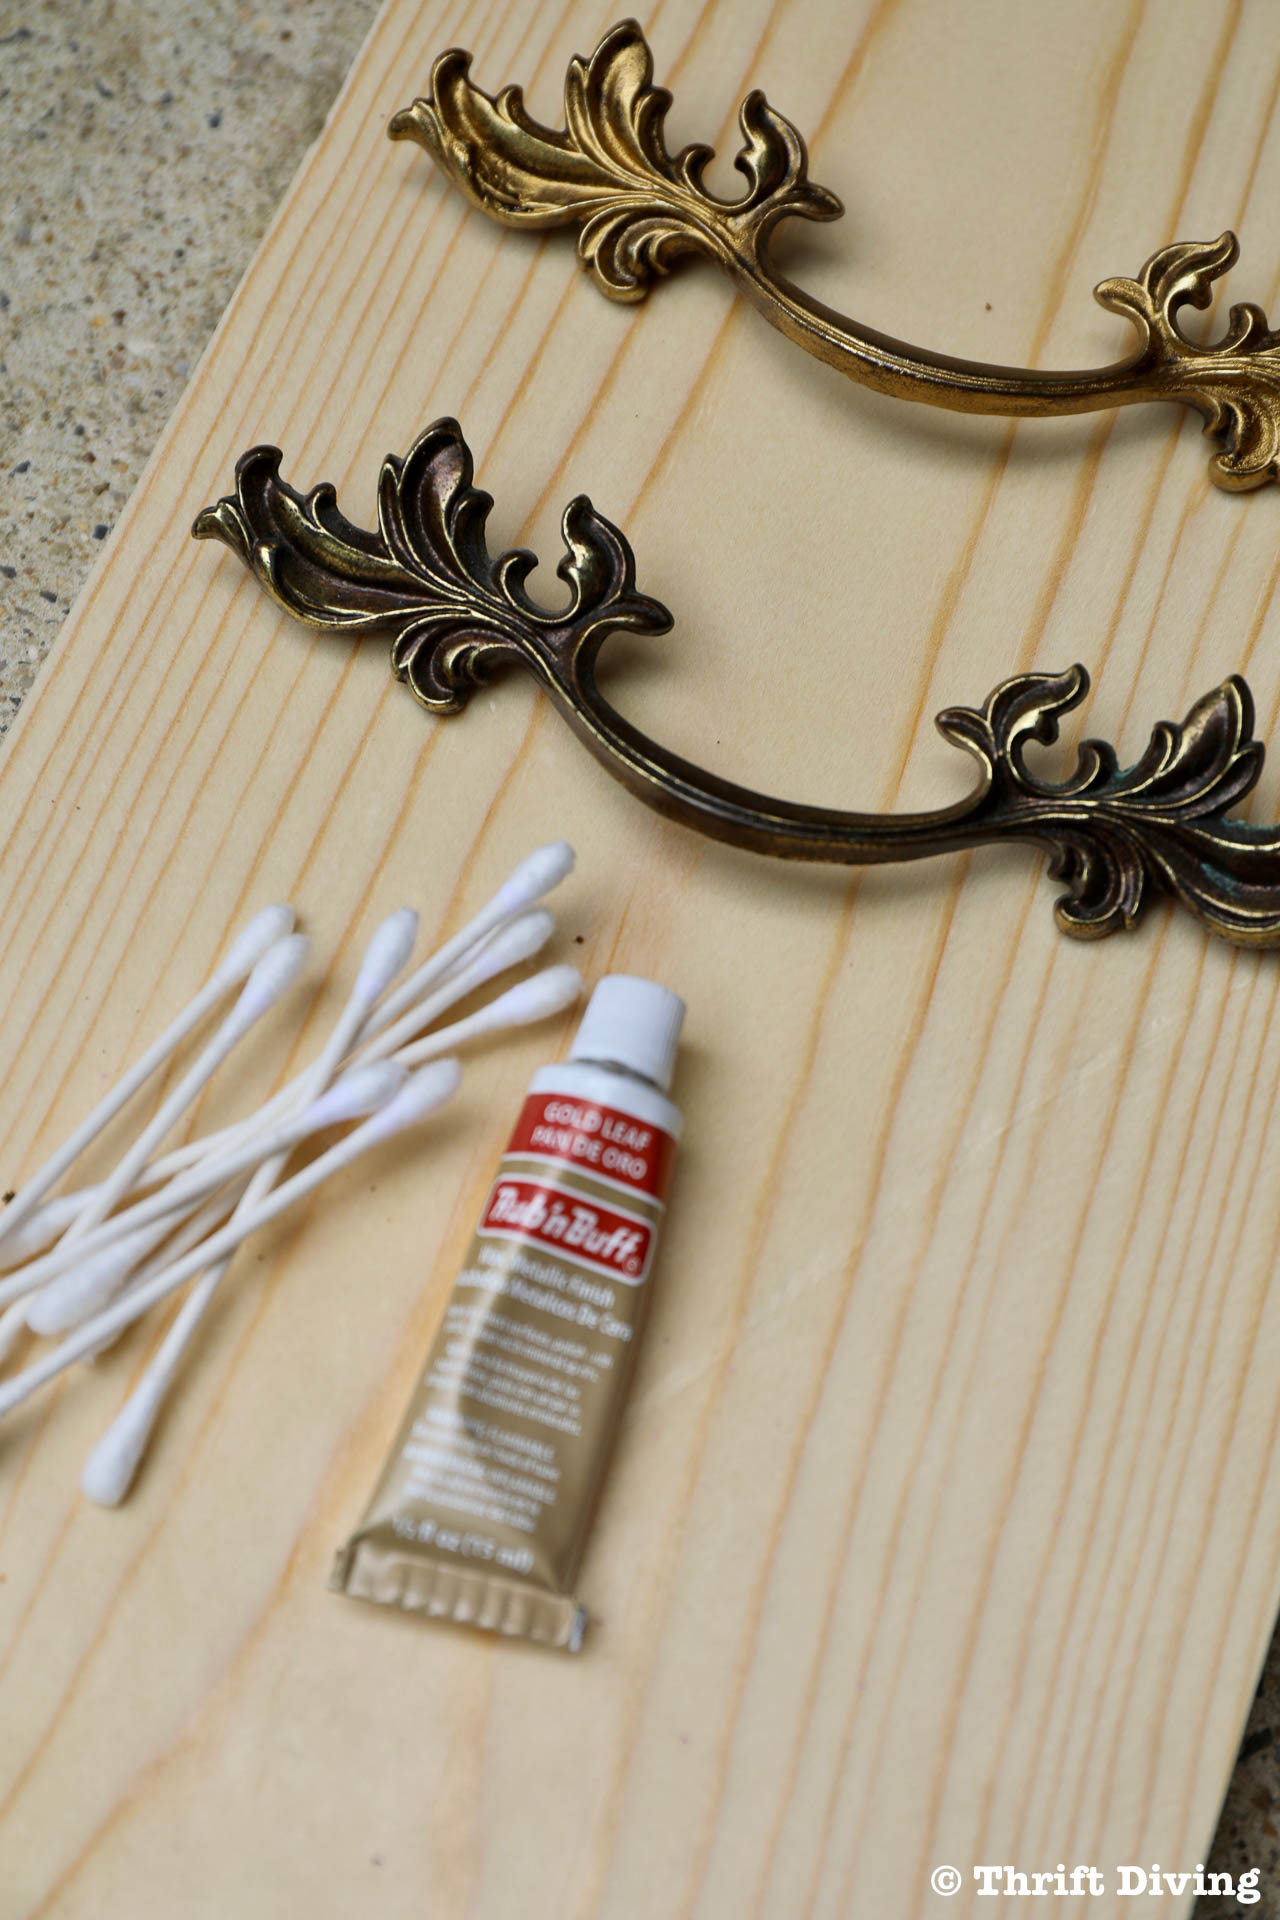
STEP 9: Eliminate the Tarnish on the Hardware With Rub n’ Buff
I absolutely love Rub n’ Buff on old tarnished handles and pulls! In case you haven’t priced knobs and pulls lately, they ain’t cheap, honey.
Using what you’ve got, but just cleaning them up a bit, is the way to go!
Rub n’ Buff, a wax metallic finish, is the best way to do that because it looks more natural than spray paint. It doesn’t leave that thick coating that spraypaint can leave.
Aren’t these French Provincial handles gorgeous??
Learn more: 5 Ways to Use Rub n’ Buff
STEP 10: Slather on a Coat of Clear Top Coat on the Body
I didn’t do this step yet, because I want the paint to cure a bit first, but yeah, I plan to put some General Finishes High Performance Top Coat on the paint. I don’t really like using wax because it has to be reapplied (which I never do….) and I don’t think it adds enough protection for paint, especially if it’s something that you rub against, like your leg again the side, etc. The top coat (maybe 2 coats) offers much more protection. I love the Satin top coat!
Let’s take another look at this BEFORE and AFTER French Provincial vanity makeover!
BEFORE
AFTER!
That top is to die for! I love how satiny it looks and feel. I’m really glad that I went in that direction and kept it natural!

BEFORE
AFTER!
So what do you think of my French Provincial Vanity Makeover?! Yes, it’s a bit girly, but a little whimsical furniture makes this DIYer very happy. 🙂

Download the 5 freebies!

Thrift Diving inspires women to decorate, improve, and maintain their home themselves...using paint, power tools, and thrift stores! Use these 5 printables, checklists, and ebooks to get started!

Wow! This is beautiful. I wish I had thrift stores close to where I live, under 10 bucks? Amazing! You did a great job.
Hi, Becky! Thank you! I am still shocked it turned out as pretty as it did! That top was confusing me and I didn’t know what I was going to do to it until after the paint was on it!
Absolutely beautiful ♥️
My daughter would love this, I thing I will do her dresser she got from her great nana, Thank you for the most beautiful ideas….
YAY!! I love inspiring you to do your project next! 🙂 Thanks, Laney!
Absolutely beautiful! I have put fabric in drawers but never thought about scrapbook paper… And I have so much scraps!
Yeah, girl, get that scrapbook paper out and get to gluin’! I like using the smaller pieces of 6×6 because I can use more of them to create different patterns. The larger pieces should be used for larger area.
Beautiful!!
Thank you, Kim!!
Beautiful work! Your post couldn’t have come at a better time, either-I just came across my dream dresser (one of them anyway, I have a bit of an addiction) in this lovely French Provincial style! I got very lucky because it’s marked on the back with the wood-French Walnut-and it’s in amazing condition, however, like you I appreciate wood grain and was torn about how to showcase that while making piece my own/updating it and refinishing where needed. I appreciate all your posts but this step-by-step process was so informative & the end result is gorgeous! What a deal, too. 😉
Awesome, Lisa!! I’m sooo glad that you found it helpful! That’s what I wanted it to be: helpful for someone who’s interested in doing a similar style, but also someone who might be just getting started with their first furniture makeover. 🙂
Nice. I like the combination
Wow, this is so beautiful! Your work always makes me want to try something like it but I know it takes a lot of practice to work up to your level of expertise. Really nice job!
Hey there, Della! You CAN do it! I did another video tonight showing you have to line the drawers with scrapbook paper. Super easy way to make it look so crisp and clean! Here’s the video: https://youtu.be/PqjPu3gLySU
This came out so much better than I thought it would. Great job!
Thank you, Cynthia! I agree! I really was stumped after I applied the pink. I had no idea what I wanted to do to the top. And the drawers were something that came about AFTER I started working on the vanity! I love when creative ideas strike in the middle of a project!! 🙂 Glad you like it!
This was amazing I can’t wait to find a piece to try it out on.
Thank you, Chris!! Yes, keep looking! The right piece will come along!
What a *lot* of work, Serena. You’re such a pro at this now, that you make it all look easy. I love the way the interior of the drawers turned out! What a nice surprise to open the drawers and see that flash of color and pattern.
It’s always nice when you can turn something old into something new and useful once again.
Hi, Alys! 🙂 OMG, it WAS a lot of work! That’s why I haven’t been heard from this week because all my free time was spent on this project. I always feel bad that I don’t post as often as I would like, but when you’re working on projects that take multiple days, it’s hard to post. Anyhow, I agree with you–opening the drawers to fun and whimsical colors and patterns makes me happy! I am going to see if I can create space for this in my bedroom. I don’t have a lot of “free walls” in my bedroom, so we shall see where I can squeeze it in. But I also love the idea of using this in my office for a crafting desk! I *WILL* make space for it! Thanks, Alys!