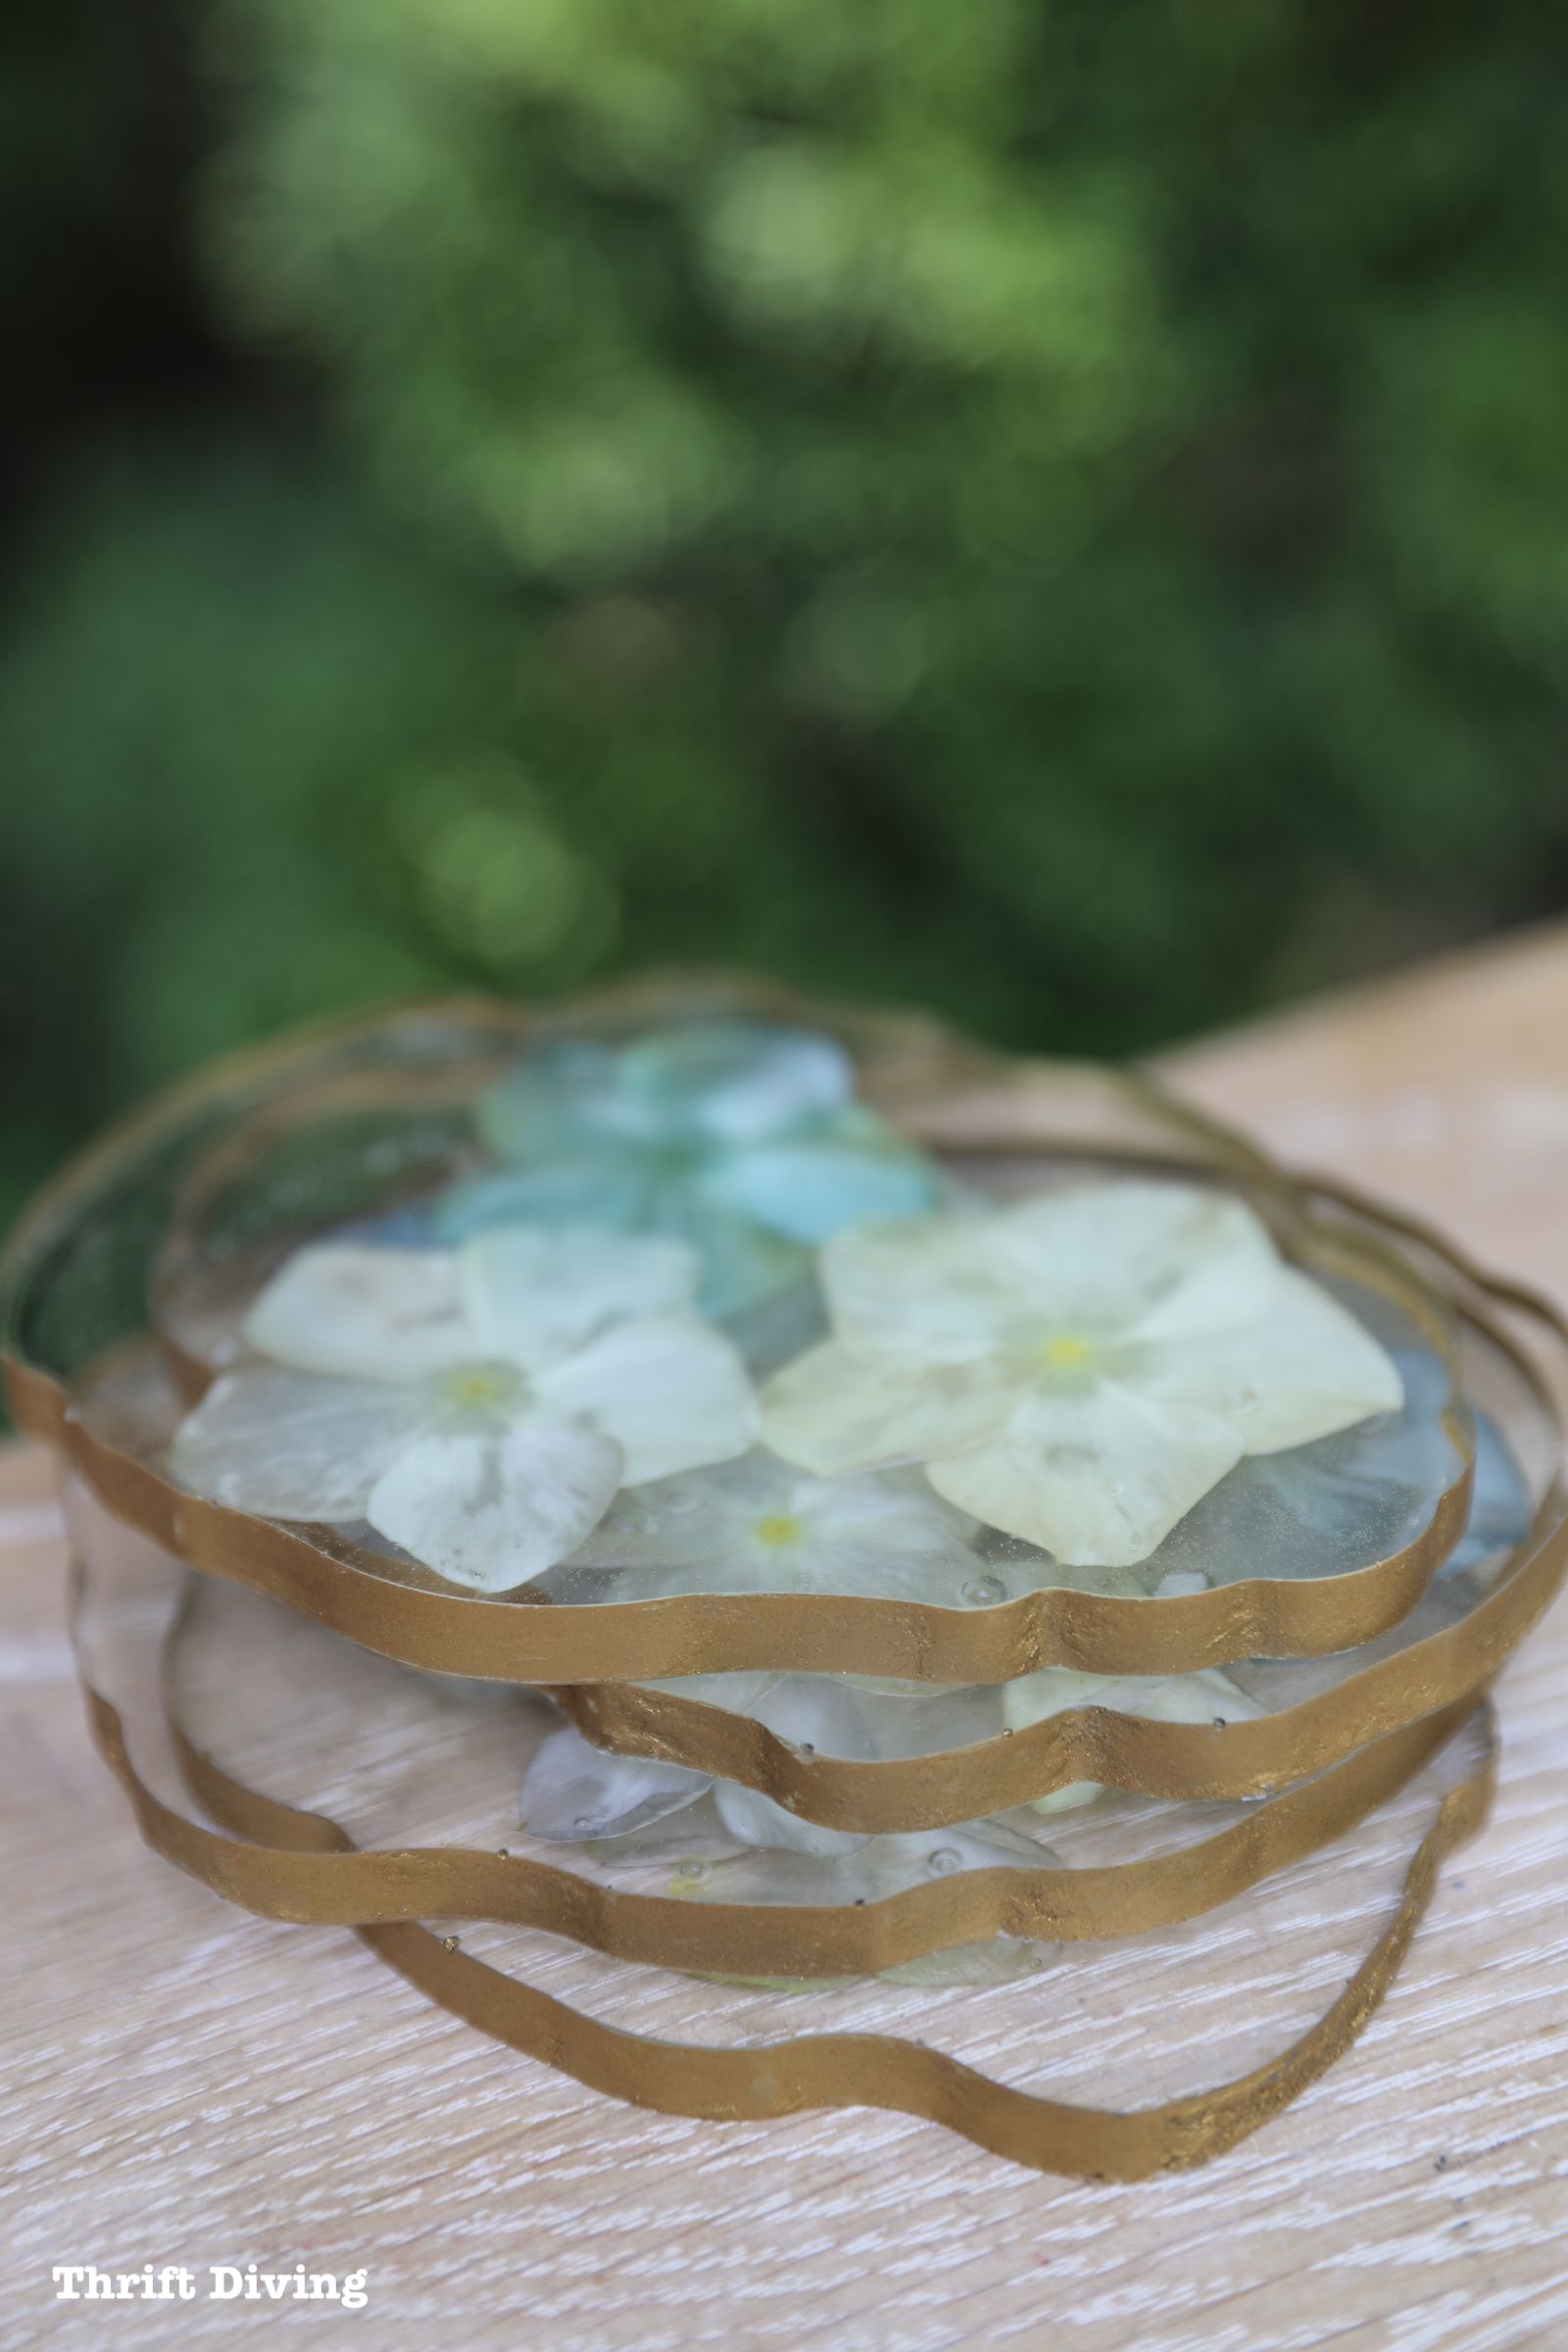
Making Epoxy Art with Flowers: DIY Drink Coasters
These epoxy art flower drink coasters tutorial is brought to you by The Home Depot. All opinions belong to Thrift Diving.
I’ve always wanted to make epoxy art with flowers, specifically epoxy flower drink coasters! I should have done some research before getting started on this project, but because I was so excited to get started, I decided I would jump right in and just “see what happens.”
Considering that I have never really used epoxy for craft projects before, I think this epoxy flower coasters turned out really cute!
Keep reading to see how I made these fun drink coasters!
Save this project on Pinterest!

Materials for Epoxy Art with Flowers
- Clear epoxy
- Silicone coaster molds
- Bernzomatic Butane Micro Torch
- Bernzomatic Butane Gas Refill Canister
- Fresh or synthetic flowers
- Activa silica gel for drying flowers (optional)
- Microwaveable plastic containers for drying flowers (optional)
- Clear spray for sealing (optional)
- Rub n’ Buff metallic wax (optional)
- Premium gilding paint (optional)
- Paint brush
- Painter’s tape
- Rags
- 320-grit sandpaper

STEP 1: Mix Your Epoxy
I actually used two different brands of epoxy while experimenting with this project. I’m definitely a noob in the epoxy game, so I wasn’t sure that if the color difference between the two brands was due to brand, normal shade variations, or user-error.
(There was definitely a lot of user-error when making these epoxy flower drink coasters, by the way!) LOL
Whichever epoxy you choose, be sure to read the instructions because one brand I used required a 2:1 mixture–2 parts resin and 1 part hardener. The second brand required a 1:1 mixture instead of resin and hardener.

The key is to thoroughly mix the resin and hardener together. I’ve read that when mixing, plan for mixing a good 3 minutes, and scrape the sides to make sure that you’ve mixed the entire batch. I used little apple sauce containers for mixing it, but find a slightly bigger plastic bowl for mixing so it doesn’t splash over the sides.
Epoxy doesn’t stick to hard plastic, so later that day after I was done, it was easy to peel right out of these containers so I can reuse them. Just be sure to pull it out before it fully hardens. It’s easier to remove that way.

STEP 2: Coat the Bottom of the Silicone Mold
The first epoxy flower coaster I made, I used the first set of epoxy resin and hardener, which was more yellow. It also had a lot of bubbles, but I later learned that if you place the tightly closed containers in warm water before mixing, it helps to reduce bubbles. Next time I’ll have to try that. 😉

STEP 3: Remove the Bubbles with a Micro Torch
Even though you’ll want to reduce the bubbles by warming up the epoxy containers with warm water, it’s also possible to remove them with a micro torch.
Ask anyone who uses epoxy and they’ll tell you that those darn bubbles can ruin a project. Thankfully, there is an easy solution, and that is a micro torch.
The Home Depot sent me this Bernzomatic Butane Micro Torch to try out and it came in handy for this project! It has 3 settings: fine solder (notice the tip?), hot air blower, and pencil flame. I used the pencil flame setting, but I think you could use the hot air blower option, too, to remove bubbles.

You’ll need butane, of course, so don’t forget to buy the Bernzomatic Butane Gas Refill Canister.
The micro torch is super easy to fill. It only takes seconds to fill by turning the micro torch upside down and inserting the tip of the butane canister until you hear gas coming out. It literally fills in a split second, so don’t over-fill. Follow the instructions on the back of the canister.

The heat from the flame over epoxy removes the bubbles in a ZAP. It’s really cool to see! The only thing is when you’re using real flowers in epoxy and they’re close to the surface, you’ve got to be really careful or you’ll burn the delicate petals.
You also have to be careful if you’re using silicone molds. A micro torch shouldn’t touch the silicone or it can damage it. This did happen to me where I moved the flame over the mold and later, it was difficult to get the epoxy out of the mold. If you’re doing small silicone molds, a heat gun (which isn’t as hot) may be a better choice. Larger molds where you can stay away from the sides, a micro torch can work.

Dry and Preserve the Flowers Before Using Them….??
I may have missed a critical step here. Had I done more research, I would have known that before using epoxy, the flowers could have (should have??) been dried and preserved to help maintain their vibrancy when using epoxy. So as a curious DIYer, I rushed off the craft store to buy the #1 flower silica gel drying agent that most crafters recommended when drying their flowers.
I followed the instructions for drying the flowers with silica gel in the microwave:
STEP A: Place 1.5″ of silica gel in a microwave-save plastic bowl.
STEP B: Place the flowers facing up with petals carefully spread out.
STEP C: Cover the flowers gently with silica gel.
STEP D: Place in the microwave next to a cup full of water.
STEP E: Turn on MEDIUM power and heat for 1 minute at a time. Check flowers after 2 – 3 minutes.
STEP F: Remove flowers and carefully brush off silica gel from the petals.
STEP G: Spray with a mist of hairspray to preserve them.
I did everything right, but felt like the results I got were worse than when I used fresh flowers. The petals turned all kinds of spotty colors. It wasn’t good….LOL.
I also tried this experiment of making epoxy flower art coasters using faux flowers, too.
For now, I would say that using the fresh flowers gave the best results!

STEP 4: Place the Flowers Carefully Face Down
The bottom of the epoxy mold will be the top of the flower coaster when it dries and is removed. So be sure to place the flowers face down in the first layer of epoxy.
Now here is where I am guessing I can improve on this project for my next set of epoxy coasters: try letting the first layer of epoxy slightly dry before placing the flowers.
Little bubbles with trapped air were created under some of the petals, and despite trying to gently remove them by pressing on the petals, I wasn’t able to completely remove them.
Those bubbles weren’t noticeable until after they’ve dried and I pulled them out of the epoxy molds.
By letting the first layer slightly dry, I’m guessing that this will help to eliminate bubbles from accumulating under the petals. I’m excited to try another batch to see if my theory works!

I’ll also point out that the size and type of flowers used matters a lot! I tried using chicory,
STEP 5: Pour Remaining Epoxy Over Flowers
Since my first layer wasn’t dry, when I then poured the remaining epoxy over the flowers, they started drifting a little bit. By letting the first layer harden up a little bit, I think that might solve the problem of the flowers shifting. We’ll have to see next time.
But go ahead and pour the remaining epoxy over the flowers, filling only until the epoxy is level with the edge of the molds.
Once that one is complete, move on the next mold, repeating the same process.
(Notice that this batch of epoxy with the other brand is less yellow?).

STEP 6: Remove the Remaining Bubbles with a Mini Torch
I was nervous to do this part once the flowers were in the epoxy because I worried I would scorch them, and even ruin the epoxy mold.
I kept the torch moving very quickly, where the flame could barely lick the surface. You can see from the picture that the flame did scorch one of the petals a bit, but thankfully I didn’t ruin the entire project!
The heat from the flame helps to remove any remaining bubbles from the epoxy. It won’t remove any bubbles trapped under the petals, but it will help to remove some of the bubbles from the batch you just poured on top.
TIP #1: Try using synthetic flowers, which may allow you to use the micro torch without worry of scorching the petals.
TIP #2: Try placing the flowers deeper into the mold so that the backs of the petals aren’t as exposed to the flames.
TIP #3: If you’re using small silicone molds, use a heat gun instead, and if you’re using larger silicone molds and can keep the flame away from the silicone mold, then a micro torch is fine.

STEP 7: Let Flower Drink Coaster Dry for 24 Hours
This is the hard part because I couldn’t wait to see what they looked like! You noticed that the flowers changed colors. The heat from the chemical reaction of the resin and hardener blanched the color of the flowers, turning them to light gray and blue. But I liked that they still had a touch of color.
See above the step that I mentioned that I didn’t know: drying and preserving the flowers firs, which will preserve the color. But yeah, this is a good example of how epoxy will face the color. This was a fun experiment, though! 🙂

STEP 8: Add Metallic Gold to the Edges
This was the very first epoxy art flower drink coaster sample I had made, without using the micro torch (see the bubbles in the epoxy) and without realizing that bubbles were getting trapped under the petals.
I also wasn’t sure about whether to add gold to the edges. I love it both ways–with or without!

But gold along the edges would add a bit of “oomph” that I was looking for. I used Grecian Gold colored Rub ‘n Buff metallic wax, which is one of my favorite crafting supplies! I wasn’t sure if it would stick to the epoxy, though.

Using a small paint brush (and some painter’s tape to try to prevent the metallic wax from staining the surface of the drink coasters), I added a few layers of metallic wax.
(But honestly, although this worked, I later found that premium gilding paint worked a million times better! But since I had the Rub ‘n Buff on hand, that’s what I used. (If you’re starting this project from scratch and will need to buy all new materials, I definitely recommend using the premium gilding paint instead of the Rub ‘n Buff metallic wax).

STEP 9: Smooth Edges with 320 Grit Sandpaper
Once the metallic wax dried for a couple hours, I sanded the edges with very fine 320 grit sandpaper. And I’m talkin’ lightly sand. If I sanded too hard, too much of the metallic wax came off. So the key was to be gently (oh–and wear a dusk mask, too).

STEP 10: Paint a Coat of Gold on the Edges
After slightly sanding the edges, I added another coat of the metallic wax to the edges. It went on much more smoothly and had better coverage.
After I had completed this project, I went to the craft store to look for the silica gel and that’s when I found the really nice premium gilding paint in brass that went on like butter! The next batch that I’m making, I will use the gilding paint instead.

You can see here on the LEFT the drink coaster that had seen sanded lightly and then coated with a final layer of metallic wax……versus the coaster on the right that had not yet been sanded or painted with a final layer.
Now….if you like the rough look, you can definitely keep the edges with more texture. But if you like it a bit smoother, definitely go with a light sanding and a final coat of metallic wax.
But if you want smooooooth edges, definitely go with the premium gilding paint! It sticks really well and dries quickly (cleanup with mineral spirits).

STEP 11: Shine with Cotton Cloth
Even with being super careful, I guarantee that you’ll get metallic wax (or gilding paint) on the edges. 🙂 It might even be helpful to apply some painter’s tape to the surface so that the metallic wax or paint doesn’t get all over the top and bottom surface of the epoxy flower drink coasters! It will cut down the amount of cleanup you’ll have to do.
If you do get some metallic wax or gilding paint on the surface area, just buff it with a cotton cloth to restore it. I also wash my hands (or change gloves) often so that I don’t transfer it to the surface.
And voila!

Despite the fact that this was an experiment with epoxy, since I haven’t ever really used it, I’m please with how they turned out! But for my next batch, these are the top take-aways I’ll keep in mind so the next batch will be even better!
- Warm up the epoxy resin and hardener bottles in warm water to reduce bubbles.
- Try letting the first layer of epoxy harden a bit before placing flowers to reduce bubbles under the petals.
- Try using faux flowers to maintain vibrant color.
- Protect the surface area with painter’s tape to minimize clean-up of metallic wax on the surfaces.

Although I had a few challenges with this project, I love, love, love how it turned out! And what a great gift to make for friends and family! I’m going to make another batch and add magnets to the back for refrigerator art! There are so many ideas for this. 🙂
Love this epoxy art project?? Click here to SAVE it on Pinterest!
![]()


Download the 5 freebies!

Thrift Diving inspires women to decorate, improve, and maintain their home themselves...using paint, power tools, and thrift stores! Use these 5 printables, checklists, and ebooks to get started!

I have to admit, I’ve always wanted to try an epoxy project! You made it a lot less intimidating!! Thanks for sharing!
I have wanted to try an epoxy project and your post was super helpful in actually breaking it all down. Thanks so much. I enjoy your blog.
You’re welcome! I am such a newbie at this, too, but it was fun to experiment! 🙂 Good luck, Sharon!
The email said you had problems with the epoxy making a mess on your work bench, but I didn’t see that in the article. I hate gloves they make my hands smell funny so I never use them. My little secret for clean up is baby wipes. it cleans that epoxy right up. off my fingers, off my mixing containers, off my kitchen counter. it has to be wiped before it’s dried. if you think a razor blade won’t damage your bench you can use that to scrape off the dried epoxy. I did that on my formica counter before I discovered baby wipes. or try a putty knife. the epoxy will soften a little if you heat it that might make it pliable enough to pick off.
Hi Dina! I didn’t post the mess that it made! LOL 🙂 I found spots alllll over my workbench. I think I’ll pull out the heat gun and see if I can soften it up. Good tip on the baby wipes! I found something similar at the store that are like baby wipes, but one side is gritty for those extra tough messes! 🙂 Next time I will learn my lesson! Thanks for commenting!