How to Create DIY Wall Art From a Thrifted Canvas
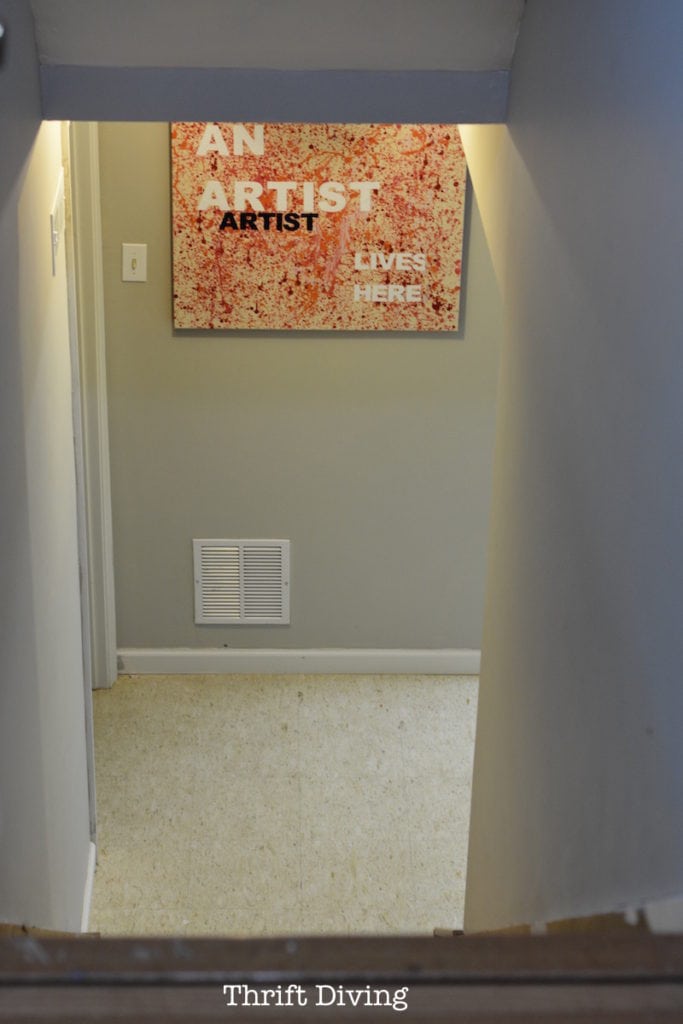
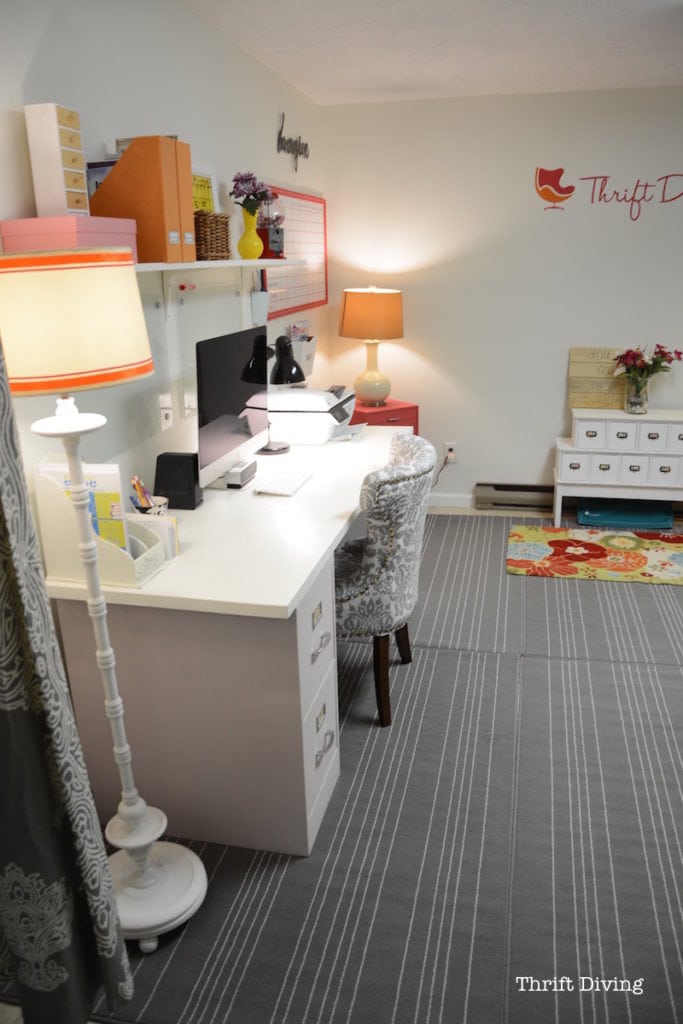
One of my favorite projects from my pretty and colorful basement office makeover recently was this DIY canvas wall art that I made and hung at the bottom of the basement stairs.
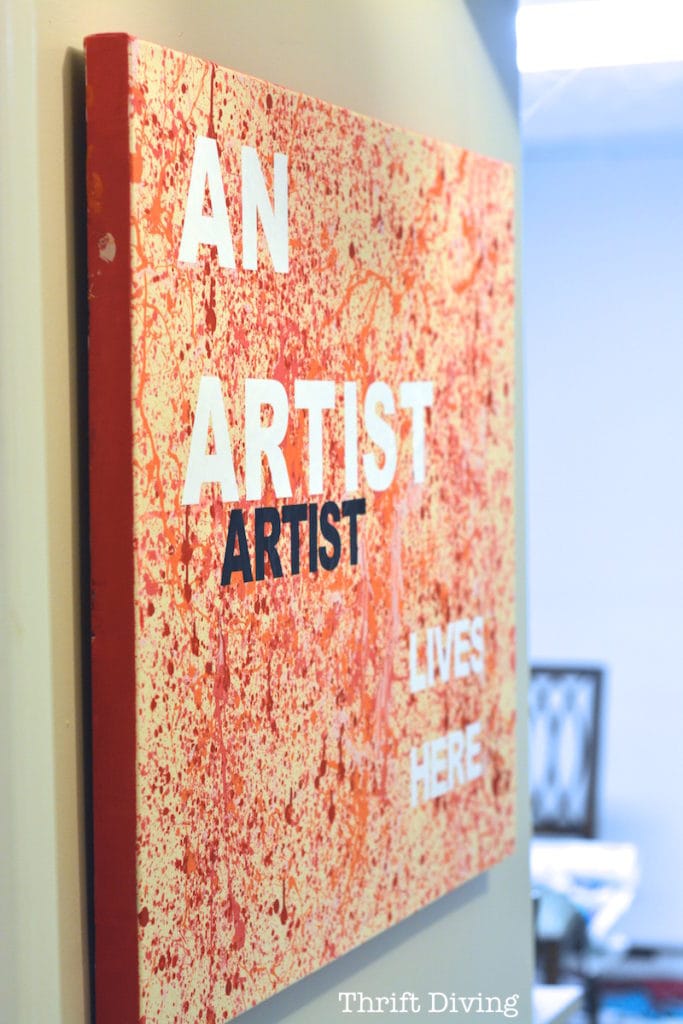
I’d been wanting to make DIY wall art that says “An Artist Lives Here” for quite some time, but I didn’t have the perfect canvas to do it. If you’ve been to art stores, even with 50% off coupons, you know that canvases can be expensive as heck! So it’s one of those projects that I just pushed to the bottom of my “Some Day!” list.
Working on my basement office, though, I was inspired. This basement is where I get to paint furniture and work on projects (and was going to be the place where I would be blogging). Why not pay homage to the very spot where creativity happens, right?
Plus, when you walk down the stairs to my basement, I wanted everyone to know a crafty person lives and works here. Then again, we lack the “entertainment” gene and rarely invite people over, so it’s primarily for my own benefit. LOL
Creating a piece of DIY wall art like this was super easy. If you’ve got bare walls or want to make over a room of your own, here’s what you do!
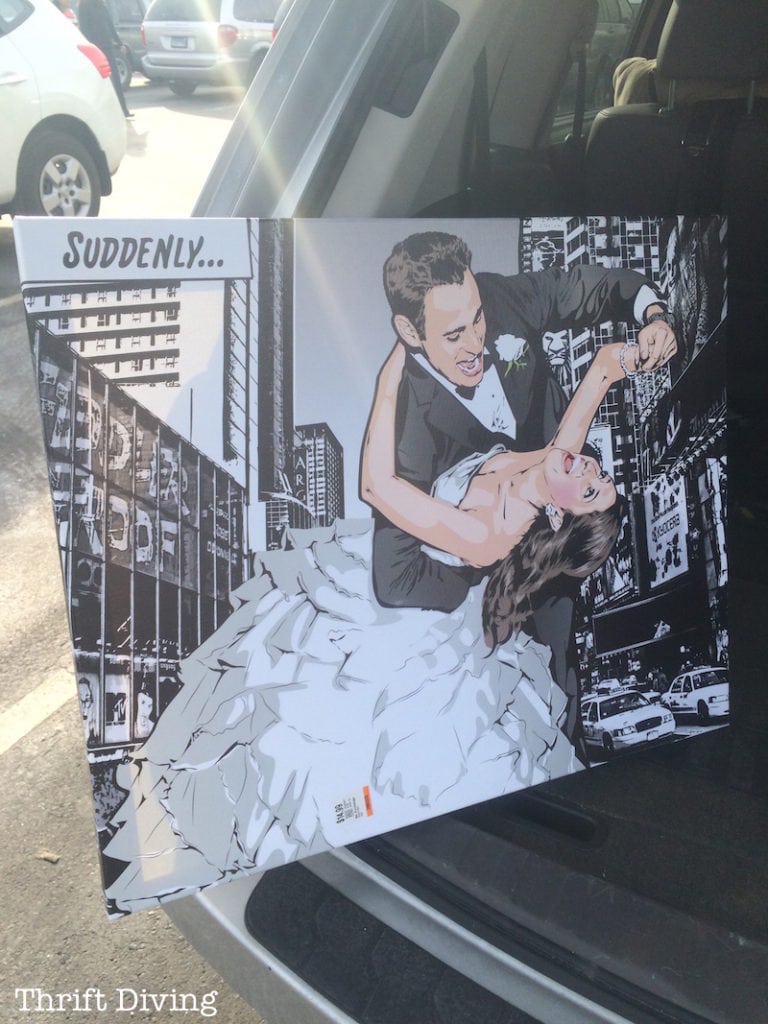
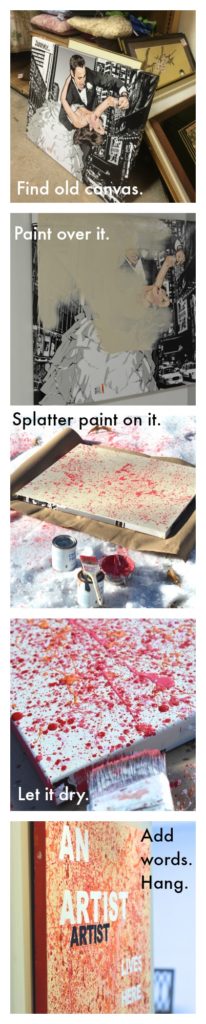
STEP #1: Find the perfect canvas or painting.
I had found this $15 canvas at my favorite thrift store. When I saw it, I knew it was perfect! I actually liked the wedding couple on the front and was a little sad to see them dissipate (like their marriage must have, too–why else would they end discarded at the thrift store? LOL. That poor, poor young couple….).
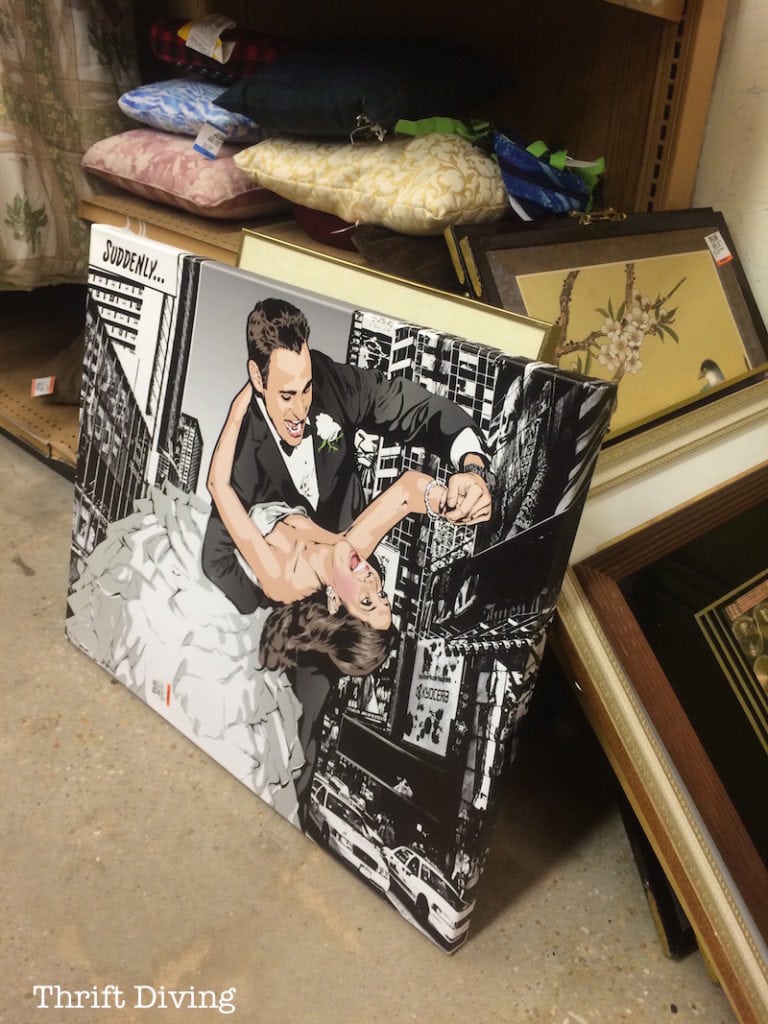
If you’ve got other discarded pictures, you can use them, too. Doesn’t necessarily have to be a canvas, per se. You can even find an old painting, too.
Be sure that the canvas you choose isn’t torn and is in generally good condition. This was in absolute perfect condition and large enough to cover some wall space.
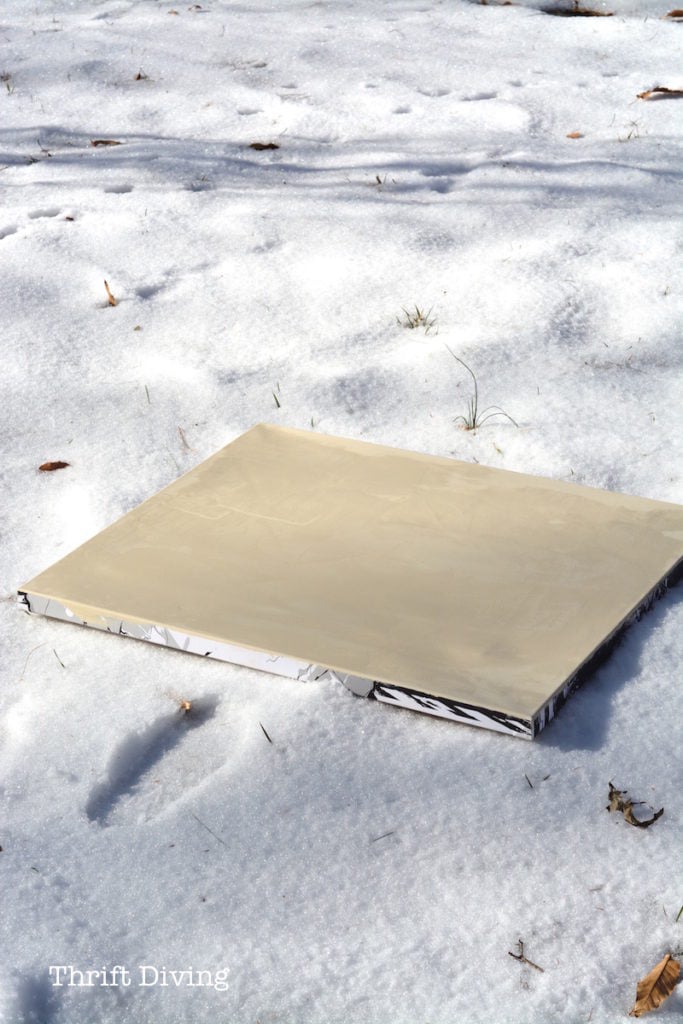
STEP #2: Paint Over the Canvas
As I said, it was sad to see “Brad and Jessica” (my made-up psuedo names!) get painted over, but my cause was much more worthy!
I used Annie Sloan decorative chalk paint to paint over it (Old Ochre) and needed a couple coats for full coverage. Chalk paint is awesome because it sticks to everything.

I left the sides unpainted for the moment because I ran out of Old Ochre!
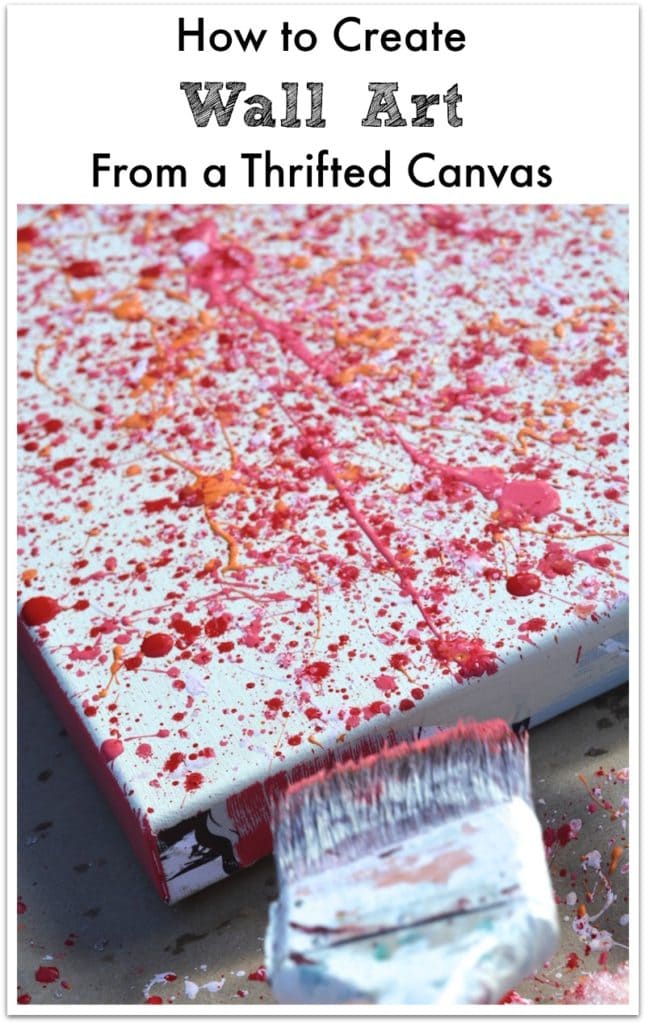
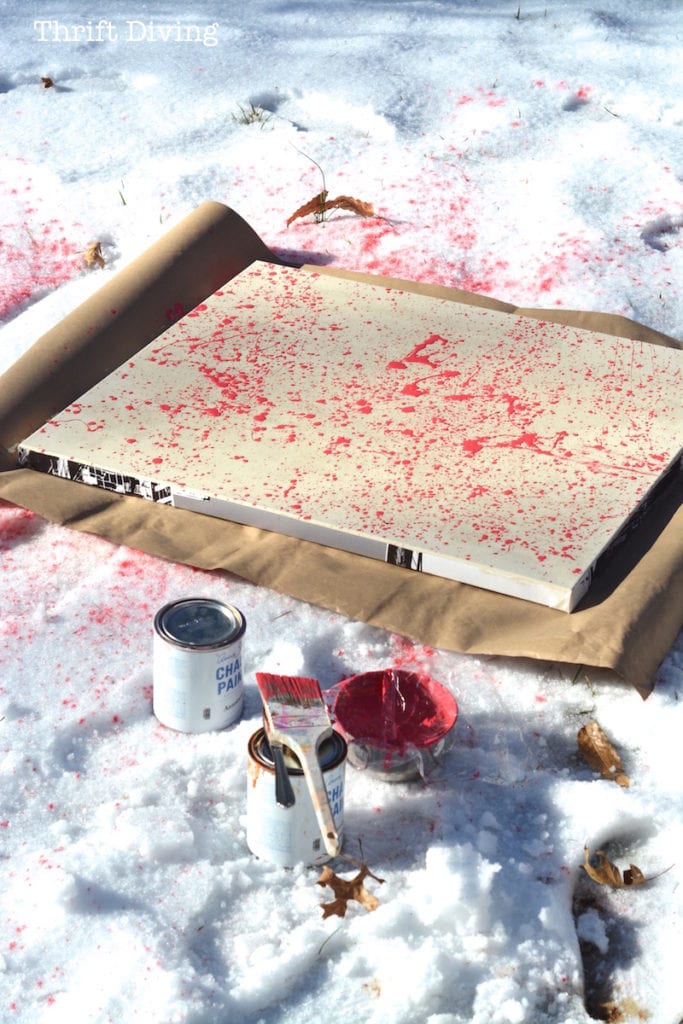
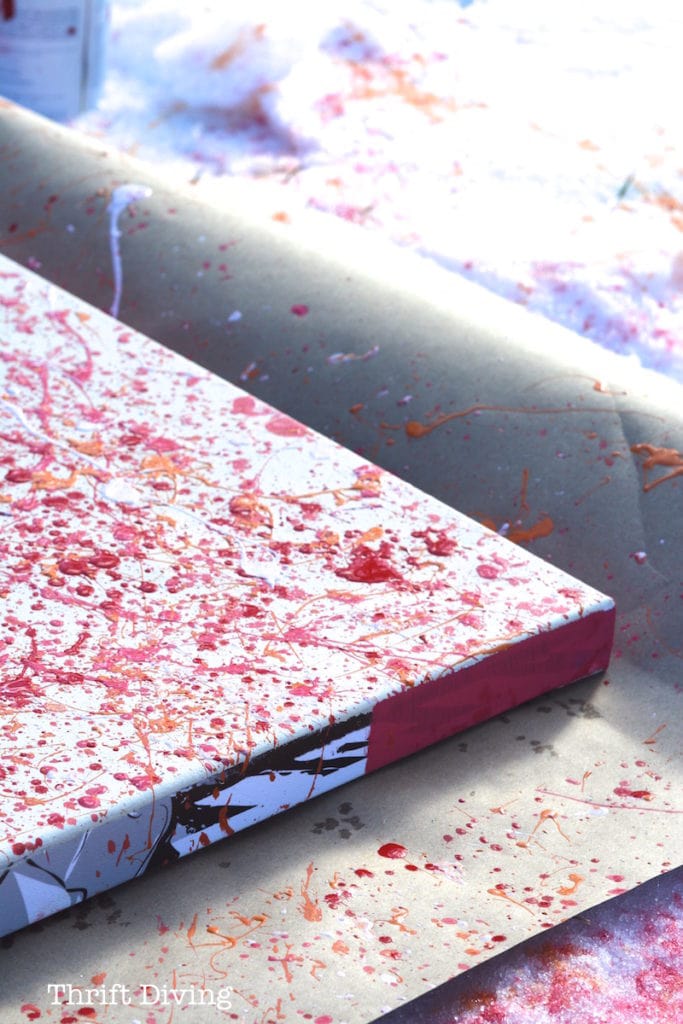
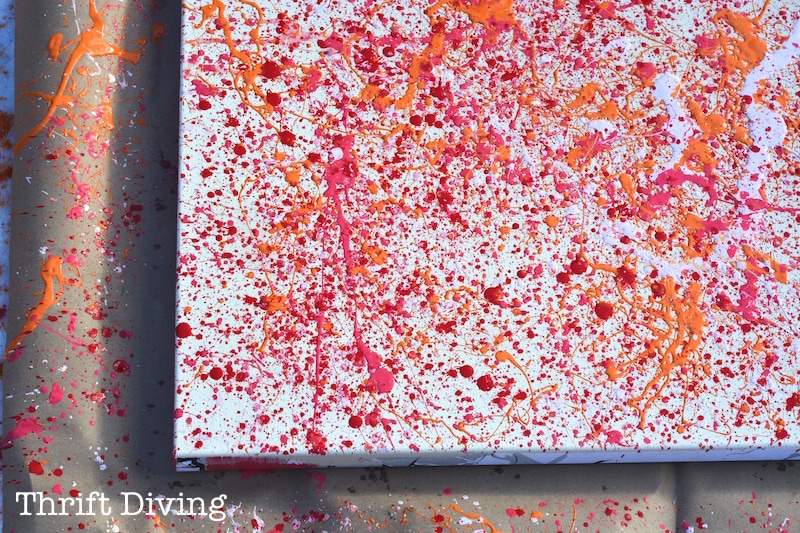
 STEP 3: Splatter!
 STEP 3: Splatter!
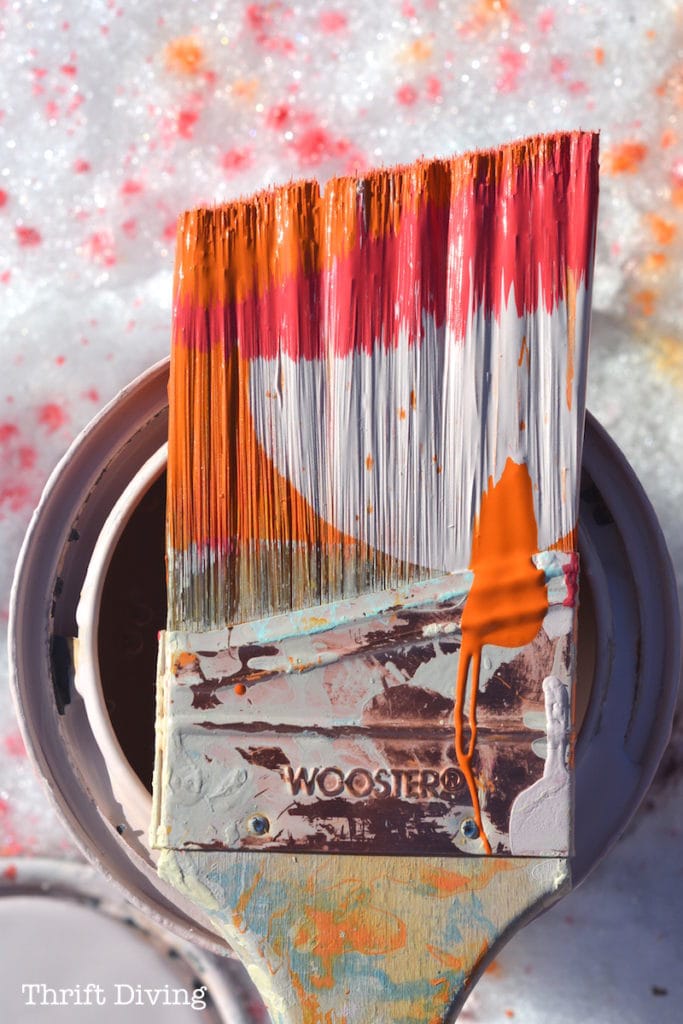
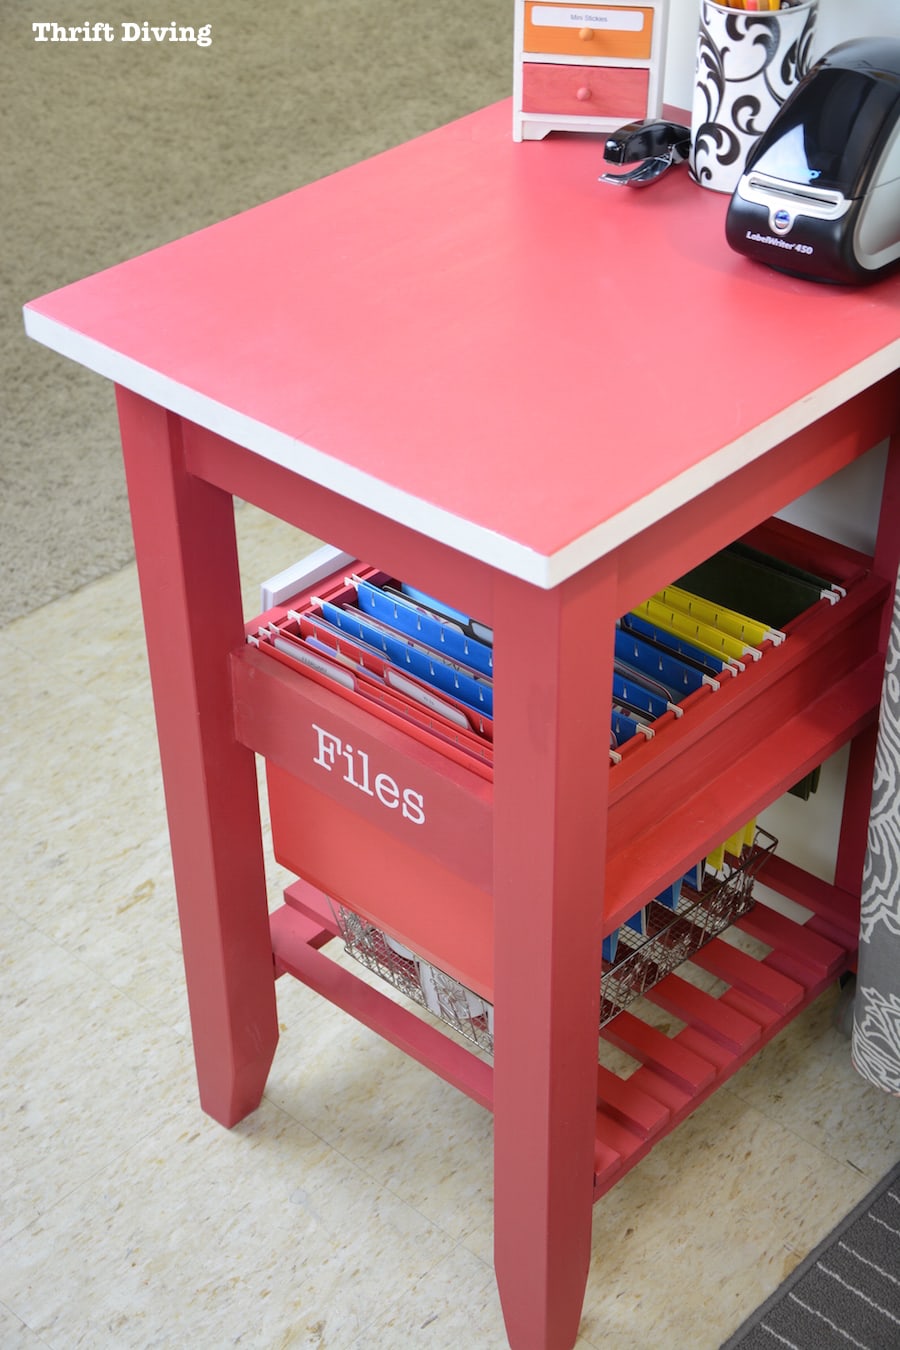
This is my favorite part! Since the colors of my basement office makeover resemble my blog colors (pink, orange, red, softer pink), those are the colors I chose. I custom mixed the pinks from Annie Sloan Emporer’s Silk and Pure White to create the deep pink color. I love this color!! I even painted these file cabinets in this color!
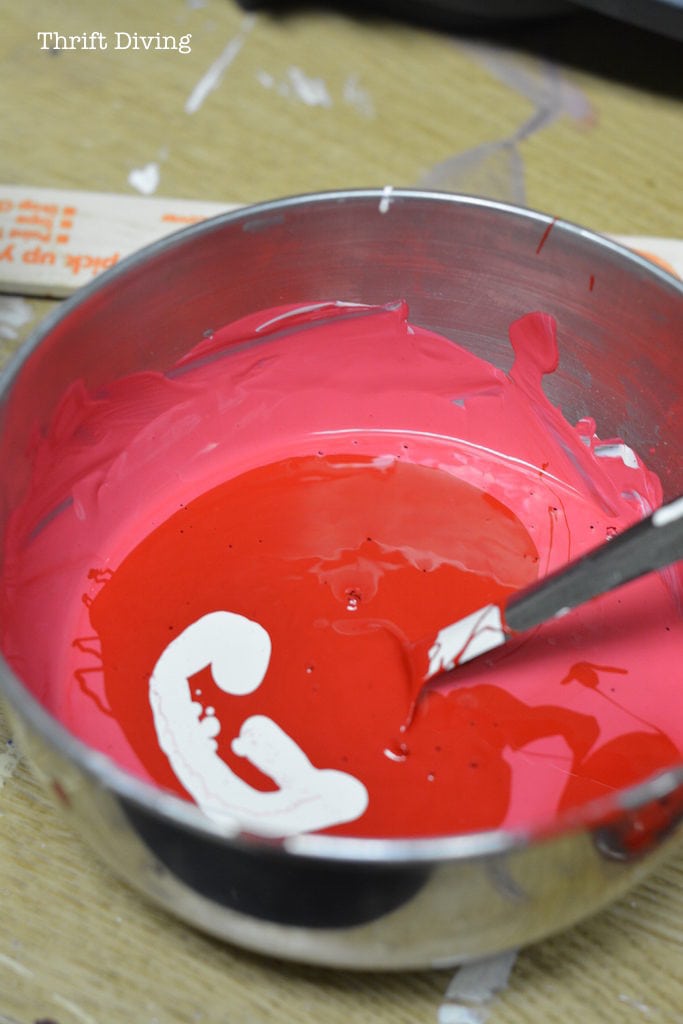
I wanted to create a splatter “artist” look, so I dipped the brush in the paint and randomly splayed it everywhere.
Nope–didn’t cover the snow.
Why bother? It was going to melt anyhow :). You could hardly see any paint in the grass when the snow melted. Perfect!
(Don’t try this inside unless you’ve got everything covered up!!! It’s super messy).
I loved the beauty of the brush so much that I almost didn’t wash out the brush and was going to let it dry this way, then hang it on the wall.
Then I remembered that these brushes cost $12, and….umm…..do I reeeeeally want to ruin a perfectly good Purdy brush (my favorite)?
Dude. No way. A picture of the prettiness will suffice :).
Heck–I might even blow up a copy of this paintbrush and hang the print on my walls. I love it that much!
I used a couple coats of some of the custom pink chalk paint to paint the border of the canvas.
STEP 4: Let It Dry
It’s got to dry before you hang it, otherwise the paint will run. Perfectly fine if that’s the look you’re going for, though. 🙂 Mine ran a little, which I didn’t want. Just be sure to keep it lying flat while it dries, even when picking it up to move to a safe place to dry. Because the paint is thick in some spots, it will take a little time.

STEP 5: Add the Wording
If you’ve got a Silhouette cutting machine, you rock! (If not, you can buy one from Amazon). Silhoutte Cameos are cutting machines that do everything under the sun, including cutting out vinyl. Vinyl is perfect for lettering (especially creative fonts) because it sticks to so many surfaces and is easy to peel off to remove. Great for wall art adhered directly to the wall, especially if you’re in an apartment. But you can also had vinyl lettering to canvas, too.
If you don’t have a Silhouette, try some vinyl letters from the Home Depot aisle where you find the mailboxes and “For Sale” signs.
That’s it!
It was super easy, a little messy, but fun and creative!!
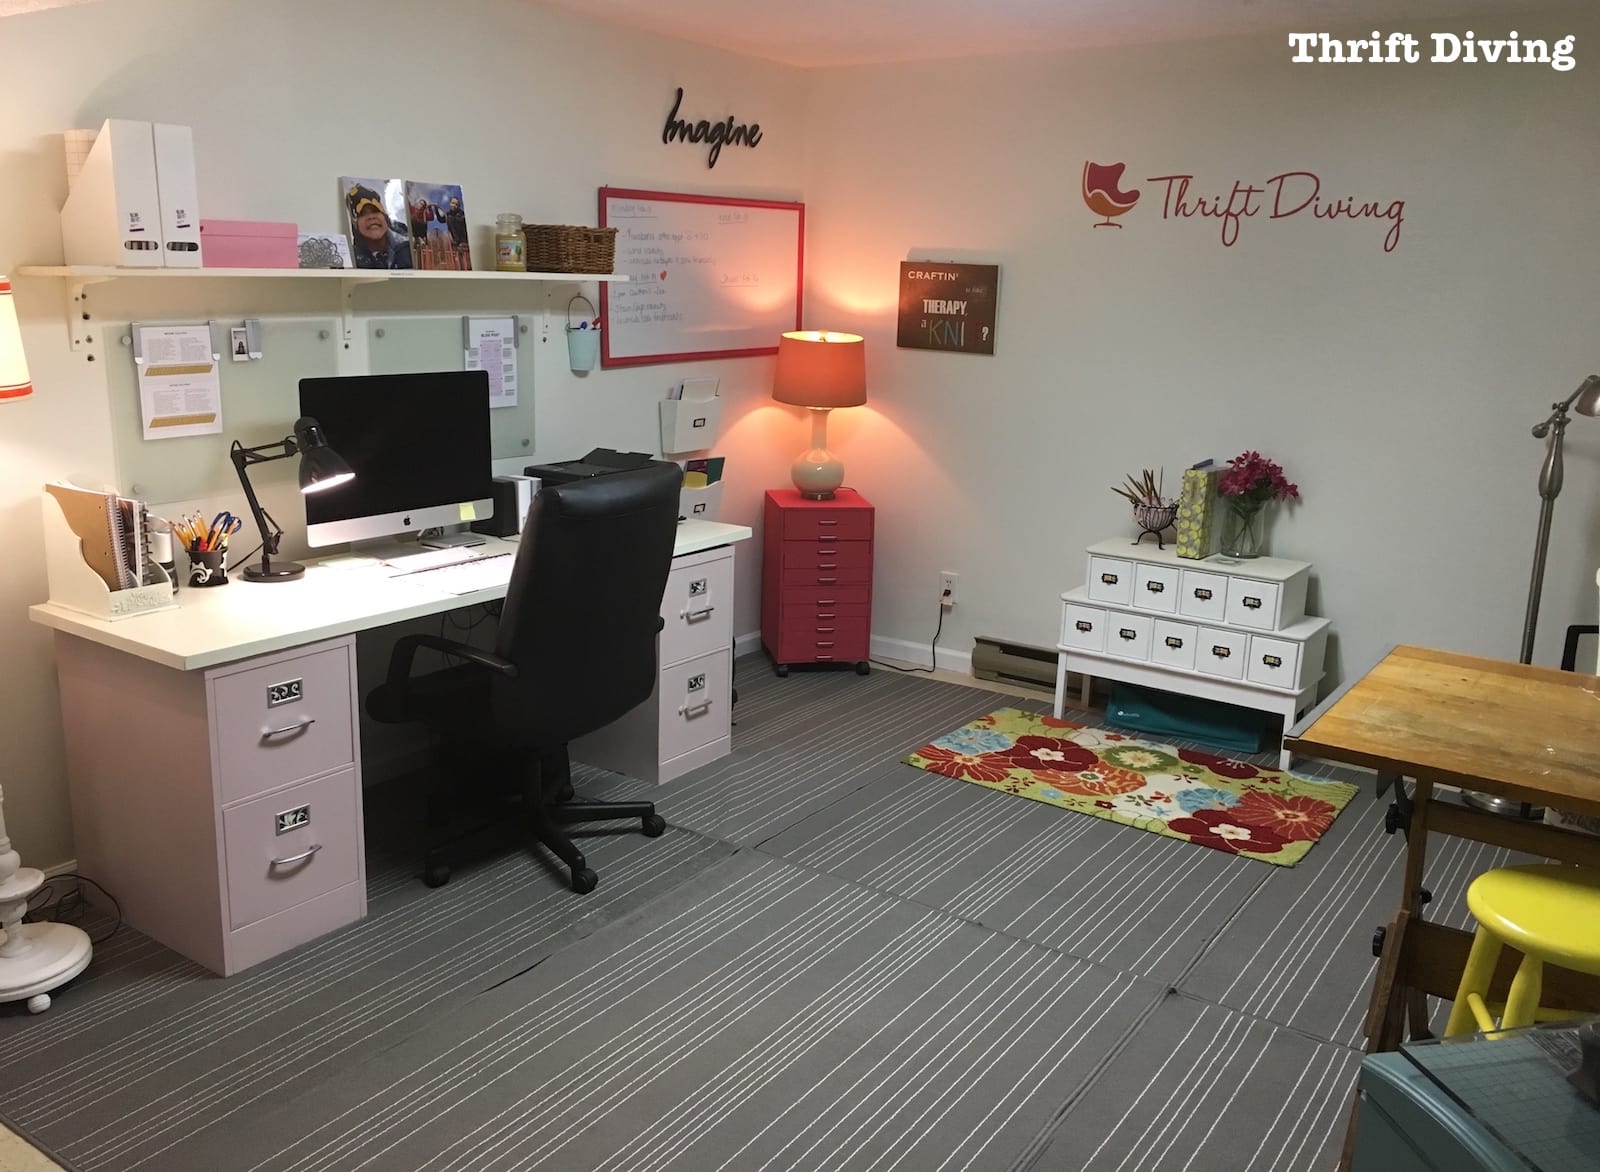
Still Not Done My Basement!
I’m still not done my basement yet, but considering that a couple months ago it looked like this right after I got started:
BEFORE

AFTER
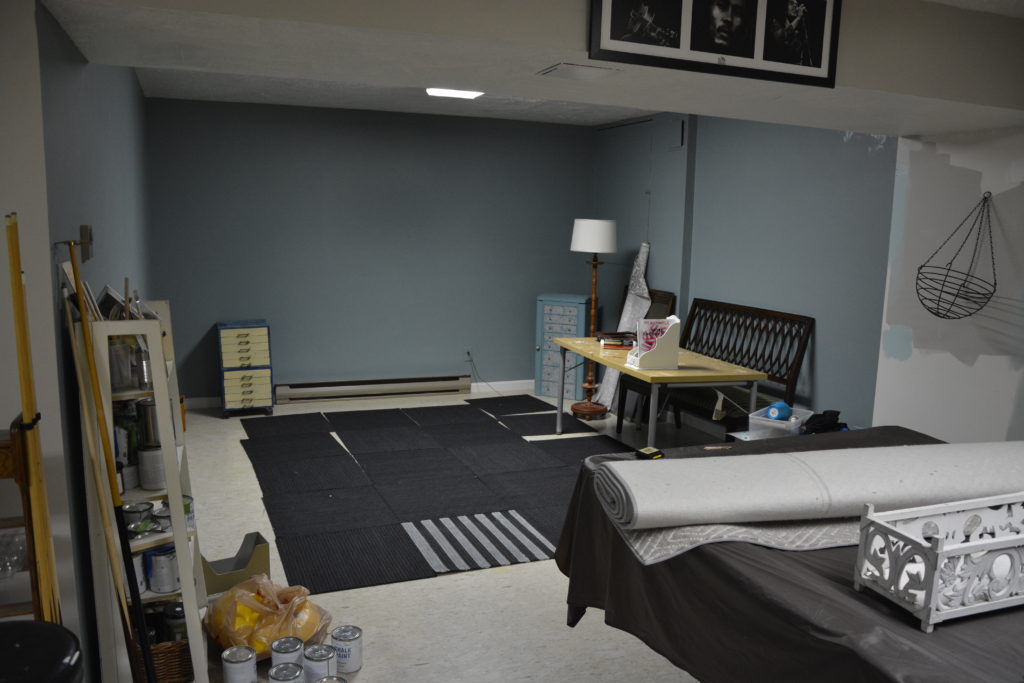
….and now it looks like this, I’ve made great progress in setting up my “she-cave” basement office. I love being down here, and the kids do, too!
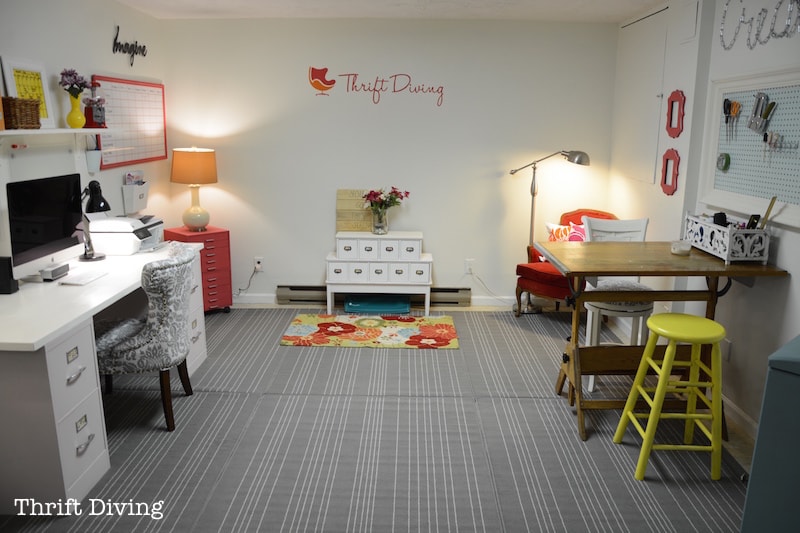
This is where I do my blogging! It has really become my favorite place in the house!!
![]()
Wanna PIN this project?
Other DIY Wall Art Ideas
As I’ve been making over one room in my house at a time, and each time I do, I create another piece of wall art that I love! Here are some ideas for other wall art in your home:


Have You Ever Created Your Own Wall Art?
Have you ever found old canvases and pictures at the thrift store and painted over them to create your own DIY wall art? Or made something really unique and original for your walls? Leave a comment below and share with us how ya did it! 🙂

Download the 5 freebies!

Thrift Diving inspires women to decorate, improve, and maintain their home themselves...using paint, power tools, and thrift stores! Use these 5 printables, checklists, and ebooks to get started!

Love the print of the paintbrush idea!
I have to ask, where did you find the striped rugs in your she’cave? I absolutely love them.
Your project was an eye opener for me. Looks terrific and it seems not to difficult. Thanks for sharing, Serena!
As usual, your work is amazing. However, my comment is about your eyebrows. I am amazed! The picture of you holding your thank-you note really put your eyes and eyebrows in the spotlight. As a woman with thin, puny brows, all I can say is “WOW!”.
HA! Thank you! You know….I should totally send you a picture of what they USED to look like when I was 18….. I had gotten them waxed once (professionally) back in ’95 and the result was so dramatic. I’ve never had them done again–just pluck a few stray hairs here and there, and they’ve kept pretty nice in the 20 years! LOL. Oh, and what’s funnier–I told my sons just yesterday, “Kids. When Mommy gets old and can’t take care of herself, promise me you’ll tweeze my eye brows and color my hair. Okay?” LOL (They’re 8, 5, and 3)
First of all, your office space looks amazing. I love that transformation and I’m a little jealous because I don’t have a designated blogging space in my home! Second, this post couldn’t have come at a better time for me. I have an old painting that isn’t looking so hot anymore but I love the size and frame and have been trying to think of a way to make it over beside making it a chalkboard. If I tape the frame really well I can take it outside and get my Jackson Pollak on! Thanks for sharing this surprisingly easy tutorial!
JEN!! You just reminded me, there is an awesome Jackson Pollak website that I used to use when my son was a toddler! Okay, you’re going to think this is totally cool. Go to this site, and start clicking around on the canvas :). Be sure to do it in “Full page.” Tell me this wouldn’t be awesome to print out and make DIY art with!!!
http://jacksonpollock.org/
Good idea! Poor Brad and Angie. they have been erased. I have to admit I threw some canvases away – on purpose – they were so bad I just wanted them GONE!! I buy “oops ” paint at local hardware stores and would use that for the base instead of Annie Sloan – just b/c AS is so expensive. I have a bedroom in the basement that is evenutally going to be my art room – can I ask what is on the floor in yours? Thanks for another great idea!
Hey there, Sharon! The rugs are from Ikea! Super deal–like $15 each. I just bought 6 and laid them side by side and made a huge rug. I think they’re 4×6 each. Can’t beat $90 for a large 12×12, right!!!
Love it great job
Thanks, Mary!
I really think you should offer classes and brainstorm your ideas – so many decorating ideas out there and most of them cost a fortune – you are real and your ideas are for real people..
Awww…thanks, Johanne! I do offer painting classes, but honestly, I don’t spend much time marketing them and will get about 2-3 people signed up. It’s such a small class that it costs me more money to host it, so I end up not making a profit from it. But I *am* thinking of putting together a video library of video tutorials and courses!! 🙂
great upcycled idea. Love the colors and especially love the shot of your paint brush. A blown up image would be awesome.
Thanks, L! Yeah, that paintbrush looks so lovely. I only hope that I can get it blown up without it getting fuzzy. Thanks for commenting!
LOL I love reading your blog! Your sense of humor ROCKS! I love your basement makeover! It looks gorgeous!
Hey Heather!! I’m so happy to hear that! I aim to please and entertain, and give ya helpful info along the way! 🙂 Thank you!!!
Well done, you! That is beautiful!
And a photograph of that paintbrush on the wall would be totally awesome. Please do it.
I’m not much of an artist, but if I were going to cover up a used canvas, I would consider using white gesso first.
Have you ever used it? Any comments about it? I’m just trying to find my way and get up the nerve to do a project such as this.
Comments from your readers comparing chalk paint to gesso (as a primer) would be appreciated, also.
Hey Nancy! I’m so glad you mention that! I actually HAVE some gesso! I didn’t even think to use it because I bought it along time ago, stuck it in some corner of some drawer, and never used it. But it probably would have worked better AND would have been more economical. Annie Sloan is expensive, although I didn’t use much for this canvas. I was at the the bottom of the can, anyhow. You’ve inspired me to try this again on another canvas, and I’ll use gesso first. I am working on my bedroom this month and will look for more canvases and post about it! 🙂 Thanks so much. And yes, you can do it!!! I think the hardest part of doing a new project is getting past the “What if it doesn’t turn out?” part. If you’re okay with the possibility of something not working out, then you’re no longer afraid to try and you just DO it! Good example–I built a lazy susan recently and spent obscene amounts of time trying to figure it out, only to have it turn out lopsided. I was disappointed, but you know–I learned some things that I’ll do differently next time! 🙂
Hello, thought I would chime in with this: One should never use an Acrylic based gesso or acrylic-based paint over a used/thrifted canvas that has been painted with oil paint. Unless you can tell the difference between an oil painting and an acrylic painting, you might want to just go with used canvases that have been printed on like the one in the blog tutorial. For that, I would think most gesso or paint in general would work for a base, but don’t quote me on that 🙂 If you do have a painted, possibly textured canvas to refresh, you could always remove the staples from the canvas and stretcher bars, flip the painted side of the canvas over the stretcher bars and re-staple (stretch) so that the blank back of the canvas is now the front – clean and ready to prime with your base layer (the painted side will now be the “back”). Hope this helps, and best wishes!
Beth, have I ever told you how awesome you are? Because if I didn’t, I would say it now. YOU. ARE. AWESOME! Great tip, especially with flipping over the canvas to the blank side! 🙂 Love that!!!
Serena and Beth, thank you so much for your replies. I have learned so much from this blog. Beth, I never would have known that, so you have prevented some frustration for at least one reader here, yours truly.