Upcycled Workstation With DIY Scrap Wood Storage
This scrap wood storage bin and workstation was the first step in my garage makeover. This project was a long-time coming.
If you’ve been a long-time reader of this blog, then you remember my pretty laundry room makeover a couple of years ago, right?
There was this ugly, turd-brown cabinet in there that, while helpful in holding heaps of clothing that I avoided folding and simply piled on top, it wasn’t as functional as I wanted it to be.
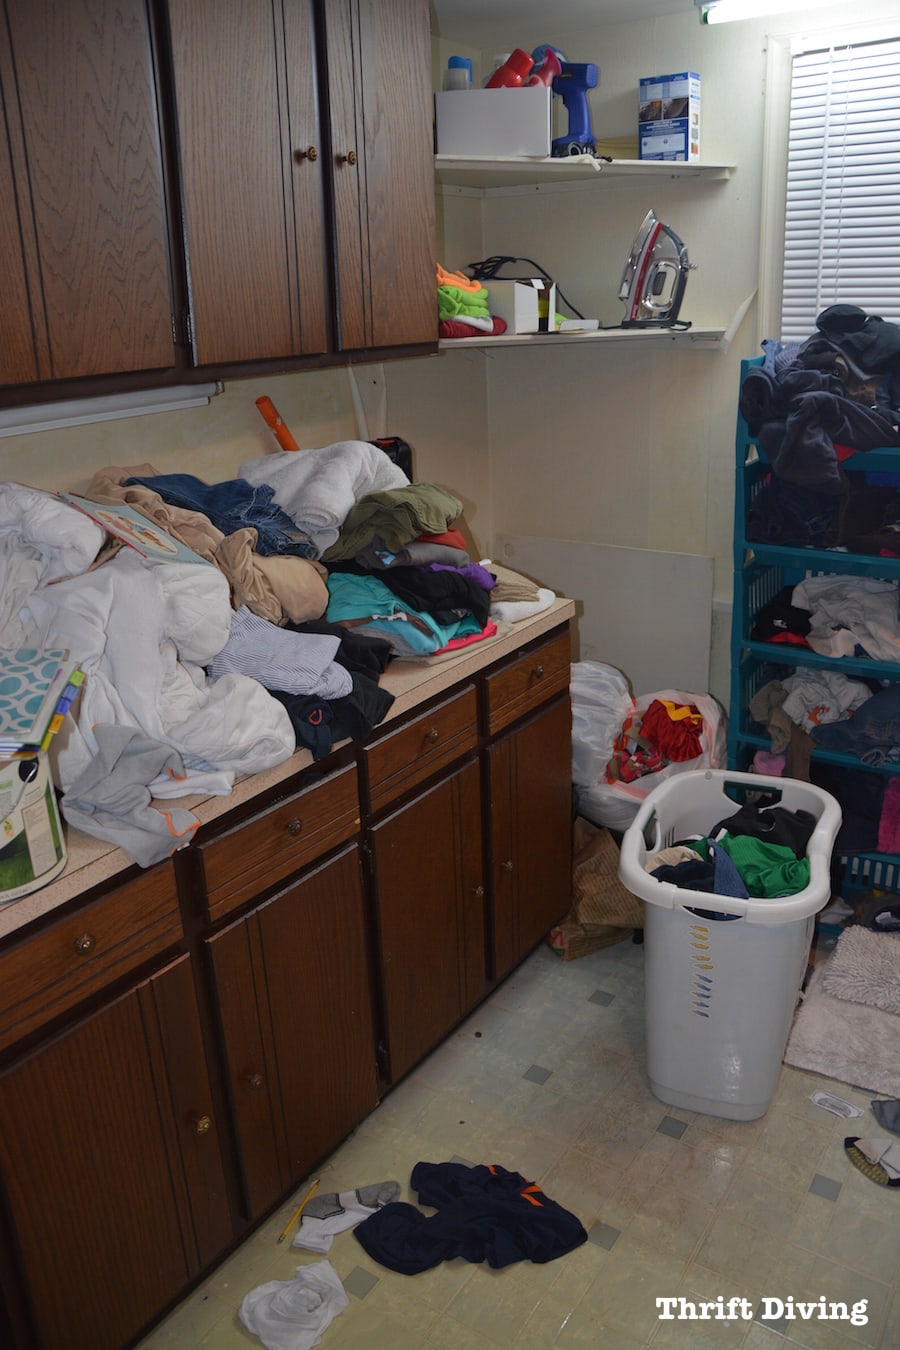
The new laundry room table with storage is 100 times more functional because I could store dirty clothes underneath (and prettier, too!). I cut the table in half in order to mount it to the wall.
Related: How to Cut a Table in Half

You know how I do……I can’t get rid of things that still have some “life” in them, and I knew this cabinet could be reused in the garage.
It must have had a sign on it that screamed, “SET JUNK ON ME, PLEASE!!”
Because it also became a junk collector in the garage and sat just like this since finding its new home.
But this month I got my hands on it because my focus is on turning this dingy garage into a pretty little workshop.
I figured this would be the best project to start!
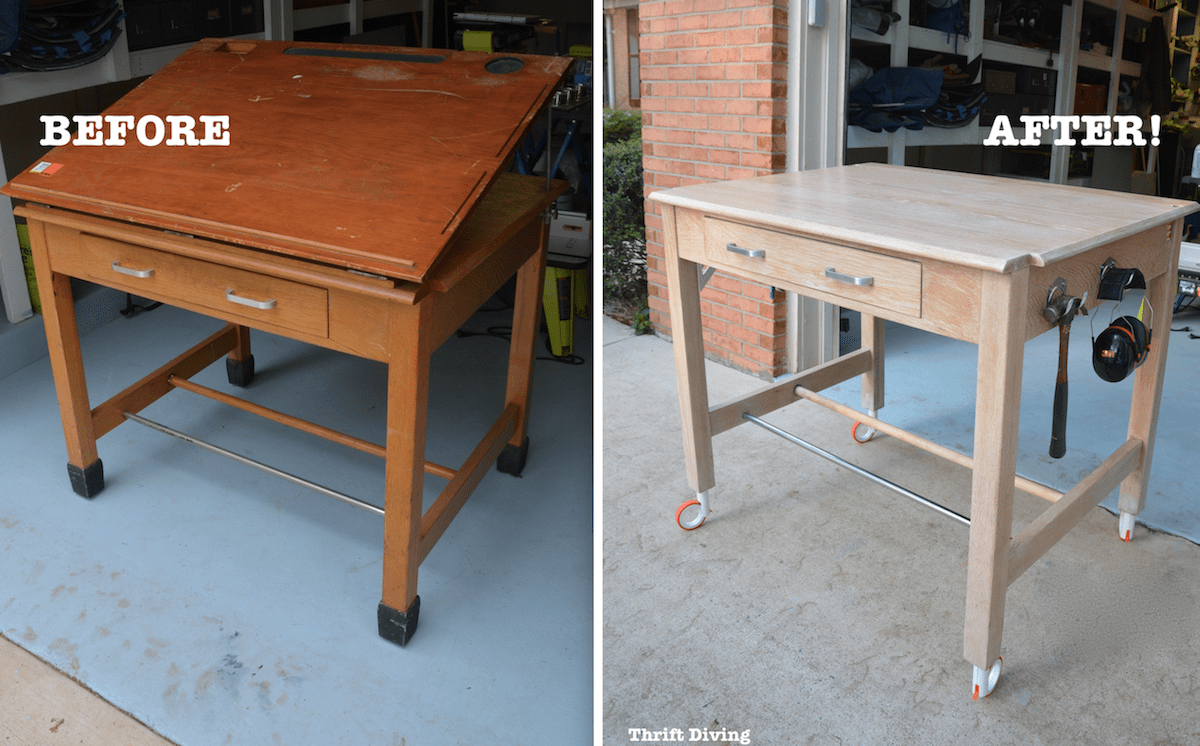
I turned it into a workstation and place for scrap wood storage on the side of it!
BEFORE

AFTER!!

BEFORE

AFTER!
The coolest parts are the galvanized steel top and the scrap wood storage that I built to hold more scrap wood! (You remember this upcycled scrap wood storage bin I painted, right?). I’m excited to have organized places to work and store things now!


Did you love this project? Click here to pin it!
![]()

Download the 5 freebies!

Thrift Diving inspires women to decorate, improve, and maintain their home themselves...using paint, power tools, and thrift stores! Use these 5 printables, checklists, and ebooks to get started!

Your cabinet looks awesome Serena! My garage is such a mess right now-the DIY picket fence took so much time and effort that things just sort of got dumped in the garage. It’s definitely on my to-do list before it gets too hot.
gail
Now that’s a workstation for a thrift diving diva LOL. Love the color!.
Serena you never cease to amaze me. What a simple solution for the scrap wood storage. I love it and have the perfect spot for it. Those food warmer frames lined with wood are a fantastic idea, small scrapes and taller pieces in one area. One question on cutting the metal with a jigsaw, did it leave it fairly smooth or does it need to be filed? Love your ideas!
I am creating a workshop this summer and I can’t wait to add this project to my do do list! Thanks for all of the great ideas and inspiration. I too own my own power tools and this one looks like something I need to add to my collection! Time to go shopping!!!
Step 10, crap wood bin?? Misspelled I’m sure, but still appropriate!!! 😀 Love your stuff!!!
I love how that turned out and especially like the steel counter top. We have lots of leftover base cabinets in the garage from the former owner and they have old laminate counter tops. I need to show this to the hubby, while he may not like the blue I think he will like the rest.
Wow, just wow!! That cabinet is so amazing now!! I was trying to figure out how you attached the 2×4’s to the cabinet…I’m not sure I understood that part. Your ability to transforms things amazes me, you have such awesome creativity. I can’t wait until you do the post on painting the garage floor, I want to paint our front porch and will learn how to do it thanks to you 🙂
Have been loving your upcycling ideas for a long time now…and love this project especially because it’s so similar to a storage problem I’ve been pondering for some time. One thing you said in this tutorial produced a forehead-slapping moment. “Upcycle what you already have”! DUH! I have been trying to figure out how to get rid of one cabinet I already have only to replace it with one I thought would be more useful and very similar to what you created. Serena, thanks to your tutorial, it dawned on me that I just needed to look at the piece a little more creatively! My old tv cabinet is going to become a perfect sewing notions/fabric, etc storage cabinet with custom-sewn fabric boxes to fit specific spaces! Wahoooooo!!! I’ve been wanting to tackle chalk painting for awhile now and this is the perfect opportunity. Thanks!
You did such a great job! It’s so pretty – I love blue, it’s so calming to me. Just great!
Wow! This looks so good! I love the area to hold the scrap wood. Right now I just use some big buckets, but yours is so much prettier!! Thanks for sharing your how-to!