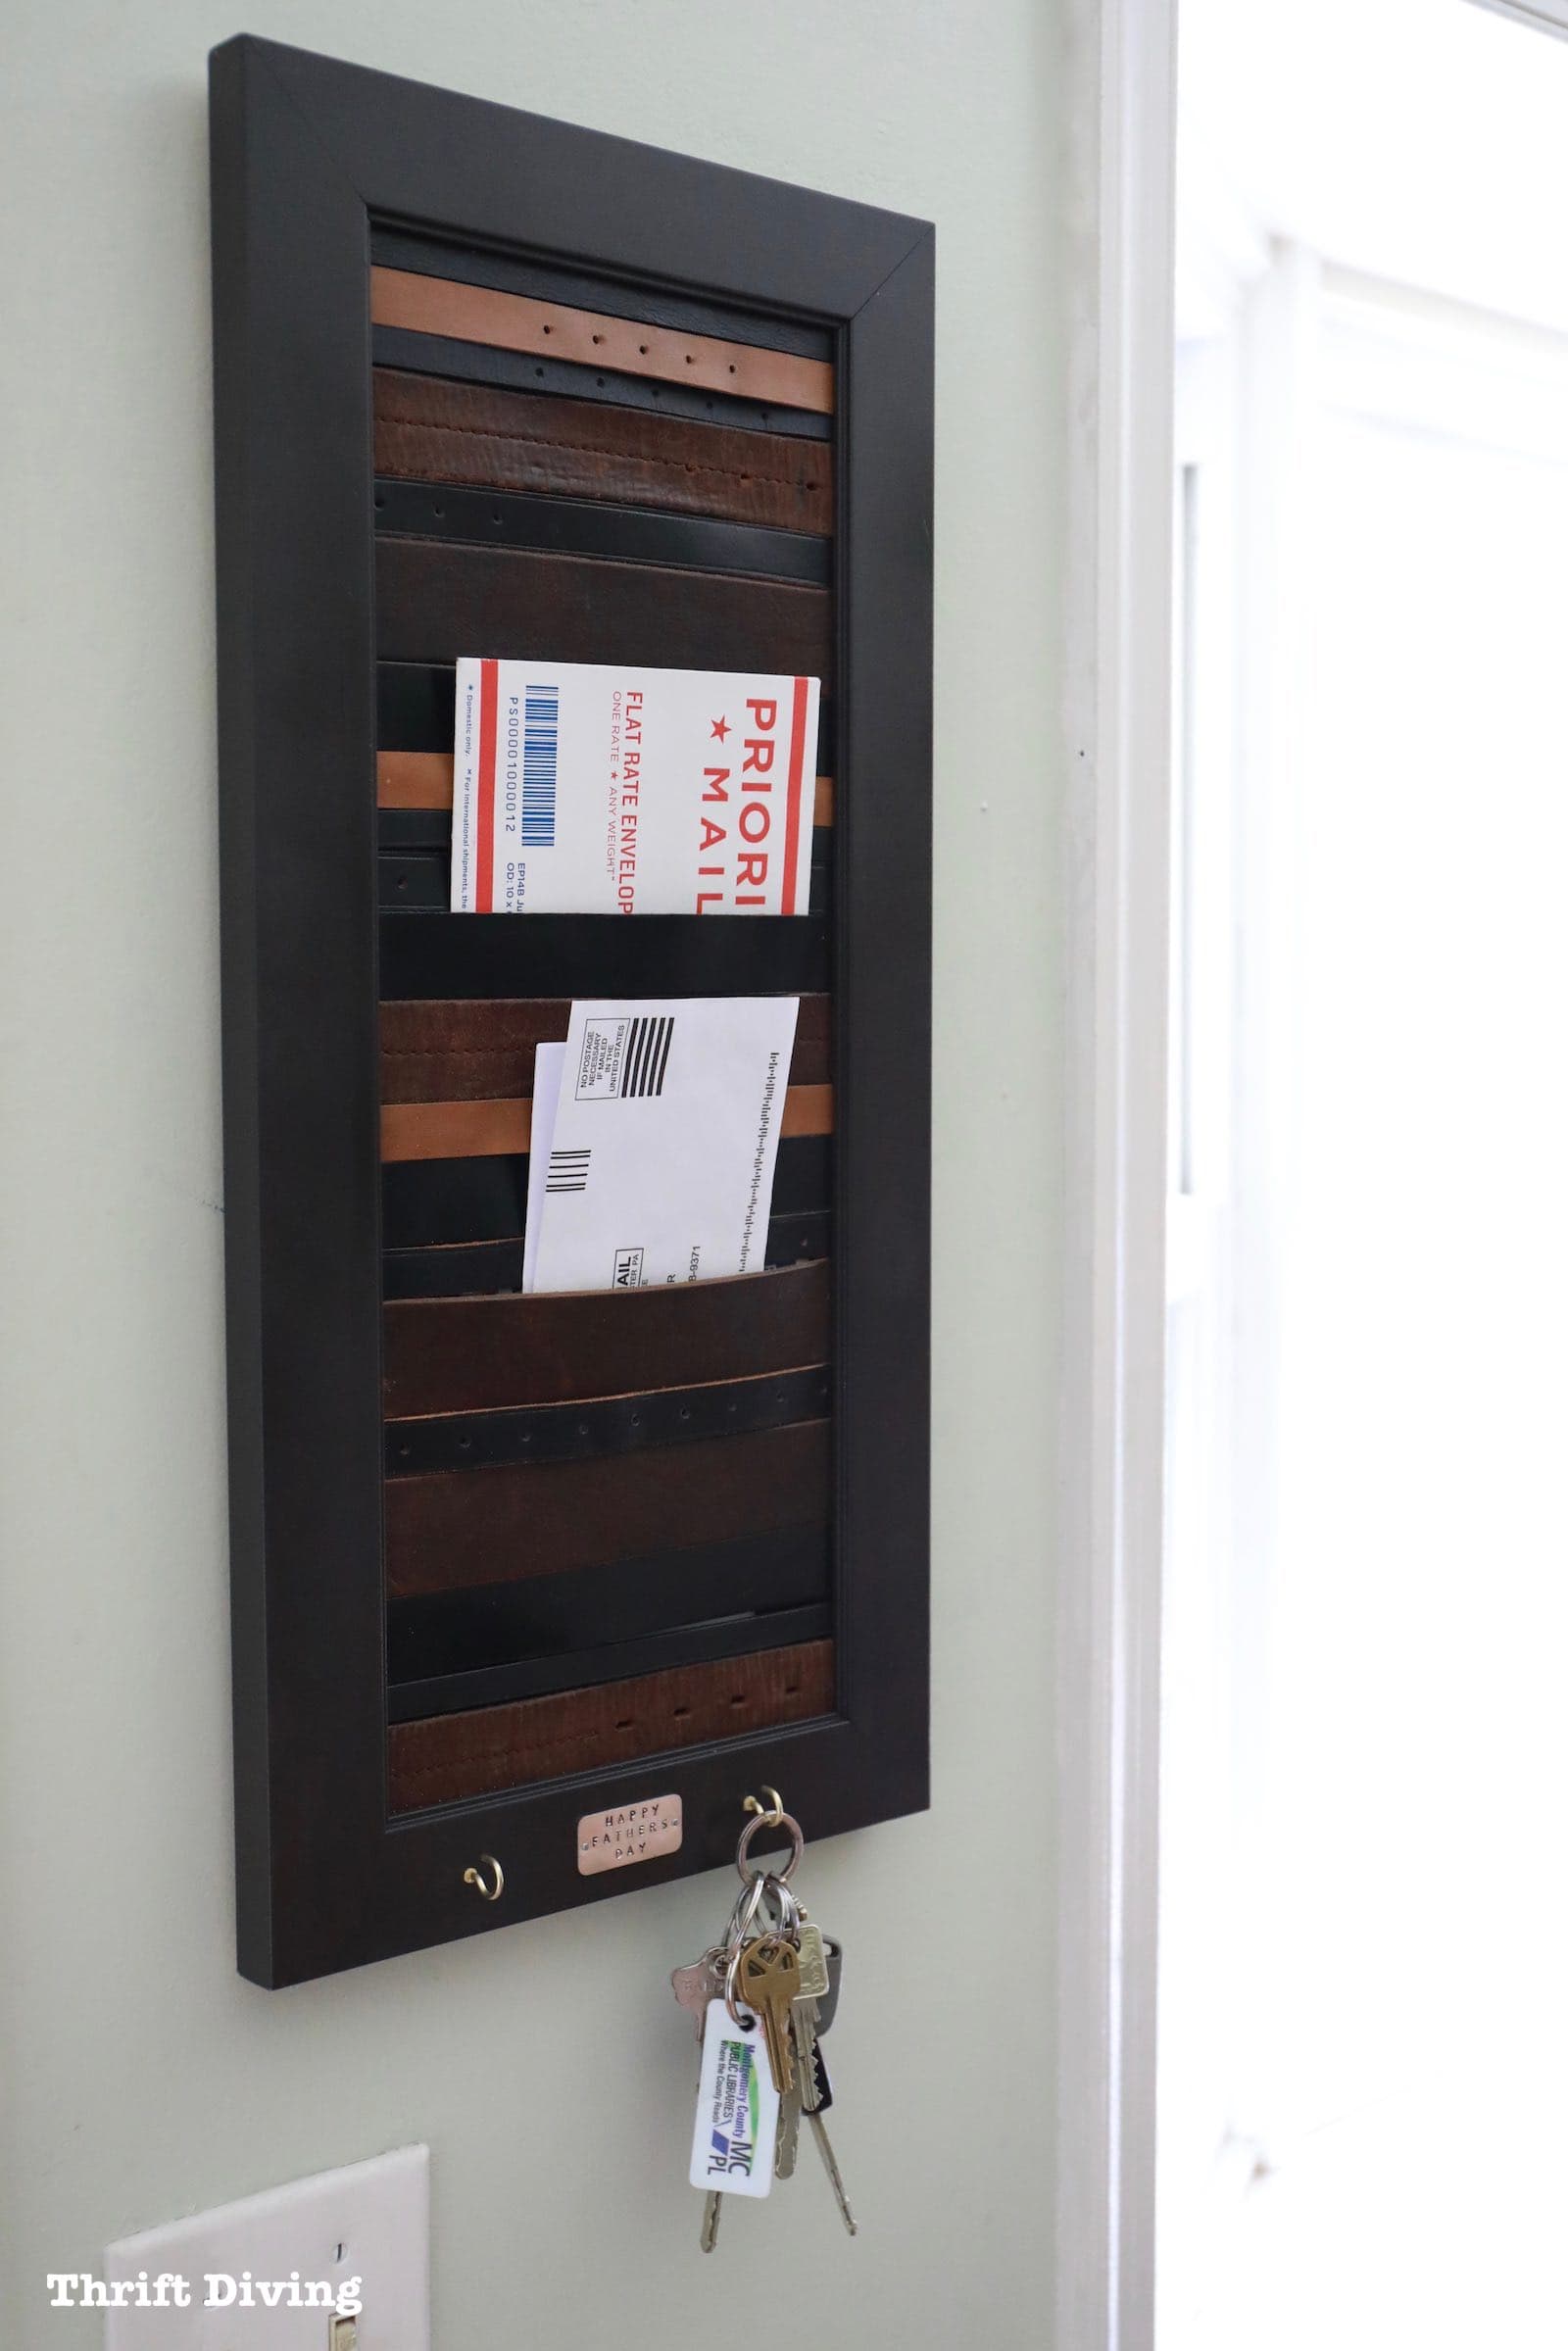
DIY Mail Organizer With Picture Frame and Old Leather Belts: Father’s Day Gift Idea
There’s an excitement that bubbles up inside when clever ideas come to me, such as this DIY mail organizer with repurposed leather belts for a fun Father’s Day Gift. I was at the thrift store looking for a leather belt to use for a DIY tablet holder project and while searching for belts–aha!–I could make a mail sorter, too!
I know that repurposed leather belts aren’t a “new” thing. I’m actually always the last person to hear, see, try anything trending. (It’s a wonder I’m even current on the ever-popular Game of Thrones. HA!). The idea of upcycling leather belts is a “been there, been done”: leather belt bracelets…leather dresser drawer pulls…and the list goes on.
However, my gut screamed, “Do it, sister!” when I thought about lining a thrift store picture frame with old leather belts, creating a wall mail organizer. Even better, it makes a great DIY Father’s Day gift idea!
This was going to be fun.
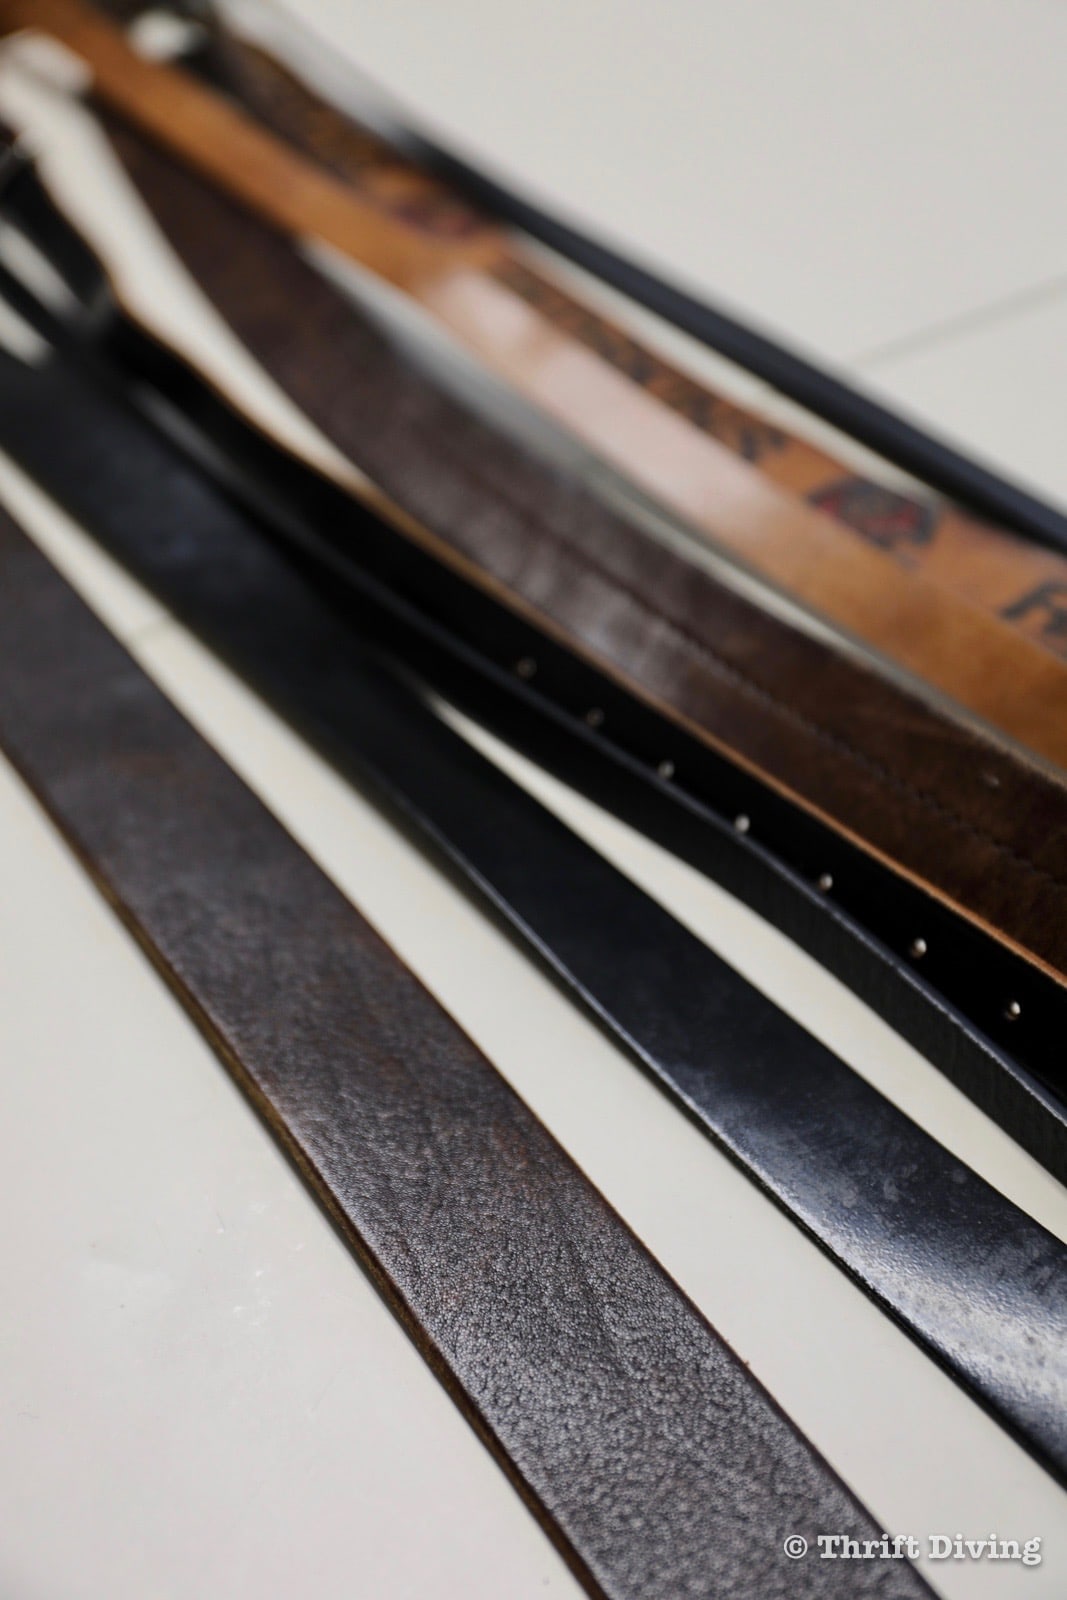
BEFORE
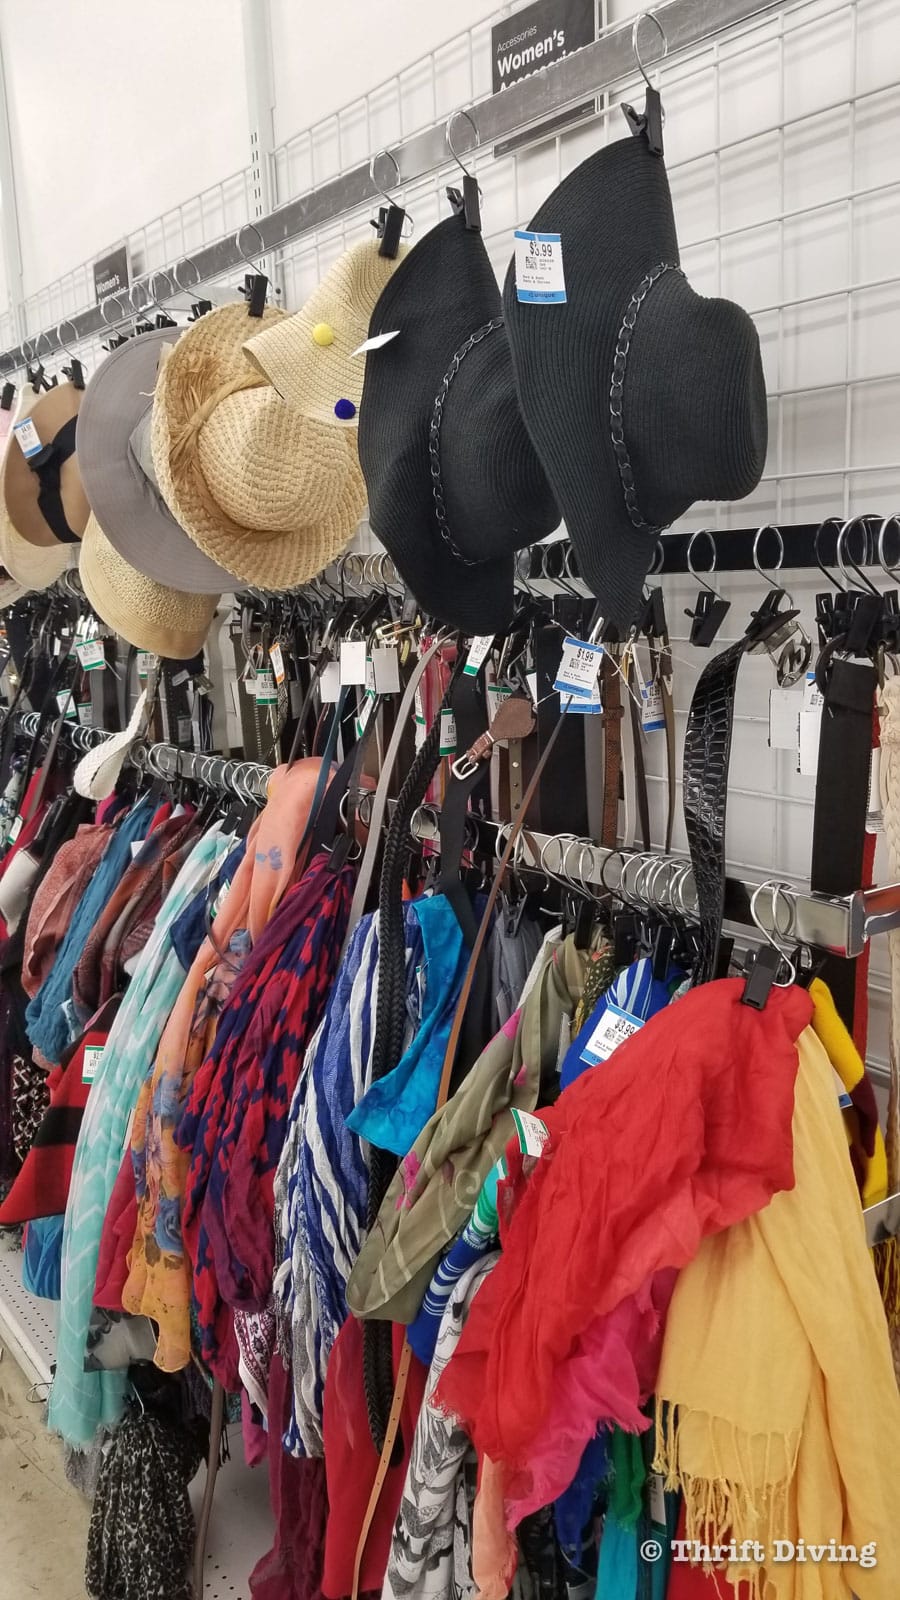
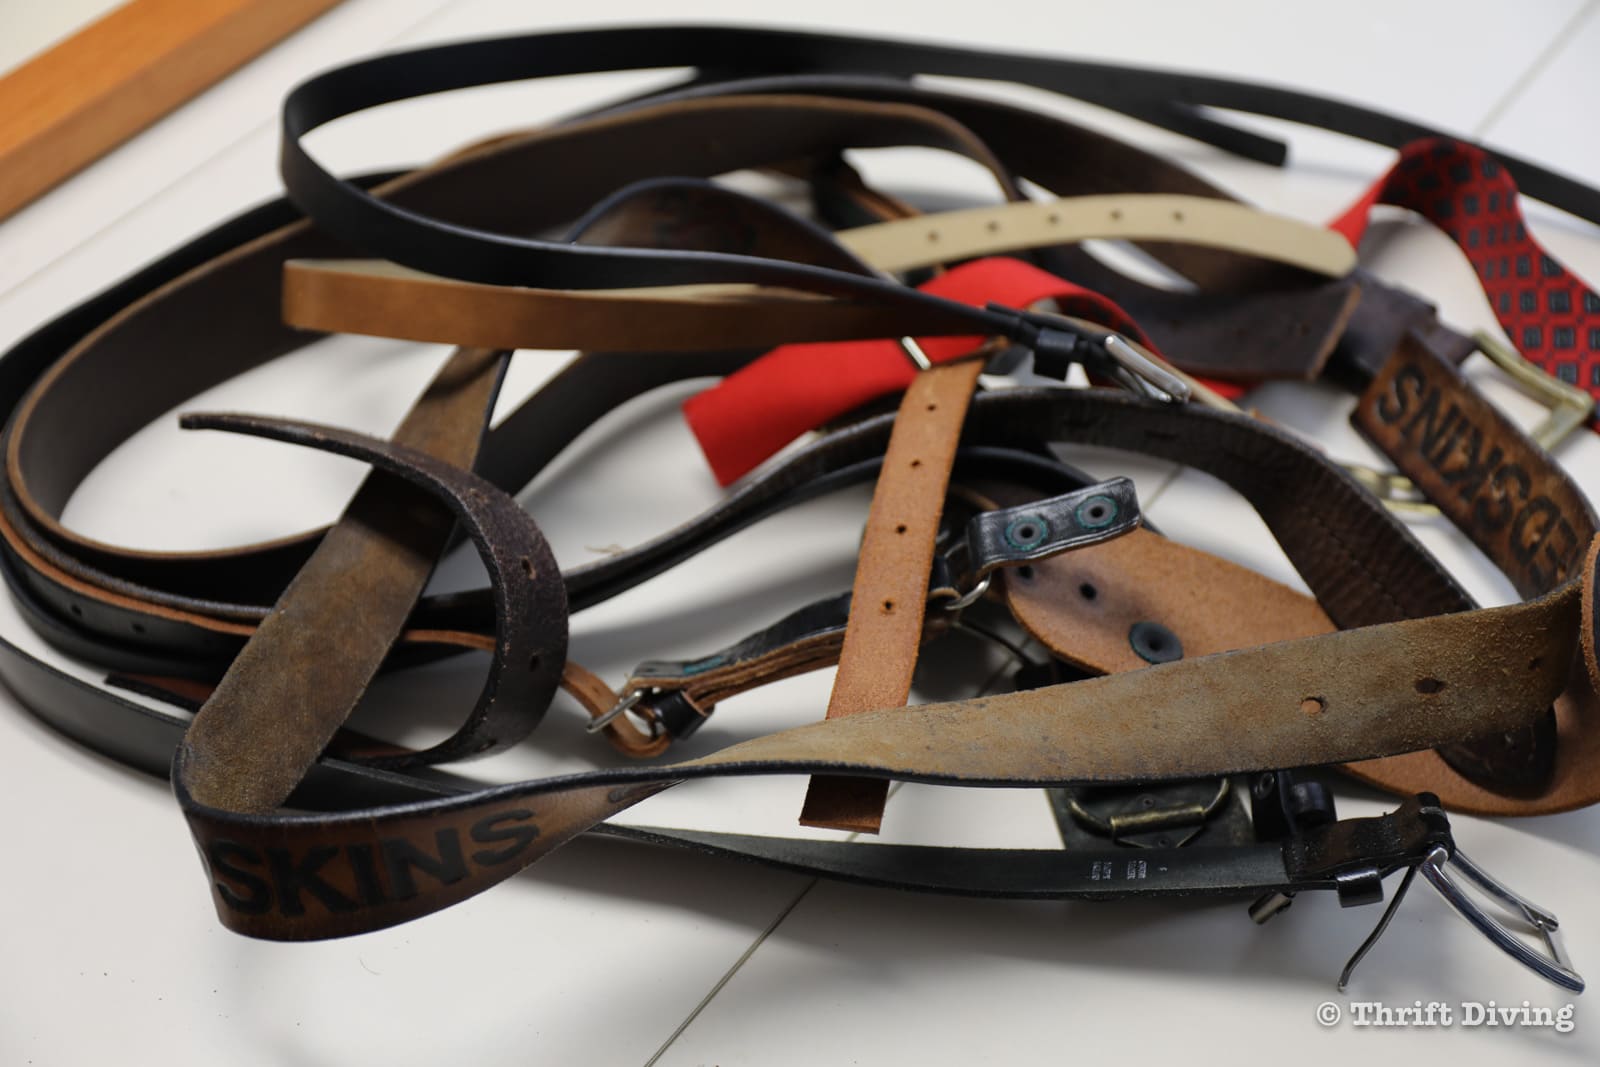
First off, if you have never checked out the belt section of Value Village (owned by Savers), then you are missing out on something special, my friend. Not only is the collection big, but the prices are just right–anywhere from $1.99 to $3.99. Catch them on a 50% off day at the thrift store and–BOOM!–you’re getting them dirt cheap.
I brought home the stack, along with some cool red suspenders (who could leave those behind??), and left the pile to sit for about a month before I had time to make it in time for Father’s Day.
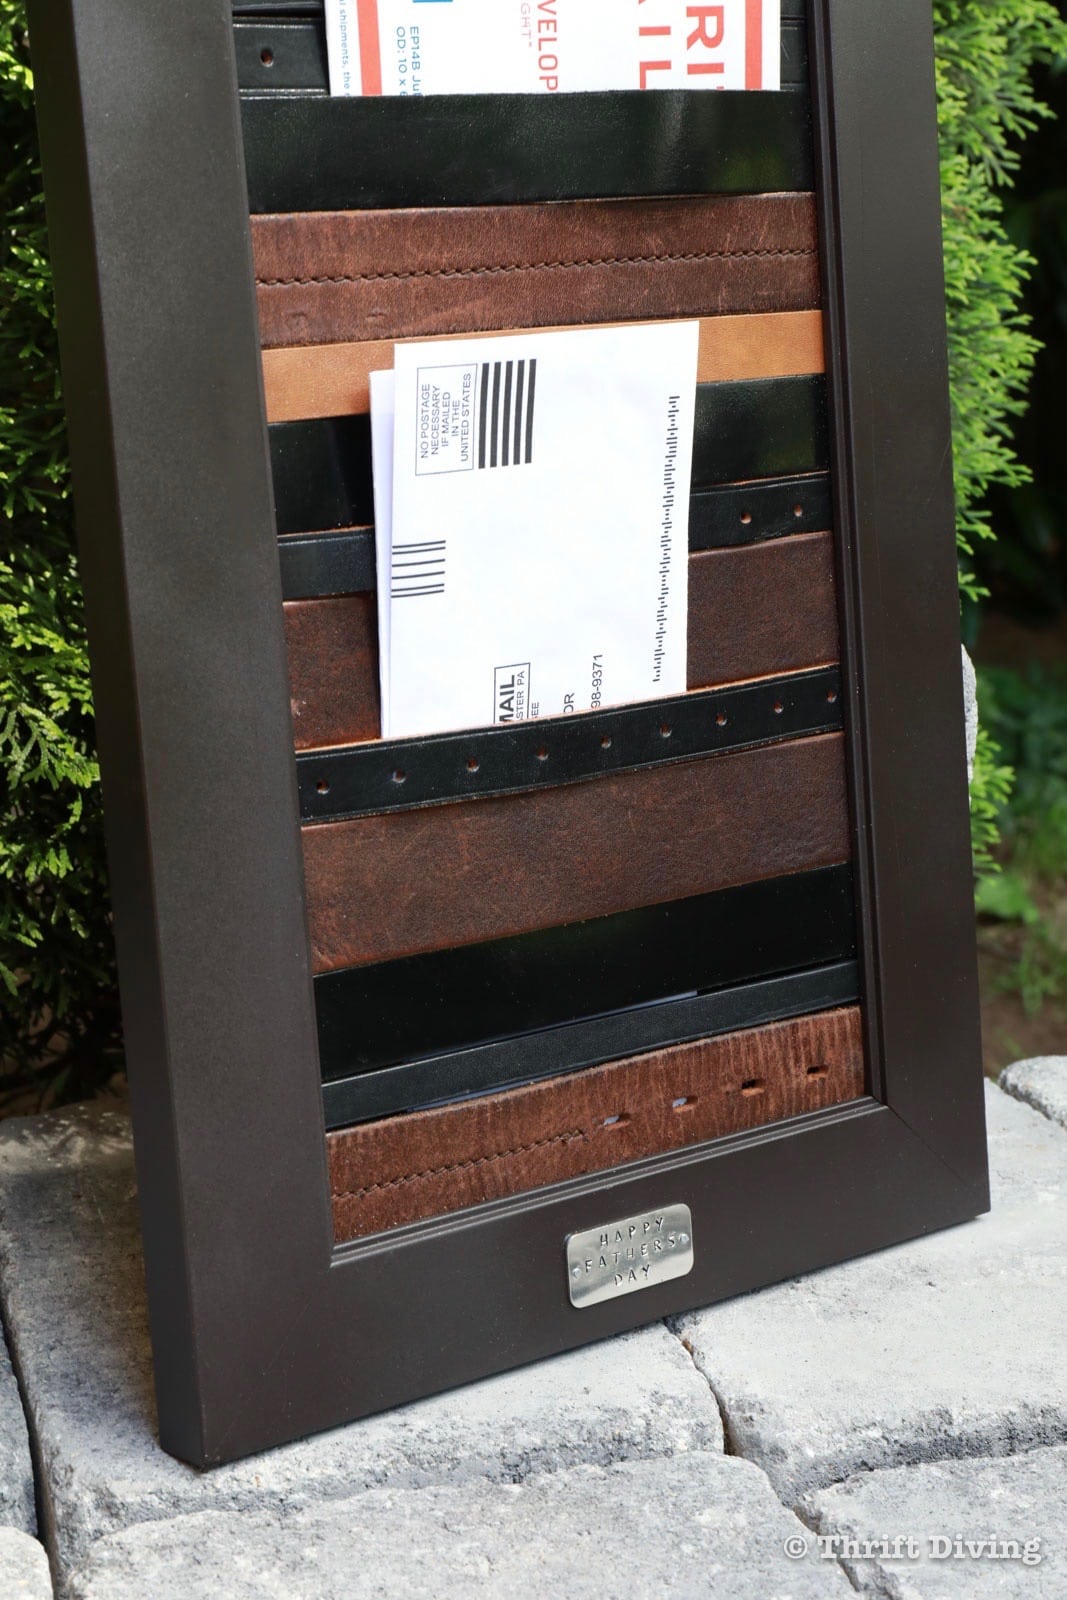
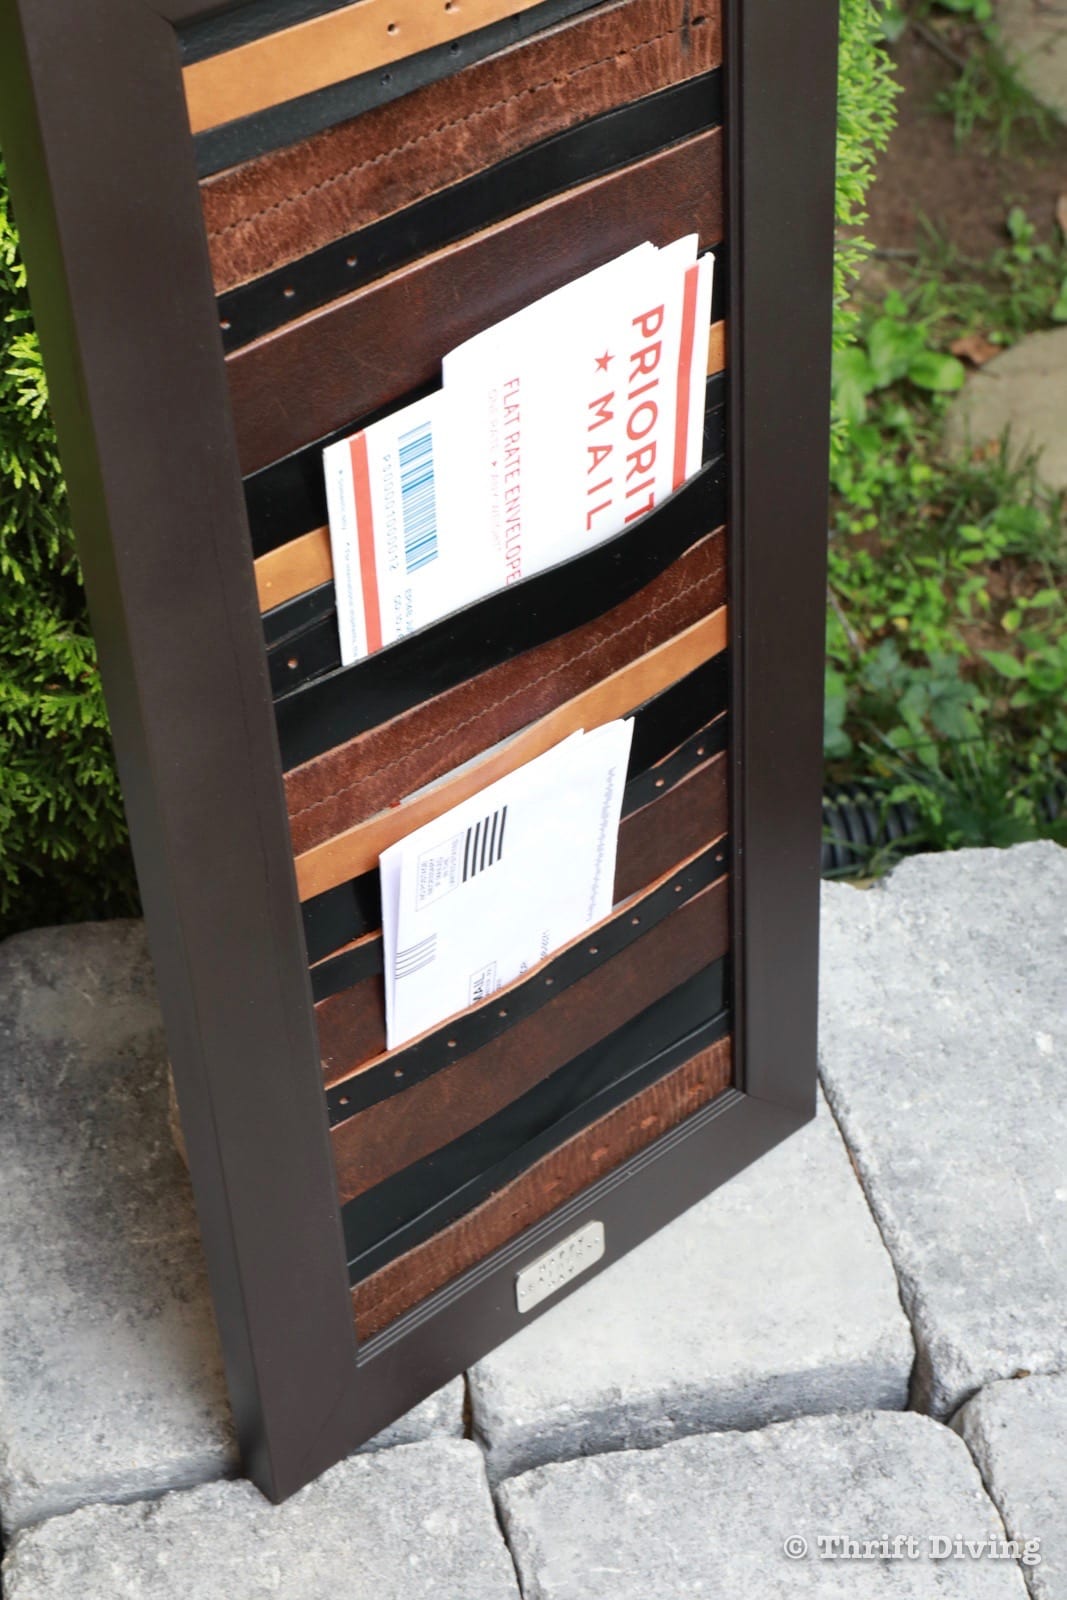
And the thrift store fairies always know how to deliver when I ask because I was crossing my fingers that I would find a picture frame exactly.like.this. to make the DIY mail organizer; something in good condition, long, but not too long, and with a good cover on the back. Voila! The thrift store fairies delivered, for about $6.00!
AFTER!
Once I worked my magic, I was pleasantly surprised that this idea came to fruition! I sent a picture of it to my friend, with the caption, “Look what I made, a mail holder!” And she responded, “Ok. It’s cool. Not exciting.” HA! But when I told her I made the mail holder with upcycled leather belts, well now–suddenly she saw “the uniqueness.” (Where’s my sarcasm emoji to insert here??).
But you, my dear friend, you see its uniqueness, right? I know–boring browns and blacks, but it’s for a Father’s Day gift. We’ll have to save the colorful leather belt mail sorter idea for Mother’s Day, hm?
Let’s jump into this tutorial right now!
TIP: Click here to save this project on Pinterest!
Oh–I also have to point out….as morbid as it sounds….this would be a great project to make with belts of someone who has passed. I can’t imagine it would be easy to get rid of a loved one’s clothing. Repurposing their accessories would be a great way to keep a small piece of them near, without the piles of clutter (didn’t Peter Walsh called that “memory clutter”?).
My cousin made pillows with our grandmother’s flannel PJs. Loved that idea!
Anyhow, here we go! If you’re a visual learner, feel free to watch this video below or over on my YouTube channel (are you subscribed yet??)
Watch This Project: DIY Mail Organizer
Materials: DIY Mail Organizer
(I participant in the Amazon Services LLC Associates Program and other affiliate advertising programs designed to provide a means for me to earn fees by linking to Amazon.com and affiliated sites).
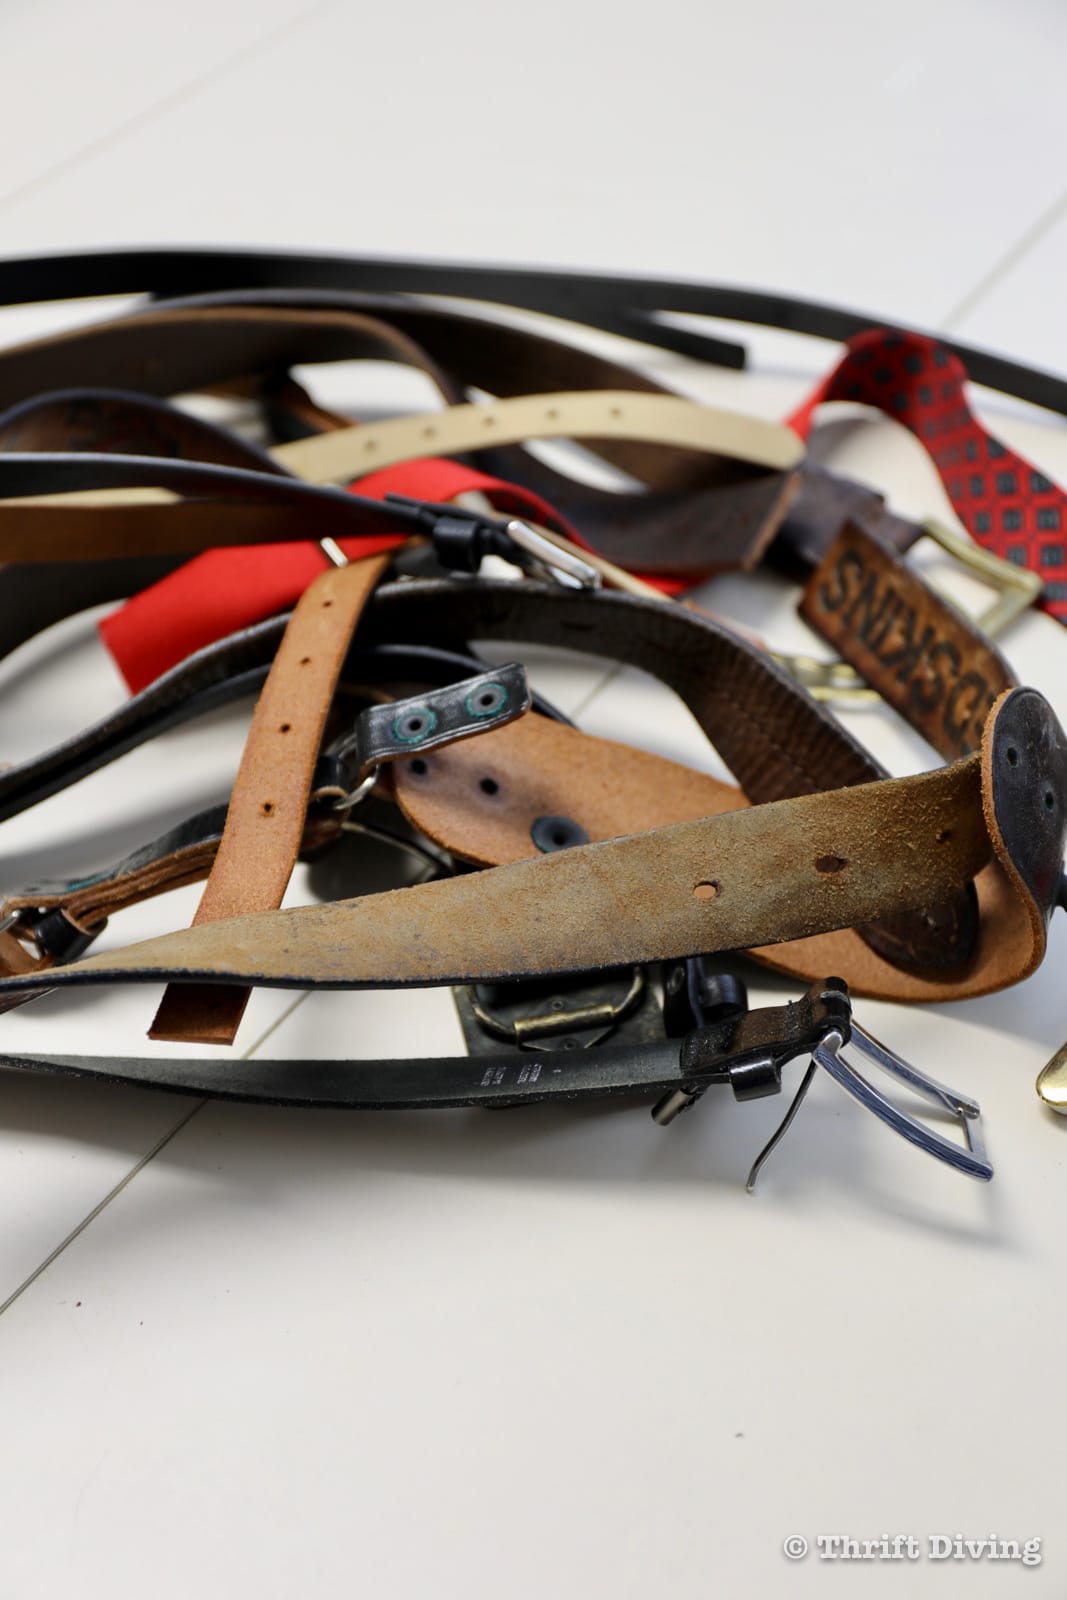
- Pile of assorted old leather belts
- Long rectangular picture frame
- Upholstery stapler (I like my Numax upholstery stapler with this quiet portable compressor)
- Upholstery staples (try the 1/4″ staples; I used the 3/8″ which were a little too long)
- Superglue (preferred, but optional)
- Scissors
- Dark Walnut spraypaint
- Metal stamping kit
- Picture hanging D-rings
- Metal screw hooks for keys
STEP 1: Buy an assorted pile of old leather belts and picture frame.
You’d be amazed how much real 100% leather you can buy at the thrift store for super cheap. I went to my local Goodwill but didn’t find a big selection. But Value Village (my favorite thrift store) usually has a ton of belts. Since this is for Father’s Day, I was focusing on 100% leather in shades of browns and blacks. Not to stereotype, but I was going for a more “manly” vibe. This stack was perfect!
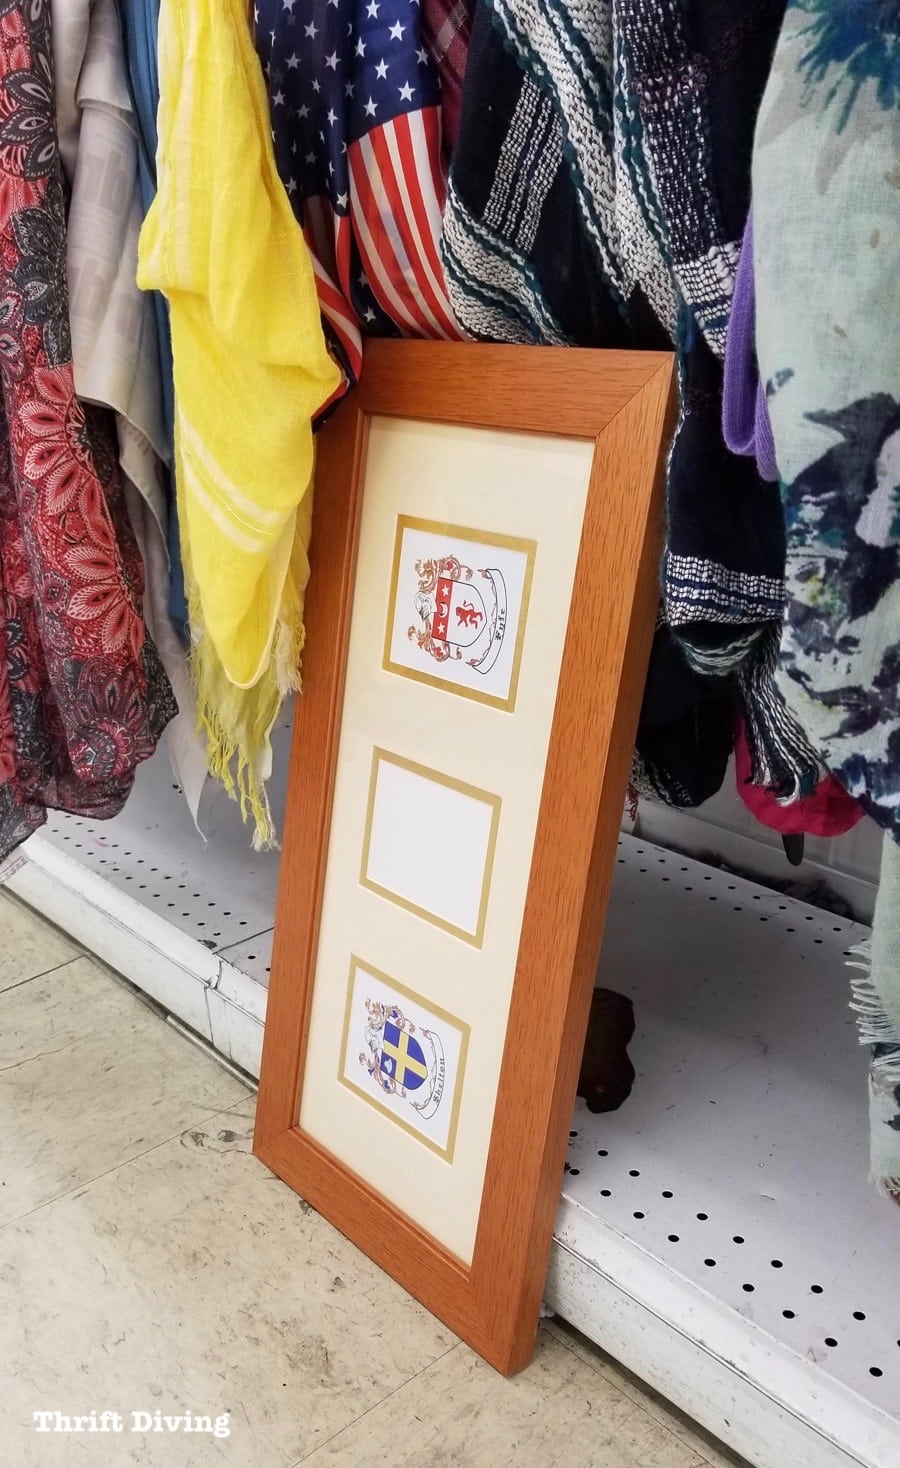
You’ll also need a picture frame. You’ll want one that is rectangular and long so that there is enough space to sort the mail. 🙂 I couldn’t believe I found the perfect picture frame! It was in pristine condition, too.
But if you can’t find the perfect picture frame, you can make your own picture frames using a miter box, without power tools.
- TIP: If you can’t find the right sized picture frame, read and watch this tutorial: How to Make DIY Picture Frames Without Power Tools (Using a Miter Box)
- PRETTY COOL: Bet you didn’t know you could frame fabric, huh? Read and watch: How to Make Framed Fabric Wall Art with a Picture Frame.
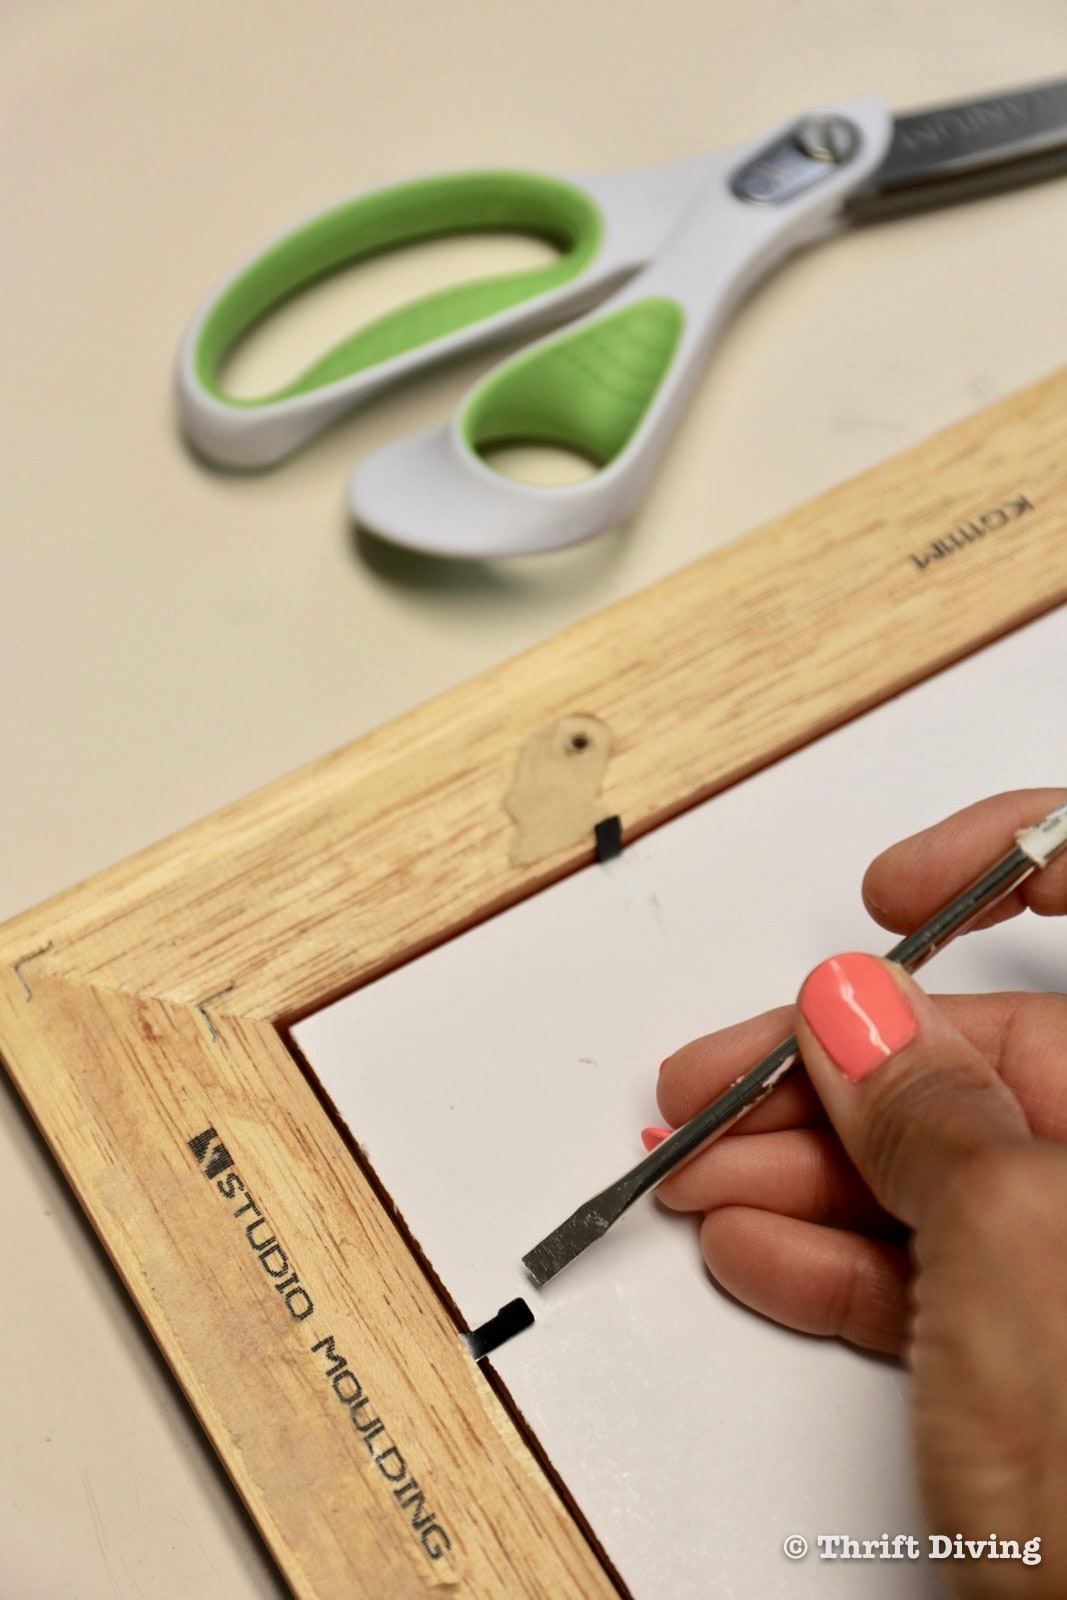
STEP 2: Remove the back of the picture frame.
Frames with those metal prongs are hard to remove. Don’t break a nail. Use a flathead screwdriver to lift them up. Hopefully, your frame has that cardboard, foam-thing in the back. You’ll need that! Put the other stuff aside, being careful not to break any glass you removed.
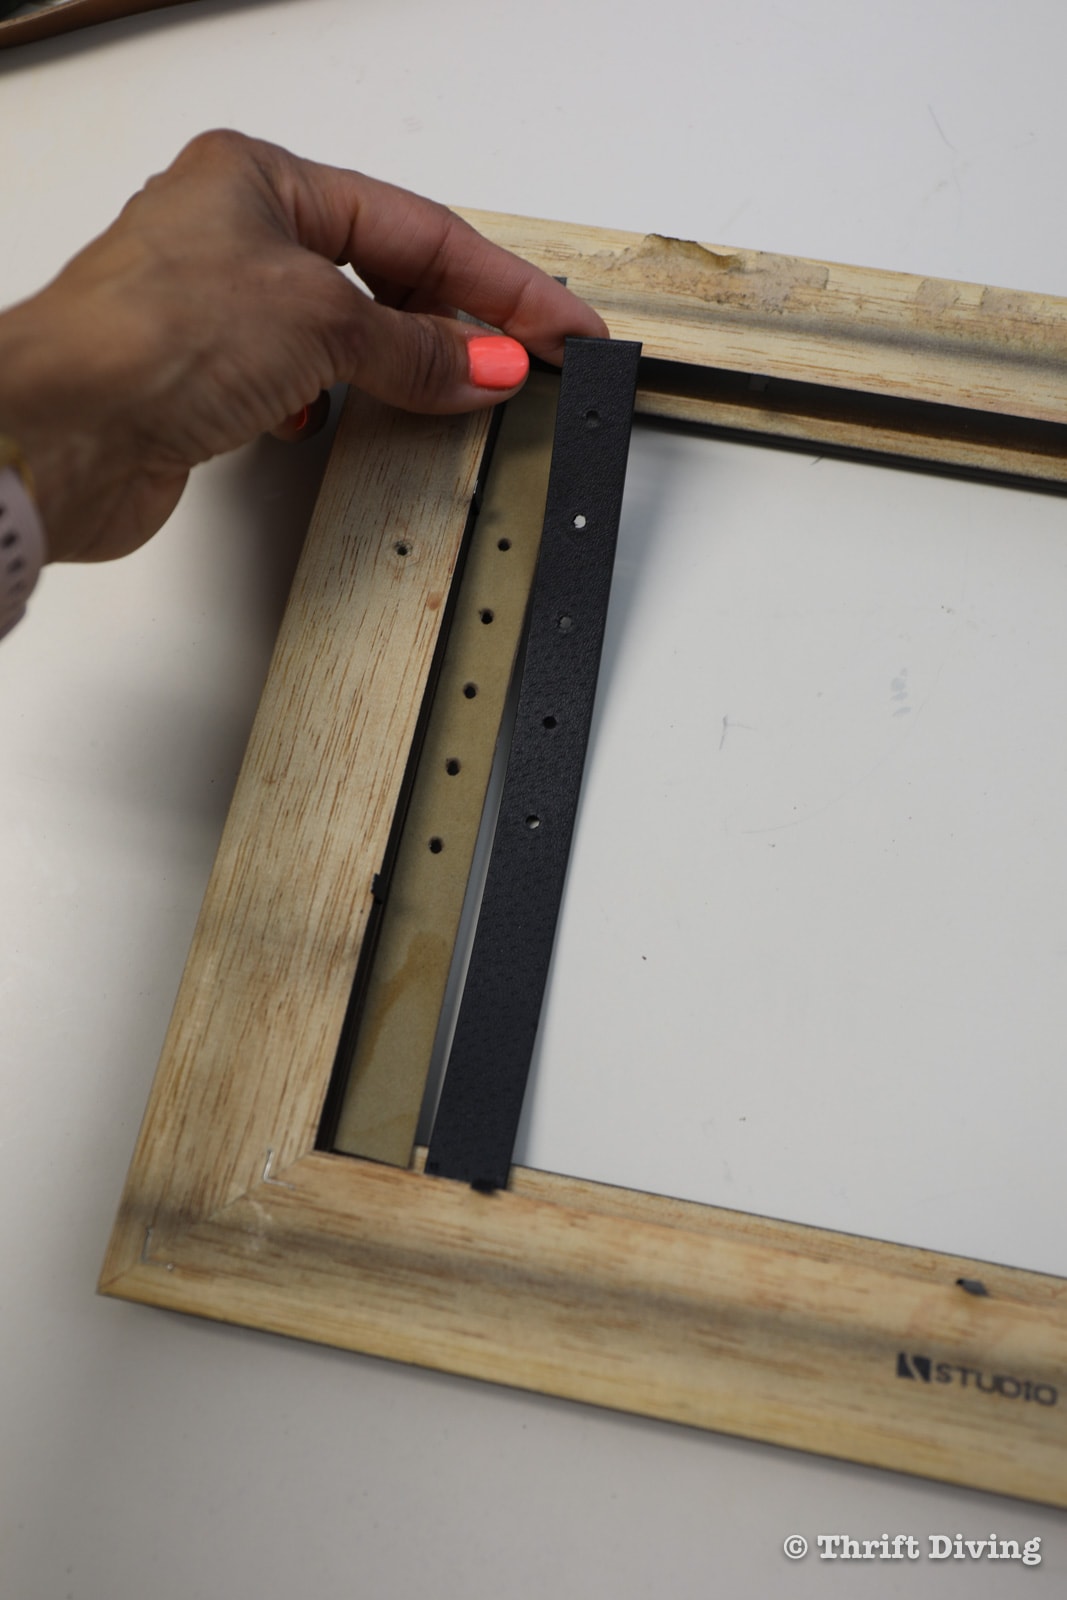
STEP 3: Cut belts to width.
Leather stretches, so when you’re trimming the leather, squaring it up, and placing it inside the picture frame, be sure to stretch it out a bit to make sure it will fit properly. You don’t want it too loose, and too tight, you might not be able to sort mail with it.
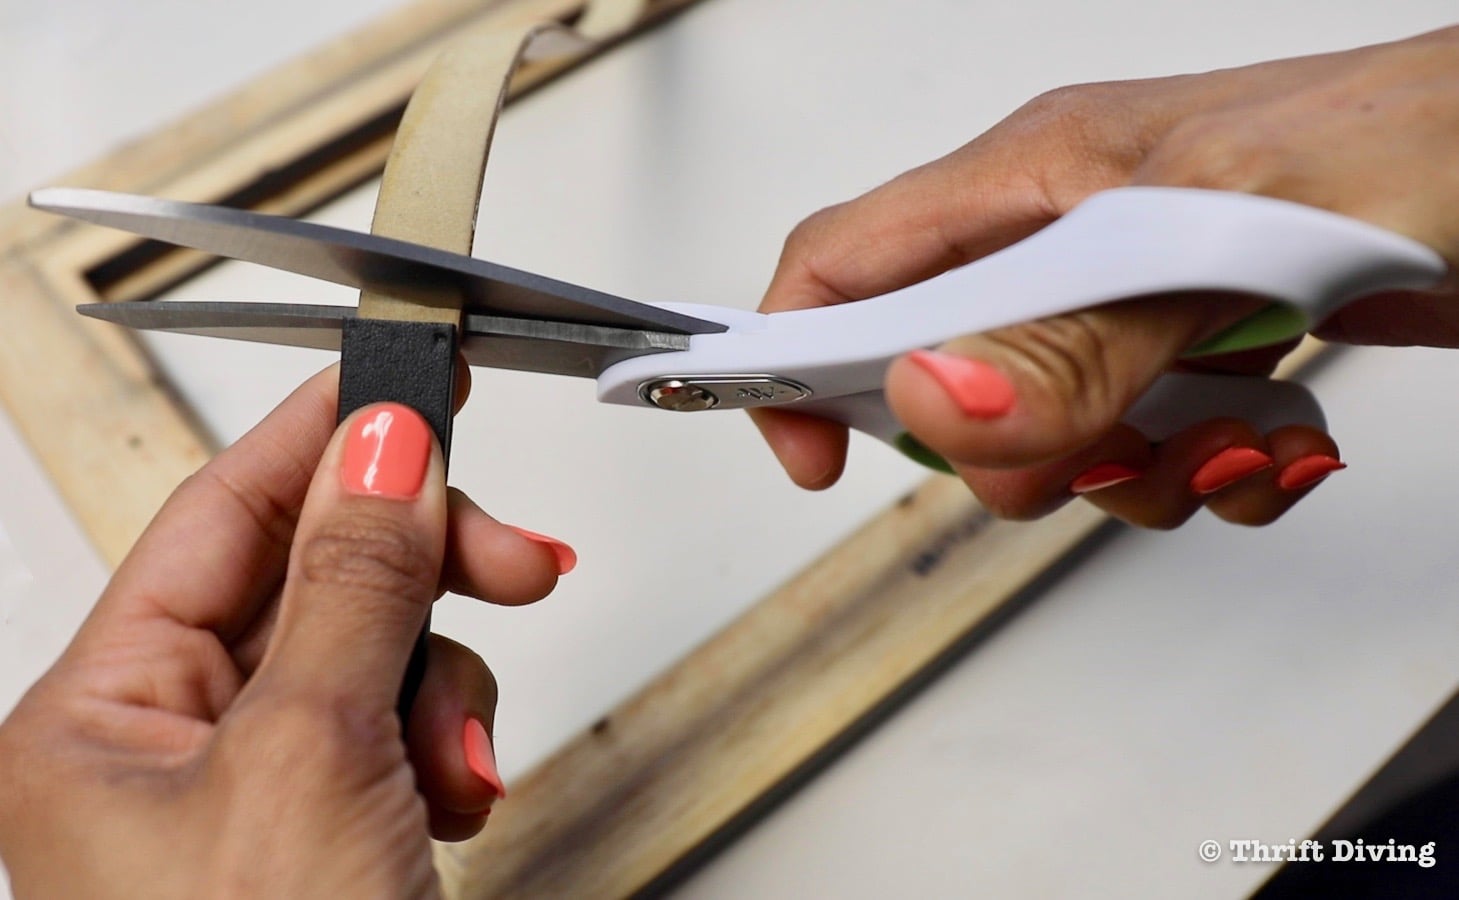
Place the cut pieces on the inside edge of the picture frame and if you leave each piece a little longer, that’s okay. You can always trim them, but if you make them too short, you can never add length (even with their natural stretch).
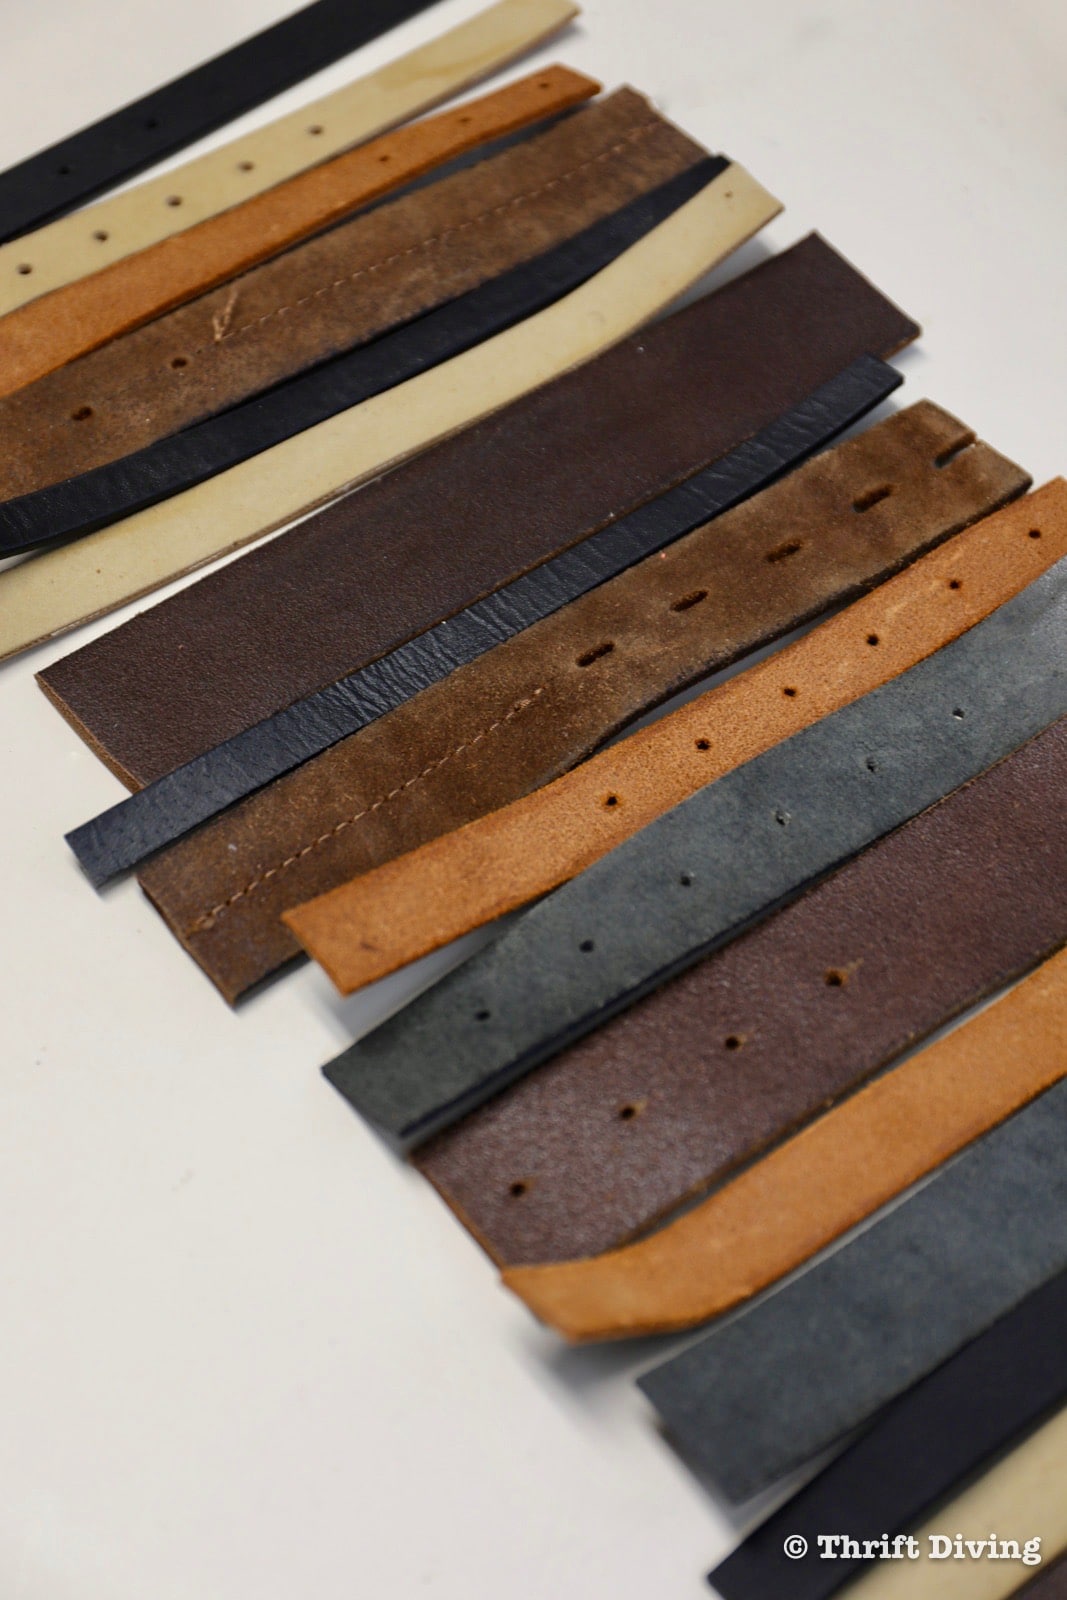
I arranged my repurposed pieces of leather belts in various arrangements to see what would look best. Try to avoid having two pieces of the same color next to each other, like below.
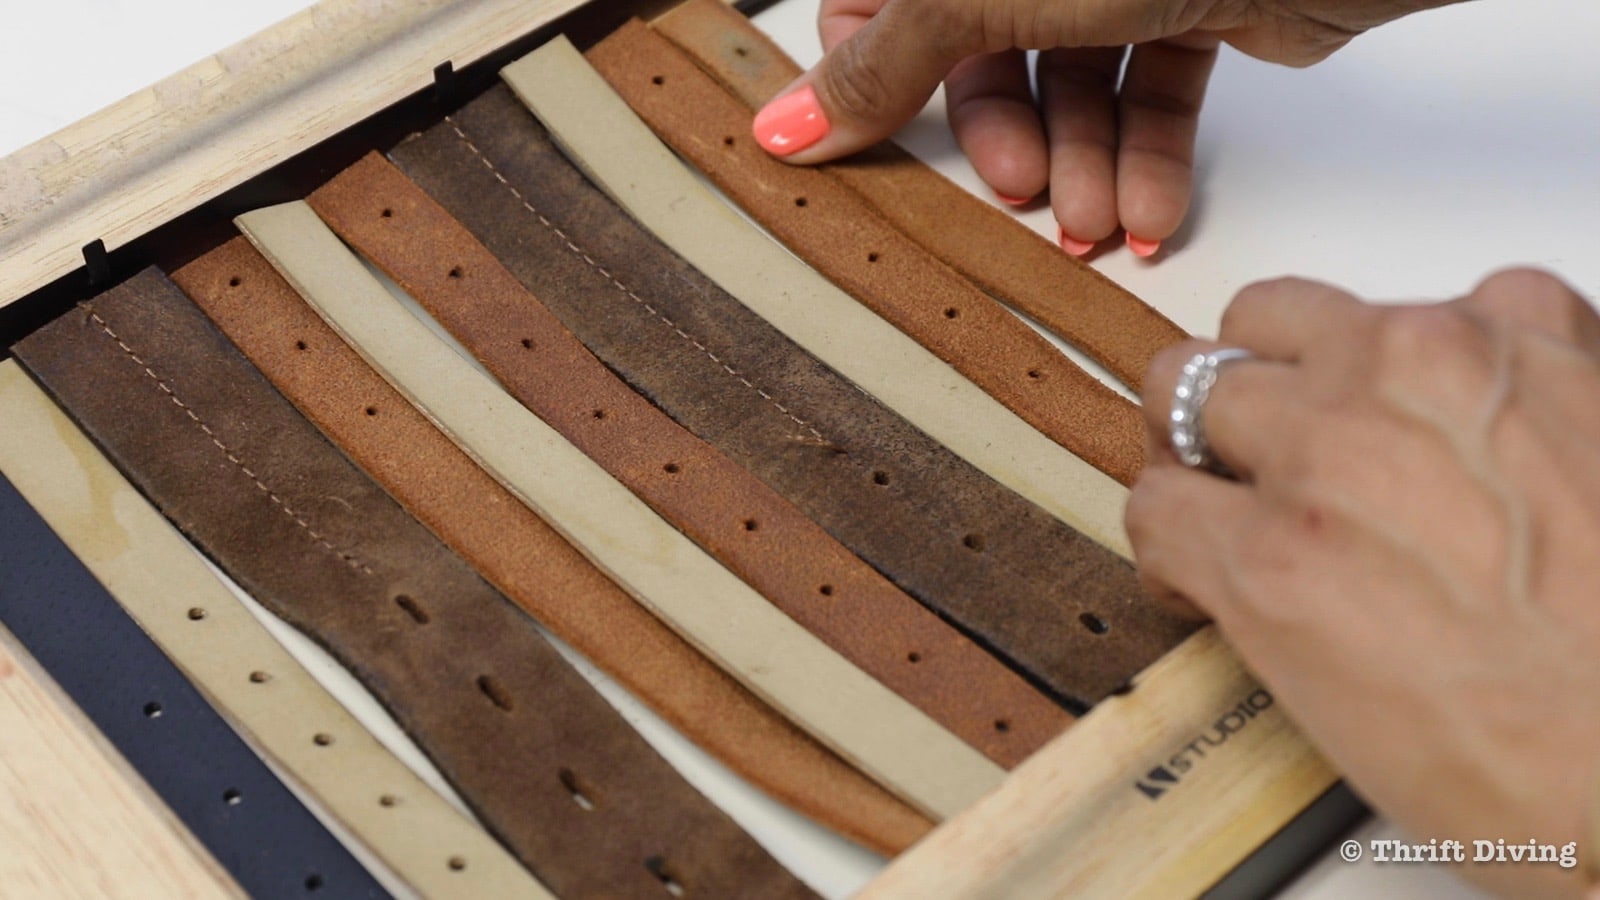
Once I had my layout, I laid the piece of leather belts off to the side. It was time to spray paint the picture frame.
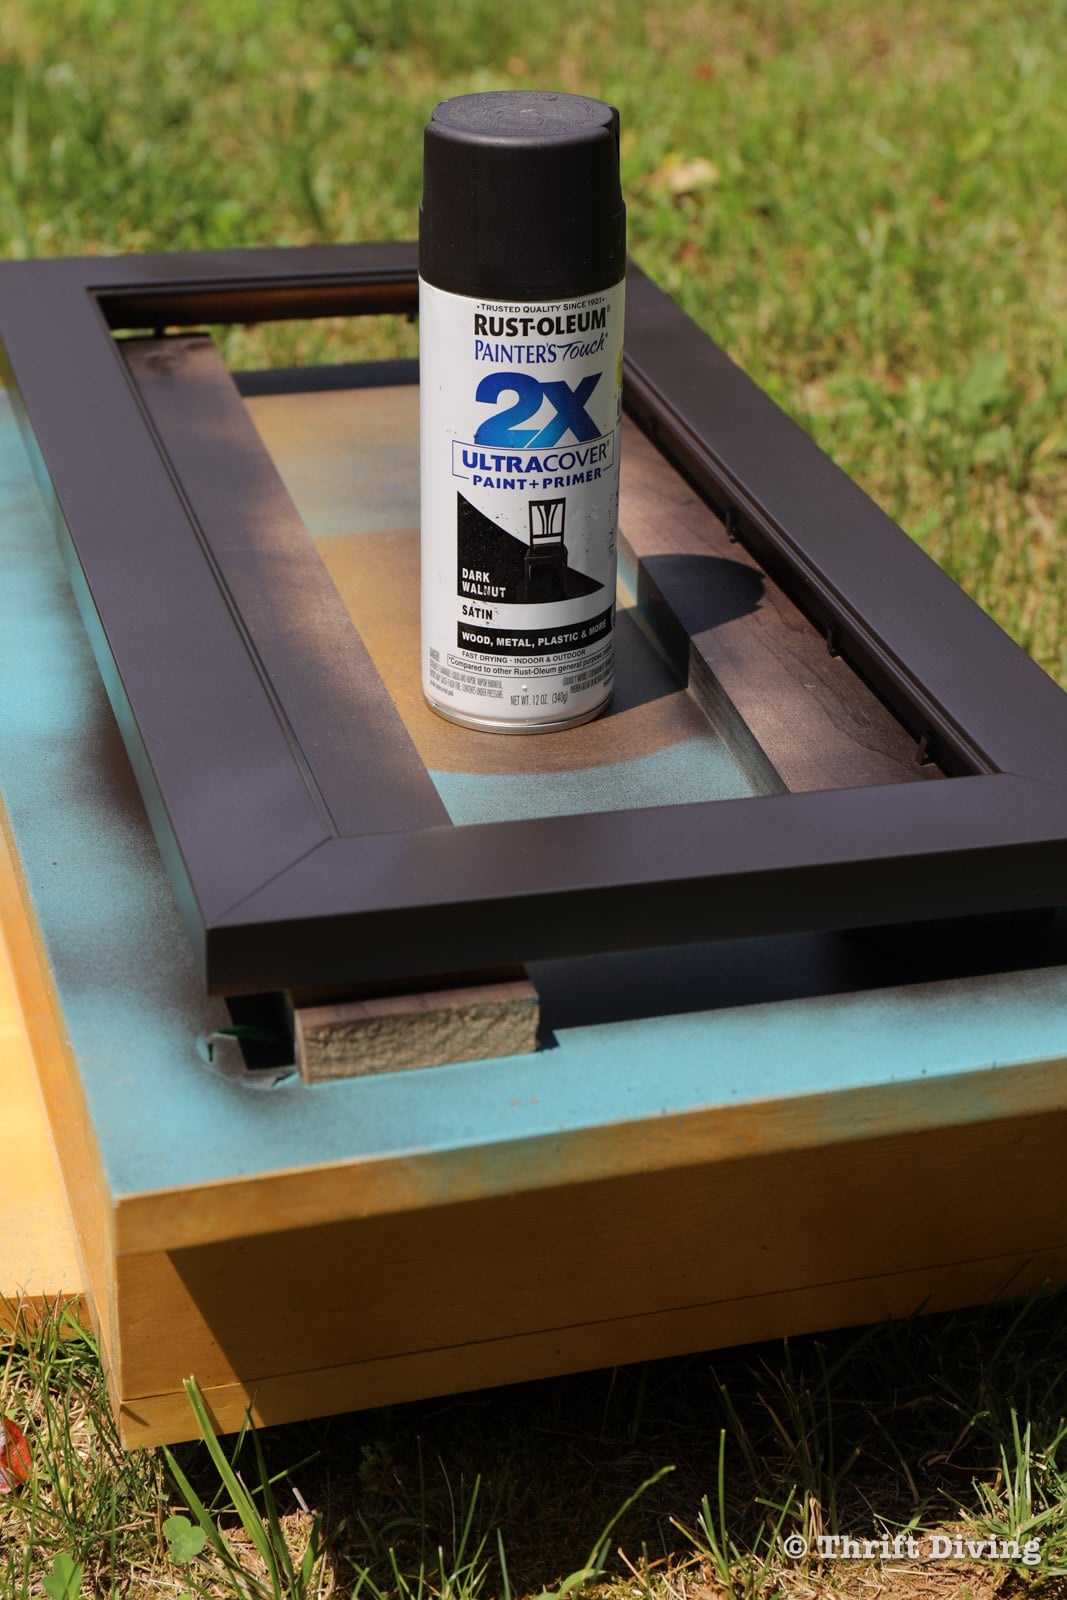
STEP 4: Spray paint the picture frame.
I wasn’t sure what color to spray paint the picture frame. I didn’t want it to be black black. And white was definitely out. Thankfully, I had some Dark Walnut spray paint left over from a previous project. It was perfect!

When spray painting, there are so many things that can go wrong: drips, runs, blotches… SIGH….Thankfully, I didn’t have any runs, but parts of it did turn blotchy. I’ll explain further down. LOL. For now, this first coat was looking great!
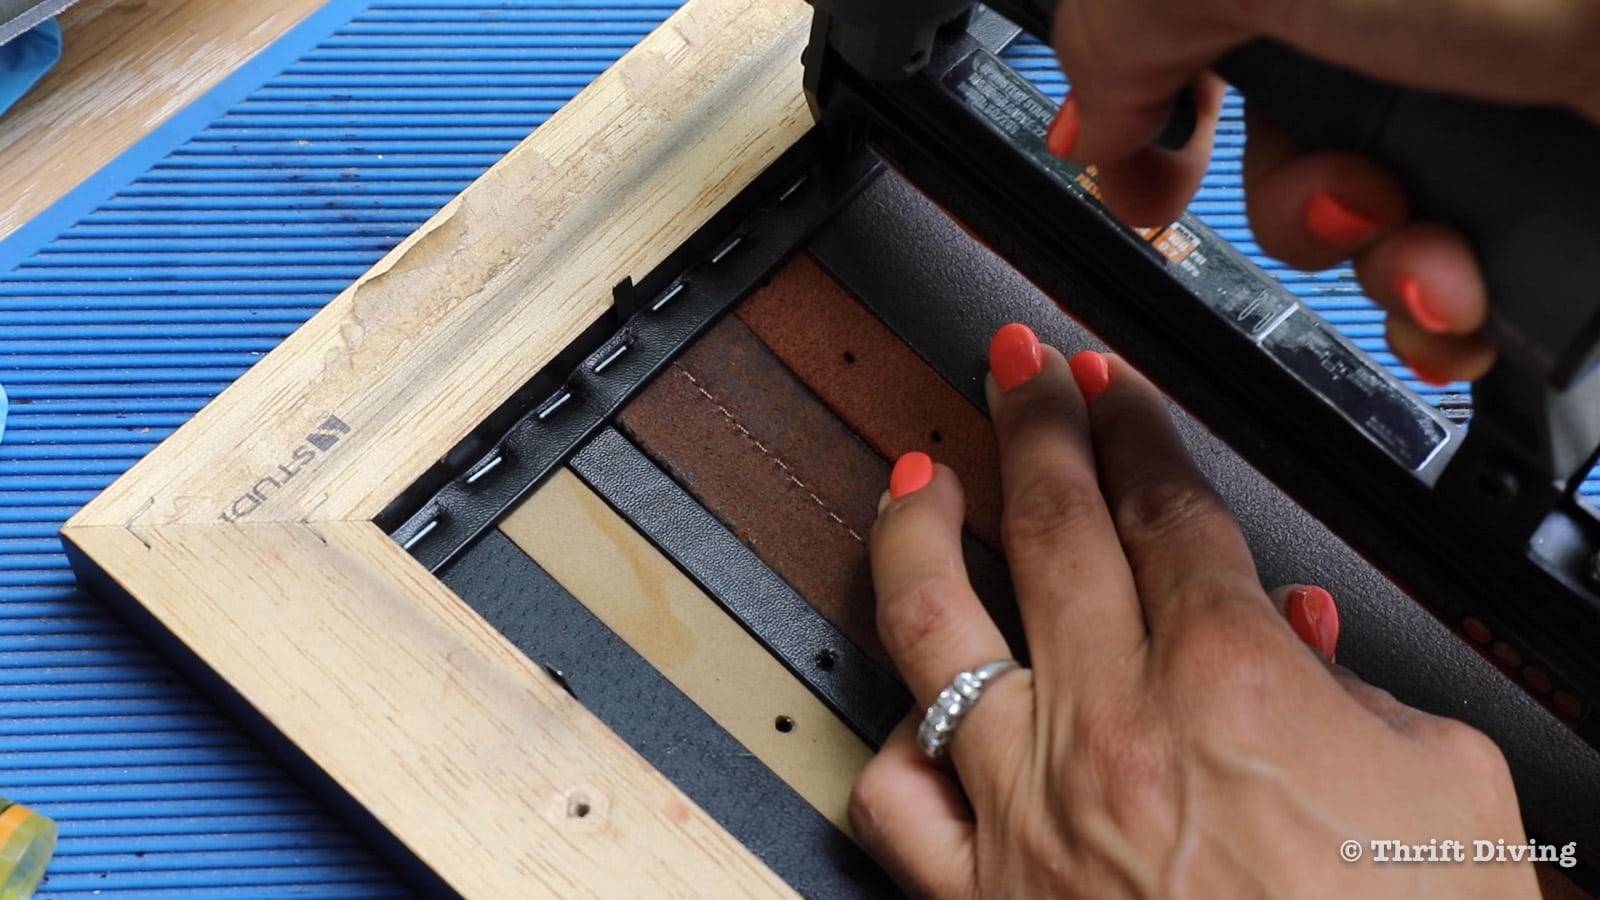
STEP 5: Glue or staple belts into the picture frame.
Once the spray paint dried, it was time to fix the upcycled leather belt pieces into the picture frame. There were a couple of problems, though:
- PROBLEM #1 – I tried to use epoxy glue and (a) nearly died from the fumes and, (b) it was messy.
- PROBLEM #2 – I couldn’t find any superglue that would dry immediately.
- PROBLEM #3 – My upholstery gun staples were too long to use on a picture frame’s thin edges.
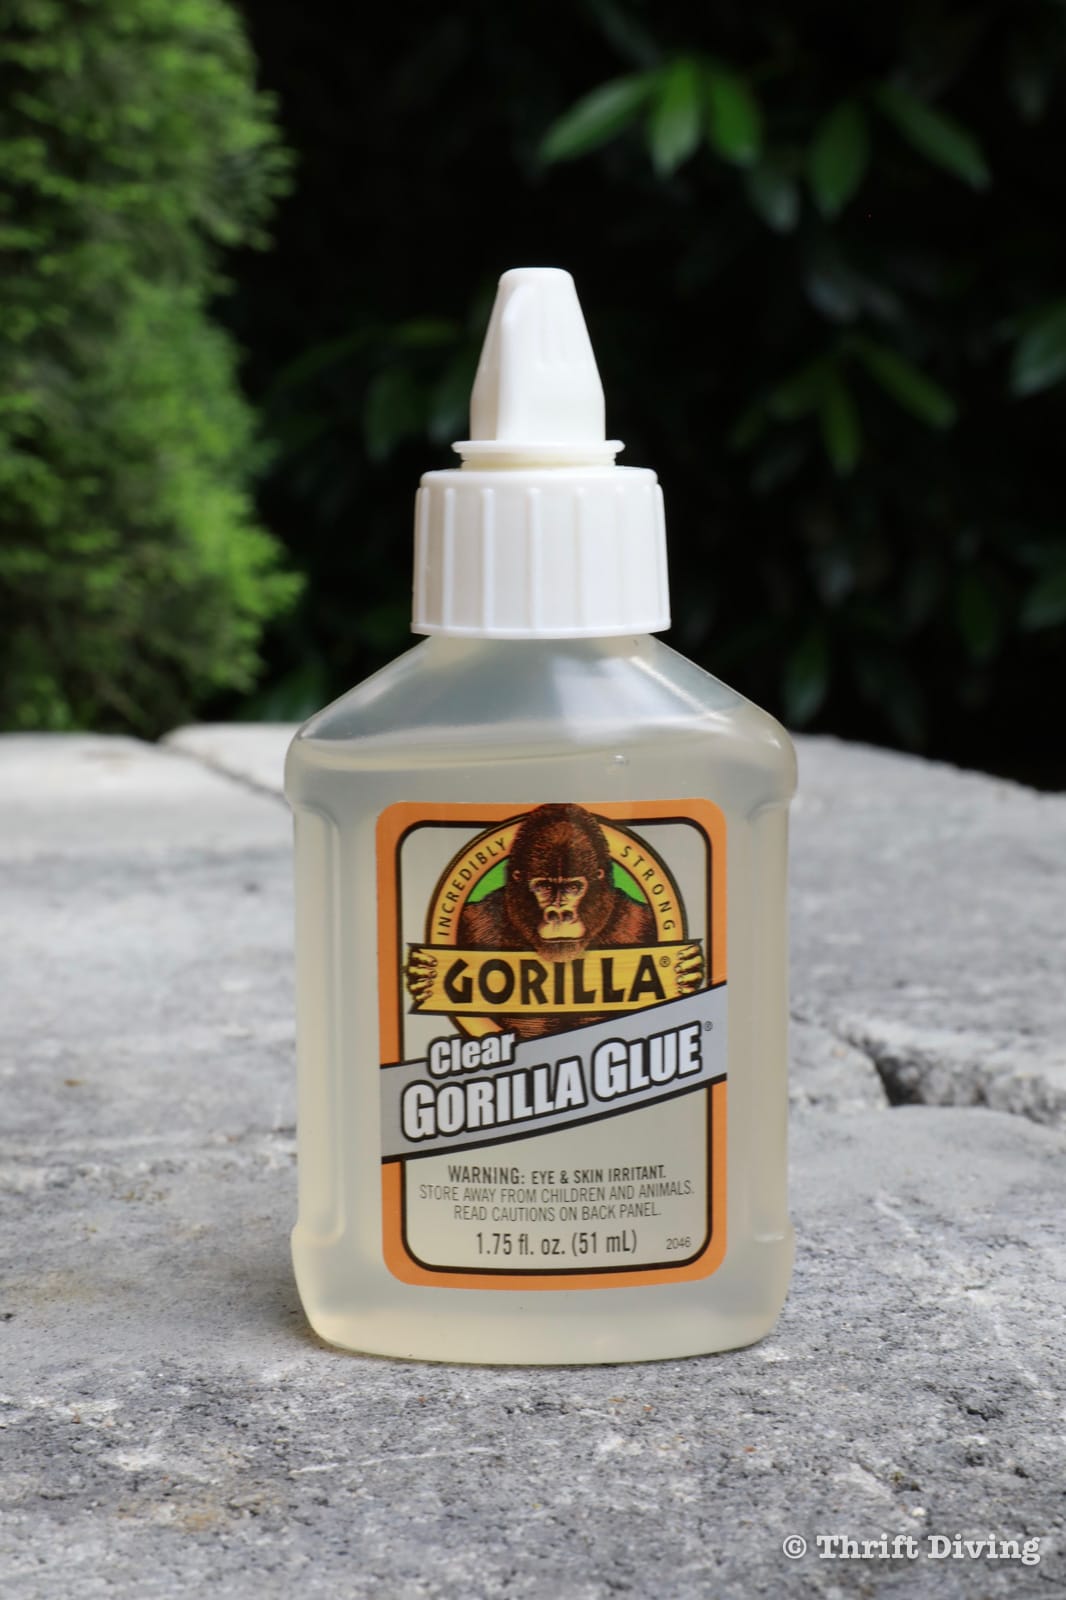
In the YouTube tutorial for this project, I show you exactly what went wrong with the materials I tried to use. But for the sake of this blog post, let’s just keep things simple and tell you that while I used my upholstery stapler, superglue is likely the easiest solution for you. 🙂
SOLUTION: To solve my problem of long staples, I used an extra piece of leather on top of the leather belts. The extra padding helped to prevent the staples from going through to the other side of the frame, for the most part.
But as I mentioned, using a superglue that dries immediately and has a strong hold (like this Gorilla Glue), that can work very well for this type of project. Just don’t get really messy with it!
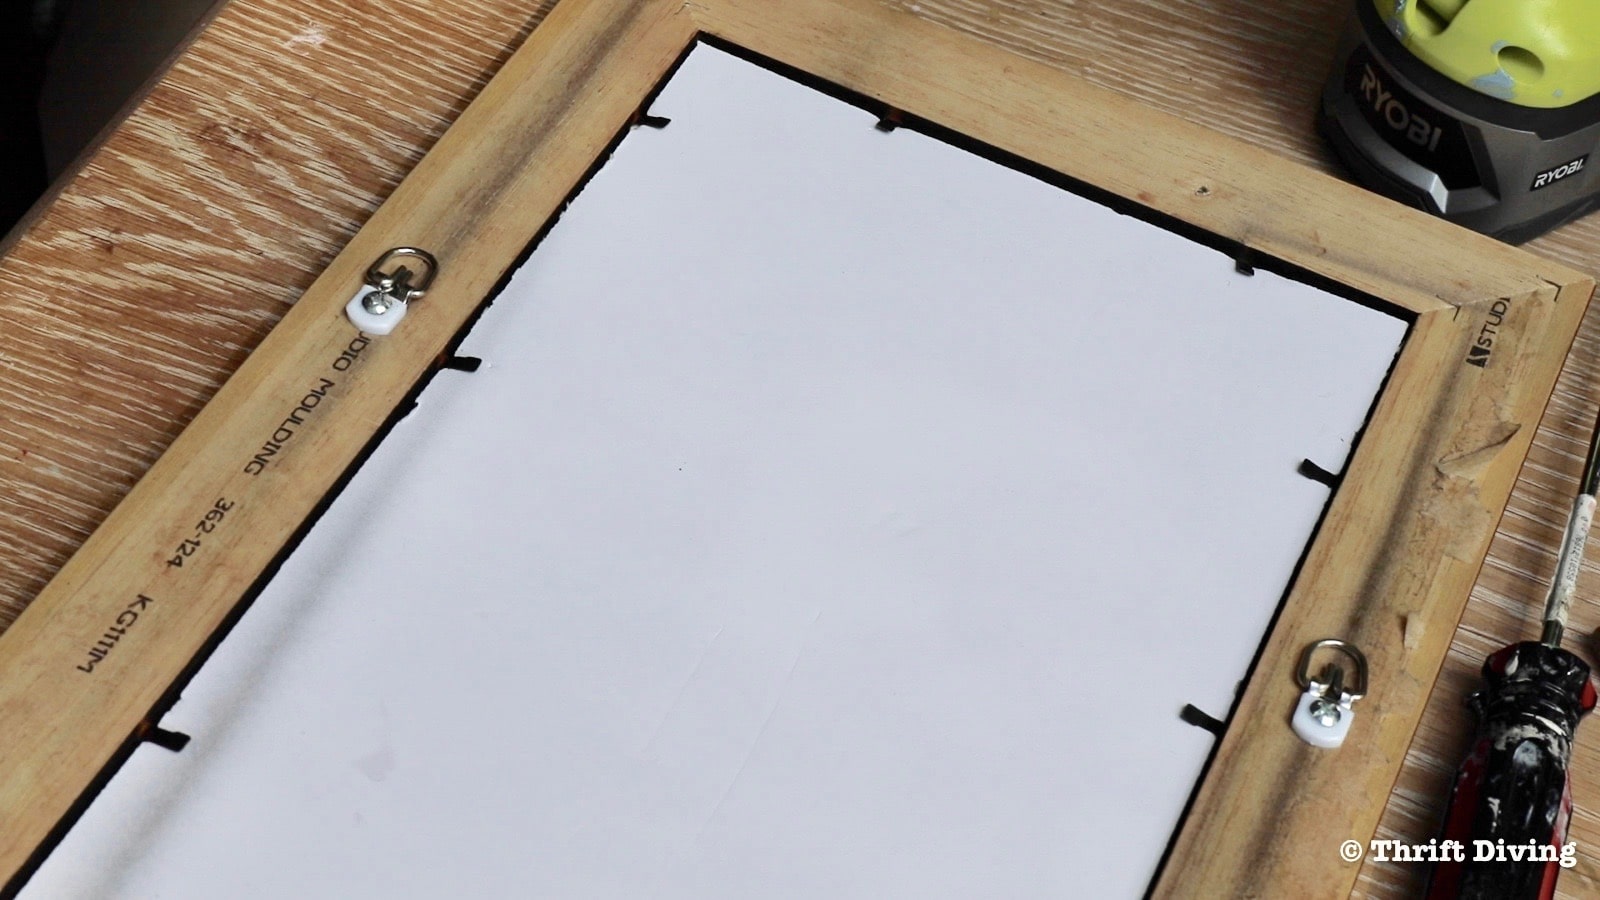
STEP 6: Attach picture hanging D-rings.
If your picture frame already has a couple of picture frame hooks on the back, great! Mine did, but they were arranged for a portrait orientation. I needed this picture frame to be landscape, so I added two D-ring picture frame hooks, making sure they were evenly spaced from the top of the frame (ain’t nothin’ like a crooked wall organizer!).
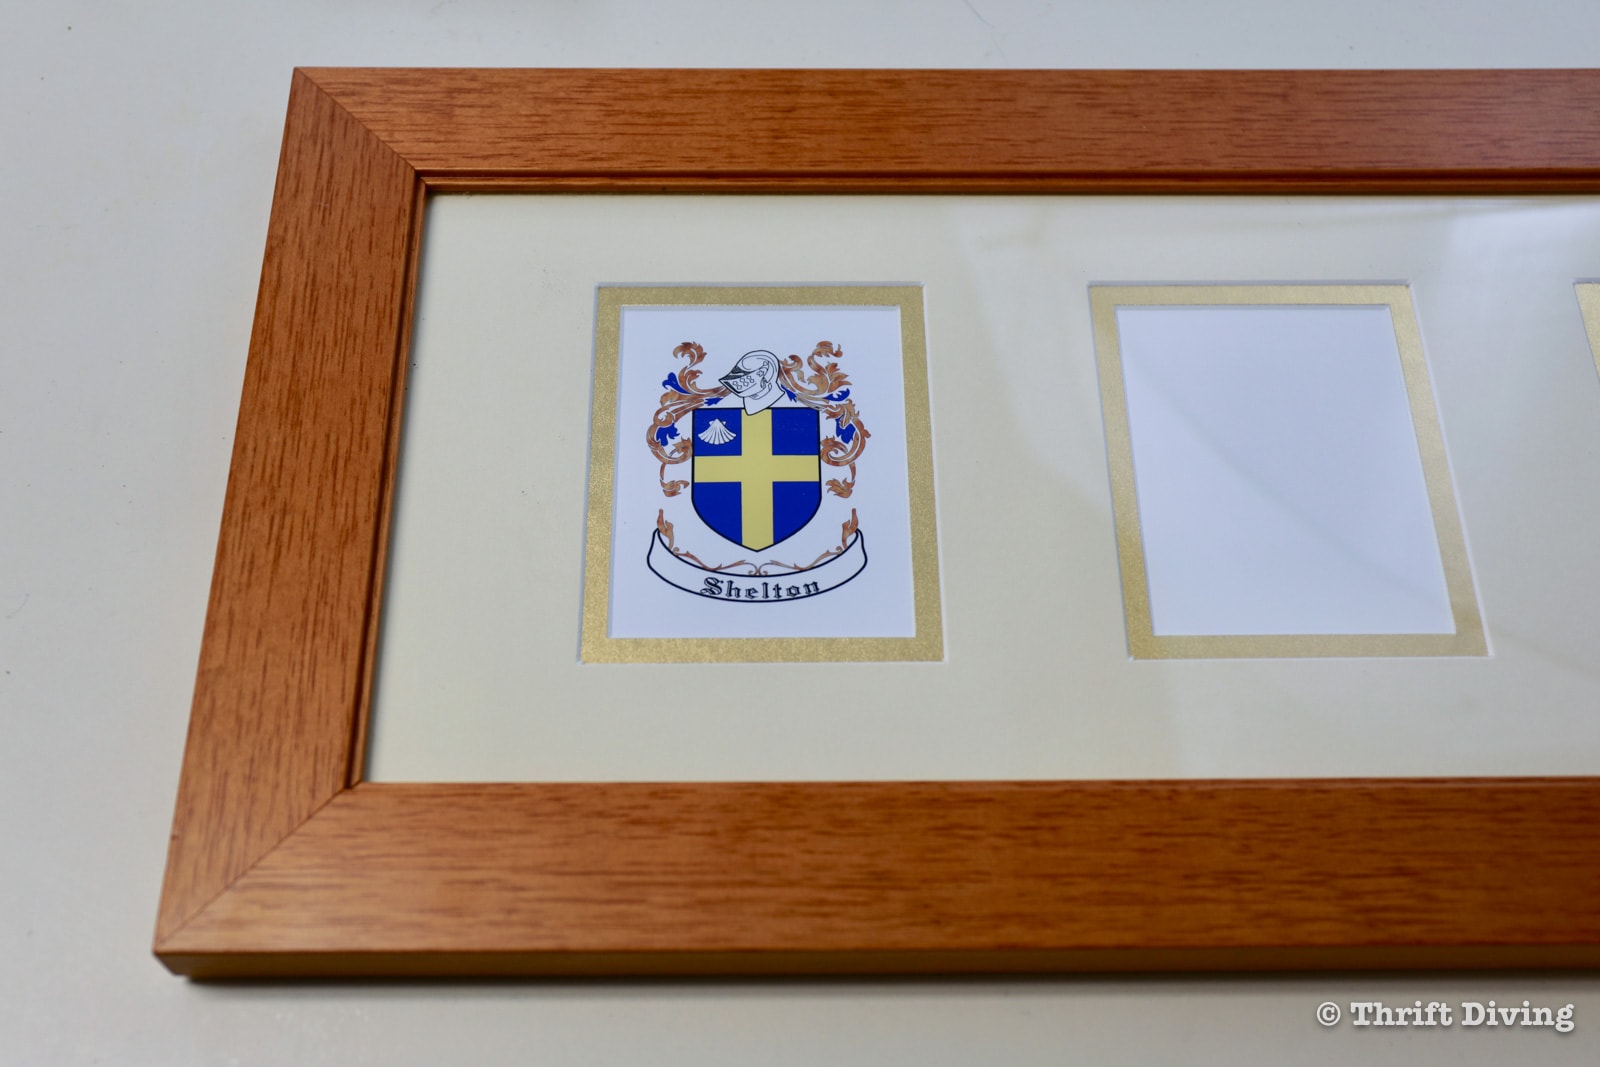
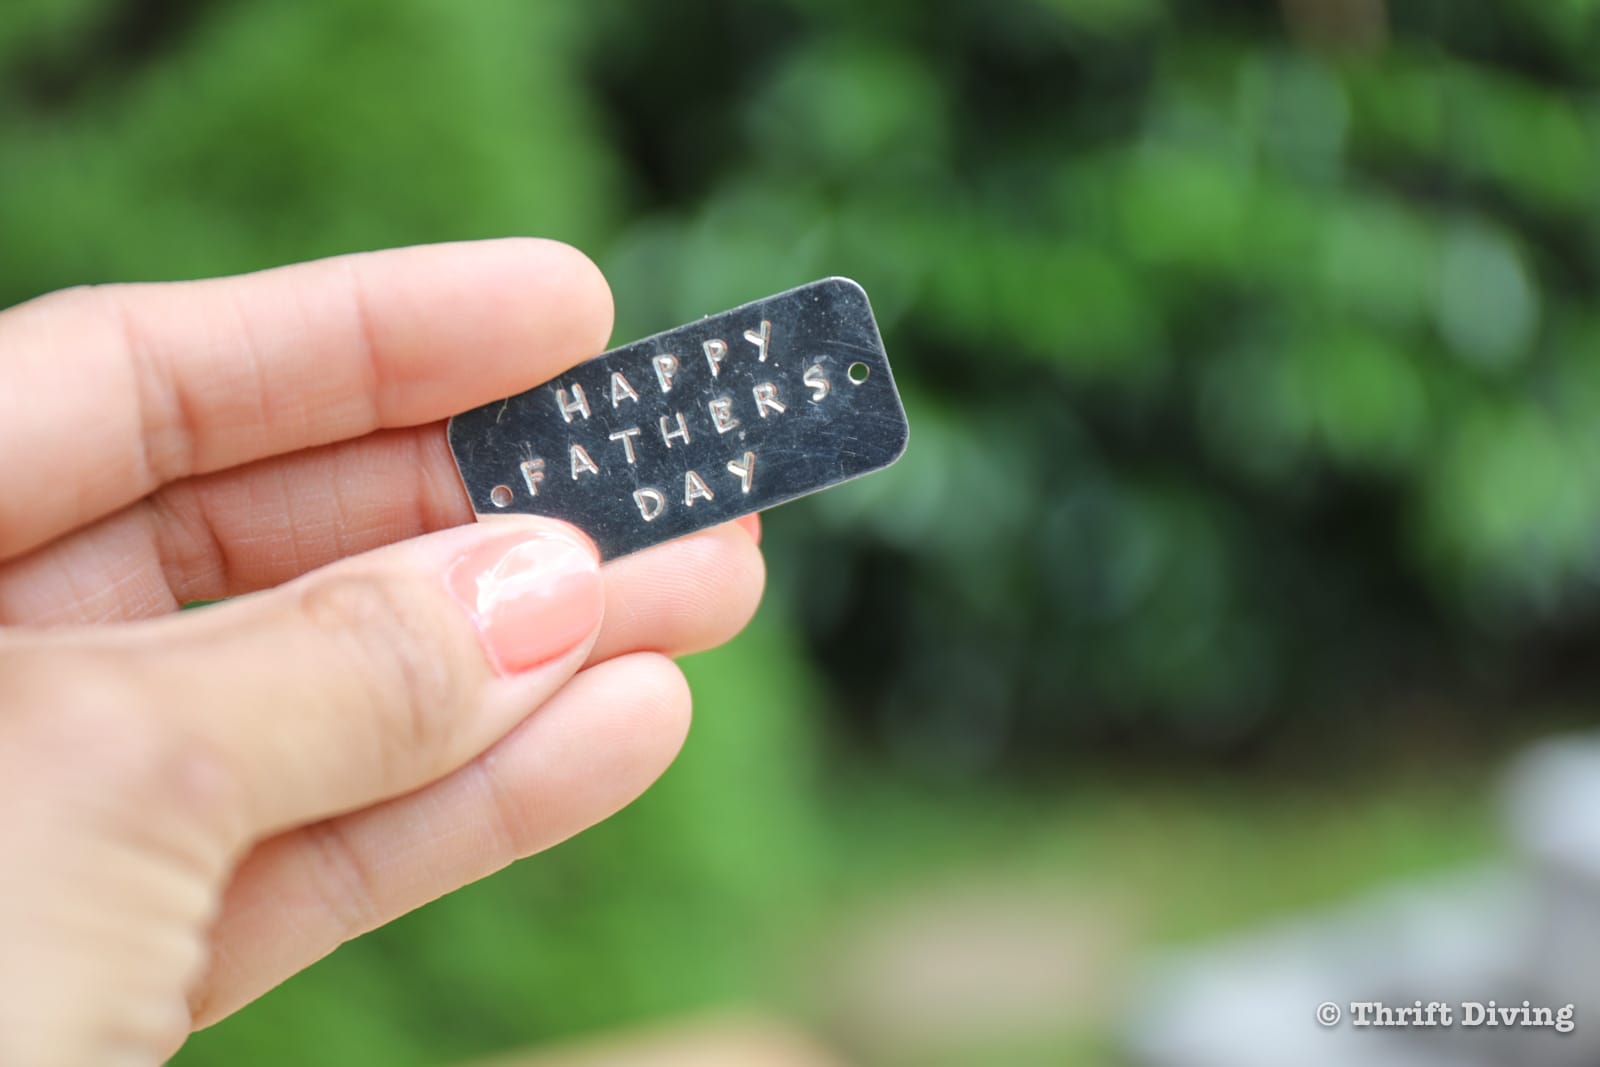
STEP 7: Stamp out “Happy Father’s Day” and Attach
Last year I stumbled upon Impress Art at a trade show, which is a metal stamping craft company. OH. MY. GOODNESS. I have been obsessed with their stuff (they’re not sponsoring this post, by the way, but I will leave you with my Amazon affiliate link in case you want to buy it). It’s great to just have around for when projects like this come up that you want to label!
STEP 8: Screw in hooks for hanging keys.
Afterward, I realized I had some of these little metal hooks that are perfect for hanging keys! I already had a couple on hand so I didn’t have to buy them. If you get them from The Home Depot, you can get a small pack. From Amazon, you can buy a 50-piece set metal screw hooks for about $7.00.
STEP 9: Hang your DIY mail organizer on the wall!
I can’t tell you how much this project gives me life. 🙂 It’s got me excited to start collecting leather belts, for real, and then see how much of a girly one I can make for myself! This would be perfect for my basement office!
DIY Father's Day Gift Idea: Repurposed Leather Belts Mail Organizer

Create a DIY mail organization using repurposed old leather belts from the thrift store and a picture frame!
Materials
- Thrifted Leather Belts
- Long rectangular picture frame
- Metal Screw Hooks
- Superglue (recommended)
- Spray paint (Dark Walnut)
- Picture hanging D-rings
Tools
- Upholstery Stapler
- Ultra Portable Air Compressor
- Metal Stamping Kit
- Scissors
Instructions
- Buy an assorted pile of old leather belts and a long, rectangular picture frame.
- Remove the back of the picture frame. Save the thick cardboard or foam.
- Cut the belt to width, to fit inside the picture frame.
- Spray paint the picture frame.
- Glue or staple belts into the picture frame.
- Attach picture hanging D-rings to the back of the frame.
- Metal stamp a decorate label (optional).
- Screw in metal screw hooks to hang keys.
- Hang in your wall! Voila!
Let me remind you again what this started out as.
BEFORE
AFTER!
Love this project? Click here to save it on Pinterest!
![]()

Whether you’re making this DIY mail organizer with old repurposed belts for a Father’s Day gift idea, or if you’re simply making a mail sorter for your office or entryway, this is a fun way to reuse belts!
What do you think?! 🙂 Leave a comment below and let’s chat about it!

Download the 5 freebies!

Thrift Diving inspires women to decorate, improve, and maintain their home themselves...using paint, power tools, and thrift stores! Use these 5 printables, checklists, and ebooks to get started!
What an awesome upcycle. What a great idea to use the belts in the frame. It looks fabulous. Thanks for sharing at Merry Monday.
This makes me think of using them for those ribbon bulletin boards/picture displays. I’ve got a country girl (real country, not the current farmhouse trend) and I’m thinking burlap or gender neutral fabric using belts as the criss cross. And I second the memory keepsake idea…not morbid at all.
This is so cool! Reminds me of a very MCM project… sharing with my daughter. I went to pin, and your images are not coming up with your share buttons (on my DT).
We’d love to have you link-up over at Tuesday Turn About! We close tonight at midnight PST.
This is such a cool idea and I love the end result. I will definitely be looking out for some old belts but I could see this being a great remembrance project too.
I LOVE getting video emails!! You are SO cute and clever!! I get excited when I see your email in my Inbox, I think here’s another project for me to do.
Hey, Sarah! Awww…you are so sweet! Thank you! I was excited about the video email, as well. I was all sweaty and dirty in the garden while doing it, so the next one, perhaps I’ll shower first. HAHAHA. Thanks for the feedback!!
Love this! I’m so short waisted, I can’t wear belts, but love them. Now, I know what to do with cool ones I see at thrift stores! Thank you! I know my Dad, and my Mom for that matter, would love receiving one like this. Thank you for sharing your inspiration and know-how.
PS: Landscape orientation is horizontal, portrait is vertical. You changed your frame from landscape to portrait orientation. ;-}
LOL, of goodness, did I get it backwards?! That’s funny. I usually have to think for a moment before saying which is which. HAHA. Anyhow, yeah, I think people who are craft or has a respect for creativity would love to receive something handmade. People who aren’t crafty and don’t respect it would scoff that getting something handmade like this! I guess it’s good to know who the giftee first! LOL
Love, love, love
What a great idea, I might have to have one
Thanks, Anne! They’re super easy to make and fun, too. A quicky easy weekend project!
It looks great and I think I may need one of these!
You should definitely make one, Susan! I am going to look for colorful belts at the thrift store and make one for my office. Or maybe my entry way! 🙂
Serena, this is so clever and I’m sure any man would love to have one. Impress Art sounds so cool! I gotta check it out! Have a wonderful weekend!
Thank you, Cecilia! I gave it to hubby and he liked it. But when I say “gave” I mean, I literally handed it ot him like, “Here, this is going to be for you. But I’m going to hang it in the kitchen.” HA! LOL