BEFORE & AFTER: My Colorful Gray Bathroom Makeover With a Wall Stencil!
This small half bathroom makeover has been a work in progress. Watch its transformation!
Watch This Half Bathroom Makeover In Action!
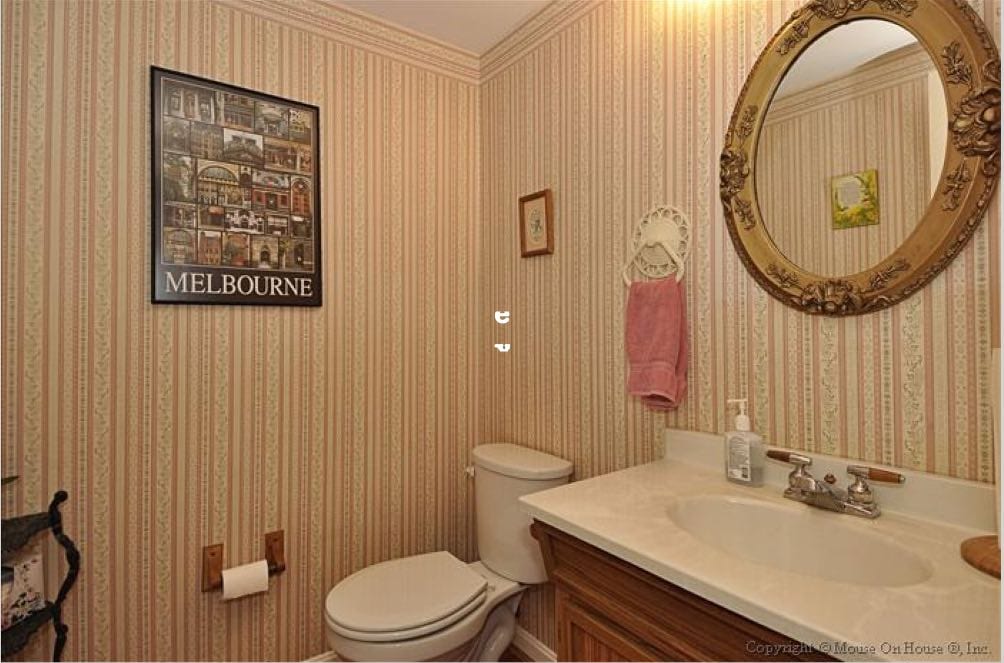
When we moved in, this is how the previous homeowners left this half bathroom. It was badly in need of a makeover!
BEFORE
I thought for sure knocking out this small gray half bathroom makeover with a wall stencil would be a drop in the bucket compared to my other room makeovers.
I mean…how difficult could it be to make over a measly 27.5 square feet??……(asked the naive DIYer)…….
Well, considering that my muscles feel like I trained for a heavyweight championship boxing match, I’d say this project kicked my butt.
Small Bathroom Makeover = 1
Serena = 0
But I can’t deny it was sooooo worth the fight. Wouldn’t you agree??
Half Bathroom With Paint Instead of Wallpaper
It took some time for me to get around to giving it some style, but when I did, oh man…it looked sooo good!
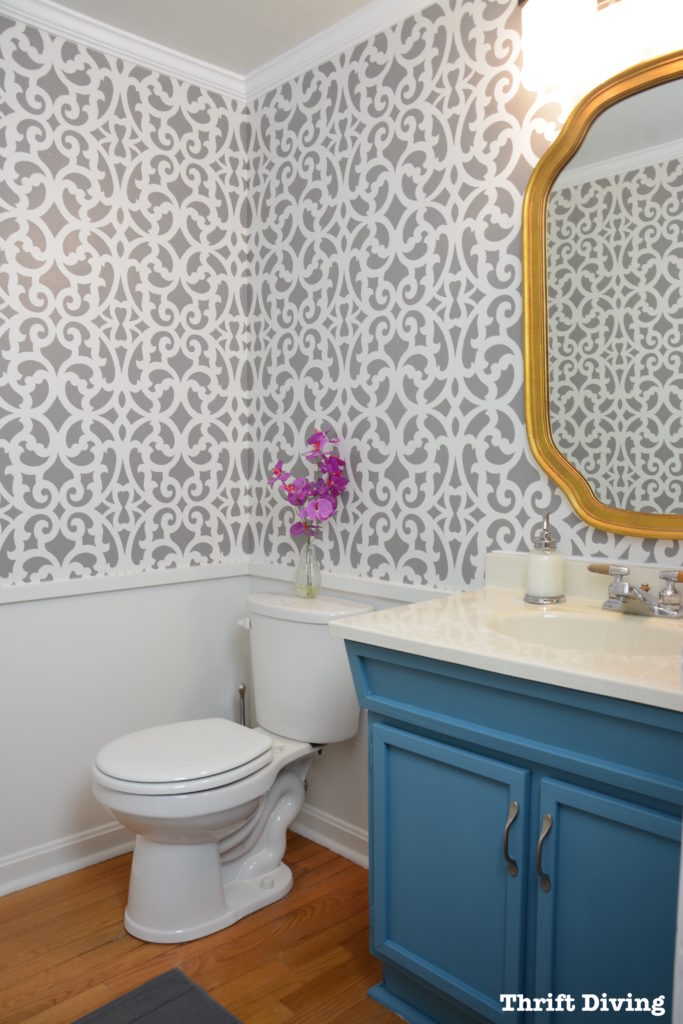
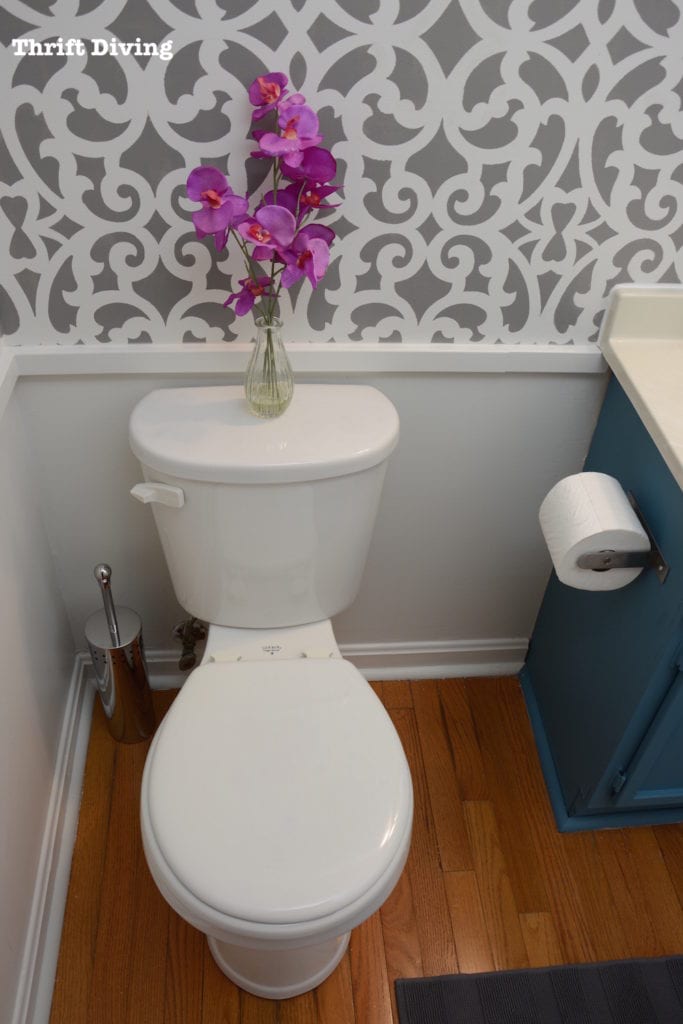
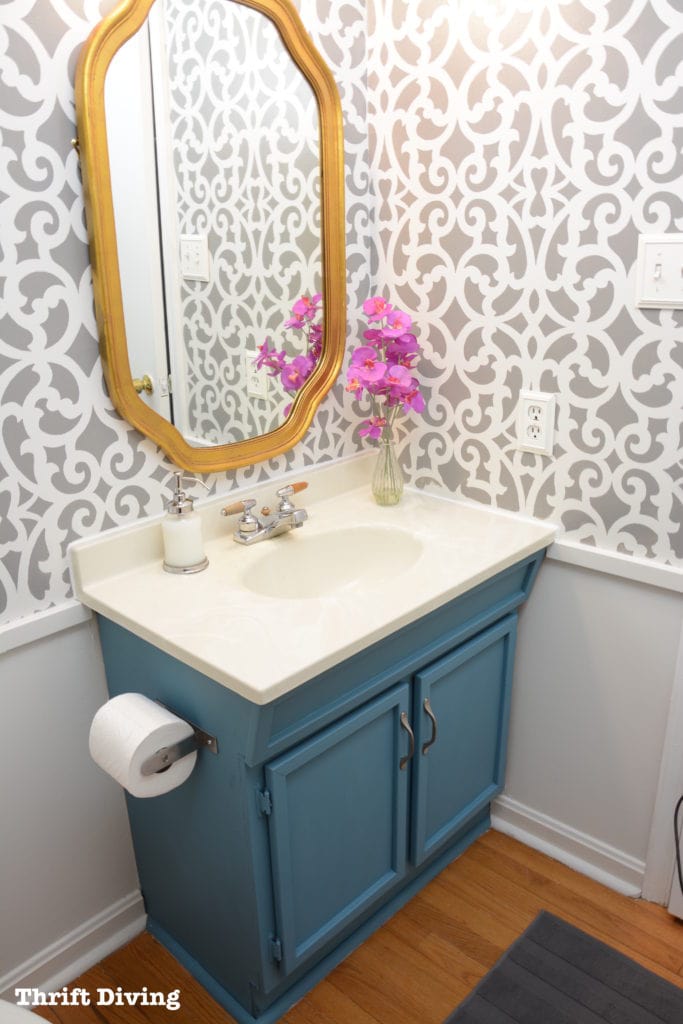
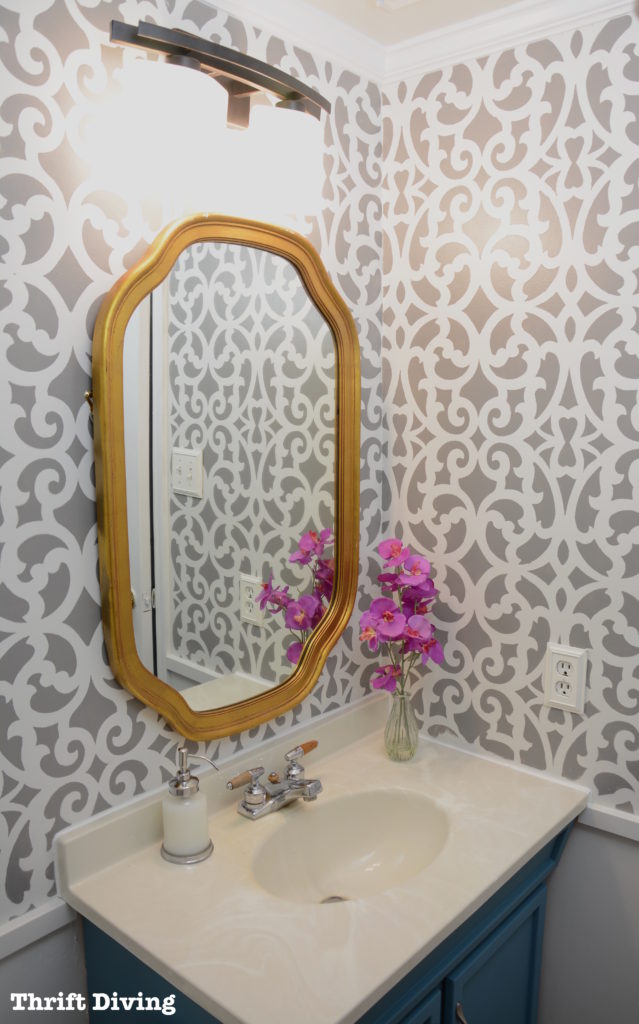
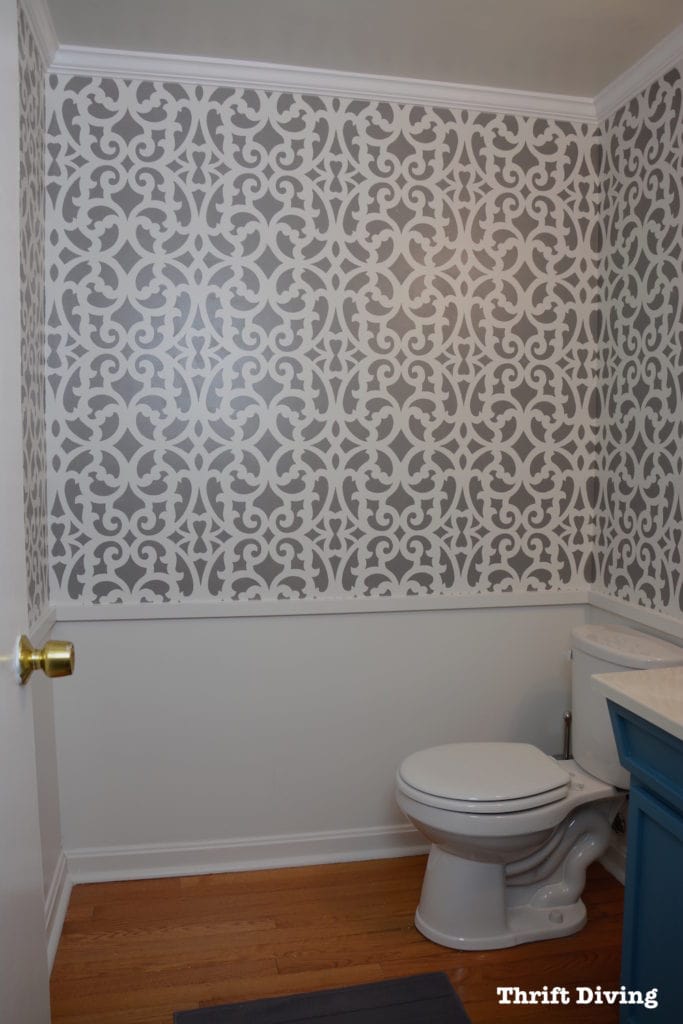
AFTER!
Stenciling Virgin
I’m going to be honest with you–I’m a wall stenciling virgin.
I’m very Plain Jane when it comes to wall treatments: two coats of pretty blues and call it a day.
But I wanted to shake things up a bit with something bolder than I have ever done:
A stenciled bathroom.
Correct: a stenciled dark gray bathroom. GASP!
I felt so adventurous. 😉
I’ve done my share of stenciled furniture, but never walls.
I was in for an eye-opening experience.
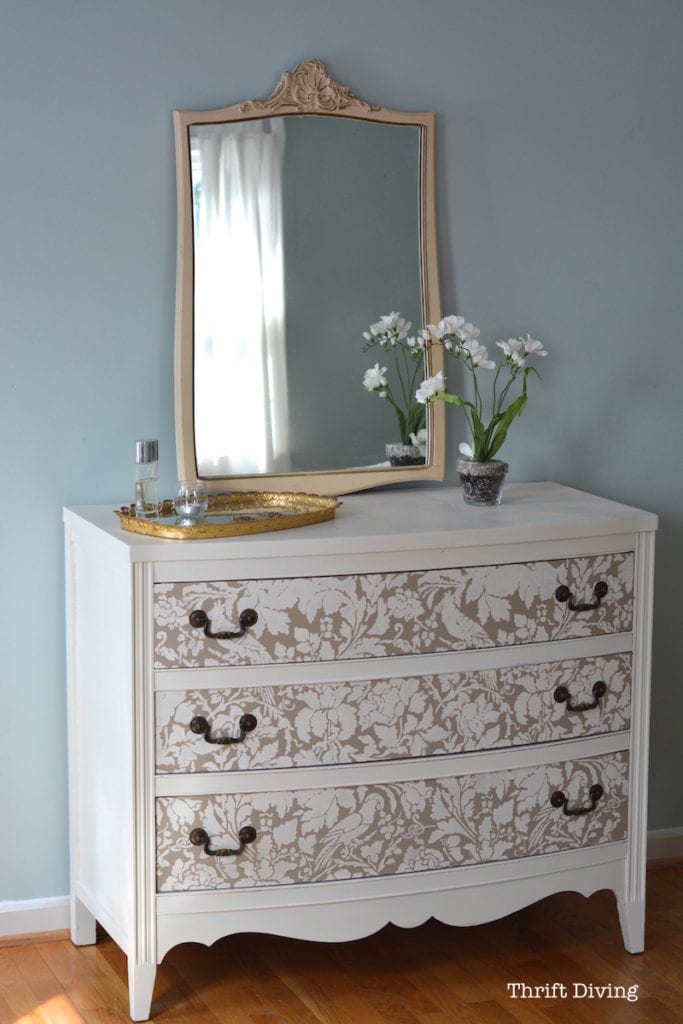
(P.S. Check out my awesome stenciled furniture makeovers using my favorite floral damask stencil):
- Vintage Dresser Makeover
- Turn an Old Jewelry Box Into Craft Organizer
- How to Stencil on Furniture
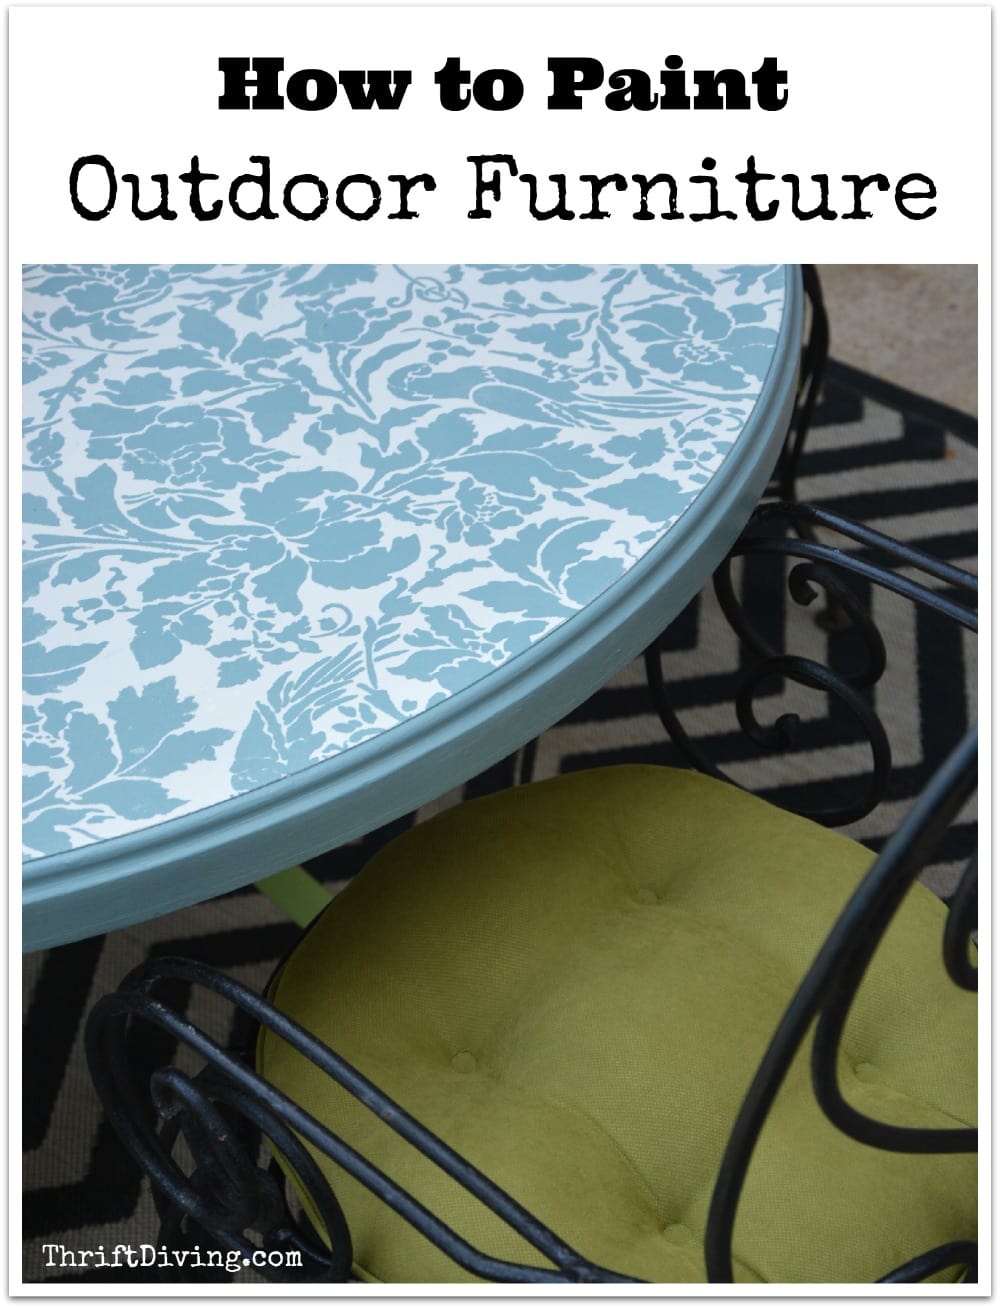
- How to Paint (and Stencil!) and Outdoor Patio Table
Materials
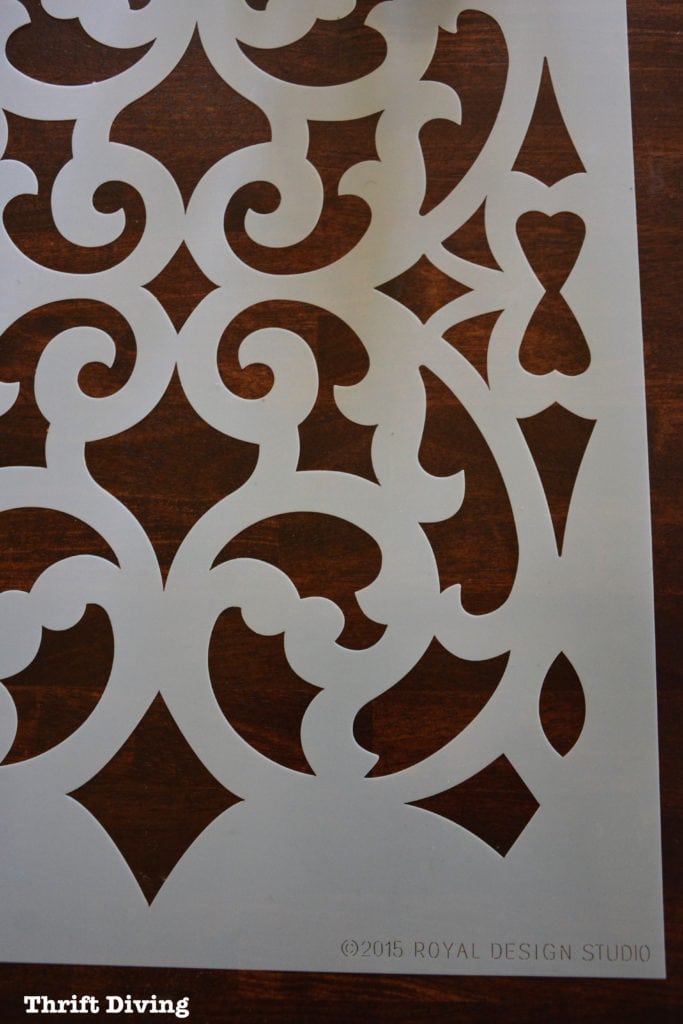
- Mansion House Grille Trellis wall stencil from Royal Design Studio (comes in large and small). This stencil pattern also comes in a super affordable, smaller furniture stencil!
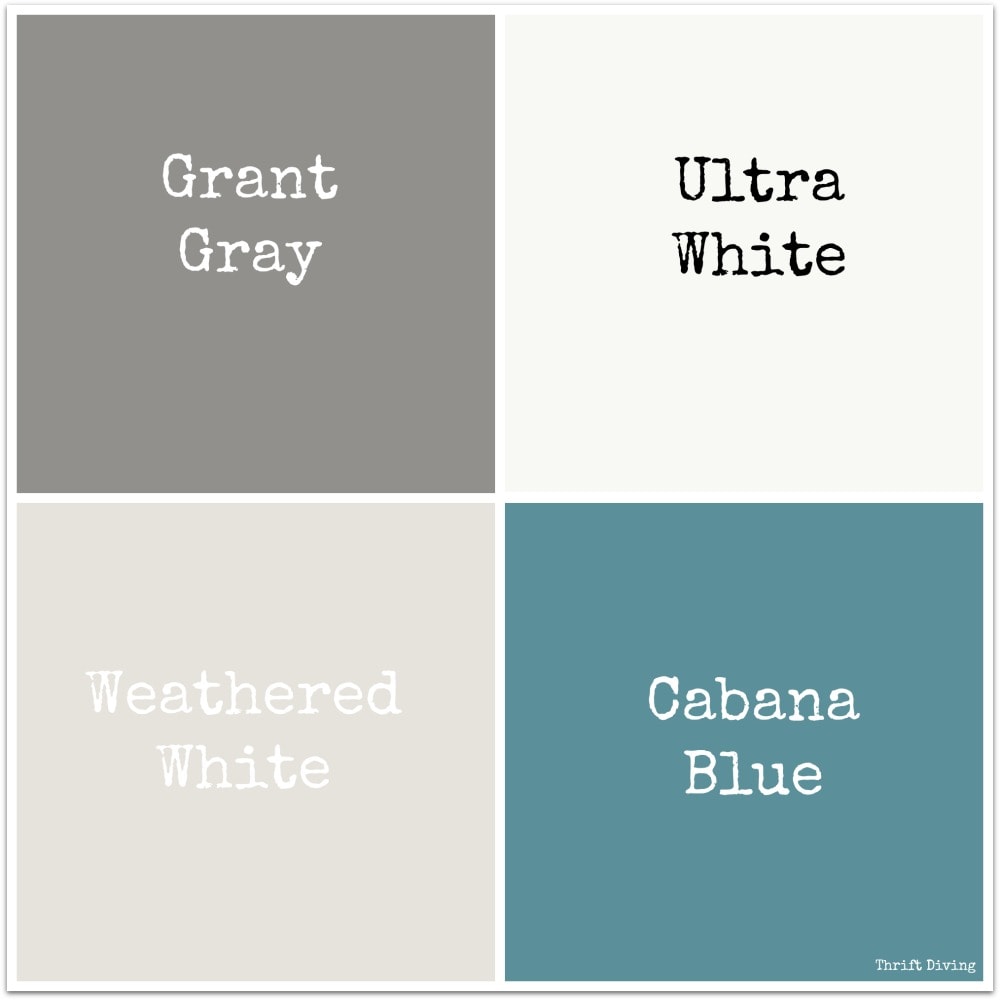
- Weathered White interior satin latex Behr (half a gallon)
- Grant Gray interior satin by Behr (1 quart)
- Cabana Blue interior flat by Behr (1 quart)
- Ultra Pure White interior semi-gloss
- Large roller for walls
- Small foam roller for stencil
- Brushes, paint trays, rags
- Painter’s tape
- Leveler
- MDF boards
- Crown molding
- Instructions for installing DIY crown molding
Stencil and Bathroom Paint
I wasn’t sure which wall stencil I wanted to use because I’m usually not a “patterns girl.”
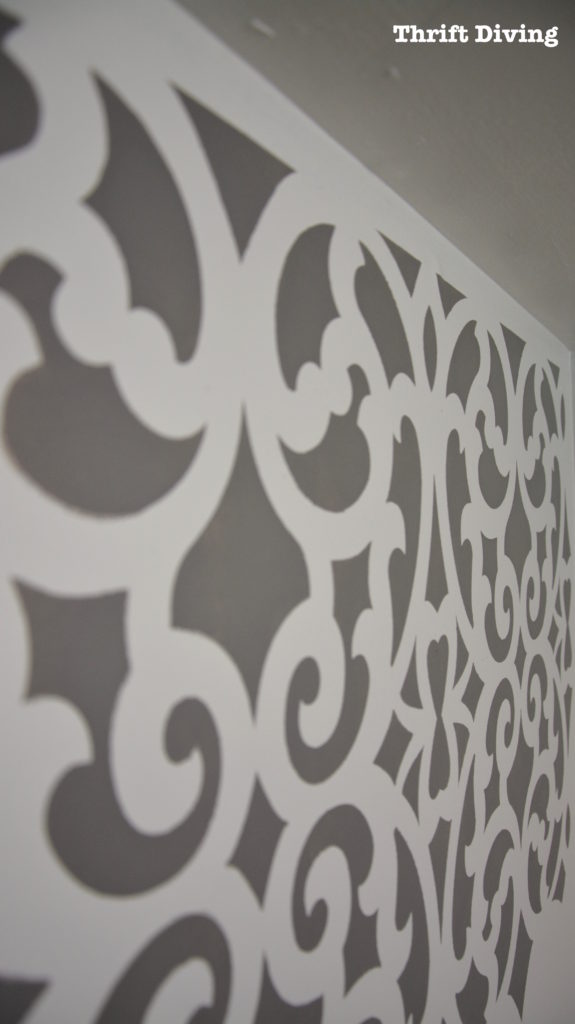
But the Mansion House Grille Trellis (the small one) stencil grabbed my attention immediately. There was something sooooo pretty about the metalwork-inspired design. And since it’s so new, I knew it wouldn’t be some cookie-cutter design that you see smeared all over Pinterest.
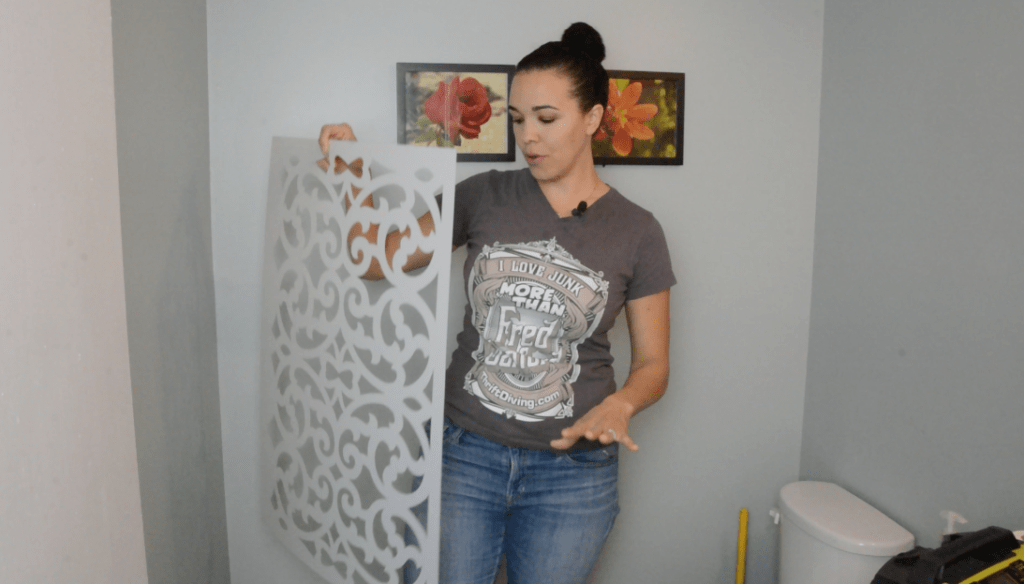
(P.S. Some of you have asked about my Fred Sanford shirt. You can buy it HERE!)
You know how I love blue…so I had to include it, but a bolder color!
Flashback From the Past
I can’t show you this project without including how this bathroom originally looked shortly after we moved in.
I started removing the wallpaper and then painted, but I had never done anything special with the bathroom.
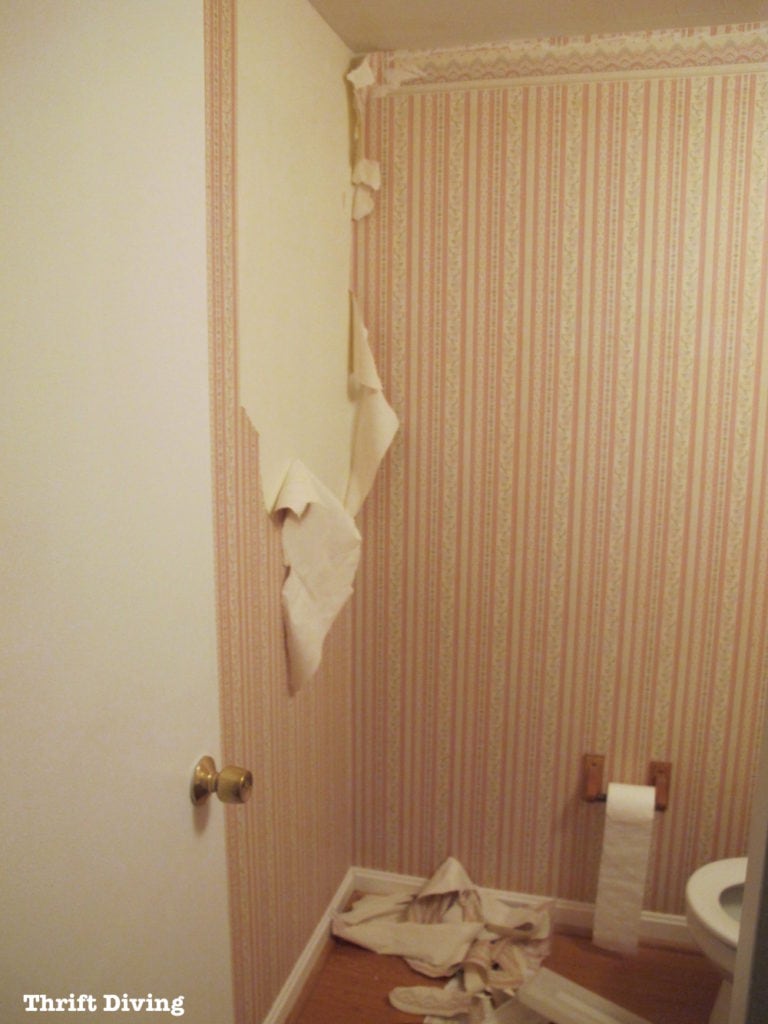
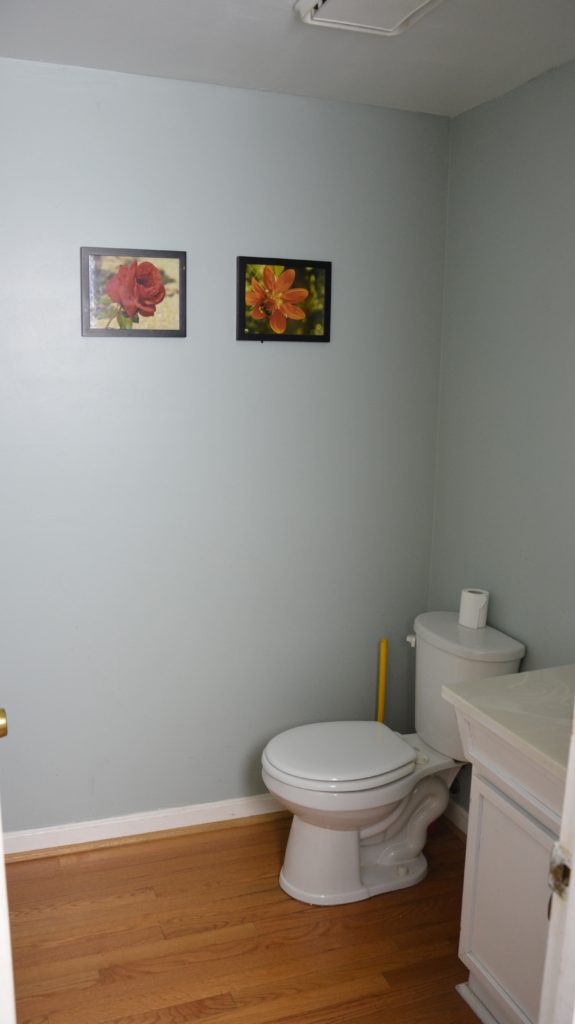
It Stayed Like This For Years
With the wallpaper gone, and a few random pictures hung, it was just a basic half bath. My husband asked for years for me to focus my attention on this bathroom since it’s the guaranteed place that visitors will always see in our house.
But I had more important room makeovers to tackle (like our laundry room, kids’ bathroom, and family room).
But I was excited to finally get this project going!
A Small Gray Bathroom Makeover With a Wall Stencil
Thankfully, I had done most of the hard work of removing the wallpaper some time ago, so there wasn’t much to do to get started on this project. I was also thankful that I didn’t have to remove the toilet. This one, albeit a little short, didn’t need to be replaced immediately.
How to Remove and Install a Toilet
NOTE: If your toilet needs to be replaced, or if you’d like to replace it with a taller one that’s ADA-compliant, check out my step-by-step instructions on how to remove a toilet yourself without paying for a plumber. Once the toilet is removed, you can follow these instructions on how to install a toilet yourself.
STEP 1: MUST.CLEAN.WALLS!!!
This is the bathroom that my kids usually use. It’s right off of the family room and is most convenient for them.
I’ve got three boys.
Need I say more??
I had to start with wiping the walls down with Simple Green to clean off all the pee residue and to prep for the paint. ICK!
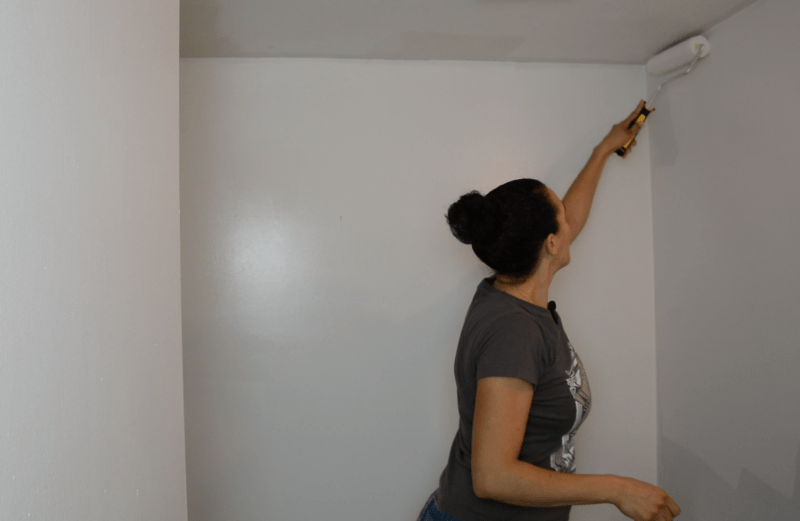
STEP 2: Painting the Base Coat
I used the Weathered White as the base coat, so I painted two coats over the walls and ceilings.
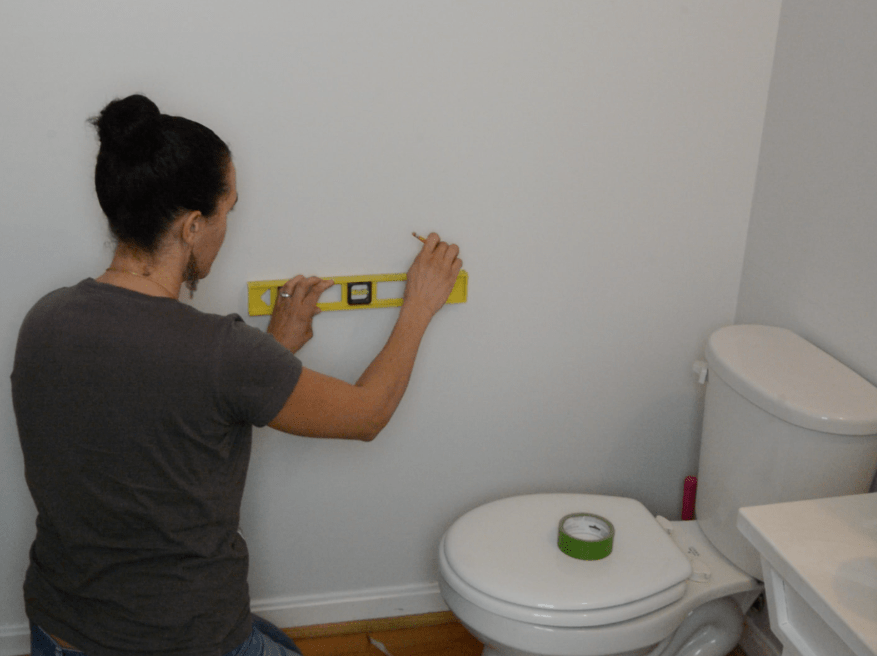
STEP 3: Measuring For Chair Rail
I decided to measure up from the floor about 30 inches and used a leveler to make sure the lines were straight.
When doing chair rail, make sure you don’t put it too high or it can look funny. I ended up having to lower mine because the first lines were waaaaay too high! This is how high the line were originally.
Too high
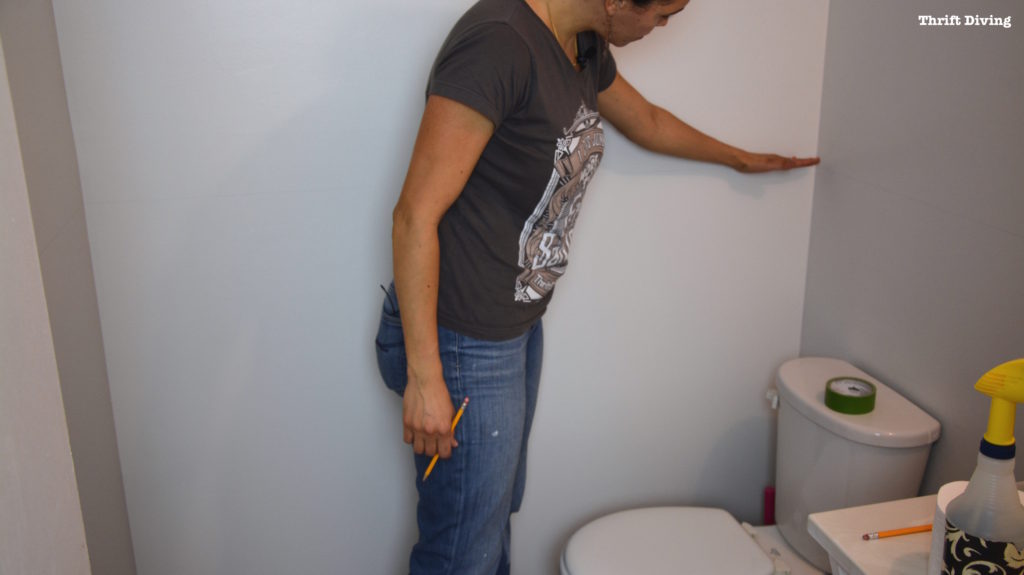
Must better!
….but I decided to lower them about a foot!
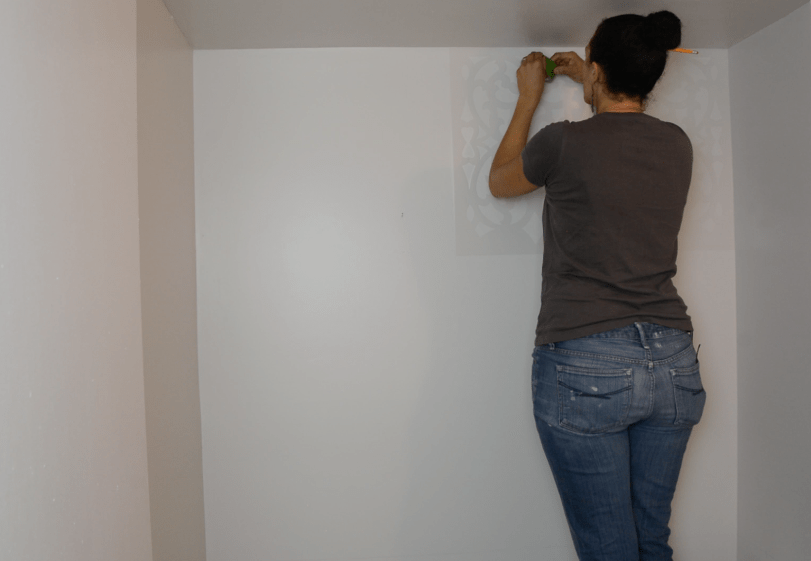
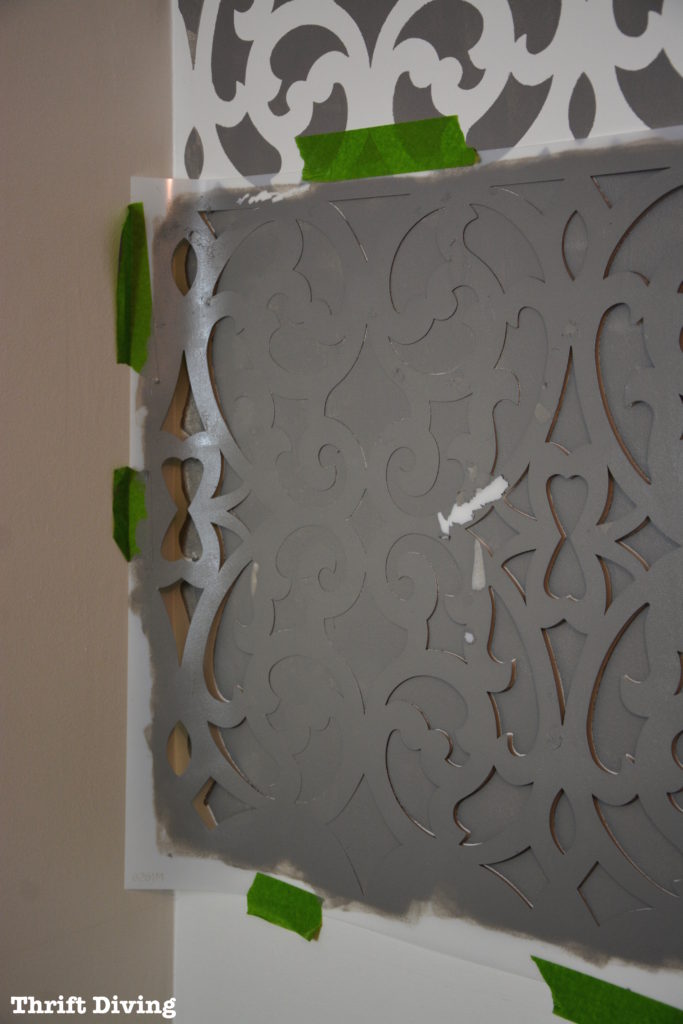
STEP 4: Taping Up the Stencil
I decided to start in one corner and work my way out. I used painter’s tape to get it hold in place.

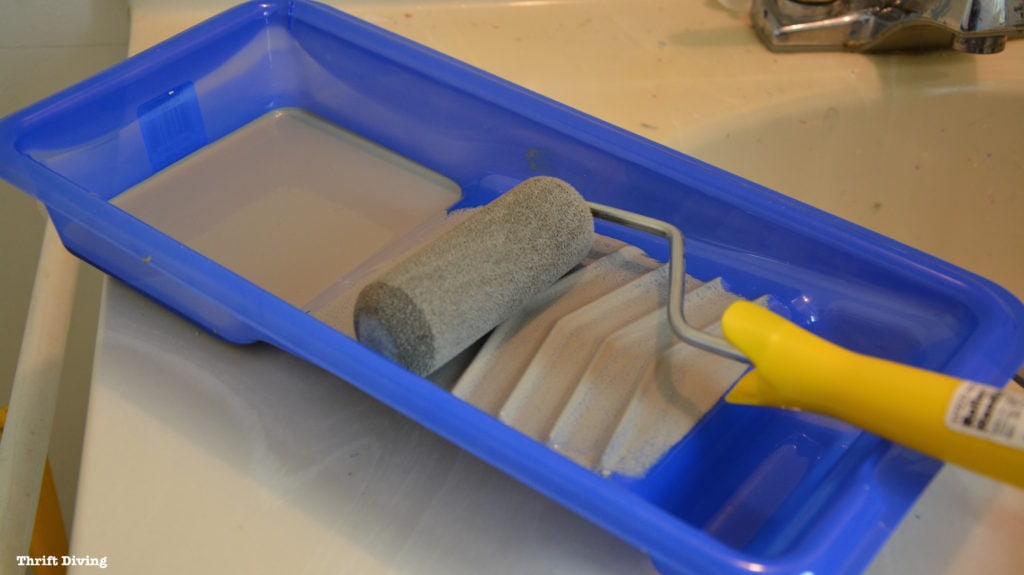
STEP 5: Loading the Grant Gray Paint
I used a small foam roller for the stencil. But you can also use a stencil brush.
I think the roller is faster, but I think stencil brush provide cleaner results. I had some seeping out of paint under the stencil, but I think I could have done a better job taping off, too.
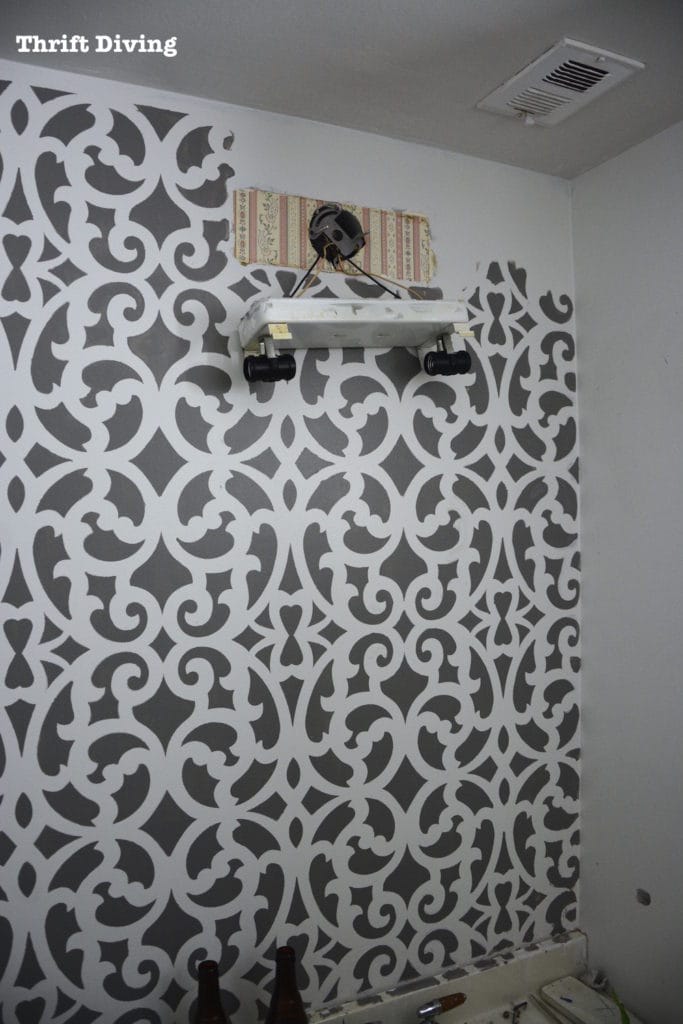
STEP 6: Painting Over the Stencil
I was loving how it looked!
So bold and so much different than my usual style!
When I was done the first section, I moved the stencil down, re-taped it, and lined up a few the cutouts, making sure it wasn’t crooked.
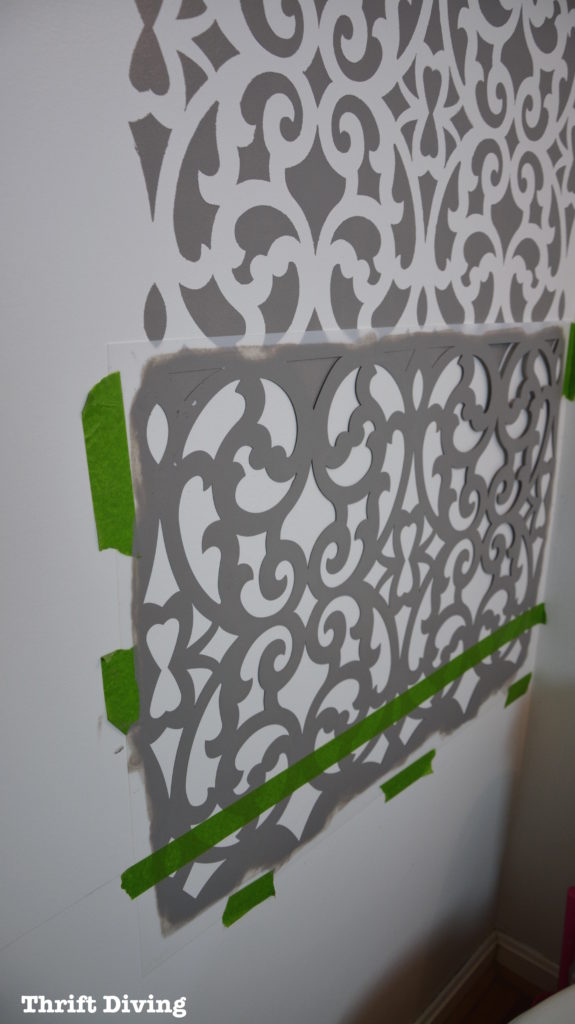
I added a piece of tape at the bottom to mark off where the chair rail was going to be so that I wouldn’t paint over that line.
NOTE: Be sure to use a SMALL amount of paint on the roller! So little paint that you can barely see the paint. Then, when that first coat dries, add another light coat. It will help to minimize the bleeding of the paint under the stencil.
STEP 7: The Dreaded Frequent Cleanings!
This is the part that I didn’t like the most: having to frequently stop to clean the stencil. When using stencils, paint gets caked on it and “gunky” and can mess up how well the stencil works.
You have to stop every few sections and clean it off in the sink or tub.
This is what it starts to look like when you need to clean it. Just be sure to have a strainer to catch the bits of paint from going down your drain.
STEP 8: The Dreaded Corners!
This is the other part that I found hard when using wall stencils: getting the corners. I’m pretty sure I used every curse word I knew. LOL
I finally figured out that instead of using the roller or brush when I get to tight corner spots (because otherwise it’s a mess), I would just trace the pattern on the wall and use a small paint brush to fill it in.
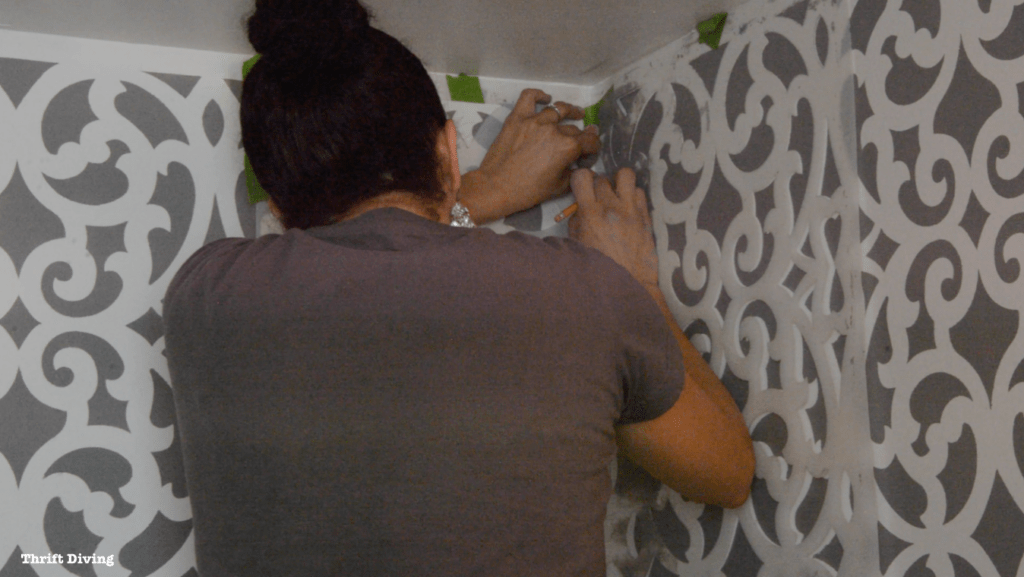
Even when using a brush, though, it’s going to look a little jacked up until the next step, where you clean it up.
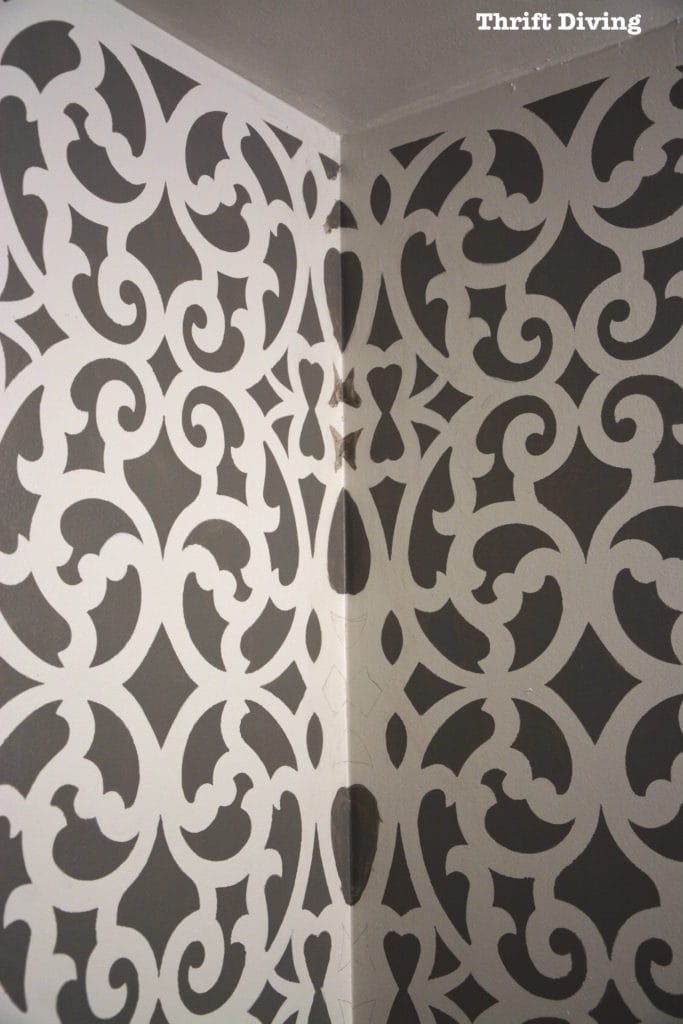
STEP 9: Cleaning Up Your Messes
Trust me. You will have messes. LOL
But the best part is that you can fill them in with a small paint brush and paint.
Look over your design and use a small crafting paintbrush to go over the areas that are a little sloppy, like in the pic above (see to the left?)
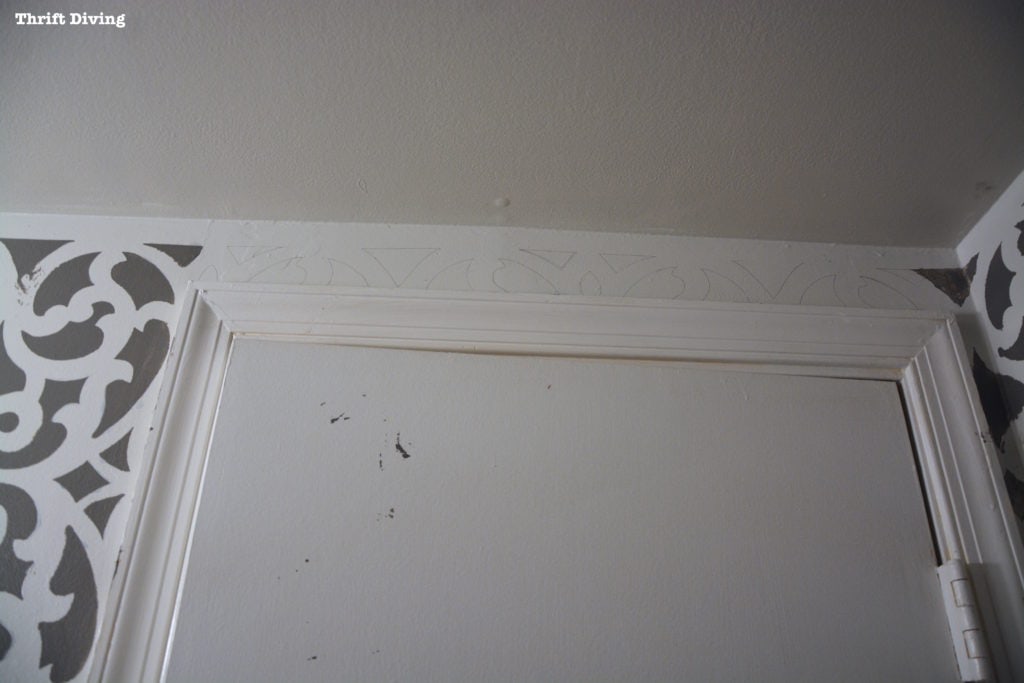
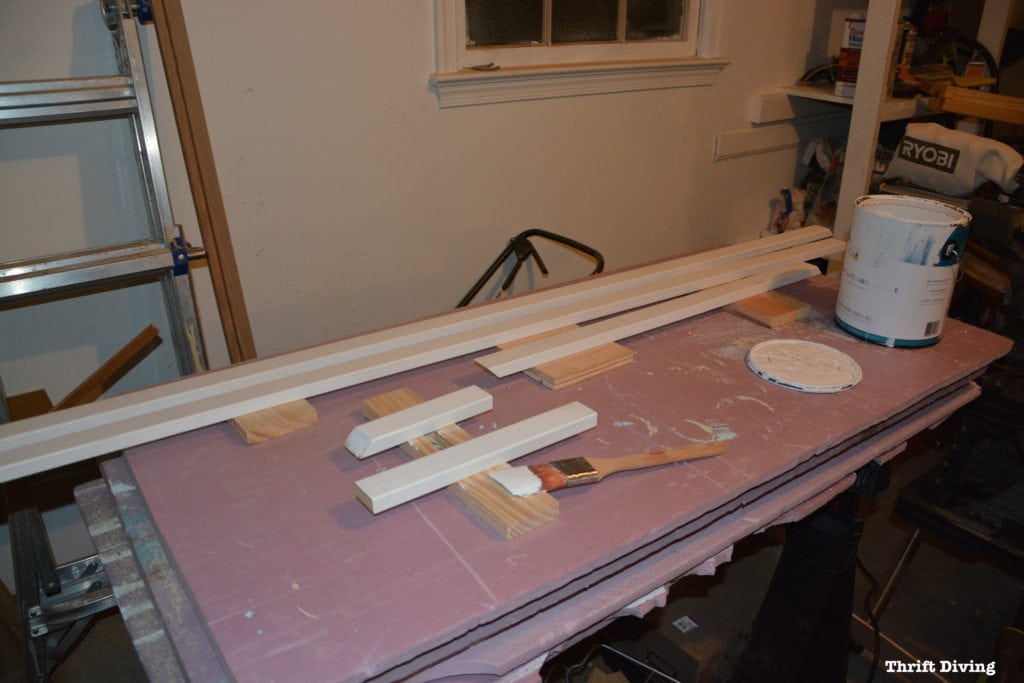
STEP 10: Adding Trim and Molding
I adore rooms where there is chair rail separating the top and bottom!
I used some MDF boards (about 1.5″ – 2″), painted them, and used my 18-gauge nailer and Liquid Nails to attach them.

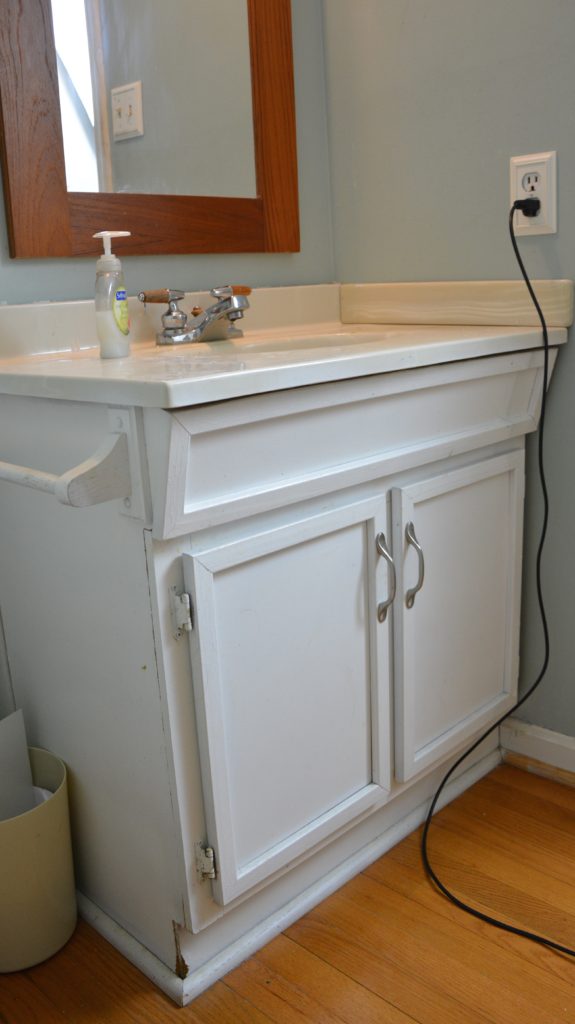
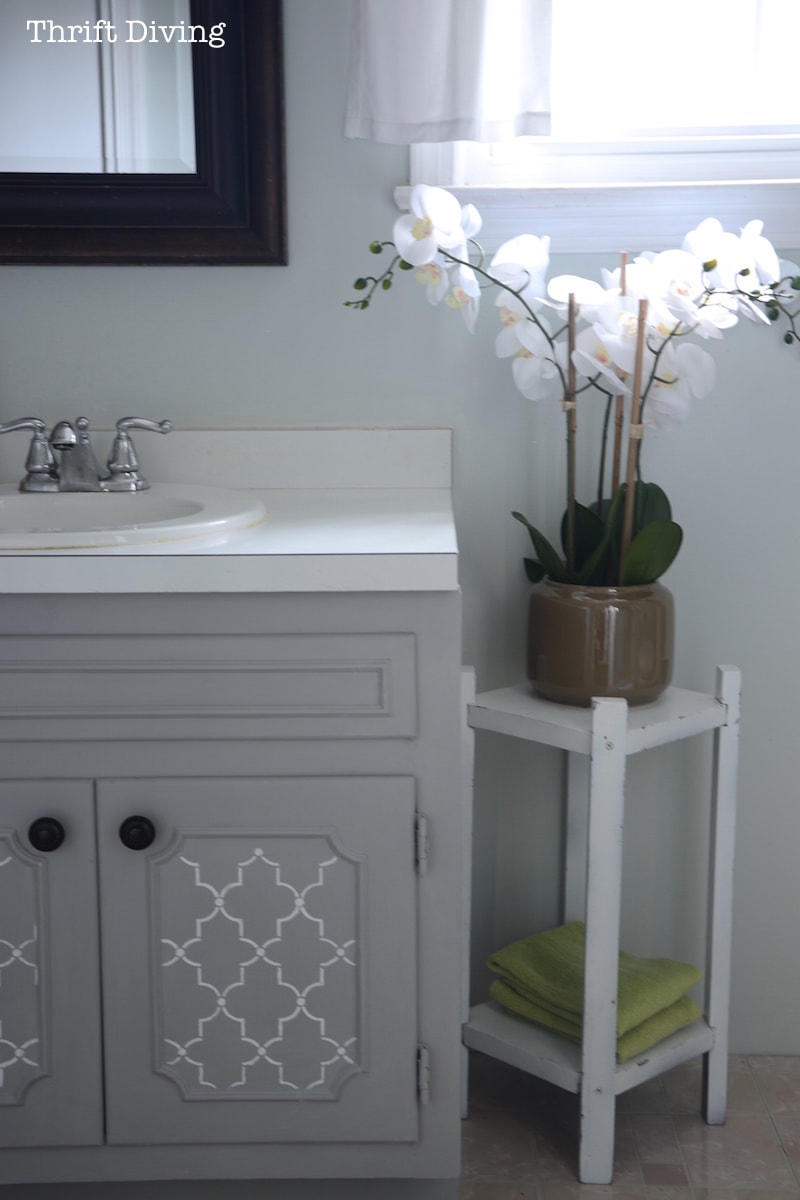
I Painted the Vanity
I had painted this vanity years ago, but it needed a pop of color. I’m tired of being afraid of deep colors! I chose Cabana Blue by Behr. I absolutely love it!
BEFORE
AFTER!
Bathrooms are the perfect place to experience with bold colors, and that’s just what I did!
I left the hardware the same, although I plan to paint it black or gold. Sometimes, you just run out of time… LOL.
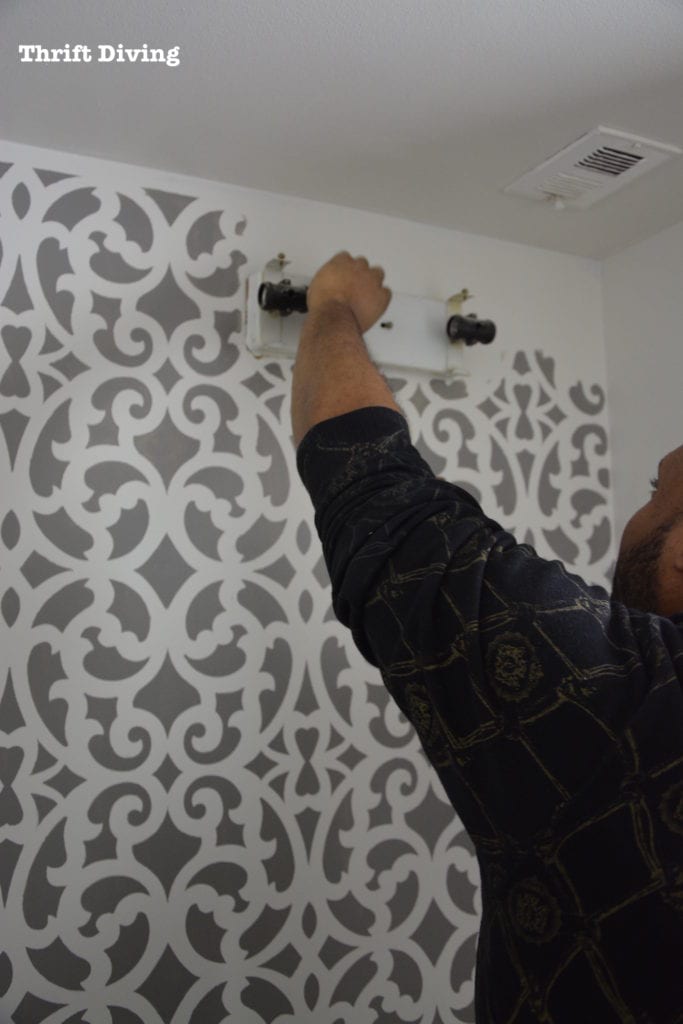
The Vanity Light
It’s embarrassing to admit, but this is the light we’ve had in this bathroom since we moved in. When we took it down, there was still the old wallpaper underneath! LOL
I don’t do electrical stuff, so this is where I love my hubby to help out!
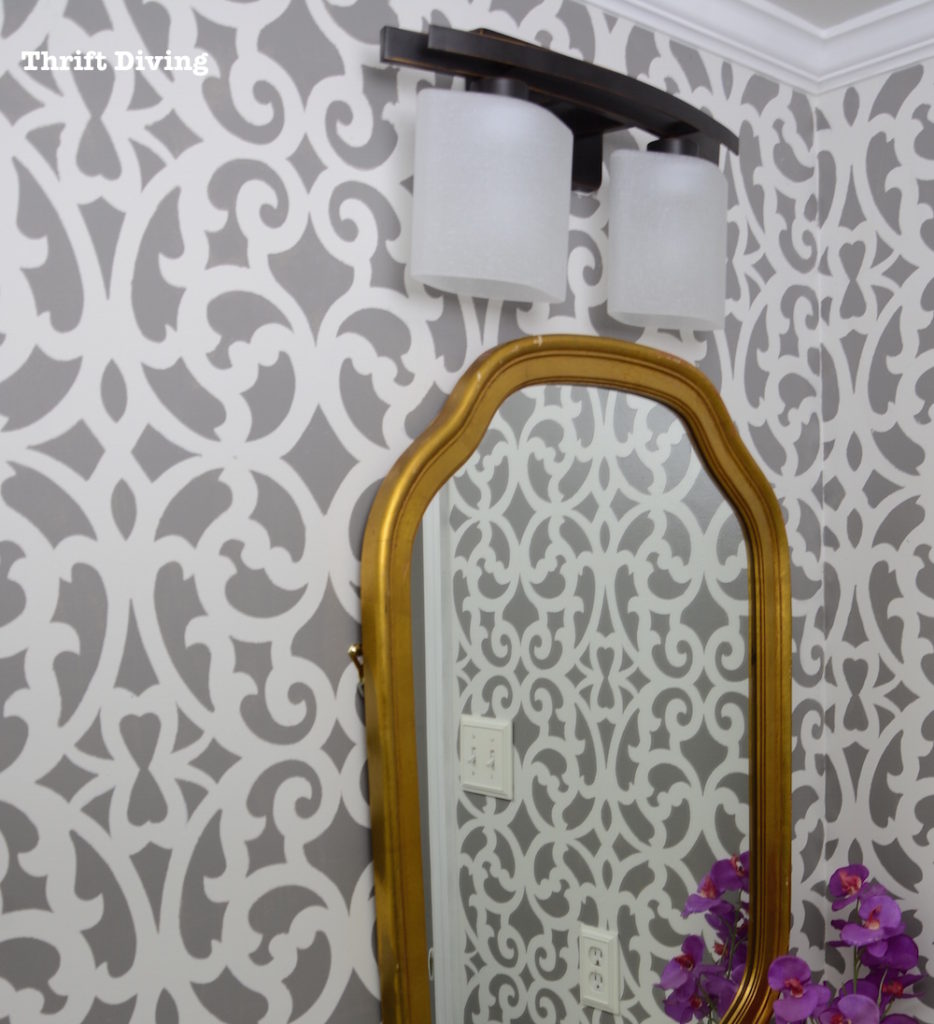
AFTER!
And the beautiful part is that I let my 9-year-old pick out the light, and this is what he chose! 🙂 I love getting my kids involved in these decisions. My 6-year-old said, “Mommy, it looks like a hotel light!” I guess that’s his way of saying it looks fancy. HAHA
I admit that it wasn’t my first choice, and the mirror doesn’t match it. But you know what?? My baby picked it out. And I’ll forever be able to look up at it and remember the time he went with me to pick it out. So who cares if it doesn’t match the mirror! 🙂
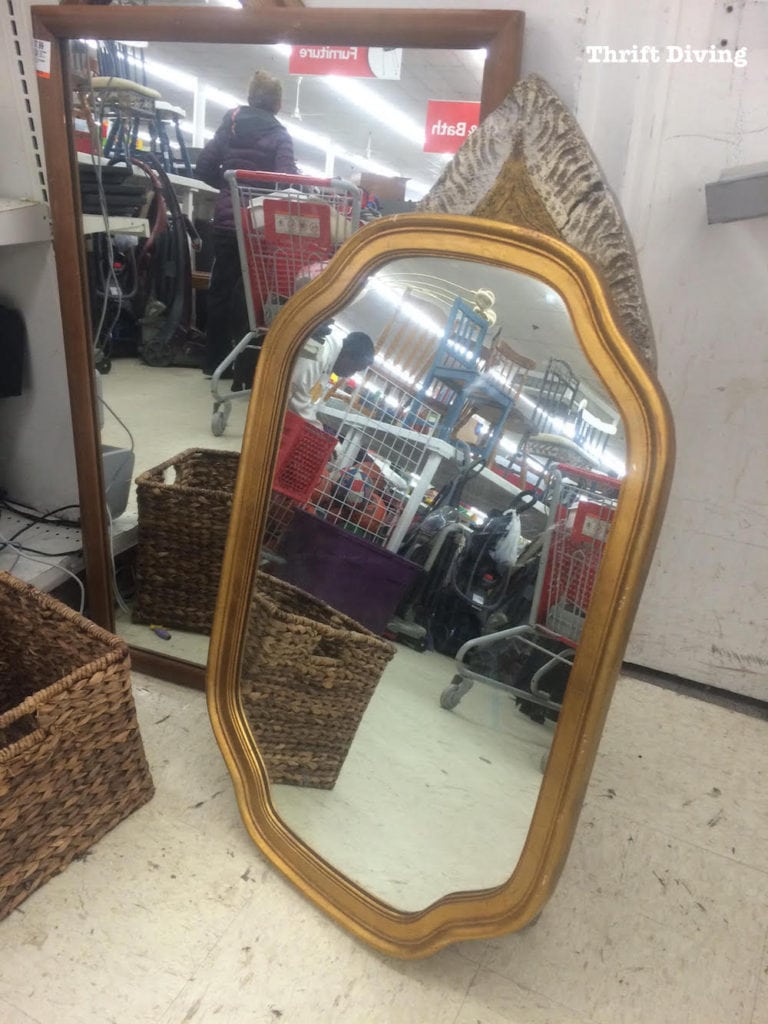
The $7.00 Thrifted Mirror
My favorite thrift store was having a 50% off sale for MLK Day and with my luck, I found this $14 mirror for $7.00!
You know….
I rather liked the vintage gold!
This bathroom is very modern, but I wanted a bit of vintage, and the mirror was perfect! The shape was beautiful, and the gold just “spoke” to me. My husband thinks we should paint it and make it “fresh” like everything else. But a little bit of chipped scuff-ness is just the edge this bathroom needed.
For this makeover, I also hung crown molding. This is the 3rd room I’ve done now! I can’t say my gaps are getting any smaller, but hey–caulking hides EVERYTHING! 🙂
If you’re looking for detailed instructions on how to install DIY crown molding, you can get a copy of my free ebook here: How to Put Up Crown Molding Like a Novice.
I still have some DIY wall art to do…… and to find a cute little wire basket to go over the toilet….maybe some shelves….and definitely new sink hardware.
But this project is proof that with just a few materials and about 3-4 days, you can really transform your house into something you can be proud of for not too much money!
Project Cost
Here’s a cost breakdown of absolutely everything for the bathroom:
- $0 – Mansion House Grille wall stencil – Provided for free from Royal Design Studio (Click here to buy)
- $33.66 – Crown molding
- $5.86 – MDF boards for chair rail
- $74.97 – New vanity light
- $12.99 – IKEA rug
- $7.94 – Thrifted mirror
- $6.99 – IKEA toilet brush
- $5.99 – IKEA toilet paper holder
- $4.97 – Light bulbs
- $8.99 – IKEA soap dispenser
- $1.98 – Hardware for TP holder
- $2.38 – Picture hangers for thrifted mirror
- $26.48 – Weathered White by Behr
- $13.47 – Grant Gray by Behr (quart)
- $12.47 – Cabana Blue by Behr (quart)
- $1.98 – Latex gloves
- $3.24 – Caulk for molding
- $3.77 – Liquid Nails
Taxes = $14
Time = 4 days
TOTAL SPENT = $247.32
This is how I felt when I was done!
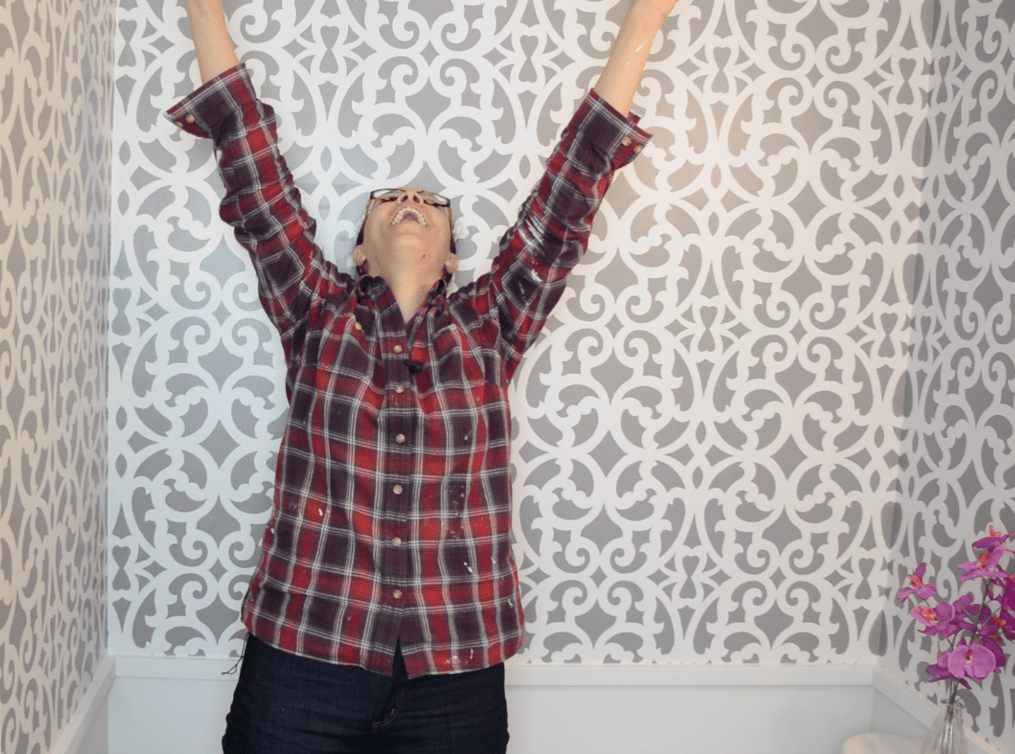
Even with a few things still on the “To Do” list, it still felt GOOD to have a pretty bathroom! I imagine now when people come over, I’ll be eagerly asking, “Hey, do you have to go to the bathroom?? Right this way!!” instead of dreading them seeing this room.
Maybe I didn’t get my butt kicked after all. I’d like to think I was the victor in this fight. 😉
Watch The Video of This Project
I did record the entire project and captured some of my frustration and fear. HAHA Check it out here on my YouTube channel:
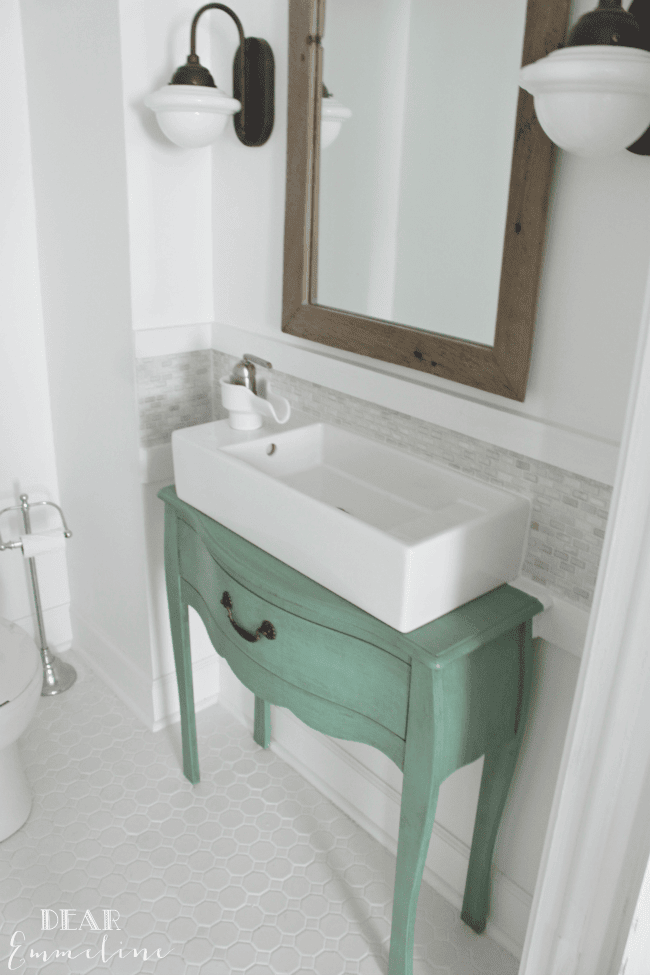
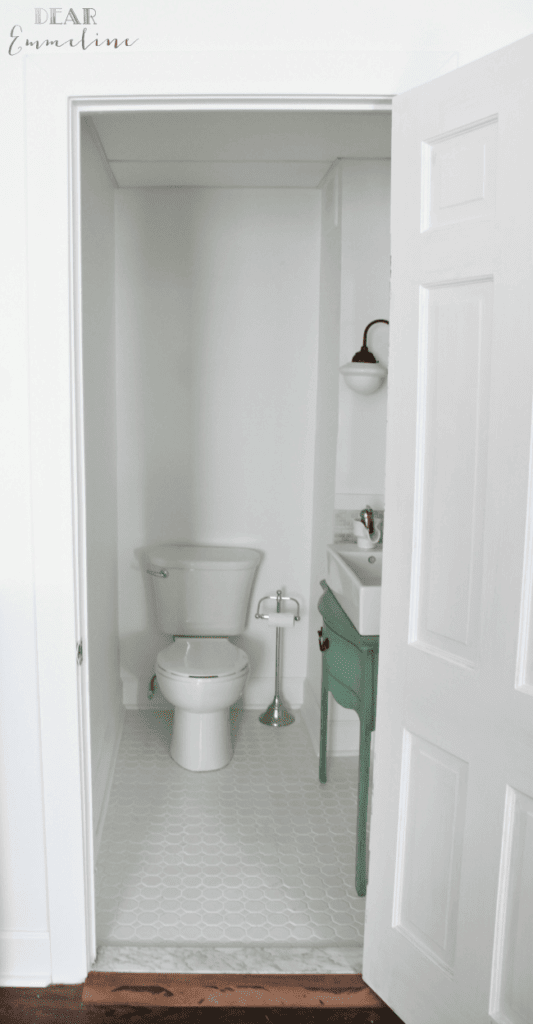
Narrow Half Bathroom Makeover
Several years ago, one of my blog readers, Jessica, from Petal & Ply, made over her half bathroom during one of my 30-Day DIY Room Makeover Challenges, as well, but hers was much more narrow than mine.
Here’s what it looked like BEFORE:

Afterwards, it looked amazing! You can find out more info about this narrow half bathroom makeover on her blog.
P.S. Did you know that they also make a bunch of smaller furniture stencils?? You can find the Mansion House Grille Trellis furniture stencil HERE if you like smaller stencil projects.

Download the 5 freebies!

Thrift Diving inspires women to decorate, improve, and maintain their home themselves...using paint, power tools, and thrift stores! Use these 5 printables, checklists, and ebooks to get started!
You did GREAT! Love the transformation! Awesome job! ??
Thanks, Jacqueline! I was actually worried that people wouldn’t like it! It’s so different than other things I have done. LOL
I love it! Surprisingly, it really does look bigger. Just awesome!
Thank you, Lisa! 🙂 Means a lot!
WHAT A WONDERFUL makeover. I love the stencil and the paint choice. It makes the bathroom look bigger
Hi, Valerie! So funny you mention that. Hubby and I thought so, too! I think the pattern plays a magical trick on the eye! 🙂
Wow! That’s what I said to myself when I first saw the ‘after’ photo of your bathroom. It loos like a professional painter did it. Beauuuutiful! I don’t think I would be willing to do all that hard work of the stenciling. (My shoulders ache just thinking about it!) I love the grey paint and that lattice stencil is gorgeous! And the blue on the sink cabinet… *sigh* I think I just fell in love with a new color! Love the mirror (leave the antique gold look!) However, in my own humble opinion, the best part is the light that your SON picked out! That will always be a great memory for the both of you. (Plus the fact that I think it looks COOL!) Maybe your two other little guys can help pick out other items – shelves? A picture? New towels maybe? Then it would really be a collaborative, FAMILY effort. Hubby counts too, as he installed the light! Last but not least, I love the photo of you doing a victory pose! Well done, Serena! 🙂
Awww…Jeanie, I loved your comment so much that I had to read it to my husband! He actually smiled! 🙂 Thanks for making my night. And that’s a great idea about letting the other two pick out the other accessories! I’ve got some ideas for some white wall art and I’ll let them help out! 🙂
I love your newly redecorated bathroom. I’m so glad that you stenciled it. It was a huge job but I think it turned out great! You did an amazing job on the corners, it looks very professional!
Thanks, Kaye! It was a LOT more work than I expected, only because I was anal about how well it turned out. So I did a lot of cleaning up to make it look as professional as possible. My shoulders! LOL. But stencils are amazing! I think I’m ready for my next stencil job!
i just love your new bathroom–everything you did is great!!! lots of style–wonderful!
Thank you, Jackie! Glad that you love it! 🙂
Fabulous bathroom redo and I love the stencil! I love it all.
Thank you, Timisha!!
Serena, you’ve done a beautiful job. I’m like you: less of a pattern person, but I do like this look. I can imagine how sore you are with your arms up over your head for so much of the painting. The chair rail and crown molding really set this off, almost like a framed picture.
And that blue! It’s a beautiful shade and a nice offset to the grey and white. Good for your for venturing out into uncharted waters.
It’s so funny, Alys. All this time, I’ve been scared of patterns. Not knowing how to use them, or just not sure what is “me.” But once you start with patterns, OH MY. I don’t think I’ll ever look at a room the same way again! Stencils are amazing.
Yes, the blue! It’s part of the Behr Artisan collection and it’s probably one of the most beautiful colors I’ve ever used! I’ll show you later this week how I did it. I used a new product for it to make DIY chalk paint.
Thanks, Alys!!
DIY chalk paint! Wow. Staying tuned.
I hear your pain re: corners and frequent stencil washing. I stencilled our bedroom wall a few years ago. If I knew then what I know now! I love the stencil you used and the colors throughout this makeover. You did good girl!!!
Hey, Marie! YES!!! I have said the same! I had no idea stenciling was so involved. Stenciling furniture and stenciling walls are so different because of the corners and washings in between. But it’s soooo worth it! It really sets a room apart from just plain walls! And there’s no wallpaper to peel off in 5 years. HA! 🙂 Glad you love it!
This is absolutely BEAUTIFUL Serena! You did a GREAT job, and now I am inspired to redo my bathroom!! I wish I could just hire you!
Thank you, Tatanisha!! I wish I could come help you, girl! Oh well–at least we have Google Hangouts. Do our next mastermind meeting in your bathroom and let’s generate some ideas! LOL