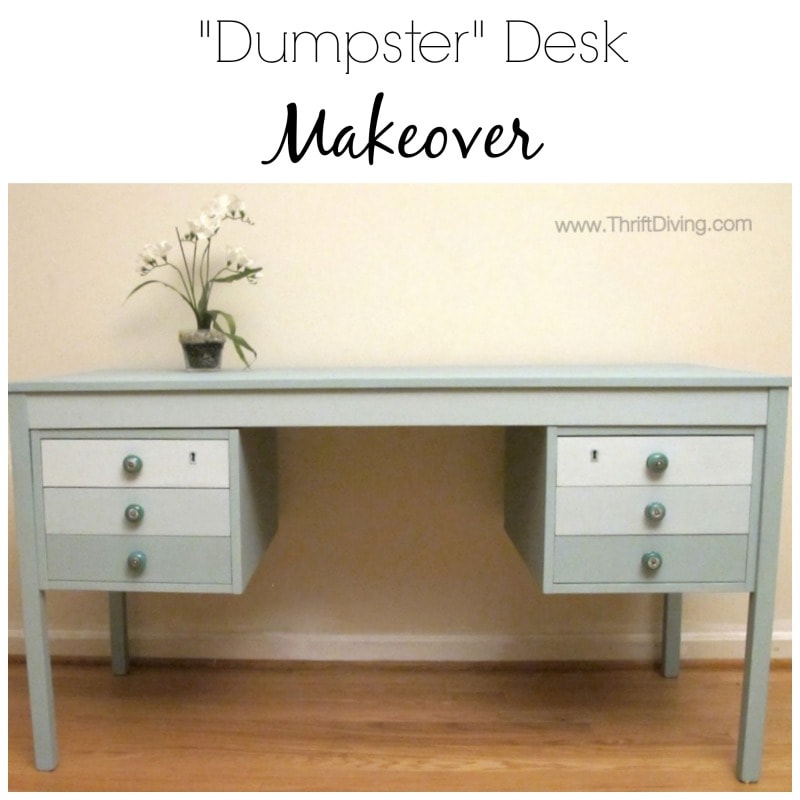
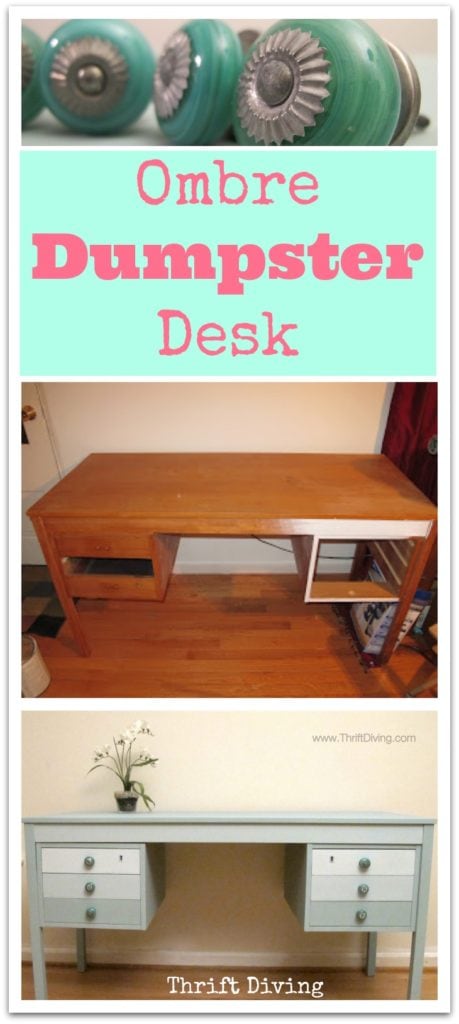
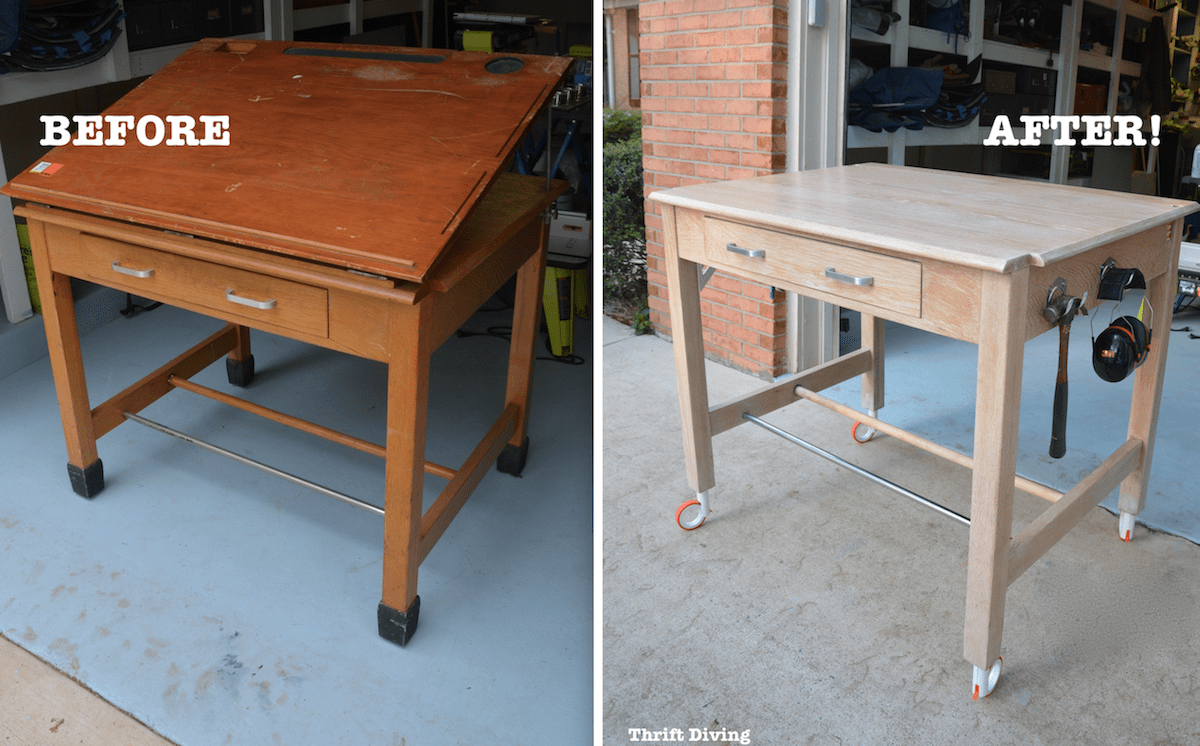
BEFORE and AFTER: The Makeover of a “Dumpster Desk”
Eh– whatever the reason, thrifty souls like myself look at it as an opportunity to transform other people’s castoffs from the “uninspiring” to the “unbelievable.”
And that’s exactly what happened with this “dumpster desk”!
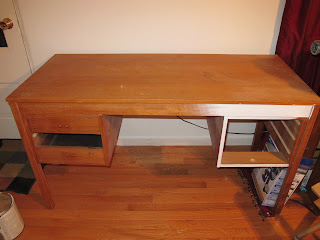
When I found this desk years ago at our condo complex, it was sitting there, just as perfect as could be. It had all its drawers. I just took them out and stupid me forgot to put them back in for this picture :). But it really was in great condition. I stopped the car so fast, put it in Park, and lugged that baby up the sidewalk and down 2 sets of stairs just to put it in our storage unit.
BEFORE
We didn’t have the space for it in our condo, but I knew one day we’d buy a house and it would serve its purpose for me.
Sure enough, a couple years after, we were finally settling into another house, and we had all our things packed and loaded. And–GASP!–hubby almost left this desk behind!! “There’s no space in the truck.”
No space, my foot!!! When you save a desk from the trash and hold onto it for 2 years, you don’t just leave it behind because there’s “not enough space.”
Glad I was able to save it twice!


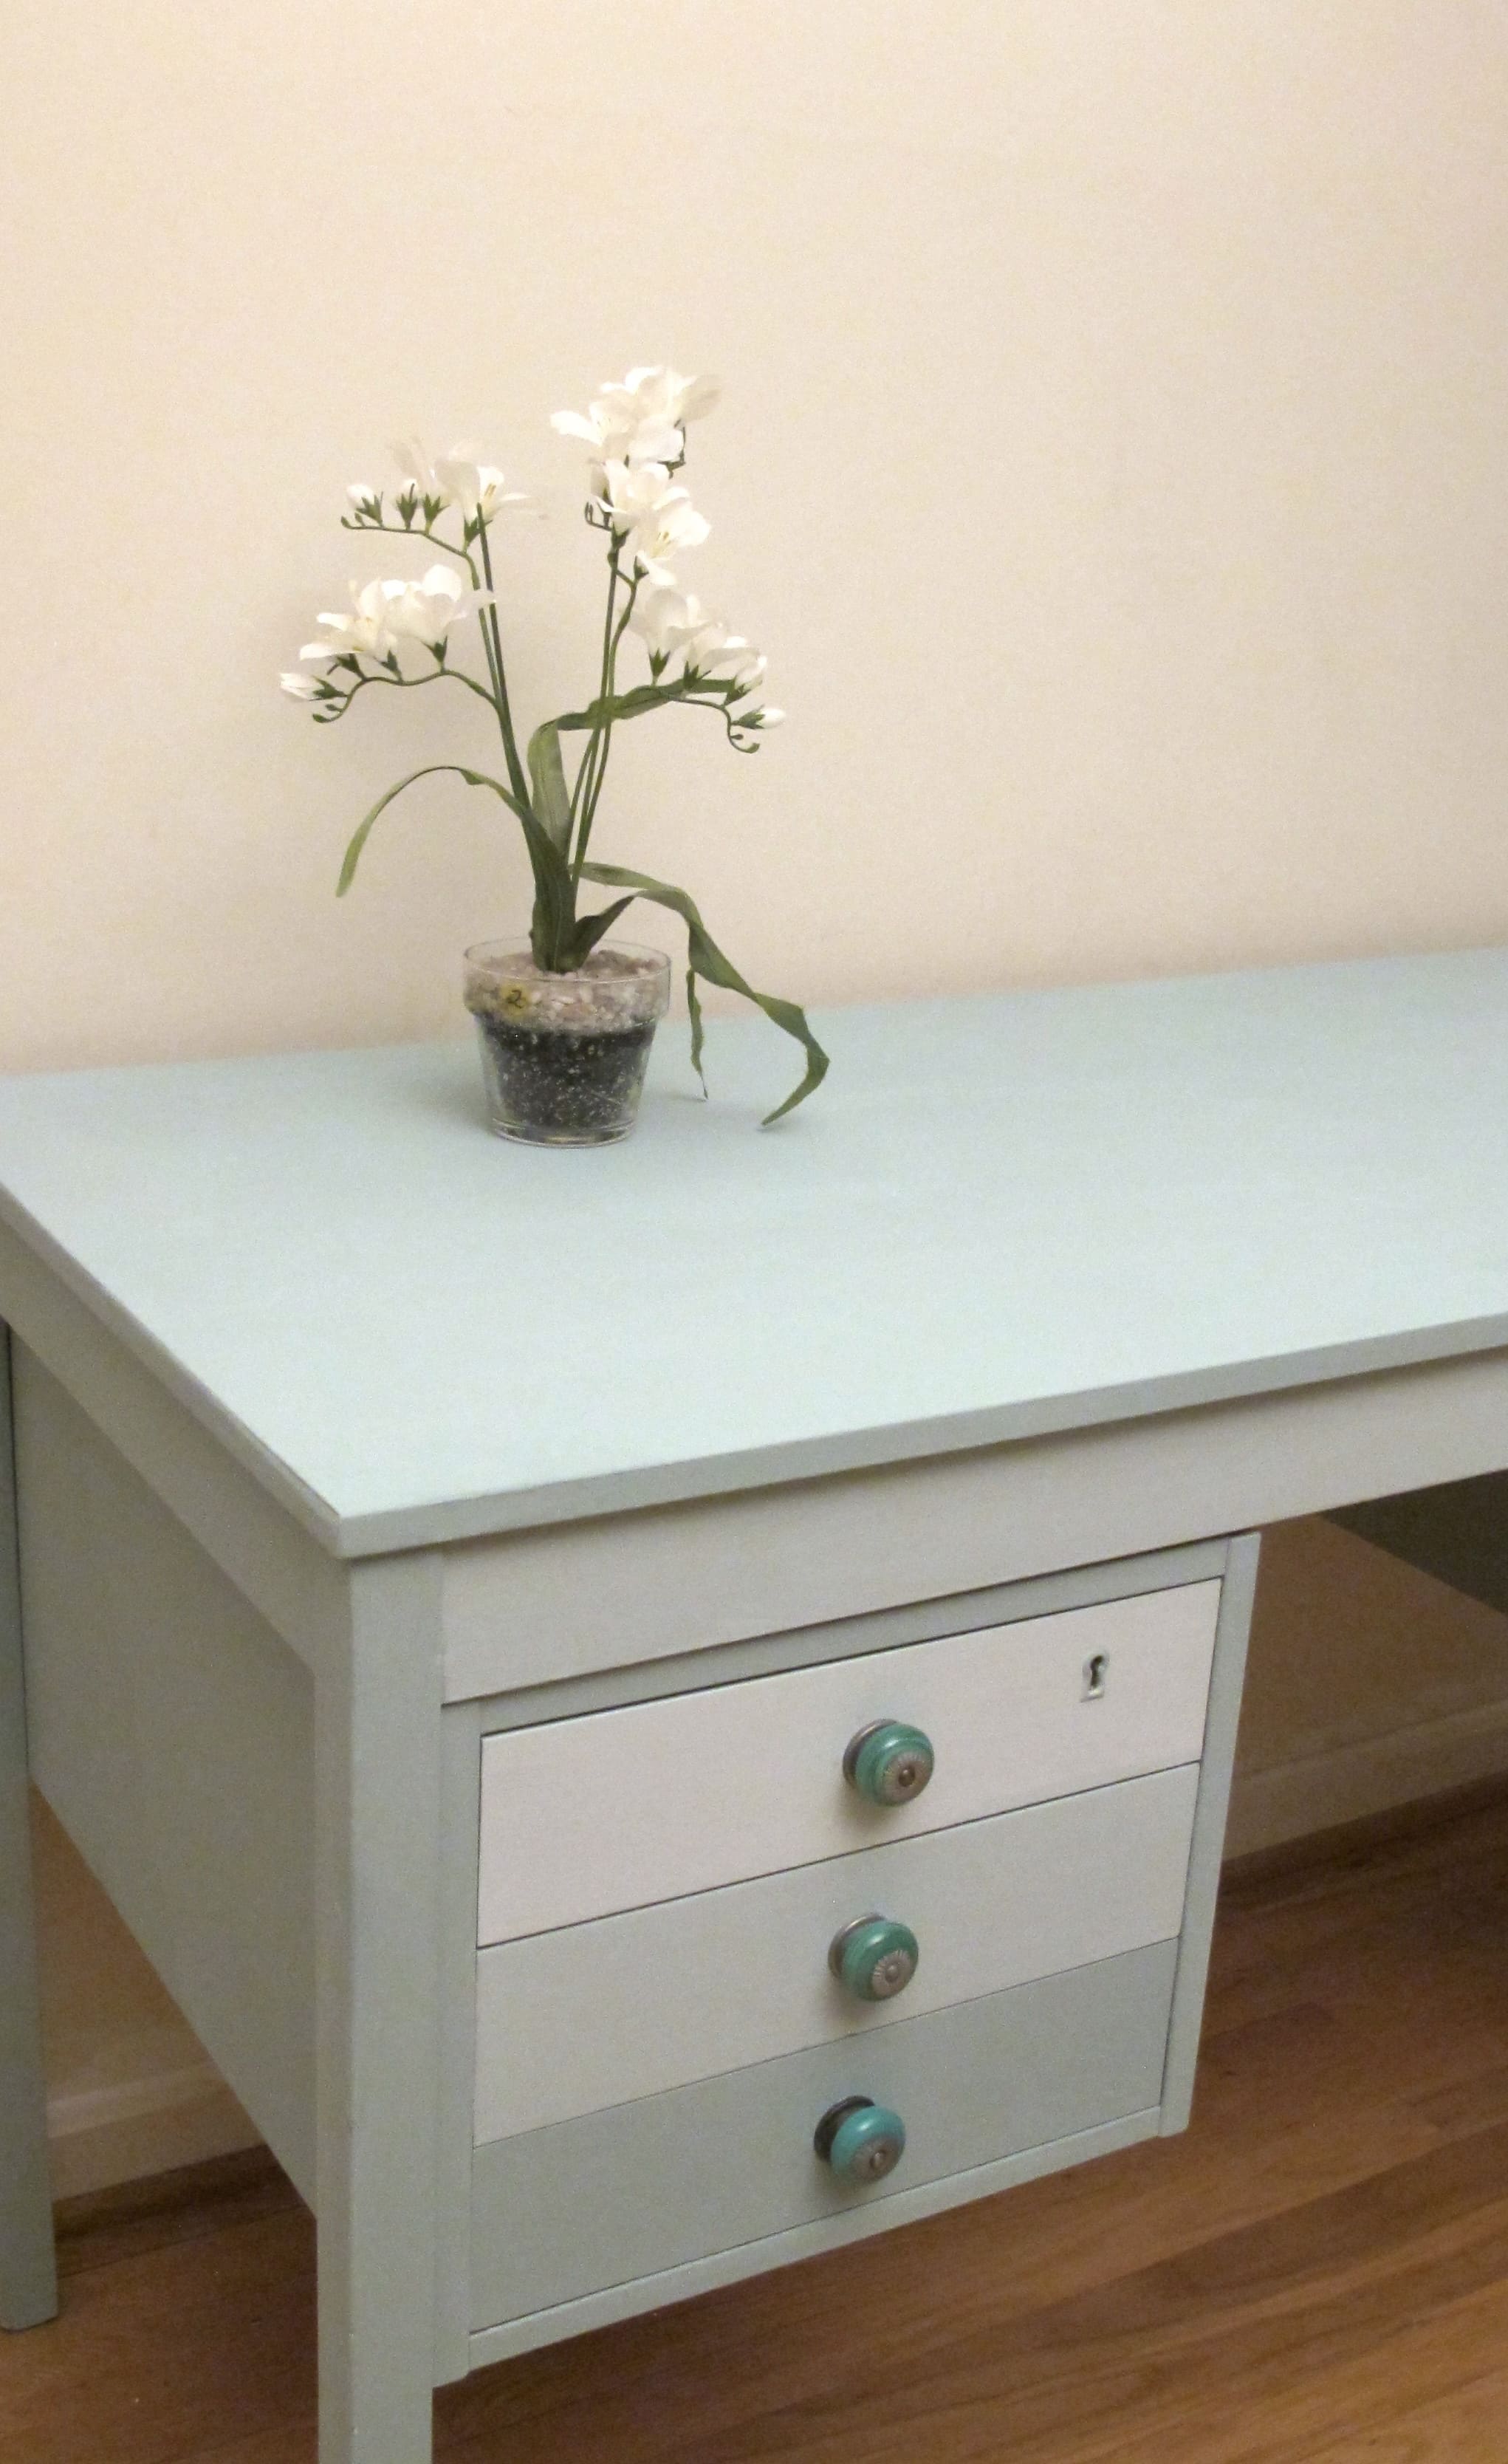
Here’s How I Transformed It

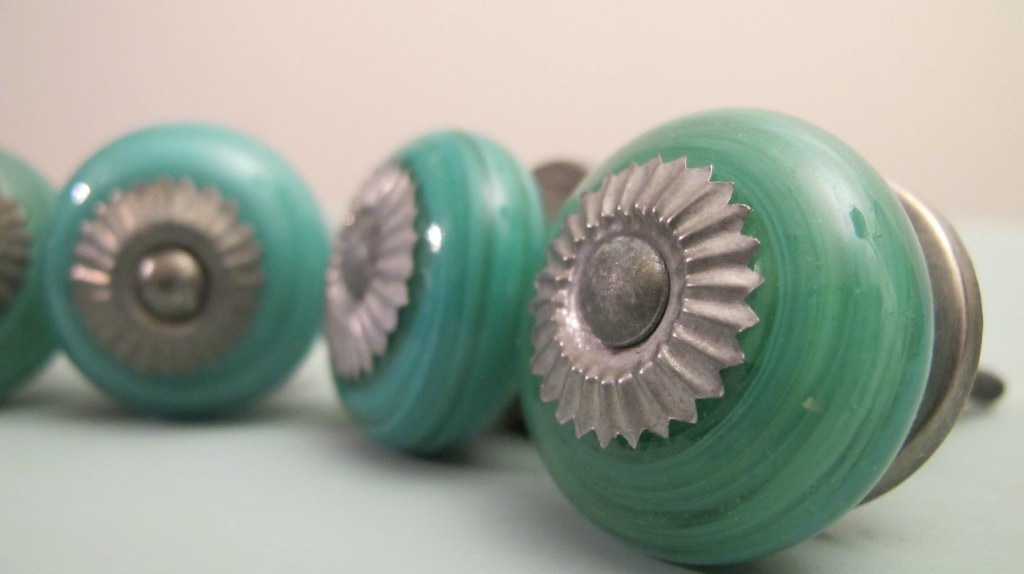
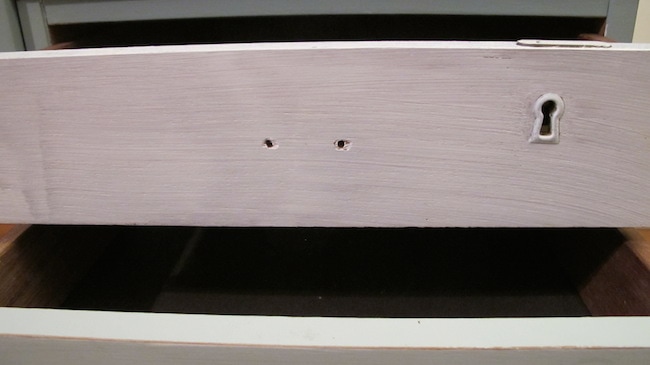
The Hardware
Normally, knobs like this go for about $8 or $9 each at that store, but I picked these up for about $2-$3 each. Love them!
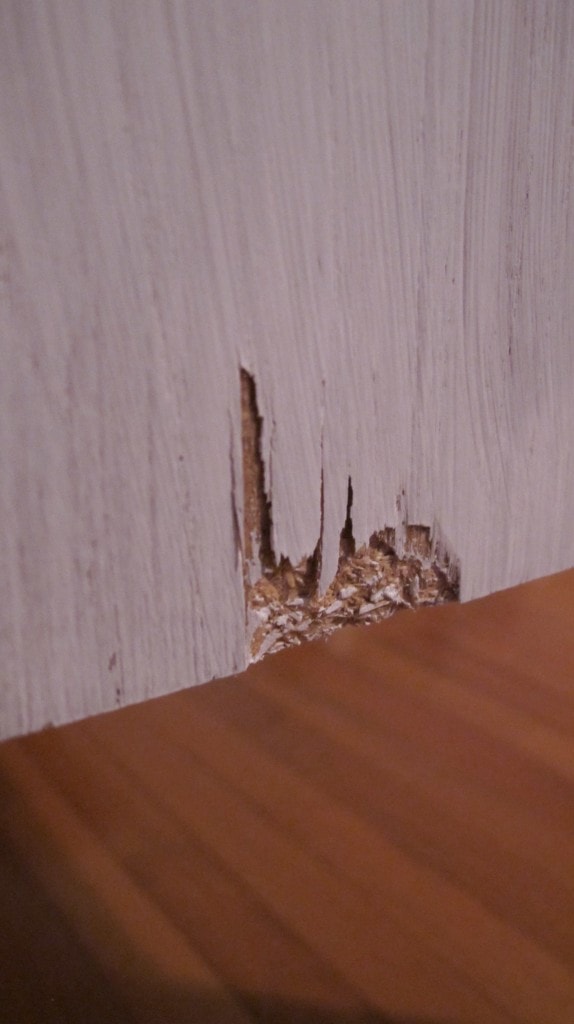
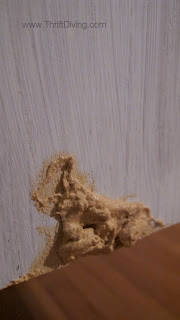
Broken Opportunities
When furniture looks like this, people want to throw it out, but for us DIY’ers, it’s just an opportunity to score a good deal 🙂

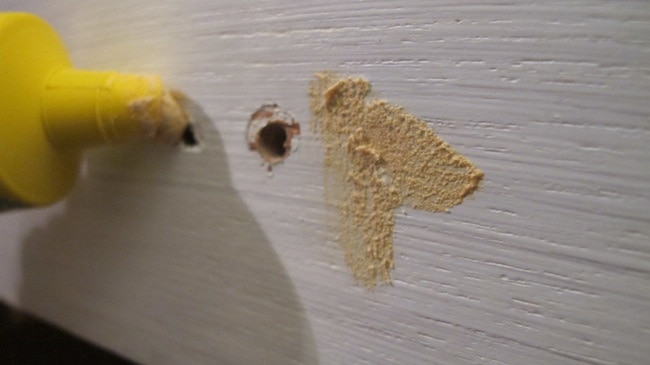
Then I added wood filler to the old holes. When it dried, I sanded it down, then slathered on a coat of paint over the drawer. Perfect!

AFTER!
CLICK HERE TO PIN THIS!
So have you ever pulled good stuff from the dumpster? Come on….I can’t be the only one! 🙂

Download the 5 freebies!

Thrift Diving inspires women to decorate, improve, and maintain their home themselves...using paint, power tools, and thrift stores! Use these 5 printables, checklists, and ebooks to get started!

Cool!!! Love the colors.
Thank you so much for linking this up with us at the “Cowgirl Up!” Linky party.
Have a wonderful day!
♥Linsey
I absolutelly love the desk and the colors! Awesome Awesome JOb!~ I am your newest folower!
Joanna, you are too sweet! I’m sure the line ahead of me to get their own show is very long! But, I love what I do, and sharing here is exciting!
You need your own show!
I’m confused, the original picture is flat out missing drawers and the new desk is not missing any. Were the originals not pictured? Did you have to build drawers?
Very beautiful work, good job!
Sorry! The drawers were intact! I had just almost forgotten to take a “before” pic and didn’t think to put it “back together” before taking the pic. I will be cognizant if that next time, for sure!! 🙂
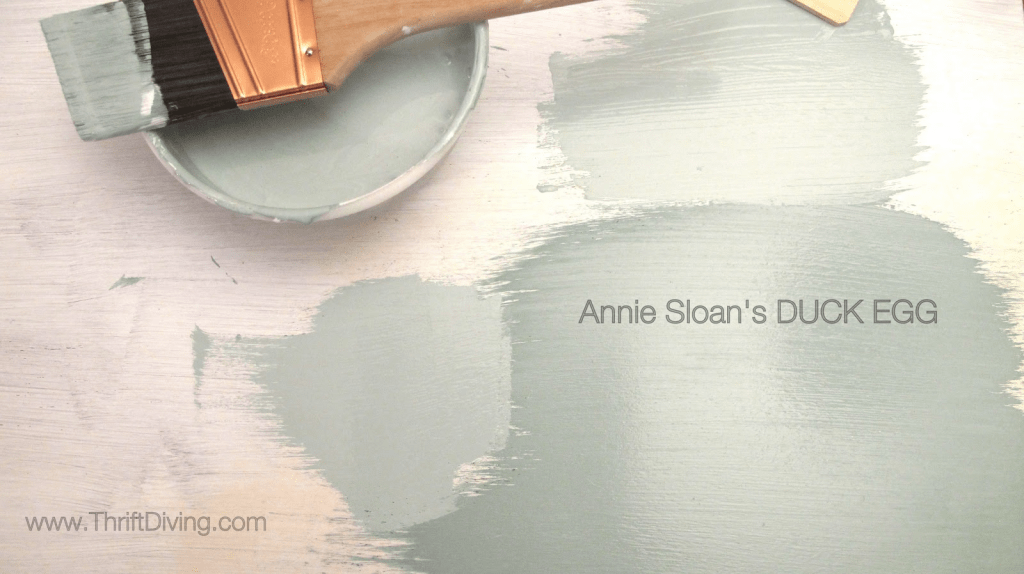
Kim, yes, you must try! But as Rachel, the commenter below, mentioned, you can try to make your own chalk paint. I have been meaning to try this. I can’t wait to explore that. Then you could use any paint color you life. Annie Sloan colors are a bit limited.
Rachel, so what recipe do you use for making chalk paint? Please share! 🙂 As for the drawers, yep, they were all there. I just happened to take a jacked-up “before” shot. LOL I had almost forgotten to take one before I started priming!
Raina, thanks so much! Glad I was able to inspire you!!! Stop by ThriftDiving again 🙂 I love commenters! And I have a whole bunch more projects coming!
Love!!! This is sooo inspirational since I’ve been searching for the perfect desk to reprint and make my own. I also love how you included each step of your transformation!
I live the post and thanks for sharing!!
Beautiful! I’ve made my own chalk paint and I lOve it. I would like to try the Annie Sloan to compare it to but it’s hard to get where I live.
Question about the drawers, did you get all of them when you found it? It looked like some were missing, if you had to make some to replace them I’d be interested in hearing how you did that.
Great work!
Looks great! I’m going to have to do some research on chalk paint. 🙂
Great job,this is a keeper.